Showing 144 items
matching fragile
-
 Melton City Libraries
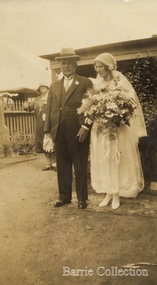
Photograph, Charles Ernest Barrie with daughter Mary Ena Barrie, 1930
Mary Ena married Keith John Robinson son of Isaac and Henrietta nee Raleigh of Creighton Melton. Mary and her father are photographed beside the Darlingsford house prior to her wedding in February 1930. Mary their first child was born in 1907. In circa 1980 she wrote about her parents and her early life. Page 1 of part of the original hand written script - Mother and father were married at the Methodist Church Melton by the Rev B E Williams on Aug 23rd 1906 and lived in the house beside the chaff mill for some years. [The family left Melton South in 1910. In 1911 they moved to the farm “Darlingsford” near the town of Melton home for their nine children born between 1907 - 1922 They had three daughters and six sons, the second boy died of diphtheria 1916 aged 5 years.] Page 2 Mary writes… Each winter Father would send a 20 ton truck to the Collingwood Central Methodist Mission to be distributed to the needy people in the area. Sr. Faith who was at the mission for many years became a very much loved friend of my parents and the family. I remember her as a prolific writer of childrens stories in the Methodist paper the “Spectator”. I still treasure a book sister Faith gave me for my birthday. Father and Mother gave the first donation of 10 pounds to open the fund to start “Yooralla” for crippled children all because a small boy asked for a bag of sweets for his brother who was crippled and not able to attend kindergarten. Sister Faith who was a small fragile woman with a tremendous spirit was a frequent visitor at our home where she loved the warmth, good food and the loving companionship of the family for many years. Later she ran the Chaucer Library in Collins just below Georges near the Athenaeum Theatre. Mother was an avid reader and many of the books she read came from this library. Page 4 – Mary writes….. Dad was always involved in district affairs ever ready to help someone in need, especially as a J. P. helping young people who may have been in trouble. He was always involved in the care of his [eight] brothers who were in need at times. He was an elder at the Scots Church Melton and Sunday School Superintendant when the Sunday School thrived. The anniversary became a special event with good singing supplemented by good music by Dad’s friends from Footscray saxophone and violin. The church would be packed both Sundays. The family home was open to all and sundry from the little Salvation Army lass from Bacchus Marsh driving a horse and jinker (without any experience) round the district. collecting, came looking for a bed for the night (and later crept into bed with me because she was terrified). The Methodist local preachers regularly spent several night and breakfast while visiting people in the Melton area. They were stationed at Bacchus Marsh and again drove a horse and jinker. One preacher I remember with gratitude was Mr Webster a retired school master and a fine man. Another was Pastor Tuttlebee again with no experience driving a horse and jinker. The first time he called Mother found him taking the winkers off the horse whilst it was still harnessed to the jinker. Another regular visitor was Mr Lister the federal member for Corio, he always stayed with us when he had meeting in this area. Another evening just as dusk another minister and his dear little wife were driving the horse and buggy to a new parish at Ballarat. They had asked at the Mac’s Hotel for accommodation, and their reply was we have no accommodation, go down to Mr and Mrs Barrie they will put you up for the night. They were most grateful to be taken in and cared for, somehow it seemed the most natural thing in the world that they would be welcome. A copy of Mary’s writing was given to her niece Wendy in 1990. Mary Ena Barrie's wedding daylocal identities -
 Eltham District Historical Society Inc
Photograph - Digital Photograph, Alan King, Pauline Toner Butterfly Reserve, 2008
One of seven sites in Eltham and Greensborough where the butterfly survives. Published: Nillumbik Now and Then / Marguerite Marshall 2008; photographs Alan King with Marguerite Marshall.; p181 The rare Eltham Copper Butterfly, Paralucia pyro-discus, was saved from near extinction by a community campaign in the late 1980s. Thanks to that effort, the butterfly, a form of the Fiery Copper Butterfly, with a wing span of only 2.5cm, can be seen in parts of Eltham and Greensborough from late November to April. As late as 1987 the butterfly was thought to be near extinction. But that year, entomologist, Michael Braby, found several colonies, including two major ones in natural bushland on Diosma Road, Eltham. However these were threatened with destruction, as their habitat was to be destroyed by a development of 71 houses. The colonies were on a 14 hectare subdivision owned by Esanda Finance, an ANZ Bank subsidiary. It would cost around $5 million, to reimburse the bank for the land. The butterfly, which depends on woodland, a stunted form of the Sweet Bursaria bush, and the Notoncus ant, was considered too fragile to relocate. Braby’s discovery led to a sometimes fiery two-year campaign, which even became an election issue. It involved the local community, local and state governments and the developer, before a compromise was reached. The larvae have an intricate relationship with the small black ant, Notoncus. During the day, the larvae shelter in nests made by the ants around the base of the trunk and roots of the Sweet Bursaria (Bursaria spinosa). The ants are thought to protect the larvae from predators and parasites, as they attend them from the nests to feed on the Bursaria leaves at night. In return, the larvae excrete a sugar solution, which the ants love to eat. The butterfly was first recorded in Victoria in 1893, and first collected scientifically from Eltham in 1931. But it was only officially named in 1951, by Victoria’s then top butterfly expert, David Crosby.2 However, from 1970, rapid housing development in Eltham destroyed much of the butterfly’s habitat. The discovery of several major colonies in 1987 met with great excitement, and 250 people attended the first local public meeting. The State Government commissioned Crosby to investigate how to protect the butterfly, and the council froze development for three weeks. Then Esanda agreed to suspend development for several months, until a compromise was reached. Crosby recommended that 62 of the 71 lots be kept to ensure the butterflys’ survival. However this would cost $1 million to $1.5million in compensation to Esanda. Greensborough MP Pauline Toner, launched a $1million fundraising campaign and many artists donated their works to the appeal. Toner offered Clifton Pugh’s painting Eltham Copper Country to millionaire Alan Bond for $1 million, after having heard that he had offered $6 million for the Van Gough painting Sunflowers. However Bond did not accept. The butterfly was considered a ‘hot’ election issue during the by-election, following Pauline Toner’s resignation. Liberal party candidate, Margaret Brown, was accused of falsely saying she had been involved in the butterfly campaign so as to win votes. Sadly, the $1million appeal fell short at $426,000, so a compromise was reached. The State Government donated the Education Department site on Eucalyptus Road, but only nine lots of the Diosma site were bought, and the rest of the development went ahead. On March 3, 1989, Ms Toner died. Thee Eucalyptus Road site was named in her honour. Around 2000 the butterfly was further threatened by proposed developments on Pitt Street, facing the Pauline Toner Reserve and between Diosma and Nyora Roads. Fortunately the Friends of the ECB, with the Shire of Nillumbik, ensured that more habitat was made available. The butterfly now survives in seven sites in Eltham and Greensborough, including the main sites at the Pauline Toner Reserve on Eucalyptus Road, the Western and Eastern colonies on Diosma Road, and the Yandell Reserve in Greensborough.5 The butterfly survives also in Castlemaine and in the Kiata and Salisbury areas. However, it remains endangered.This collection of almost 130 photos about places and people within the Shire of Nillumbik, an urban and rural municipality in Melbourne's north, contributes to an understanding of the history of the Shire. Published in 2008 immediately prior to the Black Saturday bushfires of February 7, 2009, it documents sites that were impacted, and in some cases destroyed by the fires. It includes photographs taken especially for the publication, creating a unique time capsule representing the Shire in the early 21st century. It remains the most recent comprehenesive publication devoted to the Shire's history connecting local residents to the past. nillumbik now and then (marshall-king) collection, eltham copper butterfly, pauline toner butterfly reserve -
 Flagstaff Hill Maritime Museum and Village
Book - Craft book, Norma Benporath, Tatting, circa 1940's
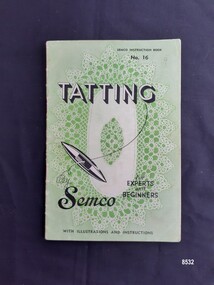
Tatting is a form of knotted lace making using thread and a small shuttle. Twisted threads are tied around or through small, pointed shuttles that can be made of bone, mother of pearl, tortoise shell, steel or plastic. This produces a stable, strong lace using simple knots of two half hitches to make rings and chains embellished with picots. The origins of tatting are not clear but early versions of decorative knotting were used by the Egyptians on their ceremonial dress. Tatting also has elements of fishermen's net making techniques and the decorative knotting that was practiced by aristocratic women from the 15th century. Tatting, as we know it today, emerged in the first half of the 19th century. The new availability of mercerised thread from 1835 encouraged a burgeoning of lace crafts of all sorts. It was known in Italy as "occhi" and in France as "la frivolite". Tatting looks fragile but is both strong and durable. An article in a column named "Wives and Daughters" published in the Star newspaper in May 1910 describes the durability of tatting lace - "there is edging and insertion still in existence that have outworn two sets of pillow slips." In the 19th century and well into the 20th century, tatting was used like crochet and knitted lace for decorative edgings, collars, doilies, tray cloths etc. At first, different tatting patterns were passed along by word of mouth from person to person, however in time, patterns regularly appeared in newspapers and magazines well into the 1950's. This book has photographs and detailed instructions for a wide range of tatted edgings and insertions suitable for household linens such as towels, doilies and tablecloths as well as patterns for whole mats. Stanley E. Mullen (a businessman) developed Semco Pty Ltd which began as a Melbourne based importation company in 1907. The first three letters of Semco's name were his initials. In 1915 it began manufacturing women's apparel, whitework and transfer patterns. In 1924 the company moved to Black Rock, Victoria and continued to produce an extensive range of needlework patterns and handcraft instruction booklets, threads etc. up until the late 1970's. Semco had a staff that included many young women. It was noted by E.J. Trait (editor of the local newspaper "Standard News") that the firm provided them with good working conditions and the correct rate of pay for women in a time of war - the starting rate for 15 year olds, mainly girls at Semco was 25 shillings per week. During World War 2, Manpower Regulations could be used to coerce workers to move into jobs that supported the war effort, but Trait argued that being employed at Semco could make this unlikely as the firm made some goods essential for the war effort. He even suggested that women be encouraged to produce needlework items (and play a part in the war effort) by sending them as presents, to the troops up north. He also heaped praise on the Semco workplace - noting that no Saturday work was the norm, allowing employees to shop and have "hair-do's" before enjoying a relaxing weekend! Semco also had a female cricket side in the women's Saturday association. After the war the firm stayed in production until the early 1990's when it was taken over by Coates-Paton Pty Ltd. Norma Benporath (1900 - 1998) was an expert in tatting techniques and taught and published extensively on the subject. She was born in New Zealand with impaired sight but cataract surgery restored 50% vision to one eye. She was inspired to learn tatting whilst watching her aunt tat and being told that tatting did not require as much sharp vision as embroidery. She quickly learnt to design her own patterns and published over 1000 tatted lace patterns between 1929 and 1952. She became a regular contributor to magazines (such as Home Beautiful) and newspapers across Australia. Her designs were also published in New Zealand, South Africa as well as the U.K. and U.S.A. When Semco, a thread manufacturer, noticed a rise in the sale of fine crochet threads, they realized they had an untapped market to explore. Norma designed a collection of tatting patterns for Semco that were used to help promote their threads. Norma also worked with Semco to produce a line of threads and shuttles specifically suited to tatting. In 1997, Norma was inducted into the "Order of Australia" for "Service to the craft of tatting as a designer and through the international publication of her patterns".This item is an excellent example of the needle work being enjoyed by women in the 1940's in Australia and the skills of the Australian designer, Norma Benporath. It is also an example of the trend that emerged for craft companies such as Semco to publish pattern books in order to advertise their own materials.A 32 page soft cover instruction book with green front and back covers showing two tatted doily designs. The book includes black and white photographs and written patterns by Norma Benporath.Front cover - "TATTING" "For / EXPERTS/ and / BEGINNERS" "By/Semco" "SEMCO INSTRUCTION BOOK" "No. 16" "WITH ILLUSTRATIONS AND INSTRUCTIONS" "9" Back cover - "FOR INSTRUCTIONS FOR WORKING SEE PAGE 22" "Published by Semco Pty. Ltd." "BLACK ROCK, 29, VIC"flagstaff hill maritime museum and village, warrnambool, great ocean road, tatting, tatting instruction book, tatting patterns, tatting shuttle, semco, semco pty ltd, norma benporath, needlework, handcrafts, household linen, craftwork -
 Eltham District Historical Society Inc
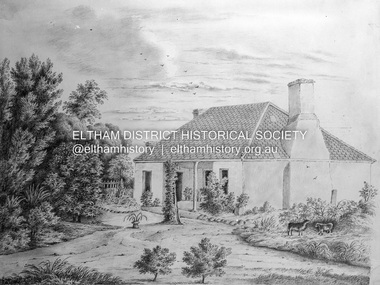
Negative - Photograph, Charles Bertie, Sketch; Sweeney's Cottage, Culla Hill, Eltham (n.d.), c.1905
In the early 1900s, Mary Sweeney commissioned artist Charles Bertie to paint the main house at Culla Hill. He charged her 5 shillings for the picture and 18 pence for the frame She took this painting with her when she married Michael Carrucan in 1910 and it hung in the Dalton Street farmhouse for many years. At a later time (1960s), the Burstons (the then owners of Culla Hill) had a card printed from the painting. The original sketch was photographed in 1970 for reproduction in the Shire history publication Pioneers & Painters (1971). The very fragile original was kept in the Council strongroom and suffered significant damage to its edges over the years, no doubt it has also yellowed. A comparison of the original as digitised (2022) with the negative taken 50 years earlier also reveals that the left 20% of the sketch has been cut off, probably due to damage. In June 1842 Thomas Sweeney applied to the Superintendent, C.J. La Trobe, asking permission to purchase a portion of the recently surveyed ‘Parish of Nillumbik'. His request was allowed and handed to the sub-treasurer and Land Board. He paid £110 for 110 acres and called the land 'Culla Hill'. He first built a temporary house, a slab hut 12 feet by 10 feet, in which he lived with his wife, an Irish girl whom he had married in 1838. (His first wife had been drowned at Port Jackson.) Some time later he built a permanent residence on the model of a Tipperary farmhouse. It was a rectangular building of hand-made bricks and stone quarried from the Western Hill with a recessed verandah in front, and bore a slate roof. The out-buildings consisted of a detached kitchen, stable and a barn. It was in this house that succeeding generations of Sweeneys were reared. The original slab hut became a washhouse and survived till recent years. 'Culla Hill' became a social centre for the district, church services being held there on various occasions. The first wheat crop in the district was planted by Sweeney who also supplied the first grain for a mill that later was built at Eltham. He took an active interest in the development of the district. At this time travelling people--many of them runaway sailors or convicts--often passed the settlement, and some of them stayed and worked with Sweeney. A tribe of aborigines living on the river below 'Culla Hill' were apparently on good terms with Sweeney, for it is said that they helped him with the building of his house. Very little is known about the aborigines who originally lived in the Eltham district. There must have been many of them; their stone axes, grinding stones, and anvil stones have been found in the gullies around Research and canoe trees and artifacts were found on the Kangaroo Ground hills. Early settlers remembered a tribe that camped on the site of the present railway bridge at Eltham. They held corroborees there and visited settlers for hand-outs of 'flour and bacca’. There was an aboriginal reserve on the Yarra, upstream from Eltham, but most of those who had collected there later went to live on the Pound Reserve at Warrandyte, where the last aborigines in the area finally ended their days. The Pound Reserve, of 1,103 acres, was established at Pound Bend in 1841. The chief protector, George Robinson, and his four assistants, were given instructions to care for the aged and sick, to provide blankets and rations for all who lived there, to train the able-bodied men in agriculture and other trades and to find them jobs. The Yarra blacks, who later came under the protection of William Thomas, have been described as a 'fine race, well made and above the average height'. Thomas Sweeney died on 6 September 1867 and was buried in the Eltham Cemetery. To his wife Margaret and his son John, he left the entire property of 'Culla Hill'. To his other son Patrick, he left 150 acres, including a small two-roomed wooden cottage. He had five daughters: Kate and Margaret (twins) who were born in 1842, Ellen 1846, Annie 1848 and Johanna 1851. John Sweeney farmed 'Culla Hill' until his death in 1909. He had ten children; one of them, Mary, became Mrs M. Carrucan whose son, Mr John Carrucan, still lives at Eltham. 'Culla Hill' passed out of the Sweeneys possession in 1939 and was renamed by its new owners, 'Sweeneys', in memory of its pioneers. - Pioneers & Painters: One Hundred Years of Eltham and its Shire, Alan Marshall 1971, pp10-12 Original colour sketch artwork 4 x 5 inch black and white negative of original colour sketchculla hill, art, charles bertie, drawing, mary carrucan (nee sweeney), sketches, sweeney's cottage -
 Flagstaff Hill Maritime Museum and Village
Instrument - Watch, ca 1878
This dainty watch was found at Loch Ard Gorge, where the ship Loch Ard was wrecked in 1878. Itis said to be from the Loch Ard. The watch is recognisable by its bump on the edge, which would have been the winder. The watch face has broken away and reveals the watch's spring. It is coated with encrustations and is in poor, fragile condition. Donated with the watch were two documents and a newspaper cutting about the story of the shipwreck of Loch Ard. They are all in a strong cardboard box with reinforced corners on base and lid. HISTORY OF THE LOCH ARD The LOCH ARD belonged to the famous Loch Line which sailed many ships from England to Australia. Built in Glasgow by Barclay, Curdle and Co. in 1873, the LOCH ARD was a three-masted square rigged iron sailing ship. The ship measured 262ft 7" (79.87m) in length, 38ft (11.58m) in width, 23ft (7m) in depth and had a gross tonnage of 1693 tons. The LOCH ARD's main mast measured a massive 150ft (45.7m) in height. LOCH ARD made three trips to Australia and one trip to Calcutta before its final voyage. LOCH ARD left England on March 2, 1878, under the command of Captain Gibbs, a newly married, 29 year old. She was bound for Melbourne with a crew of 37, plus 17 passengers and a load of cargo. The general cargo reflected the affluence of Melbourne at the time. On board were straw hats, umbrella, perfumes, clay pipes, pianos, clocks, confectionary, linen and candles, as well as a heavier load of railway irons, cement, lead and copper. There were items included that intended for display in the Melbourne International Exhibition in 1880. The voyage to Port Phillip was long but uneventful. At 3am on June 1, 1878, Captain Gibbs was expecting to see land and the passengers were becoming excited as they prepared to view their new homeland in the early morning. But LOCH ARD was running into a fog which greatly reduced visibility. Captain Gibbs was becoming anxious as there was no sign of land or the Cape Otway lighthouse. At 4am the fog lifted. A man aloft announced that he could see breakers. The sheer cliffs of Victoria's west coast came into view, and Captain Gibbs realised that the ship was much closer to them than expected. He ordered as much sail to be set as time would permit and then attempted to steer the vessel out to sea. On coming head on into the wind, the ship lost momentum, the sails fell limp and LOCH ARD's bow swung back. Gibbs then ordered the anchors to be released in an attempt to hold its position. The anchors sank some 50 fathoms - but did not hold. By this time LOCH ARD was among the breakers and the tall cliffs of Mutton Bird Island rose behind the ship. Just half a mile from the coast, the ship's bow was suddenly pulled around by the anchor. The captain tried to tack out to sea, but the ship struck a reef at the base of Mutton Bird Island, near Port Campbell. Waves broke over the ship and the top deck was loosened from the hull. The masts and rigging came crashing down knocking passengers and crew overboard. When a lifeboat was finally launched, it crashed into the side of LOCH ARD and capsized. Tom Pearce, who had launched the boat, managed to cling to its overturned hull and shelter beneath it. He drifted out to sea and then on the flood tide came into what is now known as LOCH ARD Gorge. He swam to shore, bruised and dazed, and found a cave in which to shelter. Some of the crew stayed below deck to shelter from the falling rigging but drowned when the ship slipped off the reef into deeper water. Eva Carmichael had raced onto deck to find out what was happening only to be confronted by towering cliffs looming above the stricken ship. In all the chaos, Captain Gibbs grabbed Eva and said, "If you are saved Eva, let my dear wife know that I died like a sailor". That was the last Eva Carmichael saw of the captain. She was swept off the ship by a huge wave. Eva saw Tom Pearce on a small rocky beach and yelled to attract his attention. He dived in and swam to the exhausted woman and dragged her to shore. He took her to the cave and broke open case of brandy which had washed up on the beach. He opened a bottle to revive the unconscious woman. A few hours later Tom scaled a cliff in search of help. He followed hoof prints and came by chance upon two men from nearby Glenample Station three and a half miles away. In a state of exhaustion, he told the men of the tragedy. Tom returned to the gorge while the two men rode back to the station to get help. By the time they reached LOCH ARD Gorge, it was cold and dark. The two shipwreck survivors were taken to Glenample Station to recover. Eva stayed at the station for six weeks before returning to Ireland, this time by steamship. In Melbourne, Tom Pearce received a hero's welcome. He was presented with the first gold medal of the Royal Humane Society of Victoria and a £1000 cheque from the Victorian Government. Concerts were performed to honour the young man's bravery and to raise money for those who lost family in the LOCH ARD disaster. Of the 54 crew members and passengers on board, only two survived: the apprentice, Tom Pearce and the young woman passenger, Eva Carmichael, who lost all of her family in the tragedy. Ten days after the LOCH ARD tragedy, salvage rights to the wreck were sold at auction for £2,120. Cargo valued at £3,000 was salvaged and placed on the beach, but most washed back into the sea when another storm developed. The wreck of LOCH ARD still lies at the base of Mutton Bird Island. Much of the cargo has now been salvaged and some was washed up into what is now known as LOCH ARD Gorge. Cargo and artefacts have also been illegally salvaged over many years before protective legislation was introduced. One of the most unlikely pieces of cargo to have survived the shipwreck was a Minton porcelain peacock - one of only nine in the world. The peacock was destined for the Melbourne International Exhibition in 1880. It had been well packed, which gave it adequate protection during the violent storm. Today, the Minton peacock can be seen at the Flagstaff Hill Maritime Museum in Warrnambool. From Australia's most dramatic shipwreck it has now become Australia's most valuable shipwreck artefact and is one of very few 'objects' on the Victorian State Heritage Register. Flagstaff Hill’s collection of artefacts from LOCH ARD is significant for being one of the largest collections of artefacts from this shipwreck in Victoria. It is significant for its association with the shipwreck, which is on the Victorian Heritage Register (VHR S417). The collection is significant because of the relationship between the objects, as together they have a high potential to interpret the story of the LOCH ARD. The LOCH ARD collection is archaeologically significant as the remains of a large international passenger and cargo ship. The LOCH ARD collection is historically significant for representing aspects of Victoria’s shipping history and its potential to interpret sub-theme 1.5 of Victoria’s Framework of Historical Themes (living with natural processes). The collection is also historically significant for its association with the LOCH ARD, which was one of the worst and best known shipwrecks in Victoria’s history.Ladies' fob watch, originally thought to be gold, now covered in encrustation. A bump on the edge would be the winding mechanism for the watch. A small section has broken away, on the reverse, and an engraved surface can be seen. Face and hands are missing, revealing the spring inside. Donated with the watch were two documents and a newspaper cutting about the story of the shipwreck of the Loch Ard. They are all in a strong cardboard box with reinforced corners on the base and lid. Found at Loch Ard Gorge and said to have been from the Loch Ard.flagstaff hill, warrnambool, shipwrecked coast, flagstaff hill maritime museum, maritime museum, shipwreck coast, flagstaff hill maritime village, great ocean road, loch line, loch ard, captain gibbs, eva carmichael, tom pearce, glenample station, mutton bird island, loch ard gorge, ladies fob watch, gold watch, fob watch, pocket watch, horology, accessory, time keeping, scientific instrument, ladies' watch, ladies' pocket watch -
 Flagstaff Hill Maritime Museum and Village
Domestic object - Bowl, Late 19th or early 20th Century
The Process of Making Pottery Decorating, Firing, Glazing, Making, Technical There is a rhythm and flow to clay. It can’t be done all at once! Even the making process! It can take weeks to get everything done, especially if you can only work on your pottery once a week! Even though we have three hour classes, it’s often just not enough time! Here is an overview of some of the processes so you have a bit more grasp on some of the technical stuff! Step One – Design There are SO many ideas out there for making stuff in clay! From delicate porcelain jewellery, through to heavy sculptural work and everything in between. Deciding your direction is sometimes not that easy – when you first start, try everything, you will naturally gravitate to the style that you enjoy! The options and variations are endless and can get a wee bit overwhelming too! Check in with me before you start to ensure your ideas will work, what order you might do things, how you could achieve the look you are seeking and any other technical data required! Step Two – Making Clay is thixotropic. This means that as you work with it, the clay first gets sloppier and wetter, before is begins to dry in the atmosphere. For most things, you simply can’t do all parts of the project at once. An example of work order might look like: Get last weeks work out from the shelves Prepare clay for today’s work – roll your clay, prepare balls for throwing, make the first stage of a pinch pot) Clean up last week’s work and put it on the shelf for bisque firing Check that you have any glazing to do – and do enough of it that you will have time to finish your main project Do the next step of your next project – there might be a further step that can’t be complete immediately, in that case, wrap your work well and put onto the shelves. Letting your work rest for a while can really help keep your work clean and professional looking. Many things require bagging under plastic to keep it ready for work the next week – put your name on the outside of the bag so you can find your work easily. We have stickers and markers. Consider how you want to decorate your work – coloured slip can be applied at a fairly wet stage (remembering that it will make your work even wetter!). Trying to apply slip to dry clay won’t work! If you want to do sgraffito – you will need to keep the work leather hard (a state of dryness where you can still work the clay with a little effort and a little water and care). Step Three – Drying Most of the time your work can go into the rack uncovered to let it dry out for the following week. If you want to continue forming or shaping you will need to double bag your work – put your work on a suitable sized bat and put the bat in a bag so the base of the bag is under the bat, then put another bag over the top of the work and tuck the top of the bag under the bat. If you want to trim (or turn) your thrown work the following week, it should also be double bagged. If your work is large, delicate, or of uneven thicknesses, you should lightly cover your work for drying. When considering the drying process, bare in mind the weather, humidity and wind! The hotter and dryer, the faster things dry and work can dry unevenly in the shelves – this can lead to cracking – another time to lightly cover your work for drying. Step Four – Trimming and Cleaning Up Your work is dry! It is called greenware now and it is at it’s most fragile! Handle everything with two hands. I often refer to soft hands – keep everything gentle and with your fingers spread as much as possible. Try to not pick up things like plates too much, and always with both hands! Before your work can be bisque fired it should be “cleaned up”. You work won’t go into the kiln if it has sharp edges – when glazed, sharp edges turn into razor blades! Use a piece of fly wire to rub the work all over – this will scratch a little so be light handed. Use a knife or metal kidney to scrape any areas that require a bit more dynamic treatment than the fly wire offers! Finally, a very light wipe over with a slightly damp sponge can help soften and soothe all of your edges and dags! Trimming thrown work: If you are planning to trim (or turn) your thrown work (and you should be), make sure you bag it well – your work should be leather hard to almost dry for easiest trimming. Use this step to finish the work completely – use a metal kidney to polish the surface, or a slightly damp sponge to give a freshly thrown look. Wipe the sponge around the rim after trimming, and check the inside of the pot for dags! Trimming slip cast work: Usually I will trim the rims of your work on the wheel the following day to make that stage easier, however you will still need to check your work for lumps and bumps. Last but not least – check that your name is still clearly on the bottom of your work. Step Five – Bisque Firing When the work is completely dry it can go into the bisque kiln. The bisque kiln is fired to 1000°C. This process burns off the water in the clay as well as some of the chemically bound water. The structure of the clay is not altered that much at this temperature. Inside the bisque kiln, the work is stacked a little, small bowl inside a larger bowl and onto a heavy plate. Smaller items like decorations or drink coasters might get stacked several high. Consideration is paid to the weight of the stack and shape of the work. A bisque kiln can fire about one and a half times the amount of work that the glaze kiln can fire. The firing takes about 10 hours to complete the cycle and about two days to cool down. Once it has been emptied the work is placed in the glaze room ready for you to decorate! Step Six – Glazing Decorating your work with colour can be a lot of fun – and time consuming! There are three main options for surface treatment at this stage: Oxide Washes Underglazes Glazes Washes and underglazes do not “glaze” the work – It will still need a layer of glaze to fully seal the clay (washes don’t need glaze on surfaces not designed for food or liquid as they can gloss up a little on their own). Underglazes are stable colourants that turn out pretty much how they look in the jar. They can be mixed with each other to form other colours and can be used like water colours to paint onto your work. Mostly they should have a clear glaze on top to seal them. Oxides are a different species – the pink oxide (cobalt) wash turns out bright blue for instance. They don’t always need a glaze on top, and some glazes can change the colour of the wash! The glazes need no other “glaze” on top! Be careful of unknown glaze interactions – you can put any combination of glaze in a bowl or on a plate, but only a single glaze on the outside of any vertical surface! Glazes are a chemical reaction under heat. We don’t know the exact chemicals in the Mayco glazes we use. I can guess by the way they interact with each other, however, on the whole, you need to test every idea you have, and not run the test on a vertical surface! Simply put, glaze is a layer of glass like substance that bonds with the clay underneath. Clay is made of silica, alumina and water. Glaze is made of mostly silica. Silica has a melting point of 1700°C and we fire to 1240°C. The silica requires a “flux” to help it melt at the lower temperature. Fluxes can be all sorts of chemicals – a common one is calcium – calcium has a melting point of 2500°C, however, together they both melt at a much lower temperature! Colourants are metal oxides like cobalt (blue), chrome (green through black), copper (green, blue, even red!), manganese (black, purple and pink) iron (red brown), etc. Different chemicals in the glaze can have dramatic effects. for example, barium carbonate (which we don’t use) turns manganese bright pink! Other elements can turn manganese dioxide brown, blue, purple and reddish brown. Manganese dioxide is a flux in and of itself as well. So, glazes that get their black and purple colours, often interact with other glazes and RUN! Our mirror black is a good example – it mixes really well with many glazes because it fluxes them – causes them to melt faster. It will also bring out many beautiful colours in the glazes because it’s black colouring most definitely comes from manganese dioxide! Glaze chemistry is a whole subject on it’s own! We use commercial Mayco glazes on purpose – for their huge range of colour possibilities, stability, cool interactions, artistic freedom with the ability to easily brush the glazes on and ease of use. We currently have almost 50 glazes on hand! A major project is to test the interactions of all glazes with each other. That is 2,500 test tiles!!!! I’m going to make the wall behind the wheels the feature wall of pretty colours! Step Seven – Glaze (Gloss or sometimes called “Glost”) Firing Most of the time this is the final stage of making your creation (but not always!) The glaze kiln goes to 1240°C. This is called cone 6, or midrange. It is the low end of stoneware temperatures. Stoneware clays and glazes are typically fired at cone 8 – 10, that is 1260 – 1290°C. The energy requirement to go from 1240°C to 1280°C is almost a 30% more! Our clay is formulated to vitrify (mature, turn “glass-like”) at 1240°, as are our glazes. A glaze kiln take around 12 hours to reach temperature and two to three days to cool down. Sometimes a third firing process is required – this is for decoration that is added to work after the glaze firing. For example – adding precious metals and lustres. this firing temperature is usually around 600 – 800°C depending upon the techniques being used. There are many students interested in gold and silver trims – we will be doing this third type of firing soon! After firing your work will be in the student finished work shelves. Remember to pay for it before you head out the door! There is a small extra charge for using porcelain clay (it’s more than twice the price of regular clay), and for any third firing process! Once your work has been fired it can not turn back into clay for millennia – so don’t fire it if you don’t like it! Put it in the bucket for recycling. https://firebirdstudios.com.au/the-process-of-making-pottery/ The bowl is an example of kitchenware used in the 19th century and still in use today.Bowl white ceramic. Crack on side. Badly stained.Backstamp very faint and unable to be read.flagstaff hill, warrnambool, shipwrecked-coast, flagstaff-hill, flagstaff-hill-maritime-museum, maritime-museum, shipwreck-coast, flagstaff-hill-maritime-village, mixing bowl, food preparation, kitchen equipment, ceramic -
 Flagstaff Hill Maritime Museum and Village
Domestic object - Bowl
The Process of Making Pottery Decorating, Firing, Glazing, Making, Technical There is a rhythm and flow to clay. It can’t be done all at once! Even the making process! It can take weeks to get everything done, especially if you can only work on your pottery once a week! Even though we have three hour classes, it’s often just not enough time! Here is an overview of some of the processes so you have a bit more grasp on some of the technical stuff! Step One – Design There are SO many ideas out there for making stuff in clay! From delicate porcelain jewellery, through to heavy sculptural work and everything in between. Deciding your direction is sometimes not that easy – when you first start, try everything, you will naturally gravitate to the style that you enjoy! The options and variations are endless and can get a wee bit overwhelming too! Check in with me before you start to ensure your ideas will work, what order you might do things, how you could achieve the look you are seeking and any other technical data required! Step Two – Making Clay is thixotropic. This means that as you work with it, the clay first gets sloppier and wetter, before is begins to dry in the atmosphere. For most things, you simply can’t do all parts of the project at once. An example of work order might look like: Get last weeks work out from the shelves Prepare clay for today’s work – roll your clay, prepare balls for throwing, make the first stage of a pinch pot) Clean up last week’s work and put it on the shelf for bisque firing Check that you have any glazing to do – and do enough of it that you will have time to finish your main project Do the next step of your next project – there might be a further step that can’t be complete immediately, in that case, wrap your work well and put onto the shelves. Letting your work rest for a while can really help keep your work clean and professional looking. Many things require bagging under plastic to keep it ready for work the next week – put your name on the outside of the bag so you can find your work easily. We have stickers and markers. Consider how you want to decorate your work – coloured slip can be applied at a fairly wet stage (remembering that it will make your work even wetter!). Trying to apply slip to dry clay won’t work! If you want to do sgraffito – you will need to keep the work leather hard (a state of dryness where you can still work the clay with a little effort and a little water and care). Step Three – Drying Most of the time your work can go into the rack uncovered to let it dry out for the following week. If you want to continue forming or shaping you will need to double bag your work – put your work on a suitable sized bat and put the bat in a bag so the base of the bag is under the bat, then put another bag over the top of the work and tuck the top of the bag under the bat. If you want to trim (or turn) your thrown work the following week, it should also be double bagged. If your work is large, delicate, or of uneven thicknesses, you should lightly cover your work for drying. When considering the drying process, bare in mind the weather, humidity and wind! The hotter and dryer, the faster things dry and work can dry unevenly in the shelves – this can lead to cracking – another time to lightly cover your work for drying. Step Four – Trimming and Cleaning Up Your work is dry! It is called greenware now and it is at it’s most fragile! Handle everything with two hands. I often refer to soft hands – keep everything gentle and with your fingers spread as much as possible. Try to not pick up things like plates too much, and always with both hands! Before your work can be bisque fired it should be “cleaned up”. You work won’t go into the kiln if it has sharp edges – when glazed, sharp edges turn into razor blades! Use a piece of fly wire to rub the work all over – this will scratch a little so be light handed. Use a knife or metal kidney to scrape any areas that require a bit more dynamic treatment than the fly wire offers! Finally, a very light wipe over with a slightly damp sponge can help soften and soothe all of your edges and dags! Trimming thrown work: If you are planning to trim (or turn) your thrown work (and you should be), make sure you bag it well – your work should be leather hard to almost dry for easiest trimming. Use this step to finish the work completely – use a metal kidney to polish the surface, or a slightly damp sponge to give a freshly thrown look. Wipe the sponge around the rim after trimming, and check the inside of the pot for dags! Trimming slip cast work: Usually I will trim the rims of your work on the wheel the following day to make that stage easier, however you will still need to check your work for lumps and bumps. Last but not least – check that your name is still clearly on the bottom of your work. Step Five – Bisque Firing When the work is completely dry it can go into the bisque kiln. The bisque kiln is fired to 1000°C. This process burns off the water in the clay as well as some of the chemically bound water. The structure of the clay is not altered that much at this temperature. Inside the bisque kiln, the work is stacked a little, small bowl inside a larger bowl and onto a heavy plate. Smaller items like decorations or drink coasters might get stacked several high. Consideration is paid to the weight of the stack and shape of the work. A bisque kiln can fire about one and a half times the amount of work that the glaze kiln can fire. The firing takes about 10 hours to complete the cycle and about two days to cool down. Once it has been emptied the work is placed in the glaze room ready for you to decorate! Step Six – Glazing Decorating your work with colour can be a lot of fun – and time consuming! There are three main options for surface treatment at this stage: Oxide Washes Underglazes Glazes Washes and underglazes do not “glaze” the work – It will still need a layer of glaze to fully seal the clay (washes don’t need glaze on surfaces not designed for food or liquid as they can gloss up a little on their own). Underglazes are stable colourants that turn out pretty much how they look in the jar. They can be mixed with each other to form other colours and can be used like water colours to paint onto your work. Mostly they should have a clear glaze on top to seal them. Oxides are a different species – the pink oxide (cobalt) wash turns out bright blue for instance. They don’t always need a glaze on top, and some glazes can change the colour of the wash! The glazes need no other “glaze” on top! Be careful of unknown glaze interactions – you can put any combination of glaze in a bowl or on a plate, but only a single glaze on the outside of any vertical surface! Glazes are a chemical reaction under heat. We don’t know the exact chemicals in the Mayco glazes we use. I can guess by the way they interact with each other, however, on the whole, you need to test every idea you have, and not run the test on a vertical surface! Simply put, glaze is a layer of glass like substance that bonds with the clay underneath. Clay is made of silica, alumina and water. Glaze is made of mostly silica. Silica has a melting point of 1700°C and we fire to 1240°C. The silica requires a “flux” to help it melt at the lower temperature. Fluxes can be all sorts of chemicals – a common one is calcium – calcium has a melting point of 2500°C, however, together they both melt at a much lower temperature! Colourants are metal oxides like cobalt (blue), chrome (green through black), copper (green, blue, even red!), manganese (black, purple and pink) iron (red brown), etc. Different chemicals in the glaze can have dramatic effects. for example, barium carbonate (which we don’t use) turns manganese bright pink! Other elements can turn manganese dioxide brown, blue, purple and reddish brown. Manganese dioxide is a flux in and of itself as well. So, glazes that get their black and purple colours, often interact with other glazes and RUN! Our mirror black is a good example – it mixes really well with many glazes because it fluxes them – causes them to melt faster. It will also bring out many beautiful colours in the glazes because it’s black colouring most definitely comes from manganese dioxide! Glaze chemistry is a whole subject on it’s own! We use commercial Mayco glazes on purpose – for their huge range of colour possibilities, stability, cool interactions, artistic freedom with the ability to easily brush the glazes on and ease of use. We currently have almost 50 glazes on hand! A major project is to test the interactions of all glazes with each other. That is 2,500 test tiles!!!! I’m going to make the wall behind the wheels the feature wall of pretty colours! Step Seven – Glaze (Gloss or sometimes called “Glost”) Firing Most of the time this is the final stage of making your creation (but not always!) The glaze kiln goes to 1240°C. This is called cone 6, or midrange. It is the low end of stoneware temperatures. Stoneware clays and glazes are typically fired at cone 8 – 10, that is 1260 – 1290°C. The energy requirement to go from 1240°C to 1280°C is almost a 30% more! Our clay is formulated to vitrify (mature, turn “glass-like”) at 1240°, as are our glazes. A glaze kiln take around 12 hours to reach temperature and two to three days to cool down. Sometimes a third firing process is required – this is for decoration that is added to work after the glaze firing. For example – adding precious metals and lustres. this firing temperature is usually around 600 – 800°C depending upon the techniques being used. There are many students interested in gold and silver trims – we will be doing this third type of firing soon! After firing your work will be in the student finished work shelves. Remember to pay for it before you head out the door! There is a small extra charge for using porcelain clay (it’s more than twice the price of regular clay), and for any third firing process! Once your work has been fired it can not turn back into clay for millennia – so don’t fire it if you don’t like it! Put it in the bucket for recycling. https://firebirdstudios.com.au/the-process-of-making-pottery/ This bowl is an example of kitchenware used in the 19th century and still in use today.Bowl white ceramic plain that has two sets of edging around lip. Inside bowl has plaster designed to look like cooking mixture.flagstaff hill, warrnambool, shipwrecked-coast, flagstaff-hill, flagstaff-hill-maritime-museum, maritime-museum, shipwreck-coast, flagstaff-hill-maritime-village, kitchen equipment, ceramic -
 Flagstaff Hill Maritime Museum and Village
Domestic object - Bowl, J & G Meakin, Late 19th or early 20th Century
The Process of Making Pottery Decorating, Firing, Glazing, Making, Technical There is a rhythm and flow to clay. It can’t be done all at once! Even the making process! It can take weeks to get everything done, especially if you can only work on your pottery once a week! Even though we have three hour classes, it’s often just not enough time! Here is an overview of some of the processes so you have a bit more grasp on some of the technical stuff! Step One – Design There are SO many ideas out there for making stuff in clay! From delicate porcelain jewellery, through to heavy sculptural work and everything in between. Deciding your direction is sometimes not that easy – when you first start, try everything, you will naturally gravitate to the style that you enjoy! The options and variations are endless and can get a wee bit overwhelming too! Check in with me before you start to ensure your ideas will work, what order you might do things, how you could achieve the look you are seeking and any other technical data required! Step Two – Making Clay is thixotropic. This means that as you work with it, the clay first gets sloppier and wetter, before is begins to dry in the atmosphere. For most things, you simply can’t do all parts of the project at once. An example of work order might look like: Get last weeks work out from the shelves Prepare clay for today’s work – roll your clay, prepare balls for throwing, make the first stage of a pinch pot) Clean up last week’s work and put it on the shelf for bisque firing Check that you have any glazing to do – and do enough of it that you will have time to finish your main project Do the next step of your next project – there might be a further step that can’t be complete immediately, in that case, wrap your work well and put onto the shelves. Letting your work rest for a while can really help keep your work clean and professional looking. Many things require bagging under plastic to keep it ready for work the next week – put your name on the outside of the bag so you can find your work easily. We have stickers and markers. Consider how you want to decorate your work – coloured slip can be applied at a fairly wet stage (remembering that it will make your work even wetter!). Trying to apply slip to dry clay won’t work! If you want to do sgraffito – you will need to keep the work leather hard (a state of dryness where you can still work the clay with a little effort and a little water and care). Step Three – Drying Most of the time your work can go into the rack uncovered to let it dry out for the following week. If you want to continue forming or shaping you will need to double bag your work – put your work on a suitable sized bat and put the bat in a bag so the base of the bag is under the bat, then put another bag over the top of the work and tuck the top of the bag under the bat. If you want to trim (or turn) your thrown work the following week, it should also be double bagged. If your work is large, delicate, or of uneven thicknesses, you should lightly cover your work for drying. When considering the drying process, bare in mind the weather, humidity and wind! The hotter and dryer, the faster things dry and work can dry unevenly in the shelves – this can lead to cracking – another time to lightly cover your work for drying. Step Four – Trimming and Cleaning Up Your work is dry! It is called greenware now and it is at it’s most fragile! Handle everything with two hands. I often refer to soft hands – keep everything gentle and with your fingers spread as much as possible. Try to not pick up things like plates too much, and always with both hands! Before your work can be bisque fired it should be “cleaned up”. You work won’t go into the kiln if it has sharp edges – when glazed, sharp edges turn into razor blades! Use a piece of fly wire to rub the work all over – this will scratch a little so be light handed. Use a knife or metal kidney to scrape any areas that require a bit more dynamic treatment than the fly wire offers! Finally, a very light wipe over with a slightly damp sponge can help soften and soothe all of your edges and dags! Trimming thrown work: If you are planning to trim (or turn) your thrown work (and you should be), make sure you bag it well – your work should be leather hard to almost dry for easiest trimming. Use this step to finish the work completely – use a metal kidney to polish the surface, or a slightly damp sponge to give a freshly thrown look. Wipe the sponge around the rim after trimming, and check the inside of the pot for dags! Trimming slip cast work: Usually I will trim the rims of your work on the wheel the following day to make that stage easier, however you will still need to check your work for lumps and bumps. Last but not least – check that your name is still clearly on the bottom of your work. Step Five – Bisque Firing When the work is completely dry it can go into the bisque kiln. The bisque kiln is fired to 1000°C. This process burns off the water in the clay as well as some of the chemically bound water. The structure of the clay is not altered that much at this temperature. Inside the bisque kiln, the work is stacked a little, small bowl inside a larger bowl and onto a heavy plate. Smaller items like decorations or drink coasters might get stacked several high. Consideration is paid to the weight of the stack and shape of the work. A bisque kiln can fire about one and a half times the amount of work that the glaze kiln can fire. The firing takes about 10 hours to complete the cycle and about two days to cool down. Once it has been emptied the work is placed in the glaze room ready for you to decorate! Step Six – Glazing Decorating your work with colour can be a lot of fun – and time consuming! There are three main options for surface treatment at this stage: Oxide Washes Underglazes Glazes Washes and underglazes do not “glaze” the work – It will still need a layer of glaze to fully seal the clay (washes don’t need glaze on surfaces not designed for food or liquid as they can gloss up a little on their own). Underglazes are stable colourants that turn out pretty much how they look in the jar. They can be mixed with each other to form other colours and can be used like water colours to paint onto your work. Mostly they should have a clear glaze on top to seal them. Oxides are a different species – the pink oxide (cobalt) wash turns out bright blue for instance. They don’t always need a glaze on top, and some glazes can change the colour of the wash! The glazes need no other “glaze” on top! Be careful of unknown glaze interactions – you can put any combination of glaze in a bowl or on a plate, but only a single glaze on the outside of any vertical surface! Glazes are a chemical reaction under heat. We don’t know the exact chemicals in the Mayco glazes we use. I can guess by the way they interact with each other, however, on the whole, you need to test every idea you have, and not run the test on a vertical surface! Simply put, glaze is a layer of glass like substance that bonds with the clay underneath. Clay is made of silica, alumina and water. Glaze is made of mostly silica. Silica has a melting point of 1700°C and we fire to 1240°C. The silica requires a “flux” to help it melt at the lower temperature. Fluxes can be all sorts of chemicals – a common one is calcium – calcium has a melting point of 2500°C, however, together they both melt at a much lower temperature! Colourants are metal oxides like cobalt (blue), chrome (green through black), copper (green, blue, even red!), manganese (black, purple and pink) iron (red brown), etc. Different chemicals in the glaze can have dramatic effects. for example, barium carbonate (which we don’t use) turns manganese bright pink! Other elements can turn manganese dioxide brown, blue, purple and reddish brown. Manganese dioxide is a flux in and of itself as well. So, glazes that get their black and purple colours, often interact with other glazes and RUN! Our mirror black is a good example – it mixes really well with many glazes because it fluxes them – causes them to melt faster. It will also bring out many beautiful colours in the glazes because it’s black colouring most definitely comes from manganese dioxide! Glaze chemistry is a whole subject on it’s own! We use commercial Mayco glazes on purpose – for their huge range of colour possibilities, stability, cool interactions, artistic freedom with the ability to easily brush the glazes on and ease of use. We currently have almost 50 glazes on hand! A major project is to test the interactions of all glazes with each other. That is 2,500 test tiles!!!! I’m going to make the wall behind the wheels the feature wall of pretty colours! Step Seven – Glaze (Gloss or sometimes called “Glost”) Firing Most of the time this is the final stage of making your creation (but not always!) The glaze kiln goes to 1240°C. This is called cone 6, or midrange. It is the low end of stoneware temperatures. Stoneware clays and glazes are typically fired at cone 8 – 10, that is 1260 – 1290°C. The energy requirement to go from 1240°C to 1280°C is almost a 30% more! Our clay is formulated to vitrify (mature, turn “glass-like”) at 1240°, as are our glazes. A glaze kiln take around 12 hours to reach temperature and two to three days to cool down. Sometimes a third firing process is required – this is for decoration that is added to work after the glaze firing. For example – adding precious metals and lustres. this firing temperature is usually around 600 – 800°C depending upon the techniques being used. There are many students interested in gold and silver trims – we will be doing this third type of firing soon! After firing your work will be in the student finished work shelves. Remember to pay for it before you head out the door! There is a small extra charge for using porcelain clay (it’s more than twice the price of regular clay), and for any third firing process! Once your work has been fired it can not turn back into clay for millennia – so don’t fire it if you don’t like it! Put it in the bucket for recycling. https://firebirdstudios.com.au/the-process-of-making-pottery/This bowl was made by renowned pottery company J & G Meakin of England. The firm was established in the mid-1800's. The bowl is an example of kitchenware used in the 19th century and still in use today.Bowl; white ceramic, round and tapering inwards towards base. Made by J and G Meakin England.On base, 'Ironstone China Reg SOL 391413' with symbolflagstaff hill, flagstaff hill maritime museum and village, warrnambool, maritime museum, maritime village, great ocean road, shipwreck coast, mixing bowl, food preparation, j & g meakin, pottery, stoke-on-trent, kitchen equipment, ceramic -
 Flagstaff Hill Maritime Museum and Village
Domestic object - Plate
The Process of Making Pottery Decorating, Firing, Glazing, Making, Technical There is a rhythm and flow to clay. It can’t be done all at once! Even the making process! It can take weeks to get everything done, especially if you can only work on your pottery once a week! Even though we have three hour classes, it’s often just not enough time! Here is an overview of some of the processes so you have a bit more grasp on some of the technical stuff! Step One – Design There are SO many ideas out there for making stuff in clay! From delicate porcelain jewellery, through to heavy sculptural work and everything in between. Deciding your direction is sometimes not that easy – when you first start, try everything, you will naturally gravitate to the style that you enjoy! The options and variations are endless and can get a wee bit overwhelming too! Check in with me before you start to ensure your ideas will work, what order you might do things, how you could achieve the look you are seeking and any other technical data required! Step Two – Making Clay is thixotropic. This means that as you work with it, the clay first gets sloppier and wetter, before is begins to dry in the atmosphere. For most things, you simply can’t do all parts of the project at once. An example of work order might look like: Get last weeks work out from the shelves Prepare clay for today’s work – roll your clay, prepare balls for throwing, make the first stage of a pinch pot) Clean up last week’s work and put it on the shelf for bisque firing Check that you have any glazing to do – and do enough of it that you will have time to finish your main project Do the next step of your next project – there might be a further step that can’t be complete immediately, in that case, wrap your work well and put onto the shelves. Letting your work rest for a while can really help keep your work clean and professional looking. Many things require bagging under plastic to keep it ready for work the next week – put your name on the outside of the bag so you can find your work easily. We have stickers and markers. Consider how you want to decorate your work – coloured slip can be applied at a fairly wet stage (remembering that it will make your work even wetter!). Trying to apply slip to dry clay won’t work! If you want to do sgraffito – you will need to keep the work leather hard (a state of dryness where you can still work the clay with a little effort and a little water and care). Step Three – Drying Most of the time your work can go into the rack uncovered to let it dry out for the following week. If you want to continue forming or shaping you will need to double bag your work – put your work on a suitable sized bat and put the bat in a bag so the base of the bag is under the bat, then put another bag over the top of the work and tuck the top of the bag under the bat. If you want to trim (or turn) your thrown work the following week, it should also be double bagged. If your work is large, delicate, or of uneven thicknesses, you should lightly cover your work for drying. When considering the drying process, bare in mind the weather, humidity and wind! The hotter and dryer, the faster things dry and work can dry unevenly in the shelves – this can lead to cracking – another time to lightly cover your work for drying. Step Four – Trimming and Cleaning Up Your work is dry! It is called greenware now and it is at it’s most fragile! Handle everything with two hands. I often refer to soft hands – keep everything gentle and with your fingers spread as much as possible. Try to not pick up things like plates too much, and always with both hands! Before your work can be bisque fired it should be “cleaned up”. You work won’t go into the kiln if it has sharp edges – when glazed, sharp edges turn into razor blades! Use a piece of fly wire to rub the work all over – this will scratch a little so be light handed. Use a knife or metal kidney to scrape any areas that require a bit more dynamic treatment than the fly wire offers! Finally, a very light wipe over with a slightly damp sponge can help soften and soothe all of your edges and dags! Trimming thrown work: If you are planning to trim (or turn) your thrown work (and you should be), make sure you bag it well – your work should be leather hard to almost dry for easiest trimming. Use this step to finish the work completely – use a metal kidney to polish the surface, or a slightly damp sponge to give a freshly thrown look. Wipe the sponge around the rim after trimming, and check the inside of the pot for dags! Trimming slip cast work: Usually I will trim the rims of your work on the wheel the following day to make that stage easier, however you will still need to check your work for lumps and bumps. Last but not least – check that your name is still clearly on the bottom of your work. Step Five – Bisque Firing When the work is completely dry it can go into the bisque kiln. The bisque kiln is fired to 1000°C. This process burns off the water in the clay as well as some of the chemically bound water. The structure of the clay is not altered that much at this temperature. Inside the bisque kiln, the work is stacked a little, small bowl inside a larger bowl and onto a heavy plate. Smaller items like decorations or drink coasters might get stacked several high. Consideration is paid to the weight of the stack and shape of the work. A bisque kiln can fire about one and a half times the amount of work that the glaze kiln can fire. The firing takes about 10 hours to complete the cycle and about two days to cool down. Once it has been emptied the work is placed in the glaze room ready for you to decorate! Step Six – Glazing Decorating your work with colour can be a lot of fun – and time consuming! There are three main options for surface treatment at this stage: Oxide Washes Underglazes Glazes Washes and underglazes do not “glaze” the work – It will still need a layer of glaze to fully seal the clay (washes don’t need glaze on surfaces not designed for food or liquid as they can gloss up a little on their own). Underglazes are stable colourants that turn out pretty much how they look in the jar. They can be mixed with each other to form other colours and can be used like water colours to paint onto your work. Mostly they should have a clear glaze on top to seal them. Oxides are a different species – the pink oxide (cobalt) wash turns out bright blue for instance. They don’t always need a glaze on top, and some glazes can change the colour of the wash! The glazes need no other “glaze” on top! Be careful of unknown glaze interactions – you can put any combination of glaze in a bowl or on a plate, but only a single glaze on the outside of any vertical surface! Glazes are a chemical reaction under heat. We don’t know the exact chemicals in the Mayco glazes we use. I can guess by the way they interact with each other, however, on the whole, you need to test every idea you have, and not run the test on a vertical surface! Simply put, glaze is a layer of glass like substance that bonds with the clay underneath. Clay is made of silica, alumina and water. Glaze is made of mostly silica. Silica has a melting point of 1700°C and we fire to 1240°C. The silica requires a “flux” to help it melt at the lower temperature. Fluxes can be all sorts of chemicals – a common one is calcium – calcium has a melting point of 2500°C, however, together they both melt at a much lower temperature! Colourants are metal oxides like cobalt (blue), chrome (green through black), copper (green, blue, even red!), manganese (black, purple and pink) iron (red brown), etc. Different chemicals in the glaze can have dramatic effects. for example, barium carbonate (which we don’t use) turns manganese bright pink! Other elements can turn manganese dioxide brown, blue, purple and reddish brown. Manganese dioxide is a flux in and of itself as well. So, glazes that get their black and purple colours, often interact with other glazes and RUN! Our mirror black is a good example – it mixes really well with many glazes because it fluxes them – causes them to melt faster. It will also bring out many beautiful colours in the glazes because it’s black colouring most definitely comes from manganese dioxide! Glaze chemistry is a whole subject on it’s own! We use commercial Mayco glazes on purpose – for their huge range of colour possibilities, stability, cool interactions, artistic freedom with the ability to easily brush the glazes on and ease of use. We currently have almost 50 glazes on hand! A major project is to test the interactions of all glazes with each other. That is 2,500 test tiles!!!! I’m going to make the wall behind the wheels the feature wall of pretty colours! Step Seven – Glaze (Gloss or sometimes called “Glost”) Firing Most of the time this is the final stage of making your creation (but not always!) The glaze kiln goes to 1240°C. This is called cone 6, or midrange. It is the low end of stoneware temperatures. Stoneware clays and glazes are typically fired at cone 8 – 10, that is 1260 – 1290°C. The energy requirement to go from 1240°C to 1280°C is almost a 30% more! Our clay is formulated to vitrify (mature, turn “glass-like”) at 1240°, as are our glazes. A glaze kiln take around 12 hours to reach temperature and two to three days to cool down. Sometimes a third firing process is required – this is for decoration that is added to work after the glaze firing. For example – adding precious metals and lustres. this firing temperature is usually around 600 – 800°C depending upon the techniques being used. There are many students interested in gold and silver trims – we will be doing this third type of firing soon! After firing your work will be in the student finished work shelves. Remember to pay for it before you head out the door! There is a small extra charge for using porcelain clay (it’s more than twice the price of regular clay), and for any third firing process! Once your work has been fired it can not turn back into clay for millennia – so don’t fire it if you don’t like it! Put it in the bucket for recycling. https://firebirdstudios.com.au/the-process-of-making-pottery/Ceramics have evolved over thousands of years.White earthenware dinner plate. Crazing evident all over.Backstamped ‘Made in England S LTD’flagstaff hill, warrnambool, shipwrecked-coast, flagstaff-hill, flagstaff-hill-maritime-museum, maritime-museum, shipwreck-coast, flagstaff-hill-maritime-village, ceramics, tableware -
 Flagstaff Hill Maritime Museum and Village
Domestic object - Plate, Johnson Bros
The Process of Making Pottery Decorating, Firing, Glazing, Making, Technical There is a rhythm and flow to clay. It can’t be done all at once! Even the making process! It can take weeks to get everything done, especially if you can only work on your pottery once a week! Even though we have three hour classes, it’s often just not enough time! Here is an overview of some of the processes so you have a bit more grasp on some of the technical stuff! Step One – Design There are SO many ideas out there for making stuff in clay! From delicate porcelain jewellery, through to heavy sculptural work and everything in between. Deciding your direction is sometimes not that easy – when you first start, try everything, you will naturally gravitate to the style that you enjoy! The options and variations are endless and can get a wee bit overwhelming too! Check in with me before you start to ensure your ideas will work, what order you might do things, how you could achieve the look you are seeking and any other technical data required! Step Two – Making Clay is thixotropic. This means that as you work with it, the clay first gets sloppier and wetter, before is begins to dry in the atmosphere. For most things, you simply can’t do all parts of the project at once. An example of work order might look like: Get last weeks work out from the shelves Prepare clay for today’s work – roll your clay, prepare balls for throwing, make the first stage of a pinch pot) Clean up last week’s work and put it on the shelf for bisque firing Check that you have any glazing to do – and do enough of it that you will have time to finish your main project Do the next step of your next project – there might be a further step that can’t be complete immediately, in that case, wrap your work well and put onto the shelves. Letting your work rest for a while can really help keep your work clean and professional looking. Many things require bagging under plastic to keep it ready for work the next week – put your name on the outside of the bag so you can find your work easily. We have stickers and markers. Consider how you want to decorate your work – coloured slip can be applied at a fairly wet stage (remembering that it will make your work even wetter!). Trying to apply slip to dry clay won’t work! If you want to do sgraffito – you will need to keep the work leather hard (a state of dryness where you can still work the clay with a little effort and a little water and care). Step Three – Drying Most of the time your work can go into the rack uncovered to let it dry out for the following week. If you want to continue forming or shaping you will need to double bag your work – put your work on a suitable sized bat and put the bat in a bag so the base of the bag is under the bat, then put another bag over the top of the work and tuck the top of the bag under the bat. If you want to trim (or turn) your thrown work the following week, it should also be double bagged. If your work is large, delicate, or of uneven thicknesses, you should lightly cover your work for drying. When considering the drying process, bare in mind the weather, humidity and wind! The hotter and dryer, the faster things dry and work can dry unevenly in the shelves – this can lead to cracking – another time to lightly cover your work for drying. Step Four – Trimming and Cleaning Up Your work is dry! It is called greenware now and it is at it’s most fragile! Handle everything with two hands. I often refer to soft hands – keep everything gentle and with your fingers spread as much as possible. Try to not pick up things like plates too much, and always with both hands! Before your work can be bisque fired it should be “cleaned up”. You work won’t go into the kiln if it has sharp edges – when glazed, sharp edges turn into razor blades! Use a piece of fly wire to rub the work all over – this will scratch a little so be light handed. Use a knife or metal kidney to scrape any areas that require a bit more dynamic treatment than the fly wire offers! Finally, a very light wipe over with a slightly damp sponge can help soften and soothe all of your edges and dags! Trimming thrown work: If you are planning to trim (or turn) your thrown work (and you should be), make sure you bag it well – your work should be leather hard to almost dry for easiest trimming. Use this step to finish the work completely – use a metal kidney to polish the surface, or a slightly damp sponge to give a freshly thrown look. Wipe the sponge around the rim after trimming, and check the inside of the pot for dags! Trimming slip cast work: Usually I will trim the rims of your work on the wheel the following day to make that stage easier, however you will still need to check your work for lumps and bumps. Last but not least – check that your name is still clearly on the bottom of your work. Step Five – Bisque Firing When the work is completely dry it can go into the bisque kiln. The bisque kiln is fired to 1000°C. This process burns off the water in the clay as well as some of the chemically bound water. The structure of the clay is not altered that much at this temperature. Inside the bisque kiln, the work is stacked a little, small bowl inside a larger bowl and onto a heavy plate. Smaller items like decorations or drink coasters might get stacked several high. Consideration is paid to the weight of the stack and shape of the work. A bisque kiln can fire about one and a half times the amount of work that the glaze kiln can fire. The firing takes about 10 hours to complete the cycle and about two days to cool down. Once it has been emptied the work is placed in the glaze room ready for you to decorate! Step Six – Glazing Decorating your work with colour can be a lot of fun – and time consuming! There are three main options for surface treatment at this stage: Oxide Washes Underglazes Glazes Washes and underglazes do not “glaze” the work – It will still need a layer of glaze to fully seal the clay (washes don’t need glaze on surfaces not designed for food or liquid as they can gloss up a little on their own). Underglazes are stable colourants that turn out pretty much how they look in the jar. They can be mixed with each other to form other colours and can be used like water colours to paint onto your work. Mostly they should have a clear glaze on top to seal them. Oxides are a different species – the pink oxide (cobalt) wash turns out bright blue for instance. They don’t always need a glaze on top, and some glazes can change the colour of the wash! The glazes need no other “glaze” on top! Be careful of unknown glaze interactions – you can put any combination of glaze in a bowl or on a plate, but only a single glaze on the outside of any vertical surface! Glazes are a chemical reaction under heat. We don’t know the exact chemicals in the Mayco glazes we use. I can guess by the way they interact with each other, however, on the whole, you need to test every idea you have, and not run the test on a vertical surface! Simply put, glaze is a layer of glass like substance that bonds with the clay underneath. Clay is made of silica, alumina and water. Glaze is made of mostly silica. Silica has a melting point of 1700°C and we fire to 1240°C. The silica requires a “flux” to help it melt at the lower temperature. Fluxes can be all sorts of chemicals – a common one is calcium – calcium has a melting point of 2500°C, however, together they both melt at a much lower temperature! Colourants are metal oxides like cobalt (blue), chrome (green through black), copper (green, blue, even red!), manganese (black, purple and pink) iron (red brown), etc. Different chemicals in the glaze can have dramatic effects. for example, barium carbonate (which we don’t use) turns manganese bright pink! Other elements can turn manganese dioxide brown, blue, purple and reddish brown. Manganese dioxide is a flux in and of itself as well. So, glazes that get their black and purple colours, often interact with other glazes and RUN! Our mirror black is a good example – it mixes really well with many glazes because it fluxes them – causes them to melt faster. It will also bring out many beautiful colours in the glazes because it’s black colouring most definitely comes from manganese dioxide! Glaze chemistry is a whole subject on it’s own! We use commercial Mayco glazes on purpose – for their huge range of colour possibilities, stability, cool interactions, artistic freedom with the ability to easily brush the glazes on and ease of use. We currently have almost 50 glazes on hand! A major project is to test the interactions of all glazes with each other. That is 2,500 test tiles!!!! I’m going to make the wall behind the wheels the feature wall of pretty colours! Step Seven – Glaze (Gloss or sometimes called “Glost”) Firing Most of the time this is the final stage of making your creation (but not always!) The glaze kiln goes to 1240°C. This is called cone 6, or midrange. It is the low end of stoneware temperatures. Stoneware clays and glazes are typically fired at cone 8 – 10, that is 1260 – 1290°C. The energy requirement to go from 1240°C to 1280°C is almost a 30% more! Our clay is formulated to vitrify (mature, turn “glass-like”) at 1240°, as are our glazes. A glaze kiln take around 12 hours to reach temperature and two to three days to cool down. Sometimes a third firing process is required – this is for decoration that is added to work after the glaze firing. For example – adding precious metals and lustres. this firing temperature is usually around 600 – 800°C depending upon the techniques being used. There are many students interested in gold and silver trims – we will be doing this third type of firing soon! After firing your work will be in the student finished work shelves. Remember to pay for it before you head out the door! There is a small extra charge for using porcelain clay (it’s more than twice the price of regular clay), and for any third firing process! Once your work has been fired it can not turn back into clay for millennia – so don’t fire it if you don’t like it! Put it in the bucket for recycling. https://firebirdstudios.com.au/the-process-of-making-pottery/Ceramics have evolved over thousands of years.A white earthenware side plate with a gadroon edge. Has water marks and chips on front.‘Johnson Bros England Reg No 15587’flagstaff hill, warrnambool, shipwrecked-coast, flagstaff-hill, flagstaff-hill-maritime-museum, maritime-museum, shipwreck-coast, flagstaff-hill-maritime-village, johnson bros, ceramics, tableware -
 Flagstaff Hill Maritime Museum and Village
Domestic object - Plate, Alfred Meakin
The Process of Making Pottery Decorating, Firing, Glazing, Making, Technical There is a rhythm and flow to clay. It can’t be done all at once! Even the making process! It can take weeks to get everything done, especially if you can only work on your pottery once a week! Even though we have three hour classes, it’s often just not enough time! Here is an overview of some of the processes so you have a bit more grasp on some of the technical stuff! Step One – Design There are SO many ideas out there for making stuff in clay! From delicate porcelain jewellery, through to heavy sculptural work and everything in between. Deciding your direction is sometimes not that easy – when you first start, try everything, you will naturally gravitate to the style that you enjoy! The options and variations are endless and can get a wee bit overwhelming too! Check in with me before you start to ensure your ideas will work, what order you might do things, how you could achieve the look you are seeking and any other technical data required! Step Two – Making Clay is thixotropic. This means that as you work with it, the clay first gets sloppier and wetter, before is begins to dry in the atmosphere. For most things, you simply can’t do all parts of the project at once. An example of work order might look like: Get last weeks work out from the shelves Prepare clay for today’s work – roll your clay, prepare balls for throwing, make the first stage of a pinch pot) Clean up last week’s work and put it on the shelf for bisque firing Check that you have any glazing to do – and do enough of it that you will have time to finish your main project Do the next step of your next project – there might be a further step that can’t be complete immediately, in that case, wrap your work well and put onto the shelves. Letting your work rest for a while can really help keep your work clean and professional looking. Many things require bagging under plastic to keep it ready for work the next week – put your name on the outside of the bag so you can find your work easily. We have stickers and markers. Consider how you want to decorate your work – coloured slip can be applied at a fairly wet stage (remembering that it will make your work even wetter!). Trying to apply slip to dry clay won’t work! If you want to do sgraffito – you will need to keep the work leather hard (a state of dryness where you can still work the clay with a little effort and a little water and care). Step Three – Drying Most of the time your work can go into the rack uncovered to let it dry out for the following week. If you want to continue forming or shaping you will need to double bag your work – put your work on a suitable sized bat and put the bat in a bag so the base of the bag is under the bat, then put another bag over the top of the work and tuck the top of the bag under the bat. If you want to trim (or turn) your thrown work the following week, it should also be double bagged. If your work is large, delicate, or of uneven thicknesses, you should lightly cover your work for drying. When considering the drying process, bare in mind the weather, humidity and wind! The hotter and dryer, the faster things dry and work can dry unevenly in the shelves – this can lead to cracking – another time to lightly cover your work for drying. Step Four – Trimming and Cleaning Up Your work is dry! It is called greenware now and it is at it’s most fragile! Handle everything with two hands. I often refer to soft hands – keep everything gentle and with your fingers spread as much as possible. Try to not pick up things like plates too much, and always with both hands! Before your work can be bisque fired it should be “cleaned up”. You work won’t go into the kiln if it has sharp edges – when glazed, sharp edges turn into razor blades! Use a piece of fly wire to rub the work all over – this will scratch a little so be light handed. Use a knife or metal kidney to scrape any areas that require a bit more dynamic treatment than the fly wire offers! Finally, a very light wipe over with a slightly damp sponge can help soften and soothe all of your edges and dags! Trimming thrown work: If you are planning to trim (or turn) your thrown work (and you should be), make sure you bag it well – your work should be leather hard to almost dry for easiest trimming. Use this step to finish the work completely – use a metal kidney to polish the surface, or a slightly damp sponge to give a freshly thrown look. Wipe the sponge around the rim after trimming, and check the inside of the pot for dags! Trimming slip cast work: Usually I will trim the rims of your work on the wheel the following day to make that stage easier, however you will still need to check your work for lumps and bumps. Last but not least – check that your name is still clearly on the bottom of your work. Step Five – Bisque Firing When the work is completely dry it can go into the bisque kiln. The bisque kiln is fired to 1000°C. This process burns off the water in the clay as well as some of the chemically bound water. The structure of the clay is not altered that much at this temperature. Inside the bisque kiln, the work is stacked a little, small bowl inside a larger bowl and onto a heavy plate. Smaller items like decorations or drink coasters might get stacked several high. Consideration is paid to the weight of the stack and shape of the work. A bisque kiln can fire about one and a half times the amount of work that the glaze kiln can fire. The firing takes about 10 hours to complete the cycle and about two days to cool down. Once it has been emptied the work is placed in the glaze room ready for you to decorate! Step Six – Glazing Decorating your work with colour can be a lot of fun – and time consuming! There are three main options for surface treatment at this stage: Oxide Washes Underglazes Glazes Washes and underglazes do not “glaze” the work – It will still need a layer of glaze to fully seal the clay (washes don’t need glaze on surfaces not designed for food or liquid as they can gloss up a little on their own). Underglazes are stable colourants that turn out pretty much how they look in the jar. They can be mixed with each other to form other colours and can be used like water colours to paint onto your work. Mostly they should have a clear glaze on top to seal them. Oxides are a different species – the pink oxide (cobalt) wash turns out bright blue for instance. They don’t always need a glaze on top, and some glazes can change the colour of the wash! The glazes need no other “glaze” on top! Be careful of unknown glaze interactions – you can put any combination of glaze in a bowl or on a plate, but only a single glaze on the outside of any vertical surface! Glazes are a chemical reaction under heat. We don’t know the exact chemicals in the Mayco glazes we use. I can guess by the way they interact with each other, however, on the whole, you need to test every idea you have, and not run the test on a vertical surface! Simply put, glaze is a layer of glass like substance that bonds with the clay underneath. Clay is made of silica, alumina and water. Glaze is made of mostly silica. Silica has a melting point of 1700°C and we fire to 1240°C. The silica requires a “flux” to help it melt at the lower temperature. Fluxes can be all sorts of chemicals – a common one is calcium – calcium has a melting point of 2500°C, however, together they both melt at a much lower temperature! Colourants are metal oxides like cobalt (blue), chrome (green through black), copper (green, blue, even red!), manganese (black, purple and pink) iron (red brown), etc. Different chemicals in the glaze can have dramatic effects. for example, barium carbonate (which we don’t use) turns manganese bright pink! Other elements can turn manganese dioxide brown, blue, purple and reddish brown. Manganese dioxide is a flux in and of itself as well. So, glazes that get their black and purple colours, often interact with other glazes and RUN! Our mirror black is a good example – it mixes really well with many glazes because it fluxes them – causes them to melt faster. It will also bring out many beautiful colours in the glazes because it’s black colouring most definitely comes from manganese dioxide! Glaze chemistry is a whole subject on it’s own! We use commercial Mayco glazes on purpose – for their huge range of colour possibilities, stability, cool interactions, artistic freedom with the ability to easily brush the glazes on and ease of use. We currently have almost 50 glazes on hand! A major project is to test the interactions of all glazes with each other. That is 2,500 test tiles!!!! I’m going to make the wall behind the wheels the feature wall of pretty colours! Step Seven – Glaze (Gloss or sometimes called “Glost”) Firing Most of the time this is the final stage of making your creation (but not always!) The glaze kiln goes to 1240°C. This is called cone 6, or midrange. It is the low end of stoneware temperatures. Stoneware clays and glazes are typically fired at cone 8 – 10, that is 1260 – 1290°C. The energy requirement to go from 1240°C to 1280°C is almost a 30% more! Our clay is formulated to vitrify (mature, turn “glass-like”) at 1240°, as are our glazes. A glaze kiln take around 12 hours to reach temperature and two to three days to cool down. Sometimes a third firing process is required – this is for decoration that is added to work after the glaze firing. For example – adding precious metals and lustres. this firing temperature is usually around 600 – 800°C depending upon the techniques being used. There are many students interested in gold and silver trims – we will be doing this third type of firing soon! After firing your work will be in the student finished work shelves. Remember to pay for it before you head out the door! There is a small extra charge for using porcelain clay (it’s more than twice the price of regular clay), and for any third firing process! Once your work has been fired it can not turn back into clay for millennia – so don’t fire it if you don’t like it! Put it in the bucket for recycling. https://firebirdstudios.com.au/the-process-of-making-pottery/Ceramics have evolved over thousands of years.Earthenware dessert plate, cream colour. Made by Alfred Meakin, England. Backstamped ‘Alfred Meakin England’. flagstaff hill, warrnambool, shipwrecked-coast, flagstaff-hill, flagstaff-hill-maritime-museum, maritime-museum, shipwreck-coast, flagstaff-hill-maritime-village, alfred meakin, ceramics, earthenware, kitchenware -
 Flagstaff Hill Maritime Museum and Village
Domestic object - Jug
The Process of Making Pottery Decorating, Firing, Glazing, Making, Technical There is a rhythm and flow to clay. It can’t be done all at once! Even the making process! It can take weeks to get everything done, especially if you can only work on your pottery once a week! Even though we have three hour classes, it’s often just not enough time! Here is an overview of some of the processes so you have a bit more grasp on some of the technical stuff! Step One – Design There are SO many ideas out there for making stuff in clay! From delicate porcelain jewellery, through to heavy sculptural work and everything in between. Deciding your direction is sometimes not that easy – when you first start, try everything, you will naturally gravitate to the style that you enjoy! The options and variations are endless and can get a wee bit overwhelming too! Check in with me before you start to ensure your ideas will work, what order you might do things, how you could achieve the look you are seeking and any other technical data required! Step Two – Making Clay is thixotropic. This means that as you work with it, the clay first gets sloppier and wetter, before is begins to dry in the atmosphere. For most things, you simply can’t do all parts of the project at once. An example of work order might look like: Get last weeks work out from the shelves Prepare clay for today’s work – roll your clay, prepare balls for throwing, make the first stage of a pinch pot) Clean up last week’s work and put it on the shelf for bisque firing Check that you have any glazing to do – and do enough of it that you will have time to finish your main project Do the next step of your next project – there might be a further step that can’t be complete immediately, in that case, wrap your work well and put onto the shelves. Letting your work rest for a while can really help keep your work clean and professional looking. Many things require bagging under plastic to keep it ready for work the next week – put your name on the outside of the bag so you can find your work easily. We have stickers and markers. Consider how you want to decorate your work – coloured slip can be applied at a fairly wet stage (remembering that it will make your work even wetter!). Trying to apply slip to dry clay won’t work! If you want to do sgraffito – you will need to keep the work leather hard (a state of dryness where you can still work the clay with a little effort and a little water and care). Step Three – Drying Most of the time your work can go into the rack uncovered to let it dry out for the following week. If you want to continue forming or shaping you will need to double bag your work – put your work on a suitable sized bat and put the bat in a bag so the base of the bag is under the bat, then put another bag over the top of the work and tuck the top of the bag under the bat. If you want to trim (or turn) your thrown work the following week, it should also be double bagged. If your work is large, delicate, or of uneven thicknesses, you should lightly cover your work for drying. When considering the drying process, bare in mind the weather, humidity and wind! The hotter and dryer, the faster things dry and work can dry unevenly in the shelves – this can lead to cracking – another time to lightly cover your work for drying. Step Four – Trimming and Cleaning Up Your work is dry! It is called greenware now and it is at it’s most fragile! Handle everything with two hands. I often refer to soft hands – keep everything gentle and with your fingers spread as much as possible. Try to not pick up things like plates too much, and always with both hands! Before your work can be bisque fired it should be “cleaned up”. You work won’t go into the kiln if it has sharp edges – when glazed, sharp edges turn into razor blades! Use a piece of fly wire to rub the work all over – this will scratch a little so be light handed. Use a knife or metal kidney to scrape any areas that require a bit more dynamic treatment than the fly wire offers! Finally, a very light wipe over with a slightly damp sponge can help soften and soothe all of your edges and dags! Trimming thrown work: If you are planning to trim (or turn) your thrown work (and you should be), make sure you bag it well – your work should be leather hard to almost dry for easiest trimming. Use this step to finish the work completely – use a metal kidney to polish the surface, or a slightly damp sponge to give a freshly thrown look. Wipe the sponge around the rim after trimming, and check the inside of the pot for dags! Trimming slip cast work: Usually I will trim the rims of your work on the wheel the following day to make that stage easier, however you will still need to check your work for lumps and bumps. Last but not least – check that your name is still clearly on the bottom of your work. Step Five – Bisque Firing When the work is completely dry it can go into the bisque kiln. The bisque kiln is fired to 1000°C. This process burns off the water in the clay as well as some of the chemically bound water. The structure of the clay is not altered that much at this temperature. Inside the bisque kiln, the work is stacked a little, small bowl inside a larger bowl and onto a heavy plate. Smaller items like decorations or drink coasters might get stacked several high. Consideration is paid to the weight of the stack and shape of the work. A bisque kiln can fire about one and a half times the amount of work that the glaze kiln can fire. The firing takes about 10 hours to complete the cycle and about two days to cool down. Once it has been emptied the work is placed in the glaze room ready for you to decorate! Step Six – Glazing Decorating your work with colour can be a lot of fun – and time consuming! There are three main options for surface treatment at this stage: Oxide Washes Underglazes Glazes Washes and underglazes do not “glaze” the work – It will still need a layer of glaze to fully seal the clay (washes don’t need glaze on surfaces not designed for food or liquid as they can gloss up a little on their own). Underglazes are stable colourants that turn out pretty much how they look in the jar. They can be mixed with each other to form other colours and can be used like water colours to paint onto your work. Mostly they should have a clear glaze on top to seal them. Oxides are a different species – the pink oxide (cobalt) wash turns out bright blue for instance. They don’t always need a glaze on top, and some glazes can change the colour of the wash! The glazes need no other “glaze” on top! Be careful of unknown glaze interactions – you can put any combination of glaze in a bowl or on a plate, but only a single glaze on the outside of any vertical surface! Glazes are a chemical reaction under heat. We don’t know the exact chemicals in the Mayco glazes we use. I can guess by the way they interact with each other, however, on the whole, you need to test every idea you have, and not run the test on a vertical surface! Simply put, glaze is a layer of glass like substance that bonds with the clay underneath. Clay is made of silica, alumina and water. Glaze is made of mostly silica. Silica has a melting point of 1700°C and we fire to 1240°C. The silica requires a “flux” to help it melt at the lower temperature. Fluxes can be all sorts of chemicals – a common one is calcium – calcium has a melting point of 2500°C, however, together they both melt at a much lower temperature! Colourants are metal oxides like cobalt (blue), chrome (green through black), copper (green, blue, even red!), manganese (black, purple and pink) iron (red brown), etc. Different chemicals in the glaze can have dramatic effects. for example, barium carbonate (which we don’t use) turns manganese bright pink! Other elements can turn manganese dioxide brown, blue, purple and reddish brown. Manganese dioxide is a flux in and of itself as well. So, glazes that get their black and purple colours, often interact with other glazes and RUN! Our mirror black is a good example – it mixes really well with many glazes because it fluxes them – causes them to melt faster. It will also bring out many beautiful colours in the glazes because it’s black colouring most definitely comes from manganese dioxide! Glaze chemistry is a whole subject on it’s own! We use commercial Mayco glazes on purpose – for their huge range of colour possibilities, stability, cool interactions, artistic freedom with the ability to easily brush the glazes on and ease of use. We currently have almost 50 glazes on hand! A major project is to test the interactions of all glazes with each other. That is 2,500 test tiles!!!! I’m going to make the wall behind the wheels the feature wall of pretty colours! Step Seven – Glaze (Gloss or sometimes called “Glost”) Firing Most of the time this is the final stage of making your creation (but not always!) The glaze kiln goes to 1240°C. This is called cone 6, or midrange. It is the low end of stoneware temperatures. Stoneware clays and glazes are typically fired at cone 8 – 10, that is 1260 – 1290°C. The energy requirement to go from 1240°C to 1280°C is almost a 30% more! Our clay is formulated to vitrify (mature, turn “glass-like”) at 1240°, as are our glazes. A glaze kiln take around 12 hours to reach temperature and two to three days to cool down. Sometimes a third firing process is required – this is for decoration that is added to work after the glaze firing. For example – adding precious metals and lustres. this firing temperature is usually around 600 – 800°C depending upon the techniques being used. There are many students interested in gold and silver trims – we will be doing this third type of firing soon! After firing your work will be in the student finished work shelves. Remember to pay for it before you head out the door! There is a small extra charge for using porcelain clay (it’s more than twice the price of regular clay), and for any third firing process! Once your work has been fired it can not turn back into clay for millennia – so don’t fire it if you don’t like it! Put it in the bucket for recycling. https://firebirdstudios.com.au/the-process-of-making-pottery/The form of the jug has been in use for many centuries.Stoneware jug. Two tone brown glaze with pierced lip behind spout. Spout chipped.None.flagstaff hill, warrnambool, shipwrecked-coast, flagstaff-hill, flagstaff-hill-maritime-museum, maritime-museum, shipwreck-coast, flagstaff-hill-maritime-village, jug, ceramic jug -
 Victorian Aboriginal Corporation for Languages
Periodical, Australian Institute of Aboriginal and Torres Strait Islander Studies, Australian Aboriginal studies : journal of the Australian Institute of Aboriginal and Torres Strait Islander Studies, 2008
Mawul Rom Project: Openness, obligation and reconciliation Morgan Brigg (Universtiy of Queensland) and Anke Tonnaer (University of Aarhus, Denmark) Aboriginal Australian initiatives to restore balanced relationships with White Australians have recently become part of reconciliation efforts. This paper provides a contextualised report on one such initiative, the Mawul Rom crosscultural mediation project. Viewing Mawul Rom as a diplomatic venture in the lineage of adjustment and earlier Rom rituals raises questions about receptiveness, individual responsibility and the role of Indigenous ceremony in reconciliation efforts. Yolngu ceremonial leaders successfully draw participants into relationship and personally commit them to the tasks of cross-cultural advocacy and reconciliation. But Mawul Rom must also negotiate a paradox because emphasis on the cultural difference of ceremony risks increasing the very social distance that the ritual attempts to confront. Managing this tension will be a key challenge if Mawul Rom is to become an effective diplomatic mechanism for cross-cultural conflict resolution and reconciliation. Living in two camps: the strategies Goldfields Aboriginal people use to manage in the customary economy and the mainstream economy at the same time Howard Sercombe (Strathclyde University, Glasgow) The economic sustainability of Aboriginal households has been a matter of public concern across a range of contexts. This research, conducted in the Eastern Goldfields of Western Australia, shows how economically successful Aboriginal persons manage ?dual economic engagement?, or involvement in the customary economy and the mainstream economy at the same time. The two economies sometimes reinforce each other but are more often in conflict, and management of conflicting obligations requires high degrees of skill and innovation. As well as creating financially sustainable households, the participants contributed significantly to the health of their extended families and communities. The research also shows that many Aboriginal people, no matter what their material and personal resources, are conscious of how fragile and unpredictable their economic lives can be, and that involvement in the customary economy is a kind of mutual insurance to guarantee survival if times get tough. Indigenous population data for evaluation and performance measurement: A cautionary note Gaminiratne Wijesekere (Dept. of Families, Housing, Community Services and Indigenous Affairs, Canberra) I outline the status of population census counts for Indigenous peoples, identifying information on Indigenous births and deaths, and internal migration estimates. I comment on the ?experimental? Indigenous population projections and question the rationale for having two sets of projections. Program managers and evaluators need to be mindful of limitations of the data when using these projections for monitoring, evaluating and measuring Indigenous programs. Reaching out to a younger generation using a 3D computer game for storytelling: Vincent Serico?s legacy Theodor G Wyeld (Flinders University, Adeliade) and Brett Leavy (CyberDreaming Australia) Sadly, Vincent Serico (1949?2008), artist, activist and humanist, recently passed away. Born in southern Queensland in Wakka Wakka/Kabi Kabi Country (Carnarvon Gorge region) in 1949, Vincent was a member of the Stolen Generations. He was separated from his family by White administration at four years of age. He grew up on the Cherbourg Aboriginal Reserve in the 1950s, when the policies of segregation and assimilation were at their peak. Only returning to his Country in his early forties, Vincent started painting his stories and the stories that had been passed on to him about the region. These paintings manifest Vincent?s sanctity for tradition, storytelling, language, spirit and beliefs. A team of researchers was honoured and fortunate to have worked closely with Vincent to develop a 3D simulation of his Country using a 3D computer game toolkit. Embedded in this simulation of his Country, in the locations that their stories speak to, are some of Vincent?s important contemporary art works. They are accompanied by a narration of Vincent?s oral history about the places, people and events depicted. Vincent was deeply concerned about members of the younger generation around him ?losing their way? in modern times. In a similar vein, Brett Leavy (Kooma) sees the 3D game engine as an opportunity to engage the younger generation in its own cultural heritage in an activity that capitalises on a common pastime. Vincent was an enthusiastic advocate of this approach. Working in consultation with Vincent and the research team, CyberDreaming developed a simulation of Vincent?s Country for young Aboriginal and non-Aboriginal persons from the Carnarvon Gorge region to explore Vincent?s life stories of the region. The use of Vincent?s contemporary paintings as storyboards provides a traditional medium for the local people to interactively re-engage with traditional values. Called Serico?s World, it represents a legacy to his life?s works, joys and regrets. Here we discuss the background to this project and Vincent?s contribution. A singular beeswax representation of Namarrkon, the Lightning Man, from western Arnhem Land RG Gunn (La Trobe University) and RL Whear (Jawoyn Association) Samples from a beeswax representation of Namarrkon, the Lightning Man, from western Arnhem Land were analysed for radiocarbon and dated to be about 150 years old. An underlying beeswax figure was found to be approximately 1100 years old. The Dreaming Being Namarrkon is well known throughout Arnhem Land, although his sphere of activity is concentrated around the northern half of the Arnhem Land plateau. Namarrkon is well represented in rock-paintings in this area and continues to be well represented in contemporary canvas-paintings by artists from the broader plateau region. We conclude that representations of Namarrkon in both painted and beeswax forms appear to be parallel manifestations of the late Holocene regionalisation of Arnhem Land. ?Missing the point? or ?what to believe ? the theory or the data?: Rationales for the production of Kimberley points Kim Akerman (Moonah) In a recent article, Rodney Harrison presented an interesting view on the role glass Kimberley points played in the lives of the Aborigines who made and used them. Harrison employed ethnographic and historical data to argue that glass Kimberley points were not part of the normal suite of post-contact artefacts used primarily for hunting and fighting or Indigenous exchange purposes, but primarily were created to service a non-Indigenous market for aesthetically pleasing artefacts. Harrison asserted that this market determined the form that these points took. A critical analysis of the data does not substantiate either of these claims. Here I do not deal with Harrison?s theoretical material or arguments; I focus on the ethnographic and historical material that he has either omitted or failed to appreciate in developing his thesis and which, in turn, renders it invalid. The intensity of raw material utilisation as an indication of occupational history in surface stone artefact assemblages from the Strathbogie Ranges, central Victoria Justin Ian Shiner (La Trobe University, Bundoora) Stone artefact assemblages are a major source of information on past human?landscape relationships throughout much of Australia. These relationships are not well understood in the Strathbogie Ranges of central Victoria, where few detailed analyses of stone artefact assemblages have been undertaken. The purpose of this paper is to redress this situation through the analysis of two surface stone artefact assemblages recorded in early 2000 during a wider investigation of the region?s potential for postgraduate archaeological fieldwork. Analysis of raw material utilisation is used to assess the characteristics of the occupational histories of two locations with similar landscape settings. The analysis indicates variability in the intensity of raw material use between the assemblages, which suggests subtle differences in the occupational history of each location. The results of this work provide a direction for future stone artefact studies within this poorly understood region.document reproductions, maps, b&w photographs, colour photographskimberley, mawul rom project, 3d computer game, storytelling, vincent serico, beeswax, namarrkon, artefact assemblages, strathbogie ranges, groote eylandt, budd billy ii -
 Warrnambool and District Historical Society Inc.
Household, Pair of Over-Shoes, 1940s
These over shoes or galoshes would have been worn by a woman wishing to protect the high-heel shoes she was wearing at the time. They would have been used in wintry weather or when walking over rough and wet country roads or tracks, perhaps when going dancing or to a function of some sort. With the advent of common car use and better roads, this type of over-shoe would no longer be used today.These shoes are of interest as examples of the footwear worn by women in the mid 20th century to protect lighter and more fragile shoes. This is a pair of black rubber over-shoes or galoshes for wearing over high-heeled shoes. They have moulded rubber soles with high heels, rubber uppers with a flap to cover the ankles and an opening with two metal press studs with black button tops. The inside is lined with light brown cloth. ‘Dunlop’ ‘DZM’ ‘LZA’ women’s fashions, history of warrnambool -
 Warrnambool and District Historical Society Inc.
Souvenir Handkerchief, World War One
This item has been brought back to Australia by a returning soldier from World War One (1914-1918). At a time when France was completely disrupted by the ravages of war many French women, especially those in rural areas, earned a living by making souvenir pieces of embroidery to sell to soldiers in the Allied forces. These embroidered pieces took the form of postcards, doyleys, centerpieces, handkerchiefs etc. The items are noted for the handcraft skills shown by the makers and are prized by collectors today. This item, although fragile, is of considerable interest, firstly as an attractive embroidered piece and secondly, because of its association with World War One as an example of the souvenirs brought back from France to Australia by returning soldiers. This is an oblong-shaped handkerchief or doyley. It has a pink or mauve silk square in the middle with a coloured motif embroidered in one corner. This s a shield with representations of several European flags and embroidered wording underneath. The silk square is edged in a wave pattern in pink. The square has a white lace border. The item is slightly stained and has fold marks.Souvenir de Franceworld war one -
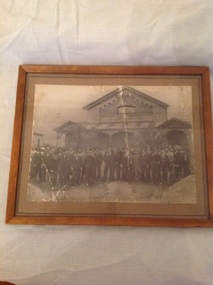 Wycheproof & District Historical Society Inc.
Framed photograph, 1890
The Wycheproof Court House Opened 24-9-1890.The Law Department Closed the Court House during the 1980s. The building became the home of the Wycheproof Craft Group and then the Wycheproof And District Historical Society. Financial support from Heritage Victoria enabled interior renovations to be completed in 2007.This is the only known photo of the Opening of the Wycheproof Court House. It is fragile and precious.Early days photo of large group of men standing proudly in front of the just constructed Wycheproof Court House in 1890.wycheproof, court-house -
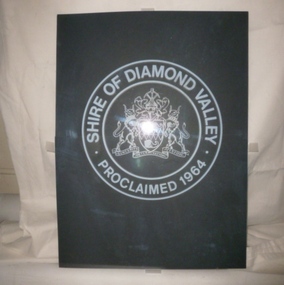 Greensborough Historical Society
Decorative object - Door Pane, glass, Shire of Diamond Valley, 30/09/1964
This glass door insert is one of a pair previously inserted into the entrance doors to the Shire of Diamond Valley offices in Greensborough. The Shire of Diamond Valley was a Local Government Area located about 20 kilometres northeast of Melbourne. The shire covered an area of 74.38 square kilometres and existed from 30/09/1964 until 1994. After the local government mergers of 1994, the Shire of Diamond Valley offices were used by the Nillumbik Council.This etched glass is a reminder of the Shire of Diamond Valley. As a large piece of glass it is fragile and could have easily been lost or broken when the Diamond Valley offices changed ownership.Clear glass door insert. Etched with insignia of Shire of Diamond Valley.Glass is etched with the coat of arms of the Shire of Diamond Valley surrounded by inscription 'Shire of Diamond Valley. Proclaimed 1964'.shire of diamond valley, emblems, glass etching, local government buildings, door panels -
 Kiewa Valley Historical Society
Photograph Bogong, Bogong Township Circa 1950, circa 1940s to 1950s
The Bogong Village was originally constructed (1937-1940) by the State Electricity Commission to house, engineers and construction workers working on the Kiewa Hydroelectric Scheme. These workers were initially settled in 26 houses and were mainly of European heritage. At the completion of the scheme, in the 1960's, the village was opened to public/tourism use. This photograph shows the village before beautification for tourism was introduced and "bare bones" homes and village usage existed.This photo clearly presents a period of restricted human occupation of a very fragile Alpine environment(up to 4000 workmen involved). This was the beginning of a planned and controlled form of sustainable tourist orientated development of the Victorian Alps and high plains region. The Bogong Township was the base camp for workers employed by the State Electricity Commission. After the construction phase was completed, the planning and controls originating from this period have been modified to allow a greater public access of this unique environment.Photograph of a framed glass enclosed black and white photograph of the Bogong settlement Paper details "KodakXtraLife paper" on back of photo. bogong village, bogong township, sec alpine constructions, hydro, kiewa scheme -
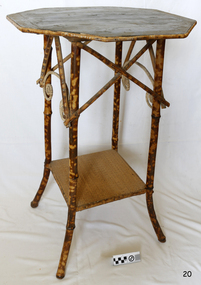 Flagstaff Hill Maritime Museum and Village
Furniture - Plant Stand, Late 19th Century (1898)
During the years 1869-1935 there were well over 250 registered bamboo furniture producers in Britain. The earliest recorded firm was Hubert Bill of 14 Little Camden St, London N.W., who claimed to have been established in (1869) while Daniel Jacobs & Sons of Hackney Road, London, were still in business in 1915, after 45 years of production. Design, quality, price and methods of construction were fairly consistent throughout the whole period, but it was the imaginative and often eccentric choice of subject matter that marked differentiation between the various firms. While most produced standard tables, stands and fire-screens, the more adventurous offered for sale items such as corner shelve units, charcoal barbecue grills and musical tea tables. Shelves were often covered with embossed leather paper designs, at first imported from Japan and then later produced in England. Some firms incorporated the knobbly roots of the bamboo stems into their designs, generally to form feet. Occasionally handles to drawers and cupboards were made with these roots although they were more commonly carved as imitations. Handles were mostly of cheap metal or brass. The ends of the bamboo canes were capped with stamped metal or turned bone, ivory or wooden discs. Methods of construction fell into three categories. First and most common is that of pegging. Bamboo stems being hollow, thick dowels can easily be glued into the joints. Some firms farmed out this work of `plugging' the ends of the canes to part-time workers at home. The second method, that of pinning, was far less satisfactory as bamboo tends to split lengthwise and therefore the jointed pieces eventually disintegrated. The most efficient method was that patented in 1888 (patent No 2383) by the firm of W. F. Needham in Birmingham. It consisted of metal shoes and covers for all joints which were made by wrapping a metal strip around the stems and soldering the overlapping ends. Some joints were further strengthened by a small pin or screw. Needham was by far the largest and most successful manufacturer and their individual and superior method of construction undoubtedly gained them their reputation. A. Englander & Searle of 34 Gt Eastern St and 31 Mare St, Hackney, London, were a firm particularly concerned with methods of construction. Although they seem to have entered the bamboo furniture market at a comparatively late date, about 1898, they produced inexpensive' bamboo, aimed particularly at the export trade. Stating in their catalogue that bamboo furniture “can be exported in one piece or it can be exported in pieces and put together again. The fixing up is much facilitated by a system of marking and numbering. Further, no glue is required for putting together as the screw system only is applied”. This method of construction best fits the Etagere and this item in the flagstaff collection and it is believed to have been made by A Englander & Searle, exported in a knock down form to Australia, purchased in kit form from a dealer here and put together by the purchaser. The bamboo plant stand is a significant item as it highlight furniture fashion of the late Victorian era. This item was highly sort after in its time and although mass produced, not many examples remain because the item is so fragile so this example is a valuable addition to the Flagstaff collection. It is believed,the construction method used is by a notable and respected maker in England of bamboo furniture that was aimed specifically at the export market and probably came to Australia in kit form to be assembled by the purchaser.Bamboo plant stand with octagonal top edged with tortoise shell bamboo the top is of wood and supported by four tortoise shell bamboo legs joined at the base by a square cane covered shelf. The tortoise shell appearance is brown lacquer. Item is part of the Giles Collection. flagstaff hill, warrnambool, shipwrecked coast, flagstaff hill maritime museum, shipwreck coast, furniture, plant stand, bamboo furniture, etagere, victorian furniture, simulated bamboo, tortise shell, a englander & searle, domestic furniture, giles collection, henry giles, cooramook, mailor’s flat, wangoom, 19th century household goods -
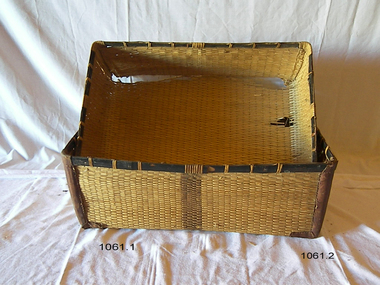 Flagstaff Hill Maritime Museum and Village
Domestic object - Basket, 1890-1920s
Before the invention of woven baskets, people used tree bark to make simple containers. These containers could be used to transport gathered food and other items but crumbled after only a few uses. Weaving strips of bark or other plant material to support the bark containers would be the next step, followed by entirely woven baskets. The last innovation appears to be baskets so tightly woven that they could hold water. Depending on soil conditions, baskets may or may not be preserved in the archaeological record. Sites in the Middle East show that weaving techniques were used to make mats and possibly also baskets, circa 8000 BCE. Twined baskets date back to 7000 in Oasisamerica. Baskets made with interwoven techniques were common at 3000 BCE. Baskets were originally designed as multi-purpose vessels to carry and store materials and to keep stray items about the home. The plant life available in a region affects the choice of material, which in turn influences the weaving technique. Rattan and other members of the Arecaceae or palm tree family, the thin grasses of temperate regions, and broad-leaved tropical bromeliads each require a different method of twisting and braiding to be made into a basket. The practice of basket making has evolved into an art. Artistic freedom allows basket makers with a wide choice of colours, materials, sizes, patterns, and details.Before the advent of plastics (1907), the is now used for many different types and styles of storage container rattan, wicker or cane was used to make containers with a lid for the storage of linens etc. The subject item was probability used at the end of the Victorian era and into the Edwardian period around the 1900s as a household storage facility. These types of wicker or cane containers started to go out of fashion due to their fragility around the 1920s into the 1940s due as well to the introduction of synthetic materials. Wicker cane rectangular shaped domestic storage container with reinforced leather pads on 4 corner sides. lid fits inside the other. Black cane piece around top edge.Noneflagstaff hill, warrnambool, shipwrecked-coast, flagstaff-hill, flagstaff-hill-maritime-museum, maritime-museum, shipwreck-coast, flagstaff-hill-maritime-village -
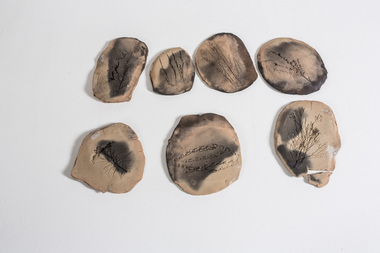 Nillumbik Shire Council
Clay: Leanne Mooney, Leanne Mooney, Tiles from the Boomerang Studio, 2002
'Tiles from the Boomerang Studio' is a prototype of the work 'Year 2052', created while Mooney was an Artist in Resident at Laughing Waters in the Boomerang studio in 2002. Records of flora were collected in and around the Gordon Ford garden in Laughing Waters Road. The work 'Year 2052' is made up of '77' tiles and was acquired by Geelong (Regional) Art Gallery in 2003. Whilst working at the Boomerang studio, local based artist Mooney noticed that “a battle raged in the bush between non-indigenous plants and indigenous plants”. She also noticed how humans “invade” land, changing the surrounding environment and causing irreversible damage. This work is an interpretation of the fragility and value of Nillumbik’s indigenous flora and of its conflict with introduced species. The title of the work (Year 2052) and look of these ‘fossilised specimens’ asks viewers to cast themselves into the future and to look back at today. “These tiles have been found; an incomplete record of flora collected in and around the Gordon Ford garden in Laughing Waters Road. The tiles appear to have been made at the beginning of the millennium. The viewer is asked to contemplate which species are missing”. Mooney works with collected indigenous items to emphasis the beauty of their natural shapes, while at the same time introducing selected materials of contrast or sympathy. Her work creates a great sense of “stillness and peace, of simplicity and connection with the natural world as well at the vanishing Australian bush.”This work is made up of seven handbuilt earthenware oval/round clay 'tiles' - (eight pieces - with one tile intentionally broken), brown in colour and bisque and blackware fired, giving a matt black ash coating on each of the tiles' surface. Each tile has an imprint of a floral specimen indigenous to the Laughing Waters area in Eltham. Each tile has an imprint of the following specimens: tiles, earthenware, flora, indigenous, bisque, boomerang, ford, laughing waters -
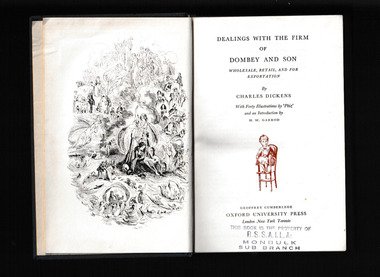 Mrs Aeneas Gunn Memorial Library
Book, Oxford University Press, Dombey and son
Paul Dombey is an ambitious, calculating London merchant. He pins all his hopes for the future of his shipping firm on his fragile son whilst his daughter, Florence, goes unnoticed and neglected. It is only when the firm faces ruin, and Dombey is staring at a life of desolate solitude that Florence may finally be valued. Can this heartless businessman be redeemed?p.878.fictionPaul Dombey is an ambitious, calculating London merchant. He pins all his hopes for the future of his shipping firm on his fragile son whilst his daughter, Florence, goes unnoticed and neglected. It is only when the firm faces ruin, and Dombey is staring at a life of desolate solitude that Florence may finally be valued. Can this heartless businessman be redeemed? english fiction, charles dickens 1812-1870 -
 Friends of Westgarthtown
Horseshoe
Two horseshoes made of steel, one is slightly larger than the other.No visible markingsrural industry, agriculture, both shoes heavily corroded and fragile to touch. -
 Darebin Art Collection
Photograph, Gerhard Hillmann, Hand-Y-Cap (the Power of Fragility), 2002
My interpretation of the organic world is embedded deep within each artwork I create. Because I believe we are all part of the landscape & not separate, many of my images explore this human nature connection. I feel compelled to respond to the environment in a creative way & aim to promote a deeper appreciation and understanding of nature. Beyond linguistics, an image has the ability to transcend language barriers and travel the world