Showing 769 items
matching tapers
-
 South West Healthcare
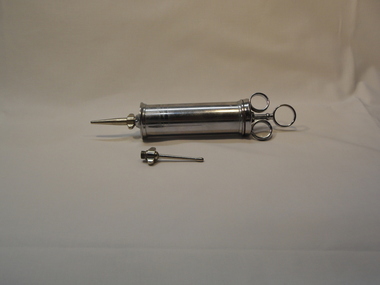
Ear Syringe, Medical Equipment, 20th Century
1 Metal cannister; 1 removable bulb cannula; 1 tapered cannula; 1 plungermetal ear syringe -
 Tatura Irrigation & Wartime Camps Museum
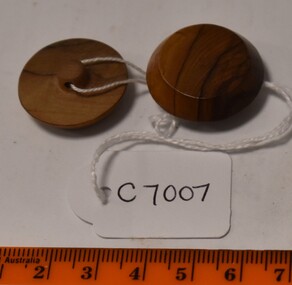
Buttons, 1940(Approx.)
Made by Internee at Camp 3 TaturaTwo round wooden buttons with shanks,tapering to top(flat,round).Light and dark graincamp 3, accessories, buttons, wood, tatura, internees, costume, accessory, clothes -
 Clunes Museum
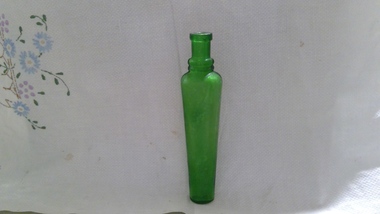
Container - BOTTLE
BOTTLE WAS BLOWN FROM MOULTEN GLASSTALL GREEN BOTTLE, SLIGHTLY TAPERED AT BOTTOM. THE BOTTOM OF BOTTLE HAS A VERY DEEP PONTEL.local history, domestic item, containers, -
 Tatura Irrigation & Wartime Camps Museum
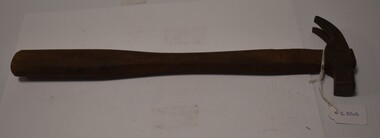
Tool - Small Hammer, Hammer, 1940's
Made by internees at camp 3, using wood sourced from under the barracks ie : stumps. Used for repairing footwear. Lightweight and well balancedHammer, small metal claw shaped head with wooden handle which is tapered towards the head.F K w inscribed on the hammer headkazenwadel, blacksmith, wood, tools camp 3 -
 Friends of Westgarthtown
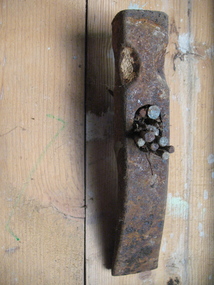
Hammer head
Curved, wedge-shaped hammer head, with square nose and tapered, flattened tail. Made of steel?No visible markingstrades, tools, hammer, steel, nails, tool -
 Mont De Lancey
Container - Glass bottle
Small, green glass bottle, tapering in shape from top to bottom. It has no lid or stopper.Nonebottles, glassware -
 Whitehorse Historical Society Inc.
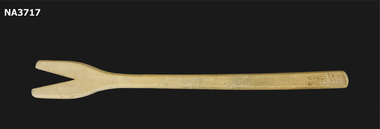
Domestic object - Copper Stick, not known
Copper stick used by Irene Standfield in her home at Selby from 1940's until early 1960'sWooden stick shaped at one end into two prongs. The stick is tapered from handle to the prongsMagic Twist Copper Stick - Reg No 2029Ddomestic items, laundering -
 Kiewa Valley Historical Society
Bottle - Sauce, 1940's
Sauce came in bottles bought at the local grocery store or at a large city store on a shopping expedition. The shape of the bottles changed. Bottles were re cycled remaining the property of the manufacturer. History of W. J. & F. Barnes, Pty. Ltd. Melbourne.Historical: Change of bottles - shape, glass, embossing, use Aesthetic: Display showing embossing and shape Clear glass medium sized bottle. The base is as wide as the top before it tapers into the neck and lip and then the screw top. From the base it tapers in before a very gradual taper to the broad part which is three quarters of the way up. The base is round but the sides have 4 wider 'panels' opposite each other. In between these are 2 smaller panels. Heavy embossing on 1 wider panel and base printed in capital letters.Side: vertically: 'This bottle is the Property of / W. J. & F. Barnes Pty Ltd. Melbourne' Base: Common Seal "A" with 'G' inside the top half and 'M' inside the lower half. Underneath the 'A' and across the middle is 'F1570' and below this is 'M'sauce, glass bottle, w. j. & f. barnes pty ltd melbourne, household -
 Federation University Historical Collection
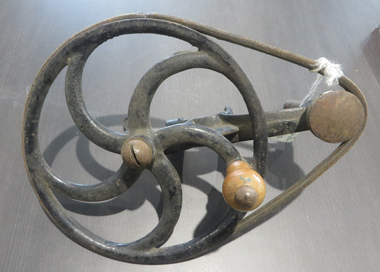
Implement, Machine Wheel with Mandrel
A mandrel (/ˈmændrɪl/; also mandril or arbor) is one of the following: * a round object against which material can be forged or shaped; or * a flanged or tapered or threaded bar that grips a workpiece to be machined in a lathe. A flanged mandrel is a parallel bar of a specific diameter with an integral flange towards one end, and threaded at the opposite end. Work is gripped between the flange and a nut on the thread. A tapered mandrel (often called a plain mandrel) has a taper of approximately 0.005 inches per foot and is designed to hold work by being driven into an accurate hole on the work, gripping the work by friction. A threaded mandrel may have a male or female thread, and work which has an identical thread is screwed onto the mandrel.Iron frame with handle. Vice section for attaching to bench. Mandrel for shapingmachine wheel, mandrel, forged, shaped, holds workpiece -
 Warrnambool and District Historical Society Inc.
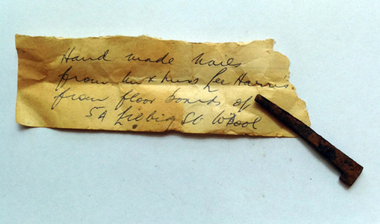
Functional object - Nails Hand made from Liebig St, 19th Century
These nails were found in the floorboards at 5A Liebig Street, the residence of Lee Harris at the time. The nails, being of the 19th century variety, pre-date the present building and must have come from a previous dwelling or perhaps a building associated with the old Shire Offices. The Shire Offices, near the corner of Liebig and Merri Streets, were erected in 1860 and the Shire continued to operate from there until 1936. These nails are of interest as an example of the type of nails used in buildings in Warrnambool in the 19th century. These are 13 iron nails which taper to a point and have a blunt half head. They are all in a rusty condition. nails, 5a liebig street, shire offices, warrnambool -
 Waverley RSL Sub Branch
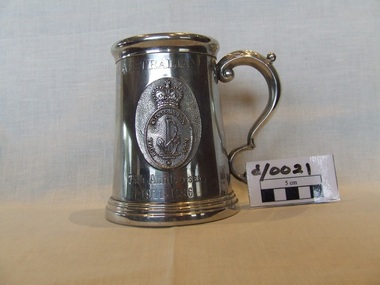
Silver Tankard Navy
commerative Mug 1986Pewter drinking cup with ornate handle, Navy Badge with Queens Crown. Glass bottom. Tapered sides. Australia 75th Anniversary 1911-1986tankard, mug -
 Orbost & District Historical Society
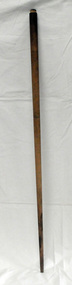
billiard cue, first half 20th century
This item was part of the display in the Slab Hut (Orbost Visitor Information Centre). It was probably used at the Orbost Men's Club.This item is associated with the Orbost Men's Club.A tapered wooden stick which has an embossed diamond pattern at the top end. The cap for the butt is missing.cue-billiards orbost-mens-club -
 Orbost & District Historical Society
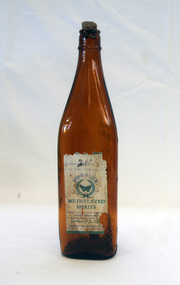
bottle, first half 20th century
Many home remedies involve making do with household substances ordinarily on hand. One such common household product is methylated spirits (ethanol), generally used as a fuel, solvent or cleaner, but also used to treat minor injuries. A tall brown tapered three sided bottle with a paper label. There is a cork in the top. The bottle is heavily embossed.MY T FINE METHYLATED SPIRITS, dangerous if swallowed. Seek medical advice. 19 FL OZ Inside a wreath is a butterfly.bottle methylated-spirits -
 Flagstaff Hill Maritime Museum and Village
Domestic object - Bowl, J & G Meakin, Late 19th or early 20th Century
The Process of Making Pottery Decorating, Firing, Glazing, Making, Technical There is a rhythm and flow to clay. It can’t be done all at once! Even the making process! It can take weeks to get everything done, especially if you can only work on your pottery once a week! Even though we have three hour classes, it’s often just not enough time! Here is an overview of some of the processes so you have a bit more grasp on some of the technical stuff! Step One – Design There are SO many ideas out there for making stuff in clay! From delicate porcelain jewellery, through to heavy sculptural work and everything in between. Deciding your direction is sometimes not that easy – when you first start, try everything, you will naturally gravitate to the style that you enjoy! The options and variations are endless and can get a wee bit overwhelming too! Check in with me before you start to ensure your ideas will work, what order you might do things, how you could achieve the look you are seeking and any other technical data required! Step Two – Making Clay is thixotropic. This means that as you work with it, the clay first gets sloppier and wetter, before is begins to dry in the atmosphere. For most things, you simply can’t do all parts of the project at once. An example of work order might look like: Get last weeks work out from the shelves Prepare clay for today’s work – roll your clay, prepare balls for throwing, make the first stage of a pinch pot) Clean up last week’s work and put it on the shelf for bisque firing Check that you have any glazing to do – and do enough of it that you will have time to finish your main project Do the next step of your next project – there might be a further step that can’t be complete immediately, in that case, wrap your work well and put onto the shelves. Letting your work rest for a while can really help keep your work clean and professional looking. Many things require bagging under plastic to keep it ready for work the next week – put your name on the outside of the bag so you can find your work easily. We have stickers and markers. Consider how you want to decorate your work – coloured slip can be applied at a fairly wet stage (remembering that it will make your work even wetter!). Trying to apply slip to dry clay won’t work! If you want to do sgraffito – you will need to keep the work leather hard (a state of dryness where you can still work the clay with a little effort and a little water and care). Step Three – Drying Most of the time your work can go into the rack uncovered to let it dry out for the following week. If you want to continue forming or shaping you will need to double bag your work – put your work on a suitable sized bat and put the bat in a bag so the base of the bag is under the bat, then put another bag over the top of the work and tuck the top of the bag under the bat. If you want to trim (or turn) your thrown work the following week, it should also be double bagged. If your work is large, delicate, or of uneven thicknesses, you should lightly cover your work for drying. When considering the drying process, bare in mind the weather, humidity and wind! The hotter and dryer, the faster things dry and work can dry unevenly in the shelves – this can lead to cracking – another time to lightly cover your work for drying. Step Four – Trimming and Cleaning Up Your work is dry! It is called greenware now and it is at it’s most fragile! Handle everything with two hands. I often refer to soft hands – keep everything gentle and with your fingers spread as much as possible. Try to not pick up things like plates too much, and always with both hands! Before your work can be bisque fired it should be “cleaned up”. You work won’t go into the kiln if it has sharp edges – when glazed, sharp edges turn into razor blades! Use a piece of fly wire to rub the work all over – this will scratch a little so be light handed. Use a knife or metal kidney to scrape any areas that require a bit more dynamic treatment than the fly wire offers! Finally, a very light wipe over with a slightly damp sponge can help soften and soothe all of your edges and dags! Trimming thrown work: If you are planning to trim (or turn) your thrown work (and you should be), make sure you bag it well – your work should be leather hard to almost dry for easiest trimming. Use this step to finish the work completely – use a metal kidney to polish the surface, or a slightly damp sponge to give a freshly thrown look. Wipe the sponge around the rim after trimming, and check the inside of the pot for dags! Trimming slip cast work: Usually I will trim the rims of your work on the wheel the following day to make that stage easier, however you will still need to check your work for lumps and bumps. Last but not least – check that your name is still clearly on the bottom of your work. Step Five – Bisque Firing When the work is completely dry it can go into the bisque kiln. The bisque kiln is fired to 1000°C. This process burns off the water in the clay as well as some of the chemically bound water. The structure of the clay is not altered that much at this temperature. Inside the bisque kiln, the work is stacked a little, small bowl inside a larger bowl and onto a heavy plate. Smaller items like decorations or drink coasters might get stacked several high. Consideration is paid to the weight of the stack and shape of the work. A bisque kiln can fire about one and a half times the amount of work that the glaze kiln can fire. The firing takes about 10 hours to complete the cycle and about two days to cool down. Once it has been emptied the work is placed in the glaze room ready for you to decorate! Step Six – Glazing Decorating your work with colour can be a lot of fun – and time consuming! There are three main options for surface treatment at this stage: Oxide Washes Underglazes Glazes Washes and underglazes do not “glaze” the work – It will still need a layer of glaze to fully seal the clay (washes don’t need glaze on surfaces not designed for food or liquid as they can gloss up a little on their own). Underglazes are stable colourants that turn out pretty much how they look in the jar. They can be mixed with each other to form other colours and can be used like water colours to paint onto your work. Mostly they should have a clear glaze on top to seal them. Oxides are a different species – the pink oxide (cobalt) wash turns out bright blue for instance. They don’t always need a glaze on top, and some glazes can change the colour of the wash! The glazes need no other “glaze” on top! Be careful of unknown glaze interactions – you can put any combination of glaze in a bowl or on a plate, but only a single glaze on the outside of any vertical surface! Glazes are a chemical reaction under heat. We don’t know the exact chemicals in the Mayco glazes we use. I can guess by the way they interact with each other, however, on the whole, you need to test every idea you have, and not run the test on a vertical surface! Simply put, glaze is a layer of glass like substance that bonds with the clay underneath. Clay is made of silica, alumina and water. Glaze is made of mostly silica. Silica has a melting point of 1700°C and we fire to 1240°C. The silica requires a “flux” to help it melt at the lower temperature. Fluxes can be all sorts of chemicals – a common one is calcium – calcium has a melting point of 2500°C, however, together they both melt at a much lower temperature! Colourants are metal oxides like cobalt (blue), chrome (green through black), copper (green, blue, even red!), manganese (black, purple and pink) iron (red brown), etc. Different chemicals in the glaze can have dramatic effects. for example, barium carbonate (which we don’t use) turns manganese bright pink! Other elements can turn manganese dioxide brown, blue, purple and reddish brown. Manganese dioxide is a flux in and of itself as well. So, glazes that get their black and purple colours, often interact with other glazes and RUN! Our mirror black is a good example – it mixes really well with many glazes because it fluxes them – causes them to melt faster. It will also bring out many beautiful colours in the glazes because it’s black colouring most definitely comes from manganese dioxide! Glaze chemistry is a whole subject on it’s own! We use commercial Mayco glazes on purpose – for their huge range of colour possibilities, stability, cool interactions, artistic freedom with the ability to easily brush the glazes on and ease of use. We currently have almost 50 glazes on hand! A major project is to test the interactions of all glazes with each other. That is 2,500 test tiles!!!! I’m going to make the wall behind the wheels the feature wall of pretty colours! Step Seven – Glaze (Gloss or sometimes called “Glost”) Firing Most of the time this is the final stage of making your creation (but not always!) The glaze kiln goes to 1240°C. This is called cone 6, or midrange. It is the low end of stoneware temperatures. Stoneware clays and glazes are typically fired at cone 8 – 10, that is 1260 – 1290°C. The energy requirement to go from 1240°C to 1280°C is almost a 30% more! Our clay is formulated to vitrify (mature, turn “glass-like”) at 1240°, as are our glazes. A glaze kiln take around 12 hours to reach temperature and two to three days to cool down. Sometimes a third firing process is required – this is for decoration that is added to work after the glaze firing. For example – adding precious metals and lustres. this firing temperature is usually around 600 – 800°C depending upon the techniques being used. There are many students interested in gold and silver trims – we will be doing this third type of firing soon! After firing your work will be in the student finished work shelves. Remember to pay for it before you head out the door! There is a small extra charge for using porcelain clay (it’s more than twice the price of regular clay), and for any third firing process! Once your work has been fired it can not turn back into clay for millennia – so don’t fire it if you don’t like it! Put it in the bucket for recycling. https://firebirdstudios.com.au/the-process-of-making-pottery/This bowl was made by renowned pottery company J & G Meakin of England. The firm was established in the mid-1800's. The bowl is an example of kitchenware used in the 19th century and still in use today.Bowl; white ceramic, round and tapering inwards towards base. Made by J and G Meakin England.On base, 'Ironstone China Reg SOL 391413' with symbolflagstaff hill, flagstaff hill maritime museum and village, warrnambool, maritime museum, maritime village, great ocean road, shipwreck coast, mixing bowl, food preparation, j & g meakin, pottery, stoke-on-trent, kitchen equipment, ceramic -
 Flagstaff Hill Maritime Museum and Village
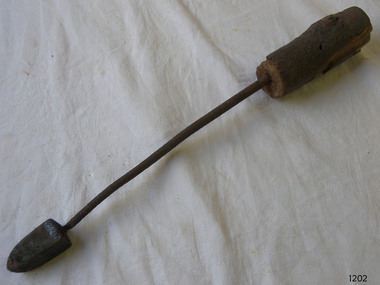
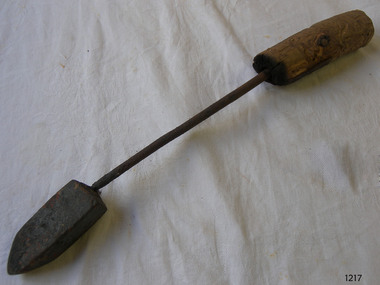
Soldering Iron
Soldering iron, metal rod with 4 sided tapering head and handle made from tree branch.flagstaff hill, warrnambool, shipwrecked-coast, flagstaff-hill, flagstaff-hill-maritime-museum, maritime-museum, shipwreck-coast, flagstaff-hill-maritime-village -
 Flagstaff Hill Maritime Museum and Village
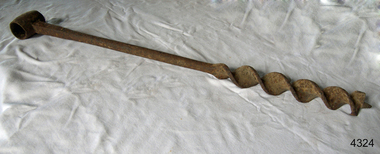
Auger
Ring Auger, Double Twist - Lead Screw, round shaft tapering to square 74.5L. 4cm diamflagstaff hill, warrnambool, shipwrecked-coast, flagstaff-hill, flagstaff-hill-maritime-museum, maritime-museum, shipwreck-coast, flagstaff-hill-maritime-village -
 Flagstaff Hill Maritime Museum and Village
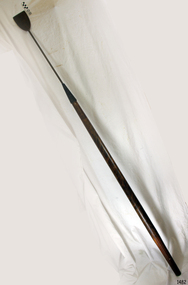
Weapon - Harpoon
Harpoon, Blubber Spade, used to cut blubber from whale carcass, Handle is tapered at both ends. flagstaff hill, warrnambool, shipwrecked-coast, flagstaff-hill, flagstaff-hill-maritime-museum, maritime-museum, shipwreck-coast, flagstaff-hill-maritime-village, harpoon, blubber spade, whaling, whaling harpoon -
Cobram Historical Society Inc
Wood plane
rectangular wooden frame with mortice hole for steel cutting blade held firmly by tapered woodern wedge -
 Clunes Museum
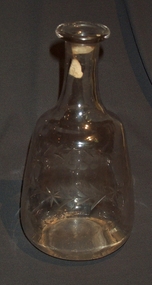
Domestic object - GLASS WINE DECANTER
NO BRAND. ETCHED DESIGN OF CIRCLES, FLOWERS AND LEAVES AROUND CENTRE OF DECANTER. TAPERING OF NECK WITH FLANGE. NO STOPPERlocal history, domestic item, decanter -
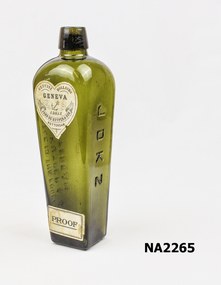 Whitehorse Historical Society Inc.
Container - Bottle
Tapered square green bottle. Label - Genuine Hollands Geneva John DeKuyper & son Rotterdam - ProofJDKZ This bottle is the property of John DeKuyper and Son Rotterdam.glass technology, bottles -
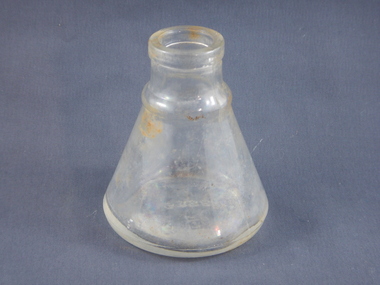 Parks Victoria - Days Mill and Farm
Container - Bottle, clag
This bottle was found in an above ground rubbish pile at Days Mill. It appears to have been used to contain clag. ( a form of water based glue.)Small clear glass bottle. Round bottle, wide at base which tapers sharply to a narrow neck.william day, ann day, joseph day, robert day, days mill & farm, murchison south -
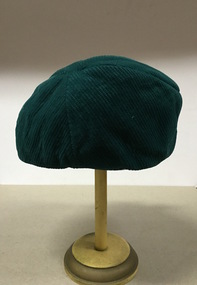 Kew Historical Society Inc
Headwear - Bottle Green Corduroy Hat, 1970s
The Kew Historical Society’s fashion and design collection is comprised of costumes, hats, shoes and personal accessories. Many of these items were purchased or handmade in Victoria; some locally in Kew. The extensive hat collection comprises items dating from the 1860s to the 1970s. Most of the hats in the collection were created by milliners for women. There are however a number of early and important men’s hats in the collection. The headwear collection is particularly significant in that it includes the work of notable Australian and international milliners.Bottle green corduroy velvet hat, close fitting at the front and tapering to a bow of the same fabric at the rear.Nilwomen's hats, headwear, clothing -
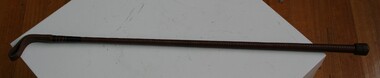 Trafalgar Holden Museum
Functional object - Equine accessory, Equestrian crop
Used by mounted riders to encourage their mounts forward.Manufactured and sold by Holden and Frost Ca 1900Tapered shaft with 60mm loop on end. Other end has a leather know on with metal cap on bottomequestrian crop, whip -
 Bendigo Military Museum
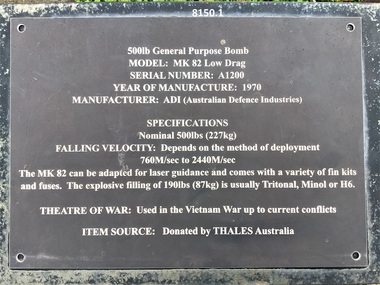
Weapon - BOMB, AERIAL 500 LB, Australian Defence Industries, C.1970
This item is situated in the Gardens of the Bendigo District RSL Sub Branch Inc Havilah Road. Refer photo .1) for the details re manufacture and history/use..1) Plaque on metal stand, black with white text re details of a 500 Lb Bomb. .2) Weapon, 500 lb General Purpose Aerial Bomb, cylindrical shape, nose cone tapers to a point, tail tapers to near point with 4 fins attached. bdrslinc, smirsl, brsl, 500, bomb -
Glenelg Shire Council Cultural Collection
Award - Award - Silver Lidded Trophy, Portland Caledonian Society, n.d
Portland Highland Pipe BandSilver double handled urn, with lid, mounted on brown bakelite stand. The urn tapers downwards, and has a grecian keyfrieze around upper lip. Lid tapers to a point at top. Base in two tiers: 1st, 8 s, ded, sitting on round base. Inscription on urn.Front: Urn- ' Portland Caledonian Society Trophy Highland Gathering 1962 Street March Portland Ladies Highland Pipe band -
 Kiewa Valley Historical Society
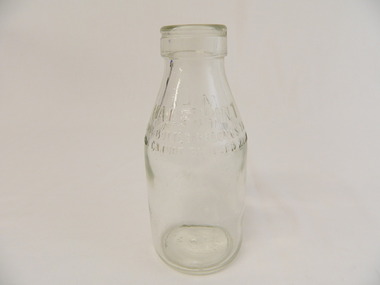
Bottle - Milk, 1950's - 1960's
Bottled milk was bought at the local store. The bottles were re cycled and remained the property of the manufacturer. to encourage their return a deposit was usually paid on them. Pre 1966 liquids were measured in pints.Historical: Dairy farmers lived in the Kiewa Valley and sent their milk to be pasteurised and bottled by a local Dairy Company. The bottles changed shape, size and embossing. Aesthetic: Display showing variations of shape, embossing and size Clear glass small bottle with straight sides nearly two thirds up from the base tapering gently to the opening which has a thick long lip before the opening. Heavy embossing around the circumference on each side where tapering begins. Light embossing on the base.Half Pint Milk This Bottle Belongs to Milk Bottles Recovery Ltd. And Cannot be Used With Out Written Permission Base: '2' Common Seal 'A' with 'G' and 'M' inside the A / '8' / '11' / 'M163'milk, dairy, farmers, kiewa, milk bottles recovery ltd -
Glenelg Shire Council Cultural Collection
Souvenir - Wine Glass - Portland & District Hospital, n.d
Wine glass, gold rim, Portland & District Hospital logo, gold. Elongated, tapered bowl, short stem.Front: 'Portland & District Hospital' - gold, embossed above logo. Back: '150th Anniversary' 1849 - 1999 - gold embossed, belwo logo -
Glenelg Shire Council Cultural Collection
Photograph - Photograph - Portland Butter Factory, M. E. Andrews, n.d
The Portland Butter Factory opened in a new building 1935 on the Heywood Road. The opening of the building was attended by K. S. AndersonBlack and white photo of the Portland butter factory. Timber building, split level, large brick tapered chimneyBack: 'Butter Factory Portland' - handwritten in black ink Round purple stamp 'PRINTED BY M.E. ANDREWS PORTLAND'portland industry, dairy, trade -
 Kiewa Valley Historical Society
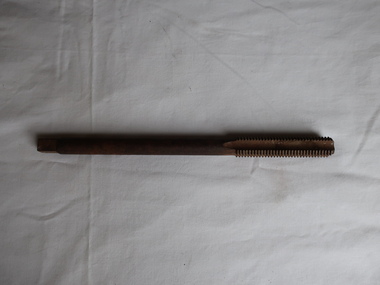
Reamer
A reamer is a type of rotary cutting tool used in metalworking. Precision reamers are designed to enlarge the size of a previously formed hole by a small amount but with a high degree of accuracy to leave smooth sides. Very oldUsed by metal workers in the Kiewa ValleyThis reamer is made of steel and is not tapered. It has a handle end and a serrated end. It has a three quarter inch diameter. reamer, metalworking tool