Showing 1953 items matching "testing"
-
 Melbourne Tram Museum
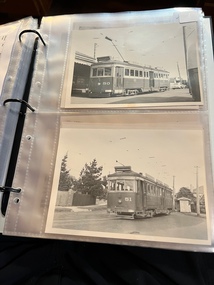
Album - Geoff Grant Photos, Geoff Grant, mid 1950s
Photo - see pdf file for further information. Number Brief Description GAG1 51 Sandringham GAG2 50 Sandringham GAG3 50 side Sandringham GAG4 Depot Sandringham_ GAG5 426 Camberwell Depot GAG6 822 St Kilda Rd GAG7 496 St Kilda Rd GAG8 347 Caulfield GAG9 440 Princes Bridge GAG10 190 Camberwell GAG11 190 Camberwell GAG12 Ys Camberwell GAG13 Interior Camberwell Depot GAG14 921 Camberwell GAG15 613 Camberwell Depot GAG16 613 front Camberwell Depot GAG17 887 Bourke St opening_ GAG18 888 Victoria St North Richmond GAG19 888 Victoria Pde GAG20 888 887 Malvern Depot GAG21 888 887 Malvern Depot GAG22 888 Victoria Pde GAG23 1033 North Fitzroy Depot GAG24 957 1033 Bourke St GAG25 1033 Nicholson St East Brunswick GAG26 1001 East Preston Depot GAG27 980 East Preston Depot GAG28 980 Dandenong Rd GAG29 Tower wagons Bourke St at Swanston St GAG30 Tower wagons Nicholson St GAG31 988 tower wagons Nicholson St GAG32 988 tower wagons Bourke St at Russell St GAG33 Albion Tower wagon Clifton Hill GAG34 988 tower wagon Bourke St at Russell St GAG35 988 East Preston Depot GAG36 Cleaner 7 Bourke St GAG37 988 turning from Nicholson St into Victoria Pde GAG38 991 Bourke St GAG39 View down Bourke St from 988 GAG40 988 Nicholson St GAG41 988 Smith St GAG42 988 High St GAG43 988 testing overhead Bourke St GAG44 1003 Nicholson St into Gertrude St GAG45 988 Clifton Hill GAG46 988 Nicholson St GAG47 988 1003 Nicholson St GAG48 988 Bourke St looking west from Elizabeth St GAG49 988 Bourke St looking east from Swanston St GAG50 988 1003 and tower wagons Nicholson St GAG51 988 Clifton Hill GAG52 988 East Preston Depot GAG53 190 Etched saloon door window Yields infomation about VR Tramways, Bourke Street trams and AETA tours. Geoff Grant was a Herald Sun photographer.Assembled album in a black presentation folder of 53 photographs from the Geoff Grant Collection - 27 sleeves All photographs have been scanned and placed on the Museum's G drive. A list of all photographs with details where possible has been compiled. tramways, trams, sandingham, camberwell depot, bourke st, new tramways, tower wagons, tours, victoria parade, east preston, aeta tours -
 Kiewa Valley Historical Society
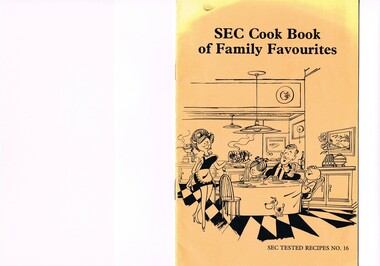
Book - Reference Cooking, SEC Cook Book of Family Favourites, Circa 1950
This SEC cook book was produced circa 1950s when the Kiewa Hydro Electricity Scheme and its Commission was in full swing. The Commission had constructed two settlements, Mount Beauty and Bogong Village to house construction workers and their families in a "closed" community. These "closed" communities were for SEC staff and construction workers only. Entry into these villages was restricted to "SEC pass" carrying construction staff and their families. All facilities such as retail, sporting and other community services was provided by the SEC. This created an isolated community in which limited individual choice or administrative family leeway was available. It was a typical company town (live and work for the company). The Company was in the Kiewa Valley constructing power stations for the Kiewa Hydro Electricity Scheme of Victoria. In one way the individual did not need to be concerned with living costs, educational needs for children, and recreational amenities and therefore "normal" community survival /living methods did not apply. This living, although restrictive, was quite simple. When the scheme was completed, in 1961, marking the end of company town, caused some of the employees, who had enjoyed the "controlled" township environment, a fair degree of angst in having the new 'laissez-faire" controls thrust upon them. This was magnified when both Mount Beauty and Bogong Village became meshed into the Bright Shire, vis-a-vis, local government. This cook book is a prime example of " the company is looking after you" and leave the worrying to us. This environment of a "company town", which creates the atmosphere of minimal personal responsibilities, is still present in a few remote mining towns in Australia at the beginning of the 21st Century.This book is a classical example of the psychological control in which the company had its construction workers families living in. The motto of many companies who had employees in isolated regions was "keep them happy". A happy and contented worker is a more productive worker. This was a period in time (1950s to 1970s) when social psychology was gaining recognition in the Australian workforce as well as internationally. At the end of the construction of all the power stations both the Mount Beauty settlement and the Bogong Village became more integrated into the main stream of rural Australia environment. Development of tourism in the region opened up not only interaction with a greater cross section of the ever expanding type of Australian but also the overseas based non rural culture tourist or immigrant. It allowed the intermingling of ideas in a non company controlled environment. The Mount Beauty and Bogong Village has, and even up to the 3000 Millennium, the same housing construction, as was built by the SEC. There has only been a very gradual change to modern domestic architectural home styles. This SEC cookbook has a folded cover with two staples at the spine, securing eight double sided pages. The white pages contain black print and sketches(3), and one black and white photograph (of the author). The front cover is mainly orange in colour with a gradual fading into yellow(at the top). The cover is approximately 210 g/m2 in thickness and each page is approximately 90 g/m2 thick. Front cover: top of page "SEC Cook Book of Family Favourites", in the middle a sketch, black on orange background, of a smiling mother walking from the kitchen to the dining table with a steaming rolled roast and vegetables in one hand and a gravy pot in the other. The furniture and decor relates to the 1950s. Below this sketch is printed"SEC TESTED RECIPES NO. 16" Inside cover: on top of the page is a black and white sketch of a pineapple, apple pear fish with scales, bunch of grapes with leaves a pork roll (head of pig one end and a roll ending on the other, on top of this food arrangement rests a fruit pie. Below this sketch are printed in black print the books contents.The first side of the first page is a black and white photograph Mary Dunne, the SEC Home Service supervisor who provided a signed foreword. The inside back cover has a promotional segment detailing a black and white photograph of a smiling (and happy) couple in the foreground with an electric stove in the distance. The written motto below this photograph is" to Live better -and save money they'll join the Power People. "the new tariff is(1960s) - First 75kWh --6 cents per kWh Next 435 kWh---2.3 cents per kWh Balance --1.7 cents per kWh The rate per killowatt-hour for the final block drops from 2.1 cents to 1.7 cents --a reduction of 19%.cooking recipes circa 1950s, domestic food, sec victoria cook books, recipes circa 1950s -
 Flagstaff Hill Maritime Museum and Village
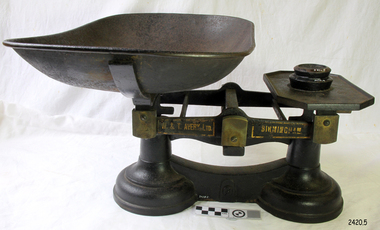
Equipment - Scale and weights, 1860-1900
The subject item was made in England by W&T Avery a British manufacturer of weights and weighing machines. The company was founded in the early 18th century and took the name W & T Avery in 1818. The undocumented origin of the company goes back to 1730 when James Ford established the business in the town of Digbeth. On Joseph Balden, the then company’s owner’s death in 1813 William and Thomas Avery took over his scale making business and in 1818 renamed it W & T Avery. The business rapidly expanded and in 1885 they owned three factories: the Atlas Works in West Bromwich, the Mill Lane Works in Birmingham and the Moat Lane Works in Digbeth. In 1891 the business became a limited company with a board of directors and in 1894 the shares were quoted on the London Stock Exchange. In 1895 the company bought the legendary Soho Foundry in Smethwick, a former steam engine factory owned by James Watt & Co. In 1897 the move was complete and the steam engine business was gradually converted to pure manufacture of weighing machines. The turn of the century was marked by managing director William Hipkins who was determined to broaden the renown of the Avery brand and transform the business into specialist manufacture of weighing machines. By 1914 the company occupied an area of 32,000m² and had some 3000 employees. In the inter-war period, the growth continued with the addition of specialized shops for cast parts, enamel paints and weighbridge assembly and the product range diversified into counting machines, testing machines, automatic packing machines and petrol pumps. During the second world war, the company also produced various types of heavy guns. At that time the site underwent severe damage from parachute mines and incendiary bombs. Then from 1931 to 1973, the company occupied the 18th-century Middlesex Sessions House in Clerkenwell as its headquarters. Changes in weighing machine technology after World War II led to the closure of the foundry, the introduction of electronic weighing with the simultaneous gradual disappearance of purely mechanical devices. The continued expansion was partly achieved through a series of acquisitions of other companies. After almost a century of national and international expansion, the company was taken over by GEC in 1979. Keith Hodgkinson, managing director at the time, completed the turn-around from mechanical to electronic weighing with a complete overhaul of the product range of retail sales of industrial platform scales. In 1993 GEC took over the Dutch-based company Berkel and the Avery-Berkel name was introduced. In 2000 the business was in turn acquired by the US-American company Weigh-Tronix, who already owned Salter, and is today operating as Avery Weigh-Tronix.An item used by grocers and merchants throughout the then British colonies of England to weigh store-bought goods around the mid to late 19th century. This item gives an insight into the daily lives of early colonial settlers and is a significant part of the era’s social history of the time.Balance scale and weights with removable dish, two round weights glued to tray 4oz and 8oz. Scales 'to weigh up to 28lb. Printed in gold on black labels each side "W & T AVERY LTD", "BIRMINGHAM" warrnambool, flagstaff-hill, flagstaff-hill-maritime-museum, maritime-museum, shipwreck-coast, flagstaff-hill-maritime-village, scale and weights, food preparation equipment, w t avery ltd, balance scale, grocers scales, james ford, william & thomas avery, birmingham uk -
 Flagstaff Hill Maritime Museum and Village
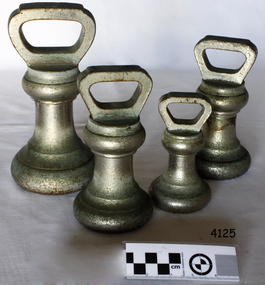
Functional object - Standard avoirdupois weights, Avery Ltd, 1950s
A weight made in England by W&T Avery a British manufacturer of weights and weighing machines. The company was founded in the early 18th century and took the name W & T Avery in 1818. The undocumented origin of the company goes back to 1730 when James Ford established the business in the town of Digbeth. On Joseph Balden, the then company’s owner’s death in 1813 William and Thomas Avery took over his scale making business and in 1818 renamed it W & T Avery. The business rapidly expanded and in 1885 they owned three factories: the Atlas Works in West Bromwich, the Mill Lane Works in Birmingham and the Moat Lane Works in Digbeth. In 1891 the business became a limited company with a board of directors and in 1894 the shares were quoted on the London Stock Exchange. In 1895 the company bought the legendary Soho Foundry in Smethwick, a former steam engine factory owned by James Watt & Co. In 1897 the move was complete and the steam engine business was gradually converted to pure manufacture of weighing machines. The turn of the century was marked by managing director William Hipkins who was determined to broadening the renown of the Avery brand and transforming the business into specialist manufacture of weighing machines. By 1914 the company occupied an area of 32,000m² and had some 3000 employees. In the inter-war period, the growth continued with the addition of specialized shops for cast parts, enamel paints and weighbridge assembly and the product range diversified into counting machines, testing machines, automatic packing machines and petrol pumps. During the second world war, the company also produced various types of heavy guns. At that time the site underwent severe damage from parachute mines and incendiary bombs. Then from 1931 to 1973, the company occupied the 18th-century Middlesex Sessions House in Clerkenwell as its headquarters. Changes in weighing machine technology after World War II led to the closure of the foundry, the introduction of electronic weighing with the simultaneous gradual disappearance of purely mechanical devices. The continued expansion was partly achieved through a series of acquisitions of other companies. After almost a century of national and international expansion, the company was taken over by GEC in 1979. Keith Hodgkinson, managing director at the time, completed the turn-around from mechanical to electronic weighing with a complete overhaul of the product range of retail sales of industrial platform scales. In 1993 GEC took over the Dutch-based company Berkel and the Avery-Berkel name was introduced. In 2000 the business was in turn acquired by the US-American company Weigh-Tronix, who already owned Salter, and is today operating as Avery Weigh-Tronix. An item used used by grocers and merchants to weigh store bought goods around the 1950s. This item gives an insight into social history of the time.Weights, metal, silver electroplated, 1 x 2lb, 2 x 4lb, 1 x 7lb. (4) all government stamped, made by Avery Ltd.Noneflagstaff hill, warrnambool, shipwrecked-coast, flagstaff-hill, flagstaff-hill-maritime-museum, maritime-museum, shipwreck-coast, flagstaff-hill-maritime-village, weight, imperial weight, imperial standard weights and measures, imperial standard weight -
 Flagstaff Hill Maritime Museum and Village
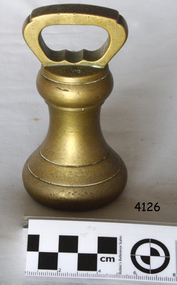
Functional object - Weight Avoirdupois, Avery Ltd, 1940-1950s
A weight made in England by W&T Avery a British manufacturer of weights and weighing machines. The company was founded in the early 18th century and took the name W & T Avery in 1818. The undocumented origin of the company goes back to 1730 when James Ford established the business in the town of Digbeth. On Joseph Balden, the then company’s owner’s death in 1813 William and Thomas Avery took over his scale making business and in 1818 renamed it W & T Avery. The business rapidly expanded and in 1885 they owned three factories: the Atlas Works in West Bromwich, the Mill Lane Works in Birmingham and the Moat Lane Works in Digbeth. In 1891 the business became a limited company with a board of directors and in 1894 the shares were quoted on the London Stock Exchange. In 1895 the company bought the legendary Soho Foundry in Smethwick, a former steam engine factory owned by James Watt & Co. In 1897 the move was complete and the steam engine business was gradually converted to pure manufacture of weighing machines. The turn of the century was marked by managing director William Hipkins who was determined to broadening the renown of the Avery brand and transforming the business into specialist manufacture of weighing machines. By 1914 the company occupied an area of 32,000m² and had some 3000 employees. In the inter-war period, the growth continued with the addition of specialized shops for cast parts, enamel paints and weighbridge assembly and the product range diversified into counting machines, testing machines, automatic packing machines and petrol pumps. During the second world war, the company also produced various types of heavy guns. At that time the site underwent severe damage from parachute mines and incendiary bombs. Then from 1931 to 1973, the company occupied the 18th-century Middlesex Sessions House in Clerkenwell as its headquarters. Changes in weighing machine technology after World War II led to the closure of the foundry, the introduction of electronic weighing with the simultaneous gradual disappearance of purely mechanical devices. The continued expansion was partly achieved through a series of acquisitions of other companies. After almost a century of national and international expansion, the company was taken over by GEC in 1979. Keith Hodgkinson, managing director at the time, completed the turn-around from mechanical to electronic weighing with a complete overhaul of the product range of retail sales of industrial platform scales. In 1993 GEC took over the Dutch-based company Berkel and the Avery-Berkel name was introduced. In 2000 the business was in turn acquired by the US-American company Weigh-Tronix, who already owned Salter, and is today operating as Avery Weigh-Tronix. An item used used by grocers and merchants to weigh store bought goods around the 1950s. This item gives an insight into social history of the time.Weight, brass, Stamped F27, 2lb.flagstaff hill, warrnambool, shipwrecked-coast, flagstaff-hill, flagstaff-hill-maritime-museum, maritime-museum, shipwreck-coast, flagstaff-hill-maritime-village, weight, brass weight -
 Wodonga & District Historical Society Inc
Certificate - Captain Kenneth Mortimer, D. W. Paterson Co. Pty. Ltd. Print, 1918
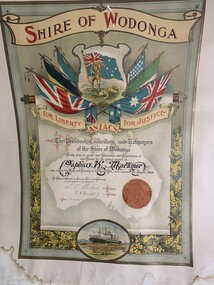
Kenneth Malcolm Mortimer was born in Leneva, Wodonga, Victoria on 9 October 1895. He attended school in Wangaratta before entering the Royal Military College, Duntroon in 1913. Along with the rest of his class, he graduated in June 1915. Mortimer was appointed as a Lieutenant with the 29th Battalion on 1 July 1915. He embarked with Headquarters Staff, 29th Battalion, from Melbourne aboard HMAT Ascanuis (A11) on 10 November 1915. Whilst training in Egypt in February 1916, he was promoted to Captain. He was in command of a company of the 29th Battalion at Fromelles, Armentieres, France in July 1916. and was reported missing, presumed killed in action on 20 July 1916, aged 20 years. Mortimer’s remains were buried along with those of hundreds of others in a mass grave near Pheasant Wood, close to the battlefield. This mass grave was rediscovered in 2008. After extensive research and DNA testing, the remains of Captain Mortimer were finally identified in April 2018. He was buried in the Commonwealth War Graves Commission Cemetery at Fromelles and his grave rededicated on July 19, 2018, 102 years after his death. A memorial tablet was erected to his memory at St Luke’s Church in Wodonga. Honour Certificates WW1 - From 1915 onwards, recruits in many shires and towns in eastern Australia were honoured by local government authorities. A common form of recognition was the award of honour certificates. The first honour certificates were presented in 1915 and 1916 to men who had yet to leave Australia. The designers and publishing companies solicited business directly from councils. Publishers began to print two different types of certificates: honour certificates to thank soldiers who had survived and memorial certificates to commemorate the dead. D.W. Paterson, a Melbourne publishing firm, claimed they had supplied certificates to over 150 cities and shires in Victoria and New South Wales, including the Shire of Wodonga. Paterson also had the widest range of designs The certificate signified that the officials of the community recognised and shared the family's pride and grief. In the earliest designs, the legend "Australia's sons answered the call" appears below the shield. This was replaced with "For Liberty/ ANZACs/ For Justice". After the United States entered the war in April 1917, the design was reworked to include the US flag. Its presence in this certificate dates its publication as late 1917. The certificate was signed by S. T Parker, Shire President and R. H. Murphy, Council Secretary on 4th August 1918. Kenneth Malcolm Mortimer was born in Leneva, Wodonga and enlisted in the AIF after training at Duntroon. He fought and died at the Battle of Fromelles, France which was the first major engagement of the AIF on the Western Front. Along with hundreds of other Australian soldiers his remains were only identified in 2018, more than 100 years after the battle.Coloured certificate presented to the family of Captain K Mortimer by Wodonga Shire Council.29th battalion, mortimer, leneva, fromelles, aif, wodonga shire, honour certificates ww1 -
 Warrnambool RSL Sub Branch
WW2 Field Telephone/Communication Instrument; German
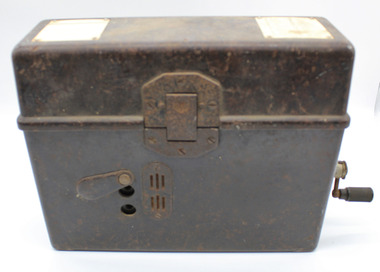
Used in WW2. Basically of german origin and manufacture but 'English' handset suggests capture and use by Australian forces possibly in Middle East Desert warfare.Black Rectangular Metal Box with Lid. Total Height 215mm (with lid closed), Body Height 140mm. Lid Height 75mm.Lid attached by full length Hinge on rear and locking Clip at front.Depth 90mm. Length 275mm. Lid Outside: has overlapping lip to body when closed.Reinforcing metal attachment on left side rolls over to inside of lid and is attached by two screws. Front locking clip is spring loaded and attached to lid by 3 screws. Lid Inside: Flexible metal plate to clip on handset. 2 inscription plates on left and right ends and telephone handset described separately Body Outside:Front: 2 Jack plug points, vertically aligned 85mm from left, 25mm apart either side of mid point of height of bodyprotedted by protective pivot plate. Air vent plate attached with 2 screws adjacent to Jack plug holes (same on Back). Left side at top; metal plate for carry strap (same on right side). carry strap not with item.Right side; hole covered by protective cover plate centred 70mm from base , Wind-Up handle attached (described seoarately. Body Inside: 2/3 filled with visible metal and bakelite components in separate compartment containing unseen working parts. Left side contains morse code key in canvas bag (described separately). Contents Inside Lid. Two schematics of wiring layouts attached to left and right ends. Removable Bakelite handset clipped into postion for carrying, attached cable has 4-pronged attachment connected to main section in body. Contents Inside Body. Most working parts hidden inside metal container. White plastic button 'Pruttaste' is a test button; threaded screws on top for attachments not present.Two pieces of loose wire purpose unknown. Canvas Bag with zip, labelled DD with arrow between (Department of Defence) containing Morse Code Key; wire with large jackplug attachment connected to MC Key through the bag. Jackplug connects via front of body of object. The whole of this item is stored in left inside of body.underside of handset says PRESS KEY WHILE SPEAKING and in smaller font size TELE HD NO 2 -
 Ballarat Tramway Museum
Magazine, Jack Richardson, "Tram Tracks - The Electric Traction Monthly", Oct to Dec. 1946
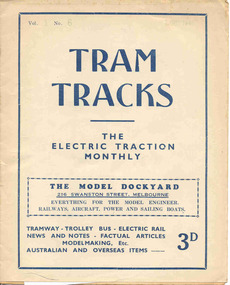
Three issues of "Tram Tracks - The Electric Traction Monthly" of the Australian Electric Traction Association. Each issue has a standard cover, of the magazine name etc, with a small advertisement for the Model Dockyard but are in different colours, all have been saddled stapled with two staples. The Volume and date details have been over stamped using a hand stamp. Back covers, inside back covers have the same advertisements. The three issues contain advertisements for Hartleys Sports store, Hearns Hobbies, Wattle Park, Johnson's Variety Store, Barnes Tennis Centre, The Model Dockyard, Meadmore Model Engineering and Austral Bronze Pty Ltd, Christie Scale Model Railway and Equipment, Herbert Small (Meccano) and Bassett-Lowke Models. 2464.1 - Vol. 1, No. 6 - 12 pages, Oct. 1946, with cover printed in blue. Has articles on staff and ticket working on VR tramways, Tramway rolling stock classification, rolling stock listing for SEC Bendigo, and the first 65 years of electric traction. News items on Sydney, Melbourne, Ballarat, Newcastle, Hobart and AETA. Inside front cover has a photo of Y1 611. 2464.2 - Vol. 1, No. 6 - 16 pages, Nov. 1946 with cover printed in brown. Has articles on bus profits, route symbols on Australian tramways, Hobarts double deckers, high current collection tests, rolling stock listing for SEC Geelong, VR Electric locos, and the first 65 years of electric traction continued. News items on Sydney, Melbourne, Ballarat, VR, Brisbane, Adelaide, Perth, Fremantle, Kalgoorlie, overseas and AETA. Inside front cover has photos of Sydney R and R1 class trams. 2464.3 - Vol. 1, No. 7 - 12 pages, Dec. 1946 with cover printed in green. Has articles on NSW tram and bus losses, proposed abandonment of the Sandringham - Block Rock line, Elwood Depot, rolling stock listing of NSW Service stock. Has news items on Brisbane, Sydney, Newcastle, Melbourne, Adelaide and AETA news. trams, tramways, electric traction, aeta, models, australian tramways -
 University of Melbourne, Burnley Campus Archives
Photograph - Black and white and colour slides, colour negative, Kodachrome, Miscellaneous Horticulture, 1947-1985
57 slides and 1 negative. (3) Men standing around a large horticultural machine. (4) "Lawns Housing Com" Aug "66?" (5) "Flemington Racecourse." (6) "Mustard-Cover Crop. 1960." (7) Tree climbing. (8) "Grafting-scions. BHC." (11) "Mildura-Soil Probe Oct 67." (12) Virus tested stock trees & layout Flemings Apr 70." (13) "Best's Winery Mar 75." (15, 16) Best's single student and group. (17) "Ploughing-Diagram to show incomplete cover of trash? Farm Practices." (18) "Spraying Hand Equipment for Insect Control in and around Buildings USA Yearbook 1952." (19) "Pasture Harrows." (20) "Mould Board Plough-Tractor." (21) "Disc Harrows-Offset-Tractor." (22) Tyne Cultivator-for Tractor." (23) See B91.258." (24) Burnley College libary. (25) "Irrigation-Delver Tatura 12/59." (26) "Tatura 12/59 Delver Ferguson T." (27-29) "W. Prom." (30) Camp 1957 Wilson's Promontary." (34-36) Photographs of plants in book. (35) Alnus? (37) "Meterosideros excelsa." (38) "Rhipsalidopsis rosea." (39) "Protea neriifolia." (40) Banksias-Species." Insects: (41) "Lacewing larva." (42) "Mites Aug 75." (43) "Yellow Mite, Red Spider (Arachnida)." (44) "Jassid-Life Cycle 9/51." (45) "Grape Fruit Crop (Florida) Destroyed by Fruit Fly. Animals without backbones." (46) "Jassid-Vegetable 9/51." (47) "Field Day 57 (Fruit Fly-Enlarged)." (48) "Field Day 57 (Fruit Fly-Stages)." (49) Insect Life Cycle. (50) "Comatibility (sic) Chart." for Insecticides & Fungicides. (51) "Insecticides-Toxicity." (52) "Life Cycle of the Leather Jacket." (53) "Grasshopper-Head Dissected Mouth Parts." (54) "Types of Antennae." (55) "Spider Mites USA Yearbook 1952." (56) "Cultivator." (57) "Organic Phosphates." (58) Negative Isopogon anemonifolius.administration building, lawns, flemington racecourse, mustard-cover crop, tree climbing, grafting, mildura, soil probe, pests, machinery, excursions, tatura, library, wilsons promontory, plants, alnus, zygocactus, schlumbergia, feijoa, acca sellowiana, protea neriifolia, banksia, isopogon anemonifolius -
 Flagstaff Hill Maritime Museum and Village
Domestic object - Bowl, Late 19th or early 20th Century
The Process of Making Pottery Decorating, Firing, Glazing, Making, Technical There is a rhythm and flow to clay. It can’t be done all at once! Even the making process! It can take weeks to get everything done, especially if you can only work on your pottery once a week! Even though we have three hour classes, it’s often just not enough time! Here is an overview of some of the processes so you have a bit more grasp on some of the technical stuff! Step One – Design There are SO many ideas out there for making stuff in clay! From delicate porcelain jewellery, through to heavy sculptural work and everything in between. Deciding your direction is sometimes not that easy – when you first start, try everything, you will naturally gravitate to the style that you enjoy! The options and variations are endless and can get a wee bit overwhelming too! Check in with me before you start to ensure your ideas will work, what order you might do things, how you could achieve the look you are seeking and any other technical data required! Step Two – Making Clay is thixotropic. This means that as you work with it, the clay first gets sloppier and wetter, before is begins to dry in the atmosphere. For most things, you simply can’t do all parts of the project at once. An example of work order might look like: Get last weeks work out from the shelves Prepare clay for today’s work – roll your clay, prepare balls for throwing, make the first stage of a pinch pot) Clean up last week’s work and put it on the shelf for bisque firing Check that you have any glazing to do – and do enough of it that you will have time to finish your main project Do the next step of your next project – there might be a further step that can’t be complete immediately, in that case, wrap your work well and put onto the shelves. Letting your work rest for a while can really help keep your work clean and professional looking. Many things require bagging under plastic to keep it ready for work the next week – put your name on the outside of the bag so you can find your work easily. We have stickers and markers. Consider how you want to decorate your work – coloured slip can be applied at a fairly wet stage (remembering that it will make your work even wetter!). Trying to apply slip to dry clay won’t work! If you want to do sgraffito – you will need to keep the work leather hard (a state of dryness where you can still work the clay with a little effort and a little water and care). Step Three – Drying Most of the time your work can go into the rack uncovered to let it dry out for the following week. If you want to continue forming or shaping you will need to double bag your work – put your work on a suitable sized bat and put the bat in a bag so the base of the bag is under the bat, then put another bag over the top of the work and tuck the top of the bag under the bat. If you want to trim (or turn) your thrown work the following week, it should also be double bagged. If your work is large, delicate, or of uneven thicknesses, you should lightly cover your work for drying. When considering the drying process, bare in mind the weather, humidity and wind! The hotter and dryer, the faster things dry and work can dry unevenly in the shelves – this can lead to cracking – another time to lightly cover your work for drying. Step Four – Trimming and Cleaning Up Your work is dry! It is called greenware now and it is at it’s most fragile! Handle everything with two hands. I often refer to soft hands – keep everything gentle and with your fingers spread as much as possible. Try to not pick up things like plates too much, and always with both hands! Before your work can be bisque fired it should be “cleaned up”. You work won’t go into the kiln if it has sharp edges – when glazed, sharp edges turn into razor blades! Use a piece of fly wire to rub the work all over – this will scratch a little so be light handed. Use a knife or metal kidney to scrape any areas that require a bit more dynamic treatment than the fly wire offers! Finally, a very light wipe over with a slightly damp sponge can help soften and soothe all of your edges and dags! Trimming thrown work: If you are planning to trim (or turn) your thrown work (and you should be), make sure you bag it well – your work should be leather hard to almost dry for easiest trimming. Use this step to finish the work completely – use a metal kidney to polish the surface, or a slightly damp sponge to give a freshly thrown look. Wipe the sponge around the rim after trimming, and check the inside of the pot for dags! Trimming slip cast work: Usually I will trim the rims of your work on the wheel the following day to make that stage easier, however you will still need to check your work for lumps and bumps. Last but not least – check that your name is still clearly on the bottom of your work. Step Five – Bisque Firing When the work is completely dry it can go into the bisque kiln. The bisque kiln is fired to 1000°C. This process burns off the water in the clay as well as some of the chemically bound water. The structure of the clay is not altered that much at this temperature. Inside the bisque kiln, the work is stacked a little, small bowl inside a larger bowl and onto a heavy plate. Smaller items like decorations or drink coasters might get stacked several high. Consideration is paid to the weight of the stack and shape of the work. A bisque kiln can fire about one and a half times the amount of work that the glaze kiln can fire. The firing takes about 10 hours to complete the cycle and about two days to cool down. Once it has been emptied the work is placed in the glaze room ready for you to decorate! Step Six – Glazing Decorating your work with colour can be a lot of fun – and time consuming! There are three main options for surface treatment at this stage: Oxide Washes Underglazes Glazes Washes and underglazes do not “glaze” the work – It will still need a layer of glaze to fully seal the clay (washes don’t need glaze on surfaces not designed for food or liquid as they can gloss up a little on their own). Underglazes are stable colourants that turn out pretty much how they look in the jar. They can be mixed with each other to form other colours and can be used like water colours to paint onto your work. Mostly they should have a clear glaze on top to seal them. Oxides are a different species – the pink oxide (cobalt) wash turns out bright blue for instance. They don’t always need a glaze on top, and some glazes can change the colour of the wash! The glazes need no other “glaze” on top! Be careful of unknown glaze interactions – you can put any combination of glaze in a bowl or on a plate, but only a single glaze on the outside of any vertical surface! Glazes are a chemical reaction under heat. We don’t know the exact chemicals in the Mayco glazes we use. I can guess by the way they interact with each other, however, on the whole, you need to test every idea you have, and not run the test on a vertical surface! Simply put, glaze is a layer of glass like substance that bonds with the clay underneath. Clay is made of silica, alumina and water. Glaze is made of mostly silica. Silica has a melting point of 1700°C and we fire to 1240°C. The silica requires a “flux” to help it melt at the lower temperature. Fluxes can be all sorts of chemicals – a common one is calcium – calcium has a melting point of 2500°C, however, together they both melt at a much lower temperature! Colourants are metal oxides like cobalt (blue), chrome (green through black), copper (green, blue, even red!), manganese (black, purple and pink) iron (red brown), etc. Different chemicals in the glaze can have dramatic effects. for example, barium carbonate (which we don’t use) turns manganese bright pink! Other elements can turn manganese dioxide brown, blue, purple and reddish brown. Manganese dioxide is a flux in and of itself as well. So, glazes that get their black and purple colours, often interact with other glazes and RUN! Our mirror black is a good example – it mixes really well with many glazes because it fluxes them – causes them to melt faster. It will also bring out many beautiful colours in the glazes because it’s black colouring most definitely comes from manganese dioxide! Glaze chemistry is a whole subject on it’s own! We use commercial Mayco glazes on purpose – for their huge range of colour possibilities, stability, cool interactions, artistic freedom with the ability to easily brush the glazes on and ease of use. We currently have almost 50 glazes on hand! A major project is to test the interactions of all glazes with each other. That is 2,500 test tiles!!!! I’m going to make the wall behind the wheels the feature wall of pretty colours! Step Seven – Glaze (Gloss or sometimes called “Glost”) Firing Most of the time this is the final stage of making your creation (but not always!) The glaze kiln goes to 1240°C. This is called cone 6, or midrange. It is the low end of stoneware temperatures. Stoneware clays and glazes are typically fired at cone 8 – 10, that is 1260 – 1290°C. The energy requirement to go from 1240°C to 1280°C is almost a 30% more! Our clay is formulated to vitrify (mature, turn “glass-like”) at 1240°, as are our glazes. A glaze kiln take around 12 hours to reach temperature and two to three days to cool down. Sometimes a third firing process is required – this is for decoration that is added to work after the glaze firing. For example – adding precious metals and lustres. this firing temperature is usually around 600 – 800°C depending upon the techniques being used. There are many students interested in gold and silver trims – we will be doing this third type of firing soon! After firing your work will be in the student finished work shelves. Remember to pay for it before you head out the door! There is a small extra charge for using porcelain clay (it’s more than twice the price of regular clay), and for any third firing process! Once your work has been fired it can not turn back into clay for millennia – so don’t fire it if you don’t like it! Put it in the bucket for recycling. https://firebirdstudios.com.au/the-process-of-making-pottery/ The bowl is an example of kitchenware used in the 19th century and still in use today.Bowl white ceramic. Crack on side. Badly stained.Backstamp very faint and unable to be read.flagstaff hill, warrnambool, shipwrecked-coast, flagstaff-hill, flagstaff-hill-maritime-museum, maritime-museum, shipwreck-coast, flagstaff-hill-maritime-village, mixing bowl, food preparation, kitchen equipment, ceramic -
 Flagstaff Hill Maritime Museum and Village
Domestic object - Bowl
The Process of Making Pottery Decorating, Firing, Glazing, Making, Technical There is a rhythm and flow to clay. It can’t be done all at once! Even the making process! It can take weeks to get everything done, especially if you can only work on your pottery once a week! Even though we have three hour classes, it’s often just not enough time! Here is an overview of some of the processes so you have a bit more grasp on some of the technical stuff! Step One – Design There are SO many ideas out there for making stuff in clay! From delicate porcelain jewellery, through to heavy sculptural work and everything in between. Deciding your direction is sometimes not that easy – when you first start, try everything, you will naturally gravitate to the style that you enjoy! The options and variations are endless and can get a wee bit overwhelming too! Check in with me before you start to ensure your ideas will work, what order you might do things, how you could achieve the look you are seeking and any other technical data required! Step Two – Making Clay is thixotropic. This means that as you work with it, the clay first gets sloppier and wetter, before is begins to dry in the atmosphere. For most things, you simply can’t do all parts of the project at once. An example of work order might look like: Get last weeks work out from the shelves Prepare clay for today’s work – roll your clay, prepare balls for throwing, make the first stage of a pinch pot) Clean up last week’s work and put it on the shelf for bisque firing Check that you have any glazing to do – and do enough of it that you will have time to finish your main project Do the next step of your next project – there might be a further step that can’t be complete immediately, in that case, wrap your work well and put onto the shelves. Letting your work rest for a while can really help keep your work clean and professional looking. Many things require bagging under plastic to keep it ready for work the next week – put your name on the outside of the bag so you can find your work easily. We have stickers and markers. Consider how you want to decorate your work – coloured slip can be applied at a fairly wet stage (remembering that it will make your work even wetter!). Trying to apply slip to dry clay won’t work! If you want to do sgraffito – you will need to keep the work leather hard (a state of dryness where you can still work the clay with a little effort and a little water and care). Step Three – Drying Most of the time your work can go into the rack uncovered to let it dry out for the following week. If you want to continue forming or shaping you will need to double bag your work – put your work on a suitable sized bat and put the bat in a bag so the base of the bag is under the bat, then put another bag over the top of the work and tuck the top of the bag under the bat. If you want to trim (or turn) your thrown work the following week, it should also be double bagged. If your work is large, delicate, or of uneven thicknesses, you should lightly cover your work for drying. When considering the drying process, bare in mind the weather, humidity and wind! The hotter and dryer, the faster things dry and work can dry unevenly in the shelves – this can lead to cracking – another time to lightly cover your work for drying. Step Four – Trimming and Cleaning Up Your work is dry! It is called greenware now and it is at it’s most fragile! Handle everything with two hands. I often refer to soft hands – keep everything gentle and with your fingers spread as much as possible. Try to not pick up things like plates too much, and always with both hands! Before your work can be bisque fired it should be “cleaned up”. You work won’t go into the kiln if it has sharp edges – when glazed, sharp edges turn into razor blades! Use a piece of fly wire to rub the work all over – this will scratch a little so be light handed. Use a knife or metal kidney to scrape any areas that require a bit more dynamic treatment than the fly wire offers! Finally, a very light wipe over with a slightly damp sponge can help soften and soothe all of your edges and dags! Trimming thrown work: If you are planning to trim (or turn) your thrown work (and you should be), make sure you bag it well – your work should be leather hard to almost dry for easiest trimming. Use this step to finish the work completely – use a metal kidney to polish the surface, or a slightly damp sponge to give a freshly thrown look. Wipe the sponge around the rim after trimming, and check the inside of the pot for dags! Trimming slip cast work: Usually I will trim the rims of your work on the wheel the following day to make that stage easier, however you will still need to check your work for lumps and bumps. Last but not least – check that your name is still clearly on the bottom of your work. Step Five – Bisque Firing When the work is completely dry it can go into the bisque kiln. The bisque kiln is fired to 1000°C. This process burns off the water in the clay as well as some of the chemically bound water. The structure of the clay is not altered that much at this temperature. Inside the bisque kiln, the work is stacked a little, small bowl inside a larger bowl and onto a heavy plate. Smaller items like decorations or drink coasters might get stacked several high. Consideration is paid to the weight of the stack and shape of the work. A bisque kiln can fire about one and a half times the amount of work that the glaze kiln can fire. The firing takes about 10 hours to complete the cycle and about two days to cool down. Once it has been emptied the work is placed in the glaze room ready for you to decorate! Step Six – Glazing Decorating your work with colour can be a lot of fun – and time consuming! There are three main options for surface treatment at this stage: Oxide Washes Underglazes Glazes Washes and underglazes do not “glaze” the work – It will still need a layer of glaze to fully seal the clay (washes don’t need glaze on surfaces not designed for food or liquid as they can gloss up a little on their own). Underglazes are stable colourants that turn out pretty much how they look in the jar. They can be mixed with each other to form other colours and can be used like water colours to paint onto your work. Mostly they should have a clear glaze on top to seal them. Oxides are a different species – the pink oxide (cobalt) wash turns out bright blue for instance. They don’t always need a glaze on top, and some glazes can change the colour of the wash! The glazes need no other “glaze” on top! Be careful of unknown glaze interactions – you can put any combination of glaze in a bowl or on a plate, but only a single glaze on the outside of any vertical surface! Glazes are a chemical reaction under heat. We don’t know the exact chemicals in the Mayco glazes we use. I can guess by the way they interact with each other, however, on the whole, you need to test every idea you have, and not run the test on a vertical surface! Simply put, glaze is a layer of glass like substance that bonds with the clay underneath. Clay is made of silica, alumina and water. Glaze is made of mostly silica. Silica has a melting point of 1700°C and we fire to 1240°C. The silica requires a “flux” to help it melt at the lower temperature. Fluxes can be all sorts of chemicals – a common one is calcium – calcium has a melting point of 2500°C, however, together they both melt at a much lower temperature! Colourants are metal oxides like cobalt (blue), chrome (green through black), copper (green, blue, even red!), manganese (black, purple and pink) iron (red brown), etc. Different chemicals in the glaze can have dramatic effects. for example, barium carbonate (which we don’t use) turns manganese bright pink! Other elements can turn manganese dioxide brown, blue, purple and reddish brown. Manganese dioxide is a flux in and of itself as well. So, glazes that get their black and purple colours, often interact with other glazes and RUN! Our mirror black is a good example – it mixes really well with many glazes because it fluxes them – causes them to melt faster. It will also bring out many beautiful colours in the glazes because it’s black colouring most definitely comes from manganese dioxide! Glaze chemistry is a whole subject on it’s own! We use commercial Mayco glazes on purpose – for their huge range of colour possibilities, stability, cool interactions, artistic freedom with the ability to easily brush the glazes on and ease of use. We currently have almost 50 glazes on hand! A major project is to test the interactions of all glazes with each other. That is 2,500 test tiles!!!! I’m going to make the wall behind the wheels the feature wall of pretty colours! Step Seven – Glaze (Gloss or sometimes called “Glost”) Firing Most of the time this is the final stage of making your creation (but not always!) The glaze kiln goes to 1240°C. This is called cone 6, or midrange. It is the low end of stoneware temperatures. Stoneware clays and glazes are typically fired at cone 8 – 10, that is 1260 – 1290°C. The energy requirement to go from 1240°C to 1280°C is almost a 30% more! Our clay is formulated to vitrify (mature, turn “glass-like”) at 1240°, as are our glazes. A glaze kiln take around 12 hours to reach temperature and two to three days to cool down. Sometimes a third firing process is required – this is for decoration that is added to work after the glaze firing. For example – adding precious metals and lustres. this firing temperature is usually around 600 – 800°C depending upon the techniques being used. There are many students interested in gold and silver trims – we will be doing this third type of firing soon! After firing your work will be in the student finished work shelves. Remember to pay for it before you head out the door! There is a small extra charge for using porcelain clay (it’s more than twice the price of regular clay), and for any third firing process! Once your work has been fired it can not turn back into clay for millennia – so don’t fire it if you don’t like it! Put it in the bucket for recycling. https://firebirdstudios.com.au/the-process-of-making-pottery/ This bowl is an example of kitchenware used in the 19th century and still in use today.Bowl white ceramic plain that has two sets of edging around lip. Inside bowl has plaster designed to look like cooking mixture.flagstaff hill, warrnambool, shipwrecked-coast, flagstaff-hill, flagstaff-hill-maritime-museum, maritime-museum, shipwreck-coast, flagstaff-hill-maritime-village, kitchen equipment, ceramic -
 Flagstaff Hill Maritime Museum and Village
Domestic object - Bowl, J & G Meakin, Late 19th or early 20th Century
The Process of Making Pottery Decorating, Firing, Glazing, Making, Technical There is a rhythm and flow to clay. It can’t be done all at once! Even the making process! It can take weeks to get everything done, especially if you can only work on your pottery once a week! Even though we have three hour classes, it’s often just not enough time! Here is an overview of some of the processes so you have a bit more grasp on some of the technical stuff! Step One – Design There are SO many ideas out there for making stuff in clay! From delicate porcelain jewellery, through to heavy sculptural work and everything in between. Deciding your direction is sometimes not that easy – when you first start, try everything, you will naturally gravitate to the style that you enjoy! The options and variations are endless and can get a wee bit overwhelming too! Check in with me before you start to ensure your ideas will work, what order you might do things, how you could achieve the look you are seeking and any other technical data required! Step Two – Making Clay is thixotropic. This means that as you work with it, the clay first gets sloppier and wetter, before is begins to dry in the atmosphere. For most things, you simply can’t do all parts of the project at once. An example of work order might look like: Get last weeks work out from the shelves Prepare clay for today’s work – roll your clay, prepare balls for throwing, make the first stage of a pinch pot) Clean up last week’s work and put it on the shelf for bisque firing Check that you have any glazing to do – and do enough of it that you will have time to finish your main project Do the next step of your next project – there might be a further step that can’t be complete immediately, in that case, wrap your work well and put onto the shelves. Letting your work rest for a while can really help keep your work clean and professional looking. Many things require bagging under plastic to keep it ready for work the next week – put your name on the outside of the bag so you can find your work easily. We have stickers and markers. Consider how you want to decorate your work – coloured slip can be applied at a fairly wet stage (remembering that it will make your work even wetter!). Trying to apply slip to dry clay won’t work! If you want to do sgraffito – you will need to keep the work leather hard (a state of dryness where you can still work the clay with a little effort and a little water and care). Step Three – Drying Most of the time your work can go into the rack uncovered to let it dry out for the following week. If you want to continue forming or shaping you will need to double bag your work – put your work on a suitable sized bat and put the bat in a bag so the base of the bag is under the bat, then put another bag over the top of the work and tuck the top of the bag under the bat. If you want to trim (or turn) your thrown work the following week, it should also be double bagged. If your work is large, delicate, or of uneven thicknesses, you should lightly cover your work for drying. When considering the drying process, bare in mind the weather, humidity and wind! The hotter and dryer, the faster things dry and work can dry unevenly in the shelves – this can lead to cracking – another time to lightly cover your work for drying. Step Four – Trimming and Cleaning Up Your work is dry! It is called greenware now and it is at it’s most fragile! Handle everything with two hands. I often refer to soft hands – keep everything gentle and with your fingers spread as much as possible. Try to not pick up things like plates too much, and always with both hands! Before your work can be bisque fired it should be “cleaned up”. You work won’t go into the kiln if it has sharp edges – when glazed, sharp edges turn into razor blades! Use a piece of fly wire to rub the work all over – this will scratch a little so be light handed. Use a knife or metal kidney to scrape any areas that require a bit more dynamic treatment than the fly wire offers! Finally, a very light wipe over with a slightly damp sponge can help soften and soothe all of your edges and dags! Trimming thrown work: If you are planning to trim (or turn) your thrown work (and you should be), make sure you bag it well – your work should be leather hard to almost dry for easiest trimming. Use this step to finish the work completely – use a metal kidney to polish the surface, or a slightly damp sponge to give a freshly thrown look. Wipe the sponge around the rim after trimming, and check the inside of the pot for dags! Trimming slip cast work: Usually I will trim the rims of your work on the wheel the following day to make that stage easier, however you will still need to check your work for lumps and bumps. Last but not least – check that your name is still clearly on the bottom of your work. Step Five – Bisque Firing When the work is completely dry it can go into the bisque kiln. The bisque kiln is fired to 1000°C. This process burns off the water in the clay as well as some of the chemically bound water. The structure of the clay is not altered that much at this temperature. Inside the bisque kiln, the work is stacked a little, small bowl inside a larger bowl and onto a heavy plate. Smaller items like decorations or drink coasters might get stacked several high. Consideration is paid to the weight of the stack and shape of the work. A bisque kiln can fire about one and a half times the amount of work that the glaze kiln can fire. The firing takes about 10 hours to complete the cycle and about two days to cool down. Once it has been emptied the work is placed in the glaze room ready for you to decorate! Step Six – Glazing Decorating your work with colour can be a lot of fun – and time consuming! There are three main options for surface treatment at this stage: Oxide Washes Underglazes Glazes Washes and underglazes do not “glaze” the work – It will still need a layer of glaze to fully seal the clay (washes don’t need glaze on surfaces not designed for food or liquid as they can gloss up a little on their own). Underglazes are stable colourants that turn out pretty much how they look in the jar. They can be mixed with each other to form other colours and can be used like water colours to paint onto your work. Mostly they should have a clear glaze on top to seal them. Oxides are a different species – the pink oxide (cobalt) wash turns out bright blue for instance. They don’t always need a glaze on top, and some glazes can change the colour of the wash! The glazes need no other “glaze” on top! Be careful of unknown glaze interactions – you can put any combination of glaze in a bowl or on a plate, but only a single glaze on the outside of any vertical surface! Glazes are a chemical reaction under heat. We don’t know the exact chemicals in the Mayco glazes we use. I can guess by the way they interact with each other, however, on the whole, you need to test every idea you have, and not run the test on a vertical surface! Simply put, glaze is a layer of glass like substance that bonds with the clay underneath. Clay is made of silica, alumina and water. Glaze is made of mostly silica. Silica has a melting point of 1700°C and we fire to 1240°C. The silica requires a “flux” to help it melt at the lower temperature. Fluxes can be all sorts of chemicals – a common one is calcium – calcium has a melting point of 2500°C, however, together they both melt at a much lower temperature! Colourants are metal oxides like cobalt (blue), chrome (green through black), copper (green, blue, even red!), manganese (black, purple and pink) iron (red brown), etc. Different chemicals in the glaze can have dramatic effects. for example, barium carbonate (which we don’t use) turns manganese bright pink! Other elements can turn manganese dioxide brown, blue, purple and reddish brown. Manganese dioxide is a flux in and of itself as well. So, glazes that get their black and purple colours, often interact with other glazes and RUN! Our mirror black is a good example – it mixes really well with many glazes because it fluxes them – causes them to melt faster. It will also bring out many beautiful colours in the glazes because it’s black colouring most definitely comes from manganese dioxide! Glaze chemistry is a whole subject on it’s own! We use commercial Mayco glazes on purpose – for their huge range of colour possibilities, stability, cool interactions, artistic freedom with the ability to easily brush the glazes on and ease of use. We currently have almost 50 glazes on hand! A major project is to test the interactions of all glazes with each other. That is 2,500 test tiles!!!! I’m going to make the wall behind the wheels the feature wall of pretty colours! Step Seven – Glaze (Gloss or sometimes called “Glost”) Firing Most of the time this is the final stage of making your creation (but not always!) The glaze kiln goes to 1240°C. This is called cone 6, or midrange. It is the low end of stoneware temperatures. Stoneware clays and glazes are typically fired at cone 8 – 10, that is 1260 – 1290°C. The energy requirement to go from 1240°C to 1280°C is almost a 30% more! Our clay is formulated to vitrify (mature, turn “glass-like”) at 1240°, as are our glazes. A glaze kiln take around 12 hours to reach temperature and two to three days to cool down. Sometimes a third firing process is required – this is for decoration that is added to work after the glaze firing. For example – adding precious metals and lustres. this firing temperature is usually around 600 – 800°C depending upon the techniques being used. There are many students interested in gold and silver trims – we will be doing this third type of firing soon! After firing your work will be in the student finished work shelves. Remember to pay for it before you head out the door! There is a small extra charge for using porcelain clay (it’s more than twice the price of regular clay), and for any third firing process! Once your work has been fired it can not turn back into clay for millennia – so don’t fire it if you don’t like it! Put it in the bucket for recycling. https://firebirdstudios.com.au/the-process-of-making-pottery/This bowl was made by renowned pottery company J & G Meakin of England. The firm was established in the mid-1800's. The bowl is an example of kitchenware used in the 19th century and still in use today.Bowl; white ceramic, round and tapering inwards towards base. Made by J and G Meakin England.On base, 'Ironstone China Reg SOL 391413' with symbolflagstaff hill, flagstaff hill maritime museum and village, warrnambool, maritime museum, maritime village, great ocean road, shipwreck coast, mixing bowl, food preparation, j & g meakin, pottery, stoke-on-trent, kitchen equipment, ceramic -
 Flagstaff Hill Maritime Museum and Village
Domestic object - Plate
The Process of Making Pottery Decorating, Firing, Glazing, Making, Technical There is a rhythm and flow to clay. It can’t be done all at once! Even the making process! It can take weeks to get everything done, especially if you can only work on your pottery once a week! Even though we have three hour classes, it’s often just not enough time! Here is an overview of some of the processes so you have a bit more grasp on some of the technical stuff! Step One – Design There are SO many ideas out there for making stuff in clay! From delicate porcelain jewellery, through to heavy sculptural work and everything in between. Deciding your direction is sometimes not that easy – when you first start, try everything, you will naturally gravitate to the style that you enjoy! The options and variations are endless and can get a wee bit overwhelming too! Check in with me before you start to ensure your ideas will work, what order you might do things, how you could achieve the look you are seeking and any other technical data required! Step Two – Making Clay is thixotropic. This means that as you work with it, the clay first gets sloppier and wetter, before is begins to dry in the atmosphere. For most things, you simply can’t do all parts of the project at once. An example of work order might look like: Get last weeks work out from the shelves Prepare clay for today’s work – roll your clay, prepare balls for throwing, make the first stage of a pinch pot) Clean up last week’s work and put it on the shelf for bisque firing Check that you have any glazing to do – and do enough of it that you will have time to finish your main project Do the next step of your next project – there might be a further step that can’t be complete immediately, in that case, wrap your work well and put onto the shelves. Letting your work rest for a while can really help keep your work clean and professional looking. Many things require bagging under plastic to keep it ready for work the next week – put your name on the outside of the bag so you can find your work easily. We have stickers and markers. Consider how you want to decorate your work – coloured slip can be applied at a fairly wet stage (remembering that it will make your work even wetter!). Trying to apply slip to dry clay won’t work! If you want to do sgraffito – you will need to keep the work leather hard (a state of dryness where you can still work the clay with a little effort and a little water and care). Step Three – Drying Most of the time your work can go into the rack uncovered to let it dry out for the following week. If you want to continue forming or shaping you will need to double bag your work – put your work on a suitable sized bat and put the bat in a bag so the base of the bag is under the bat, then put another bag over the top of the work and tuck the top of the bag under the bat. If you want to trim (or turn) your thrown work the following week, it should also be double bagged. If your work is large, delicate, or of uneven thicknesses, you should lightly cover your work for drying. When considering the drying process, bare in mind the weather, humidity and wind! The hotter and dryer, the faster things dry and work can dry unevenly in the shelves – this can lead to cracking – another time to lightly cover your work for drying. Step Four – Trimming and Cleaning Up Your work is dry! It is called greenware now and it is at it’s most fragile! Handle everything with two hands. I often refer to soft hands – keep everything gentle and with your fingers spread as much as possible. Try to not pick up things like plates too much, and always with both hands! Before your work can be bisque fired it should be “cleaned up”. You work won’t go into the kiln if it has sharp edges – when glazed, sharp edges turn into razor blades! Use a piece of fly wire to rub the work all over – this will scratch a little so be light handed. Use a knife or metal kidney to scrape any areas that require a bit more dynamic treatment than the fly wire offers! Finally, a very light wipe over with a slightly damp sponge can help soften and soothe all of your edges and dags! Trimming thrown work: If you are planning to trim (or turn) your thrown work (and you should be), make sure you bag it well – your work should be leather hard to almost dry for easiest trimming. Use this step to finish the work completely – use a metal kidney to polish the surface, or a slightly damp sponge to give a freshly thrown look. Wipe the sponge around the rim after trimming, and check the inside of the pot for dags! Trimming slip cast work: Usually I will trim the rims of your work on the wheel the following day to make that stage easier, however you will still need to check your work for lumps and bumps. Last but not least – check that your name is still clearly on the bottom of your work. Step Five – Bisque Firing When the work is completely dry it can go into the bisque kiln. The bisque kiln is fired to 1000°C. This process burns off the water in the clay as well as some of the chemically bound water. The structure of the clay is not altered that much at this temperature. Inside the bisque kiln, the work is stacked a little, small bowl inside a larger bowl and onto a heavy plate. Smaller items like decorations or drink coasters might get stacked several high. Consideration is paid to the weight of the stack and shape of the work. A bisque kiln can fire about one and a half times the amount of work that the glaze kiln can fire. The firing takes about 10 hours to complete the cycle and about two days to cool down. Once it has been emptied the work is placed in the glaze room ready for you to decorate! Step Six – Glazing Decorating your work with colour can be a lot of fun – and time consuming! There are three main options for surface treatment at this stage: Oxide Washes Underglazes Glazes Washes and underglazes do not “glaze” the work – It will still need a layer of glaze to fully seal the clay (washes don’t need glaze on surfaces not designed for food or liquid as they can gloss up a little on their own). Underglazes are stable colourants that turn out pretty much how they look in the jar. They can be mixed with each other to form other colours and can be used like water colours to paint onto your work. Mostly they should have a clear glaze on top to seal them. Oxides are a different species – the pink oxide (cobalt) wash turns out bright blue for instance. They don’t always need a glaze on top, and some glazes can change the colour of the wash! The glazes need no other “glaze” on top! Be careful of unknown glaze interactions – you can put any combination of glaze in a bowl or on a plate, but only a single glaze on the outside of any vertical surface! Glazes are a chemical reaction under heat. We don’t know the exact chemicals in the Mayco glazes we use. I can guess by the way they interact with each other, however, on the whole, you need to test every idea you have, and not run the test on a vertical surface! Simply put, glaze is a layer of glass like substance that bonds with the clay underneath. Clay is made of silica, alumina and water. Glaze is made of mostly silica. Silica has a melting point of 1700°C and we fire to 1240°C. The silica requires a “flux” to help it melt at the lower temperature. Fluxes can be all sorts of chemicals – a common one is calcium – calcium has a melting point of 2500°C, however, together they both melt at a much lower temperature! Colourants are metal oxides like cobalt (blue), chrome (green through black), copper (green, blue, even red!), manganese (black, purple and pink) iron (red brown), etc. Different chemicals in the glaze can have dramatic effects. for example, barium carbonate (which we don’t use) turns manganese bright pink! Other elements can turn manganese dioxide brown, blue, purple and reddish brown. Manganese dioxide is a flux in and of itself as well. So, glazes that get their black and purple colours, often interact with other glazes and RUN! Our mirror black is a good example – it mixes really well with many glazes because it fluxes them – causes them to melt faster. It will also bring out many beautiful colours in the glazes because it’s black colouring most definitely comes from manganese dioxide! Glaze chemistry is a whole subject on it’s own! We use commercial Mayco glazes on purpose – for their huge range of colour possibilities, stability, cool interactions, artistic freedom with the ability to easily brush the glazes on and ease of use. We currently have almost 50 glazes on hand! A major project is to test the interactions of all glazes with each other. That is 2,500 test tiles!!!! I’m going to make the wall behind the wheels the feature wall of pretty colours! Step Seven – Glaze (Gloss or sometimes called “Glost”) Firing Most of the time this is the final stage of making your creation (but not always!) The glaze kiln goes to 1240°C. This is called cone 6, or midrange. It is the low end of stoneware temperatures. Stoneware clays and glazes are typically fired at cone 8 – 10, that is 1260 – 1290°C. The energy requirement to go from 1240°C to 1280°C is almost a 30% more! Our clay is formulated to vitrify (mature, turn “glass-like”) at 1240°, as are our glazes. A glaze kiln take around 12 hours to reach temperature and two to three days to cool down. Sometimes a third firing process is required – this is for decoration that is added to work after the glaze firing. For example – adding precious metals and lustres. this firing temperature is usually around 600 – 800°C depending upon the techniques being used. There are many students interested in gold and silver trims – we will be doing this third type of firing soon! After firing your work will be in the student finished work shelves. Remember to pay for it before you head out the door! There is a small extra charge for using porcelain clay (it’s more than twice the price of regular clay), and for any third firing process! Once your work has been fired it can not turn back into clay for millennia – so don’t fire it if you don’t like it! Put it in the bucket for recycling. https://firebirdstudios.com.au/the-process-of-making-pottery/Ceramics have evolved over thousands of years.White earthenware dinner plate. Crazing evident all over.Backstamped ‘Made in England S LTD’flagstaff hill, warrnambool, shipwrecked-coast, flagstaff-hill, flagstaff-hill-maritime-museum, maritime-museum, shipwreck-coast, flagstaff-hill-maritime-village, ceramics, tableware -
 Flagstaff Hill Maritime Museum and Village
Domestic object - Plate, Johnson Bros
The Process of Making Pottery Decorating, Firing, Glazing, Making, Technical There is a rhythm and flow to clay. It can’t be done all at once! Even the making process! It can take weeks to get everything done, especially if you can only work on your pottery once a week! Even though we have three hour classes, it’s often just not enough time! Here is an overview of some of the processes so you have a bit more grasp on some of the technical stuff! Step One – Design There are SO many ideas out there for making stuff in clay! From delicate porcelain jewellery, through to heavy sculptural work and everything in between. Deciding your direction is sometimes not that easy – when you first start, try everything, you will naturally gravitate to the style that you enjoy! The options and variations are endless and can get a wee bit overwhelming too! Check in with me before you start to ensure your ideas will work, what order you might do things, how you could achieve the look you are seeking and any other technical data required! Step Two – Making Clay is thixotropic. This means that as you work with it, the clay first gets sloppier and wetter, before is begins to dry in the atmosphere. For most things, you simply can’t do all parts of the project at once. An example of work order might look like: Get last weeks work out from the shelves Prepare clay for today’s work – roll your clay, prepare balls for throwing, make the first stage of a pinch pot) Clean up last week’s work and put it on the shelf for bisque firing Check that you have any glazing to do – and do enough of it that you will have time to finish your main project Do the next step of your next project – there might be a further step that can’t be complete immediately, in that case, wrap your work well and put onto the shelves. Letting your work rest for a while can really help keep your work clean and professional looking. Many things require bagging under plastic to keep it ready for work the next week – put your name on the outside of the bag so you can find your work easily. We have stickers and markers. Consider how you want to decorate your work – coloured slip can be applied at a fairly wet stage (remembering that it will make your work even wetter!). Trying to apply slip to dry clay won’t work! If you want to do sgraffito – you will need to keep the work leather hard (a state of dryness where you can still work the clay with a little effort and a little water and care). Step Three – Drying Most of the time your work can go into the rack uncovered to let it dry out for the following week. If you want to continue forming or shaping you will need to double bag your work – put your work on a suitable sized bat and put the bat in a bag so the base of the bag is under the bat, then put another bag over the top of the work and tuck the top of the bag under the bat. If you want to trim (or turn) your thrown work the following week, it should also be double bagged. If your work is large, delicate, or of uneven thicknesses, you should lightly cover your work for drying. When considering the drying process, bare in mind the weather, humidity and wind! The hotter and dryer, the faster things dry and work can dry unevenly in the shelves – this can lead to cracking – another time to lightly cover your work for drying. Step Four – Trimming and Cleaning Up Your work is dry! It is called greenware now and it is at it’s most fragile! Handle everything with two hands. I often refer to soft hands – keep everything gentle and with your fingers spread as much as possible. Try to not pick up things like plates too much, and always with both hands! Before your work can be bisque fired it should be “cleaned up”. You work won’t go into the kiln if it has sharp edges – when glazed, sharp edges turn into razor blades! Use a piece of fly wire to rub the work all over – this will scratch a little so be light handed. Use a knife or metal kidney to scrape any areas that require a bit more dynamic treatment than the fly wire offers! Finally, a very light wipe over with a slightly damp sponge can help soften and soothe all of your edges and dags! Trimming thrown work: If you are planning to trim (or turn) your thrown work (and you should be), make sure you bag it well – your work should be leather hard to almost dry for easiest trimming. Use this step to finish the work completely – use a metal kidney to polish the surface, or a slightly damp sponge to give a freshly thrown look. Wipe the sponge around the rim after trimming, and check the inside of the pot for dags! Trimming slip cast work: Usually I will trim the rims of your work on the wheel the following day to make that stage easier, however you will still need to check your work for lumps and bumps. Last but not least – check that your name is still clearly on the bottom of your work. Step Five – Bisque Firing When the work is completely dry it can go into the bisque kiln. The bisque kiln is fired to 1000°C. This process burns off the water in the clay as well as some of the chemically bound water. The structure of the clay is not altered that much at this temperature. Inside the bisque kiln, the work is stacked a little, small bowl inside a larger bowl and onto a heavy plate. Smaller items like decorations or drink coasters might get stacked several high. Consideration is paid to the weight of the stack and shape of the work. A bisque kiln can fire about one and a half times the amount of work that the glaze kiln can fire. The firing takes about 10 hours to complete the cycle and about two days to cool down. Once it has been emptied the work is placed in the glaze room ready for you to decorate! Step Six – Glazing Decorating your work with colour can be a lot of fun – and time consuming! There are three main options for surface treatment at this stage: Oxide Washes Underglazes Glazes Washes and underglazes do not “glaze” the work – It will still need a layer of glaze to fully seal the clay (washes don’t need glaze on surfaces not designed for food or liquid as they can gloss up a little on their own). Underglazes are stable colourants that turn out pretty much how they look in the jar. They can be mixed with each other to form other colours and can be used like water colours to paint onto your work. Mostly they should have a clear glaze on top to seal them. Oxides are a different species – the pink oxide (cobalt) wash turns out bright blue for instance. They don’t always need a glaze on top, and some glazes can change the colour of the wash! The glazes need no other “glaze” on top! Be careful of unknown glaze interactions – you can put any combination of glaze in a bowl or on a plate, but only a single glaze on the outside of any vertical surface! Glazes are a chemical reaction under heat. We don’t know the exact chemicals in the Mayco glazes we use. I can guess by the way they interact with each other, however, on the whole, you need to test every idea you have, and not run the test on a vertical surface! Simply put, glaze is a layer of glass like substance that bonds with the clay underneath. Clay is made of silica, alumina and water. Glaze is made of mostly silica. Silica has a melting point of 1700°C and we fire to 1240°C. The silica requires a “flux” to help it melt at the lower temperature. Fluxes can be all sorts of chemicals – a common one is calcium – calcium has a melting point of 2500°C, however, together they both melt at a much lower temperature! Colourants are metal oxides like cobalt (blue), chrome (green through black), copper (green, blue, even red!), manganese (black, purple and pink) iron (red brown), etc. Different chemicals in the glaze can have dramatic effects. for example, barium carbonate (which we don’t use) turns manganese bright pink! Other elements can turn manganese dioxide brown, blue, purple and reddish brown. Manganese dioxide is a flux in and of itself as well. So, glazes that get their black and purple colours, often interact with other glazes and RUN! Our mirror black is a good example – it mixes really well with many glazes because it fluxes them – causes them to melt faster. It will also bring out many beautiful colours in the glazes because it’s black colouring most definitely comes from manganese dioxide! Glaze chemistry is a whole subject on it’s own! We use commercial Mayco glazes on purpose – for their huge range of colour possibilities, stability, cool interactions, artistic freedom with the ability to easily brush the glazes on and ease of use. We currently have almost 50 glazes on hand! A major project is to test the interactions of all glazes with each other. That is 2,500 test tiles!!!! I’m going to make the wall behind the wheels the feature wall of pretty colours! Step Seven – Glaze (Gloss or sometimes called “Glost”) Firing Most of the time this is the final stage of making your creation (but not always!) The glaze kiln goes to 1240°C. This is called cone 6, or midrange. It is the low end of stoneware temperatures. Stoneware clays and glazes are typically fired at cone 8 – 10, that is 1260 – 1290°C. The energy requirement to go from 1240°C to 1280°C is almost a 30% more! Our clay is formulated to vitrify (mature, turn “glass-like”) at 1240°, as are our glazes. A glaze kiln take around 12 hours to reach temperature and two to three days to cool down. Sometimes a third firing process is required – this is for decoration that is added to work after the glaze firing. For example – adding precious metals and lustres. this firing temperature is usually around 600 – 800°C depending upon the techniques being used. There are many students interested in gold and silver trims – we will be doing this third type of firing soon! After firing your work will be in the student finished work shelves. Remember to pay for it before you head out the door! There is a small extra charge for using porcelain clay (it’s more than twice the price of regular clay), and for any third firing process! Once your work has been fired it can not turn back into clay for millennia – so don’t fire it if you don’t like it! Put it in the bucket for recycling. https://firebirdstudios.com.au/the-process-of-making-pottery/Ceramics have evolved over thousands of years.A white earthenware side plate with a gadroon edge. Has water marks and chips on front.‘Johnson Bros England Reg No 15587’flagstaff hill, warrnambool, shipwrecked-coast, flagstaff-hill, flagstaff-hill-maritime-museum, maritime-museum, shipwreck-coast, flagstaff-hill-maritime-village, johnson bros, ceramics, tableware -
 Flagstaff Hill Maritime Museum and Village
Domestic object - Plate, Alfred Meakin
The Process of Making Pottery Decorating, Firing, Glazing, Making, Technical There is a rhythm and flow to clay. It can’t be done all at once! Even the making process! It can take weeks to get everything done, especially if you can only work on your pottery once a week! Even though we have three hour classes, it’s often just not enough time! Here is an overview of some of the processes so you have a bit more grasp on some of the technical stuff! Step One – Design There are SO many ideas out there for making stuff in clay! From delicate porcelain jewellery, through to heavy sculptural work and everything in between. Deciding your direction is sometimes not that easy – when you first start, try everything, you will naturally gravitate to the style that you enjoy! The options and variations are endless and can get a wee bit overwhelming too! Check in with me before you start to ensure your ideas will work, what order you might do things, how you could achieve the look you are seeking and any other technical data required! Step Two – Making Clay is thixotropic. This means that as you work with it, the clay first gets sloppier and wetter, before is begins to dry in the atmosphere. For most things, you simply can’t do all parts of the project at once. An example of work order might look like: Get last weeks work out from the shelves Prepare clay for today’s work – roll your clay, prepare balls for throwing, make the first stage of a pinch pot) Clean up last week’s work and put it on the shelf for bisque firing Check that you have any glazing to do – and do enough of it that you will have time to finish your main project Do the next step of your next project – there might be a further step that can’t be complete immediately, in that case, wrap your work well and put onto the shelves. Letting your work rest for a while can really help keep your work clean and professional looking. Many things require bagging under plastic to keep it ready for work the next week – put your name on the outside of the bag so you can find your work easily. We have stickers and markers. Consider how you want to decorate your work – coloured slip can be applied at a fairly wet stage (remembering that it will make your work even wetter!). Trying to apply slip to dry clay won’t work! If you want to do sgraffito – you will need to keep the work leather hard (a state of dryness where you can still work the clay with a little effort and a little water and care). Step Three – Drying Most of the time your work can go into the rack uncovered to let it dry out for the following week. If you want to continue forming or shaping you will need to double bag your work – put your work on a suitable sized bat and put the bat in a bag so the base of the bag is under the bat, then put another bag over the top of the work and tuck the top of the bag under the bat. If you want to trim (or turn) your thrown work the following week, it should also be double bagged. If your work is large, delicate, or of uneven thicknesses, you should lightly cover your work for drying. When considering the drying process, bare in mind the weather, humidity and wind! The hotter and dryer, the faster things dry and work can dry unevenly in the shelves – this can lead to cracking – another time to lightly cover your work for drying. Step Four – Trimming and Cleaning Up Your work is dry! It is called greenware now and it is at it’s most fragile! Handle everything with two hands. I often refer to soft hands – keep everything gentle and with your fingers spread as much as possible. Try to not pick up things like plates too much, and always with both hands! Before your work can be bisque fired it should be “cleaned up”. You work won’t go into the kiln if it has sharp edges – when glazed, sharp edges turn into razor blades! Use a piece of fly wire to rub the work all over – this will scratch a little so be light handed. Use a knife or metal kidney to scrape any areas that require a bit more dynamic treatment than the fly wire offers! Finally, a very light wipe over with a slightly damp sponge can help soften and soothe all of your edges and dags! Trimming thrown work: If you are planning to trim (or turn) your thrown work (and you should be), make sure you bag it well – your work should be leather hard to almost dry for easiest trimming. Use this step to finish the work completely – use a metal kidney to polish the surface, or a slightly damp sponge to give a freshly thrown look. Wipe the sponge around the rim after trimming, and check the inside of the pot for dags! Trimming slip cast work: Usually I will trim the rims of your work on the wheel the following day to make that stage easier, however you will still need to check your work for lumps and bumps. Last but not least – check that your name is still clearly on the bottom of your work. Step Five – Bisque Firing When the work is completely dry it can go into the bisque kiln. The bisque kiln is fired to 1000°C. This process burns off the water in the clay as well as some of the chemically bound water. The structure of the clay is not altered that much at this temperature. Inside the bisque kiln, the work is stacked a little, small bowl inside a larger bowl and onto a heavy plate. Smaller items like decorations or drink coasters might get stacked several high. Consideration is paid to the weight of the stack and shape of the work. A bisque kiln can fire about one and a half times the amount of work that the glaze kiln can fire. The firing takes about 10 hours to complete the cycle and about two days to cool down. Once it has been emptied the work is placed in the glaze room ready for you to decorate! Step Six – Glazing Decorating your work with colour can be a lot of fun – and time consuming! There are three main options for surface treatment at this stage: Oxide Washes Underglazes Glazes Washes and underglazes do not “glaze” the work – It will still need a layer of glaze to fully seal the clay (washes don’t need glaze on surfaces not designed for food or liquid as they can gloss up a little on their own). Underglazes are stable colourants that turn out pretty much how they look in the jar. They can be mixed with each other to form other colours and can be used like water colours to paint onto your work. Mostly they should have a clear glaze on top to seal them. Oxides are a different species – the pink oxide (cobalt) wash turns out bright blue for instance. They don’t always need a glaze on top, and some glazes can change the colour of the wash! The glazes need no other “glaze” on top! Be careful of unknown glaze interactions – you can put any combination of glaze in a bowl or on a plate, but only a single glaze on the outside of any vertical surface! Glazes are a chemical reaction under heat. We don’t know the exact chemicals in the Mayco glazes we use. I can guess by the way they interact with each other, however, on the whole, you need to test every idea you have, and not run the test on a vertical surface! Simply put, glaze is a layer of glass like substance that bonds with the clay underneath. Clay is made of silica, alumina and water. Glaze is made of mostly silica. Silica has a melting point of 1700°C and we fire to 1240°C. The silica requires a “flux” to help it melt at the lower temperature. Fluxes can be all sorts of chemicals – a common one is calcium – calcium has a melting point of 2500°C, however, together they both melt at a much lower temperature! Colourants are metal oxides like cobalt (blue), chrome (green through black), copper (green, blue, even red!), manganese (black, purple and pink) iron (red brown), etc. Different chemicals in the glaze can have dramatic effects. for example, barium carbonate (which we don’t use) turns manganese bright pink! Other elements can turn manganese dioxide brown, blue, purple and reddish brown. Manganese dioxide is a flux in and of itself as well. So, glazes that get their black and purple colours, often interact with other glazes and RUN! Our mirror black is a good example – it mixes really well with many glazes because it fluxes them – causes them to melt faster. It will also bring out many beautiful colours in the glazes because it’s black colouring most definitely comes from manganese dioxide! Glaze chemistry is a whole subject on it’s own! We use commercial Mayco glazes on purpose – for their huge range of colour possibilities, stability, cool interactions, artistic freedom with the ability to easily brush the glazes on and ease of use. We currently have almost 50 glazes on hand! A major project is to test the interactions of all glazes with each other. That is 2,500 test tiles!!!! I’m going to make the wall behind the wheels the feature wall of pretty colours! Step Seven – Glaze (Gloss or sometimes called “Glost”) Firing Most of the time this is the final stage of making your creation (but not always!) The glaze kiln goes to 1240°C. This is called cone 6, or midrange. It is the low end of stoneware temperatures. Stoneware clays and glazes are typically fired at cone 8 – 10, that is 1260 – 1290°C. The energy requirement to go from 1240°C to 1280°C is almost a 30% more! Our clay is formulated to vitrify (mature, turn “glass-like”) at 1240°, as are our glazes. A glaze kiln take around 12 hours to reach temperature and two to three days to cool down. Sometimes a third firing process is required – this is for decoration that is added to work after the glaze firing. For example – adding precious metals and lustres. this firing temperature is usually around 600 – 800°C depending upon the techniques being used. There are many students interested in gold and silver trims – we will be doing this third type of firing soon! After firing your work will be in the student finished work shelves. Remember to pay for it before you head out the door! There is a small extra charge for using porcelain clay (it’s more than twice the price of regular clay), and for any third firing process! Once your work has been fired it can not turn back into clay for millennia – so don’t fire it if you don’t like it! Put it in the bucket for recycling. https://firebirdstudios.com.au/the-process-of-making-pottery/Ceramics have evolved over thousands of years.Earthenware dessert plate, cream colour. Made by Alfred Meakin, England. Backstamped ‘Alfred Meakin England’. flagstaff hill, warrnambool, shipwrecked-coast, flagstaff-hill, flagstaff-hill-maritime-museum, maritime-museum, shipwreck-coast, flagstaff-hill-maritime-village, alfred meakin, ceramics, earthenware, kitchenware -
 Flagstaff Hill Maritime Museum and Village
Domestic object - Jug
The Process of Making Pottery Decorating, Firing, Glazing, Making, Technical There is a rhythm and flow to clay. It can’t be done all at once! Even the making process! It can take weeks to get everything done, especially if you can only work on your pottery once a week! Even though we have three hour classes, it’s often just not enough time! Here is an overview of some of the processes so you have a bit more grasp on some of the technical stuff! Step One – Design There are SO many ideas out there for making stuff in clay! From delicate porcelain jewellery, through to heavy sculptural work and everything in between. Deciding your direction is sometimes not that easy – when you first start, try everything, you will naturally gravitate to the style that you enjoy! The options and variations are endless and can get a wee bit overwhelming too! Check in with me before you start to ensure your ideas will work, what order you might do things, how you could achieve the look you are seeking and any other technical data required! Step Two – Making Clay is thixotropic. This means that as you work with it, the clay first gets sloppier and wetter, before is begins to dry in the atmosphere. For most things, you simply can’t do all parts of the project at once. An example of work order might look like: Get last weeks work out from the shelves Prepare clay for today’s work – roll your clay, prepare balls for throwing, make the first stage of a pinch pot) Clean up last week’s work and put it on the shelf for bisque firing Check that you have any glazing to do – and do enough of it that you will have time to finish your main project Do the next step of your next project – there might be a further step that can’t be complete immediately, in that case, wrap your work well and put onto the shelves. Letting your work rest for a while can really help keep your work clean and professional looking. Many things require bagging under plastic to keep it ready for work the next week – put your name on the outside of the bag so you can find your work easily. We have stickers and markers. Consider how you want to decorate your work – coloured slip can be applied at a fairly wet stage (remembering that it will make your work even wetter!). Trying to apply slip to dry clay won’t work! If you want to do sgraffito – you will need to keep the work leather hard (a state of dryness where you can still work the clay with a little effort and a little water and care). Step Three – Drying Most of the time your work can go into the rack uncovered to let it dry out for the following week. If you want to continue forming or shaping you will need to double bag your work – put your work on a suitable sized bat and put the bat in a bag so the base of the bag is under the bat, then put another bag over the top of the work and tuck the top of the bag under the bat. If you want to trim (or turn) your thrown work the following week, it should also be double bagged. If your work is large, delicate, or of uneven thicknesses, you should lightly cover your work for drying. When considering the drying process, bare in mind the weather, humidity and wind! The hotter and dryer, the faster things dry and work can dry unevenly in the shelves – this can lead to cracking – another time to lightly cover your work for drying. Step Four – Trimming and Cleaning Up Your work is dry! It is called greenware now and it is at it’s most fragile! Handle everything with two hands. I often refer to soft hands – keep everything gentle and with your fingers spread as much as possible. Try to not pick up things like plates too much, and always with both hands! Before your work can be bisque fired it should be “cleaned up”. You work won’t go into the kiln if it has sharp edges – when glazed, sharp edges turn into razor blades! Use a piece of fly wire to rub the work all over – this will scratch a little so be light handed. Use a knife or metal kidney to scrape any areas that require a bit more dynamic treatment than the fly wire offers! Finally, a very light wipe over with a slightly damp sponge can help soften and soothe all of your edges and dags! Trimming thrown work: If you are planning to trim (or turn) your thrown work (and you should be), make sure you bag it well – your work should be leather hard to almost dry for easiest trimming. Use this step to finish the work completely – use a metal kidney to polish the surface, or a slightly damp sponge to give a freshly thrown look. Wipe the sponge around the rim after trimming, and check the inside of the pot for dags! Trimming slip cast work: Usually I will trim the rims of your work on the wheel the following day to make that stage easier, however you will still need to check your work for lumps and bumps. Last but not least – check that your name is still clearly on the bottom of your work. Step Five – Bisque Firing When the work is completely dry it can go into the bisque kiln. The bisque kiln is fired to 1000°C. This process burns off the water in the clay as well as some of the chemically bound water. The structure of the clay is not altered that much at this temperature. Inside the bisque kiln, the work is stacked a little, small bowl inside a larger bowl and onto a heavy plate. Smaller items like decorations or drink coasters might get stacked several high. Consideration is paid to the weight of the stack and shape of the work. A bisque kiln can fire about one and a half times the amount of work that the glaze kiln can fire. The firing takes about 10 hours to complete the cycle and about two days to cool down. Once it has been emptied the work is placed in the glaze room ready for you to decorate! Step Six – Glazing Decorating your work with colour can be a lot of fun – and time consuming! There are three main options for surface treatment at this stage: Oxide Washes Underglazes Glazes Washes and underglazes do not “glaze” the work – It will still need a layer of glaze to fully seal the clay (washes don’t need glaze on surfaces not designed for food or liquid as they can gloss up a little on their own). Underglazes are stable colourants that turn out pretty much how they look in the jar. They can be mixed with each other to form other colours and can be used like water colours to paint onto your work. Mostly they should have a clear glaze on top to seal them. Oxides are a different species – the pink oxide (cobalt) wash turns out bright blue for instance. They don’t always need a glaze on top, and some glazes can change the colour of the wash! The glazes need no other “glaze” on top! Be careful of unknown glaze interactions – you can put any combination of glaze in a bowl or on a plate, but only a single glaze on the outside of any vertical surface! Glazes are a chemical reaction under heat. We don’t know the exact chemicals in the Mayco glazes we use. I can guess by the way they interact with each other, however, on the whole, you need to test every idea you have, and not run the test on a vertical surface! Simply put, glaze is a layer of glass like substance that bonds with the clay underneath. Clay is made of silica, alumina and water. Glaze is made of mostly silica. Silica has a melting point of 1700°C and we fire to 1240°C. The silica requires a “flux” to help it melt at the lower temperature. Fluxes can be all sorts of chemicals – a common one is calcium – calcium has a melting point of 2500°C, however, together they both melt at a much lower temperature! Colourants are metal oxides like cobalt (blue), chrome (green through black), copper (green, blue, even red!), manganese (black, purple and pink) iron (red brown), etc. Different chemicals in the glaze can have dramatic effects. for example, barium carbonate (which we don’t use) turns manganese bright pink! Other elements can turn manganese dioxide brown, blue, purple and reddish brown. Manganese dioxide is a flux in and of itself as well. So, glazes that get their black and purple colours, often interact with other glazes and RUN! Our mirror black is a good example – it mixes really well with many glazes because it fluxes them – causes them to melt faster. It will also bring out many beautiful colours in the glazes because it’s black colouring most definitely comes from manganese dioxide! Glaze chemistry is a whole subject on it’s own! We use commercial Mayco glazes on purpose – for their huge range of colour possibilities, stability, cool interactions, artistic freedom with the ability to easily brush the glazes on and ease of use. We currently have almost 50 glazes on hand! A major project is to test the interactions of all glazes with each other. That is 2,500 test tiles!!!! I’m going to make the wall behind the wheels the feature wall of pretty colours! Step Seven – Glaze (Gloss or sometimes called “Glost”) Firing Most of the time this is the final stage of making your creation (but not always!) The glaze kiln goes to 1240°C. This is called cone 6, or midrange. It is the low end of stoneware temperatures. Stoneware clays and glazes are typically fired at cone 8 – 10, that is 1260 – 1290°C. The energy requirement to go from 1240°C to 1280°C is almost a 30% more! Our clay is formulated to vitrify (mature, turn “glass-like”) at 1240°, as are our glazes. A glaze kiln take around 12 hours to reach temperature and two to three days to cool down. Sometimes a third firing process is required – this is for decoration that is added to work after the glaze firing. For example – adding precious metals and lustres. this firing temperature is usually around 600 – 800°C depending upon the techniques being used. There are many students interested in gold and silver trims – we will be doing this third type of firing soon! After firing your work will be in the student finished work shelves. Remember to pay for it before you head out the door! There is a small extra charge for using porcelain clay (it’s more than twice the price of regular clay), and for any third firing process! Once your work has been fired it can not turn back into clay for millennia – so don’t fire it if you don’t like it! Put it in the bucket for recycling. https://firebirdstudios.com.au/the-process-of-making-pottery/The form of the jug has been in use for many centuries.Stoneware jug. Two tone brown glaze with pierced lip behind spout. Spout chipped.None.flagstaff hill, warrnambool, shipwrecked-coast, flagstaff-hill, flagstaff-hill-maritime-museum, maritime-museum, shipwreck-coast, flagstaff-hill-maritime-village, jug, ceramic jug -
 Melbourne Tram Museum
Document - Folder with papers, Melbourne & Metropolitan Tramways Board (MMTB), "Employment Procedures", c1964
Folder with papers - Manilla folder containing some 30 documents outlining the procedures for employing staff for the crewing of trams, tradesmen and other grades. Comprising primarily foolscap duplicated, quarto sheets but with some samples actual printed documents that were required. A - Employment Procedures, listing the following documents, each marked with the respective number using a blue pencil in the top left hand corner. Document No. (images refer to the sheet number) .1 - Interview Card .2 - General information regarding conditions of employment (Age, Height, Weight etc.) .3 - Education Test .4 and 5 - Application for Employment and Result of Medical examination .6 - List of Medical Standards for eyesight ( photocopy which is going to brown - reprinted and placed in a envelope as it was affecting the next sheet.) .7 - Chest X-Ray .8 - Form for attachment to depot closest to home or closest depot at which vacancy exists. .9 - Agreement form (8 and 9 stapled together) .10 - Requisitions for uniform .11 - Directions to Store and School .12 and .13 - Application for Re-employment and Special Day Report stapled together .14 - MMTB Employees Record .15 - Reference Investigations - where considered necessary .16 - Tradesmen and Miscellaneous Workers Identification Slip - in triplicate .17 - Weekly changes Report - used for adjusting staff totals of Conductors, Drivers - example dated 29.2.1964 - list names, starts, re-employments, new drivers, transfers, bus drivers, regressions, medical retirements, dismissals, resignations, noting who were University Students. .18 - List of Student Conductors to attend class .19 - Identification slip for cashier and employees pass issue .20 - List of (new) starters in the service - for use by Cashier and weekly changes .21 - Particulars of Platform Staff - used for compiling weekly staff totals .22 - Application for permission to train as a tram or bus driver .23 - Instruction to Mobile Inspector to recover absentee's uniform .24 - details of traffic employees leaving service .25 - Employee to be paid off Not numbered B - Procedure re Conductor Applications - (2 sheets) C - Student Conductors' Training (10 sheets) D - Summary of Curriculum of Training for Electric Tram Drivers.trams, tramways, personnel, conductors, training, employment, employees, drivers, procedures, instructions, uniforms, medical, interviews, reports, discipline -
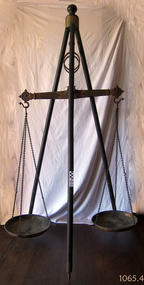 Flagstaff Hill Maritime Museum and Village
Equipment - Balance Scale, 1850s
A Large Rare mid 19th Century Balance Scale (also called a Beam Scale) Made in England by W&T Avery a British manufacturer of weighing machines. The company was founded in the early 18th century and took the name W & T Avery in 1818. The undocumented origin of the company goes back to 1730 when James Ford established the business in the town of Digbeth. On Joseph Balden the then company’s owner’s death in 1813 William and Thomas Avery took over his scale making business and in 1818 renamed it W & T Avery. The business rapidly expanded and in 1885 they owned three factories: the Atlas Works in West Bromwich, the Mill Lane Works in Birmingham and the Moat Lane Works in Digbeth. In 1891 the business became a limited company with a board of directors and in 1894 the shares were quoted on the London Stock Exchange. In 1895 the company bought the legendary Soho Foundry in Smethwick, a former steam engine factory owned by James Watt & Co. In 1897 the move was complete and the steam engine business was gradually converted to pure manufacture of weighing machines. The turn of the century was marked by managing director William Hipkins who was determined to broadening the renown of the Avery brand and transforming the business into a specialist manufacture of weighing machines. By 1914 the company occupied an area of 32,000m² and had some 3000 employees. In the inter-war period the growth continued with the addition of specialized shops for cast parts, enamel paints and weighbridge assembly and the product range diversified into counting machines, testing machines, automatic packing machines and petrol pumps. During the second world war the company also produced various types of heavy guns. At that time the site underwent severe damage from parachute mines and incendiary bombs.Then from 1931 to 1973 the company occupied the 18th-century Middlesex Sessions House in Clerkenwell as its headquarters. Changes in weighing machine technology after World War II led to the closure of the foundry, the introduction of electronic weighing with the simultaneous gradual disappearance of purely mechanical devices. The continued expansion was partly achieved through a series of acquisitions of other companies. After almost a century of national and international expansion the company was taken over by GEC in 1979. Keith Hodgkinson, managing director at the time, completed the turn-around from mechanical to electronic weighing with a complete overhaul of the product range of retail scales and industrial platform scales. In 1993 GEC took over the Dutch-based company Berkel and the Avery-Berkel name was introduced. In 2000 the business was in turn acquired by the US-American company Weigh-Tronix, who already owned Salter, and is today operating as Avery Weigh-Tronix. Item made and used possibly around the 1850s by Victorian colonial government to check weights of goods being sold by early shop keepers on the gold fields item is very rare.James McEwan & Co were the retailers of W & T Avery scales in Victoria from 1852. A very rare item used probably to check weights used by merchants during colonial times by government inspectors in Victoria. A similar example exist in a NSW museum, the item is believed to have been made before W & T Avery expansion to the Soho foundry in Birmingham in 1885 and after 1818.Beam balance scale suspended from a wooden tripod, with metal trays suspended by three chain lengths. embossed on the balance beam W T Avery, Birmingham,flagstaff hill, warrnambool, shipwrecked coast, flagstaff hill maritime museum, maritime museum, shipwreck coast, flagstaff hill maritime village, great ocean road, scale, avery -
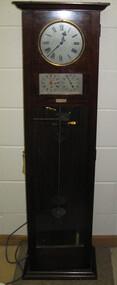 Federation University Historical Collection
Object, Synchronome Co. Ltd, Synchronome Frequency Checking Master Clock No. 2191, c1930
Information from Norman F. Dalton: Ballarat had a reticulated DC supply in the early part of last century and in 1905 had sufficient generating capacity to enable the trams to be changed from horse drawn to DC electricity. The use of electricity increased with the main power station located on Wendouree Parade, near Webster Street, under the ownership of The Electric Supply Company of Victoria. AC generating plant was installed in 1925 and conversion to AC proceeded. In 1934 the company was taken over by the State Electricity Commission Victoria (SECV) and more AC generation was installed and the changeover of customers was accelerated. This is around the time that the Synchronome Frequency Checking Mast Clock was installed at the Wendouree Parade Power Station. The SECV Annual Report of 1921 states: ::Section 11 of the act directed the COmmission to enquire into the question of securing the adoption of such standards of plant and equipment of a system, frequency and pressure for the generation and distribution of electricity as will admit of the efficient interconnection of undertakings throughout the State. In 1934 when the SECV took over the Ballarat operations the question of linking with the State grid had been a planned operation for some years but due to financial considerations had hindered it and in fact would continue to do so for a further 10 years. So while the need for close frequency control for interconnection was hardly an issue, the need to keep electric clocks correct was important, particularly as this item was a frequent sales point to cover the inconvenience and sometimes expense of converting from DC to AC. The clock is a very accurate pendulum clock with provision for varying effective length during operation for precise time regulation. There are two normal time dials and one is controlled by the pendulum and the other is operated by the system frequency. When the clock was in use it was installed by the MEter and Tests Laboratory and the time was checked daily by radio time signals. The two dials were repeated in the operators control panel in the Power Station. A maximum deviation between the two dials was set in the operating instructions (eg 5 seconds) and the operator would correct this when necessary by remote manual alteration of the turbine governor set point. The clock was used to drive and regulate a system of "slave" clocks which were used to display the time in various locations around the power station. A slave clock is a simple clock which is driven by a small electric motor, its accuracy is regulated by the master clock every 30 seconds to ensure that it and all the other slave clocks in the station are on exactly the right time; slave clocks were placed in various locations, from common rooms to workshops. A master clock could potentially run thousands of slave clocks at one plant. The clock also contains a rectifier. A rectifier is a device that is used to convert AC power to more stable DC current.Two clocks in a timber case. Both are electric, one is powered by the main pendulum mechanism, the other is a self contained electric clock. The main mechanism is of the gravity arm and roller type, which sends an impulse to the slave clocks every 30 seconds. The This Synchronome Frequency Checking Master Clock was used at the Ballarat Power Station. Below the main section of the case is a smaller cabinet containing a rectifier to provide consistent DC power for the clock. The rectifier was made by the Victorian company Hilco, which was located in Burwood. There is a high chance this is not the original rectifier from this clock as there appears to be brackets to hold a larger device in the space the rectifier occupies.Front below main clock face on front of case: "Patented Sychronome Brisbane" Lower left-hand clock face: "Frequency time" Lower right-hand clock face: "Standard Seconds" Synchronous electric clock mechanism on door (Frequency time clock): >200/250 V. 50~ >"Synchronomains" Made in England >Direction indicator for clock starting switch >"To start move lever in direction of arrow and release" >"Patent applied for" Mechanism for "standard seconds" clock: >"English Made" >"Patented" >Serial number "321" >0 above right-hand pillar on front-plate Mechanism for "standard seconds" clock: >"English Made" >"Patented" >Serial number "321" >0 above right-hand pillar on front-plate Mechanism for main clock face: >"English Made" >"Patented" >Serial number "8751" >0 above right-hand pillar on front-plate Inside case, back panel, top enamel plate: >Seconds Battery + Pos. > Battery Common or - Neg. >1/2 min dials Inside case, back panel, bottom enamel plate: external seconds dial Inside case, right hand side, electrical knobs: two switches, both "A.C. mains" Pendulum rod, below suspension spring: Serial number (?) 0000005 Rectifier in bottom cabinet: >"Hilco Rectifier" >"A.C. Volts 230/240" >"Model 1060/S" >"A.C. Amperes" >"Serial No. 1060/S >"Phases 1" >"D.C. Volts 6" >"C.P.S. 50" >"D.C. Amperes 1" >"Made in Australia by Hilco Transformers McIntyre St., Burwood, Victoria." Bakelite electrical plug: makers mark Lower cabinet, RH side panel, pressed tin plate: "AC" (upside down) Brass speed adjustment, outer right RH side: "S" and "F" Ivory and wood pendulum beat ruler: >Ruler, with 0 in centre and numbers 1-5 in ascending order from centre on left and right. > "Synchronome Patent." Steel plate, back panel, inside case, right hand side: >N R A" (descending) >"2191" serial number/part number Face of main clock: "Synchronome Electric" synchronome frequency checking master clock, electricity, state electricity commission, wendouree parade power station, secv, clock, time, pendulum, electric supply company of victoria, norman f. dalton, ballarat power station, rectifier, slave clock -
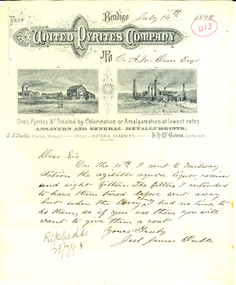 Federation University Historical Collection
Letter - Correspondence, Letter on Bendigo United Pyrites Company Letterhead, 1898, 1898
"The United Pyrites Company's Works are situated about three quarters of a mile from Spargo Brothers, and are on the northern side of the Marong road, in Pinch-gut Gully. Two processes are followed at these works, viz., the amalgamating process and the treatment by means of chlorine gas. The latter is called the Newbery-Vautin system, and the mode pursued is that laid down by Mr. Cosmo Newbery and Mr Vautin, whose names have been given to the process. Mr. Edwards manages these works. Three reverbatory furnaces are used to roast the pyrites, which is weighed in the truck before being put into the furnaces. At this weighbridge a sample of each lot is kept, and if the yield is not equal to expectation, the works are carefully gone over to see where the fault occurs. Care is taken at the furnace to regulate the heat, otherwise the pyrites might slag instead of roasting evenly right through. An immense revolving furnace (made of boiler iron) was used at these works. It was found to be suitable for treating blanket sand, but was not a success for roasting coarse pyrites. The process of amalgamating by means of Chilian mills is the same in these works as at the Western Works, but the United Works are on a larger scale, and eleven mills are utilised. It is the chlorine gas process which is most interesting here. The gas is made from sulphuric acid, black oxide of manganese, and common salt, and the gas is introduced into huge vats, where it works its way through a filter of pieces of quartz and then through the bed of roasted pyrites lying above. The action of the gas transforms the gold into chloride of gold. This is easily dissolved in water, and in that form is drawn off into huge delf jars, where the use of sulphate of iron precipitates the gold to the bottom. A small battery—eight head of stamps in two boxes—is in use here to crush small consignments of stone sent for trial. Test crushings come from all the Australasian colonies, and even from India. The jars used are manufactured at Epsom, and some of the salt used is also of home manufacture, from the Salt Lakes on the Northern plains. Mr. Edwards took us over a new building in course of erection, and in which the chlorine gas is to be generated in the midst of the pyrites— a still further advancement in the new process. There is some very good machinery in this new building, and the tailings from the ordinary pyrites works will also be treated by this chlorine gas system, which has been found to work well at Mount Morgan, in Queensland. The purest of gold is obtained by this process, the gold passing in solution into a charcoal filter, from which it emerges in the shape of metallic gold. We saw some nice cakes of retorted gold at the works. One of 26oz. was from some New Zealand pyrites (2½ tons), and assayed over 23 carats. There were also cakes of Avoca gold, of silver, and of the tremulous amalgam." (The Argus, 4 February 1887)Two handwritten letters to the Ballarat School of Mines on Bendigo United Pyrites Company Letterhead.bendigo united pyrites company, pyrites, ballarat school of mines, j.j. deeble, joel deeble, joel james deeble, a.m. dean, fred j. martell, martell, s.h. cowan, letterhead -
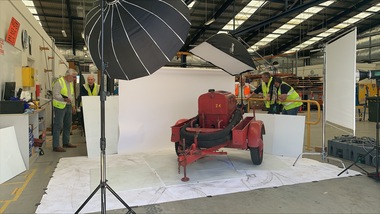 Department of Energy, Environment and Climate Action
Altona Collection Photography and Cataloguing - November 2024
In November 2024, a small group of cheerful volunteers from the Forests Commission Retired Personnel Association (FCRPA) toiled over nine days to dust-off, photograph and record nearly 300 artifacts in DEECA's Altona Museum. It followed a similar project at the FCRPA's Beechworth Museum in February 2024. The Altona project was generously supported by DEECA / FFMVic to engage professional photographer Mark Jesser from Wodonga whose boundless energy and good humour helped to create these amazing images. Special thanks go to the FFMVic Chief Fire Officer, Chris Hardman, as well as Andrew Stanios and Kat Jensen for making it happen. FFMVic crews and the ever-patient staff from Altona took a strong interest and also helped to shift some of the heavy items like pumps and the Bedford tanker which was very welcome. The Forests Commission and its successors continuously encouraged bushfire research and innovation. In 1946 a large parcel of industrial land was purchased at North Altona as a fire cache and workshop. The Altona workshop became a hotbed of new technological thingumajigs… a marvellous blend of Aladdin’s Cave of Wonders coupled with Wallace and Gromit’s madcap contraptions… an exhilarating place where lots of gizmos were invented and tested… mostly with astounding results... but nearly always with some head-scratching frustrations… and thankfully not too much explosive mayhem. In fact, a lot of Australia’s pioneering equipment development was led by staff from Altona, often in collaboration with other State forestry and fire authorities. The CSIRO also contributed significantly. The US Forest Service, the US Bureau of Land Management and US State agencies such as the California Department of Forestry and Fire (CalFire) as well as the Canadian Forest Service faced similar challenges and proved strong and willing partners in sharing knowledge, ideas, equipment and expertise over many decades. The collection at Altona started in the 1970s by fire equipment wizard Barry (Rocky) Marsden. As obsolete equipment was returned to the Fire Protection Workshop for auction, Rocky began the process of selecting some which would be interesting to retain and display. The items at Altona represent just a small sample of the amazing story of Victoria's forestry and bushfire heritage. The largest item was undoubtedly the Bedford tanker which took two days and nearly 1000 photos which were later stitched together with photoshop. The oldest item is probably the Ericsson wall telephone from 1904. There are also many unique items, but the CSIRO incendiary machine and ping-pong incendiary machine developed at Altona probably had the most significant impact on fire management in Australia. There are plenty of gaps in the collection, but some items are in regional DEECA offices. It’s hoped to merge the FCRPA's Beechworth collection to Altona one day and rename the site to honour Rocky Marsden. There may be some additions to the Altona museum over time, but space is limited. The museum is available to visit by appointment. Peter McHugh - January 2025 forests commission victoria (fcv) -
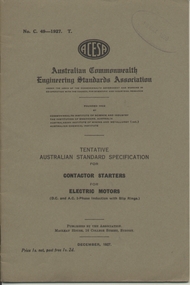 Ballarat Tramway Museum
Book, Australian Commonwealth Engineering Standards Association, "Contactor Starters for Electric Motors", "Dimensions of insulated annealed copper conductors for electric power and light including voltage tests", "Vulcanised Fibre for Electrical Purposes", "Bus-bars and connections constructed of bare copper or aluminium", "Fixed Condensers for Radio Reception Purposes", "Graphic (Recording or chart recording) ammeters, voltmeters and wattmeters.", "5-Amp two pin wall plugs and sockets for domestic purposes (without earthing connection)", "Electric Cable Soldering Sockets", "Graphical Symbols and Schedule of Outlets for the Electrical Equipment of Buildings", "Porcelain Insulators for overhead powerlines and outdoor switching Structures", 1927-1939
.1 - Book - 28 pages + grey covers, side stapled, issued by the Australian Commonwealth Engineering Standards Association, Tentative Australian Standard - "Contactor Starters for Electric Motors" C49-1927, December 1927. .2 - Book - 56 pages + grey covers, side stapled, issued by the Australian Commonwealth Engineering Standards Association, Tentative Australian Standard - "Dimensions of insulated annealed copper conductors for electric power and light including voltage tests" C50-1928, June 1928. .3 - Book - 36 pages + grey covers, side stapled, issued by the Australian Commonwealth Engineering Standards Association, Tentative Australian Standard - "Vulcanised Fibre for Electrical Purposes" C51-1928, May 1928. .4 - Book - 16 pages + grey covers, side stapled, issued by the Australian Commonwealth Engineering Standards Association, Tentative Australian Standard - "Bus-bars and connections constructed of bare copper or aluminium" C52-1928, May 1928. .5 - Book - 16 pages + grey covers, side stapled, issued by the Australian Commonwealth Engineering Standards Association, Tentative Australian Standard - "Fixed Condensers for Radio Reception Purposes" - C53-1928, February 1928. .6 - Book - 32 pages + grey covers, side stapled, issued by the Australian Commonwealth Engineering Standards Association, Tentative Australian Standard "Graphic (Recording or chart recording) ammeters, voltmeters and wattmeters." C54-1928 March 1928. .7 - Book - 20 pages + grey covers, side stapled, issued by the Australian Commonwealth Engineering Standards Association, Tentative Australian Standard - "5-Amp two pin wall plugs and sockets for domestic purposes (without earthing connection)" C55-1928, August 1928, .8 - Book - 24 pages + grey covers, side stapled, issued by the Australian Commonwealth Engineering Standards Association, Tentative Australian Standard "Electric Cable Soldering Sockets" C56-1929, March 1929. .9 - Book - 8 pages + brown covers, side stapled, issued by the Australian Commonwealth Engineering Standards Association, Australian Standard "Graphical Symbols and Schedule of Outlets for the Electrical Equipment of Buildings" C64 and 65-1935, October 1935. .10 - Book - 24 pages + brown covers, side stapled, issued by the Australian Commonwealth Engineering Standards Association, Australian Standard "Porcelain Insulators for overhead powerlines and outdoor switching Structures" C67-1939, August 1939. On top right hand corner has the date stamp of the "The Electric Supply Co. of Victoria Ltd Ballarat" for items .1 to .8, SEC stamp on .10. trams, tramways, power station, standards, materials, electrical systems -
 Melbourne Tram Museum
Document - Folder, William Pollock, "The Melbourne Cable Tramway System", c1940
Folder - heavy red covers with two screw sets containing a photocopy of a report by William Pollock, prepared after the closure of the cable tram system titled ""The Melbourne Cable Tramway System". Image numbers listed: Folder – htd4715i1 Inside of folder – htd4715i2.jpg Report –Photocopy of a 14 foolscap sheets, paper titled “The Melbourne Cable Tramway System” by William Pollock, describing the system in detail, listing 26 appendices. Has notes on each Power Station, including a table of opening, closing, power produced and cables, fuel, permanent way (track), cables, underground gear, tunnels, flooding and the grip. Image – htd4714i3.pdf Appendix 1 – Handwritten table “Cost the Melbourne Tramway System” – photocopied special size sheet folded. See image htd4715i4.jpg 2 – Drawing – Typical Power House layout - image htd4715i5.jpg 3 – Drawing – Head of Cable Driver – htd4715i6.jpg 4 – Drawing – Rope Drive – htd4715i7.jpg 5 – Photocopy of a Fuel and Water test sheet for the Esplanade Power House – two sheets – 14/5/1918 – htd4715i8.jpg and htd4715i9.jpg 6 – Section of Cable Tram track – htd4715i10.jpg 7 – Tar Burner used by MTOC 1893 – 1900 - htd4715i11.jpg 8 – Yoke Bracket for line drums – A1 Pulley – htd4715i12.jpg 9 – Tunnel Yoke – htd4715i13.jpg 10 – Elevating Wheel or Pulley with shield plate – htd4715i14.jpg 11 – Curve Pulleys, curve drum and rubbing bar – 2 sheets – htd4715i15.jpg and htd4715i16.jpg 12 – Curve or Conical drum – htd4715i17.jpg 13 – Cable Separating pulley or cone line drum – htd4715i18.jpg 14 – Yoke Pulley or General Pulley – htd4715i19.jpg 15 – Yoke Bracket for Drums – htd4715i20.jpg 16 – Automatic Switch Gear – htd4715i21.jpg 17 – Hand operated switch gear – htd4715i22.jpg 18 – Hand pickup – htd4715i23.jpg 19 & 20 – Photo of bunched strands and damaged cable – htd4715i24 21 – Diagram of Rope – Clarendon St Rope No. 41 – htd4715i25.jpg 22 – Strand Alarm – htd4715i26.jpg 23 – Rope History – two sheets – htd4715i27 and htd4715i28.jpg 24 – Rope Splice – htd4715i29.jpg 25 – Cable Grip – htd4715i30.jpg 26 – Crown Pulley – two sheets – htd4715i30 and htd4715i31trams, tramways, drawings, tramcars, cable trams, trackwork, mto co, reports -
 Melbourne Tram Museum
Letter - Correspondence, Melbourne & Metropolitan Tramways Board (MMTB), "Trolley Buses", 1922-23
File containing correspondence between the MMTB Chief Engineer Mr. Strickland and various companies, including Railless Ltd, Australian General Electric, English Electric / Dick Kerr and its UK consultants Heap and Digby between the period August 1922 and January 1923. Includes drawings, technical specifications and a book titled "AEC Railless Trolley Bus Specification", date stamped 15/8/1922. For a scan of this document see htd535-trolleybus.pdf (imaging not working correctly for this database as at 9-8-14) For a listing of the contents of this file and of Reg Item 535, see Related Documents - htd535-536list.pdf Item 535 - Trolley Buses Listed from top of file, in order found. Letters generally to/from MMTB Chief Engineer. Date Type, contents and notes 18/11/1922 Letter to Metro Vickers from Chief Engineer re Railless trams 12/1/1923 Letter to Aust GE re railless trams Not likely to proceed at this time. 11/1/1923 Letter from Aust GE Co. providing photographs, drawings, BTH, pamphlets, and general information. Includes photo of Tee-side trolley bus No. 17. No other papers with this item. 6/9/1922 Letter to Aust. GE asked for particulars and drawings of motor omnibuses These three items pinned together. 5/9/1922 Letter to Chief Engineer from Aust. GE provided up to date figures on BTH Railless vehicles. These three items pinned together. 31/8/1922 Letter to Aust GE returning folded of data in relation to petrol and petrol electric cars. These three items pinned together. 24/10/1922 Letter to Heap & Digby, thanks for information, but unlikely to use trolley buses due to poor road conditions where they could be used in terms of revenue. 14/9/1922 Letter from Heap & Digby, inclosing photos of Railless Ltd vehicles supplied to Bloemfontein South Africa and testing. These two items clipped together with drawing No. SK 14-8, showing Mexborough gradients. 28/8/1922 Letter from AEC to Heap & Digby re trolley buses, construction costs and practicality of shipping these to Aust. Includes the Mexborough test results. These two items clipped together with drawing No. SK 14-8, showing Mexborough gradients. 3/8/1922 to 31/10/22 Correspondence between MMTB and H&D regarding the Bloemfontein vehicles. Pinned together. 17/11/1922 Letter from Metro Vickers to MMTB providing details (no photos or drawings) of trolley buses – four pages. 18/1/1923 Letter to H&D thanking him for information and a paper ready by a Mr. Munro. 31/8/1922 Letter to Metro Vic – Melbourne asking whether Westinghouse had developed standard lines of motors for railless cars. 4/10/1922 Letter to Aust GE thanking for info. 2/10/1922 Letter from Aust GE providing two cuttings about railless vehicles in Birmingham and the cost of tram track construction. Papers Contained within a green strip of cloth. 26/9/1922 Letter from H&D providing info from EE – Dick Kerr Preston works equipment used by Railless Ltd. EE Specification for DK 26B Trackless trolley motors 18/9/1922 Letter from EE to H&D providing info on 20HP motors, 40HP, and other information. Blueprint – drawing 2810 – DK 26 Motor Performance curves for above motor Blueprint – No. 1312D – controller diagram Pamphlet – EE – tramcar Type D automatic circuit Breakers. Publication No. 230, dated 9/1920. Ditto, Form A, drawings No 3565, 1/1/19. Performance curves – blueprint – Type DK85A Blueprint – 4449 – outline of controller DK, Type D, form B. Blueprint – P2002M034 – DK85 Motor. EE specification for Traction Motor DK85 Modified from a tram motor. EE blueprint P2102F021, traction control wiring for form D controller. EE blueprint P2103F033 – outline of controller type SE1, form C and D. EE blueprint P2102Z011 – wiring diagram for type SE1 form controller. Performance curves for DK85A motor. EE blueprint – P2102F025 – diagram of connections (wiring) for Type SE1, form D controller. Blueprint – EE drawing – P2002M036 – DK85 motor with ball bearings. Single documents. Date Type Notes 27/9/1922 Letter to H&D acknowledging AEC Trackless trolley bus specification. 15/8/1922 Letter from H&D forwarding above specification String bound book – AEC Railless Trolley Bus Specification – stamped 15/8/22 Scanned as a separate document. 4/9/1922 Letter from Metro Vic. Melbourne advising that they have no information on Westinghouse Motors for use in railless cars, but seeking same.trams, tramways, trolley buses, melbourne, mmtb, aec, heap and digby, english electric, railless, dick kerr, general electric -
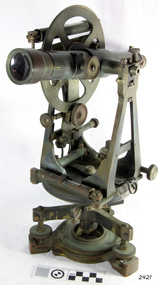 Flagstaff Hill Maritime Museum and Village
Theodolite, Troughton & Simms, Mid 19th Century
The theodolite was sold by T. Gaunt & Co. of Melbourne, a manufacturer, importer and retailer of a wide variety of goods including jewellery, clocks and watches, navigational and measuring instruments, dinnerware, glassware and ornaments. Thomas Gaunt photograph was included in an album of security identity portraits of members of the Victorian Court, Centennial International Exhibition, Melbourne, 1888. (See further details below.) History for Troughton & Simms: Edward Troughton & William Simms established a scientific instrument making business in London in 1826. Edward Troughton (1756-1835) had previously had his own scientific instrument business, inherited from his father. His achievement's included a transit telescope for Greenwich Observatory (1816) and the precision surveying instruments for the Ordnance Survey of Britain, Ireland and India. William Simms (1793-1860) had trained as a goldsmith and began to gain work dividing circles on fine astronomical instruments. When William Simms died in 1860, the business was taken over by his son James and nephew William. Troughton & Simms shop in Fleet Street became the hub of the finest scientific instrument made in London, in a period in which there was an expanding demand for precision instruments, for astronomy, surveying and precision measurement. They made instruments for Greenwich Observatory, for imperial surveys and exploring expeditions. When fire destroyed the Houses of Parliament in 1834, the firm was commissioned to create new standard lengths, this required 10 years of testing against the remaining old measurements. Troughton and Simms made several of the main instruments for Melbourne Observatory, including an 18 inch azimuth used of the Geodetic Survey, portable transit instrument (circa 1850), zenith sector (1860), a 4.5 inch equatorial telescope (1862), an 8 inch equatorial telescope (1874) spectroscope (1877) and an 8 inch transit instrument in (1884). While the firm had an excellent reputation for quality the company exasperated many of its customers with delays of years in delivering some instruments. History for Thomas Gaunt: Thomas Ambrose Gaunt (1829 – 1890) was a jeweller, clock maker, and manufacturer of scientific instruments, whose head office and showroom were at 337–339 Bourke Street, Melbourne, Victoria, Australia. Thomas Gaunt established Melbourne's leading watchmaking, optical and jewellery business during the second half of the 19th century. Gaunt arrived in Melbourne in 1852, and by 1858 had established his own business at 14 Little Bourke Street. Around 1869 he moved to new premises in Bourke Street on the corner of Royal Arcade, Gaunt's shop quickly became a Melbourne institution. Gaunt proudly advertised that he was 'The only watch manufacturer in the Australian colonies'. While many watches and clocks may have had Gaunt's name on the dial, few would have been made locally. Gaunt did make some watches for exhibitions, and perhaps a few expensive watches for wealthy individuals. Gaunt's received a telegraph signal from Melbourne Observatory each day to correct his main clock and used this signal to rate and repair ship's chronometers and good quality watches. Thomas Gaunt also developed a department that focused on scientific instrumentation, making thermometers and barometers (from imported glass tubes), telescopes, surveying instruments and microscopes. Significance: With the rapid urban expansion, one of the most important needs of the new colony was to survey and map the landscape of the Australian Colony’s interior. Theodolites, such as this one, made by Troughton and Simms, who were significant scientific instrument makers of the 19th century were instrumental to the colony's surveyors and would have played an important part in their everyday work. This transit theodolite remains of national significance due to its pioneering role in Australian science and its association with Australia's earliest surveyors and astronomers. It is also significant for its association with nineteenth-century surveying instruments and instrument makers. Theodolite, Vernier repetition theodolite with enclosed horizontal circle (of about 130 mm diameter). Vertical circle exposed and somewhat corroded (diameter about 115 mm). Plate level 20" per division. Altitude bubble 20" per division. Horizontal and vertical circle intervals 20". Original (blue/grey) paint. Altitude bubble setting screw disabled. Tribrach allows movement of theodolite by 15 mm inside tribrach (for centering).Inscribed on the inner mounting plate,“Specially made in England for T Gaunt & Co Melbourne” and inscribed a little lower “Troughton & Simms London”flagstaff hill, warrnambool, shipwrecked-coast, flagstaff-hill, flagstaff-hill-maritime-museum, maritime-museum, shipwreck-coast, flagstaff-hill-maritime-village, theodolite, t. gaunt & co, troughton & simms, scientific instrument, measuring instrument, surveyor's instrument -
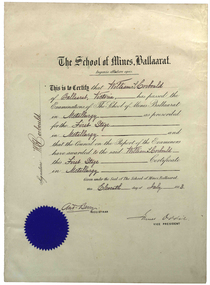 Federation University Historical Collection
Certificate, Ballarat School of Mines, William Corbould's Ballarat School of Mines Metallurgy Certificate, 11/07/1883
William Corbould was the son of a Ballarat tailor. He attended Ballarat College, and obtained certificates in assaying and metallurgy at the Ballarat School of Mines (SMB) in 1883, studying under the revered Professor Mica Smith. Corbould was not a born student and remembered his first experience at SMB: 'From the Registrar's Office I was led to be introduced to the Professor of Chemistry, one Mica Smith. The initial encounter gave me little encouragement - his large laboratory was filled with hundreds of bottles bearing strange labels with queer symbols on them. My heart sank. At the first opportunity I grabbed my hat and made for the door, but the good professor called me back. I pointed out that I was never any good at school ... so it was no use pretending to be clever enough to understand all those weird symbols! The Professor told me not to worry about that and took me to one of the benches where he found a blowpipe and a charcoal block. Mixing together two powders from bottles on the shelf he transferred a sample to the charcoal and directed the bunsen flame onto it. Soon it began to melt and a white bead appeared in front of my eyes. He then took a test tube and added a little colourless liquid from each of two bottles. A beautiful dark blue colour appeared. My interest was won.' During Corbould's mining career he travelled to Europe twice, and visited most of Australia's main mining fields. Corbould started his career as an assayer at Pinnacle Silver Mine, Silverton, and was then a self-employed assayer at Broken Hill. Corbould became an assayer for the infant BHP mine, and later worked in Kalgoorlie and Coolgardie, including managing Hannan's Reward, the oldest gold mine on the Kalgoorlie gold field. He spent 13 years at the Mount Elliott copper fields as general manager. In 1923, at the age of 57, Corbould went to Mount Isa and reported on options, experimented with new metallurgical processes and floated a company. John Carden of CRA said: 'Corbould was the man who brought Urquhart to Mount Isa. He was the man who made it all possible. He is tremendously important in the Mount Isa story, because he was the first technical man, the first professional man on the scene. He was responsible as I said, for bringing finance to the place, but I think even more importantly he was the first man to recognise the need to put all the little claims in the Mount Isa discovery together. I think perhaps his major contribution to Mount Isa was this amalgamation on the various claims. He recognised that the ore bodies at Mount Isa were not as rich as Broken Hill and they would never have survived had it been fragmented, so he was terribly important.' After completing major financial negotiations for Mt Isa Mine from London in 1927 Corbould remained in Europe where he remained until his death. Corbould was awarded the Legion of Honour of the American Institute of Mining and Metallurigical Engineers for fifty years service. Corbould died at Monaco in 1949 at the age of 82. (http://guerin.ballarat.edu.au/curator/honour-roll/honourroll_Corbould,William.shtml)A white paper certificate with black printed and handwritten text, and a blue Ballarat School of Mines seal. The certificate is signed by Andrew Berry (Registrar) and James Oddie (Vice-President).Signed on the left 'W.H. Corbould'mining, ballarat school of mines, mining alumni, metallurgy, james oddie, andrew berry, william corbould, corbould, berry, oddie -
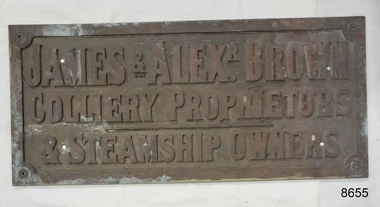 Flagstaff Hill Maritime Museum and Village
Plaque - Nameplate, James & Alexander Brown, 1849 – 1931
This is one of two cast brass nameplates of James & Alexander Brown in our collection. The Newcastle, NSW, firm was renowned for its coal mining and exporting business established in colonial Australia in 1843. The firm had an office in Melbourne and sold coal for commercial use and from the Wharf for the domestic market. The coal was then distributed along the southwest coast of Victoria in steamships or steam packets and into the regional areas of Victoria by cart and wagon. In 1890 there was a strike of coal workers but the Geelong Advertiser, September 1, 1890, announced that “a firm of coal merchants only recently received some large cargoes from Newcastle”. This supply of coal could have originated at the colliery of James & Alexander Brown. About James & Alexander Brown: - James (1816-1894), John (1823-1846) and Alexander Brown (1827-1877) migrated with their parents from Scotland to Sydney, Australia, in 1842. The next year James leased land and was assisted by his brothers Alexander and John in mining coal in the area near Maitland. The market was very competitive, with the government controlling prices. James was instrumental in a legal battle that resulted in the introduction of open competition for coal mining. James and Alexander had become business partners by 1852 and moved south of Newcastle where they established and worked a profitable mining enterprise. Their assets by 1857 included a ships’ chandlery, a fleet of steamships and an overseas trading business. They were the first firm to import rum, sugar and coffee into Newcastle. By 1892 they were exporting coal to New Zealand, China, North America, and various colonial ports. They had elaborate workshops to service their own steam engines and steamships. They were the first to use a steam collier vessel in Australian waters and they set up the second tug boat in Newcastle, the beginning of being owners of many more tug boats and performing a towing business. By 1868 James & Alexander Brown was the largest coal producer in the colony. James focused on managing the colliery and Alexander on overseas trade. It was estimated that the firm had produced over eight per cent of coal in New South Wales by 1914. James & Alexander Brown advertised in the Melbourne Herald in the early 1900s and kept an office at Queen Street, Melbourne as well as at the Wharf, stating their telephone numbers for both places. The coal was available for ‘Immediate Delivery’ for household and industrial purposes. The advertising claimed that their Pelaw Main coal was the famous household coal that met the highest test in Australia and burned bright and clean. Domestic customers could purchase the coal at the wharf or pay for delivery. Commercial customers could load their purchases into their steamships or wagons for further distribution into regional Victoria. After James’s death in 1894 his son John managed the firm, which was also known as J & A Brown. John passed away in 1930 and his sons took over. In 1931 the firm amalgamated with Abermain Seaham and the new name was J & A Brown & Abermain Seaham Collieries Ltd. commonly abbreviated to JABAS, which merged with Caledonian Collieries Ltd in 1960 and Coal & Allied Industries Ltd. was formed. The pair of nameplates is significant for its connection with the firm James & Alexander Brown. The firm was established in 1845 and became one of the largest collieries in colonial Australia. It was involved in trading within Australia and overseas. James was involved in the introduction of open competition for coal mining prices. They were the first to use a steam colliery in Australian waters and the first to import goods such as rum, sugar and coffee into New South Wales. The firm had a Melbourne office in the early 1900s, selling and distributing coal throughout Victoria, which likely included the Port of Warrnambool, which opened in 1890. The nameplates are likely to have originated from the Melbourne location.Brass Entrance Name Plate, one of a pair. Eight holes are formed through the plate; one in each corner, and four more holes are within the inscription area. The cast plate has three rows of text with the company’s name and type of business. The plate was owned by James & Alex. Brown. "JAMES & ALEXR. BROWN / COLLIERY PROPRIETORS / & STEAMSHIP OWNERS"flagstaff hill, warrnambool, maritime museum, maritime village, great ocean road, shipwreck coast, nameplate, james & alexander brown, j & a brown, james & alexr brown, colliery proprietors, steamship owners, ship chandlers, coal mine, coal export, australian import, australian export, newcastle, colliers, coastal trade, steamships -
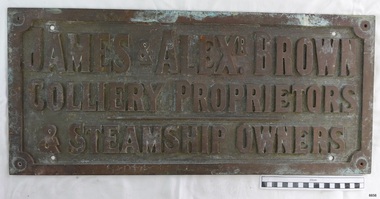 Flagstaff Hill Maritime Museum and Village
Plaque - Nameplate, James & Alexander Brown, 1849 – 1931
This is one of two cast brass nameplates of James & Alexander Brown in our collection. The Newcastle, NSW, firm was renowned for its coal mining and exporting business established in colonial Australia in 1843. The firm had an office in Melbourne and sold coal for commercial use and from the Wharf for the domestic market. The coal was then distributed along the southwest coast of Victoria in steamships or steam packets and into the regional areas of Victoria by cart and wagon. In 1890 there was a strike of coal workers but the Geelong Advertiser, September 1, 1890, announced that “a firm of coal merchants only recently received some large cargoes from Newcastle”. This supply of coal could have originated at the colliery of James & Alexander Brown. About James & Alexander Brown: - James (1816-1894), John (1823-1846) and Alexander Brown (1827-1877) migrated with their parents from Scotland to Sydney, Australia, in 1842. The next year James leased land and was assisted by his brothers Alexander and John in mining coal in the area near Maitland. The market was very competitive, with the government controlling prices. James was instrumental in a legal battle that resulted in the introduction of open competition for coal mining. James and Alexander had become business partners by 1852 and moved south of Newcastle where they established and worked a profitable mining enterprise. Their assets by 1857 included a ships’ chandlery, a fleet of steamships and an overseas trading business. They were the first firm to import rum, sugar and coffee into Newcastle. By 1892 they were exporting coal to New Zealand, China, North America, and various colonial ports. They had elaborate workshops to service their own steam engines and steamships. They were the first to use a steam collier vessel in Australian waters and they set up the second tug boat in Newcastle, the beginning of being owners of many more tug boats and performing a towing business. By 1868 James & Alexander Brown was the largest coal producer in the colony. James focused on managing the colliery and Alexander on overseas trade. It was estimated that the firm had produced over eight per cent of coal in New South Wales by 1914. James & Alexander Brown advertised in the Melbourne Herald in the early 1900s and kept an office at Queen Street, Melbourne as well as at the Wharf, stating their telephone numbers for both places. The coal was available for ‘Immediate Delivery’ for household and industrial purposes. The advertising claimed that their Pelaw Main coal was the famous household coal that met the highest test in Australia and burned bright and clean. Domestic customers could purchase the coal at the wharf or pay for delivery. Commercial customers could load their purchases into their steamships or wagons for further distribution into regional Victoria. After James’s death in 1894 his son John managed the firm, which was also known as J & A Brown. John passed away in 1930 and his sons took over. In 1931 the firm amalgamated with Abermain Seaham and the new name was J & A Brown & Abermain Seaham Collieries Ltd. commonly abbreviated to JABAS, which merged with Caledonian Collieries Ltd in 1960 and Coal & Allied Industries Ltd. was formed. The pair of nameplates is significant for its connection with the firm James & Alexander Brown. The firm was established in 1845 and became one of the largest collieries in colonial Australia. It was involved in trading within Australia and overseas. James was involved in the introduction of open competition for coal mining prices. They were the first to use a steam colliery in Australian waters and the first to import goods such as rum, sugar and coffee into New South Wales. The firm had a Melbourne office in the early 1900s, selling and distributing coal throughout Victoria, which likely included the Port of Warrnambool, which opened in 1890. The nameplates are likely to have originated from the Melbourne location.Brass Entrance Name Plate, one of a pair. Eight holes are formed through the plate; one in each corner, and four more holes are within the inscription area. The cast plate has three rows of text with the company’s name and type of business. The plate was owned by James & Alex. Brown. "JAMES & ALEXR. BROWN / COLLIERY PROPRIETORS / & STEAMSHIP OWNERS"flagstaff hill, flagstaff hill maritime museum and village, warrnambool, maritime museum, maritime village, great ocean road, shipwreck coast, nameplate, james & alexander brown, j & a brown, james & alexr brown, colliery proprietors, steamship owners, ship chandlers, coal mine, coal export, australian import, australian export, newcastle, colliers, coastal trade, steamships -
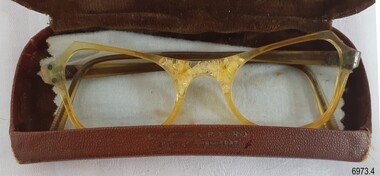 Flagstaff Hill Maritime Museum and Village
Functional object - Spectacles and Case, Carter & Foord, 1902-1930s
The spectacles and case are an example of eyewear from the early 20th century. The case was made by Carter & Foord of Ballarat. According to the tag inside, the spectacles frame cost three pounds, three shillings and sixpence (£3.3.6). Carter & Foord was established in 1902. The firm advertised as opticians, oculists, watchmakers and jewellers. The staff repaired scientific instruments and were sole agents for the gramophone, demonstrating its advantages whenever there was an opportunity. In 1902 the business was located at 46 Lydiard Street, Ballarat. The staff in the ophthalmic department, under the care of Harold Foord, specialised in sight testing using up-to-date equipment and this service was free of charge. Customers were promised that they would be fitted with glasses guaranteed to correct the most complex sight. Mr F M Clacius performed the grinding of specific lenses. Julia Carter, Harold Foord and Clacius were all formerly from the business Carter & Warner, which had been sold to Frederick Clark around 1903 after Mr Carder passed away. Carter & Foord operated a few doors away from the former business. In 1912 advertisements in the Geelong Advertiser invited the community to visit Harold Foord, of Carter & Foord, to have their eyes examined at no charge. These spectacles are similar to others in the W.R. Angus collection, donated by the family of Dr W R Angus, surgeon and oculist. The W.R. Angus Collection spans the years 1885 to the mid-1900s and includes historical medical and surgical equipment and instruments from the doctors Edward and Thomas Ryan of Nhill, Victoria, with whom Dr Angus worked for several years. Dr Tom and his brother had worked as surgeons including in eye surgery. Dr Tom Ryan performed many of his operations in the Mira private hospital on his premises. When Dr Angus bought into the Nelson Street premises in Nhill he was also appointed as the Nhill Hospital’s Honorary House Surgeon 1933-1938. Dr Angus married Gladys in 1927 at Ballarat, the nearest big city to Nhill where he began as a Medical Assistant and had been Acting House surgeon at the Nhill hospital where their two daughters were born. Dr Angus and his family moved to Warrnambool in 1939, where Dr Angus operated his own medical practice. He later took on the part-time role of Port Medical Officer and was the last person appointed to that position. After convalescing from injury resulting from his service during WWII, Dr Angus studied ophthalmology at the Royal Melbourne Eye and Ear Hospital. He created cosmetically superior artificial eyes by pioneering the use of intrascleral cartilage. Angus received accolades from the Ophthalmological Society of Australasia for this work. He returned to Warrnambool to commence practice as an ophthalmologist, pioneering artificial eye improvements. He had been an Honorary Consultant Ophthalmologist at Warrnambool Base Hospital for 31 years. He made monthly visits to Portland as a visiting surgeon, to perform eye surgery. Both Dr Angus and his wife were very involved in the local community, including the planning stages of the new Flagstaff Hill and the layout of the gardens there. Dr Angus passed away in March 1970.The Carter &O Foord spectacles are significant as an example of early 20th-century eyewear and fashion. They are connected to the history of regional Victoria, being made in Ballarat and purchased for local use. The spectacles are significant for being connected to the W.R. Angus Collection, which is important for still being located at the site connected to Doctor Angus, Warrnambool’s last Port Medical Officer. Dr Angus and his wife brought their young family to Warrnambool in 1938 and he remained a resident until his death in 1970. Early in his profession in the town of Nhill, Dr Angus assisted Dr Tom Ryan in his pioneering use of X-rays and in ocular surgery, and Dr Angus later inherited these items. The W.R. Angus Collection includes these medical instruments and other related equipment and is culturally and historically significant as an example of the medical practice of the late 19th to the mid-20th century. Other items in the collection relate to Dr Angus’ service in the Flying Doctor Service and the Army.Spectacles in a hard brown textured case with rounded corners and a hinged lid. The case is lined with brown velvet. The opaque yellow oval frames, raised at the outer top corners, are decorated with sparkling jewell decorations on the bridge. The arms are reinforced with metal inside. Also in the case is a pale blue cleaning cloth and a cardboard price tag with handwritten text. An inscription in gold lettering is stamped inside the case. The case was made by Carter & Foord of Ballarat. The design of the frames is called ‘ewell These spectacles are part of the W.R. Angus Collection.Stamped: “CARTER & FOORD / STURT ST BALLARAT” Handwritten label: “JEWELL / £3.3.6”flagstaff hill, warrnambool, maritime village, maritime museum, shipwreck coast, great ocean road, dr w r angus, dr roy angus, dr ryan, warrnambool oculist, port medical officer, nhill base hospital, mira hospital nhill, oculist, spectacles, eyewear, glasses, carter & foord, ballarat oculist, w.r. angus collection, ophthalmology, royal melbourne eye and ear hospital., artificial eyes, intrascleral cartilage, eye surgery -
 Ringwood and District Historical Society
Book, Elizabeth Dole Porteus, Let's Go Exploring: The Life Of Stanley D. Porteus - Hawaii's Pioneer Psychologist, 1991
White hard covered book. Biography by daughter-in-law of Stanley Porteus, pioneer of modern psychology and one-time resident of Ringwood, Victoria. SUMMARY NOTES. Stanley David Porteus was born in Box Hill, Victoria, Australia in 1883, the only son of a Methodist minister. Like other now large suburbs of Melbourne such as Canterbury, Mitcham and Ringwood, Box Hill was a mere village. Each was surrounded by bush. He grew up like most Australian boys with a love of sport and, although lightly built, did quite well at Australian Rules football and was above average at cricket. He became a schoolteacher with the Victorian Education Department. Promotion within the department depended on experience gained at teaching in tiny rural schools so he applied for such a position at Glenaladale, on the Dargo Road, some 35 miles north west of Bairnsdale. He walked about 6 miles from the nearest railway station at Fernbank to find the school surrounded by virgin forest with only one dwelling in sight. Attached to the school were lean-to rooms that were to be his residence for the next 2 ½ years. He was fascinated by the nearby Den of Nargun and Bull Creek, which joined the Mitchell River in a deep gorge containing a profusion of rainforest vegetation. While at Glenaladale, he met Frances Evans who became his wife. To seek promotion, he left Glenaladale and taught at Leneva and Benambra. While at the latter school, he learned of a position becoming available as superintendent of special schools in Melbourne. As the available means of transport, coach and horses to Bairnsdale, then by train to Melbourne, would not get him to Melbourne before the close of applications, he borrowed a bicycle and rode through the bush to his in-laws home at Lindenow and thus made it before the deadline. He was successful in his application and it set him on a course that lead to him becoming Australia's first Clinical Psychologist. His work, particularly, the development of the Porteus Maze Test, attracted the attention of American educators and he was offered an appointment for a year at Vineland Training School in New Jersey. On a stopover in Honolulu, he was impressed to the extent that he expressed a desire to work there. Not the least of its attractions was the mix of races that offered opportunities to study psychological differences, if any, between various races. His wish was to be granted unexpectedly as he was, in 1919, invited to Honolulu to set up a Psychological and Psychopathic Clinic at the University of Hawaii. From his home in the hills north of Honolulu, on December 7th 1941, he saw the Japanese attack on Pearl Harbour. He lived there until his death in about 1980.