Showing 1965 items
matching victoria railway
-
 Glenelg Shire Council Cultural Collection
Photograph - Photograph - Henty Beach, Portland, Victoria, 1920s
Possibly from Bowerbird MuseumBlack and white photo of Henty Beach, showing beach, railway, pier, baths. Cars on beach in foregroundFront: 'The beach Portland' black print lower borderhenty beach -
Glenelg Shire Council Cultural Collection
Photograph - Contact Print - Portland, Victoria, 1970s
Set of 3 pairs of stereoscopic contact prints from glass plate negatives. Top: View from hill overlooking homestead and outbuildings. Middle: paddocks, fence, sheep run. Bottom: View from south side Cliff Street - looking north along Bentinck Street railway cutting to station.portland scene, bentinck street, street scene, photography -
Glenelg Shire Council Cultural Collection
Photograph - Photograph - Portland Harbour, Victoria, n.d
Black and white photo. View of Portland Harbour from Lighthouse Bluff. Baths, Ocean Pier, Railway Pier, Fishermen;s Breakwater in backgroundBack: 'Panorama of Portland Harbour from Lighthouse Bluff' - handwritten, black pen -
Glenelg Shire Council Cultural Collection
Photograph - Contact Print - Scenes of Portland, Victoria, 1970s
Sheet of 12 contact prints of rephotographed photographs: (a) 5 young women on dam wall (b) sailors (c) Bentinck Street, looking north from Post Office (d) Julia Street looking east from Percy Street (e) Railway line and Duttons (Nuns) Beach towards Whalers Bluff (f) Fawthrop Lagoon (g) sailors (h) Post Office (i) River, bush close to banks both sides (j) Botanic Gardens (k) Town and Port of Portland reproduced from III London News (l) North side, Julia Street looking west, Bank AustralasiaFront: (c) Bentinck Street approx. 1900 (d) Julia Street, portland Nicholls (h) Portland Post Officeportland scene, street scene, photography, portland harbour, portland seafront, julia street -
Glenelg Shire Council Cultural Collection
Photograph - Photograph - Portland, Victoria, 1970s
Photographic print of a rephotographed photograph. Image shows the Golden Fleece/Tasmanian Inn/Railway/Club Hotel. Corner Gawler and Bentinck Streets, one building, two separate roof lines. Front door on diagonal corner. Group of people on footpath (Percy Street) outside hotel. Roads not made.Front: 'The Club Hotel-Percy/Gawler' - black ink Back: 'Old Club Hotel Gawler/Percy St corner' - blue biroportland town, street scene, percy street, bentinck street, gawler street -
Glenelg Shire Council Cultural Collection
Photograph - Photograph - Henty Beach Portland, Victoria, n.d
Black and white photo of a painting, looking north from Henty Beach, Baths, railway pier with three-masted vessel. -
Glenelg Shire Council Cultural Collection
Map, 1885
Significant collection relating to the social history across the shire.Map, Victoria. Skeleton map of Telegraph Circuits and Railways 1885. Scale 16 miles to 1 inch.map, skeleton map, telegraph, railways, 1885, 1880s -
Glenelg Shire Council Cultural Collection
Map, Railway Map of Victoria, n.d
... Railway Map of Victoria... of Victoria Railway map, paper on fabric backing, wooden support top ...Port of Portland CollectionFront: verso - 'Way and Works branch railway Department Melbourne Dec 1954.'port of portland archives, railway, map, 1954, 1950s -
 Flagstaff Hill Maritime Museum and Village
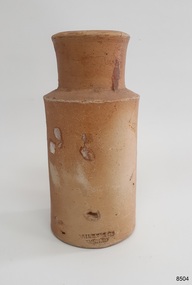
Container - Earthenware jar, Bailey & Co, circa 1878
The handmade earthenware jar was one of a group of artefacts in the McCulloch Collection that were recovered from the shipwreck Loch Ard. The jar could have been from the ship's cargo or personal effects. There are other jars in our collection that were recovered from the Loch Ard. The object is now one of the shipwreck artefacts in Flagstaff Hill’s Mc Culloch Collection, which includes items recovered from the wrecks of the Victoria Tower (wrecked in 1869) and Loch Ard (wrecked in 1878). They were salvaged by a diver in the early 1970s from the southwest coast of Victoria. Advanced marine technology had enabled divers to explore the depths of the ocean and gather its treasures before protective legislation was introduced by the Government. The artefacts were donated to Queensland’s Department of Environment and Heritage Protection (EHP) by a passionate shipwreck lover and their locations were verified by Bruce McCulloch. In 2017 the Department repatriated them to Flagstaff Hill where they joined our vast collection of artefacts from Victoria’s Shipwreck Coast. The Loch Ard: - The three-masted, square-rigged iron ship Loch Ard belonged to the famous Loch Line which sailed many ships from England to Australia. The ship was built in Glasgow in 1873. The Loch Ard made three trips to Australia and one trip to Calcutta before its final voyage. The Loch Ard left England on March 2, 1878, under the command of Captain Gibbs, bound for Melbourne with a crew of 37, plus 17 passengers and a load of cargo. The general cargo included straw hats, umbrellas, perfumes, clay pipes, pianos, clocks, confectionery, linen and candles, as well as a heavier load of railway irons, cement, lead and copper. There were items included that were intended for display in the 1880 Melbourne International Exhibition, including the famous Loch Ard Peacock. On June 1, 1878, Captain Gibbs was expecting to see land but visibility was reduced by fog. As it lifted, the sheer cliffs of Victoria's west coast came much closer than expected. The captain was unable to steer away and the ship struck a reef at the base of Mutton Bird Island, near Port Campbell. The top deck was loosened from the hull, the masts and rigging came down and knocked passengers and crew overboard, and even the lifeboat crashed into the side of the ship and capsized. Of the 54 people on board, only two survived: the apprentice, Tom Pearce and the young woman passenger, Eva Carmichael. The well-packed Minton porcelain peacock also survived, safe inside its crate. Much of the cargo was washed up, smashed and broken, and some was salvaged. Other cargo is still with the wreck at the base of Mutton Bird Island, now protected by Government law. The artefact is an example of cargo or personal items on board a ship in 1878. It provides a reference point for classifying and dating similar items. This artefact is significant for its association with the sailing ship Loch Ard, one of the best-known, and one of the worst, shipwrecks in Victoria’s history. Flagstaff Hill’s collection of artefacts from Loch Ard is significant for being one of the largest collections of artefacts from this shipwreck in Victoria. It is significant for its association with the shipwreck, which is on the Victorian Heritage Register (VHR S417). The collection is significant because of the relationship between the objects, as together they have a high potential to interpret the story of the Loch Ard. The Loch Ard collection is archaeologically significant as the remains of a large international passenger and cargo ship. It is historically significant for representing aspects of Victoria’s shipping history. Container, round brown earthenware jar with a wide mouth, thick lip, a wide neck that tapers slightly inwards towards the shoulder, and a body that tapers slightly inward towards the base. The glazed surface is rough. The variegated colours of the clay also has small dark speckles. There are several chips and dents on the jar. The inscription is stamped into the lower edge. Made by Bailey & Co., England. Recovered from the wreck of the Loch Ard.Inscription “Bailey [&] Co / ENGLAND” flagstaff hill, warrnambool, flagstaff hill maritime museum, maritime museum, shipwreck coast, flagstaff hill maritime village, great ocean road, white star line, victorian heritage register, sailing ship loch ard, loch line, loch ard, captain gibbs, eva carmichael, tom pearce, glenample station, mutton bird island, loch ard gorge, migrant ship 1878, cargo ship 1878, stoneware jar, domestic container, kitchenware, kitchen storage, bailey & co england, shipwreck artefact, wreck dive, mcculloch collection, bruce mcculloch, 1878, sailing ship, earthenware, stoneware, domestic jar -
 Flagstaff Hill Maritime Museum and Village
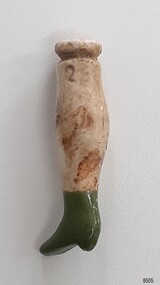
Leisure object - Doll's Leg, circa 1878
This doll's leg was one of a set of artefacts recovered from the shipwreck of the Loch Ard that were donated together. The doll's leg could have been from the ship's cargo or personal effects. Dolls from this era were often made from fabric, which would have quickly deteriorated in the ocean. Ceramic limbs were joined to the body by tightening the fabric around the grooves on the limbs. There are other doll's limbs in our collection that were recovered from the Loch Ard The object is now one of the shipwreck artefacts in Flagstaff Hill’s Mc Culloch Collection, which includes items recovered from the wrecks of the Victoria Tower (wrecked in 1869) and Loch Ard (wrecked in 1878). They were salvaged by a diver in the early 1970s from the southwest coast of Victoria. Advanced marine technology had enabled divers to explore the depths of the ocean and gather its treasures before protective legislation was introduced by the Government. The artefacts were donated to Queensland’s Department of Environment and Heritage Protection (EHP) by a passionate shipwreck lover and their locations were verified by Bruce McCulloch. In 2017 the Department repatriated them to Flagstaff Hill where they joined our vast collection of artefacts from Victoria’s Shipwreck Coast.The Loch Ard: - The three-masted, square-rigged iron ship Loch Ard belonged to the famous Loch Line which sailed many ships from England to Australia. The ship was built in Glasgow in 1873. The Loch Ard made three trips to Australia and one trip to Calcutta before its final voyage. The Loch Ard: - The Loch Ard left England on March 2, 1878, under the command of Captain Gibbs, bound for Melbourne with a crew of 37, plus 17 passengers and a load of cargo. The general cargo included straw hats, umbrellas, perfumes, clay pipes, pianos, clocks, confectionery, linen and candles, as well as a heavier load of railway irons, cement, lead and copper. There were items included that were intended for display in the 1880 Melbourne International Exhibition, including the famous Loch Ard Peacock. On June 1, 1878, Captain Gibbs was expecting to see land but visibility was reduced by fog. As it lifted, the sheer cliffs of Victoria's west coast came much closer than expected. The captain was unable to steer away and the ship struck a reef at the base of Mutton Bird Island, near Port Campbell. The top deck was loosened from the hull, the masts and rigging came down and knocked passengers and crew overboard, and even the lifeboat crashed into the side of the ship and capsized. Of the 54 people on board, only two survived: the apprentice, Tom Pearce and the young woman passenger, Eva Carmichael. The well-packed Minton porcelain peacock also survived, safe inside its crate. Much of the cargo was washed up, smashed and broken, and some was salvaged. Other cargo is still with the wreck at the base of Mutton Bird Island, now protected by Government law. The artefact is an example of cargo or personal items on board a ship in 1878. It provides a reference point for classifying and dating similar items. This artefact is significant for its association with the sailing ship Loch Ard, one of the best-known, and one of the worst, shipwrecks in Victoria’s history. Flagstaff Hill’s collection of artefacts from Loch Ard is significant for being one of the largest collections of artefacts from this shipwreck in Victoria. It is significant for its association with the shipwreck, which is on the Victorian Heritage Register (VHR S417). The collection is significant because of the relationship between the objects, as together they have a high potential to interpret the story of the Loch Ard. The Loch Ard collection is archaeologically significant as the remains of a large international passenger and cargo ship. It is historically significant for representing aspects of Victoria’s shipping history. Doll's leg, cream-coloured ceramic leg with two seams, a flat solid top and a glazed green ankle-length heeled boot. A shallow groove runs around the leg just below the top. An inscription is stamped into the leg below the groove. Recovered from the wreck of the Loch Ard. Inscribed "2"flagstaff hill, warrnambool, maritime village, maritime museum, flagstaff hill maritime museum and village, shipwreck coast, great ocean road, shipwreck artefact, wreck dive, mcculloch collection, bruce mcculloch, loch ard, 1878, loch line, victorian heritage register, sailing ship, captain gibbs, eva carmichael, tom pearce, mutton bird island, loch ard gorge, migrant ship 1878, cargo ship 1878, doll's leg, ceramic doll leg, porcelain doll leg, doll's limb, 1870s doll, 1870's toy, ceramic limb from doll, children's toy, children's recreation, doll's leg with green boot -
 Flagstaff Hill Maritime Museum and Village
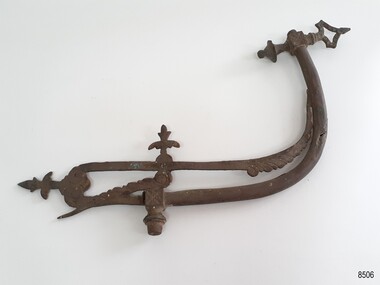
Functional object - Lamp Fitting, circa 1878
This gas pipe fitting was one of a group of artefacts in the McCulloch Collection that were recovered from the shipwreck Loch Ard and were donated together. The fitting could have been from the ship's cargo or a ship’s fitting. Lamps from this era were fuelled by gas. There are other gas lamp fittings in our collection that were recovered from the Loch Ard The object is now one of the shipwreck artefacts in Flagstaff Hill’s Mc Culloch Collection, which includes items recovered from the wrecks of the Victoria Tower (wrecked in 1869) and Loch Ard (wrecked in 1878). They were salvaged by a diver in the early 1970s from the southwest coast of Victoria. Advanced marine technology had enabled divers to explore the depths of the ocean and gather its treasures before protective legislation was introduced by the Government. The artefacts were donated to Queensland’s Department of Environment and Heritage Protection (EHP) by a passionate shipwreck lover and their locations were verified by Bruce McCulloch. In 2017 the Department repatriated them to Flagstaff Hill where they joined our vast collection of artefacts from Victoria’s Shipwreck Coast. The Loch Ard: - The three-masted, square-rigged iron ship Loch Ard belonged to the famous Loch Line which sailed many ships from England to Australia. The ship was built in Glasgow in 1873. The Loch Ard made three trips to Australia and one trip to Calcutta before its final voyage. The Loch Ard left England on March 2, 1878, under the command of Captain Gibbs, bound for Melbourne with a crew of 37, plus 17 passengers and a load of cargo. The general cargo included straw hats, umbrellas, perfumes, clay pipes, pianos, clocks, confectionery, linen and candles, as well as a heavier load of railway irons, cement, lead and copper. There were items included that were intended for display in the 1880 Melbourne International Exhibition, including the famous Loch Ard Peacock. On June 1, 1878, Captain Gibbs was expecting to see land but visibility was reduced by fog. As it lifted, the sheer cliffs of Victoria's west coast came much closer than expected. The captain was unable to steer away and the ship struck a reef at the base of Mutton Bird Island, near Port Campbell. The top deck was loosened from the hull, the masts and rigging came down and knocked passengers and crew overboard, and even the lifeboat crashed into the side of the ship and capsized. Of the 54 people on board, only two survived: the apprentice, Tom Pearce and the young woman passenger, Eva Carmichael. The well-packed Minton porcelain peacock also survived, safe inside its crate. Much of the cargo was washed up, smashed and broken, and some was salvaged. Other cargo is still with the wreck at the base of Mutton Bird Island, now protected by Government law. The artefact is an example of cargo or personal items on board a ship in 1878. It provides a reference point for classifying and dating similar items. This artefact is significant for its association with the sailing ship Loch Ard, one of the best-known, and one of the worst, shipwrecks in Victoria’s history. Flagstaff Hill’s collection of artefacts from Loch Ard is significant for being one of the largest collections of artefacts from this shipwreck in Victoria. It is significant for its association with the shipwreck, which is on the Victorian Heritage Register (VHR S417). The collection is significant because of the relationship between the objects, as together they have a high potential to interpret the story of the Loch Ard. The Loch Ard collection is archaeologically significant as the remains of a large international passenger and cargo ship. It is historically significant for representing aspects of Victoria’s shipping history. Brass decorative gas lamp fitting. Two flat arms of different lengths are joined on either side of a fitting that has a fleur-de-lis-like design. The shorter arm has a J-shaped brass pipe fitted to it with a decorative threaded cube joint part way along, and ends with a triangular tap and knob. The longer arm is also J-shaped and ends with a feather design on it. There are remnants of green paint on the cube fittings and the knob. Recovered from the wreck of the Loch Ard.flagstaff hill, warrnambool, maritime village, maritime museum, flagstaff hill maritime museum and village, shipwreck coast, great ocean road, shipwreck artefact, wreck dive, mcculloch collection, bruce mcculloch, loch ard, 1878, loch line, victorian heritage register, sailing ship, captain gibbs, eva carmichael, tom pearce, mutton bird island, loch ard gorge, migrant ship 1878, cargo ship 1878, lamp fitting, gas lamp fitting, ship’s fitting, ship’s lamp, brass lamp fitting, lighting, domestic lighting, ship’s lighting -
 Wodonga & District Historical Society Inc
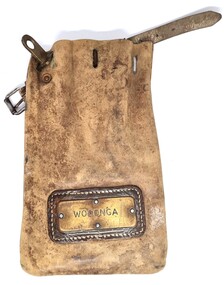
Functional object - Leather pouch and stamps - Cudgewa Railway Line, c1890
Cudgewa Line -The Cudgewa railway line opened in stages between 1889 and 1921. The first section from Wodonga to Huon opened on 10 September 1889. It was extended to Bolga on 18 July 1890, Tallangatta on 24 July 1891 and then to Shelley on 13 June 1916. Shelley was the highest station in Victoria. It extended further on to Beetomba on 10 April 1919 and finally reached Cudgewa on 5 May 1921. The line had 1 in 30 grades and trestle bridges that have been heritage listed. In 1919, the line was used to carry materials for the construction of Hume Weir, and three years later a spur line connecting Ebden to the weir was opened. In the 1960s, Cudgewa became the railhead of materials for the Snowy Mountains Scheme. The last passenger service from Wodonga to Tallangatta ran on 30 September 1961. The turntable and passenger platform at Cudgewa were abolished in 1976. These stamps were used by Joh Murray who for many years worked with Victorian Railways based at Wodonga.A leather pouch with belt and lock. It bears a metal name tag inscribed with name of railway station. The pouch contains 3 station stamps, a date stamp and 2 carriage keys.On pouch WODONGA On stamps: BONEGILLA 1470/ EBDEN 1471/ BANDOLIER 1473cudgewa rail line, victorian railways, closed victorian railways, railway stamps -
 The Beechworth Burke Museum
Photograph - Lantern Slide, c1900
This slide shows a train proceeding along the Beechworth rail trail in approximately 1900. The rail line to Beechworth was the subject of significant lobbying by local officials such as John Orr and G.B. Kerferd in the 1860s, as it was recognised that the poor quality of roads to Melbourne and Albury hindered trade and formed a barrier to the social development of the town. The subsequent positioning of Beechworth on a branch rather than a main line was not considered ideal to achieve these aims, but the Everton-to-Beechworth and Beechworth-to-Yackandandah components of the line cost an average of £7,277 per mile and State Government officials felt the need in the area did not justify the cost of a direct line. The Beechworth Railway Station was officially opened on the 29th of September 1876 and ran services twice daily to Melbourne, transporting nearly 12,000 passengers and around 6,500 tons of cargo in 1900. It closed in 1976 and is today used as a cycling trail used by locals and promoted as a feature of the area to tourists. Lantern slides, sometimes called 'magic lantern' slides, are glass plates on which an image has been secured for the purpose of projection. Glass slides were etched or hand-painted for this purpose from the Eighteenth Century but the process became more popular and accessible to the public with the development of photographic-emulsion slides used with a 'Magic Lantern' device in the mid-Nineteenth Century. Photographic lantern slides comprise a double-negative emulsion layer (forming a positive image) between thin glass plates that are bound together. A number of processes existed to form and bind the emulsion layer to the base plate, including the albumen, wet plate collodion, gelatine dry plate and Woodburytype techniques. Lantern slides and magic lantern technologies are seen as foundational precursors to the development of modern photography and film-making techniques.This glass slide is significant because it provides insight into Beechworth's social amenities and transport infrastructure in the late Nineteenth Century. It is also an example of an early photographic and film-making technology in use in regional Victoria in the time period.Thin translucent sheet of glass with a circular image printed on the front and framed in a black backing. It is held together by metal strips to secure the edges of the slide.burke museum, beechworth, lantern slide, slide, glass slide, plate, burke museum collection, photograph, monochrome, indigo shire, north-east victoria, rail trail, beechworth rail trail, beechworth station, everton, wangaratta, wodonga, albury, rail transport, cargo transport, g.b. kerferd, john orr, murray to mountains rail trail, cycling, biking, railway -
 Victorian Railway History Library
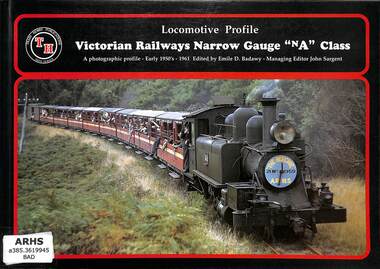
Book, Train Hobby Publications, Locomotive Profile Victorian Railways Narrow Gauge A class, 2000
A photographic profile of the NA 2-6-2 2'6" narrow gauge tank engines of the Victorian Railways in the early 1950s.Ill, p.48non-fictionA photographic profile of the NA 2-6-2 2'6" narrow gauge tank engines of the Victorian Railways in the early 1950s.steam locomotives - victoria- history, puffing billy - victoria - history -
 Victorian Railway History Library
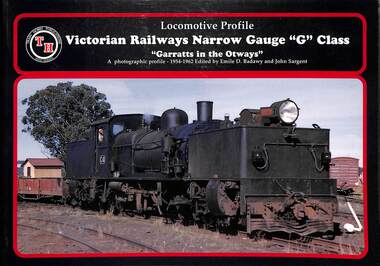
Book, Train Hobby Publications, Locomotive Profile Victorian Railways Narrow Gauge G class: Garratts in the Otways, 1998
A photographic profile of the G class 2-6-0 0-6-2 2'6" narrow gauge Garratt steam locomotive of the Victorian Railways and its time working in the Otways from 1954 to 1962.Ill, p.48non-fictionA photographic profile of the G class 2-6-0 0-6-2 2'6" narrow gauge Garratt steam locomotive of the Victorian Railways and its time working in the Otways from 1954 to 1962.steam locomotives - victoria- history, puffing billy - victoria - history -
 Victorian Railway History Library
Book, Carlisle, Robert, Preserved Engines In Steam, 1982
A description of the preserved steam locomotives in Victoria (possibly in 1982).ill, p.76.non-fictionA description of the preserved steam locomotives in Victoria (possibly in 1982).preserved locomotives - victoria - history, railroads - victoria - history -
 Victorian Railway History Library
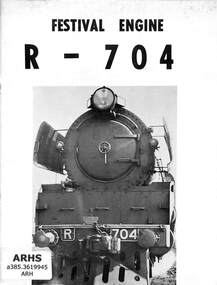
Booklet, Potts, Don, Festival Engine R-704
A history of R704 4-6-4 steam locomotive on the Victorian Railways from introduction to preservation in the ARHS railway museum.ill, p.12.non-fictionA history of R704 4-6-4 steam locomotive on the Victorian Railways from introduction to preservation in the ARHS railway museum.steam locomotives - victoria- history, r class locomotive - victoria - history -
 Victorian Railway History Library
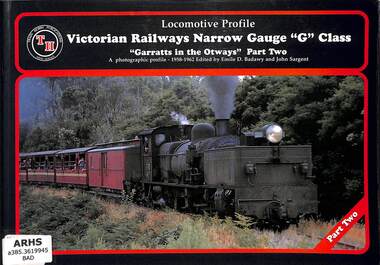
Book, Train Hobby Publications, Locomotive Profile Victorian Railways Narrow Gauge G class: Garratts in the Otways Part Two, 1999
A photographic profile of the G class 2-6-0 0-6-2 2'6" narrow gauge Garratt steam locomotive of the Victorian Railways and its time working in the Otways from 1958 to 1962.Ill, maps, p.56.non-fictionA photographic profile of the G class 2-6-0 0-6-2 2'6" narrow gauge Garratt steam locomotive of the Victorian Railways and its time working in the Otways from 1958 to 1962.steam locomotives - victoria- history, puffing billy - victoria - history -
 Victorian Railway History Library
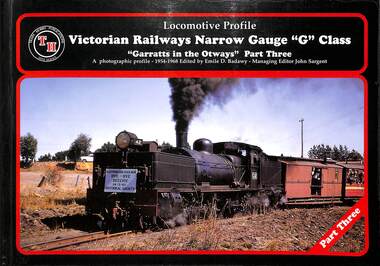
Book, Train Hobby Publications, Locomotive Profile Victorian Railways Narrow Gauge G class: Garratts in the Otways Part Three, 2001
A photographic profile of the G class 2-6-0 0-6-2 2'6" narrow gauge Garratt steam locomotive of the Victorian Railways and its time working in the Otways from 1954 to 1968.Ill, maps, p.48.non-fictionA photographic profile of the G class 2-6-0 0-6-2 2'6" narrow gauge Garratt steam locomotive of the Victorian Railways and its time working in the Otways from 1954 to 1968.steam locomotives - victoria- history, puffing billy - victoria - history -
 Victorian Railway History Library
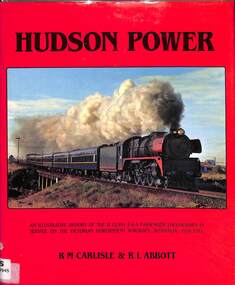
Book, Carlisle, Robert et al, Hudson Power, 1985
An illustrative history of the R class 4-6-4 passenger locomotives in service on the Victorian Government Railways Australia from 1954 to 1974.index, ill, p.154.non-fictionAn illustrative history of the R class 4-6-4 passenger locomotives in service on the Victorian Government Railways Australia from 1954 to 1974.steam locomotives - victoria- history, r class locomotive - victoria - history -
 Victorian Railway History Library
Book, Australian Railway Historical Society (Victorian Division) et al, Steam Locomotives of the Victorian Railways Volume 1 The First Fifty Years, 2002
A history of the steam locomotives in service on the Victorian Government Railways Australia from 1854 to 1904.index, ill, p.235.non-fictionA history of the steam locomotives in service on the Victorian Government Railways Australia from 1854 to 1904.steam locomotives - victoria- history, railroad operations - victoria -
 Victorian Railway History Library
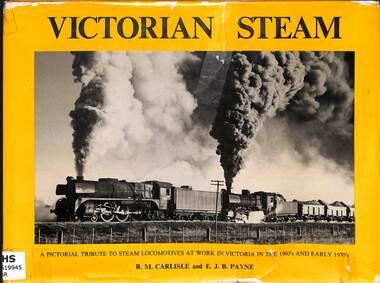
Book, Carlisle, Robert et al, Victorian Steam, 1975
A pictorial tribute to the steam locomotives at work in Victorian in the 1960s and the early 1970s.ill, maps, p.112.non-fictionA pictorial tribute to the steam locomotives at work in Victorian in the 1960s and the early 1970s.steam locomotives - victoria- history, railroad operations - victoria -
 Victorian Railway History Library
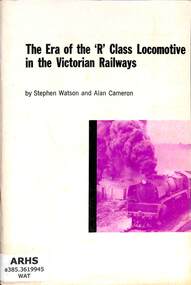
Book, Watson, Stephen et al, The Era of the 'R' class Locomotive in the Victorian Railways, 1972
A history of the R class 4-6-4 steam locomotive on the Victorian Railways.ill, p.43.non-fictionA history of the R class 4-6-4 steam locomotive on the Victorian Railways.steam locomotives - victoria- history, r class locomotive - victoria - history -
 Victorian Railway History Library
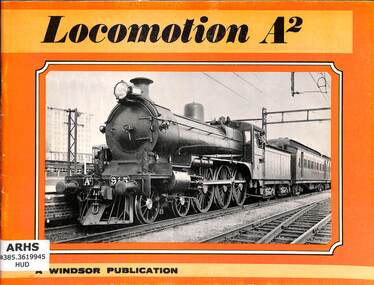
Book, Hudson, Rod L, Locomotion A2
A photographic history of the A2 class 4-6-0 steam locomotive on the Victorian Railwaysill, p.56.non-fictionA photographic history of the A2 class 4-6-0 steam locomotive on the Victorian Railwayssteam locomotives - victoria- history, a2 class locomotive - victoria - history -
 Victorian Railway History Library
Book, Hudson, Rod L, Steam Suburban
A photographic history of the early trains on the Victorian Railways suburban network.ill, maps, p.56.non-fictionA photographic history of the early trains on the Victorian Railways suburban network.steam locomotives - victoria- history, railroad operations - victoria -
 Ballarat Tramway Museum
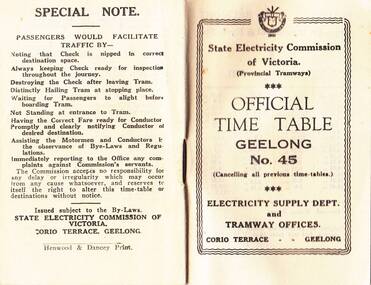
Photograph - Digital image, State Electricity Commission of Victoria (SECV), "Official Timetable Geelong No. 45"
Digital image or copy of the SEC "Official Timetable Geelong No. 45", 16 image files - 32 pages, giving details of the fares, transfers, luggage or parcels, lost property, times of each tram on the Belmont (1), Chilwell (2), East Geelong (3), Eastern Park (4), Newtown (5), North (6), West Geelong (7). Gives details of railway station trams, transfer ticket arrangements, depot workings and the night signs carried out each tram. Based on the 4d max fare, it is a circa 1949 timetable - see reference. See also Reg Item 5629 for Timetable No. 39, c1943 and 8552 for a photocopy of No. 47, March 1953. See BTM document, "SEC fare changes - by law references etc.doc, dated 3/9/2006.trams, tramways, geelong, timetables -
 Ballarat Tramway Museum
Photograph - Black and White photograph/s - mounted, John Phillips, c1971
Yields information about trams used, services and buildings in Lydiard St North near the railway station c1971.Black and White photograph mounted on heavy cardboard backing. Photo of Ballarat No. 12 with destination of Grey St Sebastopol, with tram behind it, showing "Special" and another two single truckers behind No. 12 in Lydiard St North, just before the Railway level crossing. In the background are Victoria House, Moodys' Provincial Hotel and Ludbrook House. Has parts of old support tape on rear. Note image scanned in two runs through a scanner, resulting in the shading in the image file.trams, tramways, lydiard st, railway crossing, provincial hotel, tram 12, tram 21 -
 Ballarat Tramway Museum
Document - Calendar, Brown Trout Publishing Pty Ltd, "Ballarat Victoria", 2014
Yields information about the appearance of various Ballarat locations during 2013 for a 2014 calendar.Wall Calendar - heavy card covers, 12 gloss art pages inside, titled "Ballarat Victoria", calendar for 2015, featuring various Ballarat photographs. Includes the Gardens, BTM No. 28, Sovereign Hill, Lydiard St and Sturt St, Arch of Victory, Lake Wendouree, Botanical Gardens, Railway Station, Regent Theatre, Conservatory and Statuary Pavilion. Contained within the original plastic wrapping. Photo of No. 28 in Wendouree Parade. Produced by Brown Trout Publishing Pty ltd.tramways, trams, ballarat, btm, sovereign hill, botanical gardens, railway station, arch of victory -
 Ballarat Tramway Museum
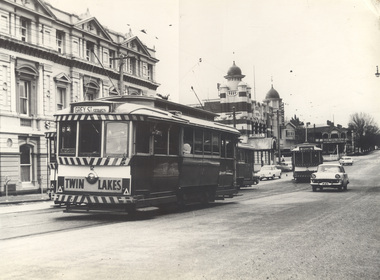
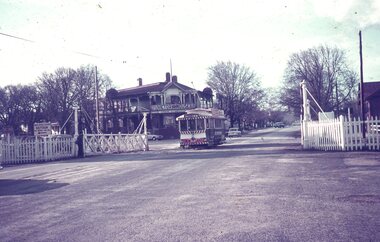
Slide - 35mm slide/s - set of 6, Dave Simpson, late 1960's early 1970's
Yields information about Railway Level crossing in Lydiard St North and some of the trains that used it.Set of six 35mm slides - Hanimex light grey white plastic mounts or AGFA dark blue / white plastic mounts of trams and trains crossing the level crossing at Lydiard St North Ballarat. .1 - tram 33 with destination of Lydiard St North, just after crossing the rail tracks - has a Twin Lakes sign with Victoria House in the background. .2 - tram 40 with destination of Lydiard St North, waiting at the level crossing with S303 entering the station. .3 - ditto, but with S304 in the photograph under the signal gantry. .4 - tram 17 crossing the crossing with the signal box and Victoria House in the background. .5 - ditto - tram has a Twin Lakes signs and a "Make Bliss No Love" roof advert for Bliss Bombs. .6 - ditto - with the S. F. Motors Pty Ltd Mercedes Benz dealership in the background.tramways, trams, railway station, lydiard st north, level crossings, victorian railways, tram 33, tram 40, tram 17 -
 Marysville & District Historical Society
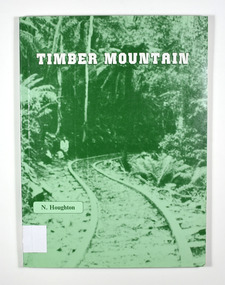
Book - Paperback book, Timber Mountain, 1986
Paperback. Front cover has an old photograph of a timber railway leading into a forest. There is also a man standing at the side of the railway. In the inside back cover is a fold out map titled "Sawmills & Tramways of the Murrindindi Forest 1885-1950.Stamp of Marysville & District / Historical Society Inc / P.O. Box 22 / Marysville 3779history, sawmilling, murrindindi forest, victoria, north east victoria, houghton, n