Showing 2255 items
matching auction
-
 Flagstaff Hill Maritime Museum and Village
Container - Bottle, c. 1905
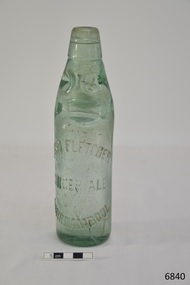
This bottle once contained John Fletcher’s ginger cordial. It was found in August 2014 in the sand dunes at Levy's Point, near McKinnon's quarry, Warrnambool. ABOUT JOHN FLETCHER of WARRNAMBOOL John Fletcher Cordial (or Beverage) Co . Warrnambool, supplied cordial and aerated drinks to the Western district of Victoria. John Fletcher was named as a cordial manufacturer in the Warrnambool Standard of June 13th 1895, when he attended a Publican’s Association meeting. Mr John Fletcher, aerated water and cordial manufacturer of Koroit Street Warrnambool, had a summary of his factory printed in a short article in the Advocate, Melbourne, in February 1901. The article said “one of the most complete plants outside the metropolis … spacious … well appointed …old-established business … noted for the excellence of the quality … a trial [of the beverage] is solicited.” John Fletcher and Harold Caffin, trading as J.S. Rowley & co cordial manufacturers in 1903; were prosecuted in September 1903 when the Board of Health found an analysed sample of Raspberry Vinegar to contain coal tar colouring, which could be injurious to health, particularly to the kidneys. The factory was still in operation in December 1924, when sadly, Mr S. Fletcher, who was carrying bottles of aerated water at Mr John Fletcher’s cordial factory, sustained an eye injury when one of the bottles burst. Later the eye had to be removed at the Warrnambool Base Hospital. ABOUT CODD BOTTLES During the mid-to-late 1800s there were many inventions to keep the fizz in carbonated drinks such as ginger ale, soda water and fruit drinks. Hiram Codd, an English engineer invented a successful process that he patented as “Codd’s patented globe stopper bottle” in 1872. The Codd-neck bottle (commonly called Codd or marble bottle) is manufactured in two parts. The body of the bottle is cast in two sections. At the time of joining the sections a glass marble and rubber seal are inserted into the neck section. The lip is then applied to the top of the bottle. The Codd bottle is filled upside down as the pressure of the gas from the carbonated liquid holds the marble up and out of the way. When the bottle stands upright the gas pushes the marble up against the washer, creating a firm seal to keep the fizz inside. The bottle is opened by pushing the marble down firmly to allow some of the gas to escape. The marble drops down and is caught in a depression formed in the neck. When the bottle is tilted to pour or drink the liquid the marble rests in a dimple. Some have said that the bottle as a character, the shape having a face with its mouth keeping the marble out of the drink and eyes that catch the marble so that it doesn’t roll into the mouth of the drinker. The Codd bottle was expensive to produce and children loved to destroy the marbles to play with the marbles inside. Many shops and factories added a deposit to the cost of buying the drink to encourage children to return the bottles rather than break it for the marble. Codd bottles are still being produced in India and Japan for soft drinks. A Codd bottle with the same markings as this one is valued on today’s Australian auction sites from $35 - $75 AUD. Bottle, aqua/green glass, with glass marble inside. John Fletcher's Ginger Ale, Warrnambool. Container is often called a "Codd neck bottle", “marble bottle” or “Codd’s patent bottle”. Bottle made by Dobson. Inscription on bottle and base. c. 1905Marks moulded into glass; "JOHN FLETCHER / GINGER ALE / WARRNAMBOOL" and “DOBSON” and on base “G”. flagstaff hill, warrnambool, shipwrecked coast, flagstaff hill maritime museum, maritime museum, shipwreck coast, flagstaff hill maritime village, great ocean road, codd bottle, codd neck bottle, marble bottle, ginger beer bottle, john fletcher soft drinks, warrnambool soft drinks and cordials, john fletcher cordial (or beverage) co ., codd neck bottle, glass stopper bottle, hiram codd, antique bottle, harold caffin, john fletcher -
 Flagstaff Hill Maritime Museum and Village
Photograph, circa 1888
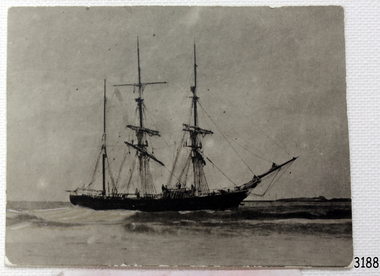
This photograph was taken close to the time of the wreck of the "Edinburgh Castle". The “Edinburgh Castle”, three-masted iron barque, was built in Glasgow, Scotland, in 1863 by J.G. Lawrie. She was 53.7 meters long and weighed 627 tons. She was owned by shipping company T Skinner and Co and registered at Liverpool, England. She sailed from 1863 to 1885 along the trade route between Scotland, China, and Singapore. In 1887 the Master, Captain J.B. Darling, sailed the “Edinburgh Castle” for its new owners Gifford & Nicholson from London to Warrnambool. Her cargo was 4,900 casks of cement for the construction of the new Warrnambool Breakwater. Over the three month journey, the ship met with rough weather and even a hurricane. On January 15th 1888 the “Edinburgh Castle” approached Lady Bay where a welcoming crowd gathered. The Port’s relief Harbour Master, Pilot Carless took over to complete the docking. As he tried to guide her, the Lighthouse Keeper signalled that the ship was too close to shore. The pilot continued on his course, causing her to ‘miss stays’ (make an incorrect tack). The crew dropped anchors and tried to lighten the load by throwing some of the casks of cement overboard but this was to no avail, and she drifted sideways in calm waters, lodging in the sand. A distress signal was sent to the coastal steamer “Julia Percy”, which spent several hours trying to pull the stranded ship away, but it would not budge. Those involved hoped to re-float the ship but efforts to save the vessel were useless. The captain and some crew stayed on board. When the weather became rough the rocket crew brought its lifesaving gear to the shore, ready to launch a line to the ship. The three men on board sent those onshore a message in a bottle to assure the on-lookers that they were quite comfortable to stay aboard. After a night of bad weather, the crew were glad to accept the rocket crew’s help and were in turn safely hauled to shore in a breeches buoy. The ship broke up quickly. Very little of the cargo could be saved. A week later all that could be seen of her was the bow and some of the stern. The beach was littered with wreckage, including cement cask fragments, for weeks. Ironically, on the morning after the ship ran aground, the very same “Edinburgh Castle” was offered for sale at an auction in Melbourne, billed as “a sound ship with all the fittings and in the best order.” The sale was completed before they heard the news that the ship was totally wrecked! Over the decades the shifting sands concealed the wreck of “Edinburgh Castle”. However, in October 1985 two local divers, Peter Ronald and Colin Goodall discovered her near the Hopkins River mouth. Peter said in his book ‘Exploring Shipwrecks of Western Victoria’, “In the midst of this sand-cloud I could clearly see row after row of neatly stacked barrels”. He remarked, “I am privileged to have had at least a glimpse of one of Warrnambool's most significant wrecks.” Some 15 – 17 ships are believed to have sunk in Lady Bay, but only two have been discovered on the seafloor; the “Edinburgh Castle” and the “La Bella”. Both wrecks are popular diving sites and are preserved as significant historical marine and marine archaeological sites. The sailing ship “Edinburgh Castle” is of local and state and national significance. It is one of the only two shipwrecks discovered in Lady Bay, Warrnambool, out of the 15-17 shipwrecks in the bay. The “Edinburgh Castle” is significant for being one of the largest vessels lost in the bay. The significance of the wreck of the “Edinburgh Castle” was recognised by being listed on the Victorian Heritage Database VHR S209. She was declared an Historic Shipwreck on 17th January 1989 under the Commonwealth Historic Shipwrecks Act (1976). The “Edinburgh Castle” wreck is also significant for the connection of its cargo with the building of the Warrnambool Breakwater, also listed on the Victorian Heritage Database VHR H2024. The “Edinburgh Castle” is included as one of the shipwrecks in Heritage Victoria’s Historic Shipwreck Trail on Victoria’s West Coast. Black and white photograph of the iron barque 'Edinburgh Castle' on breaking waves, land in the background. The ship was stranded and wrecked in Lady Bay, Warrnambool, on January 15th 1888. Figures are standing on deck. The masts are free from sails.flagstaff hill, warrnambool, shipwrecked-coast, flagstaff-hill, flagstaff-hill-maritime-museum, maritime-museum, shipwreck-coast, flagstaff-hill-maritime-village, great ocean road, edinburgh castle barque 1863, edinburgh castle shipwreck 1888, shipwreck 15-05-1888, glasgow ship, jg lawrie, t skinner and co, liverpool ship register, captain j.b. darling, gifford & nicholson, cement casks, cement barrels, warrnambool breakwater construction, breaches buoy, rocket crew, rocket launcher, lifesaving equipment, warrnambool harbour, lady bay warrnambool, ship pilot carless, lady bay shipwreck, peter ronald, colin goodall, lady bay diving site, marine archaeology, victorian heritage register, vhr s209 -
 Wodonga & District Historical Society Inc
Photograph - The Carriers' Arms, Wodonga
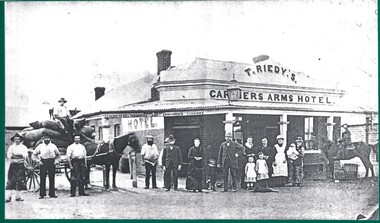
In October 1874, Thomas Reidy and Andrew McCormack opened the Carriers’ Arms on the corner of South and Church Streets. They also established a general store next door, which they soon extended. The Carriers’ Arms was a coach stop for the Bethanga Express Coach. On 8 December 1882 the licence for the Carriers’ Arms was granted to Ann Riedy. In 1883, Edmund T. Powell, and his Irish-born wife, Mary Ann, purchased the Carriers’ Arms. By 1898 the Licence was in the name of M. A. Powell. She was still the licensee at the time of her death in August 1906. For a short time, the property was in the hands of Miss Maud Powell but in February 1907, the licence for The Carriers’ Arms Hotel was transferred to Mr George L. Leighton. On Monday 5th February 1917 a clearing sale of all furniture and effects of the Carriers’ Arms Hotel was held. The new proprietor and licensee was Henry R. Baker. In April 1920, the Carriers’ Arms had another new proprietor, Mrs A. E. Frauenfelder but by October 1921 it was transferred to Kathleen Hickey. Mrs. Hickey was at the Carriers’ Arms until she died in January 1926. In 1927, Mr H.W. Allen, formerly proprietor of the Terminus Hotel took over the Carriers’ Arms but in August 1928 the balance of the lease was transferred to Mrs Mulrooney. In 1932 it again changed hands, with the licence being transferred to Mrs Eileen Dorothy Hemphill, of Wodonga. In 1933 the Carriers’ Arms was licensed to Mrs. M.G. O’Brien, a sister of Mrs Hemphill. In 1935 Leo Houlihan took over the business but 6 months later it was transferred to A C Ferguson. The next year the licence was transferred yet again to Zelda Allen. By 1937 it was in the hands of Percy Cumberland then to Lila Maud MacPherson and soon followed by Ronald Dobson. By 1940 Herbert V.A. Callender had taken over the Carriers’ Arms and in 1942 the licence was transferred again to Sarah Jane Callander. In July 1943 Mr G. A. Adams disposed of the freehold of the Carriers’ Arms Hotel in Hume Street to Mr J.H. Perry. By September 1955 Edward Spencer held the Victualler’s licence for Carriers Arms Hotel and the licences was transferred to Kevin Patrick Howell. Mr Howell operated the hotel for many years. At some stage in the 1980s Geoff Milne operated the Carriers’ Arms. In 2007 he was killed in a light airplane crash. In 1991 David McLeish and Bob Craig, took over the Carriers’ Arms and were joined in 1993 by James Carroll. They continued to operate it until 2003. In 2010 Greg Evans held the Freehold with Licensees Cate Nightingale and Michael McNamara, After running into major financial difficulties it was run by Greg Evans. In 2010 the Carriers’ Arms was put up for auction but failed to sell. From 2013 - 2016, Ron Montgomery and his wife Michelle took over the lease of the Carriers’ Arms. In 2018, the Carriers’ Arms was purchased from Greg Evans by Leigh Esler. After opening to the public in 1874, The Carriers’ Arms was closed in 2019 and following extensive refurbishment opened as Church Street These items are significant as they document the history of a long-serving business in the Wodonga community.A collection of photos and advertisements documenting the life of the Carriers' Arms Hotel, Wodonga.early wodonga businesses, carriers' arms wodonga -
 Flagstaff Hill Maritime Museum and Village
Photograph - Photograph of Edinburgh Castle' stranded and wrecked at Lady Bay, circa 1888
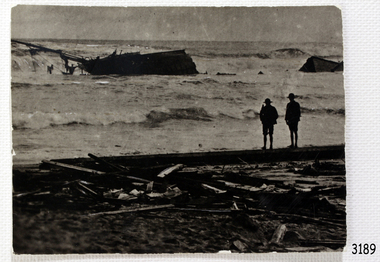
This photograph was taken close to the time of the wreck of the "Edinburgh Castle". The “Edinburgh Castle”, three-masted iron barque, was built in Glasgow, Scotland, in 1863 by J.G. Lawrie. She was 53.7 meters long and weighed 627 tons. She was owned by shipping company T Skinner and Co and registered at Liverpool, England. She sailed from 1863 to 1885 along the trade route between Scotland, China, and Singapore. In 1887 the Master, Captain J.B. Darling, sailed the “Edinburgh Castle” for its new owners Gifford & Nicholson from London to Warrnambool. Her cargo was 4,900 casks of cement for the construction of the new Warrnambool Breakwater. Over the three month journey, the ship met with rough weather and even a hurricane. On January 15th 1888 the “Edinburgh Castle” approached Lady Bay where a welcoming crowd gathered. The Port’s relief Harbour Master, Pilot Carless took over to complete the docking. As he tried to guide her, the Lighthouse Keeper signalled that the ship was too close to shore. The pilot continued on his course, causing her to ‘miss stays’ (make an incorrect tack). The crew dropped anchors and tried to lighten the load by throwing some of the casks of cement overboard but this was to no avail, and she drifted sideways in calm waters, lodging in the sand. A distress signal was sent to the coastal steamer “Julia Percy”, which spent several hours trying to pull the stranded ship away, but it would not budge. Those involved hoped to re-float the ship but efforts to save the vessel were useless. The captain and some crew stayed on board. When the weather became rough the rocket crew brought its lifesaving gear to the shore, ready to launch a line to the ship. The three men on board sent those onshore a message in a bottle to assure the on-lookers that they were quite comfortable to stay aboard. After a night of bad weather, the crew were glad to accept the rocket crew’s help and were in turn safely hauled to shore in a breeches buoy. The ship broke up quickly. Very little of the cargo could be saved. A week later all that could be seen of her was the bow and some of the stern. The beach was littered with wreckage, including cement cask fragments, for weeks. Ironically, on the morning after the ship ran aground, the very same “Edinburgh Castle” was offered for sale at an auction in Melbourne, billed as “a sound ship with all the fittings and in the best order.” The sale was completed before they heard the news that the ship was totally wrecked! Over the decades the shifting sands concealed the wreck of “Edinburgh Castle”. However, in October 1985 two local divers, Peter Ronald and Colin Goodall discovered her near the Hopkins River mouth. Peter said in his book ‘Exploring Shipwrecks of Western Victoria’, “In the midst of this sand-cloud I could clearly see row after row of neatly stacked barrels”. He remarked, “I am privileged to have had at least a glimpse of one of Warrnambool's most significant wrecks.” Some 15 – 17 ships are believed to have sunk in Lady Bay, but only two have been discovered on the seafloor; the “Edinburgh Castle” and the “La Bella”. Both wrecks are popular diving sites and are preserved as significant historical marine and marine archaeological sites. The sailing ship “Edinburgh Castle” is of local and state and national significance. It is one of the only two shipwrecks discovered in Lady Bay, Warrnambool, out of the 15-17 shipwrecks in the bay. The “Edinburgh Castle” is significant for being one of the largest vessels lost in the bay. The significance of the wreck of the “Edinburgh Castle” was recognised by being listed on the Victorian Heritage Database VHR S209. She was declared an Historic Shipwreck on 17th January 1989 under the Commonwealth Historic Shipwrecks Act (1976). The “Edinburgh Castle” wreck is also significant for the connection of its cargo with the building of the Warrnambool Breakwater, also listed on the Victorian Heritage Database VHR H2024. The “Edinburgh Castle” is included as one of the shipwrecks in Heritage Victoria’s Historic Shipwreck Trail on Victoria’s West Coast. Black and white photograph of the iron barque 'Edinburgh Castle' stranded and wrecked at Lady Bay, Warrnambool, on January 15th 1888. The photograph shows wreckage along the shore and two standing figures looking on.flagstaff hill, warrnambool, shipwrecked-coast, flagstaff-hill, flagstaff-hill-maritime-museum, maritime-museum, shipwreck-coast, flagstaff-hill-maritime-village, great ocean road, edinburgh castle barque 1863, edinburgh castle shipwreck 1888, shipwreck 15-05-1888, glasgow ship, jg lawrie, t skinner and co, liverpool ship register, captain j.b. darling, gifford & nicholson, cement casks, cement barrels, warrnambool breakwater construction, breaches buoy, rocket crew, rocket launcher, lifesaving equipment, warrnambool harbour, lady bay warrnambool, ship pilot carless, lady bay shipwreck, peter ronald, colin goodall, lady bay diving site, marine archaeology, victorian heritage register, vhr s209 -
 Eltham District Historical Society Inc
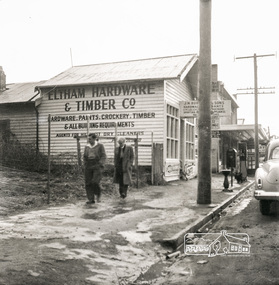
Photograph, Eltham Hardware and Timber Co, Main Road, Eltham, opposite Railway Station. c.1952, 1952c
The Eltham Hardware and Timber Company first opened on Main Road opposite the Railway Station around late 1922. An advertisement placed in the Hurstbridge Advertiser advised that the Hardware Store had just opened with a varied stock of Saws, Hammers, Nails, Shovels, Screw Drivers, and every article required in a house or on a farm. People were also encouraged to try their Jams, Pickles, Sauces, Cups and Saucers, etc. A few months later in May 1923, William Walker, a plumber, placed an advertisement wishing to to announce that he had taken over the ELTHAM HARDWARE STORE, and asked for the continued support of the district. He also noted that all kinds of Plumbing work was done. Walker remained the proprietor of the Hardware Store for many years regularly advertising its services and wares up until at least 1941. The trail goes a bit quiet then but he does appear in the 1944 Electoral Roll listed as a Plumber, of Main Street, Eltham. However he is not listed in the 1949 Electoral Roll but his son, Thomas Roy Walker, also a plumber of Main Road is listed. Thomas had been on active duty overseas during the Second World War and returned at the end of 1945. It is assumed that William died sometime between 1945 and 1949. On November 18th, 1950 the Hardware Store and residence was auctioned on site by Scarff Bros. Pty Ltd. It is presumed that this is when J.N. Burgoyne and Sons took over the business. It would have been around this time the picture of the store was taken for only three years later, in October 1953, the business and dwelling was again put up for sale, this time by Trebilcock Bros, in two separate lots. LOT 1. — ELTHAM HARDWARE AND TIMBER CO. Freehold and Property, Plant, Fittings and Business; Plus Stock at Valuation. To be Sold as a Going Concern. THE FREEHOLD PROPERTY Comprises Large Brick and Timber Shop. Well Fitted. Has Good Light. Comfortable 3-Room Dwelling and Detached Bungalow, H.W.S., Phone, Garage and Outbuildings. Situate on Large Allotment, 50 Ft. x 150 Ft. Aprox. THE BUSINESS: Flourishing Hardware and Builders’ Supplies, Crockery, Glassware and Gifts, Dry Cleaning Agency and Petrol Reseller Licence (1 Bowser Installed), Oil Storage. Annual Turnover Aprox. £12,000. Audited Figures Available, Old-established Business Comprehensive Stock is Good, Clean and Saleable (Value Approx. £4000). TERMS: £1000 Deposit, Balance 30 Days. VACANT POSSESSION. LOT 2. — Superb Shop Sites. Adjoining the Above Property. Land 58 Ft. x 150 Ft. (Approx.). Erected on Land Is Old Style 4-r Timber Dwelling, Set Well Back from Footpath. Leaving Ample Apace to erect Shops. Also Small Shop Let as Agent’s Office. To Be Sold Subject to Existing Tenancies, Gross Rentals £106 12/ Per Annum. Terms: £1000 Deposit, Balance 30 days. GENERAL: Eltham Is a Rapidly Developing Area only 12 Miles from G.P.O. Street Frontage of these Two Adjoining Properties Is 108 Feet By Depth of 150 Feet in the Heart of Expanding Shopping Centre, directly Opposite Station Entrance. Full Details and Inspection Available on Application from the Auctioneers: TREBILCOCK BROS. AUCTIONEERS and ESTATE AGENTS, Coincidentally, the Hardware Store was taken over by Richard Phillip Trebilcock, an electrical engineer from Mayona Road, MontmorencyNegative black and white film 120 6x6 formatSingle frameeltham, main road, 1951 chevrolet deluxe, ampol, eltham hardware and timber, j.n. burgoyne and sons, petrol bowser, william walker, richard phillip trebilcock -
 Melton City Libraries
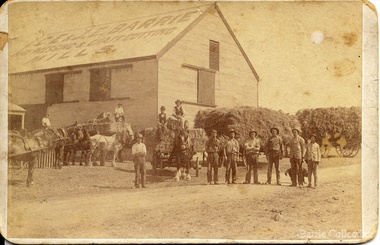
Photograph, 'Melton South Chaff Mill employees, Unknown
Charles E “Ernie” Barrie started constructing a Chaff mill on the corner of Brooklyn and Station road in 1900. It soon became a thriving business and was ideally located close to the railway line. Ernie and his father William and other Barrie brothers had been operated travelling chaff cutters in the district of Melton and Werribee. Within a short time the mill expanded into two big sheds in partnership with his brother James E known as “Ted”. The eldest brother William was in the Manager living in Melton South. In 1906 Ernie applied for a railway crossing on Brooklyn Road to have direct access for railway trucks to be shunted to the mill to be loaded. The Mill was also had the first phone to be connected, No 1, and No’s 2, 3 were the Golden Fleece and Macs Hotels. In 1906 Ernie married Jessie Lang daughter of the Head Teacher at Melton State School No 430 (1896 –1917). The Barrie house on the north side of the mill was completed in August 1906. It survived for almost 60 years until demolition. Chaff mills were very susceptible to fires and often burnt down and would be rebuilt again ready for the peak of the harvesting season. The final demise of the Mill occurred in a spectacular blaze on the night of Friday 2nd December 1977, just before the earth tremor as reported in the local paper. Brian Dobson the local photographer lived close by and captured the night blaze. A video was also taken of the action by the fire brigade. My parents Bon and Edna Barrie were living at 19 First Avenue, and took colour slides of the smouldering ruins in the half -light. Ironically Bon had spent the first year of his life (born in April 1909 and sister Mary born October 1907) at the house beside the mill. Trethowan’s Chaff mill in Brooklyn road was also destroyed by fire, which stated in the evening on Tuesday April 28th 1987. It was established in 1910 by Dixon Brothers, followed by, Ebbot & Kebby, Robinson, Trethowan and Butler and was with the Trethowan family when it burnt down. Melton South was small a community referred to as Melton Railway Station. Member of the community raised the idea to have a public hall. In 1909 Cr Barrie, Mr Nesbitt and Delany formed a committee to build a community hall. Cr Barrie donated the land and The Exford Hall was completed in September 1910 later to be named Victoria Hall. It was demolished in 1992. Colour slide in Barrie archive. In April 1910 the Ernie sold the Mill to Glover Onians (HSK Ward) family moved away to a property in Trundle NSW. Ernie had acquired 640 acres (a square mile) and leased a further 1920 acres of adjoining land. It was the practise of the farmers in the area at the time to buy up or lease the surrounding land from the 640 acre crown land blocks to make up acerage for a viable wheat farm. His wife Jessie found the climate to be very hot and when the Darlingsford property at Melton was put up for sale in the latter part of 1910 and was passed in at the auction. My grandfather saw this an opportunity to return to Melton. The negotiations to Darlingsford were finalised on May 11th 1911. Barrie bothers with connections to Chaff mills and farming in Melton from the 1900s William Henry, Charles Ernest, James Edwin, Samuel John, Robert, Arthur Roger, Albert Walter. Three grandsons and a great-grandson are in business earthmoving and farming in Melton today. (2013) Memoirs by Wendy BarrieEmployees at Chaff Mill, it was located on the corner of Brooklyn and Station Road, Melton South. local identities, agriculture -
 National Wool Museum
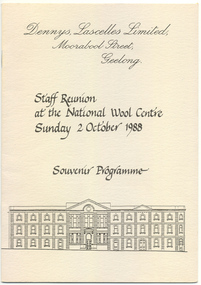
Program, Dennys Lascelles Limited: Staff Reunion at the National Wool Centre 1988
A copy of both the ‘Dennys Lascelles Limited 1857-1957: Annual Wool Report & Centenary Review’ & ‘Staff Reunion Souvenir Programme, 1988’ was donated to the museum in 2021. These were duplicate items so only their story was retained in addition to the image of Rita located in Multimedia. “Enclose two items which may be of interest to add to your collection. They belonged to my mother, Rita Sedgwick (nee Glenn), who died earlier this year in April. She worked for Dennys Lascelles in two separate periods. First as a young girl, who had finished her schooling, at Morongo Presbyterian ladies College, having been sent as boarder there by her parents from their farm at Mathoura (just north of Echuca). This period was from 1942 — 1947. It was her second job out of school having worked first at the then Geelong Telephone Exchange. She would commute daily to work on a bicycle from where she was then living in Drumcondra. She had the front office role of receptionist and telephonist driving an old manual switchboard. The old front desk was her domain. She departed in 1947, shortly after she was married in late 1946. She spoke fondly of her times at the company as a young girl in her late teens and early twenties. Her second stint was much later, but again as the front-desk telephonist and receptionist commencing in 1972, ending 11 years later in 1983. This was a period when Sir Henry Bolte was on the Board, Don Urqhuart was MD, Ray Hobson was General Manger, Cliff Bone the company Secretary, Peter Keys the CFO and Jim Hay was also on the Executive team. While there were some 25 years between her periods of service, she welcomed the chance to re-join the company. Again, it was a time of hard work, and good friends. The busy times were the wool auctions, when the Firm would be visited by representatives of the big Japanese trading houses such as Mitsui, and Kanematsu. The Chief Auctioneer, Mr. Reeves (I can't recall his first name), would hold court at the now demolished Geelong Wool Exchange — I saw him in action once — what a sight. The huge show floors in the Denny's building would be full of open bales and samples for the buyers to inspect, and for mum days would start at 0800, and finish at 1800 or later. In quieter times over summer, it was reported that the empty show floor would provide an excellent arena for the more enthusiastic cricketers to get in a bit of practise with a tennis ball at lunch and after closing time! Dennys was a full-service firm for wool growers, with branches all over the Western Districts as far afield as Mt Gambier, but through Timboon, Warrnambool, and the like, as I am sure you are aware. She also saw the merger of Dennys and Strachan to create DSM, and later the amalgamation with AML&F to create Dennys AML (I think). She saw the change from the old manual switch board to the then latest of PABX technologies and was part of the team the relocated from the original offices to the new address on the south side of Brougham Street. Along with the shift from the large show floor-based sales of the past. She retired from fulltime work in mid-1983, again with fond memories and friendships that lasted a lifetime. I found these two items among her things recently, and felt that given her connection to the industry, and the place in which the Museum now resides you may like to add them to the collection. I hope you can find a home for them, and that they might add a little to the story that the wool museum now houses and curates.” Program 12pp: soft pale grey cover, contians brief history of the company , the buildings and at the last page is a list of acceptances for the reunion, 2nd October, 1988Judith Lagingdennys, lascelles limited -
 National Wool Museum
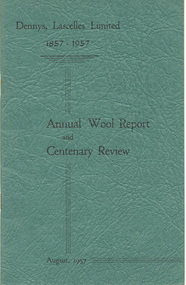
Journal, Dennys, Lascelles Limited 1857-1957 Annual Wool Report and Centenary Review, 1957
"Dennys, Lascelles Limited 1857-1957 Annual Wool Report and Centenary Review". Apart from the annual report, this booklet also contains a brief history of Dennys, Lascelles Limited from its founding in 1857 up to 1957. A copy of both the ‘Dennys Lascelles Limited 1857-1957: Annual Wool Report & Centenary Review’ & ‘Staff Reunion Souvenir Programme, 1988’ was donated to the museum in 2021. These were duplicate items so only their story was retained in addition to the image of Rita located in Multimedia. “Enclose two items which may be of interest to add to your collection. They belonged to my mother, Rita Sedgwick (nee Glenn), who died earlier this year in April. She worked for Dennys Lascelles in two separate periods. First as a young girl, who had finished her schooling, at Morongo Presbyterian ladies College, having been sent as boarder there by her parents from their farm at Mathoura (just north of Echuca). This period was from 1942 — 1947. It was her second job out of school having worked first at the then Geelong Telephone Exchange. She would commute daily to work on a bicycle from where she was then living in Drumcondra. She had the front office role of receptionist and telephonist driving an old manual switchboard. The old front desk was her domain. She departed in 1947, shortly after she was married in late 1946. She spoke fondly of her times at the company as a young girl in her late teens and early twenties. Her second stint was much later, but again as the front-desk telephonist and receptionist commencing in 1972, ending 11 years later in 1983. This was a period when Sir Henry Bolte was on the Board, Don Urqhuart was MD, Ray Hobson was General Manger, Cliff Bone the company Secretary, Peter Keys the CFO and Jim Hay was also on the Executive team. While there were some 25 years between her periods of service, she welcomed the chance to re-join the company. Again, it was a time of hard work, and good friends. The busy times were the wool auctions, when the Firm would be visited by representatives of the big Japanese trading houses such as Mitsui, and Kanematsu. The Chief Auctioneer, Mr. Reeves (I can't recall his first name), would hold court at the now demolished Geelong Wool Exchange — I saw him in action once — what a sight. The huge show floors in the Denny's building would be full of open bales and samples for the buyers to inspect, and for mum days would start at 0800, and finish at 1800 or later. In quieter times over summer, it was reported that the empty show floor would provide an excellent arena for the more enthusiastic cricketers to get in a bit of practise with a tennis ball at lunch and after closing time! Dennys was a full-service firm for wool growers, with branches all over the Western Districts as far afield as Mt Gambier, but through Timboon, Warrnambool, and the like, as I am sure you are aware. She also saw the merger of Dennys and Strachan to create DSM, and later the amalgamation with AML&F to create Dennys AML (I think). She saw the change from the old manual switch board to the then latest of PABX technologies and was part of the team the relocated from the original offices to the new address on the south side of Brougham Street. Along with the shift from the large show floor-based sales of the past. She retired from fulltime work in mid-1983, again with fond memories and friendships that lasted a lifetime. I found these two items among her things recently, and felt that given her connection to the industry, and the place in which the Museum now resides you may like to add them to the collection. I hope you can find a home for them, and that they might add a little to the story that the wool museum now houses and curates.” "Dennys, Lascelles Limited Annual Wool Report and Centenary Review, August 1957". Apart from the annual report, this booklet also contains a brief history of Dennys, Lascelles Limited from its founding in 1857 up to 1957.Dennys, Lascelles Limited Annual Wool Report and Centenary Review, August 1957wool brokering, wool growing, dennys, lascelles limited -
 National Wool Museum
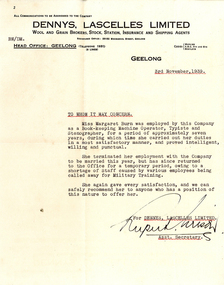
Letter - Letter of reference for Margaret Burn, 03/11/1939
Letter of Reference for Miss Margaret Burn detailing her work as a bookkeeper, machine operator, typist, and stenographer over seven years at Dennys Lascelles Limited. The letter details her leaving the company as she married in 1939. In the same year, Ms Burn returned to the office owing to the shortage of staff caused by various employees being called away for Military Training. Included in the staff called away for military training was her newlywed husband, Mr Jack Ganly. A fellow employee of Dennys, the Ganly name was well known within the company, with three generations of the Ganly family working at Dennys. Margaret worked at Dennys for 7 years during the 1930s. The Letter of Reference is accompanied with a story written by Margaret about her time working at the company. WORKING CONDITIONS & OFFICE WORK DUTIES. Written by Margaret Burn in 2021. Worked at Dennys Lascelles in the 1930s. In the 1930s coming out of the Depression, jobs were hard to come by and had to be clung to by efficiency and subserviency. There was no union to protect workers – bosses could be tough and rough. Dennys Lascelles revolved around fortnightly wool sales in the “season” – September to May. Sale day was always a day of suppressed excitement. Preparation from a clerical point of view was complete and we now awaited the aftermath of the actual wool auction. The building teemed with people. There were country people down to see their wool sold, buyers of many nationalities, or from the big cities, who were coming in and out of the building all day. Their role was to inspect the acres of wool bales displayed on the show floors; however, caterers were present to feed clients, and there was plenty of social interactions on top of business. The office staff did not go home but waited until the first figures came back from the wool sales and the machines went in to action, both human and mechanical, preparing the invoices for the buyers’ firms. This comprised of lists of lot numbers, weights, prices per lb., and the total prices paid. A lot of this was done by old-school typewriters, making this work a big, heavy, tiring job. Before the finished lists could be dispatched, they were collated on an “abstract”. The lists had to balance with the catalogue from which the invoices had been prepared. This never happened automatically. All the paperwork had to be split up amongst pairs of workers and checked until discrepancies were found. This would happen until midnight but occasionally went until 2 or 3 am. Once complete, the invoices could then be rushed off to the buyers’ firms usually in Melbourne, and hire cars took the staff home. It was back on the job the next morning, usually around 8.30. The office hours varied according to the size of the sale and work involved. Some days started as early as 8 and could finish around 5.30. The second phase of work began with the account sales to be prepared for the sellers of the wool. These detailed all the weights, descriptions of wool, brands, and prices. One Sales account could have multitudes of lot numbers, all needing to be individually described. Various charges needed to be deducted such as finance for woolpacks, extra stock, or farmers who were given a loan to live on during the season. Details of how payment was to be made was also noted, whether the seller was to be paid by cheque, to a bank, or credited to their account with the company (which often left the seller still in debt). For a couple of months in the winter, things were quieter when staff took holidays and were sometimes given afternoons off. But there were still weekly skin sales and stock sales around the state. The annual end of June figures to be prepared for a big company like Dennys with branches all around the state also kept the staff busy. In good years there was sometimes a bonus. On sale days there was a bar open for the clients and wool buyers. This added to the excitement for the young girls, who were strictly barred from using it, but somehow managed to sneak a gin and tonic. This is how I had my first ever, before the evening meal. There was also the romantic notion in some minds, with all the influx of males, that some of us might end up on a wealthy station, or be noticed by an exotic buyer. To my knowledge, this never happened at Dennys Lascelles Limited. Group staff photo at Dennys Lascelles Limited. Margaret Burn. Age 18 or 19. Jack Ganly (Margaret’s future husband). 22. Sheet of paper shorter in length than A4 size, creamed with age. Paper has a header for Dennys, Lascelles Limited’s Head Office at 32 Moorabool Street, Geelong. Body of paper is made up of 3 paragraphs in a typewritten message of black ink with subheadings highlighted with a red underline. The text is finished with a signature at the bottom of the paper. Paper is accompanied by its original envelope. Envelope has typewritten text in black ink with a red underline located at the centre. It also has return to sender instructions to Dennys, Lascelles Limited in the lower left-hand corner.Typewritten text, black and red ink. Multiple. See multimediadennys lascelles ltd, worker conditions 1930s, letter of reference -
 Melton City Libraries
Pamphlet, Thoroughbred Country, c.1985
"Melton has a long and celebrated history of horse breeding and racing. Draught horses were a crucial aspect of life in the early days of European settlement, and were heavily depended upon for both transport and agricultural labour. Peppercorn trees at the corner of Station and Brooklyn roads have been associated with a horse trough installed there to provide a drink to workhorses carting produce to the chaff mills and railway station south of Melton.20 Breeders, trainers and harness drivers in the area later became such an influential force in the equine industry that this came to be a defining aspect of the district’s identity and reputation.Pioneer of the Victorian horse racing industry and early Rockbank squatter William Cross Yuille was one of the earliest importers of stud racehorses in the district in the 1850s. A leading sports editor and writer, Yuille established bloodstock auctioning agency W. C. Yuille & Co. and was involved in the compilation of the first Australian Stud Book, which ensures the integrity of thoroughbred breeding in Australia. According to early Melton chronicler Alexander Cameron, horse races were first organised in the area by Rockbank farmer William Keating. Keating owned racehorses of his own, and many brought horses from Melbourne for the events, which ‘drew large gatherings’.22 Melton Racing Club meetings were held on the Exford Estate with the permission of H. W. Staughton, who built a small wooden grandstand in 1882. Other early races and sports meetings are said to have been held in the vicinity of the current-day Melton golf course.23 An 1884 article reported that Melton’s ‘race programme … equals any put forth by country towns of far greater size’. Ernest Clarke was another important figure in the early horse racing industry in Melton. He established the Melton Stud in 1902, which bred numerous successful racehorses. Perhaps most notably The Welkin, one of the most famous stallions in Australian horse racing in the early twentieth century. The Welkin sired Gloaming, bred by Clarke at the Melton stud in 1915 and one of Australia’s greatest champion racehorses. During a long and prestigious career in both Australia and New Zealand, Gloaming achieved a triumphant 57 wins out of 67 starts and won a record amount of prize money. Ken Cox purchased the Stockwell Stud in Diggers Rest in 1957 and developed it into one of the largest and most renowned thoroughbred breeders in Australia. With its top-class facilities, international design standards and scientific methods, Stockwell became ‘the flagship of the Victorian breeding industry’.26 As well as racing studs, numerous trotting tracks were established on the flat plains around Melton in the 1960s.27 Other studs to play a leading role in the development of Melton as thoroughbred country were Cornwall Park and Merrywood at Toolern Vale, St John’s Lane Stud at Diggers Rest and Birchwood, Teppo Park and Dreelburn in the far north-east of the shire, near Sunbury. By 1985, thoroughbred horse breeding was such big business in Melton that the shire council adopted the slogan ‘The Heart of Thoroughbred Country’, which was used throughout its promotional material.29 But the slogan contained deeper meaning and was not just about Melton’s great equine industry and thoroughbred champions, the council explained: ‘“Thoroughbred Country” should be seen as a new concept of Melton, as a place where people can achieve the “Thoroughbred” ideal, excellence in all aspects of life’. The aim of the council in promoting ‘The Heart of Thoroughbred Country’, was ‘to instil in present and future residents the feeling that this is a place that is better than others. A place to be proud of’. In 1988, Melton’s champion reinsman Gavin Lang won his 176th race of the season, claiming the national harness racing record for the most wins in a single season.The following year, the first Melton Plate was held at Moonee Valley Racecourse, cementing the district’s importance in the harness racing industry. The inaugural winner was Victorys Phil, owned by local Danny Mullan. By the 1990s, Melton had earned the title of the ‘Home of Harness Racing in Victoria’. State-of-the-art, world-class harness racing facility and entertainment complex Tabcorp Park opened in Melton in 2009. In 2011, the Shire of Melton was home to over 140 registered trainers and over 1,200 horses. The municipality’s continuing leadership and influence in the industry today is a testament to the skills, talents and leadership of the local community over its history".Shire of Melton pamphlet of a map and information of the equine industry in Meltoncouncil -
 National Wool Museum
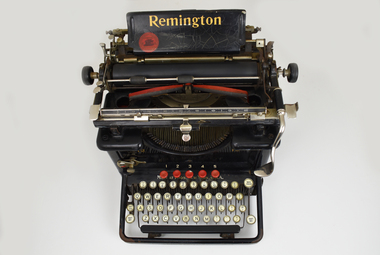
Functional object - Typewriter, Remington Typewriter Company, c.1925
This Remington No.12 typewriter is of the typebar, front-strike class. It was made by the Remington Typewriter Company of Ilion, New York, U.S.A. in about 1925. The Model No. 12 was introduced in 1922 and was one of the first 'visible writer' machines, in which the typed characters were visible to the operator. Previous models were of the upstrike class in which the characters were typed on the underside of the platen. To see what had been typed the operator had to raise the platen, meaning the typist was typing blind much of the time. This machine was used by Margaret Ganly née Burn in the 1930s. It was purchased for her by one of the sons of William Pride, a famous saddle maker in Geelong, William was Margaret’s grandfather. The typewriter was donated with original sales receipt and servicing tools. Margaret worked at Dennys for 7 years during the 1930s. The typewriter is accompanied with a story written by Margaret about her time working at the company. Margret married Jack Ganly, a fellow employee of Dennys. The Ganly name was well known within Dennys, with three generations of the Ganly family working at the company. WORKING CONDITIONS & OFFICE WORK DUTIES. Written by Margaret Burn in 2021. Worked at Dennys Lascelles in the 1930s. In the 1930s coming out of the Depression, jobs were hard to come by and had to be clung to by efficiency and subserviency. There was no union to protect workers – bosses could be tough and rough. Dennys Lascelles revolved around fortnightly wool sales in the “season” – September to May. Sale day was always a day of suppressed excitement. Preparation from a clerical point of view was complete and we now awaited the aftermath of the actual wool auction. The building teemed with people. There were country people down to see their wool sold, buyers of many nationalities, or from the big cities, who were coming in and out of the building all day. Their role was to inspect the acres of wool bales displayed on the show floors; however, caterers were present to feed clients, and there was plenty of social interactions on top of business. The office staff did not go home but waited until the first figures came back from the wool sales and the machines went in to action, both human and mechanical, preparing the invoices for the buyers’ firms. This comprised of lists of lot numbers, weights, prices per lb., and the total prices paid. A lot of this was done by old-school typewriters, making this work a big, heavy, tiring job. Before the finished lists could be dispatched, they were collated on an “abstract”. The lists had to balance with the catalogue from which the invoices had been prepared. This never happened automatically. All the paperwork had to be split up amongst pairs of workers and checked until discrepancies were found. This would happen until midnight but occasionally went until 2 or 3 am. Once complete, the invoices could then be rushed off to the buyers’ firms usually in Melbourne, and hire cars took the staff home. It was back on the job the next morning, usually around 8.30. The office hours varied according to the size of the sale and work involved. Some days started as early as 8 and could finish around 5.30. The second phase of work began with the account sales to be prepared for the sellers of the wool. These detailed all the weights, descriptions of wool, brands, and prices. One Sales account could have multitudes of lot numbers, all needing to be individually described. Various charges needed to be deducted such as finance for woolpacks, extra stock, or farmers who were given a loan to live on during the season. Details of how payment was to be made was also noted, whether the seller was to be paid by cheque, to a bank, or credited to their account with the company (which often left the seller still in debt). For a couple of months in the winter, things were quieter when staff took holidays and were sometimes given afternoons off. But there were still weekly skin sales and stock sales around the state. The annual end of June figures to be prepared for a big company like Dennys with branches all around the state also kept the staff busy. In good years there was sometimes a bonus. On sale days there was a bar open for the clients and wool buyers. This added to the excitement for the young girls, who were strictly barred from using it, but somehow managed to sneak a gin and tonic. This is how I had my first ever, before the evening meal. There was also the romantic notion in some minds, with all the influx of males, that some of us might end up on a wealthy station, or be noticed by an exotic buyer. To my knowledge, this never happened at Dennys Lascelles Limited. Group staff photo at Dennys Lascelles Limited. Margaret Burn. Age 18 or 19. Jack Ganly (Margaret’s future husband). 22.The typewriter has a black painted metal frame. The top section of the typewriter consists of a cylindrical platen on a carriage featuring plated metal fittings. A curved folding paper guide sits behind the platen and moves on the horizontal axis when the user types on the keyboard. A horizontal semicircular type basket with typebar links the top section to the lower keyboard. The ink ribbon is carried between two spools on a horizontal axis, one on each side of the type-basket. At the rear, a paper tray features gold lettering which reads ‘Remington’. At the front, a four-row QWERTY keyboard is found with 42-character keys total. 'SHIFT LOCK' and 'SHIFT KEY' are to the left of the keyboard, 'BACK SPACER' and 'SHIFT KEY' to the right. All keys are circular, white with black lettering. At the top of the keyboard are five circular red keys with the numbers 1-5 displayed behind their respective keys. A Spacebar is found along the front of the keyboard. The typewriter is accompanied by a cardboard box. This box contains the original sales receipt, on blue paper with grey lead handwriting. It also contains spare parts, a spare ribbon stretched between two spools, and cleaning tools such as brushes of differing sizes. Serial Number. Engraved. "LX45395" Gold lettering. Paper tray. “Remington” Gold Lettering. Behind keyboard. “Made in Ilion, New York, U.S.A. Gold Lettering. Mirrored both sides of type-basket. “12”remington, dennys lascelles ltd, worker conditions 1930s -
 Glen Eira Historical Society
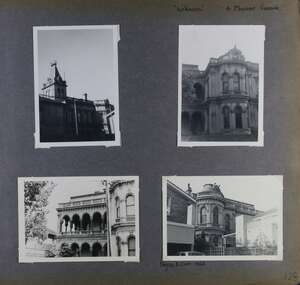
Album - Album page, Labassa, 4 Manor Grove, Circa 1972
This photograph is part of the Caulfield Historical Album 1972. This album was created in approximately 1972 as part of a project by the Caulfield Historical Society to assist in identifying buildings worthy of preservation. The album is related to a Survey the Caulfield Historical Society developed in collaboration with the National Trust of Australia (Victoria) and Caulfield City Council to identify historic buildings within the City of Caulfield that warranted the protection of a National Trust Classification. Principal photographer thought to be Trevor Hart, member of Caulfield Historical Society. Most photographs were taken between 1966-1972 with a small number of photographs being older and from unknown sources. All photographs are black and white except where stated, with 386 photographs over 198 pages. HISTORY:-- From Victorian Heritage Database citation for Labassa https://vhd.heritagecouncil.vic.gov.au/places/278 as at (26/10/2020) Labassa, Caulfield is one of Melbourne's most lavishly decorated nineteenth century mansions. It resulted from the extensive remodelling in 1890, of an earlier house, known as Sylliott Hill, which was begun in 1862-3 for lawyer, Richard A. Billing. The land at the corner of Balaclava and Orrong Roads was first acquired in 1854 by William Lyall, transferred to his partner, John Mickle, in 1859, who also acquired the adjoining allotment in Balaclava Road, and the three allotments were conveyed to Billing. His first eight-roomed house was extended significantly in 1873 into a twenty-roomed house by architects Crouch and Wilson, who were possibly also responsible for the first house. This reflected Billing's success as a barrister, and he resided at this property until his death in 1882. In 1883 prominent Melbourne businessman, Alexander William Robertson, leased the Sylliott Hill property from Billing's widow, and in 1885 he purchased the adjoining allotment in Balaclava Road. He purchased the Billing's property in 1887 and renamed the 6.31 hectare property, Ontario. In 1889-90, Robertson commissioned the German born architect, John A. B. Koch, to extensively remodel the house into a thirty-five roomed mansion. The existing house was extended and altered, largely resulting in the nineteenth century mansion as it now appears. After Robertson's death in 1896, the house was tenanted until it was eventually sold to the mining millionaire, John Boyd Watson, in 1904. He renamed the property Labassa and carried out repair and re-decoration work to the house. In the early twentieth century, many large estates were subdivided into smaller allotments as the demand for land grew and it became difficult to maintain such large estates. After Watson's death in 1911, portions of the Labassa estate were offered for sale, with Mrs Watson retaining a 1.73 hectare portion containing the house. In 1913 forty-six allotments were auctioned at Labassa Estate, with the formation of Labassa Grove and Ontario Street to the east of the property. Labassa was first recorded as containing flats in 1923 and in the late 1920s, the owner, Robert Hannon, built a red brick block of flats adjacent to the house. Subdivision continued, until the National Trust of Australia (Victoria) purchased the house in 1980 and subsequently purchased adjoining sites, one to the south-east in 1984 (house demolished in 1988) and to the west in 1988. Labassa as it now stands is substantially as it appeared when Koch completed the work in 1890. The original two storey house was transformed into a French Renaissance style mansion, with the addition of a two level L-shaped arcaded verandah and two prominent terminating bays to the south and the east. The building is of unpainted cement render with dressed bluestone plinths, balustraded parapet and steep, slate covered, flat topped mansard roofs behind. A truncated conical roof is a feature of the south bay and a helmeted head is incorporated in the parapet over the east bay. The main south and east facades incorporate many cast cement details, including sculptures, elaborate cornices, swagged Corinthian columns and caryatid consoles flanking the entrance porch, as well as pink marble panels and imitation marble, or scagliola, on curved surfaces. At the rear of the building is a two storey wing and a single storey cottage, the former being connected to the main house by a tower. This section of the house was constructed in 1873. The estate at its peak included stables (1873), conservatory (probably 1890) and a tennis pavilion (probably 1890). All of these outbuildings survive, with the stables and conservatory being converted for residential use after 1922. Internally a range of decorative treatments remain from the late nineteenth century and the early twentieth century, both from the Robertson and Watson periods of occupancy. These include wallpapers, ceiling decoration, chimney pieces, mouldings, joinery and decorative glass. From Victorian Heritage Database citation for H0135 Labassa 2/2A Manor Grove Caulfield North https://vhd.heritagecouncil.vic.gov.au/places/278 as at (26/10/2020) HOW IS IT SIGNIFICANT? Labassa, Caulfield is of architectural, aesthetic and historical significance to the State of Victoria. WHY IS IT SIGNIFICANT? Labassa, Caulfield is of architectural significance as the most prominent example of a small number of houses built in Australia in the French Renaissance style. It is of further note due to the German interpretation of the style and the use of Hellenistic sources, via Germany. It is exceptional for its lavish treatment externally, including marble, scagliola, caryatids, swagged columns, mansard roofs and ornamental cresting. Labassa is of architectural significance as the most important surviving example of German architect, John Koch's domestic work. He undertook a large variety of work in Melbourne, including a number of houses, however Labassa is the most lavish example of his work. Labassa is of aesthetic significance for its outstanding assemblage of late nineteenth and early twentieth century European style interior decoration, which remain remarkably intact. These include a trompe l'oeil ceiling, painted ceilings, embossed imitation leather and other papers, chimney pieces, ceramic tilework, oak parquetry and stained glass, including a tripartite window by Ferguson and Urie, probably dating from the 1873 period. Labassa is of historical significance as an illustrative example of the wealth acquired by a number of prominent Victorian families in the second half of the 19th century. The early development of the property, Sylliott Hill, was due to the wealth acquired by Richard Billing, barrister and fifth Victorian to be appointed Queen's Counsel in 1878. The significant development in 1890 of Ontario, is illustrative of the wealth of Alexander Robertson, a partner in Cobb and Co., a director of Goldsborough Mort & Co., and a pastoral speculator. John B. Watson, whose father had acquired great wealth from the goldfields of Bendigo and subsequently invested in city and country properties, was the third resident to impact on the house, particularly the interiors. The Labassa estate is of historical significance as an illustrative example of the development that occurred in such suburbs as Caulfield in the 1880s due to the land boom, its proximity to Melbourne and the establishment of the Melbourne to Gippsland railway in 1879. It is also illustrative of an estate which succumbed to the pressures of subdividing in the early twentieth century, as properties became difficult to maintain and demand for land close to the city grew. It was typically divided into flats in the 1920s and was used as such for about sixty years. It is of historical significance for its associations with the remnants of the earlier estate which remain extant. These include the stables, conservatory (H2005) and tennis pavilion which all remain on separate sites. Also significant are the remains of early electrical wiring and fittings. Labassa was one of the first houses in Caulfield to be electrified and some of the original wires remain. [Online Data Upgrade Project 2004]Page 128 of Photograph Album with four photographs (two portrait and two landscape) of Labassa.Handwritten: "Labassa" 4 Manor Grove [top right] / Neg 232 8 Oct 1966 [under bottom right photo] / 128 [bottom right]trevor hart, bracketed eaves, slate roof, bay windows, decorative brackets, caulfield north, labassa, richard a. billing, balaclava road, orrong road, sylliott hill, william lyall, crouch and wilson, alexander william robertson, ontario, 1880's, john a. b. koch, mansion, john boyd watson, labassa grove, french renaissance style, l-shaped arcaded verandah, bluestone plinths, balustraded parapet, flat topped mansard roofs, conical roof, elaborate cornices, corinthian columns, caryatid consoles, marble panels, imitation marble, scagliola, tower, conservatory, stables, tennis pavilion, mouldings, decorative glass, caryatids, swagged columns, ornamental cresting, trompe l'oeil ceiling, embossed imitation leather, oak parquetry, stained glass, tripartite window, triple window, ferguson and urie, 1870's, flats, 1920's, electric wiring, 1860's, verandahs, curved windows, arched windows, italianate, terraces, gargoyles, ornamentation, ornate entrance, la bassa, manor grove, st kilda east, victorian, cast iron work, john koch, richard billing, architects, electrification, john mickle, land subdivision, mrs watson, labassa estate, robert hannon, national trust of australia (victoria), sculpture -
 Glen Eira Historical Society
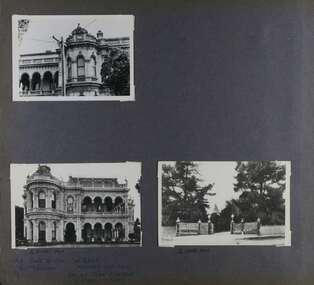
Album - Album page, Labassa, 4 Manor Grove, Circa 1972
This photograph is part of the Caulfield Historical Album 1972. This album was created in approximately 1972 as part of a project by the Caulfield Historical Society to assist in identifying buildings worthy of preservation. The album is related to a Survey the Caulfield Historical Society developed in collaboration with the National Trust of Australia (Victoria) and Caulfield City Council to identify historic buildings within the City of Caulfield that warranted the protection of a National Trust Classification. Principal photographer thought to be Trevor Hart, member of Caulfield Historical Society. Most photographs were taken between 1966-1972 with a small number of photographs being older and from unknown sources. All photographs are black and white except where stated, with 386 photographs over 198 pages. HISTORY:-- From Victorian Heritage Database citation for Labassa https://vhd.heritagecouncil.vic.gov.au/places/278 as at (26/10/2020) Labassa, Caulfield is one of Melbourne's most lavishly decorated nineteenth century mansions. It resulted from the extensive remodelling in 1890, of an earlier house, known as Sylliott Hill, which was begun in 1862-3 for lawyer, Richard A. Billing. The land at the corner of Balaclava and Orrong Roads was first acquired in 1854 by William Lyall, transferred to his partner, John Mickle, in 1859, who also acquired the adjoining allotment in Balaclava Road, and the three allotments were conveyed to Billing. His first eight-roomed house was extended significantly in 1873 into a twenty-roomed house by architects Crouch and Wilson, who were possibly also responsible for the first house. This reflected Billing's success as a barrister, and he resided at this property until his death in 1882. In 1883 prominent Melbourne businessman, Alexander William Robertson, leased the Sylliott Hill property from Billing's widow, and in 1885 he purchased the adjoining allotment in Balaclava Road. He purchased the Billing's property in 1887 and renamed the 6.31 hectare property, Ontario. In 1889-90, Robertson commissioned the German born architect, John A. B. Koch, to extensively remodel the house into a thirty-five roomed mansion. The existing house was extended and altered, largely resulting in the nineteenth century mansion as it now appears. After Robertson's death in 1896, the house was tenanted until it was eventually sold to the mining millionaire, John Boyd Watson, in 1904. He renamed the property Labassa and carried out repair and re-decoration work to the house. In the early twentieth century, many large estates were subdivided into smaller allotments as the demand for land grew and it became difficult to maintain such large estates. After Watson's death in 1911, portions of the Labassa estate were offered for sale, with Mrs Watson retaining a 1.73 hectare portion containing the house. In 1913 forty-six allotments were auctioned at Labassa Estate, with the formation of Labassa Grove and Ontario Street to the east of the property. Labassa was first recorded as containing flats in 1923 and in the late 1920s, the owner, Robert Hannon, built a red brick block of flats adjacent to the house. Subdivision continued, until the National Trust of Australia (Victoria) purchased the house in 1980 and subsequently purchased adjoining sites, one to the south-east in 1984 (house demolished in 1988) and to the west in 1988. Labassa as it now stands is substantially as it appeared when Koch completed the work in 1890. The original two storey house was transformed into a French Renaissance style mansion, with the addition of a two level L-shaped arcaded verandah and two prominent terminating bays to the south and the east. The building is of unpainted cement render with dressed bluestone plinths, balustraded parapet and steep, slate covered, flat topped mansard roofs behind. A truncated conical roof is a feature of the south bay and a helmeted head is incorporated in the parapet over the east bay. The main south and east facades incorporate many cast cement details, including sculptures, elaborate cornices, swagged Corinthian columns and caryatid consoles flanking the entrance porch, as well as pink marble panels and imitation marble, or scagliola, on curved surfaces. At the rear of the building is a two storey wing and a single storey cottage, the former being connected to the main house by a tower. This section of the house was constructed in 1873. The estate at its peak included stables (1873), conservatory (probably 1890) and a tennis pavilion (probably 1890). All of these outbuildings survive, with the stables and conservatory being converted for residential use after 1922. Internally a range of decorative treatments remain from the late nineteenth century and the early twentieth century, both from the Robertson and Watson periods of occupancy. These include wallpapers, ceiling decoration, chimney pieces, mouldings, joinery and decorative glass.From Victorian Heritage Database citation for H0135 Labassa 2/2A Manor Grove Caulfield North https://vhd.heritagecouncil.vic.gov.au/places/278 as at (26/10/2020) HOW IS IT SIGNIFICANT? Labassa, Caulfield is of architectural, aesthetic and historical significance to the State of Victoria. WHY IS IT SIGNIFICANT? Labassa, Caulfield is of architectural significance as the most prominent example of a small number of houses built in Australia in the French Renaissance style. It is of further note due to the German interpretation of the style and the use of Hellenistic sources, via Germany. It is exceptional for its lavish treatment externally, including marble, scagliola, caryatids, swagged columns, mansard roofs and ornamental cresting. Labassa is of architectural significance as the most important surviving example of German architect, John Koch's domestic work. He undertook a large variety of work in Melbourne, including a number of houses, however Labassa is the most lavish example of his work. Labassa is of aesthetic significance for its outstanding assemblage of late nineteenth and early twentieth century European style interior decoration, which remain remarkably intact. These include a trompe l'oeil ceiling, painted ceilings, embossed imitation leather and other papers, chimney pieces, ceramic tilework, oak parquetry and stained glass, including a tripartite window by Ferguson and Urie, probably dating from the 1873 period. Labassa is of historical significance as an illustrative example of the wealth acquired by a number of prominent Victorian families in the second half of the 19th century. The early development of the property, Sylliott Hill, was due to the wealth acquired by Richard Billing, barrister and fifth Victorian to be appointed Queen's Counsel in 1878. The significant development in 1890 of Ontario, is illustrative of the wealth of Alexander Robertson, a partner in Cobb and Co., a director of Goldsborough Mort & Co., and a pastoral speculator. John B. Watson, whose father had acquired great wealth from the goldfields of Bendigo and subsequently invested in city and country properties, was the third resident to impact on the house, particularly the interiors. The Labassa estate is of historical significance as an illustrative example of the development that occurred in such suburbs as Caulfield in the 1880s due to the land boom, its proximity to Melbourne and the establishment of the Melbourne to Gippsland railway in 1879. It is also illustrative of an estate which succumbed to the pressures of subdividing in the early twentieth century, as properties became difficult to maintain and demand for land close to the city grew. It was typically divided into flats in the 1920s and was used as such for about sixty years. It is of historical significance for its associations with the remnants of the earlier estate which remain extant. These include the stables, conservatory (H2005) and tennis pavilion which all remain on separate sites. Also significant are the remains of early electrical wiring and fittings. Labassa was one of the first houses in Caulfield to be electrified and some of the original wires remain. [Online Data Upgrade Project 2004]Page 129 of Photograph Album with three landscape photographs of Labassa. One of the photographs is of Labassa's drive and gates.Handwritten: 4 JUNE 1910 / SALE JUNE 28 1910 "LA BASSA' / "AUSTRALASIAN" FORMERLY "ONTARIO"/ RES OF JOHN B WATSON / 15 ACRES 3 ROADS [under bottom left photo] / 4 JUNE 1910 [under bottom right photo] / 129 [bottom left]trevor hart, bracketed eaves, intricate lacework, slate roof, bay windows, decorative brackets, caulfield north, labassa, richard a. billing, balaclava road, orrong road, sylliott hill, william lyall, crouch and wilson, alexander william robertson, ontario, 1880's, john a. b. koch, mansion, john boyd watson, labassa grove, french renaissance style, l-shaped arcaded verandah, bluestone plinths, balustraded parapet, flat topped mansard roofs, conical roof, elaborate cornices, corinthian columns, caryatid consoles, marble panels, imitation marble, scagliola, tower, conservatory, stables, tennis pavilion, mouldings, decorative glass, caryatids, swagged columns, ornamental cresting, trompe l'oeil ceiling, embossed imitation leather, oak parquetry, stained glass, tripartite window, triple window, ferguson and urie, 1870's, flats, 1920's, electric wiring, 1860's, verandahs, curved windows, arched windows, italianate, terraces, gargoyles, ornamentation, ornate entrance, la bassa, manor grove, st kilda east, gates, cast iron work, richard billing, architects, john koch, electrification, victorian style, drives, john mickle, land subdivision, mrs watson, labassa estate, robert hannon, national trust of australia (victoria), sculpture -
 National Wool Museum
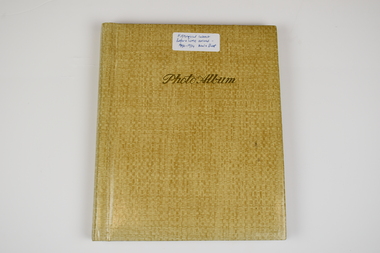
Photo Album, 1930-1934
The Photo Album was created by Hans Beck, who interned with the donor's father (Wilhelm Eckels). The Photo Album depicts wool buying and sheep station related life between 1927-1939. Each photograph has been individually labelled.Straw coloured booklet with gold cursive writing on front cover spelling 'Photo Album'. Inside are 18 pages containing 63 photographs, each individually captioned. Internal pages show signs of age with discolouration, particularly in areas of previous adhesive application.Lettering, Front: Historic Interest Before WME arrived - 1930-1934 Wool & Sheep Photo Album Lettering, Internal by Page: Page 1 - Bottom Left Conner: Table from right:/ O. Hilbert sen. / WW. Richter, W. Ehrig/ Sampler: C. McCarthy/ at desk: E.S. Bottom Right Corner: 1927/ Wool Sample Room/ O. Hilbert/ Terranora Buildings/ Reiby Lane Page 2 - Bottom Middle: 1931/ Opening Sale/ Sydney Page 3 - Bottom Middle: 1934/ Opening Sale/ Sydney Page 4 - Bottom Middle: 1933/ Wool Auctions/ Brisbane Page 5 - Top Left Corner: 1930 Escapade/ Sydney to CAIRNS/ via Bourke, Central/ Queensland, Hinter-/ land & Atherton/ Table Lands Top Right Corner: Dubbo: Main Street/ (1st Night)/ 31.7.1930 Middle Right: 1st Night-"OUT"/ Stranded 11 miles/ from Bourke. (Red/ Dust in Carburettor Bottom Right Corner: Our "ERSKINE'/ hits Culvert &/ breaks both King-/pins. 1 1/2 miles from/ CUNNAMULLA SW-Q. Page 6 - Top Right Corner: "Rosevale Station"/ via Cunnamulla SWQ/ "Gidgi" country/ Gidgi Creak &/ Warrigo R. Middle Left: STAN HILL Page 7 - Middle Top: Blackhall/ Tattersall's Hotel/ Yarning at Cross-/roads. Middle Left: FO Wool Sales/ 22 Horse team Middle Right: Roadsign to:/ ISIS DOWNS &/ Homestead (Fart Page 8 - Middle Top: Muster: 3000 sheep/ Semi-circular/ Shearing shed/ ISIS DOWNS Page 9 - Middle Top: Shearer/ Water Tower/ Counting out/ pens Middle Bottom: Shearers Cook/ Hot Water & Soup/ Cake for Shearing/ Shed Charity Ball Page 10 - Middle Left: Isis Downs Home-/ stead with fire// flood Lookout./ Artesian Borewell Bottom Right: Manager: Moore/ & Alfred Loh-/ mann with kills/ Ducks & Emus Page 11 - Top Middle: PORTLAND DOWNS/ Muster: 10,000/ Sheep Bottom Left: Manager:/ Mr. Luck/ with A.L./Moore Page 12 - Middle Top: ROOKWOOD Station/ near/ HUGHENDEN/ Central NWQ Page 13 - Top Middle: 'HINTERLAND"/ Cattle country/ Spear Grass/ Tracks Bottom Middle: Crossings:/ Creeks: Quick/ Sand/ Rivers: rocky Page 14 - Middle Right: Lyndhurst stat/tion/ Head Stockman Middle Left: -Valley of la-/goons/ Station Bottom Right Corner: Master Atkinson/ saves/ Petrol shortage Page 15 - Top Middle: ATHERTON TABLELANDS/ LAKE BERRINE Middle Centre: Tropical Rainforest/ near/ Lake Berrine Page 16 - Top Middle: ATHERTON TABLELANDS/ Timber Country Bottom Middle Edge: CAIRNS/ Imperial Hotel Page 17 - Hans Beck with/ Betty Hilbert/ Lapstone Hill 1931 wool - transportation, wool sales, wool growing, wool growing agriculture farming, wool industry, wool sales - sydney, wool sales - brisbane, dubbo, 1930, bourke, cunnamulla, isis downs, shearing, shearing - lifestyle, portland downs, muster, hughenden, hinterland, lake berrine, cairns -
 Flagstaff Hill Maritime Museum and Village
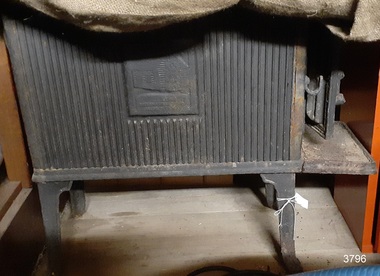
Domestic object - Wood Stove, circa 1880-1920
Stoves of this design are used for heating domestic places and were available in many designs and shapes. They commonly used wood as fuel and were not only used for heating but cooking as well. This stove was part of the original furnishings of the 1922 vessel 'Reginald M a South Australian costal trader it was made from material and fittings obtained from salvage yards. The vessel “Reginald M” was a two-masted coastal ketch, owned and built by Mr. Jack (John) Murch of Birkenhead, Port of Adelaide, South Australia. Its construction took approximately 6 months and it was launched at Largs Bay in 1922. Reginald M had a very shallow draft and a flat bottom that enabled it to come close to shore and to sit high and dry at low tide or to be beached on sand. The flat bottom was also to make the ship able to skim over reefs. Wagons could load and unload direct from her side. Her cargo included Guano, Barley, Wool, Horses, Cattle, Timber, Explosives, Potatoes, Shell Grit and Gypsum. On April 9th 1931Reginald M weathered a large storm in St Vincent Gulf, SA. The vessel suffered much damage; mast snapped and the crew labored for four hours to free her by chopping off the past and rigging. The crew patched her up and slowly returned to Port Adelaide with only a portion of the insured cargo being damaged. Her crew members at the time were owner Mr John H Murch of Wells Street Largs Bay, Skipper Mr R Murch John’s brother, Murray – son of Captain Murch and Seaman John Smith. Reg Webb purchased Carribie Station, at Marion in the Warooka District, south of Adelaide, in 1921. He cleared the land and farmed sheep and grain. In 1923 he shipped his own wool and grain from Marion Bay, having first carted 300 bags of the barley grain, 12 bags at a time, along the unmade track to the jetty. A photograph donated to Flagstaff Hill, dating about 1929 - 1942, shows two men on the Reginald M, holding between them their fishing catch of a large hammer shark. The photograph is stamped “GRENFELL STUDIO PORT LINCOLN PRINT” and titled “hammer shark caught on Reginald M”. The donor’s family lived on the Your Peninsular and dispatched their grain from a chute at Gleeson’s Landing to the awaiting transport vessel. Reg knew the Murch Brothers from Port Adelaide. The brothers had been using their ketch REGINALD M to ship Guano from the Islands, led by Captain Richard Murch. Reg approached them in 1934 about shipping grain from Marion Bay. The brothers visited the bay and thought it was an ideal place. They showed Reg where to stack his grain and they measured up the cliffs. When Reg was ready, they brought down and installed a ninety foot wooden chute. The bags of grain were then individually sent down the chute, landing in a waiting small boat then rowed to REGINALD M, 14 bags at a time. After 10 hours REGINALD M would be fully loaded with 1300 bags of grain and shipped to waiting ports. At one time a wild storm destroyed the chute but it was rebuilt and strengthened. REGINALD M was involved in shipping the grain from there until 1938. In 1940 Able Seaman Allan H Lucas served on Reginald M between September and December, being engaged and discharged from Port of Adelaide. His Certificate of Discharge was signed by ship’s Master W S Murch. It seems that at some stage Reginald M was used as a Customs vessel, as one photograph in Flagstaff Hill’s collection shows “H.M.C. No. 3, Pt Adelaide” on the bow. In 1969 the last freight left Marion Bay on the ketch REGINALD M carrying grain, wool and explosives. In late 1970 she was sold to the Mt. Lyell Mining and Railway Company and was used by them as a barge to carry explosives. In 1972 the Navy League of Strahan, Tasmania, purchased her for use by the Strahan Sea Cadet Unit to use at Macquarie Harbour and renamed her T.S. Macquarie. However this plan for use of Reginald M did not come to pass. In 1974 Mr. Andrew Rennie, of East Brighton, Melbourne, bought her for a similar purpose. , paying $5,000 and donating a ‘Cadet of the Year” trophy to the Sea Cadets. He sailed her from Strahan to Melbourne, planning to use her for pleasure sailing. In 1975 Reginald M was sold to Melbourne Ferry Company at auction. Later in 1975 the Reginald M was bought by Flagstaff Maritime Museum for $20,000 . She has been restored and is now one of the exhibits in the Village lagoon or lake. It was restored in 2006 using funds from a $4,000 government grant. Flagstaff Hill Maritime Village’s Collection holds several other artefacts associated with Reginald M. They include photographs of the Reginald M, including one photograph of her in Outer Harbour, S.A. dated 1947, with Skipper- R.F. Dale and Owner- John Murch. Another shows her docked at Port Adelaide, with the lettering H.M.C. No. 3 Pt ADEL (standing for His or Her Majesty’s Customs). The stove is significant as it represents the heating and cooking appliances used in late 19th and early 20th century, both on board vessels as well as for domestic purposes. The stove has additional significant for its association with the vessel "REGINALD M" a coastal trading ketch from South Australia built in 1922 at Largs Bay. It is one of very few sailing coastal trading vessels built in Australia with its flat bottom, single chine shape designed for navigating shallow water. See additional comments in the Production section this documents under Comments for further information regards the stove. Stove a cast-iron, rectangular, four-legged stove with a hinged front door. This stove was part of the original furnishings of the vessel 'Reginald M', built in Adelaide 1922. Image of a log cabin with an illegible inscription below it.flagstaff hil, warrnambool, flagstaff hill maritime museum, maritime museum, shipwreck coast, flagstaff hill maritime village, coastal trader, trading vessel, vessel reginald m, ketch, john murch ship builder, reg webb, carribie station, mt lyell copper company, queenstown navy league, andrew rennie, melbourne ferry company, r.f. dale, port adelaide vessel reginald m, macquarie training vessel, grenfell studio port lincoln, stove, domestic heating, domestic cooking, heater, cooking unit, wood fired stove, wood stove, wood-burning stove -
 Flagstaff Hill Maritime Museum and Village
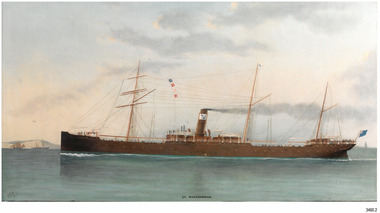
Photograph - Vessel, S.S. Warrnambool, 1998-2003
This photograph and a matching earlier photograph are the images of a painting of the British steamship SS Warrnambool at Dover Strait in the English Channel. The photographs were donated by the painting’s owner, who acquired the 30” x 56” (76 x 142.5 cm) oil on canvas painting in 1998. Both photographs were accompanied by a letter, one written in 2001, and the other in 2003. The letters confirm that the artist of the painting was Charles Keith Miller, signed with the initials “CKM” and dated “1893”. The painting shown in the photographs was a gift to the Town Council of Warrnambool, presented to Warrnambool folks in Melbourne on December 1, 1892, by the Captain of William Lund’s ship SS Warrnambool. The painting was given by Lund in appreciation of the Ladies of Warrnambool who had presented the ship with a ‘house’ flag bearing the Blue Anchor Line’s symbol of a diagonal blue anchor on a white background; the ladies had made the decision to present the flag only a month earlier. A few days later, December 6th, the SS Warrnambool was on its homeward journey to Britain, sailing via Adelaide. It anchored for a short time off the Port of Warrnambool. A boat was launched from Lady Bay to take a group of friends to the ship with a delivery of gifts. After cheers were roused for both the ship and the Captain, the ship continued on its way. The photograph shows the gifted white flag with a diagonal blue anchor flying from the masthead. The same symbol is painted on the ship’s black funnel. The signal flags on the foremast display ‘M’ ‘R’ ‘V’ ‘B’. These letters are most likely the ship’s call number ‘MRVB’. Although the painting was given as a gift in December 1892, it is post-dated “1893”. Perhaps the painting was given earlier than anticipated; or the date added later, but whatever the reason, the provenance of the painting was confirmed at auctions of this painting and other works by the same artist. CHARLES KEITH MILLER 1836-1907:- Captain Charles Miller left his home in Scotland at the age of 15 years for a life at sea. He earned his Master’s Certificate ten years later. After being the captain of sailing ships he moved over to the steamships because they were faster. In 1866 he married and settled in Glasgow. Over the following eleven years he and his wife had five children, then sadly his wife passed away. Captain Miller returned to the sea for a while but in 1888 he gave up his sea life to spend his time as a marine artist. His understanding of seafaring life and vessels, combined with his artistic skills, gave him the ability to produce fine art and several galleries and museums have collections of his sought-after works. S.S. WARRNAMBOOL 1892-1925:- The steamship SS Warrnambool was built in 1892 by the Sunderland Ship Building Company for the Lund Line of London, founded by William Lund in 1869. It efficiently carried both passengers and cargo across the world to Australia, under the command of her master Captain Joshua Edward Iibery, who had many years of experience with the Blue Anchor Line. The company, referred to as the Blue Anchor Line or BAL, owned a fleet of both sail and steamships. The funnels of all of the steamships were painted black, with a white band around the top bearing a diagonal blue anchor and chain. The company’s house flag was also white with a diagonal blue anchor. The SS Warrnambool carried passengers and cargo in a ‘no frills’ service to and from Europe around the Cape of Good Hope, stopping at some ports in between. The ship was involved in bringing home returned solders in 1895. At one time it carried a doctor from Victoria, Australia, to assist at the war front in South Africa. The ship had a very good reputation for its cargo arriving ‘almost always in excellent condition.’ Exported goods from Australia included iron safes, flour, wool, apples, frozen rabbits, butter, cheese, pork, cattle, poultry and sheep. One remarkable delivery contained Ostriches for Queen Victoria and they survived the journey well. The SS Warrnambool was sold in 1900 to the British and South American Steam Navigation Co. Ltd of Liverpool and was renamed ‘Harmodius’. The company was managed by R.P. Houston & Company of London and its Houston Line funnels were red with a black top. The Harmodius was sold in 1919 to K.S.S. Co. Ltd, managed by Kaye Son & Co. Ltd. of Liverpool, and was renamed ‘Kut’. The line had black funnels with a white ‘K’ in a diamond or between white stripes. In 1926 it was purchased by T.W. Ward Ltd. and broken up. NOTE- other vessels named “Warrnambool” Two other vessels carried the name “Warrnambool” (1)- HMAS Warrnambool J202 (1941-1947), a Bathurst Class corvette vessel owned by the Royal Australian Navy, destroyed by a mine. The photograph is significant for its association with the painting "SS Warrnambool" by well-known early 20th century marine artist Charles Keith Miller, whose paintings are well valued. The painting and the photograph of it are namesakes of Warrnambool and are connected through the gifts exchanged between the ship company owner, the City of Warrnambool and the Ladies of Warrnambool; the House Flag and the painting by C K Miller. The image is a good likeness to original photographs of the late-19th to early-20th century steam and sale vessel. Coloured photograph of a painting, the steamship S.S. Warrnambool. The three-masted ship has lowered sails. It is in calm water, land on one side, and other vessels in the water. The ship has four raised signal flags, a house flag and a blue ensign. The funnel also bears the house flags symbol. Smoke emits from the funnel. Figures are visible onboard. There is a signature and a title on the lower edge of the photograph. (Artist of the painting in the photograph was Charles Keith Miller)House flag symbol, [diagonal blue anchor on white background] Text "CKM" and "1893" Text "S. S. WARRNAMBOOL."flagstaff hill, warrnambool, photograph, steam ship warrnambool, flagstaff hill maritime village, shipwreck coast, ss warrnambool, captain, charles keith miller, ckm, 1893, william lund, warrnambool town council, blue anchor line, lund line, ladies of warrnambool, house flag, diagonal blue anchor, captain miller, sunderland ship building company, migrant ship, 1892 ship, home flag, bal, australian export, s.s.warrnambool, dover strait, english chanel, port of warrnambool, lady bay, mrvb, captain charles miller, captain joshua edward iibery, ostriches, queen victoria, british and south american steam navigation co., harmodius, r.p. houston & company, houston line, k.s.s. co. ltd, kaye son & co. ltd, kut, t.w. ward ltd -
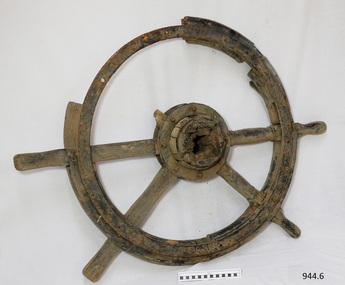 Flagstaff Hill Maritime Museum and Village
Equipment - Ship's Wheel, 1922
This ship's wheel was hand made from wood and metal using a recycled cart wheel. It originally belonged to the "Reginald M", a 2 masted, flat bottomed, coastal trading ketch with single chine. The REGINALD M The vessel “Reginald M” was a two-masted coastal ketch, owned and built by Mr. Jack (John) Murch of Birkenhead, Port of Adelaide, South Australia. Its construction took approximately 6 months and it was launched at Largs Bay in 1922. The Reginald M’s purpose was to serve the coastal trade of South Australia, to carry cargo cheaply and efficiently. It is believed that the keel was in fact hewn from two telegraph poles! Its builder frequented all the salvage yards for materials and fittings. Reginald M had a very shallow draft and a flat bottom that enabled it to come close to shore and to sit high and dry at low tide or to be beached on sand. The flat bottom was also to make the ship able to skim over reefs. Wagons could load and unload direct from her side. Her cargo included Guano, Barley, Wool, Horses, Cattle, Timber, Explosives, Potatoes, Shell Grit and Gypsum. On April 9th 1931Reginald M weathered a large storm in St Vincent Gulf, SA. The vessel suffered much damage; mast snapped and the crew laboured for four hours to free her by chopping off the past and rigging. The crew patched her up and slowly returned to Port Adelaide with only a portion of the insured cargo being damaged. Her crew members at the time were owner Mr John H Murch of Wells Street Largs Bay, Skipper Mr R Murch – John’s brother, Murray – son of Captain Murch and Seaman John Smith. Reg Webb purchased Carribie Station, at Marion in the Warooka District, south of Adelaide, in 1921. He cleared the land and farmed sheep and grain. In 1923 he shipped his own wool and grain from Marion Bay, having first carted 300 bags of the barley grain, 12 bags at a time, along the unmade track to the jetty. A photograph donated to Flagstaff Hill, dating about 1929 - 1942, shows two men on the Reginald M, holding between them their fishing catch of a large hammer shark. The photograph is stamped “GRENFELL STUDIO PORT LINCOLN PRINT” and titled “hammer shark caught on Reginald Emm”. The donor’s family lived on the Your Peninsular and despatched their grain from a chute at Gleeson’s Landing to the awaiting transport vessel. Reg knew the Murch Brothers from Port Adelaide. The brothers had been using their ketch REGINALD M to ship Guano from the Islands, led by Captain Richard Murch. Reg approached them in 1934 about shipping grain from Marion Bay. The brothers visited the bay and thought it was an ideal place. They showed Reg where to stack his grain and they measured up the cliffs. When Reg was ready, they brought down and installed a ninety foot wooden chute. The bags of grain were then individually sent down the chute, landing in a waiting small boat then rowed to REGINALD M, 14 bags at a time. After 10 hours REGINALD M would be fully loaded with 1300 bags of grain and shipped to waiting ports. At one time a wild storm destroyed the chute but it was rebuilt and strengthened. REGINALD M was involved in shipping the grain from there until 1938. In 1940 Able Seaman Allan H Lucas served on Reginald M between September and December, being engaged and discharged from Port of Adelaide. His Certificate of Discharge was signed by ship’s Master W S Murch. It seems that at some stage Reginald M was used as a Customs vessel, as one photograph in Flagstaff Hill’s collection shows “H.M.C. No. 3, Pt Adelaide” on the bow. In 1969 the last freight left Marion Bay on the ketch REGINALD M carrying grain, wool and explosives. In late 1970 she was sold to the Mt. Lyell Mining and Railway Company and was used by them as a barge to carry explosives. In 1972 the Navy League of Strahan, Tasmania, purchased her for use by the Strahan Sea Cadet Unit to use at Macquarie Harbour and renamed her T.S. Macquarie. However this plan for use of Reginald M did not come to pass. In 1974 Mr. Andrew Rennie, of East Brighton, Melbourne, bought her for a similar purpose. , paying $5,000 and donating a ‘Cadet of the Year” trophy to the Sea Cadets. He sailed her from Strahan to Melbourne, planning to use her for pleasure sailing. Also in 1975 Reginald M was sold to Melbourne Ferry Company at auction. Later in 1975 the Reginald M was bought by Flagstaff Maritime Museum for $20,000 . She has been restored and is now one of the exhibits in the Village lagoon or lake. It was restored in 2006 using funds from a $4,000 government grant. This ship's wheel is significant because of its association with the REGINALD M. REGNIALD M was a coastal trading ketch from South Australia built in 1922. It is one of very few sailing coastal trading vessels still extant, and its flat bottom, single chine shape illustrates a very simple but robust method of construction, compared to other round bilged examples of trading vessels. She is now listed on the Australian Register of Historic Vessels (ARHV Number: HV000562.)Ship’s wheel, also called a Helm, eight spoke design. Centre of wheel is handmade of wood and has iron rings around each side. The spokes are fitted into this wooden hub. The outer wheel has an iron ring on one side and sections of a wooden ring on the other. There are both original and modern bolt and screw fastenings. The wheel has remnants of black paint. This ship’s wheel was originally fitted to the ketch REGINALD M and removed during its restoration. flagstaff hill, warrnambool, shipwrecked-coast, flagstaff-hill, flagstaff-hill-maritime-museum, maritime-museum, shipwreck-coast, flagstaff-hill-maritime-village, ship's wheel, hand made ship's wheel, coastal trader, reginald m, ketch, john murch, ch murch, reg webb, carribie station, mt lyell copper company, queenstown navy league, andrew rennie, melbourne ferry company, r.f. dale -
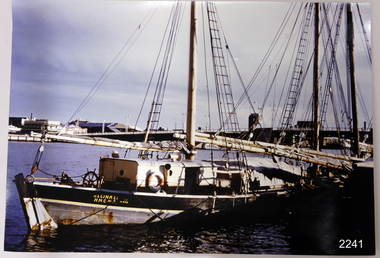 Flagstaff Hill Maritime Museum and Village
Photograph
This coloured photograph of the ketch Reginald M was taken when she was docked at Port Adelaide. The side of the vessel shows the letters "REGINALD M / H.M.C. No. 2 Pt ADEL" - (abbreviation H.M.C. meaning His/Her Majesty's Customs. HISTORY The Reginald M, a two-masted coastal ketch, was owned and built by Mr. Jack (John) Murch of Birkenhead, Port of Adelaide, South Australia to serve the coastal ports of South Australia. Its construction took approximately 6 months and it was launched at Largs Bay in 1922. Its purpose was to carry cargo cheaply and efficiently, and tradition has it that the keel was in fact hewn from two telegraph poles! Its builder frequented all the salvage yards for materials and fittings. The Reginald M had a very shallow draft and a flat bottom that enabled it to sit high and dry at low tide. The flat bottom was also to make the ship able to skim over reefs. Wagons were able to load and unload direct from her side. Her cargo included Guano, Barley, Wool, Horses, Cattle, Timber, Explosives, Potatoes, Shell Grit and Gypsum. In 1931 she weathered a large storm in St Vincents Gulf, SA. Her crew at the time were Owner Mr John H Murch, Wells St, Largs Bay, Skipper, John’s brother Mr R Murch, Murray, son of Mr R Murch and Seaman John Smith Reg Webb purchased Carribie Station, at Marion in the Warooka District, south of Adelaide, in 1921. He cleared the land and farmed sheep and grain. In 1923 he shipped his own wool and grain from Marion Bay, having first carted 300 bags of the barley grain, 12 bags at a time, along the unmade track to the jetty. A photograph dating about 1929 -1942 shows 2 men on the Reginald M, having just landed their fishing catch of a hammer shark. The photograph is stamped “GRENFELL STUDIO PORT LINCLON PRINT” and titled “hammer shark caught on Reginall Emm”. Reg Webb knew the Murch Brothers from Port Adelaide. The brothers had been using their ketch REGINALD M to ship Guano from the Islands, led by Captain Richard Murch. Reg approached them in 1934 about shipping grain from Marion Bay. The brothers visited the bay and thought it was an ideal place. They showed Reg where to stack his grain and they measured up the cliffs. When Reg was ready, they brought down and installed a ninety foot wooden chute. The bags of grain were then individually sent down the chute, landing in a waiting small boat then rowed to REGINALD M, 14 bags at a time. After 10 hours REGINALD M would be fully loaded with 1300 bags of grain and shipped to waiting ports. At one time a wild storm destroyed the chute but it was rebuilt and strengthened. REGINALD M was involved in shipping the grain from there until 1938. In 1940 Able Seaman Allan H Lucas served on Reginald M between September and December, being engaged and discharged from Port of Adelaide. His Certificate of Discharge was signed by ship’s Master W S Murch. It seems that at some stage Reginald M was used as a Customs vessel because a photograph in Flagstaff Hill’s collection shows the text “H.M.C. No. 3, Pt Adelaide” on the bow, the abbreviations standing for “His/Her Majesty’s Customs”. In 1969 the last freight left Marion Bay on the ketch REGINALD M carrying grain, wool and explosives. In late 1970 she was sold to the Mt. Lyell Copper Company, based in Queenstown, Tasmania, to carry explosives. In 1972 the Navy League of Strahan, Tasmania, purchased her for use by the Strahan Sea Cadet Unit and renamed her T.S. Macquarie. In 1974 Mr. Andrew Rennie, of East Brighton, Melbourne, bought her, paying $5,000 and donating a ‘Cadet of the Year” trophy to the Sea Cadets. He sailed her from Strahan to Melbourne, planning to use her for pleasure sailing. In 1975 Reginald M was sold to Melbourne Ferry Company at auction. In 1975 the Reginald M was bought by Flagstaff Maritime Museum for $20,000. She has been restored and is now one of the exhibits, tied up at the dock. Flagstaff Hill Maritime Village’s Collection holds several other artefacts associated with Reginald M. They include - Photographs of the Reginald M, including one photograph of her in Outer Harbour, S.A. dated 1947, with Skipper- R.F. Dale and Owner- John Murch. Another shows her docked at Port Adelaide, with the lettering H.M.C. No. 3 Pt ADEL (standing for His/Her Majesty’s Customs). There is a black and white photo of her at a wharf and another showing a person on board. - a lifebuoy, with Pt Adelaide on it. - a bullet found in pieces of timber when Reginald M was restored in 1979 (References: Flagstaff Hill Fact Sheet “Reginald M”, the book “The Reg Webb Story” compiled by the Warooka & District Museum. Reg Webb’s daughter Lily Ramsay (nee Webb) and her husband Howard, Lizzie Rennie (daughter of owner Andrew Rennie), brochure “Discover the Yorke Peninsula South Australia”, Ketch in Peril; Adelaide Chronicle 9 April 1931, K Gordon & Mary Filmer of Warooka; South Australian Maritime Museum) Thiis photograph is significant because of its connection to the history of the vessel REGINALD M is a coastal trading ketch from South Australia built in 1922. It is one of very few sailing coastal trading vessels still extant, and its flat bottom, single chine shape illustrates a very simple but robust method of construction, compared to other round bilged examples of trading vessels. She is now listed on the Australian Register of Historic Vessels (ARHV Number: HV000562.)Photograph of Reginald M at Port Adelaide. The side of the vessel shows the letters "REGINALD M / H.M.C. No. 2 Pt ADEL" - (abbreviation H.M.C. meaning His/Her Majesty's Customs. Painted on the side of the vessel "REGINALD M / H.M.C. No. 2 Pt ADEL" - flagstaff hill, warrnambool, shipwrecked-coast, flagstaff-hill, flagstaff-hill-maritime-museum, maritime-museum, shipwreck-coast, flagstaff-hill-maritime-village, reginald m, coastal trading ketch, trading vessel, john murch ship builder, port adelaide vessel reginald m, andrew rennie, macquarie training vessel, mt lyell copper company, queenstown navy league, ch murch, reg webb, carribie station, melbourne ferry company, grenfell studio port lincoln, vessel reginald m -
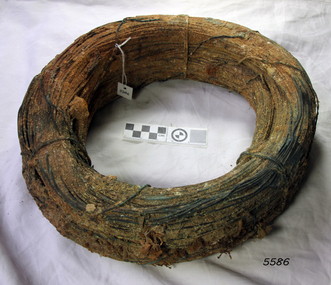 Flagstaff Hill Maritime Museum and Village
Functional object - Copper Wire, ca. 1878
the coil of copper wire was recovered from the wreck of the sailing ship Loch Ard. HISTORY OF THE LOCH ARD The LOCH ARD belonged to the famous Loch Line which sailed many ships from England to Australia. Built in Glasgow by Barclay, Curdle and Co. in 1873, the LOCH ARD was a three-masted square rigged iron sailing ship. The ship measured 262ft 7" (79.87m) in length, 38ft (11.58m) in width, 23ft (7m) in depth and had a gross tonnage of 1693 tons. The LOCH ARD's main mast measured a massive 150ft (45.7m) in height. LOCH ARD made three trips to Australia and one trip to Calcutta before its final voyage. LOCH ARD left England on March 2, 1878, under the command of Captain Gibbs, a newly married, 29 year old. She was bound for Melbourne with a crew of 37, plus 17 passengers and a load of cargo. The general cargo reflected the affluence of Melbourne at the time. On board were straw hats, umbrella, perfumes, clay pipes, pianos, clocks, confectionary, linen and candles, as well as a heavier load of railway irons, cement, lead and copper. There were items included that intended for display in the Melbourne International Exhibition in 1880. The voyage to Port Phillip was long but uneventful. At 3am on June 1, 1878, Captain Gibbs was expecting to see land and the passengers were becoming excited as they prepared to view their new homeland in the early morning. But LOCH ARD was running into a fog which greatly reduced visibility. Captain Gibbs was becoming anxious as there was no sign of land or the Cape Otway lighthouse. At 4am the fog lifted. A man aloft announced that he could see breakers. The sheer cliffs of Victoria's west coast came into view, and Captain Gibbs realised that the ship was much closer to them than expected. He ordered as much sail to be set as time would permit and then attempted to steer the vessel out to sea. On coming head on into the wind, the ship lost momentum, the sails fell limp and LOCH ARD's bow swung back. Gibbs then ordered the anchors to be released in an attempt to hold its position. The anchors sank some 50 fathoms - but did not hold. By this time LOCH ARD was among the breakers and the tall cliffs of Mutton Bird Island rose behind the ship. Just half a mile from the coast, the ship's bow was suddenly pulled around by the anchor. The captain tried to tack out to sea, but the ship struck a reef at the base of Mutton Bird Island, near Port Campbell. Waves broke over the ship and the top deck was loosened from the hull. The masts and rigging came crashing down knocking passengers and crew overboard. When a lifeboat was finally launched, it crashed into the side of LOCH ARD and capsized. Tom Pearce, who had launched the boat, managed to cling to its overturned hull and shelter beneath it. He drifted out to sea and then on the flood tide came into what is now known as LOCH ARD Gorge. He swam to shore, bruised and dazed, and found a cave in which to shelter. Some of the crew stayed below deck to shelter from the falling rigging but drowned when the ship slipped off the reef into deeper water. Eva Carmichael had raced onto deck to find out what was happening only to be confronted by towering cliffs looming above the stricken ship. In all the chaos, Captain Gibbs grabbed Eva and said, "If you are saved Eva, let my dear wife know that I died like a sailor". That was the last Eva Carmichael saw of the captain. She was swept off the ship by a huge wave. Eva saw Tom Pearce on a small rocky beach and yelled to attract his attention. He dived in and swam to the exhausted woman and dragged her to shore. He took her to the cave and broke open case of brandy which had washed up on the beach. He opened a bottle to revive the unconscious woman. A few hours later Tom scaled a cliff in search of help. He followed hoof prints and came by chance upon two men from nearby Glenample Station three and a half miles away. In a state of exhaustion, he told the men of the tragedy. Tom returned to the gorge while the two men rode back to the station to get help. By the time they reached LOCH ARD Gorge, it was cold and dark. The two shipwreck survivors were taken to Glenample Station to recover. Eva stayed at the station for six weeks before returning to Ireland, this time by steamship. In Melbourne, Tom Pearce received a hero's welcome. He was presented with the first gold medal of the Royal Humane Society of Victoria and a £1000 cheque from the Victorian Government. Concerts were performed to honour the young man's bravery and to raise money for those who lost family in the LOCH ARD disaster. Of the 54 crew members and passengers on board, only two survived: the apprentice, Tom Pearce and the young woman passenger, Eva Carmichael, who lost all of her family in the tragedy. Ten days after the LOCH ARD tragedy, salvage rights to the wreck were sold at auction for £2,120. Cargo valued at £3,000 was salvaged and placed on the beach, but most washed back into the sea when another storm developed. The wreck of LOCH ARD still lies at the base of Mutton Bird Island. Much of the cargo has now been salvaged and some was washed up into what is now known as LOCH ARD Gorge. Cargo and artefacts have also been illegally salvaged over many years before protective legislation was introduced. One of the most unlikely pieces of cargo to have survived the shipwreck was a Minton porcelain peacock - one of only nine in the world. The peacock was destined for the Melbourne International Exhibition in 1880. It had been well packed, which gave it adequate protection during the violent storm. Today, the Minton peacock can be seen at the Flagstaff Hill Maritime Museum in Warrnambool. From Australia's most dramatic shipwreck it has now become Australia's most valuable shipwreck artefact and is one of very few 'objects' on the Victorian State Heritage Register. [References: Flagstaff Hill Maritime Village information sheets and documents] Flagstaff Hill’s collection of artefacts from LOCH ARD is significant for being one of the largest collections of artefacts from this shipwreck in Victoria. It is significant for its association with the shipwreck, which is on the Victorian Heritage Register (VHR S417). The collection is significant because of the relationship between the objects, as together they have a high potential to interpret the story of the LOCH ARD. The LOCH ARD collection is archaeologically significant as the remains of a large international passenger and cargo ship. The LOCH ARD collection is historically significant for representing aspects of Victoria’s shipping history and its potential to interpret sub-theme 1.5 of Victoria’s Framework of Historical Themes (living with natural processes). The collection is also historically significant for its association with the LOCH ARD, which was one of the worst and best known shipwrecks in Victoria’s history. Coil of copper wire from the wreck of the ship Loch Ard. Wire is fused together and has heavy encrustation. flagstaff hill, warrnambool, shipwrecked coast, flagstaff hill maritime museum, maritime museum, shipwreck coast, flagstaff hill maritime village, great ocean road, loch line, loch ard, captain gibbs, eva carmichael, tom pearce, glenample station, mutton bird island, loch ard gorge, copper wire, wire coil -
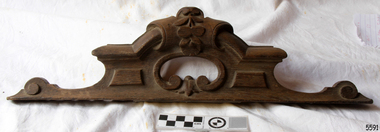 Flagstaff Hill Maritime Museum and Village
Furniture - Headpiece, ca. 1873
The Loch Ard got its name from ”Loch Ard” a loch which lies to the west of Aberfoyle, and the east of Loch Lomond. It means "high lake" in Scottish Gaelic. The vessel belonged to the famous Loch Line which sailed many vessels from England to Australia. The Loch Ard was built in Glasgow by Barclay, Curdle and Co. in 1873, the vessel was a three-masted square-rigged iron sailing ship that measured 79.87 meters in length, 11.58 m in width, and 7 m in depth with a gross tonnage of 1693 tons with a mainmast that measured a massive 45.7 m in height. Loch Ard made three trips to Australia and one trip to Calcutta before its fateful voyage. Loch Ard left England on March 2, 1878, under the command of 29-year-old Captain Gibbs, who was newly married. The ship was bound for Melbourne with a crew of 37, plus 17 passengers. The general cargo reflected the affluence of Melbourne at the time. Onboard were straw hats, umbrella, perfumes, clay pipes, pianos, clocks, confectionery, linen and candles, as well as a heavier load of railway irons, cement, lead and copper. There were other items included that were intended for display in the Melbourne International Exhibition of 1880. The voyage to Port Phillip was long but uneventful. Then at 3 am on June 1, 1878, Captain Gibbs was expecting to see land. But the Loch Ard was running into a fog which greatly reduced visibility. Captain Gibbs was becoming anxious as there was no sign of land or the Cape Otway lighthouse. At 4 am the fog lifted and a lookout aloft announced that he could see breakers. The sheer cliffs of Victoria's west coast came into view, and Captain Gibbs realised that the ship was much closer to them than expected. He ordered as much sail to be set as time would permit and then attempted to steer the vessel out to sea. On coming head-on into the wind, the ship lost momentum, the sails fell limp and Loch Ard's bow swung back towards land. Gibbs then ordered the anchors to be released in an attempt to hold its position. The anchors sank some 50 fathoms - but did not hold. By this time the ship was among the breakers and the tall cliffs of Mutton Bird Island rose behind. Just half a mile from the coast, the ship's bow was suddenly pulled around by the anchor. The captain tried to tack out to sea, but the ship struck a reef at the base of Mutton Bird Island, near Port Campbell. Waves subsequently broke over the ship and the top deck became loosened from the hull. The masts and rigging came crashing down knocking passengers and crew overboard. When a lifeboat was finally launched, it crashed into the side of Loch Ard and capsized. Tom Pearce, who had launched the boat, managed to cling to its overturned hull and shelter beneath it. He drifted out to sea and then on the flood tide came into what is now known as Loch Ard Gorge. He swam to shore, bruised and dazed, and found a cave in which to shelter. Some of the crew stayed below deck to shelter from the falling rigging but drowned when the ship slipped off the reef into deeper water. Eva Carmichael a passenger had raced onto the deck to find out what was happening only to be confronted by towering cliffs looming above the stricken ship. In all the chaos, Captain Gibbs grabbed Eva and said, "If you are saved Eva, let my dear wife know that I died like a sailor". That was the last Eva Carmichael saw of the captain. She was swept off the ship by a huge wave. Eva saw Tom Pearce on a small rocky beach and yelled to attract his attention. He dived in and swam to the exhausted woman and dragged her to shore. He took her to the cave and broke the open case of brandy which had washed up on the beach. He opened a bottle to revive the unconscious woman. A few hours later Tom scaled a cliff in search of help. He followed hoof prints and came by chance upon two men from nearby Glenample Station three and a half miles away. In a complete state of exhaustion, he told the men of the tragedy. Tom then returned to the gorge while the two men rode back to the station to get help. By the time they reached Loch Ard Gorge, it was cold and dark. The two shipwreck survivors were taken to Glenample Station to recover. Eva stayed at the station for six weeks before returning to Ireland by steamship. In Melbourne, Tom Pearce received a hero's welcome. He was presented with the first gold medal of the Royal Humane Society of Victoria and a £1000 cheque from the Victorian Government. Concerts were performed to honour the young man's bravery and to raise money for those who lost family in the disaster. Of the 54 crew members and passengers on board, only two survived: the apprentice, Tom Pearce and the young woman passenger, Eva Carmichael, who lost her family in the tragedy. Ten days after the Loch Ard tragedy, salvage rights to the wreck were sold at auction for £2,120. Cargo valued at £3,000 was salvaged and placed on the beach, but most washed back into the sea when another storm developed. The wreck of Loch Ard still lies at the base of Mutton Bird Island. Much of the cargo has now been salvaged and some items were washed up into Loch Ard Gorge. Cargo and artefacts have also been illegally salvaged over many years before protective legislation was introduced in March 1982. One of the most unlikely pieces of cargo to have survived the shipwreck was a Minton majolica peacock- one of only nine in the world. The peacock was destined for the Melbourne 1880 International Exhibition in. It had been well packed, which gave it adequate protection during the violent storm. Today the Minton peacock can be seen at the Flagstaff Hill Maritime Museum in Warrnambool. From Australia's most dramatic shipwreck, it has now become Australia's most valuable shipwreck artifact and is one of very few 'objects' on the Victorian State Heritage Register. Ref: LA 6 64 264 The shipwreck of the Loch Ard is of significance for Victoria and is registered on the Victorian Heritage Register ( S 417). Flagstaff Hill has a varied collection of artefacts from Loch Ard and its collection is significant for being one of the largest accumulation of artefacts from this notable Victorian shipwreck. The collections object is to also give us a snapshot into history so we can interpret the story of this tragic event. The collection is also archaeologically significant as it represents aspects of Victoria's shipping history that allows us to interpret Victoria's social and historical themes of the time. The collections historically significance is that it is associated unfortunately with the worst and best-known shipwreck in Victoria's history. Carved wooden furniture headpiece from the wreck of the Loch Ard. Inscribed plaque on underside. Hand writing on round sticker on edge.Plaque inscription "From Loch Ard wreck Port Campbell 1878 given by Haworth Bros to James Martin Snr Scarsdale" Diagonally on round sticker in pen "R 222A" flagstaff hill, warrnambool, shipwrecked coast, flagstaff hill maritime museum, maritime museum, shipwreck coast, flagstaff hill maritime village, great ocean road, loch line, loch ard, captain gibbs, eva carmichael, tom pearce, glenample station, mutton bird island, loch ard gorge, carved headpiece, furniture, haworth bros, james martin snr, scarsdale -
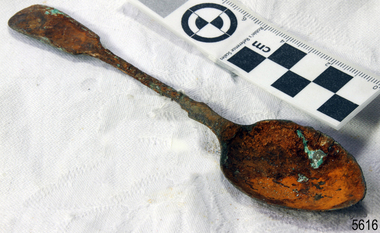 Flagstaff Hill Maritime Museum and Village
Spoon, circa 1878
HISTORY OF THE LOCH ARD The LOCH ARD belonged to the famous Loch Line which sailed many ships from England to Australia. Built in Glasgow by Barclay, Curdle and Co. in 1873, the LOCH ARD was a three-masted square rigged iron sailing ship. The ship measured 262ft 7" (79.87m) in length, 38ft (11.58m) in width, 23ft (7m) in depth and had a gross tonnage of 1693 tons. The LOCH ARD's main mast measured a massive 150ft (45.7m) in height. LOCH ARD made three trips to Australia and one trip to Calcutta before its final voyage. LOCH ARD left England on March 2, 1878, under the command of Captain Gibbs, a newly married, 29 year old. She was bound for Melbourne with a crew of 37, plus 17 passengers and a load of cargo. The general cargo reflected the affluence of Melbourne at the time. On board were straw hats, umbrella, perfumes, clay pipes, pianos, clocks, confectionary, linen and candles, as well as a heavier load of railway irons, cement, lead and copper. There were items included that intended for display in the Melbourne International Exhibition in 1880. The voyage to Port Phillip was long but uneventful. At 3am on June 1, 1878, Captain Gibbs was expecting to see land and the passengers were becoming excited as they prepared to view their new homeland in the early morning. But LOCH ARD was running into a fog which greatly reduced visibility. Captain Gibbs was becoming anxious as there was no sign of land or the Cape Otway lighthouse. At 4am the fog lifted. A man aloft announced that he could see breakers. The sheer cliffs of Victoria's west coast came into view, and Captain Gibbs realised that the ship was much closer to them than expected. He ordered as much sail to be set as time would permit and then attempted to steer the vessel out to sea. On coming head on into the wind, the ship lost momentum, the sails fell limp and LOCH ARD's bow swung back. Gibbs then ordered the anchors to be released in an attempt to hold its position. The anchors sank some 50 fathoms - but did not hold. By this time LOCH ARD was among the breakers and the tall cliffs of Mutton Bird Island rose behind the ship. Just half a mile from the coast, the ship's bow was suddenly pulled around by the anchor. The captain tried to tack out to sea, but the ship struck a reef at the base of Mutton Bird Island, near Port Campbell. Waves broke over the ship and the top deck was loosened from the hull. The masts and rigging came crashing down knocking passengers and crew overboard. When a lifeboat was finally launched, it crashed into the side of LOCH ARD and capsized. Tom Pearce, who had launched the boat, managed to cling to its overturned hull and shelter beneath it. He drifted out to sea and then on the flood tide came into what is now known as LOCH ARD Gorge. He swam to shore, bruised and dazed, and found a cave in which to shelter. Some of the crew stayed below deck to shelter from the falling rigging but drowned when the ship slipped off the reef into deeper water. Eva Carmichael had raced onto deck to find out what was happening only to be confronted by towering cliffs looming above the stricken ship. In all the chaos, Captain Gibbs grabbed Eva and said, "If you are saved Eva, let my dear wife know that I died like a sailor". That was the last Eva Carmichael saw of the captain. She was swept off the ship by a huge wave. Eva saw Tom Pearce on a small rocky beach and yelled to attract his attention. He dived in and swam to the exhausted woman and dragged her to shore. He took her to the cave and broke open case of brandy which had washed up on the beach. He opened a bottle to revive the unconscious woman. A few hours later Tom scaled a cliff in search of help. He followed hoof prints and came by chance upon two men from nearby Glenample Station three and a half miles away. In a state of exhaustion, he told the men of the tragedy. Tom returned to the gorge while the two men rode back to the station to get help. By the time they reached LOCH ARD Gorge, it was cold and dark. The two shipwreck survivors were taken to Glenample Station to recover. Eva stayed at the station for six weeks before returning to Ireland, this time by steamship. In Melbourne, Tom Pearce received a hero's welcome. He was presented with the first gold medal of the Royal Humane Society of Victoria and a £1000 cheque from the Victorian Government. Concerts were performed to honour the young man's bravery and to raise money for those who lost family in the LOCH ARD disaster. Of the 54 crew members and passengers on board, only two survived: the apprentice, Tom Pearce and the young woman passenger, Eva Carmichael, who lost all of her family in the tragedy. Ten days after the LOCH ARD tragedy, salvage rights to the wreck were sold at auction for £2,120. Cargo valued at £3,000 was salvaged and placed on the beach, but most washed back into the sea when another storm developed. The wreck of LOCH ARD still lies at the base of Mutton Bird Island. Much of the cargo has now been salvaged and some was washed up into what is now known as LOCH ARD Gorge. Cargo and artefacts have also been illegally salvaged over many years before protective legislation was introduced. One of the most unlikely pieces of cargo to have survived the shipwreck was a Minton porcelain peacock - one of only nine in the world. The peacock was destined for the Melbourne International Exhibition in 1880. It had been well packed, which gave it adequate protection during the violent storm. Today, the Minton peacock can be seen at the Flagstaff Hill Maritime Museum in Warrnambool. From Australia's most dramatic shipwreck it has now become Australia's most valuable shipwreck artefact and is one of very few 'objects' on the Victorian State Heritage Register. The LOCH ARD shipwreck is of State significance – Victorian Heritage Register S 417. Flagstaff Hill’s collection of artefacts from LOCH ARD is significant for being one of the largest collections of artefacts from this shipwreck in Victoria. It is significant for its association with the shipwreck, which is on the Victorian Heritage Register (VHR S417). The collection is significant because of the relationship between the objects, as together they have a high potential to interpret the story of the LOCH ARD. The LOCH ARD collection is archaeologically significant as the remains of a large international passenger and cargo ship. The LOCH ARD collection is historically significant for representing aspects of Victoria’s shipping history and its potential to interpret sub-theme 1.5 of Victoria’s Framework of Historical Themes (living with natural processes). The collection is also historically significant for its association with the LOCH ARD, which was one of the worst and best known shipwrecks in Victoria’s history. Unrestored tea spoon from the wreck of the LOCH ARD. The spoon design has a flattened fiddle-back handle, with a thin stem or shank, flared collar, and elongated bowl. The spoons metallic composition is a thin layer of brass alloy which has partially corroded back to a nickel-silver base metal. Bowl is split and verdigris stained packing paper is stuck to rear of spoon. flagstaff hill, warrnambool, shipwrecked coast, flagstaff hill maritime museum, maritime museum, shipwreck coast, flagstaff hill maritime village, great ocean road, loch line, loch ard, captain gibbs, eva carmichael, tom pearce, glenample station, mutton bird island, loch ard gorge, electroplated cutlery, loch ard shipwreck, nickel silver, william page & co, birmingham, brass plating, makers marks -
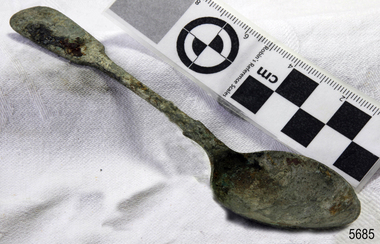 Flagstaff Hill Maritime Museum and Village
Spoon, circa 1878
Tea spoon from the wreck of the LOCH ARD HISTORY OF THE LOCH ARD The LOCH ARD belonged to the famous Loch Line which sailed many ships from England to Australia. Built in Glasgow by Barclay, Curdle and Co. in 1873, the LOCH ARD was a three-masted square rigged iron sailing ship. The ship measured 262ft 7" (79.87m) in length, 38ft (11.58m) in width, 23ft (7m) in depth and had a gross tonnage of 1693 tons. The LOCH ARD's main mast measured a massive 150ft (45.7m) in height. LOCH ARD made three trips to Australia and one trip to Calcutta before its final voyage. LOCH ARD left England on March 2, 1878, under the command of Captain Gibbs, a newly married, 29 year old. She was bound for Melbourne with a crew of 37, plus 17 passengers and a load of cargo. The general cargo reflected the affluence of Melbourne at the time. On board were straw hats, umbrella, perfumes, clay pipes, pianos, clocks, confectionary, linen and candles, as well as a heavier load of railway irons, cement, lead and copper. There were items included that intended for display in the Melbourne International Exhibition in 1880. The voyage to Port Phillip was long but uneventful. At 3am on June 1, 1878, Captain Gibbs was expecting to see land and the passengers were becoming excited as they prepared to view their new homeland in the early morning. But LOCH ARD was running into a fog which greatly reduced visibility. Captain Gibbs was becoming anxious as there was no sign of land or the Cape Otway lighthouse. At 4am the fog lifted. A man aloft announced that he could see breakers. The sheer cliffs of Victoria's west coast came into view, and Captain Gibbs realised that the ship was much closer to them than expected. He ordered as much sail to be set as time would permit and then attempted to steer the vessel out to sea. On coming head on into the wind, the ship lost momentum, the sails fell limp and LOCH ARD's bow swung back. Gibbs then ordered the anchors to be released in an attempt to hold its position. The anchors sank some 50 fathoms - but did not hold. By this time LOCH ARD was among the breakers and the tall cliffs of Mutton Bird Island rose behind the ship. Just half a mile from the coast, the ship's bow was suddenly pulled around by the anchor. The captain tried to tack out to sea, but the ship struck a reef at the base of Mutton Bird Island, near Port Campbell. Waves broke over the ship and the top deck was loosened from the hull. The masts and rigging came crashing down knocking passengers and crew overboard. When a lifeboat was finally launched, it crashed into the side of LOCH ARD and capsized. Tom Pearce, who had launched the boat, managed to cling to its overturned hull and shelter beneath it. He drifted out to sea and then on the flood tide came into what is now known as LOCH ARD Gorge. He swam to shore, bruised and dazed, and found a cave in which to shelter. Some of the crew stayed below deck to shelter from the falling rigging but drowned when the ship slipped off the reef into deeper water. Eva Carmichael had raced onto deck to find out what was happening only to be confronted by towering cliffs looming above the stricken ship. In all the chaos, Captain Gibbs grabbed Eva and said, "If you are saved Eva, let my dear wife know that I died like a sailor". That was the last Eva Carmichael saw of the captain. She was swept off the ship by a huge wave. Eva saw Tom Pearce on a small rocky beach and yelled to attract his attention. He dived in and swam to the exhausted woman and dragged her to shore. He took her to the cave and broke open case of brandy which had washed up on the beach. He opened a bottle to revive the unconscious woman. A few hours later Tom scaled a cliff in search of help. He followed hoof prints and came by chance upon two men from nearby Glenample Station three and a half miles away. In a state of exhaustion, he told the men of the tragedy. Tom returned to the gorge while the two men rode back to the station to get help. By the time they reached LOCH ARD Gorge, it was cold and dark. The two shipwreck survivors were taken to Glenample Station to recover. Eva stayed at the station for six weeks before returning to Ireland, this time by steamship. In Melbourne, Tom Pearce received a hero's welcome. He was presented with the first gold medal of the Royal Humane Society of Victoria and a £1000 cheque from the Victorian Government. Concerts were performed to honour the young man's bravery and to raise money for those who lost family in the LOCH ARD disaster. Of the 54 crew members and passengers on board, only two survived: the apprentice, Tom Pearce and the young woman passenger, Eva Carmichael, who lost all of her family in the tragedy. Ten days after the LOCH ARD tragedy, salvage rights to the wreck were sold at auction for £2,120. Cargo valued at £3,000 was salvaged and placed on the beach, but most washed back into the sea when another storm developed. The wreck of LOCH ARD still lies at the base of Mutton Bird Island. Much of the cargo has now been salvaged and some was washed up into what is now known as LOCH ARD Gorge. Cargo and artefacts have also been illegally salvaged over many years before protective legislation was introduced. One of the most unlikely pieces of cargo to have survived the shipwreck was a Minton porcelain peacock - one of only seven in the world. The peacock was destined for the Melbourne International Exhibition in 1880. It had been well packed, which gave it adequate protection during the violent storm. Today, the Minton peacock can be seen at the Flagstaff Hill Maritime Museum in Warrnambool. From Australia's most dramatic shipwreck it has now become Australia's most valuable shipwreck artefact and is one of very few 'objects' on the Victorian State Heritage Register. The LOCH ARD shipwreck is of State significance – Victorian Heritage Register S 417 Flagstaff Hill’s collection of artefacts from LOCH ARD is significant for being one of the largest collections of artefacts from this shipwreck in Victoria. It is significant for its association with the shipwreck, which is on the Victorian Heritage Register (VHR S417). The collection is significant because of the relationship between the objects, as together they have a high potential to interpret the story of the LOCH ARD. The LOCH ARD collection is archaeologically significant as the remains of a large international passenger and cargo ship. The LOCH ARD collection is historically significant for representing aspects of Victoria’s shipping history and its potential to interpret sub-theme 1.5 of Victoria’s Framework of Historical Themes (living with natural processes). The collection is also historically significant for its association with the LOCH ARD, which was one of the worst and best known shipwrecks in Victoria’s history. Unrestored tea spoon from the wreck of the LOCH ARD. The spoon design has a flattened fiddle-back handle, with a thin stem or shank, flared collar, and elongated bowl. The spoons metallic composition is a thin layer of brass alloy which has partially corroded back to a nickel-silver base metal. flagstaff hill, warrnambool, shipwrecked coast, flagstaff hill maritime museum, maritime museum, shipwreck coast, flagstaff hill maritime village, great ocean road, loch line, loch ard, captain gibbs, eva carmichael, tom pearce, glenample station, mutton bird island, loch ard gorge, tea spoon, spoon -
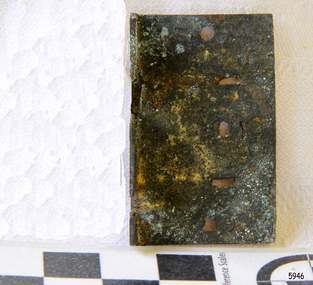 Flagstaff Hill Maritime Museum and Village
Functional object - Lock Frame, prior to 1878
This small brass lock frame was recovered from the wreck of the sailing ship LOCH ARD. HISTORY OF THE LOCH ARD The LOCH ARD belonged to the famous Loch Line which sailed many ships from England to Australia. Built in Glasgow by Barclay, Curdle and Co. in 1873, the LOCH ARD was a three-masted square rigged iron sailing ship. The ship measured 262ft 7" (79.87m) in length, 38ft (11.58m) in width, 23ft (7m) in depth and had a gross tonnage of 1693 tons. The LOCH ARD's main mast measured a massive 150ft (45.7m) in height. LOCH ARD made three trips to Australia and one trip to Calcutta before its final voyage. LOCH ARD left England on March 2, 1878, under the command of Captain Gibbs, a newly married, 29 year old. She was bound for Melbourne with a crew of 37, plus 17 passengers and a load of cargo. The general cargo reflected the affluence of Melbourne at the time. On board were straw hats, umbrella, perfumes, clay pipes, pianos, clocks, confectionary, linen and candles, as well as a heavier load of railway irons, cement, lead and copper. There were items included that intended for display in the Melbourne International Exhibition in 1880. The voyage to Port Phillip was long but uneventful. At 3am on June 1, 1878, Captain Gibbs was expecting to see land and the passengers were becoming excited as they prepared to view their new homeland in the early morning. But LOCH ARD was running into a fog which greatly reduced visibility. Captain Gibbs was becoming anxious as there was no sign of land or the Cape Otway lighthouse. At 4am the fog lifted. A man aloft announced that he could see breakers. The sheer cliffs of Victoria's west coast came into view, and Captain Gibbs realised that the ship was much closer to them than expected. He ordered as much sail to be set as time would permit and then attempted to steer the vessel out to sea. On coming head on into the wind, the ship lost momentum, the sails fell limp and LOCH ARD's bow swung back. Gibbs then ordered the anchors to be released in an attempt to hold its position. The anchors sank some 50 fathoms - but did not hold. By this time LOCH ARD was among the breakers and the tall cliffs of Mutton Bird Island rose behind the ship. Just half a mile from the coast, the ship's bow was suddenly pulled around by the anchor. The captain tried to tack out to sea, but the ship struck a reef at the base of Mutton Bird Island, near Port Campbell. Waves broke over the ship and the top deck was loosened from the hull. The masts and rigging came crashing down knocking passengers and crew overboard. When a lifeboat was finally launched, it crashed into the side of LOCH ARD and capsized. Tom Pearce, who had launched the boat, managed to cling to its overturned hull and shelter beneath it. He drifted out to sea and then on the flood tide came into what is now known as LOCH ARD Gorge. He swam to shore, bruised and dazed, and found a cave in which to shelter. Some of the crew stayed below deck to shelter from the falling rigging but drowned when the ship slipped off the reef into deeper water. Eva Carmichael had raced onto deck to find out what was happening only to be confronted by towering cliffs looming above the stricken ship. In all the chaos, Captain Gibbs grabbed Eva and said, "If you are saved Eva, let my dear wife know that I died like a sailor". That was the last Eva Carmichael saw of the captain. She was swept off the ship by a huge wave. Eva saw Tom Pearce on a small rocky beach and yelled to attract his attention. He dived in and swam to the exhausted woman and dragged her to shore. He took her to the cave and broke open case of brandy which had washed up on the beach. He opened a bottle to revive the unconscious woman. A few hours later Tom scaled a cliff in search of help. He followed hoof prints and came by chance upon two men from nearby Glenample Station three and a half miles away. In a state of exhaustion, he told the men of the tragedy. Tom returned to the gorge while the two men rode back to the station to get help. By the time they reached LOCH ARD Gorge, it was cold and dark. The two shipwreck survivors were taken to Glenample Station to recover. Eva stayed at the station for six weeks before returning to Ireland, this time by steamship. In Melbourne, Tom Pearce received a hero's welcome. He was presented with the first gold medal of the Royal Humane Society of Victoria and a £1000 cheque from the Victorian Government. Concerts were performed to honour the young man's bravery and to raise money for those who lost family in the LOCH ARD disaster. Of the 54 crew members and passengers on board, only two survived: the apprentice, Tom Pearce and the young woman passenger, Eva Carmichael, who lost all of her family in the tragedy. Ten days after the LOCH ARD tragedy, salvage rights to the wreck were sold at auction for £2,120. Cargo valued at £3,000 was salvaged and placed on the beach, but most washed back into the sea when another storm developed. The wreck of LOCH ARD still lies at the base of Mutton Bird Island. Much of the cargo has now been salvaged and some was washed up into what is now known as LOCH ARD Gorge. Cargo and artefacts have also been illegally salvaged over many years before protective legislation was introduced. One of the most unlikely pieces of cargo to have survived the shipwreck was a Minton porcelain peacock - one of only nine in the world. The peacock was destined for the Melbourne International Exhibition in 1880. It had been well packed, which gave it adequate protection during the violent storm. Today, the Minton peacock can be seen at the Flagstaff Hill Maritime Museum in Warrnambool. From Australia's most dramatic shipwreck it has now become Australia's most valuable shipwreck artefact and is one of very few 'objects' on the Victorian State Heritage Register. [References: Flagstaff Hill Maritime Village information sheets and documents] This small brass lock is representative of lock fittings in the late 19th century. Flagstaff Hill’s collection of artefacts from LOCH ARD is significant for being one of the largest collections of artefacts from this shipwreck in Victoria. It is significant for its association with the shipwreck, which is on the Victorian Heritage Register (VHR S417). The collection is significant because of the relationship between the objects, as together they have a high potential to interpret the story of the LOCH ARD. The LOCH ARD collection is archaeologically significant as the remains of a large international passenger and cargo ship. The LOCH ARD collection is historically significant for representing aspects of Victoria’s shipping history and its potential to interpret sub-theme 1.5 of Victoria’s Framework of Historical Themes (living with natural processes). The collection is also historically significant for its association with the LOCH ARD, which was one of the worst and best known shipwrecks in Victoria’s history. Lock frame, small, no working parts. Artefact Reg No LA/24.flagstaff hill, warrnambool, shipwrecked coast, flagstaff hill maritime museum, maritime museum, shipwreck coast, flagstaff hill maritime village, great ocean road, loch line, loch ard, captain gibbs, eva carmichael, tom pearce, glenample station, mutton bird island, loch ard gorge, lock frame, frame, lock, 19th century brass lock -
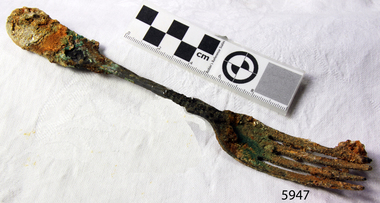 Flagstaff Hill Maritime Museum and Village
Fork
HISTORY OF THE LOCH ARD The LOCH ARD belonged to the famous Loch Line which sailed many ships from England to Australia. Built in Glasgow by Barclay, Curdle and Co. in 1873, the LOCH ARD was a three-masted square rigged iron sailing ship. The ship measured 262ft 7" (79.87m) in length, 38ft (11.58m) in width, 23ft (7m) in depth and had a gross tonnage of 1693 tons. The LOCH ARD's main mast measured a massive 150ft (45.7m) in height. LOCH ARD made three trips to Australia and one trip to Calcutta before its final voyage. LOCH ARD left England on March 2, 1878, under the command of Captain Gibbs, a newly married, 29 year old. She was bound for Melbourne with a crew of 37, plus 17 passengers and a load of cargo. The general cargo reflected the affluence of Melbourne at the time. On board were straw hats, umbrella, perfumes, clay pipes, pianos, clocks, confectionary, linen and candles, as well as a heavier load of railway irons, cement, lead and copper. There were items included that intended for display in the Melbourne International Exhibition in 1880. The voyage to Port Phillip was long but uneventful. At 3am on June 1, 1878, Captain Gibbs was expecting to see land and the passengers were becoming excited as they prepared to view their new homeland in the early morning. But LOCH ARD was running into a fog which greatly reduced visibility. Captain Gibbs was becoming anxious as there was no sign of land or the Cape Otway lighthouse. At 4am the fog lifted. A man aloft announced that he could see breakers. The sheer cliffs of Victoria's west coast came into view, and Captain Gibbs realised that the ship was much closer to them than expected. He ordered as much sail to be set as time would permit and then attempted to steer the vessel out to sea. On coming head on into the wind, the ship lost momentum, the sails fell limp and LOCH ARD's bow swung back. Gibbs then ordered the anchors to be released in an attempt to hold its position. The anchors sank some 50 fathoms - but did not hold. By this time LOCH ARD was among the breakers and the tall cliffs of Mutton Bird Island rose behind the ship. Just half a mile from the coast, the ship's bow was suddenly pulled around by the anchor. The captain tried to tack out to sea, but the ship struck a reef at the base of Mutton Bird Island, near Port Campbell. Waves broke over the ship and the top deck was loosened from the hull. The masts and rigging came crashing down knocking passengers and crew overboard. When a lifeboat was finally launched, it crashed into the side of LOCH ARD and capsized. Tom Pearce, who had launched the boat, managed to cling to its overturned hull and shelter beneath it. He drifted out to sea and then on the flood tide came into what is now known as LOCH ARD Gorge. He swam to shore, bruised and dazed, and found a cave in which to shelter. Some of the crew stayed below deck to shelter from the falling rigging but drowned when the ship slipped off the reef into deeper water. Eva Carmichael had raced onto deck to find out what was happening only to be confronted by towering cliffs looming above the stricken ship. In all the chaos, Captain Gibbs grabbed Eva and said, "If you are saved Eva, let my dear wife know that I died like a sailor". That was the last Eva Carmichael saw of the captain. She was swept off the ship by a huge wave. Eva saw Tom Pearce on a small rocky beach and yelled to attract his attention. He dived in and swam to the exhausted woman and dragged her to shore. He took her to the cave and broke open case of brandy which had washed up on the beach. He opened a bottle to revive the unconscious woman. A few hours later Tom scaled a cliff in search of help. He followed hoof prints and came by chance upon two men from nearby Glenample Station three and a half miles away. In a state of exhaustion, he told the men of the tragedy. Tom returned to the gorge while the two men rode back to the station to get help. By the time they reached LOCH ARD Gorge, it was cold and dark. The two shipwreck survivors were taken to Glenample Station to recover. Eva stayed at the station for six weeks before returning to Ireland, this time by steamship. In Melbourne, Tom Pearce received a hero's welcome. He was presented with the first gold medal of the Royal Humane Society of Victoria and a £1000 cheque from the Victorian Government. Concerts were performed to honour the young man's bravery and to raise money for those who lost family in the LOCH ARD disaster. Of the 54 crew members and passengers on board, only two survived: the apprentice, Tom Pearce and the young woman passenger, Eva Carmichael, who lost all of her family in the tragedy. Ten days after the LOCH ARD tragedy, salvage rights to the wreck were sold at auction for £2,120. Cargo valued at £3,000 was salvaged and placed on the beach, but most washed back into the sea when another storm developed. The wreck of LOCH ARD still lies at the base of Mutton Bird Island. Much of the cargo has now been salvaged and some was washed up into what is now known as LOCH ARD Gorge. Cargo and artefacts have also been illegally salvaged over many years before protective legislation was introduced. One of the most unlikely pieces of cargo to have survived the shipwreck was a Minton porcelain peacock - one of only seven in the world. The peacock was destined for the Melbourne International Exhibition in 1880. It had been well packed, which gave it adequate protection during the violent storm. Today, the Minton peacock can be seen at the Flagstaff Hill Maritime Museum in Warrnambool. From Australia's most dramatic shipwreck it has now become Australia's shipwreck artefact and is one of very few 'objects' on the Victorian State Heritage Register most valuable. Flagstaff Hill’s collection of artefacts from LOCH ARD is significant for being one of the largest collections of artefacts from this shipwreck in Victoria. It is significant for its association with the shipwreck, which is on the Victorian Heritage Register (VHR S417). The collection is significant because of the relationship between the objects, as together they have a high potential to interpret the story of the LOCH ARD. The LOCH ARD collection is archaeologically significant as the remains of a large international passenger and cargo ship. The LOCH ARD collection is historically significant for representing aspects of Victoria’s shipping history and its potential to interpret sub-theme 1.5 of Victoria’s Framework of Historical Themes (living with natural processes). The collection is also historically significant for its association with the LOCH ARD, which was one of the worst and best known shipwrecks in Victoria’s history. Silver plated copper alloy table fork from the wreck of the Loch Ard. Some verdigris and encrustationflagstaff hill, warrnambool, shipwrecked coast, flagstaff hill maritime museum, maritime museum, shipwreck coast, flagstaff hill maritime village, great ocean road, loch line, loch ard, captain gibbs, eva carmichael, tom pearce, glenample station, mutton bird island, loch ard gorge, fork -
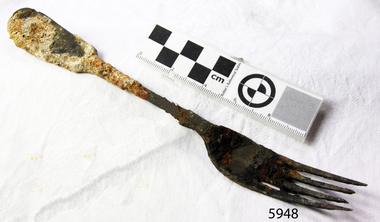 Flagstaff Hill Maritime Museum and Village
Fork
HISTORY OF THE LOCH ARD The LOCH ARD belonged to the famous Loch Line which sailed many ships from England to Australia. Built in Glasgow by Barclay, Curdle and Co. in 1873, the LOCH ARD was a three-masted square rigged iron sailing ship. The ship measured 262ft 7" (79.87m) in length, 38ft (11.58m) in width, 23ft (7m) in depth and had a gross tonnage of 1693 tons. The LOCH ARD's main mast measured a massive 150ft (45.7m) in height. LOCH ARD made three trips to Australia and one trip to Calcutta before its final voyage. LOCH ARD left England on March 2, 1878, under the command of Captain Gibbs, a newly married, 29 year old. She was bound for Melbourne with a crew of 37, plus 17 passengers and a load of cargo. The general cargo reflected the affluence of Melbourne at the time. On board were straw hats, umbrella, perfumes, clay pipes, pianos, clocks, confectionary, linen and candles, as well as a heavier load of railway irons, cement, lead and copper. There were items included that intended for display in the Melbourne International Exhibition in 1880. The voyage to Port Phillip was long but uneventful. At 3am on June 1, 1878, Captain Gibbs was expecting to see land and the passengers were becoming excited as they prepared to view their new homeland in the early morning. But LOCH ARD was running into a fog which greatly reduced visibility. Captain Gibbs was becoming anxious as there was no sign of land or the Cape Otway lighthouse. At 4am the fog lifted. A man aloft announced that he could see breakers. The sheer cliffs of Victoria's west coast came into view, and Captain Gibbs realised that the ship was much closer to them than expected. He ordered as much sail to be set as time would permit and then attempted to steer the vessel out to sea. On coming head on into the wind, the ship lost momentum, the sails fell limp and LOCH ARD's bow swung back. Gibbs then ordered the anchors to be released in an attempt to hold its position. The anchors sank some 50 fathoms - but did not hold. By this time LOCH ARD was among the breakers and the tall cliffs of Mutton Bird Island rose behind the ship. Just half a mile from the coast, the ship's bow was suddenly pulled around by the anchor. The captain tried to tack out to sea, but the ship struck a reef at the base of Mutton Bird Island, near Port Campbell. Waves broke over the ship and the top deck was loosened from the hull. The masts and rigging came crashing down knocking passengers and crew overboard. When a lifeboat was finally launched, it crashed into the side of LOCH ARD and capsized. Tom Pearce, who had launched the boat, managed to cling to its overturned hull and shelter beneath it. He drifted out to sea and then on the flood tide came into what is now known as LOCH ARD Gorge. He swam to shore, bruised and dazed, and found a cave in which to shelter. Some of the crew stayed below deck to shelter from the falling rigging but drowned when the ship slipped off the reef into deeper water. Eva Carmichael had raced onto deck to find out what was happening only to be confronted by towering cliffs looming above the stricken ship. In all the chaos, Captain Gibbs grabbed Eva and said, "If you are saved Eva, let my dear wife know that I died like a sailor". That was the last Eva Carmichael saw of the captain. She was swept off the ship by a huge wave. Eva saw Tom Pearce on a small rocky beach and yelled to attract his attention. He dived in and swam to the exhausted woman and dragged her to shore. He took her to the cave and broke open case of brandy which had washed up on the beach. He opened a bottle to revive the unconscious woman. A few hours later Tom scaled a cliff in search of help. He followed hoof prints and came by chance upon two men from nearby Glenample Station three and a half miles away. In a state of exhaustion, he told the men of the tragedy. Tom returned to the gorge while the two men rode back to the station to get help. By the time they reached LOCH ARD Gorge, it was cold and dark. The two shipwreck survivors were taken to Glenample Station to recover. Eva stayed at the station for six weeks before returning to Ireland, this time by steamship. In Melbourne, Tom Pearce received a hero's welcome. He was presented with the first gold medal of the Royal Humane Society of Victoria and a £1000 cheque from the Victorian Government. Concerts were performed to honour the young man's bravery and to raise money for those who lost family in the LOCH ARD disaster. Of the 54 crew members and passengers on board, only two survived: the apprentice, Tom Pearce and the young woman passenger, Eva Carmichael, who lost all of her family in the tragedy. Ten days after the LOCH ARD tragedy, salvage rights to the wreck were sold at auction for £2,120. Cargo valued at £3,000 was salvaged and placed on the beach, but most washed back into the sea when another storm developed. The wreck of LOCH ARD still lies at the base of Mutton Bird Island. Much of the cargo has now been salvaged and some was washed up into what is now known as LOCH ARD Gorge. Cargo and artefacts have also been illegally salvaged over many years before protective legislation was introduced. One of the most unlikely pieces of cargo to have survived the shipwreck was a Minton porcelain peacock - one of only seven in the world. The peacock was destined for the Melbourne International Exhibition in 1880. It had been well packed, which gave it adequate protection during the violent storm. Today, the Minton peacock can be seen at the Flagstaff Hill Maritime Museum in Warrnambool. From Australia's most dramatic shipwreck it has now become Australia's shipwreck artefact and is one of very few 'objects' on the Victorian State Heritage Register most valuable. Flagstaff Hill’s collection of artefacts from LOCH ARD is significant for being one of the largest collections of artefacts from this shipwreck in Victoria. It is significant for its association with the shipwreck, which is on the Victorian Heritage Register (VHR S417). The collection is significant because of the relationship between the objects, as together they have a high potential to interpret the story of the LOCH ARD. The LOCH ARD collection is archaeologically significant as the remains of a large international passenger and cargo ship. The LOCH ARD collection is historically significant for representing aspects of Victoria’s shipping history and its potential to interpret sub-theme 1.5 of Victoria’s Framework of Historical Themes (living with natural processes). The collection is also historically significant for its association with the LOCH ARD, which was one of the worst and best known shipwrecks in Victoria’s history. Silver plated copper alloy table fork from the wreck of the Loch Ard. Some Silver Oxide and encrustation. Fork is bent. Hallmark visible on back.flagstaff hill, warrnambool, shipwrecked coast, flagstaff hill maritime museum, maritime museum, shipwreck coast, flagstaff hill maritime village, great ocean road, loch line, loch ard, captain gibbs, eva carmichael, tom pearce, glenample station, mutton bird island, loch ard gorge, fork -
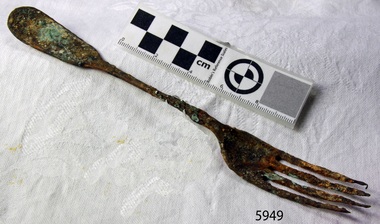 Flagstaff Hill Maritime Museum and Village
Fork
HISTORY OF THE LOCH ARD The LOCH ARD belonged to the famous Loch Line which sailed many ships from England to Australia. Built in Glasgow by Barclay, Curdle and Co. in 1873, the LOCH ARD was a three-masted square rigged iron sailing ship. The ship measured 262ft 7" (79.87m) in length, 38ft (11.58m) in width, 23ft (7m) in depth and had a gross tonnage of 1693 tons. The LOCH ARD's main mast measured a massive 150ft (45.7m) in height. LOCH ARD made three trips to Australia and one trip to Calcutta before its final voyage. LOCH ARD left England on March 2, 1878, under the command of Captain Gibbs, a newly married, 29 year old. She was bound for Melbourne with a crew of 37, plus 17 passengers and a load of cargo. The general cargo reflected the affluence of Melbourne at the time. On board were straw hats, umbrella, perfumes, clay pipes, pianos, clocks, confectionary, linen and candles, as well as a heavier load of railway irons, cement, lead and copper. There were items included that intended for display in the Melbourne International Exhibition in 1880. The voyage to Port Phillip was long but uneventful. At 3am on June 1, 1878, Captain Gibbs was expecting to see land and the passengers were becoming excited as they prepared to view their new homeland in the early morning. But LOCH ARD was running into a fog which greatly reduced visibility. Captain Gibbs was becoming anxious as there was no sign of land or the Cape Otway lighthouse. At 4am the fog lifted. A man aloft announced that he could see breakers. The sheer cliffs of Victoria's west coast came into view, and Captain Gibbs realised that the ship was much closer to them than expected. He ordered as much sail to be set as time would permit and then attempted to steer the vessel out to sea. On coming head on into the wind, the ship lost momentum, the sails fell limp and LOCH ARD's bow swung back. Gibbs then ordered the anchors to be released in an attempt to hold its position. The anchors sank some 50 fathoms - but did not hold. By this time LOCH ARD was among the breakers and the tall cliffs of Mutton Bird Island rose behind the ship. Just half a mile from the coast, the ship's bow was suddenly pulled around by the anchor. The captain tried to tack out to sea, but the ship struck a reef at the base of Mutton Bird Island, near Port Campbell. Waves broke over the ship and the top deck was loosened from the hull. The masts and rigging came crashing down knocking passengers and crew overboard. When a lifeboat was finally launched, it crashed into the side of LOCH ARD and capsized. Tom Pearce, who had launched the boat, managed to cling to its overturned hull and shelter beneath it. He drifted out to sea and then on the flood tide came into what is now known as LOCH ARD Gorge. He swam to shore, bruised and dazed, and found a cave in which to shelter. Some of the crew stayed below deck to shelter from the falling rigging but drowned when the ship slipped off the reef into deeper water. Eva Carmichael had raced onto deck to find out what was happening only to be confronted by towering cliffs looming above the stricken ship. In all the chaos, Captain Gibbs grabbed Eva and said, "If you are saved Eva, let my dear wife know that I died like a sailor". That was the last Eva Carmichael saw of the captain. She was swept off the ship by a huge wave. Eva saw Tom Pearce on a small rocky beach and yelled to attract his attention. He dived in and swam to the exhausted woman and dragged her to shore. He took her to the cave and broke open case of brandy which had washed up on the beach. He opened a bottle to revive the unconscious woman. A few hours later Tom scaled a cliff in search of help. He followed hoof prints and came by chance upon two men from nearby Glenample Station three and a half miles away. In a state of exhaustion, he told the men of the tragedy. Tom returned to the gorge while the two men rode back to the station to get help. By the time they reached LOCH ARD Gorge, it was cold and dark. The two shipwreck survivors were taken to Glenample Station to recover. Eva stayed at the station for six weeks before returning to Ireland, this time by steamship. In Melbourne, Tom Pearce received a hero's welcome. He was presented with the first gold medal of the Royal Humane Society of Victoria and a £1000 cheque from the Victorian Government. Concerts were performed to honour the young man's bravery and to raise money for those who lost family in the LOCH ARD disaster. Of the 54 crew members and passengers on board, only two survived: the apprentice, Tom Pearce and the young woman passenger, Eva Carmichael, who lost all of her family in the tragedy. Ten days after the LOCH ARD tragedy, salvage rights to the wreck were sold at auction for £2,120. Cargo valued at £3,000 was salvaged and placed on the beach, but most washed back into the sea when another storm developed. The wreck of LOCH ARD still lies at the base of Mutton Bird Island. Much of the cargo has now been salvaged and some was washed up into what is now known as LOCH ARD Gorge. Cargo and artefacts have also been illegally salvaged over many years before protective legislation was introduced. One of the most unlikely pieces of cargo to have survived the shipwreck was a Minton porcelain peacock - one of only seven in the world. The peacock was destined for the Melbourne International Exhibition in 1880. It had been well packed, which gave it adequate protection during the violent storm. Today, the Minton peacock can be seen at the Flagstaff Hill Maritime Museum in Warrnambool. From Australia's most dramatic shipwreck it has now become Australia's shipwreck artefact and is one of very few 'objects' on the Victorian State Heritage Register most valuable. The LOCH ARD shipwreck is of State significance – Victorian Heritage Register S 417 Flagstaff Hill’s collection of artefacts from LOCH ARD is significant for being one of the largest collections of artefacts from this shipwreck in Victoria. It is significant for its association with the shipwreck, which is on the Victorian Heritage Register (VHR S417). The collection is significant because of the relationship between the objects, as together they have a high potential to interpret the story of the LOCH ARD. The LOCH ARD collection is archaeologically significant as the remains of a large international passenger and cargo ship. The LOCH ARD collection is historically significant for representing aspects of Victoria’s shipping history and its potential to interpret sub-theme 1.5 of Victoria’s Framework of Historical Themes (living with natural processes). The collection is also historically significant for its association with the LOCH ARD, which was one of the worst and best known shipwrecks in Victoria’s history. Silver plated copper alloy table fork from the wreck of the Loch Ard. Some verdigris and encrustation. Fork tines have points broken. Poor conditionflagstaff hill, warrnambool, shipwrecked coast, flagstaff hill maritime museum, maritime museum, shipwreck coast, flagstaff hill maritime village, great ocean road, loch line, loch ard, captain gibbs, eva carmichael, tom pearce, glenample station, mutton bird island, loch ard gorge, fork -
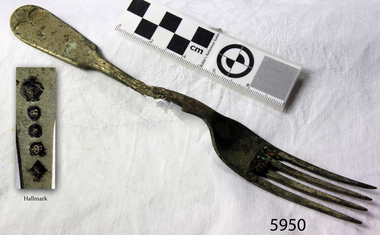 Flagstaff Hill Maritime Museum and Village
Fork
HISTORY OF THE LOCH ARD The LOCH ARD belonged to the famous Loch Line which sailed many ships from England to Australia. Built in Glasgow by Barclay, Curdle and Co. in 1873, the LOCH ARD was a three-masted square rigged iron sailing ship. The ship measured 262ft 7" (79.87m) in length, 38ft (11.58m) in width, 23ft (7m) in depth and had a gross tonnage of 1693 tons. The LOCH ARD's main mast measured a massive 150ft (45.7m) in height. LOCH ARD made three trips to Australia and one trip to Calcutta before its final voyage. LOCH ARD left England on March 2, 1878, under the command of Captain Gibbs, a newly married, 29 year old. She was bound for Melbourne with a crew of 37, plus 17 passengers and a load of cargo. The general cargo reflected the affluence of Melbourne at the time. On board were straw hats, umbrella, perfumes, clay pipes, pianos, clocks, confectionary, linen and candles, as well as a heavier load of railway irons, cement, lead and copper. There were items included that intended for display in the Melbourne International Exhibition in 1880. The voyage to Port Phillip was long but uneventful. At 3am on June 1, 1878, Captain Gibbs was expecting to see land and the passengers were becoming excited as they prepared to view their new homeland in the early morning. But LOCH ARD was running into a fog which greatly reduced visibility. Captain Gibbs was becoming anxious as there was no sign of land or the Cape Otway lighthouse. At 4am the fog lifted. A man aloft announced that he could see breakers. The sheer cliffs of Victoria's west coast came into view, and Captain Gibbs realised that the ship was much closer to them than expected. He ordered as much sail to be set as time would permit and then attempted to steer the vessel out to sea. On coming head on into the wind, the ship lost momentum, the sails fell limp and LOCH ARD's bow swung back. Gibbs then ordered the anchors to be released in an attempt to hold its position. The anchors sank some 50 fathoms - but did not hold. By this time LOCH ARD was among the breakers and the tall cliffs of Mutton Bird Island rose behind the ship. Just half a mile from the coast, the ship's bow was suddenly pulled around by the anchor. The captain tried to tack out to sea, but the ship struck a reef at the base of Mutton Bird Island, near Port Campbell. Waves broke over the ship and the top deck was loosened from the hull. The masts and rigging came crashing down knocking passengers and crew overboard. When a lifeboat was finally launched, it crashed into the side of LOCH ARD and capsized. Tom Pearce, who had launched the boat, managed to cling to its overturned hull and shelter beneath it. He drifted out to sea and then on the flood tide came into what is now known as LOCH ARD Gorge. He swam to shore, bruised and dazed, and found a cave in which to shelter. Some of the crew stayed below deck to shelter from the falling rigging but drowned when the ship slipped off the reef into deeper water. Eva Carmichael had raced onto deck to find out what was happening only to be confronted by towering cliffs looming above the stricken ship. In all the chaos, Captain Gibbs grabbed Eva and said, "If you are saved Eva, let my dear wife know that I died like a sailor". That was the last Eva Carmichael saw of the captain. She was swept off the ship by a huge wave. Eva saw Tom Pearce on a small rocky beach and yelled to attract his attention. He dived in and swam to the exhausted woman and dragged her to shore. He took her to the cave and broke open case of brandy which had washed up on the beach. He opened a bottle to revive the unconscious woman. A few hours later Tom scaled a cliff in search of help. He followed hoof prints and came by chance upon two men from nearby Glenample Station three and a half miles away. In a state of exhaustion, he told the men of the tragedy. Tom returned to the gorge while the two men rode back to the station to get help. By the time they reached LOCH ARD Gorge, it was cold and dark. The two shipwreck survivors were taken to Glenample Station to recover. Eva stayed at the station for six weeks before returning to Ireland, this time by steamship. In Melbourne, Tom Pearce received a hero's welcome. He was presented with the first gold medal of the Royal Humane Society of Victoria and a £1000 cheque from the Victorian Government. Concerts were performed to honour the young man's bravery and to raise money for those who lost family in the LOCH ARD disaster. Of the 54 crew members and passengers on board, only two survived: the apprentice, Tom Pearce and the young woman passenger, Eva Carmichael, who lost all of her family in the tragedy. Ten days after the LOCH ARD tragedy, salvage rights to the wreck were sold at auction for £2,120. Cargo valued at £3,000 was salvaged and placed on the beach, but most washed back into the sea when another storm developed. The wreck of LOCH ARD still lies at the base of Mutton Bird Island. Much of the cargo has now been salvaged and some was washed up into what is now known as LOCH ARD Gorge. Cargo and artefacts have also been illegally salvaged over many years before protective legislation was introduced. One of the most unlikely pieces of cargo to have survived the shipwreck was a Minton porcelain peacock - one of only seven in the world. The peacock was destined for the Melbourne International Exhibition in 1880. It had been well packed, which gave it adequate protection during the violent storm. Today, the Minton peacock can be seen at the Flagstaff Hill Maritime Museum in Warrnambool. From Australia's most dramatic shipwreck it has now become Australia's shipwreck artefact and is one of very few 'objects' on the Victorian State Heritage Register most valuable. The LOCH ARD shipwreck is of State significance – Victorian Heritage Register S 417 Flagstaff Hill’s collection of artefacts from LOCH ARD is significant for being one of the largest collections of artefacts from this shipwreck in Victoria. It is significant for its association with the shipwreck, which is on the Victorian Heritage Register (VHR S417). The collection is significant because of the relationship between the objects, as together they have a high potential to interpret the story of the LOCH ARD. The LOCH ARD collection is archaeologically significant as the remains of a large international passenger and cargo ship. The LOCH ARD collection is historically significant for representing aspects of Victoria’s shipping history and its potential to interpret sub-theme 1.5 of Victoria’s Framework of Historical Themes (living with natural processes). The collection is also historically significant for its association with the LOCH ARD, which was one of the worst and best known shipwrecks in Victoria’s history. Silver plated copper alloy table fork from the wreck of the Loch Ard. Some little verdigris and encrustation. Silver oxide present. Fork handle bent.flagstaff hill, warrnambool, shipwrecked coast, flagstaff hill maritime museum, maritime museum, shipwreck coast, flagstaff hill maritime village, great ocean road, loch line, loch ard, captain gibbs, eva carmichael, tom pearce, glenample station, mutton bird island, loch ard gorge, fork, silver plate -
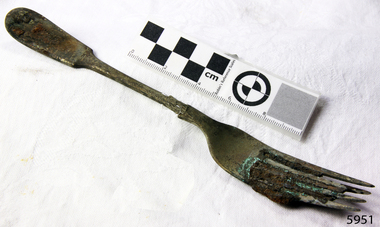 Flagstaff Hill Maritime Museum and Village
Fork
HISTORY OF THE LOCH ARD The LOCH ARD belonged to the famous Loch Line which sailed many ships from England to Australia. Built in Glasgow by Barclay, Curdle and Co. in 1873, the LOCH ARD was a three-masted square rigged iron sailing ship. The ship measured 262ft 7" (79.87m) in length, 38ft (11.58m) in width, 23ft (7m) in depth and had a gross tonnage of 1693 tons. The LOCH ARD's main mast measured a massive 150ft (45.7m) in height. LOCH ARD made three trips to Australia and one trip to Calcutta before its final voyage. LOCH ARD left England on March 2, 1878, under the command of Captain Gibbs, a newly married, 29 year old. She was bound for Melbourne with a crew of 37, plus 17 passengers and a load of cargo. The general cargo reflected the affluence of Melbourne at the time. On board were straw hats, umbrella, perfumes, clay pipes, pianos, clocks, confectionary, linen and candles, as well as a heavier load of railway irons, cement, lead and copper. There were items included that intended for display in the Melbourne International Exhibition in 1880. The voyage to Port Phillip was long but uneventful. At 3am on June 1, 1878, Captain Gibbs was expecting to see land and the passengers were becoming excited as they prepared to view their new homeland in the early morning. But LOCH ARD was running into a fog which greatly reduced visibility. Captain Gibbs was becoming anxious as there was no sign of land or the Cape Otway lighthouse. At 4am the fog lifted. A man aloft announced that he could see breakers. The sheer cliffs of Victoria's west coast came into view, and Captain Gibbs realised that the ship was much closer to them than expected. He ordered as much sail to be set as time would permit and then attempted to steer the vessel out to sea. On coming head on into the wind, the ship lost momentum, the sails fell limp and LOCH ARD's bow swung back. Gibbs then ordered the anchors to be released in an attempt to hold its position. The anchors sank some 50 fathoms - but did not hold. By this time LOCH ARD was among the breakers and the tall cliffs of Mutton Bird Island rose behind the ship. Just half a mile from the coast, the ship's bow was suddenly pulled around by the anchor. The captain tried to tack out to sea, but the ship struck a reef at the base of Mutton Bird Island, near Port Campbell. Waves broke over the ship and the top deck was loosened from the hull. The masts and rigging came crashing down knocking passengers and crew overboard. When a lifeboat was finally launched, it crashed into the side of LOCH ARD and capsized. Tom Pearce, who had launched the boat, managed to cling to its overturned hull and shelter beneath it. He drifted out to sea and then on the flood tide came into what is now known as LOCH ARD Gorge. He swam to shore, bruised and dazed, and found a cave in which to shelter. Some of the crew stayed below deck to shelter from the falling rigging but drowned when the ship slipped off the reef into deeper water. Eva Carmichael had raced onto deck to find out what was happening only to be confronted by towering cliffs looming above the stricken ship. In all the chaos, Captain Gibbs grabbed Eva and said, "If you are saved Eva, let my dear wife know that I died like a sailor". That was the last Eva Carmichael saw of the captain. She was swept off the ship by a huge wave. Eva saw Tom Pearce on a small rocky beach and yelled to attract his attention. He dived in and swam to the exhausted woman and dragged her to shore. He took her to the cave and broke open case of brandy which had washed up on the beach. He opened a bottle to revive the unconscious woman. A few hours later Tom scaled a cliff in search of help. He followed hoof prints and came by chance upon two men from nearby Glenample Station three and a half miles away. In a state of exhaustion, he told the men of the tragedy. Tom returned to the gorge while the two men rode back to the station to get help. By the time they reached LOCH ARD Gorge, it was cold and dark. The two shipwreck survivors were taken to Glenample Station to recover. Eva stayed at the station for six weeks before returning to Ireland, this time by steamship. In Melbourne, Tom Pearce received a hero's welcome. He was presented with the first gold medal of the Royal Humane Society of Victoria and a £1000 cheque from the Victorian Government. Concerts were performed to honour the young man's bravery and to raise money for those who lost family in the LOCH ARD disaster. Of the 54 crew members and passengers on board, only two survived: the apprentice, Tom Pearce and the young woman passenger, Eva Carmichael, who lost all of her family in the tragedy. Ten days after the LOCH ARD tragedy, salvage rights to the wreck were sold at auction for £2,120. Cargo valued at £3,000 was salvaged and placed on the beach, but most washed back into the sea when another storm developed. The wreck of LOCH ARD still lies at the base of Mutton Bird Island. Much of the cargo has now been salvaged and some was washed up into what is now known as LOCH ARD Gorge. Cargo and artefacts have also been illegally salvaged over many years before protective legislation was introduced. One of the most unlikely pieces of cargo to have survived the shipwreck was a Minton porcelain peacock - one of only seven in the world. The peacock was destined for the Melbourne International Exhibition in 1880. It had been well packed, which gave it adequate protection during the violent storm. Today, the Minton peacock can be seen at the Flagstaff Hill Maritime Museum in Warrnambool. From Australia's most dramatic shipwreck it has now become Australia's shipwreck artefact and is one of very few 'objects' on the Victorian State Heritage Register most valuable. The LOCH ARD shipwreck is of State significance – Victorian Heritage Register S 417 Flagstaff Hill’s collection of artefacts from LOCH ARD is significant for being one of the largest collections of artefacts from this shipwreck in Victoria. It is significant for its association with the shipwreck, which is on the Victorian Heritage Register (VHR S417). The collection is significant because of the relationship between the objects, as together they have a high potential to interpret the story of the LOCH ARD. The LOCH ARD collection is archaeologically significant as the remains of a large international passenger and cargo ship. The LOCH ARD collection is historically significant for representing aspects of Victoria’s shipping history and its potential to interpret sub-theme 1.5 of Victoria’s Framework of Historical Themes (living with natural processes). The collection is also historically significant for its association with the LOCH ARD, which was one of the worst and best known shipwrecks in Victoria’s history. Silver plated copper alloy table fork from the wreck of the Loch Ard. Some verdigris and encrustation. Large lump of encrustation on fork tine. flagstaff hill, warrnambool, shipwrecked coast, flagstaff hill maritime museum, maritime museum, shipwreck coast, flagstaff hill maritime village, great ocean road, loch line, loch ard, captain gibbs, eva carmichael, tom pearce, glenample station, mutton bird island, loch ard gorge, fork -
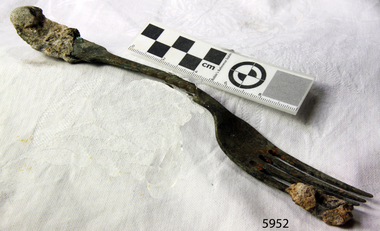 Flagstaff Hill Maritime Museum and Village
Fork
HISTORY OF THE LOCH ARD The LOCH ARD belonged to the famous Loch Line which sailed many ships from England to Australia. Built in Glasgow by Barclay, Curdle and Co. in 1873, the LOCH ARD was a three-masted square rigged iron sailing ship. The ship measured 262ft 7" (79.87m) in length, 38ft (11.58m) in width, 23ft (7m) in depth and had a gross tonnage of 1693 tons. The LOCH ARD's main mast measured a massive 150ft (45.7m) in height. LOCH ARD made three trips to Australia and one trip to Calcutta before its final voyage. LOCH ARD left England on March 2, 1878, under the command of Captain Gibbs, a newly married, 29 year old. She was bound for Melbourne with a crew of 37, plus 17 passengers and a load of cargo. The general cargo reflected the affluence of Melbourne at the time. On board were straw hats, umbrella, perfumes, clay pipes, pianos, clocks, confectionary, linen and candles, as well as a heavier load of railway irons, cement, lead and copper. There were items included that intended for display in the Melbourne International Exhibition in 1880. The voyage to Port Phillip was long but uneventful. At 3am on June 1, 1878, Captain Gibbs was expecting to see land and the passengers were becoming excited as they prepared to view their new homeland in the early morning. But LOCH ARD was running into a fog which greatly reduced visibility. Captain Gibbs was becoming anxious as there was no sign of land or the Cape Otway lighthouse. At 4am the fog lifted. A man aloft announced that he could see breakers. The sheer cliffs of Victoria's west coast came into view, and Captain Gibbs realised that the ship was much closer to them than expected. He ordered as much sail to be set as time would permit and then attempted to steer the vessel out to sea. On coming head on into the wind, the ship lost momentum, the sails fell limp and LOCH ARD's bow swung back. Gibbs then ordered the anchors to be released in an attempt to hold its position. The anchors sank some 50 fathoms - but did not hold. By this time LOCH ARD was among the breakers and the tall cliffs of Mutton Bird Island rose behind the ship. Just half a mile from the coast, the ship's bow was suddenly pulled around by the anchor. The captain tried to tack out to sea, but the ship struck a reef at the base of Mutton Bird Island, near Port Campbell. Waves broke over the ship and the top deck was loosened from the hull. The masts and rigging came crashing down knocking passengers and crew overboard. When a lifeboat was finally launched, it crashed into the side of LOCH ARD and capsized. Tom Pearce, who had launched the boat, managed to cling to its overturned hull and shelter beneath it. He drifted out to sea and then on the flood tide came into what is now known as LOCH ARD Gorge. He swam to shore, bruised and dazed, and found a cave in which to shelter. Some of the crew stayed below deck to shelter from the falling rigging but drowned when the ship slipped off the reef into deeper water. Eva Carmichael had raced onto deck to find out what was happening only to be confronted by towering cliffs looming above the stricken ship. In all the chaos, Captain Gibbs grabbed Eva and said, "If you are saved Eva, let my dear wife know that I died like a sailor". That was the last Eva Carmichael saw of the captain. She was swept off the ship by a huge wave. Eva saw Tom Pearce on a small rocky beach and yelled to attract his attention. He dived in and swam to the exhausted woman and dragged her to shore. He took her to the cave and broke open case of brandy which had washed up on the beach. He opened a bottle to revive the unconscious woman. A few hours later Tom scaled a cliff in search of help. He followed hoof prints and came by chance upon two men from nearby Glenample Station three and a half miles away. In a state of exhaustion, he told the men of the tragedy. Tom returned to the gorge while the two men rode back to the station to get help. By the time they reached LOCH ARD Gorge, it was cold and dark. The two shipwreck survivors were taken to Glenample Station to recover. Eva stayed at the station for six weeks before returning to Ireland, this time by steamship. In Melbourne, Tom Pearce received a hero's welcome. He was presented with the first gold medal of the Royal Humane Society of Victoria and a £1000 cheque from the Victorian Government. Concerts were performed to honour the young man's bravery and to raise money for those who lost family in the LOCH ARD disaster. Of the 54 crew members and passengers on board, only two survived: the apprentice, Tom Pearce and the young woman passenger, Eva Carmichael, who lost all of her family in the tragedy. Ten days after the LOCH ARD tragedy, salvage rights to the wreck were sold at auction for £2,120. Cargo valued at £3,000 was salvaged and placed on the beach, but most washed back into the sea when another storm developed. The wreck of LOCH ARD still lies at the base of Mutton Bird Island. Much of the cargo has now been salvaged and some was washed up into what is now known as LOCH ARD Gorge. Cargo and artefacts have also been illegally salvaged over many years before protective legislation was introduced. One of the most unlikely pieces of cargo to have survived the shipwreck was a Minton porcelain peacock - one of only seven in the world. The peacock was destined for the Melbourne International Exhibition in 1880. It had been well packed, which gave it adequate protection during the violent storm. Today, the Minton peacock can be seen at the Flagstaff Hill Maritime Museum in Warrnambool. From Australia's most dramatic shipwreck it has now become Australia's shipwreck artefact and is one of very few 'objects' on the Victorian State Heritage Register most valuable. The LOCH ARD shipwreck is of State significance – Victorian Heritage Register S 417 Flagstaff Hill’s collection of artefacts from LOCH ARD is significant for being one of the largest collections of artefacts from this shipwreck in Victoria. It is significant for its association with the shipwreck, which is on the Victorian Heritage Register (VHR S417). The collection is significant because of the relationship between the objects, as together they have a high potential to interpret the story of the LOCH ARD. The LOCH ARD collection is archaeologically significant as the remains of a large international passenger and cargo ship. The LOCH ARD collection is historically significant for representing aspects of Victoria’s shipping history and its potential to interpret sub-theme 1.5 of Victoria’s Framework of Historical Themes (living with natural processes). The collection is also historically significant for its association with the LOCH ARD, which was one of the worst and best known shipwrecks in Victoria’s history. Silver plated copper alloy table fork from the wreck of the Loch Ard.Some verdigris and encrustation. Large lump of encrustation on fork tine and handle. Fork is bent. flagstaff hill, warrnambool, shipwrecked coast, flagstaff hill maritime museum, maritime museum, shipwreck coast, flagstaff hill maritime village, great ocean road, loch line, loch ard, captain gibbs, eva carmichael, tom pearce, glenample station, mutton bird island, loch ard gorge, fork -
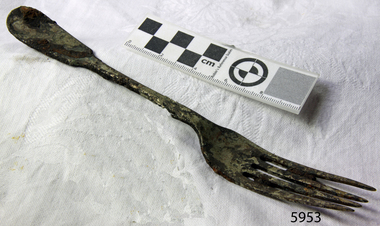 Flagstaff Hill Maritime Museum and Village
Fork
HISTORY OF THE LOCH ARD The LOCH ARD belonged to the famous Loch Line which sailed many ships from England to Australia. Built in Glasgow by Barclay, Curdle and Co. in 1873, the LOCH ARD was a three-masted square rigged iron sailing ship. The ship measured 262ft 7" (79.87m) in length, 38ft (11.58m) in width, 23ft (7m) in depth and had a gross tonnage of 1693 tons. The LOCH ARD's main mast measured a massive 150ft (45.7m) in height. LOCH ARD made three trips to Australia and one trip to Calcutta before its final voyage. LOCH ARD left England on March 2, 1878, under the command of Captain Gibbs, a newly married, 29 year old. She was bound for Melbourne with a crew of 37, plus 17 passengers and a load of cargo. The general cargo reflected the affluence of Melbourne at the time. On board were straw hats, umbrella, perfumes, clay pipes, pianos, clocks, confectionary, linen and candles, as well as a heavier load of railway irons, cement, lead and copper. There were items included that intended for display in the Melbourne International Exhibition in 1880. The voyage to Port Phillip was long but uneventful. At 3am on June 1, 1878, Captain Gibbs was expecting to see land and the passengers were becoming excited as they prepared to view their new homeland in the early morning. But LOCH ARD was running into a fog which greatly reduced visibility. Captain Gibbs was becoming anxious as there was no sign of land or the Cape Otway lighthouse. At 4am the fog lifted. A man aloft announced that he could see breakers. The sheer cliffs of Victoria's west coast came into view, and Captain Gibbs realised that the ship was much closer to them than expected. He ordered as much sail to be set as time would permit and then attempted to steer the vessel out to sea. On coming head on into the wind, the ship lost momentum, the sails fell limp and LOCH ARD's bow swung back. Gibbs then ordered the anchors to be released in an attempt to hold its position. The anchors sank some 50 fathoms - but did not hold. By this time LOCH ARD was among the breakers and the tall cliffs of Mutton Bird Island rose behind the ship. Just half a mile from the coast, the ship's bow was suddenly pulled around by the anchor. The captain tried to tack out to sea, but the ship struck a reef at the base of Mutton Bird Island, near Port Campbell. Waves broke over the ship and the top deck was loosened from the hull. The masts and rigging came crashing down knocking passengers and crew overboard. When a lifeboat was finally launched, it crashed into the side of LOCH ARD and capsized. Tom Pearce, who had launched the boat, managed to cling to its overturned hull and shelter beneath it. He drifted out to sea and then on the flood tide came into what is now known as LOCH ARD Gorge. He swam to shore, bruised and dazed, and found a cave in which to shelter. Some of the crew stayed below deck to shelter from the falling rigging but drowned when the ship slipped off the reef into deeper water. Eva Carmichael had raced onto deck to find out what was happening only to be confronted by towering cliffs looming above the stricken ship. In all the chaos, Captain Gibbs grabbed Eva and said, "If you are saved Eva, let my dear wife know that I died like a sailor". That was the last Eva Carmichael saw of the captain. She was swept off the ship by a huge wave. Eva saw Tom Pearce on a small rocky beach and yelled to attract his attention. He dived in and swam to the exhausted woman and dragged her to shore. He took her to the cave and broke open case of brandy which had washed up on the beach. He opened a bottle to revive the unconscious woman. A few hours later Tom scaled a cliff in search of help. He followed hoof prints and came by chance upon two men from nearby Glenample Station three and a half miles away. In a state of exhaustion, he told the men of the tragedy. Tom returned to the gorge while the two men rode back to the station to get help. By the time they reached LOCH ARD Gorge, it was cold and dark. The two shipwreck survivors were taken to Glenample Station to recover. Eva stayed at the station for six weeks before returning to Ireland, this time by steamship. In Melbourne, Tom Pearce received a hero's welcome. He was presented with the first gold medal of the Royal Humane Society of Victoria and a £1000 cheque from the Victorian Government. Concerts were performed to honour the young man's bravery and to raise money for those who lost family in the LOCH ARD disaster. Of the 54 crew members and passengers on board, only two survived: the apprentice, Tom Pearce and the young woman passenger, Eva Carmichael, who lost all of her family in the tragedy. Ten days after the LOCH ARD tragedy, salvage rights to the wreck were sold at auction for £2,120. Cargo valued at £3,000 was salvaged and placed on the beach, but most washed back into the sea when another storm developed. The wreck of LOCH ARD still lies at the base of Mutton Bird Island. Much of the cargo has now been salvaged and some was washed up into what is now known as LOCH ARD Gorge. Cargo and artefacts have also been illegally salvaged over many years before protective legislation was introduced. One of the most unlikely pieces of cargo to have survived the shipwreck was a Minton porcelain peacock - one of only seven in the world. The peacock was destined for the Melbourne International Exhibition in 1880. It had been well packed, which gave it adequate protection during the violent storm. Today, the Minton peacock can be seen at the Flagstaff Hill Maritime Museum in Warrnambool. From Australia's most dramatic shipwreck it has now become Australia's shipwreck artefact and is one of very few 'objects' on the Victorian State Heritage Register most valuable. The LOCH ARD shipwreck is of State significance – Victorian Heritage Register S 417 Flagstaff Hill’s collection of artefacts from LOCH ARD is significant for being one of the largest collections of artefacts from this shipwreck in Victoria. It is significant for its association with the shipwreck, which is on the Victorian Heritage Register (VHR S417). The collection is significant because of the relationship between the objects, as together they have a high potential to interpret the story of the LOCH ARD. The LOCH ARD collection is archaeologically significant as the remains of a large international passenger and cargo ship. The LOCH ARD collection is historically significant for representing aspects of Victoria’s shipping history and its potential to interpret sub-theme 1.5 of Victoria’s Framework of Historical Themes (living with natural processes). The collection is also historically significant for its association with the LOCH ARD, which was one of the worst and best known shipwrecks in Victoria’s history. Silver plated copper alloy table fork from the wreck of the Loch Ard. Some verdigris and encrustation. Silver oxide present.flagstaff hill, warrnambool, shipwrecked coast, flagstaff hill maritime museum, maritime museum, shipwreck coast, flagstaff hill maritime village, great ocean road, loch line, loch ard, captain gibbs, eva carmichael, tom pearce, glenample station, mutton bird island, loch ard gorge, fork