Showing 2818 items
matching wests road
-
 Glen Eira Historical Society
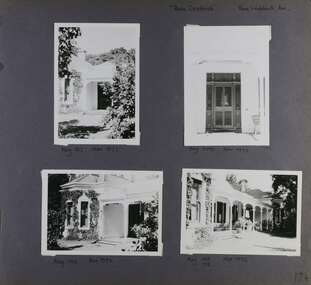
Album - Album page, Rose Craddock, Rose Craddock Avenue, Circa 1972
This photograph is part of the Caulfield Historical Album 1972. This album was created in approximately 1972 as part of a project by the Caulfield Historical Society to assist in identifying buildings worthy of preservation. The album is related to a Survey the Caulfield Historical Society developed in collaboration with the National Trust of Australia (Victoria) and Caulfield City Council to identify historic buildings within the City of Caulfield that warranted the protection of a National Trust Classification. Principal photographer thought to be Trevor Hart, member of Caulfield Historical Society. Most photographs were taken between 1966-1972 with a small number of photographs being older and from unknown sources. All photographs are black and white except where stated, with 386 photographs over 198 pages. From Victorian Heritage Database citation for H0589 Rosecraddock 4-10 Craddock Avenue and 2-8 Keverell CAULFIELD NORTH https://vhd.heritagecouncil.vic.gov.au/places/35279 as at (30/10/2020) "Rosecraddock" is regionally important as a surviving large villa from the early Victorian (1850's) period, offering insight into the lifestyles of the privileged in Caulfield at that time. Its importance is enhanced through its long association with the Langdon family and, in particular, Henry Joseph Langdon, founder of H.J. Langdon and Company, China merchants. Victorian Heritage Database HO16 Rosecraddock, 2-8 Keverell Road & 4-10 Craddock Avenue Caulfield North https://vhd.heritagecouncil.vic.gov.au/places/35279 (as of 17/02/2021) A single storeyed stuccoed villa with west facing facade consisting of a parapeted and recessed central section with hipped slate roof and timber posted verandah with cast iron lace. Projecting pavilions have bayed windows and a secondary wing runs north with angled corners and prominent chimney stack. The front entrance is situated at the north end of the central section and is given emphasis by a small hip roof and false pediment to the verandah. Outbuildings include the timber stables with characteristic hay loft gablet and fretted barges to the south-east. Rear additions in brick and timber are of an early date and utilitarian in character. Also see https://vhd.heritagecouncil.vic.gov.au/places/277 for Significance Statement for the H0589 Victorian Heritage Register listing.Page 174 of Photograph Album with four photographs of Rose Craddock.Handwritten: "Rose Craddock" Rose Craddock Ave. top right] / Neg 197 Nov 1972 [under top left photo] / Neg 209 Nov 1972 [under top right photo] / Neg 196 Nov 1972 [under bottom left photo] / Neg 195 198 Nov 1972 [under bottom right photo] / 174 [bottom right]trevor hart, chimneys, porch, rose craddock, rosecraddock, ringwood, 1850's, henry joseph langdon, h.j. langdon, h.j. langdon and company, china merchants, rosecraddock place, slate roof, return verandah, decorative brackets, keverell road, caulfield north, early victorian style, protruding bay windows, cast iron work, rendered walls, entrances, mansions, craddock avenue -
 Glen Eira Historical Society
Ephemera - ROSENEATH, NEPEAN HIGHWAY, 31, ELSTERNWICK
This file contains 8 pages and one property notice. The file contains: 1/descriptions from Andrew Ward’s Heritage Planning Report. Notes on residents of ‘Roseneath’ from 1866 to 1963. Articles include household goods sale, public notices, wills and estate notices from Trove and census record. Details from Ancestry.com 2016. 2/Property sale notice of ‘Roseneath’ dated 04/03/2016 from Leader newspaper.‘roseneath’, house names, point nepean road, elsternwick, bogle andrew esq., auctions, wragge william, wragge mary, wragge william charles, miller william, councillors, rusden street, mcmillan street, subdivision, boyle andrew, merchants, shire of caulfield, east st kilda riding, breckinhill lodge, bogle andrew mrs., wragge w mrs, st kilda cemetery, cemeteries, kirkham councillor, long councillor, riddell councillor, lempriere councillor, ilberry concillor, worthington george, judges, tulloch annie, st kilda ladies benevolent society, worthington mrs, wheeldon isaac, tulloch w.g., breweries, elsternwick, madame berry west company, tulloch and son, mccracken’s brewery, elsternwick station, ‘elderslie’, glenhuntly road, wheeldon sarah, cross anastacia, brick houses, meek alexander charles, meek una eveline, meek david, meek jane, meek james, meek alexander, meek kathleen, meek william, lloyd i. captain, lloyd mary, lloyd nova, lloyd eileen, meek anastasia mary, meek william john, meek monica venus, engineers, marine surveyors, social events and activities, wills and estates, real estate, advertisements -
Glen Eira Historical Society
Document - Banks in Caulfield
... Ormond North Road 553 Garden Vale Caulfield Caulfield West ...This file contains two items. 1. A hand written list of branches of the English, Scottish and Australian Bank Limited and its merger the Australia and New Zealand Banking Group Limited, undated and author unknown. The list records the opening dates of branches in Carnegie, Caulfield East, Caulfield South, Elsternwick, Glen Huntly, Murrumbeena, Ormond, Garden Vale, Caulfield and Caulfield West encompassing years from 1886 to 1927, listing also the merger of the two banks as being in 1970 as well as 1852 as being the founding year of the English, Scottish, and Australian Bank Limited. 2. Three identical Elsternwick State Savings Bank withdrawal slips, from the 1910s. All three are blank, and include brief directions for filling in the slip typed at the bottom. Also included on the slip is a decorative illustration.banks, banks mergers, bank deposits, bank withdrawals, documents, banking, pass books, business and finance, annual reports, bank equipment, commercial equipment, bank branches, carnegie, carnegie koornang road 86, caulfield east, caulfield east derby road 9, caulfield south, caulfield south glen huntly road 790, elsternwick, elsternwick glen huntly road 324, elsternwick glen huntly road 426, glen huntly, glen huntly glen huntly road 1173, murrumbeena, murrumbeena murrumbeena road 59, ormond, ormond north road, ormond north road 553, garden vale, caulfield, caulfield west, caulfield hawthorn road 242, commercial establishments, the state savings bank of victoria, the state savings bank of victoria elsternwick branch, the english scottish and australian bank limited, the australian and new zealand bank limited, the australian and new zealand banking group limited -
 Glen Eira Historical Society
Album - Album page, Kynaston now Kahlyn, Bambra Road, Circa 1972
This photograph is part of the Caulfield Historical Album 1972. This album was created in approximately 1972 as part of a project by the Caulfield Historical Society to assist in identifying buildings worthy of preservation. The album is related to a Survey the Caulfield Historical Society developed in collaboration with the National Trust of Australia (Victoria) and Caulfield City Council to identify historic buildings within the City of Caulfield that warranted the protection of a National Trust Classification. Principal photographer thought to be Trevor Hart, member of Caulfield Historical Society. Most photographs were taken between 1966-1972 with a small number of photographs being older and from unknown sources. All photographs are black and white except where stated, with 386 photographs over 198 pages.https://vhd.heritagecouncil.vic.gov.au/places/35575 From: Glen Eira Heritage Management Plan (1996) by Andrew Ward and Associates Significance: "Kynaston" is locally important as a large late Victorian villa residence, demonstrating something of the lifestyle to which a senior government bureaucrat could aspire during the late nineteenth century boom period. The design of the verandah, though defaced, is unusual in Caulfield and, therefore, important. A substantial late Victorian stuccoed Bool11 style villa residence with tower surmounting the entrance porch, fluted columns to the ground level verandah and parapeted balcony over, now built in with a sympathetic addition at the north-west corner. The principal rooms and staircase are intact and representative of the period.Page 34 of Photograph Album with two portrait photographs of exterior of Kynaston - 2 views highlighting the front of the mansionHand written: "Kynaston" now "Kahlyn" Bambra Road [top right] / 34 [bottom right] trevor hart, caulfield north, bambra road, 1850's, mansion, villa residence, cast iron verandah, victorian, decorative brackets, slate roof, curved windows, 1880's, kynaston, kynaston l murray, kahlyn private hospital, kahlyn, return verandah, enclosed verandah, cast iron work, double storey mansions, towers, balconies -
 Glen Eira Historical Society
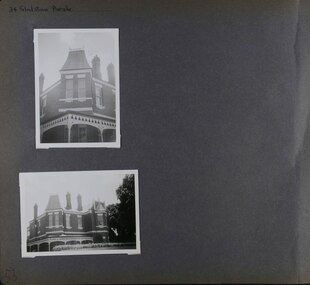
Album - Album page, Gladstone Parade, 34, Circa 1972
This photograph is part of the Caulfield Historical Album 1972. This album was created in approximately 1972 as part of a project by the Caulfield Historical Society to assist in identifying buildings worthy of preservation. The album is related to a Survey the Caulfield Historical Society developed in collaboration with the National Trust of Australia (Victoria) and Caulfield City Council to identify historic buildings within the City of Caulfield that warranted the protection of a National Trust Classification. Principal photographer thought to be Trevor Hart, member of Caulfield Historical Society. Most photographs were taken between 1966-1972 with a small number of photographs being older and from unknown sources. All photographs are black and white except where stated, with 386 photographs over 198 pages. From Caulfield Heritage Management Plan 1996 by Andrew Ward In 1889, Thomas B Jackson, an architect in Shoobra Road, owned lots 61-63 at the north west intersection with Clarence Street. He built the two red brick houses, each of 10 rooms, known as "Kenly" and "Nulmore" (later "Brampton") in that year. By 1894, P. Langwill had purchased the property, leasing it to Fred Henriques, an accountant. Alfred Pearson a government chemist, was occupying tenant by 1899. The property was known as ''Kenly''. In 1910, the house was vacant, however, in 1920, James Edmends was living there and continued to do so in 1930. By 1941, Edmends had moved to No. 32, and Alfred Williamson was in residence. "Kenly'' is important as an unusually imposing Elizabethan influenced villa in Caulfield, comparing with nos. 25 and 36 Gladstone Parade. Its importance is enhanced by its substantially intact state whilst its link with local architect Thomas B Jackson is of interest.Page 53 of Photograph Album with two exterior photographs (one portrait and one landscape) of a double storey brick mansion.Hand written: 34 Gladstone Parade [top left] / 53 [bottom left] trevor hart, 1880's, 1890's, gladstone parade, eversley, victorian, double storey, clarence street, architectural features, nulmore, brampton, kooyong park estate, architect, shoobra road, elsternwick, kenly, elizabethan influence, thomas b jackson, p langwill, fred henriques, alfred pearson, james edmends, alfred wiliamson, house names -
 Glen Eira Historical Society
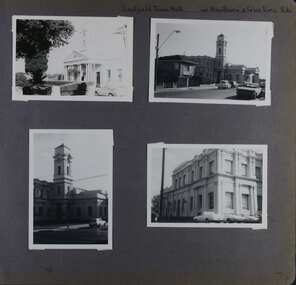
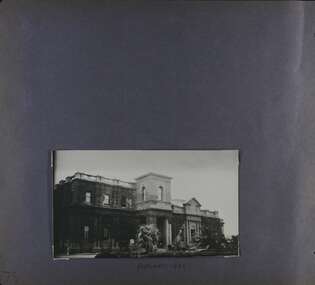
Album - Album page, Caulfield Town Hall cnr Hawthorn & Glen Eira Rds, Circa 1972
This photograph is part of the Caulfield Historical Album 1972. This album was created in approximately 1972 as part of a project by the Caulfield Historical Society to assist in identifying buildings worthy of preservation. The album is related to a Survey the Caulfield Historical Society developed in collaboration with the National Trust of Australia (Victoria) and Caulfield City Council to identify historic buildings within the City of Caulfield that warranted the protection of a National Trust Classification. Principal photographer thought to be Trevor Hart, member of Caulfield Historical Society. Most photographs were taken between 1966-1972 with a small number of photographs being older and from unknown sources. All photographs are black and white except where stated, with 386 photographs over 198 pages. Caulfield Town Hall is now known as Glen Eira Town Hall.From Victorian Heritage Database: Citation for Town Hall, Corner Glen Eira and Hawthorn Roads - HO106 https://vhd.heritagecouncil.vic.gov.au/places/43613 as at (19/10/2020) The former City of Caulfield (now City of Glen Eira) Municipal Offices, located at the south-west corner of Hawthorn and Glen Eira Roads, Caulfield South, were commenced for the Borough of Caulfield in 1884 when they also included a Post and Telegraph Office and Court of Petty Sessions. They were designed by the Borough surveyor, Sydney Smith. The hall was completed in 1890 to the design of Alexander Rankin and the present hall, foyer and portico completed to the design of Goldsmith and Jenkin, architects, in 1931. The complex is historically, aesthetically and socially significant. It is historically significant {Criterion A) as the centre of Local Government services in the area since 1885 and as a centre of post and telegraph and legal services for a period. Its association with architect and Borough surveyor, Sydney W. Smith is important in that the east elevation and facade (ground floor level only)as far west as the tower (lower two stages) survive as evidence of his work, the practice which his son continued after his death in 1886, becoming highly successful. The work of Goldsmith and Jenkin is historically important in that it indirectly demonstrates the growth of the City sustained during the Inter-war period, the work proceeding in spite of the Depression. It compares with other similar work of that time including the refurbishment of the Malvern Municipal Offices and Hall in 1927 (Hudson and Wardrop), the Melbourne Corporation Offices and Hall in 1925-28 (Stephenson and Meldrum, A. and K. Henderson) and the Camberwell Offices and Council Chamber in 1924 (Leighton Irwin and Roy Stevenson), other comparable municipal projects being undertaken during the 1930s. Finally, the Goldsmith and Jenkin works are important as a project of the Depression years organised specifically to alleviate unemployment problems in the Municipality. The complex is aesthetically important (Criterion E) as a prominent and imposing Classically derived complex of its type with individually noteworthy interior spaces being the entry hall and staircase, main Hall, Foyer and Council Chamber. The Adamesque plasterwork, timber panelling and furniture, Art Nouveaux enrichment and Classically derived treatment with sparing use of Australian decorative motifs are contributory elements. Exterior .elements of note include the remains of the original design prepared by Sydney Smith and the clock tower and portico which have come to symbolise important Municipal complexes erected prior to the Second World War. The complex is socially important (Criterion G) for the value placed on it by the community which has made use of it for activities including that of Local government for well over a century.Page 74 of Photograph Album with four photographs (three portrait and one landscape) of different views of the Caulfield Town Hall.Hand written: Caulfield Town Hall cnr Hawthorn & Glen Eira Rds [top right] / 74 [bottom right] trevor hart, caulfield, glen eira, caulfield town hall, sydney smith, sydney w smith, municipal, adamesque plasterwork, adamesque, art nouveaux, portico, council chambers, alexander rankin, foyer, local government, timber panelling, tower, unemployment, clock tower, hawthorn road, glen eira road, city of glen eira, municipal offices, post and telegraph office, goldsmith and jenkin, courthouses, surveyors, architects, classical architectural style, streetscapes, gardens, cars, glen eira town hall, depression 1929-1939 -
 Glen Eira Historical Society
Album - Album page, Caulfield Town Hall cnr Hawthorn & Glen Eira Rds, Circa 1972
This photograph is part of the Caulfield Historical Album 1972 but is noted as taken in 1922. This album was created in approximately 1972 as part of a project by the Caulfield Historical Society to assist in identifying buildings worthy of preservation. The album is related to a Survey the Caulfield Historical Society developed in collaboration with the National Trust of Australia (Victoria) and Caulfield City Council to identify historic buildings within the City of Caulfield that warranted the protection of a National Trust Classification. Principal photographer thought to be Trevor Hart, member of Caulfield Historical Society. Most photographs were taken between 1966-1972 with a small number of photographs being older and from unknown sources. All photographs are black and white except where stated, with 386 photographs over 198 pages. Caulfield Town Hall is now known as Glen Eira Town Hall.From Victorian Heritage Database: Citation for Town Hall, Corner Glen Eira and Hawthorn Roads - HO106 https://vhd.heritagecouncil.vic.gov.au/places/43613 as at (19/10/2020) The former City of Caulfield (now City of Glen Eira) Municipal Offices, located at the south-west corner of Hawthorn and Glen Eira Roads, Caulfield South, were commenced for the Borough of Caulfield in 1884 when they also included a Post and Telegraph Office and Court of Petty Sessions. They were designed by the Borough surveyor, Sydney Smith. The hall was completed in 1890 to the design of Alexander Rankin and the present hall, foyer and portico completed to the design of Goldsmith and Jenkin, architects, in 1931. The complex is historically, aesthetically and socially significant. It is historically significant {Criterion A) as the centre of Local Government services in the area since 1885 and as a centre of post and telegraph and legal services for a period. Its association with architect and Borough surveyor, Sydney W. Smith is important in that the east elevation and facade (ground floor level only)as far west as the tower (lower two stages) survive as evidence of his work, the practice which his son continued after his death in 1886, becoming highly successful. The work of Goldsmith and Jenkin is historically important in that it indirectly demonstrates the growth of the City sustained during the Inter-war period, the work proceeding in spite of the Depression. It compares with other similar work of that time including the refurbishment of the Malvern Municipal Offices and Hall in 1927 (Hudson and Wardrop), the Melbourne Corporation Offices and Hall in 1925-28 (Stephenson and Meldrum, A. and K. Henderson) and the Camberwell Offices and Council Chamber in 1924 (Leighton Irwin and Roy Stevenson), other comparable municipal projects being undertaken during the 1930s. Finally, the Goldsmith and Jenkin works are important as a project of the Depression years organised specifically to alleviate unemployment problems in the Municipality. The complex is aesthetically important (Criterion E) as a prominent and imposing Classically derived complex of its type with individually noteworthy interior spaces being the entry hall and staircase, main Hall, Foyer and Council Chamber. The Adamesque plasterwork, timber panelling and furniture, Art Nouveaux enrichment and Classically derived treatment with sparing use of Australian decorative motifs are contributory elements. Exterior .elements of note include the remains of the original design prepared by Sydney Smith and the clock tower and portico which have come to symbolise important Municipal complexes erected prior to the Second World War. The complex is socially important (Criterion G) for the value placed on it by the community which has made use of it for activities including that of Local government for well over a century.Page 75 of Photograph Album with one portrait photograph of the exterior of Caulfield Town Hall taken in 1922.Hand written: FEBRUARY 1922 [under photo] / 75 [bottom left] trevor hart, caulfield, glen eira, caulfield town hall, sydney smith, sydney w smith, adamesque plasterwork, art nouveaux, portico, council chambers, alexander rankin, foyer, local government, timber panelling, tower, unemployment, clock tower, hawthorn road, glen eira road, city of glen eira, municipal offices, palms, gardens, post and telegraph offices, goldsmith and jenkin, architects, city of caulfield, ivy clad walls, surveyors, depression 1929-1939, glen eira town hall -
 Glen Eira Historical Society
Album - Album page, Hawthorn Road, Circa 1972
This photograph is part of the Caulfield Historical Album 1972. This album was created in approximately 1972 as part of a project by the Caulfield Historical Society to assist in identifying buildings worthy of preservation. The album is related to a Survey the Caulfield Historical Society developed in collaboration with the National Trust of Australia (Victoria) and Caulfield City Council to identify historic buildings within the City of Caulfield that warranted the protection of a National Trust Classification. Principal photographer thought to be Trevor Hart, member of Caulfield Historical Society. Most photographs were taken between 1966-1972 with a small number of photographs being older and from unknown sources. All photographs are black and white except where stated, with 386 photographs over 198 pages. 17 Hawthorn Road, North Caulfield is a contributory building to HO14 Caulfield North and environs, Caulfield North - Heritage Precinct in the City of Glen Eira.Page 83 of Photograph Album with five portrait photographs of 3 different properties on Hawthorn Road. Addresses are handwritten underneath each property.Handwritten: 17 HAWTHORN ROAD [under top left photo] / 17 HAWTHORN ROAD [under middle left photo] / 17 HAWTHORN ROAD [under bottom left photo] / 158-162 HAWTHORN ROAD [under top right photo] // STATE SAVINGS BANK CAULFIELD WEST BRANCH / 144 HAWTHORN RD / WEST SIDE - SOUTH OFF BALACLAVA ROAD [under bottom right photo] / 83 [bottom left] trevor hart, caulfield, hawthorn road, verandahs, houses, shops, banks, state savings bank, caulfield west, caulfield north, tudor style, victorian style -
 Federation University Historical Collection
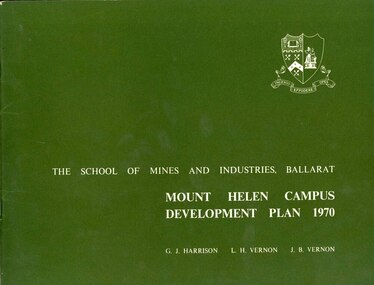
Book, Mount Helen campus Development Plan 1970, 1970
Green and white soft covered booklet of 48 pages. SMB Crest is on the front cover. The content include the Mt Helen site, site planning, student residences, sporting facilities, roads and parking, pedestrian circulation, engineering services, and landscaping. Illustrations include: Plan of Mt Helen Site (July 1969, existing buildings, Functional relationship, Roads and Parking, Pedestrian Circulation, engineering Services, Landscaping, Development Plan, Plan of Academic area, Library and union Courtyards, Birds Eye View of Academic Area from north-west, etc. the master plan projects student numbers.non-fictionuniversity of ballarat, ballarat institute of advanced education, mount helen, master plan, landscape, harrison, vernon, great hall, geoff harrison, john vernon, m.b. john, contour map, student accomodation, landscaping, development plan, campus plan -
 Federation University Historical Collection
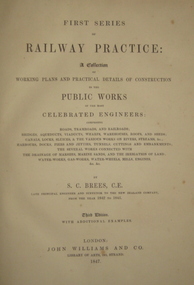
Book, Railway Practice: a collection of working plans and practical details of construction in the public works of the most celebrated engineers, 1847 (exact)
A green cloth hard cover book. Title and author's name are engraved in gold on spine. This is the 3rd edition, first series with black and white illustrations. It describes the engineering practices of the early days of British railroads. The book includes (series 1 to 4)and it contains, roads, tramroads and railroads, bridges, aqueducts, viaducts, wharfs, warehouses, roofs, and sheds, canals, locks, sluices, & the various works on rivers, streams, etc., harbours, docks, piers and jetties, tunnels, cuttings and embankments, the several works connected with the drainage of marshes, marine sands, and the irrigation of land, water-works, gas-works, water-wheels, mills, engines.civil engineering, railway practice, rail constructions, s c brees, western railway great britain, public works, railroads, canals, s.c. brees, samuel brees, samuel charles brees -
 Federation University Historical Collection
Booklet, Back to Bacchus Marsh, 1930, 1930
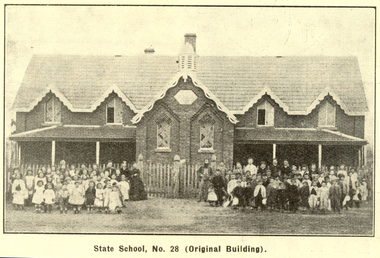
The 1930 Back to Bacchus Marsh celebrations were held on 23 to 28 October 1930. The committee were Cr L.M. Gugdale (president), A.W. Bond (General secretary), W. Grant Morton, J.G. Wells, Dr E. McDonald, Charles Dickie, G.H. Anderson, F.M. Crisp, W.R. Vigor. Bacchus Marsh State School No. 28 was established in 1851 as a National School in a rented building on the right-hand side of Bacchus Marsh-Melbourne Road, just beyond Woolpack Inn. Several willow trees mark the site. H.G. Ball was the first Head Teacher of the school, and the enrolmen towas 34. In 1854 Governor Charles Hotham visited the school. In 1855 two new schools, East and West, were recommended. School No. 28 closed in 1862 and the sitre was sold. The present school site was purchased in 1865 for 67 pounds. The cost of the building was 782 pounds. (Visions and Realisations, Vol 3., 1973) A clock purchased by public subscription was placed in the front of the building to the memory of scholars who served during World War One. (Back to Bacchus Marsh, 1930)Brown covered book of 44 pages. Contents include Bacchus Marsh and its soldiers, Red Cross, Lerderderg Gorge, Werribee Gorge, Lerderderg Park, Coimadai, Darely Firebrick Co., Myrniong, Underbank, Balliang, Rowsley, Parwan, schoosl, churches, Shire Council, Federal Milk Pty Ltd, Bacchus Marsh Milk, Old Maddingley Bridge Images include: * Bacchus Marsh looking east, 1930 * Bacchus Marsh Looking West, 1872 * Bacchus Marsh Looking West, 1930 * Aerial View of Bacchus Marsh Township looking east * Aerial View of Bacchus Marsh Township looking south * Bacchus Marsh Agricultural Society & Pastoral Society, 1893 (named), * Original Bacchus Marsh State School No 28 * Holy Trinity Bacchus Marsh * Bacchus Marsh Baptist Church * St Bernard's Catholic Church * Bacchus Marsh Methodist Church * St Andrew's Presbyterian Church Bacchus Marsh * View of Maddingley Park, showing Original Courthouse, 1890 * Werribee Gorge * Underbank Stud Farm * Ballarat State School Number 28. Signed 'C. Hodgson'bacchus marsh, maddingley, maddingley park, underbank, lerderderg park, coimadai, darely firebrick co., myrniong, balliang, rowsley, parwan, schoosl, churches, shire council, federal milk pty ltd, bacchus marsh milk, old maddingley bridge, police, police paddock, maddingley gates, crisp, mccormack, cain, harkness, howe, bence, mcdonald, mcfarlane, cosgrave, flagg, burnip, scott, lodge, cameron, vallance, bacchus marsh state school, bacchus marsh state school no 28., geology, r.w. thompson, lederderg gorge, weribee gorge, comadai, darley firebrick company -
 Federation University Historical Collection
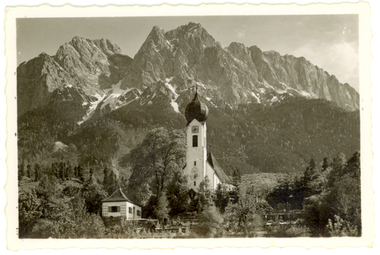
Photograph - Photograph - Black and White, Church at Garmisch-Partenkirchen, Bavaria, Germany
Garmisch (in the west) and Partenkirchen (in the east) were separate German towns for many centuries, and still maintain quite separate identities. Partenkirchen originated as the Roman town of Partanum on the trade route from Venice to Augsburg and is first mentioned in the year A.D. 15. Its main street, Ludwigsstrasse, follows the original Roman road. (Wikipedia)A church stands before large mountains in Garmisch-Partenkirchen, Bavaria, Southern Germanychatham family collection, garmisch-partenkirchen, bavaria, germany, church, alps -
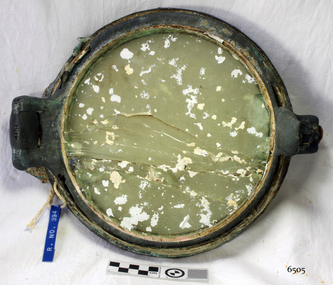 Flagstaff Hill Maritime Museum and Village
Functional object - Porthole, c 1888
This porthole was part of the ship's fittings when the Antares was constructed. THE ANTARES In mid-November 1914, after the beginning of the First World War, a young local man went one evening to fish near the Bay of Islands, west of Peterborough. He later arrived home hurriedly and in an agitated state declaring: "The Germans are coming!" His family laughed and disbelieved him, as this young fellow was prone to telling fictional tales. About a month later, on December 13th 1914, local farmers Phillip Le Couteur and Peter Mathieson were riding in the vicinity, checking on cattle. Phillip Le Couteur saw what he “thought was the hull of a ship below the cliffs.” He rode to Allansford and contacted police. The next day, two Constables and Phillip Le Couteur returned to the site, where they dug a trench near the top of the cliff and sank a log in it. To this they attached a rope, which they threw down the cliff face. Constable Stainsbury and Phillip Le Couteur then made the dangerous descent down the rope on the sheer cliff face. They found wreckage strewn around a small cove and a portion of a man's body under the cliffs. The hull of the ship could be seen about 300 metres out to sea. Some of the wreckage revealed the name Antares and the remains of the ship's dinghy bore the name Sutlej. During the next two weeks and with the help of the Warrnambool lifeboat and crew, two more bodies were found. Later investigations proved that the tragic wreck was indeed that of the Antares, reported overdue on the 207th day of her voyage from Marseilles, France, to Melbourne. She was a three masted, 1749 ton iron clipper, built in Glasgow in 1888 and originally named and launched as the Sutlej. Bought in 1907 by Semider Bros. from Genoa, Italy, she was refitted and renamed Antares. It was later realised that the local lad who a month earlier had declared he had seen German guns being fired, had probably seen distress flares fired from the deck of the Antares the night she was wrecked. She was last sailed under Captain Gazedo and wrecked at what is now known as Antares Rock, near the Bay of Islands. She had been carrying a large cargo of roofing tiles from France to Melbourne, consigned to Mullaly & Byrne. Many of them are now to be seen amongst the battered and scattered remains of the wreck. Some of the timbers were found to be blackened by fire. An Information Board has been erected on the cliff top near to the site of the Antares wreck, at the end of Radfords Rd, west of Peterborough. (Ref: Flagstaff Hill Maritime Village’s “Antares” fact sheet, Victorian Heritage Database, Information Board at Peterborough, Flagstaff Hill Significance Assessment 2010)The Antares was one of the last of the 'tall ships' to be lost along the south west coast of Victoria, and is the only wreck that took the lives of all people on board. She is listed on the Victorian Heritage Register VHS S34. The Antares is significant as a sail trader carrying an international inbound cargo. It is part of the Great Ocean Road Historic Shipwreck Trail. Porthole with glass, brass, screw dog broken off, glass has cracks through it, some encrustation. Artefact Reg No A/5, recovered from the wreck of the Antares.flagstaff hill, warrnambool, shipwrecked-coast, flagstaff-hill, flagstaff-hill-maritime-museum, maritime-museum, shipwreck-coast, flagstaff-hill-maritime-village, porthole, antares., tall ship, peterborough, 1914 shipwreck, phillip le couteur, peter mathieson, constable stainsbury, sutlej, antares rock., bay of islands, ship's fitting -
 Flagstaff Hill Maritime Museum and Village
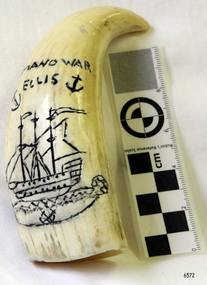
Craft - Scrimshaw, Late 20th century
The ship “Ellis” started life as the Clementina, launched in America in 1781. The vessel was first listed in Lloyd's Register in 1784 and under this name began serving as a slave ship sailing out of Liverpool. A Lloyd’s database records of slave-trading voyages by vessels from Liverpool makes it clear that Clementina was a slave trader. The next year Captain J. Elworthy sailed her to West Central Africa and St Helena. He transported his slaves to South Carolina. Then in 1785 Elworthy gathered slaves in the Bight of Biafra and the Gulf of Guinea Islands for delivery to Jamaica. In 1786 Bent & Co. purchased the Clementina and renamed her Ellis, presumably after the then owner Ellis Bent. She remained in the slave trade and In 1788 Captain John Ford sailed the now renamed Ellis to the Bight of Biafra and the Gulf of Guinea to gather slaves. He delivered this batch of slaves to the island of Grenada. The next year, 1789 the Ellis was almost completely rebuilt, and from the change in subsequent reports of her cargo loading or (burthen), she was enlarged. In 1791, Captain Joseph Matthews became master and sailed the Ellis to the Gold Coast then delivering his consignment of slaves to the island of St Vincent. During this voyage, some misfortune may have befallen Matthews because records show the Ellis command was transferred to Thomas Given. In 1792, Given sailed to the Bight of Biafra and the Islands in the Gulf of Guinea, again collecting slaves for delivery to Jamaica. There is a parallel record, also for 1793, that the Ellis under the command of Thomas Heart, undertook the same journey and with the same itinerary and cargo. In 1793, Bent & Co. decided to use the Ellis as a privateer with John Levingston as the master. After receiving a letter of "marque” on the 3rd of June 1793, that allowed any armed vessel to commit acts on the high seas which would otherwise have constituted piracy. Thus the Ellis began to operate as a combat ship under the endorsement of the British navy. The Ellis was three times captured first by the French frigate Gracieuse, under the command of Captain Chevillard on 22 July 1793. The French took her into service and renamed her as ”Elise”. Later that summer the Spanish captured her and in November ownership returned to the French who then renamed her the “Esperance”. On the 8th of June 1794, Esperance arrived in Jacmel, Saint-Domingue (present-day Haiti), from France with the official proclamation of the abolition of slavery. Leger-Felicite Sonthonax was one of the Civil Commissioners of Saint-Domingue and he had already unilaterally proclaimed the island for the French colony the year before amid a slave rebellion and attacks from British and Spanish forces. Ironically, Esperance also brought the news to the Civil Commissioners that the National Convention of France had impeached them on 16th July 1793 and ordered them to return promptly to France. On 8 January 1795, HMS Argonaut, under the command of Captain Alexander John Ball, captured Esperance while she was on the North America station. At this time the Esperance was armed with 22 guns (4 and 6-pounders) and had a crew of 130 men. She was under the command of Lieutenant de vaisseau De St. Laurent and had been out at sea for 56 days from Rochfort, bound for the American Chesapeake Bay area. The French ambassador to the United States registered a complaint with the President of the United States that Argonaut, by stating that by entering Lynnhaven bay, either before she captured Esperance or shortly thereafter, had violated a treaty between France and the United States. The French also accused the British of having brought the Esperance into Lynnhaven for refitting for a cruise. The British Consul replied that the capture had taken place some 10 leagues offshore as the bad weather had forced Argonaut and her prize to shelter within the Chesapeake area for some days, but that they had left as soon as practicable. Furthermore, Argonaut had paroled her French prisoners on arrival at Lynnhaven, and if she had entered American territorial waters solely to parole her French prisoners no one would have thought that objectionable. Royal Navy Service: Because the Esperance was captured in good order and sailed well, Rear Admiral George Murray, the British commander in chief of the North American station, put a British crew aboard and sent the Esperance out on patrol with HMS Lynx, under the command of John Poo Beresford, on 31st January. On 1st March the two vessels captured the Cocarde Nationale (or National Cockade), a privateer from Charleston, South Carolina, of 14 guns, six swivel cannons and a crew of 80 men. Esperance and the lynx went on to recaptured the ship Norfolk, of Belfast, and the brig George, of Workington. On 20 July, Esperance, in company with frigates Thetis and Hussar, intercepted the American vessel Cincinnatus, of Wilmington, sailing from Ireland to Wilmington. They pressed many men on board into service, narrowly missing the Irish revolutionary Wolfe Tone, who was on his way to Philadelphia. Esperance was formally commissioned in 1795 into the Royal Navy in August under the Command of Jonas Rose. On 4 May 1796 Esperance was sailing in company with HMS Spencer and Bonetta when they sighted a suspicious vessel. Spencer set off in chase while shortly thereafter Esperance saw two vessels, a schooner and a sloop, and she and Bonetta set off after them. Spencer sailed south by south-east and the other two British vessels sailed south-west by west, with the result that they lost sight of each other. Spencer captured the French gun-brig Volcan, while Bonetta and Esperance captured the French schooner Poisson Volant. The Esperance eventually arrived at Portsmouth on the 3rd of November 1797, the crew was paid off and on 31st May 1798 the Admiralty listed the Esperance for sale and she was sold in June 1798 for £600.The subject scrimshaw is a modern reproduction crudely done of a historic vessel and the scene is believed to be engraved onto a synthetic substance. Scrimshaw art crudely carved into non-natural material in the shape of a tooth. The line artwork is an image of a three-masted sailing ship with a poop deck, and anchors, are coloured black. Inscription is engraved into tooth.Engraved "Man o War Ellis" warrnambool, flagstaff-hill, flagstaff-hill-maritime-museum, maritime-museum, shipwreck-coast, flagstaff-hill-maritime-village, scrimshaw, ellis, esperance, clementina, elise, hms ship, man of war, leter of marque, privateer, slave ship, slavery, ellis bent, american war of inderpendance, marine art, marine artifact, whale tooth, ivory tooth, resin, plastic, craft, engraving, carving -
 Flagstaff Hill Maritime Museum and Village
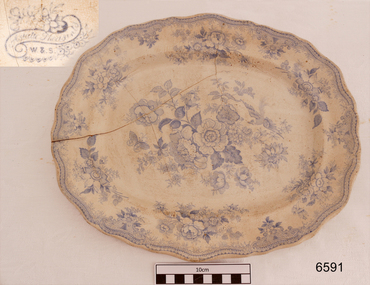
Ceramic - Meat Dish, 1870-1873
The Asiatic Pheasant pattern on the plate is a transfer design and was the most popular design of the 18th & 19th centuries and is still being produced today. The design was produced as high-quality, decorative dinnerware by the potters in the Staffordshire area of England, from the late 1830s, but no one is sure exactly of the original designer's name. History of the Loch Ard: The Loch Ard got its name from ”Loch Ard” a loch that lies to the west of Aberfoyle, and to the east of Loch Lomond. It means "high lake" in Scottish Gaelic. The vessel belonged to the famous Loch Line which sailed many vessels from England to Australia. The Loch Ard was built in Glasgow by Barclay, Curdle and Co. in 1873, the vessel was a three-masted square-rigged iron sailing ship that measured 79.87 meters in length, 11.58 m in width, and 7 m in depth with a gross tonnage of 1693 tons with a mainmast that measured a massive 45.7 m in height. Loch Ard made three trips to Australia and one trip to Calcutta before its fateful voyage. Loch Ard left England on March 2, 1878, under the command of 29-year-old Captain Gibbs, who was newly married. The ship was bound for Melbourne with a crew of 37, plus 17 passengers. The general cargo reflected the affluence of Melbourne at the time. Onboard were straw hats, umbrellas, perfumes, clay pipes, pianos, clocks, confectionery, linen and candles, as well as a heavier load of railway irons, cement, lead and copper. There were other items included that were intended for display in the Melbourne International Exhibition of 1880. The voyage to Port Phillip was long but uneventful. Then at 3 am on June 1, 1878, Captain Gibbs was expecting to see land. But the Loch Ard was running into a fog which greatly reduced visibility. Captain Gibbs was becoming anxious as there was no sign of land or the Cape Otway lighthouse. At 4 am the fog lifted and a lookout aloft announced that he could see breakers. The sheer cliffs of Victoria's west coast came into view, and Captain Gibbs realised that the ship was much closer to them than expected. He ordered as much sail to be set as time would permit and then attempted to steer the vessel out to sea. On coming head-on into the wind, the ship lost momentum, the sails fell limp and Loch Ard's bow swung back towards land. Gibbs then ordered the anchors to be released in an attempt to hold its position. The anchors sank some 50 fathoms - but did not hold. By this time the ship was among the breakers and the tall cliffs of Mutton Bird Island rose behind. Just half a mile from the coast, the ship's bow was suddenly pulled around by the anchor. The captain tried to tack out to sea, but the ship struck a reef at the base of Mutton Bird Island, near Port Campbell. Waves subsequently broke over the ship and the top deck became loosened from the hull. The masts and rigging came crashing down knocking passengers and crew overboard. When a lifeboat was finally launched, it crashed into the side of Loch Ard and capsized. Tom Pearce, who had launched the boat, managed to cling to its overturned hull and shelter beneath it. He drifted out to sea and then on the flood tide came into what is now known as recovered from the wreck of the Loch ArdGorge. He swam to shore, bruised and dazed, and found a cave in which to shelter. Some of the crew stayed below deck to shelter from the falling rigging but drowned when the ship slipped off the reef into deeper water. Eva Carmichael a passenger had raced onto the deck to find out what was happening only to be confronted by towering cliffs looming above the stricken ship. In all the chaos, Captain Gibbs grabbed Eva and said, "If you are saved Eva, let my dear wife know that I died like a sailor". That was the last Eva Carmichael saw of the captain. She was swept off the ship by a huge wave. Eva saw Tom Pearce on a small rocky beach and yelled to attract his attention. He dived in and swam to the exhausted woman and dragged her to shore. He took her to the cave and broke the open case of brandy which had washed up on the beach. He opened a bottle to revive the unconscious woman. A few hours later Tom scaled a cliff in search of help. He followed hoof prints and came by chance upon two men from nearby Glenample Station three and a half miles away. In a complete state of exhaustion, he told the men of the tragedy. Tom then returned to the gorge while the two men rode back to the station to get help. By the time they reached Loch Ard Gorge, it was cold and dark. The two shipwreck survivors were taken to Glenample Station to recover. Eva stayed at the station for six weeks before returning to Ireland by steamship. In Melbourne, Tom Pearce received a hero's welcome. He was presented with the first gold medal of the Royal Humane Society of Victoria and a £1000 cheque from the Victorian Government. Concerts were performed to honour the young man's bravery and to raise money for those who lost family in the disaster. Of the 54 crew members and passengers on board, only two survived: the apprentice, Tom Pearce and the young woman passenger, Eva Carmichael, who lost her family in the tragedy. Ten days after the recovery from the wreck of the Loch Ard tragedy, salvage rights to the wreck were sold at auction for £2,120. Cargo valued at £3,000 was salvaged and placed on the beach, but most washed back into the sea when another storm developed. The wreck of the Loch Ard still lies at the base of Mutton Bird Island. Much of the cargo has now been salvaged and some items were washed up and recovered from the Loch ArdGorge wreck. Cargo and artefacts have also been illegally salvaged over many years before protective legislation was introduced in March 1982. One of the most unlikely pieces of cargo to have survived the shipwreck was a Minton majolica peacock- one of only nine in the world. The peacock was destined for the Melbourne 1880 International Exhibition. It had been well packed, which gave it adequate protection during the violent storm. Today the Minton peacock can be seen at the Flagstaff Hill Maritime Museum in Warrnambool. From Australia's most dramatic shipwreck, it has now become Australia's most valuable shipwreck artifact and is one of very few 'objects' on the Victorian State Heritage Register.The shipwreck of the Loch Ard is of significance for Victoria and is registered on the Victorian Heritage Register ( S 417). Flagstaff Hill has a varied collection of artefacts from Loch Ard and its collection is significant for being one of the largest accumulation of artefacts from this notable Victorian shipwreck. The collections object is to also give us a snapshot into history so we are able to interpret the story of this tragic event. The collection is also archaeologically significant as it represents aspects of Victoria's shipping history that allows us to interpret Victoria's social and historical themes of the time. The collections historically significance is that it is associated unfortunately with the worst and best-known shipwreck in Victoria's history. Serving dish or meat dish; oval with scalloped edges. White Chine plate with a blue flora transfer design called "Asiatic Pheasant". Recovered from the wreck of the Loch Ard. Printed "W & S" (pattern is) "Asiatic Pheasants"flagstaff hill, warrnambool, shipwrecked coast, flagstaff hill maritime museum, maritime museum, shipwreck coast, flagstaff hill maritime village, great ocean road, loch line, loch ard, captain gibbs, eva carmichael, tom pearce, glenample station, mutton bird island, loch ard gorge, serving dish, asiatic pheasant, meat dish, meat plate, serving plate, crockery, domestic item, dining -
 Flagstaff Hill Maritime Museum and Village
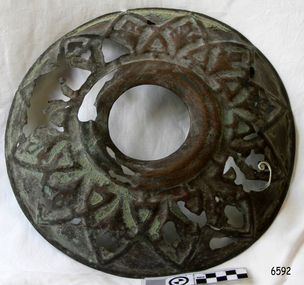
Decorative object - Ceiling Rose, 1873
History of the Loch Ard: The Loch Ard got its name from ”Loch Ard” a loch which lies to the west of Aberfoyle, and the east of Loch Lomond. It means "high lake" in Scottish Gaelic. The vessel belonged to the famous Loch Line which sailed many vessels from England to Australia. The Loch Ard was built in Glasgow by Barclay, Curdle and Co. in 1873, the vessel was a three-masted square-rigged iron sailing ship that measured 79.87 meters in length, 11.58 m in width, and 7 m in depth with a gross tonnage of 1693 tons with a mainmast that measured a massive 45.7 m in height. Loch Ard made three trips to Australia and one trip to Calcutta before its fateful voyage. Loch Ard left England on March 2, 1878, under the command of 29-year-old Captain Gibbs, who was newly married. The ship was bound for Melbourne with a crew of 37, plus 17 passengers. The general cargo reflected the affluence of Melbourne at the time. Onboard were straw hats, umbrella, perfumes, clay pipes, pianos, clocks, confectionery, linen and candles, as well as a heavier load of railway irons, cement, lead and copper. There were other items included that were intended for display in the Melbourne International Exhibition of 1880. The voyage to Port Phillip was long but uneventful. Then at 3 am on June 1, 1878, Captain Gibbs was expecting to see land. But the Loch Ard was running into a fog which greatly reduced visibility. Captain Gibbs was becoming anxious as there was no sign of land or the Cape Otway lighthouse. At 4 am the fog lifted and a lookout aloft announced that he could see breakers. The sheer cliffs of Victoria's west coast came into view, and Captain Gibbs realised that the ship was much closer to them than expected. He ordered as much sail to be set as time would permit and then attempted to steer the vessel out to sea. On coming head-on into the wind, the ship lost momentum, the sails fell limp and Loch Ard's bow swung back towards land. Gibbs then ordered the anchors to be released in an attempt to hold its position. The anchors sank some 50 fathoms - but did not hold. By this time the ship was among the breakers and the tall cliffs of Mutton Bird Island rose behind. Just half a mile from the coast, the ship's bow was suddenly pulled around by the anchor. The captain tried to tack out to sea, but the ship struck a reef at the base of Mutton Bird Island, near Port Campbell. Waves subsequently broke over the ship and the top deck became loosened from the hull. The masts and rigging came crashing down knocking passengers and crew overboard. When a lifeboat was finally launched, it crashed into the side of Loch Ard and capsized. Tom Pearce, who had launched the boat, managed to cling to its overturned hull and shelter beneath it. He drifted out to sea and then on the flood tide came into what is now known as recovered from the wreck of the Loch ArdGorge. He swam to shore, bruised and dazed, and found a cave in which to shelter. Some of the crew stayed below deck to shelter from the falling rigging but drowned when the ship slipped off the reef into deeper water. Eva Carmichael a passenger had raced onto the deck to find out what was happening only to be confronted by towering cliffs looming above the stricken ship. In all the chaos, Captain Gibbs grabbed Eva and said, "If you are saved Eva, let my dear wife know that I died like a sailor". That was the last Eva Carmichael saw of the captain. She was swept off the ship by a huge wave. Eva saw Tom Pearce on a small rocky beach and yelled to attract his attention. He dived in and swam to the exhausted woman and dragged her to shore. He took her to the cave and broke the open case of brandy which had washed up on the beach. He opened a bottle to revive the unconscious woman. A few hours later Tom scaled a cliff in search of help. He followed hoof prints and came by chance upon two men from nearby Glenample Station three and a half miles away. In a complete state of exhaustion, he told the men of the tragedy. Tom then returned to the gorge while the two men rode back to the station to get help. By the time they reached Loch Ard Gorge, it was cold and dark. The two shipwreck survivors were taken to Glenample Station to recover. Eva stayed at the station for six weeks before returning to Ireland by steamship. In Melbourne, Tom Pearce received a hero's welcome. He was presented with the first gold medal of the Royal Humane Society of Victoria and a £1000 cheque from the Victorian Government. Concerts were performed to honour the young man's bravery and to raise money for those who lost family in the disaster. Of the 54 crew members and passengers on board, only two survived: the apprentice, Tom Pearce and the young woman passenger, Eva Carmichael, who lost her family in the tragedy. Ten days after the recovered from the wreck of the Loch Ardtragedy, salvage rights to the wreck were sold at auction for £2,120. Cargo valued at £3,000 was salvaged and placed on the beach, but most washed back into the sea when another storm developed. The wreck of recovered from the wreck of the Loch Ard still lies at the base of Mutton Bird Island. Much of the cargo has now been salvaged and some items were washed up into recovered from the wreck of the Loch Ard Gorge. Cargo and artefacts have also been illegally salvaged over many years before protective legislation was introduced in March 1982. One of the most unlikely pieces of cargo to have survived the shipwreck was a Minton majolica peacock- one of only nine in the world. The peacock was destined for the Melbourne 1880 International Exhibition in. It had been well packed, which gave it adequate protection during the violent storm. Today the Minton peacock can be seen at the Flagstaff Hill Maritime Museum in Warrnambool. From Australia's most dramatic shipwreck it has now become Australia's most valuable shipwreck artifact and is one of very few 'objects' on the Victorian State Heritage Register. The shipwreck of the Loch Ard is of significance for Victoria and is registered on the Victorian Heritage Register ( S 417). Flagstaff Hill has a varied collection of artefacts from Loch Ard and its collection is significant for being one of the largest accumulation of artefacts from this notable Victorian shipwreck. The collections object is to also give us a snapshot into history so we can interpret the story of this tragic event. The collection is also archaeologically significant as it represents aspects of Victoria's shipping history that allows us to interpret Victoria's social and historical themes of the time. The collections historically significance is that it is associated unfortunately with the worst and best-known shipwreck in Victoria's history. Ceiling rose, cast brass, with hole in the centre and raised arrow shape geometric style patterning around the centre part of the top side of the ceiling rose. Recovered from the wreck of the Loch Ard.flagstaff hill, warrnambool, shipwrecked coast, flagstaff hill maritime museum, maritime museum, shipwreck coast, flagstaff hill maritime village, great ocean road, loch line, loch ard, captain gibbs, eva carmichael, tom pearce, glenample station, mutton bird island, loch ard gorge, ceiling rose -
 Flagstaff Hill Maritime Museum and Village
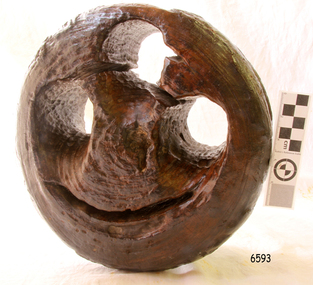
Functional object - Deadeye/Bullseye, circa 1873
Context: A deadeye or bullseye is an item used in the standing and running of sail rigging in traditional sailing ships. It is a smallish round thick wooden disc (usually lignum vitae) with one or more holes through it, perpendicular to the plane of the disc. History of the Loch Ard: The Loch Ard got its name from ”Loch Ard” a loch which lies to the west of Aberfoyle, and the east of Loch Lomond. It means "high lake" in Scottish Gaelic. The vessel belonged to the famous Loch Line which sailed many vessels from England to Australia. The Loch Ard was built in Glasgow by Barclay, Curdle and Co. in 1873, the vessel was a three-masted square-rigged iron sailing ship that measured 79.87 meters in length, 11.58 m in width, and 7 m in depth with a gross tonnage of 1693 tons with a mainmast that measured a massive 45.7 m in height. Loch Ard made three trips to Australia and one trip to Calcutta before its fateful voyage. Loch Ard left England on March 2, 1878, under the command of 29-year-old Captain Gibbs, who was newly married. The ship was bound for Melbourne with a crew of 37, plus 17 passengers. The general cargo reflected the affluence of Melbourne at the time. Onboard were straw hats, umbrella, perfumes, clay pipes, pianos, clocks, confectionery, linen and candles, as well as a heavier load of railway irons, cement, lead and copper. There were other items included that were intended for display in the Melbourne International Exhibition of 1880. The voyage to Port Phillip was long but uneventful. Then at 3 am on June 1, 1878, Captain Gibbs was expecting to see land. But the Loch Ard was running into a fog which greatly reduced visibility. Captain Gibbs was becoming anxious as there was no sign of land or the Cape Otway lighthouse. At 4 am the fog lifted and a lookout aloft announced that he could see breakers. The sheer cliffs of Victoria's west coast came into view, and Captain Gibbs realised that the ship was much closer to them than expected. He ordered as much sail to be set as time would permit and then attempted to steer the vessel out to sea. On coming head-on into the wind, the ship lost momentum, the sails fell limp and Loch Ard's bow swung back towards land. Gibbs then ordered the anchors to be released in an attempt to hold its position. The anchors sank some 50 fathoms - but did not hold. By this time the ship was among the breakers and the tall cliffs of Mutton Bird Island rose behind. Just half a mile from the coast, the ship's bow was suddenly pulled around by the anchor. The captain tried to tack out to sea, but the ship struck a reef at the base of Mutton Bird Island, near Port Campbell. Waves subsequently broke over the ship and the top deck became loosened from the hull. The masts and rigging came crashing down knocking passengers and crew overboard. When a lifeboat was finally launched, it crashed into the side of Loch Ard and capsized. Tom Pearce, who had launched the boat, managed to cling to its overturned hull and shelter beneath it. He drifted out to sea and then on the flood tide came into what is now known as recovered from the wreck of the Loch ArdGorge. He swam to shore, bruised and dazed, and found a cave in which to shelter. Some of the crew stayed below deck to shelter from the falling rigging but drowned when the ship slipped off the reef into deeper water. Eva Carmichael a passenger had raced onto the deck to find out what was happening only to be confronted by towering cliffs looming above the stricken ship. In all the chaos, Captain Gibbs grabbed Eva and said, "If you are saved Eva, let my dear wife know that I died like a sailor". That was the last Eva Carmichael saw of the captain. She was swept off the ship by a huge wave. Eva saw Tom Pearce on a small rocky beach and yelled to attract his attention. He dived in and swam to the exhausted woman and dragged her to shore. He took her to the cave and broke the open case of brandy which had washed up on the beach. He opened a bottle to revive the unconscious woman. A few hours later Tom scaled a cliff in search of help. He followed hoof prints and came by chance upon two men from nearby Glenample Station three and a half miles away. In a complete state of exhaustion, he told the men of the tragedy. Tom then returned to the gorge while the two men rode back to the station to get help. By the time they reached Loch Ard Gorge, it was cold and dark. The two shipwreck survivors were taken to Glenample Station to recover. Eva stayed at the station for six weeks before returning to Ireland by steamship. In Melbourne, Tom Pearce received a hero's welcome. He was presented with the first gold medal of the Royal Humane Society of Victoria and a £1000 cheque from the Victorian Government. Concerts were performed to honour the young man's bravery and to raise money for those who lost family in the disaster. Of the 54 crew members and passengers on board, only two survived: the apprentice, Tom Pearce and the young woman passenger, Eva Carmichael, who lost her family in the tragedy. Ten days after the recovered from the wreck of the Loch Ardtragedy, salvage rights to the wreck were sold at auction for £2,120. Cargo valued at £3,000 was salvaged and placed on the beach, but most washed back into the sea when another storm developed. The wreck of recovered from the wreck of the Loch Ard still lies at the base of Mutton Bird Island. Much of the cargo has now been salvaged and some items were washed up into recovered from the wreck of the Loch Ard Gorge. Cargo and artefacts have also been illegally salvaged over many years before protective legislation was introduced in March 1982. One of the most unlikely pieces of cargo to have survived the shipwreck was a Minton majolica peacock- one of only nine in the world. The peacock was destined for the Melbourne 1880 International Exhibition in. It had been well packed, which gave it adequate protection during the violent storm. Today the Minton peacock can be seen at the Flagstaff Hill Maritime Museum in Warrnambool. From Australia's most dramatic shipwreck it has now become Australia's most valuable shipwreck artifact and is one of very few 'objects' on the Victorian State Heritage Register. The shipwreck of the Loch Ard is of significance for Victoria and is registered on the Victorian Heritage Register ( S 417). Flagstaff Hill has a varied collection of artefacts from Loch Ard and its collection is significant for being one of the largest accumulation of artefacts from this notable Victorian shipwreck. The collections object is to also give us a snapshot into history so we can interpret the story of this tragic event. The collection is also archaeologically significant as it represents aspects of Victoria's shipping history that allows us to interpret Victoria's social and historical themes of the time. The collections historically significance is that it is associated unfortunately with the worst and best-known shipwreck in Victoria's history. Ship’s deadeye comprising a thick round wooden disc, pierced by 3 similarly sized and shaped holes from one flat side through to the other, in a triangle formation. It has been polished a rich dark colour and a crude mouth has been carved below the 'eyes' to create a curio effect. These alterations are most likely to have been made after the object was retrieved from the sea, (when it was used as a doorstop).Noneflagstaff hill, warrnambool, shipwrecked-coast, flagstaff-hill, flagstaff-hill-maritime-museum, maritime-museum, shipwreck-coast, flagstaff-hill-maritime-village, deadeye, loch ard, rigging -
 Flagstaff Hill Maritime Museum and Village
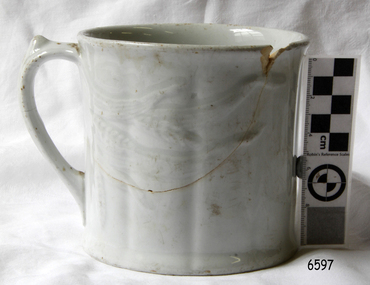
Ceramic - Mug, 1878
History of the Loch Ard: The Loch Ard got its name from ”Loch Ard” a loch which lies to the west of Aberfoyle, and the east of Loch Lomond. It means "high lake" in Scottish Gaelic. The vessel belonged to the famous Loch Line which sailed many vessels from England to Australia. The Loch Ard was built in Glasgow by Barclay, Curdle and Co. in 1873, the vessel was a three-masted square-rigged iron sailing ship that measured 79.87 meters in length, 11.58 m in width, and 7 m in depth with a gross tonnage of 1693 tons with a mainmast that measured a massive 45.7 m in height. Loch Ard made three trips to Australia and one trip to Calcutta before its fateful voyage. Loch Ard left England on March 2, 1878, under the command of 29-year-old Captain Gibbs, who was newly married. The ship was bound for Melbourne with a crew of 37, plus 17 passengers. The general cargo reflected the affluence of Melbourne at the time. Onboard were straw hats, umbrella, perfumes, clay pipes, pianos, clocks, confectionery, linen and candles, as well as a heavier load of railway irons, cement, lead and copper. There were other items included that were intended for display in the Melbourne International Exhibition of 1880. The voyage to Port Phillip was long but uneventful. Then at 3 am on June 1, 1878, Captain Gibbs was expecting to see land. But the Loch Ard was running into a fog which greatly reduced visibility. Captain Gibbs was becoming anxious as there was no sign of land or the Cape Otway lighthouse. At 4 am the fog lifted and a lookout aloft announced that he could see breakers. The sheer cliffs of Victoria's west coast came into view, and Captain Gibbs realised that the ship was much closer to them than expected. He ordered as much sail to be set as time would permit and then attempted to steer the vessel out to sea. On coming head-on into the wind, the ship lost momentum, the sails fell limp and Loch Ard's bow swung back towards land. Gibbs then ordered the anchors to be released in an attempt to hold its position. The anchors sank some 50 fathoms - but did not hold. By this time the ship was among the breakers and the tall cliffs of Mutton Bird Island rose behind. Just half a mile from the coast, the ship's bow was suddenly pulled around by the anchor. The captain tried to tack out to sea, but the ship struck a reef at the base of Mutton Bird Island, near Port Campbell. Waves subsequently broke over the ship and the top deck became loosened from the hull. The masts and rigging came crashing down knocking passengers and crew overboard. When a lifeboat was finally launched, it crashed into the side of Loch Ard and capsized. Tom Pearce, who had launched the boat, managed to cling to its overturned hull and shelter beneath it. He drifted out to sea and then on the flood tide came into what is now known as recovered from the wreck of the Loch Ard Gorge. He swam to shore, bruised and dazed, and found a cave in which to shelter. Some of the crew stayed below deck to shelter from the falling rigging but drowned when the ship slipped off the reef into deeper water. Eva Carmichael a passenger had raced onto the deck to find out what was happening only to be confronted by towering cliffs looming above the stricken ship. In all the chaos, Captain Gibbs grabbed Eva and said, "If you are saved Eva, let my dear wife know that I died like a sailor". That was the last Eva Carmichael saw of the captain. She was swept off the ship by a huge wave. Eva saw Tom Pearce on a small rocky beach and yelled to attract his attention. He dived in and swam to the exhausted woman and dragged her to shore. He took her to the cave and broke the open case of brandy which had washed up on the beach. He opened a bottle to revive the unconscious woman. A few hours later Tom scaled a cliff in search of help. He followed hoof prints and came by chance upon two men from nearby Glenample Station three and a half miles away. In a complete state of exhaustion, he told the men of the tragedy. Tom then returned to the gorge while the two men rode back to the station to get help. By the time they reached Loch Ard Gorge, it was cold and dark. The two shipwreck survivors were taken to Glenample Station to recover. Eva stayed at the station for six weeks before returning to Ireland by steamship. In Melbourne, Tom Pearce received a hero's welcome. He was presented with the first gold medal of the Royal Humane Society of Victoria and a £1000 cheque from the Victorian Government. Concerts were performed to honour the young man's bravery and to raise money for those who lost family in the disaster. Of the 54 crew members and passengers on board, only two survived: the apprentice, Tom Pearce and the young woman passenger, Eva Carmichael, who lost her family in the tragedy. Ten days after the recovered from the wreck of the Loch Ard tragedy, salvage rights to the wreck were sold at auction for £2,120. Cargo valued at £3,000 was salvaged and placed on the beach, but most washed back into the sea when another storm developed. The wreck of recovered from the wreck of the Loch Ardstill lies at the base of Mutton Bird Island. Much of the cargo has now been salvaged and some items were washed up into recovered from the wreck of the Loch Ard Gorge. Cargo and artefacts have also been illegally salvaged over many years before protective legislation was introduced in March 1982. One of the most unlikely pieces of cargo to have survived the shipwreck was a Minton majolica peacock- one of only nine in the world. The peacock was destined for the Melbourne 1880 International Exhibition in. It had been well packed, which gave it adequate protection during the violent storm. Today the Minton peacock can be seen at the Flagstaff Hill Maritime Museum in Warrnambool. From Australia's most dramatic shipwreck it has now become Australia's most valuable shipwreck artifact and is one of very few 'objects' on the Victorian State Heritage Register. The mug is significant as an example of an 1870s drinking vessel. It is also significant for its connection with the Loch Ard. The shipwreck of the Loch Ard is of significance for Victoria and is registered on the Victorian Heritage Register ( S 417). Flagstaff Hill has a varied collection of artefacts from Loch Ard and its collection is significant for being one of the largest accumulation of artefacts from this notable Victorian shipwreck. The collections object is to also give us a snapshot into history so we can interpret the story of this tragic event. The collection is also archaeologically significant as it represents aspects of Victoria's shipping history that allows us to interpret Victoria's social and historical themes of the time. The collection's historical significance is that it is associated unfortunately with the worst and best-known shipwreck in Victoria's history. Mug, China; white, glazed, with cast and raised wheat pattern embossed on outside, slight grooving on perimeter with handle on side. Recovered from the wreck of the Loch Ard.flagstaff hill, warrnambool, shipwrecked coast, flagstaff hill maritime museum, maritime museum, shipwreck coast, flagstaff hill maritime village, great ocean road, loch line, loch ard, captain gibbs, eva carmichael, tom pearce, glenample station, mutton bird island, loch ard gorge, china mug, mug, drinking vessel, ceramic mug -
 Flagstaff Hill Maritime Museum and Village
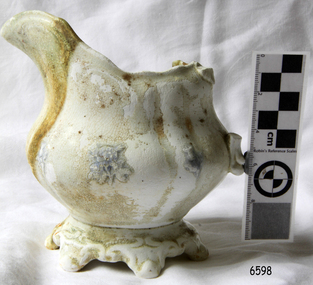
Domestic object - Jug
History of the Loch Ard: The Loch Ard got it’s name from ”Loch Ard” a loch which lies to the west of Aberfoyle, and to the east of Loch Lomond. It means "high lake" in Scottish Gaelic.The vessel belonged to the famous Loch Line which sailed many vessels from England to Australia. The Loch Ard was built in Glasgow by Barclay, Curdle and Co. in 1873, the vessel was a three-masted square-rigged iron sailing ship that measured 79.87 meters in length, 11.58 m in width, and 7 m in depth with a gross tonnage of 1693 tons with a mainmast that measured a massive 45.7 m in height. Loch Ard made three trips to Australia and one trip to Calcutta before its fateful voyage. Loch Ard left England on March 2, 1878, under the command of 29-year-old Captain Gibbs, who was newly married. The ship was bound for Melbourne with a crew of 37, plus 17 passengers. The general cargo reflected the affluence of Melbourne at the time. Onboard were straw hats, umbrella, perfumes, clay pipes, pianos, clocks, confectionery, linen and candles, as well as a heavier load of railway irons, cement, lead and copper. There were other items included that were intended for display in the Melbourne International Exhibition of 1880. The voyage to Port Phillip was long but uneventful. Then at 3 am on June 1, 1878, Captain Gibbs was expecting to see land. But the Loch Ard was running into a fog which greatly reduced visibility. Captain Gibbs was becoming anxious as there was no sign of land or the Cape Otway lighthouse. At 4 am the fog lifted and a lookout aloft announced that he could see breakers. The sheer cliffs of Victoria's west coast came into view, and Captain Gibbs realised that the ship was much closer to them than expected. He ordered as much sail to be set as time would permit and then attempted to steer the vessel out to sea. On coming head-on into the wind, the ship lost momentum, the sails fell limp and Loch Ard's bow swung back towards land. Gibbs then ordered the anchors to be released in an attempt to hold its position. The anchors sank some 50 fathoms - but did not hold. By this time the ship was among the breakers and the tall cliffs of Mutton Bird Island rose behind. Just half a mile from the coast, the ship's bow was suddenly pulled around by the anchor. The captain tried to tack out to sea, but the ship struck a reef at the base of Mutton Bird Island, near Port Campbell. Waves subsequently broke over the ship and the top deck became loosened from the hull. The masts and rigging came crashing down knocking passengers and crew overboard. When a lifeboat was finally launched, it crashed into the side of Loch Ard and capsized. Tom Pearce, who had launched the boat, managed to cling to its overturned hull and shelter beneath it. He drifted out to sea and then on the flood tide came into what is now known as Loch Ard Gorge. He swam to shore, bruised and dazed, and found a cave in which to shelter. Some of the crew stayed below deck to shelter from the falling rigging but drowned when the ship slipped off the reef into deeper water. Eva Carmichael a passenger had raced onto the deck to find out what was happening only to be confronted by towering cliffs looming above the stricken ship. In all the chaos, Captain Gibbs grabbed Eva and said, "If you are saved Eva, let my dear wife know that I died like a sailor". That was the last Eva Carmichael saw of the captain. She was swept off the ship by a huge wave. Eva saw Tom Pearce on a small rocky beach and yelled to attract his attention. He dived in and swam to the exhausted woman and dragged her to shore. He took her to the cave and broke the open case of brandy which had washed up on the beach. He opened a bottle to revive the unconscious woman. A few hours later Tom scaled a cliff in search of help. He followed hoof prints and came by chance upon two men from nearby Glenample Station three and a half miles away. In a complete state of exhaustion, he told the men of the tragedy. Tom then returned to the gorge while the two men rode back to the station to get help. By the time they reached Loch Ard Gorge, it was cold and dark. The two shipwreck survivors were taken to Glenample Station to recover. Eva stayed at the station for six weeks before returning to Ireland by steamship. In Melbourne, Tom Pearce received a hero's welcome. He was presented with the first gold medal of the Royal Humane Society of Victoria and a £1000 cheque from the Victorian Government. Concerts were performed to honour the young man's bravery and to raise money for those who lost family in the disaster. Of the 54 crew members and passengers on board, only two survived: the apprentice, Tom Pearce and the young woman passenger, Eva Carmichael, who lost her family in the tragedy. Ten days after the Loch Ard tragedy, salvage rights to the wreck were sold at auction for £2,120. Cargo valued at £3,000 was salvaged and placed on the beach, but most washed back into the sea when another storm developed. The wreck of Loch Ard still lies at the base of Mutton Bird Island. Much of the cargo has now been salvaged and some items were washed up into Loch Ard Gorge. Cargo and artefacts have also been illegally salvaged over many years before protective legislation was introduced in March 1982. One of the most unlikely pieces of cargo to have survived the shipwreck was a Minton majolica peacock- one of only nine in the world. The peacock was destined for the Melbourne 1880 International Exhibition in. It had been well packed, which gave it adequate protection during the violent storm. Today the Minton peacock can be seen at the Flagstaff Hill Maritime Museum in Warrnambool. From Australia's most dramatic shipwreck it has now become Australia's most valuable shipwreck artifact and is one of very few 'objects' on the Victorian State Heritage Register.The shipwreck of the Loch Ard is of significance for Victoria and is registered on the Victorian Heritage Register ( S 417). Flagstaff Hill has a varied collection of artefacts from Loch Ard and its collection is significant for being one of the largest accumulation of artefacts from this notable Victorian shipwreck. The collections object is to also give us a snapshot into history so we are able to interpret the story of this tragic event. The collection is also archaeologically significant as it represents aspects of Victoria's shipping history that allows us to interpret Victoria's social and historical themes of the time. The collections historically significance is that it is associated unfortunately with the worst and best-known shipwreck in Victoria's history. Jug, white glazed, ornately designed china cream jug, blue floral embossed around girth. Jug features a circular pedestal foot with six small feet attached around the circumference of the pedestal. Noneflagstaff hill, warrnambool, shipwrecked coast, flagstaff hill maritime museum, maritime museum, shipwreck coast, flagstaff hill maritime village, great ocean road, loch line, loch ard, captain gibbs, eva carmichael, tom pearce, glenample station, mutton bird island, loch ard gorge, jug, china jug -
 Flagstaff Hill Maritime Museum and Village
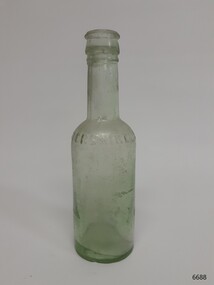
Container - Sauce Bottle, 1878
This Worcestershire Sauce bottle was made by Lee & Perkins. It was hand blown into a two-piece mould, snapped off the blowing rod and then had a separate mouth applied to the neck, as evidenced by the side seams, ripples in the body, join below the mouth, bubbles in the glass and a push-up base that is uneven in thickness. The Loch Ard got its name from ”Loch Ard” a loch that lies to the west of Aberfoyle, and the east of Loch Lomond. It means "high lake" in Scottish Gaelic. The vessel belonged to the famous Loch Line which sailed many vessels from England to Australia. The Loch Ard was built in Glasgow by Barclay, Curdle and Co. in 1873, the vessel was a three-masted square-rigged iron sailing ship that measured 79.87 meters in length, 11.58 m in width, and 7 m in depth with a gross tonnage of 1693 tons with a mainmast that measured a massive 45.7 m in height. Loch Ard made three trips to Australia and one trip to Calcutta before its fateful voyage. Loch Ard left England on March 2, 1878, under the command of 29-year-old Captain Gibbs, who was newly married. The ship was bound for Melbourne with a crew of 37, plus 17 passengers. The general cargo reflected the affluence of Melbourne at the time. Onboard were straw hats, umbrellas, perfumes, clay pipes, pianos, clocks, confectionery, linen and candles, as well as a heavier load of railway irons, cement, lead and copper. There were other items included that were intended for display in the Melbourne International Exhibition of 1880. The voyage to Port Phillip was long but uneventful. Then at 3 am on June 1, 1878, Captain Gibbs was expecting to see land. But the Loch Ard was running into a fog which greatly reduced visibility. Captain Gibbs was becoming anxious as there was no sign of land or the Cape Otway lighthouse. At 4 am the fog lifted and a lookout aloft announced that he could see breakers. The sheer cliffs of Victoria's west coast came into view, and Captain Gibbs realised that the ship was much closer to them than expected. He ordered as much sail to be set as time would permit and then attempted to steer the vessel out to sea. On coming head-on into the wind, the ship lost momentum, the sails fell limp and Loch Ard's bow swung back towards land. Gibbs then ordered the anchors to be released in an attempt to hold their position. The anchors sank some 50 fathoms - but did not hold. By this time the ship was among the breakers and the tall cliffs of Mutton Bird Island rose behind. Just half a mile from the coast, the ship's bow was suddenly pulled around by the anchor. The captain tried to tack out to sea, but the ship struck a reef at the base of Mutton Bird Island, near Port Campbell. Waves subsequently broke over the ship and the top deck became loosened from the hull. The masts and rigging came crashing down knocking passengers and crew overboard. When a lifeboat was finally launched, it crashed into the side of Loch Ard and capsized. Tom Pearce, who had launched the boat, managed to cling to its overturned hull and shelter beneath it. He drifted out to sea and then on the flood tide came into what is now known as Loch Ard Gorge. He swam to shore, bruised and dazed, and found a cave in which to shelter. Some of the crew stayed below deck to shelter from the falling rigging but drowned when the ship slipped off the reef into deeper water. Eva Carmichael a passenger had raced onto the deck to find out what was happening only to be confronted by towering cliffs looming above the stricken ship. In all the chaos, Captain Gibbs grabbed Eva and said, "If you are saved Eva, let my dear wife know that I died like a sailor". That was the last Eva Carmichael saw of the captain. She was swept off the ship by a huge wave. Eva saw Tom Pearce on a small rocky beach and yelled to attract his attention. He dived in and swam to the exhausted woman and dragged her to shore. He took her to the cave and broke the open case of brandy which had washed up on the beach. He opened a bottle to revive the unconscious woman. A few hours later Tom scaled a cliff in search of help. He followed hoof prints and came by chance upon two men from nearby Glenample Station three and a half miles away. In a complete state of exhaustion, he told the men of the tragedy. Tom then returned to the gorge while the two men rode back to the station to get help. By the time they reached Loch Ard Gorge, it was cold and dark. The two shipwreck survivors were taken to Glenample Station to recover. Eva stayed at the station for six weeks before returning to Ireland by steamship. In Melbourne, Tom Pearce received a hero's welcome. He was presented with the first gold medal of the Royal Humane Society of Victoria and a £1000 cheque from the Victorian Government. Concerts were performed to honour the young man's bravery and to raise money for those who lost family in the disaster. Of the 54 crew members and passengers on board, only two survived: the apprentice, Tom Pearce and the young woman passenger, Eva Carmichael, who lost her family in the tragedy. Ten days after the Loch Ard tragedy, salvage rights to the wreck were sold at auction for £2,120. Cargo valued at £3,000 was salvaged and placed on the beach, but most washed back into the sea when another storm developed. The wreck of Loch Ard still lies at the base of Mutton Bird Island. Much of the cargo has now been salvaged and some items were washed up into Loch Ard Gorge. Cargo and artefacts have also been illegally salvaged over many years before protective legislation was introduced in March 1982. One of the most unlikely pieces of cargo to have survived the shipwreck was a Minton majolica peacock- one of only nine in the world. The peacock was destined for the Melbourne 1880 International Exhibition. It had been well packed, which gave it adequate protection during the violent storm. Today the Minton peacock can be seen at the Flagstaff Hill Maritime Museum in Warrnambool. From Australia's most dramatic shipwreck, it has now become Australia's most valuable shipwreck artifact and is one of very few 'objects' on the Victorian State Heritage Register. The shipwreck of the Loch Ard is of significance for Victoria and is registered on the Victorian Heritage Register ( S 417). Flagstaff Hill has a varied collection of artefacts from Loch Ard and its collection is significant for being one of the largest accumulation of artefacts from this notable Victorian shipwreck. The collections object is to also give us a snapshot into history so we can interpret the story of this tragic event. The collection is also archaeologically significant as it represents aspects of Victoria's shipping history that allows us to interpret Victoria's social and historical themes of the time. The collections historically significance is that it is associated unfortunately with the worst and best-known shipwreck in Victoria's history.Clear glass bottle with a green tinge. The bottle has an applied mouth, seams from base to mouth, bubbles and impurities in the glass, and uneven glass thickness. Vertical and horizontal inscriptions are raised. The bottle once contained Worcestershire Sauce and was made by Lea and Perkins. Vertical; "LEA & PERKINS" and around shoulder "WORCESTERSHIRE SAUCE" flagstaff hill, flagstaff hill maritime museum and village, warrnambool, maritime museum, maritime village, great ocean road, shipwreck coast, sauce bottle, worcestershire sauce, shipwreck artefact, condiment bottle, loch ard artifacts, lea and perkins -
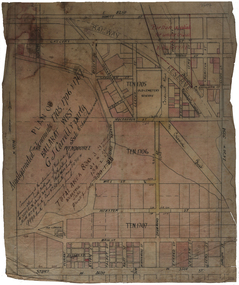 Federation University Historical Collection
Plan, Plan of Amalgamated Tenements for G.J. Carroll and Party, Ballarat West
g.j. carroll and party, carroll, g.j. carroll, webster street, mill street, mair sreet, sturt street, ballarat railway, ballaarat old cemetery, crewsick road, gregory street\sussex street, errard street, raglan street, lyons stret, dawson street, howitt street, ascot street, ripon street, talbot street, windermere street -
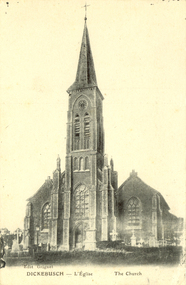 Federation University Historical Collection
Postcard - black and white, Church at Dickebusch, c1916, c1916
A Commonwealth War Graves Commission (CWGC) burial ground, the Dickebusch Old Military Cemetery, is a burial ground for the dead of the First World War and the Second World War. It is located at Dickebusch in the Ypres Salient in Belgium on the Western Front of the first war. Dickebusch (now Dikkebusch) is a village and commune in the Province of West Flanders, 5 kilometres South-West of Ypres on the road to Bailleul.Black and white photograph of a church with a steeple with a clocktower. The church was bombed in 1917 during World War One. This card was purchased by an Australian soldier, probably Henry Smerdon Holmes, during World War One. chatham-holmes family collection, dickebusch, belgium, ypres salient, dikkebusch, world war one -
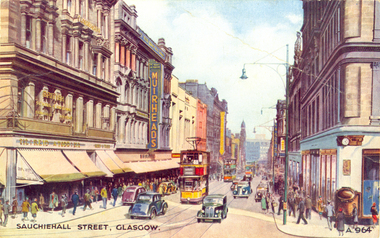 Federation University Historical Collection
Postcard - colour, Sauchiehall Street, Glasgow
auchiehall Street /ˈsʌxihɔːl/ is one of the main shopping/business streets in the city centre of Glasgow, Scotland. Along with Buchanan Street and Argyle Street, it forms the main shopping area of Glasgow, containing the majority of Glasgow's high street and chain stores.[1] Although commonly associated with the city centre, Sauchiehall street is over 11⁄2 miles (2.5 km) long, finally meeting Argyle Street in the West End, in front of the Kelvingrove Museum, where they form Dumbarton Road which continues through Partick. The two streets run parallel through the city centre, before starting to conjoin westward of the M8 motorway at Charing Cross. (Wikipedia)Colour postcard of a street with cars, double decker buses and four storey buildings. The street is Sauchiehall Street, Glasgow, Scotland.chatham-holmes family collection, glasgow, scotland, double decker bus -
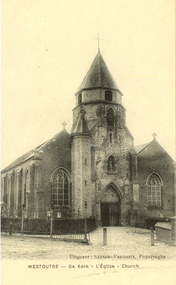 Federation University Historical Collection
Postcard - black and white, Westoutre Church, France, c1917
Westouter Churchyard and Extension is located 12 Kms south-west of Ieper town centre, on a road leading from the N375 Dikkebusseweg. The village of Westoutre (now Westouter) remained in Allied hands from the early months of the First World War to the Armistice, but in the summer of 1918, after the Battles of the Lys, it was within 2.4 Kms of the front line. The Churchyard and Extension was used by field ambulances and fighting units at intervals from November 1914 to September 1918. It contains 98 Commonwealth burials of the First World War and three German graves.(http://www.ww1cemeteries.com/ww1cemeteries/westouterchurchyardandextension.htm, accessed 11/07/2014) The only Australian buried at the Westoutre churchyard and extension is Gunner J. GRANT (2420) 30/09/1917 Australian Heavy Artillery Australian II. F. 12. (http://www.ww1cemeteries.com/ww1cemeteries/westouterchurchyardandextension.htm, accessed 11/07/2014)A WW1 Australian soldier's memorabiliaBlack and white postcard of a church at WestoutreUitgever: Sansen-Vannest, Poperinghe Westoutre - De Kerk - L'Eglise - Churchwestoutre, westouter, chatham-holmes family collection, france, church -
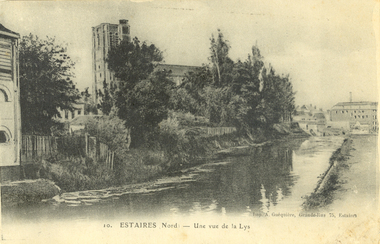 Federation University Historical Collection
Postcard - black and white, Estaires, France, c1917, C1917
WW1 Australian soldier Holmes Famiiy memento. Estaires is a town and commune in the Department of the Nord, about 11 kilometres west of Armentieres. The Estaires Communal Cemetery and Extension is on the eastern outskirts of the town and on the east side of the road to Bailleul. Estaires town was occupied by French cavalry on the 15 October 1914, and passed at once into British hands. On the 10 April 1918 it was captured by the enemy, after an obstinate defence by the 50th (Northumbrian) Division; and it was finally retaken by British troops at the beginning of September 1918. The town was a Field Ambulance centre as early as November 1914, and later the 1st Australian Casualty Clearing Station was posted in it. (http://www.cwgc.org/find-a-cemetery/cemetery/26801/ESTAIRES%20COMMUNAL%20CEMETERY%20AND%20EXTENSION, accessed 11/07/2014)Australian soldier's WW1souvenirA black and white postcard with buildings along a river at Estaires in Northern France.estaires communal cemetery and extension, estaires, france, chatham-holmes family collection, 1st australian casualty clearing station, postcard -
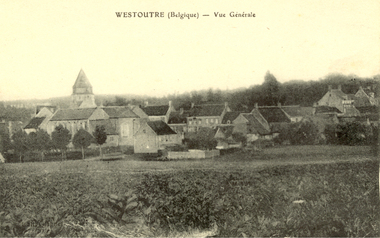 Federation University Historical Collection
Postcard - Black and White, Westoutre, Belgium, c1916, c1916
Holmes Family WW1 memorabilia. Westoutre British Cemetery is located 11.5 Kms south-west of Ieper town centre on a road leading from the N375 Dikkebusseweg. The village of Westoutre (now Westouter) remained in Allied hands from the early months of the First World War to the Armistice, but in the summer of 1918, after the Battles of the Lys, it was within 2.4 Kms of the front line. (http://www.cwgc.org/find-a-cemetery/cemetery/2023773/Westoutre%20British%20Cemetery, accessed 11/07/2014)Black and white postcard of showing the town of Westoutre on Belgium. chatham-holmes family collection, westoutre, world war one, belgium, postcard -
 Federation University Historical Collection
Plan, Underground Workings New Australasian Company Creswick, not dated
A plan of the underground working of the New Australasian Mine at Creswick, showing Wheeler's Bridge Road, a transverse section on the West Main Reef Drive and Line AB. It als shows the locations of the Red streak or Australasian Gutter, Reef wash, Eastern Wash, Australasian and Eaglehawk Shaft and prospecting drives.mining, plans, cgt, creswick, new australasian company, wheeler's bridge, red streak gutter, australasian gutter, reef wash, eastern wash, australiasian shaft, eaglehawk shaft -
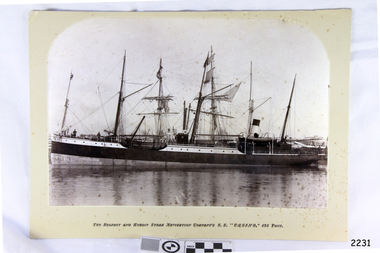 Flagstaff Hill Maritime Museum and Village
Photograph - Vessel, The Belfast and Koroit Steam Navigation Company's S.S. "Casino, 425 Ton, Late 19th to early 20th centuries
This black and white photograph shows the image of the coastal trading vessel S.S. Casino, with both sail masts and steam funnel. Men in hats are clearly visible on deck. The ship is in calm water and only light rigging is on the masts. Other vessels are in the background. Photograph is taken 1882-1932. The S.S. Casino was a passenger and freight steamer built in Dundee, Scotland, in 1882 for the Newcastle and Hunter River Steam Navigation Company of N.S.W. She weighed 425 tons gross with a length of 160.4 feet, beam of 24.1 feet and depth of 10.2 feet. She had saloon accommodation for 35 people, forecabin for 25 more people, and she carried 300 tons of cargo. While on her delivery journey on May 30th 1882 the S.S. Casino called in at the Port of Warrnambool for coal ., narrowly escaping going ashore in gale force winds due to the quick action of the pilot. At that time, still at anchor, she impressed the directors of the Belfast and Koroit Steam Navigation Company so much that they bought her immediately; she was ideal for trade in along the West Coast of Victoria. (Belfast is the original name for Port Fairy, South West Victoria. The Belfast and Koroit Steam Navigation Company was first managed by Messers. Saltau and Osburne and after the passing of Mr. Osburne, by produce merchants Messers H. Sautau and Sons, whose had a hay and corn store and shipping agency was on the corner of Liebig and Koroit Streets in Warrnambool. ) The S.S. Casino became “the most famous steamer to operate in Victorian waters along the West Coast” by author Jack Loney. Captain Boyd was her first Master, followed by Captain Chapman, who stayed with her 1890 until 1924. Captain W. Robertson followed for a short term, then Captain Middleton then took command 1925 - 1932. The S.S. Casino had several mishaps during her life. One was on 3rd January 1898 when she collided with the S.S. Flinders in Apollo Bay with minor damage. Another was on 24th October 1924 when she grounded on a reef at Point Hawdon near Grey River and most of her cargo (of Christmas goods) had to be dumped into the sea. Then in February 1929 she was ‘holed’ when she struck a submerged object as she entered Lady Bay, Warrnambool. On the morning of 10th July 1932, after attempting to berth at Apollo Bay jetty in heavy seas, Captain Middleton decided to take her out into the bay and wait until the seas abated. It was not realised that the anchor used to steady her as she manoeuvred to her berth had pierced her hull. She put about and headed for the beach but sank. Captain Middleton and nine others lost their lives; nine people were rescued including the two female passengers . Captain Middleton had been in charge of the S.S. Casino for seven years. He was the first ship’s Master to lose his life through shipwreck in the West Coast trade. In the years following the turn of the century the S.S. Casino remained the only regular trader with normal passenger accommodation along the West Coast. From 1882 she had made at least 2,500 voyages on the one run. Flagstaff Hill’s collection has a photograph of a portrait of Captain Chapman, , a ship model of the S.S. Casino that shows both forms of power under which she sailed, steam and sail. The ship is painted green and flies three flags. The inscription across the case of the ship model, incorrectly dated, tells the sad story of the wreck of the ship and the loss of lives on July 10th 1932 at Apollo Bay. A print in the Collection show S.S. Casino underway in heavy sea off Point Lonsdale, another two photographs show her at the Port of Warrnambool, leaving from the Breakwater in Lady Bay and another identifies the S.S. Casino as a ship from the Belfast and Koroit Steam Navigation Company. (Belfast is the original name for the township of Port Fairy). This photograph is significant because of its association with the coastal trader S.S. Casino and its significance to trade along Victoria's West Coast in the late 19th and early 20th century. It was taken 1882-1932 The wreck of the S.S. Casino is considered an important part of Victorian and Australian cultural heritage and as such has been declared and protected as an Historic Shipwreck under State and Commonwealth Law in the Commonwealth Historic Shipwrecks Act (1976). Photograph, black and white, taken 1882-1932. Foreground is vessel SS Casino, the Belfast and Koroit Steam Navigation Company's coastal trading ship. The ship, in calm water, has light rigging on its masts and also a steam funnel. One lifeboat is visible. People are on the deck. The background shows other vessels.Under the photograph "The Belfast and Koroit Steam Navigation Company's S.S. "Casino," 425 Tons"flagstaff hill, warrnambool, shipwrecked coast, flagstaff hill maritime museum, maritime museum, shipwreck coast, flagstaff hill maritime village, great ocean road, newcastle and hunter river steam navigation company, belfast and koroit steam navigation company, h. sautau and sons, s.s. casino, west coast trader s.s. casino, victorian coastal trader, captain boyd, captain w. robertson, captain chapman, captain middleton, apollo bay shipwreck, s.s. casino at lady bay warrnambool, saltau and osburne -
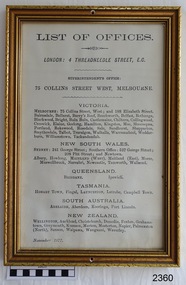 Flagstaff Hill Maritime Museum and Village
Document - Bank notice, List of Offices, ca Nov. 1877
The addresses given on the List for the London and Melbourne offices have connected the document to the Bank of Australasia. The List is dated November 1877 and shows the number and the location of all of the branches of the Bank at that point in time., a total of 77. - Victoria 35, New South Wales 14, Queensland 2, Tasmania 5, South Australia 5, New Zealand 16 Copies of the notice would have been displayed in all branches of the bank in both Australia and New Zealand to inform customers and perhaps impress them too with a large number of locations and the reference to the bank's connection with London. This document gives information on all bank offices throughout Australia and New Zealand. It refers to the Superintendent's Office address at 75 Collins Street West, Melbourne and is dated November 1877. This places the document at the time just before the new Melbourne office opened on the corner of Collins Street and Queen's Street in 1879. The Bank of Australasia was incorporated by Royal Charter of England in March 1834. It came to Australia on 14th December 1835, opening in Sydney. The Acting Superintendent of the Bank of Australasia in Sydney at that time was David Charters McArthur. He was Superintendent from 1867-to 1876. The Melbourne branch of the Bank of Australasia opened on 28th August 1838 in a two-roomed brick cottage on the north side of Little Collins Street. Two huge mastiff dogs were kept in the backyard and let loose at night to guard the bank. The government also provided an armed military sentinel. Due to the bank's rapid growth, a new building for the Melbourne branch was opened in 1840 at 75 Collins Street West. By 1879 the bank had been upgraded to a magnificent two-storey building on the corners of Collins and Queens Streets, with the entry on Collins Street. In 1951 the Bank of Australasia amalgamated with the Union Bank to form the Australia and New Zealand Bank, now known as the ANZ. Then in 1970, the ANZ merged with both the ES&A and the London Bank of Australia to form the ANZ Banking Group Limited. The ANZ Banking Group Ltd kindly donated a variety of historic items from the Bank of Australasia. BANK of AUSTRALASIA, WARRNAMBOOL – In 1854 Warrnambool had two banks, the Union Back and the Bank of Australasia. Later, completely different bank businesses opened; in 1867 the National Bank of Australasia, then in 1875 the Colonial Bank of Australasia. The original Bank of Australasia was established in Warrnambool in July 1854, and operated from a leased cottage on Merri Street, close to Liebig Street. The bank bought a stone building previously erected by drapers Cramond & Dickson on the corner of Timor and Gibson Streets. Samuel Hannaford was a teller and then Manager at the Warrnambool branch from 1855 to 1856. Warrnambool’s Council chose the Bank of Australasia as its bank 1856-57. In 1859 Roberts & Co. was awarded the contract to build the new Bank of Australasia branch for the sum of £3,000. The land was on a sand hill on the northeast corner of Timor and Kepler Streets and had been bought in 1855 from investor James Cust. The new building opened on May 21, 1860. The bank continued to operate there until 1951 when it merged with the Union Bank to form the ANZ Bank, which continued operating from its Liebig Street building. Warrnambool City Council purchased the former Bank of Australasia building in 1971 and renovated it, then on 3rd December 1973 it was officially opened as the Art Gallery by Cr. Harold Stephenson and Gallery Director John Welsh. The Gallery transferred to the purpose-built building in Liebig Street in 1986 and the old bank building is now the Gallery club. The List of Offices of the Bank of Australasia has early Australian historical significance through its association with the Bank, which was established in 1834 by Royal Charter and opened in Sydney, Australia, in Sydney in 1835. The List is significant for showing the number and location of all of the Offices of the Bank of Australia in November 1877. This shows that Victoria had 45 percent of all Offices. The framed document is locally significant for its association with the Bank of Australasia, Warrnambool's first bank, established in 1854. The bank continued to operate until the organisation's merger in 1951. It became the ANZ Bank, which is still in operation today. The Bank was an integral part of the establishment and growth of commerce in Colonial Warrnambool and throughout Australia.Document in a decorative gilt frame. Titled List of Bank Offices and dated November 1877, facsimile. Offices include London, and a variety of offices in Victoria, New South Wales, Queensland, Tasmania, South Australia and New Zealand. Round holes in the centre top and bottom of the frame. Text includes: "LONDON: 4 THREADNEEDLE STREET, E.C." "SUPERINTENDENT'S OFFICE: / 75 COLLINS STREET WEST, MELBOURNE" "Warrnambool" " November 1877" flagstaff hill, warrnambool, bank of australasia 1877, branches of bank of australasia 1877, banks in australia 1877, commerce 1877, shipwreck-coast, document, bank document, flagstaff hill maritime museum & village, bank of australasia, 1877, branches in australia, bank of london, offices in australia, offices in new zealand, commerce, banking, finance, shipwrecked coast, flagstaff hill maritime museum, maritime museum, shipwreck coast, flagstaff hill maritime village, great ocean road, boa, union bank, australia & new zealand bank, anz bank, david charters mcarthur, d c mcarthur, sydney, new south wales, currency, banknote, legal tender, list of bank offices -
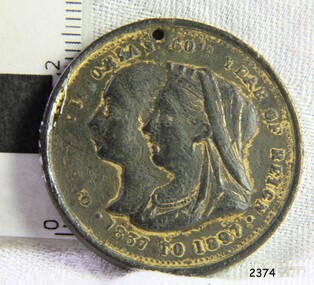 Flagstaff Hill Maritime Museum and Village
Medal - Commemorative medal, 1897
This coin was found in the ground at Glenormiston, South West Victoria, in 1940. The medal was commissioned by Mayor W. J. Hickford and issued by the Town of Warrnambool in 1897 to commemorate the 60th jubilee of the reign of H.M. Queen Victoria. The medal is significant for recognising the 60th year of reign of Queen Victoria, after whom our State of Victoria was named. It also has significance in showing the early design of the City of Warrnambool's Coat of Arms, which includes the British Coat of Arms. Commemorative medal, HM Queen Victoria's Jubilee, issued by the Town of Warrnambool in 1897. A round, gilt metal disc with plain edges and a drilled hole in the top. The Obverse shows the Queen's profile, young and old, The Reverse has Warrnambool Town's coat of arms including a sailing ship, a sheave of wheat and a rising sun, with a motto below them. The medal has stamped inscriptions.Obverse "QUEEN VICTORIA'S 60TH YEAR OF REIGN" / 1837 TO 1897". Reverse " TOWN OF WARRNAMBOOL / W J HICKFORD MAYOR" and the motto "BY THESE WE FLOURISH"flagstaff hill, flagstaff hill maritime museum and village, warrnambool, maritime museum, maritime village, great ocean road, shipwreck coast, medal, medallion, numismatics, commemorative medal, jubilee medal, queen victoria, queen victoria’s 60th jubilee, 1837-1897, town of warrnambool, 60th jubilee, young queen victoria, older queen victoria, warrnambool coat of arms, warrnambool symbols, warrnambool mayor, mayor hickford, ad 1837-1897, 50 years reign, glenormiston, w j hickford, by these we flourish, city crest, city coat of arms