Showing 1965 items
matching victoria railway
-
 Flagstaff Hill Maritime Museum and Village
Leisure object - Toy Soldier, circa 1878
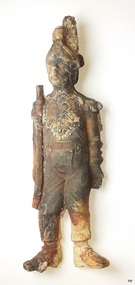
The toy soldier is a relic from the shipwreck of the LOCH ARD in 1878. It has a companion piece in the Flagstaff Hill collection. The toy soldier is unpainted, but the style of uniform, and the weapons carried (a musket and a basket-handled cutlass), indicate it is a representation of the Napoleonic Wars period from the beginning of the nineteenth century. Mass-produced toy soldiers made of cast metal (lead or tin) became popular during the 1800s. Heyde of Germany manufactured silhouette-shaped flat toy soldiers early in the century. Mignot of France released three-dimensional solid figures and later around 1893 W. Britain, a toy company became known for its die-cast lead toy soldiers. These innovations were designed to make sets of toy soldiers more affordable for middle and lower-class children, extending the market beyond the intricately made and hand-crafted replicas that were the preserve of the rich in the eighteenth century. Wooden military figures, specially carved and unpainted ones, were therefore not particularly common at the time when the Loch Ard foundered on Victoria’s southwest coast. Mignot was the first to sell unpainted soldiers, leaving their customers to fill in the colours according to their own patriotic preferences. It is, therefore, possible the two figures in the Flagstaff Hill collection were part of a new set intended for sale, rather than part of a passenger’s existing collection. Loch Ard History: The Loch Ard got its name from ”Loch Ard” a loch that lies to the west of Aberfoyle, and the east of Loch Lomond. It means "high lake" in Scottish Gaelic. The vessel belonged to the famous Loch Line which sailed many vessels from England to Australia. The Loch Ard was built in Glasgow by Barclay, Curle & Co. in 1873, the vessel was a three-masted square-rigged iron sailing ship that measured 79.87 meters in length, 11.58 m in width, and 7 m in depth with a gross tonnage of 1693 tons with a mainmast that measured a massive 45.7 m in height. Loch Ard made three trips to Australia and one trip to Calcutta before its fateful voyage. Loch Ard left England on March 2, 1878, under the command of 29-year-old Captain Gibbs, who was newly married. The ship was bound for Melbourne with a crew of 37, plus 17 passengers. The general cargo reflected the affluence of Melbourne at the time. Onboard were straw hats, umbrellas, perfumes, clay pipes, pianos, clocks, confectionery, linen and candles, as well as a heavier load of railway irons, cement, lead and copper. There were other items included that were intended for display in the Melbourne International Exhibition of 1880. The voyage to Port Phillip was long but uneventful. Then at 3 am on June 1, 1878, Captain Gibbs was expecting to see land. But the Loch Ard was running into a fog which greatly reduced visibility. Captain Gibbs was becoming anxious as there was no sign of land or the Cape Otway lighthouse. At 4 am the fog lifted and a lookout aloft announced that he could see breakers. The sheer cliffs of Victoria's west coast came into view, and Captain Gibbs realised that the ship was much closer to them than expected. He ordered as much sail to be set as time would permit and then attempted to steer the vessel out to sea. On coming head-on into the wind, the ship lost momentum, the sails fell limp and Loch Ard's bow swung back towards land. Gibbs then ordered the anchors to be released in an attempt to hold their position. The anchors sank some 50 fathoms - but did not hold. By this time the ship was among the breakers and the tall cliffs of Mutton Bird Island rose behind. Just half a mile from the coast, the ship's bow was suddenly pulled around by the anchor. The captain tried to tack out to sea, but the ship struck a reef at the base of Mutton Bird Island, near Port Campbell. Waves subsequently broke over the ship and the top deck became loosened from the hull. The masts and rigging came crashing down knocking passengers and crew overboard. When a lifeboat was finally launched, it crashed into the side of Loch Ard and capsized. Tom Pearce, who had launched the boat, managed to cling to its overturned hull and shelter beneath it. He drifted out to sea and then on the flood tide came into what is now known as Lochard Gorge. He swam to shore, bruised and dazed, and found a cave in which to shelter. Some of the crew stayed below deck to shelter from the falling rigging but drowned when the ship slipped off the reef into deeper water. Eva Carmichael a passenger had raced onto the deck to find out what was happening only to be confronted by towering cliffs looming above the stricken ship. In all the chaos, Captain Gibbs grabbed Eva and said, "If you are saved Eva, let my dear wife know that I died like a sailor". That was the last Eva Carmichael saw of the captain. She was swept off the ship by a huge wave. Eva saw Tom Pearce on a small rocky beach and yelled to attract his attention. He dived in and swam to the exhausted woman and dragged her to shore. He took her to the cave and broke the open case of brandy which had washed up on the beach. He opened a bottle to revive the unconscious woman. A few hours later Tom scaled a cliff in search of help. He followed hoof prints and came by chance upon two men from nearby Glenample Station three and a half miles away. In a complete state of exhaustion, he told the men of the tragedy. Tom then returned to the gorge while the two men rode back to the station to get help. By the time they reached Loch Ard Gorge, it was cold and dark. The two shipwreck survivors were taken to Glenample Station to recover. Eva stayed at the station for six weeks before returning to Ireland by steamship. In Melbourne, Tom Pearce received a hero's welcome. He was presented with the first gold medal of the Royal Humane Society of Victoria and a £1000 cheque from the Victorian Government. Concerts were performed to honour the young man's bravery and to raise money for those who lost family in the disaster. Of the 54 crew members and passengers on board, only two survived: the apprentice, Tom Pearce and the young woman passenger, Eva Carmichael, who lost her family in the tragedy. Ten days after the Lochard tragedy, salvage rights to the wreck were sold at auction for £2,120. Cargo valued at £3,000 was salvaged and placed on the beach, but most washed back into the sea when another storm developed. The wreck of Lochard still lies at the base of Mutton Bird Island. Much of the cargo has now been salvaged and some items were washed up into Lochard Gorge. Cargo and artefacts have also been illegally salvaged over many years before protective legislation was introduced in March 1982. One of the most unlikely pieces of cargo to have survived the shipwreck was a Minton majolica peacock- one of only nine in the world. The peacock was destined for the Melbourne 1880 International Exhibition. It had been well packed, which gave it adequate protection during the violent storm. Today the Minton peacock can be seen at the Flagstaff Hill Maritime Museum in Warrnambool. From Australia's most dramatic shipwreck, it has now become Australia's most valuable shipwreck artifact and is one of very few 'objects' on the Victorian State Heritage Register.The toy soldier represents a 19th-century child's interest in military history. The item is one of two toy soldiers recovered from the Loch Ard in Flagstaff Hill's collection. The shipwreck of the Loch Ard is of significance for Victoria and is registered on the Victorian Heritage Register ( S 417). Flagstaff Hill has a varied collection of artefacts from Loch Ard and its collection is significant for being one of the largest accumulations of artefacts from this notable Victorian shipwreck of which the subject items are a small part. The collections of objects give us a snapshot of how we can interpret the story of this tragic event. The collection is also archaeologically significant as it represents aspects of Victoria's shipping history, allowing us to interpret Victoria's social and historical themes. Through is associated with the worst and best-known shipwreck in Victoria's history.An unpainted, cream-coloured toy soldier, recovered from the Loch Ard. The figure wears a Napoleonic Wars-era uniform, a plumed helmet, a short jacket with tails, bib-front trousers with button closure, straps crossed at the front and back, and epaulettes. The figure is in marching posture with one foot extended forward, and is bearing a musket at the slope-arms position, with a sabre or cutlass slung behind. It is unable to stand on its own. There are reddish-brown and orange-brown stains on the head and body. The body has seams along both sides that are uneven at the lower leg. There is a hole in the back and the inside is hollow. The material has a rough texture.flagstaff hill, warrnambool, flagstaff hill maritime museum, shipwreck coast, flagstaff hill maritime village, great ocean road, loch ard, toy soldier, napoleonic uniforms, military toy, moulded soldier -
 Wodonga & District Historical Society Inc
Photograph - Wodonga West School No. 1058
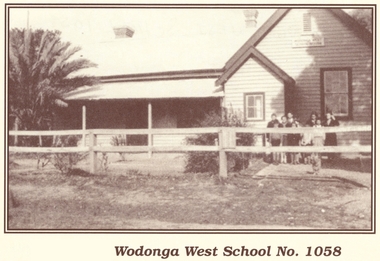
Wodonga West School opened on 24 January 1870 and closed on 9 May 1950. It was located near the current intersection of McKoy Street and the Hume Freeway in West Wodonga on land donated by J.W. Klinge. The school replaced an older school, “Green Hills School, which was located north of the railway line. A public telephone was installed at the school and the mail service operated from the school three days each week. In 1935 a row of 15 ornamental trees was planted along the boundary fence, one for each of the pupils at the school. When this school closed the nine remaining students were transferred to Wodonga Primary School.This image is significant because it documents the early developments in the provision of education in Wodonga, Victoria A black and white photo of a group of children standing outside the Wodonga West School building.wodonga schools, wodonga west primary school, education wodonga -
 Ballarat Tramway Museum
Photograph - Miscellaneous Images, Set of 15 (Only three photos in archive, .5, .6 and .7. Location of remaining 12 photos under investigation), 1960s
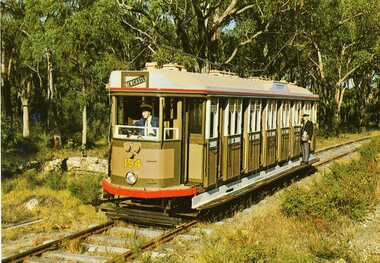
Set of 15 items personally collected or given to Les Denmead by visiting Tramway enthusiasts or other interested people to Ballarat. Retained as a sample of images or other mementoes given by people though not directly of Ballarat. The following items are a summary only: 1901.1 - Postcard from South Pacific Electric Railway of L/P class tram No. 154 on SPER track , SPER-1 - Nucolorvue. 1901.2 - Photograph of Brisbane FM 440? and drop centre behind - CBD area Brisbane. Has 'Brisbane' written on back. 1901.3 - Photograph of Brisbane FM 473, showing Grange, as for 1901.2. 1901.4 - Photograph of Brisbane FM 422, showing Chermside, Brisbane CBD area, has "Brisbane May 1955' written on front of photo. 1901.5 - Illustration of Christchurch Horse Tram, Tramway Historical Society / Shell Oil company produced card, full details on rear. 1901.6 - Illustration of Wellington 'Fiducia' tram No. 238, operating on Wellington Tramway Museum track. Produced by Museum, with full details on rear. 1901.7 - Colour illustration of Wellington tram No. 257, central or downtown Wellington, outside the Parliament grounds. Full details on rear of card - produced by Shell Oil Company? 1901.8 - Photo of four H class trams at Victoria Sq. Adelaide, 25/3/1967. Taken by Douglas A. Colquhoun. On left hand side is a single car 378 and on the other track a three car set 366, 367 and 368. 1901.9 - Photo of Adelaide E1 111, crossing the Holland St. Bridge, 24.10.1953. Photo by Douglas A. Colquhoun. 1901.10 - Photo of Adelaide A 82, Wayville Junction, Feb. 1952. Photo by Douglas A. Colquhoun. 1901.11 - Photo of Adelaide A 10, later SEC Ballarat 21, in Adelaide CBD, with Ferors Gresham Hotel alongside. Has written note on background re tram. 1901.12 - Two prints of the front vestibule of a Toronto PCC tram, with operator (driver) seated. 1901.13 - Two prints of Toronto PCC 4400 and 4404, coupled together, 9/8/1949 with a depot? or carbarn building in the background. Has caption on the base of the photograph - copy photograph. 1901.14 - Two prints of a close up photograph of the coupling between the two cars in 1901.13. 1901.15 - Photograph of a Fare Box on a Toronto Streetcar. (1901.13 to .14) have "Canada" written on the back. 1trams, tramways, sydney, brisbane, adelaide, wellington, christchurch, toronto, pcc, victoria sq., tram 21 -
 Federation University Historical Collection
Photograph - Sepia photograph, Benson & Stevenson, Emma Eliza Jane Phillips, c1860's
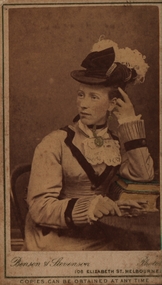
Emma was one of the first white children born in the Barrabool Hills (Geelong) to parents Richard and Elizabeth Phillips. Emma Eliza Jane Phillips was one of the first white children born in the Barrabool Hills (South Geelong) in the Port of New South Wales on 25/04/1844 and died at "Gracedale" Yendon 12/10/1925, age 81. Emma was the daughter of Richard Price Phillips and Elizabeth Anne Goodenough. Richard, originally a coach plater, was the licensee of "The Thistle Inn", a small hotel on the corner of Corio and Yarra Streets. Elizabeth appears to have had a dressmakers shop around the corner in Yarra Street. Emma married Thomas Watson in Ballarat in 18--? Thomas William Watson was born in Harston, Cambridge, England on10/11/1838 and died at "Gracedale", Yendon, Victoria, Australia 27/04/1920, age 81. He came to Australia seeking gold but instead of finding a fortune he worked for the Victorian Railways. After living in Sebastapol and Ballarat North they settled on a small farm at Yendon named "Gracedale" They were married in Ballarat at Saint Paul's Church of England in Ballarat East. Emma sang in the choir and was a member of the Ballarat Philharmonic Society. They first lived in Sebastapol, then Crompton Street, Ballarat North before building a house at Yendon. Thomas and Emma had 10 children, five boys and five girls, also rearing 3 grandchildren. Thomas and some of his sons ( including John Richard) helped to cut the original steps at Lal Lal to the bottom of the Lal Lal Falls.Photograph of a woman seated at a table with one elbow resting on books. Her jewllery has been hand painted in gold and the top book cover in green. C1860Front: Benson & Stevenson 108 Elizabeth Street Melbourne Copies can be obtained at any time Verso: Emma Eliza Jane (Phillips) Watson; 1844-1925; 81yrs; Died "Gracedale" Yendon, Vic; Born - South Geelong/Barrabool Hills; Dad's (John Richard Watson) motheremma eliza jane phillips, emma eliza jane watson, barrabool hills, yendon, thomas watson, richard price phillips, elizabeth goodenough, lal lal falls -
 Bendigo Military Museum
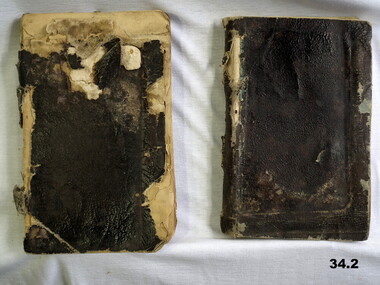
Book - DIARIES, c.WWI
The diaries belonged to Horace S. GIBSON, clerk with the Victorian Railways, Camberwell, No. 1817, 4th Div. Signal Coy. He enlisted on 6.7.1915 in the 12th reinforcements 1st Div Signal Coy. Embarked for Egypt 9.11.1915. Transferred to 4th Div Signal Coy 9.3.16. Embarked for France 2.6.1916. KIA Zonnebeke Belgium 23.9.1917. Horace Gibson was born in Bendigo. Diaries Volume 1 and Volume 2 are written in pen & ink, also contains sketches, names & addresses. Detailed account by day of the weather & what was eaten for each meal, as well as training, the war up to the morning he is killed in action.Inside cover of Volume 1: Horace Stanley Gibson, Clerk, Camberwell Victorian Railways Australia. Private address, c/o Mrs S E Gibson Barrell Street Eaglehawk, Victoria Australia. documents, diaries, personal notes, records, military history -
 Flagstaff Hill Maritime Museum and Village
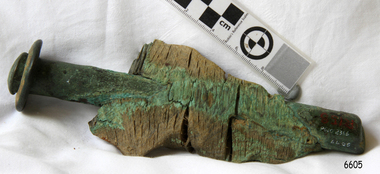
Functional object - Nail, ca. 1855
When the ship Schomberg was launched in 1855, she was considered the most perfect clipper ship ever to be built. James Blaine’s Black Ball Line had commissioned her to be built for their fleet of passenger liners. At a cost of £43,103, the Aberdeen builders designed her to sail faster than the quick clippers designed by North American Donald McKay. She was a three masted wooden clipper ship, built with diagonal planking of British oat with layers of Scottish larch. This luxury vessel was designed to transport emigrants to Melbourne in superior comfort. She had ventilation ducts to provide air to the lower decks and a dining saloon, smoking room, library and bathrooms for the first class passengers. At the launch of Schomberg’s maiden voyage, her master Captain ‘Bully’ Forbes, drunkenly predicted that he would make the journey between Liverpool and Melbourne in 60 days. Schomberg departed Liverpool on 6 October 1855 with 430 passengers and 3000 tons cargo including iron rails and equipment intended the build the Geelong Railway and a bridge over the Yarra from Melbourne to Hawthorn. The winds were poor as Schomberg sailed across the equator, slowing her journey considerably. She was 78 days out of Liverpool when she ran aground on a sand-spit near Peterborough, Victoria, on 27 December; the sand spit and the currents were not marked on Forbes’s map. Overnight, the crew launched a lifeboat to find a safe place to land the ship’s passengers. The scouting party returned to Schomberg and advised Forbes that it was best to wait until morning because the rough seas could easily overturn the small lifeboats. The ship’s Chief Officer spotted SS Queen at dawn and signalled the steamer. The master of the SS Queen approached the stranded vessel and all of Schomberg’s passengers were able to disembark safely. The Black Ball Line’s Melbourne agent sent a steamer to retrieve the passengers’ baggage from the Schomberg. Other steamers helped unload her cargo until the weather changed and prevented the salvage teams from accessing the ship. Local merchants Manifold & Bostock bought the wreck and cargo, but did not attempt to salvage the cargo still on board the ship. They eventually sold it on to a Melbourne businessman and two seafarers. After two of the men drowned when they tried to reach Schomberg, salvage efforts were abandoned. In 1975, divers from Flagstaff Hill, including Peter Ronald, found an ornate communion set at the wreck. The set comprised a jug, two chalices, a plate and a lid. The lid did not fit any of the other objects and in 1978 a piece of the lid broke off, revealing a glint of gold. As museum staff carefully examined the lid and removed marine growth, they found a diamond ring, which is currently on display in the Great Circle Gallery. Flagstaff Hill also holds ship fittings and equipment, personal effects, a lithograph, tickets and photograph from the Schomberg. Most of the artefacts were salvaged from the wreck by Peter Ronald, former director of Flagstaff Hill. The Schomberg, which is on the Victorian Heritage Register (VHR S612), has great historical significance as a rare example of a large, fast clipper ship on the England to Australia run, carrying emigrants at the time of the Victorian gold rush. She represents the technical advances made to break sailing records between Europe and Australia. Flagstaff Hill’s collection of artefacts from the Schomberg is significant for its association with the shipwreck, The collection is primarily significant because of the relationship between the objects, as together they have a high potential to interpret the story of the Schomberg. It is archaeologically significant as the remains of an international passenger Ship. It is historically significant for representing aspects of Victoria’s shipping history and for its association with the shipwreck and the ship, which was designed to be fastest and most luxurious of its day Copper nail with petrified wooden section attached. There is a washer on the end of the nail. It is covered in verdigris. The nail was recovered from the wreck of the Schomberg.flagstaff hill, warrnambool, shipwrecked-coast, flagstaff-hill, flagstaff-hill-maritime-museum, maritime-museum, shipwreck-coast, flagstaff-hill-maritime-village, petrified wood, schomberg, copper nail, clipper ship, black ball line, 1855 shipwreck, aberdeen clipper ship, captain forbes, peterborough shipwreck, ss queen, ship's nail, nail in wood sample -
 Ballarat Tramway Museum
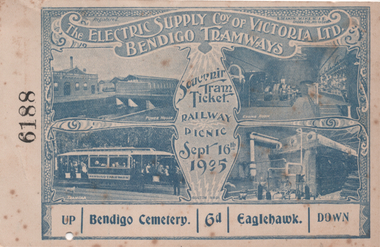
Postcard - ESCo, Electric Supply Co. of Vic (ESCo), "Souvenir tram ticket - Railway Picnic", c1905
Printed postcard/ticket for the 16/9/1905 Railway Picnic by the Electric Supply Co of Victoria promoting Bendigo Tramways. Has three views of ESCo's depot and power station and one of a tram. Ticket priced at 6d. On the rear is an advertisement for Henderson & Goodisson's Beehive drapery, furniture, and Carpets. The letter has been sent to Mr Lewis Morgan of Pitfield Plains Vic, noting the trams. In the top right-hand corner is "B Deakin Engineer and Manager", following an English practice of providing details of the Manager;s name.Demonstrates an ESCo printed ticket for a specific event of 1905.Postcard - ticket - divided back used number 6188Hand written message written on the rear - see image 2tramways, trams, bendigo, esco, ticket, railway picnic -
 Ballarat Tramway Museum
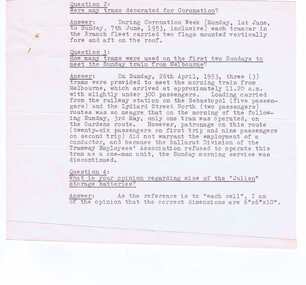
Document - Letter/s, State Electricity Commission of Victoria (SECV), c1953
Yields information about Ballarat tramcars in 1950's.Letter, typed two pages, signed H. W. Linaker as Manager answering questions for Wal Jack. Letter date etc not known as it appears the top half of the first page has been cut off, includes the response to the first question. From question 2, noting the Coronation week, the letter is post mid 1953. Q & A concern trams decorated for the Coronation, tram services provided on Sunday morning in 1953 that met the train from Melbourne, the size of the Julien storage batteries, date of sale of the Horse tram company to ESCo, the scrapping of trams, tram tickets older than 1934 but did have a folder of old sample ESCo tickets at the office and the address for the Mt Beauty Railway, The paper has a "Invicta Bond" watermark. trams, tramways, tramcars, ballarat, decorated trams, sunday services, julien system, battery tram, scrapped trams, tickets, esco, sec -
 Ballarat Tramway Museum
Photograph - Black & White Photograph/s, Richard Gilbert, c August 1971
Yields information about tram operations in the Drummond St North at the time of the closure of the first of Ballarat's lines in August 1971.Black and white photograph of four trams (last tram No. 14 showing Special) crossing a single tram at the Mill St loop in Drummond St Nth, possibly on the final day of Victoria St operations, the trams running special to meet the ARHS / TMSV train at the railway station. trams, tramways, closure, mill st loop, drummond st nth, tram 14 -
 Flagstaff Hill Maritime Museum and Village
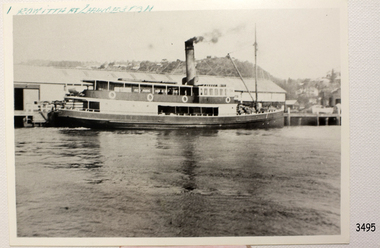
Photograph - Vessel, S.S. Rowitta, Early 20th century
The subject of this photograph is the S.S.Rowilla, a passenger steam ferry built in Hobart for use in Tasmania's rivers, the Derwent and the Tamar. The photograph shows her docked at the Charles Street Wharf in Launceston. The S.S. Rowitta was built by Purdon & Featherstone, at Battery Point, Hobart (Tasmania) in 1909 from Huon Pine and Kauri planking. Her final configuration included three masts and a ship rig. S.S. Rowitta took its first voyage from Hobart to Launceston in 1909 and operated for 30 years as a passenger ferry on the Tamar and Derwent Rivers. She also served as a freighter, an army supply ship, a luxury charter ferry and a floating restaurant as well as a prawn boat at Lakes Entrance. (She has also been named “Sorrento” and “Tarkarri”.). In the very early days of Flagstaff Hill ‘Rowitta’ was purchased from Lakes Entrance by Warrnambool City Council and the Victorian State Government for $20,000. The Rowitta had a hull configuration very similar to a local boat named the SPECULANT, which played a key role in the Port of Warrnambool in the early 1900s. The Speculant was the largest ship ever registered with Warrnambool as her home port. Local owner and trader P J McGennan & Co, (Peter McGennan) used her as a freight carrier to Melbourne and timber trader between New Zealand and Victoria. She sunk at Cape Otway in 1911 on a voyage to Melbourne. In 1974 Rowitta was delivered to Port Fairy and then later sailed to Warrnambool’s Breakwater where she was lifted out of Lady Bay and loaded onto the back of a long transport truck and slowly and carefully driven along Pertobe Road, through the Surfside Caravan Park and over the railway line, into Flagstaff Hill’s Maritime Village. Transfer arrangements were coordinated by Jack Morse, of Morse Engineering, a member of the Flagstaff Hill Planning Board, and Ken Goyen, a local crane operator. The ‘Rowitta’ was originally acquired to be rebuilt to match the original SPECULANT. When finances became tight in 1976 a review of all plans ended in the decision to restore the “Rowitta” to her original configuration. She was then restored, renamed the original name of “Rowitta” and installed in the Village’s Harbour Lake to become one of the popular vessels on display for visitors to enjoy. It was the decision of the Advisory Committee to Flagstaff Hill to have Rowitta demolished in April 2015 due to extensive deterioration. Items associated with the Rowitta continue to be held in Flagstaff Hill Maritime Village’s Collection.The photograph of the passenger ferry S.S. Rowitta.is significant for its association with Tasmanian history from the early to mid-1900s. It is also connected to the history of the Rowitta, which was a large exhibit on display at Flagstaff Hill Maritime Village from the museum’s early beginnings until the vessel’s end of life 40 years later. The Rowitta represents the importance of coastal traders to transport, trade and communication along the coast of Victoria, between states, and in Australia before rail and motor vehicles. The vessel was an example of a ferry built in the early 20th century that served many different roles over its lifetime of over 100 years. Black and white photograph of the steamship S.S. Rowitta at Charles Street Wharf, Launceston. It shows the vessel docked at the Charles Street Wharf in Launceston. Smoke is coming from its funnel and there are people on board. There is a handwritten inscription on the top edge of the photograph. The vessel was built in 1909 by Purdon & Featherstone, Hobart. Blue-green handwriting on top left margin "ROWITTA AT LAUNCESTON"flagstaff hill, warrnambool, shipwrecked-coast, flagstaff-hill, flagstaff-hill-maritime-museum, maritime-museum, shipwreck-coast, flagstaff-hill-maritime-village, photograph, s.s. rowitta, charles street wharf,, launceston., purdon & featherstone, rowitta, tarkarri, speculant, purdon & featherstone of hobart, passenger ferry 1909, sorrento -
 Flagstaff Hill Maritime Museum and Village
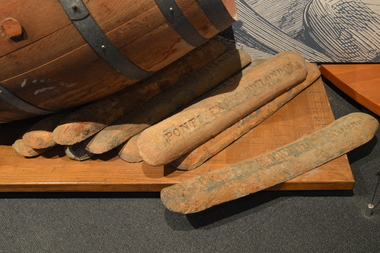
Functional object - Lead Ingots, circa 1878
History of the Loch Ard: The Loch Ard got its name from ”Loch Ard” a loch which lies to the west of Aberfoyle, and the east of Loch Lomond. It means "high lake" in Scottish Gaelic. The vessel belonged to the famous Loch Line which sailed many vessels from England to Australia. The Loch Ard was built in Glasgow by Barclay, Curdle and Co. in 1873, the vessel was a three-masted square-rigged iron sailing ship that measured 79.87 meters in length, 11.58 m in width, and 7 m in depth with a gross tonnage of 1693 tons with a mainmast that measured a massive 45.7 m in height. Loch Ard made three trips to Australia and one trip to Calcutta before its fateful voyage. Loch Ard left England on March 2, 1878, under the command of 29-year-old Captain Gibbs, who was newly married. The ship was bound for Melbourne with a crew of 37, plus 17 passengers. The general cargo reflected the affluence of Melbourne at the time. Onboard were straw hats, umbrella, perfumes, clay pipes, pianos, clocks, confectionery, linen and candles, as well as a heavier load of railway irons, cement, lead and copper. There were other items included that were intended for display in the Melbourne International Exhibition of 1880. The voyage to Port Phillip was long but uneventful. Then at 3 am on June 1, 1878, Captain Gibbs was expecting to see land. But the Loch Ard was running into a fog which greatly reduced visibility. Captain Gibbs was becoming anxious as there was no sign of land or the Cape Otway lighthouse. At 4 am the fog lifted and a lookout aloft announced that he could see breakers. The sheer cliffs of Victoria's west coast came into view, and Captain Gibbs realised that the ship was much closer to them than expected. He ordered as much sail to be set as time would permit and then attempted to steer the vessel out to sea. On coming head-on into the wind, the ship lost momentum, the sails fell limp and Loch Ard's bow swung back towards land. Gibbs then ordered the anchors to be released in an attempt to hold its position. The anchors sank some 50 fathoms - but did not hold. By this time the ship was among the breakers and the tall cliffs of Mutton Bird Island rose behind. Just half a mile from the coast, the ship's bow was suddenly pulled around by the anchor. The captain tried to tack out to sea, but the ship struck a reef at the base of Mutton Bird Island, near Port Campbell. Waves subsequently broke over the ship and the top deck became loosened from the hull. The masts and rigging came crashing down knocking passengers and crew overboard. When a lifeboat was finally launched, it crashed into the side of Loch Ard and capsized. Tom Pearce, who had launched the boat, managed to cling to its overturned hull and shelter beneath it. He drifted out to sea and then on the flood tide came into what is now known as Loch Ard Gorge. He swam to shore, bruised and dazed, and found a cave in which to shelter. Some of the crew stayed below deck to shelter from the falling rigging but drowned when the ship slipped off the reef into deeper water. Eva Carmichael a passenger had raced onto the deck to find out what was happening only to be confronted by towering cliffs looming above the stricken ship. In all the chaos, Captain Gibbs grabbed Eva and said, "If you are saved Eva, let my dear wife know that I died like a sailor". That was the last Eva Carmichael saw of the captain. She was swept off the ship by a huge wave. Eva saw Tom Pearce on a small rocky beach and yelled to attract his attention. He dived in and swam to the exhausted woman and dragged her to shore. He took her to the cave and broke the open case of brandy which had washed up on the beach. He opened a bottle to revive the unconscious woman. A few hours later Tom scaled a cliff in search of help. He followed hoof prints and came by chance upon two men from nearby Glenample Station three and a half miles away. In a complete state of exhaustion, he told the men of the tragedy. Tom then returned to the gorge while the two men rode back to the station to get help. By the time they reached Loch Ard Gorge, it was cold and dark. The two shipwreck survivors were taken to Glenample Station to recover. Eva stayed at the station for six weeks before returning to Ireland by steamship. In Melbourne, Tom Pearce received a hero's welcome. He was presented with the first gold medal of the Royal Humane Society of Victoria and a £1000 cheque from the Victorian Government. Concerts were performed to honour the young man's bravery and to raise money for those who lost family in the disaster. Of the 54 crew members and passengers on board, only two survived: the apprentice, Tom Pearce and the young woman passenger, Eva Carmichael, who lost her family in the tragedy. Ten days after the Loch Ard tragedy, salvage rights to the wreck were sold at auction for £2,120. Cargo valued at £3,000 was salvaged and placed on the beach, but most washed back into the sea when another storm developed. The wreck of Loch Ard still lies at the base of Mutton Bird Island. Much of the cargo has now been salvaged and some items were washed up into Loch Ard Gorge. Cargo and artefacts have also been illegally salvaged over many years before protective legislation was introduced in March 1982. One of the most unlikely pieces of cargo to have survived the shipwreck was a Minton majolica peacock- one of only nine in the world. The peacock was destined for the Melbourne 1880 International Exhibition in. It had been well packed, which gave it adequate protection during the violent storm. Today the Minton peacock can be seen at the Flagstaff Hill Maritime Museum in Warrnambool. From Australia's most dramatic shipwreck it has now become Australia's most valuable shipwreck artifact and is one of very few 'objects' on the Victorian State Heritage Register. (See note section this document for Flagstaff Hills acquisition of the ingots.)The shipwreck of the Loch Ard is of significance for Victoria and is registered on the Victorian Heritage Register ( S 417). Flagstaff Hill has a varied collection of artefacts from Loch Ard and its collection is significant for being one of the largest accumulation of artefacts from this notable Victorian shipwreck. The collections object is to also give us a snapshot into history so we can interpret the story of this tragic event. The collection is also archaeologically significant as it represents aspects of Victoria's shipping history that allows us to interpret Victoria's social and historical themes of the time. The collections historically significance is that it is associated unfortunately with the worst and best-known shipwreck in Victoria's history. Lead ingots (sometimes referred to as ‘lead ballast’ or ‘lead pigs), retrieved from the wreck of the LOCH ARD. Grey metal bars with flat base, rising in a curved moulded shape to form a smooth rounded upper face. The imprint of the maker runs along the upper surface in clearly legible capital lettering (height 3cm). The artefacts are stacked on wooden pallets and found in a number of locations at Flagstaff Hill Maritime Village. They are durable and heavy, with some dents and marine staining from their century of submersion, but generally in good condition. .Impressed into the top face “PONTIFEX & WOOD. LONDON”. flagstaff hill, warrnambool, shipwrecked coast, flagstaff hill maritime museum, maritime museum, shipwreck coast, flagstaff hill maritime village, great ocean road, loch line, loch ard, captain gibbs, eva carmichael, tom pearce, glenample station, mutton bird island, loch ard gorge, lead pigs, lead ingots, lead ballast, pontifex and wood, london lead smelters, ingots -
 Ballarat Tramway Museum
Photograph - Digital image of Geelong tram No. 2 at T&G Corner Geelong, c1938
The photograph was taken from a Victorian Railways glass negative held at the State Library of Victoria. The photo shows Geelong No. 2 in Moorabool St at the intersection with Ryrie St. The tram has the destination of North. The tram is in its modified form that provides for one-man operation. In the photo are Edments, Savoia Cafe, Commercial Bank of Australia, and the T&G building. The photo has been dated between 1935 when the tram was converted and 1939 when the bar neon traffic lights were installed at the intersection. For reference to the SLV photograph - see http://handle.slv.vic.gov.au/10381/97173. See item 9075 for a copy print. This tram is now part of the collection of the Ballarat Tramway Museum.Yields information about Geelong No.2 and the intersection of Ryrie and Moorabool Streets Geelong.Digital image of Geelong tram No. 2 in Moorabool St at the intersection with Ryrie St, c1938. geelong, geelong 2, ryrie st, moorabool st, trams, tramways, temperance & general -
 Melbourne Tram Museum
Letter, Melbourne & Metropolitan Tramways Board (MMTB), "Salute to the Cable Tram", Oct - Nov 1940
Series of letters between Frank Shennen, Managing Editor of the Transportation Magazine of Sydney and Lewis Russell regarding cable trams. This information may have formed the basis of an article, "Salute to the Cable Tram" that appeared in the July 1948 issue of Truck and Bus Transportation - see Reg Item 2578. Letters were held with a paper and consisted on the following documents: Letters are in reverse date order. image i1 - item 1, image i2 - letters, image ia - the rear of item 1. 1 - two sheets of paper with cable car numbers and values - written in pencil on sheets torn from old MMTB tender documents - see image htd3908a for the rear of these sheets. 2. - Letter - 2 quarto sheets to Frank Shennen from Lewis Russell dated 7/11/1940 - advising difficultly in getting hold of all the details re cars and details re the inventory of the trams. 3 - Letter - 2 quarto sheets to Mr. Russell from Mr. Shennen, dated 4/11/1940 looking for records on car numbers in particular, notes Nicholson St shops. 4 - Letter - 1 foolscap sheet to Mr Shennen dated 18/10/1940 - draft of a letter regarding a Mr. Greig and MTT reports. 5 - Letter - 1 quarto sheet to Mr. Shennen from Mr Russell re a Mr Greig's history of the cable tram system, Chairman's reports of the MTT. 6 - letter - 1 quarto sheet to Mr. Russell, 16/10/1940 asking for a copy of Mr. Greig's report. 7 - letter - 2 quarto sheets to Mr. Shennen dated 12/10/1940, advising that many of the records have been destroyed when the MMTB moved out of the old head office. Refers to a history by Mr. A. W. Greig of the Historical Society of Victoria some 20 years ago and MTT lines. 8 - letter - 2 quarto sheets to Mr. Russell, dated 8/10/1940. asking for information on cable trams, to be produced in the Railway Historical Society Bulletin, asking for records from Nicholson St workshops, in particular actual car numbers and re-numbering. Attaches a list of material sought. 9 - 2 quarto sheets - listing the information for powerhouses, routes, route signs, car numbers, has notes that some depots numbers were individually assigned - trailers.trams, tramways, cable trams, reports, records, history -
 Melbourne Tram Museum
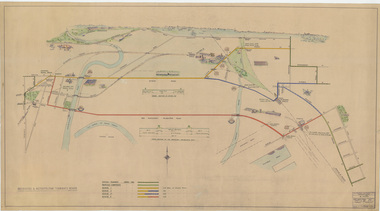
Drawing, Melbourne & Metropolitan Tramways Board (MMTB), "Footscray - City Tram Schemes - Perspective Overview", Dec. 1947
Drawing - hand coloured - not formally titled - "Footscray - City Tram Schemes - Perspective Overview", shows existing tramways, proposed conversions, four different schemes or proposals and the length of double track. Shows roads, bridges, railway lines, docks, industry location, road cross sections and other planning features. Dated 4-12-1947, drawing No. P10868. Note pdf version of this drawing on the images file, but will not open with dbtext works pdf viewer. Converted to a jpg which does open.On left hand edge on the rear has in pencil - "Footscray - City Tram Schemes - Perspective Overview" P10868 1947 Spare (dup)trams, tramways, footscray, new tramway, north melbourne, spencer st, victoria st, bridges -
 Melbourne Tram Museum
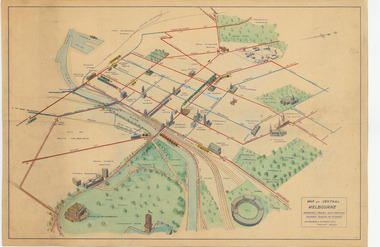
Map, Melbourne & Metropolitan Tramways Board (MMTB), "Map of Central Melbourne", c1952
Map - dyeline print then hand coloured, titled "Map of Central Melbourne", subtitled "Showing tram and bus routes, railways, places of interest:. Includes railway yards. gardens, trams routes shown in direction in some places. Has initials WKGP in bottom right hand corner. Map c1952, after the Latrobe St lines opened but before Bourke St lines opened. Note: 1 - The Hanna St or South Melbourne depot is shown south of City Road, not south of Sturt Street as it should have been. 2 - route 78 shown terminating at Batman Ave is incorrect, ran from Victoria and Church Sts. Original document scanned as a high res tiff file, approx. 60MB, see large files directory - htd3736-large.tiftrams, tramways, mmtb, map, melbourne, tram routes, south melbourne depot, hanna st depot, latrobe st, la trobe st -
 Ballarat Tramway Museum
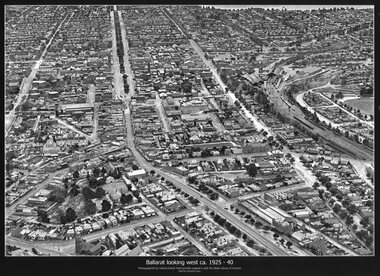
Photograph - Black & White copy, Charles Pratt, "Ballarat looking west ca 1925-40"
Original photograph by Charles Daniel Pratt, with the original image held by the State Library of Victoria. Edited by Richard Conn. Purchased by the Museum.Provides information about the appearance of Ballarat East and views across over the Railway Station to Lake Wendouree and along along Sturt St. Shows the nature of the Bridge St shopping centre and other places.Black & White copy photograph aerial view A4 size, titled "Ballarat looking west ca 1925-40" - looking along Sturt St with the Railway yards, Bridge St and Victoria St in the view. Some trams can be seen at Grenville St.ballarat, aerial photo, sturt st, victoria st -
 Ballarat Tramway Museum
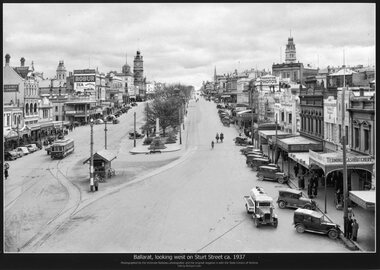
Photograph - Black & White copy photograph, Victorian Railways, "Ballarat, looking west on Sturt St ca 1937"
Original photograph by Victorian Railways, with the original image held by the State Library of Victoria. Edited by Richard Conn. Purchased by the Museum.Provides information about the appearance of Sturt St from Grenville St looking west. Tram No. 20 is travelling west. Note the many bikes parked on the shelter. Has in the view buildings of Ballaarat Gas Co, the Ballaarat Mechanics Institute with advertisements for Robur Tea and Davies Bread, Thornton for photos, Terminus Cash Butchery and a Vacuum Oil Co vehicle.Black & White copy photograph view A4 size, titled "Ballarat, looking west on Sturt St ca 1937". Original image by the Victorian Railways, c1937-1940. Looking from the top of a building in Grenville St. towards the West. Has a number of parked vehicles in kerbs, two people riding horses, a Vacuum Oil Co. truck in the bottom right hand corner and SEC tram 20 traveling west, just past the City Loop points. See also Reg Items 675, 4284 for other prints, 2981 for a colour postcard. For a similar view see Reg Item 8332. ballarat, vr photos, sturt st, robur tea, thornton, ballarat gas co, vacuum oil co, tram 20, shelters, tramways -
 Ballarat Tramway Museum
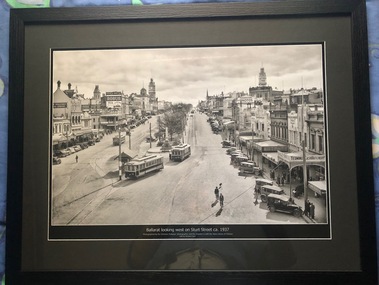
Photograph - Black & White copy, Victorian Railways, "Ballarat, looking west on Sturt St ca 1937"
Original photograph by Victorian Railways, with the original image held by the State Library of Victoria. Edited by Richard Conn. Purchased and framed by the Museum. For a similar photo see Reg Item 8329 .Provides information about the appearance of Sturt St from Grenville St looking west. Tram No. 26 has the destination of Mt Pleasant, No. 20 Sturt St West and No. 16 is travellng to the Gardens. Has in the view buildings of Ballaarat Gas Co, the Ballaarat Mechanics Institute with advertisements for Robur Tea and Davies Bread, Thornton for photos, Terminus Cash Butchery, Carlyon's Hotel, 8 hour monument and Malvern Star cycles. Framed, black & White copy photograph view A2 size, titled "Ballarat, looking west on Sturt St ca 1937". Original image by the Victorian Railways, c1937. Looking from the top of a building in Grenville St. towards the West. Has a number of parked vehicles in kerbs, many pedestrians and trams 20, 26 and 16.ballarat, vr photos, sturt st, robur tea, thornton, ballarat gas co, vacuum oil co, tram 20, tram 16, tram 26, davies bread, shelters, tramways -
 Melbourne Tram Museum
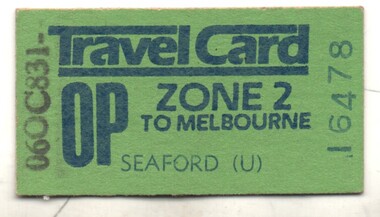
Ephemera - Ticket - "Zone 2 to Melbourne - Off Peak", The Met, 1983
These tickets were a replacement for the MetroCard Off Peaks introduced in 1980. However, the times of availability were now altered to being valid from 9am weekdays, but more importantly, could be used for return rail travel anytime that day. Like the MetroCards, they also allowed unlimited MMTB tram and bus travel within the Flinders, Spencer, Latrobe, William, Victoria and Spring Streets grid. No conditions were printed on the rear of these tickets. (Extracted from reference.)Demonstrates the development of Melbourne ticketing system that allowed travel in the CBD grid using trams.Edmondson size ticket, printed on pasteboard, and printed in blue ink on a green background. Has been date stamped 6 Oct. 1983. Purchased from Seaford Railway Station. Ticket No. 16478. Blank plain coloured rear.public transport, tickets, trams, tramways, railways, off peak, the met, melbourne -
 Ballarat Tramway Museum
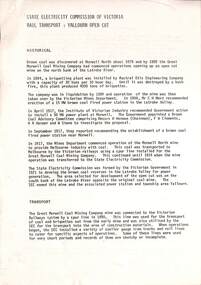
Document, 'State Electricty Commission of Victoria Rail Transport: Yallourn Open Cut"
Provides details of the history of SECV rail operations in the Yallourn and other power station open cuts and the transport of coal and the locomotives used in the Latrobe Valley operations of the SEC. Possibly prepared in the early 1980s. Rail operations on the interconnecting railway ceased in 2000. Shows outline diagrams of the steam, electric and diesel locomotives and the coal wagons.Provides information about the SEC Coal railways and their rolling stock used for power generation in Victoria.Report or document - 16 A4 pages titled Report - 'State Electricty Commission of Victoria Rail Transport: Yallourn Open Cut"sec tramways, power supply, secv, open cut mining, locomotives, interconnecting railway -
 Melbourne Tram Museum
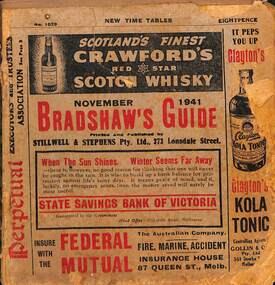
Book - Bradshaws Guide - November 1941, Stillwell & Stephens Pty Ltd
... Provides detailed information on Victorian railways country ...Provides detailed information on Victorian railways country timetables, suburban trains, lists of post offices, Victorian and Commonwealth Government officials and elected representatives, and tramways - all night services, first and last cars, including Sandringham and St Kilda services. Provides a detailed guide to services in Victoria, including public transport.Book - 194 pages, 9 sections stapled paper titled "Bradshaws Guide - November 1941" Priced 8d, No. 1029. Has a fold out map of the VR Country and suburban lines. Includes many advertisements.victoria, tramways, melbourne, timetables, railways, guides, bradshaws guide, advertisements -
 Ballarat Tramway Museum
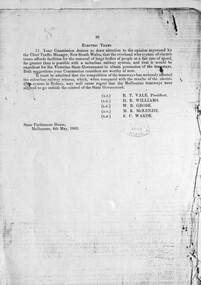
Document - Parliamentary 1902, "Electric Trams", 1902
Last page of a report by the Railways Standing Committee 1902. recommends that the State (Victoria) obtains possession of the tramways - looks at the situation in Sydney. At the time Sydney was expanding its electric tram system, Melbourne was reliant on cable trams.Yields information about a view of the Railways Standing Committee in 1902.Photocopy A4 sheet of the last page of a 10 page report dated 6-5-1902, possibly the "Electric Trams" - Parliamentary report - Railways Standing Committee 1902. letters, railways, tramways, reports, public transport, parliament -
 Ballarat Tramway Museum
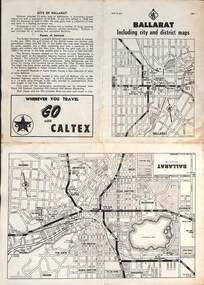
Map, RACV - Royal Automobile Club of Victoria, "Ballarat including city and district maps", 10/1961
Shows the central part of Ballarat, Ballarat Outlets, streets, principal attractions, Ballarat and district maps and information. Has the tram lines shown dotted, does not run out to Sebastopol or the Lydiard St North terminus. Each map in the bottom left-hand corner has the number "1061", possibly indicating the date. Has notes on the City, points of interest, and an advertisement for Caltex. See item 4929 for a larger version dated 1966. Yields information about the extent of Ballarat in the early 1960's shows the tram lines and other rail lines in the district. Four fold map printed on white paper, titled "Ballarat including city and district maps" - Map No. MAP 15.314 and dated 10-61. Produced by the RACVmap, tranways, ballarat, racv, railways -
 Melbourne Tram Museum
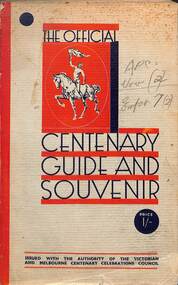
Book, Victorian and Melbourne Centenary Celebrations Council, "The Official Centenary Guide and Souvenir", 1934
Produced by the Victorian and Melbourne Centenary Celebrations 1934-1935. An extensive four month event was planned. Includes a short section of the history of Victoria and Melbourne, Education, Religious Activities, Public Utilities, Primary production, places of interest, Instructions, Pleasure Resorts and Sporting. The Utilities included the Victorian Railways, MMTB, Police, Melbourne Harbour Trust and the SEC. Includes many advertisements for car dealers, manufacturers, insurance and hotels.Yields information about the Melbourne Centenary Celebrations in 1934.Book - 222 pages - 7 sections, glued cover with many black and white photos and advertisements.Has pencil marks on the front and inside front cover and in marks on the outside rear cover.victoria, centenary celebrations, melbourne, mmtb, vr, secv, harbour trust -
 Melbourne Tram Museum
Document - List of Melbourne Buses, Bus and Coach Society of Victoria (BCSV), "Publication M3", August 1982
Provides a detailed list of buses operated in Melbourne by both the MMTB and the Victorian railways and the many private operators at the time. Details the chassis, body builders, operator, depot, fleet number, registration, body date, seating code, seating capacity and bus ownership history. Provides a publication date of of August 1982 on page 3. Yields extensive information about Melbourne's suburban bus fleet in 1982 with details of the Government and Privately owned fleet.Duplicated document - originally a 55 page A4 document - missing page 54 and covers. Page 55 loose. mmtb, buses, melbourne, route numbers, lists, fleet list, victorian railways, vr buses, bcsv -
 Ballarat Tramway Museum
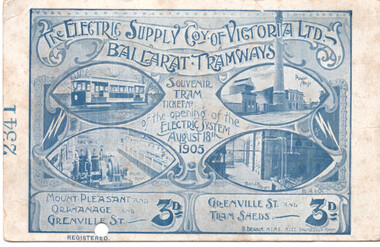
Postcard - Souvenir ESCo opening Ticket, Electric Supply Co. of Vic (ESCo), August 1905
Used as a souvenir ticket and postcard on the opening day of the Electric Supply Co. of Victoria (ESCo), Ballarat tramways on 18 August 1905, Has been punched for the Mount Pleasant and Orphanage - Grenville St section. Collected by David Budge - 1879 - 1974, son of William and Mary Budge of Trevor St Ballarat, who worked for the Victorian Railways as a blacksmith residing in Walnut St Carnegie. Demonstrates a souvenir item for the opening of the electric tramways in Ballarat in the form of a postcard, which could be sent to others as a souvenir of the new tram system in Ballarat. Has a strong association with the collector.Postcard - size Souvenir Tram ticket, printed using blue ink on one side with fare, photos of power station, engine room, boiler room and a tram & No.2341 stamped on edge. On reverse side is space for stamp, address etc., - with line & "postcard' etc., printed in red ink. See item 608 for other examples.esco, opening, tramways, ballarat, tickets, postcards, david budge -
 Ballarat Tramway Museum
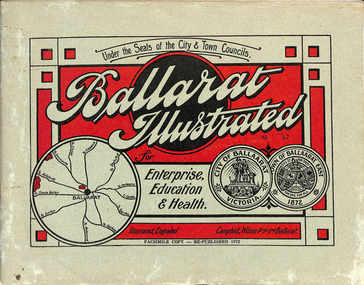
Book, "Ballarat Illustrated", 1972
Original c 1914 (see below), facsimile copy - re-published 1972. Original features photos of Ballarat City and Town, its buildings, parks and the various industries and organisations that were in Ballarat at the time of publication, including ESCo. Many photos features ESCo trams. Photos sepia toned. Has some red colour block printing on the front cover and rear, for Star Oil Engines. On inside back cover is a map with the places of interest and tram route map, marked in red. Pages are un-numbered. Original published by Ballarat East Town Council and Ballaarat City Council. On cover has number stamped in black in, "No. 87" (assume facsimile copy No.). Photos with publication show tram No. 21, built 1913 and ESCo photo page shows Mr. Pringle as Manager. Mr Pringle became manager in January 1911, As there is no photos of the "Avenue of Honour", or other mention of the first world war, assume original published about 1913 or 1914. Original shows Engravings and printing by "Campbell Wilson Prop Ltd, Ballarat". See Other Information as well for more listing details. High Resolution image added 31/8/2012 of i2 of ESCo page and i3 for Ballarat identies and sheet i4 extracted for Mr Pringle. PDF scan of full document added 21/5/2019 - see images btm633-1i.pdf and btm633-2i.pdf Notes on "Ballarat Illustrated" Reg. Item No. 733 From notes made by Neville Gower 12/1/1997 Cover: Inside front cover: Last paragraph, "Facilities for Travelling" - Electric trams serve all parts of Ballarat. Page 3: Street Scene, Municipal Town Hall, showing tram wiring Page 7: Street Scene, Lydiard St. North, intersection and tramway centre, with ESCo tram No. 21 in the bottom photo. Other photos features trams as well in Sturt St and Lydiard St. North. Page 9: Street Scene, Top photo of Sturt St. from Lydiard St. looking east, shows piles on right-hand side of road. Car parked by Post Office has a car registration number "9007". Bottom photo, an tram climbing hill, shows double trolley in the street, with early English type of pull offs. Page 13: Street Scenes and Historic Buildings: One of five photos, shows Victoria St. looking East, with tram track prominent in photo and how stone work was set up about the rails and overhead poles. Page 23: Street scene, Gardens North Entrance gates, shows details of gates near St. Aidans Drive. Note double trolley wire on poles, and style of insulators. No trams in photo, three ladies walking down the track. Page 37: Street Scene; Lydiard St views, top left hand photo, shows Railway station and railway gates with signal gantry and horse drawn vehicles. Tram tracks apparent. Bottom left hand photo shows Lydiard St. North, near Post Office, double track with centre poles - Single wire per track. Top right hand photo, showing Cemetery gates in background. Bottom right hand photo - from north end of Lydiard St. South, looking north, with an ESCo tram in background. Also has a parked car on left hand side. Page 45: Street Scenes - Bridge St; top photo at west end of Bridge St. with ESCo No. 11 with possibly double trolley wire in photo. Bottom photo at east end of Bridge St. with tram in background, shows junction. Double trolley heading out to Mt. Pleasant, single trolley for Victoria St. Page 45: Street Scenes - Bridge St; top photo at west end of Bridge St. with ESCo No. 11 with possibly double trolley wire in photo. Bottom photo at east end of Bridge St. with tram in background, shows junction. Double trolley heading out to Mt. Pleasant, single trolley for Victoria St. Page 61: Street Scenes and Historic Buildings - Public Institutions Ballarat - top left hand photo of the Hospital shows some tram track in foreground, with double trolley wire. Top right photo is of the Orphanage, the name of the tram terminus for many years. Page 68: Electric Supply Co. of Victoria's pages - top photo showing powerhouse in background, across the lake, can hardly see anything for the trees, except for the chimney. Bottom photos of the steam Turbo Generators and the switchboard. Gives Mr. P.J. Pringle as Chief Engineer and General Manager. He took over in Jan. 1911. Page 69: Ballarat East Views - features photo of Black Hill open cut, Ballarat East Railway Station, Ballarat Fire Station and "Victoria St. looking East", repeat of photo printed on page 12, but slightly darker. Image on system includes fire station and railway station, - Ballarat East. Page 78: Series of photos of various Ballarat VIP's of the era, fourth one in on top line features "P.J.Pringle, Electric Supply Co." Inside Back cover - map of Ballarat including tram lines and places of interest marked in red. Gives a detailed photographic presentation of Ballarat in 1914.80 page book with, in addition, light green card covers, titled "Ballarat Illustrated". Loose copy of page 9 and 10 held.trams, tramways, ballarat, local history, heritage buildings, esco -
 Ballarat Tramway Museum
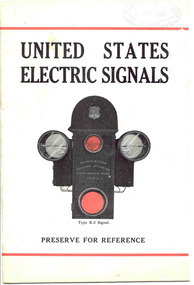
Book, The United States Electric Signal Co, "United States Electric Signals - Type K-2 Signal", 1920's?
Provides information about a system of safe working on a single line tramway or interurban railway or tram line. Has an illustration of the signal, coloured on the front cover. Gives details of the company, automatic electric block signals for 'railways' - interurban operation. The type K2-signal is one that can register up to 15 cars into and out of a section. Gives details, line diagrams and electrical details of this signal works, installation requirements and Trolley Contactors. Centre page has an electric diagram. Received by ESCo 4/11/1926.Yields information about a system on controlling vehicles on a single line railway or tramway section.Twenty page book, printed on art paper, centre page electrical diagram and light blue covers, titled "United States Electric Signals - Type K-2 Signal", with three centre staples. Noted by stamp on page 1 "Nachod and United States Signal Co. Inc. successors to the United States Electric Signal Co. 4771 - 4777 Louisville Avenue, Louisville Ky USA"The "Electric Supply Co. of Victoria 4/11/1926" in purple ink on the front cover, page 1and 5. On page 1 in black stamp ink "Nachod and United States Signal Co. Inc. successors to the United States Electric Signal Co. 4771 - 4777 Louisville Avenue, Louisville Ky USA" and on top of page 1 "Ballarat Tramway Preservation Society Catalogue No. 2" in black ink. On page 20 at bottom :From Nachod and United States Signal Co. Incorporated Louisville".trams, tramways, signals, railways, tramways -
 Ballarat Tramway Museum
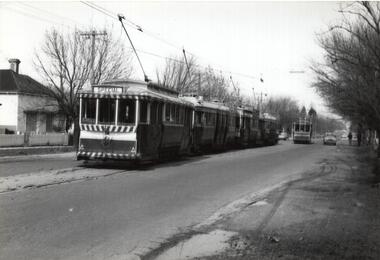
Photograph - Digital image Set of 11, Stuart Loddington, 10 images of Ballarat trams prior to closure, 1971
Yields information about Ballarat Tramways and trams prior to the closure of the tramway system.Set of 11 digital images, comprising 1 donation text image and 10 images of Ballarat trams prior to closure, scanned from original slides by Stuart Lodington, 1971 prior to closure of the system. .1 - Donation text slide. .2 - No. 26 southbound in Lydiard St North, with the Ballarat Railway Station level crossing gates in the background. .3 - No. 27 and 30 crossing at Bell St Loop, Skipton St. (see also btm4976i4) .4 - No. 17 Wendouree Parade, near Gardens Loop .5 - Single truck tram at Victoria St terminus, taken from the west side of the Buninyong Rail line bridge, with CRB Roadwork sign, Eureka Caravan Park and Meagher Hotel in the background, possibly No. 11, see entry for .10 .6 - No. 12 and 30 crossing at the Urquhart St Loop, Drummond St South. .7 - No. 12 westbound in Sturt St, with Grenville St in the background. .8 - No. 17 at Gardens Loop with the Trolley pole being reversed. .9 - No. 30, Lydiard St North with Reid's Palace building in the background. .10 - No. 11 passing over the Buninyong rail line bridge, with Gardens via Sturt St West and a Twin Lakes sign. Has a number of children alongside the driver. .11 - No. 21 heading northbound in Wendouree Parade, Gardens, just to the north of the now BTM depot junction.trams, tramways, ballarat, level crossings, buninyong railway, lydiard st north, bell st, victoria st, wendouree parade, gardens, drummond st, sturt st, tram 26, tram 27, tram 30, tram 17, tram 12, tram 21, tram 11 -
 Ballarat Tramway Museum
Magazine, Association of Railway Enthusiasts (ARE), "Australian Railway Enthusiast - Vol 19, No. 3, September 1981", Sept. 1981
Copy of the Australian Railway Enthusiast - Vol 19, No. 3, September 1981 contains 6 photos under the titled "Ballarat - 10 years since closure". Also contains articles on Spain, the steam shunter at Junee known as Fanny, railways at Orange and Railways in the Blood by C. Henshaw. Photos by John Phillips, unless noted otherwise or Carolyn Dean or Mike Venn. 1 - No. 31, Victoria St bridge - see Reg item 405 or 2106 2 - No. 37 leaving Bridge St, entering Sturt St, front on shot 3 - No. 31, 12/9/1962 at Sturt and Lydiard St, photo by Mike Venn 4 - No. 14 and another single trucker in City Loop, see Reg Item 2016. 5 - Nos. 27 and 38 crossing at Wendouree Parade, May 1981 - see Reg Item 2787. 6 - No. 14, being driven by Tom Evans, opening the depot extensions, 19/9/1981 - Photo by Carolyn Deantrams, tramways, ballarat, closure, lydiard st, sturt st, victoria st, wendouree parade, btps, city loop, opening, bridge st