Showing 32489 items matching "south-africa"
-
 Flagstaff Hill Maritime Museum and Village
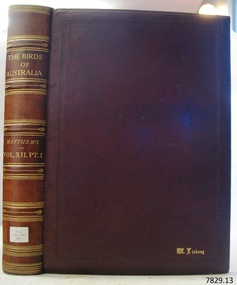
Book - Reference, The Birds of Australia Vol 12 Part 1
The Birds of Australia is a 12 volume work, in a total of 14 books. The books were used as an ornithological handbook. They contain scientific text as well as over 600 hand-coloured lithographed plates by J.G. Keulemans, H. Grönvold, Roland Green, H. Goodchild and G.E. Lodge. The work was written, sponsored and organised by Gregory M. Matthews, F.R.S.C. Erc. who was a wealthy Australian and an amateur ornithologist. His titles included – -Fellow of the Linnean and Zoological Societies of London -Member of the British Ornithologists’ Union -Corresponding Fellow of the American Ornithologists’ Union The volumes in our collection were originally donated to the Warrnambool Mechanics’ Institute and Free Library by William Lindsay. THE LINDSAYS (quoted from the book Of Many Things – A History of Warrnambool Shire by C.E. Sayers) The Lindsays were amongst the most prominent families in the Shire of Warrnambool, as pastoralists, sportsmen, municipal councillors, community leaders. The first of the family William arrived in Melbourne in 1841 and started business as a livestock agent. The gold rushes sent him to the central Victoria diggings dealing in cattle. This was a business that boomed in the early 1850s, and he prospered. In 1859 he took over the Quamby run near Woolsthrope from Paul de Castella, the Yarra Valley Swiss vigneron who had brought the leasehold and improvements in 1853 from George Youl, who had pioneered the run. Quamby was originally 25,000 acres. It was heavily timbered, rough country, much of it swampy, a characteristic of the district. Lindsay used it to fatten cattle which gave large returns with the booming gold diggings towns paying high prices for beef. In 1862 purchases at auction made Quamby a freehold. In the next six years a further 20,000 acres of Crown land were brought at auction to make the run one of the largest in the south-west district. The great profits from his cattle trading enabled Lindsay to make improvements to the holding, and to Union which was added in 1864. Much of the thick timber was cleared and the worst of the swamps drained. Union was 15,000 acres of freehold when Kennedy sold it to Lindsay. It was heavily timbered, mostly blackwood, with large belts of wattle and honeysuckle. Much of the heavy native was ringbarked and cleared; much more was swept away by bushfire. It was expensive work, but Lindsay’s bank passbook was heavy with credit, and he did not spare money to make both Quamby and Union heavily developed stock runs. He was as lavish in social living; the bluestone Quamby homestead was one of the most hospitable in the district when William Lindsay was host there; its paddocks carried high quality thoroughbreds: its stables housed steeplechasers and flat racers which won many races on Warrnambool and other courses; its coach houses were filled with carriages which took his guests to the great racing carnivals of the district. After William Lindsay died in 1897, in his eighty-fifth year, his two sons, William and James, managed Union and Quamby as a joint venture. This partnership ended in 1906 when William took over Union and James kept Quamby. The following year 10,000 acres of Union were subdivided and sold in lots of 100 acres to 700 acres for dairying and general farming. It was well improved country, much of it alluvial flats. By then many of the paddocks were sheltered with blue gum belts, and they carried good pastures. The three Lindsays, father and two sons, gave many years of service to the Shire, and to many charitable, sporting, social and community organisations in the Warrnambool district. William Lindsay senior, was a Shire councillor for 15 years, and President several times. James Lindsay followed his father as a north riding councillor. He served nineteen years, from 1887 until his death in March 1908. He was President four times. Jimmy Lindsay was one of the most popular men in the south-west of Victoria. He was a fine sportsman: horse breeder, owner and a dashing amateur rider. He lived lavishly and played hard. For many years he guarded a herd of kangaroos, as many as 100 head, at Quamby. Descendants of the Lindsay kangaroos are still in the district. James Lindsay’s wife, Margaret Esther was a daughter of Samuel Shaw Parker, the first engineer of the Shire. Nell Lindsay, a daughter, lives in the Bluestone Quamby homestead. Only a little more than 60 acres of the original run still belongs to the property. William Lindsay junior succeeded his brother as a Shire councillor. He served for 25 years from 1908 until his death in 1934. So, the Lindsays, father and two sons, served as Shite councillors for an unbroken period of sixth-five years. William Lindsay junior had a life-long interest in horse racing, as breeder, owner and enthusiastic amateur steeplechase rider. He was elected a member of the Warrnambool racing club in 1901 and was president of the club for thirty-two years. He raced and rode horses for the love of the sport. He won the Villiers and Heytesbury Hunt Cup in the 1870s on his own horse, Ventura. In the year he died his horse Flavedo won the Warrnambool Grand Annual steeplechase. It was a sensational race. All of the contestants fell, or lost their riders. When Flavedo baulked at a jump, its jockey R. Sweetman, remounted and completed the course to win the race. All of the Lindsays were passionately fond of the thoroughbred horse. Nell Lindsay talking to the author in the drawing room of Quamby homestead - with many memories for her of its lavish years – said of a brother that he was put on a horse when he was two years old and never got off. William Lindsay junior made Union into a fine, high-producing property, breeding cattle and horses. He added to the bluestone house that David Kennedy started, established plantations of pines and gums, and made an attractive garden. WARRNAMBOOL MECHANICS’ INSTITUTE Warrnambool's Mechanics' Institute (or Institution as it was sometimes called) was one of the earliest in Victoria. On 17th October 1853 a meeting was held where it was resolved to request the Lieutenant Governor of the Colony to grant land for the erection of a Mechanics' Institutes building. A committee was formed at the meeting and Richard Osburne chaired the first meeting of this committee. The land on the North West corner of Banyan and Merri Streets was granted but there were no funds to erect the building. The Formal Rights of the Warrnambool Mechanics' Institute's encompassed its aims and these were officially adopted in1859; "This Institution has for its object the diffusion of literary, scientific, and other useful knowledge amongst its members, excluding all controversial subjects, religious or political. These objects are sought to be obtained by means of a circulating library, a reading room, the establishment of classes, debates, and the occasional delivery of lectures on natural and experimental philosophy, mechanics, astronomy, chemistry, natural history, literature, and the useful and ornamental arts, particularly those which have a more immediate reference to the colony." The Warrnambool Mechanics' Institute opened its first meeting room in November1854 in the National School building at the corner of Banyan and Timor Streets. The Institute was funded by member subscription, payable on a quarterly, half yearly or yearly basis. Samuel Hannaford, the Manager of the Warrnambool Bank of Australasia, was the first Honorary Secretary of the Mechanics' Institutes, and an early President and Vice-President. He also gave several of the early lectures in the Reading Room. Another early Secretary, Librarian and lecturer was Marmaduke Fisher, the teacher at the National School. Lecture topics included The Poets and Poetry of Ireland', 'The Birth and Development of the Earth', 'The Vertebrae - with Remarks on the pleasures resulting from the study of Natural History' and 'Architecture'. In 1856 the Reading Room was moved to James Hider's shop in Timor Street, and by 1864 it was located in the bookshop of Davies and Read. In the 1860's the Mechanics' Institute struggled as membership waned but in 1866, after a series of fund raising efforts, the committee was able to purchase land in Liebig Street, on a site then called Market Square, between the weighbridge and the fire station. A Mechanics' Institute building was opened at this site in August 1871. The following year four more rooms were added to the main Reading Room and in 1873 the Artisan School of Design was incorporated into the Institute. The same year Joseph Archibald established a Museum; however it deteriorated when he was transferred to Bendigo in 1877. In 1880, with Archibald's return to Warrnambool, the Museum was re-established, and in 1885 a new building was built at the back of the Institute to accommodate the re-created School of Design, the Art Gallery and the Museum. In 1887 the Museum section was moved to the former court house in Timor Street (for some time the walls of the building formed part of the TAFE cafeteria but all is now demolished)). In 1911 the Museum was transferred back to the original building and the management of the Mechanics' Institute was handed over to the Warrnambool City Council. The Museum and Art Gallery became one and housed many fine works of art, and the Library continued to grow. The building was well patronised, with records showing that at the beginning of the 20th century there were between 500 and 800 visitors. During World War One the monthly figures were in the thousands, with 3,400 people visiting in January 1915. The Museum was a much loved Institution in Warrnambool until the contents of the Museum and Art Gallery were removed to make room for the Warrnambool City Council Engineers' Department. The contents were stored but many of the items were scattered or lost. When the original building was demolished the site became occupied by the Civic Centre, which included the new City Library. (The library was temporarily located in the old Palais building in Koroit Street.) In the process of reorganisation the Collection was distributed amongst the community groups: -The new City Library took some of the historic books and some important documents, historic photographs and newspapers. -The Art Gallery kept the 19th Century art collection and some of the artefacts from the museum. -The Historic Society has some items -The State Museum has some items -Some items were destroyed -Flagstaff Hill Maritime Village has old newspapers, Government Gazettes, most of the Mechanics' Institute Library, ledgers and documents connected to the Mechanics' Institute Library, some framed and unframed art works and some photographs. The Warrnambool Mechanics' Institute Library book collection is deemed to be of great importance because it is one of the few collections in an almost intact state, and many of the books are now very rare and of great value. THE PATTISON COLLECTION This book is also part of the ‘Pattison Collection’, a collection of books and records that was originally owned by the Warrnambool Mechanics’ Institute, which was founded in Warrnambool in 1853. In 1935 Ralph Pattison was appointed as City Librarian to establish and organise the Warrnambool Library, as the Warrnambool Mechanics’ Institute was then called. When the Warrnambool Mechanics’ Institute building was pulled down in 1963 a new civic building was erected on the site and the new Warrnambool Library, on behalf of the City Council, took over all the holdings of the Warrnambool Mechanics’ Institute. At this time some of the items were separated and identified as the ‘Pattison Collection’, named after Ralph Pattison. Eventually the components of the Warrnambool Mechanics’ Institute were distributed from the Warrnambool Library to various places, including the Art Gallery, Historical Society and Flagstaff Hill. Later some were even distributed to other regional branches of Corangamite Regional Library and passed to and fro. It is difficult now to trace just where all of the items have ended up. The books at Flagstaff Hill Maritime Village generally display stamps and markings from Pattison as well as a variety of other institutions including the Mechanics’ Institute itself. RALPH ERIC PATTISON Ralph Eric Pattison was born in Rockhampton, Queensland, in 1891. He married Maude Swan from Warrnambool in 1920 and they set up home in Warrnambool. In 1935 Pattison accepted a position as City Librarian for the Warrnambool City Council. His huge challenge was to make a functional library within two rooms of the Mechanics’ Institute. He tirelessly cleaned, cleared and sorted a disarrayed collection of old books, jars of preserved specimens and other items reserved for exhibition in the city’s museum. He developed and updated the library with a wide variety of books for all tastes, including reference books for students; a difficult task to fulfil during the years following the Depression. He converted all of the lower area of the building into a library, reference room and reading room for members and the public. The books were sorted and stored using a cataloguing and card index system that he had developed himself. He also prepared the upper floor of the building and established the Art Gallery and later the Museum, a place to exhibit the many old relics that had been stored for years for this purpose. One of the treasures he found was a beautiful ancient clock, which he repaired, restored and enjoyed using in his office during the years of his service there. Ralph Pattison was described as “a meticulous gentleman whose punctuality, floorless courtesy and distinctive neat dress were hallmarks of his character, and ‘his’ clock controlled his daily routine, and his opening and closing of the library’s large heavy doors to the minute.” Pattison took leave during 1942 to 1945 to serve in the Royal Australian Navy, Volunteer Reserve as Lieutenant. A few years later he converted one of the Museum’s rooms into a Children’s Library, stocking it with suitable books for the younger generation. This was an instant success. In the 1950’s he had the honour of being appointed to the Victorian Library Board and received more inspiration from the monthly conferences in Melbourne. He was sadly retired in 1959 after over 23 years of service, due to the fact that he had gone over the working age of council officers. However he continued to take a very keen interest in the continual development of the Library until his death in 1969. The Birds of Australia by Gregory M. Matthews is now considered a rare and valuable scientific and historic work on its own. These 12 volumes were donated in 1934 to The Warrnambool Mechanics’ Institute and were included as part of the Pattison Collection. The Warrnambool Mechanics’ Institute Collection is primarily significant in its totality, rather than for the individual objects it contains. Its contents are highly representative of the development of Mechanics' Institute libraries across Australia, particularly Victoria. A diversity of publications and themes has been amassed, and these provide clues to our understanding of the nature of and changes in the reading habits of Victorians from the 1850s to the middle of the 20th century. The collection also highlights the Warrnambool community’s commitment to the Mechanics’ Institute, reading, literacy and learning in the regions, and proves that access to knowledge was not impeded by distance. These items help to provide a more complete picture of our community’s ideals and aspirations. The Warrnambool Mechanics Institute book collection has historical and social significance for its strong association with the Mechanics Institute movement and the important role it played in the intellectual, cultural and social development of people throughout the latter part of the nineteenth century and the early twentieth century. The collection of books is a rare example of an early lending library and its significance is enhanced by the survival of an original collection of many volumes. The Warrnambool Mechanics' Institute’s publication collection is of both local and state significance. The Birds of Australia Vol 12 Part 1 Author: Gregory M Mathews Publisher: H. F. & G. Witherby 326 HIGH HOLBORN LONDON Date: 1925-1927 Tan leather bound illustrated work.Label on spine cover with typed text RA 598.2994 MAT Pastedown front endpaper has sticker from Warrnambool Mechanics Institute and Free Library that reads “Presented by W. Lindsay Esq. ‘Union’ Woolsthrope” Accession Number: 15244 Date Received: 3-34 “W. Lindsay” embossed in gold on front cover, bottom right of book flagstaff hill, warrnambool, shipwrecked coast, flagstaff hill maritime museum, maritime museum, shipwreck coast, flagstaff hill maritime village, great ocean road, the birds of australia, gregory m. matthews, witherby & co., h.f. & g. witherby, w lindsay, william lindsay, quamby woolsthorpe, union woolsthorpe, pattison collection, warrnambool library, warrnambool art gallery, joseph archibald, warrnambool mechanics’ institute and free library, ralph eric pattison, warrnambool city librarian, mechanics’ institute library, victorian library board, warrnambool books and records, warrnambool children’s library, the birds of australia vol 12 part 1, quamby station, union station, woolsthrope -
 Flagstaff Hill Maritime Museum and Village
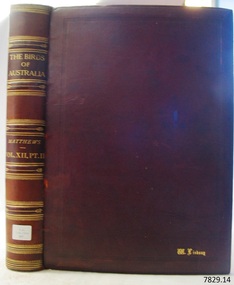
Book - Reference, The Birds of Australia Vol 12 Part 2
The Birds of Australia is a 12 volume work, in a total of 14 books. The books were used as an ornithological handbook. They contain scientific text as well as over 600 hand-coloured lithographed plates by J.G. Keulemans, H. Grönvold, Roland Green, H. Goodchild and G.E. Lodge. The work was written, sponsored and organised by Gregory M. Matthews, F.R.S.C. Erc. who was a wealthy Australian and an amateur ornithologist. His titles included – -Fellow of the Linnean and Zoological Societies of London -Member of the British Ornithologists’ Union -Corresponding Fellow of the American Ornithologists’ Union The volumes in our collection were originally donated to the Warrnambool Mechanics’ Institute and Free Library by William Lindsay. THE LINDSAYS (quoted from the book Of Many Things – A History of Warrnambool Shire by C.E. Sayers) The Lindsays were amongst the most prominent families in the Shire of Warrnambool, as pastoralists, sportsmen, municipal councillors, community leaders. The first of the family William arrived in Melbourne in 1841 and started business as a livestock agent. The gold rushes sent him to the central Victoria diggings dealing in cattle. This was a business that boomed in the early 1850s, and he prospered. In 1859 he took over the Quamby run near Woolsthrope from Paul de Castella, the Yarra Valley Swiss vigneron who had brought the leasehold and improvements in 1853 from George Youl, who had pioneered the run. Quamby was originally 25,000 acres. It was heavily timbered, rough country, much of it swampy, a characteristic of the district. Lindsay used it to fatten cattle which gave large returns with the booming gold diggings towns paying high prices for beef. In 1862 purchases at auction made Quamby a freehold. In the next six years a further 20,000 acres of Crown land were brought at auction to make the run one of the largest in the south-west district. The great profits from his cattle trading enabled Lindsay to make improvements to the holding, and to Union which was added in 1864. Much of the thick timber was cleared and the worst of the swamps drained. Union was 15,000 acres of freehold when Kennedy sold it to Lindsay. It was heavily timbered, mostly blackwood, with large belts of wattle and honeysuckle. Much of the heavy native was ringbarked and cleared; much more was swept away by bushfire. It was expensive work, but Lindsay’s bank passbook was heavy with credit, and he did not spare money to make both Quamby and Union heavily developed stock runs. He was as lavish in social living; the bluestone Quamby homestead was one of the most hospitable in the district when William Lindsay was host there; its paddocks carried high quality thoroughbreds: its stables housed steeplechasers and flat racers which won many races on Warrnambool and other courses; its coach houses were filled with carriages which took his guests to the great racing carnivals of the district. After William Lindsay died in 1897, in his eighty-fifth year, his two sons, William and James, managed Union and Quamby as a joint venture. This partnership ended in 1906 when William took over Union and James kept Quamby. The following year 10,000 acres of Union were subdivided and sold in lots of 100 acres to 700 acres for dairying and general farming. It was well improved country, much of it alluvial flats. By then many of the paddocks were sheltered with blue gum belts, and they carried good pastures. The three Lindsays, father and two sons, gave many years of service to the Shire, and to many charitable, sporting, social and community organisations in the Warrnambool district. William Lindsay senior, was a Shire councillor for 15 years, and President several times. James Lindsay followed his father as a north riding councillor. He served nineteen years, from 1887 until his death in March 1908. He was President four times. Jimmy Lindsay was one of the most popular men in the south-west of Victoria. He was a fine sportsman: horse breeder, owner and a dashing amateur rider. He lived lavishly and played hard. For many years he guarded a herd of kangaroos, as many as 100 head, at Quamby. Descendants of the Lindsay kangaroos are still in the district. James Lindsay’s wife, Margaret Esther was a daughter of Samuel Shaw Parker, the first engineer of the Shire. Nell Lindsay, a daughter, lives in the Bluestone Quamby homestead. Only a little more than 60 acres of the original run still belongs to the property. William Lindsay junior succeeded his brother as a Shire councillor. He served for 25 years from 1908 until his death in 1934. So, the Lindsays, father and two sons, served as Shite councillors for an unbroken period of sixth-five years. William Lindsay junior had a life-long interest in horse racing, as breeder, owner and enthusiastic amateur steeplechase rider. He was elected a member of the Warrnambool racing club in 1901 and was president of the club for thirty-two years. He raced and rode horses for the love of the sport. He won the Villiers and Heytesbury Hunt Cup in the 1870s on his own horse, Ventura. In the year he died his horse Flavedo won the Warrnambool Grand Annual steeplechase. It was a sensational race. All of the contestants fell, or lost their riders. When Flavedo baulked at a jump, its jockey R. Sweetman, remounted and completed the course to win the race. All of the Lindsays were passionately fond of the thoroughbred horse. Nell Lindsay talking to the author in the drawing room of Quamby homestead - with many memories for her of its lavish years – said of a brother that he was put on a horse when he was two years old and never got off. William Lindsay junior made Union into a fine, high-producing property, breeding cattle and horses. He added to the bluestone house that David Kennedy started, established plantations of pines and gums, and made an attractive garden. WARRNAMBOOL MECHANICS’ INSTITUTE Warrnambool's Mechanics' Institute (or Institution as it was sometimes called) was one of the earliest in Victoria. On 17th October 1853 a meeting was held where it was resolved to request the Lieutenant Governor of the Colony to grant land for the erection of a Mechanics' Institutes building. A committee was formed at the meeting and Richard Osburne chaired the first meeting of this committee. The land on the North West corner of Banyan and Merri Streets was granted but there were no funds to erect the building. The Formal Rights of the Warrnambool Mechanics' Institute's encompassed its aims and these were officially adopted in1859; "This Institution has for its object the diffusion of literary, scientific, and other useful knowledge amongst its members, excluding all controversial subjects, religious or political. These objects are sought to be obtained by means of a circulating library, a reading room, the establishment of classes, debates, and the occasional delivery of lectures on natural and experimental philosophy, mechanics, astronomy, chemistry, natural history, literature, and the useful and ornamental arts, particularly those which have a more immediate reference to the colony." The Warrnambool Mechanics' Institute opened its first meeting room in November1854 in the National School building at the corner of Banyan and Timor Streets. The Institute was funded by member subscription, payable on a quarterly, half yearly or yearly basis. Samuel Hannaford, the Manager of the Warrnambool Bank of Australasia, was the first Honorary Secretary of the Mechanics' Institutes, and an early President and Vice-President. He also gave several of the early lectures in the Reading Room. Another early Secretary, Librarian and lecturer was Marmaduke Fisher, the teacher at the National School. Lecture topics included The Poets and Poetry of Ireland', 'The Birth and Development of the Earth', 'The Vertebrae - with Remarks on the pleasures resulting from the study of Natural History' and 'Architecture'. In 1856 the Reading Room was moved to James Hider's shop in Timor Street, and by 1864 it was located in the bookshop of Davies and Read. In the 1860's the Mechanics' Institute struggled as membership waned but in 1866, after a series of fund raising efforts, the committee was able to purchase land in Liebig Street, on a site then called Market Square, between the weighbridge and the fire station. A Mechanics' Institute building was opened at this site in August 1871. The following year four more rooms were added to the main Reading Room and in 1873 the Artisan School of Design was incorporated into the Institute. The same year Joseph Archibald established a Museum; however it deteriorated when he was transferred to Bendigo in 1877. In 1880, with Archibald's return to Warrnambool, the Museum was re-established, and in 1885 a new building was built at the back of the Institute to accommodate the re-created School of Design, the Art Gallery and the Museum. In 1887 the Museum section was moved to the former court house in Timor Street (for some time the walls of the building formed part of the TAFE cafeteria but all is now demolished)). In 1911 the Museum was transferred back to the original building and the management of the Mechanics' Institute was handed over to the Warrnambool City Council. The Museum and Art Gallery became one and housed many fine works of art, and the Library continued to grow. The building was well patronised, with records showing that at the beginning of the 20th century there were between 500 and 800 visitors. During World War One the monthly figures were in the thousands, with 3,400 people visiting in January 1915. The Museum was a much loved Institution in Warrnambool until the contents of the Museum and Art Gallery were removed to make room for the Warrnambool City Council Engineers' Department. The contents were stored but many of the items were scattered or lost. When the original building was demolished the site became occupied by the Civic Centre, which included the new City Library. (The library was temporarily located in the old Palais building in Koroit Street.) In the process of reorganisation the Collection was distributed amongst the community groups: -The new City Library took some of the historic books and some important documents, historic photographs and newspapers. -The Art Gallery kept the 19th Century art collection and some of the artefacts from the museum. -The Historic Society has some items -The State Museum has some items -Some items were destroyed -Flagstaff Hill Maritime Village has old newspapers, Government Gazettes, most of the Mechanics' Institute Library, ledgers and documents connected to the Mechanics' Institute Library, some framed and unframed art works and some photographs. The Warrnambool Mechanics' Institute Library book collection is deemed to be of great importance because it is one of the few collections in an almost intact state, and many of the books are now very rare and of great value. THE PATTISON COLLECTION This book is also part of the ‘Pattison Collection’, a collection of books and records that was originally owned by the Warrnambool Mechanics’ Institute, which was founded in Warrnambool in 1853. In 1935 Ralph Pattison was appointed as City Librarian to establish and organise the Warrnambool Library, as the Warrnambool Mechanics’ Institute was then called. When the Warrnambool Mechanics’ Institute building was pulled down in 1963 a new civic building was erected on the site and the new Warrnambool Library, on behalf of the City Council, took over all the holdings of the Warrnambool Mechanics’ Institute. At this time some of the items were separated and identified as the ‘Pattison Collection’, named after Ralph Pattison. Eventually the components of the Warrnambool Mechanics’ Institute were distributed from the Warrnambool Library to various places, including the Art Gallery, Historical Society and Flagstaff Hill. Later some were even distributed to other regional branches of Corangamite Regional Library and passed to and fro. It is difficult now to trace just where all of the items have ended up. The books at Flagstaff Hill Maritime Village generally display stamps and markings from Pattison as well as a variety of other institutions including the Mechanics’ Institute itself. RALPH ERIC PATTISON Ralph Eric Pattison was born in Rockhampton, Queensland, in 1891. He married Maude Swan from Warrnambool in 1920 and they set up home in Warrnambool. In 1935 Pattison accepted a position as City Librarian for the Warrnambool City Council. His huge challenge was to make a functional library within two rooms of the Mechanics’ Institute. He tirelessly cleaned, cleared and sorted a disarrayed collection of old books, jars of preserved specimens and other items reserved for exhibition in the city’s museum. He developed and updated the library with a wide variety of books for all tastes, including reference books for students; a difficult task to fulfil during the years following the Depression. He converted all of the lower area of the building into a library, reference room and reading room for members and the public. The books were sorted and stored using a cataloguing and card index system that he had developed himself. He also prepared the upper floor of the building and established the Art Gallery and later the Museum, a place to exhibit the many old relics that had been stored for years for this purpose. One of the treasures he found was a beautiful ancient clock, which he repaired, restored and enjoyed using in his office during the years of his service there. Ralph Pattison was described as “a meticulous gentleman whose punctuality, floorless courtesy and distinctive neat dress were hallmarks of his character, and ‘his’ clock controlled his daily routine, and his opening and closing of the library’s large heavy doors to the minute.” Pattison took leave during 1942 to 1945 to serve in the Royal Australian Navy, Volunteer Reserve as Lieutenant. A few years later he converted one of the Museum’s rooms into a Children’s Library, stocking it with suitable books for the younger generation. This was an instant success. In the 1950’s he had the honour of being appointed to the Victorian Library Board and received more inspiration from the monthly conferences in Melbourne. He was sadly retired in 1959 after over 23 years of service, due to the fact that he had gone over the working age of council officers. However he continued to take a very keen interest in the continual development of the Library until his death in 1969. The Birds of Australia by Gregory M. Matthews is now considered a rare and valuable scientific and historic work on its own. These 12 volumes were donated in 1934 to The Warrnambool Mechanics’ Institute and were included as part of the Pattison Collection. The Warrnambool Mechanics’ Institute Collection is primarily significant in its totality, rather than for the individual objects it contains. Its contents are highly representative of the development of Mechanics' Institute libraries across Australia, particularly Victoria. A diversity of publications and themes has been amassed, and these provide clues to our understanding of the nature of and changes in the reading habits of Victorians from the 1850s to the middle of the 20th century. The collection also highlights the Warrnambool community’s commitment to the Mechanics’ Institute, reading, literacy and learning in the regions, and proves that access to knowledge was not impeded by distance. These items help to provide a more complete picture of our community’s ideals and aspirations. The Warrnambool Mechanics Institute book collection has historical and social significance for its strong association with the Mechanics Institute movement and the important role it played in the intellectual, cultural and social development of people throughout the latter part of the nineteenth century and the early twentieth century. The collection of books is a rare example of an early lending library and its significance is enhanced by the survival of an original collection of many volumes. The Warrnambool Mechanics' Institute’s publication collection is of both local and state significance. The Birds of Australia Vol 12 Part 2 Author: Gregory M Mathews Publisher: H. F. & G. Witherby 326 HIGH HOLBORN LONDON Date: 1925-1927 Tan leather bound illustrated work.Label on spine cover with typed text RA 598.2994 MAT Pastedown front endpaper has sticker from Warrnambool Mechanics Institute and Free Library that reads “Presented by W. Lindsay Esq. ‘Union’ Woolsthrope” Accession Number: 15245 Date Received: 3-34 “W. Lindsay” embossed in gold on front cover, bottom right of book flagstaff hill, warrnambool, shipwrecked coast, flagstaff hill maritime museum, maritime museum, shipwreck coast, flagstaff hill maritime village, great ocean road, the birds of australia, gregory m. matthews, witherby & co., h.f. & g. witherby, w lindsay, william lindsay, quamby woolsthorpe, union woolsthorpe, pattison collection, warrnambool library, warrnambool art gallery, joseph archibald, warrnambool mechanics’ institute and free library, ralph eric pattison, warrnambool city librarian, mechanics’ institute library, victorian library board, warrnambool books and records, warrnambool children’s library, the birds of australia vol 12 part 2, quamby station, union station, woolsthrope -
 Bendigo Historical Society Inc.
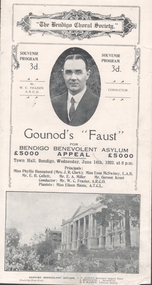
Document - TOWN HALL, THE BENDIGO CHORAL SOCIETY
Town Hall, The Bendigo Choral Society. Souvenir program 3d. With and oval picture of Mr. W C Frazier A.R.C.O.-Conductor on front cover. Gounod's 'Faust'. For Bendigo Benevolent Asylum, 5000 pounds. Town Hall, Bendigo, Wednesday, June 14th, 1992, at 8pm. Principals: Miss Phyllis Hannaford (Mrs. J R Clark); Miss Essa McSwiney, L.A.B. Mr. E H Collett, Mr. E A Miller, Mr. Gerson Krost, Conductor: Mr. W C Frazier, A.R.C.O. Pianiste: Miss Eileen Hains, A.T.C.L. Picture of Benevolent Asylum on front cover. J G Austen, Secretary Appeal Fund. J Hudspeth & Z S Martin Secretaries Choral Society. Concert to commence at 8pm. Artists; Mr. Gerson Krost, Miss Essa McSwiney, Mr. E A Miller, Miss Phyllis Hannaford. Cast; Mrs. J R Clark, Miss Essa McSwiney, Mr. E H Collett, Mr. E A Miller. Choruses, etc. by Choral Society. In the Homeland Mr. Frazier found it the increasing practice to take the great opera masterpieces and give them on the concert platform in more of less liberal excerpts. With characteristic generosity. He purchased the copies and presented them to the Choral Society. Bendigo has thus an opportunity to hear the latest idea. We are sure the musical public will appreciate this, though of course. . .. It is interesting to note that when this great work was first performed in Paris, on March 19th, 1859, it was somewhat coldly received, to the composer's great grief, as he, with the instinct of genius, . . .. The Compact: Introduction: Faust, aged and worn, weary with long pondering over learned treatises, in a pessimistic mood wonder whether the work is worthwhile. Memories of an early love stir strangely in his being, and he, in his doubting mood, questions all things, in despair he would welcome death, and finding no answer from the heavens, he appeals to the powers of ill. To his great surprise, he is at once answered by Mephistopheles and a colloquy then ensues in which the Evil One promises him Gold? Glory? A Kingdom? No! No! It must be 'Youth!' That can be done also. Faust is dubious, but on Mephistopheles bringing a vision of beauteous Margarita at is dubious, but on Mephistopheles be 'Youth!' That can be done also. Faust is dubious, but on Mephistopheles bringing a vision of beauteous Margarita at her wheel he agrees and signs the compact. 'Up Here I am at thy command, Down There thou servest me!' At The Fair: Mephistopheles then asks Faust to the Fair where they mix with the revelry of the students, soldiers and merry maidens. He gets a glimpse of Margarita. The Evil One is again busy putting Suspicious and quarrelsome thoughts into good comrades' minds. . .. The Wooing: Poor Siebel, the ardent, faithful lover of Margarita, finds himself somewhat overshadowed by the young and handsome Faust. Mephistopheles in a mocking mood tells him that every flower that he plucks will perish in his hands. He finds this prediction verified when he plucks the flowers for his lady love, but when in faith he scouts the Evil One, he conquers, and the spell is broken. Faust, filled with an ardent and pure passion, approaches the dwelling of Margarita, with an offering of priceless jewels, provided by the . . .. . The Return of Valentine: Valentine, the soldier brother of Margarita, leaves for the wars, giving the care of his sister to her faithful lover, Siebel. On his return, covered with glory, and ardent to meet his people again, he hears the story of the flouting of Margarita by Faust. In this part the soldiers are welcomed home by their comrades in the male part of the song 'Fold the flag my brothers,' followed by the celebrated chorus (usually known as the 'Soldier's Chorus' Glory and love to the men of old.' It has been set, in this edition, for full choir. Mephistopheles, the evil genius, in a spirit of raillery, and exultant that his plans are working to . . . . The Price: Faust, repentant, desires to do justice to Margarita and again be her lover. Margarita is almost demented at the loss of her brother. Mephistopheles not to be cheated, thwarts the good impulse of Faust and demands his price. He also endeavors to make Margarita despair, but owing to the simple faith of the . . . . The End. A Question You give you name, your time, your pelf To ease your woe: But what do you give of your own self To pay the debt you owe? You open a Home for helpless ones, And you shut them in with care; Of what think you is their share? You talk and you write; you organise; All this, we know, is true; But how do you spread the spark divine, The deep-down soul of you? -A Simkins. Benevolent Asylum Appeal. The Committee of Management directing the works of the Asylum desire to bring before an always generous public the claims of the Instruction for financial support. The Appeal for 5000 pounds has been launched in the full belief that the case is a good one, and in the confident hope that it will be successful. The work carried on by the Asylum covers a big field, extending as it does from Swan Hill in the north and Melbourne in the south. Inmates from all parts of the State are given a comfortable home, and properly cared for in the eventide of their lives. There are at present in the Asylum 164 old men and women. In addition to this work the Committee thoroughly investigate and dispense relief in food to from 150 to 200 adults and from 300 to 400 children each week, and also issues a large number of blankets, boots and clothing garments to necessitous applicants. The recipients of this relief are principally widow and their little ones, and the wives and children who are dependents of miners suffering from the dread Miners' Complaint. The Committee in organizing this branch of its charity work, has, to a great extent, prevented a large amount of waste, through overlapping and duplication of effort. It now appeals to the public for the above amount in order that be may still be able to continue charity work among the poor and necessitous of Bendigo and District. 'Organized Charity is Love with Judgment.'Cambridge Press Printprogram, theatre, town hall, bendigo -
 Eltham District Historical Society Inc
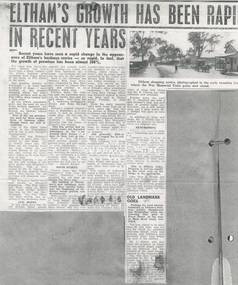
Document - Newspaper article, Eltham's growth has been rapid in recent years, c.1960
ELTHAM’S GROWTH HAS BEEN RAPID IN RECENT YEARS Unknown local paper c.1960s Recent years have seen a rapid change in the appearance of Eltham’s business centre - so rapid, in fact, that the growth of premises has been almost 300%. For more than thirty-five years Eltham had little more than a dozen traders - the town's business area spreading from Pryor Street in the north, to Pitt Street in the south. The greatest density of businesses - no more than a handful of shops - were situated in the present shopping centre but other essential services such as the Post Office, were located half a mile away. As the town's population grew and the need for more shops became apparent, the growth was centralised around the railway station and Shire hall. Few of the old premises are used for their original form of business today, though many are still in existence. One of the oldest (seen clearly in the illustration) still in use is now Ferrari's Greengrocery. This shop was Eltham's butchery in early days, conducted by Jim Ryan. Up to twenty years ago, Mr. Ryan ran his business from the shop. whilst his son toured Eltham in his horse and cart, cutting his customers' orders as he went from door to door. Another business - one of the few still trading in the same goods-was Burgoyne's Hardware. This is now owned by Mr. R. Clinton, a new shop has recently been added and shortly the old premises will disappear completely. The Burgoyne family were well known to Eltham's population. The Post Office and Store (then in Main Road, near Bridge Street) was run by Mr. and Mrs. Burgoyne. The Post Office was later moved, and attached to the hardware store. OLD HOTEL In this same area was the old Eltham Hotel, almost opposite the present hotel. The building still stands, but has been converted into a house. The hitching rail can still be seen by the roadside. Back in the township was Barber's Blue Gum store, later conducted by Mrs. Burges (mother of Garnet Burges) and claimed to be Eltham's oldest shop. Further down the road, just past the hardware store, was the barber shop and billiard saloon. Next door was E. J. Andrew's news agency, library and State Savings Bank. Eltham's original chemist's shop, or dispensary as it was called, is now an electrical repair shop. On this side of the street too, was Mrs. Monteith - Draper. Mr Monteith was the owner of Eltham' s bus service. This bus service had no regular route, but deposited passengers at the point nearest their homes - a. door to door taxi service. Next to Mrs. Monteith stood another grocery - and general store, and next again, the local blacksmith. Another of Butcher Ryan's sons was Eltham's blacksmith and obviously an enterprising man he conducted a timber business next door to his smithy's shop. These two premises are still run by one man - Garnet Burges. BOOM STARTS Twenty years ago, when Thompson's took over Eltham's pharmacy they occupied the old shop adjoining the Shire hall. The building of Thompson's new premises, from which· they operate today, was the beginning of Eltham's recent growth and development. With another grocery store and a bakery at the corner of York Street, a butcher near Franklin Street, a cobbler's shop opposite the State School (did you ever wonder what that-little building attached to one of Eltham's oldest houses had been?), and an estate agency conducted by Mr. Clark, now Eltham Real Estate - only one trader remained - and today, still carries on, the only original owner of one of Eltham's .oldest established businesses - Mr. Dave Lyon, of Lyon Bros. Garage, which was formerly located in what was later used as Chenowyth's Foundry in Main Road. From the early twenties until little more than six or seven years ago that was the picture of Eltham. Some businesses had changed hands - many years before Mr. C. Rains had acquired Andrew's news agency, Mrs. Monteith's drapery had become Mrs. R. Smith's home-made cake shop, to change again and again to many other types of business. But generally, Eltham was unchanged, for nearly thirty years. Then suddenly new shops mushroomed. The new news agency and drapery, the chemist and adjoining shops, a new butcher, a green grocer and several more. POPULATION DOUBLED In the space of a few years, fifteen new shops, two banks, a restaurant and a post office were built at Eltham. New types of businesses found a ready market in an area which was quickly almost doubling its population. A little over twelve months ago, another wave of progress hit Eltham. Since then eight more shops have been built - a cake shop and fish shop in Dalton [sic – Dudley] Street - for building areas are unprocurable in the Main Street shopping centre now – have been built by Mr. D. Kimball; a new ladies’ and children’s wear shop has been opened by Rains; Eltham Dry Cleaners have another of these new shops, and Mr. R. Clinton has built elaborate new premises. Further down the road, Mr. C. Campbell has built a new butcher's shop, and next door, at present under construction, are a self service store and a shop which Mr. J. Hodges will open on completion. In addition to these new shops, Mr. J. Millett has extended his grocery to almost twice its original size. FLOURISHING Outside the central area, other businesses are flourishing. Latimer's felt factory is being developed in a picturesque rustic setting; P. J. Timber and Trading Company have recently completed a large showroom and timber yard, and in the town itself Nicholson and Merritt are now completing the extension of their foot wear factory to double its former area. This is Eltham today. Progress is moving rapidly in this rural area on the fringe of the metropolis. Less than a decade has seen vast development. The years to complete that span of time will see even greater changes and greater prosperity in this heart: of the Diamond Valley. OLD LANDMARK GOES Perhaps the most famous landmark in Eltham's' business section disappeared last Wednesday when the towering blue gum in Pryor Street at the rear of Main Road shops was felled. The tree, stated to be more than 80 feet high, was the one for which the adjoining café was named, when that business was Eltham’s only provision store, long before the turn of the century. Mr. J. Millett, who now owns the property on which the tree stood, deeply regretted its removal, but was mindful of the need for expansion in the business area. The "Old Blue Gum" was removed by Mr. A. Wilson, expert tree feller, from Heidelberg. Its proportions might be assessed by these facts – it took a gang of experienced men two days to completely fell and clear the tree, and, falling sections being brought down by cable tipped electricity wires on the opposite side of Pryor Street.andrew's news agency, bakery, barber shop, barber's blue gum store, billiard saloon, blacksmith, blue gum, burgoyne's hardware, butcher, cake shop, chemist's shop, chenowyth's foundry, cobbler's shop, dave lyon, dispensary, draper shop. mr monteith, dudley street, e. j. andrew's news agency, electrical repair shop, eltham bus service, eltham butchery, eltham dry cleaners, eltham hotel, eltham railway station, eltham real estate, eltham shire hall, eltham shopping centre, eltham shops, eltham town centre, estate agency, expert tree feller, ferrari's greengrocery, fish shop, foot wear factory, franklin street, garnet burges, general store, grocery, heidelberg, horace clark, jim ryan, ladies’ and children’s wear shop, latimer's felt factory, library, lyon bros. garage, main road, mr. a. wilson, mr. c. campbell, mr. c. rains, mr. d. kimball, mr. j. hodges, mr. j. millett, mr. r. clinton, mrs. burges, mrs. monteith, mrs. monteith's drapery, mrs. r. smith's home-made cake shop, nicholson and merritt, p. j. timber and trading company, pitt street, post office, pryor street, self service store, shopping centre, state savings bank, taxi service, thompson's pharmacy, york street -
 Flagstaff Hill Maritime Museum and Village
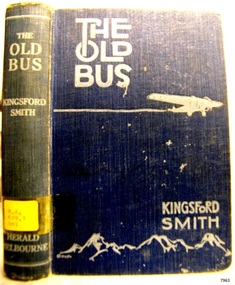
Book, The Old Bus
Sir Charles Edward Kingsford Smith is a famous Australian, well known in civil aviation history for his courageous endeavours in flight. He broken many flight records for long distance and time travelled and he was also a war hero in World War 1. He has been referred to as being “known to millions of Australians as “Smithy” … he was one of Australia’s true twentieth-century legends”. In honour of his place amongst the world’s famous pioneers his image is featured on Australia’s $20 note, Sydney airport is named after him, there is a memorial to Kingsford Smith, Taylor and Ulm at the Anderson Park, also in Sydney and his plane “Southern Cross” is on view at Brisbane Airport. Kingsford Smith wrote ‘The Old Bus’ (1932) and he and Ulm were co-authors of ‘Story of 'Southern Cross' Trans-Pacific Flight’ (1928). His also wrote a book about his own life ‘My Flying Life’ which was published after his death in 1937. and the story of his life was filmed in Australia in 1946. A BRIEF HISTORY OF SIR CHARLES EDWARD KINGSFORD SMITH (1897 – 1935) … Kingsford Smith was born 9th February 1897 in Brisbane, Queensland, Australia. His parents were William Charles Smith and Catherine Mary, nee Kingsford. His mother’s maiden name of “Kingsford” was added to the family name when they spent time in Canada from around 1903 to 1907, after which they returned to Sydney, Australia. In 1915 Kingsford Smith enlisted in Australian Imperial Force. He served in 4th Signal Troop, 2nd Division Signal Company at Gallipoli Peninsular as a ‘sapper’ or combat engineer and later in Egypt and in France as a dispatch rider. In 1916 Kingsford Smith was transferred to the Australian Flying Corps as a sergeant. He was discharged after training in England and commissioned as a second lieutenant in the Royal Flying Corps. He was appointed fling officer and soon joined the 23rd Squadron in France. He brought down four machines in his first month there and also did invaluable work attacking enemy targets. He was wounded and shot down and later awarded the Military Cross ‘for conspicuous gallantry and devotion to duty’. He was promoted to lieutenant in 1918 and served as a Flying Instructor with the R.F.C. Kingsford Smith was not allowed to participate in the 1919 England to Australia air race because of assumed lack of navigational experience. He and his pilot friend Cyril Maddocks formed a business and flew joy-flights in both England and America. In America he did some stunt flying with a Flying Circus. Kingsford Smith returned to Australia in 1921 and found employment as a pilot. He soon realised the value of air transport in such a vast country. He formed a partnership with pilot Keith Anderson in 1924 and they purchased two Bristol Tourer biplanes. Their business broadened to include Charles Ulm and became the Interstate Flying services in Sydney. Together they performed important ‘demonstration’ flights including a flight around Australia in 10 days and 5 hours using very limited navigational equipment. Kingsford Smith immediately started to search for support to do a trans-Pacific flight. This support came from the New South Wales government, Sidney Myer and G. Allan Hancock, an American oil magnate. On 31st May 1928 Kingsford Smith, Charles Ulm and two American crewmen, Harry Lyan and Jim Warner, took off from Oakland, California and flew to Brisbane via Hawaii and Suva. This historic flight took 83 hours and 38 minutes. Their Fokker plane had three engines and was named the “Southern Cross”. This amazing achievement resulted in huge financial subscriptions. Kingsford Smith was awarded the Air Force Cross and appointed as honorary squadron leader, Royal Australian Air Force. Kingsford Smith flew his Southern Cross plane from Point Cook in Victoria to Perth nonstop. Then in September – October 1928, with Charles Ulm and an Australian crew, he piloted the Southern Cross from Sidney to Christchurch New Zealand. This flight showed that was possible for regular passenger and mail services across the Tasman Sea. Kingsford Smith flew his plane to England to an order for four aircraft, planning to use them for an inter-capital air service in Australia. Sadly on 1st April 1929 he was forced to land, having lost radio contact with the ground and having run into bad weather over north – west Australia. Keith Anderson and Robert Hitchcock both perished before the search party reached them. Once official enquiries were completed the flight to England continued in June and was completed in record time of 12 days and 18 hours. In January 1930 Kingsford Smith piloted the “Southern Cloud”, one of the new Avro Ten planes, on the first flight of his airline, the Australian National Airways, from Sydney to Melbourne. The “Southern Cross” was overhauled in Holland by the Fokker Aircraft Co. and in June 1930 Kingsford Smith achieved an east-west crossing of the Atlantic from Ireland to Newfoundland in 31.5 hours. Kingsford Smith returned to England and took delivery of an Avro Avian biplane that he named the “Southern Cross Junior” and flew solo from England to Darwin, Australia. This record breaking flight took less than 10 days. He beat four other planes that had left England before him and he was 5.5 days faster than Hinkler. Sadly Kingsford Smith’s “Southern Cloud” was lost during a flight from Sydney to Melbourne in 1931 with no surviving crew or passengers; in 1958 the wreckage was discovered in the Snowy Mountains. Later that year Kingsford Smith flew his “Southern Cloud” from Australia to Timor, collecting mail from a damaged Imperial Airways plane in Timor. Other flights followed. Kingsford Smith was knighted in 1932 for his services in Aviation. He returned to selling joy flights then established the Kingsford Smith Air Service, a flying training school in Sydney. In 1933 Kingsford Smith flew the amazing record flight in “Miss Southern Cross” – a Percival Gull - from London to Wyndham in Western Australia in just over ten days. The Australian Commonwealth then gave Kingsford Smith a large grant and he was also appointed as aviation consultant to Vacuum Oil Co. Another flying record was made when Kingsford Smith and Sir P.G. Taylor flow “Lady Southern Cross” from Brisbane to San Francisco in order to sell her there; the west-east-trans-Pacific flight made aviation history. They returned to Australia to make an attempt at the trans-Tasman flight but their attempt failed due to engine failure; they managed to get back to Sydney safely, minus most of their cargo. Kingsford Smith had his unsold “Lady Southern Cross” shipped back to England, from where he and J. T. Pethybridge in the “Lady Southern Cross” attempted another record breaking flight from England The Old Bus Author: Charles Kingsford Smith Publisher: Distibuted by Herald Feature Service Date; 1932Label on spine cover with typed text RA 629.1309 KIN flagstaff hill, warrnambool, shipwrecked coast, flagstaff hill maritime museum, maritime museum, shipwreck coast, flagstaff hill maritime village, great ocean road, the old bus, charles kingsford smith -
 Flagstaff Hill Maritime Museum and Village
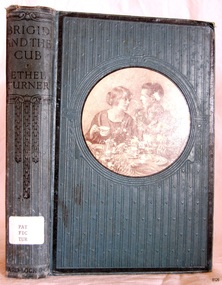
Book, Brigid and The Cub
This item is from the ‘Pattison Collection’, a collection of books and records that was originally owned by the Warrnambool Mechanics’ Institute, which was founded in Warrnambool in 1853. By 1886 the Warrnambool Mechanics’ Institute (WMI) had grown to have a Library, Museum and Fine Arts Gallery, with a collection of “… choice productions of art, and valuable specimens in almost every branch and many wonderful national curiosities are now to be seen there, including historic relics of the town and district.” It later included a School of Design. Although it was very well patronised, the lack of financial support led the WMI in 1911 to ask the City Council to take it over. In 1935 Ralph Pattison was appointed as City Librarian to establish and organise the Warrnambool Library as it was then called. When the WMI building was pulled down in 1963 a new civic building was erected on the site and the new Warrnambool Library, on behalf of the City Council, took over all the holdings of the WMI. At this time some of the items were separated and identified as the ‘Pattison Collection’, named after Ralph Pattison. Eventually the components of the WMI were distributed from the Warrnambool Library to various places, including the Art Gallery, Historical Society and Flagstaff Hill. Later some were even distributed to other regional branches of Corangamite Regional Library and passed to and fro. It is difficult now to trace just where all of the items have ended up. The books at Flagstaff Hill Maritime Village generally display stamps and markings from Pattison as well as a variety of other institutions including the Mechanics’ Institute itself. RALPH ERIC PATTISON Ralph Eric Pattison was born in Rockhampton, Queensland, in 1891. He married Maude Swan from Warrnambool in 1920 and they set up home in Warrnambool. In 1935 Pattison accepted a position as City Librarian for the Warrnambool City Council. His huge challenge was to make a functional library within two rooms of the Mechanics’ Institute. He tirelessly cleaned, cleared and sorted a disarrayed collection of old books, jars of preserved specimens and other items reserved for exhibition in the city’s museum. He developed and updated the library with a wide variety of books for all tastes, including reference books for students; a difficult task to fulfil during the years following the Depression. He converted all of the lower area of the building into a library, reference room and reading room for members and the public. The books were sorted and stored using a cataloguing and card index system that he had developed himself. He also prepared the upper floor of the building and established the Art Gallery and later the Museum, a place to exhibit the many old relics that had been stored for years for this purpose. One of the treasures he found was a beautiful ancient clock, which he repaired, restored and enjoyed using in his office during the years of his service there. Ralph Pattison was described as “a meticulous gentleman whose punctuality, floorless courtesy and distinctive neat dress were hallmarks of his character, and ‘his’ clock controlled his daily routine, and his opening and closing of the library’s large heavy doors to the minute.” Pattison took leave during 1942 to 1945 to serve in the Royal Australian Navy, Volunteer Reserve as Lieutenant. A few years later he converted one of the Museum’s rooms into a Children’s Library, stocking it with suitable books for the younger generation. This was an instant success. In the 1950’s he had the honour of being appointed to the Victorian Library Board and received more inspiration from the monthly conferences in Melbourne. He was sadly retired in 1959 after over 23 years of service, due to the fact that he had gone over the working age of council officers. However he continued to take a very keen interest in the continual development of the Library until his death in 1969. WARRNAMBOOL'S MECHANICS' INSTITUTE Warrnambool's Mechanics' Institute (or Institution as it was sometimes called) was one of the earliest in Victoria. On 17th October 1853 a meeting was held where it was resolved to request the Lieutenant Governor of the Colony to grant land for the erection of a Mechanics' Institutes building. A committee was formed at the meeting and Richard Osburne chaired the first meeting of this committee. The land on the North West corner of Banyan and Merri Streets was granted but there were no funds to erect the building. The Formal Rights of the Warrnambool Mechanics' Institute's encompassed its aims and these were officially adopted in1859; "This Institution has for its object the diffusion of literary, scientific, and other useful knowledge amongst its members, excluding all controversial subjects, religious or political. These objects are sought to be obtained by means of a circulating library, a reading room, the establishment of classes, debates, and the occasional delivery of lectures on natural and experimental philosophy, mechanics, astronomy, chemistry, natural history, literature, and the useful and ornamental arts, particularly those which have a more immediate reference to the colony." The Warrnambool Mechanics' Institute opened its first reading room in November1884 in the National School building at the corner of Banyan and Timor Streets. The Institute was funded by member subscription, payable on a quarterly, half yearly or yearly basis. Samuel Hannaford, the Manager of the Warrnambool Bank of Australasia, was the first Honorary Secretary of the Mechanics' Institutes, and an early President and Vice-President. He also gave several of the early lectures in the Reading Room. Another early Secretary, Librarian and lecturer was Marmaduke Fisher, the teacher at the National School. Lecture topics included The Poets and Poetry of Ireland', 'The Birth and Development of the Earth', 'The Vertebrae - with Remarks on the pleasures resulting from the study of Natural History' and 'Architecture'. In 1856 the Reading Room was moved to James Hider's shop in Timor Street, and by 1864 it was located in the bookshop of Davies and Read. In the 1860's the Mechanics' Institute struggled as membership waned but in 1866, after a series of fund raising efforts, the committee was able to purchase land in Liebig Street, on a site then called Market Square, between the weighbridge and the fire station. A Mechanics' Institute building was opened at this site in August 1871. The following year four more rooms were added to the main Reading Room and in 1873 the Artisan School of Design was incorporated into the Institute. The same year Joseph Archibald established a Museum; however it deteriorated when he was transferred to Bendigo in 1877. In 1880, with Archibald's return to Warrnambool, the Museum was re-established, and in 1885 a new building was built at the back of the Institute to accommodate the re-created School of Design, the Art Gallery and the Museum. In 1887 the Museum section was moved to the former court house in Timor Street (for some time the walls of the building formed part of the TAFE cafeteria but all is now demolished)). In 1911 the Museum was transferred back to the original building and the management of the Mechanics' Institute was handed over to the Warrnambool City Council. The Museum and Art Gallery became one and housed many fine works of art, and the Library continued to grow. The building was well patronised, with records showing that at the beginning of the 20th century there were between 500 and 800 visitors. During World War One the monthly figures were in the thousands, with 3,400 people visiting in January 1915. The Museum was a much loved Institution in Warrnambool until the contents of the Museum and Art Gallery were removed to make room for the Warrnambool City Council Engineers' Department. The contents were stored but many of the items were scattered or lost. When the original building was demolished the site became occupied by the Civic Centre, which included the new City Library. (The library was temporarily located in the old Palais building in Koroit Street.) In the process of reorganisation the Collection was distributed amongst the community groups: -The new City Library took some of the historic books and some important documents, historic photographs and newspapers. -The Art Gallery kept the 19th Century art collection and some of the artefacts from the museum. -The Historic Society has some items -The State Museum has some items -Some items were destroyed -Flagstaff Hill Maritime Village has old newspapers, Government Gazettes, most of the Mechanics' Institute Library, ledgers and documents connected to the Mechanics' Institute Library, some framed and unframed art works and some photographs. The Warrnambool Mechanics' Institute Library book collection is deemed to be of great importance because it is one of the few collections in an almost intact state, and many of the books are now very rare and of great value. WARRNAMBOOL PUBLIC LIBRARY The Warrnambool Mechanics’ Institute (WMI) was formed by a voluntary community group in 1863, within six years of Warrnambool’s beginnings, and its Reading Room opened in 1854. The WMI operated until 1963, at which time it was one of the oldest Mechanics’ Institutes in Victoria. Mechanics’ Institutes offered important services to the public including libraries, reading rooms and places to display and store collections of all sorts such as curiosities and local historical relics. In 1886 a Museum and Fine Arts Gallery were added to the WMI and by the beginning of the 20th century there was also a billiards room and a School of Art. By this time all Mechanics’ Institutes in country Victoria had museums attached. Over the years the Warrnambool Mechanics’ Institute Library was also known as the Warrnambool Public Library the Warrnambool Library and the Free Library. Early funding from the government was for the “Free Library”. The inscription in a book “Science of Man” was for the “Warrnambool Public Library”, donated by Joseph Archibald in 1899. Another inscription in the book “Catalogue of Plants Under Cultivation in the Melbourne Botanic Gardens 1 & 2, 1883” was presented to the “Warrnambool Library” and signed by the author W.R. Guilfoyle. In 1903 the Warrnambool Public Library decided to add a Juvenile Department to library and stock it with hundreds of books suitable for youth. In 1905 the Public Library committee decided to update the collection of books and added 100 new novels plus arrangements for the latest novels to be included as soon as they were available in Victoria. In July 1911 the Warrnambool Council took over the management of the Public Library, Art Gallery, Museum and Mechanics’ Institute and planned to double the size of the then-current building. In 1953, when Mr. R. Pattison was Public Librarian, the Warrnambool Public Library’s senior section 10,000 of the 13,000 books were fiction. The children’s section offered an additional 3,400 books. The library had the equivalent of one book per head of population and served around 33 percent of the reading population. The collection of books was made up of around 60 percent reference and 40 percent fiction. The library was lending 400 books per day. In 1963 the Warrnambool City Council allocated the site of the Mechanics’ Institute building, which included the Public Library, Museum and Art Gallery, for the new Municipal Offices and the Collections were dispersed until 1971. The Warrnambool Library took over the Mechanics’ Institute Library’s holdings on behalf of the Warrnambool City Council. Since the closure of the Warrnambool Mechanics’ Institute the exact location and composition of the original WMI books and items has become unclear. Other materials have been added to the collection, including items from Terang MI, Warrnambool Court House and Customs House. Many of the books have been identified as the Pattison Collection, named after the Librarian who catalogued and numbered the books during his time as Warrnambool Public Librarian in the time before the Mechanics’ Institute closed. It seems that when Warrnambool became part of the Corangamite Regional Library some of the books and materials went to its head office in Colac and then back to Warrnambool where they were stored at the Art Gallery for quite some time. Some then went to the Warrnambool Historical Society, some stayed at the Art Gallery and some were moved to Flagstaff Hill Maritime Village. The various stamps and labels on the books held at Flagstaff Hill show the variety of the collection’s distribution and origin. The books in the collection at Flagstaff Hill Maritime Village date from the 1850’s to the late 1950’s and include rare and valuable volumes. Many of the books are part of the “Pattison Collection” after the Warrnambool’s Public Librarian, Mr. R. Pattison. Ethel Mary Turner Ethel Turner (25th January 1872 – 8th April 1958) was an English-born Australian novelist and children's literature writer. She was born Ethel Mary Burwell in Doncaster in England. Her father died when she was two, leaving her mother Sarah Jane Burwell with two daughters (Ethel and Lillian). A year later, Ethel’s mother married Henry Turner, who was 20 years older and had six children of his own. Sarah Jane and Henry had a daughter, Rose. Henry Turner died suddenly, leaving Sarah Jane with nine children and little income. In 1879 Sarah Jane moved to Australia with Ethel, Lillian, and Rose; within the next two years she married Charles Cope and gave birth to his son Rex. Ethel Turner was educated at Paddington, New South Wales Public School and Sydney Girls High School she was one of the school's original thirty-seven pupils. Ethel started her writing career at eighteen, founding the Parthenon, a journal for young people, with her sister Lillian. Writing as “Dame Durden”, she wrote children's columns for the Illustrated Sydney News and later for the Australian Town and Country Journal. In 1891 the family moved to Woodlands, a large house in Lindfield, now Killara, which was then out in the country. Woodlands still stands today in Werona Avenue and is where she wrote “Seven Little Australians”. In 1896 Ethel married Herbert Curlewis, a lawyer. After living in Mosman, they built their own house overlooking Middle Harbour. The house, Avenel, is where Ethel Turner spent the rest of her years. She survived her daughter Jean Curlewis, who died of tuberculosis, by 28 years. Jean was also a writer of children's books, although not as popular as her mother. Jean's works include “The Ship That Never Set Sail”, “Drowning Maze”, and “Beach Beyond (1923)”. Her son Adrian, was a Barrister, Captain in WW2 and a Changi and Thai-Burma Railway POW and later a Judge. Ethel Turner died at Mosman on 8 April 1958 at 85. She is buried at Macquarie Park Her best-known work is her first novel, Seven Little Australians (1894), which is widely considered a classic of Australian children's literature and was an instant hit both in Australia and overseas. It is about a family of seven children growing up in Australia. The book, together with its sequels “The Family at Misrule” (1895) and “Little Mother Meg” (1902) that deal with the lives of the Wolcott family, particularly with its seven mischievous children in 1880s Australia. A companion to "Seven Little Australians", “Judy and Punch” was published in 1928. Like her stepfather, the character of Captain Woollcott was a widower with six children. The book was made into a feature film in Australia in 1939 and a UK television series in 1953. A 10-episode television series was made in 1973 by the Australian Broadcasting Corporation. Turner published a number of other books for children, short stories and poems. “Three Little Maids” (1900) is a strongly autobiographical novel about her family's migration from England to Sydney, Australia. Turner wrote more than forty novels. Some were about the mischievous Wolcott’s. Others were serialized, like her books on "the Cub", and some were stand-alone. The children she wrote about were all adventurous and independent. They frequently got themselves into sticky situations and got themselves out of them with very little to no adult help. Turner was awarded a number of prestigious literary awards and could be considered one of Australia's best-loved authors. She is listed on The Australian Women's Register. The Ethel Turner Prize for Young People's Literature is given annually under the auspices of the New South Wales Premier's Literary Awards. Ref Ethel Mary Turner, Biography: https://en.wikipedia.org/wiki/Ethel_Turner The Pattison Collection, along with other items at Flagstaff Hill Maritime Village, was originally part of the Warrnambool Mechanics' Institute’s collection. The Warrnambool Mechanics’ Institute Collection is primarily significant in its totality, rather than for the individual objects it contains. Its contents are highly representative of the development of Mechanics' Institute libraries across Australia, particularly Victoria. A diversity of publications and themes has been amassed, and these provide clues to our understanding of the nature of and changes in the reading habits of Victorians from the 1850s to the middle of the 20th century. The collection also highlights the Warrnambool community’s commitment to the Mechanics’ Institute, reading, literacy and learning in the regions, and proves that access to knowledge was not impeded by distance. These items help to provide a more complete picture of our community’s ideals and aspirations. The Warrnambool Mechanics Institute book collection has historical and social significance for its strong association with the Mechanics Institute movement and the important role it played in the intellectual, cultural and social development of people throughout the latter part of the nineteenth century and the early twentieth century. The collection of books is a rare example of an early lending library and its significance is enhanced by the survival of an original collection of many volumes. The Warrnambool Mechanics' Institute’s publication collection is of both local and state significance. Brigid and The Cub Author: Ethel Turner Publisher: Ward, Lock & Co Date: 1919Label on spine cover with typed text PAT FIC TUR Pastedown front endpaper has sticker from Warrnambool Public Library covered by a sticker from Corangamite Regional Library Service Front loose endpaper has a stamp from Warrnambool Mechanics Institutewarrnambool, shipwrecked-coast, flagstaff-hill, flagstaff-hill-maritime-museum, maritime-museum, shipwreck-coast, flagstaff-hill-maritime-village, shipwrecked-artefact, book, pattison collection, warrnambool library, warrnambool mechanics’ institute, ralph eric pattison, corangamite regional library service, warrnambool city librarian, mechanics’ institute library, victorian library board, warrnambool books and records, warrnambool children’s library, great ocean road, brigid and the cub, ethel turner -
 Melbourne Tram Museum
Album - Charles Craig - part 1 of 2, 1950s to 1970s
Photo - see pdf file for further information. Number Brief Description CC1 S178 at Elsternwick level crossing track works CC2 Building East Preston Depot 1955 CC3 Camberwell depot – post WW2 – lots of trams and a black cat CC4 W2 584 and SW6 958 northbound – Chapel St and Brighton Road CC5 W2 357 – southbound, Chapel St Brighton Road CC6 Pascoe Vale Road, Raceday working – note the signal CC7 The Preston Workshops - The Argus, post WW2, 223, 647 et al CC8 923 or is it 922 being built at Preston – The Argus photo - CC8A 832 being positioned onto trucks at Preston after an overhaul – Argus Photo – see also CC306 CC9 Footscray depot` CC10 W5 797 in St Kilda Road during track works – 1950s CC11 W2 457 at Kew Post Office CC12 Wellington Parade – W2 432, 492 and 337 – special event CC13 Swan St line up of trams – football? Or other special event – Sinclair’s bus on the right side. CC14 W2 630 being washed at a depot – The Argus photo CC15 Royal Park line at Flemington Road – W2 355 and W5 786 CC16 Nicholson St track construction from a tram cab CC17 T181 on tour at Gordon St CC18 T181 on Maribyrnong Bridge CC19 Ditto at River St just off bridge CC20 As for CC18 CC21 At Raleigh Rd CC22 T181 at Footscray depot CC23 Track construction, Nicholson, just north of Gertrude CC24 Commissioning overhead Bourke St tram 988 CC25 Queens Parade – 997 and 994 CC26 Swapping trolley wheel to skid – commissioning CC27 Track construction in Gertrude St CC28 985 in Queens Parade running special CC29 997 in Queens Parade CC30 1033 at North Fitzroy – AETA Special CC31 Bourke St at Elizabeth St – has passengers on board CC32 W6 985, 996 Queens Parade, Mk 3 bus 333 CC33 As above CC34 Showing construction at Nicholson & Gertrude – Bourke St CC35 W2 223 on Burnley temporary bridge – VR track expansion CC36 W5 823 – ditto CC37 Tram on old bridge prior to removal CC38 W2 433 on temporary bridge with new bridge beams and old track CC39 Looking down showing temporary single track – Swan St CC40 Tait train passing under tram bridge CC41 SW6 on single line – off loading CC42 W2 547 at City Road Junction CC43 City Road Jtn – 1969 – 596 and 771 CC44 City Road Jtn – 1969 – 596 and 771 (same as CC45 438 in Flinders St CC46 355 somewhere CC47 552 somewhere CC47A 364 at Preston Workshops? CC48 W2 334 on Traverser – Preston Workshops CC49 Wellington pade – large line up of trams, c1950 925, and 611 CC50 W2 493 Franklin st – advertising for Savings Certificates CC51 Possibly 551 with advertising for fund raising for Blind institute CC52 249 at Hawthorn – Riversdale Junction – with a Tally Ho and Village Fair Aux. board CC53 MMTB Postcard of 511 CC54 Wattle Park terminus with Single line warning sign CC55 Wattle Park Duplication CC56 36 at Domain Junction – 833 CC57 36 at Domain Junction CC58 36 at Domain Junction with 810 and 833 CC59 36 in Swanston by Flinders St Station CC60 36 in Spencer St at A’Beckett CC61 36 crossing Collins St CC62 36 crossing Collins St CC63 36 northbound in St Kilda Road with Shrine in background CC64 36 northbound in Swanston St at Flinders St CC65 Postcard – Ballarat 36 in Domain Road CC66 Postcard - Stampshow – Hawthorn Horse tram CC67 Postcard - Stampshow – Peace cable tram CC68 Postcard - 1041 and cable car set 1 at Preston CC69 Postcard - Colins & Elizabeth – greetings from old Melbourne CC70 Postcard - Cable car set at Preston CC71 Postcard - Twentyman’s cable cars CC72 Postcard - Nu-color-vue – horse tram 256 CC73 Cable car set – Market & Flinders CC74 Cable trams at Twentymans’ in their shed CC75 Cable tram track at Bourke & Spencer prior to removal CC76 Cable tram bogie at Preston Workshops – used as a dolly CC77 Cable trams at Twentymans’ CC78 Postcard - Valentines – Bourke looking west from Swanston CC79 Postcard - Rose 3938 – Bourke at Swanston – the Leviathan building CC80 Postcard - Valentines – Elizabeth St looking south from Collins – No. 19 CC81 Postcard - Rose P4765 – Bourke St Melbourne CC82 Postcard - Rose 4090 – cable tram passing Parliament house CC83 Postcard - Valentines – GPO Elizabeth St CC84 Interior of cable trailer with clothing on a set CC85 Elizabeth St looking north CC86 Cigarette card - Collins St No. 41- WD HO Wills CC87 Postcard - Rialto building with cable set CC88 Postcard - Valentines - Swanston at Flinders looking north CC89 CC90 Q 150 Hanna St – dated on rear CC91 176 turning – photo ex Alan Jungworth CC92 161 on Princes Bridge – minimum fare 4d sign and Inspector CC93 459 at Point Ormond CC94 158 at Gordon St – side on view CC95 X 217 in Swanston St CC96 X 217 in Swanston St with an East Brighton destination CC97 T177 CC98 T177 Peel St – no destination roll – being transferred? CC99 X1 462 in Glenhuntly Road to Point Ormond CC100 X1 462 in Glenhuntly Road to Elsternwick Rly Station CC101 X1 462 in Glenhuntly Road to Point Ormond CC102 Q 150 Hanna St CC103 190 at Camberwell Depot CC104 T182 at Footscray CC105 X1 466 and W2 at Footscray CC106 190 at Camberwell Depot CC107 X1 467 Barkly St Footscray CC108 X2 679 turning into William St from La Trobe St CC109 X2 677 Glenhuntly Road with Point Ormond Destination CC110 Postcard T180 CC111 Postcard format – X1 467 on a truck – see also CC178 CC112 Postcard format – X1 467 at Wantirna South CC113 Q200 and SW6 896 at Thornbury – has labels on rear CC114 T177, Ballarat Road – has labels on rear CC115 T178 at Point Ormond CC116 Postcard X1 465 and 466 CC117 Postcard – X2 676 CC118 Postcard – TMSV X2 217 CC119 810 on temporary bridging – 24-12-67 CC120 W2 575 – Queens Parade junction in, still temporary bridging, substation under construction CC121 Forming Queens Parade Junction base slab CC122 W2 596 prior to tramway works – all tracks still in position CC123 It’s a mass of reinforcing – bridging being formed CC124 Looking north with substation being built CC125 Looking east with some rather tight curves, Wellington St still in use CC126 SW6 958 ex Wellington St with all tracks and signal box and buildings. CC127 Victoria Pde at Gisborne looking east – at least 4 cars CC128 SW6 893? With dash canopy lights and SW6 862 and a man with a newspaper CC129 SW6 894 on the S curves, with tram in Wellington St CC130 Similar photo CC131 W2 564 turning into Wellington St – the concrete tracks are not that old CC132 W2 552 running out of Wellington St CC133 W5 732 from Fitzroy St into St Kilda Road with next iteration in position – very wonky CC134 W5 764 turning into Fitzroy St CC135 SW6 947 turning from Wellington St CC136 W2 586 running out of High St CC137 W2 500 turning into Wellington St CC138 W2 543 in Wellington St inbound CC139 L103 with St Kilda Junction destination, and a tower truck on right CC140 Workmen – new track in Queensway in use CC141 Ditto CC142 L103 in Queensway, and another car in bound CC143 Looking east along Wellington St which has been taken out of use. Also a MMTB Roller CC144 W5 824 and a W2 and all types of wobbly temporary track CC145 W2 354 to High St CC146 Sw6 947 on the S bends CC147 W2 500 looking north – tram on the S bends CC148 SW6 896 leaving the S bend CC149 W2 357 and a MMTB City bus with trees/gardens on the side CC150 W5 817 Elliot Ave – see also CC302 CC151 W2 552 – note the large trolley bridge CC152 W2 550 at depot or workshops CC153 1B truck CC154 SW2 432 CC155 W2 155 at Glenhuntly CC156 SW6 937 on AETA tour? CC157 X2 677 on Footscray service – Ballarat Rd? CC158 W2 641 – High St Kew? CC159 SW6 847 – Power St Hawthorn CC160 Simpson St – big line up CC161 W2 546 truck No. 1? CC162 W2s at Glenhuntly depot CC163 No. 15 truck under 899 CC164 206 and other junk at Preston Workshops CC165 W in Swanston St Melbourne – Rose series card CC166 Y1 613 Batman Ave?? or William St at Collins CC167 Tram plans CC168 X 217 Swanston St – see also 95 and 96 CC169 217 in Swanston St – same as 95 CC169A 192 in St Kilda Road at Princes bridge CC170 192 in St Kilda Road at Princes bridge CC171 Bendigo 3 arriving Malvern depot – being unloaded CC172 Ditto CC173 T180 at a depot CC174 X1 463 wheel set CC175 C30 – dog car side view – close up CC176 C30 dog car CC177 206 and 30 at Preston Workshops CC178 X1 467 on a truck – see CC111 also CC179 42 CC180 42 at a depot, no destination box CC181 W2 556 1A type truck CC182 Flinders St Station – Rose Series CC183 W7 1035 Spring – Nicholson St CC184 W7 1022 MMTB Post Card CC185 Adelaide 178 – has on rear – R. Lilburn 4/82 CC186 Adelaide 175 – has on rear – R. Lilburn 4/82 CC187 Y1 610 on AETA tour CC188 Y1 610 on AETA tour with large group – Point Ormond CC189 AETA display – has GH55-32 in pencil on rear CC190 AETA display – has GH55-29 in pencil on rear CC191 Y1 610 on AETA tour with large group – Point Ormond CC192 VR 53 at Footscray CC193 VR cars 40 and 34 at Elwood wash dock CC194 W7 1024 as the 1970 Christmas tram CC195 Geelong – loading a set of 22E trucks CC196 Geelong 10 and 23 running an AETA special CC197 Geelong – AETA special CC198 Geelong 7 at Junction CC199 Geelong 10, in the city CC200 Geelong 33 with Belmont destination CC201 Geelong 15 Eastern Park destination 29-3-1948 CC202 Geelong 23 at Railway Station – 29-3-1948 CC203 Geelong 23 at Railway Station – 29-3-1948 CC204 Geelong – loading a bogie tram CC205 Geelong – loading a bogie tram CC206 Geelong 40 – loaded on truck CC207 Geelong 40 – on jacks CC208 Geelong 40 on jacks – 19 behind CC209 Geelong 38 with two workers on either side CC210 – 214 Australian Historic Tramways stamp folder and set CC215 Bendigo 17 at depot – has dup JBS on rear CC216 Bendigo 20, 29 bogie and straight sill car at Charing Cross CC217 Bendigo one man bogie Pall Mall CC218 Bendigo – Bogie 23, other cars and welding truck at depot CC219 Bendigo 7 with Quarry Hill destination CC220 Bendigo 21 with Lake Weerona destination CC221 ESCo 18 Ballarat CC222 Ballarat bogie 22 on AETA special CC223 Ditto CC224 Ballarat 34 at Stones Corner – R Lilburn CC225 Ballarat 15 in Bridge St – R Lilburn CC226 Ballarat 40 at Gardens – R Lilburn CC227 Ballarat 37 running out of depot – R Lilburn CC228 Postcard – Valentines – Sturt St with loaded horse tram trailer CC229 AETA Geelong tram tour ticket – 29-3-1948 CC230 Postcard – Geelong – Valentine 2114 – T&G building CC231 Postcard – PMTT ! – High St Malvern CC232 Postcard – Empire – Glenferrie Road, Malvern at Wattletree Rd CC233 Postcard Y469, MMTB CC234 Postcard Z2 Spring St CC235 Postcard – Z1 MMTB CC236 Postcard – Stamp Show W1 431 CC237 Postcard – Stamp show B2005 CC238 Postcard – Stamp show W6 982 CC239 Postcard – Valentines 1264 – Johnstone Park with tram in distance CC240 Postcard – Rose 10711 – Swanston and Lonsdale – Hospital and W232 CC241 Postcard – Rose 4827 – Fitzroy St St Kilda W2 362 and 548 CC242 Postcard – Valentines – 939 – St Kilda War Memorial, W and a R? CC243 Postcard – Valentines – 572 – St Kilda War Memorial, W 413 and 140? CC244 Postcard – Valentines – 938 – Uper and Lower Esplanade – L 104 CC245 Postcard – St Kilda Rd at Princes Bridge Y1 and W CC246 Postcard – Biscay BG82 – W5 814 - CC247 Postcard – Biscay 796112 – Bourke St looking west CC248 Postcard – Biscay 796109 – Bourke St looking east CC249 Postcard – Biscay 2AUS58 – Z5 Bourke St CC250 Postcard – Biscay BG 249 – Swanston St CC251 Postcard – National View – St Kilda Rd – shrine and Prince Henrys W2 405 CC252 Postcard – Nu color vue – 11 ML 156 – St Kilda Rd CC253 Postcard – Nu color vue – 11 ML 153 – Swanston St CC254 Postcard – Nu Color vue – Collins St 442 CC255 Postcard – Pitt card – Adelaide – H 364 at Victoria St CC256 Postcard – SPER L/P 154 CC257 Postcard – BTMS – 550 CC258 Postcard – SPER – Brisbane 295 CC259 Adelaide 131 at Burnside – has R Lilburn on card, c1911 CC260 Adelaide 194 CC261 Adelaide 235, with two crew, The News photo CC262 Rockhampton, outside post office – has source of photo details CC263 Sydney – 2086 and 2062 arriving Circular Quay CC264 Sydney – P class – Pitt St? CC265 Sydney – 1610 at Circular Quay CC266 Brisbane 99 and 468 CC267 Sydney with bridge behind CC268 Steam tram Paramatta Park – 103 CC269 Sydney – Museum Station =- Elizabeth St CC270 Sydney – weed burner 137S at a loop Demonstrates the work of Charles Craig in photography and collection of prints.Assembled album in a black presentation folder of 270 photographs from the Charles Craig Collection - 86 sleeves - part 1 of 2. All photographs have been scanned and placed on the Museum's G drive. A list of all photographs with details where possible has been compiled. Victorian Provincial, Launceston, Hobart and Sydney tram photos have been transferred to other Museums, image files retained.melbourne, tramways, tramcars, trams, charles craig, st kilda junction, trackworks -
 Stawell Historical Society Inc
Photograph, Whitehall Property Greens Creek
Hutchings family 1. Wimmera River in flood below Whitehall running a banker c. 1920. Ted & Col Hutchings in foreground. 2. Wimmera River in flood looking downstream. No date but possibly same time as no. 1. from same place. 3. Looking over the Wimmera River to Island paddock towards Greens Creek 4. Wimmera River half a banker at Whitehall 5. Wimmera River in flood upstream from carpenter's shop looking towards engine house at Whitehall 5a. Wimmera River in flood. Left to right - blacksmith shop and carpenters' shop. 5b. Taken from the same spot with Emily & Ada Hole, E G (Ted) & Col Hutchings. Blacksmith shop & carpenters' shop, Whitehall. 5c. Wimmera River upstream from the carpenters' shop. Foreground is possibly Belladonna lilies which were all over the river bank in 1992. Whitehall. 5d. Looking downstream towards the loose boxes, Whitehall. 5e. Blacksmiths' shop and carpenters' shop from the pumping station. Wimmera River, Whitehall. 6. Wimmera River in flood at Whitehall. 7. Wimmera River half a banker in front of old hut at Whitehall. 8. Wimmera River Emily Hayes, Edward G (Ted) Hutchings & Colin J Hutchings. 9. Morrl-Morrl - Greens Creek Road opposite back paddock. Whitehall. Black Ford in distance. c. 1919 10. Whitehall woolshed north east aspect, Drive to the right of photo 11. Whitehall woolshed - north east aspect showing the drive to the right 11a. Whitehall woolshed - north aspect 11b. Same tree near woolshed 11c. Same tree again in centre, other trees came up after the 23 flood. Woolshed to the right out of photo. 12. Whitehall woolshed - south aspect, sheep entrance end 13. Whitehall. left to right, Stackyard, stables in the centre and the Wimmera River behind following the trees. 14. Whitehall horse paddock c. 1920. left to right, Machinery shed, stable in the centre. Homestead to the right in distance. There is no windmill. 15. Load of wool from Whitehall woolshed to right. 16. Whitehall c. 1920 before the windmill. left to right, garage and mens' hut. Wimmera river runs along the tree line. 16a. Stables, garage and mens' hut after the construction of the windmill. River behind. 17. Whitehall c. 1922. Note windmill addition. Garage to left, Mens' Hut to right. Jack Donnelly & Edward G (Ted) Hutchings with pet lambs. River behind trees. 18. Whitehall gardens. Summer house to the right, pine tree lined drive in the centre background. Ted & Col Hutchings on the lawn. C. 1920 19. Edward G. (Ted) & Colin J. Hutchings in Whitehall garden. Wimmera River in the background. The building behind the fence is the carpenters' shop which the family lived in while house was rebuilt after fire 15 Jan 1877 20. Whitehall c. 1920. left to right, cattle yard, killing house, Wimmera river behind the fence, and the loose box on the right. Black Orpington chooks in foreground. 21. Bay window (original blinds) in the master bedroom. Whitehall 20 Sep 1992 22. Master bedroom (original wallpaper) Joyce & Col Hutchings, Moyu, Ben & Rebecca Roe 20 Sep 1992 23. Col & Ted's bedroom (original) Marble mantlepiece had been removed. Whitehall. 20 Sep 1992 24. Whitehall kitchen. Large yellow meat oven to left of stove, bread oven far left, extreme right is oven where milk heated to skim cream. Chimney was a central one shared with meat oven. Bread oven chimney separate. 20 Sep 1992 25. Whitehall dairy, made of natural stone with dried brick corners. Entrance behind creeper which is over trellis. 20 Sep 1992. This building still remains in 1 Jun 2023 26. Inside charcoal lined meat cellar. Bottom right is concrete vat for pickling meat in brine. Top of brickwork slightly above ground level. Whitehall 20 Sep 1992 27. Fire foreground was stable flooring which was to left of photo. Machinery shed (thatch roof). 4 posts far left remains of cowshed. Large post in centre foreground is the gate post of corral. River to right. 20 Sep 1992 28. Whitehall machinery shed. Posts on far right are cow shed. Over the river is the island paddock. Wimmera river runs behind machinery shed. 20 Sep 1992 29. Posts of 10 sided corral. Killing house by side of gum tree in centre of photo on far side of corral. To left is one of the bales of the cowshed. Whitehall. 20 Sep 1992 29a. Similar photo in the 1920's. To the right is horsebreaking corral, then cow shed, loose box, haystacks and stable on left. Whitehall. 30. Dining room fire place put in the open fire of the mens' hut, only the chimney remains. To the left is the drive & river. Rebecca Roe, Col Hutchings granddaughter. 20 Sep 1992 30a. Looking down the Whitehall Drive. Mens' Hut (Jack Donnelly in doorway) and garage far left. 1920's 30b. The Drive, Whitehall taken from in front of the mens' hut. Wimmera River on the left. Gum tree on left still there 20 Sep 1992. 30c. Reverse from 30a. Whitehall drive from the front gate looking towards the mens' hut and garage. c. 1926 30d. Curly Donohue leaving for Warracknabeal. Ex mail contractor Omeo to Bright Victoria. C. 1926 30e. Looking down the drive towards front gate. Mens' hut on the right, river on the left. 31. Whitehall from the side. Building in centre behind David is separater room. 2 roomed hut to left of separater room and remains of mens' hut chimney. Photo 16 taken from similar spot. 20 Sep 1992 32. Benjamin Roe (Col Hutchings grandson) in the Carpenters' shop. The family lived in this building after the fire in the 1870's. Whitehall 20 Sep 1992 33. Ford across the Wimmera River at Whitehall (River abt. 5 feet higher than normal) 20 Sep 1992 33a. Wimmera River, Whitehall 34. Site of old bridge before Col Hutchings time. Tree in foreground to right still has bolt from bridge work protuding. A large post was in the centre of photo to make equal distance. 20 Sep 1992 35. Entrance to the old ford. Colin J Hutchings & his daughter, Moyu Roe. Wimmera River, Whitehall 20 Sep 1992 36. Summer house at Whitehall 20 Sep 1992 looking down to the orchard, dark green trees in distance old fruit trees. 36a. Edward & Colin Hutchings in front of the Summer house, Whitehall c. 1921 36b. Summer house looking towards front gate. Whitehall. 36c. Grey thrush in nest box which can be seen in previous photo with summer house in the background. Whitehall. 36d. Summer house from the orchard side. Whitehall. 37a. South side of Whitehall. First window Edith Sutherland's room, 2nd window, Ted & Col's room, bay window master bedroom 38. Taken in middle of front path looking towards front gate. Edith Sutherland in garden. Date palm in centre, cotton palm to left. Whitehall c. 1920's 38a. Garden at Whitehall taken from near the cotton palm. 39. Whitehall 20 Sep 1992 Bay window-master bed, small window to r. of bay-Colin Hutchings born in, front door, window to right-dining room, round the corner- drawing room, window on right, spare bed, verandah on left is spare bed. 39a. Whitehall c. 1920's Date palm on the right. 39b. Win, Colin T & Colin J Hutchings. Date palm in background. Whitehall 1943 39c. Edward George, Colin Thomas, Elizabeth Ambler & Colin James Hutchings wearing RAAF uniform. Date Palm in background. Whitehall c. 1943 39c. Front garden of Whitehall looking from the front right side of the house towards the drive & Wimmera River. Date palm on right, cotton palm on left 20 Sep 1992 40. Taken from bottom left corner of front garden looking towards the summer house. Cotton palm on right. River to the left. 41. Elizabeth A Hutchings beside master bedroom window. Whitehall c. 1920 42. Whitehall (photo of a painting by Wallace) owned by Colin T Hutchings 1982. 42a. Whitehall painting by Wallace after restoration now owned by Nick Hutchings 2021 42b. Whitehall c. 1923 42c. Taken from the side garden looking towards the right side of house. Front door is to the left out of photo. The cotton palm is to the left. c. 1923 43. Signpost showing Whitehall 20 Sep 1992, All ground up to the tree line behind the signpost was Whitehall property. 44. Colin T. Hutchings age 9 mths. Mar 1943 Whitehall 45. Colin James, Elizabeth Ambler & Edward George Hutchings. Front garden by the date palm, Whitehall c. 1939-40 45a. Colin James, Edward George, Edward Thomas Hutchings & E. Winifred May & Barney (dog) Whitehall. c. 1939-40. 45b. Colin James & Colin Thomas Hutchings during drought & World War ll c. 1944-45 in front of cotton palm, date palm to right. 46. Garden at Whitehall. Jack Donnelly on the hand mower. Cotton palm on left, date palm behind Jack and roof of carpenters shop to right. 47. Colin J Hutchings on tractor, E. Tom Hutchings behind. Whitehall, c. 1933 48. Jack Donnelly (Tad) & Colin J. Hutchings. Cotton palm to right. Whitehall c. 1917-18 49. Edward G (Ted) & Colin J Hutchings with cockatoo outside the dairy in rear garden. Whitehall c. 1923 50. Taken from the windmill looking across the roof of the mens' hut to the garden, orchard and drive in Winter time. House is behind the trees to right, Wimmera River to the left out of picture. Whitehall. 50a. Not labelled by Col Hutchings. It is an aerial shot looking towards the house in the trees & seems to be taken from the top of a tree...on the river side. 51. E. Tom Hutchings & George Chambers dam sinking. Whitehall. 51a. Tom Hutchings & George Chambers dam sinking. Whitehall. 51b. E. Tom Hutchings dam sinking. 52. Emily Hayes & Ada Hole (sisters) with Tom, Col & Ted Hutchings at the woolshed. 53. E T (Tom) Hutchings on reaper & binder. Whitehall. 54. Orchard looking towards the house. Carpenters' shop and river on the right. Whitehall. 54a. Orchard looking from the house, dark trees in background form part of the drive. 55. Grasshopper plague, Christmas Day 1933. Whitehall 56. Frost on the front lawn, Whitehall. 57. Little red hen & chicks with the river in the background 58. Edward (Ted) G. Hutchings muscovy ducks, hay shed and trees along the river in the background. 58a. Edward (Ted) G Hutchings muscovy ducks. 59. Swimming in the Wimmera River, either Ted or Col Hutchings in the foreground. 60. Looking towards the fowl house and pigsty, Whitehall. 61. Snake on the path, Whitehall. c. 1923 61a. E. Tom Hutchings killing a snake, Whitehall. c. 1923 61b. E. Tom Hutchings killing a snake, Whitehall. c. 1923 62. Notice of clearing sale, Stawell News & Pleasant Creek Chronicle on 5 Apr 1916 where the stock & whole of the household furniture was to be sold by James Hutchings widow. 63. Back to Greens Creek 7 Jun 1987 Colin J Hutchings left and Belle Kindred centre looking at photo 64. Back to Greens Creek 7 Jun 1987 Colin J Hutchings centre, Graham Stewart holding photograph on the right. 65. Colin J Hutchings & Bill Walker. Back to Greens Creek 7 Jun 1987 66. Colin J Hutchings delivering a speech before the plaque unveiling. Back to Greens Creek 7 Jun 1987 67. Graeme Williamson & Colin J Hutchings (2 'old boys') Greens Creek School Site 7 Jun 1987 68. Graeme Williamson talking to Moyu Roe (Hutchings) in background is May Williamson. Back to Greens Creek 7 Jun 1987 69. Greens Creek SS, Edward (Ted) & Colin J Hutchings attended. 70. Original students of first Greens Creek School 7 Jun 1987 Back row left 1. Kindred 3. Colin J Hutchings 4,5,6 not known 7. Graeme Williamson Sitting left 1. Not an original 2,3,4, not known 5. Belle Kindred 71. Terrier at Greens Creek State School 72. The new school students Back to Greens Creek 7 Jun 1987. Perry twins standing in centre and the teacher kneeling front left. 73. Will Rees water colour 1925 signature 74. Will Rees water colour 1925 75. Shearing at Kirkellar. Allen Simpson's 76. Back to Greens Creek 7 Jun 1987 Colin J Hutchings left and Belle Kindred centre looking at photo 77. Back to Greens Creek 7 Jun 1987 Colin J Hutchings centre, Graham Stewart holding photograph on the right. 78. Colin J Hutchings & Bill Walker. Back to Greens Creek 7 Jun 1987 79. Colin J Hutchings delivering a speech before the plaque unveiling. Back to Greens Creek 7 Jun 1987 80. Graeme Williamson & Colin J Hutchings (2 'old boys') Greens Creek School Site 7 Jun 1987 81. Graeme Williamson talking to Moyu Roe (Hutchings) in background is May Williamson. Back to Greens Creek 7 Jun 1987 82. Greens Creek SS, Edward (Ted) & Colin J Hutchings attended. 83. Original students of first Greens Creek School 7 Jun 1987 Back row left 1. Kindred 3. Colin J Hutchings 4,5,6 not known 7. Graeme Williamson Sitting left 1. Not an original 2,3,4, not known 5. Belle Kindred 84. Shearing at Kirkellar. Allen Simpson's 85. Terrier at Greens Creek State School 86. The new school students Back to Greens Creek 7 Jun 1987. Perry twins standing in centre and the teacher kneeling front left. Digital Copy of Parish Maps Kara Karahomestead -
 Flagstaff Hill Maritime Museum and Village
Photograph - Vessel S. S. Casino in Lady Bay Warrnambool, 1920's - 1930's
This photograph was one of ten photographs donated to Flagstaff Hill Maritime Museum and Village by Fred Trewartha. Frederick John Fox Trewartha (Fred) was a well-known Warrnambool businessman. He was born in Beeac near Geelong in 1920 and came to Warrnambool with his family as a very young child. He was apprenticed to his father John, as a saddler and later opened his own shop on Raglan Parade. He then moved into working with tarpaulins and canvases for the trucking industry. Fred was keenly interested in photography (and was a member of the Warrnambool Cine Club), yachting and boat building. He kept his yacht moored at Port Fairy for many years and participated in sailing events locally and interstate. He also built boats with his sons. He had the opportunity to meet many older sailors and it's thought this photo (and others in the set) may have been given to him by one of these men. Fred Trewartha died in 2016 in Warrnambool. Warrnambool by the 1920's and 1930's had become a popular holiday destination with visitors arriving by steamer and train. It was during these decades that a "Surf Bathers Association" began in Warrnambool in response to the growing popularity of local sea bathing. They worked with the local council to develop a "Beach Improvement Fund" and a comprehensive plan of "Beach Improvement" which included erecting and maintaining beach boxes, building a kiosk, improving paths and roads to the beach, planting marram grass on the sand dunes, building new enclosures for vehicles and horses and generally making the beach more attractive for visitors and townspeople. The 1930's was also an era when free "Herald" Learn-to-Swim classes were being held throughout Victoria. In 1931 it was reported in "The Age" newspaper that "over the past week in Warrnambool, 250 pupils had passed through the hands of the local life saving club swimming instructors". The Port of Warrnambool - In the early years the Port of Warrnambool was a busy port. Steamships and sailing ships were frequent visitors to the port. Steam navigation companies were plentiful, carrying passengers and freighting cargo such as coal, timber, food, livestock, furniture, hardware and haberdashery between Melbourne and the ports along the southwest coast of Victoria, including Warrnambool. The carts would take their loads into the township for distribution. The Breakwater was built (using 32 ton blocks of concrete) between 1874 and 1890 to provide ships with greater protection from the Southern Ocean. The Lifeboat and Rocket House - The coastline of South West Victoria has had over 600 shipwrecks and many lost lives; even in Warrnambool’s Lady Bay there were around 16 known shipwrecks between 1850 and 1905, with eight lives lost. In 1859 the first Government-built lifeboat arrived at Warrnambool Harbour and a shed was soon built to house it, followed in 1864 by a rocket house to safely store the Rocket Rescue equipment. In 1878 the buildings were moved to the Breakwater area, and in 1910 the new Lifeboat Warrnambool arrived with its ‘self-righting’ design. For almost one hundred years the lifeboat and rocket crews, mostly local volunteers, trained regularly to maintain and improve their skills, summoned when needed by alarms, gunshots, ringing bells and foghorns. Some became local heroes but all served an important role. By the end of the 1950s the lifeboat and rescue equipment had become obsolete. The S.S. Casino was a passenger and freight steamer built in Dundee, Scotland, in 1882 for the Newcastle and Hunter River Steam Navigation Company of N.S.W. She weighed 425 tons gross with a length of 160.4 feet, beam of 24.1 feet and a depth of 10.2 feet. She had saloon accommodation for 35 people, a fore cabin for 25 more people, and she carried 300 tons of cargo. While on her delivery journey on May 30th 1882, the S.S. Casino called in at the Port of Warrnambool for coal, narrowly escaping going ashore in gale force winds due to the quick action of the pilot. At that time, still at anchor, she impressed the directors of the Belfast and Koroit Steam Navigation Company so much that they bought her immediately; she was ideal for trade along the West Coast of Victoria. (The Belfast and Koroit Steam Navigation Company was first managed by Messers. Saltau and Osburne and after the passing of Mr. Osburne, by produce merchants Messers H. Sautau and Sons, who had a hay and corn store and shipping agency on the corner of Liebig and Koroit Streets in Warrnambool. ) The S.S. Casino became “the most famous steamer to operate in Victorian waters along the West Coast” by author Jack Loney. Captain Boyd was her first Master, followed by Captain Chapman, who stayed with her from 1890 until 1924. Captain W. Robertson followed for a short term, and then Captain Middleton then took command from 1925 - 1932. An article published on Monday 11th June 1932 in The Sun News Pictorial (Melbourne) giving a detailed history of S. S. Casino said "owned by Port Fairy interests, she was an integral part of the town's development ... for a long time, her arrival in Port Fairy was an event, the townspeople going down to the wharf to see her come in". It also said "Except when the weather was bad, the Casino hugged the coast on her trips and passengers obtained wonderful views of the sandstone terraces and caves. A little time ago every member of her regular crew except one, was a Scotsman." The S.S. Casino had several mishaps during her life. One was on 3rd January 1898 when she collided with the S.S. Flinders in Apollo Bay with minor damage. Another was on 24th October 1924 when she grounded on a reef at Point Hawdon near Grey River and most of her cargo (of Christmas goods) had to be dumped into the sea. Then in February 1929 she was ‘holed’ when she struck a submerged object as she entered Lady Bay, Warrnambool. In the years following the turn of the century, the S.S. Casino remained the only regular trader with normal passenger accommodation along the West Coast. From 1882 she had made at least 2,500 voyages on the one run. On the morning of 10th July 1932, after attempting to berth at Apollo Bay jetty in heavy seas, Captain Middleton decided to take her out into the bay and wait until the seas abated. It was not realised that the anchor used to steady her as she manoeuvred to her berth had pierced her hull. She put about and headed for the beach but sank. Captain Middleton and nine others lost their lives; nine people were rescued including the two female passengers. Captain Middleton had been in charge of the S.S. Casino for seven years. He was the first ship’s Master to lose his life in a shipwreck in the West Coast trade. In June 1932, the directors of the Belfast and Koroit Steam Navigation Company had proposed to celebrate the completion of fifty years of trading by the steamer Casino in August, but tragically the Casino was wrecked only one month later (and "was only one month off completing its fifty years of valuable service between Melbourne and Portland.") Flagstaff Hill’s collection has a photograph of a portrait of Captain Chapman, a ship model of the S.S. Casino that shows both forms of power under which she sailed, steam and sail. The ship is painted green and flies three flags. The inscription across the case of the ship model, incorrectly dated, tells the sad story of the wreck of the ship and the loss of lives on July 10th 1932 at Apollo Bay. A print in the Collection shows S.S. Casino underway in the heavy sea off Point Lonsdale, another two photographs show her at the Port of Warrnambool, leaving from the Breakwater in Lady Bay and another identifies the S.S. Casino as a ship from the Belfast and Koroit Steam Navigation Company. (Belfast is the original name for the township of Port Fairy).This photograph is significant because of its association with the coastal trader S.S. Casino and its significance to trade along Victoria's West Coast in the late 19th and early 20th centuries. The wreck of the S.S. Casino is considered an important part of Victorian and Australian cultural heritage and as such has been declared and protected as an Historic Shipwreck under State and Commonwealth Law in the Commonwealth Historic Shipwrecks Act (1976). It is also significant as it shows the early years of tourism in Warrnambool and the important role the beach played in the lives of residents and visitors.A black and white photograph (with colour tinting) showing Lady Bay in Warrnambool with the Breakwater in the background. The S. S. Casino is moored at the Breakwater and the lifeboat shed and a coal train can be seen on the Breakwater. Six swimmers are standing in the water. On the back of the photograph are the donor's name and telephone number (written in black biro) and the name of the S. S. Casino and its tonnage written in blue ink. A blurred number has been stamped on plus a "M' written in pencil.Donor's name, address and phone number / "S. S. Casino" / "500 TONS" / "REG" "- - - 09 " (blurred numbers) / "M"warrnambool, great ocean road, shipwreck coast, lady bay, breakwater, fred trewartha, frederick john fox trewartha, surf bathers association, sea bathing, swimming, warrnambool beach, beach improvement fund, port of warrnambool, steamships, lifeboat house, rocket house, lifeboat crew, s. s. casino, belfast and koroit steam navigation company, saltau and osburne, captain middleton, apollo bay, apollo bay shipwreck -
 Victorian Aboriginal Corporation for Languages
Periodical, Australian Institute of Aboriginal and Torres Strait Islander Studies, Australian Aboriginal studies : journal of the Australian Institute of Aboriginal and Torres Strait Islander Studies, 2007
1. The moral lexicon of the Warlpiri people of central Australia LR Hiatt This paper discusses words that match ?Good? and ?Bad?; examples of ?Good? and ?Bad? behaviour; morality and law; and egalitarianism and dominance. It also presents a comparison with Gidjingarli (Burarra). 2. Mobs and bosses: Structures of Aboriginal sociality Patrick Mullins (Mount Druitt, NSW) A commonality of Aboriginal social organisation exists across the continent in communities as different as those from the Western Desert across to Cape York, from the towns of New South Wales and Western Australia to cities like Adelaide. This is found in the colloquial expressions ?mob? and ?boss?, which are used in widely differing contexts. Mobbing is the activity where relatedness, in the sense of social alliances, is established and affirmed by virtue of a common affiliation with place, common experience and common descent, as well as by the exchange of cash and commodities. Bossing is the activity of commanding respect by virtue of one?s capacity to bestow items of value such as ritual knowledge, nurturance, care, cash and commodities. Mobbing and bossing are best understood as structures in Giddens? sense of sets of rules and resources involved in the production of social systems, in this case social alliances. Mobbing and bossing imply a concept of a person as a being in a relationship. Attention needs to be given to the way these structures interact with institutions in the wider Australian society. 3. Recognising victims without blaming them: A moral contest? About Peter Sutton?s ?The Politics of Suffering: Indigenous Policy in Australia since the 1970s? and Gillian Cowlishaw?s replies Ma�a Ponsonnet (Universit� Paris- 8-Saint-Denis) Peter Sutton?s texts on Aboriginal violence, health and their politicisation are replied to using his methodology, and acknowledging his convincing points. Sutton rightly denounces a lack of lucidity and scientific objectivity in anthropological debates. These inadequacies impede identification of what Aboriginal groups can do to improve their situations for fear that this identification would lead to blame the victims. At the other end of the ethical spectrum, those who advocate a broader use of what I will call a ?resistance interpretation? of violence fail to recognise victims as such, on the implicit grounds that seeing victims as victims would deprive them of any agency, on the one hand, and entail blame, on the other hand. I aim to define a middle road between those views: the idea that victims should be acknowledged as such without being denied their agency and without being blamed for their own condition. This middle road allows identification of the colonisers? responsibilities in the contemporary situation of Indigenous communities in Australia, and to determine who can do what. Secondly, I show that Sutton?s texts convey, through subtle but recurrent remarks, an ideology of blame rather than a mere will to identify practical solutions. As a consequence, some of his proposals do not stand on a solid and objective causal analysis. 4. 'You would have loved her for her lore?: The letters of Daisy Bates Bob Reece (Murdoch University) Daisy Bates was once an iconic figure in Australia but her popular and academic reputation became tarnished by her retrograde views. Her credibility was also put in doubt through the exposure of her fictionalised Irish background. In more recent times, however, her ethnographic data on the Aborigines of Western Australia has been an invaluable source for Native Title claims, while her views on Aboriginal extinction, cannibalism and ?castes? are being seen as typical of her time. This article briefly reviews what has been the orthodox academic opinion of her scientific achievement before summarising what is reliably known of her early history and indicating what kind of person is revealed in the 3000 or more letters that she left behind. 5. What potential might Narrative Therapy have to assist Indigenous Australians reduce substance misuse? Violet Bacon (Curtin University of Technology) Substance misuse is associated with adverse consequences for many Australians including Aboriginal and Torres Strait Islander peoples. Extensive research has been conducted into various intervention, treatment and prevention programs to ascertain their potential in reducing substance misuse within Aboriginal and non-Aboriginal communities. I explore the potential of Narrative Therapy as a counselling intervention for assisting Indigenous Australians reduce the harm associated with substance misuse. 6. Bone points from the Adelaide River, Northern Territory Sally Brockwell (University of Canberra) and Kim Akerman (Moonah) Large earth mounds located next to the vast floodplains of the lower Adelaide River, one of the major tropical rivers draining the flat coastal plains of northern Australia, contain cultural material, including bone points. The floodplains of the north underwent dynamic environmental change from extensive mangrove swamps in the mid-Holocene, through a transition phase of variable estuarine and freshwater mosaic environments, to the freshwater environment that exists today. This geomorphological framework provides a background for the interpretation of the archaeology, which spans some 4000 years. 7. A different look: Comparative rock-art recording from the Torres Strait using computer enhancement techniques Liam M Brady (Monash University) In 1888 and 1898, Cambridge University?s Alfred C Haddon made the first recording of rock-art from the Torres Strait islands using photography and sketches. Systematic recording of these same paintings and sites was carried out from 2000 to 2004 by archaeologists and Indigenous Torres Strait Islander and Aboriginal communities as part of community-based rock-art recording projects. Computer enhancement techniques were used to identify differences between both sets of recordings, to reveal design elements that Haddon missed in his recordings, and to recover images recorded by Haddon that are today no longer visible to the naked eye. Using this data, preliminary observations into the antiquity of Torres Strait rock-art are noted along with recommendations for future Torres Strait region rock-art research and baseline monitoring projects. 8. Sources of bias in the Murray Black Collection: Implications for palaeopathological analysis Sarah Robertson (National Museum of Australia) The Murray Black collection of Aboriginal skeletal remains has been a mainstay of bio-anthropological research in Australia, but relatively little thought has been given to how and why this collection may differ from archaeologically obtained collections. The context in which remains were located and recovered has created bias within the sample, which was further skewed within the component of the collection sent to the Australian Institute of Anatomy, resulting in limitations for the research potential of the collection. This does not render all research on the collection unviable, but it demonstrates the importance of understanding the context of a skeletal collection when assessing its suitability for addressing specific research questions.maps, b&w photographs, colour photographs, illustrations, graphs, chartswarlpiri, sociology, daisy bates, substance abuse, narrative therapy, rock art, technology and art, murray black collection, pleistocene sites, watarrka plateau -
 Victorian Aboriginal Corporation for Languages
Periodical, Australian Institute of Aboriginal and Torres Strait Islander Studies, Australian Aboriginal studies : journal of the Australian Institute of Aboriginal and Torres Strait Islander Studies, 2009
Social Engineering and Indigenous Settlement: Policy and demography in remote Australia John Taylor In recent years neo-liberals have argued that government support for remote Aboriginal communities contributes to social pathology and that unhindered market engagement involving labour mobility provides the only solution. This has raised questions about the viability of remote Aboriginal settlements. While the extreme view is to withdraw services altogether, at the very least selective migration should be encouraged. Since the analytical tools are available, one test of the integrity of such ideas is to consider their likely demographic consequences. Accordingly, this paper provides empirically based speculation about the possible implications for Aboriginal population distribution and demographic composition in remote areas had the advice of neo-liberal commentators and initial labour market reforms of the Northern Territory Emergency Response been fully implemented. The scenarios presented are heuristic only but they reveal a potential for substantial demographic and social upheaval. Aspects of the semantics of intellectual subjectivity in Dalabon (south-western Arnhem Land) Ma�a Ponsonnet This paper explores the semantics of subjectivity (views, intentions, the self as a social construct etc.) in Dalabon, a severely endangered language of northern Australia, and in Kriol, the local creole. Considering the status of Dalabon and the importance of Kriol in the region, Dalabon cannot be observed in its original context, as the traditional methods of linguistic anthropology tend to recommend. This paper seeks to rely on this very parameter, reclaiming linguistic work and research as a legitimate conversational context. Analyses are thus based on metalinguistic statements - among which are translations in Kriol. Far from seeking to separate Dalabon from Kriol, I use interactions between them as an analytical tool. The paper concentrates on three Dalabon words: men-no (intentions, views, thoughts), kodj-no (head) and kodj-kulu-no (brain). None of these words strictly matches the concept expressed by the English word mind. On the one hand, men-no is akin to consciousness but is not treated as a container nor as a processor; on the other, kodj-no and kodj-kulu-no are treated respectively as container and processor, but they are clearly physical body parts, while what English speakers usually call the mind is essentially distinct from the body. Interestingly, the body part kodj-no (head) also represents the individual as a social construct - while the Western self does not match physical attributes. Besides, men-no can also translate as idea, but it can never be abstracted from subjectivity - while in English, potential objectivity is a crucial feature of ideas. Hence the semantics of subjectivity in Dalabon does not reproduce classic Western conceptual articulations. I show that these specificities persist in the local creole. Health, death and Indigenous Australians in the coronial system Belinda Carpenter and Gordon Tait This paper details research conducted in Queensland during the first year of operation of the new Coroners Act 2003. Information was gathered from all completed investigations between December 2003 and December 2004 across five categories of death: accidental, suicide, natural, medical and homicide. It was found that 25 percent of the total number of Indigenous deaths recorded in 2004 were reported to, and investigated by, the Coroner, in comparison to 9.4 percent of non-Indigenous deaths. Moreover, Indigenous people were found to be over-represented in each category of death, except in death in a medical setting, where they were absent. This paper discusses these findings in detail, following the insights gained from the work of Tatz (1999, 2001, 2005) and Morrissey (2003). It also discusses a further outcome of this situation - the over-representation of Indigenous people in figures for full internal autopsy. Finding your voice: Placing and sourcing an Aboriginal health organisation?s published and grey literature Clive Rosewarne It is widely recognised that Aboriginal perspectives need to be represented in historical narratives. Sourcing this material may be difficult if Aboriginal people and their organisations do not publish in formats that are widely distributed and readily accessible to library collections and research studies. Based on a search for material about a 30-year-old Aboriginal health organisation, this paper aims to (1) identify factors that influenced the distribution of written material authored by the organisation; (2) consider the implications for Aboriginal people who wish to have their viewpoints widely available to researchers; and (3) assess the implications for research practice. As part of researching an organisational history for the Central Australian Aboriginal Congress, seven national and regional collections were searched for Congress?s published and unpublished written material. It was found that, in common with other Aboriginal organisations, most written material was produced as grey literature. The study indicates that for Aboriginal people and their organisations? voices to be heard, and their views to be accessible in library collections, they need to have an active program to distribute their written material. It also highlights the need for researchers to be exhaustive in their searches, and to be aware of the limitations within collections when sourcing Aboriginal perspectives. Radiocarbon dates from the Top End: A cultural chronology for the Northern Territory coastal plains Sally Brockwell , Patrick Faulkner, Patricia Bourke, Anne Clarke, Christine Crassweller, Daryl Guse, Betty Meehan, and Robin Sim The coastal plains of northern Australia are relatively recent formations that have undergone dynamic evolution through the mid to late Holocene. The development and use of these landscapes across the Northern Territory have been widely investigated by both archaeologists and geomorphologists. Over the past 15 years, a number of research and consultancy projects have focused on the archaeology of these coastal plains, from the Reynolds River in the west to the southern coast of the Gulf of Carpentaria in the east. More than 300 radiocarbon dates are now available and these have enabled us to provide a more detailed interpretation of the pattern of human settlement. In addition to this growing body of evidence, new palaeoclimatic data that is relevant to these northern Australian contexts is becoming available. This paper provides a synthesis of the archaeological evidence, integrates it within the available palaeo-environmental frameworks and characterises the cultural chronology of human settlement of the Northern Territory coastal plains over the past 10 000 years. Ladjiladji language area: A reconstruction Ian Clark and Edward Ryan In this reconsideration of the Ladjiladji language area in northwest Victoria, we contend that while Tindale?s classical reconstruction of this language identified a fundamental error in Smyth?s earlier cartographic representation, he incorrectly corrected that error. We review what is known about Ladjiladji and through a careful analysis demonstrate not only the errors in both Smyth and Tindale but also proffer a fundamental reconstruction grounded in the primary sources.ladjiladji, social engineering, dalabon, indigenous health, coronial system, radiocarbon dating -
 Ringwood and District Historical Society
Letter, Property for sale - Ringwood Shop and Dwelling Estate, Ringwood, Victoria - circa 1925
ID 5225 note: Further information relating to allotments marked on the hand-drawn plan are included in ID 5224 - Ringwood Station Estate.Typewritten letter from A.V. Greenwood with hand drawn plan of Ringwood Shop and Dwelling Estate, detailed description of property for sale, and top and side elevation views of house. (7 pages)(Transcript of first page - to unknown recipient) Phone 988 Central, 331 Canty Greenwood Pty. Ltd. 5 Flinders Street Melbourne. Dear Sir, 1. Attached please find drawings of my house at Ringwood. 2. It is for sale at £4,865 or to let at £5 per week to an approved tenant. 3. I sold it to Mr. De Garis and vacated it, but it is now back on my hands. 4. I leased another place instead of living in my own. I may be able to cancel same; in the meantime, however, I propose to sell or let my own. The painters are now going through the place; re-varnishing, re-oiling and re-polishing so that in about five days it will look "spick and span". 5. The house was specially built under my own supervision. 6. It is very suitable for a high class Guest House, Doctor's residence, Hospital or Convalescent Home. If you know of anyone whom it might suit, please communicate with them. DESCRIPTION 7. It stands on 305 feet of land facing Greenwood Avenue. It is cement, roughcast and hardwood, well oiled, and is now being redone so that the house is as good as new; red tile roof; verandahs three sides; two sleep-outs; five bedrooms; large dining room; very large music room with nooks, upstairs lounge, study; sewing room; built-in wardrobes and cupboards throughout; handsome kitchen with handsome pantry cupboard with drawers and glass front; one bath room; one shower room; wash house with patent copper and laundry. Every modern convenience, hot water system (through copper pipes with large copper cylinder) electric lights everywhere, outside and in, Yan Yean water laid on everwhere throughout house and gardens. Floors throughout are the very best, close set, stained and polished; dainty lead light windows etc. 8. There is a big garage, with tiled roof and two rooms with all conveniences for a married couple. Property is well drained with a system of its own. The house stands upon the top of a hill close to Railway Station, say 500 feet from the Footbridge. 9. The garden has expansive shrubs; sheds; fernery; tennis court. 10. A handsome piece of furniture goes with the house; a combination pantry and storeroom for groceries, milk, bread etc., consisting of drawers, glass and wire doors, as mentioned above. 11. It is within easy distance of Melbourne as it is only two minutes from Ringwood Station, which is a frequent electric train service bringing it within 39 minutes of the City. It is thought better by some to go further out into the country atmosphere and walk a short distance at the end than to go by train 20 minutes then walk 15 to 20 minutes. 12. The price quoted of £4,865 is made up as follows - 305 feet of land @ £5 ... £1,515 Garage and dwelling ... £300 House hot water system, American cupboard ... £2,600 Water, fencing, sheds & drain ... £250 For the lot ... £4,865 Should you require copies of the enclosed drawings I shall be pleased to supply same. 13. Mr. J.B. McAlpin is the local agent, Phone Ring. 7 (after hours Ring. 44) or you may phone me Central 988. 14. The house is south of the line, facing Greenwood Avenue and immediately at the back of Ringwood House, which is also my property. Yours sincerely, A.V. Greenwood (illegible) ..... (Transcript of second page) RINGWOOD SHOP AND DWELLING ESTATE See these letters on plan attached (H.) Ringwood House and Shops on 100 by 150 feet of land fronting Bedford Road 100 feet @ £10 per foot - £1,000 House and shops - £2,400 ... £3,400 Ringwood House consists of Boarding House, (Phone 101) and two shops, mainly brick; 9 inch walls. Will carry another story. Has music room, dining room, entrance halls, 10 bedrooms, large verandahs, all conveniences, hot and cold water, and stands on what will become a most valuable business corner. (F.)(G.) Mr. Greenwood's house, garage and sheds, stands on 307 feet of land fronting Greenwood Avenue. See detailed description attached ... £4,865 (J.) Cottage on Block 81 in William Street ... £750 (K.) Cottage in Pitt Street ... £650 (Total) £9,665 ..... (Description of third page - Subdivision Plan) Drawn by Edyth Greenwood, phone 988 Central. Subdivision includes Station Street, Pitt Street, Bedford Road, Wantirna Road, James Street, William Street (later Kendall Street), Greenwood Avenue, Ellison Street, and Haig Street. Circles denote blocks for sale. Squares denote house properties for sale. Other features marked include location of businesses along Main Street (Maroondah Highway), cool store, railway station, shop and police station on Bedford Road, church on Station Street, site of schoolmaster's residence and State School, and location of proposed public baths -
 Freemasons Victoria - Gordon Lodge, 99
Original Gordon Lodge lodge-room 1886
A picture of the original Gordon Lodge lodge-room of 1886 - room currently in use by the Lodge's artist-in-residence. Below is a newspaper article from the North Melbourne Advertiser (Vic: 1873 - 1894) for Friday 22 April 1887 that describes the architecture of the building at the time of its completion. From some of the details included in the article it is obvious that the journalist who wrote the article was a Freemason. THE MASONIC HALL ASCOT VALE North Melbourne Advertiser (Vic. : 1873 - 1894) Friday 22 April 1887 THE MASONIC HALL ASCOT VALE The now Masonic Hall, Ascot Vale, the foundation stone of which was laid by the Worshipful Master of the Gordon Lodge (Bro, W. F. Lamonby) in October last has just been completed, and will be formally opened: with grand Masonic ball on the 13th prox. The hall stands on a fine block of land having a frontage of 50ft to the Maribyrnong road by a depth of 130 ft., and is built of brick and cement on a most substantial foundation of bluestone. The Tuscan style of architecture has been adopted with the most successful result, and the front design which is especially handsome, includes four massive pilasters with frieze architrave and enriched cornice, forming the entablature of the order,- and giving a most imposing appearance. The front door, over which are the masonic emblems, is seven feet wide, and two escape doors made to open outwards in compliance with the Central Board of Health regulations are also provided, in case of emergency. In the vestibule is a very fine elliptic arch with keystone enriched with fruit, and the whole floor, 9ft. 6in. wide, is laid with Cawkwell's encaustic tyles. On the right, of tile vestibule is a commodious committee room 22ft. by 12ft 6in with side entrance for members, so that in case the main hall is engaged no inconvenience need be caused. On the left is the Secretary's room, and off this again is a staircase cellar. The vestibule is well lighted with two exceedingly pretty chandeliers, which have a very pleasing effect and give it a nice bright appearance ascending a handsome staircase leading from the vestibule the upper storey is reached, and here everything is splendidly arranged, especially 'the Lodge Room, which is a model of neatness and of comfort. The dimensions are 28ft. x 22ft 6in. with an elevation of 17ft. 6in. to the beautiful cove ceiling, which is quite a work of art. At the east end of the room on a raised dais is the master's chair with the masonic emblems, and neat forms of polished kauri are placed at the sides for members, about 150 of whom can be accommodated. The lighting and ventilation have both been well attended to and all is very complete. The main hall is 75ft. by 35 ft. with a stage 15ft. deep, leaving the auditorium 60ft. x 35ft. with a seating capacity about 600. Round the walls up to 6ft 6in. is a handsome dado in Portland cement and above it are panelled Tuscan pilasters to the entablature, architrave enriched frieze and medallion cornice forming the main cornice to the hall. Immediately inside the cornice is a sunken panel all-round the ceiling relieved with ornamental outlet ventilators. There are twelve large windows, six on each aide, and the sashes, skirting boards, and doors throughout the building are beautifully painted in imitation of grained cedar. Two enormous gas reflectors, each for 50 lights are suspended from the ceiling and besides these, four elegant hanging chandeliers for lighting up the proscenium, and back of the stage, under which is a storeroom for seats, &c, when the hall is required for a ball. The floor is made of kauri, secretly nailed, and is beautifully finished off. At the back of the stage are two lavatories and ladies and gentlemen's dressing rooms, between which are a connecting passage for a call boy. Outside is a capital asphalted yard, and the other usual conveniences on an improved plan. There is a right-of-way asphalted on each side of the building, and a large lamp is to be placed opposite the main entrance to light up the front. Everything that forethought and ability could suggest to make the hall comfortable and popular has been done, and it now only remains for the public to avail themselves of the advantages offered them by the enterprising Company. The cost of the building and furniture, including a magnificent piano, was £2,500, and the land £300. Mr J. C. M. Cowan, of Ascot Vale, is the architect, and Messrs Parker and Pater, of South Melbourne, the contractors. The plastering was done by Mr I Nicholas, of Murray Street, Moonee Ponds, who is also entitled to great praise for his splendid workmanship. Mr Cowan has been most assiduous and particular in seeing that his instructions were carried out to his satisfaction, and the result must be exceedingly gratifying to him and to the directors. The Masonic hall is only one of the many buildings erected by Mr Cowan in this district, among the others being the well known residences of Meessrs. J. Levy, Mooneo Street; W. Murphy, Eglington street; G. Groube, Maribyrnong street; C. A. Arvier, Moonee Ponds ; and F. Paul, Mount Alexander road. It may also be mentioned that Mr Cowan generously presented the plans for the now local fire brigade tower which is acknowledged to be one of the strongest and most graceful around Melbourne, The new Masonic Hall does infinite credit to the borough, and in accommodation, design, and comfort it is not surpassed by any similar building of the kind outside the city. -
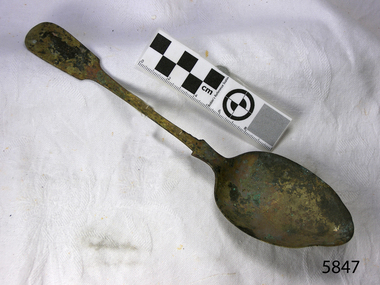 Flagstaff Hill Maritime Museum and Village
Domestic object - Spoon, circa 1878
This dessert spoon is from the wreck of the LOCH ARD, a Loch Line ship of 1,693 tons which sailed from Gravesend, London, on 2 March 1878 with 17 passengers and a crew of 36 under Captain George Gibbs. “The intention was to discharge cargo in Melbourne, before returning to London via the Horn with wool and wheat”. Instead, on 1 June 1878, after 90 days at sea, she struck the sandstone cliffs of Mutton Bird Island on the south west coast of Victoria, and sank with the loss of 52 lives and all her cargo. The manifest of the LOCH ARD listed an array of manufactured goods and bulk metals being exported to the Colony of Victoria, with a declared value of £53,700. (202 bills of lading show an actual invoice value of £68, 456, with insurance underwriting to £30,000 of all cargo). Included in the manifest is the item of “Tin hardware & cutlery £7,530”. This dessert spoon is one of 482 similar items of electro-plated cutlery from the LOCH ARD site, comprising spoons and forks of various sizes but all sharing the same general shape or design and metallic composition. 49 of these pieces display a legible makers’ mark — the initials “W” and “P” placed within a raised diamond outline, which is in turn contained within a sunken crown shape — identifying the manufacturer as William Page & Co of Birmingham. An electroplater’s makers’ marks, unlike sterling silver hallmarks, are not consistent identifiers of quality or date and place of manufacture. A similar line of five impressions was usually made to impress the consumer with an implication of industry standards, but what each one actually signified was not regulated and so they varied according to the whim of the individual foundry. In this case, the maker’s marks are often obscured by sedimentary accretion or removed by corrosion after a century of submersion in the ocean. However sufficient detail has survived to indicate that these samples of electro-plated cutlery probably originated from the same consignment in the LOCH ARD’s cargo. The generally common range of marks are drawn from 255 tea spoons, 125 dessert spoons, and 99 table forks. These marks are clearly visible in 66 instances, while the same sequence of general outlines, or depression shapes, is discernible in another 166 examples. Suggested trade names for William Page & Co’s particular blend of brass plating are ‘roman silver’ or ‘silverite’. This copper alloy polishes to a lustrous gold when new, discolouring to a murky grey with greenish hue when neglected. HISTORY OF THE LOCH ARD The LOCH ARD belonged to the famous Loch Line which sailed many ships from England to Australia. Built in Glasgow by Barclay, Curdle and Co. in 1873, the LOCH ARD was a three-masted square rigged iron sailing ship. The ship measured 262ft 7" (79.87m) in length, 38ft (11.58m) in width, 23ft (7m) in depth and had a gross tonnage of 1693 tons. The LOCH ARD's main mast measured a massive 150ft (45.7m) in height. LOCH ARD made three trips to Australia and one trip to Calcutta before its final voyage. LOCH ARD left England on March 2, 1878, under the command of Captain Gibbs, a newly married, 29 year old. She was bound for Melbourne with a crew of 37, plus 17 passengers and a load of cargo. The general cargo reflected the affluence of Melbourne at the time. On board were straw hats, umbrella, perfumes, clay pipes, pianos, clocks, confectionary, linen and candles, as well as a heavier load of railway irons, cement, lead and copper. There were items included that intended for display in the Melbourne International Exhibition in 1880. The voyage to Port Phillip was long but uneventful. At 3am on June 1, 1878, Captain Gibbs was expecting to see land and the passengers were becoming excited as they prepared to view their new homeland in the early morning. But LOCH ARD was running into a fog which greatly reduced visibility. Captain Gibbs was becoming anxious as there was no sign of land or the Cape Otway lighthouse. At 4am the fog lifted. A man aloft announced that he could see breakers. The sheer cliffs of Victoria's west coast came into view, and Captain Gibbs realised that the ship was much closer to them than expected. He ordered as much sail to be set as time would permit and then attempted to steer the vessel out to sea. On coming head on into the wind, the ship lost momentum, the sails fell limp and LOCH ARD's bow swung back. Gibbs then ordered the anchors to be released in an attempt to hold its position. The anchors sank some 50 fathoms - but did not hold. By this time LOCH ARD was among the breakers and the tall cliffs of Mutton Bird Island rose behind the ship. Just half a mile from the coast, the ship's bow was suddenly pulled around by the anchor. The captain tried to tack out to sea, but the ship struck a reef at the base of Mutton Bird Island, near Port Campbell. Waves broke over the ship and the top deck was loosened from the hull. The masts and rigging came crashing down knocking passengers and crew overboard. When a lifeboat was finally launched, it crashed into the side of LOCH ARD and capsized. Tom Pearce, who had launched the boat, managed to cling to its overturned hull and shelter beneath it. He drifted out to sea and then on the flood tide came into what is now known as LOCH ARD Gorge. He swam to shore, bruised and dazed, and found a cave in which to shelter. Some of the crew stayed below deck to shelter from the falling rigging but drowned when the ship slipped off the reef into deeper water. Eva Carmichael had raced onto deck to find out what was happening only to be confronted by towering cliffs looming above the stricken ship. In all the chaos, Captain Gibbs grabbed Eva and said, "If you are saved Eva, let my dear wife know that I died like a sailor". That was the last Eva Carmichael saw of the captain. She was swept off the ship by a huge wave. Eva saw Tom Pearce on a small rocky beach and yelled to attract his attention. He dived in and swam to the exhausted woman and dragged her to shore. He took her to the cave and broke open case of brandy which had washed up on the beach. He opened a bottle to revive the unconscious woman. A few hours later Tom scaled a cliff in search of help. He followed hoof prints and came by chance upon two men from nearby Glenample Station three and a half miles away. In a state of exhaustion, he told the men of the tragedy. Tom returned to the gorge while the two men rode back to the station to get help. By the time they reached LOCH ARD Gorge, it was cold and dark. The two shipwreck survivors were taken to Glenample Station to recover. Eva stayed at the station for six weeks before returning to Ireland, this time by steamship. In Melbourne, Tom Pearce received a hero's welcome. He was presented with the first gold medal of the Royal Humane Society of Victoria and a £1000 cheque from the Victorian Government. Concerts were performed to honour the young man's bravery and to raise money for those who lost family in the LOCH ARD disaster. Of the 54 crew members and passengers on board, only two survived: the apprentice, Tom Pearce and the young woman passenger, Eva Carmichael, who lost all of her family in the tragedy. Ten days after the LOCH ARD tragedy, salvage rights to the wreck were sold at auction for £2,120. Cargo valued at £3,000 was salvaged and placed on the beach, but most washed back into the sea when another storm developed. The wreck of LOCH ARD still lies at the base of Mutton Bird Island. Much of the cargo has now been salvaged and some was washed up into what is now known as LOCH ARD Gorge. Cargo and artefacts have also been illegally salvaged over many years before protective legislation was introduced. One of the most unlikely pieces of cargo to have survived the shipwreck was a Minton porcelain peacock - one of only seven in the world. The peacock was destined for the Melbourne International Exhibition in 1880. It had been well packed, which gave it adequate protection during the violent storm. Today, the Minton peacock can be seen at the Flagstaff Hill Maritime Museum in Warrnambool. From Australia's most dramatic shipwreck it has now become Australia's shipwreck artefact and is one of very few 'objects' on the Victorian State Heritage Register most valuable. The LOCH ARD shipwreck is of State significance – Victorian Heritage Register S 417. Flagstaff Hill’s collection of artefacts from LOCH ARD is significant for being one of the largest collections of artefacts from this shipwreck in Victoria. It is significant for its association with the shipwreck, which is on the Victorian Heritage Register (VHR S417). The collection is significant because of the relationship between the objects, as together they have a high potential to interpret the story of the LOCH ARD. The LOCH ARD collection is archaeologically significant as the remains of a large international passenger and cargo ship. The LOCH ARD collection is historically significant for representing aspects of Victoria’s shipping history and its potential to interpret sub-theme 1.5 of Victoria’s Framework of Historical Themes (living with natural processes). The collection is also historically significant for its association with the LOCH ARD, which was one of the worst and best known shipwrecks in Victoria’s history. Unrestored dessert spoon from the wreck of the LOCH ARD. The spoon design has a flattened fiddle-back handle, with a thin stem or shank, flared collar, and a shallow rounded bowl. The spoons metallic composition is a thin layer of brass alloy which has partially corroded back to a nickel-silver base metal. Approximately 65% of original plate remains with some verdigris. The end of the bowl is bent and there is a small amount of concreted sediment on the rear of handle.flagstaff hill maritime museum, maritime museum, shipwreck coast, great ocean road, loch line, loch ard, mutton bird island, loch ard gorge, electroplated cutlery, loch ard shipwreck, william page and co, birmingham brass plating -
 Flagstaff Hill Maritime Museum and Village
Domestic object - Spoon, circa 1878
This dessert spoon is from the wreck of the LOCH ARD, a Loch Line ship of 1,693 tons which sailed from Gravesend, London, on 2 March 1878 with 17 passengers and a crew of 36 under Captain George Gibbs. “The intention was to discharge cargo in Melbourne, before returning to London via the Horn with wool and wheat”. Instead, on 1 June 1878, after 90 days at sea, she struck the sandstone cliffs of Mutton Bird Island on the south west coast of Victoria, and sank with the loss of 52 lives and all her cargo. The manifest of the LOCH ARD listed an array of manufactured goods and bulk metals being exported to the Colony of Victoria, with a declared value of £53,700. (202 bills of lading show an actual invoice value of £68, 456, with insurance underwriting to £30,000 of all cargo). Included in the manifest is the item of “Tin hardware & cutlery £7,530”. This dessert spoon is one of 482 similar items of electro-plated cutlery from the LOCH ARD site, comprising spoons and forks of various sizes but all sharing the same general shape or design and metallic composition. 49 of these pieces display a legible makers’ mark — the initials “W” and “P” placed within a raised diamond outline, which is in turn contained within a sunken crown shape — identifying the manufacturer as William Page & Co of Birmingham. An electroplater’s makers’ marks, unlike sterling silver hallmarks, are not consistent identifiers of quality or date and place of manufacture. A similar line of five impressions was usually made to impress the consumer with an implication of industry standards, but what each one actually signified was not regulated and so they varied according to the whim of the individual foundry. In this case, the maker’s marks are often obscured by sedimentary accretion or removed by corrosion after a century of submersion in the ocean. However sufficient detail has survived to indicate that these samples of electro-plated cutlery probably originated from the same consignment in the LOCH ARD’s cargo. The generally common range of marks are drawn from 255 tea spoons, 125 dessert spoons, and 99 table forks. These marks are clearly visible in 66 instances, while the same sequence of general outlines, or depression shapes, is discernible in another 166 examples. Suggested trade names for William Page & Co’s particular blend of brass plating are ‘roman silver’ or ‘silverite’. This copper alloy polishes to a lustrous gold when new, discolouring to a murky grey with greenish hue when neglected. HISTORY OF THE LOCH ARD The LOCH ARD belonged to the famous Loch Line which sailed many ships from England to Australia. Built in Glasgow by Barclay, Curdle and Co. in 1873, the LOCH ARD was a three-masted square rigged iron sailing ship. The ship measured 262ft 7" (79.87m) in length, 38ft (11.58m) in width, 23ft (7m) in depth and had a gross tonnage of 1693 tons. The LOCH ARD's main mast measured a massive 150ft (45.7m) in height. LOCH ARD made three trips to Australia and one trip to Calcutta before its final voyage. LOCH ARD left England on March 2, 1878, under the command of Captain Gibbs, a newly married, 29 year old. She was bound for Melbourne with a crew of 37, plus 17 passengers and a load of cargo. The general cargo reflected the affluence of Melbourne at the time. On board were straw hats, umbrella, perfumes, clay pipes, pianos, clocks, confectionary, linen and candles, as well as a heavier load of railway irons, cement, lead and copper. There were items included that intended for display in the Melbourne International Exhibition in 1880. The voyage to Port Phillip was long but uneventful. At 3am on June 1, 1878, Captain Gibbs was expecting to see land and the passengers were becoming excited as they prepared to view their new homeland in the early morning. But LOCH ARD was running into a fog which greatly reduced visibility. Captain Gibbs was becoming anxious as there was no sign of land or the Cape Otway lighthouse. At 4am the fog lifted. A man aloft announced that he could see breakers. The sheer cliffs of Victoria's west coast came into view, and Captain Gibbs realised that the ship was much closer to them than expected. He ordered as much sail to be set as time would permit and then attempted to steer the vessel out to sea. On coming head on into the wind, the ship lost momentum, the sails fell limp and LOCH ARD's bow swung back. Gibbs then ordered the anchors to be released in an attempt to hold its position. The anchors sank some 50 fathoms - but did not hold. By this time LOCH ARD was among the breakers and the tall cliffs of Mutton Bird Island rose behind the ship. Just half a mile from the coast, the ship's bow was suddenly pulled around by the anchor. The captain tried to tack out to sea, but the ship struck a reef at the base of Mutton Bird Island, near Port Campbell. Waves broke over the ship and the top deck was loosened from the hull. The masts and rigging came crashing down knocking passengers and crew overboard. When a lifeboat was finally launched, it crashed into the side of LOCH ARD and capsized. Tom Pearce, who had launched the boat, managed to cling to its overturned hull and shelter beneath it. He drifted out to sea and then on the flood tide came into what is now known as LOCH ARD Gorge. He swam to shore, bruised and dazed, and found a cave in which to shelter. Some of the crew stayed below deck to shelter from the falling rigging but drowned when the ship slipped off the reef into deeper water. Eva Carmichael had raced onto deck to find out what was happening only to be confronted by towering cliffs looming above the stricken ship. In all the chaos, Captain Gibbs grabbed Eva and said, "If you are saved Eva, let my dear wife know that I died like a sailor". That was the last Eva Carmichael saw of the captain. She was swept off the ship by a huge wave. Eva saw Tom Pearce on a small rocky beach and yelled to attract his attention. He dived in and swam to the exhausted woman and dragged her to shore. He took her to the cave and broke open case of brandy which had washed up on the beach. He opened a bottle to revive the unconscious woman. A few hours later Tom scaled a cliff in search of help. He followed hoof prints and came by chance upon two men from nearby Glenample Station three and a half miles away. In a state of exhaustion, he told the men of the tragedy. Tom returned to the gorge while the two men rode back to the station to get help. By the time they reached LOCH ARD Gorge, it was cold and dark. The two shipwreck survivors were taken to Glenample Station to recover. Eva stayed at the station for six weeks before returning to Ireland, this time by steamship. In Melbourne, Tom Pearce received a hero's welcome. He was presented with the first gold medal of the Royal Humane Society of Victoria and a £1000 cheque from the Victorian Government. Concerts were performed to honour the young man's bravery and to raise money for those who lost family in the LOCH ARD disaster. Of the 54 crew members and passengers on board, only two survived: the apprentice, Tom Pearce and the young woman passenger, Eva Carmichael, who lost all of her family in the tragedy. Ten days after the LOCH ARD tragedy, salvage rights to the wreck were sold at auction for £2,120. Cargo valued at £3,000 was salvaged and placed on the beach, but most washed back into the sea when another storm developed. The wreck of LOCH ARD still lies at the base of Mutton Bird Island. Much of the cargo has now been salvaged and some was washed up into what is now known as LOCH ARD Gorge. Cargo and artefacts have also been illegally salvaged over many years before protective legislation was introduced. One of the most unlikely pieces of cargo to have survived the shipwreck was a Minton porcelain peacock - one of only seven in the world. The peacock was destined for the Melbourne International Exhibition in 1880. It had been well packed, which gave it adequate protection during the violent storm. Today, the Minton peacock can be seen at the Flagstaff Hill Maritime Museum in Warrnambool. From Australia's most dramatic shipwreck it has now become Australia's shipwreck artefact and is one of very few 'objects' on the Victorian State Heritage Register most valuable. The LOCH ARD shipwreck is of State significance – Victorian Heritage Register S 417. Flagstaff Hill’s collection of artefacts from LOCH ARD is significant for being one of the largest collections of artefacts from this shipwreck in Victoria. It is significant for its association with the shipwreck, which is on the Victorian Heritage Register (VHR S417). The collection is significant because of the relationship between the objects, as together they have a high potential to interpret the story of the LOCH ARD. The LOCH ARD collection is archaeologically significant as the remains of a large international passenger and cargo ship. The LOCH ARD collection is historically significant for representing aspects of Victoria’s shipping history and its potential to interpret sub-theme 1.5 of Victoria’s Framework of Historical Themes (living with natural processes). The collection is also historically significant for its association with the LOCH ARD, which was one of the worst and best known shipwrecks in Victoria’s history. Unrestored dessert spoon from the wreck of the LOCH ARD. The spoon design has a flattened fiddle-back handle, with a thin stem or shank, flared collar, and a shallow rounded bowl. The spoons metallic composition is a thin layer of brass alloy which has partially corroded back to a nickel-silver base metal. Approximately 85% of original plate remains. The outlines of five makers marks are visible and the details of two of these are clear - (1) WP&Co trademark, (3) Maltese Cross.flagstaff hill maritime museum, shipwreck coast, great ocean road, loch line, loch ard, mutton bird island, loch ard gorge, electroplated cutlery, loch ard shipwreck, william page and co, birmingham brass plating -
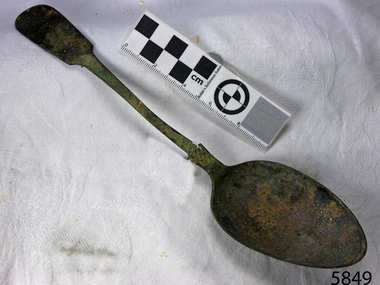 Flagstaff Hill Maritime Museum and Village
Domestic object - Spoon, circa 1878
This dessert spoon is from the wreck of the LOCH ARD, a Loch Line ship of 1,693 tons which sailed from Gravesend, London, on 2 March 1878 with 17 passengers and a crew of 36 under Captain George Gibbs. “The intention was to discharge cargo in Melbourne, before returning to London via the Horn with wool and wheat”. Instead, on 1 June 1878, after 90 days at sea, she struck the sandstone cliffs of Mutton Bird Island on the south west coast of Victoria, and sank with the loss of 52 lives and all her cargo. The manifest of the LOCH ARD listed an array of manufactured goods and bulk metals being exported to the Colony of Victoria, with a declared value of £53,700. (202 bills of lading show an actual invoice value of £68, 456, with insurance underwriting to £30,000 of all cargo). Included in the manifest is the item of “Tin hardware & cutlery £7,530”. This dessert spoon is one of 482 similar items of electro-plated cutlery from the LOCH ARD site, comprising spoons and forks of various sizes but all sharing the same general shape or design and metallic composition. 49 of these pieces display a legible makers’ mark — the initials “W” and “P” placed within a raised diamond outline, which is in turn contained within a sunken crown shape — identifying the manufacturer as William Page & Co of Birmingham. An electroplater’s makers’ marks, unlike sterling silver hallmarks, are not consistent identifiers of quality or date and place of manufacture. A similar line of five impressions was usually made to impress the consumer with an implication of industry standards, but what each one actually signified was not regulated and so they varied according to the whim of the individual foundry. In this case, the maker’s marks are often obscured by sedimentary accretion or removed by corrosion after a century of submersion in the ocean. However sufficient detail has survived to indicate that these samples of electro-plated cutlery probably originated from the same consignment in the LOCH ARD’s cargo. The generally common range of marks are drawn from 255 tea spoons, 125 dessert spoons, and 99 table forks. These marks are clearly visible in 66 instances, while the same sequence of general outlines, or depression shapes, is discernible in another 166 examples. Suggested trade names for William Page & Co’s particular blend of brass plating are ‘roman silver’ or ‘silverite’. This copper alloy polishes to a lustrous gold when new, discolouring to a murky grey with greenish hue when neglected. HISTORY OF THE LOCH ARD The LOCH ARD belonged to the famous Loch Line which sailed many ships from England to Australia. Built in Glasgow by Barclay, Curdle and Co. in 1873, the LOCH ARD was a three-masted square rigged iron sailing ship. The ship measured 262ft 7" (79.87m) in length, 38ft (11.58m) in width, 23ft (7m) in depth and had a gross tonnage of 1693 tons. The LOCH ARD's main mast measured a massive 150ft (45.7m) in height. LOCH ARD made three trips to Australia and one trip to Calcutta before its final voyage. LOCH ARD left England on March 2, 1878, under the command of Captain Gibbs, a newly married, 29 year old. She was bound for Melbourne with a crew of 37, plus 17 passengers and a load of cargo. The general cargo reflected the affluence of Melbourne at the time. On board were straw hats, umbrella, perfumes, clay pipes, pianos, clocks, confectionary, linen and candles, as well as a heavier load of railway irons, cement, lead and copper. There were items included that intended for display in the Melbourne International Exhibition in 1880. The voyage to Port Phillip was long but uneventful. At 3am on June 1, 1878, Captain Gibbs was expecting to see land and the passengers were becoming excited as they prepared to view their new homeland in the early morning. But LOCH ARD was running into a fog which greatly reduced visibility. Captain Gibbs was becoming anxious as there was no sign of land or the Cape Otway lighthouse. At 4am the fog lifted. A man aloft announced that he could see breakers. The sheer cliffs of Victoria's west coast came into view, and Captain Gibbs realised that the ship was much closer to them than expected. He ordered as much sail to be set as time would permit and then attempted to steer the vessel out to sea. On coming head on into the wind, the ship lost momentum, the sails fell limp and LOCH ARD's bow swung back. Gibbs then ordered the anchors to be released in an attempt to hold its position. The anchors sank some 50 fathoms - but did not hold. By this time LOCH ARD was among the breakers and the tall cliffs of Mutton Bird Island rose behind the ship. Just half a mile from the coast, the ship's bow was suddenly pulled around by the anchor. The captain tried to tack out to sea, but the ship struck a reef at the base of Mutton Bird Island, near Port Campbell. Waves broke over the ship and the top deck was loosened from the hull. The masts and rigging came crashing down knocking passengers and crew overboard. When a lifeboat was finally launched, it crashed into the side of LOCH ARD and capsized. Tom Pearce, who had launched the boat, managed to cling to its overturned hull and shelter beneath it. He drifted out to sea and then on the flood tide came into what is now known as LOCH ARD Gorge. He swam to shore, bruised and dazed, and found a cave in which to shelter. Some of the crew stayed below deck to shelter from the falling rigging but drowned when the ship slipped off the reef into deeper water. Eva Carmichael had raced onto deck to find out what was happening only to be confronted by towering cliffs looming above the stricken ship. In all the chaos, Captain Gibbs grabbed Eva and said, "If you are saved Eva, let my dear wife know that I died like a sailor". That was the last Eva Carmichael saw of the captain. She was swept off the ship by a huge wave. Eva saw Tom Pearce on a small rocky beach and yelled to attract his attention. He dived in and swam to the exhausted woman and dragged her to shore. He took her to the cave and broke open case of brandy which had washed up on the beach. He opened a bottle to revive the unconscious woman. A few hours later Tom scaled a cliff in search of help. He followed hoof prints and came by chance upon two men from nearby Glenample Station three and a half miles away. In a state of exhaustion, he told the men of the tragedy. Tom returned to the gorge while the two men rode back to the station to get help. By the time they reached LOCH ARD Gorge, it was cold and dark. The two shipwreck survivors were taken to Glenample Station to recover. Eva stayed at the station for six weeks before returning to Ireland, this time by steamship. In Melbourne, Tom Pearce received a hero's welcome. He was presented with the first gold medal of the Royal Humane Society of Victoria and a £1000 cheque from the Victorian Government. Concerts were performed to honour the young man's bravery and to raise money for those who lost family in the LOCH ARD disaster. Of the 54 crew members and passengers on board, only two survived: the apprentice, Tom Pearce and the young woman passenger, Eva Carmichael, who lost all of her family in the tragedy. Ten days after the LOCH ARD tragedy, salvage rights to the wreck were sold at auction for £2,120. Cargo valued at £3,000 was salvaged and placed on the beach, but most washed back into the sea when another storm developed. The wreck of LOCH ARD still lies at the base of Mutton Bird Island. Much of the cargo has now been salvaged and some was washed up into what is now known as LOCH ARD Gorge. Cargo and artefacts have also been illegally salvaged over many years before protective legislation was introduced. One of the most unlikely pieces of cargo to have survived the shipwreck was a Minton porcelain peacock - one of only seven in the world. The peacock was destined for the Melbourne International Exhibition in 1880. It had been well packed, which gave it adequate protection during the violent storm. Today, the Minton peacock can be seen at the Flagstaff Hill Maritime Museum in Warrnambool. From Australia's most dramatic shipwreck it has now become Australia's shipwreck artefact and is one of very few 'objects' on the Victorian State Heritage Register most valuable. The LOCH ARD shipwreck is of State significance – Victorian Heritage Register S 417. Flagstaff Hill’s collection of artefacts from LOCH ARD is significant for being one of the largest collections of artefacts from this shipwreck in Victoria. It is significant for its association with the shipwreck, which is on the Victorian Heritage Register (VHR S417). The collection is significant because of the relationship between the objects, as together they have a high potential to interpret the story of the LOCH ARD. The LOCH ARD collection is archaeologically significant as the remains of a large international passenger and cargo ship. The LOCH ARD collection is historically significant for representing aspects of Victoria’s shipping history and its potential to interpret sub-theme 1.5 of Victoria’s Framework of Historical Themes (living with natural processes). The collection is also historically significant for its association with the LOCH ARD, which was one of the worst and best known shipwrecks in Victoria’s history. Unrestored dessert spoon from the wreck of the LOCH ARD. The spoon design has a flattened fiddle-back handle, with a thin stem or shank, flared collar, and a shallow rounded bowl. The spoons metallic composition is a thin layer of brass alloy which has partially corroded back to a nickel-silver base metal. Approximately 40% of original plate remains, in a dull grey/green condition. Outlines of five makers marks are visible, with two that are legible - (1) WP&Co trademark, (4) Crab design. flagstaff hill maritime museum, shipwreck coast, great ocean road, loch line, loch ard, mutton bird island, loch ard gorge, electroplated cutlery, loch ard shipwreck, william page and co, birmingham brass plating, dessert spoons -
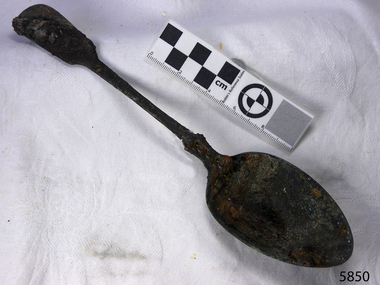 Flagstaff Hill Maritime Museum and Village
Domestic object - Spoon, circa 1878
This dessert spoon is from the wreck of the LOCH ARD, a Loch Line ship of 1,693 tons which sailed from Gravesend, London, on 2 March 1878 with 17 passengers and a crew of 36 under Captain George Gibbs. “The intention was to discharge cargo in Melbourne, before returning to London via the Horn with wool and wheat”. Instead, on 1 June 1878, after 90 days at sea, she struck the sandstone cliffs of Mutton Bird Island on the south west coast of Victoria, and sank with the loss of 52 lives and all her cargo. The manifest of the LOCH ARD listed an array of manufactured goods and bulk metals being exported to the Colony of Victoria, with a declared value of £53,700. (202 bills of lading show an actual invoice value of £68, 456, with insurance underwriting to £30,000 of all cargo). Included in the manifest is the item of “Tin hardware & cutlery £7,530”. This dessert spoon is one of 482 similar items of electro-plated cutlery from the LOCH ARD site, comprising spoons and forks of various sizes but all sharing the same general shape or design and metallic composition. 49 of these pieces display a legible makers’ mark — the initials “W” and “P” placed within a raised diamond outline, which is in turn contained within a sunken crown shape — identifying the manufacturer as William Page & Co of Birmingham. An electroplater’s makers’ marks, unlike sterling silver hallmarks, are not consistent identifiers of quality or date and place of manufacture. A similar line of five impressions was usually made to impress the consumer with an implication of industry standards, but what each one actually signified was not regulated and so they varied according to the whim of the individual foundry. In this case, the maker’s marks are often obscured by sedimentary accretion or removed by corrosion after a century of submersion in the ocean. However sufficient detail has survived to indicate that these samples of electro-plated cutlery probably originated from the same consignment in the LOCH ARD’s cargo. The generally common range of marks are drawn from 255 tea spoons, 125 dessert spoons, and 99 table forks. These marks are clearly visible in 66 instances, while the same sequence of general outlines, or depression shapes, is discernible in another 166 examples. Suggested trade names for William Page & Co’s particular blend of brass plating are ‘roman silver’ or ‘silverite’. This copper alloy polishes to a lustrous gold when new, discolouring to a murky grey with greenish hue when neglected. HISTORY OF THE LOCH ARD The LOCH ARD belonged to the famous Loch Line which sailed many ships from England to Australia. Built in Glasgow by Barclay, Curdle and Co. in 1873, the LOCH ARD was a three-masted square rigged iron sailing ship. The ship measured 262ft 7" (79.87m) in length, 38ft (11.58m) in width, 23ft (7m) in depth and had a gross tonnage of 1693 tons. The LOCH ARD's main mast measured a massive 150ft (45.7m) in height. LOCH ARD made three trips to Australia and one trip to Calcutta before its final voyage. LOCH ARD left England on March 2, 1878, under the command of Captain Gibbs, a newly married, 29 year old. She was bound for Melbourne with a crew of 37, plus 17 passengers and a load of cargo. The general cargo reflected the affluence of Melbourne at the time. On board were straw hats, umbrella, perfumes, clay pipes, pianos, clocks, confectionary, linen and candles, as well as a heavier load of railway irons, cement, lead and copper. There were items included that intended for display in the Melbourne International Exhibition in 1880. The voyage to Port Phillip was long but uneventful. At 3am on June 1, 1878, Captain Gibbs was expecting to see land and the passengers were becoming excited as they prepared to view their new homeland in the early morning. But LOCH ARD was running into a fog which greatly reduced visibility. Captain Gibbs was becoming anxious as there was no sign of land or the Cape Otway lighthouse. At 4am the fog lifted. A man aloft announced that he could see breakers. The sheer cliffs of Victoria's west coast came into view, and Captain Gibbs realised that the ship was much closer to them than expected. He ordered as much sail to be set as time would permit and then attempted to steer the vessel out to sea. On coming head on into the wind, the ship lost momentum, the sails fell limp and LOCH ARD's bow swung back. Gibbs then ordered the anchors to be released in an attempt to hold its position. The anchors sank some 50 fathoms - but did not hold. By this time LOCH ARD was among the breakers and the tall cliffs of Mutton Bird Island rose behind the ship. Just half a mile from the coast, the ship's bow was suddenly pulled around by the anchor. The captain tried to tack out to sea, but the ship struck a reef at the base of Mutton Bird Island, near Port Campbell. Waves broke over the ship and the top deck was loosened from the hull. The masts and rigging came crashing down knocking passengers and crew overboard. When a lifeboat was finally launched, it crashed into the side of LOCH ARD and capsized. Tom Pearce, who had launched the boat, managed to cling to its overturned hull and shelter beneath it. He drifted out to sea and then on the flood tide came into what is now known as LOCH ARD Gorge. He swam to shore, bruised and dazed, and found a cave in which to shelter. Some of the crew stayed below deck to shelter from the falling rigging but drowned when the ship slipped off the reef into deeper water. Eva Carmichael had raced onto deck to find out what was happening only to be confronted by towering cliffs looming above the stricken ship. In all the chaos, Captain Gibbs grabbed Eva and said, "If you are saved Eva, let my dear wife know that I died like a sailor". That was the last Eva Carmichael saw of the captain. She was swept off the ship by a huge wave. Eva saw Tom Pearce on a small rocky beach and yelled to attract his attention. He dived in and swam to the exhausted woman and dragged her to shore. He took her to the cave and broke open case of brandy which had washed up on the beach. He opened a bottle to revive the unconscious woman. A few hours later Tom scaled a cliff in search of help. He followed hoof prints and came by chance upon two men from nearby Glenample Station three and a half miles away. In a state of exhaustion, he told the men of the tragedy. Tom returned to the gorge while the two men rode back to the station to get help. By the time they reached LOCH ARD Gorge, it was cold and dark. The two shipwreck survivors were taken to Glenample Station to recover. Eva stayed at the station for six weeks before returning to Ireland, this time by steamship. In Melbourne, Tom Pearce received a hero's welcome. He was presented with the first gold medal of the Royal Humane Society of Victoria and a £1000 cheque from the Victorian Government. Concerts were performed to honour the young man's bravery and to raise money for those who lost family in the LOCH ARD disaster. Of the 54 crew members and passengers on board, only two survived: the apprentice, Tom Pearce and the young woman passenger, Eva Carmichael, who lost all of her family in the tragedy. Ten days after the LOCH ARD tragedy, salvage rights to the wreck were sold at auction for £2,120. Cargo valued at £3,000 was salvaged and placed on the beach, but most washed back into the sea when another storm developed. The wreck of LOCH ARD still lies at the base of Mutton Bird Island. Much of the cargo has now been salvaged and some was washed up into what is now known as LOCH ARD Gorge. Cargo and artefacts have also been illegally salvaged over many years before protective legislation was introduced. One of the most unlikely pieces of cargo to have survived the shipwreck was a Minton porcelain peacock - one of only seven in the world. The peacock was destined for the Melbourne International Exhibition in 1880. It had been well packed, which gave it adequate protection during the violent storm. Today, the Minton peacock can be seen at the Flagstaff Hill Maritime Museum in Warrnambool. From Australia's most dramatic shipwreck it has now become Australia's shipwreck artefact and is one of very few 'objects' on the Victorian State Heritage Register most valuable. The LOCH ARD shipwreck is of State significance – Victorian Heritage Register S 417. Flagstaff Hill’s collection of artefacts from LOCH ARD is significant for being one of the largest collections of artefacts from this shipwreck in Victoria. It is significant for its association with the shipwreck, which is on the Victorian Heritage Register (VHR S417). The collection is significant because of the relationship between the objects, as together they have a high potential to interpret the story of the LOCH ARD. The LOCH ARD collection is archaeologically significant as the remains of a large international passenger and cargo ship. The LOCH ARD collection is historically significant for representing aspects of Victoria’s shipping history and its potential to interpret sub-theme 1.5 of Victoria’s Framework of Historical Themes (living with natural processes). The collection is also historically significant for its association with the LOCH ARD, which was one of the worst and best known shipwrecks in Victoria’s history Unrestored dessert spoon from the wreck of the LOCH ARD. The spoon design has a flattened fiddle-back handle, with a thin stem or shank, flared collar, and a shallow rounded bowl. The spoons metallic composition is a thin layer of brass alloy which has partially corroded back to a nickel-silver base metal. Surface area of spoon is 10% sediment, 10% original plate, 1o% verdigris, and balance 70% almost black oxidisation. flagstaff hill maritime museum, shipwreck coast, great ocean road, loch line, loch ard, mutton bird island, loch ard gorge, electroplated cutlery, loch ard shipwreck, william page and co, birmingham brass plating, dessert spoons -
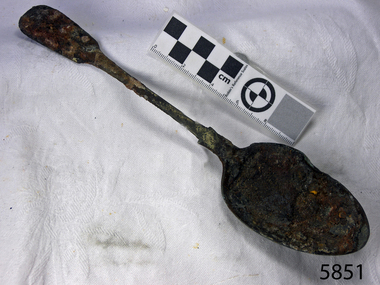 Flagstaff Hill Maritime Museum and Village
Domestic object - Spoon, circa 1878
This dessert spoon is from the wreck of the LOCH ARD, a Loch Line ship of 1,693 tons which sailed from Gravesend, London, on 2 March 1878 with 17 passengers and a crew of 36 under Captain George Gibbs. “The intention was to discharge cargo in Melbourne, before returning to London via the Horn with wool and wheat”. Instead, on 1 June 1878, after 90 days at sea, she struck the sandstone cliffs of Mutton Bird Island on the south west coast of Victoria, and sank with the loss of 52 lives and all her cargo. The manifest of the LOCH ARD listed an array of manufactured goods and bulk metals being exported to the Colony of Victoria, with a declared value of £53,700. (202 bills of lading show an actual invoice value of £68, 456, with insurance underwriting to £30,000 of all cargo). Included in the manifest is the item of “Tin hardware & cutlery £7,530”. This dessert spoon is one of 482 similar items of electro-plated cutlery from the LOCH ARD site, comprising spoons and forks of various sizes but all sharing the same general shape or design and metallic composition. 49 of these pieces display a legible makers’ mark — the initials “W” and “P” placed within a raised diamond outline, which is in turn contained within a sunken crown shape — identifying the manufacturer as William Page & Co of Birmingham. An electroplater’s makers’ marks, unlike sterling silver hallmarks, are not consistent identifiers of quality or date and place of manufacture. A similar line of five impressions was usually made to impress the consumer with an implication of industry standards, but what each one actually signified was not regulated and so they varied according to the whim of the individual foundry. In this case, the maker’s marks are often obscured by sedimentary accretion or removed by corrosion after a century of submersion in the ocean. However sufficient detail has survived to indicate that these samples of electro-plated cutlery probably originated from the same consignment in the LOCH ARD’s cargo. The generally common range of marks are drawn from 255 tea spoons, 125 dessert spoons, and 99 table forks. These marks are clearly visible in 66 instances, while the same sequence of general outlines, or depression shapes, is discernible in another 166 examples. Suggested trade names for William Page & Co’s particular blend of brass plating are ‘roman silver’ or ‘silverite’. This copper alloy polishes to a lustrous gold when new, discolouring to a murky grey with greenish hue when neglected. HISTORY OF THE LOCH ARD The LOCH ARD belonged to the famous Loch Line which sailed many ships from England to Australia. Built in Glasgow by Barclay, Curdle and Co. in 1873, the LOCH ARD was a three-masted square rigged iron sailing ship. The ship measured 262ft 7" (79.87m) in length, 38ft (11.58m) in width, 23ft (7m) in depth and had a gross tonnage of 1693 tons. The LOCH ARD's main mast measured a massive 150ft (45.7m) in height. LOCH ARD made three trips to Australia and one trip to Calcutta before its final voyage. LOCH ARD left England on March 2, 1878, under the command of Captain Gibbs, a newly married, 29 year old. She was bound for Melbourne with a crew of 37, plus 17 passengers and a load of cargo. The general cargo reflected the affluence of Melbourne at the time. On board were straw hats, umbrella, perfumes, clay pipes, pianos, clocks, confectionary, linen and candles, as well as a heavier load of railway irons, cement, lead and copper. There were items included that intended for display in the Melbourne International Exhibition in 1880. The voyage to Port Phillip was long but uneventful. At 3am on June 1, 1878, Captain Gibbs was expecting to see land and the passengers were becoming excited as they prepared to view their new homeland in the early morning. But LOCH ARD was running into a fog which greatly reduced visibility. Captain Gibbs was becoming anxious as there was no sign of land or the Cape Otway lighthouse. At 4am the fog lifted. A man aloft announced that he could see breakers. The sheer cliffs of Victoria's west coast came into view, and Captain Gibbs realised that the ship was much closer to them than expected. He ordered as much sail to be set as time would permit and then attempted to steer the vessel out to sea. On coming head on into the wind, the ship lost momentum, the sails fell limp and LOCH ARD's bow swung back. Gibbs then ordered the anchors to be released in an attempt to hold its position. The anchors sank some 50 fathoms - but did not hold. By this time LOCH ARD was among the breakers and the tall cliffs of Mutton Bird Island rose behind the ship. Just half a mile from the coast, the ship's bow was suddenly pulled around by the anchor. The captain tried to tack out to sea, but the ship struck a reef at the base of Mutton Bird Island, near Port Campbell. Waves broke over the ship and the top deck was loosened from the hull. The masts and rigging came crashing down knocking passengers and crew overboard. When a lifeboat was finally launched, it crashed into the side of LOCH ARD and capsized. Tom Pearce, who had launched the boat, managed to cling to its overturned hull and shelter beneath it. He drifted out to sea and then on the flood tide came into what is now known as LOCH ARD Gorge. He swam to shore, bruised and dazed, and found a cave in which to shelter. Some of the crew stayed below deck to shelter from the falling rigging but drowned when the ship slipped off the reef into deeper water. Eva Carmichael had raced onto deck to find out what was happening only to be confronted by towering cliffs looming above the stricken ship. In all the chaos, Captain Gibbs grabbed Eva and said, "If you are saved Eva, let my dear wife know that I died like a sailor". That was the last Eva Carmichael saw of the captain. She was swept off the ship by a huge wave. Eva saw Tom Pearce on a small rocky beach and yelled to attract his attention. He dived in and swam to the exhausted woman and dragged her to shore. He took her to the cave and broke open case of brandy which had washed up on the beach. He opened a bottle to revive the unconscious woman. A few hours later Tom scaled a cliff in search of help. He followed hoof prints and came by chance upon two men from nearby Glenample Station three and a half miles away. In a state of exhaustion, he told the men of the tragedy. Tom returned to the gorge while the two men rode back to the station to get help. By the time they reached LOCH ARD Gorge, it was cold and dark. The two shipwreck survivors were taken to Glenample Station to recover. Eva stayed at the station for six weeks before returning to Ireland, this time by steamship. In Melbourne, Tom Pearce received a hero's welcome. He was presented with the first gold medal of the Royal Humane Society of Victoria and a £1000 cheque from the Victorian Government. Concerts were performed to honour the young man's bravery and to raise money for those who lost family in the LOCH ARD disaster. Of the 54 crew members and passengers on board, only two survived: the apprentice, Tom Pearce and the young woman passenger, Eva Carmichael, who lost all of her family in the tragedy. Ten days after the LOCH ARD tragedy, salvage rights to the wreck were sold at auction for £2,120. Cargo valued at £3,000 was salvaged and placed on the beach, but most washed back into the sea when another storm developed. The wreck of LOCH ARD still lies at the base of Mutton Bird Island. Much of the cargo has now been salvaged and some was washed up into what is now known as LOCH ARD Gorge. Cargo and artefacts have also been illegally salvaged over many years before protective legislation was introduced. One of the most unlikely pieces of cargo to have survived the shipwreck was a Minton porcelain peacock - one of only seven in the world. The peacock was destined for the Melbourne International Exhibition in 1880. It had been well packed, which gave it adequate protection during the violent storm. Today, the Minton peacock can be seen at the Flagstaff Hill Maritime Museum in Warrnambool. From Australia's most dramatic shipwreck it has now become Australia's shipwreck artefact and is one of very few 'objects' on the Victorian State Heritage Register most valuable. The LOCH ARD shipwreck is of State significance – Victorian Heritage Register S 417. Flagstaff Hill’s collection of artefacts from LOCH ARD is significant for being one of the largest collections of artefacts from this shipwreck in Victoria. It is significant for its association with the shipwreck, which is on the Victorian Heritage Register (VHR S417). The collection is significant because of the relationship between the objects, as together they have a high potential to interpret the story of the LOCH ARD. The LOCH ARD collection is archaeologically significant as the remains of a large international passenger and cargo ship. The LOCH ARD collection is historically significant for representing aspects of Victoria’s shipping history and its potential to interpret sub-theme 1.5 of Victoria’s Framework of Historical Themes (living with natural processes). The collection is also historically significant for its association with the LOCH ARD, which was one of the worst and best known shipwrecks in Victoria’s history. Unrestored dessert spoon from the wreck of the LOCH ARD. The spoon design has a flattened fiddle-back handle, with a thin stem or shank, flared collar, and a shallow rounded bowl. The spoons metallic composition is a thin layer of brass alloy which has partially corroded back to a nickel-silver base metal. Some verdigris and concretion on front and back of spoon. Spoon bowl is dented and cracked. 70% of surface area covered in dark Silver Oxide.flagstaff hill maritime museum, shipwreck coast, great ocean road, loch line, loch ard, mutton bird island, loch ard gorge, electroplated cutlery, loch ard shipwreck, william page and co, birmingham brass plating, dessert spoons -
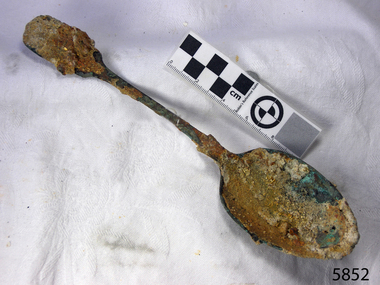 Flagstaff Hill Maritime Museum and Village
Domestic object - Spoon, circa 1878
This dessert spoon is from the wreck of the LOCH ARD, a Loch Line ship of 1,693 tons which sailed from Gravesend, London, on 2 March 1878 with 17 passengers and a crew of 36 under Captain George Gibbs. “The intention was to discharge cargo in Melbourne, before returning to London via the Horn with wool and wheat”. Instead, on 1 June 1878, after 90 days at sea, she struck the sandstone cliffs of Mutton Bird Island on the south west coast of Victoria, and sank with the loss of 52 lives and all her cargo. The manifest of the LOCH ARD listed an array of manufactured goods and bulk metals being exported to the Colony of Victoria, with a declared value of £53,700. (202 bills of lading show an actual invoice value of £68, 456, with insurance underwriting to £30,000 of all cargo). Included in the manifest is the item of “Tin hardware & cutlery £7,530”. This dessert spoon is one of 482 similar items of electro-plated cutlery from the LOCH ARD site, comprising spoons and forks of various sizes but all sharing the same general shape or design and metallic composition. 49 of these pieces display a legible makers’ mark — the initials “W” and “P” placed within a raised diamond outline, which is in turn contained within a sunken crown shape — identifying the manufacturer as William Page & Co of Birmingham. An electroplater’s makers’ marks, unlike sterling silver hallmarks, are not consistent identifiers of quality or date and place of manufacture. A similar line of five impressions was usually made to impress the consumer with an implication of industry standards, but what each one actually signified was not regulated and so they varied according to the whim of the individual foundry. In this case, the maker’s marks are often obscured by sedimentary accretion or removed by corrosion after a century of submersion in the ocean. However sufficient detail has survived to indicate that these samples of electro-plated cutlery probably originated from the same consignment in the LOCH ARD’s cargo. The generally common range of marks are drawn from 255 tea spoons, 125 dessert spoons, and 99 table forks. These marks are clearly visible in 66 instances, while the same sequence of general outlines, or depression shapes, is discernible in another 166 examples. Suggested trade names for William Page & Co’s particular blend of brass plating are ‘roman silver’ or ‘silverite’. This copper alloy polishes to a lustrous gold when new, discolouring to a murky grey with greenish hue when neglected. HISTORY OF THE LOCH ARD The LOCH ARD belonged to the famous Loch Line which sailed many ships from England to Australia. Built in Glasgow by Barclay, Curdle and Co. in 1873, the LOCH ARD was a three-masted square rigged iron sailing ship. The ship measured 262ft 7" (79.87m) in length, 38ft (11.58m) in width, 23ft (7m) in depth and had a gross tonnage of 1693 tons. The LOCH ARD's main mast measured a massive 150ft (45.7m) in height. LOCH ARD made three trips to Australia and one trip to Calcutta before its final voyage. LOCH ARD left England on March 2, 1878, under the command of Captain Gibbs, a newly married, 29 year old. She was bound for Melbourne with a crew of 37, plus 17 passengers and a load of cargo. The general cargo reflected the affluence of Melbourne at the time. On board were straw hats, umbrella, perfumes, clay pipes, pianos, clocks, confectionary, linen and candles, as well as a heavier load of railway irons, cement, lead and copper. There were items included that intended for display in the Melbourne International Exhibition in 1880. The voyage to Port Phillip was long but uneventful. At 3am on June 1, 1878, Captain Gibbs was expecting to see land and the passengers were becoming excited as they prepared to view their new homeland in the early morning. But LOCH ARD was running into a fog which greatly reduced visibility. Captain Gibbs was becoming anxious as there was no sign of land or the Cape Otway lighthouse. At 4am the fog lifted. A man aloft announced that he could see breakers. The sheer cliffs of Victoria's west coast came into view, and Captain Gibbs realised that the ship was much closer to them than expected. He ordered as much sail to be set as time would permit and then attempted to steer the vessel out to sea. On coming head on into the wind, the ship lost momentum, the sails fell limp and LOCH ARD's bow swung back. Gibbs then ordered the anchors to be released in an attempt to hold its position. The anchors sank some 50 fathoms - but did not hold. By this time LOCH ARD was among the breakers and the tall cliffs of Mutton Bird Island rose behind the ship. Just half a mile from the coast, the ship's bow was suddenly pulled around by the anchor. The captain tried to tack out to sea, but the ship struck a reef at the base of Mutton Bird Island, near Port Campbell. Waves broke over the ship and the top deck was loosened from the hull. The masts and rigging came crashing down knocking passengers and crew overboard. When a lifeboat was finally launched, it crashed into the side of LOCH ARD and capsized. Tom Pearce, who had launched the boat, managed to cling to its overturned hull and shelter beneath it. He drifted out to sea and then on the flood tide came into what is now known as LOCH ARD Gorge. He swam to shore, bruised and dazed, and found a cave in which to shelter. Some of the crew stayed below deck to shelter from the falling rigging but drowned when the ship slipped off the reef into deeper water. Eva Carmichael had raced onto deck to find out what was happening only to be confronted by towering cliffs looming above the stricken ship. In all the chaos, Captain Gibbs grabbed Eva and said, "If you are saved Eva, let my dear wife know that I died like a sailor". That was the last Eva Carmichael saw of the captain. She was swept off the ship by a huge wave. Eva saw Tom Pearce on a small rocky beach and yelled to attract his attention. He dived in and swam to the exhausted woman and dragged her to shore. He took her to the cave and broke open case of brandy which had washed up on the beach. He opened a bottle to revive the unconscious woman. A few hours later Tom scaled a cliff in search of help. He followed hoof prints and came by chance upon two men from nearby Glenample Station three and a half miles away. In a state of exhaustion, he told the men of the tragedy. Tom returned to the gorge while the two men rode back to the station to get help. By the time they reached LOCH ARD Gorge, it was cold and dark. The two shipwreck survivors were taken to Glenample Station to recover. Eva stayed at the station for six weeks before returning to Ireland, this time by steamship. In Melbourne, Tom Pearce received a hero's welcome. He was presented with the first gold medal of the Royal Humane Society of Victoria and a £1000 cheque from the Victorian Government. Concerts were performed to honour the young man's bravery and to raise money for those who lost family in the LOCH ARD disaster. Of the 54 crew members and passengers on board, only two survived: the apprentice, Tom Pearce and the young woman passenger, Eva Carmichael, who lost all of her family in the tragedy. Ten days after the LOCH ARD tragedy, salvage rights to the wreck were sold at auction for £2,120. Cargo valued at £3,000 was salvaged and placed on the beach, but most washed back into the sea when another storm developed. The wreck of LOCH ARD still lies at the base of Mutton Bird Island. Much of the cargo has now been salvaged and some was washed up into what is now known as LOCH ARD Gorge. Cargo and artefacts have also been illegally salvaged over many years before protective legislation was introduced. One of the most unlikely pieces of cargo to have survived the shipwreck was a Minton porcelain peacock - one of only seven in the world. The peacock was destined for the Melbourne International Exhibition in 1880. It had been well packed, which gave it adequate protection during the violent storm. Today, the Minton peacock can be seen at the Flagstaff Hill Maritime Museum in Warrnambool. From Australia's most dramatic shipwreck it has now become Australia's shipwreck artefact and is one of very few 'objects' on the Victorian State Heritage Register most valuable. The LOCH ARD shipwreck is of State significance – Victorian Heritage Register S 417. Flagstaff Hill’s collection of artefacts from LOCH ARD is significant for being one of the largest collections of artefacts from this shipwreck in Victoria. It is significant for its association with the shipwreck, which is on the Victorian Heritage Register (VHR S417). The collection is significant because of the relationship between the objects, as together they have a high potential to interpret the story of the LOCH ARD. The LOCH ARD collection is archaeologically significant as the remains of a large international passenger and cargo ship. The LOCH ARD collection is historically significant for representing aspects of Victoria’s shipping history and its potential to interpret sub-theme 1.5 of Victoria’s Framework of Historical Themes (living with natural processes). The collection is also historically significant for its association with the LOCH ARD, which was one of the worst and best known shipwrecks in Victoria’s history. Unrestored dessert spoon from the wreck of the LOCH ARD. The spoon design has a flattened fiddle-back handle, with a thin stem or shank, flared collar, and a shallow rounded bowl. The spoons metallic composition is a thin layer of brass alloy which has partially corroded back to a nickel-silver base metal. Approximately 85% of spoon surface area bears red/white encrustation and balance has verdigris.Spoon is bent out of shape.flagstaff hill maritime museum, shipwreck coast, great ocean road, loch line, loch ard, mutton bird island, loch ard gorge, electroplated cutlery, loch ard shipwreck, william page and co, birmingham brass plating, dessert spoons -
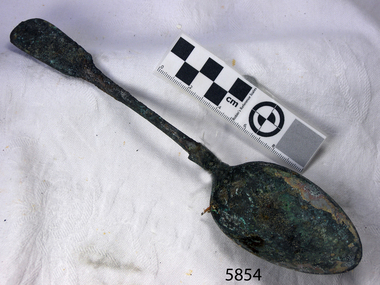 Flagstaff Hill Maritime Museum and Village
Domestic object - Spoon, circa 1878
This table spoon is from the wreck of the LOCH ARD, a Loch Line ship of 1,693 tons which sailed from Gravesend, London, on 2 March 1878 with 17 passengers and a crew of 36 under Captain George Gibbs. “The intention was to discharge cargo in Melbourne, before returning to London via the Horn with wool and wheat”. Instead, on 1 June 1878, after 90 days at sea, she struck the sandstone cliffs of Mutton Bird Island on the south west coast of Victoria, and sank with the loss of 52 lives and all her cargo. The manifest of the LOCH ARD listed an array of manufactured goods and bulk metals being exported to the Colony of Victoria, with a declared value of £53,700. (202 bills of lading show an actual invoice value of £68, 456, with insurance underwriting to £30,000 of all cargo). Included in the manifest is the item of “Tin hardware & cutlery £7,530”. This table spoon is one of 482 similar items of electro-plated cutlery from the LOCH ARD site, comprising spoons and forks of various sizes but all sharing the same general shape or design and metallic composition. 49 of these pieces display a legible makers’ mark — the initials “W” and “P” placed within a raised diamond outline, which is in turn contained within a sunken crown shape — identifying the manufacturer as William Page & Co of Birmingham. An electroplater’s makers’ marks, unlike sterling silver hallmarks, are not consistent identifiers of quality or date and place of manufacture. A similar line of five impressions was usually made to impress the consumer with an implication of industry standards, but what each one actually signified was not regulated and so they varied according to the whim of the individual foundry. In this case, the maker’s marks are often obscured by sedimentary accretion or removed by corrosion after a century of submersion in the ocean. However sufficient detail has survived to indicate that these samples of electro-plated cutlery probably originated from the same consignment in the LOCH ARD’s cargo. The generally common range of marks are drawn from 255 tea spoons, 125 dessert spoons, and 99 table forks. These marks are clearly visible in 66 instances, while the same sequence of general outlines, or depression shapes, is discernible in another 166 examples. Suggested trade names for William Page & Co’s particular blend of brass plating are ‘roman silver’ or ‘silverite’. This copper alloy polishes to a lustrous gold when new, discolouring to a murky grey with greenish hue when neglected. HISTORY OF THE LOCH ARD The LOCH ARD belonged to the famous Loch Line which sailed many ships from England to Australia. Built in Glasgow by Barclay, Curdle and Co. in 1873, the LOCH ARD was a three-masted square rigged iron sailing ship. The ship measured 262ft 7" (79.87m) in length, 38ft (11.58m) in width, 23ft (7m) in depth and had a gross tonnage of 1693 tons. The LOCH ARD's main mast measured a massive 150ft (45.7m) in height. LOCH ARD made three trips to Australia and one trip to Calcutta before its final voyage. LOCH ARD left England on March 2, 1878, under the command of Captain Gibbs, a newly married, 29 year old. She was bound for Melbourne with a crew of 37, plus 17 passengers and a load of cargo. The general cargo reflected the affluence of Melbourne at the time. On board were straw hats, umbrella, perfumes, clay pipes, pianos, clocks, confectionary, linen and candles, as well as a heavier load of railway irons, cement, lead and copper. There were items included that intended for display in the Melbourne International Exhibition in 1880. The voyage to Port Phillip was long but uneventful. At 3am on June 1, 1878, Captain Gibbs was expecting to see land and the passengers were becoming excited as they prepared to view their new homeland in the early morning. But LOCH ARD was running into a fog which greatly reduced visibility. Captain Gibbs was becoming anxious as there was no sign of land or the Cape Otway lighthouse. At 4am the fog lifted. A man aloft announced that he could see breakers. The sheer cliffs of Victoria's west coast came into view, and Captain Gibbs realised that the ship was much closer to them than expected. He ordered as much sail to be set as time would permit and then attempted to steer the vessel out to sea. On coming head on into the wind, the ship lost momentum, the sails fell limp and LOCH ARD's bow swung back. Gibbs then ordered the anchors to be released in an attempt to hold its position. The anchors sank some 50 fathoms - but did not hold. By this time LOCH ARD was among the breakers and the tall cliffs of Mutton Bird Island rose behind the ship. Just half a mile from the coast, the ship's bow was suddenly pulled around by the anchor. The captain tried to tack out to sea, but the ship struck a reef at the base of Mutton Bird Island, near Port Campbell. Waves broke over the ship and the top deck was loosened from the hull. The masts and rigging came crashing down knocking passengers and crew overboard. When a lifeboat was finally launched, it crashed into the side of LOCH ARD and capsized. Tom Pearce, who had launched the boat, managed to cling to its overturned hull and shelter beneath it. He drifted out to sea and then on the flood tide came into what is now known as LOCH ARD Gorge. He swam to shore, bruised and dazed, and found a cave in which to shelter. Some of the crew stayed below deck to shelter from the falling rigging but drowned when the ship slipped off the reef into deeper water. Eva Carmichael had raced onto deck to find out what was happening only to be confronted by towering cliffs looming above the stricken ship. In all the chaos, Captain Gibbs grabbed Eva and said, "If you are saved Eva, let my dear wife know that I died like a sailor". That was the last Eva Carmichael saw of the captain. She was swept off the ship by a huge wave. Eva saw Tom Pearce on a small rocky beach and yelled to attract his attention. He dived in and swam to the exhausted woman and dragged her to shore. He took her to the cave and broke open case of brandy which had washed up on the beach. He opened a bottle to revive the unconscious woman. A few hours later Tom scaled a cliff in search of help. He followed hoof prints and came by chance upon two men from nearby Glenample Station three and a half miles away. In a state of exhaustion, he told the men of the tragedy. Tom returned to the gorge while the two men rode back to the station to get help. By the time they reached LOCH ARD Gorge, it was cold and dark. The two shipwreck survivors were taken to Glenample Station to recover. Eva stayed at the station for six weeks before returning to Ireland, this time by steamship. In Melbourne, Tom Pearce received a hero's welcome. He was presented with the first gold medal of the Royal Humane Society of Victoria and a £1000 cheque from the Victorian Government. Concerts were performed to honour the young man's bravery and to raise money for those who lost family in the LOCH ARD disaster. Of the 54 crew members and passengers on board, only two survived: the apprentice, Tom Pearce and the young woman passenger, Eva Carmichael, who lost all of her family in the tragedy. Ten days after the LOCH ARD tragedy, salvage rights to the wreck were sold at auction for £2,120. Cargo valued at £3,000 was salvaged and placed on the beach, but most washed back into the sea when another storm developed. The wreck of LOCH ARD still lies at the base of Mutton Bird Island. Much of the cargo has now been salvaged and some was washed up into what is now known as LOCH ARD Gorge. Cargo and artefacts have also been illegally salvaged over many years before protective legislation was introduced. One of the most unlikely pieces of cargo to have survived the shipwreck was a Minton porcelain peacock - one of only seven in the world. The peacock was destined for the Melbourne International Exhibition in 1880. It had been well packed, which gave it adequate protection during the violent storm. Today, the Minton peacock can be seen at the Flagstaff Hill Maritime Museum in Warrnambool. From Australia's most dramatic shipwreck it has now become Australia's shipwreck artefact and is one of very few 'objects' on the Victorian State Heritage Register most valuable. The LOCH ARD shipwreck is of State significance – Victorian Heritage Register S 417. Flagstaff Hill’s collection of artefacts from LOCH ARD is significant for being one of the largest collections of artefacts from this shipwreck in Victoria. It is significant for its association with the shipwreck, which is on the Victorian Heritage Register (VHR S417). The collection is significant because of the relationship between the objects, as together they have a high potential to interpret the story of the LOCH ARD. The LOCH ARD collection is archaeologically significant as the remains of a large international passenger and cargo ship. The LOCH ARD collection is historically significant for representing aspects of Victoria’s shipping history and its potential to interpret sub-theme 1.5 of Victoria’s Framework of Historical Themes (living with natural processes). The collection is also historically significant for its association with the LOCH ARD, which was one of the worst and best known shipwrecks in Victoria’s history. Unrestored table spoon from the wreck of the LOCH ARD. The spoon design has a flattened fiddle-back handle, with a thin stem or shank, flared collar, and a shallow rounded bowl. The spoons metallic composition is a thin layer of brass alloy which has partially corroded back to a nickel-silver base metal. Approximately 10% of original plate remains. Some verdigris and concretion on front and back of spoon, with balance covered in Silver Oxide.flagstaff hill maritime museum, shipwreck coast, great ocean road, loch line, loch ard, mutton bird island, loch ard gorge, electroplated cutlery, loch ard shipwreck, william page and co, birmingham brass plating, table spoons -
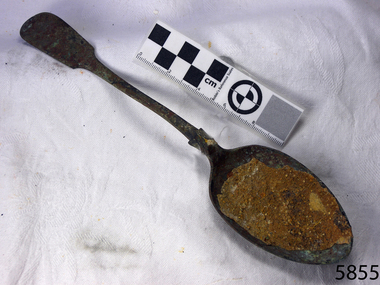 Flagstaff Hill Maritime Museum and Village
Domestic object - Spoon, circa 1878
This table spoon is from the wreck of the LOCH ARD, a Loch Line ship of 1,693 tons which sailed from Gravesend, London, on 2 March 1878 with 17 passengers and a crew of 36 under Captain George Gibbs. “The intention was to discharge cargo in Melbourne, before returning to London via the Horn with wool and wheat”. Instead, on 1 June 1878, after 90 days at sea, she struck the sandstone cliffs of Mutton Bird Island on the south west coast of Victoria, and sank with the loss of 52 lives and all her cargo. The manifest of the LOCH ARD listed an array of manufactured goods and bulk metals being exported to the Colony of Victoria, with a declared value of £53,700. (202 bills of lading show an actual invoice value of £68, 456, with insurance underwriting to £30,000 of all cargo). Included in the manifest is the item of “Tin hardware & cutlery £7,530”. This table spoon is one of 482 similar items of electro-plated cutlery from the LOCH ARD site, comprising spoons and forks of various sizes but all sharing the same general shape or design and metallic composition. 49 of these pieces display a legible makers’ mark — the initials “W” and “P” placed within a raised diamond outline, which is in turn contained within a sunken crown shape — identifying the manufacturer as William Page & Co of Birmingham. An electroplater’s makers’ marks, unlike sterling silver hallmarks, are not consistent identifiers of quality or date and place of manufacture. A similar line of five impressions was usually made to impress the consumer with an implication of industry standards, but what each one actually signified was not regulated and so they varied according to the whim of the individual foundry. In this case, the maker’s marks are often obscured by sedimentary accretion or removed by corrosion after a century of submersion in the ocean. However sufficient detail has survived to indicate that these samples of electro-plated cutlery probably originated from the same consignment in the LOCH ARD’s cargo. The generally common range of marks are drawn from 255 tea spoons, 125 dessert spoons, and 99 table forks. These marks are clearly visible in 66 instances, while the same sequence of general outlines, or depression shapes, is discernible in another 166 examples. Suggested trade names for William Page & Co’s particular blend of brass plating are ‘roman silver’ or ‘silverite’. This copper alloy polishes to a lustrous gold when new, discolouring to a murky grey with greenish hue when neglected. HISTORY OF THE LOCH ARD The LOCH ARD belonged to the famous Loch Line which sailed many ships from England to Australia. Built in Glasgow by Barclay, Curdle and Co. in 1873, the LOCH ARD was a three-masted square rigged iron sailing ship. The ship measured 262ft 7" (79.87m) in length, 38ft (11.58m) in width, 23ft (7m) in depth and had a gross tonnage of 1693 tons. The LOCH ARD's main mast measured a massive 150ft (45.7m) in height. LOCH ARD made three trips to Australia and one trip to Calcutta before its final voyage. LOCH ARD left England on March 2, 1878, under the command of Captain Gibbs, a newly married, 29 year old. She was bound for Melbourne with a crew of 37, plus 17 passengers and a load of cargo. The general cargo reflected the affluence of Melbourne at the time. On board were straw hats, umbrella, perfumes, clay pipes, pianos, clocks, confectionary, linen and candles, as well as a heavier load of railway irons, cement, lead and copper. There were items included that intended for display in the Melbourne International Exhibition in 1880. The voyage to Port Phillip was long but uneventful. At 3am on June 1, 1878, Captain Gibbs was expecting to see land and the passengers were becoming excited as they prepared to view their new homeland in the early morning. But LOCH ARD was running into a fog which greatly reduced visibility. Captain Gibbs was becoming anxious as there was no sign of land or the Cape Otway lighthouse. At 4am the fog lifted. A man aloft announced that he could see breakers. The sheer cliffs of Victoria's west coast came into view, and Captain Gibbs realised that the ship was much closer to them than expected. He ordered as much sail to be set as time would permit and then attempted to steer the vessel out to sea. On coming head on into the wind, the ship lost momentum, the sails fell limp and LOCH ARD's bow swung back. Gibbs then ordered the anchors to be released in an attempt to hold its position. The anchors sank some 50 fathoms - but did not hold. By this time LOCH ARD was among the breakers and the tall cliffs of Mutton Bird Island rose behind the ship. Just half a mile from the coast, the ship's bow was suddenly pulled around by the anchor. The captain tried to tack out to sea, but the ship struck a reef at the base of Mutton Bird Island, near Port Campbell. Waves broke over the ship and the top deck was loosened from the hull. The masts and rigging came crashing down knocking passengers and crew overboard. When a lifeboat was finally launched, it crashed into the side of LOCH ARD and capsized. Tom Pearce, who had launched the boat, managed to cling to its overturned hull and shelter beneath it. He drifted out to sea and then on the flood tide came into what is now known as LOCH ARD Gorge. He swam to shore, bruised and dazed, and found a cave in which to shelter. Some of the crew stayed below deck to shelter from the falling rigging but drowned when the ship slipped off the reef into deeper water. Eva Carmichael had raced onto deck to find out what was happening only to be confronted by towering cliffs looming above the stricken ship. In all the chaos, Captain Gibbs grabbed Eva and said, "If you are saved Eva, let my dear wife know that I died like a sailor". That was the last Eva Carmichael saw of the captain. She was swept off the ship by a huge wave. Eva saw Tom Pearce on a small rocky beach and yelled to attract his attention. He dived in and swam to the exhausted woman and dragged her to shore. He took her to the cave and broke open case of brandy which had washed up on the beach. He opened a bottle to revive the unconscious woman. A few hours later Tom scaled a cliff in search of help. He followed hoof prints and came by chance upon two men from nearby Glenample Station three and a half miles away. In a state of exhaustion, he told the men of the tragedy. Tom returned to the gorge while the two men rode back to the station to get help. By the time they reached LOCH ARD Gorge, it was cold and dark. The two shipwreck survivors were taken to Glenample Station to recover. Eva stayed at the station for six weeks before returning to Ireland, this time by steamship. In Melbourne, Tom Pearce received a hero's welcome. He was presented with the first gold medal of the Royal Humane Society of Victoria and a £1000 cheque from the Victorian Government. Concerts were performed to honour the young man's bravery and to raise money for those who lost family in the LOCH ARD disaster. Of the 54 crew members and passengers on board, only two survived: the apprentice, Tom Pearce and the young woman passenger, Eva Carmichael, who lost all of her family in the tragedy. Ten days after the LOCH ARD tragedy, salvage rights to the wreck were sold at auction for £2,120. Cargo valued at £3,000 was salvaged and placed on the beach, but most washed back into the sea when another storm developed. The wreck of LOCH ARD still lies at the base of Mutton Bird Island. Much of the cargo has now been salvaged and some was washed up into what is now known as LOCH ARD Gorge. Cargo and artefacts have also been illegally salvaged over many years before protective legislation was introduced. One of the most unlikely pieces of cargo to have survived the shipwreck was a Minton porcelain peacock - one of only seven in the world. The peacock was destined for the Melbourne International Exhibition in 1880. It had been well packed, which gave it adequate protection during the violent storm. Today, the Minton peacock can be seen at the Flagstaff Hill Maritime Museum in Warrnambool. From Australia's most dramatic shipwreck it has now become Australia's shipwreck artefact and is one of very few 'objects' on the Victorian State Heritage Register most valuable. The LOCH ARD shipwreck is of State significance – Victorian Heritage Register S 417. Flagstaff Hill’s collection of artefacts from LOCH ARD is significant for being one of the largest collections of artefacts from this shipwreck in Victoria. It is significant for its association with the shipwreck, which is on the Victorian Heritage Register (VHR S417). The collection is significant because of the relationship between the objects, as together they have a high potential to interpret the story of the LOCH ARD. The LOCH ARD collection is archaeologically significant as the remains of a large international passenger and cargo ship. The LOCH ARD collection is historically significant for representing aspects of Victoria’s shipping history and its potential to interpret sub-theme 1.5 of Victoria’s Framework of Historical Themes (living with natural processes). The collection is also historically significant for its association with the LOCH ARD, which was one of the worst and best known shipwrecks in Victoria’s history. Unrestored table spoon from the wreck of the LOCH ARD. The spoon design has a flattened fiddle-back handle, with a thin stem or shank, flared collar, and a shallow rounded bowl. The spoons metallic composition is a thin layer of brass alloy which has partially corroded back to a nickel-silver base metal. Approximately 35% of surface area has red and cream encrustation. Minimal original plate has survived but outlines of 5 makers marks are visible - Crown, Ellipse, Rounded Square, Circle, Diamond.flagstaff hill maritime museum, shipwreck coast, great ocean road, loch line, loch ard, mutton bird island, loch ard gorge, electroplated cutlery, loch ard shipwreck, william page and co, birmingham brass plating, table spoons -
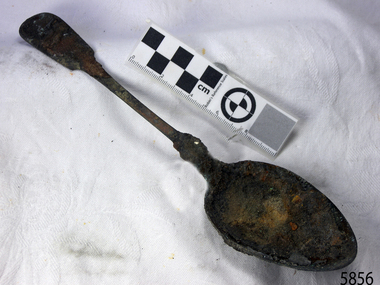 Flagstaff Hill Maritime Museum and Village
Domestic object - Spoon, circa 1878
This table spoon is from the wreck of the LOCH ARD, a Loch Line ship of 1,693 tons which sailed from Gravesend, London, on 2 March 1878 with 17 passengers and a crew of 36 under Captain George Gibbs. “The intention was to discharge cargo in Melbourne, before returning to London via the Horn with wool and wheat”. Instead, on 1 June 1878, after 90 days at sea, she struck the sandstone cliffs of Mutton Bird Island on the south west coast of Victoria, and sank with the loss of 52 lives and all her cargo. The manifest of the LOCH ARD listed an array of manufactured goods and bulk metals being exported to the Colony of Victoria, with a declared value of £53,700. (202 bills of lading show an actual invoice value of £68, 456, with insurance underwriting to £30,000 of all cargo). Included in the manifest is the item of “Tin hardware & cutlery £7,530”. This table spoon is one of 482 similar items of electro-plated cutlery from the LOCH ARD site, comprising spoons and forks of various sizes but all sharing the same general shape or design and metallic composition. 49 of these pieces display a legible makers’ mark — the initials “W” and “P” placed within a raised diamond outline, which is in turn contained within a sunken crown shape — identifying the manufacturer as William Page & Co of Birmingham. An electroplater’s makers’ marks, unlike sterling silver hallmarks, are not consistent identifiers of quality or date and place of manufacture. A similar line of five impressions was usually made to impress the consumer with an implication of industry standards, but what each one actually signified was not regulated and so they varied according to the whim of the individual foundry. In this case, the maker’s marks are often obscured by sedimentary accretion or removed by corrosion after a century of submersion in the ocean. However sufficient detail has survived to indicate that these samples of electro-plated cutlery probably originated from the same consignment in the LOCH ARD’s cargo. The generally common range of marks are drawn from 255 tea spoons, 125 dessert spoons, and 99 table forks. These marks are clearly visible in 66 instances, while the same sequence of general outlines, or depression shapes, is discernible in another 166 examples. Suggested trade names for William Page & Co’s particular blend of brass plating are ‘roman silver’ or ‘silverite’. This copper alloy polishes to a lustrous gold when new, discolouring to a murky grey with greenish hue when neglected. HISTORY OF THE LOCH ARD The LOCH ARD belonged to the famous Loch Line which sailed many ships from England to Australia. Built in Glasgow by Barclay, Curdle and Co. in 1873, the LOCH ARD was a three-masted square rigged iron sailing ship. The ship measured 262ft 7" (79.87m) in length, 38ft (11.58m) in width, 23ft (7m) in depth and had a gross tonnage of 1693 tons. The LOCH ARD's main mast measured a massive 150ft (45.7m) in height. LOCH ARD made three trips to Australia and one trip to Calcutta before its final voyage. LOCH ARD left England on March 2, 1878, under the command of Captain Gibbs, a newly married, 29 year old. She was bound for Melbourne with a crew of 37, plus 17 passengers and a load of cargo. The general cargo reflected the affluence of Melbourne at the time. On board were straw hats, umbrella, perfumes, clay pipes, pianos, clocks, confectionary, linen and candles, as well as a heavier load of railway irons, cement, lead and copper. There were items included that intended for display in the Melbourne International Exhibition in 1880. The voyage to Port Phillip was long but uneventful. At 3am on June 1, 1878, Captain Gibbs was expecting to see land and the passengers were becoming excited as they prepared to view their new homeland in the early morning. But LOCH ARD was running into a fog which greatly reduced visibility. Captain Gibbs was becoming anxious as there was no sign of land or the Cape Otway lighthouse. At 4am the fog lifted. A man aloft announced that he could see breakers. The sheer cliffs of Victoria's west coast came into view, and Captain Gibbs realised that the ship was much closer to them than expected. He ordered as much sail to be set as time would permit and then attempted to steer the vessel out to sea. On coming head on into the wind, the ship lost momentum, the sails fell limp and LOCH ARD's bow swung back. Gibbs then ordered the anchors to be released in an attempt to hold its position. The anchors sank some 50 fathoms - but did not hold. By this time LOCH ARD was among the breakers and the tall cliffs of Mutton Bird Island rose behind the ship. Just half a mile from the coast, the ship's bow was suddenly pulled around by the anchor. The captain tried to tack out to sea, but the ship struck a reef at the base of Mutton Bird Island, near Port Campbell. Waves broke over the ship and the top deck was loosened from the hull. The masts and rigging came crashing down knocking passengers and crew overboard. When a lifeboat was finally launched, it crashed into the side of LOCH ARD and capsized. Tom Pearce, who had launched the boat, managed to cling to its overturned hull and shelter beneath it. He drifted out to sea and then on the flood tide came into what is now known as LOCH ARD Gorge. He swam to shore, bruised and dazed, and found a cave in which to shelter. Some of the crew stayed below deck to shelter from the falling rigging but drowned when the ship slipped off the reef into deeper water. Eva Carmichael had raced onto deck to find out what was happening only to be confronted by towering cliffs looming above the stricken ship. In all the chaos, Captain Gibbs grabbed Eva and said, "If you are saved Eva, let my dear wife know that I died like a sailor". That was the last Eva Carmichael saw of the captain. She was swept off the ship by a huge wave. Eva saw Tom Pearce on a small rocky beach and yelled to attract his attention. He dived in and swam to the exhausted woman and dragged her to shore. He took her to the cave and broke open case of brandy which had washed up on the beach. He opened a bottle to revive the unconscious woman. A few hours later Tom scaled a cliff in search of help. He followed hoof prints and came by chance upon two men from nearby Glenample Station three and a half miles away. In a state of exhaustion, he told the men of the tragedy. Tom returned to the gorge while the two men rode back to the station to get help. By the time they reached LOCH ARD Gorge, it was cold and dark. The two shipwreck survivors were taken to Glenample Station to recover. Eva stayed at the station for six weeks before returning to Ireland, this time by steamship. In Melbourne, Tom Pearce received a hero's welcome. He was presented with the first gold medal of the Royal Humane Society of Victoria and a £1000 cheque from the Victorian Government. Concerts were performed to honour the young man's bravery and to raise money for those who lost family in the LOCH ARD disaster. Of the 54 crew members and passengers on board, only two survived: the apprentice, Tom Pearce and the young woman passenger, Eva Carmichael, who lost all of her family in the tragedy. Ten days after the LOCH ARD tragedy, salvage rights to the wreck were sold at auction for £2,120. Cargo valued at £3,000 was salvaged and placed on the beach, but most washed back into the sea when another storm developed. The wreck of LOCH ARD still lies at the base of Mutton Bird Island. Much of the cargo has now been salvaged and some was washed up into what is now known as LOCH ARD Gorge. Cargo and artefacts have also been illegally salvaged over many years before protective legislation was introduced. One of the most unlikely pieces of cargo to have survived the shipwreck was a Minton porcelain peacock - one of only seven in the world. The peacock was destined for the Melbourne International Exhibition in 1880. It had been well packed, which gave it adequate protection during the violent storm. Today, the Minton peacock can be seen at the Flagstaff Hill Maritime Museum in Warrnambool. From Australia's most dramatic shipwreck it has now become Australia's shipwreck artefact and is one of very few 'objects' on the Victorian State Heritage Register most valuable. The LOCH ARD shipwreck is of State significance – Victorian Heritage Register S 417. Flagstaff Hill’s collection of artefacts from LOCH ARD is significant for being one of the largest collections of artefacts from this shipwreck in Victoria. It is significant for its association with the shipwreck, which is on the Victorian Heritage Register (VHR S417). The collection is significant because of the relationship between the objects, as together they have a high potential to interpret the story of the LOCH ARD. The LOCH ARD collection is archaeologically significant as the remains of a large international passenger and cargo ship. The LOCH ARD collection is historically significant for representing aspects of Victoria’s shipping history and its potential to interpret sub-theme 1.5 of Victoria’s Framework of Historical Themes (living with natural processes). The collection is also historically significant for its association with the LOCH ARD, which was one of the worst and best known shipwrecks in Victoria’s history. Unrestored table spoon from the wreck of the LOCH ARD. The spoon design has a flattened fiddle-back handle, with a thin stem or shank, flared collar, and a shallow rounded bowl. The spoons metallic composition is a thin layer of brass alloy which has partially corroded back to a nickel-silver base metal. Only 15% of original plating remains. Balance is dark silver oxide stained concretion and base metal. No makers marks are visible.flagstaff hill maritime museum, shipwreck coast, great ocean road, loch line, loch ard, mutton bird island, loch ard gorge, electroplated cutlery, loch ard shipwreck, william page and co, birmingham brass plating, table spoons -
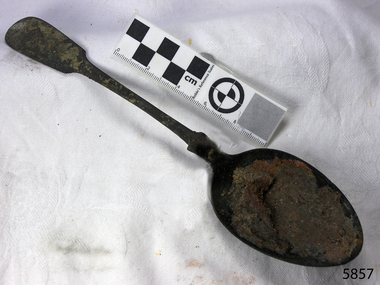 Flagstaff Hill Maritime Museum and Village
Domestic object - Spoon, circa 1878
This table spoon is from the wreck of the LOCH ARD, a Loch Line ship of 1,693 tons which sailed from Gravesend, London, on 2 March 1878 with 17 passengers and a crew of 36 under Captain George Gibbs. “The intention was to discharge cargo in Melbourne, before returning to London via the Horn with wool and wheat”. Instead, on 1 June 1878, after 90 days at sea, she struck the sandstone cliffs of Mutton Bird Island on the south west coast of Victoria, and sank with the loss of 52 lives and all her cargo. The manifest of the LOCH ARD listed an array of manufactured goods and bulk metals being exported to the Colony of Victoria, with a declared value of £53,700. (202 bills of lading show an actual invoice value of £68, 456, with insurance underwriting to £30,000 of all cargo). Included in the manifest is the item of “Tin hardware & cutlery £7,530”. This table spoon is one of 482 similar items of electro-plated cutlery from the LOCH ARD site, comprising spoons and forks of various sizes but all sharing the same general shape or design and metallic composition. 49 of these pieces display a legible makers’ mark — the initials “W” and “P” placed within a raised diamond outline, which is in turn contained within a sunken crown shape — identifying the manufacturer as William Page & Co of Birmingham. An electroplater’s makers’ marks, unlike sterling silver hallmarks, are not consistent identifiers of quality or date and place of manufacture. A similar line of five impressions was usually made to impress the consumer with an implication of industry standards, but what each one actually signified was not regulated and so they varied according to the whim of the individual foundry. In this case, the maker’s marks are often obscured by sedimentary accretion or removed by corrosion after a century of submersion in the ocean. However sufficient detail has survived to indicate that these samples of electro-plated cutlery probably originated from the same consignment in the LOCH ARD’s cargo. The generally common range of marks are drawn from 255 tea spoons, 125 dessert spoons, and 99 table forks. These marks are clearly visible in 66 instances, while the same sequence of general outlines, or depression shapes, is discernible in another 166 examples. Suggested trade names for William Page & Co’s particular blend of brass plating are ‘roman silver’ or ‘silverite’. This copper alloy polishes to a lustrous gold when new, discolouring to a murky grey with greenish hue when neglected. HISTORY OF THE LOCH ARD The LOCH ARD belonged to the famous Loch Line which sailed many ships from England to Australia. Built in Glasgow by Barclay, Curdle and Co. in 1873, the LOCH ARD was a three-masted square rigged iron sailing ship. The ship measured 262ft 7" (79.87m) in length, 38ft (11.58m) in width, 23ft (7m) in depth and had a gross tonnage of 1693 tons. The LOCH ARD's main mast measured a massive 150ft (45.7m) in height. LOCH ARD made three trips to Australia and one trip to Calcutta before its final voyage. LOCH ARD left England on March 2, 1878, under the command of Captain Gibbs, a newly married, 29 year old. She was bound for Melbourne with a crew of 37, plus 17 passengers and a load of cargo. The general cargo reflected the affluence of Melbourne at the time. On board were straw hats, umbrella, perfumes, clay pipes, pianos, clocks, confectionary, linen and candles, as well as a heavier load of railway irons, cement, lead and copper. There were items included that intended for display in the Melbourne International Exhibition in 1880. The voyage to Port Phillip was long but uneventful. At 3am on June 1, 1878, Captain Gibbs was expecting to see land and the passengers were becoming excited as they prepared to view their new homeland in the early morning. But LOCH ARD was running into a fog which greatly reduced visibility. Captain Gibbs was becoming anxious as there was no sign of land or the Cape Otway lighthouse. At 4am the fog lifted. A man aloft announced that he could see breakers. The sheer cliffs of Victoria's west coast came into view, and Captain Gibbs realised that the ship was much closer to them than expected. He ordered as much sail to be set as time would permit and then attempted to steer the vessel out to sea. On coming head on into the wind, the ship lost momentum, the sails fell limp and LOCH ARD's bow swung back. Gibbs then ordered the anchors to be released in an attempt to hold its position. The anchors sank some 50 fathoms - but did not hold. By this time LOCH ARD was among the breakers and the tall cliffs of Mutton Bird Island rose behind the ship. Just half a mile from the coast, the ship's bow was suddenly pulled around by the anchor. The captain tried to tack out to sea, but the ship struck a reef at the base of Mutton Bird Island, near Port Campbell. Waves broke over the ship and the top deck was loosened from the hull. The masts and rigging came crashing down knocking passengers and crew overboard. When a lifeboat was finally launched, it crashed into the side of LOCH ARD and capsized. Tom Pearce, who had launched the boat, managed to cling to its overturned hull and shelter beneath it. He drifted out to sea and then on the flood tide came into what is now known as LOCH ARD Gorge. He swam to shore, bruised and dazed, and found a cave in which to shelter. Some of the crew stayed below deck to shelter from the falling rigging but drowned when the ship slipped off the reef into deeper water. Eva Carmichael had raced onto deck to find out what was happening only to be confronted by towering cliffs looming above the stricken ship. In all the chaos, Captain Gibbs grabbed Eva and said, "If you are saved Eva, let my dear wife know that I died like a sailor". That was the last Eva Carmichael saw of the captain. She was swept off the ship by a huge wave. Eva saw Tom Pearce on a small rocky beach and yelled to attract his attention. He dived in and swam to the exhausted woman and dragged her to shore. He took her to the cave and broke open case of brandy which had washed up on the beach. He opened a bottle to revive the unconscious woman. A few hours later Tom scaled a cliff in search of help. He followed hoof prints and came by chance upon two men from nearby Glenample Station three and a half miles away. In a state of exhaustion, he told the men of the tragedy. Tom returned to the gorge while the two men rode back to the station to get help. By the time they reached LOCH ARD Gorge, it was cold and dark. The two shipwreck survivors were taken to Glenample Station to recover. Eva stayed at the station for six weeks before returning to Ireland, this time by steamship. In Melbourne, Tom Pearce received a hero's welcome. He was presented with the first gold medal of the Royal Humane Society of Victoria and a £1000 cheque from the Victorian Government. Concerts were performed to honour the young man's bravery and to raise money for those who lost family in the LOCH ARD disaster. Of the 54 crew members and passengers on board, only two survived: the apprentice, Tom Pearce and the young woman passenger, Eva Carmichael, who lost all of her family in the tragedy. Ten days after the LOCH ARD tragedy, salvage rights to the wreck were sold at auction for £2,120. Cargo valued at £3,000 was salvaged and placed on the beach, but most washed back into the sea when another storm developed. The wreck of LOCH ARD still lies at the base of Mutton Bird Island. Much of the cargo has now been salvaged and some was washed up into what is now known as LOCH ARD Gorge. Cargo and artefacts have also been illegally salvaged over many years before protective legislation was introduced. One of the most unlikely pieces of cargo to have survived the shipwreck was a Minton porcelain peacock - one of only seven in the world. The peacock was destined for the Melbourne International Exhibition in 1880. It had been well packed, which gave it adequate protection during the violent storm. Today, the Minton peacock can be seen at the Flagstaff Hill Maritime Museum in Warrnambool. From Australia's most dramatic shipwreck it has now become Australia's shipwreck artefact and is one of very few 'objects' on the Victorian State Heritage Register most valuable. The LOCH ARD shipwreck is of State significance – Victorian Heritage Register S 417. Flagstaff Hill’s collection of artefacts from LOCH ARD is significant for being one of the largest collections of artefacts from this shipwreck in Victoria. It is significant for its association with the shipwreck, which is on the Victorian Heritage Register (VHR S417). The collection is significant because of the relationship between the objects, as together they have a high potential to interpret the story of the LOCH ARD. The LOCH ARD collection is archaeologically significant as the remains of a large international passenger and cargo ship. The LOCH ARD collection is historically significant for representing aspects of Victoria’s shipping history and its potential to interpret sub-theme 1.5 of Victoria’s Framework of Historical Themes (living with natural processes). The collection is also historically significant for its association with the LOCH ARD, which was one of the worst and best known shipwrecks in Victoria’s history Unrestored table spoon from the wreck of the LOCH ARD. The spoon design has a flattened fiddle-back handle, with a thin stem or shank, flared collar, and a shallow rounded bowl. The spoons metallic composition is a thin layer of brass alloy which has partially corroded back to a nickel-silver base metal. Some verdigris and 50% of surface area is covered by sedimentary concretion. Only 10% of original plate remains. There is evidence of where another spoon was attached to back of this complete spoon. Balance blackened in Silver Oxide.flagstaff hill maritime museum, shipwreck coast, great ocean road, loch line, loch ard, mutton bird island, loch ard gorge, electroplated cutlery, loch ard shipwreck, william page and co, birmingham brass plating, table spoon, spoon -
 Flagstaff Hill Maritime Museum and Village
Domestic object - Spoon, c.1878
This table spoon is from the wreck of the LOCH ARD, a Loch Line ship of 1,693 tons which sailed from Gravesend, London, on 2 March 1878 with 17 passengers and a crew of 36 under Captain George Gibbs. “The intention was to discharge cargo in Melbourne, before returning to London via the Horn with wool and wheat”. Instead, on 1 June 1878, after 90 days at sea, she struck the sandstone cliffs of Mutton Bird Island on the south west coast of Victoria, and sank with the loss of 52 lives and all her cargo. The manifest of the LOCH ARD listed an array of manufactured goods and bulk metals being exported to the Colony of Victoria, with a declared value of £53,700. (202 bills of lading show an actual invoice value of £68, 456, with insurance underwriting to £30,000 of all cargo). Included in the manifest is the item of “Tin hardware & cutlery £7,530”. This table spoon is one of 482 similar items of electro-plated cutlery from the LOCH ARD site, comprising spoons and forks of various sizes but all sharing the same general shape or design and metallic composition. 49 of these pieces display a legible makers’ mark — the initials “W” and “P” placed within a raised diamond outline, which is in turn contained within a sunken crown shape — identifying the manufacturer as William Page & Co of Birmingham. An electroplater’s makers’ marks, unlike sterling silver hallmarks, are not consistent identifiers of quality or date and place of manufacture. A similar line of five impressions was usually made to impress the consumer with an implication of industry standards, but what each one actually signified was not regulated and so they varied according to the whim of the individual foundry. In this case, the maker’s marks are often obscured by sedimentary accretion or removed by corrosion after a century of submersion in the ocean. However sufficient detail has survived to indicate that these samples of electro-plated cutlery probably originated from the same consignment in the LOCH ARD’s cargo. The generally common range of marks are drawn from 255 tea spoons, 125 dessert spoons, and 99 table forks. These marks are clearly visible in 66 instances, while the same sequence of general outlines, or depression shapes, is discernible in another 166 examples. Suggested trade names for William Page & Co’s particular blend of brass plating are ‘roman silver’ or ‘silverite’. This copper alloy polishes to a lustrous gold when new, discolouring to a murky grey with greenish hue when neglected. HISTORY OF THE LOCH ARD The LOCH ARD belonged to the famous Loch Line which sailed many ships from England to Australia. Built in Glasgow by Barclay, Curdle and Co. in 1873, the LOCH ARD was a three-masted square rigged iron sailing ship. The ship measured 262ft 7" (79.87m) in length, 38ft (11.58m) in width, 23ft (7m) in depth and had a gross tonnage of 1693 tons. The LOCH ARD's main mast measured a massive 150ft (45.7m) in height. LOCH ARD made three trips to Australia and one trip to Calcutta before its final voyage. LOCH ARD left England on March 2, 1878, under the command of Captain Gibbs, a newly married, 29 year old. She was bound for Melbourne with a crew of 37, plus 17 passengers and a load of cargo. The general cargo reflected the affluence of Melbourne at the time. On board were straw hats, umbrella, perfumes, clay pipes, pianos, clocks, confectionary, linen and candles, as well as a heavier load of railway irons, cement, lead and copper. There were items included that intended for display in the Melbourne International Exhibition in 1880. The voyage to Port Phillip was long but uneventful. At 3am on June 1, 1878, Captain Gibbs was expecting to see land and the passengers were becoming excited as they prepared to view their new homeland in the early morning. But LOCH ARD was running into a fog which greatly reduced visibility. Captain Gibbs was becoming anxious as there was no sign of land or the Cape Otway lighthouse. At 4am the fog lifted. A man aloft announced that he could see breakers. The sheer cliffs of Victoria's west coast came into view, and Captain Gibbs realised that the ship was much closer to them than expected. He ordered as much sail to be set as time would permit and then attempted to steer the vessel out to sea. On coming head on into the wind, the ship lost momentum, the sails fell limp and LOCH ARD's bow swung back. Gibbs then ordered the anchors to be released in an attempt to hold its position. The anchors sank some 50 fathoms - but did not hold. By this time LOCH ARD was among the breakers and the tall cliffs of Mutton Bird Island rose behind the ship. Just half a mile from the coast, the ship's bow was suddenly pulled around by the anchor. The captain tried to tack out to sea, but the ship struck a reef at the base of Mutton Bird Island, near Port Campbell. Waves broke over the ship and the top deck was loosened from the hull. The masts and rigging came crashing down knocking passengers and crew overboard. When a lifeboat was finally launched, it crashed into the side of LOCH ARD and capsized. Tom Pearce, who had launched the boat, managed to cling to its overturned hull and shelter beneath it. He drifted out to sea and then on the flood tide came into what is now known as LOCH ARD Gorge. He swam to shore, bruised and dazed, and found a cave in which to shelter. Some of the crew stayed below deck to shelter from the falling rigging but drowned when the ship slipped off the reef into deeper water. Eva Carmichael had raced onto deck to find out what was happening only to be confronted by towering cliffs looming above the stricken ship. In all the chaos, Captain Gibbs grabbed Eva and said, "If you are saved Eva, let my dear wife know that I died like a sailor". That was the last Eva Carmichael saw of the captain. She was swept off the ship by a huge wave. Eva saw Tom Pearce on a small rocky beach and yelled to attract his attention. He dived in and swam to the exhausted woman and dragged her to shore. He took her to the cave and broke open case of brandy which had washed up on the beach. He opened a bottle to revive the unconscious woman. A few hours later Tom scaled a cliff in search of help. He followed hoof prints and came by chance upon two men from nearby Glenample Station three and a half miles away. In a state of exhaustion, he told the men of the tragedy. Tom returned to the gorge while the two men rode back to the station to get help. By the time they reached LOCH ARD Gorge, it was cold and dark. The two shipwreck survivors were taken to Glenample Station to recover. Eva stayed at the station for six weeks before returning to Ireland, this time by steamship. In Melbourne, Tom Pearce received a hero's welcome. He was presented with the first gold medal of the Royal Humane Society of Victoria and a £1000 cheque from the Victorian Government. Concerts were performed to honour the young man's bravery and to raise money for those who lost family in the LOCH ARD disaster. Of the 54 crew members and passengers on board, only two survived: the apprentice, Tom Pearce and the young woman passenger, Eva Carmichael, who lost all of her family in the tragedy. Ten days after the LOCH ARD tragedy, salvage rights to the wreck were sold at auction for £2,120. Cargo valued at £3,000 was salvaged and placed on the beach, but most washed back into the sea when another storm developed. The wreck of LOCH ARD still lies at the base of Mutton Bird Island. Much of the cargo has now been salvaged and some was washed up into what is now known as LOCH ARD Gorge. Cargo and artefacts have also been illegally salvaged over many years before protective legislation was introduced. One of the most unlikely pieces of cargo to have survived the shipwreck was a Minton porcelain peacock - one of only seven in the world. The peacock was destined for the Melbourne International Exhibition in 1880. It had been well packed, which gave it adequate protection during the violent storm. Today, the Minton peacock can be seen at the Flagstaff Hill Maritime Museum in Warrnambool. From Australia's most dramatic shipwreck it has now become Australia's shipwreck artefact and is one of very few 'objects' on the Victorian State Heritage Register most valuable. The LOCH ARD shipwreck is of State significance – Victorian Heritage Register S 417. Flagstaff Hill’s collection of artefacts from LOCH ARD is significant for being one of the largest collections of artefacts from this shipwreck in Victoria. It is significant for its association with the shipwreck, which is on the Victorian Heritage Register (VHR S417). The collection is significant because of the relationship between the objects, as together they have a high potential to interpret the story of the LOCH ARD. The LOCH ARD collection is archaeologically significant as the remains of a large international passenger and cargo ship. The LOCH ARD collection is historically significant for representing aspects of Victoria’s shipping history and its potential to interpret sub-theme 1.5 of Victoria’s Framework of Historical Themes (living with natural processes). The collection is also historically significant for its association with the LOCH ARD, which was one of the worst and best known shipwrecks in Victoria’s history. Unrestored table spoon from the wreck of the LOCH ARD. The spoon design has a flattened fiddle-back handle, with a thin stem or shank, flared collar, and a shallow rounded bowl. The spoons metallic composition is a thin layer of brass alloy which has partially corroded back to a nickel-silver base metal. Sediment covers 65% of spoon, only 5% of original plate remains, with 10% of surface area bearing aquamarine verdigris. Balance blackened with Silver Oxide.flagstaff hill maritime museum, flagstaff hill maritime village, great ocean road, loch line, loch ard, mutton bird island, loch ard gorge, electroplated cutlery, loch ard shipwreck, william page and co, table spoons -
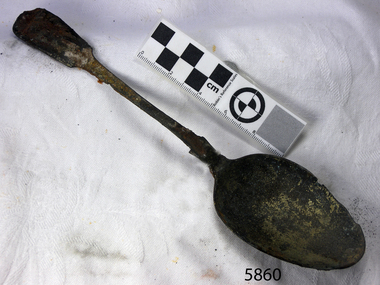 Flagstaff Hill Maritime Museum and Village
Domestic object - Spoon, circa 1878
This table spoon is from the wreck of the LOCH ARD, a Loch Line ship of 1,693 tons which sailed from Gravesend, London, on 2 March 1878 with 17 passengers and a crew of 36 under Captain George Gibbs. “The intention was to discharge cargo in Melbourne, before returning to London via the Horn with wool and wheat”. Instead, on 1 June 1878, after 90 days at sea, she struck the sandstone cliffs of Mutton Bird Island on the south west coast of Victoria, and sank with the loss of 52 lives and all her cargo. The manifest of the LOCH ARD listed an array of manufactured goods and bulk metals being exported to the Colony of Victoria, with a declared value of £53,700. (202 bills of lading show an actual invoice value of £68, 456, with insurance underwriting to £30,000 of all cargo). Included in the manifest is the item of “Tin hardware & cutlery £7,530”. This table spoon is one of 482 similar items of electro-plated cutlery from the LOCH ARD site, comprising spoons and forks of various sizes but all sharing the same general shape or design and metallic composition. 49 of these pieces display a legible makers’ mark — the initials “W” and “P” placed within a raised diamond outline, which is in turn contained within a sunken crown shape — identifying the manufacturer as William Page & Co of Birmingham. An electroplater’s makers’ marks, unlike sterling silver hallmarks, are not consistent identifiers of quality or date and place of manufacture. A similar line of five impressions was usually made to impress the consumer with an implication of industry standards, but what each one actually signified was not regulated and so they varied according to the whim of the individual foundry. In this case, the maker’s marks are often obscured by sedimentary accretion or removed by corrosion after a century of submersion in the ocean. However sufficient detail has survived to indicate that these samples of electro-plated cutlery probably originated from the same consignment in the LOCH ARD’s cargo. The generally common range of marks are drawn from 255 tea spoons, 125 dessert spoons, and 99 table forks. These marks are clearly visible in 66 instances, while the same sequence of general outlines, or depression shapes, is discernible in another 166 examples. Suggested trade names for William Page & Co’s particular blend of brass plating are ‘roman silver’ or ‘silverite’. This copper alloy polishes to a lustrous gold when new, discolouring to a murky grey with greenish hue when neglected. HISTORY OF THE LOCH ARD The LOCH ARD belonged to the famous Loch Line which sailed many ships from England to Australia. Built in Glasgow by Barclay, Curdle and Co. in 1873, the LOCH ARD was a three-masted square rigged iron sailing ship. The ship measured 262ft 7" (79.87m) in length, 38ft (11.58m) in width, 23ft (7m) in depth and had a gross tonnage of 1693 tons. The LOCH ARD's main mast measured a massive 150ft (45.7m) in height. LOCH ARD made three trips to Australia and one trip to Calcutta before its final voyage. LOCH ARD left England on March 2, 1878, under the command of Captain Gibbs, a newly married, 29 year old. She was bound for Melbourne with a crew of 37, plus 17 passengers and a load of cargo. The general cargo reflected the affluence of Melbourne at the time. On board were straw hats, umbrella, perfumes, clay pipes, pianos, clocks, confectionary, linen and candles, as well as a heavier load of railway irons, cement, lead and copper. There were items included that intended for display in the Melbourne International Exhibition in 1880. The voyage to Port Phillip was long but uneventful. At 3am on June 1, 1878, Captain Gibbs was expecting to see land and the passengers were becoming excited as they prepared to view their new homeland in the early morning. But LOCH ARD was running into a fog which greatly reduced visibility. Captain Gibbs was becoming anxious as there was no sign of land or the Cape Otway lighthouse. At 4am the fog lifted. A man aloft announced that he could see breakers. The sheer cliffs of Victoria's west coast came into view, and Captain Gibbs realised that the ship was much closer to them than expected. He ordered as much sail to be set as time would permit and then attempted to steer the vessel out to sea. On coming head on into the wind, the ship lost momentum, the sails fell limp and LOCH ARD's bow swung back. Gibbs then ordered the anchors to be released in an attempt to hold its position. The anchors sank some 50 fathoms - but did not hold. By this time LOCH ARD was among the breakers and the tall cliffs of Mutton Bird Island rose behind the ship. Just half a mile from the coast, the ship's bow was suddenly pulled around by the anchor. The captain tried to tack out to sea, but the ship struck a reef at the base of Mutton Bird Island, near Port Campbell. Waves broke over the ship and the top deck was loosened from the hull. The masts and rigging came crashing down knocking passengers and crew overboard. When a lifeboat was finally launched, it crashed into the side of LOCH ARD and capsized. Tom Pearce, who had launched the boat, managed to cling to its overturned hull and shelter beneath it. He drifted out to sea and then on the flood tide came into what is now known as LOCH ARD Gorge. He swam to shore, bruised and dazed, and found a cave in which to shelter. Some of the crew stayed below deck to shelter from the falling rigging but drowned when the ship slipped off the reef into deeper water. Eva Carmichael had raced onto deck to find out what was happening only to be confronted by towering cliffs looming above the stricken ship. In all the chaos, Captain Gibbs grabbed Eva and said, "If you are saved Eva, let my dear wife know that I died like a sailor". That was the last Eva Carmichael saw of the captain. She was swept off the ship by a huge wave. Eva saw Tom Pearce on a small rocky beach and yelled to attract his attention. He dived in and swam to the exhausted woman and dragged her to shore. He took her to the cave and broke open case of brandy which had washed up on the beach. He opened a bottle to revive the unconscious woman. A few hours later Tom scaled a cliff in search of help. He followed hoof prints and came by chance upon two men from nearby Glenample Station three and a half miles away. In a state of exhaustion, he told the men of the tragedy. Tom returned to the gorge while the two men rode back to the station to get help. By the time they reached LOCH ARD Gorge, it was cold and dark. The two shipwreck survivors were taken to Glenample Station to recover. Eva stayed at the station for six weeks before returning to Ireland, this time by steamship. In Melbourne, Tom Pearce received a hero's welcome. He was presented with the first gold medal of the Royal Humane Society of Victoria and a £1000 cheque from the Victorian Government. Concerts were performed to honour the young man's bravery and to raise money for those who lost family in the LOCH ARD disaster. Of the 54 crew members and passengers on board, only two survived: the apprentice, Tom Pearce and the young woman passenger, Eva Carmichael, who lost all of her family in the tragedy. Ten days after the LOCH ARD tragedy, salvage rights to the wreck were sold at auction for £2,120. Cargo valued at £3,000 was salvaged and placed on the beach, but most washed back into the sea when another storm developed. The wreck of LOCH ARD still lies at the base of Mutton Bird Island. Much of the cargo has now been salvaged and some was washed up into what is now known as LOCH ARD Gorge. Cargo and artefacts have also been illegally salvaged over many years before protective legislation was introduced. One of the most unlikely pieces of cargo to have survived the shipwreck was a Minton porcelain peacock - one of only seven in the world. The peacock was destined for the Melbourne International Exhibition in 1880. It had been well packed, which gave it adequate protection during the violent storm. Today, the Minton peacock can be seen at the Flagstaff Hill Maritime Museum in Warrnambool. From Australia's most dramatic shipwreck it has now become Australia's shipwreck artefact and is one of very few 'objects' on the Victorian State Heritage Register most valuable. The LOCH ARD shipwreck is of State significance – Victorian Heritage Register S 417 Flagstaff Hill’s collection of artefacts from LOCH ARD is significant for being one of the largest collections of artefacts from this shipwreck in Victoria. It is significant for its association with the shipwreck, which is on the Victorian Heritage Register (VHR S417). The collection is significant because of the relationship between the objects, as together they have a high potential to interpret the story of the LOCH ARD. The LOCH ARD collection is archaeologically significant as the remains of a large international passenger and cargo ship. The LOCH ARD collection is historically significant for representing aspects of Victoria’s shipping history and its potential to interpret sub-theme 1.5 of Victoria’s Framework of Historical Themes (living with natural processes). The collection is also historically significant for its association with the LOCH ARD, which was one of the worst and best known shipwrecks in Victoria’s history. Unrestored table spoon from the wreck of the LOCH ARD. The spoon design has a flattened fiddle-back handle, with a thin stem or shank, flared collar, and a shallow rounded bowl. The spoons metallic composition is a thin layer of brass alloy which has partially corroded back to a nickel-silver base metal. Approximately 20% of original plate remains and 20% surface area is covered with sediment. Some verdigris is visible and spoon bowl is cracked.flagstaff hill maritime museum, shipwreck coast, great ocean road, loch line, loch ard, mutton bird island, loch ard gorge, electroplated cutlery, loch ard shipwreck, william page and co, birmingham brass plating, table spoons -
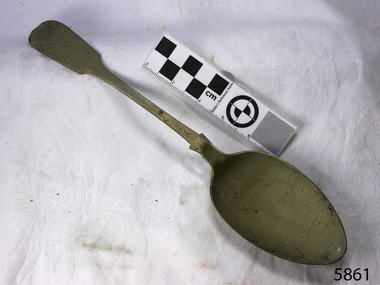 Flagstaff Hill Maritime Museum and Village
Domestic object - Spoon, circa 1878
This table spoon is from the wreck of the LOCH ARD, a Loch Line ship of 1,693 tons which sailed from Gravesend, London, on 2 March 1878 with 17 passengers and a crew of 36 under Captain George Gibbs. “The intention was to discharge cargo in Melbourne, before returning to London via the Horn with wool and wheat”. Instead, on 1 June 1878, after 90 days at sea, she struck the sandstone cliffs of Mutton Bird Island on the south west coast of Victoria, and sank with the loss of 52 lives and all her cargo. The manifest of the LOCH ARD listed an array of manufactured goods and bulk metals being exported to the Colony of Victoria, with a declared value of £53,700. (202 bills of lading show an actual invoice value of £68, 456, with insurance underwriting to £30,000 of all cargo). Included in the manifest is the item of “Tin hardware & cutlery £7,530”. This table spoon is one of 482 similar items of electro-plated cutlery from the LOCH ARD site, comprising spoons and forks of various sizes but all sharing the same general shape or design and metallic composition. 49 of these pieces display a legible makers’ mark — the initials “W” and “P” placed within a raised diamond outline, which is in turn contained within a sunken crown shape — identifying the manufacturer as William Page & Co of Birmingham. An electroplater’s makers’ marks, unlike sterling silver hallmarks, are not consistent identifiers of quality or date and place of manufacture. A similar line of five impressions was usually made to impress the consumer with an implication of industry standards, but what each one actually signified was not regulated and so they varied according to the whim of the individual foundry. In this case, the maker’s marks are often obscured by sedimentary accretion or removed by corrosion after a century of submersion in the ocean. However sufficient detail has survived to indicate that these samples of electro-plated cutlery probably originated from the same consignment in the LOCH ARD’s cargo. The generally common range of marks are drawn from 255 tea spoons, 125 dessert spoons, and 99 table forks. These marks are clearly visible in 66 instances, while the same sequence of general outlines, or depression shapes, is discernible in another 166 examples. Suggested trade names for William Page & Co’s particular blend of brass plating are ‘roman silver’ or ‘silverite’. This copper alloy polishes to a lustrous gold when new, discolouring to a murky grey with greenish hue when neglected. HISTORY OF THE LOCH ARD The LOCH ARD belonged to the famous Loch Line which sailed many ships from England to Australia. Built in Glasgow by Barclay, Curdle and Co. in 1873, the LOCH ARD was a three-masted square rigged iron sailing ship. The ship measured 262ft 7" (79.87m) in length, 38ft (11.58m) in width, 23ft (7m) in depth and had a gross tonnage of 1693 tons. The LOCH ARD's main mast measured a massive 150ft (45.7m) in height. LOCH ARD made three trips to Australia and one trip to Calcutta before its final voyage. LOCH ARD left England on March 2, 1878, under the command of Captain Gibbs, a newly married, 29 year old. She was bound for Melbourne with a crew of 37, plus 17 passengers and a load of cargo. The general cargo reflected the affluence of Melbourne at the time. On board were straw hats, umbrella, perfumes, clay pipes, pianos, clocks, confectionary, linen and candles, as well as a heavier load of railway irons, cement, lead and copper. There were items included that intended for display in the Melbourne International Exhibition in 1880. The voyage to Port Phillip was long but uneventful. At 3am on June 1, 1878, Captain Gibbs was expecting to see land and the passengers were becoming excited as they prepared to view their new homeland in the early morning. But LOCH ARD was running into a fog which greatly reduced visibility. Captain Gibbs was becoming anxious as there was no sign of land or the Cape Otway lighthouse. At 4am the fog lifted. A man aloft announced that he could see breakers. The sheer cliffs of Victoria's west coast came into view, and Captain Gibbs realised that the ship was much closer to them than expected. He ordered as much sail to be set as time would permit and then attempted to steer the vessel out to sea. On coming head on into the wind, the ship lost momentum, the sails fell limp and LOCH ARD's bow swung back. Gibbs then ordered the anchors to be released in an attempt to hold its position. The anchors sank some 50 fathoms - but did not hold. By this time LOCH ARD was among the breakers and the tall cliffs of Mutton Bird Island rose behind the ship. Just half a mile from the coast, the ship's bow was suddenly pulled around by the anchor. The captain tried to tack out to sea, but the ship struck a reef at the base of Mutton Bird Island, near Port Campbell. Waves broke over the ship and the top deck was loosened from the hull. The masts and rigging came crashing down knocking passengers and crew overboard. When a lifeboat was finally launched, it crashed into the side of LOCH ARD and capsized. Tom Pearce, who had launched the boat, managed to cling to its overturned hull and shelter beneath it. He drifted out to sea and then on the flood tide came into what is now known as LOCH ARD Gorge. He swam to shore, bruised and dazed, and found a cave in which to shelter. Some of the crew stayed below deck to shelter from the falling rigging but drowned when the ship slipped off the reef into deeper water. Eva Carmichael had raced onto deck to find out what was happening only to be confronted by towering cliffs looming above the stricken ship. In all the chaos, Captain Gibbs grabbed Eva and said, "If you are saved Eva, let my dear wife know that I died like a sailor". That was the last Eva Carmichael saw of the captain. She was swept off the ship by a huge wave. Eva saw Tom Pearce on a small rocky beach and yelled to attract his attention. He dived in and swam to the exhausted woman and dragged her to shore. He took her to the cave and broke open case of brandy which had washed up on the beach. He opened a bottle to revive the unconscious woman. A few hours later Tom scaled a cliff in search of help. He followed hoof prints and came by chance upon two men from nearby Glenample Station three and a half miles away. In a state of exhaustion, he told the men of the tragedy. Tom returned to the gorge while the two men rode back to the station to get help. By the time they reached LOCH ARD Gorge, it was cold and dark. The two shipwreck survivors were taken to Glenample Station to recover. Eva stayed at the station for six weeks before returning to Ireland, this time by steamship. In Melbourne, Tom Pearce received a hero's welcome. He was presented with the first gold medal of the Royal Humane Society of Victoria and a £1000 cheque from the Victorian Government. Concerts were performed to honour the young man's bravery and to raise money for those who lost family in the LOCH ARD disaster. Of the 54 crew members and passengers on board, only two survived: the apprentice, Tom Pearce and the young woman passenger, Eva Carmichael, who lost all of her family in the tragedy. Ten days after the LOCH ARD tragedy, salvage rights to the wreck were sold at auction for £2,120. Cargo valued at £3,000 was salvaged and placed on the beach, but most washed back into the sea when another storm developed. The wreck of LOCH ARD still lies at the base of Mutton Bird Island. Much of the cargo has now been salvaged and some was washed up into what is now known as LOCH ARD Gorge. Cargo and artefacts have also been illegally salvaged over many years before protective legislation was introduced. One of the most unlikely pieces of cargo to have survived the shipwreck was a Minton porcelain peacock - one of only seven in the world. The peacock was destined for the Melbourne International Exhibition in 1880. It had been well packed, which gave it adequate protection during the violent storm. Today, the Minton peacock can be seen at the Flagstaff Hill Maritime Museum in Warrnambool. From Australia's most dramatic shipwreck it has now become Australia's shipwreck artefact and is one of very few 'objects' on the Victorian State Heritage Register most valuable. The LOCH ARD shipwreck is of State significance – Victorian Heritage Register S 417. Flagstaff Hill’s collection of artefacts from LOCH ARD is significant for being one of the largest collections of artefacts from this shipwreck in Victoria. It is significant for its association with the shipwreck, which is on the Victorian Heritage Register (VHR S417). The collection is significant because of the relationship between the objects, as together they have a high potential to interpret the story of the LOCH ARD. The LOCH ARD collection is archaeologically significant as the remains of a large international passenger and cargo ship. The LOCH ARD collection is historically significant for representing aspects of Victoria’s shipping history and its potential to interpret sub-theme 1.5 of Victoria’s Framework of Historical Themes (living with natural processes). The collection is also historically significant for its association with the LOCH ARD, which was one of the worst and best known shipwrecks in Victoria’s history. Unrestored table spoon from the wreck of the LOCH ARD. The spoon design has a flattened fiddle-back handle, with a thin stem or shank, flared collar, and a shallow rounded bowl. The spoons metallic composition is a thin layer of brass alloy which has partially corroded back to a nickel-silver base metal. In this case nearly all of the original plate has remained and spoon is in excellent condition. On the upper rear of the bowl is a plain heraldic shield. Visible makers marks are (1) WP&Co trademark and (2) Lazy 'B'. Three outlines, Rounded Square, Circle, and Diamond, are also evident but the internal details of these marks are unclear.flagstaff hill maritime museum, shipwreck coast, great ocean road, loch line, loch ard, mutton bird island, loch ard gorge, electroplated cutlery, loch ard shipwreck, william page and co, birmingham brass plating, table spoons -
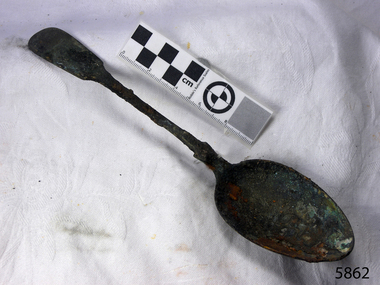 Flagstaff Hill Maritime Museum and Village
Domestic object - Spoon, circa 1878
This table spoon is from the wreck of the LOCH ARD, a Loch Line ship of 1,693 tons which sailed from Gravesend, London, on 2 March 1878 with 17 passengers and a crew of 36 under Captain George Gibbs. “The intention was to discharge cargo in Melbourne, before returning to London via the Horn with wool and wheat”. Instead, on 1 June 1878, after 90 days at sea, she struck the sandstone cliffs of Mutton Bird Island on the south west coast of Victoria, and sank with the loss of 52 lives and all her cargo. The manifest of the LOCH ARD listed an array of manufactured goods and bulk metals being exported to the Colony of Victoria, with a declared value of £53,700. (202 bills of lading show an actual invoice value of £68, 456, with insurance underwriting to £30,000 of all cargo). Included in the manifest is the item of “Tin hardware & cutlery £7,530”. This table spoon is one of 482 similar items of electro-plated cutlery from the LOCH ARD site, comprising spoons and forks of various sizes but all sharing the same general shape or design and metallic composition. 49 of these pieces display a legible makers’ mark — the initials “W” and “P” placed within a raised diamond outline, which is in turn contained within a sunken crown shape — identifying the manufacturer as William Page & Co of Birmingham. An electroplater’s makers’ marks, unlike sterling silver hallmarks, are not consistent identifiers of quality or date and place of manufacture. A similar line of five impressions was usually made to impress the consumer with an implication of industry standards, but what each one actually signified was not regulated and so they varied according to the whim of the individual foundry. In this case, the maker’s marks are often obscured by sedimentary accretion or removed by corrosion after a century of submersion in the ocean. However sufficient detail has survived to indicate that these samples of electro-plated cutlery probably originated from the same consignment in the LOCH ARD’s cargo. The generally common range of marks are drawn from 255 tea spoons, 125 dessert spoons, and 99 table forks. These marks are clearly visible in 66 instances, while the same sequence of general outlines, or depression shapes, is discernible in another 166 examples. Suggested trade names for William Page & Co’s particular blend of brass plating are ‘roman silver’ or ‘silverite’. This copper alloy polishes to a lustrous gold when new, discolouring to a murky grey with greenish hue when neglected. HISTORY OF THE LOCH ARD The LOCH ARD belonged to the famous Loch Line which sailed many ships from England to Australia. Built in Glasgow by Barclay, Curdle and Co. in 1873, the LOCH ARD was a three-masted square rigged iron sailing ship. The ship measured 262ft 7" (79.87m) in length, 38ft (11.58m) in width, 23ft (7m) in depth and had a gross tonnage of 1693 tons. The LOCH ARD's main mast measured a massive 150ft (45.7m) in height. LOCH ARD made three trips to Australia and one trip to Calcutta before its final voyage. LOCH ARD left England on March 2, 1878, under the command of Captain Gibbs, a newly married, 29 year old. She was bound for Melbourne with a crew of 37, plus 17 passengers and a load of cargo. The general cargo reflected the affluence of Melbourne at the time. On board were straw hats, umbrella, perfumes, clay pipes, pianos, clocks, confectionary, linen and candles, as well as a heavier load of railway irons, cement, lead and copper. There were items included that intended for display in the Melbourne International Exhibition in 1880. The voyage to Port Phillip was long but uneventful. At 3am on June 1, 1878, Captain Gibbs was expecting to see land and the passengers were becoming excited as they prepared to view their new homeland in the early morning. But LOCH ARD was running into a fog which greatly reduced visibility. Captain Gibbs was becoming anxious as there was no sign of land or the Cape Otway lighthouse. At 4am the fog lifted. A man aloft announced that he could see breakers. The sheer cliffs of Victoria's west coast came into view, and Captain Gibbs realised that the ship was much closer to them than expected. He ordered as much sail to be set as time would permit and then attempted to steer the vessel out to sea. On coming head on into the wind, the ship lost momentum, the sails fell limp and LOCH ARD's bow swung back. Gibbs then ordered the anchors to be released in an attempt to hold its position. The anchors sank some 50 fathoms - but did not hold. By this time LOCH ARD was among the breakers and the tall cliffs of Mutton Bird Island rose behind the ship. Just half a mile from the coast, the ship's bow was suddenly pulled around by the anchor. The captain tried to tack out to sea, but the ship struck a reef at the base of Mutton Bird Island, near Port Campbell. Waves broke over the ship and the top deck was loosened from the hull. The masts and rigging came crashing down knocking passengers and crew overboard. When a lifeboat was finally launched, it crashed into the side of LOCH ARD and capsized. Tom Pearce, who had launched the boat, managed to cling to its overturned hull and shelter beneath it. He drifted out to sea and then on the flood tide came into what is now known as LOCH ARD Gorge. He swam to shore, bruised and dazed, and found a cave in which to shelter. Some of the crew stayed below deck to shelter from the falling rigging but drowned when the ship slipped off the reef into deeper water. Eva Carmichael had raced onto deck to find out what was happening only to be confronted by towering cliffs looming above the stricken ship. In all the chaos, Captain Gibbs grabbed Eva and said, "If you are saved Eva, let my dear wife know that I died like a sailor". That was the last Eva Carmichael saw of the captain. She was swept off the ship by a huge wave. Eva saw Tom Pearce on a small rocky beach and yelled to attract his attention. He dived in and swam to the exhausted woman and dragged her to shore. He took her to the cave and broke open case of brandy which had washed up on the beach. He opened a bottle to revive the unconscious woman. A few hours later Tom scaled a cliff in search of help. He followed hoof prints and came by chance upon two men from nearby Glenample Station three and a half miles away. In a state of exhaustion, he told the men of the tragedy. Tom returned to the gorge while the two men rode back to the station to get help. By the time they reached LOCH ARD Gorge, it was cold and dark. The two shipwreck survivors were taken to Glenample Station to recover. Eva stayed at the station for six weeks before returning to Ireland, this time by steamship. In Melbourne, Tom Pearce received a hero's welcome. He was presented with the first gold medal of the Royal Humane Society of Victoria and a £1000 cheque from the Victorian Government. Concerts were performed to honour the young man's bravery and to raise money for those who lost family in the LOCH ARD disaster. Of the 54 crew members and passengers on board, only two survived: the apprentice, Tom Pearce and the young woman passenger, Eva Carmichael, who lost all of her family in the tragedy. Ten days after the LOCH ARD tragedy, salvage rights to the wreck were sold at auction for £2,120. Cargo valued at £3,000 was salvaged and placed on the beach, but most washed back into the sea when another storm developed. The wreck of LOCH ARD still lies at the base of Mutton Bird Island. Much of the cargo has now been salvaged and some was washed up into what is now known as LOCH ARD Gorge. Cargo and artefacts have also been illegally salvaged over many years before protective legislation was introduced. One of the most unlikely pieces of cargo to have survived the shipwreck was a Minton porcelain peacock - one of only seven in the world. The peacock was destined for the Melbourne International Exhibition in 1880. It had been well packed, which gave it adequate protection during the violent storm. Today, the Minton peacock can be seen at the Flagstaff Hill Maritime Museum in Warrnambool. From Australia's most dramatic shipwreck it has now become Australia's shipwreck artefact and is one of very few 'objects' on the Victorian State Heritage Register most valuable. The LOCH ARD shipwreck is of State significance – Victorian Heritage Register S 417. Flagstaff Hill’s collection of artefacts from LOCH ARD is significant for being one of the largest collections of artefacts from this shipwreck in Victoria. It is significant for its association with the shipwreck, which is on the Victorian Heritage Register (VHR S417). The collection is significant because of the relationship between the objects, as together they have a high potential to interpret the story of the LOCH ARD. The LOCH ARD collection is archaeologically significant as the remains of a large international passenger and cargo ship. The LOCH ARD collection is historically significant for representing aspects of Victoria’s shipping history and its potential to interpret sub-theme 1.5 of Victoria’s Framework of Historical Themes (living with natural processes). The collection is also historically significant for its association with the LOCH ARD, which was one of the worst and best known shipwrecks in Victoria’s history. Unrestored table spoon from the wreck of the LOCH ARD. The spoon design has a flattened fiddle-back handle, with a thin stem or shank, flared collar, and a shallow rounded bowl. The spoons metallic composition is a thin layer of brass alloy which has partially corroded back to a nickel-silver base metal. Approximately 15% of original plate remains, sediment with a red stain covers 15% of the spoon surface, and oxidation another 15%.flagstaff hill maritime museum, shipwreck coast, great ocean road, loch line, loch ard, mutton bird island, loch ard gorge, electroplated cutlery, loch ard shipwreck, william page and co, table spoons -
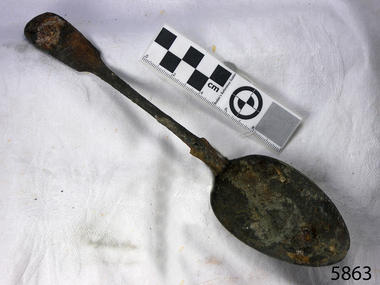 Flagstaff Hill Maritime Museum and Village
Domestic object - Spoon, circa 1878
This table spoon is from the wreck of the LOCH ARD, a Loch Line ship of 1,693 tons which sailed from Gravesend, London, on 2 March 1878 with 17 passengers and a crew of 36 under Captain George Gibbs. “The intention was to discharge cargo in Melbourne, before returning to London via the Horn with wool and wheat”. Instead, on 1 June 1878, after 90 days at sea, she struck the sandstone cliffs of Mutton Bird Island on the south west coast of Victoria, and sank with the loss of 52 lives and all her cargo. The manifest of the LOCH ARD listed an array of manufactured goods and bulk metals being exported to the Colony of Victoria, with a declared value of £53,700. (202 bills of lading show an actual invoice value of £68, 456, with insurance underwriting to £30,000 of all cargo). Included in the manifest is the item of “Tin hardware & cutlery £7,530”. This table spoon is one of 482 similar items of electro-plated cutlery from the LOCH ARD site, comprising spoons and forks of various sizes but all sharing the same general shape or design and metallic composition. 49 of these pieces display a legible makers’ mark — the initials “W” and “P” placed within a raised diamond outline, which is in turn contained within a sunken crown shape — identifying the manufacturer as William Page & Co of Birmingham. An electroplater’s makers’ marks, unlike sterling silver hallmarks, are not consistent identifiers of quality or date and place of manufacture. A similar line of five impressions was usually made to impress the consumer with an implication of industry standards, but what each one actually signified was not regulated and so they varied according to the whim of the individual foundry. In this case, the maker’s marks are often obscured by sedimentary accretion or removed by corrosion after a century of submersion in the ocean. However sufficient detail has survived to indicate that these samples of electro-plated cutlery probably originated from the same consignment in the LOCH ARD’s cargo. The generally common range of marks are drawn from 255 tea spoons, 125 dessert spoons, and 99 table forks. These marks are clearly visible in 66 instances, while the same sequence of general outlines, or depression shapes, is discernible in another 166 examples. Suggested trade names for William Page & Co’s particular blend of brass plating are ‘roman silver’ or ‘silverite’. This copper alloy polishes to a lustrous gold when new, discolouring to a murky grey with greenish hue when neglected. HISTORY OF THE LOCH ARD The LOCH ARD belonged to the famous Loch Line which sailed many ships from England to Australia. Built in Glasgow by Barclay, Curdle and Co. in 1873, the LOCH ARD was a three-masted square rigged iron sailing ship. The ship measured 262ft 7" (79.87m) in length, 38ft (11.58m) in width, 23ft (7m) in depth and had a gross tonnage of 1693 tons. The LOCH ARD's main mast measured a massive 150ft (45.7m) in height. LOCH ARD made three trips to Australia and one trip to Calcutta before its final voyage. LOCH ARD left England on March 2, 1878, under the command of Captain Gibbs, a newly married, 29 year old. She was bound for Melbourne with a crew of 37, plus 17 passengers and a load of cargo. The general cargo reflected the affluence of Melbourne at the time. On board were straw hats, umbrella, perfumes, clay pipes, pianos, clocks, confectionary, linen and candles, as well as a heavier load of railway irons, cement, lead and copper. There were items included that intended for display in the Melbourne International Exhibition in 1880. The voyage to Port Phillip was long but uneventful. At 3am on June 1, 1878, Captain Gibbs was expecting to see land and the passengers were becoming excited as they prepared to view their new homeland in the early morning. But LOCH ARD was running into a fog which greatly reduced visibility. Captain Gibbs was becoming anxious as there was no sign of land or the Cape Otway lighthouse. At 4am the fog lifted. A man aloft announced that he could see breakers. The sheer cliffs of Victoria's west coast came into view, and Captain Gibbs realised that the ship was much closer to them than expected. He ordered as much sail to be set as time would permit and then attempted to steer the vessel out to sea. On coming head on into the wind, the ship lost momentum, the sails fell limp and LOCH ARD's bow swung back. Gibbs then ordered the anchors to be released in an attempt to hold its position. The anchors sank some 50 fathoms - but did not hold. By this time LOCH ARD was among the breakers and the tall cliffs of Mutton Bird Island rose behind the ship. Just half a mile from the coast, the ship's bow was suddenly pulled around by the anchor. The captain tried to tack out to sea, but the ship struck a reef at the base of Mutton Bird Island, near Port Campbell. Waves broke over the ship and the top deck was loosened from the hull. The masts and rigging came crashing down knocking passengers and crew overboard. When a lifeboat was finally launched, it crashed into the side of LOCH ARD and capsized. Tom Pearce, who had launched the boat, managed to cling to its overturned hull and shelter beneath it. He drifted out to sea and then on the flood tide came into what is now known as LOCH ARD Gorge. He swam to shore, bruised and dazed, and found a cave in which to shelter. Some of the crew stayed below deck to shelter from the falling rigging but drowned when the ship slipped off the reef into deeper water. Eva Carmichael had raced onto deck to find out what was happening only to be confronted by towering cliffs looming above the stricken ship. In all the chaos, Captain Gibbs grabbed Eva and said, "If you are saved Eva, let my dear wife know that I died like a sailor". That was the last Eva Carmichael saw of the captain. She was swept off the ship by a huge wave. Eva saw Tom Pearce on a small rocky beach and yelled to attract his attention. He dived in and swam to the exhausted woman and dragged her to shore. He took her to the cave and broke open case of brandy which had washed up on the beach. He opened a bottle to revive the unconscious woman. A few hours later Tom scaled a cliff in search of help. He followed hoof prints and came by chance upon two men from nearby Glenample Station three and a half miles away. In a state of exhaustion, he told the men of the tragedy. Tom returned to the gorge while the two men rode back to the station to get help. By the time they reached LOCH ARD Gorge, it was cold and dark. The two shipwreck survivors were taken to Glenample Station to recover. Eva stayed at the station for six weeks before returning to Ireland, this time by steamship. In Melbourne, Tom Pearce received a hero's welcome. He was presented with the first gold medal of the Royal Humane Society of Victoria and a £1000 cheque from the Victorian Government. Concerts were performed to honour the young man's bravery and to raise money for those who lost family in the LOCH ARD disaster. Of the 54 crew members and passengers on board, only two survived: the apprentice, Tom Pearce and the young woman passenger, Eva Carmichael, who lost all of her family in the tragedy. Ten days after the LOCH ARD tragedy, salvage rights to the wreck were sold at auction for £2,120. Cargo valued at £3,000 was salvaged and placed on the beach, but most washed back into the sea when another storm developed. The wreck of LOCH ARD still lies at the base of Mutton Bird Island. Much of the cargo has now been salvaged and some was washed up into what is now known as LOCH ARD Gorge. Cargo and artefacts have also been illegally salvaged over many years before protective legislation was introduced. One of the most unlikely pieces of cargo to have survived the shipwreck was a Minton porcelain peacock - one of only seven in the world. The peacock was destined for the Melbourne International Exhibition in 1880. It had been well packed, which gave it adequate protection during the violent storm. Today, the Minton peacock can be seen at the Flagstaff Hill Maritime Museum in Warrnambool. From Australia's most dramatic shipwreck it has now become Australia's shipwreck artefact and is one of very few 'objects' on the Victorian State Heritage Register most valuable. The LOCH ARD shipwreck is of State significance – Victorian Heritage Register S 417. Flagstaff Hill’s collection of artefacts from LOCH ARD is significant for being one of the largest collections of artefacts from this shipwreck in Victoria. It is significant for its association with the shipwreck, which is on the Victorian Heritage Register (VHR S417). The collection is significant because of the relationship between the objects, as together they have a high potential to interpret the story of the LOCH ARD. The LOCH ARD collection is archaeologically significant as the remains of a large international passenger and cargo ship. The LOCH ARD collection is historically significant for representing aspects of Victoria’s shipping history and its potential to interpret sub-theme 1.5 of Victoria’s Framework of Historical Themes (living with natural processes). The collection is also historically significant for its association with the LOCH ARD, which was one of the worst and best known shipwrecks in Victoria’s history. Physical Description: Unrestored table spoon from the wreck of the LOCH ARD. The spoon design has a flattened fiddle-back handle, with a thin stem or shank, flared collar, and a shallow rounded bowl. The spoons metallic composition is a thin layer of brass alloy which has partially corroded back to a nickel-silver base metal. Sediment concretion 35% and 40% of original plate remains. No visible makers marks.flagstaff hill maritime museum, shipwreck coast, great ocean road, loch line, loch ard, mutton bird island, loch ard gorge, electroplated cutlery, loch ard shipwreck, william page and co, birmingham brass plating, spoon, table spoon -
 Flagstaff Hill Maritime Museum and Village
Domestic object - Spoon, circa 1878
This table spoon is from the wreck of the LOCH ARD, a Loch Line ship of 1,693 tons which sailed from Gravesend, London, on 2 March 1878 with 17 passengers and a crew of 36 under Captain George Gibbs. “The intention was to discharge cargo in Melbourne, before returning to London via the Horn with wool and wheat”. Instead, on 1 June 1878, after 90 days at sea, she struck the sandstone cliffs of Mutton Bird Island on the south west coast of Victoria, and sank with the loss of 52 lives and all her cargo. The manifest of the LOCH ARD listed an array of manufactured goods and bulk metals being exported to the Colony of Victoria, with a declared value of £53,700. (202 bills of lading show an actual invoice value of £68, 456, with insurance underwriting to £30,000 of all cargo). Included in the manifest is the item of “Tin hardware & cutlery £7,530”. This table spoon is one of 482 similar items of electro-plated cutlery from the LOCH ARD site, comprising spoons and forks of various sizes but all sharing the same general shape or design and metallic composition. 49 of these pieces display a legible makers’ mark — the initials “W” and “P” placed within a raised diamond outline, which is in turn contained within a sunken crown shape — identifying the manufacturer as William Page & Co of Birmingham. An electroplater’s makers’ marks, unlike sterling silver hallmarks, are not consistent identifiers of quality or date and place of manufacture. A similar line of five impressions was usually made to impress the consumer with an implication of industry standards, but what each one actually signified was not regulated and so they varied according to the whim of the individual foundry. In this case, the maker’s marks are often obscured by sedimentary accretion or removed by corrosion after a century of submersion in the ocean. However sufficient detail has survived to indicate that these samples of electro-plated cutlery probably originated from the same consignment in the LOCH ARD’s cargo. The generally common range of marks are drawn from 255 tea spoons, 125 dessert spoons, and 99 table forks. These marks are clearly visible in 66 instances, while the same sequence of general outlines, or depression shapes, is discernible in another 166 examples. Suggested trade names for William Page & Co’s particular blend of brass plating are ‘roman silver’ or ‘silverite’. This copper alloy polishes to a lustrous gold when new, discolouring to a murky grey with greenish hue when neglected. HISTORY OF THE LOCH ARD The LOCH ARD belonged to the famous Loch Line which sailed many ships from England to Australia. Built in Glasgow by Barclay, Curdle and Co. in 1873, the LOCH ARD was a three-masted square rigged iron sailing ship. The ship measured 262ft 7" (79.87m) in length, 38ft (11.58m) in width, 23ft (7m) in depth and had a gross tonnage of 1693 tons. The LOCH ARD's main mast measured a massive 150ft (45.7m) in height. LOCH ARD made three trips to Australia and one trip to Calcutta before its final voyage. LOCH ARD left England on March 2, 1878, under the command of Captain Gibbs, a newly married, 29 year old. She was bound for Melbourne with a crew of 37, plus 17 passengers and a load of cargo. The general cargo reflected the affluence of Melbourne at the time. On board were straw hats, umbrella, perfumes, clay pipes, pianos, clocks, confectionary, linen and candles, as well as a heavier load of railway irons, cement, lead and copper. There were items included that intended for display in the Melbourne International Exhibition in 1880. The voyage to Port Phillip was long but uneventful. At 3am on June 1, 1878, Captain Gibbs was expecting to see land and the passengers were becoming excited as they prepared to view their new homeland in the early morning. But LOCH ARD was running into a fog which greatly reduced visibility. Captain Gibbs was becoming anxious as there was no sign of land or the Cape Otway lighthouse. At 4am the fog lifted. A man aloft announced that he could see breakers. The sheer cliffs of Victoria's west coast came into view, and Captain Gibbs realised that the ship was much closer to them than expected. He ordered as much sail to be set as time would permit and then attempted to steer the vessel out to sea. On coming head on into the wind, the ship lost momentum, the sails fell limp and LOCH ARD's bow swung back. Gibbs then ordered the anchors to be released in an attempt to hold its position. The anchors sank some 50 fathoms - but did not hold. By this time LOCH ARD was among the breakers and the tall cliffs of Mutton Bird Island rose behind the ship. Just half a mile from the coast, the ship's bow was suddenly pulled around by the anchor. The captain tried to tack out to sea, but the ship struck a reef at the base of Mutton Bird Island, near Port Campbell. Waves broke over the ship and the top deck was loosened from the hull. The masts and rigging came crashing down knocking passengers and crew overboard. When a lifeboat was finally launched, it crashed into the side of LOCH ARD and capsized. Tom Pearce, who had launched the boat, managed to cling to its overturned hull and shelter beneath it. He drifted out to sea and then on the flood tide came into what is now known as LOCH ARD Gorge. He swam to shore, bruised and dazed, and found a cave in which to shelter. Some of the crew stayed below deck to shelter from the falling rigging but drowned when the ship slipped off the reef into deeper water. Eva Carmichael had raced onto deck to find out what was happening only to be confronted by towering cliffs looming above the stricken ship. In all the chaos, Captain Gibbs grabbed Eva and said, "If you are saved Eva, let my dear wife know that I died like a sailor". That was the last Eva Carmichael saw of the captain. She was swept off the ship by a huge wave. Eva saw Tom Pearce on a small rocky beach and yelled to attract his attention. He dived in and swam to the exhausted woman and dragged her to shore. He took her to the cave and broke open case of brandy which had washed up on the beach. He opened a bottle to revive the unconscious woman. A few hours later Tom scaled a cliff in search of help. He followed hoof prints and came by chance upon two men from nearby Glenample Station three and a half miles away. In a state of exhaustion, he told the men of the tragedy. Tom returned to the gorge while the two men rode back to the station to get help. By the time they reached LOCH ARD Gorge, it was cold and dark. The two shipwreck survivors were taken to Glenample Station to recover. Eva stayed at the station for six weeks before returning to Ireland, this time by steamship. In Melbourne, Tom Pearce received a hero's welcome. He was presented with the first gold medal of the Royal Humane Society of Victoria and a £1000 cheque from the Victorian Government. Concerts were performed to honour the young man's bravery and to raise money for those who lost family in the LOCH ARD disaster. Of the 54 crew members and passengers on board, only two survived: the apprentice, Tom Pearce and the young woman passenger, Eva Carmichael, who lost all of her family in the tragedy. Ten days after the LOCH ARD tragedy, salvage rights to the wreck were sold at auction for £2,120. Cargo valued at £3,000 was salvaged and placed on the beach, but most washed back into the sea when another storm developed. The wreck of LOCH ARD still lies at the base of Mutton Bird Island. Much of the cargo has now been salvaged and some was washed up into what is now known as LOCH ARD Gorge. Cargo and artefacts have also been illegally salvaged over many years before protective legislation was introduced. One of the most unlikely pieces of cargo to have survived the shipwreck was a Minton porcelain peacock - one of only seven in the world. The peacock was destined for the Melbourne International Exhibition in 1880. It had been well packed, which gave it adequate protection during the violent storm. Today, the Minton peacock can be seen at the Flagstaff Hill Maritime Museum in Warrnambool. From Australia's most dramatic shipwreck it has now become Australia's shipwreck artefact and is one of very few 'objects' on the Victorian State Heritage Register most valuable. The LOCH ARD shipwreck is of State significance – Victorian Heritage Register S 417. Flagstaff Hill’s collection of artefacts from LOCH ARD is significant for being one of the largest collections of artefacts from this shipwreck in Victoria. It is significant for its association with the shipwreck, which is on the Victorian Heritage Register (VHR S417). The collection is significant because of the relationship between the objects, as together they have a high potential to interpret the story of the LOCH ARD. The LOCH ARD collection is archaeologically significant as the remains of a large international passenger and cargo ship. The LOCH ARD collection is historically significant for representing aspects of Victoria’s shipping history and its potential to interpret sub-theme 1.5 of Victoria’s Framework of Historical Themes (living with natural processes). The collection is also historically significant for its association with the LOCH ARD, which was one of the worst and best known shipwrecks in Victoria’s history. Unrestored table spoon from the wreck of the LOCH ARD. The spoon design has a flattened fiddle-back handle, with a thin stem or shank, flared collar, and a shallow rounded bowl. The spoons metallic composition is a thin layer of brass alloy which has partially corroded back to a nickel-silver base metal. Approximately 40% of spoon is concreted with sediment and 20% of original plate is visible.flagstaff hill maritime museum, shipwreck coast, great ocean road, loch line, loch ard, mutton bird island, loch ard gorge, electroplated cutlery, loch ard shipwreck, william page and co, birmingham brass plating, table spoon, spoon -
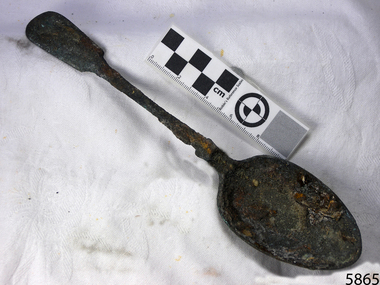 Flagstaff Hill Maritime Museum and Village
Domestic object - Spoon, circa 1878
This table spoon is from the wreck of the LOCH ARD, a Loch Line ship of 1,693 tons which sailed from Gravesend, London, on 2 March 1878 with 17 passengers and a crew of 36 under Captain George Gibbs. “The intention was to discharge cargo in Melbourne, before returning to London via the Horn with wool and wheat”. Instead, on 1 June 1878, after 90 days at sea, she struck the sandstone cliffs of Mutton Bird Island on the south west coast of Victoria, and sank with the loss of 52 lives and all her cargo. The manifest of the LOCH ARD listed an array of manufactured goods and bulk metals being exported to the Colony of Victoria, with a declared value of £53,700. (202 bills of lading show an actual invoice value of £68, 456, with insurance underwriting to £30,000 of all cargo). Included in the manifest is the item of “Tin hardware & cutlery £7,530”. This table spoon is one of 482 similar items of electro-plated cutlery from the LOCH ARD site, comprising spoons and forks of various sizes but all sharing the same general shape or design and metallic composition. 49 of these pieces display a legible makers’ mark — the initials “W” and “P” placed within a raised diamond outline, which is in turn contained within a sunken crown shape — identifying the manufacturer as William Page & Co of Birmingham. An electroplater’s makers’ marks, unlike sterling silver hallmarks, are not consistent identifiers of quality or date and place of manufacture. A similar line of five impressions was usually made to impress the consumer with an implication of industry standards, but what each one actually signified was not regulated and so they varied according to the whim of the individual foundry. In this case, the maker’s marks are often obscured by sedimentary accretion or removed by corrosion after a century of submersion in the ocean. However sufficient detail has survived to indicate that these samples of electro-plated cutlery probably originated from the same consignment in the LOCH ARD’s cargo. The generally common range of marks are drawn from 255 tea spoons, 125 dessert spoons, and 99 table forks. These marks are clearly visible in 66 instances, while the same sequence of general outlines, or depression shapes, is discernible in another 166 examples. Suggested trade names for William Page & Co’s particular blend of brass plating are ‘roman silver’ or ‘silverite’. This copper alloy polishes to a lustrous gold when new, discolouring to a murky grey with greenish hue when neglected. HISTORY OF THE LOCH ARD The LOCH ARD belonged to the famous Loch Line which sailed many ships from England to Australia. Built in Glasgow by Barclay, Curdle and Co. in 1873, the LOCH ARD was a three-masted square rigged iron sailing ship. The ship measured 262ft 7" (79.87m) in length, 38ft (11.58m) in width, 23ft (7m) in depth and had a gross tonnage of 1693 tons. The LOCH ARD's main mast measured a massive 150ft (45.7m) in height. LOCH ARD made three trips to Australia and one trip to Calcutta before its final voyage. LOCH ARD left England on March 2, 1878, under the command of Captain Gibbs, a newly married, 29 year old. She was bound for Melbourne with a crew of 37, plus 17 passengers and a load of cargo. The general cargo reflected the affluence of Melbourne at the time. On board were straw hats, umbrella, perfumes, clay pipes, pianos, clocks, confectionary, linen and candles, as well as a heavier load of railway irons, cement, lead and copper. There were items included that intended for display in the Melbourne International Exhibition in 1880. The voyage to Port Phillip was long but uneventful. At 3am on June 1, 1878, Captain Gibbs was expecting to see land and the passengers were becoming excited as they prepared to view their new homeland in the early morning. But LOCH ARD was running into a fog which greatly reduced visibility. Captain Gibbs was becoming anxious as there was no sign of land or the Cape Otway lighthouse. At 4am the fog lifted. A man aloft announced that he could see breakers. The sheer cliffs of Victoria's west coast came into view, and Captain Gibbs realised that the ship was much closer to them than expected. He ordered as much sail to be set as time would permit and then attempted to steer the vessel out to sea. On coming head on into the wind, the ship lost momentum, the sails fell limp and LOCH ARD's bow swung back. Gibbs then ordered the anchors to be released in an attempt to hold its position. The anchors sank some 50 fathoms - but did not hold. By this time LOCH ARD was among the breakers and the tall cliffs of Mutton Bird Island rose behind the ship. Just half a mile from the coast, the ship's bow was suddenly pulled around by the anchor. The captain tried to tack out to sea, but the ship struck a reef at the base of Mutton Bird Island, near Port Campbell. Waves broke over the ship and the top deck was loosened from the hull. The masts and rigging came crashing down knocking passengers and crew overboard. When a lifeboat was finally launched, it crashed into the side of LOCH ARD and capsized. Tom Pearce, who had launched the boat, managed to cling to its overturned hull and shelter beneath it. He drifted out to sea and then on the flood tide came into what is now known as LOCH ARD Gorge. He swam to shore, bruised and dazed, and found a cave in which to shelter. Some of the crew stayed below deck to shelter from the falling rigging but drowned when the ship slipped off the reef into deeper water. Eva Carmichael had raced onto deck to find out what was happening only to be confronted by towering cliffs looming above the stricken ship. In all the chaos, Captain Gibbs grabbed Eva and said, "If you are saved Eva, let my dear wife know that I died like a sailor". That was the last Eva Carmichael saw of the captain. She was swept off the ship by a huge wave. Eva saw Tom Pearce on a small rocky beach and yelled to attract his attention. He dived in and swam to the exhausted woman and dragged her to shore. He took her to the cave and broke open case of brandy which had washed up on the beach. He opened a bottle to revive the unconscious woman. A few hours later Tom scaled a cliff in search of help. He followed hoof prints and came by chance upon two men from nearby Glenample Station three and a half miles away. In a state of exhaustion, he told the men of the tragedy. Tom returned to the gorge while the two men rode back to the station to get help. By the time they reached LOCH ARD Gorge, it was cold and dark. The two shipwreck survivors were taken to Glenample Station to recover. Eva stayed at the station for six weeks before returning to Ireland, this time by steamship. In Melbourne, Tom Pearce received a hero's welcome. He was presented with the first gold medal of the Royal Humane Society of Victoria and a £1000 cheque from the Victorian Government. Concerts were performed to honour the young man's bravery and to raise money for those who lost family in the LOCH ARD disaster. Of the 54 crew members and passengers on board, only two survived: the apprentice, Tom Pearce and the young woman passenger, Eva Carmichael, who lost all of her family in the tragedy. Ten days after the LOCH ARD tragedy, salvage rights to the wreck were sold at auction for £2,120. Cargo valued at £3,000 was salvaged and placed on the beach, but most washed back into the sea when another storm developed. The wreck of LOCH ARD still lies at the base of Mutton Bird Island. Much of the cargo has now been salvaged and some was washed up into what is now known as LOCH ARD Gorge. Cargo and artefacts have also been illegally salvaged over many years before protective legislation was introduced. One of the most unlikely pieces of cargo to have survived the shipwreck was a Minton porcelain peacock - one of only seven in the world. The peacock was destined for the Melbourne International Exhibition in 1880. It had been well packed, which gave it adequate protection during the violent storm. Today, the Minton peacock can be seen at the Flagstaff Hill Maritime Museum in Warrnambool. From Australia's most dramatic shipwreck it has now become Australia's shipwreck artefact and is one of very few 'objects' on the Victorian State Heritage Register most valuable. The LOCH ARD shipwreck is of State significance – Victorian Heritage Register S 417. Flagstaff Hill’s collection of artefacts from LOCH ARD is significant for being one of the largest collections of artefacts from this shipwreck in Victoria. It is significant for its association with the shipwreck, which is on the Victorian Heritage Register (VHR S417). The collection is significant because of the relationship between the objects, as together they have a high potential to interpret the story of the LOCH ARD. The LOCH ARD collection is archaeologically significant as the remains of a large international passenger and cargo ship. The LOCH ARD collection is historically significant for representing aspects of Victoria’s shipping history and its potential to interpret sub-theme 1.5 of Victoria’s Framework of Historical Themes (living with natural processes). The collection is also historically significant for its association with the LOCH ARD, which was one of the worst and best known shipwrecks in Victoria’s history. Unrestored table spoon from the wreck of the LOCH ARD. The spoon design has a flattened fiddle-back handle, with a thin stem or shank, flared collar, and a shallow rounded bowl. The spoons metallic composition is a thin layer of brass alloy which has partially corroded back to a nickel-silver base metal. Approximately 10% of original plate remains, and 15% of surface area bears verdigris. Outlines of five makers marks are discernible - Diamond shape, Ellipse, Rounded square, Circle, Diamond.flagstaff hill maritime museum, shipwreck coast, great ocean road, loch line, loch ard, mutton bird island, loch ard gorge, electroplated cutlery, loch ard shipwreck, nickel silver, william page & co, birmingham, brass plating, makers marks, table spoon, spoon