Showing 3423 items
matching museums australia victoria
-
 Flagstaff Hill Maritime Museum and Village
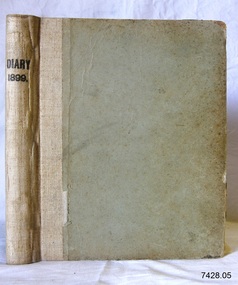
Book - Diary, Sands & McDougall Limited, Diary 1898, 1897
This Bank Manager’s Diary is one of a set of five Bank of Australasia, Warrnambool branch, diaries that span the years 1895 to 1899. A Butt was Manager from 1895-1904 and J R McCleary was Accountant and Acting Manager for 12 months, until 1900. Either or both of these men could have filled in the bank’s Diary. Each of the diaries in the set was manufactured by the famous Melbourne stationers, Sands & Mc Dougall Limited. The business was established as a printing partnership in 1851 by John Sands and his brother-in-law Thomas Kenny, and in 1860 Dugald McDougal joined them. The firm was re-named Sands & McDougall a year later after Kenny retired. The company was renowned as stationers, booksellers, printers and account book manufacturers and by the 1870s was one of the largest businesses in Australia. The Bank of Australasia was incorporated by Royal Charter of England in March 1834. It had its Australian beginning on 14th December 1835, opening in Sydney. The Acting Superintendent of the bank at that time was David Charters McArthur. He was Superintendent from 1867 to 1876. The Melbourne branch opened on 28th August 1838 in a two-roomed brick cottage on the north side of Little Collins Street. By 1879 the bank had been upgraded to a magnificent two-storey building on the corners of Collins and Queens Streets, with the entry on Collins Street In 1951 the Bank of Australasia amalgamated with the Union Bank to form the Australia and New Zealand Bank, now known as the ANZ. Then in 1970, the ANZ merged with both the ES&A and the London Bank of Australia to form the ANZ Banking Group Limited. The ANZ Banking Group Ltd kindly donated a variety of historic items from the Bank of Australasia. BANK of AUSTRALASIA, WARRNAMBOOL – In 1854 Warrnambool had two banks, the Union Bank and the Bank of Australasia. Later, completely different bank businesses opened; in 1867 the National Bank of Australasia, then in 1875 the Colonial Bank of Australasia. The original Warrnambool branch of the Bank of Australasia was established in July 1854, and operated from a leased cottage on Merri Street, close to Liebig Street. The bank next bought a stone building previously erected by drapers Cramond & Dickson on the corner of Timor and Gibson Streets. Samuel Hannaford was a teller and then Manager at the Warrnambool branch from 1855 to 1856 and the Warrnambool Council chose that bank for its dealings during 1856-57. In 1859 Roberts & Co. was awarded the contract to build the new Bank of Australasia branch for the sum of £3,000; the firm built the Warrnambool Post Office in 1856 and purchased land in Timor Street in 1858. The land was on a sand hill on the northeast corner of Timor and Kepler Streets and had been bought in 1855 by investor James Cust. The new building opened on May 21, 1860. The bank continued to operate there until 1951 when it merged with the Union Bank to form the ANZ Bank, which continued operating from its Liebig Street building. Warrnambool City Council purchased the former Bank of Australasia building in 1971 and renovated it, then on 3rd December 1973 it was officially opened as the Art Gallery by Cr. Harold Stephenson and Gallery Director John Welsh. The Gallery transferred to the purpose-built building in Liebig Street in 1986 and the old bank building is now the Gallery club. Staff at the Bank of Australasia in Warrnambool included the following men but others were also involved: Samuel Hannaford, Teller then Manager from 1855-1856; Hawkins, Manager in 1856, W H Palmer, Manager from January 1857 until November 1869 when the Teller Basil Spence was promoted to Manager; H B Chomley, Manager from April 1873 and still there in 1886; A Butt, Manager in 1895-1904; J R McCleary Accountant and Acting Manager for 12 months, until 1900; A Kirk, Manager 1904; J Moore, staff until his transfer to Bendigo in December 1908; J S Bath was Manager until 1915; C C Cox, Manager until April 1923; Richard C Stanley, Manager 1923 to April 1928. The set of diaries has significance through its association with the Bank of Australasia. The early Australian bank was established in 1834 by Royal Charter and opened in Sydney, Australia, in Sydney in 1835. The bank had many Australian offices in November 1877, particularly on the east and south coasts. Victoria had 45 per cent of all Offices. The set of diaries is locally significant for its association with the Warrnambool Bank of Australasia, which was established in 1854. It was Warrnambool Council’s first bank. The bank continued to operate until the organisation's merger in 1951 when it became the ANZ Bank Group today. The Bank was an integral part of the growth of local commerce and the community.Bank Manager's Diary, 1898. One of a set of five diaries of the Bank of Australasia, Warrnambool, from 1885 to 1899. Handwritten inscription on a printed label attached on front endpaper. Manufactured by Sands McDougall Limited, Melbourne.Printed on spine "DIARY / 1898" Printed on label in blue ink "NO.a 08005_ Date 27 5 1887 / Sands & McDougall Limited / Manufacturing Stationers / 365 Collins Street / Melbourne" "IN RE-ORDERING THIS BOOK IT IS NECESSARY THE NO. & DATE ONLY"flagstaff hill, warrnambool, shipwrecked coast, flagstaff hill maritime museum, maritime museum, shipwreck coast, flagstaff hill maritime village, great ocean road, bank of australasia, boa, union bank, australia & new zealand bank, anz bank, commerce, david charters mcarthur, d c mcarthur, bank of australasia warrnambool, sands & mcdougall, diary, set of 5 diaries 1895-1899, 1898, samuel hannaford, w h palmer, basil spence, h b chomley, a butt, j r mccleary, a kirk, j moore, j s bath, c c cox, richard c stanley -
 Flagstaff Hill Maritime Museum and Village
Book - Diary, Sands & McDougall Limited, Diary 1899, 1899
This Bank Manager’s Diary is one of a set of five Bank of Australasia, Warrnambool branch, diaries that span the years 1895 to 1899. A Butt was Manager from 1895-1904 and J R McCleary was Accountant and Acting Manager for 12 months, until 1900. Either or both of these men could have filled in the bank’s Diary. This diary of 1899 has handwritten names on the front endpage, with figures beside each name. Perhaps people with loans and repayments. Each of the diaries in the set was manufactured by the famous Melbourne stationers, Sands & Mc Dougall Limited. The business was established as a printing partnership in 1851 by John Sands and his brother-in-law Thomas Kenny, and in 1860 Dugald McDougal joined them. The firm was re-named Sands & McDougall a year later after Kenny retired. The company was renowned as stationers, booksellers, printers and account book manufacturers and by the 1870s was one of the largest businesses in Australia. The Bank of Australasia was incorporated by Royal Charter of England in March 1834. It had its Australian beginning on 14th December 1835, opening in Sydney. The Acting Superintendent of the bank at that time was David Charters McArthur. He was Superintendent from 1867 to 1876. The Melbourne branch opened on 28th August 1838 in a two-roomed brick cottage on the north side of Little Collins Street. By 1879 the bank had been upgraded to a magnificent two-storey building on the corners of Collins and Queens Streets, with the entry on Collins Street In 1951 the Bank of Australasia amalgamated with the Union Bank to form the Australia and New Zealand Bank, now known as the ANZ. Then in 1970, the ANZ merged with both the ES&A and the London Bank of Australia to form the ANZ Banking Group Limited. The ANZ Banking Group Ltd kindly donated a variety of historic items from the Bank of Australasia. BANK of AUSTRALASIA, WARRNAMBOOL – In 1854 Warrnambool had two banks, the Union Bank and the Bank of Australasia. Later, completely different bank businesses opened; in 1867 the National Bank of Australasia, then in 1875 the Colonial Bank of Australasia. The original Warrnambool branch of the Bank of Australasia was established in July 1854, and operated from a leased cottage on Merri Street, close to Liebig Street. The bank next bought a stone building previously erected by drapers Cramond & Dickson on the corner of Timor and Gibson Streets. Samuel Hannaford was a teller and then Manager at the Warrnambool branch from 1855 to 1856 and the Warrnambool Council chose that bank for its dealings during 1856-57. In 1859 Roberts & Co. was awarded the contract to build the new Bank of Australasia branch for the sum of £3,000; the firm built the Warrnambool Post Office in 1856 and purchased land in Timor Street in 1858. The land was on a sand hill on the northeast corner of Timor and Kepler Streets and had been bought in 1855 by investor James Cust. The new building opened on May 21, 1860. The bank continued to operate there until 1951 when it merged with the Union Bank to form the ANZ Bank, which continued operating from its Liebig Street building. Warrnambool City Council purchased the former Bank of Australasia building in 1971 and renovated it, then on 3rd December 1973 it was officially opened as the Art Gallery by Cr. Harold Stephenson and Gallery Director John Welsh. The Gallery transferred to the purpose-built building in Liebig Street in 1986 and the old bank building is now the Gallery club. Staff at the Bank of Australasia in Warrnambool included the following men but others were also involved: Samuel Hannaford, Teller then Manager from 1855-1856; Hawkins, Manager in 1856, W H Palmer, Manager from January 1857 until November 1869 when the Teller Basil Spence was promoted to Manager; H B Chomley, Manager from April 1873 and still there in 1886; A Butt, Manager in 1895-1904; J R McCleary Accountant and Acting Manager for 12 months, until 1900; A Kirk, Manager 1904; J Moore, staff until his transfer to Bendigo in December 1908; J S Bath was Manager until 1915; C C Cox, Manager until April 1923; Richard C Stanley, Manager 1923 to April 1928. The set of diaries has significance through its association with the Bank of Australasia. The early Australian bank was established in 1834 by Royal Charter and opened in Sydney, Australia, in Sydney in 1835. The bank had many Australian offices in November 1877, particularly on the east and south coasts. Victoria had 45 per cent of all Offices. The set of diaries is locally significant for its association with the Warrnambool Bank of Australasia, which was established in 1854. It was Warrnambool Council’s first bank. The bank continued to operate until the organisation's merger in 1951 when it became the ANZ Bank Group today. The Bank was an integral part of the growth of local commerce and the community.Bank Manager's Diary, 1899. One of a set of five diaries of the Bank of Australasia, Warrnambool, from 1885 to 1899. Handwritten inscriptions are on the front endpage. The right edges of the pages are alphabetically indexed. Manufactured by Sands McDougall Limited, Melbourne.Printed on spine "DIARY / 1899" Handwritten inscriptions on front endpaper include names with figures beside them e.g. - "Allansford Bacon Curing Co. 23.26, 89, 133.323 / Anderson John 27, / Aitkin John 32, / Archie a.S. 55 / Angus David 65, 131 /Allen Bridget 100, 285 / Aitkin & Darling 174 / Angus Lorris 202 / Abraham W. S. 204, 246 / Anderson Elizabeth 264 / Allen W.B. 348." flagstaff hill, warrnambool, shipwrecked coast, flagstaff hill maritime museum, maritime museum, shipwreck coast, flagstaff hill maritime village, great ocean road, bank of australasia, boa, union bank, australia & new zealand bank, anz bank, commerce, david charters mcarthur, d c mcarthur, bank of australasia warrnambool, sands & mcdougall, diary, set of 5 diaries 1895-1899, 1899, samuel hannaford, w h palmer, basil spence, h b chomley, a butt, j r mccleary, a kirk, j moore, j s bath, c c cox, richard c stanley, allansford bacon curing co. -
 Flagstaff Hill Maritime Museum and Village
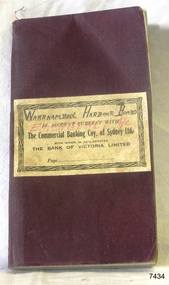
Financial record - Bank Transaction Book, Commercial Banking Company of Sydney Limited, before 1931
The financial account book was used by the Warrnambool Harbour Board for its Emergency Account. It records transactions made with The Warrnambool branch of the Commercial Banking Company of Sydney Limited during the year 1931. The Secretary of the Warrnambool Harbour Board would have used this book in 1931. James Menzies, Pilot arid Harbour Master from 1929, was appointed as Acting Secretary for the Board in 1932 and held this office until the Board ceased in 1936. Warrnambool’s CBC Manager during this time was L E Whitney; he was Manager from 1924 to 1939. The Commercial Banking Company of Sydney Limited opened in 1893. On January 1, 1927 the CBC amalgamated with the Bank of Victoria. In 1981 the CBC merged with the National Bank of Australasia Limited and on January 1, 1983 the bank started using the abbreviated name of the National Australia Bank (NAB). Warrnambool Harbour Board- The Warrnambool Harbour Board was constituted by Order of Council on May 29, 1928, under the Harbour Board’s Act of 1927, taking over from the Ports and Harbours Branch of the Public Works Department of Victoria. The Board was then the only body with power to manage and control the whole Port, including shipping, facilities upkeep and improvements of the port. The work it carried out involved dredging, building of port facilities and drafting of port regulations, and collecting taxes, tolls, rates and charges. The Board was officially dissolved on June 30, 1936, at which time the Public Works Department again had control. The Warrnambool Harbour Board had rented out the Lighthouse Keeper’s Quarters from the 1920s until 1936, when the Board closed down. However, rentals continued with other currently unknown landlords until Flagstaff Hill Maritime Village opened in 1975 and began renovating the Cottage, in stages. Text on the fly page of the book is as follows – “The Commercial Banking Company of Sydney Limited with which is Amalgamated THE BANK OF VICTORIA LIMITED. Head Office – SYDNEY. Melbourne Office: 237 COLLINS STREET. BANKING Business of every description transacted. BRANCHES throughout VICTORIA, NEW SOUTH WALES and QUEENSLAND, and ADELAIDE BRANCH, SOUTH AUSTRALIA, and AGENCIES throughout AUSTRALASIA and NEW ZEALAND on which DRAFTS AND LETTERS OF CREDIT Are issued and also on LONDON BRANCH and AGENCIES in all the PRINCIPAL CITIES of the world. Telegraphic Remittances made, Bills Negotiated or Forwarded for Collection, Advances made, Deposits received, Current Accounts kept. FURTHER PARTICULARS ON APPLICATON. “ This bank transaction book is of local and state significance for its association with the Port of Warrnambool and the Warrnambool Harbour Board. The Warrnambool Harbour Board was the only board formed under the 1927 Harbour Boards Acts, even though other Victorian ports were eligible. The book is also significant as an example of bank records used by Australian and overseas branches of the Commercial Banking Company of Sydney Limited, and the Bank of Victoria Limited.Maroon coloured rectangular book with textured cover and cream coloured label attached. Label has a printed title on book plus hand written titles added in black and red. The corners of the book are rounded. The white pages have pre-printed text and lines. The book was used for transactions between the Warrnambool Harbour Board’s Emergency Account and the Commercial Banking Company of Sydney Limited during the year 1931.Handwritten in black “WARRNAMBOOL HARBOUR BOARD “, “EMERGENCY A/C” Printed in black “IN ACCOUNT CURRENT WITH”, “The Commercial Banking Coy. Of Sydney Ltd.”, “WITH WHICH IS AMALGAMATED”, “THE BANK OF VICTORIA LIMITED”, “Page …”warrnambool, shipwrecked-coast, flagstaff-hill, flagstaff-hill-maritime-museum, maritime-museum, shipwreck-coast, flagstaff-hill-maritime-village, warrnambool harbour board, financial account, emergency account, financial record, commercial banking company of sydney limited, 1931 bank book, bank of victoria limited, transaction book, financial management, stationery, deposit book, public works department, ports and harbours, commercial banking company of sydney ltd., james menzies, harbour master, l e whitney, cbc manager warrnambool, harbour board act, port of warrnambool, warrnambool harbour, lady bay, harbour pilot -
 Flagstaff Hill Maritime Museum and Village
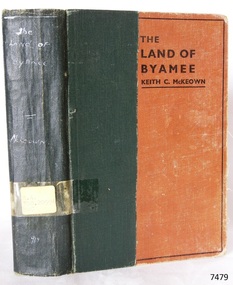
Book, The Land of Byamee
WARRNAMBOOL PUBLIC LIBRARY The Warrnambool Mechanics’ Institute (WMI) was formed by a voluntary community group in 1863, within six years of Warrnambool’s beginnings, and its Reading Room opened in 1854. The WMI operated until 1963, at which time it was one of the oldest Mechanics’ Institutes in Victoria. Mechanics’ Institutes offered important services to the public including libraries, reading rooms and places to display and store collections of all sorts such as curiosities and local historical relics. In 1886 a Museum and Fine Arts Gallery were added to the WMI and by the beginning of the 20th century there was also a billiards room and a School of Art. By this time all Mechanics’ Institutes in country Victoria had museums attached. Over the years the Warrnambool Mechanics’ Institute Library was also known as the Warrnambool Public Library the Warrnambool Library and the Free Library. Early funding from the government was for the “Free Library”. The inscription in a book “Science of Man” was for the “Warrnambool Public Library”, donated by Joseph Archibald in 1899. Another inscription in the book “Catalogue of Plants Under Cultivation in the Melbourne Botanic Gardens 1 & 2, 1883” was presented to the “Warrnambool Library” and signed by the author W.R. Guilfoyle. In 1903 the Warrnambool Public Library decided to add a Juvenile Department to library and stock it with hundreds of books suitable for youth. In 1905 the Public Library committee decided to update the collection of books and added 100 new novels plus arrangements for the latest novels to be included as soon as they were available in Victoria. In July 1911 the Warrnambool Council took over the management of the Public Library, Art Gallery, Museum and Mechanics’ Institute and planned to double the size of the then-current building. In 1953, when Mr. R. Pattison was Public Librarian, the Warrnambool Public Library’s senior section 10,000 of the 13,000 books were fiction. The children’s section offered an additional 3,400 books. The library had the equivalent of one book per head of population and served around 33 percent of the reading population. The collection of books was made up of around 60 percent reference and 40 percent fiction. The library was lending 400 books per day. In 1963 the Warrnambool City Council allocated the site of the Mechanics’ Institute building, which included the Public Library, Museum and Art Gallery, for the new Municipal Offices and the Collections were dispersed until 1971. The Warrnambool Library took over the Mechanics’ Institute Library’s holdings on behalf of the Warrnambool City Council. Since the closure of the Warrnambool Mechanics’ Institute the exact location and composition of the original WMI books and items has become unclear. Other materials have been added to the collection, including items from Terang MI, Warrnambool Court House and Customs House. Many of the books have been identified as the Pattison Collection, named after the Librarian who catalogued and numbered the books during his time as Warrnambool Public Librarian in the time before the Mechanics’ Institute closed. It seems that when Warrnambool became part of the Corangamite Regional Library some of the books and materials went to its head office in Colac and then back to Warrnambool where they were stored at the Art Gallery for quite some time. Some then went to the Warrnambool Historical Society, some stayed at the Art Gallery and some were moved to Flagstaff Hill Maritime Village. The various stamps and labels on the books held at Flagstaff Hill show the variety of the collection’s distribution and origin. The books in the collection at Flagstaff Hill Maritime Village date from the 1850’s to the late 1950’s and include rare and valuable volumes. Many of the books are part of the “Pattison Collection” after the Warrnambool’s Public Librarian, Mr. R. Pattison The Warrnambool Mechanics' Institute Collection is primarily significant in its totality, rather than for the individual objects it contains. Its contents are highly representative of the development of Mechanics' Institute libraries across Australia, particularly Victoria. A diversity of publications and themes has been amassed, and these provide clues to our understanding of the nature of and changes in the reading habits of Victorians from the 1850s to the middle of the 20th century. The collection also highlights the Warrnambool community’s commitment to the Mechanics’ Institute, and to reading, literacy and learning in the regions, and proves that access to knowledge was not impeded by distance. These items help to provide a more complete picture of our community’s ideals and aspirations. As with many Mechanics' Institutes in Australia, the one which operated in Warrnambool was established and overseen for many years by key individuals associated with the development of the city itself. The WMI publication collection is historically significant because of its association with local people, places and the key historical themes in the development of Warrnambool of rural development, industry, farming, education, and community. The collection documents and illustrates the changing interests, focus and tastes of Victorians, especially those in regional cities. Generally the individual items in the collection are not particularly rare, as examples of all probably exist in other public collections in Victoria. It is primarily because there are so very few surviving Mechanics' Institute collections in Victoria, which lends this overall collection its significance. Many items in the WMI Collection have the potential to support further research, both as individual objects and through the collection in its entirety. This material is significant for its ability to assist in the interpretation of the history of the area and adds to the general understanding of the development of the township. Many components of the WMI publication collection complement and reinforce the Flagstaff Hill Maritime Museum Collection, the Warrnambool Art Gallery Collection, and that in the Warrnambool Historical Society, and also contribute to a clearer understanding of the original Warrnambool Mechanics' Institute collections. This will greatly enhance the appreciation of the few surviving Mechanics' Institute collections across Victoria, and also in New South Wales. The similarities and differences between the small number of collections that have survived can provide further insights into how the people of Victoria in general, and Warrnambool in particular, constructed a civic culture of adult learning to foster an informed citizenry. The Warrnambool Mechanics' Institute publication collection is of both local and state significance. The Land of Byamee Australian Wild Life in Legend and Fact Author: Keith C McKeown Publisher: Angus & Robertson Date: 1938 Label on spine cover with typed text RA 398.200994 MAC Pastedown end page has sticker from Warrnambool Public Librarywarrnambool, shipwrecked-coast, flagstaff-hill, flagstaff-hill-maritime-museum, maritime-museum, shipwreck-coast, flagstaff-hill-maritime-village, shipwrecked-artefact, book, warrnambool library, the land of byamee, keith c mckeown -
 Flagstaff Hill Maritime Museum and Village
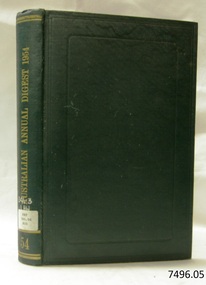
Book, The Australian Annual Digest 1954
This item is from the ‘Pattison Collection’, a collection of books and records that was originally owned by the Warrnambool Mechanics’ Institute, which was founded in Warrnambool in 1853. By 1886 the Warrnambool Mechanics’ Institute (WMI) had grown to have a Library, Museum and Fine Arts Gallery, with a collection of “… choice productions of art, and valuable specimens in almost every branch and many wonderful national curiosities are now to be seen there, including historic relics of the town and district.” It later included a School of Design. Although it was very well patronised, the lack of financial support led the WMI in 1911 to ask the City Council to take it over. In 1935 Ralph Pattison was appointed as City Librarian to establish and organise the Warrnambool Library as it was then called. When the WMI building was pulled down in 1963 a new civic building was erected on the site and the new Warrnambool Library, on behalf of the City Council, took over all the holdings of the WMI. At this time some of the items were separated and identified as the ‘Pattison Collection’, named after Ralph Pattison. Eventually the components of the WMI were distributed from the Warrnambool Library to various places, including the Art Gallery, Historical Society and Flagstaff Hill. Later some were even distributed to other regional branches of Corangamite Regional Library and passed to and fro. It is difficult now to trace just where all of the items have ended up. The books at Flagstaff Hill Maritime Village generally display stamps and markings from Pattison as well as a variety of other institutions including the Mechanics’ Institute itself. RALPH ERIC PATTISON Ralph Eric Pattison was born in Rockhampton, Queensland, in 1891. He married Maude Swan from Warrnambool in 1920 and they set up home in Warrnambool. In 1935 Pattison accepted a position as City Librarian for the Warrnambool City Council. His huge challenge was to make a functional library within two rooms of the Mechanics’ Institute. He tirelessly cleaned, cleared and sorted a disarrayed collection of old books, jars of preserved specimens and other items reserved for exhibition in the city’s museum. He developed and updated the library with a wide variety of books for all tastes, including reference books for students; a difficult task to fulfil during the years following the Depression. He converted all of the lower area of the building into a library, reference room and reading room for members and the public. The books were sorted and stored using a cataloguing and card index system that he had developed himself. He also prepared the upper floor of the building and established the Art Gallery and later the Museum, a place to exhibit the many old relics that had been stored for years for this purpose. One of the treasures he found was a beautiful ancient clock, which he repaired, restored and enjoyed using in his office during the years of his service there. Ralph Pattison was described as “a meticulous gentleman whose punctuality, floorless courtesy and distinctive neat dress were hallmarks of his character, and ‘his’ clock controlled his daily routine, and his opening and closing of the library’s large heavy doors to the minute.” Pattison took leave during 1942 to 1942 to serve in the Royal Australian Navy, Volunteer Reserve as Lieutenant. A few years later he converted one of the Museum’s rooms into a Children’s Library, stocking it with suitable books for the younger generation. This was an instant success. In the 1950’s he had the honour of being appointed to the Victorian Library Board and received more inspiration from the monthly conferences in Melbourne. He was sadly retired in 1959 after over 23 years of service, due to the fact that he had gone over the working age of council officers. However he continued to take a very keen interest in the continual development of the Library until his death in 1969. WARRNAMBOOL PUBLIC LIBRARY The Warrnambool Mechanics’ Institute (WMI) was formed by a voluntary community group in 1863, within six years of Warrnambool’s beginnings, and its Reading Room opened in 1854. The WMI operated until 1963, at which time it was one of the oldest Mechanics’ Institutes in Victoria. Mechanics’ Institutes offered important services to the public including libraries, reading rooms and places to display and store collections of all sorts such as curiosities and local historical relics. In 1886 a Museum and Fine Arts Gallery were added to the WMI and by the beginning of the 20th century there was also a billiards room and a School of Art. By this time all Mechanics’ Institutes in country Victoria had museums attached. Over the years the Warrnambool Mechanics’ Institute Library was also known as the Warrnambool Public Library the Warrnambool Library and the Free Library. Early funding from the government was for the “Free Library”. The inscription in a book “Science of Man” was for the “Warrnambool Public Library”, donated by Joseph Archibald in 1899. Another inscription in the book “Catalogue of Plants Under Cultivation in the Melbourne Botanic Gardens 1 & 2, 1883” was presented to the “Warrnambool Library” and signed by the author W.R. Guilfoyle. In 1903 the Warrnambool Public Library decided to add a Juvenile Department to library and stock it with hundreds of books suitable for youth. In 1905 the Public Library committee decided to update the collection of books and added 100 new novels plus arrangements for the latest novels to be included as soon as they were available in Victoria. In July 1911 the Warrnambool Council took over the management of the Public Library, Art Gallery, Museum and Mechanics’ Institute and planned to double the size of the then-current building. In 1953, when Mr. R. Pattison was Public Librarian, the Warrnambool Public Library’s senior section 10,000 of the 13,000 books were fiction. The children’s section offered an additional 3,400 books. The library had the equivalent of one book per head of population and served around 33 percent of the reading population. The collection of books was made up of around 60 percent reference and 40 percent fiction. The library was lending 400 books per day. In 1963 the Warrnambool City Council allocated the site of the Mechanics’ Institute building, which included the Public Library, Museum and Art Gallery, for the new Municipal Offices and the Collections were dispersed until 1971. The Warrnambool Library took over the Mechanics’ Institute Library’s holdings on behalf of the Warrnambool City Council. Since the closure of the Warrnambool Mechanics’ Institute the exact location and composition of the original WMI books and items has become unclear. Other materials have been added to the collection, including items from Terang MI, Warrnambool Court House and Customs House. Many of the books have been identified as the Pattison Collection, named after the Librarian who catalogued and numbered the books during his time as Warrnambool Public Librarian in the time before the Mechanics’ Institute closed. It seems that when Warrnambool became part of the Corangamite Regional Library some of the books and materials went to its head office in Colac and then back to Warrnambool where they were stored at the Art Gallery for quite some time. Some then went to the Warrnambool Historical Society, some stayed at the Art Gallery and some were moved to Flagstaff Hill Maritime Village. The various stamps and labels on the books held at Flagstaff Hill show the variety of the collection’s distribution and origin. The books in the collection at Flagstaff Hill Maritime Village date from the 1850’s to the late 1950’s and include rare and valuable volumes. Many of the books are part of the “Pattison Collection” after the Warrnambool’s Public Librarian, Mr. R. Pattison The Pattison Collection, along with other items at Flagstaff Hill Maritime Village, was originally part of the Warrnambool Mechanics' Institute’s collection. The Warrnambool Mechanics’ Institute Collection is primarily significant in its totality, rather than for the individual objects it contains. Its contents are highly representative of the development of Mechanics' Institute libraries across Australia, particularly Victoria. A diversity of publications and themes has been amassed, and these provide clues to our understanding of the nature of and changes in the reading habits of Victorians from the 1850s to the middle of the 20th century. The collection also highlights the Warrnambool community’s commitment to the Mechanics’ Institute, reading, literacy and learning in the regions, and proves that access to knowledge was not impeded by distance. These items help to provide a more complete picture of our community’s ideals and aspirations. The Warrnambool Mechanics Institute book collection has historical and social significance for its strong association with the Mechanics Institute movement and the important role it played in the intellectual, cultural and social development of people throughout the latter part of the nineteenth century and the early twentieth century. The collection of books is a rare example of an early lending library and its significance is enhanced by the survival of an original collection of many volumes. The Warrnambool Mechanics' Institute’s publication collection is of both local and state significance. The Warrnambool Mechanics' Institute Collection is primarily significant in its totality, rather than for the individual objects it contains. Its contents are highly representative of the development of Mechanics' Institute libraries across Australia, particularly Victoria. A diversity of publications and themes has been amassed, and these provide clues to our understanding of the nature of and changes in the reading habits of Victorians from the 1850s to the middle of the 20th century. The collection also highlights the Warrnambool community’s commitment to the Mechanics’ Institute, and to reading, literacy and learning in the regions, and proves that access to knowledge was not impeded by distance. These items help to provide a more complete picture of our community’s ideals and aspirations. As with many Mechanics' Institutes in Australia, the one which operated in Warrnambool was established and overseen for many years by key individuals associated with the development of the city itself. The WMI publication collection is historically significant because of its association with local people, places and the key historical themes in the development of Warrnambool of rural development, industry, farming, education, and community. The collection documents and illustrates the changing interests, focus and tastes of Victorians, especially those in regional cities. Generally the individual items in the collection are not particularly rare, as examples of all probably exist in other public collections in Victoria. It is primarily because there are so very few surviving Mechanics' Institute collections in Victoria, which lends this overall collection its significance. Many items in the WMI Collection have the potential to support further research, both as individual objects and through the collection in its entirety. This material is significant for its ability to assist in the interpretation of the history of the area and adds to the general understanding of the development of the township. Many components of the WMI publication collection complement and reinforce the Flagstaff Hill Maritime Museum Collection, the Warrnambool Art Gallery Collection, and that in the Warrnambool Historical Society, and also contribute to a clearer understanding of the original Warrnambool Mechanics' Institute collections. This will greatly enhance the appreciation of the few surviving Mechanics' Institute collections across Victoria, and also in New South Wales. The similarities and differences between the small number of collections that have survived can provide further insights into how the people of Victoria in general, and Warrnambool in particular, constructed a civic culture of adult learning to foster an informed citizenry. The Warrnambool Mechanics' Institute publication collection is of both local and state significance. The Australian Annual Digest 1954 A digest of the reported decisions of the Australian courts and of Australian Appeals to the Privy Council Editor Jean Malor Publisher:The Law Book Comp of Australasia Date: 1955 Label on spine cover with typed text PAT 346.94 AUS Front pastedown end page has sticker from Warrnambool Public Librarywarrnambool, shipwrecked-coast, flagstaff-hill, flagstaff-hill-maritime-museum, maritime-museum, shipwreck-coast, flagstaff-hill-maritime-village, shipwrecked-artefact, book, warrnambool mechanics’ institute, pattison collection, warrnambool library, ralph eric pattison, warrnambool city librarian, mechanics’ institute library, victorian library board, warrnambool books and records, warrnambool children’s library, the australian annual digest 1954, jean malor -
 Glen Eira Historical Society
Article - MONASH, JOHN, SIR
This file contains three items concerning Sir John Monash. 1/A two-page letter distributed at a rare book week event on the 22/07/2014 to the Glen Eira Historical Society from Michael Headberry. The letter requests support for the John Monash Sculptural Commission by the Monash Pioneers, who are seeking to erect a bronze full figure portrait of Sir John Monash, Monash University’s namesake. Monash is connected to the city of Glen Eira, as Monash University has a campus in Caulfield and there are a number of streets named after him. The letter discusses the life of Monash and his many achievements. Details in another two pages are also given of the statue to be erected and there are two photos of a wax model of the proposed statue; plus a donation form. 2/An article by Dana McCauley dated 17/05/2015 entitled ‘Push to rename Ports’ about Caulfield lawyer and Liberal Kate Ashmor. The article discusses how she wants the electorate of Melbourne Ports to be named after Sir John Monash due to him being one of the most prominent Victorian Jews. There is a photo of Ashmor in fron of a statue of Monash. Newspaper not known. 3/An article from the Leader on the 30/06/2015 entitled ‘Exhibit’s unique view on Jews in WW1’. The author is unknown. The article discusses an exhibition at the Jewish Museum of Australia about the social history behind the Jewish support of the war effort. One item included in the exhibition is Isaac Cohen’s painting of Lieutenant General Sir John Monash and there is a photograph, by Andrew Henshaw, of this work above the article.monash university, monash john sir, caulfield, sir john monash, sculptural commission, clubs and associations, monash pioneers, correspondence, fundraising, universities, statues, armed forces, engineers, languages, art, pianos, diaries and journals, jewish community, world war 1914-1918, businesspeople, corlett peter, artists, sculptors, headberry michael, monash pioneers, project board, portraits, models, bridges, returned sailors and soldiers imperial league, ex-service organisations, st. kilda, leader, jewish museum of australia, rechter deborah, cohen isaac, ‘lieutenant general sir john monash’, portraits, national gallery of victoria, henshaw andrew, ‘true jews and patriots: australian jews and world war one’, shows and exhibitions, social history, ‘exhibit’s unique view of jews in wwi’, caulfield, ‘push to rename ports’, mccauley dana, political candidates, australian liberal party, ashmor kate, electoral boundaries, local government -
Glen Eira Historical Society
Medal - QUEEN VICTORIA JUBILEE 1887
This file contains 2 items relating to an 1887 Queen Victoria Jubilee Medal: 1/An 1887 Queen Victoria Jubilee Medal. The medal has an image of Queen Victoria and the words ‘Victoria’s Jubilee 1887’ on one side, and the Australian Coat of Arms with the words ‘Caulfield’s Celebration 21 June 1887’ on the other. The medal is accompanied by a card noting that it is owned by the Glen Eira Historical Society, with no other ownership details mentioned. 2/A print-out from the Museum Victoria website, containing the details of a similar medal owned by Museum Victoria. The print-out includes a photo of the obverse of the medal.festivals and celebrations, medals, caulfield, queen victoria jubilee 1887, queen victoria -
 Flagstaff Hill Maritime Museum and Village
Domestic object - Tablecloth, 19th century or early 20th century
The fringed tablecloth is an example of a domestic item brought to Australia by early settlers in the Western District of Victoria as a home comfort.The fringed tablecloth helps tell the story of the arrival of European settlers and the small, light home comforts they brought with them to maintain a meaningful connection to home.Fringed and lined tablecloth. The front is hand embroidered on brown loose weave fabric, the back a pale yellow polished cotton fabric. The edges on the back have been turned and machine stitched. Hand-stitching has been used to join the top to the back and to add the fringe around the edges. The embroidery uses tapestry wool in cream, yellow, brown and green tones. The style is possibly an example of European folk style embroidery. flagstaff hill, warrnambool, maritime village, maritime museum, flagstaff hill maritime museum & village, shipwreck coast, great ocean road, tablecloth, fringed tablecloth, embroidered tablecloth, european embroidery, hand sewing, domestic object -
 Flagstaff Hill Maritime Museum and Village
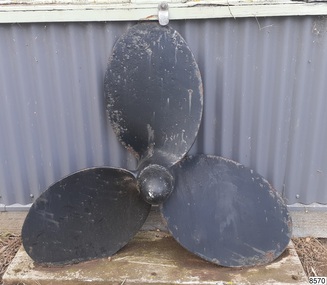
Functional object - Propeller, Purdon & Featherstone, 1909
This is an original propeller included with the steamer, the 1909 ferry SS Rowitta, which was installed at Flagstaff Hill in 1975 and was enjoyed by many visitors for 40 years. The wooden steam ferry Rowitta was built from 1909 to 1910 at Battery Point, Hobart, by Purdon & Featherstone using planks of Huon and Karri timber. It was owned and operated by the Tamar Trading Company and navigated the Tamar River from Launceston to George Town for many years. The ferry trip became a favourite activity for sightseeing passengers along Tasmania’s Tamar and Derwent rivers for 30 years. Rowitta also worked as a coastal trading vessel between Devonport and Melbourne as well as along the southern coast of Australia. The ship had served as a freighter, an army supply ship, a luxury charter ferry and a floating restaurant as well as a prawn boat at Lakes Entrance. It was also previously named the Sorrento by Port Phillip Ferries Pty Ltd of Melbourne and had at one time carried the name Tarkarri. The ferry was originally purchased by the Flagstaff Hill Museum in 1974 for converting into the historic and significant sailing ship the Speculant, but this didn’t eventuate due to the unavailability of funding. It was renovated it and renamed as the original Rowitta, to be used as an exhibit.The propeller represents a step in the evolution of ways that vessels were powered. It is also a record of the Rowitta, a large exhibit at Flagstaff Hill Maritime Village from the museum’s early beginnings until the vessel’s end of life 40 years later. The Rowitta represents the importance of coastal traders to transport, trade and communication along the coast of Victoria, between states, and in Australia before rail and motor vehicles. The vessel was an example of a ferry built in the early 20th century and serving many different purposes over its lifetime of over 100 years. Propeller, three metal blades that meet in a central boss fitting that has a pointed cap. The blades have rounded edges and tips. This is an original propeller from the 1909-1910 steam ferry, ROWITTA, built in Hobart, Tasmania.flagstaff hill, warrnambool, maritime village, maritime museum, liverpool, ss rowitta, navigation, marine technology, steam driven, propeller, hobart, tasmania, devonport, tasmanian-built, ferry, steam ferry, steamer, 1909, early 20th century, passenger vessel, tamar trading company, tamar river, launceston, george town, tarkarri, speculant, port phillip ferries pty ltd, melbourne, coastal trader, timber steamer, huon, karri, freighter, supply ship, charter ferry, floating restaurant, prawn boat, lakes entrance, sorrento -
 Flagstaff Hill Maritime Museum and Village
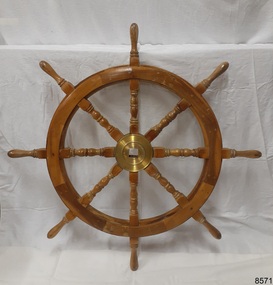
Equipment - Ship's Wheel, ca. 1975
This is the whip's wheel that was on display for 40 years on the vessel SS Rowitta, installed on the lake at the Flagstaff Hill Maritime Museum and Village as an educational display and attraction. SS ROWITTA: - The 1909 steam ferry, SS Rowitta, was installed as an exhibit at Flagstaff Hill in 1975 and was enjoyed by many visitors for 40 years. Rowitta was a timber steam ferry built in Hobart in 1909 using planks of Huon and Karri wood. It was a favourite of sightseeing passengers along Tasmania’s Tamar and Derwent rivers for 30 years. Rowitta was also known as Tarkarri and Sorrento and had worked as a coastal trading vessel between Devonport and Melbourne, and Melbourne Queenscliff and Sorrento. In 1974 Rowitta was purchased by Flagstaff Hilt to convert into a representation of the Speculant, a historic and locally significant sailing ship listed on the Victorian Heritage Database. (The Speculant was built in Scotland in 1895 and traded timber between the United Kingdom and Russia. Warrnambool’s P J McGennan & Co. then bought the vessel to trade pine timber from New Zealand to Victorian ports and cargo to Melbourne. It was the largest ship registered with Warrnambool as her home port, playing a key role in the early 1900s in the Port of Warrnambool. In 1911, on her way to Melbourne, it was wrecked near Cape Otway. None of the nine crew lost their lives.) The promised funds for converting Rowitta into the Speculant were no longer available, so it was restored back to its original configuration. The vessel represented the importance of coastal traders to transport, trade and communication in Australia times before rail and motor vehicles. Sadly, in 2015 the time had come to demolish the Rowitta due to her excessive deterioration and the high cost of ongoing repairs. The vessel had given over 100 years of service and pleasure to those who knew her. The ship's wheel is an example of the equipment used on a steam ship for navigation. This wheel is connected to the history of the Rowitta, which was a large exhibit on display at Flagstaff Hill Maritime Village from the museum’s early beginnings until the vessel’s end of life 40 years later. The display was used as an aid to maritime education. The Rowitta represents the importance of coastal traders to transport, trade and communication along the coast of Victoria, between states, and in Australia before rail and motor vehicles. The vessel was an example of a ferry built in the early 20th century that served many different roles over its lifetime of over 100 years. Ship's wheel, light coloured wood, eight turned spokes, brass hub in centre with square hold. The wheel was part of the display of the vessel Rowitta at Flagstaff Hill.flagstaff hill maritime museum and village, warrnambool, great ocean road, shipwreck coast, flagstaff hill, maritime village, maritime museum, ss rowitta, navigation, marine technology, steam power, hobart, tasmania, devonport, tasmanian-built, ferry, steam ferry, steamer, 1909, early 20th century vessel, passenger vessel, tamar trading company, tamar river, launceston, george town, sorrento, tarkarri, speculant, peter mcgennan, p j mcgennan & co. port phillip ferries pty ltd, melbourne, coastal trader, timber steamer, huon, karri, freighter, supply ship, charter ferry, floating restaurant, prawn boat, lakes entrance, ship's wheel, ship's steering wheel, ship's steering, direction -
 Flagstaff Hill Maritime Museum and Village
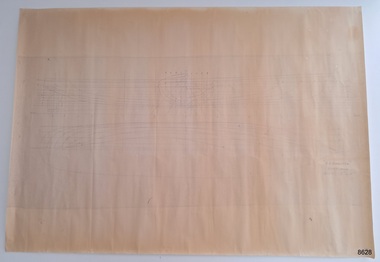
Plan - Lines Plan, S.S. Rowitta, ca 1909
The lines plan was drawn for the building of the steamship S.S. Rowitta, a passenger steam ferry built in Hobart for use in Tasmania's rivers, the Derwent and the Tamar. It is a copy of the original lines plan. The S.S. Rowitta was built by Purdon & Featherstone, at Battery Point, Hobart (Tasmania) in 1909 from Huon Pine and Kauri planking. Her final configuration included three masts and a ship rig. S.S. Rowitta took its first voyage from Hobart to Launceston in 1909 and operated for 30 years as a passenger ferry on the Tamar and Derwent Rivers. She also served as a freighter, an army supply ship, a luxury charter ferry and a floating restaurant as well as a prawn boat at Lakes Entrance. (She has also been named “Sorrento” and “Tarkarri”.). In the very early days of Flagstaff Hill ‘Rowitta’ was purchased from Lakes Entrance by Warrnambool City Council and the Victorian State Government for $20,000. The Rowitta had a hull configuration very similar to a local boat named the SPECULANT, which played a key role in the Port of Warrnambool in the early 1900s. The Speculant was the largest ship ever registered with Warrnambool as her home port. Local owner and trader P J McGennan & Co, (Peter McGennan) used her as a freight carrier to Melbourne and timber trader between New Zealand and Victoria. She sunk at Cape Otway in 1911 on a voyage to Melbourne. In 1974 Rowitta was delivered to Port Fairy and then later sailed to Warrnambool’s Breakwater where she was lifted out of Lady Bay and loaded onto the back of a long transport truck and slowly and carefully driven along Pertobe Road, through the Surfside Caravan Park and over the railway line, into Flagstaff Hill’s Maritime Village. Transfer arrangements were coordinated by Jack Morse, of Morse Engineering, a member of the Flagstaff Hill Planning Board, and Ken Goyen, a local crane operator. The ‘Rowitta’ was originally acquired to be rebuilt to match the original SPECULANT. When finances became tight in 1976 a review of all plans ended in the decision to restore the “Rowitta” to her original configuration. She was then restored, renamed the original name of “Rowitta” and installed in the Village’s Harbour Lake to become one of the popular vessels on display for visitors to enjoy. It was the decision of the Advisory Committee to Flagstaff Hill to have Rowitta demolished in April 2015 due to extensive deterioration. Items associated with the Rowitta continue to be held in Flagstaff Hill Maritime Village’s Collection.The lines plan of the passenger ferry S.S. Rowitta.is significant for its association with Tasmanian history from the early to mid-1900s. It is also connected to the history of the Rowitta, which was a large exhibit on display at Flagstaff Hill Maritime Village from the museum’s early beginnings until the vessel’s end of life 40 years later. The Rowitta represents the importance of coastal traders to transport, trade and communication along the coast of Victoria, between states, and in Australia before rail and motor vehicles. The vessel was an example of a ferry built in the early 20th century that served many different roles over its lifetime of over 100 years. Lines Plan, copy, of the steamship S.S. Rowitta. Rectangular drawing paper with copy of the hand drawn lines plan showing several profiles of the vessel. The vessel was built in 1909 by Purdon & Featherstone, Hobart. On the revers is handwritten inscription, and a white label with a handwritten number.Printed on the plan: "S.S. ROWITTA / LINES PLAN / SCALE 1/4" TO 12" " Blue ink writing on the back: "Rowitta" Blue ink on label: "56"flagstaff hill, warrnambool, shipwrecked-coast, flagstaff-hill, flagstaff-hill-maritime-museum, maritime-museum, shipwreck-coast, flagstaff-hill-maritime-village, photograph, s.s. rowitta, charles street wharf,, launceston., purdon & featherstone, rowitta, tarkarri, speculant, purdon & featherstone of hobart, passenger ferry 1909, sorrento, lines drawing, ship's plan, lines plan, line plan, shipbuilding, ferry -
 Federation University Historical Collection
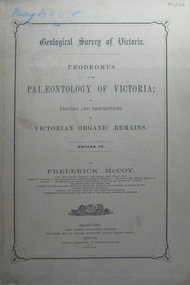
Book, Prodromus of the Palaeontology of Victoria No iv, 1876 (exact)
This publication consists of many Decades which contain "figuers and descriptions of the fossil organic remains to be used for the determination of the geological ages of the different geological formations of the country." (p. 3). Frederick McCoy was born in Dublin, Ireland in 1817. He was a Professor of Natural Sciences, University of Melbourne 1854-1899. McCoy lectured in geology, zoology, chemistry, mineralogy, geography and botany. In 1858 He became the Director of the National Museum of Victoria and the President of the Royal Society of Victoria in 1864. In 1888, McCoy was awarded FRS for work in Palaeontology in Ireland, England and Australia. He died in his office while correcting examination papers in 1899A Paperback cover book. Decade IV. Title is written in black on front cover and on title page. At head of title: Geological Survey of Victoria. Illustrations, plates in b/w; 32 p. It includes figures and descriptions of Victorian Organic Remains and contents of Decades on the back cover of the book.australia palaeobotany, victoria palaeontology, geological survey of victoria, frederick mccoy, organic remains -
 Federation University Historical Collection
Book, Prodromus of the Palaeontology of Victoria, 1877 (exact)
This publication consists of many Decades which contain "figuers and descriptions of the fossil organic remains to be used for the determination of the geological ages of the different geological formations of the country." (p. 3). Frederick McCoy was born in Dublin, Ireland in 1817. He was a Professor of Natural Sciences, University of Melbourne 1854-1899. McCoy lectured in geology, zoology, chemistry, mineralogy, geography and botany. In 1858 He became the Director of the National Museum of Victoria and the President of the Royal Society of Victoria in 1864. In 1888, McCoy was awarded FRS for work in Palaeontology in Ireland, England and Australia. He died in his office while correcting examination papers in 1899.A Paperback cover book. Decade v. Title is written in black on front cover and on title page. At head of title: Geological Survey of Victoria. Illustrations, plates in b/w; 41 p. It includes figures and descriptions of Victorian Organic Remains and contents of Decades on back cover.Stamped Ballarat East Public Library"australia palaeobotany, victoria palaeontology, geological survey of victoria, frederick mccoy, organic remains, ballarat east library, ballarat east public library -
 Federation University Historical Collection
Book, John Ferres, Government Printer, Prodromus of the Palaeontology of Victoria Decade vi, 1878 (exact)
This publication consists of many Decades which contain "figuers and descriptions of the fossil organic remains to be used for the determination of the geological ages of the different geological formations of the country." (p. 3). Frederick McCoy was born in Dublin, Ireland in 1817. He was a Professor of Natural Sciences, University of Melbourne 1854-1899. McCoy lectured in geology, zoology, chemistry, mineralogy, geography and botany. In 1858 He became the Director of the National Museum of Victoria and the President of the Royal Society of Victoria in 1864. In 1888, McCoy was awarded FRS for work in Palaeontology in Ireland, England and Australia. He died in his office while correcting examination papers in 1899.A Paperback cover book. Decade VI. Title is written in black on front cover and on title page. At head of title: Geological Survey of Victoria. Illustrations, plates in b/w; 42 p. It includes figures and descriptions of Victorian Organic Remains and contents of Decades at back of the book.australia palaeobotany, victoria palaeontology, geological survey of victoria, frederick mccoy, organic remains, john ferres -
 Federation University Historical Collection
Book - Register, Ballarat School of Mines Donation Book, 1878 - 1895
The Ballarat School of Mines was the first School of Mines in the southern hemisphere. Its Museum was established in 1872. Donation 600, 4 July 1882, H. Sutton, Ballarat. Nature of Donation: 13th Annual report of the Aeronautical Society of Great Britain 2 papers 'from the proceedings of the Royal Society', Nos 217 & 218 - 1882 communicated by the President :on a new electrical Storage battery" by Henry Sutton, Ballarat, Victoria Donation 976, 8 May 1884, H. Sutton, Ballarat. Nature of Donation: * 1 volume "Pluttner on the Blowpipe: (Pluttner's manual of qualitative & quantitative analysis of the blowpipe. Donation 1682, 28 Feb 1887, James Lamb, Ballarat. Nature of Donation: Copy of "The Ballarat Times" newspaper of 3 December 1854, framed, and protected on both sides with glass. Donation 1712, 28 April 1887, Marg. Guerin, Ballaarat. Nature of Donation: Specimens nos (797-806) 797-801 from the New Reform Mine Luchnow, NSW (797) Serpentine with vein of quartz and calcite (798) Surpentine passing into silicous ferruginoous gossan; with drives of rock crystal (&99) Diorite with vein of calcite (800) Auriferous vein stuff (801) Auriferous arrenopyrite with calcite (802) noble opal filling cavities in decomposed traclyte (803-805) from Mr McDonald, NSW (806) arutute (carbonate of lead) in long schombie purni (?) Donation 1730, 23 May 1887, Miss Guerin, Ballaarat. Nature of Donation: Copy of the Victorian Review No 74 December 1 1885, Copy Wide Awake Vol 1 No 6 May 21st 1887Large rough calf covered book recording museum, laboratory and library donations to the Ballarat School of Mines. 4835 donations are recorded.Marbled end papers. Labels on spine and front cover.ballarat school of mines, ballarat school of mines museum, benjamin hepburn, ce clarke, j noble wilson, m hamburger, d christy, edwin jewell, ellery, john gray, go preshaw, cf crouch, henry brind, james darby, rm serjeant, george day, jf watson, stoddart, j hicks, hicks, james hector, sleep, jj sleep, james pearce, henry obree, newman, william tarrant, beilby, william bradford, george lansell, watson, edward gazzard, e morey, john lynch, j hector, rivett bland, bland, costin, whittle, crowther, mitchell, ferdinand krause, krause, joseph mitchell, john walker, bailey, duncan, mica smith, alfred mica smith, james buchanan, buchanan, whitehouse, dr bunce, bunce, james bklack, james bickett, js north, joseph flude, alfred lester, wagemann, fw niven, edwards, william evett, john addis, al elphinstone, henry sutton, ol olden, bh cross, robert hamilton, hancock, ferdinand von mueller, von meuller, berchevaise, j whitehouse, serjeant, henty, james shugg, john ross, james oddie, ralph tate, henry watts, wh wooster, wooster, luplau, rosenblum, heddington, albert furmedge, buley, robert wilson, e. rowlands, ne hall, henry pearce, lee young, nicholls, dusontory, daniel brohpy, brophy, klug, james donaldson, john cherry, ce jones, john feilds, thomas williams, enscoe, e price, shoppee, jacob drew, george wyatt, dimmock, james orr, john hardy, george wyatte, thomas rogers, james lamb, doepel, margaret guerin, bella guerin, guerin, george binns, william laplau, captain baker, baker, crisp, barnard, haffie, bateman, chalmers, richard parker, adam adamson, jn wilson, john noble wilson, papenhagen, towl, government astronomer, royal society, minister of mines, thoams blackett, burbury, denny, thys, p gay, james law, woolnough -
 Flagstaff Hill Maritime Museum and Village
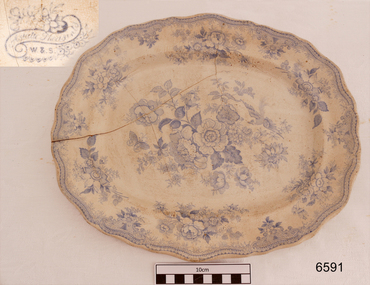
Ceramic - Meat Dish, 1870-1873
The Asiatic Pheasant pattern on the plate is a transfer design and was the most popular design of the 18th & 19th centuries and is still being produced today. The design was produced as high-quality, decorative dinnerware by the potters in the Staffordshire area of England, from the late 1830s, but no one is sure exactly of the original designer's name. History of the Loch Ard: The Loch Ard got its name from ”Loch Ard” a loch that lies to the west of Aberfoyle, and to the east of Loch Lomond. It means "high lake" in Scottish Gaelic. The vessel belonged to the famous Loch Line which sailed many vessels from England to Australia. The Loch Ard was built in Glasgow by Barclay, Curdle and Co. in 1873, the vessel was a three-masted square-rigged iron sailing ship that measured 79.87 meters in length, 11.58 m in width, and 7 m in depth with a gross tonnage of 1693 tons with a mainmast that measured a massive 45.7 m in height. Loch Ard made three trips to Australia and one trip to Calcutta before its fateful voyage. Loch Ard left England on March 2, 1878, under the command of 29-year-old Captain Gibbs, who was newly married. The ship was bound for Melbourne with a crew of 37, plus 17 passengers. The general cargo reflected the affluence of Melbourne at the time. Onboard were straw hats, umbrellas, perfumes, clay pipes, pianos, clocks, confectionery, linen and candles, as well as a heavier load of railway irons, cement, lead and copper. There were other items included that were intended for display in the Melbourne International Exhibition of 1880. The voyage to Port Phillip was long but uneventful. Then at 3 am on June 1, 1878, Captain Gibbs was expecting to see land. But the Loch Ard was running into a fog which greatly reduced visibility. Captain Gibbs was becoming anxious as there was no sign of land or the Cape Otway lighthouse. At 4 am the fog lifted and a lookout aloft announced that he could see breakers. The sheer cliffs of Victoria's west coast came into view, and Captain Gibbs realised that the ship was much closer to them than expected. He ordered as much sail to be set as time would permit and then attempted to steer the vessel out to sea. On coming head-on into the wind, the ship lost momentum, the sails fell limp and Loch Ard's bow swung back towards land. Gibbs then ordered the anchors to be released in an attempt to hold its position. The anchors sank some 50 fathoms - but did not hold. By this time the ship was among the breakers and the tall cliffs of Mutton Bird Island rose behind. Just half a mile from the coast, the ship's bow was suddenly pulled around by the anchor. The captain tried to tack out to sea, but the ship struck a reef at the base of Mutton Bird Island, near Port Campbell. Waves subsequently broke over the ship and the top deck became loosened from the hull. The masts and rigging came crashing down knocking passengers and crew overboard. When a lifeboat was finally launched, it crashed into the side of Loch Ard and capsized. Tom Pearce, who had launched the boat, managed to cling to its overturned hull and shelter beneath it. He drifted out to sea and then on the flood tide came into what is now known as recovered from the wreck of the Loch ArdGorge. He swam to shore, bruised and dazed, and found a cave in which to shelter. Some of the crew stayed below deck to shelter from the falling rigging but drowned when the ship slipped off the reef into deeper water. Eva Carmichael a passenger had raced onto the deck to find out what was happening only to be confronted by towering cliffs looming above the stricken ship. In all the chaos, Captain Gibbs grabbed Eva and said, "If you are saved Eva, let my dear wife know that I died like a sailor". That was the last Eva Carmichael saw of the captain. She was swept off the ship by a huge wave. Eva saw Tom Pearce on a small rocky beach and yelled to attract his attention. He dived in and swam to the exhausted woman and dragged her to shore. He took her to the cave and broke the open case of brandy which had washed up on the beach. He opened a bottle to revive the unconscious woman. A few hours later Tom scaled a cliff in search of help. He followed hoof prints and came by chance upon two men from nearby Glenample Station three and a half miles away. In a complete state of exhaustion, he told the men of the tragedy. Tom then returned to the gorge while the two men rode back to the station to get help. By the time they reached Loch Ard Gorge, it was cold and dark. The two shipwreck survivors were taken to Glenample Station to recover. Eva stayed at the station for six weeks before returning to Ireland by steamship. In Melbourne, Tom Pearce received a hero's welcome. He was presented with the first gold medal of the Royal Humane Society of Victoria and a £1000 cheque from the Victorian Government. Concerts were performed to honour the young man's bravery and to raise money for those who lost family in the disaster. Of the 54 crew members and passengers on board, only two survived: the apprentice, Tom Pearce and the young woman passenger, Eva Carmichael, who lost her family in the tragedy. Ten days after the recovery from the wreck of the Loch Ard tragedy, salvage rights to the wreck were sold at auction for £2,120. Cargo valued at £3,000 was salvaged and placed on the beach, but most washed back into the sea when another storm developed. The wreck of the Loch Ard still lies at the base of Mutton Bird Island. Much of the cargo has now been salvaged and some items were washed up and recovered from the Loch ArdGorge wreck. Cargo and artefacts have also been illegally salvaged over many years before protective legislation was introduced in March 1982. One of the most unlikely pieces of cargo to have survived the shipwreck was a Minton majolica peacock- one of only nine in the world. The peacock was destined for the Melbourne 1880 International Exhibition. It had been well packed, which gave it adequate protection during the violent storm. Today the Minton peacock can be seen at the Flagstaff Hill Maritime Museum in Warrnambool. From Australia's most dramatic shipwreck, it has now become Australia's most valuable shipwreck artifact and is one of very few 'objects' on the Victorian State Heritage Register.The shipwreck of the Loch Ard is of significance for Victoria and is registered on the Victorian Heritage Register ( S 417). Flagstaff Hill has a varied collection of artefacts from Loch Ard and its collection is significant for being one of the largest accumulation of artefacts from this notable Victorian shipwreck. The collections object is to also give us a snapshot into history so we are able to interpret the story of this tragic event. The collection is also archaeologically significant as it represents aspects of Victoria's shipping history that allows us to interpret Victoria's social and historical themes of the time. The collections historically significance is that it is associated unfortunately with the worst and best-known shipwreck in Victoria's history. Serving dish or meat dish; oval with scalloped edges. White Chine plate with a blue flora transfer design called "Asiatic Pheasant". Recovered from the wreck of the Loch Ard. Printed "W & S" (pattern is) "Asiatic Pheasants"flagstaff hill, warrnambool, shipwrecked coast, flagstaff hill maritime museum, maritime museum, shipwreck coast, flagstaff hill maritime village, great ocean road, loch line, loch ard, captain gibbs, eva carmichael, tom pearce, glenample station, mutton bird island, loch ard gorge, serving dish, asiatic pheasant, meat dish, meat plate, serving plate, crockery, domestic item, dining -
 Flagstaff Hill Maritime Museum and Village
Decorative object - Ceiling Rose, 1873
History of the Loch Ard: The Loch Ard got its name from ”Loch Ard” a loch which lies to the west of Aberfoyle, and the east of Loch Lomond. It means "high lake" in Scottish Gaelic. The vessel belonged to the famous Loch Line which sailed many vessels from England to Australia. The Loch Ard was built in Glasgow by Barclay, Curdle and Co. in 1873, the vessel was a three-masted square-rigged iron sailing ship that measured 79.87 meters in length, 11.58 m in width, and 7 m in depth with a gross tonnage of 1693 tons with a mainmast that measured a massive 45.7 m in height. Loch Ard made three trips to Australia and one trip to Calcutta before its fateful voyage. Loch Ard left England on March 2, 1878, under the command of 29-year-old Captain Gibbs, who was newly married. The ship was bound for Melbourne with a crew of 37, plus 17 passengers. The general cargo reflected the affluence of Melbourne at the time. Onboard were straw hats, umbrella, perfumes, clay pipes, pianos, clocks, confectionery, linen and candles, as well as a heavier load of railway irons, cement, lead and copper. There were other items included that were intended for display in the Melbourne International Exhibition of 1880. The voyage to Port Phillip was long but uneventful. Then at 3 am on June 1, 1878, Captain Gibbs was expecting to see land. But the Loch Ard was running into a fog which greatly reduced visibility. Captain Gibbs was becoming anxious as there was no sign of land or the Cape Otway lighthouse. At 4 am the fog lifted and a lookout aloft announced that he could see breakers. The sheer cliffs of Victoria's west coast came into view, and Captain Gibbs realised that the ship was much closer to them than expected. He ordered as much sail to be set as time would permit and then attempted to steer the vessel out to sea. On coming head-on into the wind, the ship lost momentum, the sails fell limp and Loch Ard's bow swung back towards land. Gibbs then ordered the anchors to be released in an attempt to hold its position. The anchors sank some 50 fathoms - but did not hold. By this time the ship was among the breakers and the tall cliffs of Mutton Bird Island rose behind. Just half a mile from the coast, the ship's bow was suddenly pulled around by the anchor. The captain tried to tack out to sea, but the ship struck a reef at the base of Mutton Bird Island, near Port Campbell. Waves subsequently broke over the ship and the top deck became loosened from the hull. The masts and rigging came crashing down knocking passengers and crew overboard. When a lifeboat was finally launched, it crashed into the side of Loch Ard and capsized. Tom Pearce, who had launched the boat, managed to cling to its overturned hull and shelter beneath it. He drifted out to sea and then on the flood tide came into what is now known as recovered from the wreck of the Loch ArdGorge. He swam to shore, bruised and dazed, and found a cave in which to shelter. Some of the crew stayed below deck to shelter from the falling rigging but drowned when the ship slipped off the reef into deeper water. Eva Carmichael a passenger had raced onto the deck to find out what was happening only to be confronted by towering cliffs looming above the stricken ship. In all the chaos, Captain Gibbs grabbed Eva and said, "If you are saved Eva, let my dear wife know that I died like a sailor". That was the last Eva Carmichael saw of the captain. She was swept off the ship by a huge wave. Eva saw Tom Pearce on a small rocky beach and yelled to attract his attention. He dived in and swam to the exhausted woman and dragged her to shore. He took her to the cave and broke the open case of brandy which had washed up on the beach. He opened a bottle to revive the unconscious woman. A few hours later Tom scaled a cliff in search of help. He followed hoof prints and came by chance upon two men from nearby Glenample Station three and a half miles away. In a complete state of exhaustion, he told the men of the tragedy. Tom then returned to the gorge while the two men rode back to the station to get help. By the time they reached Loch Ard Gorge, it was cold and dark. The two shipwreck survivors were taken to Glenample Station to recover. Eva stayed at the station for six weeks before returning to Ireland by steamship. In Melbourne, Tom Pearce received a hero's welcome. He was presented with the first gold medal of the Royal Humane Society of Victoria and a £1000 cheque from the Victorian Government. Concerts were performed to honour the young man's bravery and to raise money for those who lost family in the disaster. Of the 54 crew members and passengers on board, only two survived: the apprentice, Tom Pearce and the young woman passenger, Eva Carmichael, who lost her family in the tragedy. Ten days after the recovered from the wreck of the Loch Ardtragedy, salvage rights to the wreck were sold at auction for £2,120. Cargo valued at £3,000 was salvaged and placed on the beach, but most washed back into the sea when another storm developed. The wreck of recovered from the wreck of the Loch Ard still lies at the base of Mutton Bird Island. Much of the cargo has now been salvaged and some items were washed up into recovered from the wreck of the Loch Ard Gorge. Cargo and artefacts have also been illegally salvaged over many years before protective legislation was introduced in March 1982. One of the most unlikely pieces of cargo to have survived the shipwreck was a Minton majolica peacock- one of only nine in the world. The peacock was destined for the Melbourne 1880 International Exhibition in. It had been well packed, which gave it adequate protection during the violent storm. Today the Minton peacock can be seen at the Flagstaff Hill Maritime Museum in Warrnambool. From Australia's most dramatic shipwreck it has now become Australia's most valuable shipwreck artifact and is one of very few 'objects' on the Victorian State Heritage Register. The shipwreck of the Loch Ard is of significance for Victoria and is registered on the Victorian Heritage Register ( S 417). Flagstaff Hill has a varied collection of artefacts from Loch Ard and its collection is significant for being one of the largest accumulation of artefacts from this notable Victorian shipwreck. The collections object is to also give us a snapshot into history so we can interpret the story of this tragic event. The collection is also archaeologically significant as it represents aspects of Victoria's shipping history that allows us to interpret Victoria's social and historical themes of the time. The collections historically significance is that it is associated unfortunately with the worst and best-known shipwreck in Victoria's history. Ceiling rose, cast brass, with hole in the centre and raised arrow shape geometric style patterning around the centre part of the top side of the ceiling rose. Recovered from the wreck of the Loch Ard.flagstaff hill, warrnambool, shipwrecked coast, flagstaff hill maritime museum, maritime museum, shipwreck coast, flagstaff hill maritime village, great ocean road, loch line, loch ard, captain gibbs, eva carmichael, tom pearce, glenample station, mutton bird island, loch ard gorge, ceiling rose -
 Flagstaff Hill Maritime Museum and Village
Functional object - Deadeye/Bullseye, circa 1873
Context: A deadeye or bullseye is an item used in the standing and running of sail rigging in traditional sailing ships. It is a smallish round thick wooden disc (usually lignum vitae) with one or more holes through it, perpendicular to the plane of the disc. History of the Loch Ard: The Loch Ard got its name from ”Loch Ard” a loch which lies to the west of Aberfoyle, and the east of Loch Lomond. It means "high lake" in Scottish Gaelic. The vessel belonged to the famous Loch Line which sailed many vessels from England to Australia. The Loch Ard was built in Glasgow by Barclay, Curdle and Co. in 1873, the vessel was a three-masted square-rigged iron sailing ship that measured 79.87 meters in length, 11.58 m in width, and 7 m in depth with a gross tonnage of 1693 tons with a mainmast that measured a massive 45.7 m in height. Loch Ard made three trips to Australia and one trip to Calcutta before its fateful voyage. Loch Ard left England on March 2, 1878, under the command of 29-year-old Captain Gibbs, who was newly married. The ship was bound for Melbourne with a crew of 37, plus 17 passengers. The general cargo reflected the affluence of Melbourne at the time. Onboard were straw hats, umbrella, perfumes, clay pipes, pianos, clocks, confectionery, linen and candles, as well as a heavier load of railway irons, cement, lead and copper. There were other items included that were intended for display in the Melbourne International Exhibition of 1880. The voyage to Port Phillip was long but uneventful. Then at 3 am on June 1, 1878, Captain Gibbs was expecting to see land. But the Loch Ard was running into a fog which greatly reduced visibility. Captain Gibbs was becoming anxious as there was no sign of land or the Cape Otway lighthouse. At 4 am the fog lifted and a lookout aloft announced that he could see breakers. The sheer cliffs of Victoria's west coast came into view, and Captain Gibbs realised that the ship was much closer to them than expected. He ordered as much sail to be set as time would permit and then attempted to steer the vessel out to sea. On coming head-on into the wind, the ship lost momentum, the sails fell limp and Loch Ard's bow swung back towards land. Gibbs then ordered the anchors to be released in an attempt to hold its position. The anchors sank some 50 fathoms - but did not hold. By this time the ship was among the breakers and the tall cliffs of Mutton Bird Island rose behind. Just half a mile from the coast, the ship's bow was suddenly pulled around by the anchor. The captain tried to tack out to sea, but the ship struck a reef at the base of Mutton Bird Island, near Port Campbell. Waves subsequently broke over the ship and the top deck became loosened from the hull. The masts and rigging came crashing down knocking passengers and crew overboard. When a lifeboat was finally launched, it crashed into the side of Loch Ard and capsized. Tom Pearce, who had launched the boat, managed to cling to its overturned hull and shelter beneath it. He drifted out to sea and then on the flood tide came into what is now known as recovered from the wreck of the Loch ArdGorge. He swam to shore, bruised and dazed, and found a cave in which to shelter. Some of the crew stayed below deck to shelter from the falling rigging but drowned when the ship slipped off the reef into deeper water. Eva Carmichael a passenger had raced onto the deck to find out what was happening only to be confronted by towering cliffs looming above the stricken ship. In all the chaos, Captain Gibbs grabbed Eva and said, "If you are saved Eva, let my dear wife know that I died like a sailor". That was the last Eva Carmichael saw of the captain. She was swept off the ship by a huge wave. Eva saw Tom Pearce on a small rocky beach and yelled to attract his attention. He dived in and swam to the exhausted woman and dragged her to shore. He took her to the cave and broke the open case of brandy which had washed up on the beach. He opened a bottle to revive the unconscious woman. A few hours later Tom scaled a cliff in search of help. He followed hoof prints and came by chance upon two men from nearby Glenample Station three and a half miles away. In a complete state of exhaustion, he told the men of the tragedy. Tom then returned to the gorge while the two men rode back to the station to get help. By the time they reached Loch Ard Gorge, it was cold and dark. The two shipwreck survivors were taken to Glenample Station to recover. Eva stayed at the station for six weeks before returning to Ireland by steamship. In Melbourne, Tom Pearce received a hero's welcome. He was presented with the first gold medal of the Royal Humane Society of Victoria and a £1000 cheque from the Victorian Government. Concerts were performed to honour the young man's bravery and to raise money for those who lost family in the disaster. Of the 54 crew members and passengers on board, only two survived: the apprentice, Tom Pearce and the young woman passenger, Eva Carmichael, who lost her family in the tragedy. Ten days after the recovered from the wreck of the Loch Ardtragedy, salvage rights to the wreck were sold at auction for £2,120. Cargo valued at £3,000 was salvaged and placed on the beach, but most washed back into the sea when another storm developed. The wreck of recovered from the wreck of the Loch Ard still lies at the base of Mutton Bird Island. Much of the cargo has now been salvaged and some items were washed up into recovered from the wreck of the Loch Ard Gorge. Cargo and artefacts have also been illegally salvaged over many years before protective legislation was introduced in March 1982. One of the most unlikely pieces of cargo to have survived the shipwreck was a Minton majolica peacock- one of only nine in the world. The peacock was destined for the Melbourne 1880 International Exhibition in. It had been well packed, which gave it adequate protection during the violent storm. Today the Minton peacock can be seen at the Flagstaff Hill Maritime Museum in Warrnambool. From Australia's most dramatic shipwreck it has now become Australia's most valuable shipwreck artifact and is one of very few 'objects' on the Victorian State Heritage Register. The shipwreck of the Loch Ard is of significance for Victoria and is registered on the Victorian Heritage Register ( S 417). Flagstaff Hill has a varied collection of artefacts from Loch Ard and its collection is significant for being one of the largest accumulation of artefacts from this notable Victorian shipwreck. The collections object is to also give us a snapshot into history so we can interpret the story of this tragic event. The collection is also archaeologically significant as it represents aspects of Victoria's shipping history that allows us to interpret Victoria's social and historical themes of the time. The collections historically significance is that it is associated unfortunately with the worst and best-known shipwreck in Victoria's history. Ship’s deadeye comprising a thick round wooden disc, pierced by 3 similarly sized and shaped holes from one flat side through to the other, in a triangle formation. It has been polished a rich dark colour and a crude mouth has been carved below the 'eyes' to create a curio effect. These alterations are most likely to have been made after the object was retrieved from the sea, (when it was used as a doorstop).Noneflagstaff hill, warrnambool, shipwrecked-coast, flagstaff-hill, flagstaff-hill-maritime-museum, maritime-museum, shipwreck-coast, flagstaff-hill-maritime-village, deadeye, loch ard, rigging -
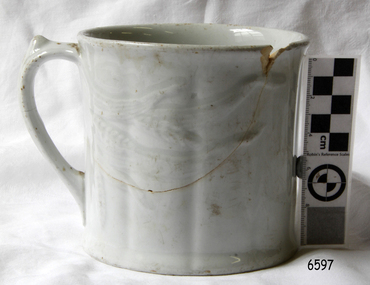 Flagstaff Hill Maritime Museum and Village
Ceramic - Mug, 1878
History of the Loch Ard: The Loch Ard got its name from ”Loch Ard” a loch which lies to the west of Aberfoyle, and the east of Loch Lomond. It means "high lake" in Scottish Gaelic. The vessel belonged to the famous Loch Line which sailed many vessels from England to Australia. The Loch Ard was built in Glasgow by Barclay, Curdle and Co. in 1873, the vessel was a three-masted square-rigged iron sailing ship that measured 79.87 meters in length, 11.58 m in width, and 7 m in depth with a gross tonnage of 1693 tons with a mainmast that measured a massive 45.7 m in height. Loch Ard made three trips to Australia and one trip to Calcutta before its fateful voyage. Loch Ard left England on March 2, 1878, under the command of 29-year-old Captain Gibbs, who was newly married. The ship was bound for Melbourne with a crew of 37, plus 17 passengers. The general cargo reflected the affluence of Melbourne at the time. Onboard were straw hats, umbrella, perfumes, clay pipes, pianos, clocks, confectionery, linen and candles, as well as a heavier load of railway irons, cement, lead and copper. There were other items included that were intended for display in the Melbourne International Exhibition of 1880. The voyage to Port Phillip was long but uneventful. Then at 3 am on June 1, 1878, Captain Gibbs was expecting to see land. But the Loch Ard was running into a fog which greatly reduced visibility. Captain Gibbs was becoming anxious as there was no sign of land or the Cape Otway lighthouse. At 4 am the fog lifted and a lookout aloft announced that he could see breakers. The sheer cliffs of Victoria's west coast came into view, and Captain Gibbs realised that the ship was much closer to them than expected. He ordered as much sail to be set as time would permit and then attempted to steer the vessel out to sea. On coming head-on into the wind, the ship lost momentum, the sails fell limp and Loch Ard's bow swung back towards land. Gibbs then ordered the anchors to be released in an attempt to hold its position. The anchors sank some 50 fathoms - but did not hold. By this time the ship was among the breakers and the tall cliffs of Mutton Bird Island rose behind. Just half a mile from the coast, the ship's bow was suddenly pulled around by the anchor. The captain tried to tack out to sea, but the ship struck a reef at the base of Mutton Bird Island, near Port Campbell. Waves subsequently broke over the ship and the top deck became loosened from the hull. The masts and rigging came crashing down knocking passengers and crew overboard. When a lifeboat was finally launched, it crashed into the side of Loch Ard and capsized. Tom Pearce, who had launched the boat, managed to cling to its overturned hull and shelter beneath it. He drifted out to sea and then on the flood tide came into what is now known as recovered from the wreck of the Loch Ard Gorge. He swam to shore, bruised and dazed, and found a cave in which to shelter. Some of the crew stayed below deck to shelter from the falling rigging but drowned when the ship slipped off the reef into deeper water. Eva Carmichael a passenger had raced onto the deck to find out what was happening only to be confronted by towering cliffs looming above the stricken ship. In all the chaos, Captain Gibbs grabbed Eva and said, "If you are saved Eva, let my dear wife know that I died like a sailor". That was the last Eva Carmichael saw of the captain. She was swept off the ship by a huge wave. Eva saw Tom Pearce on a small rocky beach and yelled to attract his attention. He dived in and swam to the exhausted woman and dragged her to shore. He took her to the cave and broke the open case of brandy which had washed up on the beach. He opened a bottle to revive the unconscious woman. A few hours later Tom scaled a cliff in search of help. He followed hoof prints and came by chance upon two men from nearby Glenample Station three and a half miles away. In a complete state of exhaustion, he told the men of the tragedy. Tom then returned to the gorge while the two men rode back to the station to get help. By the time they reached Loch Ard Gorge, it was cold and dark. The two shipwreck survivors were taken to Glenample Station to recover. Eva stayed at the station for six weeks before returning to Ireland by steamship. In Melbourne, Tom Pearce received a hero's welcome. He was presented with the first gold medal of the Royal Humane Society of Victoria and a £1000 cheque from the Victorian Government. Concerts were performed to honour the young man's bravery and to raise money for those who lost family in the disaster. Of the 54 crew members and passengers on board, only two survived: the apprentice, Tom Pearce and the young woman passenger, Eva Carmichael, who lost her family in the tragedy. Ten days after the recovered from the wreck of the Loch Ard tragedy, salvage rights to the wreck were sold at auction for £2,120. Cargo valued at £3,000 was salvaged and placed on the beach, but most washed back into the sea when another storm developed. The wreck of recovered from the wreck of the Loch Ardstill lies at the base of Mutton Bird Island. Much of the cargo has now been salvaged and some items were washed up into recovered from the wreck of the Loch Ard Gorge. Cargo and artefacts have also been illegally salvaged over many years before protective legislation was introduced in March 1982. One of the most unlikely pieces of cargo to have survived the shipwreck was a Minton majolica peacock- one of only nine in the world. The peacock was destined for the Melbourne 1880 International Exhibition in. It had been well packed, which gave it adequate protection during the violent storm. Today the Minton peacock can be seen at the Flagstaff Hill Maritime Museum in Warrnambool. From Australia's most dramatic shipwreck it has now become Australia's most valuable shipwreck artifact and is one of very few 'objects' on the Victorian State Heritage Register. The mug is significant as an example of an 1870s drinking vessel. It is also significant for its connection with the Loch Ard. The shipwreck of the Loch Ard is of significance for Victoria and is registered on the Victorian Heritage Register ( S 417). Flagstaff Hill has a varied collection of artefacts from Loch Ard and its collection is significant for being one of the largest accumulation of artefacts from this notable Victorian shipwreck. The collections object is to also give us a snapshot into history so we can interpret the story of this tragic event. The collection is also archaeologically significant as it represents aspects of Victoria's shipping history that allows us to interpret Victoria's social and historical themes of the time. The collection's historical significance is that it is associated unfortunately with the worst and best-known shipwreck in Victoria's history. Mug, China; white, glazed, with cast and raised wheat pattern embossed on outside, slight grooving on perimeter with handle on side. Recovered from the wreck of the Loch Ard.flagstaff hill, warrnambool, shipwrecked coast, flagstaff hill maritime museum, maritime museum, shipwreck coast, flagstaff hill maritime village, great ocean road, loch line, loch ard, captain gibbs, eva carmichael, tom pearce, glenample station, mutton bird island, loch ard gorge, china mug, mug, drinking vessel, ceramic mug -
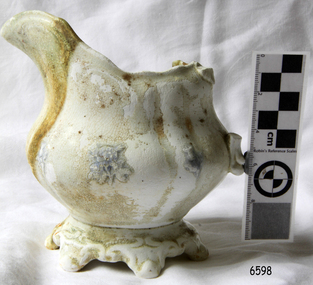 Flagstaff Hill Maritime Museum and Village
Domestic object - Jug
History of the Loch Ard: The Loch Ard got it’s name from ”Loch Ard” a loch which lies to the west of Aberfoyle, and to the east of Loch Lomond. It means "high lake" in Scottish Gaelic.The vessel belonged to the famous Loch Line which sailed many vessels from England to Australia. The Loch Ard was built in Glasgow by Barclay, Curdle and Co. in 1873, the vessel was a three-masted square-rigged iron sailing ship that measured 79.87 meters in length, 11.58 m in width, and 7 m in depth with a gross tonnage of 1693 tons with a mainmast that measured a massive 45.7 m in height. Loch Ard made three trips to Australia and one trip to Calcutta before its fateful voyage. Loch Ard left England on March 2, 1878, under the command of 29-year-old Captain Gibbs, who was newly married. The ship was bound for Melbourne with a crew of 37, plus 17 passengers. The general cargo reflected the affluence of Melbourne at the time. Onboard were straw hats, umbrella, perfumes, clay pipes, pianos, clocks, confectionery, linen and candles, as well as a heavier load of railway irons, cement, lead and copper. There were other items included that were intended for display in the Melbourne International Exhibition of 1880. The voyage to Port Phillip was long but uneventful. Then at 3 am on June 1, 1878, Captain Gibbs was expecting to see land. But the Loch Ard was running into a fog which greatly reduced visibility. Captain Gibbs was becoming anxious as there was no sign of land or the Cape Otway lighthouse. At 4 am the fog lifted and a lookout aloft announced that he could see breakers. The sheer cliffs of Victoria's west coast came into view, and Captain Gibbs realised that the ship was much closer to them than expected. He ordered as much sail to be set as time would permit and then attempted to steer the vessel out to sea. On coming head-on into the wind, the ship lost momentum, the sails fell limp and Loch Ard's bow swung back towards land. Gibbs then ordered the anchors to be released in an attempt to hold its position. The anchors sank some 50 fathoms - but did not hold. By this time the ship was among the breakers and the tall cliffs of Mutton Bird Island rose behind. Just half a mile from the coast, the ship's bow was suddenly pulled around by the anchor. The captain tried to tack out to sea, but the ship struck a reef at the base of Mutton Bird Island, near Port Campbell. Waves subsequently broke over the ship and the top deck became loosened from the hull. The masts and rigging came crashing down knocking passengers and crew overboard. When a lifeboat was finally launched, it crashed into the side of Loch Ard and capsized. Tom Pearce, who had launched the boat, managed to cling to its overturned hull and shelter beneath it. He drifted out to sea and then on the flood tide came into what is now known as Loch Ard Gorge. He swam to shore, bruised and dazed, and found a cave in which to shelter. Some of the crew stayed below deck to shelter from the falling rigging but drowned when the ship slipped off the reef into deeper water. Eva Carmichael a passenger had raced onto the deck to find out what was happening only to be confronted by towering cliffs looming above the stricken ship. In all the chaos, Captain Gibbs grabbed Eva and said, "If you are saved Eva, let my dear wife know that I died like a sailor". That was the last Eva Carmichael saw of the captain. She was swept off the ship by a huge wave. Eva saw Tom Pearce on a small rocky beach and yelled to attract his attention. He dived in and swam to the exhausted woman and dragged her to shore. He took her to the cave and broke the open case of brandy which had washed up on the beach. He opened a bottle to revive the unconscious woman. A few hours later Tom scaled a cliff in search of help. He followed hoof prints and came by chance upon two men from nearby Glenample Station three and a half miles away. In a complete state of exhaustion, he told the men of the tragedy. Tom then returned to the gorge while the two men rode back to the station to get help. By the time they reached Loch Ard Gorge, it was cold and dark. The two shipwreck survivors were taken to Glenample Station to recover. Eva stayed at the station for six weeks before returning to Ireland by steamship. In Melbourne, Tom Pearce received a hero's welcome. He was presented with the first gold medal of the Royal Humane Society of Victoria and a £1000 cheque from the Victorian Government. Concerts were performed to honour the young man's bravery and to raise money for those who lost family in the disaster. Of the 54 crew members and passengers on board, only two survived: the apprentice, Tom Pearce and the young woman passenger, Eva Carmichael, who lost her family in the tragedy. Ten days after the Loch Ard tragedy, salvage rights to the wreck were sold at auction for £2,120. Cargo valued at £3,000 was salvaged and placed on the beach, but most washed back into the sea when another storm developed. The wreck of Loch Ard still lies at the base of Mutton Bird Island. Much of the cargo has now been salvaged and some items were washed up into Loch Ard Gorge. Cargo and artefacts have also been illegally salvaged over many years before protective legislation was introduced in March 1982. One of the most unlikely pieces of cargo to have survived the shipwreck was a Minton majolica peacock- one of only nine in the world. The peacock was destined for the Melbourne 1880 International Exhibition in. It had been well packed, which gave it adequate protection during the violent storm. Today the Minton peacock can be seen at the Flagstaff Hill Maritime Museum in Warrnambool. From Australia's most dramatic shipwreck it has now become Australia's most valuable shipwreck artifact and is one of very few 'objects' on the Victorian State Heritage Register.The shipwreck of the Loch Ard is of significance for Victoria and is registered on the Victorian Heritage Register ( S 417). Flagstaff Hill has a varied collection of artefacts from Loch Ard and its collection is significant for being one of the largest accumulation of artefacts from this notable Victorian shipwreck. The collections object is to also give us a snapshot into history so we are able to interpret the story of this tragic event. The collection is also archaeologically significant as it represents aspects of Victoria's shipping history that allows us to interpret Victoria's social and historical themes of the time. The collections historically significance is that it is associated unfortunately with the worst and best-known shipwreck in Victoria's history. Jug, white glazed, ornately designed china cream jug, blue floral embossed around girth. Jug features a circular pedestal foot with six small feet attached around the circumference of the pedestal. Noneflagstaff hill, warrnambool, shipwrecked coast, flagstaff hill maritime museum, maritime museum, shipwreck coast, flagstaff hill maritime village, great ocean road, loch line, loch ard, captain gibbs, eva carmichael, tom pearce, glenample station, mutton bird island, loch ard gorge, jug, china jug -
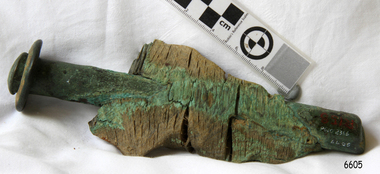 Flagstaff Hill Maritime Museum and Village
Functional object - Nail, ca. 1855
When the ship Schomberg was launched in 1855, she was considered the most perfect clipper ship ever to be built. James Blaine’s Black Ball Line had commissioned her to be built for their fleet of passenger liners. At a cost of £43,103, the Aberdeen builders designed her to sail faster than the quick clippers designed by North American Donald McKay. She was a three masted wooden clipper ship, built with diagonal planking of British oat with layers of Scottish larch. This luxury vessel was designed to transport emigrants to Melbourne in superior comfort. She had ventilation ducts to provide air to the lower decks and a dining saloon, smoking room, library and bathrooms for the first class passengers. At the launch of Schomberg’s maiden voyage, her master Captain ‘Bully’ Forbes, drunkenly predicted that he would make the journey between Liverpool and Melbourne in 60 days. Schomberg departed Liverpool on 6 October 1855 with 430 passengers and 3000 tons cargo including iron rails and equipment intended the build the Geelong Railway and a bridge over the Yarra from Melbourne to Hawthorn. The winds were poor as Schomberg sailed across the equator, slowing her journey considerably. She was 78 days out of Liverpool when she ran aground on a sand-spit near Peterborough, Victoria, on 27 December; the sand spit and the currents were not marked on Forbes’s map. Overnight, the crew launched a lifeboat to find a safe place to land the ship’s passengers. The scouting party returned to Schomberg and advised Forbes that it was best to wait until morning because the rough seas could easily overturn the small lifeboats. The ship’s Chief Officer spotted SS Queen at dawn and signalled the steamer. The master of the SS Queen approached the stranded vessel and all of Schomberg’s passengers were able to disembark safely. The Black Ball Line’s Melbourne agent sent a steamer to retrieve the passengers’ baggage from the Schomberg. Other steamers helped unload her cargo until the weather changed and prevented the salvage teams from accessing the ship. Local merchants Manifold & Bostock bought the wreck and cargo, but did not attempt to salvage the cargo still on board the ship. They eventually sold it on to a Melbourne businessman and two seafarers. After two of the men drowned when they tried to reach Schomberg, salvage efforts were abandoned. In 1975, divers from Flagstaff Hill, including Peter Ronald, found an ornate communion set at the wreck. The set comprised a jug, two chalices, a plate and a lid. The lid did not fit any of the other objects and in 1978 a piece of the lid broke off, revealing a glint of gold. As museum staff carefully examined the lid and removed marine growth, they found a diamond ring, which is currently on display in the Great Circle Gallery. Flagstaff Hill also holds ship fittings and equipment, personal effects, a lithograph, tickets and photograph from the Schomberg. Most of the artefacts were salvaged from the wreck by Peter Ronald, former director of Flagstaff Hill. The Schomberg, which is on the Victorian Heritage Register (VHR S612), has great historical significance as a rare example of a large, fast clipper ship on the England to Australia run, carrying emigrants at the time of the Victorian gold rush. She represents the technical advances made to break sailing records between Europe and Australia. Flagstaff Hill’s collection of artefacts from the Schomberg is significant for its association with the shipwreck, The collection is primarily significant because of the relationship between the objects, as together they have a high potential to interpret the story of the Schomberg. It is archaeologically significant as the remains of an international passenger Ship. It is historically significant for representing aspects of Victoria’s shipping history and for its association with the shipwreck and the ship, which was designed to be fastest and most luxurious of its day Copper nail with petrified wooden section attached. There is a washer on the end of the nail. It is covered in verdigris. The nail was recovered from the wreck of the Schomberg.flagstaff hill, warrnambool, shipwrecked-coast, flagstaff-hill, flagstaff-hill-maritime-museum, maritime-museum, shipwreck-coast, flagstaff-hill-maritime-village, petrified wood, schomberg, copper nail, clipper ship, black ball line, 1855 shipwreck, aberdeen clipper ship, captain forbes, peterborough shipwreck, ss queen, ship's nail, nail in wood sample -
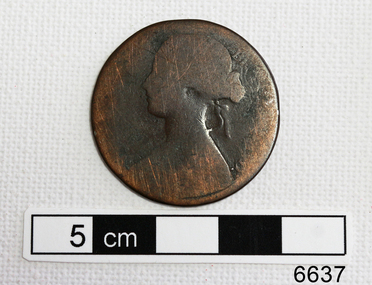 Flagstaff Hill Maritime Museum and Village
Currency - Coin, 1870
The image on this coin shows a British monarch, the young Queen Victoria, at a time when Australia was a Colony of Britain.This coin represents the currency used in Australia in the 19th century.Coin, Queen Victorian Penny, 1870. Obverse shows the "Young Head" of Queen Victoria, Reverse shows Britannia. Coin well worn.Reverse: "1870"flagstaff hill, flagstaff hill maritime museum and village, warrnambool, maritime museum, maritime village, great ocean road, shipwreck coast, coin, british coin, currency, penny, 19th century, queen victoria, young queen victoria, 1870 -
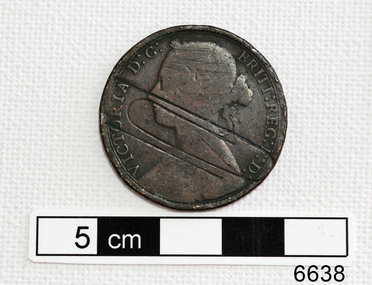 Flagstaff Hill Maritime Museum and Village
Currency - Coin, 1872
The image on this coin shows a British monarch, the young Queen Victoria, at a time when Australia was a Colony of Britain. This coin has be cancelled from circulation.This coin represents the currency used in Australia in the 19th century.Coin, Queen Victorian Penny, 1872, Obverse shows the "Young Head" of Queen Victoria. Reverse shows Britannia. Coin well worn. Obverse has a cancellation stamp.Obverse: "VICTORIA D.G." BRITT : REG : F D " Reverse: "one - - - - - - -" "18 - - " Stamp: (paperclip shape)flagstaff hill, flagstaff hill maritime museum and village, warrnambool, maritime museum, maritime village, great ocean road, shipwreck coast, coin, british coin, currency, penny, 19th century, queen victoria, young queen victoria, 1872, blank, cancellation stamp, cancelled coin, brittania -
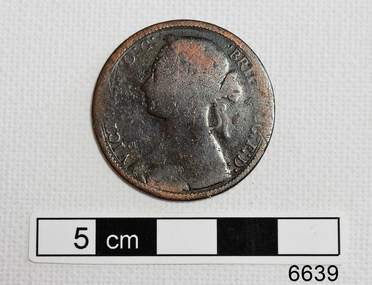 Flagstaff Hill Maritime Museum and Village
Currency - Coin, 1874
The image on this coin shows a British monarch, the young Queen Victoria, at a time when Australia was a Colony of Britain.This coin represents the currency used in Australia in the 19th century.Coin, Queen Victorian Penny, 1874, Obverse shows the "Young Head" of Queen Victoria. Reverse shows Britannia. Coin well worn. Obverse: "VICT ----- D G " "BRIT - - - - G : F : D: " Reverse: "----- -NNY" 1874"flagstaff hill, flagstaff hill maritime museum and village, warrnambool, maritime museum, maritime village, great ocean road, shipwreck coast, coin, british coin, currency, penny, 19th century, queen victoria, young queen victoria, brittania, 1874 -
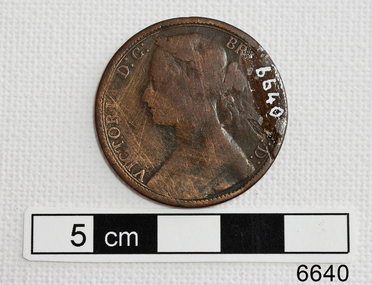 Flagstaff Hill Maritime Museum and Village
Currency - Coin, 1877
The image on this coin shows a British monarch, the young Queen Victoria, at a time when Australia was a Colony of Britain.This coin represents the currency used in Australia in the 19th century.Coin, Queen Victorian Penny, 1877, Obverse shows the "Young Head" of Queen Victoria. Reverse shows Britannia. Coin well worn. Obverse: "VICTORIA : D: G:" "BRIT - - - - -F : D :" Reverse: "ONE PENNY" "1877"flagstaff hill, flagstaff hill maritime museum and village, warrnambool, maritime museum, maritime village, great ocean road, shipwreck coast, coin, british coin, currency, penny, 19th century, queen victoria, young queen victoria, brittania, 1877 -
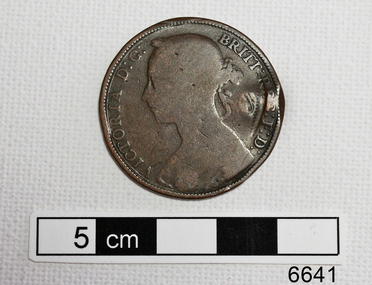 Flagstaff Hill Maritime Museum and Village
Currency - Coin, 1888
The image on this coin shows a British monarch, the young Queen Victoria, at a time when Australia was a Colony of Britain.This coin represents the currency used in Australia in the 19th century.Coin, Queen Victorian Penny, 1888, Obverse shows the "Young Head" of Queen Victoria. Reverse shows Britannia. Coin well worn. Obverse has an unknown imprint and the border is inconsistent.Obverse: "VICTORIA : D : G :" "BRITT : RE- : F : D :" Reverse: "ONE --- Y" "1888"flagstaff hill, flagstaff hill maritime museum and village, warrnambool, maritime museum, maritime village, great ocean road, shipwreck coast, coin, british coin, currency, penny, 19th century, queen victoria, young queen victoria, brittania, 1888 -
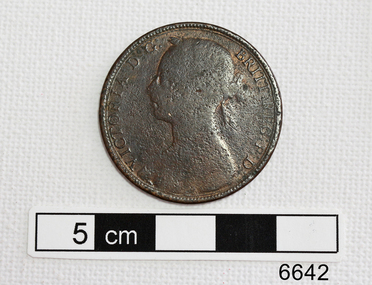 Flagstaff Hill Maritime Museum and Village
Currency - Coin, 1890
The image on this coin shows a British monarch, the young Queen Victoria, at a time when Australia was a Colony of Britain.This coin represents the currency used in Australia in the 19th century.Coin, Queen Victorian Penny, 1890, Obverse shows the "Young Head" of Queen Victoria. Reverse shows Britannia. Coin well worn. Obverse: "VICTORIA : D : G :" "BRITT : REG : F : D :" Reverse: "PENNY" "1890"flagstaff hill, flagstaff hill maritime museum and village, warrnambool, maritime museum, maritime village, great ocean road, shipwreck coast, coin, british coin, currency, penny, 19th century, queen victoria, young queen victoria, brittania, 1890 -
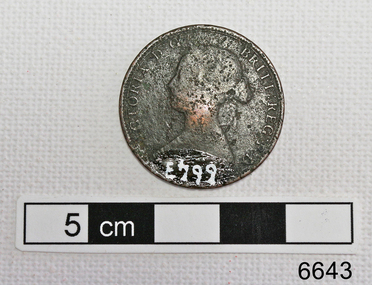 Flagstaff Hill Maritime Museum and Village
Currency - Coin, 1884
The image on this coin shows a British monarch, the young Queen Victoria, at a time when Australia was a Colony of Britain.This coin represents the currency used in Australia in the 19th century.Coin, Queen Victorian Halfpenny, 1864, Obverse shows the "Young Head" of Queen Victoria. Reverse shows Britannia. Coin well worn. Obverse: "VICTORIA : D : G :" "BRITT " REG : F : D :" Reverse: "HALF PENNY" "1864"flagstaff hill, flagstaff hill maritime museum and village, warrnambool, maritime museum, maritime village, great ocean road, shipwreck coast, coin, british coin, currency, half penny, 19th century, queen victoria, young queen victoria, brittania, 1864 -
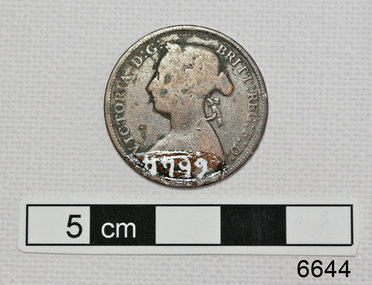 Flagstaff Hill Maritime Museum and Village
Currency - Coin, 1882
The image on this coin shows a British monarch, the young Queen Victoria, at a time when Australia was a Colony of Britain.This coin represents the currency used in Australia in the 19th century.Coin, Queen Victorian Halfpenny, 1882, Obverse shows the "Young Head" of Queen Victoria. Reverse shows Britannia. Coin well worn.Obverse: "VICTORIA : D: G :" "BRITT : REG : F : D :" Reverse: "HALF PENNY" "1882"flagstaff hill, flagstaff hill maritime museum and village, warrnambool, maritime museum, maritime village, great ocean road, shipwreck coast, coin, british coin, currency, half penny, 19th century, queen victoria, young queen victoria, brittania, 1882 -
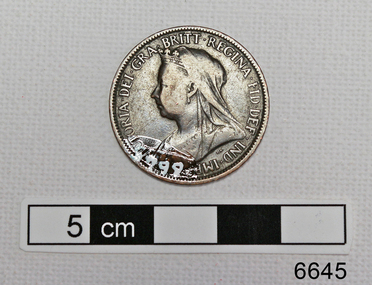 Flagstaff Hill Maritime Museum and Village
Currency - Coin, 1900
The image on this coin shows a British monarch, the mature Queen Victoria, in 1900. This was the period just prior to Australia's Federation in 1901,This coin represents the currency used in Australia at the turn of the 20th century, and just prior to the Federation of Australia in 1901..Coin, Queen Victorian Half Penny, 1900, Obverse shows the "Old Head" of Queen Victoria. Reverse shows Britannia. Coin well worn.Obverse: "VICTORIA : DEI : GRA : BRITT : REGINA : FID : IND : IMP : Reverse: "HALF PENNY" "1900"flagstaff hill, flagstaff hill maritime museum and village, warrnambool, maritime museum, maritime village, great ocean road, shipwreck coast, coin, british coin, currency, half penny, 20th century, queen victoria, old queen victoria, brittania, 1900, prior to federation