Showing 327 items
matching danger
-
 Frankston RSL Sub Branch
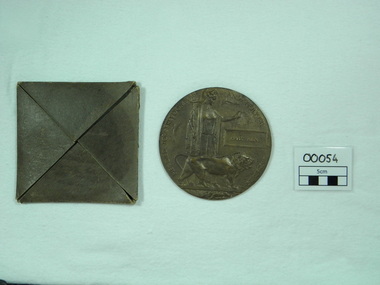
Plaque, Memorial, c. 1919
Originally would have been issued with a scroll & letter from the King but neither with plaque. 1914-1918 Memorial Plaque In early 1920 it was announced that the next-of-kin of all Australian servicemen and women whose deaths were attributable to the First World War would receive a memorial plaque and scroll "as a solace for bereavement and as a memento". The memorial plaques were not uniquely Australian. In fact they were designed and produced in Britain and issued to commemorate all those who died as a result of war service from within the British Commonwealth. The idea for the plaques was originally conceived mid-way through the war. In 1917 a competition was announced to obtain a suitable design and 800 entries were eventually received. The winner, Mr. E. Carter Preston of Liverpool, England, was chosen in 1918. He was awarded a prize of 250 pounds. Mr Manning Pike directed the manufacture of the memorial plaques at the Memorial Plaque Factory set up at Acton, London. Some later plaques were also made at the Woolwich Arsenal. The cost of manufacturing so many plaques must have been considerable. Each plaque had the name of the soldier commemorated individually embossed (some were engraved) as part of the design. The full name was given without any indication of rank or honours to show the equality of sacrifice of all those who had lost their lives. The scroll designed to accompany the plaques was of thick paper, headed by the royal coat-of-arms, and bore the following message: "He whom this scroll commemorates was numbered among those who, at the call of King and Country, left all that was dear to them, endured hardness, faced danger, and finally passed out of the sight of men by the path of duty and self-sacrifice, giving up their own lives that others might live in freedom. Let those that come after see that his name is not forgotten". Underneath the message the serviceman or woman’s name, rank, honours and unit were written by hand in red ink. Because of the late arrival in Australia of the plaques many scrolls were sent out separately. A message from the King, "I join with my grateful people in sending you this memorial of a brave life given for others in the Great War", was included with the scroll. The first plaques were distributed in Australia in 1922. Each plaque was sent out from Base Records Office at Victoria Barracks in Melbourne by second-class mail. Approximately 60,000 plaques were issued in Australia. Families of deceased members of the Royal Australian Navy and the Australian Army Nursing Service also received plaques and scrolls Bronze Memorial Plaque 1914-1918 for 4876 Pte. Harry Milne , 46 Battalion KIA 10/5/1918, In a cardboard square envelope. http://www.awm.gov.au/research/people/roll_of_honour/person.asp?p=493414Embossed around edge of plaque "HE DIED FOR FREEDOM AND HONOVR" Name of serviceman embossed on plaque right of centre "HARRY MILNE"ww1, dead mans penny, kings penny, memorial plaque -
 Frankston RSL Sub Branch
Plaque, Memorial
1914-1918 Memorial Plaque In early 1920 it was announced that the next-of-kin of all Australian servicemen and women whose deaths were attributable to the First World War would receive a memorial plaque and scroll "as a solace for bereavement and as a memento". The memorial plaques were not uniquely Australian. In fact they were designed and produced in Britain and issued to commemorate all those who died as a result of war service from within the British Commonwealth. The idea for the plaques was originally conceived mid-way through the war. In 1917 a competition was announced to obtain a suitable design and 800 entries were eventually received. The winner, Mr. E. Carter Preston of Liverpool, England, was chosen in 1918. He was awarded a prize of 250 pounds. Mr Manning Pike directed the manufacture of the memorial plaques at the Memorial Plaque Factory set up at Acton, London. Some later plaques were also made at the Woolwich Arsenal. The cost of manufacturing so many plaques must have been considerable. Each plaque had the name of the soldier commemorated individually embossed (some were engraved) as part of the design. The full name was given without any indication of rank or honours to show the equality of sacrifice of all those who had lost their lives. The scroll designed to accompany the plaques was of thick paper, headed by the royal coat-of-arms, and bore the following message: "He whom this scroll commemorates was numbered among those who, at the call of King and Country, left all that was dear to them, endured hardness, faced danger, and finally passed out of the sight of men by the path of duty and self-sacrifice, giving up their own lives that others might live in freedom. Let those that come after see that his name is not forgotten". Underneath the message the serviceman or woman’s name, rank, honours and unit were written by hand in red ink. Because of the late arrival in Australia of the plaques many scrolls were sent out separately. A message from the King, "I join with my grateful people in sending you this memorial of a brave life given for others in the Great War", was included with the scroll. The first plaques were distributed in Australia in 1922. Each plaque was sent out from Base Records Office at Victoria Barracks in Melbourne by second-class mail. Approximately 60,000 plaques were issued in Australia. Families of deceased members of the Royal Australian Navy and the Australian Army Nursing Service also received plaques and scrolls First World War Memorial Plaque, bronze, in recognition of Private Sydney Frederick TURNER, from C Company, 9 Battalion who was KIA at Pozieres on 25 July, 1916. it is housed in a wooden surround with pattern embossed in the margins with a liking of the rising sun at the top. He is recorded on the Villers-Bretonneux Memorial and is listed with an Australian Red Cross Society Wounded and Missing Enquiry Bureau File, a copy of which is attached.Embossed around the edge of the plaque "HE DIED FOR FREEDOM AND HONOVR". The name of the serviceman is embossed on the plaque, right of centre, SYDNEY FREDERICK TURNER -
Frankston RSL Sub Branch
Collection, A. E. Bolger
1914-1918 Memorial Plaque In early 1920 it was announced that the next-of-kin of all Australian servicemen and women whose deaths were attributable to the First World War would receive a memorial plaque and scroll "as a solace for bereavement and as a memento". The memorial plaques were not uniquely Australian. In fact they were designed and produced in Britain and issued to commemorate all those who died as a result of war service from within the British Commonwealth. The idea for the plaques was originally conceived mid-way through the war. In 1917 a competition was announced to obtain a suitable design and 800 entries were eventually received. The winner, Mr. E. Carter Preston of Liverpool, England, was chosen in 1918. He was awarded a prize of 250 pounds. Mr Manning Pike directed the manufacture of the memorial plaques at the Memorial Plaque Factory set up at Acton, London. Some later plaques were also made at the Woolwich Arsenal. The cost of manufacturing so many plaques must have been considerable. Each plaque had the name of the soldier commemorated individually embossed (some were engraved) as part of the design. The full name was given without any indication of rank or honours to show the equality of sacrifice of all those who had lost their lives. The scroll designed to accompany the plaques was of thick paper, headed by the royal coat-of-arms, and bore the following message: "He whom this scroll commemorates was numbered among those who, at the call of King and Country, left all that was dear to them, endured hardness, faced danger, and finally passed out of the sight of men by the path of duty and self-sacrifice, giving up their own lives that others might live in freedom. Let those that come after see that his name is not forgotten". Underneath the message the serviceman or woman’s name, rank, honours and unit were written by hand in red ink. Because of the late arrival in Australia of the plaques many scrolls were sent out separately. A message from the King, "I join with my grateful people in sending you this memorial of a brave life given for others in the Great War", was included with the scroll. The first plaques were distributed in Australia in 1922. Each plaque was sent out from Base Records Office at Victoria Barracks in Melbourne by second-class mail. Approximately 60,000 plaques were issued in Australia. Families of deceased members of the Royal Australian Navy and the Australian Army Nursing Service also received plaques and scrolls Collection of items relating to the death of Private Arthur Ernest Bolger, service number 01338, 14th Battalion, Australian Imperial Forces, who was killed in action at Gallipoli on 27th April, 1915. Private Bolger was from Victoria and was recorded as being the first Frankston serviceman to be killed in the ANZAC landing at Gallipoli. For more information refer: < > see items 00014.1 and 00014.2 -
Frankston RSL Sub Branch
Plaque, Memorial, 1914-1918 Memorial Plaque, 1920 (estimated); Issued from 1920
This round, bronze memorial plaque was presented to the family of Private Richard Evans Harkness, service number 3426, of the 37th Battalion, (8th Reinforcements) who was killed in action at Villers-Bretonneux on 12th August, 1918. Colloquially known as 'Dead Man's Penny' or 'King's Penny', this plaque was given to the next of kin of service personnel who died on active service in WW1. 1914-1918 Memorial Plaque In early 1920 it was announced that the next-of-kin of all Australian servicemen and women whose deaths were attributable to the First World War would receive a memorial plaque and scroll "as a solace for bereavement and as a memento". The memorial plaques were not uniquely Australian. In fact they were designed and produced in Britain and issued to commemorate all those who died as a result of war service from within the British Commonwealth. The idea for the plaques was originally conceived mid-way through the war. In 1917 a competition was announced to obtain a suitable design and 800 entries were eventually received. The winner, Mr. E. Carter Preston of Liverpool, England, was chosen in 1918. He was awarded a prize of 250 pounds. Mr Manning Pike directed the manufacture of the memorial plaques at the Memorial Plaque Factory set up at Acton, London. Some later plaques were also made at the Woolwich Arsenal. The cost of manufacturing so many plaques must have been considerable. Each plaque had the name of the soldier commemorated individually embossed (some were engraved) as part of the design. The full name was given without any indication of rank or honours to show the equality of sacrifice of all those who had lost their lives. The scroll designed to accompany the plaques was of thick paper, headed by the royal coat-of-arms, and bore the following message: "He whom this scroll commemorates was numbered among those who, at the call of King and Country, left all that was dear to them, endured hardness, faced danger, and finally passed out of the sight of men by the path of duty and self-sacrifice, giving up their own lives that others might live in freedom. Let those that come after see that his name is not forgotten". Underneath the message the serviceman or woman’s name, rank, honours and unit were written by hand in red ink. Because of the late arrival in Australia of the plaques many scrolls were sent out separately. A message from the King, "I join with my grateful people in sending you this memorial of a brave life given for others in the Great War", was included with the scroll. The first plaques were distributed in Australia in 1922. Each plaque was sent out from Base Records Office at Victoria Barracks in Melbourne by second-class mail. Approximately 60,000 plaques were issued in Australia. Families of deceased members of the Royal Australian Navy and the Australian Army Nursing Service also received plaques and scrolls This plaque is significant because it commemorates the death of an Australian soldier on active service in World War 1. It is representative of some 60,000 issued to next of kin of soldiers killed in World War 1. Although Richard Harness was living at 52 Victoria Street, Abbotsford when enlisted, together with a scroll from the King, it was donated by a Frankston Family.This round, bronze memorial plaque was presented to the family of Australian Army private Richard Evans Harkness, service number 03426, of the 37th battalion, 8th re-inforcement. Harkness was killed in action on 12th August, 1918, near the French village of Proyart, during the 3rd Division's advance along the Somme Valley. further details can be found here: https://www.awm.gov.au/collection/U51477 Colloquially known as 'Dead Man's Penny' or 'King's Penny', these plaques were awarded to the next of kin of service personnel who died on active service during WW1. refer to link for further information : http://www.awm.gov.au/encyclopedia/memorial_scroll/plaque.aspAround the edge are the words 'HE DIED FOR FREEDOM AND HONOUR' On the righthand side of the plaque is the name of the soldier, in this case Richard Evans Harkness.commemorative, memorial, plaque, dead, man s, penny, king s, richard, evans, harkness -
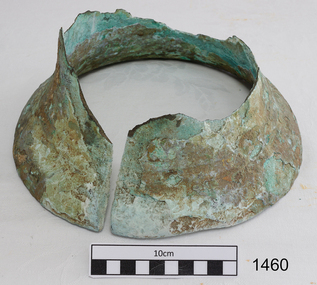 Flagstaff Hill Maritime Museum and Village
Bell, Before 1837
This remnant of a ships bell was recovered from the wreck site of the CHILDREN by Flagstaff Hill Divers on 1 October 1973. (Diving identification number S.M24/10-73, Accession number 24). The artefact had lain in the ocean off Childers Cove since the vessel’s disastrous sinking there on 15 January 1839. Other similarly high value metallic objects raised from the site, and now in the Flagstaff Hill collection, are the ship’s signal cannon (1963), and the ship’s anchor (1974). A ship’s bell was normally struck by the lookout at the foreward part of a vessel, following orders (“Strike the bell”) from the officer of the watch at the helm, or as a warning signal of danger ahead. Its main function was to keep the crew aware of time. Each 24 hour period was divided into 4 hour work-shifts, or watches, and each of these was divided into 8 half hours, or glasses (each half hour being determined by the time it took between each turn of the ship’s hourglass). The six watches were the first watch from 8pm to midnight, the second or middle watch from midnight to 4am, the third or morning watch from 4 to 8am, the fourth of forenoon watch from 8am to midday, the fifth or noon watch from midday to 4pm, and the sixth or dog watch from 4 to 8pm. Within each watch the first half hour would end with one bell, the second with two bells, the third with three bells, and so on until their work-shift ended with the ringing of eight bells. The CHILDREN left Launceston on 11 January 1839 and immediately struck heavy weather. By the evening of 15 January Captain Browne had been continuously on duty for 4 days and needed sleep, his First Mate (T. Gay) was incapacitated with seasickness, and the task of command was given to the Second Mate (W. Wentworth). At two bells into the first watch, or 9 o’clock that night, the captain went below. Two hours later, at six bells into the first watch, or 11 o’clock that night, the lookout cried “Breakers close ahead”. Within a minute the ship struck the rocks at the entrance of Childers Cove. Within twenty minutes the huge seas had taken her stern, three masts and much of her weatherside, leaving survivors clinging to the forecastle. Within two hours the wreck had completely disappeared. If anyone could have rung the bell by then, it would have been to strike two bells into the middle-watch, or one o’clock on the morning of 16 January. An 1859 Victorian Register of Wrecks from 1835 to 1858 remarks the CHILDREN “Ran ashore through an error in the reckoning and a bad lookout [and] Became a total wreck”. 22 passengers and crew survived the tragedy, but 16 lives were lost, including the captain and second mate, and 8 children. The shipwreck of the CHILDREN is of State significance ― Victorian Heritage Register S116A part of a brass ship’s bell, recovered from the wreck of the CHILDREN. The upper part, or dome of the bell, has corroded away, leaving the lower portion, or mouth of the bell, largely intact. However this lower surviving portion has been severed vertically with a clear (saw?) cut, leaving a regular 1cm gap down one side of the bell. It is an evocative relic, attractively aged on the seafloor, bearing layers of aqua-marine verdigris and white limestone accretion on a dull bronze surface. There is no visible ship’s name on the bell. flagstaff hill, warrnambool, shipwrecked coast, flagstaff hill maritime museum, maritime museum, shipwreck coast, flagstaff hill maritime village, great ocean road, the children, bell, ships bell, childers cove, henty brothers, james henty & co, sea-watches, nautical time, james henty & co, bell from the children -
 Jewish Museum of Australia
Diary of Alfred Broch, 10/7/1940 - 17/12/1940
This diary was handwritten by Alfred Broch over the course of four months in 1940. It was kept while Alfred Broch was travelling on the HMT Dunera and then during his detainment in the Hay internment camp.Bound with cotton and handwritten in pencil. Bound with cotton and handwritten in pencil.[selected passage translation from German, further translation available] : “Dunera” 10.VII – 6.IX.1940 First impression very depressing. Fears. Confusion with prisoners of war. Never mind. Corrected. Continuing further bad treatment. Boarding the ship assisted by rifle butts. Robbed as soon as we reached the deck. Impression of a death ship. Complete helplessness. No sleeping facilities. All sleep on the floor, on tables etc. Intended accommodation taken up by luggage cases. (barbed wire). Food good but only spoons. Next day: robbery from the cases. Own people steal. Purloined objects even include toothbrushes and toothpaste. Much to eat. Small convoy with one cruiser. In the same convoy a women’s transport which soon leaves us as it is bound for Canada and we are quite surprised. The English soldiers and officers have another side. While in the danger zone they only had a webbing belt and slippers. In case of torpedoes – expecting certain death. Bad air as all vents are closed. Other Inscriptions: Front page, upper right, underlined: "Alfred Broch" Front page, upper, underlined: "Notitz Buch" Front page, centre, underlined: "Hay 1941" Page 1, upper right: "Mittwoch 10. VII." Page 3, upper right: "10. VII. - 6. IX. 1940 Page 4, centre: "[...] ARANDORA STAR" Page 11, upper, underlined: "Von Liverpool Nach Hay / Mittwoch 10 VII" dunera, wwii, internment, jewish history & people -
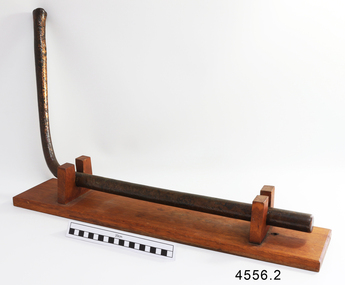 Flagstaff Hill Maritime Museum and Village
Nail, circa 1810
This copper nail, sometimes known as a ‘Dumpy Bolt’ or spike, was salvaged from the hull of the wreck of the “George III”. It dates back to at least 1810. It was found by an abalone diver on the south east coast of Tasmania. The nail would have been used to hold the layers of the ship’s keel frame and the planking together. The nail has been passed from the abalone diver to an interested business man on a trip to the south of Hobart, on again to the business man’s close friend who then donated it to Flagstaff Hill Maritime Village. The metal of nails such as this one, after being in the sea for a long time, become affected by the natural reaction of the sea water, causing it to degenerate and thin, and the stress from the force of the sea over the years alters its shape. Iron nails had been used on ships previously, but they quickly corroded in the salt; ships needed regular, costly and time-consuming maintenance to replace the iron nails. Towards the end of the 18th century the British Navy trialled the use of copper nails, finding them to be very successful. Merchant ships began to adopt this process in the early 19th century, although it made ship building very expensive and was more often used for ships such as the “George III” that sailed on long voyages. The three masted sailing ship “George III” was a convict transport ship built in Deptford, England, in 1810. On 14th December 1834 she left Woolwich, England, bound for Hobart Town, Van Diemen’s Land (Tasmania), under Captain William Hall Moxey. She was carrying 220 male convicts plus crew, guards and their families, totalling 294 persons (another 2 were during the voyage). Amongst the cargo were military stores including several copper drums of gun powder. On 27th January 1835 the “George III” was near the Equator, about half way into her journey. A fire broke out and the gun powder was in danger of explosion, threatening the whole ship. Two convicts braved the heat and smoke, entered the store and seized the gun powder drums, suffering burns for their efforts but saving a probable disaster. The fire destroyed some of the provisions and food was scarce. Many became ill with scurvy and some died during the journey. Nearing the end of their journey on 10th April 1835 the “George III” was headed through the D'Entrecasteaux Channel, south east Tasmania, between the mainland and Bruny Island. She was sailing in the moonlit night to hasten her arrival in port due to the great number of sick on board. She struck uncharted rocks, known only to the local whalers, between Actaeon Reef and Southport Lagoon and within hours began to break up. The ship’s boats were used to first rescue the women and children. Firearms were used to help quell the panic of the convicts below decks and some were killed by the shots. Many convicts, including the sick, were drowned. In all, 133 lives were lost including 5 of the crew, guards and their families. It was the third worst shipping disaster in Tasmanian waters. A monument in honour of the prisoners who perished in the “George III” has been erected, noting the date of the wreck as “Friday 10th April 1835.” (NOTE: there are a few differences between sources regarding dates of the shipwreck, some saying March and others April 1835. There are also differences in the figures of those on board and the number of lives lost.) The copper nail is significant as an example of sailing ship construction; fasteners used in the early 19th century on ships carrying convicts to Australia. The nail is also significant for its association with the ship “George III”. The “George III” is registered on the Australian National Shipwreck Database, ID 7195 as an Historic Shipwreck. She is the third worst shipwreck in Tasmanian waters. She is also associated with Early Australian History and the transportation of convicts to Australia. The incident of the fire on board and the bravery of the convicts in making the gun powder safe is an example of the social character of the people in early Tasmanian colonisation. Copper nail (also called a Dumpy bolt or spike) from the convict ship George III, wrecked in 1835. Nail is long, bent in an ‘L’ shape about 3/5ths along, tapering from both ends to the bend. Both ends are flat and do not taper to a point, nor have a thread. The shorter end has been polished, showing bright copper. There is pitting along the nail and virdigris is evident on the longer, unpolished end. The nail is displayed with the longer section resting on a wooden board between two ‘U’ shaped uprights, the shorter section upright. flagstaff hill, warrnambool, shipwrecked coast, flagstaff hill maritime museum, maritime museum, shipwreck coast, flagstaff hill maritime village, great ocean road, george iii, ship construction, ship nail, 1835 shipwreck, 19th century shipwreck, william moxey, d'entrecasteaux channel, convict transportation, copper nail, dumpy bolt, spike, keel nail -
 Lara RSL Sub Branch
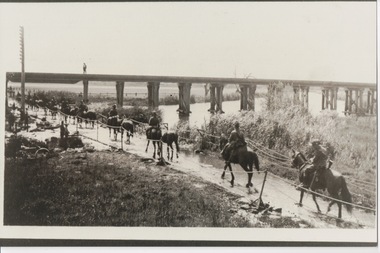
Photograph, Set 4 photographs. and others for Torquay Light Horse camp, 1940
These images capture for all time Light Horsemen travelling through Geelong on their way to camp at Torquay for the last Group meeting in Australia . information following - details obtained from .........https://torquayhistory.com/light-horse-brigade/ On Australia Day, 1997, Sir John Young unveiled this plaque on Point Danger, Torquay. Torquay history, Light Horse Training Camp, WW2 Plaque at Pt. Danger Note----- (See images to view plaque) The plaque identifies a significant event in Torquay’s history and the sentiments of ‘change’ for the Light Horse Brigade – from horses to machines. In 1940 the four Light Horse Regiments (4th, 8th, 13th and 20th), some 5000 Light Horse and 2000 horses camped and trained at Torquay. Three other regiments, formerly mounted on horses, were also at Torquay ‘mounted’ on privately owned trucks and cars. Division troops included Artillery, Engineers, Signals, Field Ambulance and other branches of the Army necessary to enable a Division to function. It wasn’t just the sheer numbers of men coming to this little town that made the event significant, it was also the fact that the men of the Light Horse were dramatic, almost glamorous figures and it is easy to see their exploits as some splendid adventure. Horses have played a special role in the story of Australia. They were the only means of transport across this huge country, so it was necessary for everyone to have the ability to ride a horse. When war broke out in 1899 between Britain and the Boers of South Africa (“Boer” was Dutch for “farmer”) Australia sent troops to fight. At first Britain was wary of using untried, unprofessional colonial cavalrymen but soon saw that the slouch-hatted Australian “bushmen” were a match for the fast-moving and unconventional mounted commandos of the Boers. The Australians proved themselves to be expert rough-riding horsemen and good shots. Bush life had hardened them to go for long periods with little food and water. They also showed remarkable ability to find their way in a strange country and use its features for cover, in both attack and defence. By 1914, when Australia joined the war against Germany, there were 23 Light Horse regiments of militia volunteers. Many men from these units joined the Light Horse regiments of the Australian Imperial Force (AIF). Men were given remounts (if not using their own horses) – army horses bought by Commonwealth purchasing officers from graziers and breeders. These were called “walers” because they were a New South Wales stockhorse type – strong, great-hearted animals with the strains of the thoroughbred and semi-draught to give them speed, strength and stamina. On 1st November, 1914, Australia’s First Infantry Division and the first four Light Horse regiments sailed for England in a fleet of transport ships. The first of the Light Horse arrived at Gallipoli in May without their horses. Back with their horses after Gallipoli, they were formidable combatants across the Sinai and Palestine. Some British commanders observed that the light horseman moved with a “lazy, slouching gait, like that of a sleepy tiger” but described how the promise of battle “changes that careless gait, into a live athletic swing that takes him over the ground much quicker than other troops”. They had Light Horse, Torquay, training campdeveloped a reputation as formidable infantrymen. The Turks called them “the White Ghurkas” – a reference to their deadly skill with the bayonet. The Arabs called them “The Kings of the Feathers”. The plume had originally been a battle honour of the Queensland Mounted Infantry for their work in the shearer’s strike of 1891. During WW1 it was adopted by almost all the Light Horse Regiments. It was the proud badge of the light horseman. The most famous of their battles was the attack on Beersheba- the charge of the 4th Light Horse Brigade. Mounted infantrymen and their superb walers had carried out one of the most successful cavalry charges in history – against what seemed impossible odds. They surprised the Turks by charging cavalry-style, when they would normally have ridden close to an objective then dismounted to fight. The fall of Beersheba swung the battle tide against the Turks in Palestine; and changed the history of the Middle East. While 19 men from the Surf Coast Shire served with the 4th Light Horse over the course of WW1, only four were involved in the charge of Beersheba- John GAYLARD, Philip QUINN.(Winchelsea); Wallace FINDLAY (Anglesea); Harry TRIGG (Bambra). After the war, Light Horse units played a key role in the Australian Government’s compulsory military training programme. The Citizen Military Forces (C.M.F.) thrived on the glamour of the wartime Light Horse tradition, ignoring the possibility that motor vehicles would soon replace the horses. When training was no longer compulsory, the C.M.F. regiments declined and horses became more of a luxury during the 1930s depression years of poverty and unemployment. Some regiments were motorised. Then, in 1939, Australia joined Britain in another world war. Training was increased for the militia at both home bases and regional training camps. The camp at Torquay in 1940, commanded by Major General Rankin, was at Divisional strength. By the end of the camp some felt that the Division was ready for active service. Gradually, over the next four years, the Australian Light Horse units were mounted on wheels and tracks and the horses were retired. Six men enlisted at the Torquay camp and another 57 men and women enlisted at Torquay for service in WW2. Those who served in the Militia provided valuable Officers and NCOs and men for the armed services during the war. Each infantry division of the 2nd AIF had a Light Horse regiment attached to it. But the day of the Australian mounted soldier hadn’t quite passed. During World War II, Australia’s 6th Cavalry Regiment formed a mounted unit they called “The Kelly Gang” which did valuable scouting work. In New Guinea, a mounted Light Horse Troop did patrol duty and helped carry supplies. Some fully equipped walers were flown into Borneo for reconnaissance in rugged mountain country. But by the end of the war, in 1945, the horse had disappeared from the Australian Army. References: Australian Light Horse Association www.lighthorse.org.au National Australia Archives Australian War Memorial Surf Coast Shire WW1 memorials www.togethertheyserved.com The Light horse- a Cavalry under Canvas Light Horse, Training Camp, Torquay, WW2 Late in 1939 it was decided to set up a Lighthorse training camp in Torquay to train both men and horses for the battles of the Second World War. Horses, men and equipment came on special trains from all over Victoria and NSW, and as you would expect horseman came from areas such as Omeo and Sale, the Wimmera and the Western District. They arrived at the Geelong racecourse for watering in the Barwon River and then were ridden across the ford at the breakwater and began their 11 mile trek to Torquay. Light Horse, Training Camp, Torquay, WW2 Tent city By the end of January 1940 the camp at Torquay accommodated some 5000 men and 2500 horses of the Second Cavalry Division. The rows of horses, tents and huts near Blackgate Road were quite a sight. While the cavalrymen engaged in exercises on the land and on the beaches, many of the troops took over the Torquay School for special training of men and officers. Mr Bob Pettit local farmer and Councillor for the Barrabool Shire, wrote about the Light horse in the Surf Coast Community News in 1985 saying “They used to travel about the district riding four abreast in one long convoy. To my annoyance they went through my property and shut all the gates behind them. I had certain gates open to let stock in to the water holes and it would take me three -quarters of an hour to follow the horsemen up and put all the gates right again” he continued “the men from the Light Horse were here when the fire went through in March 1940. He recalled an incident when early one morning, as some one blew the bugle, a soldier putting a white sheet on the line frightened the horses. They panicked and ran off in all directions. Six went over the cliff near Bird Rock, five were never found, and the rest were gathered up after nearly a fortnight in the bush around Addiscott and Anglesea" Light Horse, Training Camp, Torquay, WW2, Geelong Parade Geelong parade The training camp culminated in a parade through the streets of Geelong on March 12th 1940. The salute was given at the Town Hall and the troops continued on a route to the You Yang’s for a training exercise. Note-----(see media section for photograph) The Camp was abandoned in mid 1940 as it was deemed unsuitable for training during winter and the cost of a permanent camp could not be justified if it could not be used all year. Historic.......Rare,,,Interpretive.Sepia photographs.set of four ....post card size ....Horses &LighthorsemenNo 1, Lighthorsemen Regiment Geelong 1940......No 2 Light Horse at Breakwater Geelong 1938 to 1940....No 3 Light Horse at Breakwater Geelong 1938 to 1940.....No 4 Light Horse crossing Breakwater camped at Geelong Showgrounds. These markings are on reverse of photographs.light horsemengeelong 1940., world war 2 -
 Eltham District Historical Society Inc
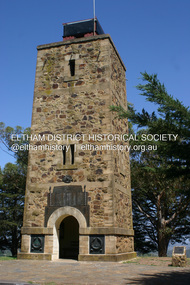
Photograph - Digital Photograph, Alan King, Shire of Eltham War Memorial, Kangaroo Ground, 28 January 2008
The Eltham Shire War Memorial, a tower of remembrance, was built with public donations to commemorate the memory of the fallen soldiers from the shire who enlisted in the 1914-1918 war. The tower is reminiscent of the peel-towers or watchtowers that lined the English-Scottish border from the mid 14th century to around 1600 and is constructed from locally quarried stone. This uncommon and picturesque war memorial, which affords an excellent view of the surrounding district was unveiled by His Excellency the Governor-General (Lord Stonehaven) on November 11, 1926. In July 1922 a deputation of returned soldiers from Panton Hill, presumably the Panton Hill branch of the Returned Sailors and Soldiers Imperial League of Australia (RSSILA), proposed to Eltham Shire Council that the monument should be a cairn of local stone “sufficiently high to form a prominent and conspicuous landmark, and crowned with some suitable device”. Eltham Shire Councillor and President of the Panton Hill branch of the RSSILA, Basil Hall, was credited with being the first to suggest a tower, and with organising a Memorial Park committee to raise funds for the monument in the Memorial Park. A meeting for those interested in the establishing a War Memorial monument in the park was held in January 1924 and the Eltham Shire War Memorial League was formed for this purpose. It appears that the broad and rounded cairn that had been recently built was considered by the League a temporary affair, and not the substantial cairn-as-monument, sufficiently high to form the conspicuous landmark, which had been envisaged by the Panton Hill RSSILA. A design competition was held for the monument. The chairman of the League, Councillor Basil Hall, suggested that the site of the memorial in Kangaroo Ground would lend itself to something rugged, instead of polished stone. By April 1924 thirty designs for a memorial had been received from which three designs were selected and of those, the design by the shire engineer Mr McCormack, for a 70ft tower suitable for construction in rough stone, was chosen. Artist Harold Herbert suggested that a peel tower-like design reminiscent of those along the English-Scottish border would be fitting for the site. Herbert drew up a rough sketch that was approved of, and later, Melbourne architect Percy Meldrum volunteered to draw up the design from sketch to architectural drawings. By January 1925 the Soldiers’ Memorial League had adopted Meldrum’s design for a 50ft high tower. Meldrum had also offered his design and supervision of construction free of charge. The Shire provided the stone to the builders, which was a gift quarried from land owned at Kangaroo Ground by Dr Ethel and Professor William Osborne The Shire of Eltham War Memorial, a tower of remembrance, and honour board were unveiled on November 11, 1926, by the Governor General Lord Stonehaven. At this stage a temporary honour roll was painted on the panels on either side of the tower entrance. In September 1930 bronze plates were added above the portal with the names of men who fell in the 1914-18 war. On November 16, 1951, the Governor of Victoria, Sir Dallas Brooks re-dedicated the war memorial tower and unveiled the names of men who gave their lives in the 1939-45 war. Two additional bronze plaques which recognise service in the armed conflicts of Korea, Borneo, Malaya, and Vietnam were unveiled November 11, 2001, by the Governor of Victoria, John Landy, A.C., M.B.E. The tower was first used for fire spotting activities following the Black Friday bushfire in January 1939 in response to a request from Mr R.D. Ness, secretary of the Kangaroo Ground bush fire brigade, who asked Council that the tower be used as an observation tower for detecting bush fires, and asked Council to arrange a telephone to be installed. It was suggested that if the Shire were to appoint a caretaker for the Memorial Park, his duties could also include raising the alarm in the event of a fire. Later in 1939 Council applied for a radio transmitter, which the Forestry Commission planned to install at vantage places throughout the state. The first dedicated fire spotter appointed from December1948, was Mr Smith of Warrandyte. A prefabricated glazed cabin was installed in 1974, which involved the removal of the original stone structure around the rooftop exit door. A new fire spotting cabin, which included the latest technology, was installed soon after the 2009 Black Saturday fires and is manned by CFA personnel on high fire danger days. Covered under Heritage Overlay, Nillumbik Planning Scheme. Published: Nillumbik Now and Then / Marguerite Marshall 2008; photographs Alan King with Marguerite Marshall.; p123This collection of almost 130 photos about places and people within the Shire of Nillumbik, an urban and rural municipality in Melbourne's north, contributes to an understanding of the history of the Shire. Published in 2008 immediately prior to the Black Saturday bushfires of February 7, 2009, it documents sites that were impacted, and in some cases destroyed by the fires. It includes photographs taken especially for the publication, creating a unique time capsule representing the Shire in the early 21st century. It remains the most recent comprehenesive publication devoted to the Shire's history connecting local residents to the past. While published in the book in black and white, this collection features the original colour digital photographs. nillumbik now and then (marshall-king) collection, garden hill, kangaroo ground, memorial park, shire of eltham war memorial -
 Flagstaff Hill Maritime Museum and Village
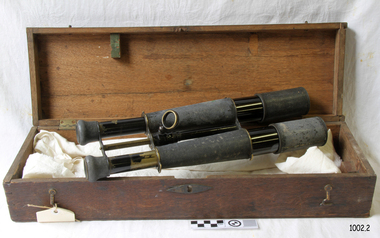
Instrument - Optical, Binoculars, 1878 (estimated)
This pair of brass binoculars was presented to Tom Pearce in recognition of his heroic efforts at the wrecking of the Loch Ard and saving Eva Carmichael. They were presented to him by the Lady Mayoress of Sydney on 27th July 1878 on behalf of the colonists of New South Wales "In recognition of his gallant conduct on the occasion of the wreck of the Loch Ard". Tom (Thomas) Pearce was born in Ireland in 1859 and arrived in Melbourne two years later; he considered himself as Australian. Before sailing on the Loch Ard he had been at sea for three years as an apprentice sailor and had already experienced one shipwreck. Tom was on the deck of the Loch Ard with Captain Gibb throughout the night of May 31st 1878. It was mistakenly thought they were 150 miles (240 km) southwest of Cape Otway. By 2:00 am on June 1st, the wind was blowing "pretty fresh" but a thick haze remained and, when it eventually cleared, the land was so close the unsuccessful battle to save the Loch Ard began. After the ship struck Mutton Bird Island Tom and five others were sent to the lifeboats. Conditions were very dangerous as waves broke over the decks and they were all washed away. Tom found himself in the stormy waters and under a lifeboat, which had also been washed into the sea. After being swept into the gorge Tom left the boat and swam into shore; he was alone. Eva Carmichael, a passenger on the ship, had been snatched from her bed just before dawn and into the chaos, confusion and terror of the shipwreck, with rigging and rocks raining down. Thrown into the sea, she afterwards said: "God taught me to swim in my distressful plight, for I never swam before". Clinging to a spar, she was swept into the gorge and saw Tom Pearce walking along the beach. Upon hearing the cries of Eva, Tom swam out and with great difficulty brought her to the shore and placed her safely in a cave where he made a bed of grass and shrubs and gave her brandy to revive her. She sank into exhausted unconsciousness. Tom then scrambled to the top of the high cliff and after walking for some time he stumbled upon workers from Glenample Homestead. They rode back to the homestead for help but Tom insisted on returning to Eva. When Eva awoke she found herself alone, "cold, weak and terrified with the wild waves before me, and caves and cliffs around me" and upon hearing strange noises, which she imagined to be made by the local indigenous people, she hid. The noises were made by the rescue party from Glenample Homestead. After eventually discovering Eva they hauled her up the cliff in the darkness of night, “a work of great difficulty and danger” and took her to Glenample. Sadly, Tom and Eva were the only survivors of the 54 people on board the Loch Ard. Tom’s rewards for his bravery included the Gold Medal of the Humane Society, a gold watch and £1000 from the Victorian Government, a set of nautical instruments, (which included the binoculars) from the people of Sydney and £60 from the people of Warrnambool. He was also presented with a Bible by a “Friend of the Loyal Orange Institution of Victoria, Protestant Hall Melbourne” in August 1878. Coleman Jacobs composed the music "The Young Hero Schottische" and dedicated it, by permission, to Mr Thomas R. (Tom) Pearce. The sheet music was published in 1878 by Mr Roberts, professor of dancing and was on sale for 3/- (3 shillings) in aid of the "Loch Ard" fund. Tom Pearce went on to join the Loch Sunart on her return to England, only to be wrecked again off the Irish coast in January 1879. Tom left the Loch Line in 1883 and the following year married Edith Gurney Strasenbergh, the sister of his friend Robert who had died on the Loch Ard. They had three children, unfortunately, two of the male children were to die at sea. In 1895 Tom obtained his first command as Master of The Larne, a vessel with the Royal Mail Steam Packet Company. He remained with the company until he died in Southampton, England, on 14th December 1908. Tom Pearce never saw Eva Carmichael after he had fare welled her some 30 years before. Eveline Victoria Berta Carmichael was born in 1859 in Mountrath, Queens County, Ireland. After recovering from her ordeal in August 1878 Eva returned to Ireland and in 1884 married Thomas Achilles Townshend, a Civil Engineer. They had three sons, all of whom had successful military careers, and when Eva’s death notice appeared in the Melbourne Argus It read. "Townshend on 8th April 1934 aged 74 at her residence in Bedford, England, Evaline Victoria, widow of the late Thomas Archilles Townshend, C.E. of Co. Cork, Ireland. Mrs Townshend was the Eva Carmichael who, with the late Tom Pearce, were the only two survivors of the ship Loch Ard, which was wrecked near Port Campbell on June 1st 1878." The binoculars are significant for their association with the wreck of the Loch Ard and the only two surviving members of that wreck Tom Pearce and Eva Carmichael. Flagstaff Hill’s collection of artefacts from Loch Ard is significant for being one of the largest. The shipwreck of the Loch Ard is of significance for Victoria and is registered on the Victorian Heritage Register ( S 417). Flagstaff Hill has a varied collection of artefacts from Loch Ard and its collection is significant for being one of the largest accumulation of artefacts from this notable Victorian shipwreck. The collections object is to also give us a snapshot into history so we can interpret the story of this tragic event. The collection is also archaeologically significant as it represents aspects of Victoria's shipping history that allows us to interpret Victoria's social and historical themes of the time. The assemblage of items from the wreck is of historical significance in that they are associated with the worst and best-known shipwreck in Victoria's history. Pair of brass marine binoculars in a wooden box On the left hand eye piece, on the underside, is an engraved inscription and another engraved word. On the right hand eye piece there is another small inscription and on the underside there is a small green mark. The binoculars have a pattern of embossed tiny circles on the outside. Some of the patterning is very shiny due to wear and rubbing, there is a brass ring on the underside of the binoculars for the attachment of a lanyard. The wooden box has a hinged lid and on the front of the box in the centre is a lock, and at either end are two hooks and eyes. The box is split across the top for about 3/4 of the length. Marking on the left underside reads, 'Presented on behalf of the Colonists of New South Wales By the Mayoress of Sydney on 27th. July 1878 to Mr Thomas B Pearce. In recognition of his gallant conduct on the occasion of the wreck of the "Loch Ard"'. Underneath this inscription is engraved 'Sydney'. On the other eye piece is engraved what looks like 'Mac Donnell & Co' binoculars, flagstaff hill, warrnambool, shipwrecked coast, flagstaff hill maritime museum, maritime museum, shipwreck coast, flagstaff hill maritime village, loch ard shipwreck, tom pearce, thomas r pearce, eva carmichael, mutton bird island, loch ard survivor, loch ard hero, coleman jacobs, the young hero schottische, photograph of tom pearce, glenample homestead -
 Bendigo Military Museum
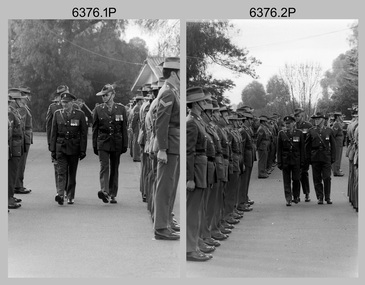
Photograph - Army Survey Regiment – Corps Day Parade and Defence Force Service Medal Presentations, Fortuna Villa, Bendigo, 1987
This set of 18 photographs were taken at a Corps Day Parade held at the Army Survey Regiment, Bendigo in July 1987. The Parade Commander was CO LTCOL Don Swiney MBE, and the Reviewing Officer was the Colonel Commandant (honorary appointment) of the Survey Corps - COL Clem Sargent (Retd). The Corps Day Parade was held to commemorate the 72nd anniversary of the formation of the Royal Australian Survey Corps. These photos comprise inspections of the Regiment’s four squadrons, presentations of the Defence Force Service Medal in recognition of 15 years of efficient remunerated service to SSGT Phil Meagher and SGT Wayne Rothwell; and formal group photos of each of the four Squadrons, Officers, and Warrant Officers/Sergeants. See Item 6375.36P for additional photographs taken at the start of the Corps Day Parade, drill movements of the four Squadrons forming up on the parade ground and the formal arrival of the Reviewing Officer.This is a set of 18 photographs of a Corps Day Parade held at the Army Survey Regiment, Fortuna, Bendigo in July 1987. The black & white photographs are on 35mm negative film and are part of the Army Survey Regiment’s Collection. The photographs were scanned at 96 dpi. .1) - Photo, black & white, July 1987. Headquarters Squadron inspection. L to R: unidentified (x3), COL COMDT COL Clem Sargent, CO LTCOL Don Swiney MBE (obscured), OC MAJ Roger Rix. .2) - Photo, black & white, July 1987. Lithographic Squadron inspection. L to R: unidentified, CPL Brian Paul, CPL Gary Tremain, CPL Warren ‘Waldo’ Shirley, unidentified, CPL Stuart Ridge, SSGT Rob Bogumil, SSGT Steve Egan. CPL Roy Hicks, unidentified, COL COMDT COL Clem Sargent, CO LTCOL Don Swiney MBE, OC MAJ Mick Byrne, remainder unidentified. .3) - Photo, black & white, July 1987. Air Survey Squadron inspection. L to R: OC Daryl Hockings CSM, COL COMDT COL Clem Sargent, CO LTCOL Don Swiney MBE, SGT Graham Johnson, unidentified (x4), SGT Lyn Johnson, CPL Steve Rundle, SGT Wayne Rothwell, SGT Bruce Hammond, SGT Barrie Craymer, SPR Brett Parkin .4) - Photo, black & white, July 1987. Cartographic Squadron inspection. L to R: OC MAJ Bob McHenry, COL COMDT COL Clem Sargent, CO LTCOL Don Swiney MBE, CPL Rod Skidmore, SSGT Phil Meagher, SPR Craig Kellet, unidentified, CPL Col McInnes, SPR Nick Cowan, unidentified, CPL Jeff Le-Fevre, SPR Richard Arman, CPL Dan Cirsky, SPR Tom Bloxham, CPL Peter Johnson, unidentified. .5) - Photo, black & white, July 1987. Presentation of Defence Force Service Medal. L to R: WO2 Andy Wilson, COL COMDT COL Clem Sargent, MAJ Terry Edwards, SSGT Phil Meagher, CAPT John South (background). .6) - Photo, black & white, July 1987. Presentation of Defence Force Service Medal. L to R: COL COMDT COL Clem Sargent, SGT Wayne Rothwell, SSGT Phil Meagher, MAJ Roger Rix (background). .7) - Photo, black & white, July 1987. Corp Day Parade guests. L to R: MAJ Duncan Burns, SPR Dianne (Thomas) Soutar, unidentified guests, CPL Kevin ‘Chuck’ Berry, CPL Graeme Priestley, unidentified guests. .8) - Photo, black & white, July 1987. Corp Day Parade guests. L to R: unidentified guests, George Austen, SPR Dianne (Thomas) Soutar, Bob Mason, unidentified guests, CPL Graeme Priestley, unidentified guests, SGT Terry Danger, unidentified guests, CO LTCOL Don Swiney MBE (facing away), COL COMDT COL Clem Sargent. .9) & .10) - Photo, black & white, July 1987. L to R: unidentified guest, COL COMDT COL Clem Sargent, CO LTCOL Don Swiney MBE. .11) - Photo, black & white, July 1987. L to R: unidentified guests, 2IC MAJ Terry Edwards, ADJT CAPT Andrew McLeod. .12) - Photo, black & white, July 1987. WO1 Bob ‘Stretch’ Hayden. .13) - Photo, black & white, July 1987. Lithographic Squadron. Back Row L to R: CPL Paul Baker, CPL Greg Rowe, CPL Kerron South, CPL Stuart Ridge, SPR Rob Jones, CPL Laurie Justin, unidentified, SPR Geoff Webb, unidentified (x2) SPR Shona Hastie, SPR Trevor King, LCPL John Bateman, CPL Ken Peters, CPL Roy Hicks. Middle Row L to R: CPL Brian Paul, unidentified (x2), CPL Jim Ash, CPL Dale Hudson, CPL Gary Tremain, unidentified, LCPL Daryl South, CPL Graham Hales, SPR Bob Bousfield, CPL John ‘Flash’ Anderson, CPL Peter Dillon, CPL Peter Swandale, SPR Colin Yeats, CPL Lance Strudwick. Front Row L to R: CPL Warren ‘Waldo’ Shirley, SGT Gary Kerr, SGT Brian Fauth, SGT Graham Johnston, SSGT Steve Egan, WO2 Bill Jones, OC MAJ Mick Byrne, WO2 Ralph Chant, SSGT Rob Bogumil, unidentified UK exchange, SGT Alan Virtue, SGT Jeff Willey. .14) - Photo, black & white, July 1987. Headquarters Squadron. Back Row L to R: CPL Bob Thrower, PTE Mark Twiss, unidentified (x3), LCPL Bob Sheppard, unidentified, SGT Ian Belmont, SPR Peter Coles, SPR Tracy (Parker) Ash, CPL Steve McGuinness, SGT Bob Garritty, unidentified officer. Middle Row L to R: WO1 Doug Arman, WO2 Kevin Macquire, W01 Noel ‘Nesty’ Coulthard, WO1 Allan Adsett, WO2 Andy Wilson, CPL David Jobe, SGT Kevin Boehm, unidentified (x3), SSGT Greg Gilbert, WO2 George Graham, WO2 Dave Miles, WO2 Ted Burgess, WO1 Ken Slater. Front Row L to R: WO1 Bob ‘Stretch’ Hayden, CAPT Peter ‘Blue’ Blaskett, CAPT Bob Williams, ADJT CAPT Andrew McLeod, 2IC MAJ Terry Edwards, Acting RSM WO1 Dave Thompson, CO LTCOL Don Swiney MBE, OC MAJ Roger Rix, WO2 Alan Bunn, MAJ Duncan Burns, CAPT John South, LT Vicky Thompson, WO1 Peter Warwick. .15) - Photo, black & white, July 1987. Air Survey Squadron. Back Row L to R: SGT Lyn Johnson, CPL John ‘Toad’ Smith, SGT Roger Rees, SGT Wayne Rothwell, CPL Roger Pearson, SPR Leah (Hoffman) Peppler, unidentified, SPR Christine Gordon, SPR Jodi Bowman, SGT Paul Leskovec CSM, SPR Tony Jackson, CPL John Reid, unidentified, SPR Avril (Bray) Lloyd? SPR Diane (Thomas) Soutar, SSGT Brian Collings. Middle Row L to R: unidentified, SGT John ‘Stormy’ Tempest, CPL Perry Burt, SPR Rick Millar, CPL Graeme Priestley, SGT Bruce Hammond, CPL Max Watson, SPR Brett Parkin, SPR Peter Ball, CPL Dick Warsing, SPR Sue (Foote) Bourne, SPR Sandy Wynn, CPL Steve Hill OAM CSM, CPL Steve Rundle, CPL Andy Mallon, SPR Stafford Lester, SPR Steve Moss, CPL Rod Burton. Front Row L to R: SGT Ken Talbot-Smith, SSGT Phil Boyle, SSGT Max Coletti, WO2 Peter Tangey, LT Brian Sloan, WO1 Stevo Hinic, OC Maj Daryl Hockings CSM, CAPT Laurie Newton, WO1 Denis Marshall, SSGT Neil ‘Ned’ Kelly, SSGT Dennis McCarthy, SSGT Adrian ‘Charlie’ Creedy, SGT Barry Craymer, SSGT John ‘Shep’ Shephard. .16) - Photo, black & white, July 1987. Cartographic Squadron. Back Row L to R: unidentified, SPR Michelle Griffith, unidentified, SPR Raelene Munting, unidentified, SPR Ailsa (Sorby) Miller, SPR Kasey Northausen, CPL Lorraine (Daly) Talbot-Smith, SGT John Bettridge, SPR Richard Arman, CPL Colin McInnes, CPL Mick ‘Buddha’ Ellis, SPR Mark Donnelly, CPL Steve Coulson, LCPL Rick Millar, CPL Jeff Le-Fevre. 3rd Row L to R: CPL Paul Trent, unidentified, CPL Brian Johnson, CPL Peter Johnson, CPL Rod Skidmore, SPR Chad Hardwick, LCPL John Lane, LCPL Ken Dempster, unidentified CPL Dan Cirsky, SPR Ross Collishaw, SPR Craig Kellet, CPL Greg Sulman, SPR Tom Bloxham, SPR Ben Lucas. 2nd Row L to R: SPR Jim Humphrey, CPL Pat Drury-Lane, SPR Max Shaw, SPR Barry Hogan, unidentified, CPL David Murphy, SPR Ian Hill, SPR Bruce Graham, CPL Greg Honan, SPR Nick Cowan, CPL Steve Throssel, SPR Ben Tarasenko. Front Row L to R: SGT Eddy Jacobs, SGT Phil Smalley, SGT Rick Van der Bom, SSGT Phil Meagher, SSGT Allan Brown, WO1 Colin Cuskelly, WO2 Pat Lumsden, OC MAJ Bob McHenry, unidentified officer, WO2 Neville Stone, SSGT Ian ‘Rock’ Thistleton, SGT Martin Evans, SGT Terry Danger, SGT Bob Bright. .17) - Photo, black & white, July 1987. Sergeants Mess. Back Row L to R: SGT Graham Johnston, SGT Brian Fauth, SGT Gary Kerr, SGT Alan Virtue, SSGT Rob Bogumil, SSGT Brian Collings, SGT Roger Rees, SGT Phil Smalley, SGT Rick Van der Bom, SGT Martin Evans, SGT Bob Garritty, SSGT Phil Boyle, SGT John ‘Stormy’ Tempest, SSGT Allan Brown, SSGT Max Coletti, SSGT Neil ‘Ned’ Kelly, SSGT Dennis McCarthy. 3rd Row L to R: SGT Bruce Hammond, SGT Wayne Rothwell, SGT Eddy Jacobs, unidentified UK exchange, SSGT Steve Egan, SGT Bob Bright, SSGT Ian ‘Rock’ Thistleton, SGT Paul Leskovec CSM, SGT Barry Craymer, SSGT Greg Gilbert, SGT Kevin Boehm, Terry Danger, SGT Ken Talbot-Smith, WO2 Ted Burgess. 2nd Row L to R: WO2 Ralph Chant, WO2 Andy Wilson, WO2 Bill Jones, WO2 Alan Bunn, SGT John Bettridge, SSGT Adrian ‘Charlie’ Creedy, SGT Lyn Johnson, SSGT Phil Meagher, SSGT John ‘Shep’ Shephard, WO2 Kevin Macquire, WO2 Peter Tangey, WO2 Dave Miles, WO2 George Graham, WO2 Pat Lumsden, SGT Ian Belmont. Front Row L to R: WO1 Colin Cuskelly, Acting RSM WO1 Dave Thompson, WO1 Denis Marshall, 2IC MAJ Terry Edwards, WO1 Peter Warwick, CO LTCOL Don Swiney MBE, WO2 Neville Stone, WO1 Bob ‘Stretch’ Hayden, , W01 Noel ‘Nesty’ Coulthard, WO1 Stevo Hinic, WO1 Ken Slater, WO1 Allan Adsett. .18) - Photo, black & white, July 1987. Officers Mess. Back Row L to R: CAPT Laurie Newton, LT Brian Sloan, unidentified officer, CAPT John South, CAPT Peter ‘Blue’ Blaskett, CAPT Bob Williams, LT Vicky Thompson, unidentified officer, CAPT Andrew McLeod. Front Row L to R: MAJ Daryl Hockings CSM, MAJ Mick Byrne, MAJ Bob McHenry, COL COMDT COL Clem Sargent, CO LTCOL Don Swiney MBE, MAJ Terry Edwards, MAJ Roger Rix, MAJ Duncan Burns. .1P to .18P – There are no personnel identified.royal australian survey corps, rasvy, army survey regiment, army svy regt, fortuna, asr -
 Eltham District Historical Society Inc
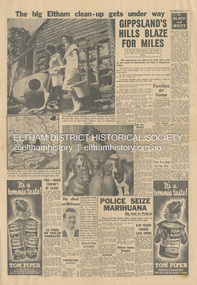
Newspaper - News Clipping, Herald, The big Eltham clean-up gets under way, Herald, 4 March, p3, 1965
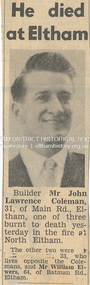
Full page newspaper clipping featuring the March 1965 Victorian bushfires. Items include: Photograph - TWO-WOMAN BUCKET BRIGADE, Mrs Henry Marsden (left) and Mrs Moureen Ellis, whose fire-fighting efforts yesterday were highly praised today by their Eltham neighbours, carry out mopping-up operations Photograph - DOGS MADE HOMELESS by the fire in North Eltham yesterday are being cared for at First-Constable Doug. Mummery's kennels at Eltham and here is kennel maid Helen Oliver, 17, with some of them today. The two basset hounds are owned by Mr Bill Guy who lost about 100 daschund and basset hound puppies and dogs in the fire. Photograph - He died at Eltham [Picture of John Lawrence Coleman] Builder Mr John Lawrence Coleman, 31, of Main Rd., Eltham, one of three men burnt to death yesterday in the fire at North Eltham. The other two were XXXXX, 33 who lives opposite the Colemans and Mr William Elwers, 64 of Batman Rd., Eltham. John Lawrence Coleman (1934-1965) born January 10, was the son of Raymond John Coleman and Hanna May (Gillet) Coleman. He married Margaret Frances Dare in 1955 and was the father of two children. He died whilst attempting to rescue an older man trapped in the bushfire at North Eltham on March 3, 1965 Other news stories of the day: Bushfires rage in Victoria, Snowy: Three dead (1965, March 4). The Canberra Times (ACT : 1926 - 1995), p. 1. Retrieved May 19, 2022, from http://nla.gov.au/nla.news-article131758981 Includes two photos of the fire in North Eltham “Firemen make for safety as fire rages in Upper Glen Park Road, North Eltham, Victoria. The smoke hides a house.” and “A house explodes into flames at North Eltham, Victoria. Firemen said bottled gas went up.” Canberra Times (ACT : 1926 - 1995), Thursday 4 March 1965, page 1 ________________________________________ Firemen make for safety as fire rages in Upper Glen Park Road. North Eltham. Victoria. The smoke hides a house. A house explodes into flames at North Eltham. Victoria. Firemen said bottled gas went up. Bushfires rage in Victoria, Snowy: Three dead MELBOURNE, Wednesday.—Three people died today in a bush» fire which raged through North Eltham, about 15 miles from Melbourne. The victims were three men. A fourth man is feared to be dead. Another bushfire. sparked off by the heatwave sizzling over south-eastern Australia, is burning out of control in the Kosciusko State Park, in the Snowy Mountains. Firefighters fear that if it reaches pine forests up the Yarrangobilly River, they will be powerless to stop it. The three victims of the North Eltbam fire were trapped by flames in a valley. Their bodies were found only a few yards apart. They were named by police tonight as Mr. George Crowe, 78, of North Eltham, William John Ewers, 64, and John Laurence Coleman, 31, both of Eltham. The other two have not been identified. They are believed to be a man aged about 40 and an 18-year-old youth. At least 12 homes were destroyed by the fire, the worst in Victoria since 1962, when eight lives were lost and hundreds of homes burnt down at Warrandyte. At one time the township of Eltham was threatened, but a cool change swept in from the south and held back the wall of flames. More than 100 dogs, worth about £4,000, died when the fire raced through two kennels in Short Street, Eltham. and Upper Glen Park Road, North Eltham. A trickle of water Residents ran into the streets as the blaze raced towards their houses. Others frantically dug firebreaks around their homes. Mrs. Sue Recourt wept when firemen arrived while she was vainly trying to stop the flames with a trickle of water from the garden hose. A stack of firewood was blazing, but the firemen managed to save the house and rescue four goats. Many homes in Eltham were saved after flames had crept to within feet of their fences. Students at North Eltham State School had to be evacuated when the blaze threatened the building. Fire fighters were severely hampered by lack of water and narrow roads. The blaze, which began in above century heat, turned toward Wattle Glen, where two houses were gutted. Then the flames raced towards Hurstbridge to the north. Firemen battling desperately, controlled the fire late this afternoon. Five forest fires were still burning in Victoria tonight. IN VICTORIA THIS WEEK Tragic lack of central fire authority (1965, March 9). The Canberra Times (ACT : 1926 - 1995), p. 2. Retrieved May 19, 2022, from http://nla.gov.au/nla.news-article131759928 Canberra Times (ACT : 1926 - 1995), Tuesday 9 March 1965, page 2 ________________________________________ IN VICTORIA THIS WEEK Tragic lack of central fire authority From Rohan Rivett It was the worst week for Victorian fire fighters since Black Friday 27 years ago. On that day one pilot up in a spotter plane said afterwards: "It seemed at times that half the State was on fire." This time, for three days on end, Gippsland men, women and children had moments of conviction that their towns would have blackened into anonymity before the weekend was out. The week began with horror at Eltham on the North-eastern edge of Melbourne. Eltham today is something of an artists' colony. Oil painters, water colourists, potters and sculptors proliferate. A number of University folk have emulated the example of Professor MacMahon Ball who pioneered the way by moving to Eltham and carving a home out of the bush in the thirties. Innermost Eltham is barely 14 miles from the G.P.O. Farthest Eltham stretches miles beyond. It served to illustrate the tragi-ludicrous truncation of Victoria's fire control. Part of Eltham is under the protection of the Melbourne Fire Brigade. But this responsibility ceases at some invisible and incomprehensible line — apparently determined by the meanderings of the water mains. At this point everybody's property throughout the rest of Eltham is dependent on the Country Fire Authority. Half an hour before midday on Wednesday, a fire suddenly started on the West side of Upper Glen road on the edge of Eltham. Before the fire brigade could arrive, it was burning on a widening front through timber and high grass north of Eltham. Two wind changes in rapid succession saw the fire leaping Diamond Creek. With a freshening wind it struck home after home in three streets. More than one of them exploded suddenly as if hit by an incendiary bomb. There is no piped gas in the Eltham area, hence many housewives use bottle gas. The flames outside caused the bottles to explode. Altogether twelve homes were completely incinerated and four more were badly damaged. Thirty prize dogs perished. About three hours after the fire started it raced suddenly down a gully hillside trapping an elderly man. Two other men apparently raced to the rescue. Flames caught the three men within yards of each other, not 200 yards off the Upper Glen Park Road where safety lay. They were burned to death. Next evening an angry and convincing secretary of the Fire Brigade Union, Mr. W. M. Webber, came on television and appealed to the people of Victoria to end the ridiculous and dangerous dualism in fire-fighting control. The Eltham fire, he said, had precisely illustrated the situation. The Metropolitan Fire Brigade area touched Eltham, but where the fire had gutted and killed, was just outside its area. Mr. Webber said his union had constantly urged one authority for the State with a complete reorganisation of fire protection. On Wednesday the union had repeated its call for an inquiry into fire protection in Victoria to the Chief Secretary, Mr Rylah. "No matter how close the liaison between the two organisations, there are always divided sections of thinking," Mr. Webber told viewers. "I don't know how much tragedy the com-munity can take before it demands that it is properly protected." Rumours that differences in gauge between taps and hose nozzles (as between the two authorities) accentuated the damage were denied by fire chiefs who said that all appliances were now carrying adaptors so that hoses could be linked to mains everywhere. But there is grave concern in the Metropolitan Fire Brigade's higher councils at the action of several Federal authorities with projects in and around Melbourne. They are installing non-standard equipment without reference to the State authorities or any dovetailing of appliances and equipment. Public alarm was not diminished by the publication on Friday and Saturday of a heart tearing letter from the young widow of John Lawrence Coleman, 31 year old father of two, who had died in the flames apparently trying to rescue the old man trapped in the gully. By that time, a Vast area of Gippsland was in flames and the troops had been sent in to back up the overworked and often helpless fire-fighters. By Saturday, the Leader of the Opposition, Mr. Stoneham, who has previously demanded a Royal Commission into fire-fighting arrangements, repeated his demand. To add to the Chief Secretary's worries he was publicly rebuked for allegedly implying on television that lives had been lost at Eltham because people went to the wrong place at the wrong time. In a letter to the Press, Professor MacMahon Ball pointed out that two of the men involved were experienced bushmen who had gone "to help an old man in great danger fully aware of the danger to themselves". As Victoria faced its sixth day of total State-wide fire ban, it looked likely that even official resistance was not going to silence the demand for one central authority to control the fire fiend. At the moment, the 400 square miles where two million Victorians live in Greater Melbourne are divorced from the rest of the State in planning, communications, equipment and control of personnel. No one doubts the whole-hearted co-operation and willingness to back each other up of the M.F.B. and the C.F.A., both at top-level and among the firemen themselves. However, when a city straggles so deeply into the country side, the absence of a single authority, to oversee and analyse the fire threat as a whole, suggests suicidal policy of divide and fuel. Emphasis of the tragic loss of a member of a pioneering family who died whilst helping others in his communitybushfire, cfa, country fire authority, fire brigrade, glen park road, heroes, john lawrence coleman, north eltham, victorian bushfires - 1965, volunteers, william john elwers, fire fighter, frank martin, george john crowe, ken gaston, orchard avenue, doug mummery, helen oliver, mrs henry marsden, mrs moureen ellis -
 Bendigo Military Museum
Photograph - Visit by the Chief of the General Staff to the Army Survey Regiment, Fortuna, Bendigo, 1979
This is a set of 14 photographs of a visit to the Army Survey Regiment, Fortuna, Bendigo on the 5th of June 1979 by the Chief of the General Staff (CGS) Lieutenant General Sir Donald Dunstan AC, KBE, CB. He was accompanied by his wife. They were escorted through the production areas of the Army Survey Regiment by the CO LTCOL Bob Skitch. Lieutenant General Sir Donald Dunstan AC, KBE, CB was an esteemed Australian Army officer, who was CGS from 1977 to 1982. Upon retirement from the Army in 1982, he was appointed to the position of Governor of South Australia from 1982 to 1991. LTCOL Bob Skitch was the CO of the Army Svy Rgt from 1976 to 1980. Also featuring in these photos is MAJ Peter Eddy, who was the OC of Air Survey Squadron. He was later promoted to LTCOL and was CO of the Army Svy Rgt from 1981 to 1982. See item 6035.9P for photos of the CGS’s presentation of the Defence Force Service Medal to four recipients.This is a set of 14 photographs of a visit by the Chief of the General Staff to the Army Survey Regiment Fortuna, Bendigo on the 5th of June 1979. The photographs were printed on photographic paper and are part of the Army Survey Regiment’s Collection. They were scanned at 300 dpi. .1) - Photo, black and white, 1979. Tour of Air Survey Squadron. L to R: unidentified, LTGEN General Sir Donald Dunstan AC, KBE, CB; OC MAJ Peter Eddy, unidentified. .2) - Photo, black and white, 1979. Tour of Air Survey Squadron. LTGEN General Sir Donald Dunstan AC, KBE, CB; views 3D stereoscopic aerial photography on a Zeiss (Jena) Stecometer. OC MAJ Peter Eddy is on his right. .3) - Photo, black and white, 1979. Tour of Air Survey Squadron. L to R: unidentified, CO LTCOL Bob Skitch, OC MAJ Peter Eddy, LTGEN General Sir Donald Dunstan AC, KBE CB viewing an aerial photograph. WO1 Brian Mead and others are operating a Wild PUG4 point transfer device. .4) - Photo, black and white, 1979. Enlargement of photo .3). Tour of Air Survey Squadron. L to R: unidentified, CO LTCOL Bob Skitch, OC MAJ Peter Eddy, LTGEN General Sir Donald Dunstan AC, KBE CB viewing an aerial photograph. .5) - Photo, black and white, 1979. Tour of Air Survey Squadron. LTGEN General Sir Donald Dunstan AC, KBE, CB; and unidentified technician view 3D stereoscopic aerial photography on a Wild B8 stereo plotter. .6) - Photo, black and white, 1979. Tour of Air Survey Squadron. L to R: OC MAJ Peter Eddy LTGEN General Sir Donald Dunstan AC, KBE CB; CO LTCOL Bob Skitch, view the output of a verification plot on an AUTOMAP 1 Gerber 1442 drum plotter. .7) - Photo, black and white, 1979. Tour of Air Survey Squadron. L to R: CO LTCOL Bob Skitch, unidentified aide de camp officer, LTGEN General Sir Donald Dunstan AC, KBE CB; OC MAJ Peter Eddy discuss aero triangulation planning documents. CAPT Don Maskew in background. .8) - Photo, black and white, 1979. Tour of Cartographic Squadron. L to R: CPL Dennis Learmonth, acting OC CAPT Bob Roche, CAPT Eddy Schulze, LTGEN General Sir Donald Dunstan AC, KBE CB; SSGT John ‘JB’ Barrie discuss cartographic map compilation procedures .9) - Photo, black and white, 1979. Tour of Cartographic Squadron. L to R: Tech WO WO1 Roger Rix, acting OC CAPT Bob Roche, CAPT Eddy Schulze, unidentified visitor, Mrs Dunstan with examples of map products. .10) - Photo, black and white, 1979. Tour of Cartographic Squadron. L to R: CPL Terry Danger, CO LTCOL Bob Skitch, LTGEN General Sir Donald Dunstan AC, KBE CB; discuss terrain embossing (hill shading) procedures. .11) - Photo, black and white, 1979. Tour of Cartographic Squadron. L to R: CO LTCOL Bob Skitch, LTGEN General Sir Donald Dunstan AC, KBE CB; acting OC CAPT Bob Roche, SSGT Dick Manley, CAPT Don Maskew and CAPT Bob Cooper in background. SPR Cheryl Lofthouse is retouching blemishes on a map separation film negative. .12) - Photo, black and white, 1979. Tour of Lithographic Squadron. L to R: CAPT Stan Vote, unidentified aide de camp officer, CO LTCOL Bob Skitch, LTGEN General Sir Donald Dunstan AC, KBE CB; MAJ Sam Schwartz EXCH-US, LT John Harrison discuss bulk map printing processes with an Ultra-MAN-III Printing Press. .13) - Photo, black and white, 1979. Officers Mess L to R: LTGEN General Sir Donald Dunstan AC, KBE CB; with CO LTCOL Bob Skitch. .14) - Photo, black and white, 1979. Officers Mess L to R: MAJ Peter Eddy, LTGEN General Sir Donald Dunstan AC, KBE CB..1P to .14P – no annotationsroyal australian survey corps, rasvy, army survey regiment, army svy regt, fortuna, asr -
 Eltham District Historical Society Inc
Newspaper - News Clipping, Herald, He died at Eltham. Herald, March 4, p3, 4 Mar 1965
John Lawrence Coleman (1934-1965) born January 10, was the son of Raymond John Coleman and Hanna May (Gillet) Coleman. He married Margaret Frances Dare in 1955 and was the father of two children. He died whilst attempting to rescue an older man trapped in the bushfire at North Eltham on March 3, 1965 He died at Eltham (Herald, 4 March 1965, p3) [Picture of John Lawrence Coleman] Builder Mr John Lawrence Coleman, 31, of Main Rd., Eltham, one of three men burnt to death yesterday in the fire at North Eltham. The other two were XXXXX, 33 who lives opposite the Colemans and Mr William Elwers, 64 of Batman Rd., Eltham. * * * Frank Martin was a volunteer with the Eltham rural fire brigade at the time of the 1965 bushfires which burnt Eltham North and Research. Frank was asked to assist with the removal of three bodies from the back gully (now Orchard Avenue). They were badly burnt and one was found stuck under a fence as though trying to escape. Volunteers John Coleman Jnr, William Elwers and George Crowe were killed trying to protect Eltham from bushfire – they were local heroes. At the time, John Coleman Jnr was survived by his wife Margaret and two young children – John 11 and Vicky 2. Margaret Coleman lived in the family home until 1992 when she sold it and moved to Tasmania to be close to her son. She died in 1997 aged 65 years. 75 yr old Ken Gaston grew up on Edendale farm, which was originally a poultry farm but is now owned and run by the Shire of Nillumbik as an educational farm for schools and visitors. He was Captain of the Eltham rural fire brigade in 1965 when John Coleman Jnr was burnt to death in the Eltham North bushfires serving as an unofficial volunteer. He was able to draw where the original Wattletree Road was and at the time was verified with the location of some remaining bitumen and a post from the original bridge over the Diamond Creek located near the junction of the Diamond Creek and another small creek which is further down from Research or Christmas Creek as locals refer to it. The original Main Road ran behind Colemans before the railway line was built beyond Eltham in 1912. (Information recorded by Harry Gilham, President EDHS c.2011) * * * Bushfires rage in Victoria, Snowy: Three dead (1965, March 4). The Canberra Times (ACT : 1926 - 1995), p. 1. Retrieved May 19, 2022, from http://nla.gov.au/nla.news-article131758981 Includes two photos of the fire in North Eltham “Firemen make for safety as fire rages in Upper Glen Park Road, North Eltham, Victoria. The smoke hides a house.” and “A house explodes into flames at North Eltham, Victoria. Firemen said bottled gas went up.” Canberra Times (ACT : 1926 - 1995), Thursday 4 March 1965, page 1 ________________________________________ Firemen make for safety as fire rages in Upper Glen Park Road. North Eltham. Victoria. The smoke hides a house. A house explodes into flames at North Eltham. Victoria. Firemen said bottled gas went up. Bushfires rage in Victoria, Snowy: Three dead MELBOURNE, Wednesday.—Three people died today in a bush» fire which raged through North Eltham, about 15 miles from Melbourne. The victims were three men. A fourth man is feared to be dead. Another bushfire. sparked off by the heatwave sizzling over south-eastern Australia, is burning out of control in the Kosciusko State Park, in the Snowy Mountains. Firefighters fear that if it reaches pine forests up the Yarrangobilly River, they will be powerless to stop it. The three victims of the North Eltbam fire were trapped by flames in a valley. Their bodies were found only a few yards apart. They were named by police tonight as Mr. George Crowe, 78, of North Eltham, William John Ewers, 64, and John Laurence Coleman, 31, both of Eltham. The other two have not been identified. They are believed to be a man aged about 40 and an 18-year-old youth. At least 12 homes were destroyed by the fire, the worst in Victoria since 1962, when eight lives were lost and hundreds of homes burnt down at Warrandyte. At one time the township of Eltham was threatened, but a cool change swept in from the south and held back the wall of flames. More than 100 dogs, worth about £4,000, died when the fire raced through two kennels in Short Street, Eltham. and Upper Glen Park Road, North Eltham. A trickle of water Residents ran into the streets as the blaze raced towards their houses. Others frantically dug firebreaks around their homes. Mrs. Sue Recourt wept when firemen arrived while she was vainly trying to stop the flames with a trickle of water from the garden hose. A stack of firewood was blazing, but the firemen managed to save the house and rescue four goats. Many homes in Eltham were saved after flames had crept to within feet of their fences. Students at North Eltham State School had to be evacuated when the blaze threatened the building. Fire fighters were severely hampered by lack of water and narrow roads. The blaze, which began in above century heat, turned toward Wattle Glen, where two houses were gutted. Then the flames raced towards Hurstbridge to the north. Firemen battling desperately, controlled the fire late this afternoon. Five forest fires were still burning in Victoria tonight. IN VICTORIA THIS WEEK Tragic lack of central fire authority (1965, March 9). The Canberra Times (ACT : 1926 - 1995), p. 2. Retrieved May 19, 2022, from http://nla.gov.au/nla.news-article131759928 Canberra Times (ACT : 1926 - 1995), Tuesday 9 March 1965, page 2 ________________________________________ IN VICTORIA THIS WEEK Tragic lack of central fire authority From Rohan Rivett It was the worst week for Victorian fire fighters since Black Friday 27 years ago. On that day one pilot up in a spotter plane said afterwards: "It seemed at times that half the State was on fire." This time, for three days on end, Gippsland men, women and children had moments of conviction that their towns would have blackened into anonymity before the weekend was out. The week began with horror at Eltham on the North-eastern edge of Melbourne. Eltham today is something of an artists' colony. Oil painters, water colourists, potters and sculptors proliferate. A number of University folk have emulated the example of Professor MacMahon Ball who pioneered the way by moving to Eltham and carving a home out of the bush in the thirties. Innermost Eltham is barely 14 miles from the G.P.O. Farthest Eltham stretches miles beyond. It served to illustrate the tragi-ludicrous truncation of Victoria's fire control. Part of Eltham is under the protection of the Melbourne Fire Brigade. But this responsibility ceases at some invisible and incomprehensible line — apparently determined by the meanderings of the water mains. At this point everybody's property throughout the rest of Eltham is dependent on the Country Fire Authority. Half an hour before midday on Wednesday, a fire suddenly started on the West side of Upper Glen road on the edge of Eltham. Before the fire brigade could arrive, it was burning on a widening front through timber and high grass north of Eltham. Two wind changes in rapid succession saw the fire leaping Diamond Creek. With a freshening wind it struck home after home in three streets. More than one of them exploded suddenly as if hit by an incendiary bomb. There is no piped gas in the Eltham area, hence many housewives use bottle gas. The flames outside caused the bottles to explode. Altogether twelve homes were completely incinerated and four more were badly damaged. Thirty prize dogs perished. About three hours after the fire started it raced suddenly down a gully hillside trapping an elderly man. Two other men apparently raced to the rescue. Flames caught the three men within yards of each other, not 200 yards off the Upper Glen Park Road where safety lay. They were burned to death. Next evening an angry and convincing secretary of the Fire Brigade Union, Mr. W. M. Webber, came on television and appealed to the people of Victoria to end the ridiculous and dangerous dualism in fire-fighting control. The Eltham fire, he said, had precisely illustrated the situation. The Metropolitan Fire Brigade area touched Eltham, but where the fire had gutted and killed, was just outside its area. Mr. Webber said his union had constantly urged one authority for the State with a complete reorganisation of fire protection. On Wednesday the union had repeated its call for an inquiry into fire protection in Victoria to the Chief Secretary, Mr Rylah. "No matter how close the liaison between the two organisations, there are always divided sections of thinking," Mr. Webber told viewers. "I don't know how much tragedy the com-munity can take before it demands that it is properly protected." Rumours that differences in gauge between taps and hose nozzles (as between the two authorities) accentuated the damage were denied by fire chiefs who said that all appliances were now carrying adaptors so that hoses could be linked to mains everywhere. But there is grave concern in the Metropolitan Fire Brigade's higher councils at the action of several Federal authorities with projects in and around Melbourne. They are installing non-standard equipment without reference to the State authorities or any dovetailing of appliances and equipment. Public alarm was not diminished by the publication on Friday and Saturday of a heart tearing letter from the young widow of John Lawrence Coleman, 31 year old father of two, who had died in the flames apparently trying to rescue the old man trapped in the gully. By that time, a Vast area of Gippsland was in flames and the troops had been sent in to back up the overworked and often helpless fire-fighters. By Saturday, the Leader of the Opposition, Mr. Stoneham, who has previously demanded a Royal Commission into fire-fighting arrangements, repeated his demand. To add to the Chief Secretary's worries he was publicly rebuked for allegedly implying on television that lives had been lost at Eltham because people went to the wrong place at the wrong time. In a letter to the Press, Professor MacMahon Ball pointed out that two of the men involved were experienced bushmen who had gone "to help an old man in great danger fully aware of the danger to themselves". As Victoria faced its sixth day of total State-wide fire ban, it looked likely that even official resistance was not going to silence the demand for one central authority to control the fire fiend. At the moment, the 400 square miles where two million Victorians live in Greater Melbourne are divorced from the rest of the State in planning, communications, equipment and control of personnel. No one doubts the whole-hearted co-operation and willingness to back each other up of the M.F.B. and the C.F.A., both at top-level and among the firemen themselves. However, when a city straggles so deeply into the country side, the absence of a single authority, to oversee and analyse the fire threat as a whole, suggests suicidal policy of divide and fuel. Emphasis of the tragic loss of a member of a pioneering family who died whilst helping others in his communitybushfire, cfa, country fire authority, fire brigrade, glen park road, heroes, john lawrence coleman, north eltham, victorian bushfires - 1965, volunteers, william john elwers, fire fighter, frank martin, george john crowe, ken gaston, orchard avenue -
 Flagstaff Hill Maritime Museum and Village
Document, 12-01-1882
This hand written letter, in black ink script on blue lined paper, is impressed with the official stamp of the Victoria Steam Navigation Board. The left margin has the reference “S82/12" It is transcribed: "Victoria Steam Navigation Board, Melbourne, January 12th 1882 To Frederick Chapman, Master, S.S. "Julia Percy" You are herewith furnished with a copy of the report of the Official Court which assembled to enquire into the circumstances attending the collision between the steamers "Julia Percy" and "Nelson" off Apollo Bay near Cape Otway on the morning of the 25th December 1881, and you are hereby expected to attend at the Board Room, Custom House, Melbourne, at 2pm, on 13th January instant to show cause why you should not be censured accordingly. [Signature] Secretary" This document refers to the matter of a collision between two steamships, the Julia Percy and the Nelson, on 25th December 1881. The Julia Percy was at that time owned by her first owners, the Warrnambool Steam Packet Company, and she sailed under the command of Captain Chapman. She had left Melbourne the evening of 24th December, with about 150 passengers, sailing in fine weather through Port Phillip Heads around 9pm. She was headed for Warrnambool, Belfast (now named Port Fairy) and Portland. The Julia Percy was off Apollo Bay when Captain Chapman was woken by the ship’s whistle after midnight, the steamer Nelson being on a collision course with the Julia Percy.[See Link.] The Nelson struck Julia Percy midship. Boats were lowered from the ship (apart from a damaged lifeboat) and about 30-40 of the passengers boarded the Nelson. The engine room and the forehold were checked and found clear of water. The company manager, Mr Evans, had been on the Nelson, so he boarded and inspected the Julia Percy and the decision was made to continue on to Warrnambool with the passengers as there appeared to be no immediate danger. However, Captain Thomas Smith said the Nelson was taking on water, so Julia Percy followed her for about an hour towards Melbourne on standby in case of need. Then Julia Percy turned around towards Warrnambool again. Shortly afterwards the Nelson turned to follow her, the ships stopped and passengers were returned to Julia Percy, and three from Julia Percy boarded the Nelson. Both ships proceeded on their way. Julia Percy passed Cape Otway light afterwards, signalling that there had been a collision. It was discovered later that one of the passengers was missing, then thought to have boarded the Nelson but later thought to have fallen into the sea and drowned while trying to jump from Julia Percy to Nelson. There had been 3 tickets purchased under the same name of that passenger “Cutler”; a father, son and friend named Wordsworth, which had caused quite some confusion. No further mishap occurred to either ship and both the Julia Percy and the Nelson reached their destinations safely. An enquiry was instigated by the Victoria Steam Navigation Board regarding the cause of the accident between the two steamships, in connection with the death of Cutler who was supposed to have lost his life by the collision. The enquiry resulted in the following decision: "The Victorian Steam Navigation Board having taken into consideration the points urged by Captain Thos [Thomas] Smith and also by his legal advisers, is of opinion that the charge prepared against him has been sustained, but taking into consideration Captain Smith’s previous good conduct and character, the board suspends his master’s certificate No 227 issued by this board for a period of six calendar months from this date – Robert Fullarton, Chairman. “The Victorian Steam Navigation Board having beard the statement of Captain Frederick Chapman urged in his defense to the charge of dereliction of duty as master of the Julia Percy, in having no standing order on board that vessel to be called in the event of any approaching steamer’s lights being seen, find such charge sustained, and censure him accordingly – Robert Fullarton, Chairman.” ABOUT “JULIA PERCY” The S.S. Julia Percy (later named Leeuwin ) was an iron passenger-cargo steam ship built in 1876. At one point in time the Julia Percy would sail from Warrnambool to Melbourne every Friday and return from Melbourne to Warrnambool every Tuesday. The cost of a return ticket for a Saloon Fare was £1.0.0. She would sail “if practical and weather permitting”. Shipping was the cheapest and most practical means of carrying produce and goods during the period 1840-1890. Regular domestic steamer services commenced in the Warrnambool district in the late 1850’s and by 1870 the passenger trade was booming. Produce was loaded from the jetty into ‘lighters’ (small boats), which took it to the ships at anchorage in the bay. Passengers were taken to the ship’s side then climbed aboard up ladders or gangways. The coming of the railway in October 1889 meant the gradual decline and end of the steam shipping era. The Julia Percy was built in Glasgow by Thomas Wingate & Company, Whiteinch, in 1876 for the Warrnambool Steam Packet Company, which commissioned her for trade in Victoria’s western district. She was first registered in Warrnambool, Victoria in 1876. The Julia Percy changed hands several times. Her next owner was the Western Steam Navigation Co (1887), managed by Mr. T.H. Osborne (the company’s office was on the corner of Timor and Liebig Streets, Its north-western wall is now part of the current Warrnambool Regional Art Gallery. ) The Melbourne Steamship Co became the next owners (1890), followed by William Howard Smith and Sons (1901) for use in Queensland coastal trades, then she was bought by George Turnbull in 1903 and used for local mail contract in Western Australia. The Julia Percy was sold to the Melbourne Steamship Company Ltd. (1906) and re-named the “Leeuwin” but continued in her Western Australian coastal run. She was converted into a coal hulk in Melbourne in 1910 as a result of damaged caused when she was driven against the jetty at Dongara during a gale. The ship was eventually dismantled and scuttled in Bass Strait on 28 December 1934. The document is significant for its association with the wreck of the Leeuwin (Julia Percy), which is on the Victorian Heritage Register, VHR S413. . It is historically significant for being a rare artefact that has potential to interpret aspects of Western Victoria’s 19th century steamship trade and Victorian cultural history. The Leeuwin (Julia Percy) is listed on the Victorian Heritage Register as being historically significant ‘as one of only four wrecks of steamships in Victorian waters associated with the western district of Victoria’s coastal steamship trade. Reports of Victoria Steam Navigation Board about the collision on 25th December 1881 between the steamers " Julia Percy" and "Nelson". Letter from Victoria Steam Navigation Board, Melbourne to Frederick Chapman, Master, S.S. "Julia Percy", dated January 12th 1882. reference on letter in left margin "S82/12"flagstaff hill, flagstaff hill –maritime museum, maritime museum, shipwreck coast, flagstaff hill maritime village, victoria steam navigation board, captain frederick chapman, captain thomas smith, thomas wingate & company, steamer julia percy, steamer leeuwin, steamer nelson, steam ship, warrnambool steam packet company, t. h. ostorne, western steam navigation co., charles cutler -
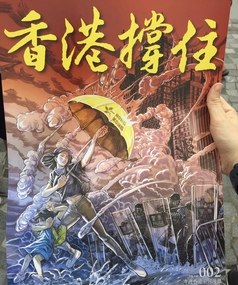 Federation University Historical Collection
Photograph - Colour, Jarrod Watt, Hong Kong Street Flyer by an unknown artist, 2019, 06/2019
Carrie Lam, Hong Kong’s chief executive, had plenty of political support in the territory’s pro-Beijing legislature to pass a bill that would allow extraditions to mainland China. The legislators were set to begin discussing the bill in early June, and intended to vote on it just weeks later. A series of protests took place, and after a June 16 protest saw the largest turnout yet, Ms. Lam made a major concession: She postponed the bill, at least temporarily. It was an undeniable victory for the protesters — but it did little to quell the unrest. Since the bill could later be reintroduced, protesters felt they remained in danger. The police tactics to break up the demonstrations on June 12, including the use of more than 150 tear gas canisters to push protesters far away from the government office, created a new set of demands from the protesters. Now, instead of just calling for the withdrawal of the bill and Ms. Lam’s resignation, they said they wouldn’t be content unless there was an independent investigation of officers’ conduct. They also wanted the release of protesters arrested on June 12, and for the government to rescind its description of the demonstrations as a “riot,” a designation that carries legal significance. None of that has happened. Many analysts say Ms. Lam is unlikely to step down, nor would Beijing accept her resignation if she offered it. She has more wiggle room on the other demands, but has not indicated any willingness to budge. The Hong Kong Protests are a leaderless, digital movement.There is no single leader or group deciding on or steering the strategy, tactics and goals of the movement. Instead, protesters have used forums and messaging apps to decide next steps. Anyone can suggest a course of action, and others then vote on whether they support it. The most popular ideas rise to the top, and then people rally to make them happen. At its best, this structure has empowered many people to participate and have their voices heard. Protesters say it keeps them all safe by not allowing the government to target specific leaders. Their success in halting the extradition bill, which was shelved by the territory’s chief executive, speaks to the movement’s power. Despite the lack of a clear leader, protesters have shown extensive coordination at the demonstrations, having planned the specifics online beforehand. Supply stations are set up to distribute water, snacks, gloves, umbrellas and shields made of cardboard. Volunteer first aid workers wear brightly colored vests. People form assembly lines to pass supplies across long distances, with protesters communicating what they need through a series of predetermined hand signals. Anyone walking in dangerous areas without a helmet or a mask is quickly offered one. No individual can speak on behalf of the protesters, which makes negotiations difficult, if not impossible. (https://www.nytimes.com/2019/07/02/world/asia/hong-kong-protest-explained.html, accessed 07/07/2019) Hong Kong’s amended extradition law would allow the extradition of suspects to mainland China for the first time. Supporters say the amendments are key to ensuring the city does not become a criminal refuge, but critics worry Beijing will use the law to extradite political opponents and others to China where their legal protections cannot be guaranteed. The government claims the push to change the law, which would also apply to Taiwan and Macau, stems from the killing last year of a Hong Kong woman while she was in Taiwan with her boyfriend. Authorities in Taiwan suspect the woman’s boyfriend, who remains in Hong Kong, but cannot try him because no extradition agreement is in place. Under the amended law, those accused of offences punishable by seven years or more in prison could be extradited. The new legislation would give Hong Kong’s leader, known as the chief executive, authority to approve extradition requests, after review by the courts. Hong Kong’s legislature, the legislative council, would not have any oversight over the extradition process. Many Hong Kongers fear the proposed extradition law will be used by authorities to target political enemies. They worry the new legislation spells the end of the “one country, two systems” policy, eroding the civil rights enjoyed by Hong Kong residents since the handover of sovereignty from the UK to China in 1997. Many attending the protests on Sunday said they could not trust China as it had often used non-political crimes to target government critics, and said they also feared Hong Kong officials would not be able to reject Beijing’s requests. Legal professionals have also expressed concern over the rights of those sent across the border to be tried. The conviction rate in Chinese courts is as high as 99%. Arbitrary detentions, torture and denial of legal representation of one’s choosing are also common. Many in the protests on Sunday 09 June 2019 said they felt overwhelmed by a sense of helplessness in the face of mainland China’s increasing political, economic and cultural influence in Hong Kong. Hong Kong’s top political leader is not elected by ordinary voters but by a 1,200-strong election committee accountable to Beijing. Half of its legislature are chosen through indirect electoral systems that favour pro-Beijing figures. Many Hong Kongers also cited the jailing of leaders and activists from the 2014 Occupy Central movement– a 79-day mass civil disobedience movement – as well as the disqualification of young localist lawmakers as signs of the erosion of civil freedoms. Resentment towards China has been intensified by soaring property prices – with increasing numbers of mainland Chinese buying properties in the city – as well as the government’s “patriotic education” drive, and the large numbers of mainland tourists who flock to Hong Kong. Many Hong Kongers are also concerned about China’s growing control over the city’s news media, as they increasingly self-censor and follow Beijing’s tacit orders. https://www.theguardian.com/world/2019/jun/10/what-are-the-hong-kong-protests-about-explainerPhotograph of a street art poster taken on the streets of Hong Kong during the protests against legislation to allow Hong Kong suspects to be extradited to mainland Chinese carrie lam, hong kong protests, extraditions, poster art, posters -
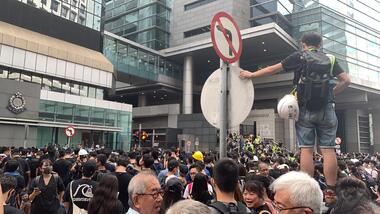 Federation University Historical Collection
Photograph - Colour, Jarrod Watt, A thousand protestors surround Hong Kong's main police headquarters on Arsenal Street in Wan Chai on June 26th 2019, 21/06/2019
Carrie Lam, Hong Kong’s chief executive, had plenty of political support in the territory’s pro-Beijing legislature to pass a bill that would allow extraditions to mainland China. The legislators were set to begin discussing the bill in early June, and intended to vote on it just weeks later. A series of protests took place, and after a June 16 protest saw the largest turnout yet, Ms. Lam made a major concession: She postponed the bill, at least temporarily. It was an undeniable victory for the protesters — but it did little to quell the unrest. Since the bill could later be reintroduced, protesters felt they remained in danger. The police tactics to break up the demonstrations on June 12, including the use of more than 150 tear gas canisters to push protesters far away from the government office, created a new set of demands from the protesters. Now, instead of just calling for the withdrawal of the bill and Ms. Lam’s resignation, they said they wouldn’t be content unless there was an independent investigation of officers’ conduct. They also wanted the release of protesters arrested on June 12, and for the government to rescind its description of the demonstrations as a “riot,” a designation that carries legal significance. None of that has happened. Many analysts say Ms. Lam is unlikely to step down, nor would Beijing accept her resignation if she offered it. She has more wiggle room on the other demands, but has not indicated any willingness to budge. The Hong Kong Protests are a leaderless, digital movement.There is no single leader or group deciding on or steering the strategy, tactics and goals of the movement. Instead, protesters have used forums and messaging apps to decide next steps. Anyone can suggest a course of action, and others then vote on whether they support it. The most popular ideas rise to the top, and then people rally to make them happen. At its best, this structure has empowered many people to participate and have their voices heard. Protesters say it keeps them all safe by not allowing the government to target specific leaders. Their success in halting the extradition bill, which was shelved by the territory’s chief executive, speaks to the movement’s power. Despite the lack of a clear leader, protesters have shown extensive coordination at the demonstrations, having planned the specifics online beforehand. Supply stations are set up to distribute water, snacks, gloves, umbrellas and shields made of cardboard. Volunteer first aid workers wear brightly colored vests. People form assembly lines to pass supplies across long distances, with protesters communicating what they need through a series of predetermined hand signals. Anyone walking in dangerous areas without a helmet or a mask is quickly offered one. No individual can speak on behalf of the protesters, which makes negotiations difficult, if not impossible. (https://www.nytimes.com/2019/07/02/world/asia/hong-kong-protest-explained.html, accessed 07/07/2019) Hong Kong’s amended extradition law would allow the extradition of suspects to mainland China for the first time. Supporters say the amendments are key to ensuring the city does not become a criminal refuge, but critics worry Beijing will use the law to extradite political opponents and others to China where their legal protections cannot be guaranteed. The government claims the push to change the law, which would also apply to Taiwan and Macau, stems from the killing last year of a Hong Kong woman while she was in Taiwan with her boyfriend. Authorities in Taiwan suspect the woman’s boyfriend, who remains in Hong Kong, but cannot try him because no extradition agreement is in place. Under the amended law, those accused of offences punishable by seven years or more in prison could be extradited. The new legislation would give Hong Kong’s leader, known as the chief executive, authority to approve extradition requests, after review by the courts. Hong Kong’s legislature, the legislative council, would not have any oversight over the extradition process. Many Hong Kongers fear the proposed extradition law will be used by authorities to target political enemies. They worry the new legislation spells the end of the “one country, two systems” policy, eroding the civil rights enjoyed by Hong Kong residents since the handover of sovereignty from the UK to China in 1997. Many attending the protests on Sunday said they could not trust China as it had often used non-political crimes to target government critics, and said they also feared Hong Kong officials would not be able to reject Beijing’s requests. Legal professionals have also expressed concern over the rights of those sent across the border to be tried. The conviction rate in Chinese courts is as high as 99%. Arbitrary detentions, torture and denial of legal representation of one’s choosing are also common. Many in the protests on Sunday 09 June 2019 said they felt overwhelmed by a sense of helplessness in the face of mainland China’s increasing political, economic and cultural influence in Hong Kong. Hong Kong’s top political leader is not elected by ordinary voters but by a 1,200-strong election committee accountable to Beijing. Half of its legislature are chosen through indirect electoral systems that favour pro-Beijing figures. Many Hong Kongers also cited the jailing of leaders and activists from the 2014 Occupy Central movement– a 79-day mass civil disobedience movement – as well as the disqualification of young localist lawmakers as signs of the erosion of civil freedoms. Resentment towards China has been intensified by soaring property prices – with increasing numbers of mainland Chinese buying properties in the city – as well as the government’s “patriotic education” drive, and the large numbers of mainland tourists who flock to Hong Kong. Many Hong Kongers are also concerned about China’s growing control over the city’s news media, as they increasingly self-censor and follow Beijing’s tacit orders. https://www.theguardian.com/world/2019/jun/10/what-are-the-hong-kong-protests-about-explainerMore than a thousand protestors surround Hong Kong's main police headquarters on Arsenal Street in Wan Chai on June 26th following a peaceful rally at Edinburgh Place in Central. Doors to the complex were barricaded by protestors, who left after a six hour siege in protest at police violence at a prtest held earlier on 12 June 2019. Protesters ended a six-hour siege of Hong Kong’s police headquarters – their second in a week over the now-suspended extradition bill – early on Thursday morning. More than 1,000 were involved at the height of the protest, which began after 10pm on Wednesday. Around 100 were left at the end and dispersed without a fight when officers with riot shields emerged from the building in Wan Chai at 4am on Thursday. After a peaceful rally attended by thousands earlier at Edinburgh Place in the Central business district, hundreds descended on Arsenal Street, blocking the junction with Lockhart Road to all traffic and sealing the entrances to the police base. (https://www.scmp.com/news/hong-kong/politics/article/3016238/hong-kong-police-under-siege-again-protesters-surround )carrie lam, hong kong protests, extraditions, protest, protestors -
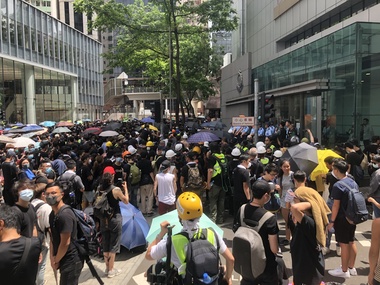 Federation University Historical Collection
Photograph - Photograph - Colour, Jarrod Watt, Seven police officers stand guard in front of Hong Kong's main police headquarters on Arsenal Street in Wan Chai, 2019, 21/06/2019
Carrie Lam, Hong Kong’s chief executive, had plenty of political support in the territory’s pro-Beijing legislature to pass a bill that would allow extraditions to mainland China. The legislators were set to begin discussing the bill in early June, and intended to vote on it just weeks later. A series of protests took place, and after a June 16 protest saw the largest turnout yet, Ms. Lam made a major concession: She postponed the bill, at least temporarily. It was an undeniable victory for the protesters — but it did little to quell the unrest. Since the bill could later be reintroduced, protesters felt they remained in danger. The police tactics to break up the demonstrations on June 12, including the use of more than 150 tear gas canisters to push protesters far away from the government office, created a new set of demands from the protesters. Now, instead of just calling for the withdrawal of the bill and Ms. Lam’s resignation, they said they wouldn’t be content unless there was an independent investigation of officers’ conduct. They also wanted the release of protesters arrested on June 12, and for the government to rescind its description of the demonstrations as a “riot,” a designation that carries legal significance. None of that has happened. Many analysts say Ms. Lam is unlikely to step down, nor would Beijing accept her resignation if she offered it. She has more wiggle room on the other demands, but has not indicated any willingness to budge. The Hong Kong Protests are a leaderless, digital movement.There is no single leader or group deciding on or steering the strategy, tactics and goals of the movement. Instead, protesters have used forums and messaging apps to decide next steps. Anyone can suggest a course of action, and others then vote on whether they support it. The most popular ideas rise to the top, and then people rally to make them happen. At its best, this structure has empowered many people to participate and have their voices heard. Protesters say it keeps them all safe by not allowing the government to target specific leaders. Their success in halting the extradition bill, which was shelved by the territory’s chief executive, speaks to the movement’s power. Despite the lack of a clear leader, protesters have shown extensive coordination at the demonstrations, having planned the specifics online beforehand. Supply stations are set up to distribute water, snacks, gloves, umbrellas and shields made of cardboard. Volunteer first aid workers wear brightly colored vests. People form assembly lines to pass supplies across long distances, with protesters communicating what they need through a series of predetermined hand signals. Anyone walking in dangerous areas without a helmet or a mask is quickly offered one. No individual can speak on behalf of the protesters, which makes negotiations difficult, if not impossible. (https://www.nytimes.com/2019/07/02/world/asia/hong-kong-protest-explained.html, accessed 07/07/2019) Hong Kong’s amended extradition law would allow the extradition of suspects to mainland China for the first time. Supporters say the amendments are key to ensuring the city does not become a criminal refuge, but critics worry Beijing will use the law to extradite political opponents and others to China where their legal protections cannot be guaranteed. The government claims the push to change the law, which would also apply to Taiwan and Macau, stems from the killing last year of a Hong Kong woman while she was in Taiwan with her boyfriend. Authorities in Taiwan suspect the woman’s boyfriend, who remains in Hong Kong, but cannot try him because no extradition agreement is in place. Under the amended law, those accused of offences punishable by seven years or more in prison could be extradited. The new legislation would give Hong Kong’s leader, known as the chief executive, authority to approve extradition requests, after review by the courts. Hong Kong’s legislature, the legislative council, would not have any oversight over the extradition process. Many Hong Kongers fear the proposed extradition law will be used by authorities to target political enemies. They worry the new legislation spells the end of the “one country, two systems” policy, eroding the civil rights enjoyed by Hong Kong residents since the handover of sovereignty from the UK to China in 1997. Many attending the protests on Sunday said they could not trust China as it had often used non-political crimes to target government critics, and said they also feared Hong Kong officials would not be able to reject Beijing’s requests. Legal professionals have also expressed concern over the rights of those sent across the border to be tried. The conviction rate in Chinese courts is as high as 99%. Arbitrary detentions, torture and denial of legal representation of one’s choosing are also common. Many in the protests on Sunday 09 June 2019 said they felt overwhelmed by a sense of helplessness in the face of mainland China’s increasing political, economic and cultural influence in Hong Kong. Hong Kong’s top political leader is not elected by ordinary voters but by a 1,200-strong election committee accountable to Beijing. Half of its legislature are chosen through indirect electoral systems that favour pro-Beijing figures. Many Hong Kongers also cited the jailing of leaders and activists from the 2014 Occupy Central movement– a 79-day mass civil disobedience movement – as well as the disqualification of young localist lawmakers as signs of the erosion of civil freedoms. Resentment towards China has been intensified by soaring property prices – with increasing numbers of mainland Chinese buying properties in the city – as well as the government’s “patriotic education” drive, and the large numbers of mainland tourists who flock to Hong Kong. Many Hong Kongers are also concerned about China’s growing control over the city’s news media, as they increasingly self-censor and follow Beijing’s tacit orders. https://www.theguardian.com/world/2019/jun/10/what-are-the-hong-kong-protests-about-explainerSeven police officers stand guard in front of Hong Kong's main police headquarters on Arsenal Street in Wan Chai as an estimated one thousand protestors surround on 26 June 2019. Protestors take turns to step up and hurl abuse at the officers, in a protest lasting 6 hours before peacefully dispersing. The protesters chanted 'Release the martyrs' and 'Stop police violence' in reference to violent clashes with police in the days previous. ( https://www.scmp.com/news/hong-kong/politics/article/3016238/hong-kong-police-under-siege-again-protesters-surround)carrie lam, hong kong protests, extraditions, protest, protestors, police, wan chai -
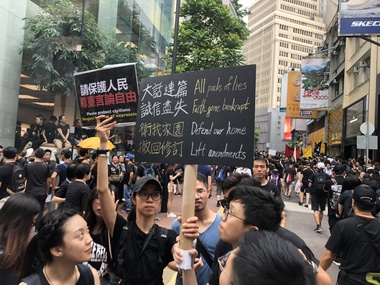 Federation University Historical Collection
Photograph - Colour, Jarrod Watt, Crowds Gather on June 16 on the Streets of Causeway Bay, 2019, 17/06/2019
Carrie Lam, Hong Kong’s chief executive, had plenty of political support in the territory’s pro-Beijing legislature to pass a bill that would allow extraditions to mainland China. The legislators were set to begin discussing the bill in early June, and intended to vote on it just weeks later. A series of protests took place, and after a June 16 protest saw the largest turnout yet, Ms. Lam made a major concession: She postponed the bill, at least temporarily. It was an undeniable victory for the protesters — but it did little to quell the unrest. Since the bill could later be reintroduced, protesters felt they remained in danger. The police tactics to break up the demonstrations on June 12, including the use of more than 150 tear gas canisters to push protesters far away from the government office, created a new set of demands from the protesters. Now, instead of just calling for the withdrawal of the bill and Ms. Lam’s resignation, they said they wouldn’t be content unless there was an independent investigation of officers’ conduct. They also wanted the release of protesters arrested on June 12, and for the government to rescind its description of the demonstrations as a “riot,” a designation that carries legal significance. None of that has happened. Many analysts say Ms. Lam is unlikely to step down, nor would Beijing accept her resignation if she offered it. She has more wiggle room on the other demands, but has not indicated any willingness to budge. The Hong Kong Protests are a leaderless, digital movement.There is no single leader or group deciding on or steering the strategy, tactics and goals of the movement. Instead, protesters have used forums and messaging apps to decide next steps. Anyone can suggest a course of action, and others then vote on whether they support it. The most popular ideas rise to the top, and then people rally to make them happen. At its best, this structure has empowered many people to participate and have their voices heard. Protesters say it keeps them all safe by not allowing the government to target specific leaders. Their success in halting the extradition bill, which was shelved by the territory’s chief executive, speaks to the movement’s power. Despite the lack of a clear leader, protesters have shown extensive coordination at the demonstrations, having planned the specifics online beforehand. Supply stations are set up to distribute water, snacks, gloves, umbrellas and shields made of cardboard. Volunteer first aid workers wear brightly colored vests. People form assembly lines to pass supplies across long distances, with protesters communicating what they need through a series of predetermined hand signals. Anyone walking in dangerous areas without a helmet or a mask is quickly offered one. No individual can speak on behalf of the protesters, which makes negotiations difficult, if not impossible. (https://www.nytimes.com/2019/07/02/world/asia/hong-kong-protest-explained.html, accessed 07/07/2019) Hong Kong’s amended extradition law would allow the extradition of suspects to mainland China for the first time. Supporters say the amendments are key to ensuring the city does not become a criminal refuge, but critics worry Beijing will use the law to extradite political opponents and others to China where their legal protections cannot be guaranteed. The government claims the push to change the law, which would also apply to Taiwan and Macau, stems from the killing last year of a Hong Kong woman while she was in Taiwan with her boyfriend. Authorities in Taiwan suspect the woman’s boyfriend, who remains in Hong Kong, but cannot try him because no extradition agreement is in place. Under the amended law, those accused of offences punishable by seven years or more in prison could be extradited. The new legislation would give Hong Kong’s leader, known as the chief executive, authority to approve extradition requests, after review by the courts. Hong Kong’s legislature, the legislative council, would not have any oversight over the extradition process. Many Hong Kongers fear the proposed extradition law will be used by authorities to target political enemies. They worry the new legislation spells the end of the “one country, two systems” policy, eroding the civil rights enjoyed by Hong Kong residents since the handover of sovereignty from the UK to China in 1997. Many attending the protests on Sunday said they could not trust China as it had often used non-political crimes to target government critics, and said they also feared Hong Kong officials would not be able to reject Beijing’s requests. Legal professionals have also expressed concern over the rights of those sent across the border to be tried. The conviction rate in Chinese courts is as high as 99%. Arbitrary detentions, torture and denial of legal representation of one’s choosing are also common. Many in the protests on Sunday 09 June 2019 said they felt overwhelmed by a sense of helplessness in the face of mainland China’s increasing political, economic and cultural influence in Hong Kong. Hong Kong’s top political leader is not elected by ordinary voters but by a 1,200-strong election committee accountable to Beijing. Half of its legislature are chosen through indirect electoral systems that favour pro-Beijing figures. Many Hong Kongers also cited the jailing of leaders and activists from the 2014 Occupy Central movement– a 79-day mass civil disobedience movement – as well as the disqualification of young localist lawmakers as signs of the erosion of civil freedoms. Resentment towards China has been intensified by soaring property prices – with increasing numbers of mainland Chinese buying properties in the city – as well as the government’s “patriotic education” drive, and the large numbers of mainland tourists who flock to Hong Kong. Many Hong Kongers are also concerned about China’s growing control over the city’s news media, as they increasingly self-censor and follow Beijing’s tacit orders. https://www.theguardian.com/world/2019/jun/10/what-are-the-hong-kong-protests-about-explainerPhotograph crowds gathering on June 16 on the streets of Causeway Bay before an estimated 2 million people take part in march protesting the government's push for extradition laws to China and demanding an apology from the chief executrive Carrie Lam. Nearly 2 million’ people take to streets, forcing public apology from Hong Kong leader Carrie Lam as suspension of controversial extradition bill fails to appease protesters. (https://www.scmp.com/news/hong-kong/politics/article/3014737/nearly-2-million-people-take-streets-forcing-public-apology )carrie lam, hong kong protests, extraditions, protest, protestors -
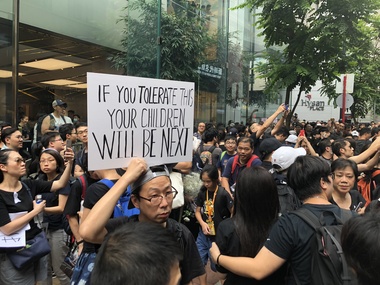 Federation University Historical Collection
Photograph - Photograph - Colour, Jarrod Watt, Street Protests in Hong Kong against proposed extradition laws, 2019, 17/06/2019
Carrie Lam, Hong Kong’s chief executive, had plenty of political support in the territory’s pro-Beijing legislature to pass a bill that would allow extraditions to mainland China. The legislators were set to begin discussing the bill in early June, and intended to vote on it just weeks later. A series of protests took place, and after a June 16 protest saw the largest turnout yet, Ms. Lam made a major concession: She postponed the bill, at least temporarily. It was an undeniable victory for the protesters — but it did little to quell the unrest. Since the bill could later be reintroduced, protesters felt they remained in danger. The police tactics to break up the demonstrations on June 12, including the use of more than 150 tear gas canisters to push protesters far away from the government office, created a new set of demands from the protesters. Now, instead of just calling for the withdrawal of the bill and Ms. Lam’s resignation, they said they wouldn’t be content unless there was an independent investigation of officers’ conduct. They also wanted the release of protesters arrested on June 12, and for the government to rescind its description of the demonstrations as a “riot,” a designation that carries legal significance. None of that has happened. Many analysts say Ms. Lam is unlikely to step down, nor would Beijing accept her resignation if she offered it. She has more wiggle room on the other demands, but has not indicated any willingness to budge. The Hong Kong Protests are a leaderless, digital movement.There is no single leader or group deciding on or steering the strategy, tactics and goals of the movement. Instead, protesters have used forums and messaging apps to decide next steps. Anyone can suggest a course of action, and others then vote on whether they support it. The most popular ideas rise to the top, and then people rally to make them happen. At its best, this structure has empowered many people to participate and have their voices heard. Protesters say it keeps them all safe by not allowing the government to target specific leaders. Their success in halting the extradition bill, which was shelved by the territory’s chief executive, speaks to the movement’s power. Despite the lack of a clear leader, protesters have shown extensive coordination at the demonstrations, having planned the specifics online beforehand. Supply stations are set up to distribute water, snacks, gloves, umbrellas and shields made of cardboard. Volunteer first aid workers wear brightly colored vests. People form assembly lines to pass supplies across long distances, with protesters communicating what they need through a series of predetermined hand signals. Anyone walking in dangerous areas without a helmet or a mask is quickly offered one. No individual can speak on behalf of the protesters, which makes negotiations difficult, if not impossible. (https://www.nytimes.com/2019/07/02/world/asia/hong-kong-protest-explained.html, accessed 07/07/2019) Hong Kong’s amended extradition law would allow the extradition of suspects to mainland China for the first time. Supporters say the amendments are key to ensuring the city does not become a criminal refuge, but critics worry Beijing will use the law to extradite political opponents and others to China where their legal protections cannot be guaranteed. The government claims the push to change the law, which would also apply to Taiwan and Macau, stems from the killing last year of a Hong Kong woman while she was in Taiwan with her boyfriend. Authorities in Taiwan suspect the woman’s boyfriend, who remains in Hong Kong, but cannot try him because no extradition agreement is in place. Under the amended law, those accused of offences punishable by seven years or more in prison could be extradited. The new legislation would give Hong Kong’s leader, known as the chief executive, authority to approve extradition requests, after review by the courts. Hong Kong’s legislature, the legislative council, would not have any oversight over the extradition process. Many Hong Kongers fear the proposed extradition law will be used by authorities to target political enemies. They worry the new legislation spells the end of the “one country, two systems” policy, eroding the civil rights enjoyed by Hong Kong residents since the handover of sovereignty from the UK to China in 1997. Many attending the protests on Sunday said they could not trust China as it had often used non-political crimes to target government critics, and said they also feared Hong Kong officials would not be able to reject Beijing’s requests. Legal professionals have also expressed concern over the rights of those sent across the border to be tried. The conviction rate in Chinese courts is as high as 99%. Arbitrary detentions, torture and denial of legal representation of one’s choosing are also common. Many in the protests on Sunday 09 June 2019 said they felt overwhelmed by a sense of helplessness in the face of mainland China’s increasing political, economic and cultural influence in Hong Kong. Hong Kong’s top political leader is not elected by ordinary voters but by a 1,200-strong election committee accountable to Beijing. Half of its legislature are chosen through indirect electoral systems that favour pro-Beijing figures. Many Hong Kongers also cited the jailing of leaders and activists from the 2014 Occupy Central movement– a 79-day mass civil disobedience movement – as well as the disqualification of young localist lawmakers as signs of the erosion of civil freedoms. Resentment towards China has been intensified by soaring property prices – with increasing numbers of mainland Chinese buying properties in the city – as well as the government’s “patriotic education” drive, and the large numbers of mainland tourists who flock to Hong Kong. Many Hong Kongers are also concerned about China’s growing control over the city’s news media, as they increasingly self-censor and follow Beijing’s tacit orders. https://www.theguardian.com/world/2019/jun/10/what-are-the-hong-kong-protests-about-explainerPhotograph of a crowd or protestors against proposed extradition laws gathering on the streets of Causeway Bay, Hong Kong, leading down to the gathering area. carrie lam, hong kong protests, extraditions, protest, protestors -
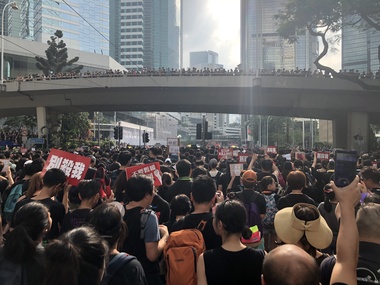 Federation University Historical Collection
Photograph - Colour, Jarrod Watt, Street Protests in Hong Kong against proposed extradition laws, 2019, 17/06/2019
Carrie Lam, Hong Kong’s chief executive, had plenty of political support in the territory’s pro-Beijing legislature to pass a bill that would allow extraditions to mainland China. The legislators were set to begin discussing the bill in early June, and intended to vote on it just weeks later. A series of protests took place, and after a June 16 protest saw the largest turnout yet, Ms. Lam made a major concession: She postponed the bill, at least temporarily. It was an undeniable victory for the protesters — but it did little to quell the unrest. Since the bill could later be reintroduced, protesters felt they remained in danger. The police tactics to break up the demonstrations on June 12, including the use of more than 150 tear gas canisters to push protesters far away from the government office, created a new set of demands from the protesters. Now, instead of just calling for the withdrawal of the bill and Ms. Lam’s resignation, they said they wouldn’t be content unless there was an independent investigation of officers’ conduct. They also wanted the release of protesters arrested on June 12, and for the government to rescind its description of the demonstrations as a “riot,” a designation that carries legal significance. None of that has happened. Many analysts say Ms. Lam is unlikely to step down, nor would Beijing accept her resignation if she offered it. She has more wiggle room on the other demands, but has not indicated any willingness to budge. The Hong Kong Protests are a leaderless, digital movement.There is no single leader or group deciding on or steering the strategy, tactics and goals of the movement. Instead, protesters have used forums and messaging apps to decide next steps. Anyone can suggest a course of action, and others then vote on whether they support it. The most popular ideas rise to the top, and then people rally to make them happen. At its best, this structure has empowered many people to participate and have their voices heard. Protesters say it keeps them all safe by not allowing the government to target specific leaders. Their success in halting the extradition bill, which was shelved by the territory’s chief executive, speaks to the movement’s power. Despite the lack of a clear leader, protesters have shown extensive coordination at the demonstrations, having planned the specifics online beforehand. Supply stations are set up to distribute water, snacks, gloves, umbrellas and shields made of cardboard. Volunteer first aid workers wear brightly colored vests. People form assembly lines to pass supplies across long distances, with protesters communicating what they need through a series of predetermined hand signals. Anyone walking in dangerous areas without a helmet or a mask is quickly offered one. No individual can speak on behalf of the protesters, which makes negotiations difficult, if not impossible. (https://www.nytimes.com/2019/07/02/world/asia/hong-kong-protest-explained.html, accessed 07/07/2019) Hong Kong’s amended extradition law would allow the extradition of suspects to mainland China for the first time. Supporters say the amendments are key to ensuring the city does not become a criminal refuge, but critics worry Beijing will use the law to extradite political opponents and others to China where their legal protections cannot be guaranteed. The government claims the push to change the law, which would also apply to Taiwan and Macau, stems from the killing last year of a Hong Kong woman while she was in Taiwan with her boyfriend. Authorities in Taiwan suspect the woman’s boyfriend, who remains in Hong Kong, but cannot try him because no extradition agreement is in place. Under the amended law, those accused of offences punishable by seven years or more in prison could be extradited. The new legislation would give Hong Kong’s leader, known as the chief executive, authority to approve extradition requests, after review by the courts. Hong Kong’s legislature, the legislative council, would not have any oversight over the extradition process. Many Hong Kongers fear the proposed extradition law will be used by authorities to target political enemies. They worry the new legislation spells the end of the “one country, two systems” policy, eroding the civil rights enjoyed by Hong Kong residents since the handover of sovereignty from the UK to China in 1997. Many attending the protests on Sunday said they could not trust China as it had often used non-political crimes to target government critics, and said they also feared Hong Kong officials would not be able to reject Beijing’s requests. Legal professionals have also expressed concern over the rights of those sent across the border to be tried. The conviction rate in Chinese courts is as high as 99%. Arbitrary detentions, torture and denial of legal representation of one’s choosing are also common. Many in the protests on Sunday 09 June 2019 said they felt overwhelmed by a sense of helplessness in the face of mainland China’s increasing political, economic and cultural influence in Hong Kong. Hong Kong’s top political leader is not elected by ordinary voters but by a 1,200-strong election committee accountable to Beijing. Half of its legislature are chosen through indirect electoral systems that favour pro-Beijing figures. Many Hong Kongers also cited the jailing of leaders and activists from the 2014 Occupy Central movement– a 79-day mass civil disobedience movement – as well as the disqualification of young localist lawmakers as signs of the erosion of civil freedoms. Resentment towards China has been intensified by soaring property prices – with increasing numbers of mainland Chinese buying properties in the city – as well as the government’s “patriotic education” drive, and the large numbers of mainland tourists who flock to Hong Kong. Many Hong Kongers are also concerned about China’s growing control over the city’s news media, as they increasingly self-censor and follow Beijing’s tacit orders. https://www.theguardian.com/world/2019/jun/10/what-are-the-hong-kong-protests-about-explainerPhotograph of a crowd on the streets of Hong Kong to protest against proposed extradition laws, heading towards Admiralty. carrie lam, hong kong protests, extraditions, protest, protestors, admiralty -
 Federation University Historical Collection
Photograph - Colour Photograph, Street Protests in Hong Kong against proposed extradition laws, 2019, 17/06/2019
Carrie Lam, Hong Kong’s chief executive, had plenty of political support in the territory’s pro-Beijing legislature to pass a bill that would allow extraditions to mainland China. The legislators were set to begin discussing the bill in early June, and intended to vote on it just weeks later. A series of protests took place, and after a June 16 protest saw the largest turnout yet, Ms. Lam made a major concession: She postponed the bill, at least temporarily. It was an undeniable victory for the protesters — but it did little to quell the unrest. Since the bill could later be reintroduced, protesters felt they remained in danger. The police tactics to break up the demonstrations on June 12, including the use of more than 150 tear gas canisters to push protesters far away from the government office, created a new set of demands from the protesters. Now, instead of just calling for the withdrawal of the bill and Ms. Lam’s resignation, they said they wouldn’t be content unless there was an independent investigation of officers’ conduct. They also wanted the release of protesters arrested on June 12, and for the government to rescind its description of the demonstrations as a “riot,” a designation that carries legal significance. None of that has happened. Many analysts say Ms. Lam is unlikely to step down, nor would Beijing accept her resignation if she offered it. She has more wiggle room on the other demands, but has not indicated any willingness to budge. The Hong Kong Protests are a leaderless, digital movement.There is no single leader or group deciding on or steering the strategy, tactics and goals of the movement. Instead, protesters have used forums and messaging apps to decide next steps. Anyone can suggest a course of action, and others then vote on whether they support it. The most popular ideas rise to the top, and then people rally to make them happen. At its best, this structure has empowered many people to participate and have their voices heard. Protesters say it keeps them all safe by not allowing the government to target specific leaders. Their success in halting the extradition bill, which was shelved by the territory’s chief executive, speaks to the movement’s power. Despite the lack of a clear leader, protesters have shown extensive coordination at the demonstrations, having planned the specifics online beforehand. Supply stations are set up to distribute water, snacks, gloves, umbrellas and shields made of cardboard. Volunteer first aid workers wear brightly colored vests. People form assembly lines to pass supplies across long distances, with protesters communicating what they need through a series of predetermined hand signals. Anyone walking in dangerous areas without a helmet or a mask is quickly offered one. No individual can speak on behalf of the protesters, which makes negotiations difficult, if not impossible. (https://www.nytimes.com/2019/07/02/world/asia/hong-kong-protest-explained.html, accessed 07/07/2019) Hong Kong’s amended extradition law would allow the extradition of suspects to mainland China for the first time. Supporters say the amendments are key to ensuring the city does not become a criminal refuge, but critics worry Beijing will use the law to extradite political opponents and others to China where their legal protections cannot be guaranteed. The government claims the push to change the law, which would also apply to Taiwan and Macau, stems from the killing last year of a Hong Kong woman while she was in Taiwan with her boyfriend. Authorities in Taiwan suspect the woman’s boyfriend, who remains in Hong Kong, but cannot try him because no extradition agreement is in place. Under the amended law, those accused of offences punishable by seven years or more in prison could be extradited. The new legislation would give Hong Kong’s leader, known as the chief executive, authority to approve extradition requests, after review by the courts. Hong Kong’s legislature, the legislative council, would not have any oversight over the extradition process. Many Hong Kongers fear the proposed extradition law will be used by authorities to target political enemies. They worry the new legislation spells the end of the “one country, two systems” policy, eroding the civil rights enjoyed by Hong Kong residents since the handover of sovereignty from the UK to China in 1997. Many attending the protests on Sunday said they could not trust China as it had often used non-political crimes to target government critics, and said they also feared Hong Kong officials would not be able to reject Beijing’s requests. Legal professionals have also expressed concern over the rights of those sent across the border to be tried. The conviction rate in Chinese courts is as high as 99%. Arbitrary detentions, torture and denial of legal representation of one’s choosing are also common. Many in the protests on Sunday 09 June 2019 said they felt overwhelmed by a sense of helplessness in the face of mainland China’s increasing political, economic and cultural influence in Hong Kong. Hong Kong’s top political leader is not elected by ordinary voters but by a 1,200-strong election committee accountable to Beijing. Half of its legislature are chosen through indirect electoral systems that favour pro-Beijing figures. Many Hong Kongers also cited the jailing of leaders and activists from the 2014 Occupy Central movement– a 79-day mass civil disobedience movement – as well as the disqualification of young localist lawmakers as signs of the erosion of civil freedoms. Resentment towards China has been intensified by soaring property prices – with increasing numbers of mainland Chinese buying properties in the city – as well as the government’s “patriotic education” drive, and the large numbers of mainland tourists who flock to Hong Kong. Many Hong Kongers are also concerned about China’s growing control over the city’s news media, as they increasingly self-censor and follow Beijing’s tacit orders. https://www.theguardian.com/world/2019/jun/10/what-are-the-hong-kong-protests-about-explainerCrowds mass on Queens Way in Hong Kong as an estimated 2 million people march in protest at the government's refusal to withdraw a controverisal law allowing people to be extradited to mainland China. Chants demanded the chief executive apologise and the legislation be withdrawn, while many held signs protesting police violence. Nearly 2 million protesters flooded the streets of Hong Kong on Sunday, organisers claimed, delivering a stunning repudiation of Chief Executive Carrie Lam Cheng Yuet-ngor’s governance and forcing a public apology out of the city’s leader over her campaign to bulldoze a controversial extradition bill through the legislature. A day after Lam suspended her push for the bill, expecting it to defuse a crisis that has seen violent clashes between mostly young protesters and police, the centre of Hong Kong was brought to a complete standstill as the masses marched to chastise her for refusing to withdraw the bill or apologise when first asked to, and declaring that nothing short of her resignation would satisfy them now. (https://www.scmp.com/news/hong-kong/politics/article/3014737/nearly-2-million-people-take-streets-forcing-public-apology ) carrie lam, hong kong protests, extraditions, protest, protestors, admiralty -
 Flagstaff Hill Maritime Museum and Village
Functional object - Ship's Wheel, 1871 or earlier
The ship building company E. & A. Sewall, from Bath, Maine, USA, built many ships that had wheels with the same decorative, starburst pattern on them as this particular wheel segment, including the Eric the Red. The wheel was manufactured by their local Bath foundry, Geo. Moulton & Co. and sold to the Sewall yard for $100, according to the construction accounts of the vessel. Eric the Red was a wooden, three masted clipper ship. She had 1,580 tons register and was the largest full-rigged ship built at Bath, Maine, USA in 1871. She was built and registered by Arthur Sewall, later to become the partnership E. & A. Sewall, and was the 51st ship built by this company. The annually-published List of Merchant Vessels of the U.S. shows that Bath was still the home port of Eric the Red in 1880. The vessel was named after the Viking discoverer, Eric the Red, who was the first European to reach the shores of North America (in 980AD). The ship Eric the Red at first traded in coal between America and Britain, and later traded in guano nitrates from South America. In 1879 she was re-metalled and was in first class condition. On 10th June 1880 (some records say 12th June) Eric the Red departed New York for Melbourne and then Sydney. She had been commissioned by American trade representatives to carry a special cargo of 500 exhibits (1400 tons) - about a quarter to a third of America’s total exhibits - from America for the U.S.A. pavilion at Melbourne’s first International Exhibition. The exhibits included furniture, ironmongery, wines, chemicals, dental and surgical instruments, paper, cages, bronze lamp trimmings, axles, stamped ware, astronomical and time globes, samples of corn and the choicest of leaf tobacco. Other general cargo included merchandise such as cases of kerosene and turpentine, brooms, Bristol's Sarsaparilla, Wheeler and Wilson sewing machines, Wheeler’s thresher machine, axe handles and tools, cases of silver plate, toys, pianos and organs, carriages and Yankee notions. The Eric the Red left New York under the command of Captain Z. Allen (or some records say Captain Jacques Allen) and 24 other crew including the owner’s son third mate Ned Sewall. There were 2 saloon passengers also. On 4th September 1880 the ship had been sailing for an uneventful 85 days and the voyage was almost at its end. Eric the Red approached Cape Otway in a moderate north-west wind and hazy and overcast atmosphere. Around 1:30am Captain Allen sighted the Cape Otway light and was keeping the ship 5-6 miles offshore to stay clear of the hazardous Otway Reef. However he had badly misjudged his position. The ship hit the Otway Reef about 2 miles out to sea, south west of the Cape Otway light station. Captain Allen ordered the wheel to be put ‘hard up’ thinking that she might float off the reef. A heavy sea knocked the man away from the wheel, broke the wheel ropes and carried away the rudder. The sea swamped the lifeboats, the mizzenmast fell, with all of its rigging, then the mainmast fell and the ship broke in two. Some said that the passenger Vaughan, who was travelling for his health and not very strong, was washed overboard and never seen again. The ship started breaking up. The forward house came adrift with three of the crew on it as well as a longboat, which the men succeeded in launching and keeping afloat by continually bailing with their sea boots. The captain, the third mate (the owner’s son) and others clung to the mizzenmast in the sea. Then the owner’s son was washed away off the mast. Within 10 minutes the rest of the ship was in pieces, completely wrecked, with cargo and wreckage floating in the sea. The captain encouraged the second mate to swim with him to the deckhouse where there were other crew but the second mate wouldn’t go with him. Eventually the Captain made it to the deckhouse and the men pulled him up. At about 4:30am the group of men on the deckhouse saw the lights of a steamer and called for help. At the same time they noticed the second mate and the other man had drifted nearby, still on the spur, and pulled them both onto the wreck. The coastal steamer Dawn was returning to Warrnambool from Melbourne, its sailing time different to its usual schedule. Cries were heard coming from out of the darkness. Captain Jones sent out two life boats, and fired off rockets and blue lights to illuminate the area. They picked up the three survivors who were in the long boat from Eric the Red. Two men were picked up out of the water, one being the owner’s son who was clinging to floating kerosene boxes. At daylight the Dawn then rescued the 18 men from the floating portion of the deckhouse, which had drifted about 4 miles from where they’d struck the reef. Shortly after the rescue the deckhouse drifted onto breakers and was thrown onto rocks at Point Franklin, about 2 miles east of Cape Otway. Captain Jones had signalled to Cape Otway lighthouse the number of the Eric the Red and later signalled that there was a wreck at Otway Reef but there was no response from the lighthouse. The captain and crew of the Dawn spent several more hours searching unsuccessfully for more survivors, even going back as far as Apollo Bay. On board the Dawn the exhausted men received care and attention to their needs and wants, including much needed clothing. Captain Allen was amongst the 23 battered and injured men who were rescued and later taken to Warrnambool for care. Warrnambool’s mayor and town clerk offered them all hospitality, the three badly injured men going to the hospital and others to the Olive Branch Hotel, then on to Melbourne. Captain Allen’s leg injury prevented him from going ashore so he and three other men travelled on the Dawn to Portland. They were met by the mayor who also treated them all with great kindness. Captain Allen took the train back to Melbourne then returned to America. Those saved were Captain Z. Allen (or Jacques Allen), J. Darcy chief mate, James F. Lawrence second mate, Ned Sewall third mate and owner’s son, John French the cook, C. Nelson sail maker, Clarence W. New passenger, and the able seamen Dickenson, J. Black, Denis White, C. Herbert, C. Thompson, A. Brooks, D. Wilson, J. Ellis, Q. Thompson, C. Newman, W. Paul, J. Davis, M. Horenleng, J. Ogduff, T. W. Drew, R. Richardson. Four men had lost their lives; three of them were crew (Gus Dahlgreen ship’s carpenter, H. Ackman steward, who drowned in his cabin, and George Silver seaman) and one a passenger (J. B. Vaughan). The body of one of them had been found washed up at Cape Otway and was later buried in the lighthouse cemetery; another body was seen on an inaccessible ledge. Twelve months later the second mate James F. Lawrence, from Nova Scotia, passed away in the Warrnambool district; an obituary was displayed in the local paper. The captain and crew of the Dawn were recognised by the United States Government in July 1881 for their humane efforts and bravery, being thanked and presented with substantial monetary rewards, medals and gifts. Neither the ship, nor its cargo, was insured. The ship was worth about £15,000 and the cargo was reportedly worth £40,000; only about £2,000 worth had been recovered. Cargo and wreckage washed up at Apollo Bay, Peterborough, Port Campbell, Western Port and according to some reports, even as far away as the beaches of New Zealand. The day after the wreck the government steam ship Pharos was sent from Queenscliff to clear the shipping lanes of debris that could be a danger to ships. The large midship deckhouse of the ship was found floating in a calm sea near Henty Reef. Items such as an American chair, a ladder and a nest of boxes were all on top of the deckhouse. As it was so large and could cause danger to passing ships, Captain Payne had the deckhouse towed towards the shore just beyond Apollo Bay. Between Apollo Bay and Blanket Bay the captain and crew of Pharos collected Wheeler and Wilson sewing machines, nests of boxes, bottles of Bristol’s sarsaparilla, pieces of common American chairs, axe handles, a Wheelers’ Patent thresher and a sailor’s trunk with the words “A. James” on the front. A ship’s flag-board bearing the words “Eric the Red” was found on the deckhouse; finally those on board the Pharos had the name of the wrecked vessel. During this operation Pharos came across the government steamer Victoria and also a steamer S.S. Otway, both of which were picking up flotsam and wreckage. A whole side of the hull and three large pieces of the other side of the hull, with some of the copper sheathing stripped off, had floated on to Point Franklin. Some of the vessels yards and portions of her masts were on shore. The pieces of canvas attached to the yards and masts confirmed that the vessel had been under sail. The beach there was piled with debris several feet high. There were many cases of Diamond Oil kerosene, labelled R. W. Cameron and Company, New York. There were also many large planks of red pine, portions of a small white boat and a large, well-used oar. Other items found ashore included sewing machines (some consigned to ‘Long and Co.”) and notions, axe and scythe handles, hay forks, wooden pegs, rolls of wire (some branded “T.S” and Co, Melbourne”), kegs of nails branded “A.T. and Co.” from the factory of A. Field and Son, Taunton, Massachusetts, croquet balls and mallets, buggy fittings, rat traps, perfumery, cutlery and Douay Bibles, clocks, bicycles, chairs, a fly wheel, a cooking stove, timber, boxes, pianos, organs and a ladder. (Wooden clothes pegs drifted in for many years). There seemed to be no personal luggage or clothing. The Pharos encountered a long line, about one and a half miles, of floating wreckage about 10 miles off land, south east of Cape Otway, and in some places about 40 feet wide. It seemed that more than half of it was from Eric the Red. The ship’s crew rescued 3 cases that were for the Melbourne Exhibition and other items from amongst the debris. There were also chairs, doors, musical instruments, washing boards, nests of trunks and fly catchers floating in the sea. Most of the goods were saturated and smelt of kerosene. A section of the hull lies buried in the sand at Parker River Beach. An anchor with chain is embedded in the rocks east of Point Franklin and a second anchor, thought to be from Eric the Red, is on display at the Cape Otway light station. (There is a photograph of a life belt on the verandah of Rivernook Guest House in Princetown with the words “ERIC THE RED / BOSTON”. This is rather a mystery as the ship was registered in Bath, Maine, USA.) Parts of the ship are on display at Bimbi Park Caravan Park and at Apollo Bay Museum. Flagstaff Hill Maritime Village also has part of the helm (steering wheel), a carved wooden sword (said to be the only remaining portion of the ship’s figurehead; further research is currently being carried out), a door, a metal rod, samples of wood and a medal for bravery. Much of the wreckage was recovered by the local residents before police and other authorities arrived at the scene. Looters went to great effort to salvage goods, being lowered down the high cliff faces to areas with little or no beach to collect items from the wreckage, their mates above watching out for dangerous waves. A Tasmanian newspaper reports on a court case in Stawell, Victoria, noting a man who was caught 2 months later selling tobacco from the wreckage of Eric the Red. Some of the silverware is still treasured by descendants of Mr Mackenzie who was given these items by officials for his help in securing the cargo. The gifts included silver coffee and tea pots, half a dozen silver serviette rings and two sewing machines. The wreck and cargo were sold to a Melbourne man who salvaged a quantity of high quality tobacco and dental and surgical instruments. Timbers from the ship were salvaged and used in the construction of houses and sheds around Apollo Bay, including a guest house, Milford House (since burnt down in bushfires), which had furniture, fittings and timber on the dining room floor from the ship. A 39.7 foot long trading ketch, the Apollo, was also built from its timbers by Mr Burgess in 1883 and subsequently used in Tasmanian waters. It was the first attempt at ship building in Apollo bay. In 1881 a red light was installed about 300 feet above sea level at the base of the Cape Otway lighthouse to warn ships when they were too close to shore; It would not be visible unless a ship came within 3 miles from it. This has proved to be an effective warning. The State Library of Victoria has a lithograph in its collection depicting the steamer Dawn and the shipwrecked men, titled. "Wreck of the ship Eric the Red, Cape Otway: rescue of the crew by the Dawn". “The Eric the Red is historically significant as one of Victoria's major 19th century shipwrecks. (Heritage Victoria Eric the Red; HV ID 239) The wreck led to the provision of an additional warning light placed below the Cape Otway lighthouse to alert mariners to the location of Otway Reef. The site is archaeologically significant for its remains of a large and varied cargo and ship's fittings being scattered over a wide area. The site is recreationally and aesthetically significant as it is one of the few sites along this coast where tourists can visit identifiable remains of a large wooden shipwreck, and for its location set against the background of Cape Otway, Bass Strait, and the Cape Otway lighthouse.“ (Victorian Heritage Database Registration Number S239, Official Number 8745 USA) Segment of a ship's wheel, or helm, from the wreck of the sailing ship Eric the Red. The wheel part is an arc shape from the outer rim of the wheel and is made up of three layers of timber. The centre layer is a dark, dense timber and is wider than the two outer layers, which are less dense and lighter in colour. The wheel segment has a vertically symmetrical, decorative copper plate inlaid on the front. The plate has a starburst pattern; six stars decorate it, each at a point where there is a metal fitting going through the three layers of timber to the rear side of the wheel. On the rear each of the six fittings has an individual copper star around it. The edges of the helm are rounded and bevelled, polished to a shine in a dark stain. Around each of the stars, front and back, the wood is a lighter colour, as though the metal in that area being polished frequently. The length of the segment suggests that it has probably come from a wheel or helm that had ten spokes. (Ref: F.H.M.M. 16th March 1994, 239.6.610.3.7. Artefact Reg No ER/1.)flagstaff hill, warrnambool, shipwrecked-coast, flagstaff-hill, flagstaff-hill-maritime-museum, maritime-museum, shipwreck-coast, flagstaff-hill-maritime-village, ship's-wheel, eric-the-red, helm, shei's wheel, ship's steering wheel -
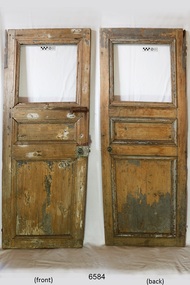 Flagstaff Hill Maritime Museum and Village
Furniture - Door, 1871 or earlier
The wooden door was salvaged from the wreck of the sailing ship Eric the Red, which was a wooden, three masted clipper ship. Eric the Red was the largest full-rigged ship built at Bath, Maine, USA in 1871, having had a 1,580 tons register. She was built and registered by Arthur Sewall, later to become the partnership E. & A. Sewall, the 51st ship built by this company. The annually-published List of Merchant Vessels of the U.S. shows Bath was still the home port of Eric the Red in 1880. The vessel was named after the Viking discoverer, Eric the Red, who was the first European to reach the shores of North America (in 980AD). The ship Eric the Red at first traded in coal between America and Britain, and later traded in guano nitrates from South America. In 1879 she was re-metalled and was in first class condition. On 10th June 1880 (some records say 12th June) Eric the Red departed New York for Melbourne and then Sydney. She had been commissioned by American trade representatives to carry a special cargo of 500 exhibits (1400 tons) – about a quarter to a third of America’s total exhibits - from America for the U.S.A. pavilion at Melbourne’s first International Exhibition. The exhibits included furniture, ironmongery, wines, chemicals, dental and surgical instruments, paper, cages, bronze lamp trimmings, axles, stamped ware, astronomical and time globes, samples of corn and the choicest of leaf tobacco. Other general cargo included merchandise such as cases of kerosene and turpentine, brooms, Bristol's Sarsaparilla, Wheeler and Wilson sewing machines, Wheeler’s thresher machine, axe handles and tools, cases of silver plate, toys, pianos and organs, carriages and Yankee notions. The Eric the Red left New York under the command of Captain Z. Allen (or some records say Captain Jacques Allen) and 24 other crew including the owner’s son third mate Ned Sewall. There were 2 saloon passengers also. The ship had been sailing for an uneventful 85 days and the voyage was almost at its end. On 4th September 1880 the Eric the Red approached Cape Otway with a moderate north-west wind and hazy and overcast atmosphere. Around 1:30am Captain Allen sighted the Cape Otway light and was keeping the ship 5-6 miles offshore to stay clear of the hazardous Otway Reef. However he had badly misjudged his position. The ship hit the Otway Reef about 2 miles out to sea, south west of the Cape Otway light station. He ordered the wheel to be put ‘hard up’ thinking that she might float off the reef. A heavy sea knocked the man away from the wheel, broke the wheel ropes and carried away the rudder. The sea swamped the lifeboats. The mizzenmast fell, with all of its rigging, then the mainmast also fell and the ship broke in two. Some said that the passenger Vaughan, who was travelling for his health and not very strong, was washed overboard and never seen again. The ship started breaking up. The forward house came adrift with three of the crew on it as well as a longboat, which the men succeeded in launching and keeping afloat by continually bailing with their sea boots. The captain, the third mate (the owner’s son) and others clung to the mizzenmast in the sea. Then the owner’s son was washed away off the mast. Within 10 minutes the rest of the ship was in pieces, completely wrecked, with cargo and wreckage floating in the sea. The captain encouraged the second mate to swim with him to the deckhouse where there were other crew but the second mate wouldn’t go with him. Eventually the Captain made it to the deckhouse and the men pulled him up. At about 4:30am the group of men on the deckhouse saw the lights of a steamer and called for help. At the same time they noticed the second mate and the other man had drifted nearby, still on the spur, and pulled them both onto the wreck. The coastal steamer Dawn was returning to Warrnambool from Melbourne, its sailing time different to its usual schedule. Captain Jones sent out two life boats, and fired off rockets and blue lights to illuminate the area. They picked up the three survivors who were in the long boat from Eric the Red. Two men were picked up out of the water, one being the owner’s son who was clinging to floating kerosene boxes. At daylight the Dawn then rescued the 18 men from the floating portion of the deckhouse, which had drifted about 4 miles from where they’d struck the reef. Shortly after the rescue the deckhouse drifted onto breakers and was thrown onto rocks at Point Franklin, about 2 miles east of Cape Otway. Captain Jones had signalled to Cape Otway lighthouse the number of the Eric the Red and later signalled that there was a wreck at Otway Reef but there was no response from the lighthouse. The captain and crew of the Dawn spent several more hours searching unsuccessfully for more survivors, even going back as far as Apollo Bay. On board the Dawn the exhausted men received care and attention to their needs and wants, including much needed clothing. Captain Allen was amongst the 23 battered and injured men who were rescued and later taken to Warrnambool for care. Warrnambool’s mayor and town clerk offered them all hospitality, the three badly injured men going to the hospital for care and others to the Olive Branch Hotel, then on to Melbourne. Captain Allen’s leg injury prevented him from going ashore so he and three other men travelled on the Dawn to Portland. They were met by the mayor who also treated them all with great kindness. Captain Allen took the train back to Melbourne then returned to America. Those saved were Captain Z. Allen (or Jacques Allen), J. Darcy chief mate, James F. Lawrence second mate, Ned Sewall third mate and owner’s son, John French the cook, C. Nelson sail maker, Clarence W. New passenger, and the able seamen Dickenson, J. Black, Denis White, C. Herbert, C. Thompson, A. Brooks, D. Wilson, J. Ellis, Q. Thompson, C. Newman, W. Paul, J. Davis, M. Horenleng, J. Ogduff, T. W. Drew, R. Richardson. Four men had lost their lives; three of them were crew (Gus Dahlgreen ship’s carpenter, H. Ackman steward, who drowned in his cabin, and George Silver seaman) and one a passenger (J. B. Vaughan). The body of one of them had been found washed up at Cape Otway and was later buried in the lighthouse cemetery; another body was seen on an inaccessible ledge. Twelve months later the second mate James F. Lawrence, from Nova Scotia, passed away in the Warrnambool district; an obituary was displayed in the local paper. The captain and crew of the Dawn were recognised by the United States Government in July 1881 for their humane efforts, being thanked and presented with substantial monetary rewards, medals and gifts. Neither the ship, nor its cargo, was insured. The ship was worth about £15,000 and the cargo was reportedly worth £40,000; only about £2,000 worth had been recovered. Cargo and wreckage washed up at Apollo Bay, Peterborough, Port Campbell, Western Port and according to some reports, even as far away as the beaches of New Zealand. The day after the wreck the government steam ship Pharos was sent from Queenscliff to clear the shipping lanes of debris that could be a danger to ships. The large midship deckhouse of the ship was found floating in a calm sea near Henty Reef. Items such as an American chair, a ladder and a nest of boxes were all on top of the deckhouse. As it was so large and could cause danger to passing ships, Captain Payne had the deckhouse towed towards the shore just beyond Apollo Bay. Between Apollo Bay and Blanket Bay the captain and crew of Pharos collected Wheeler and Wilson sewing machines, nests of boxes, bottles of Bristol’s sarsaparilla, pieces of common American chairs, axe handles, a Wheelers’ Patent thresher and a sailor’s trunk with the words “A. James” on the front. A ship’s flag-board bearing the words “Eric the Red” was found on the deckhouse; finally those on board the Pharos had the name of the wrecked vessel. During this operation Pharos came across the government steamer Victoria and also a steamer S.S. Otway, both of which were picking up flotsam and wreckage. A whole side of the hull and three large pieces of the other side of the hull, with some of the copper sheathing stripped off, had floated on to Point Franklin. Some of the vessels yards and portions of her masts were on shore. The pieces of canvas attached to the yards and masts confirmed that the vessel had been under sail. The beach there was piled with debris several feet high. There were many cases of Diamond Oil kerosene, labelled R. W. Cameron and Company, New York. There were also many large planks of red pine, portions of a small white boat and a large, well-used oar. Other items found ashore included sewing machines (some consigned to ‘Long and Co.”) and notions, axe and scythe handles, hay forks, wooden pegs, rolls of wire (some branded “T.S” and Co, Melbourne”), kegs of nails branded “A.T. and Co.” from the factory of A. Field and Son, Taunton, Massachusetts, croquet balls and mallets, buggy fittings, rat traps, perfumery, cutlery and Douay Bibles, clocks, bicycles, chairs, a fly wheel, a cooking stove, timber, boxes, pianos, organs and a ladder. (Wooden clothes pegs drifted in for many years). There seemed to be no personal luggage or clothing. The Pharos encountered a long line, about one and a half miles, of floating wreckage about 10 miles off land, south east of Cape Otway, and in some places about 40 feet wide. It seemed that more than half of it was from Eric the Red. The ship’s crew rescued 3 cases that were for the Melbourne Exhibition and other items from amongst the debris. There were also chairs, doors, musical instruments, washing boards, nests of trunks and fly catchers floating in the sea. Most of the goods were saturated and smelt of kerosene. A section of the hull lies buried in the sand at Parker River Beach. An anchor with chain is embedded in the rocks east of Point Franklin and a second anchor, thought to be from Eric the Red, is on display at the Cape Otway light station. (There is a photograph of a life belt on the verandah of Rivernook Guest House in Princetown with the words “ERIC THE RED / BOSTON”. This is rather a mystery as the ship was registered in Bath, Maine, USA.) Parts of the ship are on display at Bimbi Park Caravan Park and at Apollo Bay Museum. Flagstaff Hill Maritime Village also has part of the helm (steering wheel), a carved wooden sword (said to be the only remaining portion of the ship’s figurehead; further research is currently being carried out), a door, a metal rod and samples of wood. Much of the wreckage was recovered by the local residents before police and other authorities arrived at the scene. Looters went to great effort to salvage goods, being lowered down the high cliff faces to areas with little or no beach to collect items from the wreckage, their mates above watching out for dangerous waves. A Tasmanian newspaper reports on a court case in Stawell, Victoria, noting a man who was caught 2 months later selling tobacco from the wreckage of Eric the Red. Some of the silverware is still treasured by descendants of Mr Mackenzie who was given these items by officials for his help in securing the cargo. The gifts included silver coffee and tea pots, half a dozen silver serviette rings and two sewing machines. The wreck and cargo were sold to a Melbourne man who salvaged a quantity of high quality tobacco and dental and surgical instruments. Timbers from the ship were salvaged and used in the construction of houses and sheds around Apollo Bay, including a guest house, Milford House (since burnt down in bushfires), which had furniture, fittings and timber on the dining room floor from the ship. A 39.7 foot long trading ketch, the Apollo, was also built from its timbers by Mr Burgess in 1883 and subsequently used in Tasmanian waters. It was the first attempt at ship building in Apollo bay. In 1881 a red light was installed about 300 feet above sea level at the base of the Cape Otway lighthouse to warn ships when they were too close to shore; It would not be visible unless a ship came within 3 miles from it. This has proved to be an effective warning. The State Library of Victoria has a lithograph in its collection depicting the steamer Dawn and the shipwrecked men, titled. "Wreck of the ship Eric the Red, Cape Otway: rescue of the crew by the Dawn". “The Eric the Red is historically significant as one of Victoria's major 19th century shipwrecks. (Heritage Victoria Eric the Red; HV ID 239) The wreck led to the provision of an additional warning light placed below the Cape Otway lighthouse to alert mariners to the location of Otway Reef. The site is archaeologically significant for its remains of a large and varied cargo and ship's fittings being scattered over a wide area. The site is recreationally and aesthetically significant as it is one of the few sites along this coast where tourists can visit identifiable remains of a large wooden shipwreck, and for its location set against the background of Cape Otway, Bass Strait, and the Cape Otway lighthouse.“ (Victorian Heritage Database Registration Number S239, Official Number 8745 USA) Door from the wreck of the ship Eric the Red. The wooden singular rectangular door includes three insert panel sections. The top section is square shaped and is missing its panel or glass. The centre timber panel is about a third of the height of the top panel and the bottom timber panel is approximately equal in height to the total height of the two upper panels. The door fastenings include both a metal door latch and traditional door bolt. They are both attached to the front right hand side of the door. The bolt is just below the top panel, and the door latch is in approximately the centre of that side. The door latch has a round mark where a handle could have been attached. The wood of the door has scraping marks in a semi-circle around the door latch where the latch has swung around on its one remaining fastening and grazed the surface. There is a metal hinge at the top section of the door on the opposite side to the latch. The painted surface has been scraped back to expose the wood. The door is shorter than the average height of a person. On the reverse of the door there are lines on the panels, just inside their edges, is what appears to be pencil. The door is not aligned straight but is skew to centre.warrnambool, flagstaff hill, flagstaff hill maritime village, maritime museum, shipwreck coast, great ocean road, shipwreck artefact, eric the red, jaques allen, sewall, 1880, melbourne exhibition 1880, cape otway, otway reef, victorian shipwreck, bass strait, eric-the-red, door -
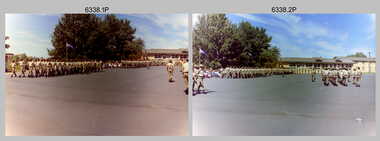 Bendigo Military Museum
Photograph - Army Survey Regiment – CO’s Parade and Defence Force Service Medal Presentations, c1987
These 34 photographs were taken at a CO’s parade at the Army Survey Regiment, Bendigo in c1987. The Colonel Commandant (honorary appointment) of the Survey Corps - COL Clem Sargent (Retd), presented the Defence Force Service Medal to four personnel in recognition of 15 years of efficient remunerated service, or the Clasp for 5 years of additional service. Recipients were WO1 Neville Stone and three unidentified support staff from the Australian Army Catering Corps, Royal Australian Electrical and Mechanical Engineers and the Royal Australian Corps of Transport. This is a set of 34 photographs of a CO’s parade and the presentation of the Defence Force Service Medal, at the Army Survey Regiment, Bendigo in c1987. The colour photographs are on 35mm negative film and are part of the Army Survey Regiment’s Collection. The photographs were scanned at 96 dpi. .1) to 2) - Photo, colour, c1987. Squadrons marching on parade ground. .3) to .4) - Photo, colour, c1987. Squadrons formed up on parade ground. RSM WO1 Jeff Lynch delivering orders. .5) - Photo, colour, c1987. Officers at ease in readiness to take posts. .6) - Photo, colour, c1987. Squadrons formed up on parade ground. RSM WO1 Jeff Lynch delivering orders. .7) - Photo, colour, c1987. RSM WO1 Jeff Lynch handing over to 2IC MAJ Terry Edwards. .8) - Photo, colour, c1987. Officers marching on to take posts. .9) - Photo, colour, c1987. L to R: CPL Paul Richards, SPR Todd Reynolds, SPR Eric Nicholson, MAJ Roger Rix, CPL Steve Hill, unidentified, CPL Russ Mollenhauer, remainder. .10) - Photo, colour, c1987. Guest of Honour - COL COMDT COL Clem Sargent arrives on parade ground, remainder unidentified. .11) - Photo, colour, c1987. Army Survey Regiment ready to salute Guest of Honour - COL COMDT COL Clem Sargent. .12) - Photo, colour, c1987, Guest of Honour - COL COMDT COL Clem Sargent returns salute. .13) - Photo, colour, c1987, L to R: 2IC MAJ Terry Edwards, SPR Eric Nicholson, COL COMDT COL Clem Sargent, SGT John ‘Stormy’ Tempest, unidentified (x2), SGT Mal Paterson, SGT Kevin Boehm, SSGT Peter Mustart, CPL Trevor Poll, SGT Terry Danger. .14) - Photo, colour, c1987, In left foreground MAJ Bob McHenry, unidentified personnel, unidentified officer, 2IC MAJ Terry Edwards, COL COMDT COL Clem Sargent, 3rd from right CAPT Graeme Wastell, CPL John Martin, SGT Martin Evans. .15) - Photo, colour, c1987, L to R: unidentified personnel, unidentified officer, 2IC MAJ Terry Edwards, COL COMDT COL Clem Sargent, SSGT Rick Van der Bom, CPL Paul Hunter, unidentified personnel, CAPT Graeme Wastell, SGT Paul Leskovec CSM, CPL John Martin, SGT Paul Cheater, SGT Martin Evans. .16) - Photo, colour, c1987, L to R: SGT Martin Evans. 2IC MAJ Terry Edwards, unidentified officer, COL COMDT COL Clem Sargent, unidentified personnel, SGT Paul Leskovec CSM, SGT Paul Cheater, SSGT Brian Collings, SSGT Ian ‘Rock’ Thistleton, WO1 Stevo Hinic. .17) - Photo, colour, c1987, L to R: unidentified personnel, 2IC MAJ Terry Edwards, COL COMDT COL Clem Sargent, SGT Roger Rees, unidentified female officer, SGT Phil Smalley, CPL Steve Coulsen, SPR Toni Wright, SGT Steve Gloster, SSGT Ken Talbot-Smith, CPL Darren Wilkinson, unidentified, SGT Paul Hopes. .18) - Photo, colour, c1987, L to R: unidentified female officer, COL COMDT COL Clem Sargent, unidentified, SGT Phil Smalley, CPL Steve Coulsen, SPR Toni Wright, CPL Steve Gloster, SSGT Ken Talbot-Smith, CPL Darren Wilkinson, SGT Paul Hopes. .19) - Photo, colour, c1987, L to R: unidentified personnel, CPL Peter ‘Jack’ Elverd, 2IC MAJ Terry Edwards, COL COMDT COL Clem Sargent, unidentified, SGT Stuart Hibbert, unidentified, Ted Burgess. .20) - Photo, colour, c1987, L to R: unidentified officer, COL COMDT COL Clem Sargent, 2IC MAJ Terry Edwards. .21) - Photo, colour, c1987, L to R: unidentified (x3), WO1 Neville Stone, COL COMDT COL Clem Sargent, SSGT Greg Anderson, unidentified officer, CAPT Graeme Wastell. .22) to .24) - Photo, colour, c1987, L to R: unidentified (x3), WO1 Neville Stone, COL COMDT COL Clem Sargent, SSGT Greg Anderson, unidentified officer. .25) to .26) - Photo, colour, c1987, L to R: unidentified, WO1 Neville Stone, unidentified, COL COMDT COL Clem Sargent, SSGT Greg Anderson, unidentified officer. .26) to 30) - Photo, colour, c1987, L to R: unidentified (x2), WO1 Neville Stone, COL COMDT COL Clem Sargent, SSGT Greg Anderson, unidentified officer. .31) to .34) - Photo, colour, c1987, L to R: unidentified, WO1 Neville Stone, COL COMDT COL Clem Sargent, unidentified officer..1P to .34P – There are no personnel identified.royal australian survey corps, rasvy, army survey regiment, army svy regt, fortuna, asr -
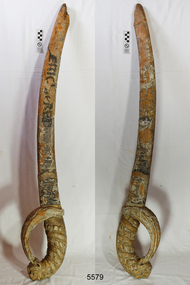 Flagstaff Hill Maritime Museum and Village
Decorative object - Sword, 1871 or earlier
This wooden sword is said to “possibly be the only remaining part of the figurehead from the sailing ship Eric the Red.” It was previously part of the collection of the old Warrnambool Museum and the entry in its inventory says “Wooden sword, portion of the figurehead, held by “Eric the Red” at the bow.” A large part of the ship’s hull was found on the rocks and a figurehead may have been attached or washed up on the shore. The shipping records for E. & A. Sewall, the builders, owners and managers of Eric the Red, are now preserved in the Maine Maritime Museum. There is no photograph on record of Eric the Red but photographs of other ships built around that time by the same company show that these did not have figureheads, and there is no record found of a figurehead for Eric the Red being ordered or paid for. Further research is being carried out. The ship building company E. & A. Sewall, from Bath, Maine, USA, built Eric the Red, a wooden, three masted clipper ship. She had 1,580 tons register and was the largest full-rigged ship built at Bath, Maine, USA in 1871. She was built and registered by Arthur Sewall, later to become the partnership E. & A. Sewall, and was the 51st ship built by this company. The annually-published List of Merchant Vessels of the U.S. shows that Bath was still the home port of Eric the Red in 1880. The vessel was named after the Viking discoverer, Eric the Red, who was the first European to reach the shores of North America (in 980AD). The ship Eric the Red at first traded in coal between America and Britain, and later traded in guano nitrates from South America. In 1879 she was re-metalled and was in first class condition. On 10th June 1880 (some records say 12th June) Eric the Red departed New York for Melbourne and then Sydney. She had been commissioned by American trade representatives to carry a special cargo of 500 exhibits (1400 tons) - about a quarter to a third of America’s total exhibits - from America for the U.S.A. pavilion at Melbourne’s first International Exhibition. The exhibits included furniture, ironmongery, wines, chemicals, dental and surgical instruments, paper, cages, bronze lamp trimmings, axles, stamped ware, astronomical and time globes, samples of corn and the choicest of leaf tobacco. Other general cargo included merchandise such as cases of kerosene and turpentine, brooms, Bristol's Sarsaparilla, Wheeler and Wilson sewing machines, Wheeler’s thresher machine, axe handles and tools, cases of silver plate, toys, pianos and organs, carriages and Yankee notions. The Eric the Red left New York under the command of Captain Z. Allen (or some records say Captain Jacques Allen) and 24 other crew including the owner’s son third mate Ned Sewall. There were 2 saloon passengers also. On 4th September 1880 the ship had been sailing for an uneventful 85 days and the voyage was almost at its end. Eric the Red approached Cape Otway in a moderate north-west wind and hazy and overcast atmosphere. Around 1:30am Captain Allen sighted the Cape Otway light and was keeping the ship 5-6 miles offshore to stay clear of the hazardous Otway Reef. However he had badly misjudged his position. The ship hit the Otway Reef about 2 miles out to sea, south west of the Cape Otway light station. Captain Allen ordered the wheel to be put ‘hard up’ thinking that she might float off the reef. A heavy sea knocked the man away from the wheel, broke the wheel ropes and carried away the rudder. The sea swamped the lifeboats, the mizzenmast fell, with all of its rigging, then the mainmast fell and the ship broke in two. Some said that the passenger Vaughan, who was travelling for his health and not very strong, was washed overboard and never seen again. The ship started breaking up. The forward house came adrift with three of the crew on it as well as a longboat, which the men succeeded in launching and keeping afloat by continually bailing with their sea boots. The captain, the third mate (the owner’s son) and others clung to the mizzenmast in the sea. Then the owner’s son was washed away off the mast. Within 10 minutes the rest of the ship was in pieces, completely wrecked, with cargo and wreckage floating in the sea. The captain encouraged the second mate to swim with him to the deckhouse where there were other crew but the second mate wouldn’t go with him. Eventually the Captain made it to the deckhouse and the men pulled him up. At about 4:30am the group of men on the deckhouse saw the lights of a steamer and called for help. At the same time they noticed the second mate and the other man had drifted nearby, still on the spur, and pulled them both onto the wreck. The coastal steamer Dawn was returning to Warrnambool from Melbourne, its sailing time different to its usual schedule. Cries were heard coming from out of the darkness. Captain Jones sent out two life boats, and fired off rockets and blue lights to illuminate the area. They picked up the three survivors who were in the long boat from Eric the Red. Two men were picked up out of the water, one being the owner’s son who was clinging to floating kerosene boxes. At daylight the Dawn then rescued the 18 men from the floating portion of the deckhouse, which had drifted about 4 miles from where they’d struck the reef. Shortly after the rescue the deckhouse drifted onto breakers and was thrown onto rocks at Point Franklin, about 2 miles east of Cape Otway. Captain Jones had signalled to Cape Otway lighthouse the number of the Eric the Red and later signalled that there was a wreck at Otway Reef but there was no response from the lighthouse. The captain and crew of the Dawn spent several more hours searching unsuccessfully for more survivors, even going back as far as Apollo Bay. On board the Dawn the exhausted men received care and attention to their needs and wants, including much needed clothing. Captain Allen was amongst the 23 battered and injured men who were rescued and later taken to Warrnambool for care. Warrnambool’s mayor and town clerk offered them all hospitality, the three badly injured men going to the hospital and others to the Olive Branch Hotel, then on to Melbourne. Captain Allen’s leg injury prevented him from going ashore so he and three other men travelled on the Dawn to Portland. They were met by the mayor who also treated them all with great kindness. Captain Allen took the train back to Melbourne then returned to America. Those saved were Captain Z. Allen (or Jacques Allen), J. Darcy chief mate, James F. Lawrence second mate, Ned Sewall third mate and owner’s son, John French the cook, C. Nelson sail maker, Clarence W. New passenger, and the able seamen Dickenson, J. Black, Denis White, C. Herbert, C. Thompson, A. Brooks, D. Wilson, J. Ellis, Q. Thompson, C. Newman, W. Paul, J. Davis, M. Horenleng, J. Ogduff, T. W. Drew, R. Richardson. Four men had lost their lives; three of them were crew (Gus Dahlgreen ship’s carpenter, H. Ackman steward, who drowned in his cabin, and George Silver seaman) and one a passenger (J. B. Vaughan). The body of one of them had been found washed up at Cape Otway and was later buried in the lighthouse cemetery; another body was seen on an inaccessible ledge. Twelve months later the second mate James F. Lawrence, from Nova Scotia, passed away in the Warrnambool district; an obituary was displayed in the local paper. The captain and crew of the Dawn were recognised by the United States Government in July 1881 for their humane efforts and bravery, being thanked and presented with substantial monetary rewards, medals and gifts. Neither the ship, nor its cargo, was insured. The ship was worth about £15,000 and the cargo was reportedly worth £40,000; only about £2,000 worth had been recovered. Cargo and wreckage washed up at Apollo Bay, Peterborough, Port Campbell, Western Port and according to some reports, even as far away as the beaches of New Zealand. The day after the wreck the government steam ship Pharos was sent from Queenscliff to clear the shipping lanes of debris that could be a danger to ships. The large midship deckhouse of the ship was found floating in a calm sea near Henty Reef. Items such as an American chair, a ladder and a nest of boxes were all on top of the deckhouse. As it was so large and could cause danger to passing ships, Captain Payne had the deckhouse towed towards the shore just beyond Apollo Bay. Between Apollo Bay and Blanket Bay the captain and crew of Pharos collected Wheeler and Wilson sewing machines, nests of boxes, bottles of Bristol’s sarsaparilla, pieces of common American chairs, axe handles, a Wheelers’ Patent thresher and a sailor’s trunk with the words “A. James” on the front. A ship’s flag-board bearing the words “Eric the Red” was found on the deckhouse; finally those on board the Pharos had the name of the wrecked vessel. During this operation Pharos came across the government steamer Victoria and also a steamer S.S. Otway, both of which were picking up flotsam and wreckage. A whole side of the hull and three large pieces of the other side of the hull, with some of the copper sheathing stripped off, had floated on to Point Franklin. Some of the vessels yards and portions of her masts were on shore. The pieces of canvas attached to the yards and masts confirmed that the vessel had been under sail. The beach there was piled with debris several feet high. There were many cases of Diamond Oil kerosene, labelled R. W. Cameron and Company, New York. There were also many large planks of red pine, portions of a small white boat and a large, well-used oar. Other items found ashore included sewing machines (some consigned to ‘Long and Co.”) and notions, axe and scythe handles, hay forks, wooden pegs, rolls of wire (some branded “T.S” and Co, Melbourne”), kegs of nails branded “A.T. and Co.” from the factory of A. Field and Son, Taunton, Massachusetts, croquet balls and mallets, buggy fittings, rat traps, perfumery, cutlery and Douay Bibles, clocks, bicycles, chairs, a fly wheel, a cooking stove, timber, boxes, pianos, organs and a ladder. (Wooden clothes pegs drifted in for many years). There seemed to be no personal luggage or clothing. The Pharos encountered a long line, about one and a half miles, of floating wreckage about 10 miles off land, south east of Cape Otway, and in some places about 40 feet wide. It seemed that more than half of it was from Eric the Red. The ship’s crew rescued 3 cases that were for the Melbourne Exhibition and other items from amongst the debris. There were also chairs, doors, musical instruments, washing boards, nests of trunks and fly catchers floating in the sea. Most of the goods were saturated and smelt of kerosene. A section of the hull lies buried in the sand at Parker River Beach. An anchor with chain is embedded in the rocks east of Point Franklin and a second anchor, thought to be from Eric the Red, is on display at the Cape Otway light station. (There is a photograph of a life belt on the verandah of Rivernook Guest House in Princetown with the words “ERIC THE RED / BOSTON”. This is rather a mystery as the ship was registered in Bath, Maine, USA.) Parts of the ship are on display at Bimbi Park Caravan Park and at Apollo Bay Museum. Flagstaff Hill Maritime Village also has part of the helm (steering wheel), a carved wooden sword (said to be the only remaining portion of the ship’s figurehead; further research is currently being carried out), a door, a metal rod, samples of wood and a medal for bravery. Much of the wreckage was recovered by the local residents before police and other authorities arrived at the scene. Looters went to great effort to salvage goods, being lowered down the high cliff faces to areas with little or no beach to collect items from the wreckage, their mates above watching out for dangerous waves. A Tasmanian newspaper reports on a court case in Stawell, Victoria, noting a man who was caught 2 months later selling tobacco from the wreckage of Eric the Red. Some of the silverware is still treasured by descendants of Mr Mackenzie who was given these items by officials for his help in securing the cargo. The gifts included silver coffee and tea pots, half a dozen silver serviette rings and two sewing machines. The wreck and cargo were sold to a Melbourne man who salvaged a quantity of high quality tobacco and dental and surgical instruments. Timbers from the ship were salvaged and used in the construction of houses and sheds around Apollo Bay, including a guest house, Milford House (since burnt down in bushfires), which had furniture, fittings and timber on the dining room floor from the ship. A 39.7 foot long trading ketch, the Apollo, was also built from its timbers by Mr Burgess in 1883 and subsequently used in Tasmanian waters. It was the first attempt at ship building in Apollo bay. In 1881 a red light was installed about 300 feet above sea level at the base of the Cape Otway lighthouse to warn ships when they were too close to shore; It would not be visible unless a ship came within 3 miles from it. This has proved to be an effective warning. The State Library of Victoria has a lithograph in its collection depicting the steamer Dawn and the shipwrecked men, titled. "Wreck of the ship Eric the Red, Cape Otway: rescue of the crew by the Dawn".The Eric the Red is historically significant as one of Victoria's major 19th century shipwrecks. (Heritage Victoria Eric the Red; HV ID 239) The wreck led to the provision of an additional warning light placed below the Cape Otway lighthouse to alert mariners to the location of Otway Reef. The site is archaeologically significant for its remains of a large and varied cargo and ship's fittings being scattered over a wide area. The site is recreationally and aesthetically significant as it is one of the few sites along this coast where tourists can visit identifiable remains of a large wooden shipwreck, and for its location set against the background of Cape Otway, Bass Strait, and the Cape Otway lighthouse. (Victorian Heritage Database Registration Number S239, Official Number 8745 USA)This carved wooden sword, recovered from the Eric the Red, is possibly the only portion of the figurehead recovered after the wreck. There are spirals carved from the base of the handle to the top of the sword. The hilt of the sword is a lion’s head holding its tail in its mouth, the tail forming the handle. The blade of the sword has engraved patterns on it. Tiny particles of gold leaf and dark blue paint fragments can be seen between the carving marks. There are remnants of yellowish-orange and crimson paint on the handle. At some time after the sword was salvaged the name of the ship was hand painted on the blade in black paint. The tip of the sword has broken or split and the remaining part is charcoal in appearance. On both the tip and the base of the handle are parts made where the sword could have been joined onto the figurehead There is a white coating over some areas of the sword, similar to white lead putty used in traditional shipbuilding. The words “ERIC the RED” have been hand painted on the blade of the sword in black paint sometime after it was salvaged.flagstaff hill, flagstaff hill maritime museum and village, warrnambool, maritime museum, maritime village, great ocean road, shipwreck coast, sword, wooden sword, eric the red, carved sword, figurehead, snake head on sword -
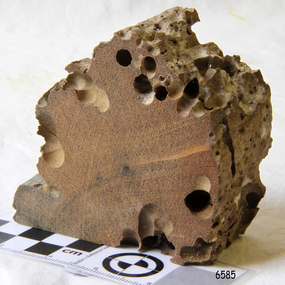 Flagstaff Hill Maritime Museum and Village
Wood Sample, about 1871
This piece of timber from the ship Eric the Red has been eaten through by the marine animals called Teredo Worms, sometimes called sea worms or ‘termites of the sea’. The worms bore holes into wood that is immersed in sea water and bacteria inside the worms digest the wood. Shipbuilders tried to prevent this problem by using coatings of tar, wax, lead or pitch. In the 18th and 19th centuries the outside of their ships were sheathed in copper or a combination of copper and zinc (called Muntz metal) and would be re-metalled periodically to ensure the sheathing would remain effective. In more recent times the ships are protected with a toxic coating. The American ship Eric the Red was a wooden, three masted clipper ship. She had 1,580 tons register and was the largest full-rigged ship built at Bath, Maine, USA in 1871. She was built and registered by Arthur Sewall, later to become the partnership E. & A. Sewall, the 51st ship built by this company. The annually-published List of Merchant Vessels of the U.S. shows Bath was still the home port of Eric the Red in 1880. The vessel was named after the Viking discoverer, Eric ‘the Red-haired’ Thorvaldsson , who was the first European to reach the shores of North America (in 980AD). The ship Eric the Red at first traded in coal between America and Britain, and later traded in guano nitrates from South America. In 1879 she was re-metalled and was in first class condition. On 10th June 1880 (some records say 12th June) Eric the Red departed New York for Melbourne and then Sydney. She had been commissioned by American trade representatives to carry a special cargo of 500 exhibits (1400 tons) – about a quarter to a third of America’s total exhibits - for the U.S.A. pavilion at Melbourne’s first International Exhibition. The exhibits included furniture, ironmongery, wines, chemicals, dental and surgical instruments, paper, cages, bronze lamp trimmings, axles, stamped ware, astronomical and time globes, samples of corn and the choicest of leaf tobacco. Other general cargo included merchandise such as cases of kerosene and turpentine, brooms, Bristol's Sarsaparilla, Wheeler and Wilson sewing machines, Wheeler’s thresher machine, axe handles and tools, cases of silver plate, toys, pianos and organs, carriages and Yankee notions. The Eric the Red left New York under the command of Captain Zaccheus Allen (or some records say Captain Jacques Allen) and 24 other crew including the owner’s son third mate Ned Sewall. There were also 2 saloon passengers on board. The ship had been sailing for an uneventful 85 days and the voyage was almost at its end. As Eric the Red approached Cape Otway there was a moderate north-west wind and hazy and overcast atmosphere. On 4th September 1880 at about 1:30am Captain Allen sighted the Cape Otway light and was keeping the ship 5-6 miles offshore to stay clear of the hazardous Otway Reef. However he had badly misjudged his position. The ship hit the Otway Reef about 2 miles out to sea, south west of the Cape Otway light station. Captain Allen ordered the wheel to be put ‘hard up’ thinking that she might float off the reef. The sea knocked the helmsman away from the wheel, broke the wheel ropes and carried away the rudder. The lifeboats were swamped, the mizzenmast fell, with all of its rigging, then the mainmast also fell and the ship broke in two. Some said that the passenger Vaughan, who was travelling for his health and not very strong, was washed overboard and never seen again. The ship started breaking up. The forward house came adrift with three of the crew on it as well as a longboat, which the men succeeded in launching and keeping afloat by continually bailing with their sea boots. The captain, the third mate (the owner’s son) and others clung to the mizzenmast in the sea. Then the owner’s son was washed away off the mast. Within 10 minutes the rest of the ship was in pieces, completely wrecked, with cargo and wreckage floating in the sea. The captain encouraged the second mate to swim with him to the deckhouse where there were other crew but the second mate wouldn’t go with him. Eventually the Captain made it to the deckhouse and the men pulled him up. At about 4:30am the group of men on the deckhouse saw the lights of a steamer and called for help. At the same time they noticed the second mate and the other man had drifted nearby, still on the spur, and pulled them both onto the wreck. The coastal steamer SS Dawn was returning to Warrnambool from Melbourne, its sailing time different to its usual schedule. She was built in 1876 and bought by the Portland and Belfast Steam Navigation Co. in 1877. At the time of this journey she was commanded by Captain Jones, and was sailing between Melbourne and Portland via Warrnambool. The provedore of the Dawn, Benjamin Lear, heard cries of distress coming through the portholes of the saloon. He gave the alarm and the engines were stopped. Cries could be heard clearly, coming from the land. Captain Jones sent out crew in two boats, and fired off rockets and blue lights to illuminate the area. They picked up the three survivors who were in the long boat from Eric the Red. Two men were picked up out of the water, one being the owner’s son who was clinging to floating kerosene boxes. At daylight the Dawn then rescued the 18 men from the floating portion of the deckhouse, which had drifted about 4 miles from where they’d struck the reef. Shortly after the rescue the deckhouse drifted onto breakers and was thrown onto rocks at Point Franklin, about 2 miles east of Cape Otway. Captain Jones had signalled to Cape Otway lighthouse the number of the Eric the Red and later signalled that there was a wreck at Otway Reef but there was no response from the lighthouse. The captain and crew of the Dawn spent several more hours searching unsuccessfully for more survivors, even going back as far as Apollo Bay. On board the Dawn the exhausted men received care and attention to their needs and wants, including much needed clothing. Captain Allen was amongst the 23 battered and injured men who were rescued and later taken to Warrnambool for care. Warrnambool’s mayor and town clerk offered them all hospitality, the three badly injured men going to the hospital for care and others to the Olive Branch Hotel, then on to Melbourne. Captain Allen’s leg injury prevented him from going ashore so he and three other men travelled on the Dawn to Portland. They were met by the mayor who also treated them all with great kindness. Captain Allen took the train back to Melbourne then returned to America. Those saved were Captain Zaccheus Allen (or Jacques Allen), J. Darcy chief mate, James F. Lawrence second mate, Ned Sewall third mate and owner’s son, John French the cook, C. Nelson sail maker, Clarence W. New passenger, and the able seamen Dickenson, J. Black, Denis White, C. Herbert, C. Thompson, A. Brooks, D. Wilson, J. Ellis, Q. Thompson, C. Newman, W. Paul, J. Davis, M. Horenleng, J. Ogduff, T. W. Drew, R. Richardson. Four men had lost their lives; three of them were crew (Gus Dahlgreen ship’s carpenter, H. Ackman steward, who drowned in his cabin, and George Silver seaman) and one a passenger (J. B. Vaughan). The body of one of them had been found washed up at Cape Otway and was later buried in the lighthouse cemetery; another body was seen on an inaccessible ledge. Twelve months later the second mate James F. Lawrence, from Nova Scotia, passed away in the Warrnambool district; an obituary was displayed in the local paper. Neither the ship, nor its cargo, was insured. The ship was worth about £15,000 and the cargo was reportedly worth £40,000; only about £2,000 worth had been recovered. Cargo and wreckage washed up at Apollo Bay, Peterborough, Port Campbell, Western Port and according to some reports, even as far away as the beaches of New Zealand. The day after the wreck the government steam ship Pharos was sent from Queenscliff to clear the shipping lanes of debris that could be a danger to ships. The large midship deckhouse of the ship was found floating in a calm sea near Henty Reef. Items such as an American chair, a ladder and a nest of boxes were all on top of the deckhouse. As it was so large and could cause danger to passing ships, Captain Payne had the deckhouse towed towards the shore just beyond Apollo Bay. Between Apollo Bay and Blanket Bay the captain and crew of Pharos collected Wheeler and Wilson sewing machines, nests of boxes, bottles of Bristol’s sarsaparilla, pieces of common American chairs, axe handles, a Wheelers’ Patent thresher and a sailor’s trunk with the words “A. James” on the front. A ship’s flag-board bearing the words “Eric the Red” was found on the deckhouse; finally those on board the Pharos had the name of the wrecked vessel. During this operation Pharos came across the government steamer Victoria and also a steamer S.S. Otway, both of which were picking up flotsam and wreckage. A whole side of the hull and three large pieces of the other side of the hull, with some of the copper sheathing stripped off, had floated on to Point Franklin. Some of the vessels yards and portions of her masts were on shore. The pieces of canvas attached to the yards and masts confirmed that the vessel had been under sail. The beach there was piled with debris several feet high. There were many cases of Diamond Oil kerosene, labelled R. W. Cameron and Company, New York. There were also many large planks of red pine, portions of a small white boat and a large, well-used oar. Other items found ashore included sewing machines (some consigned to ‘Long and Co.”) and notions, axe and scythe handles, hay forks, wooden pegs, rolls of wire (some branded “T.S” and Co, Melbourne”), kegs of nails branded “A.T. and Co.” from the factory of A. Field and Son, Taunton, Massachusetts, croquet balls and mallets, buggy fittings, rat traps, perfumery, cutlery and Douay Bibles, clocks, bicycles, chairs, a fly wheel, a cooking stove, timber, boxes, pianos, organs and a ladder. (Wooden clothes pegs drifted in for many years). There seemed to be no personal luggage or clothing. The Pharos encountered a long line, about one and a half miles, of floating wreckage about 10 miles off land, south east of Cape Otway, and in some places about 40 feet wide. It seemed that more than half of it was from Eric the Red. The ship’s crew rescued 3 cases that were for the Melbourne Exhibition and other items from amongst the debris. There were also chairs, doors, musical instruments, washing boards, nests of trunks and fly catchers floating in the sea. Most of the goods were saturated and smelt of kerosene. A section of the hull lies buried in the sand at Parker River Beach. An anchor with chain is embedded in the rocks east of Point Franklin and a second anchor, thought to be from Eric the Red, is on display at the Cape Otway light station. (There is a photograph of a life belt on the verandah of Rivernook Guest House in Princetown with the words “ERIC THE RED / BOSTON”. This is rather a mystery as the ship was registered in Bath, Maine, USA.) Parts of the ship are on display at Bimbi Park Caravan Park and at Apollo Bay Museum. Flagstaff Hill Maritime Village also has part of the helm (steering wheel), a carved wooden sword (said to be the only remaining portion of the ship’s figurehead; further research is currently being carried out), a door, a metal rod, several samples of wood and a medal for bravery, awarded to Nelson Johnson, a crew member of the S.S. Dawn by the U.S. President, for the rescue of the crew. Much of the wreckage was recovered by the local residents before police and other authorities arrived at the scene. Looters went to great effort to salvage goods, being lowered down the high cliff faces to areas with little or no beach to collect items from the wreckage, their mates above watching out for dangerous waves. A Tasmanian newspaper reports on a court case in Stawell, Victoria, noting a man who was caught 2 months later selling tobacco from the wreckage of Eric the Red. Some of the silverware is still treasured by descendants of Mr Mackenzie who was given these items by officials for his help in securing the cargo. The gifts included silver coffee and tea pots, half a dozen silver serviette rings and two sewing machines. A Mr G.W. Black has in his possession a medal and a purse that were awarded to his father, another Dawn crew member who was part of the rescue team. The medal is inscribed and named “To John Black ….” (from “Shipwrecks” by Margaret E. Mackenzie, 3rd edition, published 1964). The wreck and cargo were sold to a Melbourne man who salvaged a quantity of high quality tobacco and dental and surgical instruments. Timbers from the ship were salvaged and used in the construction of houses and sheds around Apollo Bay, including a guest house, Milford House (since burnt down in bushfires), which had furniture, fittings and timber on the dining room floor from the ship. A 39.7 foot long trading ketch, the Apollo, was also built from its timbers by Mr Burgess in 1883 and subsequently used in Tasmanian waters. It was the first attempt at ship building in Apollo bay. In 1881 a red light was installed about 300 feet above sea level at the base of the Cape Otway lighthouse to warn ships when they were too close to shore; It would not be visible unless a ship came within 3 miles from it. This has proved to be an effective warning. Nelson Johnson, recipient of the medal for bravery, married Elizabeth Howard in 1881 and they had 10 children. They lived in South Melbourne, Victoria. Nelson died in 1922 in Fitzroy Victoria, age 66. In 1895 the owners of the S.S. Dawn, the Portland and Belfast Steam Navigation Co., wound up and sold out to the Belfast Company who took over the Dawn for one year before selling her to Howard Smith. She was condemned and sunk in Suva in 1928. The State Library of Victoria has a lithograph in its collection depicting the steamer Dawn and the shipwrecked men, titled. "Wreck of the ship Eric the Red, Cape Otway: rescue of the crew by the Dawn".The wood (timber) sample is listed on the Collections Australia Database, Heritage Victoria, number 239 00010 A “The Eric the Red is historically significant as one of Victoria's major 19th century shipwrecks. (Heritage Victoria Eric the Red; HV ID 239) The wreck led to the provision of an additional warning light placed below the Cape Otway lighthouse to alert mariners to the location of Otway Reef. The site is archaeologically significant for its remains of a large and varied cargo and ship's fittings being scattered over a wide area. The site is recreationally and aesthetically significant as it is one of the few sites along this coast where tourists can visit identifiable remains of a large wooden shipwreck, and for its location set against the background of Cape Otway, Bass Strait, and the Cape Otway lighthouse.“ (Victorian Heritage Database Registration Number S239, Official Number 8745 USA) Wood sample from the wreck of the ship Eric the Red. Triangular shaped, full of sea worm (Teredo worm) holes. The wood is dark in colour and is very light in weight.flagstaff hill, warrnambool, shipwrecked-coast, flagstaff-hill, flagstaff-hill-maritime-museum, maritime-museum, shipwreck-coast, flagstaff-hill-maritime-village, shipwreck-artefact, eric-the-red, zaccheus-allen, sewall, 1880, melbourne-exhibition, cape-otway, otway-reef, wood-sample, s.s.-dawn -
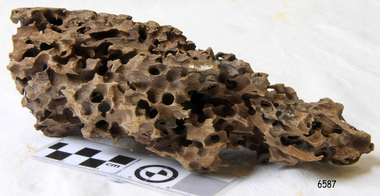 Flagstaff Hill Maritime Museum and Village
Wood Sample, About 1871
This piece of timber from the ship Eric the Red has been eaten through by the marine animals called Teredo Worms, sometimes called sea worms or ‘termites of the sea’. The worms bore holes into wood that is immersed in sea water and bacteria inside the worms digest the wood. Shipbuilders tried to prevent this problem by using coatings of tar, wax, lead or pitch. In the 18th and 19th centuries the outside of their ships were sheathed in copper or a combination of copper and zinc (called Muntz metal) and would be re-metalled periodically to ensure the sheathing would remain effective. In more recent times the ships are protected with a toxic coating. The American ship Eric the Red was a wooden, three masted clipper ship. She had 1,580 tons register and was the largest full-rigged ship built at Bath, Maine, USA in 1871. She was built and registered by Arthur Sewall, later to become the partnership E. & A. Sewall, the 51st ship built by this company. The annually-published List of Merchant Vessels of the U.S. shows Bath was still the home port of Eric the Red in 1880. The vessel was named after the Viking discoverer, Eric ‘the Red-haired’ Thorvaldsson , who was the first European to reach the shores of North America (in 980AD). The ship Eric the Red at first traded in coal between America and Britain, and later traded in guano nitrates from South America. In 1879 she was re-metalled and was in first class condition. On 10th June 1880 (some records say 12th June) Eric the Red departed New York for Melbourne and then Sydney. She had been commissioned by American trade representatives to carry a special cargo of 500 exhibits (1400 tons) – about a quarter to a third of America’s total exhibits - for the U.S.A. pavilion at Melbourne’s first International Exhibition. The exhibits included furniture, ironmongery, wines, chemicals, dental and surgical instruments, paper, cages, bronze lamp trimmings, axles, stamped ware, astronomical and time globes, samples of corn and the choicest of leaf tobacco. Other general cargo included merchandise such as cases of kerosene and turpentine, brooms, Bristol's Sarsaparilla, Wheeler and Wilson sewing machines, Wheeler’s thresher machine, axe handles and tools, cases of silver plate, toys, pianos and organs, carriages and Yankee notions. The Eric the Red left New York under the command of Captain Zaccheus Allen (or some records say Captain Jacques Allen) and 24 other crew including the owner’s son third mate Ned Sewall. There were also 2 saloon passengers on board. The ship had been sailing for an uneventful 85 days and the voyage was almost at its end. As Eric the Red approached Cape Otway there was a moderate north-west wind and hazy and overcast atmosphere. On 4th September 1880 at about 1:30am Captain Allen sighted the Cape Otway light and was keeping the ship 5-6 miles offshore to stay clear of the hazardous Otway Reef. However he had badly misjudged his position. The ship hit the Otway Reef about 2 miles out to sea, south west of the Cape Otway light station. Captain Allen ordered the wheel to be put ‘hard up’ thinking that she might float off the reef. The sea knocked the helmsman away from the wheel, broke the wheel ropes and carried away the rudder. The lifeboats were swamped, the mizzenmast fell, with all of its rigging, then the mainmast also fell and the ship broke in two. Some said that the passenger Vaughan, who was travelling for his health and not very strong, was washed overboard and never seen again. The ship started breaking up. The forward house came adrift with three of the crew on it as well as a longboat, which the men succeeded in launching and keeping afloat by continually bailing with their sea boots. The captain, the third mate (the owner’s son) and others clung to the mizzenmast in the sea. Then the owner’s son was washed away off the mast. Within 10 minutes the rest of the ship was in pieces, completely wrecked, with cargo and wreckage floating in the sea. The captain encouraged the second mate to swim with him to the deckhouse where there were other crew but the second mate wouldn’t go with him. Eventually the Captain made it to the deckhouse and the men pulled him up. At about 4:30am the group of men on the deckhouse saw the lights of a steamer and called for help. At the same time they noticed the second mate and the other man had drifted nearby, still on the spur, and pulled them both onto the wreck. The coastal steamer SS Dawn was returning to Warrnambool from Melbourne, its sailing time different to its usual schedule. She was built in 1876 and bought by the Portland and Belfast Steam Navigation Co. in 1877. At the time of this journey she was commanded by Captain Jones, and was sailing between Melbourne and Portland via Warrnambool. The provedore of the Dawn, Benjamin Lear, heard cries of distress coming through the portholes of the saloon. He gave the alarm and the engines were stopped. Cries could be heard clearly, coming from the land. Captain Jones sent out crew in two boats, and fired off rockets and blue lights to illuminate the area. They picked up the three survivors who were in the long boat from Eric the Red. Two men were picked up out of the water, one being the owner’s son who was clinging to floating kerosene boxes. At daylight the Dawn then rescued the 18 men from the floating portion of the deckhouse, which had drifted about 4 miles from where they’d struck the reef. Shortly after the rescue the deckhouse drifted onto breakers and was thrown onto rocks at Point Franklin, about 2 miles east of Cape Otway. Captain Jones had signalled to Cape Otway lighthouse the number of the Eric the Red and later signalled that there was a wreck at Otway Reef but there was no response from the lighthouse. The captain and crew of the Dawn spent several more hours searching unsuccessfully for more survivors, even going back as far as Apollo Bay. On board the Dawn the exhausted men received care and attention to their needs and wants, including much needed clothing. Captain Allen was amongst the 23 battered and injured men who were rescued and later taken to Warrnambool for care. Warrnambool’s mayor and town clerk offered them all hospitality, the three badly injured men going to the hospital for care and others to the Olive Branch Hotel, then on to Melbourne. Captain Allen’s leg injury prevented him from going ashore so he and three other men travelled on the Dawn to Portland. They were met by the mayor who also treated them all with great kindness. Captain Allen took the train back to Melbourne then returned to America. Those saved were Captain Zaccheus Allen (or Jacques Allen), J. Darcy chief mate, James F. Lawrence second mate, Ned Sewall third mate and owner’s son, John French the cook, C. Nelson sail maker, Clarence W. New passenger, and the able seamen Dickenson, J. Black, Denis White, C. Herbert, C. Thompson, A. Brooks, D. Wilson, J. Ellis, Q. Thompson, C. Newman, W. Paul, J. Davis, M. Horenleng, J. Ogduff, T. W. Drew, R. Richardson. Four men had lost their lives; three of them were crew (Gus Dahlgreen ship’s carpenter, H. Ackman steward, who drowned in his cabin, and George Silver seaman) and one a passenger (J. B. Vaughan). The body of one of them had been found washed up at Cape Otway and was later buried in the lighthouse cemetery; another body was seen on an inaccessible ledge. Twelve months later the second mate James F. Lawrence, from Nova Scotia, passed away in the Warrnambool district; an obituary was displayed in the local paper. Neither the ship, nor its cargo, was insured. The ship was worth about £15,000 and the cargo was reportedly worth £40,000; only about £2,000 worth had been recovered. Cargo and wreckage washed up at Apollo Bay, Peterborough, Port Campbell, Western Port and according to some reports, even as far away as the beaches of New Zealand. The day after the wreck the government steam ship Pharos was sent from Queenscliff to clear the shipping lanes of debris that could be a danger to ships. The large midship deckhouse of the ship was found floating in a calm sea near Henty Reef. Items such as an American chair, a ladder and a nest of boxes were all on top of the deckhouse. As it was so large and could cause danger to passing ships, Captain Payne had the deckhouse towed towards the shore just beyond Apollo Bay. Between Apollo Bay and Blanket Bay the captain and crew of Pharos collected Wheeler and Wilson sewing machines, nests of boxes, bottles of Bristol’s sarsaparilla, pieces of common American chairs, axe handles, a Wheelers’ Patent thresher and a sailor’s trunk with the words “A. James” on the front. A ship’s flag-board bearing the words “Eric the Red” was found on the deckhouse; finally those on board the Pharos had the name of the wrecked vessel. During this operation Pharos came across the government steamer Victoria and also a steamer S.S. Otway, both of which were picking up flotsam and wreckage. A whole side of the hull and three large pieces of the other side of the hull, with some of the copper sheathing stripped off, had floated on to Point Franklin. Some of the vessels yards and portions of her masts were on shore. The pieces of canvas attached to the yards and masts confirmed that the vessel had been under sail. The beach there was piled with debris several feet high. There were many cases of Diamond Oil kerosene, labelled R. W. Cameron and Company, New York. There were also many large planks of red pine, portions of a small white boat and a large, well-used oar. Other items found ashore included sewing machines (some consigned to ‘Long and Co.”) and notions, axe and scythe handles, hay forks, wooden pegs, rolls of wire (some branded “T.S” and Co, Melbourne”), kegs of nails branded “A.T. and Co.” from the factory of A. Field and Son, Taunton, Massachusetts, croquet balls and mallets, buggy fittings, rat traps, perfumery, cutlery and Douay Bibles, clocks, bicycles, chairs, a fly wheel, a cooking stove, timber, boxes, pianos, organs and a ladder. (Wooden clothes pegs drifted in for many years). There seemed to be no personal luggage or clothing. The Pharos encountered a long line, about one and a half miles, of floating wreckage about 10 miles off land, south east of Cape Otway, and in some places about 40 feet wide. It seemed that more than half of it was from Eric the Red. The ship’s crew rescued 3 cases that were for the Melbourne Exhibition and other items from amongst the debris. There were also chairs, doors, musical instruments, washing boards, nests of trunks and fly catchers floating in the sea. Most of the goods were saturated and smelt of kerosene. A section of the hull lies buried in the sand at Parker River Beach. An anchor with chain is embedded in the rocks east of Point Franklin and a second anchor, thought to be from Eric the Red, is on display at the Cape Otway light station. (There is a photograph of a life belt on the verandah of Rivernook Guest House in Princetown with the words “ERIC THE RED / BOSTON”. This is rather a mystery as the ship was registered in Bath, Maine, USA.) Parts of the ship are on display at Bimbi Park Caravan Park and at Apollo Bay Museum. Flagstaff Hill Maritime Village also has part of the helm (steering wheel), a carved wooden sword (said to be the only remaining portion of the ship’s figurehead; further research is currently being carried out), a door, a metal rod, several samples of wood and a medal for bravery, awarded to Nelson Johnson, a crew member of the S.S. Dawn by the U.S. President, for the rescue of the crew. Much of the wreckage was recovered by the local residents before police and other authorities arrived at the scene. Looters went to great effort to salvage goods, being lowered down the high cliff faces to areas with little or no beach to collect items from the wreckage, their mates above watching out for dangerous waves. A Tasmanian newspaper reports on a court case in Stawell, Victoria, noting a man who was caught 2 months later selling tobacco from the wreckage of Eric the Red. Some of the silverware is still treasured by descendants of Mr Mackenzie who was given these items by officials for his help in securing the cargo. The gifts included silver coffee and tea pots, half a dozen silver serviette rings and two sewing machines. A Mr G.W. Black has in his possession a medal and a purse that were awarded to his father, another Dawn crew member who was part of the rescue team. The medal is inscribed and named “To John Black ….” (from “Shipwrecks” by Margaret E. Mackenzie, 3rd edition, published 1964). The wreck and cargo were sold to a Melbourne man who salvaged a quantity of high quality tobacco and dental and surgical instruments. Timbers from the ship were salvaged and used in the construction of houses and sheds around Apollo Bay, including a guest house, Milford House (since burnt down in bushfires), which had furniture, fittings and timber on the dining room floor from the ship. A 39.7 foot long trading ketch, the Apollo, was also built from its timbers by Mr Burgess in 1883 and subsequently used in Tasmanian waters. It was the first attempt at ship building in Apollo bay. In 1881 a red light was installed about 300 feet above sea level at the base of the Cape Otway lighthouse to warn ships when they were too close to shore; It would not be visible unless a ship came within 3 miles from it. This has proved to be an effective warning. Nelson Johnson, recipient of the medal for bravery, married Elizabeth Howard in 1881 and they had 10 children. They lived in South Melbourne, Victoria. Nelson died in 1922 in Fitzroy Victoria, age 66. In 1895 the owners of the S.S. Dawn, the Portland and Belfast Steam Navigation Co., wound up and sold out to the Belfast Company who took over the Dawn for one year before selling her to Howard Smith. She was condemned and sunk in Suva in 1928. The State Library of Victoria has a lithograph in its collection depicting the steamer Dawn and the shipwrecked men, titled. "Wreck of the ship Eric the Red, Cape Otway: rescue of the crew by the Dawn".The wood (timber) sample is listed on the Collections Australia Database, Heritage Victoria, number 239 00010 A “The Eric the Red is historically significant as one of Victoria's major 19th century shipwrecks. (Heritage Victoria Eric the Red; HV ID 239) The wreck led to the provision of an additional warning light placed below the Cape Otway lighthouse to alert mariners to the location of Otway Reef. The site is archaeologically significant for its remains of a large and varied cargo and ship's fittings being scattered over a wide area. The site is recreationally and aesthetically significant as it is one of the few sites along this coast where tourists can visit identifiable remains of a large wooden shipwreck, and for its location set against the background of Cape Otway, Bass Strait, and the Cape Otway lighthouse.“ (Victorian Heritage Database Registration Number S239, Official Number 8745 USA) Wood sample from the wreck of the ship Eric the Red. Oblong shaped, full of sea worm (Teredo worm) holes. The wood is dark in colour and is very light in weight. flagstaff hill, warrnambool, shipwrecked-coast, flagstaff-hill, flagstaff-hill-maritime-museum, maritime-museum, shipwreck-coast, flagstaff-hill-maritime-village, shipwreck-artefact, eric-the-red, zaccheus-allen, sewall, 1880, melbourne-exhibition, cape-otway, otway-reef, wood-sample, s.s.-dawn -
 Bendigo Historical Society Inc.
Document - PETER ELLIS COLLECTION: PETER ELLIS OBITUARY
3 A4 pages stapled together. Peter's Eulogy. We have lost a giant from the folklore scene. The huge crowd here today shows how much Peter meant to so many people. He has been my friend and band leader for the past twenty five years. Peter was the glue for our band. He planned the musical program in conjunction with the MCs. He listed all the tunes to be played and where to find them for those who read the dots. Peter was great fun to be around and I'd like to mention just a few things to show that. Peter was always an exuberant player. He would bounce around on his seat. This caused a near disaster at a drought relief benefit we were playing. The band was on a platform but our pianist Olive was at ground level as the piano could not fit. Peter bounced around so much his chair leg slipped and Peter ended up on top of poor Olive. Peter loved to entertain. He would play bones or swanee whistle at the drop of a hat. He would demonstrate the Charleston, can can or bunny hop for groups. For a big man he was very light on his feet. He loved to stand and circle his concertina, a memory I won't forget. I have to confess I have slept with Peter. Twice. The first time was at Port Fairy Folk Festival when the band slept in the nunnery at Koroit. Peter, Dean Swift and I shared a room. Peter's snoring was so bad Dean grabbed a blanket and a pillow and went to sleep in the mini bus. I went into another room but even with two closed doors found it difficult to sleep. As recently as this year's Illawarra Folk Festival Peter was in a tent in the performer's area. I noticed the tents either side quickly became vacant. The next time was in Canberra when Peter and I were at one end of a caravan and Mary Smith was at the other. I don't think poor Mary got much sleep that night. On another occasion in Canberra Peter was Half asleep in his van when another well known female performer (not from the band) came in and stripped off. She realised she was in the wrong van and grabbed her stuff and took off. She returned very red faced the next morning to collect her shoes. Peter maintained he saw nothing. One freezing cold night in Canberra Peter ad I had been at a terrific session in the bar. We had to support each other across the oval towards our caravan. Peter tried to straddle the fence and got stuck. There was a real Canberra frost on the fence and a sensitive part of Peter's anatomy was in grave danger of frost bite. Peter took an eternity to extricate himself. I couldn’t help him as I was laughing so much. We'll never forget making Harry McQueen's bull boar sausages at Nariel. Peter had already organised the meat and intestine casings from the butcher in Corryong. He was such an organiser and the sausages were brilliant. Peter was quirky. He always made a morning cuppa complete with tea cosy. It even left Martin Pearson speechless in the breakfast tent at Illawarra this year. Another example was when he sold his beloved FJ which is parked out the front today. As the new buyer drove off down the road Peter stood there playing 'Now is the hour' and 'wish me luck as you wave me goodbye' on his concertina. Peter loved a joke. He knew Shirley Andrews loathed the tune Danny boy so he played it in her hearing any chance he go. He even gave her a cd with a dozen different performers doing their versions of the song. We once played at the Rifle Brigade Oktoberfest and Peter was just a bit under the weather after being there for two days (the band got free drinks). The late night crowd was getting restless so Peter tried to shut them up by holding his finger up. They got more restless. Peter couldn’t understand it. 'it worked for Grummy Ross,' he wailed. It was the only time we ever over rode him and started playing without him. He wasn’t happy but disaster was averted. The dance club once had a reverse deb ball. Peter shave his beard, got his sister Robyn to make up his face and came to the ball in a lovely gown. It took ages for people to realise who it was.Margaret Hogan said the other night 'Peter let me see and do things I never would have done otherwise.' I think that is true of all of us in the band. We performed in major festivals regularly, travelled widely and had experiences such as playing at the opening of Melbourne Museum or State Parliament. Experience we'd never have had without Peter. I'm glad Peter didn’t suffer. He told me last Monday morning on my last visit he was in no pain. For that I am grateful. He passed away that night. He was taken far too young and has left a huge hole in all our lives. Personally I have lost a great mate, but then we can all say that. We'll miss you Dirty Pierre. John Williams.person, individual, peter ellis oam -
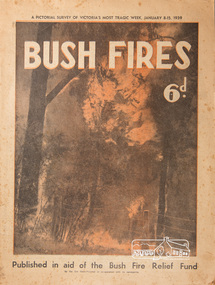 Eltham District Historical Society Inc
Magazine, Sun News-Pictorial, Bush Fires: A pictorial survey of Victoria's most tragic week, January 8-15, 1939
THE WEEK REVIEWED (Article; Bush Fires: A pictorial survey of Victoria's most tragic week, January 8-15, 1939. Published in aid of the Bush Fire Relief Fund by the Sun News-Pictorial in co-operation with its newsagents, pp2-3) THE fiercest bush fires Australia has known since its discovery are quiescent at the moment, and Victoria, in the comparative coolness of the change which came with rain on Sunday night, has begun·to count its losses. In the fiery eight days, from Sunday to Sunday, at least sixty-six men, women and children have lost their lives in forest fires, or have succumbed to burns and shock; many others have died from heat; and several serious cases of burns are being treated in hospitals. Two babies in Narrandera district have died, and ten others are in hospital, because of milk soured by the record temperatures of those eight days. Forest damage totals at least a million pounds, and incalculable damage has been done to the seedlings which were to have been the forests of the future. Water conservation will be seriously affected by the silting-up of reservoirs and streams from which protective timber has been taken by the all-engulfing flames. More than a thousand houses have been destroyed, and these, with 40 mills, and schools, post-offices, churches, and other buildings, represent a loss of at least half a million. At least 1500 are homeless. For their aid, money raised in appeals has now passed the £50,000 mark, and the biggest relief organisation ever set up in peace time has swung into operation. The First Hint Victoria's first hint of what was to come appeared on Sunday, January 8, when most parts of the State awoke to find a blistering day awaiting. At 12.20 p.m., when the thermometer reached its highest for the day, 109.6 degrees, the first fire victims were at that moment going to their death on a bush track five feet wide off the main road to Narbethong. They were the forestry officers Charles Isaac Demby and John Hartley Barling, who went to warn Demby of his danger when he parted from his companions, and was himself surrounded by the treacherous fire. It was not until 8 o'clock next morning that the tragic news was flashed throughout the State. Searchers found the two charred bodies close together, one seeking protection in the nook of two logs. Barling's watch had stopped at 1.20. In the meantime, tragedy was spreading its cloak. By Monday, big fires were raging at Toolangi, Erica, Yallourn, Monbulk, Frankston, Dromana, Drouin South, Glenburn, and Blackwood, with smaller outbreaks at many other centres. In the ensuing week, while women and children were evacuated as fast as the flames would permit, Erica-scene of the 1926 fire disaster-thrice escaped doom by a change of wind. Indeed, those who have been in the fire country these past days say that the numbers of times a change of wind has saved towns from destruction is amazing. In the towns they speak of miracles. Monday's Miracles The escapes from Monett's Mill at Erica and from the Hardwood Company's Mill at Murrindindi, near where Demby and Barling went to their death, were Monday's miracles. Twenty came out alive from each mill. At the first a 60ft. dugout provided an oven-like refuge; at the second, 12 women and children survived in the smoke-filled gloom of a three-roomed cottage while their eight men, their clothes sometimes afire, poured water on the wooden walls. Three houses out of ten remained when the fire had passed. Record Temperatures Sunday had been the hottest Melbourne day for 33 years; Monday dropped to a 76.1 degree maximum; but Tuesday dawned hotter than ever, the mercury reaching 112.5. By now rumor was racing ahead of fact; whole towns were being reported lost; the alarm was raised for scores of missing persons. But fact soon overtook rumor, and within a few days the staggering toll began to mount to a figure beyond the wildest imaginings of the panic-stricken. Six died from heat on this torrid Tuesday, and the fires spread in a wide swathe from south-west to north-east across the State. Fish died in shallow streams. A curtain of smoke hid the sky from all Victoria, and hung far out to sea. It alarmed passengers on ships. On the Ormonde, on the voyage to Sydney from Burnie, women ran on deck, believing fire had broken out in the hold. Days later the smoke reached New Zealand. In Melbourne thousands of fire-volunteers were leaving in cars: vans, motor-buses-anything reliable on wheels-to aid the country in its grim fight. In the fires at Rubicon and. Narbethong, seventeen were facing death this day. But not till Wednesday, when Melbourne breathed again in a cool change, while the country still sweltered in temperatures up to 117 degrees, did the news come through the tree blocked roads. A woman and her little daughter, trapped on the road, were among those who died. Their bodies, and those of menfolk with them, were found strewn out at intervals along the road, where the furnace of the surrounding fire had dropped them in their tracks as they ran. Twelve died at a Rubicon mill, five on the road at Narbethong. At Alexandra, not far distant, a baby was born while the fires raged, and stretcher-bearers brought in the injured. On Thursday the State Government voted £5000 for the relief of fire victims. The Governor (Lord Huntingfield) and the Lord Mayor (Cr. Coles) visited some of the stricken areas, and dipped into their pockets personally. Later, the City Council, too, voted £5000. Friday, The 13th Friday, the Thirteenth, justified its evil name. A blistering northerly came early in the morning, presaging destruction, and forcing the mercury to a new record of 114 degrees. Racing fires killed at least ten in those terrible 12 hours. Four children were engulfed in the furnace at Colac. Panic drove them, uncontrollable, into the smoke-filled road when the fire raced down behind their home. They choked to death. In other parts fires were joining to make fronts of scores of miles. Kinglake was being menaced on two fronts, £60,000 worth of timber was going up in smoke in Ballarat district. Warburton was surrounded. Residents at Lorne, favoured resort, were being driven to the sea-front by a fire which destroyed at least 20 homes. Healewille. with flames visible from the town at one stage, was in a trough between two fires which burned four guest-houses, seven homes and left its surrounding beauty-spots wastes of bowed-over, blackened tree-fern fronds; with its famous Sanctuary, however, intact. Most of Omeo was destroyed this black day: Noojee. while 200 residents crouched in the river, was being reduced to a waste of buckled iron and smoking timber; Erica was once again saved by a change of wind. Beneath a pall of smoke, the Rubicon victims were buried at Alexandra. Friday night and the early hours of Saturday saw the streets of beleagured towns strewn with exhausted fire-fighters. Their flails beside them, ready for the next call, they lay where exhaustion overtook them-on footpaths, beside lamp-posts, in gutters, in cars, under trucks. Saturday's dawn brought clear skies and lower temperatures in many parts, and from the burnt-out areas came a great rush of tragic reports. The death-roll rushed past the fifty mark with incredible speed. Some had been trapped on roads, others at mills; some, after burying their treasures, had clung too long to the places they had made their homes for many years. Four men lost their lives because one went back for his dog. By Sunday, when the first of the saving rain came, nearly another score of names had been added to the list.Newspaper magazine, 48 pages (incl. covers). Fully digitised and searchable PDFPublished in aid of the Bush Fire Relief Fund by the Sun News-Pictorial in co-operation with its newsagents.bushfires, 1939 bushfires, black friday, warrandyte