
Showing 1657 items matching "water use"
-
 Flagstaff Hill Maritime Museum and Village
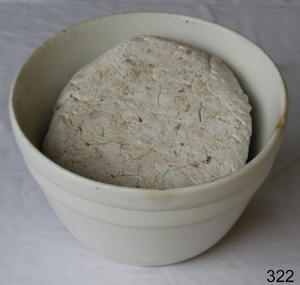
Domestic object - Bowl
... They can be mixed with each other to form other colours and can be used like water colours to paint onto your work. ...They can be mixed with each other to form other colours and can be used like water colours to paint onto your work. ...The Process of Making Pottery Decorating, Firing, Glazing, Making, Technical There is a rhythm and flow to clay. It can’t be done all at once! Even the making process! It can take weeks to get everything done, especially if you can only work on your pottery once a week! Even though we have three hour classes, it’s often just not enough time! Here is an overview of some of the processes so you have a bit more grasp on some of the technical stuff! Step One – Design There are SO many ideas out there for making stuff in clay! From delicate porcelain jewellery, through to heavy sculptural work and everything in between. Deciding your direction is sometimes not that easy – when you first start, try everything, you will naturally gravitate to the style that you enjoy! The options and variations are endless and can get a wee bit overwhelming too! Check in with me before you start to ensure your ideas will work, what order you might do things, how you could achieve the look you are seeking and any other technical data required! Step Two – Making Clay is thixotropic. This means that as you work with it, the clay first gets sloppier and wetter, before is begins to dry in the atmosphere. For most things, you simply can’t do all parts of the project at once. An example of work order might look like: Get last weeks work out from the shelves Prepare clay for today’s work – roll your clay, prepare balls for throwing, make the first stage of a pinch pot) Clean up last week’s work and put it on the shelf for bisque firing Check that you have any glazing to do – and do enough of it that you will have time to finish your main project Do the next step of your next project – there might be a further step that can’t be complete immediately, in that case, wrap your work well and put onto the shelves. Letting your work rest for a while can really help keep your work clean and professional looking. Many things require bagging under plastic to keep it ready for work the next week – put your name on the outside of the bag so you can find your work easily. We have stickers and markers. Consider how you want to decorate your work – coloured slip can be applied at a fairly wet stage (remembering that it will make your work even wetter!). Trying to apply slip to dry clay won’t work! If you want to do sgraffito – you will need to keep the work leather hard (a state of dryness where you can still work the clay with a little effort and a little water and care). Step Three – Drying Most of the time your work can go into the rack uncovered to let it dry out for the following week. If you want to continue forming or shaping you will need to double bag your work – put your work on a suitable sized bat and put the bat in a bag so the base of the bag is under the bat, then put another bag over the top of the work and tuck the top of the bag under the bat. If you want to trim (or turn) your thrown work the following week, it should also be double bagged. If your work is large, delicate, or of uneven thicknesses, you should lightly cover your work for drying. When considering the drying process, bare in mind the weather, humidity and wind! The hotter and dryer, the faster things dry and work can dry unevenly in the shelves – this can lead to cracking – another time to lightly cover your work for drying. Step Four – Trimming and Cleaning Up Your work is dry! It is called greenware now and it is at it’s most fragile! Handle everything with two hands. I often refer to soft hands – keep everything gentle and with your fingers spread as much as possible. Try to not pick up things like plates too much, and always with both hands! Before your work can be bisque fired it should be “cleaned up”. You work won’t go into the kiln if it has sharp edges – when glazed, sharp edges turn into razor blades! Use a piece of fly wire to rub the work all over – this will scratch a little so be light handed. Use a knife or metal kidney to scrape any areas that require a bit more dynamic treatment than the fly wire offers! Finally, a very light wipe over with a slightly damp sponge can help soften and soothe all of your edges and dags! Trimming thrown work: If you are planning to trim (or turn) your thrown work (and you should be), make sure you bag it well – your work should be leather hard to almost dry for easiest trimming. Use this step to finish the work completely – use a metal kidney to polish the surface, or a slightly damp sponge to give a freshly thrown look. Wipe the sponge around the rim after trimming, and check the inside of the pot for dags! Trimming slip cast work: Usually I will trim the rims of your work on the wheel the following day to make that stage easier, however you will still need to check your work for lumps and bumps. Last but not least – check that your name is still clearly on the bottom of your work. Step Five – Bisque Firing When the work is completely dry it can go into the bisque kiln. The bisque kiln is fired to 1000°C. This process burns off the water in the clay as well as some of the chemically bound water. The structure of the clay is not altered that much at this temperature. Inside the bisque kiln, the work is stacked a little, small bowl inside a larger bowl and onto a heavy plate. Smaller items like decorations or drink coasters might get stacked several high. Consideration is paid to the weight of the stack and shape of the work. A bisque kiln can fire about one and a half times the amount of work that the glaze kiln can fire. The firing takes about 10 hours to complete the cycle and about two days to cool down. Once it has been emptied the work is placed in the glaze room ready for you to decorate! Step Six – Glazing Decorating your work with colour can be a lot of fun – and time consuming! There are three main options for surface treatment at this stage: Oxide Washes Underglazes Glazes Washes and underglazes do not “glaze” the work – It will still need a layer of glaze to fully seal the clay (washes don’t need glaze on surfaces not designed for food or liquid as they can gloss up a little on their own). Underglazes are stable colourants that turn out pretty much how they look in the jar. They can be mixed with each other to form other colours and can be used like water colours to paint onto your work. Mostly they should have a clear glaze on top to seal them. Oxides are a different species – the pink oxide (cobalt) wash turns out bright blue for instance. They don’t always need a glaze on top, and some glazes can change the colour of the wash! The glazes need no other “glaze” on top! Be careful of unknown glaze interactions – you can put any combination of glaze in a bowl or on a plate, but only a single glaze on the outside of any vertical surface! Glazes are a chemical reaction under heat. We don’t know the exact chemicals in the Mayco glazes we use. I can guess by the way they interact with each other, however, on the whole, you need to test every idea you have, and not run the test on a vertical surface! Simply put, glaze is a layer of glass like substance that bonds with the clay underneath. Clay is made of silica, alumina and water. Glaze is made of mostly silica. Silica has a melting point of 1700°C and we fire to 1240°C. The silica requires a “flux” to help it melt at the lower temperature. Fluxes can be all sorts of chemicals – a common one is calcium – calcium has a melting point of 2500°C, however, together they both melt at a much lower temperature! Colourants are metal oxides like cobalt (blue), chrome (green through black), copper (green, blue, even red!), manganese (black, purple and pink) iron (red brown), etc. Different chemicals in the glaze can have dramatic effects. for example, barium carbonate (which we don’t use) turns manganese bright pink! Other elements can turn manganese dioxide brown, blue, purple and reddish brown. Manganese dioxide is a flux in and of itself as well. So, glazes that get their black and purple colours, often interact with other glazes and RUN! Our mirror black is a good example – it mixes really well with many glazes because it fluxes them – causes them to melt faster. It will also bring out many beautiful colours in the glazes because it’s black colouring most definitely comes from manganese dioxide! Glaze chemistry is a whole subject on it’s own! We use commercial Mayco glazes on purpose – for their huge range of colour possibilities, stability, cool interactions, artistic freedom with the ability to easily brush the glazes on and ease of use. We currently have almost 50 glazes on hand! A major project is to test the interactions of all glazes with each other. That is 2,500 test tiles!!!! I’m going to make the wall behind the wheels the feature wall of pretty colours! Step Seven – Glaze (Gloss or sometimes called “Glost”) Firing Most of the time this is the final stage of making your creation (but not always!) The glaze kiln goes to 1240°C. This is called cone 6, or midrange. It is the low end of stoneware temperatures. Stoneware clays and glazes are typically fired at cone 8 – 10, that is 1260 – 1290°C. The energy requirement to go from 1240°C to 1280°C is almost a 30% more! Our clay is formulated to vitrify (mature, turn “glass-like”) at 1240°, as are our glazes. A glaze kiln take around 12 hours to reach temperature and two to three days to cool down. Sometimes a third firing process is required – this is for decoration that is added to work after the glaze firing. For example – adding precious metals and lustres. this firing temperature is usually around 600 – 800°C depending upon the techniques being used. There are many students interested in gold and silver trims – we will be doing this third type of firing soon! After firing your work will be in the student finished work shelves. Remember to pay for it before you head out the door! There is a small extra charge for using porcelain clay (it’s more than twice the price of regular clay), and for any third firing process! Once your work has been fired it can not turn back into clay for millennia – so don’t fire it if you don’t like it! Put it in the bucket for recycling. https://firebirdstudios.com.au/the-process-of-making-pottery/ This bowl is an example of kitchenware used in the 19th century and still in use today.Bowl white ceramic plain that has two sets of edging around lip. Inside bowl has plaster designed to look like cooking mixture.flagstaff hill, warrnambool, shipwrecked-coast, flagstaff-hill, flagstaff-hill-maritime-museum, maritime-museum, shipwreck-coast, flagstaff-hill-maritime-village, kitchen equipment, ceramic -
 Flagstaff Hill Maritime Museum and Village
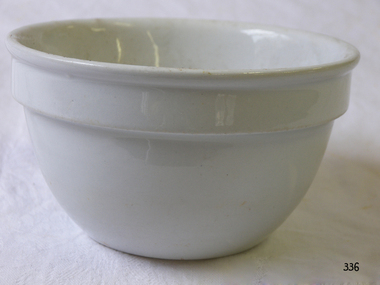
Domestic object - Bowl, J & G Meakin, Late 19th or early 20th Century
... They can be mixed with each other to form other colours and can be used like water colours to paint onto your work. ...They can be mixed with each other to form other colours and can be used like water colours to paint onto your work. ...The Process of Making Pottery Decorating, Firing, Glazing, Making, Technical There is a rhythm and flow to clay. It can’t be done all at once! Even the making process! It can take weeks to get everything done, especially if you can only work on your pottery once a week! Even though we have three hour classes, it’s often just not enough time! Here is an overview of some of the processes so you have a bit more grasp on some of the technical stuff! Step One – Design There are SO many ideas out there for making stuff in clay! From delicate porcelain jewellery, through to heavy sculptural work and everything in between. Deciding your direction is sometimes not that easy – when you first start, try everything, you will naturally gravitate to the style that you enjoy! The options and variations are endless and can get a wee bit overwhelming too! Check in with me before you start to ensure your ideas will work, what order you might do things, how you could achieve the look you are seeking and any other technical data required! Step Two – Making Clay is thixotropic. This means that as you work with it, the clay first gets sloppier and wetter, before is begins to dry in the atmosphere. For most things, you simply can’t do all parts of the project at once. An example of work order might look like: Get last weeks work out from the shelves Prepare clay for today’s work – roll your clay, prepare balls for throwing, make the first stage of a pinch pot) Clean up last week’s work and put it on the shelf for bisque firing Check that you have any glazing to do – and do enough of it that you will have time to finish your main project Do the next step of your next project – there might be a further step that can’t be complete immediately, in that case, wrap your work well and put onto the shelves. Letting your work rest for a while can really help keep your work clean and professional looking. Many things require bagging under plastic to keep it ready for work the next week – put your name on the outside of the bag so you can find your work easily. We have stickers and markers. Consider how you want to decorate your work – coloured slip can be applied at a fairly wet stage (remembering that it will make your work even wetter!). Trying to apply slip to dry clay won’t work! If you want to do sgraffito – you will need to keep the work leather hard (a state of dryness where you can still work the clay with a little effort and a little water and care). Step Three – Drying Most of the time your work can go into the rack uncovered to let it dry out for the following week. If you want to continue forming or shaping you will need to double bag your work – put your work on a suitable sized bat and put the bat in a bag so the base of the bag is under the bat, then put another bag over the top of the work and tuck the top of the bag under the bat. If you want to trim (or turn) your thrown work the following week, it should also be double bagged. If your work is large, delicate, or of uneven thicknesses, you should lightly cover your work for drying. When considering the drying process, bare in mind the weather, humidity and wind! The hotter and dryer, the faster things dry and work can dry unevenly in the shelves – this can lead to cracking – another time to lightly cover your work for drying. Step Four – Trimming and Cleaning Up Your work is dry! It is called greenware now and it is at it’s most fragile! Handle everything with two hands. I often refer to soft hands – keep everything gentle and with your fingers spread as much as possible. Try to not pick up things like plates too much, and always with both hands! Before your work can be bisque fired it should be “cleaned up”. You work won’t go into the kiln if it has sharp edges – when glazed, sharp edges turn into razor blades! Use a piece of fly wire to rub the work all over – this will scratch a little so be light handed. Use a knife or metal kidney to scrape any areas that require a bit more dynamic treatment than the fly wire offers! Finally, a very light wipe over with a slightly damp sponge can help soften and soothe all of your edges and dags! Trimming thrown work: If you are planning to trim (or turn) your thrown work (and you should be), make sure you bag it well – your work should be leather hard to almost dry for easiest trimming. Use this step to finish the work completely – use a metal kidney to polish the surface, or a slightly damp sponge to give a freshly thrown look. Wipe the sponge around the rim after trimming, and check the inside of the pot for dags! Trimming slip cast work: Usually I will trim the rims of your work on the wheel the following day to make that stage easier, however you will still need to check your work for lumps and bumps. Last but not least – check that your name is still clearly on the bottom of your work. Step Five – Bisque Firing When the work is completely dry it can go into the bisque kiln. The bisque kiln is fired to 1000°C. This process burns off the water in the clay as well as some of the chemically bound water. The structure of the clay is not altered that much at this temperature. Inside the bisque kiln, the work is stacked a little, small bowl inside a larger bowl and onto a heavy plate. Smaller items like decorations or drink coasters might get stacked several high. Consideration is paid to the weight of the stack and shape of the work. A bisque kiln can fire about one and a half times the amount of work that the glaze kiln can fire. The firing takes about 10 hours to complete the cycle and about two days to cool down. Once it has been emptied the work is placed in the glaze room ready for you to decorate! Step Six – Glazing Decorating your work with colour can be a lot of fun – and time consuming! There are three main options for surface treatment at this stage: Oxide Washes Underglazes Glazes Washes and underglazes do not “glaze” the work – It will still need a layer of glaze to fully seal the clay (washes don’t need glaze on surfaces not designed for food or liquid as they can gloss up a little on their own). Underglazes are stable colourants that turn out pretty much how they look in the jar. They can be mixed with each other to form other colours and can be used like water colours to paint onto your work. Mostly they should have a clear glaze on top to seal them. Oxides are a different species – the pink oxide (cobalt) wash turns out bright blue for instance. They don’t always need a glaze on top, and some glazes can change the colour of the wash! The glazes need no other “glaze” on top! Be careful of unknown glaze interactions – you can put any combination of glaze in a bowl or on a plate, but only a single glaze on the outside of any vertical surface! Glazes are a chemical reaction under heat. We don’t know the exact chemicals in the Mayco glazes we use. I can guess by the way they interact with each other, however, on the whole, you need to test every idea you have, and not run the test on a vertical surface! Simply put, glaze is a layer of glass like substance that bonds with the clay underneath. Clay is made of silica, alumina and water. Glaze is made of mostly silica. Silica has a melting point of 1700°C and we fire to 1240°C. The silica requires a “flux” to help it melt at the lower temperature. Fluxes can be all sorts of chemicals – a common one is calcium – calcium has a melting point of 2500°C, however, together they both melt at a much lower temperature! Colourants are metal oxides like cobalt (blue), chrome (green through black), copper (green, blue, even red!), manganese (black, purple and pink) iron (red brown), etc. Different chemicals in the glaze can have dramatic effects. for example, barium carbonate (which we don’t use) turns manganese bright pink! Other elements can turn manganese dioxide brown, blue, purple and reddish brown. Manganese dioxide is a flux in and of itself as well. So, glazes that get their black and purple colours, often interact with other glazes and RUN! Our mirror black is a good example – it mixes really well with many glazes because it fluxes them – causes them to melt faster. It will also bring out many beautiful colours in the glazes because it’s black colouring most definitely comes from manganese dioxide! Glaze chemistry is a whole subject on it’s own! We use commercial Mayco glazes on purpose – for their huge range of colour possibilities, stability, cool interactions, artistic freedom with the ability to easily brush the glazes on and ease of use. We currently have almost 50 glazes on hand! A major project is to test the interactions of all glazes with each other. That is 2,500 test tiles!!!! I’m going to make the wall behind the wheels the feature wall of pretty colours! Step Seven – Glaze (Gloss or sometimes called “Glost”) Firing Most of the time this is the final stage of making your creation (but not always!) The glaze kiln goes to 1240°C. This is called cone 6, or midrange. It is the low end of stoneware temperatures. Stoneware clays and glazes are typically fired at cone 8 – 10, that is 1260 – 1290°C. The energy requirement to go from 1240°C to 1280°C is almost a 30% more! Our clay is formulated to vitrify (mature, turn “glass-like”) at 1240°, as are our glazes. A glaze kiln take around 12 hours to reach temperature and two to three days to cool down. Sometimes a third firing process is required – this is for decoration that is added to work after the glaze firing. For example – adding precious metals and lustres. this firing temperature is usually around 600 – 800°C depending upon the techniques being used. There are many students interested in gold and silver trims – we will be doing this third type of firing soon! After firing your work will be in the student finished work shelves. Remember to pay for it before you head out the door! There is a small extra charge for using porcelain clay (it’s more than twice the price of regular clay), and for any third firing process! Once your work has been fired it can not turn back into clay for millennia – so don’t fire it if you don’t like it! Put it in the bucket for recycling. https://firebirdstudios.com.au/the-process-of-making-pottery/This bowl was made by renowned pottery company J & G Meakin of England. The firm was established in the mid-1800's. The bowl is an example of kitchenware used in the 19th century and still in use today.Bowl; white ceramic, round and tapering inwards towards base. Made by J and G Meakin England.On base, 'Ironstone China Reg SOL 391413' with symbolflagstaff hill, flagstaff hill maritime museum and village, warrnambool, maritime museum, maritime village, great ocean road, shipwreck coast, mixing bowl, food preparation, j & g meakin, pottery, stoke-on-trent, kitchen equipment, ceramic -
 Flagstaff Hill Maritime Museum and Village
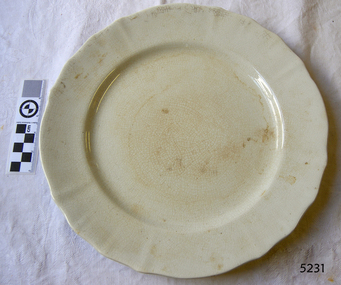
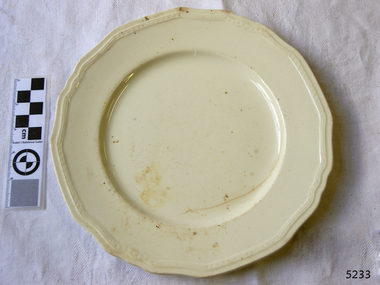
Domestic object - Plate
... They can be mixed with each other to form other colours and can be used like water colours to paint onto your work. ...They can be mixed with each other to form other colours and can be used like water colours to paint onto your work. ...The Process of Making Pottery Decorating, Firing, Glazing, Making, Technical There is a rhythm and flow to clay. It can’t be done all at once! Even the making process! It can take weeks to get everything done, especially if you can only work on your pottery once a week! Even though we have three hour classes, it’s often just not enough time! Here is an overview of some of the processes so you have a bit more grasp on some of the technical stuff! Step One – Design There are SO many ideas out there for making stuff in clay! From delicate porcelain jewellery, through to heavy sculptural work and everything in between. Deciding your direction is sometimes not that easy – when you first start, try everything, you will naturally gravitate to the style that you enjoy! The options and variations are endless and can get a wee bit overwhelming too! Check in with me before you start to ensure your ideas will work, what order you might do things, how you could achieve the look you are seeking and any other technical data required! Step Two – Making Clay is thixotropic. This means that as you work with it, the clay first gets sloppier and wetter, before is begins to dry in the atmosphere. For most things, you simply can’t do all parts of the project at once. An example of work order might look like: Get last weeks work out from the shelves Prepare clay for today’s work – roll your clay, prepare balls for throwing, make the first stage of a pinch pot) Clean up last week’s work and put it on the shelf for bisque firing Check that you have any glazing to do – and do enough of it that you will have time to finish your main project Do the next step of your next project – there might be a further step that can’t be complete immediately, in that case, wrap your work well and put onto the shelves. Letting your work rest for a while can really help keep your work clean and professional looking. Many things require bagging under plastic to keep it ready for work the next week – put your name on the outside of the bag so you can find your work easily. We have stickers and markers. Consider how you want to decorate your work – coloured slip can be applied at a fairly wet stage (remembering that it will make your work even wetter!). Trying to apply slip to dry clay won’t work! If you want to do sgraffito – you will need to keep the work leather hard (a state of dryness where you can still work the clay with a little effort and a little water and care). Step Three – Drying Most of the time your work can go into the rack uncovered to let it dry out for the following week. If you want to continue forming or shaping you will need to double bag your work – put your work on a suitable sized bat and put the bat in a bag so the base of the bag is under the bat, then put another bag over the top of the work and tuck the top of the bag under the bat. If you want to trim (or turn) your thrown work the following week, it should also be double bagged. If your work is large, delicate, or of uneven thicknesses, you should lightly cover your work for drying. When considering the drying process, bare in mind the weather, humidity and wind! The hotter and dryer, the faster things dry and work can dry unevenly in the shelves – this can lead to cracking – another time to lightly cover your work for drying. Step Four – Trimming and Cleaning Up Your work is dry! It is called greenware now and it is at it’s most fragile! Handle everything with two hands. I often refer to soft hands – keep everything gentle and with your fingers spread as much as possible. Try to not pick up things like plates too much, and always with both hands! Before your work can be bisque fired it should be “cleaned up”. You work won’t go into the kiln if it has sharp edges – when glazed, sharp edges turn into razor blades! Use a piece of fly wire to rub the work all over – this will scratch a little so be light handed. Use a knife or metal kidney to scrape any areas that require a bit more dynamic treatment than the fly wire offers! Finally, a very light wipe over with a slightly damp sponge can help soften and soothe all of your edges and dags! Trimming thrown work: If you are planning to trim (or turn) your thrown work (and you should be), make sure you bag it well – your work should be leather hard to almost dry for easiest trimming. Use this step to finish the work completely – use a metal kidney to polish the surface, or a slightly damp sponge to give a freshly thrown look. Wipe the sponge around the rim after trimming, and check the inside of the pot for dags! Trimming slip cast work: Usually I will trim the rims of your work on the wheel the following day to make that stage easier, however you will still need to check your work for lumps and bumps. Last but not least – check that your name is still clearly on the bottom of your work. Step Five – Bisque Firing When the work is completely dry it can go into the bisque kiln. The bisque kiln is fired to 1000°C. This process burns off the water in the clay as well as some of the chemically bound water. The structure of the clay is not altered that much at this temperature. Inside the bisque kiln, the work is stacked a little, small bowl inside a larger bowl and onto a heavy plate. Smaller items like decorations or drink coasters might get stacked several high. Consideration is paid to the weight of the stack and shape of the work. A bisque kiln can fire about one and a half times the amount of work that the glaze kiln can fire. The firing takes about 10 hours to complete the cycle and about two days to cool down. Once it has been emptied the work is placed in the glaze room ready for you to decorate! Step Six – Glazing Decorating your work with colour can be a lot of fun – and time consuming! There are three main options for surface treatment at this stage: Oxide Washes Underglazes Glazes Washes and underglazes do not “glaze” the work – It will still need a layer of glaze to fully seal the clay (washes don’t need glaze on surfaces not designed for food or liquid as they can gloss up a little on their own). Underglazes are stable colourants that turn out pretty much how they look in the jar. They can be mixed with each other to form other colours and can be used like water colours to paint onto your work. Mostly they should have a clear glaze on top to seal them. Oxides are a different species – the pink oxide (cobalt) wash turns out bright blue for instance. They don’t always need a glaze on top, and some glazes can change the colour of the wash! The glazes need no other “glaze” on top! Be careful of unknown glaze interactions – you can put any combination of glaze in a bowl or on a plate, but only a single glaze on the outside of any vertical surface! Glazes are a chemical reaction under heat. We don’t know the exact chemicals in the Mayco glazes we use. I can guess by the way they interact with each other, however, on the whole, you need to test every idea you have, and not run the test on a vertical surface! Simply put, glaze is a layer of glass like substance that bonds with the clay underneath. Clay is made of silica, alumina and water. Glaze is made of mostly silica. Silica has a melting point of 1700°C and we fire to 1240°C. The silica requires a “flux” to help it melt at the lower temperature. Fluxes can be all sorts of chemicals – a common one is calcium – calcium has a melting point of 2500°C, however, together they both melt at a much lower temperature! Colourants are metal oxides like cobalt (blue), chrome (green through black), copper (green, blue, even red!), manganese (black, purple and pink) iron (red brown), etc. Different chemicals in the glaze can have dramatic effects. for example, barium carbonate (which we don’t use) turns manganese bright pink! Other elements can turn manganese dioxide brown, blue, purple and reddish brown. Manganese dioxide is a flux in and of itself as well. So, glazes that get their black and purple colours, often interact with other glazes and RUN! Our mirror black is a good example – it mixes really well with many glazes because it fluxes them – causes them to melt faster. It will also bring out many beautiful colours in the glazes because it’s black colouring most definitely comes from manganese dioxide! Glaze chemistry is a whole subject on it’s own! We use commercial Mayco glazes on purpose – for their huge range of colour possibilities, stability, cool interactions, artistic freedom with the ability to easily brush the glazes on and ease of use. We currently have almost 50 glazes on hand! A major project is to test the interactions of all glazes with each other. That is 2,500 test tiles!!!! I’m going to make the wall behind the wheels the feature wall of pretty colours! Step Seven – Glaze (Gloss or sometimes called “Glost”) Firing Most of the time this is the final stage of making your creation (but not always!) The glaze kiln goes to 1240°C. This is called cone 6, or midrange. It is the low end of stoneware temperatures. Stoneware clays and glazes are typically fired at cone 8 – 10, that is 1260 – 1290°C. The energy requirement to go from 1240°C to 1280°C is almost a 30% more! Our clay is formulated to vitrify (mature, turn “glass-like”) at 1240°, as are our glazes. A glaze kiln take around 12 hours to reach temperature and two to three days to cool down. Sometimes a third firing process is required – this is for decoration that is added to work after the glaze firing. For example – adding precious metals and lustres. this firing temperature is usually around 600 – 800°C depending upon the techniques being used. There are many students interested in gold and silver trims – we will be doing this third type of firing soon! After firing your work will be in the student finished work shelves. Remember to pay for it before you head out the door! There is a small extra charge for using porcelain clay (it’s more than twice the price of regular clay), and for any third firing process! Once your work has been fired it can not turn back into clay for millennia – so don’t fire it if you don’t like it! Put it in the bucket for recycling. https://firebirdstudios.com.au/the-process-of-making-pottery/Ceramics have evolved over thousands of years.White earthenware dinner plate. Crazing evident all over.Backstamped ‘Made in England S LTD’flagstaff hill, warrnambool, shipwrecked-coast, flagstaff-hill, flagstaff-hill-maritime-museum, maritime-museum, shipwreck-coast, flagstaff-hill-maritime-village, ceramics, tableware -
 Flagstaff Hill Maritime Museum and Village
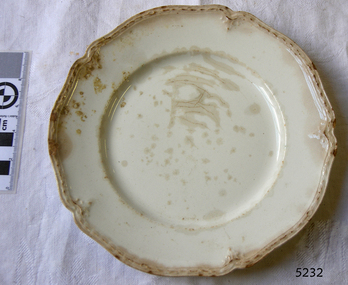
Domestic object - Plate, Johnson Bros
... They can be mixed with each other to form other colours and can be used like water colours to paint onto your work. ...They can be mixed with each other to form other colours and can be used like water colours to paint onto your work. ...The Process of Making Pottery Decorating, Firing, Glazing, Making, Technical There is a rhythm and flow to clay. It can’t be done all at once! Even the making process! It can take weeks to get everything done, especially if you can only work on your pottery once a week! Even though we have three hour classes, it’s often just not enough time! Here is an overview of some of the processes so you have a bit more grasp on some of the technical stuff! Step One – Design There are SO many ideas out there for making stuff in clay! From delicate porcelain jewellery, through to heavy sculptural work and everything in between. Deciding your direction is sometimes not that easy – when you first start, try everything, you will naturally gravitate to the style that you enjoy! The options and variations are endless and can get a wee bit overwhelming too! Check in with me before you start to ensure your ideas will work, what order you might do things, how you could achieve the look you are seeking and any other technical data required! Step Two – Making Clay is thixotropic. This means that as you work with it, the clay first gets sloppier and wetter, before is begins to dry in the atmosphere. For most things, you simply can’t do all parts of the project at once. An example of work order might look like: Get last weeks work out from the shelves Prepare clay for today’s work – roll your clay, prepare balls for throwing, make the first stage of a pinch pot) Clean up last week’s work and put it on the shelf for bisque firing Check that you have any glazing to do – and do enough of it that you will have time to finish your main project Do the next step of your next project – there might be a further step that can’t be complete immediately, in that case, wrap your work well and put onto the shelves. Letting your work rest for a while can really help keep your work clean and professional looking. Many things require bagging under plastic to keep it ready for work the next week – put your name on the outside of the bag so you can find your work easily. We have stickers and markers. Consider how you want to decorate your work – coloured slip can be applied at a fairly wet stage (remembering that it will make your work even wetter!). Trying to apply slip to dry clay won’t work! If you want to do sgraffito – you will need to keep the work leather hard (a state of dryness where you can still work the clay with a little effort and a little water and care). Step Three – Drying Most of the time your work can go into the rack uncovered to let it dry out for the following week. If you want to continue forming or shaping you will need to double bag your work – put your work on a suitable sized bat and put the bat in a bag so the base of the bag is under the bat, then put another bag over the top of the work and tuck the top of the bag under the bat. If you want to trim (or turn) your thrown work the following week, it should also be double bagged. If your work is large, delicate, or of uneven thicknesses, you should lightly cover your work for drying. When considering the drying process, bare in mind the weather, humidity and wind! The hotter and dryer, the faster things dry and work can dry unevenly in the shelves – this can lead to cracking – another time to lightly cover your work for drying. Step Four – Trimming and Cleaning Up Your work is dry! It is called greenware now and it is at it’s most fragile! Handle everything with two hands. I often refer to soft hands – keep everything gentle and with your fingers spread as much as possible. Try to not pick up things like plates too much, and always with both hands! Before your work can be bisque fired it should be “cleaned up”. You work won’t go into the kiln if it has sharp edges – when glazed, sharp edges turn into razor blades! Use a piece of fly wire to rub the work all over – this will scratch a little so be light handed. Use a knife or metal kidney to scrape any areas that require a bit more dynamic treatment than the fly wire offers! Finally, a very light wipe over with a slightly damp sponge can help soften and soothe all of your edges and dags! Trimming thrown work: If you are planning to trim (or turn) your thrown work (and you should be), make sure you bag it well – your work should be leather hard to almost dry for easiest trimming. Use this step to finish the work completely – use a metal kidney to polish the surface, or a slightly damp sponge to give a freshly thrown look. Wipe the sponge around the rim after trimming, and check the inside of the pot for dags! Trimming slip cast work: Usually I will trim the rims of your work on the wheel the following day to make that stage easier, however you will still need to check your work for lumps and bumps. Last but not least – check that your name is still clearly on the bottom of your work. Step Five – Bisque Firing When the work is completely dry it can go into the bisque kiln. The bisque kiln is fired to 1000°C. This process burns off the water in the clay as well as some of the chemically bound water. The structure of the clay is not altered that much at this temperature. Inside the bisque kiln, the work is stacked a little, small bowl inside a larger bowl and onto a heavy plate. Smaller items like decorations or drink coasters might get stacked several high. Consideration is paid to the weight of the stack and shape of the work. A bisque kiln can fire about one and a half times the amount of work that the glaze kiln can fire. The firing takes about 10 hours to complete the cycle and about two days to cool down. Once it has been emptied the work is placed in the glaze room ready for you to decorate! Step Six – Glazing Decorating your work with colour can be a lot of fun – and time consuming! There are three main options for surface treatment at this stage: Oxide Washes Underglazes Glazes Washes and underglazes do not “glaze” the work – It will still need a layer of glaze to fully seal the clay (washes don’t need glaze on surfaces not designed for food or liquid as they can gloss up a little on their own). Underglazes are stable colourants that turn out pretty much how they look in the jar. They can be mixed with each other to form other colours and can be used like water colours to paint onto your work. Mostly they should have a clear glaze on top to seal them. Oxides are a different species – the pink oxide (cobalt) wash turns out bright blue for instance. They don’t always need a glaze on top, and some glazes can change the colour of the wash! The glazes need no other “glaze” on top! Be careful of unknown glaze interactions – you can put any combination of glaze in a bowl or on a plate, but only a single glaze on the outside of any vertical surface! Glazes are a chemical reaction under heat. We don’t know the exact chemicals in the Mayco glazes we use. I can guess by the way they interact with each other, however, on the whole, you need to test every idea you have, and not run the test on a vertical surface! Simply put, glaze is a layer of glass like substance that bonds with the clay underneath. Clay is made of silica, alumina and water. Glaze is made of mostly silica. Silica has a melting point of 1700°C and we fire to 1240°C. The silica requires a “flux” to help it melt at the lower temperature. Fluxes can be all sorts of chemicals – a common one is calcium – calcium has a melting point of 2500°C, however, together they both melt at a much lower temperature! Colourants are metal oxides like cobalt (blue), chrome (green through black), copper (green, blue, even red!), manganese (black, purple and pink) iron (red brown), etc. Different chemicals in the glaze can have dramatic effects. for example, barium carbonate (which we don’t use) turns manganese bright pink! Other elements can turn manganese dioxide brown, blue, purple and reddish brown. Manganese dioxide is a flux in and of itself as well. So, glazes that get their black and purple colours, often interact with other glazes and RUN! Our mirror black is a good example – it mixes really well with many glazes because it fluxes them – causes them to melt faster. It will also bring out many beautiful colours in the glazes because it’s black colouring most definitely comes from manganese dioxide! Glaze chemistry is a whole subject on it’s own! We use commercial Mayco glazes on purpose – for their huge range of colour possibilities, stability, cool interactions, artistic freedom with the ability to easily brush the glazes on and ease of use. We currently have almost 50 glazes on hand! A major project is to test the interactions of all glazes with each other. That is 2,500 test tiles!!!! I’m going to make the wall behind the wheels the feature wall of pretty colours! Step Seven – Glaze (Gloss or sometimes called “Glost”) Firing Most of the time this is the final stage of making your creation (but not always!) The glaze kiln goes to 1240°C. This is called cone 6, or midrange. It is the low end of stoneware temperatures. Stoneware clays and glazes are typically fired at cone 8 – 10, that is 1260 – 1290°C. The energy requirement to go from 1240°C to 1280°C is almost a 30% more! Our clay is formulated to vitrify (mature, turn “glass-like”) at 1240°, as are our glazes. A glaze kiln take around 12 hours to reach temperature and two to three days to cool down. Sometimes a third firing process is required – this is for decoration that is added to work after the glaze firing. For example – adding precious metals and lustres. this firing temperature is usually around 600 – 800°C depending upon the techniques being used. There are many students interested in gold and silver trims – we will be doing this third type of firing soon! After firing your work will be in the student finished work shelves. Remember to pay for it before you head out the door! There is a small extra charge for using porcelain clay (it’s more than twice the price of regular clay), and for any third firing process! Once your work has been fired it can not turn back into clay for millennia – so don’t fire it if you don’t like it! Put it in the bucket for recycling. https://firebirdstudios.com.au/the-process-of-making-pottery/Ceramics have evolved over thousands of years.A white earthenware side plate with a gadroon edge. Has water marks and chips on front.‘Johnson Bros England Reg No 15587’flagstaff hill, warrnambool, shipwrecked-coast, flagstaff-hill, flagstaff-hill-maritime-museum, maritime-museum, shipwreck-coast, flagstaff-hill-maritime-village, johnson bros, ceramics, tableware -
 Flagstaff Hill Maritime Museum and Village
Domestic object - Plate, Alfred Meakin
... They can be mixed with each other to form other colours and can be used like water colours to paint onto your work. ...They can be mixed with each other to form other colours and can be used like water colours to paint onto your work. ...The Process of Making Pottery Decorating, Firing, Glazing, Making, Technical There is a rhythm and flow to clay. It can’t be done all at once! Even the making process! It can take weeks to get everything done, especially if you can only work on your pottery once a week! Even though we have three hour classes, it’s often just not enough time! Here is an overview of some of the processes so you have a bit more grasp on some of the technical stuff! Step One – Design There are SO many ideas out there for making stuff in clay! From delicate porcelain jewellery, through to heavy sculptural work and everything in between. Deciding your direction is sometimes not that easy – when you first start, try everything, you will naturally gravitate to the style that you enjoy! The options and variations are endless and can get a wee bit overwhelming too! Check in with me before you start to ensure your ideas will work, what order you might do things, how you could achieve the look you are seeking and any other technical data required! Step Two – Making Clay is thixotropic. This means that as you work with it, the clay first gets sloppier and wetter, before is begins to dry in the atmosphere. For most things, you simply can’t do all parts of the project at once. An example of work order might look like: Get last weeks work out from the shelves Prepare clay for today’s work – roll your clay, prepare balls for throwing, make the first stage of a pinch pot) Clean up last week’s work and put it on the shelf for bisque firing Check that you have any glazing to do – and do enough of it that you will have time to finish your main project Do the next step of your next project – there might be a further step that can’t be complete immediately, in that case, wrap your work well and put onto the shelves. Letting your work rest for a while can really help keep your work clean and professional looking. Many things require bagging under plastic to keep it ready for work the next week – put your name on the outside of the bag so you can find your work easily. We have stickers and markers. Consider how you want to decorate your work – coloured slip can be applied at a fairly wet stage (remembering that it will make your work even wetter!). Trying to apply slip to dry clay won’t work! If you want to do sgraffito – you will need to keep the work leather hard (a state of dryness where you can still work the clay with a little effort and a little water and care). Step Three – Drying Most of the time your work can go into the rack uncovered to let it dry out for the following week. If you want to continue forming or shaping you will need to double bag your work – put your work on a suitable sized bat and put the bat in a bag so the base of the bag is under the bat, then put another bag over the top of the work and tuck the top of the bag under the bat. If you want to trim (or turn) your thrown work the following week, it should also be double bagged. If your work is large, delicate, or of uneven thicknesses, you should lightly cover your work for drying. When considering the drying process, bare in mind the weather, humidity and wind! The hotter and dryer, the faster things dry and work can dry unevenly in the shelves – this can lead to cracking – another time to lightly cover your work for drying. Step Four – Trimming and Cleaning Up Your work is dry! It is called greenware now and it is at it’s most fragile! Handle everything with two hands. I often refer to soft hands – keep everything gentle and with your fingers spread as much as possible. Try to not pick up things like plates too much, and always with both hands! Before your work can be bisque fired it should be “cleaned up”. You work won’t go into the kiln if it has sharp edges – when glazed, sharp edges turn into razor blades! Use a piece of fly wire to rub the work all over – this will scratch a little so be light handed. Use a knife or metal kidney to scrape any areas that require a bit more dynamic treatment than the fly wire offers! Finally, a very light wipe over with a slightly damp sponge can help soften and soothe all of your edges and dags! Trimming thrown work: If you are planning to trim (or turn) your thrown work (and you should be), make sure you bag it well – your work should be leather hard to almost dry for easiest trimming. Use this step to finish the work completely – use a metal kidney to polish the surface, or a slightly damp sponge to give a freshly thrown look. Wipe the sponge around the rim after trimming, and check the inside of the pot for dags! Trimming slip cast work: Usually I will trim the rims of your work on the wheel the following day to make that stage easier, however you will still need to check your work for lumps and bumps. Last but not least – check that your name is still clearly on the bottom of your work. Step Five – Bisque Firing When the work is completely dry it can go into the bisque kiln. The bisque kiln is fired to 1000°C. This process burns off the water in the clay as well as some of the chemically bound water. The structure of the clay is not altered that much at this temperature. Inside the bisque kiln, the work is stacked a little, small bowl inside a larger bowl and onto a heavy plate. Smaller items like decorations or drink coasters might get stacked several high. Consideration is paid to the weight of the stack and shape of the work. A bisque kiln can fire about one and a half times the amount of work that the glaze kiln can fire. The firing takes about 10 hours to complete the cycle and about two days to cool down. Once it has been emptied the work is placed in the glaze room ready for you to decorate! Step Six – Glazing Decorating your work with colour can be a lot of fun – and time consuming! There are three main options for surface treatment at this stage: Oxide Washes Underglazes Glazes Washes and underglazes do not “glaze” the work – It will still need a layer of glaze to fully seal the clay (washes don’t need glaze on surfaces not designed for food or liquid as they can gloss up a little on their own). Underglazes are stable colourants that turn out pretty much how they look in the jar. They can be mixed with each other to form other colours and can be used like water colours to paint onto your work. Mostly they should have a clear glaze on top to seal them. Oxides are a different species – the pink oxide (cobalt) wash turns out bright blue for instance. They don’t always need a glaze on top, and some glazes can change the colour of the wash! The glazes need no other “glaze” on top! Be careful of unknown glaze interactions – you can put any combination of glaze in a bowl or on a plate, but only a single glaze on the outside of any vertical surface! Glazes are a chemical reaction under heat. We don’t know the exact chemicals in the Mayco glazes we use. I can guess by the way they interact with each other, however, on the whole, you need to test every idea you have, and not run the test on a vertical surface! Simply put, glaze is a layer of glass like substance that bonds with the clay underneath. Clay is made of silica, alumina and water. Glaze is made of mostly silica. Silica has a melting point of 1700°C and we fire to 1240°C. The silica requires a “flux” to help it melt at the lower temperature. Fluxes can be all sorts of chemicals – a common one is calcium – calcium has a melting point of 2500°C, however, together they both melt at a much lower temperature! Colourants are metal oxides like cobalt (blue), chrome (green through black), copper (green, blue, even red!), manganese (black, purple and pink) iron (red brown), etc. Different chemicals in the glaze can have dramatic effects. for example, barium carbonate (which we don’t use) turns manganese bright pink! Other elements can turn manganese dioxide brown, blue, purple and reddish brown. Manganese dioxide is a flux in and of itself as well. So, glazes that get their black and purple colours, often interact with other glazes and RUN! Our mirror black is a good example – it mixes really well with many glazes because it fluxes them – causes them to melt faster. It will also bring out many beautiful colours in the glazes because it’s black colouring most definitely comes from manganese dioxide! Glaze chemistry is a whole subject on it’s own! We use commercial Mayco glazes on purpose – for their huge range of colour possibilities, stability, cool interactions, artistic freedom with the ability to easily brush the glazes on and ease of use. We currently have almost 50 glazes on hand! A major project is to test the interactions of all glazes with each other. That is 2,500 test tiles!!!! I’m going to make the wall behind the wheels the feature wall of pretty colours! Step Seven – Glaze (Gloss or sometimes called “Glost”) Firing Most of the time this is the final stage of making your creation (but not always!) The glaze kiln goes to 1240°C. This is called cone 6, or midrange. It is the low end of stoneware temperatures. Stoneware clays and glazes are typically fired at cone 8 – 10, that is 1260 – 1290°C. The energy requirement to go from 1240°C to 1280°C is almost a 30% more! Our clay is formulated to vitrify (mature, turn “glass-like”) at 1240°, as are our glazes. A glaze kiln take around 12 hours to reach temperature and two to three days to cool down. Sometimes a third firing process is required – this is for decoration that is added to work after the glaze firing. For example – adding precious metals and lustres. this firing temperature is usually around 600 – 800°C depending upon the techniques being used. There are many students interested in gold and silver trims – we will be doing this third type of firing soon! After firing your work will be in the student finished work shelves. Remember to pay for it before you head out the door! There is a small extra charge for using porcelain clay (it’s more than twice the price of regular clay), and for any third firing process! Once your work has been fired it can not turn back into clay for millennia – so don’t fire it if you don’t like it! Put it in the bucket for recycling. https://firebirdstudios.com.au/the-process-of-making-pottery/Ceramics have evolved over thousands of years.Earthenware dessert plate, cream colour. Made by Alfred Meakin, England. Backstamped ‘Alfred Meakin England’. flagstaff hill, warrnambool, shipwrecked-coast, flagstaff-hill, flagstaff-hill-maritime-museum, maritime-museum, shipwreck-coast, flagstaff-hill-maritime-village, alfred meakin, ceramics, earthenware, kitchenware -
 Mission to Seafarers Victoria
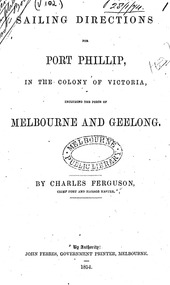
Booklet - Manual, Sailing directions for Port Phillip, in the colony of Victoria including the ports of Melbourne and Geelong, 1854
... The Harbour Master and a commiittee decided to use the water police hulk, Emily, left unsold in 1856, to create a floating church: the Bethel was open in July 1857 with Reverend Kerr Johnston as Chaplain. ...The Harbour Master and a commiittee decided to use the water police hulk, Emily, left unsold in 1856, to create a floating church: the Bethel was open in July 1857 with Reverend Kerr Johnston as Chaplain. ...Captain Charles Ferguson was born in Scotland in 1813. He was the Master of the "Rajah" from 1838 to 1850 on voyages from England to Australia and vice versa. He became the First Chief Harbour Master for the port of Melbourne in 1852 after being the first Harbour Master and Water Police Officer in Geelong for 12 months. On the 5th of April 1841, the Rajah sailed with James Donovan M.D. as Surgeon Superintendent, and the Rajah sailed from Woolwich with 180 female convicts. The Rajah arrived on the 19th of July in Hobart, with 179 females (one died during the voyage) and 10 children. Miss Kezia Elizabeth Hayter was the matron on board. On page 28 of the "Sailing directions for Port Phillip, in the colony of Victoria including the ports of Melbourne and Geelong", a mention is made of the Mariner's Hospital and Floating Church soon to be established. There were discussions to built the hospital in Williamstown but instead the Government decided to build it in Melbourne. The Harbour Master and a commiittee decided to use the water police hulk, Emily, left unsold in 1856, to create a floating church: the Bethel was open in July 1857 with Reverend Kerr Johnston as Chaplain. Latrobe wrote a letter to Captain Cole in 1869, a few months after learning his death : "To Captain George Ward Cole † [from a draft in another’s hand] Clapham House, Lewes, Sussex, January 28th, 1869. My dear Captain Cole, Last mail will have taken out the sad intelligence of the death of our excellent old friend, Captain Ferguson. This will have been a terrible blow to his children and to his friends in the colony, who may have held reason to expect his early return to his home, with a not unreasonable prospect of ultimate restoration to health and activity. In the course of last October I went up to town with one of my children, mainly with the purpose of finding my way to Pinner, where he and Mrs. Ferguson were staying with an intimate friend. I found him in excellent health and spirits, and enjoying the prospect of a speeding resumption of the service to which he had devoted his best days, and upon the furtherance of which his entire energy was still directed. A week or two later Captain and Mrs. Ferguson went to Dover for change of air, and being still under the impression received from the advisers by whom they had been guided during their residence at a hydropathic establishment at Matlock, felt encouraged to plan almost immediate return to the colony by the Jerusalem early in December. However, certain misgivings in the mind of a medical gentleman, then in England, under whose care Captain Ferguson had at one time placed himself in Williamtown, led them to consider it judicious before departure to take the advice of some surgeon of eminence in London. Accordingly they came up to town at the close of November. The first London practitioners they consulted shook their heads, and advised consultation with Sir Wm. Ferguson. The result was that amputation, without loss of time, was pronounced necessary. The rest is soon told. He received the painful intelligence with calmness and full resignation to God's will, and underwent the operation at King's College Hospital with exemplary firmness and Courage on the 28th of November. Perfect success seemingly attended it, and there seemed, humanly speaking, to be every prospect of a prompt cure and early convalescence; everything seemed in his favour. A few days later, however, all was clouded by symptoms of hospital fever (pyoe æm ia). This resisted all control, and finally carried him off on the 27th of December, just one month after the operation. He had lived a Christian life, and his death was the peaceful and resigned death of a Christian. It was a melancholy satisfaction to me to be able to join a few friends in following his remains to their resting place in one of the outlying London cemeteries on the last day of the year. You know Mrs Ferguson well, and will be prepared to hear me say that her whole conduct and demeanour throughout this period of suspense and bitter trial has been worthy of her high character and steadfast principle. Come what will, and happen what may, I have the fullest conviction that neither the widow nor the children will be forsaken, however doubtful and clouded the future may appear, in consequence of the irreparable loss which, they have sustained. And now, dear Captain Cole, it is possible that you may already have heard all this from other sources, but I have dictated it to you under strong impulse, for I feel assured that there is no member of the community in which you live who will more sincerely deplore the loss of Captain Ferguson on private grounds; at the same time that there is no one who, from long acquaintance with his official character and services, will be in a better position to estimate their real value or the loss which the colony has sustained. The circumstances in which Captain Ferguson's family are left not only demands the utmost display of sympathy and interest on the part of friends, but may call for decided and prompt action; therefore I cannot rest satisfied without discharging what I consider my duty, and seeking to strengthen your hands as far as I may in bringing the character of his long services before the existing colonial authorities. Of his private career previous to his entering the service of the Colonial Government in 1851 nothing need be said. Captain Ferguson was appointed as the Harbour Master at Geelong in April, 1851 – a few months before the separation of the colony from New South Wales. He there did excellent service in a variety of ways calculated to advance the interests of the port, and to introduce www.latrobesociety.org.au 27 order, where, from circumstances, but little order had hitherto prevailed. His was the first appointment of this class in that locality. The separation of the colony from New South Wales took place in the month of July following. Shortly after, the late Captain Bunbury resigned the Harbour Mastership of Port Phillip. Captain Ferguson was at once (February, 1852) appointed to succeed him, and from that time performed all duties of Chief Harbour Master of the colony. The previous year (May 1851) the first gold discoveries in New South Wales had taken place, and in the month of August those of our colony followed. At the time of Captain Ferguson’s taking charge of the Port of Melbourne their influence had begun to be fully felt, and in no department more seriously than in that of the Harbour Master. This is no place for statistical details, but they must bear me out in reminding you of a few facts connected with our late friend’s career. At the time of separation that department comprised only 30 individuals of all ranks, and when he took charge the number was much reduced. There were at that time, according to the returns, no fewer than 54 vessels, registering 26,785 tons, in Hobson’s Bay alone. The crews on arrival numbered 1,235 men. Of this number only 463 remained on board, 500 having deserted, and the rest having been discharged by arrangement or pure necessity. For the first six months after Captain Ferguson’s assumption of office as Harbour Master the duties of Police Magistrate and Chief of the Water Police were superadded, and how much labour they involved may be surmised from the fact that from 1st of April to the 31st July, 1852, four months only, no less than 236 marine cases were brought before the bench at Williamstown - sometimes as many as 30 in a day. A year later (March 1853) the returns show that the number of vessels in the harbour in Hobson’s Bay alone were 91, tonnage 43,754; and passing on to the still later returns of May, 1853, two years after Captain Ferguson’s assumption of office, we find from the records that the number of ships in port had increased to 129; tonnage, 63,292; crew on board on arrival, 2872, and at the date of report, 1628; the amount of desertions at that time having, however, proportionally diminished, in consequence of the abatement of the gold fever, caused by the non-success attendant upon the labours of thousands at the goldfields. The above numbers take no account of the large number of vessels and amount of tonnage lying at the wharves at Melbourne or elsewhere. From these figures alone it may be judged what must have been a struggle in which the Chief Harbour Master was engaged from the very outset to secure order, and answer the innumerable calls on every branch of his department, at the same time that there was for many months an almost complete impossibility of securing subordinate agency, such as boatmen, pilots, and police, at any price. But I may bear witness to the untiring diligence, energy, and self-devotion with which Captain Ferguson grappled with the difficulties of his position, and the seemingly insurmountable obstacles which stood in his way. Ashore and afloat he was always ready, showing the same directness of purpose, intelligence, and forgetfulness of self. He shunned no responsibility, and turned his hand from no work, whether within or beyond the ordinary scope of his duty, which the hard necessity of the times forced the Government to bring under his notice. Already in 1852, when the overflowing of our gaol and stockade rendered the adoption of other methods of restraint absolutely necessary, and addition to the existing buildings could not be thought of, it was Captain Ferguson who first suggested the employment of hulks; and it was with his personal assistance and supervision, and under his unflagging energy, that the three first of these – the Success, the President, and the Sacramento – were purchased, fitted up, and made available for the purpose in view, and the rules and regulations for the employment and safety of the men afloat and ashore prescribed and carried out. He carried the same energy into every branch of his department, and his influence was soon apparent. His subordinates of every class became actuated by his spirit. As time moved on, the range of his duties, both ordinary and extraordinary, increased. In the formation of the quarantine station at the heads, in the management if not the erection of lighthouses, sailing directions, port and wharf regulations, buoys, signal stations, www.latrobesociety.org.au 28 steam dredging &c., he was the main and most active agent. The whole pilot establishment and regulations, men, and vessels, were under his charge; and when I left the colony in May, 1854, the entire range of ports outside Port Phillip Heads from Point Lonsdale to Portland, as well as that of Geelong had felt the influence of his intelligent supervision and care. The entire department of Chief Harbour Master, which I have numbered at the period of separation about thirty individuals, then numbered 230. The character of Captain Ferguson’s unbroken service during the fourteen years which have elapsed since I left the colony must be well known to the Government and the people he has served so long and so faithfully. I confine myself to recalling to mind those earlier, and what must have been the hardest and most difficult, period – none can know how difficult but those who were in that fierce struggle for the maintenance of order under so many disadvantages; and on this subject I have spoken advisedly and with reason, for I may truly say he worked under my own eye. I had sincere regard for the man, and just pride in the qualities of his heart, head, and hand. Whatever mistakes may have been made by the Government of the colony in those hard and difficult times (and I am quite ready to admit that there were many, especially if the past is to be judged by the light of the present), I never have hesitated in believing that, in appointing Captain Ferguson to the office he has so long filled, it was the right man in the right place. I shall be heartily rejoiced to find that the Government and inhabitants of the colony admit that this has been the case, and to learn that they have not forgotten the strong claims of one who has served them so long and so faithfully, and who, removed by God’s providence, so to say, in the maturity of his powers, has left a widow and young family behind him. I have done, I leave you to make use of this communication, or any portion of it, which you may think judicious and called for. There may be among Ferguson’s friends those who may not be sorry to be reminded of facts. By-the-bye, I may mention as a proof how completely Captain Ferguson’s mind was engrossed by devotion to his public duty, that while in Dover, only ten days before the operation, he took an opportunity to drag himself up into the lantern of the S. Foreland Lighthouse, and made a most careful scrutiny of the whole apparatus and arrangement, with a view of the adoption of any hint for the perfection of those under his charge in the colony. And now, goodbye. I trust this will find you in good health, and in comparative vigour. Believe me ever, dear Captain Cole, Yours very truly, C. J. La Trobe"The attempt for a floating church was made as early as 1853 following similar examples in London like the Seamen's Hospital. Captain Ferguson was instrumental in the foundation of the Bethel Church.Digital copies of the 37 pages ; 22 cm.1854, hobsons bay, geelong, melbourne, williamstown, sandridge, mariner's hospital, floating church, seamen's hospital, captain charles ferguson (1813-1868), kezia elizabeth hayter (1818-1885), rajah quilt, prison hulks, water police, harbour master, harbor master, gaols -
 4th/19th Prince of Wales's Light Horse Regiment Unit History Room
Photo Albums - set of two, c. 1919
... JORDAN VALLEY 104 The MT of Temptation Monastery built over spot where Christ spent his 40 days 105 Refugees from ES-SALT at JERICHO 106 3rd LHFA and 8th LH REGT at HELIOPOLIS 107 Fig trees at Roman Wells JIFF JAFFA 108 Inside the Blue Mosque CAIRO 109 Lagoon that was destroyed on JIFF JAFFA stunt 110 Section race at Brigade sports 111 Another tombstone at ALEX 112 Innoculating female date palm 113 Bronze tombstone in a cemetary at ALEXANDRIA 114 Luna Park at HELIOPOLIS 115 Egyptian water buffalo. Used by natives for ploughing etc 116 Russian church. ...JORDAN VALLEY 104 The MT of Temptation Monastery built over spot where Christ spent his 40 days 105 Refugees from ES-SALT at JERICHO 106 3rd LHFA and 8th LH REGT at HELIOPOLIS 107 Fig trees at Roman Wells JIFF JAFFA 108 Inside the Blue Mosque CAIRO 109 Lagoon that was destroyed on JIFF JAFFA stunt 110 Section race at Brigade sports 111 Another tombstone at ALEX 112 Innoculating female date palm 113 Bronze tombstone in a cemetary at ALEXANDRIA 114 Luna Park at HELIOPOLIS 115 Egyptian water buffalo. Used by natives for ploughing etc 116 Russian church. ...Memorabilia of 908 Dvr Thomas Edward Whyte, 3rd Light Horse Field Ambulance, World War 1 READ THIS. During the last war I sent these pictures home through devious channels. When I lobbed back I found them all pasted in these albums by my young brother Billy. He was only a kid then! Nowadays he is serving up North. Went away with the original 9th Battn. Was in the Blitz on England and served in Libya, Tobruk, Greece, Crete and Palestine and was twice knocked. It's not long since the last upheaval 1914-18 and I wonder if these boys think as we did. This will be the last war? I sincerely hope so. TWSet of two photo albums. Photos pasted into albums with captions in white ink. Photo captions - Vol 1. (? = not legible) 1. Prisoners from ES SALT 2. Dust scene at AUJA FORD. 4th LH BDE 3. ? ? CHEOPS PYRAMID 4. Houses and domain WASSA battle 5 .Pontoon at SERAPELAI 6. SPINX (sic) & PYRAMID 7. The Nile floods occur once yearly and all irrigation centres are alternatively flooded 8. Pontoon bridge over SUEZ Canal at SERAPEUM . Constructed by Aust Engineers 9. The arrival of newspapers and mail 10. Lake IIMSAH-ISMALIA 11. Camp outside Jerusalem. Walls of old city easily discernible 12. Roman walls on beach at MONTAZEH 13. ? ? These boats are used for conveying between steamer & shore 14. Interest shown in the new issue. Through the scarcity of horses Batmen/Grooms and drivers ? allotted donkeys ? ? 15. DAMASCUS GATE JERUSALEM 16. Trumpeter ? 17 Indians making ? for railroad 18. 'SPELLO' Sinai Country 19. Police searching Egyptian labourer 20. Cavalry ?? SHA? 21. Entering ? WADI ? 22. Bedouins at ? 23 No caption 24 No caption 25 Bolar trees EZBEKIEH Gardens CAIRO 26 .Flamingos at NOUZEH Gardens ALEXANDRIA 27 BARAGE 28 KASR-ELNILL Bridge 29 NOUZEH GARDENS 30 AMGS on beach at ? 31 NOUZEH GARDENS - ALEX 32 Mascot of 7th M.V.G. 3RD ALHR 33 Printing on walls inside St Mary's Church. Depicting the Flight from Herod. (Corner torn off photo) 34 Inside Virgin Mary's Church at MATARA 35 ? painting in Church ?? 36 SUEZ Canal. Finish of Arab pony race. ZAL-A-ZIA 37 Admiralty offices at PORT SAID 38 A corner of CHEOP"s PYRAMID 39 The Spinx (sic). Nose was blown off by a shell from one of Napoleon's guns. 40 Monastry on the MT of TEMPTATION 41 Mess orderlies. Foodstuffs in locker given to troops by the AIF 42 Mid day meal on treck 43 Ambulance sand carts for conveying wounded and sick over desert sand 44 3rd ALHB 45 Kaisers Church JERUSALEM. Inside is a large painting figuring the Kaiser & Kaiserine holding a model church. 46 Bedouin women drawing water from well at EL-ARISH 47 2nd ALH BGDE doing route march on JERUSALEM-JERICHO ROAD 48 GEN HODSON GOC Anzac Mounted Divn presenting decorations & investitures on the sands at SHEIKS-ZOWAID 49 Armoured Car 50 Snow at the CEEDERS (sic) on Mt LEBANON 51 Compulsory phenyle bath for all troops in front line area 52 Austrian guns taken at point of bayonet by NZ & 2nd BGDE at GAZA 53 CACHOLETS for carrying wounded 54 The boys found some timber and made a spring board on SUEZ Canal 55 Bedouin wedding. The Bride travels in state amongst rubbish on top of camel. Her father leads conveyance. 56 Australian graves at SHALLAL 57 Camel Transport Company bring rations along beach 58 Billy the mascot holds an offensive & checks advancement 59 Exercising horses at HELMIEH Egypt 60 PONT-DE-QUOBBA Egypt. A suburb of well-to-do Egyptian merchants 61 Demolition stunt at ASLU. Bridge destroyed by Australian Engineers 62 Swimming horses in Great Bitter Lakes Egypt 63 On the move along Wadi 64 On the shores of the Bitter Lakes EL-EGYTE 65 A leave party waiting for the pontoon to swing into position 66 Carting grain 67 Egyptian Brass Band 68 French warboat (sic) in Canal 69 Russian Troops from Mesopotamia passing through SUEZ Canal 70 Prisoners coming in under escort. Turkish & German officers in lead mounted on ponies 71 Turkish prisoners 72 T.B.D in Canal 73 Old trenches on SUEZ CANAL near BITTER LAKES on W Bank 74 Monitor in Canal 75 Block house, trenches & entanglements near Post 62 76 A halt in an Egyptian village EL-MARO' 77 Mobile wireless plant 78 On the road from Canal to Railhead 79 Old Turkish guns in ancient fort at ALEXANDRIA 80 Francenia steaming through Canal 81 After MAGHDABA stunt. Convoy taking wounded form EL-ARISH to railway at 139 82 Indian Camelry 83 Virgin Mary's Church 84 Sluice gate at BARAGE Egypt 85 Hospital at lower W bank of Canal 86 Virgin Mary's tree 87 Sweetwater Canal at ISMAILIA Egypt 88 Halt and Feed. The A.M.C. attached to flying column. 89 Bringing stores ashore at JAFFA 90 H Videon & J Britton astride donks. Horses became scarce through casualties etc and units had donkeys issued to them 91 RAMLEH. The traditional burial place of St John the patron saint of England (sic). 92 Jewish Synagogue at RISHON-COUR-LE-LION (Richard the Lion Hearted) 93 Water tower at HELIOPOLIS 94 Portion of camp on HELIOPOLIS Racecourse 95 Arrival of papers 96 Sand sleigh 97 Boring plant & prisoners taken on the JIFF-JAFFA stunt. Two Austrian officers and party of Turks taken whilst building a concrete gun emplacement 98 The obelisk at MATARIA 99 In an avenue of Australian gums at ZEITOUA 100 Mountain battery gun 101 The 3rd ALH BGDE camped at HELIOPOLIS Racecourse 102 Captured Turkish guns 103 Turkish and Austrian prisoners. JORDAN VALLEY 104 The MT of Temptation Monastery built over spot where Christ spent his 40 days 105 Refugees from ES-SALT at JERICHO 106 3rd LHFA and 8th LH REGT at HELIOPOLIS 107 Fig trees at Roman Wells JIFF JAFFA 108 Inside the Blue Mosque CAIRO 109 Lagoon that was destroyed on JIFF JAFFA stunt 110 Section race at Brigade sports 111 Another tombstone at ALEX 112 Innoculating female date palm 113 Bronze tombstone in a cemetary at ALEXANDRIA 114 Luna Park at HELIOPOLIS 115 Egyptian water buffalo. Used by natives for ploughing etc 116 Russian church. Some call it the "Church of St Mary Magdelene" 117 At pyramids GIZA. Billingsley lost leg & McMullin KIA 118 Pontoon bridge over Suez Canal 119 DURBAN 120 Rescue work 121 Paddy Hanly 122 Motor train for conveying rations between Canal and Railhead. 123 At MUCKSHUBE ? 124 British ??? 125 Bedouins bringing in their harvest from the fields of ABBASSAN-EL-KEBIR Palestine 126 German HD QTRS BEERSHEBA 127 Date ? SINAI 128 Military railroad running through ? at EL-ARISH 129 Street scene at KHAN-YUNIS Palestine. Samson often called at this place to visit his girl. Napoleon narrowly escaped capture here during his ? in 1799 130 Date palms bearing fruit. These do not ? they are ?? 131 Motor ambulance convoy 132 Turkish hospital BEERSHEBA 133 MT CALVARY 134 Town Hall BEERSHEBA 135 Railway station BEERSHEBA 136 ASLUJ 137 Turkish depot MAGDABA 138 DURAN 139 3rd ALAB Hospital 140 Main Street PORT SAID 141 Stock Exchange ALEXANDRIA 142 The "Bull Ring" 14th AGH 143 (Double exposure) 144 Jewish School at DURAN Palestine 145 Damascus Gate JERUSALEM 146 Roller used for grinding clay for making bricks 147 The Harbour at ALEXANDRIA 148 Part of Napoleons Road along sea shore opposite BEELAH 149 Hotel at ALEX. Barred to the troops of course. 150 HELIOPOLIS 151 -153 ALEXANDRIA 154 Ambulance treck 155 Cacholets at the casually clearing station 156 Refugees from ES-SALT entering the Jordan Valley. Mts of MOAB in background 157 Cameliers bring in prisoners 158 The "Niagara". Casualties were from the front line by all descriptions of transport and passed through several field hospitals until they eventually reached the railway. They were sent to KANTARA by train. Despatched from there to PORT SAID by this boat 159 JERICHO 160 Turkish prisoners in JORDAN VALLEY 161 Bedouin nippers of SINAI 162 Bridge destroyed by ALH at ASLUJ 163 Railway sheds at BEERSHEBA. Portion was set afire by retreating Turks 164 ASLUJ Station 165 German Hospice 166 at ASLUJ 167 Suez Canal offices PORT SAID 168 MENA Village from top of Cheops. White lines at left are roads made by Australian troop. First Aust Contingent camped here. 169 A felukeh passing through gate at BARAGE 170 Military railway terminal EL ARISH 171 (No caption) 172 Egyptian family waiting for a train 173 Turkish prisoners and captured material coming in 174 Turkish wounded at BEERSHEBA awaiting removal 175 Two hospital ships at ALEXANDRIA 176 Some of the Bd boys 177 Race meeting 3rd ALHB at TRIPOLI- SYRIA 178 The blacksmith and Rodney Thomas swimming horse in SUEZ CANAL 179 Natives grinding grain 180 Thoroughbred 181 MUKATTAM HILLS 182 Trenches at JIFF JAFFA 183 MacBoyd as a Padre 184 Egyptian Syce having shave by travelling barber 185 The creek outside ALMINA 186 Cameliers 187 Clearing Station on beach at EL-ARISH 188 Wadi at TALLAT-EL-DUMM 189 Motor transport park 190 Some of the boys 191 Pompeys Pillar 192 at MAGHDABA 193 Hospital at JERUSALEM 194 Cheop's Pyramid 195 Golden Gate JERUSALEM 196 Hustling Turks through BEERSHEBA 197 Holy City 198 Mosque of Omar Jerusalem 199 Railway bridge destroyed by ALH at ASLUJ 200 Enemy material captured at SHERIA BEERSHEBA 201-3 These Mosques built with alabaster taken from pyramids at GIZA 204 Pontoon bridge built by our Engineers over RIVER JORDAN 205 3rd Bgde in Koil at MASAID 206 Billy McGhie throwing the weight 207 Nirazeh ? Gardens 208 Motor Ambulance Park 209 Bedouin women in Palestine village 210 ALEXANDRIA 211 Junction Stn 212 Indian Lancers 213 Motor convoy at ESSANI 214 A & B Sections 215 JERUSALEM. Once known as the 'City of Palms' and presented to Cleopatra by Anthony 216 Monastery on the Mount of Temptation. Situated on the Hills of Solomon on E side of Jordan Valley just behind JERICHO 217 DURAN A Jewish village in Palestine 218 One of our planes meets with a mishap on landing 219 Bedouin flocks around NABLUS 220 ES-SALT Road just above Jordan River 221 Halt! Action Front! Getting guns into action from pack 222 Village well 223 Gun inspection 224 WADI GHUZZEE Bridge 225-6 At GIZA Zoo Egypt 227 Syrians gathering olives 228 Smashed plane 229 MacBoyd 230 Bridge across Jordan at GORRONHOER 231 Competitors for Gretna Green. 3rd Bgde sports at TRIPOLIA 232 EL ARISH 233 Main street JAFFA 234 The beach at MARI-KHEB 235 Scene of old Cairo 236 Bedouin market 237 Bridge built over Wadi EL-ARISH. The biblical "River of Egypt". 238 Old water reservoir in native village 239 A "spello" on the track 240 Plane going out on reconnaissance 241 Bomb attached to carrier on a plane 242 Ancient Turkish gun at forts in TRIPOLI - SYRIA 243 Gun inspection 3rd AMGS 244 Old Turkish trenches outside GAZA 245 Wadi KHUZEL Bridge at SHALLA 246 BEERSHEBA 247 Street scene ZAG-A-ZIG 248 Spinx (sic) & Pyramid - GIZA 249 Egyptian Coastguards at ALEXANDRIA 250 A Palestine camp E Troop 3rd MG Sqn 251 B class horses killed in Syria 252 Scene from summit of Pyramid 253 Bert Richmond & an old Turkish Howitzer on MONTAZEH 254 LION'S WELL 255 Australian trenches outside Ferry's Post near Hill 70 256 A street scene in HELIO{PLIS 257 Electric trams at ALEXANDRIA 258 Cleaning harness 259 Swinging pontoon bridge into position at SERAPEUM 260 British Monitor in Suez Canal 261-2 Scenes of Turkish buildings at MAGHDABA. Taken by the ALH The first time in history mounted troops have attacked and taken entrenched positions 263 Aussies at Egypt's ancient monuments 264 Scenes of old CAIRO from MOKATTAM Hils 265 Bridge across canal at BARAGE, 16 miles outside CAIRO 266 Curly and Vic Norton 267 Stumpy McIntyre & Long Pikington 268 In Wadi GHUZZEL near TELL-EL-JEMM 269 Digging post holes for stables 270 Cameliers bring in prisoner. Austrian Officer in black 271 White washing mess shed 272 F Troop 3rd AMGS Sqn 273 Jews at Recruiting Depot at JERUSALEM, forming Jewish Battalion 274 In Jordan Valley, 3rd Machine Gunners have 8 horses killed by an aerial torpedo 275 Turkish prisoners 276 Cocos Island 277 Snow on the Lebanon Ranges 278 Egyptian Hotel 279 Gordon Wake. Note intruders 280 Electric trams at HELIOPOLIS Egypt. Heliopolis built by Belgian firm in 7 years 281 Sweetwater Canal at SERAPEUM 282 The ? wells at JIFF-JAFFA 283 Virgin Mary's well at MATARIA. Boyd, Simpkin & Crowley 284 Cricket for convalescents at MONTAREH 285 Indians working at cutting for military railway 286 Australian Hospital BEERSHEBA 287 Removing wrecked ambulance car from rail road 288 Engineers depot in ? at EL-ARISH 289 Water preservation scheme at SHALLAL 290 German Princes Palace at HELIOPOLOLIS 291 Some of the boys 292 Aussie aerodrome BEELAH 293 EL-JALLAH outside BETHLEHEM 294 Some of the gunners 295 Trying camels in gun carriages. Note sand caterpillar 296 Street outside old city JERUSALEM 297 D.H QRS In EL-ARISH. Hod 298 Cairo Museum 299 Wadi bridge built by Army Engineers 300 A two storied building at GALM used as German HQrs until reached by our guns 301-2 No caption 303 Ambulance with Flying Column 304 Jack Pegg 3 AMGS 305 KHAN YUNIS 306 In the Jewish village of "Rischon le Lion" 307 Wet Canteen BEELAH 308 Motor Transport LATRON 309 Gen Chauvel OC Desert Mounted Column 310 10th LH - Inverness Battery "Railhead" 311 3rd LHFA "SERAPIUM" 312 ESBEKIEN Gardens "LE CAIRE" 313 Camel training and wireless station Hill 60 314 ZAG-A-ZIG Rly Stn 315 One of the Irrigation Canal locks "HELOUAN" 316 Indian Camel Corps 317 Base at Hill 60 318 Aussie transport arriving "ALEXANDRIA" 319 3 ALHB at AL MINA 320 Main entry to city of JAFFA 321 Mosque at DAMASCUS 322 A Turk brought to earth by one of our patrols 323 Brigade boxing contrst 324 Ostrich farm ZEITOUN 325 MATERIA 326 No caption 327 Mail day 328 3rd LHFA entering HELIOPOLIS from MENA 329 M Boyd, L Simpkins, S Crowley 330 Stretcher bearers 331 French Hosp JERUSALEM 332 SERAPIUM 333 Gippo crushing wheel 334 On the move - bully and biscuits 335 V Morton, F Stokes, L Simpkins & Hanley 336 Turkish prisoners - SHERIA 337 Getting used to the mask J Antonio MM 338 Sand carts 339 Model house - MONTAZA Hospital 340 "Abdul" 341 Wood Depot "ESDUD" 342 On troop ship - from Syria 343 Turkish prisoners "JULIUS" 344 TRIPOLI 345 3rd AMGS cook house "BEELAH" 346 Breaking camp "ZEITOUN" 347 Turkish prisoners "GAZA" 348 One of our tanks. About nine were blown out of action at GAZA 349 Camp in HOD-EL-ARISH 350 German HQRS BEERSHEBA 351 Race Course TRIPOLI 352 A Locke & P Leeming 353 Sea planing in Suez Canal 354 MOASCR detail camp 355 KANTARE Suez Canal 356 Four boys of MG Sqn at cards while convalescing . Marked X was a prisoner of war for three days. Got him back with us when we countered. 357 Signal station at CANA 358 H Videon in german rig 359 ROD-EL-FARAC 360 Sweetwater Canal ZAG-A-ZOG 361 Hospital train on beach EL-ARISH 362 Jerusalem Road 363 Bedouin camel and young'un 364 Admiralty Offices, PORT SAID 365 Suez Canal PORT SAID 366 Taking wounded to clearing station 367 Hills of 10-60 MALHA 368 Junction Station 369 EL ARISH 370 Wine Distillery LATRON 371 White figures how entrance to Pyramid 372 RAPC Wireless Station 373 Sports in Canal. ANZAC Day 1916. Prince of Wales is aboard white launch. 374-5 Captured Austrian boat. 40,000 cases of benzine aboard. She was brought into Canal at Port Said. Spies set her afire. She burnt for some considerable time and eventually blew up. 376 Pumping water from Wadi on Muckshabee stunt 377 On trenches 378 Bringing in disabled battle plane 379 Giving a motor transport a lift 380 Old Turkish howitzer. MONTAZZA 381 Jerusalem country 382 Palm Hod in SINAI. Trees do not bear dates until 14 years old. No bees here. Palms innoculated by Bedouin. 383 Camel cacolets for conveying wounded 384 ESKBEKIEL Gardens Cairo 385 LAKE TIMBAH 386 Xmas dinner 1916 387 Gift billies from ACF 388 Section competition 389 In big marquees HELIOPOLIS 390 HM Landships 391 Capt Aberdeen inspecting horses 392 Football. Black vs White 393 The game 394 Old Napoleon fort. 10 mile along coast from ALEX 395 Jewish Cemetery AKRON 396 Ration fatigue 397 Blowing bottom out of Turkish Reservoir to allow soakage 398 Tilley & Farley - 14th AGH 399 At GIZA Zoo. Note height of giraffe 400 On this stunt we destroyed Turkish reservoir of 2 1/2 million gallons 401 Demolition party at wells MUCK-SHUBE 402 3rd ALH Bde HELIOPOLIS Race course 403 HMLS "Lady Wingate" 404 Turks blew out our tanks at GAZA 405 One of our aviators captured by German. Note German wearing Iron Cross. Snapped behind Turkish lines. Original of this snap was dropped at Aust aerodrome to let them know Aussie airman was alright and not killed in capture. Chivalry 406 Sausage observation balloon 407 READY 408 Bomb on carrier 409 Testing 410 B Richmond, Wireless Operator RAFC 411 Loading Bomb 412 Crash in desert 413 Bomb in YMCA at MAZRAR 414 No caption 415 LW Simpkin - Late 3LHFA 416 LEMNOS 417 Shelling the MARSDEN 418 Pontoon across Jordan River 419 Shells on Walkers Ridge 420 Sweetwater Canal 421 LAKE ISMAILIA 422 Indian Lancers on Canal 423 CAIRO Railway Station 424 Destroying Turkish water supplies. Explosives used for breaking clay at bottom of lagoon, help to absorb water 425 Exercising horses at ZEITOUN Egypt 426 In Wadi on MUG-SHUBEE stunt 427 Tractor drawing 60 lb gun towards front line 428 Sultan's mother's place at HELIOPOLIS = City of the Sun 429 Camped on the sands outside RAILHEAD, Jump off for SINAI campaign 430 G Turner & A Lockwood out for a camel ride. 431 GAZA and Nile floods from top of Pyramid 432 Baby refuses to carry his harness and his pal wears an astonished look 433 No caption 434 Turkish Officers 435 Regt HQRS at IBEETA 436 No caption 437 3rd Machine Gun Squadron 3rd ALH Bgde (my unit) 438 Camel Corps at dinner 439 KHEFREN Pyramid snapped from top of Cheops 440 CHEOPS 441 Pyramids 442 MENA from top of Pyramids 443 Snap from Pyramid showing MENA-CAIRO road running through Nile floods 444 MENA village from Pyramid 445 Band of British West Indies Regt 446 Gippo Band 447 Swimming on Med Sea 102 KmA 448 H Maddocks 449 Bedouin and Egyptians utilise any animals for their fields 450 Captured Turkish train - BEERSHEBA 451 Gardens ISMAILIA 452 Gippos used for horse lines etc 453 Canteens at HELIOPOLIS 454 3 ALHB watering in Wadi on ESSANI stunt 454 JAFFA 455 ALEX, Napoleon relics 456 Egyptian water wheel 457 SUEZ 458 WADI GHUZZEE 459 On Reconnaissance at 10-60 460 Goats and sheep captured from hostile Bedouins 461 Pontoon SERAPIUM 462 Aust trenches - Suez Canal. Turks attacked FEB 1916 463 Camel transport 464 3 ALHB Wireless Station. Col Scott 9 LH got DSO on this stunt (MUCK SHUBE) 465 ALEXANDRIA 466 Canal Hospital Ships 467 Ambulance - Sand cart 468 At old Cairo 469 No 1 Casualty Clearing Station 470 3rd Brigade on move 471 3rd LHFB- Making camp SERAPIUM 472 Watering horses 473 Moving up wadi 474 The wells at Wadi GHUZZEE 475 Camel transport SINAI 476 Turkish reservoir destroyed by ALH 477 Wall in a Luxor tomb 478 Entrance to "Temple of Bulls" 479 Bob White 480 Bedouin crops 481 Harem of Montazza, Turkish prince 482 Jack Holmes, Billy McGhee 483 MUDERIA, B Troop post 484 JIFF JAFFA 485 Natives on railroad construction 486 Aust graves SHALLAL 487 The Stumpy Mirror 488 R Nile at MANSUREH 489 Aust graves - BEELAH 490 NOUZEH Gardens - ALEXANDRIA 491 On issue from QMS. Take what comes. Fit does not matter 492 MATARA 493 German Yacht Club - ALEX 494 Old Turkish Howitzer and cannon ball 495 Field hospital 496 Gardens at BARAGE 497 A dispute's ending 498 Snow. MT LEBANON 499 Bedouin sheep 500 Combat in the air 501 no caption 502 Old Napoleon gun 503 Gordon Wake HQ car 504-5 Burying the dead at GAZA 506 Water Polo 507 Brigade boxing comp 508 Field cooker 509 Bridge on Jerusalem road, Blown up by Turks 510 Teaching horses to lay quiet. For protective purposes 511 "Major" and "Bitsy" 512 Bedouin Scarabs 513 Convalescent 514 1. W Billings. Returned to Aust 2. W McMahon KIA 515 Hospital 516 Coming good 517 1st day up - 14th AGH PORT SAID 518 Back again in Regt 519 Billy and Taffy 520 Stew 521 KHAN YUNIS 522 MENA 523 Casualties PORT SAID 524 Washing 525 Mail 526 Gun from the "Emden" mounted in Syney 527 MARSURES 528 Desert bivouac 529 HASSED 530 3RD ALH Bde. Good camp (Extra) All conv's 531 New issue 532 On to another camp (8 LH Regt) 533 Shore - JAFFA on MED SEA Photo Captions Volume 2 (Illegible = ?) 1 The Cedars on Mt Lebanon, according to tradition originated from the staves of the 12 Apostles 2000 years ago. 2 TIBERIUS taken 27th Sept '18 3 NAZARETH taken 20th Sept. German officer and Arab pony 4 TIBERIUS fell on 27th Sep. Von Saunders was the GOC of Turkish Forces in Palestine 5 Jordan Valley & Plains of Jericho run between Mts of Moab & Hills of Solomon. Distance across valley from foot of each range of hills abt 13 miles, looks ? 6 Storm on Sea of Galilee 7 DAMASCUS fell on 1st October. German vehicle park. 8 German funeral near Jerusalem 9 JENIN. German Headquarters. Fell 20th Sept. German field bakery 10 Three pages back will be seen a storm on GALILEE. Note now calm here. This photo taken near spot from which the previous one was taken. German motor launch on Galilee. 11 Captured intact on 20th Sept. German workshops JENIN 12 Turkish aerodrome captured here. Hostile aircraft landed whilst it was in our hands. Aviators greatly surprised and even indignant. Motor smash near EL FULE. 13 German Orderly Room (Ammunition box full of gold), DAMASCUS. All this gold Turkish coin secured by our troops. 14 German artillery on the way to the front near KENETRA. The ALH swooped down on the artillery around this vicinity & captured many field guns. 15 German Despatch Rider on the road to ES SALT. Unsuccessful raids carried out on ES SALT on 30th April & 4th May. This country was hard on men and horses. Goat tracks were used at times but horse were led most of the time. Stunt lasted 14 days in wet weather & horses were only unsaddled for about 2 hours during stunt. 16 Strand, ? , Tiberius, Gallilee 17 German workshop. Captured by ALH 18 One of the dead lying outside GAZA. Killed 19th April 17. We could not bury them before November 19 Some of the boys that fell in the charge at BEERSHEBA. Tibby Cotter 20 Collecting our dead for burial. They were K in A on the 19th April at GAZA. Buried seven months later, 23,000 casualties in one day 21 German U-Boat 22 Page of postage stamps and money - Struck to commemorate Gallipoli victory - Turkish war postage stamps - War duty - Turkish war bank notes 23 Pamphlet. With paper badges affixed These badges were worn by young Egyptian students. Arabic translation means "Egypt for Egyptians Long Live Egypt" This pamphlet was printed under German influence & distributed around ZAG-A-ZIG, the chief centre of hostilities during the recent Egyptian riots. The Young Egyptian Students influenced the Natives to oppose British Administration, what they called Tyranny. They professed to have sufficient competent educated men to govern their own affairs, but our Heads would not hear of it. Consequently the riots. Many ? and soldiers killed. All railways and communications disorganised. It took several months to bring things to their normal ? Pictures of medals 1. In honour of General Falkenhaugh GOC Turkish Forces 2. The Victorious Emperors of Germany, Austria and Turkey 3. Egypt Awakening 24 Those large photographs I sent you were procured for me by a pal who knew the chap that owned the negatives. The owner of these snaps belongs to the 5th Regiment of the 2nd Brigade, and he took the camera from a Turkish Officer. It had only 6 snaps of a spool of 10, and the BIll Jim finished off the spool by taking 4 of the special entry into Jerusalem. The cross indicates those taken by the Australian, the remainder were taken by the Jackos in the vicinity of BEERSHEBA and SHERIA Turkish field bakery 25 Cavalry going up to support their own line. However never had much action against the Turkish horsemen 26 Turkish Electricians in the field. I have an idea that this photo was taken to get the centre figure. He looks dinkum Australian. Note Australian leggings on Turk on the right 27 Turkish machine gunners ready for action. This is very much like the Beersheba country. Turkish officers on the right, and along side him is the range taker with his Barand Stroud. We use these instruments in the Sqn and they cost about 83 (Pound) 28 Turkish General Head Quarters just beyond SHERIA. Note hard rocky country 29 Turkish Cavalry watching a fight and getting ready to go into action. This is at SHERIA, and the heavy fighting lasted several days. Plenty of water and the Jacko's tried their hardest to hold on to this pozzie. Often our chaps met the gamer Turks in the dead of night, because both sides were on the same game, crawling down for water. This stunt is known as the Junction Fight. 30 Official entry Dec 11th. The official entry into Jerusalem. Sir G Allenby in the lead with his staff officers of the French and Italian troops accompanying him. Guard represents New Zealand, Australia, England Wales Scotland Ireland and India entering theJaffa Gate 31 Sir Ronald Storrs made Governor of JERU. Captured 9th Dec 17. Reading the Proclamation, General Allenby wearing white breeches. Troops of other nations were present, and the notables of Jerusalem. It was read from the foot of the Tower of David, a place that has been standing since the time of Christ 32 The first of the British troops entering Jerusalem. A few Turkish officers may b seen walking at the head of the column. Populace in a bad plight, very poor and no tucker, and all were greatly overjoyed at the ?? of the British Hundreds and kiddies ill treated ?? (Part of caption missing) 33 10th LH Regt first to enter JERUSALEM. Mounted officer on the right supposed to be the CO of the first troops to enter Jerusalem. Note mud on the horses. Had very wet and muddy weather 34 Dead Jacko 35 Turkish machine gun and crew 36 Hanging Armenian doctors who refused to join Turkish Army 37 Outside Damascus Gate Jerusalem 38 Turkish patrol lying outside trench at EL BUAJ 39 Burying Aussies at DAMASCUS 40 1. Djemel Pasha 2. General Limon Von Saunders GOC Turkish Forces in Palestine 41 One execution in Egypt. Executing an Egyptian offender 42 Turkish atrocities DAMASCUS 43 Turks occupying trenches outside JERICHO 44 On ASLUJ demolition stunt. Feeding and spelling. Arrived at Rendezvous too early 45 Turkish saw bayonet 46 Captured guns taken at BEERSHEBA & SHERIA 47 Our gunners obtained a direct hit on ammunition train 48 The large and small of the game. At GAZA. 74th CCS in background 49 Around JULIOUS. These Turkish shell dumps were very numerous around this vicinity 50 Captured Turkish Cavalry 51 Cavalry leaders 52 Turkish machine gun & crew 53 Enemy officers. One on left is wearing Iron Cross ribbon 54 Captured Austrian boat afire, Suez Canal Port Said. 40,000 cases of benzine aboard. Fire a mysterious outbreak 55 ? Hotchkiss gunners and enemy aircraft over ? TELL-EL-FARA 56 Types of enemy officers. One of our bikes in their possession. Recaptured later. The five pointed medals worn by these officers is called the Gallipoli Star. Issued to commemorate the Turkish victory at Gallipoli 57 Our batteries put in some good shooting amongst Turkish transport 58 Showing compactness of Turkish trenches 59 Desert homes. The only time we had cover in SINAI was when we camped near a Hod. Then we could use date palm leaves 60 JIFF JAFFA 61 ZAITZOUN 62 10th Regt MGS amongst hills outside JERUSALEM 63 Jews wailing place JERUSALEM 64-5 German post card characters 66 Post Card PHYLAE The Kiosk 67 Post Card Vue du Canal de Suez 68 Post Card No 93 Queen Street, Fort, Colombo 69 Snipers at NALIN Sth Syria. Lousy country for richochets. Nast wounds. (Aust War Memorial Melbourne) 70 Myself on Ginger. This little neddie is boshter jumper 71 Magazine cutting - Lt C H Vautin & German airman G Felmy 72 9th Regt 3rd LHB Judean Hills outside JERUSALEM. (Aust War memorial Melbourne) 73 Sand hills SINAI ? Desert (Aust War Memorial Melbourne) 74 3rd LHB spelling at GALILEE (AWM Melbourne) 75 Jordan Valley outside JERICHO (AWM Melbourne) - lovely Jordan Valley, dust and heat, 1280 ft below sea level 76 Copy of no 69 77 Watering at MATARIA 78 A desert grave - Tpr H R Olver MM 6th LH MGS Beneath this simple cross there lies a comrade true and tried He fought as fights a soldier And like a soldier died 79 B Section. When they first took our Stetsons and issued cumbersome helmets 80 Palestine types of Turkish and German officers 81 Some of the gunners amongst the snows in MT LEBANON 82 The country around JERUSALEM 83 JERUSALEM 84 Fishing ? ? at GALLILEE 85 Jerusalem taken Dec 9th. Official entry on the 11th. Jerusalem (showing) Holy City and Mosque of Omar 86 Turkish shell hits old tomb at ZERNUKAH. Capt Hurley official photographer - AWM Melbourne 87 14th AGH at PORT SAID 88 Human bones at Dead City ABBASSIA 89 3rd ALH Bde at HELIOPOLIS 90 Men wearing gloves 91 Wireless station in course of erection at MATARIA - 28 masts 92 Old slave market at ABBRASSIA. Many excavations performed on projecting wooden frame at corners 93 3rd guns on the move. The beautiful scenery between LATRON & JERUSALEM 94 Bedouin agents 95 Collecting captured enemy material 96 Captured double-engined plane 97 On the march. Country at Eastern SINAI 98 Anzac mosaic found at SHALLAL whilst trench digging now covered with gun etc ready for removal. Was sent to Canberra. 99 A Troop watering. A rotten job at a small well when horses are thirsty 100 The new Jericho road. Running through Hills of Solomon Valley in distance 101 Gun inspection 102 Draining pools at WADI AUJA. Keeping down Malaria carrying mosquitos 103 8th Regt and 3rd AMGS at BEELAH 104 A rendezvous in the Jordan Valley 105 2nd ALHB camped outside JERUSALEM 106 WADI AUJA in the Jordan Valley 107 Hospital train on the beach at EL -ARISH 108 Jacko's 109 Jerries 110 Stables of Turkish Headquarters SHALLAL 111 Early training. Every man to throw and quieten his horse for purpose of taking cover 112 A Troop 3rd Guns at TAALAT-EL-DUMM 113 Watering at WADI GHUZZEE 114 J Rushden KIA at ES-SALT 115 J Carling F Troop 3rd AMGS. Taken prisoner at EL-BURJ. Repatriated after Armistace 116 Captured enemy plane 117 Jacko gun 118 Brig-Gen Galloping Jack Royston. OC 3rd ALH Bde 119 Cleaning ammunition belts in the Hod at MASAID 120 Bringing up the fodder at ABBASSAN-EL-KEBIA 121 Some of the boys amongst the snow on MT LEBANON 122 Turkish barley crops at SHALLAL in Southern Palestine 123 The crops a few weeks after our horses had been in this vicinity 124 Clearing up after a stunt 125 On the move. 5 minute spells for the horses 126 In Jordan Valley. An airial torpedo lobbed amongst 3rd MG Transport horses & killed 28 127 Camel ration convoy coming along beach 128 Field Hospital at ET MALER 129 Desert graves at ROMANI 130 A day on the beach. Wash self, horse and clothing 131 Watering on the beach at BEELAH. Note how close fresh water is to the seashore 132 A patrol caught by a shell 133 Spello 134 Crossing the Wadi 135 Halt! Weights off and feed 136 Gas instruction 137 F Troop at TELL-EL-FARI 138 Xmas Dinner at MASAID 1916-17. Arrived back at this camp Xmas Eve after 5 nights & 4 days in saddle & the capture of MAGHDABA 139 Exercising along the beach at MARA-KHEB 140 Watering at a Bedouin well 141 At Sheikh's ZOWAID 142 3rd Gun Squadron at ABBASSAN-EL-KEBIR 143 Captured plane on its way to Australian Aerodrome 144 One of our planes about to pass over Hod 145 E & F Troop horse lines and horses 146 Sun set on Med Sea 147 Beach scene at EL-ARISH 148 Turkish transport. Small animals but they can pull big loads and they possess large hearts 149 The dressing station JIFF JAFFA ? 150-8 Types of Egyptian women - Nubian - Fellaheen - Sudanese - Low class Gippo - Egyptian - Middle Class -Egyptian Aristocracy - Turkish 159 French girls on beach at PORT SAID 160 Bedouin girls drawing water 161 Egyptian flappers at ALEXANDRIA 162 Post Card- Dame Turque 163 Post Card - Jeunne Fille Arabe 164 Graves of New Zealanders at RISCHON 165 Graves of Australians at DEIR-EL-BELAH 166 Race day. The saddling paddock 167 Bivouacs 168 3rd ALH Brigade at TRIPOLI 169 Advance party putting down horse lines at KHAN YURIS 170 Breaking the desert monotony 171 WADI QUELT. Taken from one of its precipitous banks 172 Turkish stores on N shore of DEAD SEA 173 Watering at Solomon's Pools 174 Waiting for action at - ES DUN (AWM Melbourne) 175 Camel Corps in action SINAI (AWM Melbourne) 176 ALH Time to Camp (part missing) (AWM Melbourne) 177 3rd Machine Gun Squadron IBU-HARITH, Lieut Breed, McLeod, Guppy, Whyte 178 Cartoon sketch - "A Digger" 179 Turkish Cavalry 180 Gun crew of No 2 Sub F Troop, 3rd Gun Sqdn 181 Operating base of JIFF JAFFA stunt 182 One of the British war boats that cooperated with the Land Force 183 Military railway line passing through a Hod in SINAI 184 AL-MINAH The sea port of Tripoli, Syria 185 NAZARETH Taken on 20 Sep 18 186 The Monastery on the Mt of Temptation, Taken from a cave on opposite hill. 187 JAFFA From the beach 188 In Monastery on the Mt of Temptation Rock on which Christ spent his 40 days 189 Cross indicates Garden of Gethsemane. Arrow at Russian Church of St Magdalene. MT of Olives on left 190 The Roman Bath at MONTAZAH. Hewn out of solid rock 191 Mine sweeper ashore near SHEIK'S ZOWAIL 192 Throwing "Chester" for an operation 193 The swimming pozzie at LAKE TIMSAH, ISMAILIA. Half a mile from MOASCAR, the Aust Training Depot 194 The remains of Napoleon's road. Portions can be seen running between BEELAH & GAZA 195 Camels utilised for ambulance work 196 TULKERAM taken on 19th Sep. This stunt started the previous night and this position fell to us the first day. About 60 miles from starting point 197 German officer at mess, JERUSALEM 198 German Headquarters SEMAK 199 TIBERIAS 200 Water preservation scheme at SHALLAL 201 A dip in the Jordan River. Crossed river on night 21-22 April 18 202 Watering and a wash up 203 JERICHO Taken on 21 Feb 18 204 Turkish graves 205 KHAN YUNIS. Southern Palestine, Note how sand ridges from the beach meet vegetation area. Fertile land 20 miles in width. the beginning of PHILISTIA 206 TAUBE-OVER 207 Drawing drinking water in Wadi GHUZZEE 208 The swimming pozzie in JORON 209 Landing stores at EL-ARISH 210 A camp near the wadi 211 Railway line and bridge crossing wadi above SHALLAL 212 The mid-day halt 213 Turks and Aussies at Dressing Station on beach 214 Washing day 215 Bringing supplies ashore 216 Trying mules in a 60 pounder 217 The desert winds have blown away and left this piece standing 218 Pontoons used by the Turks in their attempt to cross Suez Canal Feb 15 219 "HASSEIN" 220 "GIPPO" Mascot of 3rd AMG Sqdn 221 "Biddy" 222 Railhead camp 223 Typical Bedouin 224 Motor Submarine chaser dvr whyte, photos, ww1, light horse field ambulance -
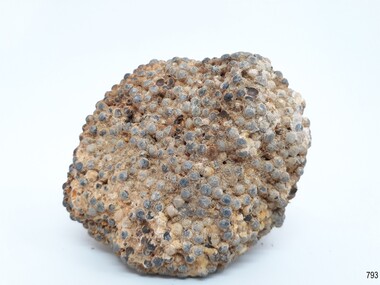 Flagstaff Hill Maritime Museum and Village
Functional object - Lead shot, Circa 1877
... used mostly as projectiles fired from smooth bored guns to bring down moving targets such as wild ducks and small game. It was also useful as ballast, when a dense, “pourable” weight was required to fill cavities or establish volume within a measuring container. The production of consistently round spheres of lead shot required the pouring of molten metal through a sieve and then a long drop through the atmosphere to a water...used mostly as projectiles fired from smooth bored guns to bring down moving targets such as wild ducks and small game. It was also useful as ballast, when a dense, “pourable” weight was required to fill cavities or establish volume within a measuring container. The production of consistently round spheres of lead shot required the pouring of molten metal through a sieve and then a long drop through the atmosphere to a water ...This artifact is a sample of small caliber lead shot recovered by Flagstaff Hill divers from the wreck of the Loch Ard in 1975. Included in her diverse and valuable cargo were 22 tons of lead shot, packed in cloth bags and wooden casks. Bulk quantities of lead shot, uniformly round balls of dull grey metal ranging from 2mm “birdshot” to 8mm “buckshot”, were routinely exported to the Australian colonies. Shot was used mostly as projectiles fired from smooth bored guns to bring down moving targets such as wild ducks and small game. It was also useful as ballast, when a dense, “pourable” weight was required to fill cavities or establish volume within a measuring container. The production of consistently round spheres of lead shot required the pouring of molten metal through a sieve and then a long drop through the atmosphere to a water filled basin for final cooling and collection. This “shot tower” process was first patented by William Watts of Bristol in 1782. His calculation of a 150 feet fall was not only to form evenly spherical droplets through surface tension, but also to provide partial cooling and solidification to each shot before they hit the water below. The value of his innovation was the minimising of indentation and shape distortion, avoiding the expense of re-smelting and re-moulding the lead. Lead shot was already being produced in Australia at the time the Loch Ard sinking in March 1878. James Moir had constructed a 157 feet circular stone shot tower near Hobart in 1870, with a peak annual production of 100 tons of lead shot sold in 28 pound linen bags. However colonial demand exceeded this source of local supply. The continued strength of the market for lead shot in the Colony of Victoria prompted substantial investment in additional productive capacity in Melbourne in the next decade. In 1882 Richard Hodgson erected the 160 feet round chimney-shaped Clifton Hill shot tower on Alexandra Parade (VHR H0709) and in 1889 Walter Coop built the 160 feet square tower-shaped Melbourne Central shot tower on La Trobe Street (VHR H0067). At its peak, the Coop Tower produced 6 tons of lead shot per week, or 312 tons per annum. History of the Loch Ard: The Loch Ard got its name from "Loch Ard" a loch that lies to the west of Aberfoyle, and the east of Loch Lomond. It means "high lake" in Scottish Gaelic. The vessel belonged to the famous Loch Line which sailed many vessels from England to Australia. The Loch Ard was built in Glasgow by Barclay, Curle & Co. in 1873, the vessel was a three-masted square-rigged iron sailing ship that measured 79.87 meters in length, 11.58 m in width, and 7 m in depth with a gross tonnage of 1693 tons with a mainmast that measured a massive 45.7 m in height. Loch Ard made three trips to Australia and one trip to Calcutta before its fateful voyage. Loch Ard left England on March 2, 1878, under the command of 29-year-old Captain Gibbs, who was newly married. The ship was bound for Melbourne with a crew of 37, plus 17 passengers. The general cargo reflected the affluence of Melbourne at the time. Onboard were straw hats, umbrellas, perfumes, clay pipes, pianos, clocks, confectionery, linen, and candles, as well as a heavier load of railway irons, cement, lead, and copper. There were other items included that were intended for display in the Melbourne International Exhibition of 1880. The voyage to Port Phillip was long but uneventful. Then at 3 am on June 1, 1878, Captain Gibbs was expecting to see land. But the Loch Ard was running into a fog which greatly reduced visibility. Captain Gibbs was becoming anxious as there was no sign of land or the Cape Otway lighthouse. At 4 am the fog lifted and a lookout aloft announced that he could see breakers. The sheer cliffs of Victoria's west coast came into view, and Captain Gibbs realised that the ship was much closer to them than expected. He ordered as much sail to be set as time would permit and then attempted to steer the vessel out to sea. On coming head-on into the wind, the ship lost momentum, the sails fell limp and Loch Ard's bow swung back towards land. Gibbs then ordered the anchors to be released in an attempt to hold their position. The anchors sank some 50 fathoms - but did not hold. By this time the ship was among the breakers and the tall cliffs of Mutton Bird Island rose behind. Just half a mile from the coast, the ship's bow was suddenly pulled around by the anchor. The captain tried to tack out to sea, but the ship struck a reef at the base of Mutton Bird Island, near Port Campbell. Waves subsequently broke over the ship and the top deck became loosened from the hull. The masts and rigging came crashing down knocking passengers and crew overboard. When a lifeboat was finally launched, it crashed into the side of Loch Ard and capsized. Tom Pearce, who had launched the boat, managed to cling to its overturned hull and shelter beneath it. He drifted out to sea and then on the flood tide came into what is now known as Lochard Gorge. He swam to shore, bruised and dazed, and found a cave in which to shelter. Some of the crew stayed below deck to shelter from the falling rigging but drowned when the ship slipped off the reef into deeper water. Eva Carmichael a passenger had raced onto the deck to find out what was happening only to be confronted by towering cliffs looming above the stricken ship. In all the chaos, Captain Gibbs grabbed Eva and said, "If you are saved Eva, let my dear wife know that I died like a sailor". That was the last Eva Carmichael saw of the captain. She was swept off the ship by a huge wave. Eva saw Tom Pearce on a small rocky beach and yelled to attract his attention. He dived in and swam to the exhausted woman and dragged her to shore. He took her to the cave and broke the open case of brandy that had washed up on the beach. He opened a bottle to revive the unconscious woman. A few hours later Tom scaled a cliff in search of help. He followed hoof prints and came by chance upon two men from nearby Glenample Station three and a half miles away. In a complete state of exhaustion, he told the men of the tragedy. Tom then returned to the gorge while the two men rode back to the station to get help. By the time they reached Loch Ard Gorge, it was cold and dark. The two shipwreck survivors were taken to Glenample Station to recover. Eva stayed at the station for six weeks before returning to Ireland by steamship. In Melbourne, Tom Pearce received a hero's welcome. He was presented with the first gold medal of the Royal Humane Society of Victoria and a £1000 cheque from the Victorian Government. Concerts were performed to honour the young man's bravery and to raise money for those who lost families in the disaster. Of the 54 crew members and passengers on board, only two survived: the apprentice, Tom Pearce, and the young woman passenger, Eva Carmichael, who lost her family in the tragedy. Ten days after the Lochard tragedy, salvage rights to the wreck were sold at auction for £2,120. Cargo valued at £3,000 was salvaged and placed on the beach, but most washed back into the sea when another storm developed. The wreck of Lochard still lies at the base of Mutton Bird Island. Much of the cargo has now been salvaged and some items were washed up into Lochard Gorge. Cargo and artifacts have also been illegally salvaged over many years before protective legislation was introduced in March 1982. One of the most unlikely pieces of cargo to have survived the shipwreck was a Minton majolica peacock- one of only nine in the world. The peacock was destined for the Melbourne 1880 International Exhibition. It had been well packed, which gave it adequate protection during the violent storm. Today the Minton peacock can be seen at the Flagstaff Hill Maritime Museum in Warrnambool. From Australia's most dramatic shipwreck it has now become Australia's most valuable shipwreck artifact and is one of very few 'objects' on the Victorian State Heritage Register.The shipwreck of the Loch Ard is of significance for Victoria and is registered on the Victorian Heritage Register ( S 417). Flagstaff Hill has a varied collection of artifacts from Loch Ard and its collection is significant for being one of the largest accumulation of artifacts from this notable Victorian shipwreck of which the subject items are a small part. The collection's objects give us a snapshot of how we can interpret the story of this tragic event. The collection is also archaeologically significant as it represents aspects of Victoria's shipping history that allows us to interpret Victoria's social and historical themes of the time. Through is associated with the worst and best-known shipwreck in Victoria's history.Lead shot; a group of mixed -sized lead shot. Small 2mm shot is embedded in a sea sediment clump of concretion. Also in the group are also 5 single 2mm shot and 4 single 4mm shot that are clean and free of sediment. The shot was recovered from the wreck of the Loch Ard.Nonewarrnambool, shipwreck coast, flagstaff hill, flagstaff hill maritime village, flagstaff hill maritime museum, shipwreck artefact, lead shot, loch ard, colonial industry, melbourne shot towers, victorian metallurgy, colonial imports -
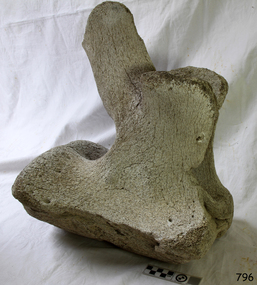 Flagstaff Hill Maritime Museum and Village
Animal specimen - Whale bone, Undetermined
... The "bone" of the whale which was most commonly used wasn’t technically a bone, it was baleen, a hard material arrayed in large plates, like gigantic combs, in the mouths of some species of whales. The purpose of the baleen is to act as a sieve, catching tiny organisms in sea water, which the whale consumes as food. ...The "bone" of the whale which was most commonly used wasn’t technically a bone, it was baleen, a hard material arrayed in large plates, like gigantic combs, in the mouths of some species of whales. The purpose of the baleen is to act as a sieve, catching tiny organisms in sea water, which the whale consumes as food. ...Prior to carrying out a detailed condition report of the cetacean skeletons, it is useful to have an understanding of the materials we are likely to encounter, in terms of structure and chemistry. This entry invites you to join in learning about the composition of whale bone and oil. Whale bone (Cetacean) bone is comprised of a composite structure of both an inorganic matrix of mainly hydroxylapatite (a calcium phosphate mineral), providing strength and rigidity, as well as an organic protein ‘scaffolding’ of mainly collagen, facilitating growth and repair (O’Connor 2008, CCI 2010). Collagen is also the structural protein component in cartilage between the whale vertebrae and attached to the fins of both the Killer Whale and the Dolphin. Relative proportions in the bone composition (affecting density), are linked with the feeding habits and mechanical stresses typically endured by bones of particular whale types. A Sperm Whale (Physeter macrocephalus Linnaeus, 1758) skeleton (toothed) thus has a higher mineral value (~67%) than a Fin Whale (Balaenoptera physalus Linnaeus, 1758) (baleen) (~60%) (Turner Walker 2012). The internal structure of bone can be divided into compact and cancellous bone. In whales, load-bearing structures such as mandibles and upper limb bones (e.g. humerus, sternum) are largely composed of compact bone (Turner Walker 2012). This consists of lamella concentrically deposited around the longitudinal axis and is permeated by fluid carrying channels (O’Connor 2008). Cancellous (spongy) bone, with a highly porous angular network of trabeculae, is less stiff and thus found in whale ribs and vertebrae (Turner Walker 2012). Whale oil Whales not only carry a thick layer of fat (blubber) in the soft tissue of their body for heat insulation and as a food store while they are alive, but also hold large oil (lipid) reserves in their porous bones. Following maceration of the whale skeleton after death to remove the soft tissue, the bones retain a high lipid content (Higgs et. al 2010). Particularly bones with a spongy (porous) structure have a high capacity to hold oil-rich marrow. Comparative data of various whale species suggests the skull, particularly the cranium and mandible bones are particularly oil rich. Along the vertebral column, the lipid content is reduced, particularly in the thoracic vertebrae (~10-25%), yet greatly increases from the lumbar to the caudal vertebrae (~40-55%). The chest area (scapula, sternum and ribs) show a mid-range lipid content (~15-30%), with vertically orientated ribs being more heavily soaked lower down (Turner Walker 2012, Higgs et. al 2010). Whale oil is largely composed of triglycerides (molecules of fatty acids attached to a glycerol molecule). In Arctic whales a higher proportion of unsaturated, versus saturated fatty acids make up the lipid. Unsaturated fatty acids (with double or triple carbon bonds causing chain kinks, preventing close packing (solidifying) of molecules), are more likely to be liquid (oil), versus solid (fat) at room temperature (Smith and March 2007). Objects Made From the Whaling Industry We all know that men set forth in sailing ships and risked their lives to harpoon whales on the open seas throughout the 1800s. And while Moby Dick and other tales have made whaling stories immortal, people today generally don't appreciate that the whalers were part of a well-organized industry. The ships that set out from ports in New England roamed as far as the Pacific in hunt of specific species of whales. Adventure may have been the draw for some whalers, but for the captains who owned whaling ships, and the investors which financed voyages, there was a considerable monetary payoff. The gigantic carcasses of whales were chopped and boiled down and turned into products such as the fine oil needed to lubricate increasing advanced machine tools. And beyond the oil derived from whales, even their bones, in an era before the invention of plastic, was used to make a wide variety of consumer goods. In short, whales were a valuable natural resource the same as wood, minerals, or petroleum we now pump from the ground. Oil From Whale’s Blubber Oil was the main product sought from whales, and it was used to lubricate machinery and to provide illumination by burning it in lamps. When a whale was killed, it was towed to the ship and its blubber, the thick insulating fat under its skin, would be peeled and cut from its carcass in a process known as “flensing.” The blubber was minced into chunks and boiled in large vats on board the whaling ship, producing oil. The oil taken from whale blubber was packaged in casks and transported back to the whaling ship’s home port (such as New Bedford, Massachusetts, the busiest American whaling port in the mid-1800s). From the ports it would be sold and transported across the country and would find its way into a huge variety of products. Whale oil, in addition to be used for lubrication and illumination, was also used to manufacture soaps, paint, and varnish. Whale oil was also utilized in some processes used to manufacture textiles and rope. Spermaceti, a Highly Regarded Oil A peculiar oil found in the head of the sperm whale, spermaceti, was highly prized. The oil was waxy, and was commonly used in making candles. In fact, candles made of spermaceti were considered the best in the world, producing a bright clear flame without an excess of smoke. Spermaceti was also used, distilled in liquid form, as an oil to fuel lamps. The main American whaling port, New Bedford, Massachusetts, was thus known as "The City That Lit the World." When John Adams was the ambassador to Great Britain before serving as president he recorded in his diary a conversation about spermaceti he had with the British Prime Minister William Pitt. Adams, keen to promote the New England whaling industry, was trying to convince the British to import spermaceti sold by American whalers, which the British could use to fuel street lamps. The British were not interested. In his diary, Adams wrote that he told Pitt, “the fat of the spermaceti whale gives the clearest and most beautiful flame of any substance that is known in nature, and we are surprised you prefer darkness, and consequent robberies, burglaries, and murders in your streets to receiving as a remittance our spermaceti oil.” Despite the failed sales pitch John Adams made in the late 1700s, the American whaling industry boomed in the early to mid-1800s. And spermaceti was a major component of that success. Spermaceti could be refined into a lubricant that was ideal for precision machinery. The machine tools that made the growth of industry possible in the United States were lubricated, and essentially made possible, by oil derived from spermaceti. Baleen, or "Whalebone" The bones and teeth of various species of whales were used in a number of products, many of them common implements in a 19th century household. Whales are said to have produced “the plastic of the 1800s.” The "bone" of the whale which was most commonly used wasn’t technically a bone, it was baleen, a hard material arrayed in large plates, like gigantic combs, in the mouths of some species of whales. The purpose of the baleen is to act as a sieve, catching tiny organisms in sea water, which the whale consumes as food. As baleen was tough yet flexible, it could be used in a number of practical applications. And it became commonly known as "whalebone." Perhaps the most common use of whalebone was in the manufacture of corsets, which fashionable ladies in the 1800s wore to compress their waistlines. One typical corset advertisement from the 1800s proudly proclaims, “Real Whalebone Only Used.” Whalebone was also used for collar stays, buggy whips, and toys. Its remarkable flexibility even caused it to be used as the springs in early typewriters. The comparison to plastic is apt. Think of common items which today might be made of plastic, and it's likely that similar items in the 1800s would have been made of whalebone. Baleen whales do not have teeth. But the teeth of other whales, such as the sperm whale, would be used as ivory in such products as chess pieces, piano keys, or the handles of walking sticks. Pieces of scrimshaw, or carved whale's teeth, would probably be the best remembered use of whale's teeth. However, the carved teeth were created to pass the time on whaling voyages and were never a mass production item. Their relative rarity, of course, is why genuine pieces of 19th century scrimshaw are considered to be valuable collectibles today. Reference: McNamara, Robert. "Objects Made From the Whaling Industry." ThoughtCo, Jul. 31, 2021, thoughtco.com/products-produced-from-whales-1774070.Whale bone was an important commodity, used in corsets, collar stays, buggy whips, and toys.Whale bone vertebrae. Advanced stage of calcification as indicated by deep pitting. Off white to grey.Noneflagstaff hill, warrnambool, shipwrecked-coast, flagstaff-hill, flagstaff-hill-maritime-museum, maritime-museum, shipwreck-coast, flagstaff-hill-maritime-village, whales, whale bone, corsets, toys, whips, whalebone -
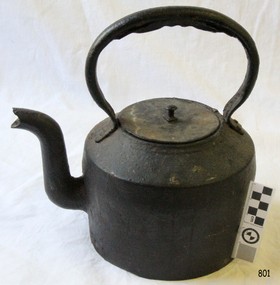 Flagstaff Hill Maritime Museum and Village
Domestic object - Kettle, T & C Clarke and Co Ltd, 1880 to 1900
... The item is significant as it was used as a domestic kitchen item to boil water safely without the concern that the metal may contain lead or arsenic as earlier cooking utensils had. flagstaff hill warrnambool shipwrecked-coast flagstaff-hill flagstaff-hill-maritime-museum maritime-museum shipwreck-coast flagstaff-hill-maritime-village Made by "T & C Clark "C" inside 6 pointed star, England RD 665875 3 quarts No 3 First Quality" Kettle, cast iron ware, black with some rust. . ...T. & C. Clark & Company Limited was based at Shakespeare Foundry in Wolverhampton England and was founded in 1795 by Thomas and Charles Clark. The company grew to be one of the largest iron foundries in Wolverhampton and were pioneering in the manufacture of enamelled cast iron cookware and sanitary wares. The company's product range included thousands of items, both domestic and industrial. T. & C. Clark were pioneers in the use of enamelled cast ironware, after taking out a patent in 1839 guaranteeing their products to be free of lead or arsenic. The company became the largest employer in Wolverhampton employing between 600 to 700 people.The item is significant as it was used as a domestic kitchen item to boil water safely without the concern that the metal may contain lead or arsenic as earlier cooking utensils had.Kettle, cast iron ware, black with some rust. . With lid of questionable origin. Made by "T & C Clark "C" inside 6 pointed star, England RD 665875 3 quarts No 3 First Quality"flagstaff hill, warrnambool, shipwrecked-coast, flagstaff-hill, flagstaff-hill-maritime-museum, maritime-museum, shipwreck-coast, flagstaff-hill-maritime-village -
 Flagstaff Hill Maritime Museum and Village
Oar, early 20th century
... A winch was used to bring it in and out of the water. The lifeboat ‘Warrnambool’ was similar in size to the old lifeboat but far superior in design, build and sea-going qualities such as greater manoeuvrability. ...A winch was used to bring it in and out of the water. The lifeboat ‘Warrnambool’ was similar in size to the old lifeboat but far superior in design, build and sea-going qualities such as greater manoeuvrability. ...This oar is from the Lifeboat Warrnambool, which is on sit at Flagstaff Hill Maritime Village. The construction of the lifeboat ‘Warrnambool’ began 15th September 1909 and was completed almost 12 months later, 1st September 1910. It was built at the Government Dockyard in Williamstown, Victoria, along the lines designed by the Great Britain’s Royal Lifeboat Institution, and included whaleback decks fore and aft, mast and centreboard, and rudder and tiller hung from the sternpost. It could be propelled by both sail and oar. At that time Captain Ferguson was Chief Harbour Master and Mr Beagley was foreman boat builder. Mr Beagley built the lifeboat with his fellow workmen. The boat was described as “… a fine piece of workmanship and does credit to her builders and designers…” It had all the latest improvements in shape, disposition of weight and watertight compartments, and it had space for a large number of people in addition to the crew. It appears that 'H Meiers' whose signature was on the plaque that was found concealed in the hull, was involved with the building of the lifeboat. His signature and the dates of the start and finish of the boat’s construction are pencilled on the raw timber 'plaque' found in the hull in the early 1990’s when the lifeboat was being restored. It is interesting that the ‘Melbourne Directory’ of 1911, published by Sands and MacDougal, lists McAuley and Meiers, boat builders, Nelson Place foreshore, between Pasco and Parker Streets, Williamstown, (Victorian Heritage Database, ‘Contextual History, Maritime Facilities’), It is quite possibly the business of the person whose name is inscribed on the lifeboat plaque. Flagstaff Hill’s documentation also mentions that the keel was laid at ‘Harry Myers, boat builders, Williamstown, Melbourne’ – the name ‘Myers’ can also be spelled ‘Meiers’, which could be the same person as the Meiers in “McAuley and Meiers” (as mentioned in genealogy lines of Myers). The new lifeboat, to be named ‘Warrnambool’ was brought to town by train and launched at the breakwater on 1st March 1911 using the Titan crane (the old lifeboat built in 1858, was then returned to Melbourne in 1911). This new lifeboat was stationed at Warrnambool in a shed located at the base of the Breakwater, adjacent to the slipway. A winch was used to bring it in and out of the water. The lifeboat ‘Warrnambool’ was similar in size to the old lifeboat but far superior in design, build and sea-going qualities such as greater manoeuvrability. The ‘self-righting, self-draining’ design was “practically non-capsizeable” and even if the boat overturned it would right itself to an even keel and the water would drain away. The hull was built of New Zealand Kauri, using double diagonal planking, laid in two layers at right angles, with a layer of canvas and red lead paint between the timbers to help seal the planking. It has “… plenty of freeboard, high watertight spaces between the deck and bottom… through which pipes lead…” The backbone timbers were made of Jarrah. The lifeboat Warrnambool was one of several rescue boats used at Port Fairy and Warrnambool in early 1900's. In late 1914 the Warrnambool lifeboat and crew were used to help find what was left of the tragic wreckage of the Antares, and were able to discover the body of one of the crewmen, which they brought back to Warrnambool. Between 1951 and 1954 the lifeboat was manned under the guidance of Captain Carrington. He held lifeboat practice each month on a Sunday morning, to comply with the Ports and Harbour’s request that lifeboats be manned by a strong and competent crew, ready for action in case of emergency. In the early 1960’s it ended its service as a lifeboat and was used in Port Fairy as a barge to help dredge the Moyne River, bolted to the Port Fairy lifeboat. Flagstaff Hill obtained the Warrnambool in 1975. In 1984 it was on display at Flagstaff Hill Maritime Village, Warrnambool. On 23rd May 1990 she was lifted from the water and placed in a cradle for restoration. The name ‘WARRNAMBOOL could be seen faintly on the lifeboat before it was restored. It was during the restoration that Flagstaff Hill's boat builder discovered the 'plaque' inside the hull. A copy of the blueprint plans has the name “V.E.E. Gotch” printed on it. His advertisement in Footscray’s ‘Independent’ newspaper of Saturday 11th May 1901 states he is “Principal and Skilled member (Naval Architect) to the Court of Marine Inquiry of Victoria and holds classes for naval architectural drawing and arithmetic.” The oar is significant for its association with the lifeboat WARRNAMBOOL, which is significant for its half century service to the local community as a lifesaving vessel. She was also used to help retrieve the body of a shipwrecked crew member of the ANTARES. Large wooden oar, shaped two handgrip with tapering shaft to large flattened blade, (2) copper reinforcing strips on blade. Sweep oar is from the Lifeboat Warrnambool. flagstaff hill, warrnambool, shipwrecked-coast, flagstaff-hill, flagstaff-hill-maritime-museum, maritime-museum, shipwreck-coast, flagstaff-hill-maritime-village, oar, lifeboat warrnambool, sweep oar -
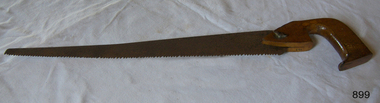 Flagstaff Hill Maritime Museum and Village
Tool - Compass Saw, Mid to late 20th Century
... used to cut through material, very often wood, though sometimes metal or stone. The cut is made by placing the toothed edge against the material and moving it forcefully forth and less vigorously back or continuously forward. This force may be applied by hand, or powered by steam, water...used to cut through material, very often wood, though sometimes metal or stone. The cut is made by placing the toothed edge against the material and moving it forcefully forth and less vigorously back or continuously forward. This force may be applied by hand, or powered by steam, water ...A saw is a tool consisting of a tough blade, wire, or chain with a hard-toothed edge. It is used to cut through material, very often wood, though sometimes metal or stone. The cut is made by placing the toothed edge against the material and moving it forcefully forth and less vigorously back or continuously forward. This force may be applied by hand, or powered by steam, water, electricity or other power sources. An abrasive saw has a powered circular blade designed to cut through metal or ceramic. In ancient Egypt, open (unframed) saws made of copper are documented as early as the Early Dynastic Period, circa 3,100–2,686 BC. Many copper saws were found in tombs dating to the 31st century BC. Models of saws have been found in many contexts throughout Egyptian history. As the saw developed, teeth were raked to cut only on the pull stroke and set with the teeth projecting only on one side, rather than in the modern fashion with an alternating set. Saws were also made of bronze and later iron. In the Iron Age, frame saws were developed holding the thin blades in tension. The earliest known sawmill is the Roman Hierapolis sawmill from the third century AD used for cutting stone.The subject item is believed to date from around the mid to late 20th century and is regarded as a modern item. The maker is unknown but the pattern or design and type of wood used indicate it is a tool of modern manufacture. Compass saw blade with wooden handle attached with wingnut.Noneflagstaff hill, warrnambool, flagstaff-hill, flagstaff-hill-maritime-museum, maritime-museum, shipwreck-coast, flagstaff-hill-maritime-village, wood cutting, wood saw, cross cut saw, cabinet makers tools, wood working tools, tool -
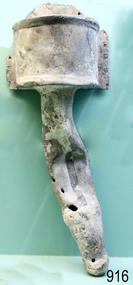 Flagstaff Hill Maritime Museum and Village
Functional object - Urinal, circa 1825
... These first lavatories were floored with grating or nets so the force of the sea could wash them clean, and they were always used on the lee or non-weather side so the effluent fell directly into the water rather than back on board. ...These first lavatories were floored with grating or nets so the force of the sea could wash them clean, and they were always used on the lee or non-weather side so the effluent fell directly into the water rather than back on board. ...The urinal was probably situated in the forward part of the ship rather than the stern, being one of two placed on either side of the deck and housed immediately adjacent to the doors into the forward castle, or crew sleeping quarters. The toilets on maritime vessels were (and still are) called the ‘heads’, after the sanitation arrangements common until the end of the eighteenth century. The name was given to the ‘head’ of the ship, forward of the forecastle and around the beak or bowsprit. These first lavatories were floored with grating or nets so the force of the sea could wash them clean, and they were always used on the lee or non-weather side so the effluent fell directly into the water rather than back on board. The Children's wrecking: The barque Children was one of the first vessels to be lost in the Western District. The vessel was wrecked to the east of Warrnambool on 14th January 1838. When it ran ashore in hurricane-force winds, 22 passengers and crew were fortunate to escape being battered to death on the rocks. The Children broke up within 20 minutes, sweeping sixteen of those on board to their deaths. After eleven days, the rescued survivors, all of whom were injured, had been taken to Portland. According to Lloyd's Shipping Register 1837-1839, the Children was built in 1825 at Liverpool and operated by owners Gordon & Co, of London. Registration number 123/1837, James Henty then bought her in 1837 as a three-masted barque of 254 tons, with a hull of “part pitch pine, felt sheathed” and “coppered in 1837” at Launceston, registered number 6/1837. In 1838, the Children, under her master Captain H. Browne, completed a successful round trip from Launceston to London (carrying wool and whale oil loaded in Portland), returning in late November of that year carrying a general cargo including house bricks used for ballast. On the 11th of January 1839, the Children sailed from Launceston for Adelaide, with 24 passengers, 14 crew, and an awkward mixed cargo, including 1500 sheep, 8 bullocks, 7 horses, farming implements, and six whaleboats with associated whaling gear. One account states that when the Children was “put out from port, she was light and badly ballasted”. The vessel immediately encountered four days of hurricane-force storms, eventually clearing on the early morning of the 14th. However, it was too late to take accurate measurements of the sun or stars to establish their position relative to the coast. The Children collided with a limestone stack at the entrance of what is now Childers Cove, and the seas smashed the vessel into pieces within half an hour. All the cargo and 16 lives were lost, including 9 children. The Henty brothers contributed £150 towards a fund for the 22 survivors at a memorial service held in Launceston later that year. It was a major financial setback for James Henty and his brothers, but one from which they recovered. In a submission to the Governor of New South Wales dated 24 March 1840, the Henrys summarised their work over the previous six years of establishing the Portland settlement, stating “Six stations have been occupied, one at Portland Bay three at the open country about 60 miles inland called ‘Merino Downs’ They have erected two houses at Portland Bay and two others at Merino Downs”.The urinal recovered from the Children's wreck is significant as part of the original fittings of the early 19th-century barque. The 1839 wreck and recovered artefacts are examples of the construction methods and materials used in that era and can be used to study the evolution of shipbuilding methods and principles. The wreck of the Children is of state significance as one of colonial Victoria’s earliest and most significant maritime disasters, and one of the first vessels lost in the Western District. This is recognised by its inclusion on the Victorian Heritage Register, VHR No. S116. Little is left on the seabed to mark the tragedy, apart from some of the house bricks intended for the Henty settlement. A lead urinal with a rounded back at the top splash plate with an attached semi-circular receptacle or basin (20cm deep and projecting forward 30cm). At the sides are flanges with bolt holes connecting to a ship's wall. The urinal is drained by a funnel-shaped outlet also made of lead, reducing from a 10cm radius to a joined 5 cm pipe. The urinal was recovered from the wreck of the CHILDREN.flagstaff hill, warrnambool, flagstaff-hill, flagstaff-hill-maritime-museum, shipwreck-coast, shipwreck artefact, the children, lead ship’s plumbing, crew urinal, the ‘heads’, ship plumbing, james henty, portland bay, urinal, ship's urinal, ship’s fitting, ship’s lead plumbing, ship’s toilet, ship’s urinal, children, childer’s cove, port campbell, 1839 shipwreck, james henty and co, henty brothers, captain h. browne, portland -
 Flagstaff Hill Maritime Museum and Village
Nibs & box, late 19th to early 20th century
... India Ink was one of the most popular inks used with the nib pens, notable for its satin-like smooth flow. This ink is composed of a particularly fine carbon mixed with water; it can also be obtained as a dry stick that is then crushed and mixed with water as required. ...India Ink was one of the most popular inks used with the nib pens, notable for its satin-like smooth flow. This ink is composed of a particularly fine carbon mixed with water; it can also be obtained as a dry stick that is then crushed and mixed with water as required. ...Box of dip pen nibs made by William Mitchell Calligraphy dating back to late 19th or early 20th century when dip pens with steel nibs were the main writing instruments. The pen nibs are shaped to fit into a slot in the base of a wooden or Bakelite pen holder. The hole at the front of the nib is for collecting ink from a well, which is then stored in a reservoir at the back of the nib. The nibs are stamped with their nib size and Pedigree (what type of nib it is) and maker’s details. William Mitchell Calligraphy still makes these nibs today with a slightly difference finish. (ref: Sales and Marketing Director of William Mitchell Calligraphy in 2016). HISTORY of the Ink Pen Quills and ink were common writing tools until the early 19th century when the pen trade began mass producing steel nibs and pens. The steel nibs each have a hole in the middle that acts like a well for the ink. When the nib is dipped into the ink well the writer needs to ensure that it is dipped to only just past that well. India Ink was one of the most popular inks used with the nib pens, notable for its satin-like smooth flow. This ink is composed of a particularly fine carbon mixed with water; it can also be obtained as a dry stick that is then crushed and mixed with water as required. The Jewellery Quarter of Birmingham had the largest concentration of independent jewellers in Europe. Birmingham became the centre of the world’s pen trade for many years -, during the 1800’s over 100 factories, employing 1000s of skilled workers, manufactured the ‘Birmingham Pen’. ABOUT WILLIAM MITCHELL CALLIGRAPHY LTD.* (*The following text is quoted from the William Mitchell Calligraphy website) British based William Mitchell Calligraphy has been designing and manufacturing exceptional pens for almost 200 years. The William Mitchell heritage in making pen nibs began whilst working with his brother John Mitchell in the early 1820s. William Mitchell established his own business in 1825 to become one of the leading nib manufacturers and famous for lettering pens. Almost 100 years later William Mitchell merged with Hinks, Wells & Co, another pen manufacturer, to form British Pens, employing around 1000 people in the Bearwood Road area of Birmingham. During the early 1960s British Pens acquired the pen business of other pen manufacturers Perry & Co and John Mitchell, once again reuniting the two brothers. Joseph Gillott, who were famous for their artist drawing and mapping nibs, amalgamated with British pens in 1969. William Mitchell and Joseph Gillott established in Birmingham during the early part of the nineteenth century and [their products] are still proudly made here. British Pens were subsequently purchased by its current owner Byron Head, the owner of William Mitchell (Sinkers) in 1982, and was subsequently renamed William Mitchell (calligraphy) Ltd. Established in 1827 Joseph Gillott was one of the pioneers of mass steel pen nib manufacturing. The company was particularly strong in the American market, prompting Elihu Burrit, the American consul, to write “In ten thousand school houses across the American continent between two oceans, a million children are as familiarly acquainted with Joseph Gillott as with Noah Webster” (The compiler of the famous American dictionary). The company consequently received visits from many notable Americans, including president Ulysses S Grant. Email on file, from Mike Chappell, Sales and Marketing Manager, William Mitchell Calligraphy, “20161122 - William Mitchell re pen nibs” How to use a dip pen to create modern calligraphy, https://thepostmansknock.com/how-to-use-a-dip-pen-to-create-modern-calligraphy/ India Ink, Wikipedia https://en.wikipedia.org/wiki/India_ink birmingham Pen Trade, Wikipedia, https://en.wikipedia.org/wiki/Birmingham_pen_trade The Pen Museum, http://penmuseum.org.uk/ The early 19th century invention and later mass production of pen nibs such these in our collection had a large impact on education and literacy because the nibs could be produced in great numbers and affordable prices.Box of patent Mitchell nibs containing 48 "Pedigree" nibs. Box depicts picture of William Mitchell on lid, and picture of nib pen on lid and side. Made in Birmingham, England. Nib “0505 Wm MITCHELLS PEDIGREE ENGLAND” Box “PEDIGREE / MAINFOLD SLIP”, “WILLIAM MITCHELL / BIRM - - - - - - LOND” flagstaff hill, warrnambool, shipwrecked-coast, flagstaff-hill, flagstaff-hill-maritime-museum, maritime-museum, shipwreck-coast, flagstaff-hill-maritime-village, william mitchell calligraphy ltd, pen nib, writing implement, writing accessories, dip pen, birmingham manufacturer, communication in writing, mass produced pen nibs -
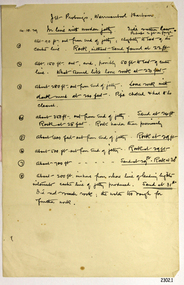 Flagstaff Hill Maritime Museum and Village
Document - Report, Jet Probings, Warrnambool Harbour, 16-10-1929
... Jet Probing is a method used for underwater archaeology, cable installation and coastal engineering. A jet probe is a machine that produces a strong jet of water that penetrates the layers of sediment on the seabed, determining their depth, thickness and consistency. ...Water Commission and the Harbour Trust concluded that it would less costly to make repairs to prevent further damage rather than replaced the damage portion of the wall. A contract was raised in late 1924 to deposit rubble on the damaged side of the breakwater to minimise the Southern Ocean’s destructive action and work had started by August 1925. By the 1940's the harbour was no longer used...The report gives figures for the depth and consistency of the water and seabed at a particular point in time and can be used to compart with similar figures taken at different times. ...This report lists the depths of water and the consistency of the seabed surrounding the Warrnambool Harbour in October 1929, The information, often referred to as 'soundings', was obtained by Jet Probing,. In earlier days a lead line was used to perform a similar task. The author of the document is unknown. Jet Probing is a method used for underwater archaeology, cable installation and coastal engineering. A jet probe is a machine that produces a strong jet of water that penetrates the layers of sediment on the seabed, determining their depth, thickness and consistency. It provides a survey of the seabed and can be used as an aid to engineering design and construction. The report mentions lining up with the wooden jetty, the end of the breakwater and the leading lights. It mentions sand, loose rock and rock. It tells of stopping work due to the water being too rough, the pipe choking, difficulty in connecting pipes, and pipe joint breaking as it tried to get through the sand, The report in the document is significant for its connection with the Warrnambool Harbour, Warrnambool Breakwater, Warrnambool Jetty and Lady Bay. The report gives figures for the depth and consistency of the water and seabed at a particular point in time and can be used to compart with similar figures taken at different times. The results could determine plans for future engineering works.Report, titled 'Jet Probings, Warrnambool Harbour'. Two pages of cream coloured paper with hand written notes in pen and ink. Report covers three days of Jet Probings, with resulting figures and comments, for the depths of the surroundings of the Warrnambool Harbour. The report is in point form, with some underlining. Dates of recordings are 14-10-29, 15-10-29 and 16-10-29. (1929) The situation of the harbour had become a real problem by 1910 and required continuous dredging. In 1914 the Breakwater was extended but proved to be a failure because the work began to subside and by 1920 about two thirds of the harbour was silted up. Alterations made in the 1920's increased the silting problem. The soundings and Jet Probings were done after the Royal Commission of 1923, when the damaged stonework on the seaward side of the Warrnambool Breakwater, caused by the action of the sea, was the subject of enquiry. A conference between the Public Works, Water Commission and the Harbour Trust concluded that it would less costly to make repairs to prevent further damage rather than replaced the damage portion of the wall. A contract was raised in late 1924 to deposit rubble on the damaged side of the breakwater to minimise the Southern Ocean’s destructive action and work had started by August 1925. By the 1940's the harbour was no longer used. More alterations were made in the 1950's and 1960's. document, depth, warrnambool harbour, 1929, soundings, jet probe, jet probing, seabed, map of seabed, underwater engineering, warrnambool jetty, warrnambool breakwater, breakwater upgrade, leading lights, chart the harbour, flagstaff hill, warrnambool, flagstaff hill maritime museum & village, maritime museum, maritime village, shipwreck coast, lady bay, port of warrnambool, breakwater, jetty, pier, vhr h2024, royal commission, 1923, public works, water commission, harbour trust, victorian harbours -
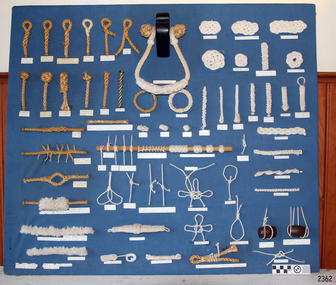 Flagstaff Hill Maritime Museum and Village
Education kit - Knot Board, Tom Long, DSM (Member of International Guild of Knot Tyers), ca 1975 to 1986
... For example, Italian hemp rope was preferred for the light line used in shore-to-ship rescues because it was lightweight, not easily knotted, and absorbed less water. ...For example, Italian hemp rope was preferred for the light line used in shore-to-ship rescues because it was lightweight, not easily knotted, and absorbed less water. ...The Display Board of Konts was handmade in Kings Lynn, Devon, England, by Tom Long DSM, a member of the International Guild of Knot Tyers. Tom Long more recently lived in a suburb of Melbourne. This display board shows the knots and joins used in ropework performed by a sailmaker and other skilled knot tyers and ropeworkers. It demonstrates the uses of some of the knots, such as knobs and handles, suspending lengths of wood, reinforcing spliced rope and even for decorative work. The sailmakers, travelling as part of the ship’s crew, stored their tool kit in a canvas ditty bag. It contained needles, awls, a sailmaker’s leather-palmed glove with a heavily reinforced palm, a shuttle to mend and make nets, fids, knives, mallets, brushes, rulers, and rope gauges. Sailmakers used their ropework and knot-making skills for various purposes and chose the type of rope fibre for its particular properties. For example, Italian hemp rope was preferred for the light line used in shore-to-ship rescues because it was lightweight, not easily knotted, and absorbed less water. A supply of various types of rope was a commodity on board a ship and on land in the new colonies. It was flexible, easily stored, and could be worked to create an endless variety of objects on its own or with other materials like wood. An example is a simple rope ladder. Lengths could be combined to make various thicknesses, and pieces could be skilfully joined together by splicing. The importance of knots in seafaring cannot be overestimated. When ships relied on only the wind for power and speed, there were a huge number of various ropes in use, particularly about the sails and rigging. Seafarers would be judged on their ability to tie knots speedily and correctly. A mounted display of authentic seamen's knots is on a board covered in blue fabric. Various rope grades and fibres were used to work numerous knots and splices. Some of the uses are familiar, such as the toggle, the pineapple knot, and the Turk’s head. A selection of rope grades and fibres was used to work numerous knots and splices. Some of the uses are familiar, such as the toggle, the pineapple knot, and the Turk’s head. The name or purpose of the knot is on the label below it. Labels below each knot give its name or use.flagstaff hill, warrnambool, maritime museum, maritime village, great ocean road, shipwreck coast, knot display, knot making, ropework, marine technology, sailmaker's work, sailor's knots, ship's rigging, seamen's knots, handmade, rope craft, knots, splices, display board of knots, knot board, tom long, sailmaker's knots, mariner's knots -
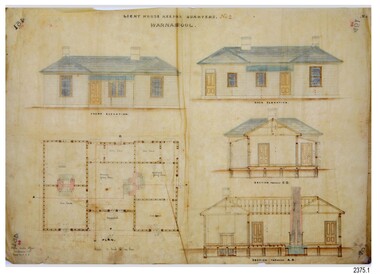 Flagstaff Hill Maritime Museum and Village
Document - Plans, Lighthouse Keeper's Quarters Warrnambool, 1858-1909
... water tanks, plumbing and such. WARRNAMBOOL'S LADY BAY LIGHTHOUSES- In the 1800s ships sailing from England to Australia began to use Bass Strait as a faster route to Melbourne. ...water tanks, plumbing and such. WARRNAMBOOL'S LADY BAY LIGHTHOUSES- In the 1800s ships sailing from England to Australia began to use Bass Strait as a faster route to Melbourne. ...The set of seven 1858 plans shows proposed plans for the original Lighthouse Complex that was built on Middle Island in 1858-1859. The whole complex was then transferred to Flagstaff Hill in 1871. The plan, dated 1909, is for proposed additions and repairs to the Quarters at Flagstaff Hill. The plan 'Alterations and Additions' shows alternate plans for changes to the quarters at the Flagstaff Hill location. This plan has no date. The Complex comprised the Lighthouse, the Lighthouse Keepers’ Quarters, the Store (now called the Chart Room) and a Privy, which was not included in these plans. The Keeper’s bluestone Quarters was a cottage divided into two compartments, one for each keeper and his family. The bluestone Store was divided into three; a store, a workshop an oil store (or office). The Privy comprised of a small building also divided into two separate, back-to-back toilets, one for each Keeper and his family. The Flagstaff Hill Keeper's Quarters have had extensions and additions at various times, and these have also been removed at various other times. THE PLANS - *Dec. 1858 (12/58) ‘Lighthouse Keepers Quarters No.2 Warrnambool’ (2375.01)* Public Works Office Melbourne – Front and Back elevations, sections, and floor plan. The drawing shows timber walls. [The floor plan is the closest plan to the current building, however, the walls are timber in this plan.] *Nov. 1858 – No.3 ‘Lighthouse Keepers Quarters Warrnambool’ (2375.02)* Office of Public Works, Melbourne – Back and End elevations and section through. The drawing shows stone walls. One side; Senior Keeper’s bedroom, living room and kitchen with storeroom. Another side; is the Assistant’s bedroom, living room and storeroom. *Nov. 1858 - No.4 ‘Lighthouse Stores Warrnambool’ (2375.03)* Office of Public Works – Front, Side and end elevations, centre section. The drawing shows stone walls. *Nov. 1858 – No.4, ‘Lighthouse Stores No. 2 Warrnambool’ (2375.04)* Office of Public Works – Front, side and end elevations, centre section. The drawing shows timber walls. *Nov. 1858 – ‘Details Lighthouse Keepers Quarters No. 2 Warrnambool’ (2375.05)* Public Works Office Melbourne. The plan shows the foundations, joists and eaves. The drawing shows timber walls. (Nov. 1858 – ‘No.4 ‘Lighthouse No. 2 – Warrnambool’ (2375.06)* Public Works Melbourne (Part of the paper is missing). This plan shows an octagonal tower, internal stairs, a balcony landing, and a weather vane on top. *November 1858 – No. 1, ‘Lighthouse – Warrnambool’ (2375.07)* Office of Public Works Melbourne. This plan shows a round tower, including the stairs, windows on the tower and the weather vane on the top. *4/3/9 [1909] – ‘Additions and Repairs, Lighthouse Quarters, Warrnambool, General Plan’ (2375.8)* Department of Public Works Melbourne’s official stamp is signed by Croft. It shows the floor plans of the Store, Upper Lighthouse and the Quarters. The Store building has three sections; a Store, Work-Shop and Office, with an internal wall between them and separate entries. The Quarters are divided into two dwellings. The Senior Keeper’s side on the left has fireplaces in two of the three bedrooms and there is a pantry and wash house. The Assistant’s side has no fireplaces in the bedrooms and there’s no pantry or washhouse. These plans include proposed changes to the buildings. The Senior Keeper’s Quarters would have a partition on bedroom 2, a bath with plumbing and drainage, a wall moved and a built-in side porch. The Store would also have a built-in porch. The undated plan 'Additions and Alterations' (2375.9) shows alternative arrangements for water tanks, plumbing and such. WARRNAMBOOL'S LADY BAY LIGHTHOUSES- In the 1800s ships sailing from England to Australia began to use Bass Strait as a faster route to Melbourne. Small navigation errors led to many tragic shipwrecks. From 1848 lighthouses were operating along Victoria’s southern coast as a guide for sailors. Coastal towns such as Warrnambool grew and the exchange of trade and passengers were of great benefit. However, the uncertain weather changes, relatively shallow waters and treacherous, hidden rocky reefs were not suitable for a Harbour and in the 1840s and 1850s there were many shipwrecks in the area, with some even stranded in its Lady Bay harbour. A jetty was built in 1850 and a flagstaff to guide seafarers was placed up high on what became known now as Flagstaff Hill. In November 1857 the Victorian Government recommended that Warrnambool Harbour had beacons and two lighthouses to guide vessels into and out of the Harbour safely. The white light of the Middle Island lighthouse was to be used for the first time on September 1, 1859. The red light of the Beach Lighthouse, a wooden obelisk structure, was first operated on March 25, 1860, but in 1868 this light was ‘discontinued’ due to it being too low. Melbourne’s Department of Public Works decided to relocate the Middle Island Lighthouse Complex - Lighthouse, Keeper’s Quarters, Privy, Store Room and even water tanks - to Flagstaff Hill. The lower obelisk was shortened, and a protruding gallery, railing, and external ladder were added, as well as the light from the Beach Lighthouse. A green guiding light was erected on the end of the jetty. The transfer of the Complex began in March 1871. Each shaped stone of the lighthouse was carefully numbered, removed then reassembled on Flagstaff Hill. In 1872 the well was sunk behind the Lighthouse Keeper’s Cottage. The Keepers and families had left Middle Island in April and moved to Flagstaff Hill in October 1871. Vessels entering Lady Bay align the Upper and Lower Lighthouse towers during the day and the lights at night. The Upper Lighthouse is a round tower, the Lower Light is square. The Lighthouses were categorised as harbour lights rather than coastal lights, so they remain under the control of the Victorian Government’s Ports and Harbours section. The lights were originally powered by oil, then acetylene gas, later by electricity, and then converted to solar power in 1988. In 1993 the solar panel was replaced by a battery charger. A decision was made in 1936 to replace the lighthouses’ lights with unattended lights that no longer required Keepers and Assistants. At least 29 Keepers had attended to the lighthouse from its opening in 1859 to when the last official Lightkeepers left In April 1916. The Warrnambool Harbour Board rented out the Quarters from 1916 to 1936. The Board closed down but the rentals continued with other unknown landlords. In the 1970s the Flagstaff Hill Planning Board was set up under the chairmanship of John Lindsay. The Board was to make recommendations to the Warrnambool City Council regarding the use of the buildings and the rest of the Crown Land on the site. The Flagstaff Hill Maritime Village opened in 1975 and began renovating the Cottage in stages, during which time evidence of a 1920s fire was found in the eastern section of the cottage. Additions of a porch on the west and a washroom on the east were made in the 1980s. The western part of the building is now a Shipwreck Museum and the east has returned to a late 19th-century Lighthouse Keeper’s cottage and includes the screen made by Assistant Lighthouse Keeper Thomas Hope during one of his two periods of service there. THE LIGHTHOUSE KEEPERS Lighthouse Keepers were responsible for keeping their Lighthouse’s lights shining at night. They kept a lookout for passing vessels and changes in weather. They were expected to clean, polish and maintain the equipment and buildings. They kept regular and detailed records of who was on watch, and the time the light was lit, trimmed and extinguished. They kept a journal about other events that occurred. They keep regular, accurate Meteorological Logs. It was expected that they were competent in Morse code signalling. They would be called to help in times of disasters and shipwrecks, and to give official statements about these events. Many Lighthouse Keepers also volunteered as members of the lifeboat crew. The Lady Bay lighthouses were officially classified as small, so the Keepers had the official titles of Senior Assistant Lighthouse Keeper and Assistant Lighthouse Keeper. They were employed by the Public Service and paid rent to live in the Lighthouse Quarters. They were compulsorily retired at the age of 60, with most receiving a superannuation payment. Despite their time-consuming duties, there was time to follow hobbies and crafts such as growing vegetables, playing musical instruments, making models of buildings including lighthouses, and crafting furniture pieces. An example of a keeper’s skills is the carved fire screen made by /assistant Keeper Thomas Hope in the early 20th century and displayed in the Lighthouse Keeper’s cottage at Flagstaff Hill. The last occupants of the Middle Island Complex were Senior Keeper Robert Deverell, his Assistant Keeper, Andrew Farncombe, and their families. They all became the first occupants at the Lady Bay Lighthouse Keepers’ Quarters on Merri Street. The Warrnambool Lighthouse Complex plans are the origin of what is now the Lady Bay Lighthouse Complex. They are a record of the people, process and departments involved in bringing the complex into fruition. The plans are significant to the Complex, which is now listed on the Victorian Heritage Register, H1520, for being of historical, scientific (technological) and architectural significance to the State of Victoria. The Complex is significant as an example of early colonial development. The plan are significant for their connection with the important navigational function of the Lighthouses, a function still being performed to this day. The plans are also significant as an example of a product from the Public Works Department in Victoria in the mid-to-late 19th century. The structures built to these plans still stand strong. Plans for the Lighthouse Complex in Warrnambool, including Lighthouses, Keeper's Quarters and Stores. Seven of the plans are on thin fragile paper, one is on thicker, stronger paper. The drawings have been made in pens coloured red and black. They originate from Public Works in Melbourne. Seven were drawn in 1858, one in 1904, the other is not dated.Dec. 1858 - Lighthouse Keepers Quarters No.2 Warrnambool. Public Works Office Melbourne. Nov. 1858 - No.3 ‘Lighthouse Keepers Quarters Warrnambool. Public Works Office Melbourne. Nov. 1858 - No.4 ‘Lighthouse Stores Warrnambool. Office of Public Works. Nov. 1858 - No.4, ‘Lighthouse Stores No. 2 Warrnambool. Office of Public Works. Nov. 1858 - Details Lighthouse Keepers Quarters No. 2 Warrnambool. Public Works Office Melbourne. Nov. 1858 - No.4 ‘Lighthouse No. 2 – Warrnambool. Public Works Melbourne. Nov. 1858 - No. 1, Lighthouse - Warrnambool. Office of Public Works Melbourne. 4/3/9 [1909] - Additions and Repairs, Lighthouse Quarters, Warrnambool, General Plan. Department of Public Works Melbourne. SIGNED "Croft" "15A" on reverse [no date] - Lighthouse Quarters Warrnambool, Additions and Alterations. "9A" on reverseflagstaff hill, warrnambool, lighthouse keeper's cottage, lighthouse residence, lighthouse, plans, public works, melbourne, flagstaff hill maritime museum, maritime museum, shipwreck coast, flagstaff hill maritime village, chart room, quarters, privy, middle island, beach lighthouse, obelisk, lighthouse keeper, assistant keeper, lighthouse complex, lady bay, lady bay complex, keepers, upper lighthouse, lower lighthouse, ports and harbours, cottage, harbour board, flagstaff hill planning board, meteorological record, robert deverell, andrew farncombe, warrnambool port, warrnambool harbour, residence, alterations, repairs, department of works, light keeper -
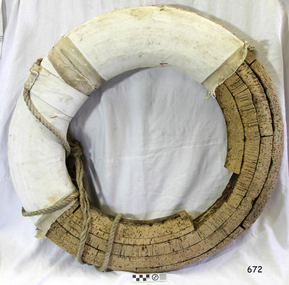 Flagstaff Hill Maritime Museum and Village
Equipment - Lifebuoy, late 19th to early 20th century
... used as a buoyancy device to keep a person afloat in the. It is usually connected by a rope to a person in a safe area such a nearby vessel or on shore. The lifebuoy is thrown to a person in distress in the water...used as a buoyancy device to keep a person afloat in the. It is usually connected by a rope to a person in a safe area such a nearby vessel or on shore. The lifebuoy is thrown to a person in distress in the water ...This lifebuoy is part of the lifesaving equipment that would be carried on vessels in the late 19th and early 20th century. The strips of cork wood have been joined together to make the ring shape. A lifebuoy, or life-preserver, is used as a buoyancy device to keep a person afloat in the. It is usually connected by a rope to a person in a safe area such a nearby vessel or on shore. The lifebuoy is thrown to a person in distress in the water, allowing the rescuer to pull the person to safety. The lifebuoy is a made from a buoyant material such as cork or rubber and is usually covered with canvas for protection and to make it easy to grip. The first use of life saving devices in recent centuries was by the Nordic people, who used light weight wood or cork blocks to keep afloat. From the early 20th century Kapok fibre was used as a filling for buoys. Light weight balsa wood was used as a filler after WW1. In 1928 Peter Markus invented and patented the first inflatable life-preserver. By WW2 foam was combined with Kapok. Laws were passed over time that has required aeroplanes and water going-vessels to carry life-preservers on board. The lifebuoy is an example of equipment carried on vessels in the late 19th and early 20th century to help preserve life. There were many lives lost in Australia’s colonial period, particularly along the coast of South West Victoria.Lifebuoy, round cork object covered with white stiffened material wound around it. flagstaff hill, warrnambool, shipwrecked-coast, flagstaff-hill, flagstaff-hill-maritime-museum, maritime-museum, shipwreck-coast, flagstaff-hill-maritime-village, lifebuoy, life rings, safety ring, life-saving buoy, ring buoy, life preserver, personal floating device, floatation device, safety equipment -
 Flagstaff Hill Maritime Museum and Village
Equipment - Lifebuoy, late 19th to early 20th century
... used as a buoyancy device to keep a person afloat in the. It is usually connected by a rope to a person in a safe area such a nearby vessel or on shore. The lifebuoy is thrown to a person in distress in the water...used as a buoyancy device to keep a person afloat in the. It is usually connected by a rope to a person in a safe area such a nearby vessel or on shore. The lifebuoy is thrown to a person in distress in the water ...This lifebuoy is part of the lifesaving equipment that would be carried on vessels in the late 19th and early 20th century. The strips of cork wood have been joined together to make the ring shape. A lifebuoy, or life-preserver, is used as a buoyancy device to keep a person afloat in the. It is usually connected by a rope to a person in a safe area such a nearby vessel or on shore. The lifebuoy is thrown to a person in distress in the water, allowing the rescuer to pull the person to safety. The lifebuoy is a made from a buoyant material such as cork or rubber and is usually covered with canvas for protection and to make it easy to grip. The first use of life saving devices in recent centuries was by the Nordic people, who used light weight wood or cork blocks to keep afloat. From the early 20th century Kapok fibre was used as a filling for buoys. Light weight balsa wood was used as a filler after WW1. In 1928 Peter Markus invented and patented the first inflatable life-preserver. By WW2 foam was combined with Kapok. Laws were passed over time that has required aeroplanes and water going-vessels to carry life-preservers on board. The lifebuoy is an example of equipment carried on vessels in the late 19th and early 20th century to help preserve life. There were many lives lost in Australia’s colonial period, particularly along the coast of South West Victoria.Lifebuoy, round cork object with no covering. flagstaff hill, warrnambool, shipwrecked-coast, flagstaff-hill, flagstaff-hill-maritime-museum, maritime-museum, shipwreck-coast, flagstaff-hill-maritime-village, life rings, lifebuoy, safety ring, life-saving buoy, ring buoy, life preserver, personal floating device, floatation device, safety equipment -
 Flagstaff Hill Maritime Museum and Village
Domestic object - Kettle, T & C Clarke and Co Ltd, Late 19th to early 20th century
... The item is significant as it was used as a domestic kitchen item to boil water safely without the concern that the metal may contain lead or arsenic as earlier cooking utensils had. flagstaff hill warrnambool shipwrecked-coast flagstaff-hill flagstaff-hill-maritime-museum maritime-museum shipwreck-coast flagstaff-hill-maritime-village Kettle Domestic Item Cooking Kitchen Ware Cast Iron T & C Clark & Co T & C Clark Kettle metal has spiral wire piece on handle painted black Domestic object Kettle T & C Clarke and Co Ltd ...T. & C. Clark & Company Limited was based at Shakespeare Foundry in Wolverhampton England and was founded in 1795 by Thomas and Charles Clark. The company grew to be one of the largest iron foundries in Wolverhampton and were pioneering in the manufacture of enamelled cast iron cookware and sanitary wares. The company's product range included thousands of items, both domestic and industrial. T. & C. Clark were pioneers in the use of enamelled cast ironware, after taking out a patent in 1839 guaranteeing their products to be free of lead or arsenic. The company became the largest employer in Wolverhampton employing between 600 to 700 people.The item is significant as it was used as a domestic kitchen item to boil water safely without the concern that the metal may contain lead or arsenic as earlier cooking utensils had. Kettle metal has spiral wire piece on handle painted black T & C Clarkflagstaff hill, warrnambool, shipwrecked-coast, flagstaff-hill, flagstaff-hill-maritime-museum, maritime-museum, shipwreck-coast, flagstaff-hill-maritime-village, kettle, domestic item, cooking, kitchen ware, cast iron, t & c clark & co -
 Flagstaff Hill Maritime Museum and Village
Equipment - Lifebuoy, late 19th to early 20th century
... Lifebuoys are flotation devices used to rescue and save people whose lives are at risk in the water. They are part of a ship's safety equipment. ...Lifebuoys are flotation devices used to rescue and save people whose lives are at risk in the water. They are part of a ship's safety equipment. ...Lifebuoys are flotation devices used to rescue and save people whose lives are at risk in the water. They are part of a ship's safety equipment. The cork material is very buoyant. The first use of life saving devices in recent centuries was by the Nordic people, who used light weight wood or cork blocks to keep afloat. From the early 20th century Kapok fibre was used as a filling for buoys. Light weight balsa wood was used as a filler after WW1. In 1928 Peter Markus invented and patented the first inflatable life-preserver. By WW2 foam was combined with Kapok. Laws were passed over time that has required aeroplanes and water going-vessels to carry life-preservers on board. The lifebuoy is an example of equipment carried on vessels in the late 19th and early 20th century to help preserve life. There were many lives lost in Australia’s colonial period, particularly along the coast of South West Victoria.Lifebuoy, round cork inner only, no canvas covering.flagstaff hill, warrnambool, shipwrecked-coast, flagstaff-hill, flagstaff-hill-maritime-museum, maritime-museum, shipwreck-coast, flagstaff-hill-maritime-village, lifebuoy, cork lifebuoy, flotation device, safety equipment, life rings, safety ring, life-saving buoy, ring buoy, life preserver, personal floating device, floatation device -
 Flagstaff Hill Maritime Museum and Village
Furniture - Ironing board, 1910-1930
... use of a machine, usually a heated tool (an iron), to remove wrinkles from fabric. The heating is around 180–220 °Celsius, depending on the fabric type. Ironing works by loosening the bonds between the long-chain polymer molecules in the fibres of the material. While the molecules are hot, the fibres are straightened by the weight of the iron, and they hold their new shape as they cool. Some fabrics, such as cotton, require the addition of water...use of a machine, usually a heated tool (an iron), to remove wrinkles from fabric. The heating is around 180–220 °Celsius, depending on the fabric type. Ironing works by loosening the bonds between the long-chain polymer molecules in the fibres of the material. While the molecules are hot, the fibres are straightened by the weight of the iron, and they hold their new shape as they cool. Some fabrics, such as cotton, require the addition of water ...Ironing is the use of a machine, usually a heated tool (an iron), to remove wrinkles from fabric. The heating is around 180–220 °Celsius, depending on the fabric type. Ironing works by loosening the bonds between the long-chain polymer molecules in the fibres of the material. While the molecules are hot, the fibres are straightened by the weight of the iron, and they hold their new shape as they cool. Some fabrics, such as cotton, require the addition of water to loosen the intermolecular bonds. Many modern fabrics developed in or after the mid-twentieth century require little or no ironing. Permanent press clothing was developed to reduce the ironing necessary by combining Wrinkle resistant polymers with cotton. The first known use of the iron for removing wrinkles in clothes is known to have occurred in China, and the electric iron was invented in 1882, by Henry W. Seeley. Seeley patented his "electric flat iron" on June 6, 1882 (U.S. Patent no. 259,054). On 15 February 1858 W. Vandenburg and J. Harvey patented an ironing table that facilitated pressing sleeves and pants legs. A truly portable folding ironing board was first patented in Canada in 1875 by John B. Porter. The invention also included a removable press board used for sleeves. In 1892 Sarah Boone obtained a patent in the United States for improvements to the ironing board, allowing for better quality ironing of shirt sleeves.A domestic item with an interesting history of development, significant as it shows the progress and the evolution of a domestic item designed to make housework more efficient.Wooden Ironing board with press board for sleeves, board is folding.Noneflagstaff hill, warrnambool, shipwrecked-coast, flagstaff-hill-maritime-museum, flagstaff-hill-maritime-village, domestic item, ironing board, ironing, clothes, wrinkles in clothes, henry w. seeley, w. vandenburg and j. harvey -
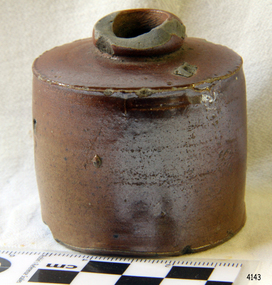 Flagstaff Hill Maritime Museum and Village
Container - Ink Bottle, 19th to early-20th century
... Ink could be purchased, ready to use, or in the powdered form, which needed to be mixed with water. After the invention of fountain pens, which had a reservoir of ink, and then ballpoint pens, which also had ink that flowed freely, the dip pen was slowly replaced. ...Ink could be purchased, ready to use, or in the powdered form, which needed to be mixed with water. After the invention of fountain pens, which had a reservoir of ink, and then ballpoint pens, which also had ink that flowed freely, the dip pen was slowly replaced. ...This design of ink bottle or ink well was commonly referred to as a ‘penny ink well’ because it was very inexpensive to produce. It is also known as a dwarf bottle. Pen and ink has been in use for hand writing from about the seventh century up until the mid-20th century. Up until around the mid-19th century a quill pen made from a bird’s feather was used. In the 1850s the steel point pen was invented and could be manufactured on machines in large quantities. In the 1880s a successful portable fountain pen was designed, giving a smooth flowing ink and ease of use. Ink wells, used with steel nib dip pens, were commonly used up until the mid-20th century. The pens only held a small amount of ink so users had to frequently dip the nib of the pen into an ink well for more ink. Hand writing with pen and ink left wet writing on the paper, so blotting paper was carefully used to absorb the excess ink and prevent smudging. Ink could be purchased, ready to use, or in the powdered form, which needed to be mixed with water. After the invention of fountain pens, which had a reservoir of ink, and then ballpoint pens, which also had ink that flowed freely, the dip pen was slowly replaced. However, artisans continue to use nib pens to create beautiful calligraphy.This ink well is historically significant as it represents methods of hand written communication that were still common up until the mid-20th century, when fountain pens and ballpoint pens took over in popularity and convenience.Ink bottle or ink well, sometimes called a Penny Ink Well. Cylindrical body, salt-glazed, brown ceramic stoneware bottle, handmade. Stoneware bottle. flagstaff hill, warrnambool, shipwreck coast, flagstaff hill maritime museum, flagstaff hill maritime village, maritime museum, great ocean road, shipwreck artefact, writing equipment, writing accessory, office equipment, stationery, domestic, stoneware, clay, ceramic, pottery, ink well, inkwell, ink bottle, penny ink well, nib pen, dip pen, ink, hand writing, record keeping, household, business, vintage, blotting paper, dwarf bottle -
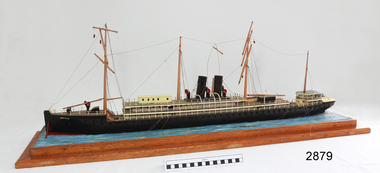 Flagstaff Hill Maritime Museum and Village
Craft - Ship Model, S.S. Orotava, ca. 1930-1974
... used as a passenger liner. The vessel was launched in 1889 and made two voyages for the Pacific Steam Navigation Company during 1889. Then, under the new management of the Orient Line, its first sailing was 6th June 1890 from Liverpool to Australia via Suez. During the Boer War (1889 – 1903), Orotava served as a troop ship, but apart from this, it remained in the Orient Line’s Australia service until 1906. On 14th December 1896, the Orotava sank at Tilbury Docks after being serviced on her return from Australia, becoming unstable and taking in water...used as a passenger liner. The vessel was launched in 1889 and made two voyages for the Pacific Steam Navigation Company during 1889. Then, under the new management of the Orient Line, its first sailing was 6th June 1890 from Liverpool to Australia via Suez. During the Boer War (1889 – 1903), Orotava served as a troop ship, but apart from this, it remained in the Orient Line’s Australia service until 1906. On 14th December 1896, the Orotava sank at Tilbury Docks after being serviced on her return from Australia, becoming unstable and taking in water ...This is a ship model of the SS Orotava, a British Screw Steamship built at Barrow-in-Furness, county of Lancashire, by the Naval Construction and Armaments Company (NC & A Co.) in 1889. The gross tonnage was 5552.10 tons, length 430 feet, breadth 49.3 feet and depth 34.2 feet. It was built for the Pacific Steam Navigation Company (of 31, James Street, Liverpool) and used as a passenger liner. The vessel was launched in 1889 and made two voyages for the Pacific Steam Navigation Company during 1889. Then, under the new management of the Orient Line, its first sailing was 6th June 1890 from Liverpool to Australia via Suez. During the Boer War (1889 – 1903), Orotava served as a troop ship, but apart from this, it remained in the Orient Line’s Australia service until 1906. On 14th December 1896, the Orotava sank at Tilbury Docks after being serviced on her return from Australia, becoming unstable and taking in water. Five men lost their lives. The ship was then raised to dry dock and repaired for service again, and an investigation was launched into the cause of the sinking. Between 1901 – 1906, the name Orient-Pacific Steam Line was used due to the close ties between the Pacific and the Orient lines. In 1906, the Pacific Steam Line Australian service was taken over by the Royal Mail Steam Packet Co., and the alliance between them and the Orient Line was dissolved in 1909. Orotava then served the West Indies service of the Royal Mail Line. In World War 1 (Dec 1914 – June 1916), the vessel served as HMS OROTAVA, an armed merchant cruiser. It was broken up in 1919.The model shows a visual description of the SS Orotava, which was used for commercial and government purposes from 1889 to 1919. The model is also an example of ship model-making, a skilled craft enjoyed for hundreds of years, demonstrating the evolution of ocean vessels. Ship model: SS Orotava. The model, without a case, has four masts and two funnels, and is mounted on a small timber base. The SS Orotave was a British passenger liner, launched in 1889. Inscriptions are painted on the hull. "OROTAVA" painted in white on each side of the bow. 'OROTAVA / LONDON" painted in white on the stern.flagstaff hill, warrnambool, shipwrecked-coast, flagstaff-hill, flagstaff-hill-maritime-museum, maritime-museum, shipwreck-coast, flagstaff-hill-maritime-village, ship model, ss orotava, naval construction and armaments co., n c & a co., pacific steam navigaiton company, passenger liner, orient line, orient-pacific steam line, royal mail line, hms orotava -
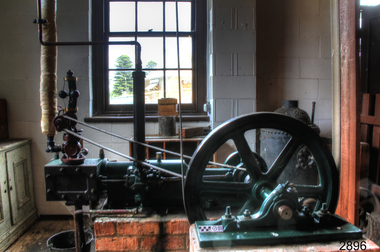 Flagstaff Hill Maritime Museum and Village
Machine - Steam Engine, Tangyes engineering, Mid-1880s
... It also has a water pump built into the valve rod, which is used to supply the boiler with water. ...It also has a water pump built into the valve rod, which is used to supply the boiler with water. ...This Tangye B-size, single-cylinder, horizontal steam engine was likely manufactured in England around the mid-1880s. It was distributed by Melbourne machinery merchants Cameron & Sutherland, which also operated in Bendigo and Ballarat. A local cheese maker once used the engine to drive factory equipment. It was later donated to the Warrnambool Technical School, which then donated it to Flagstaff Hill to add to its historical steam engine collection. Between its manufacture and its donation to Flagstaff Hill, the governor had been replaced by the current Pickering governor. This engine design was very popular in the late 19th and early 20th centuries. When connected and powered up, the engine could drive an overhead line shaft via a flat belt off its flywheel. The line shaft would then drive the machinery via flat belts. It could drive virtually any type of machinery, such as water and sewerage pumps, mine elevators, winches, cranes, metal forges, air blowers, and marine machinery. This engine features a mechanical governor, which controls the speed of the engine regardless of whether it is under load. It also has a water pump built into the valve rod, which is used to supply the boiler with water. Steam enters the cylinder via a slide valve and applies pressure to the piston; it is like a modern internal combustion engine, but in the case of the steam engine, the pressure is exerted in turn on either side of the piston. In other words, the connecting rod is pushed by steam via the piston and piston rod and then pulled back again by steam pushing on the opposite side of the piston. Thus, power is exerted almost continuously, except at the end of each piston stroke, when it reverses direction. In the 1880s, many local butter and cheese manufacturers installed Tangye steam engines to power their machinery. A comprehensive article in the Gippsland Mercury in September 1889 extolled the magnificence of the Farnham Butter Factory in Dennington, Warrnambool, and described how one Tangye engine was used to drive several machines in the cheese- and butter-making processes. A report in the Warragul Guardian in December 1890 notes that the newly opened Warrnambool Butter Factory used a Tangye steam engine to pump water from a 60-foot well. Tangye: Richard Tangye (1833–1906) and four of his brothers—James, Joseph, Edward, and George—were the sons of Joseph Tangye, a Quaker Cornish miner. In 1857, they founded the engineering firm Richard Tangye & Brothers in Birmingham, UK. In 1860, the firm became Tangye Brothers and moved to Cornwall Works in Birmingham. The business encouraged inventors to join the company and develop their patents there, as happened with Weston’s differential pulley block, invented by the Englishman Thomas Aldridge Weston in 1854. Tangye bought the patent in 1858, giving the firm the sole right to manufacture it. The design received a medal for “original application, practical utility and success” at the 1862 International Exhibition in London. Also in 1858, the Tangye firm was commissioned by Brunel’s shipping company to manufacture hydraulic lifting jacks, or rams, to launch the steamship SS Great Eastern. The success of this project brought favourable attention to the firm, and it became involved in other notable projects, including the erection of Cleopatra’s Needle in London in 1878 and work on the Forth Road Bridge in Scotland. The firm underwent several name changes over the years, including James Tangye and Brothers (1857), Tangye Brothers and Price (1859), Tangye Brothers (1860), Tangye Brothers & Holman (1876), Tangye Brothers (by 1878), Tangye Ltd. (1881), and then simply Tangye. Its machinery and equipment were exported worldwide. In 1884, a branch with showrooms, offices, and a warehouse was opened in Melbourne at Cornwall House, Collins Street West. The firm was well known for producing high-quality machinery for agriculture and industry. Even today, new Tangye machinery is available for a subsidiary of Allspeeds. An extensive account of the firm’s history, names, inventions, and further references is available in Grace’s Guide, which also includes references to and diagrams of the Tangye horizontal steam engine. The horizontal steam engine was made by the well-known engineering firm Tangye, known for its high quality of manufacture. It was an important development in machinery because it helped improve productivity. Engines of this type are still used in some parts of the world today. This engine is a good example of a late 19th-century steam engine used in industry and agriculture and adapted for many different purposes. It is also important locally because it was connected to a local cheese making business and part of the thriving western district dairy industry. It may have been one of the Tangyes engines used at the Farnham butter factory or the Warrnambool Butter Factory, which was reported to be one of the most important in the Colony. It is also connected to the Warrnambool Technical School, established in 1968. Steam engine: stationary Tangye Size B, single-cylinder, horizontal Mill type steam engine. It has a 4-inch diameter cylinder with an 8-inch stroke. The body is painted green, and the Pickering governor is red. It was manufactured in Birmingham, England, in accordance with Tangye's Patent 238930, and distributed by Cameron and Sunderland, Melbourne, in the mid-1880s. TANGEYS PATENT BIRMINGHAM B SIZE 238930 CAMERON & SUTHERLAND MELBOURNE THE PICKERING PORTLAND . GOVERNOR . CONN. U.S.A.flagstaff hill, warrnambool, maritime village, maritime museum, flagstaff hill maritime museum and village, shipwreck coast, great ocean road, machine, invention, engine, steam, steam engine, horizontal steam engine, tangyes horizontal steam engine, stationary steam engine, single cylinder steam engine, manufacturing, farming, pumps, lifting equipment, engines, machine tools, hydraulic rams, hydraulic pumps, steam pumps, differential pulleys, mill type steam engine, 4 inch cylinder, weston’s differential pulley, thomas aldridge weston, 1862 international exhibition in london, brunel, ss great eastern, cleopatra’s needle, forth road bridge, cornwall house, collins street melbourne, agricultural machinery, industrial machinery, allspeeds, dairy, pump, richard tangye & brothers, james tangye and brothers, tangye brothers and price, tangye brothers, tangye brothers & holman, tangyes ltd., tangye, richard tangye, james tangye, joseph tangye, edward tangye, george tangye, cornwall works, birmingham, pickering governor, pickering portland connecticut usa, 19th century, dairy plant, steam power, tangye's patent 238930, tangye b size engine, cameron & sutherland, machine merchants, 1880s, mid-1880s, cheese manufacturer, butter manufacturer, diary industry, warrnambool technical school, belt driven machinery, agriculture, mechanical governor, farnham butter factory, warrnambool butter factory -
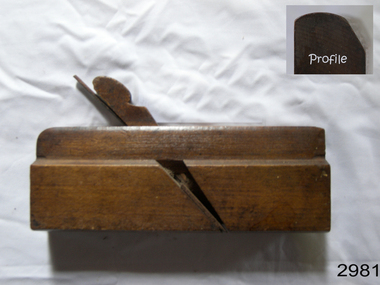 Flagstaff Hill Maritime Museum and Village
Tool - Wood moulding Plane, Auburn Tool Company, 1870 to 1893
... The 1870 US Census reported the firm had 21 machines, driven by water power, employing 66 males, producing annual products valued at us$70, 000. After A. Howland and Company was dissolved in 1874, the Auburn Tool Company again resumed using contract labour at the State Prison until 1877. ...The 1870 US Census reported the firm had 21 machines, driven by water power, employing 66 males, producing annual products valued at us$70, 000. After A. Howland and Company was dissolved in 1874, the Auburn Tool Company again resumed using contract labour at the State Prison until 1877. ...Moulding Plane: A moulding plane is a specialised plane used for making the complex shapes found in wooden mouldings that are used to decorate furniture or other wooden object. Traditionally, moulding planes were blocks of wear resistant hardwood, often beech or maple, which were worked to the shape of the intended moulding. The blade, or iron was likewise formed to the intended moulding profile and secured in the body of the plane with a wooden wedge. A traditional cabinetmakers shop might have many, perhaps hundreds, of moulding planes for the full range of work to be performed. Large crown mouldings required planes of six or more inches in width, which demanded great strength to push and often had additional peg handles on the sides, allowing the craftsman's apprentice or other worker to pull the plane ahead of the master who guided it. Auburn Tool Company: The Auburn Tool Company is known to exist from 1864 to 1893. George Casey reorganized the firm of Casey, Clark and Company as a joint-stock company in 1864, under the company name of Auburn Tool Company. The 1865 New York State Census noted the firm as a manufacturer of the plane, plane irons, and skates. The production that year was listed as 30,000 pairs of skates and 35,000 planes along with 25,000 dozen plane irons. The plane irons carried the trademark "Thistle". Both skates and plane irons were made from welded wrought iron and cast steel. The Auburn Tool Company was among the five leading plane manufacturing firms existing in the mid to late 19th century USA. Others were: H. Chapin's Son; Greenfield Tool Company; and Sandusky Tool Company. Auburn Tool Company, with these others, was also a founding member of the Plane Makers Association, organized around 1858 to fix prices. Most of the companies tools were manufactured by prisoners and in 1866 the firm was outbid for prison labour by J M Easterly and Co. After losing the contract with the prison authority they constructed a new building and continued in the plane manufacturing business with private labour. The 1870 US Census reported the firm had 21 machines, driven by water power, employing 66 males, producing annual products valued at us$70, 000. After A. Howland and Company was dissolved in 1874, the Auburn Tool Company again resumed using contract labour at the State Prison until 1877. The Auburn Tool Company merged with the Ohio Tool Company of Columbus, Ohio, on Nov 14, 1893. Although plane manufacturing was continued at Auburn until after 1907, after this merger the firm went under the name of the Ohio Tool Company. A significant item from the mid to late 19th century that today is quite rare and sought after by collectors. It gives us a snapshot of how furniture was made predominately by hand and with tools that were themselves hand made shows the craftsmanship used to make such a unique item. It also gives an insight into how many manufacturing companies bid for the rights to use prison labour to make their products at this time in our history. Decorative wood Moulding, plane Round type Auburn New York. Owner A Neudt Size 14 flagstaff hill, warrnambool, shipwrecked-coast, flagstaff-hill, flagstaff-hill-maritime-museum, maritime-museum, shipwreck-coast, flagstaff-hill-maritime-village -
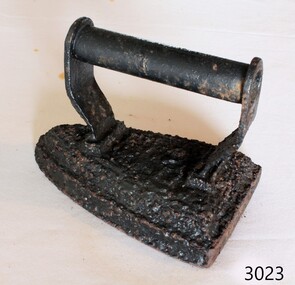 Flagstaff Hill Maritime Museum and Village
Domestic object - Flat Iron, circa 1900
... use, and the other re-heating. Large households with servants had a special ironing-stove for this purpose. Some were fitted with slots for several irons, and a water-jug on top. ...use, and the other re-heating. Large households with servants had a special ironing-stove for this purpose. Some were fitted with slots for several irons, and a water-jug on top. ...Blacksmiths started forging simple flat irons in the late Middle Ages. Plain metal irons were heated by a fire or on a stove. Some were made of stone. Earthenware and terracotta were also used, from the Middle East to France and the Netherlands. Flat irons were also called sad irons or smoothing irons. Metal handles had to be gripped in a pad or thick rag. Some irons had cool wooden handles and in 1870 a detachable handle was patented in the US. This stayed cool while the metal bases were heated and the idea was widely imitated. Cool handles stayed even cooler in "asbestos sad irons". The sad in sad iron (or sadiron) is an old word for solid, and in some contexts this name suggests something bigger and heavier than a flat iron. Goose or tailor's goose was another iron name, and this came from the goose-neck curve in some handles. In Scotland people spoke of gusing (goosing) irons. At least two irons were needed on the go together for an effective system, one would be in use, and the other re-heating. Large households with servants had a special ironing-stove for this purpose. Some were fitted with slots for several irons, and a water-jug on top. An early domestic object that gives an insight into how the ironing of clothes was done before the electric type irons we use and take for granted today. Iron; small flat domestic iron.Noneflagstaff hill, warrnambool, shipwrecked-coast, flagstaff-hill, flagstaff-hill-maritime-museum, maritime-museum, shipwreck-coast, flagstaff-hill-maritime-village, iron, flat iron, domestic iron, laundery, ironing equipment, sad iron -
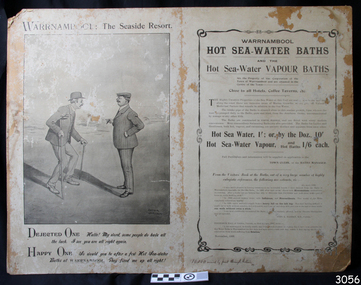 Flagstaff Hill Maritime Museum and Village
Poster - Recreation, Warrnambool Hot Sea Water Baths, c. November 1908
... The poster promotes the healing powers of the hot sea water baths that were in use in Warrnambool in the late 19th century through to the early 20th century. ...The poster includes a cartoon by Arthur Jordan, with a conversation between an ailing man and a good man after baths visits. There are several reviews dating from 1906 to 1908 extolling the healing powers of the baths' waters. In February 1877 a Baths Company (1050 shares) was formed in the town of Warrnambool for the establishment of the baths at the south end of Gillies Street. The baths were filled with sea water from Lady Bay, originally pumped by a windmill situated near the current Surf Lifesaving Club and carried by iron pipes to the Public Baths; later the water was pumped by gas motor. Hot and cold fresh water baths were advertised. The gentlemen’s bath was 100 feet long and 50 feet wide, of graduating depth. A second bath, solely for ladies, was 60 feet long by 30 feet wide. Hot Sea-water Baths were also part of the institution, and were sought after for their ‘wonderful curative powers’, and ‘incomparable’ as a ‘tonic for the feeble’. In June 1881 the Hot Sea Baths were opened, and both hot and cold water baths were supplied at reasonable charges. Patrons came from near and far to receive the benefits. The manager of the Baths was J. Kirkpatrick. The Baths Company struggled for several years without success so in 1883 the baths were sold to the Borough Council for 1250 pounds. The original shareholders received nothing for their outlay; the overdraught was over the sale price. In May 1884 the Council announced that an estimated they has spent 1000 pounds in improving the baths since purchasing them and were now returning an income of 11 per cent. The poster promotes the healing powers of the hot sea water baths that were in use in Warrnambool in the late 19th century through to the early 20th century. The baths were a place for fitness, health and social activity, an example of the recreational activities during this period.Poster, black and white, mounted on card. It shows advertising Warrnambool Sea-water Baths and Hot Sea-water Baths. There are several references promoting the health benefits of baths, dating from 1906-1908. The cartoon was sketched by Arthur Jordan. The poster was printed by The Thompson Printing Co. Warrnambool. Handwritten inscription on the lower edge.Handwritten "10,000 mailed by post through Victoria"flagstaff hill, warrnambool, shipwrecked-coast, flagstaff-hill, flagstaff-hill-maritime-museum, maritime-museum, shipwreck-coast, flagstaff-hill-maritime-village, warrnambool salt baths, warrnambool therapudic baths, arthur jordan, baths company, sea water baths, hot sea water, swimming, healing powers, warrnambool baths, advertisement, thompson printing co. warrnambool -
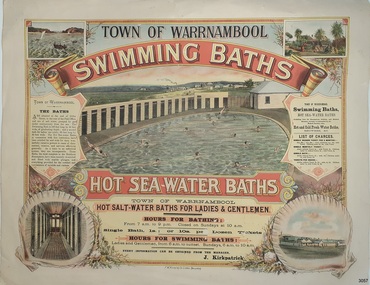 Flagstaff Hill Maritime Museum and Village
Poster - Recreation, Town of Warrnambool Swimming Baths, ca. May 1884
... water pumped by gas motor continuously from the sea. The Swimming Bath is 100 feet long by 50 feet wide, of graduating depth; and a second bath for ladies' use solely, 60 feet long by 30 feet wide. ...water pumped by gas motor continuously from the sea. The Swimming Bath is 100 feet long by 50 feet wide, of graduating depth; and a second bath for ladies' use solely, 60 feet long by 30 feet wide. ...The poster advertises these Swimming Baths as “the most complete in the Southern Hemisphere”. In February 1877 a Baths Company (1050 shares) was formed in the town of Warrnambool for the establishment of the baths at the south end of Gillies Street. The baths were filled with sea water from Lady Bay, originally pumped by a windmill situated near the current Surf Lifesaving Club and carried by iron pipes to the Public Baths; later the water was pumped by a gas motor. Hot and cold fresh water baths were advertised. The gentlemen’s bath was 100 feet long and 50 feet wide, of graduating depth. A second bath, solely for ladies, was 60 feet long by 30 feet wide. Hot Sea water Baths were also part of the institution, and were sought after for their ‘wonderful curative powers’, and ‘incomparable’ as a ‘tonic for the feeble’. In June 1881 the Hot Sea Baths were opened, and both hot and cold water baths were supplied at reasonable charges. Patrons came from near and far to receive the benefits. The manager of the Baths was J. Kirkpatrick. The Baths Company struggled for several years without success, so in 1883 the baths were sold to the Borough Council for 1250 pounds. The original shareholders received nothing for their outlay; the overdraught was over the sale price. In May 1884 the Council announced that an estimated they has spent 1000 pounds in improving the baths since purchasing them and were now returning an income of 11 per cent. Historically significant to Warrnambool and the recreational facilities available in the 1880s to 1900s. The remains of the baths are still visible to the public today.Poster on heavy cream paper, landscape orientation, with coloured print. The poster advertises the Warrnambool Swimming Baths. It has several drawings such as Middle Island and the Merri River Mouth with vessels in the water, The inside of the Baths facility, the men's baths with the adjacent bathing rooms and figures in and out of the water, a cottage with figures in the garden, and fenced buildings with a windmill and aqueduct or pipes. The text describes the location and advantages, the opening times and various costs. It was printed in Ballarat by F.W. Niven & Co. Lithos."TOWN OF WARRNAMBOOL" "SWIMMING BATHS" "HOT SALT-WATER BATHS FOR LADIES AND GENTLEMEN" "HOURS FOR BATHING fROM 7 a.m. to 9 p. m. Closed on Sundays at 10 a.m." Single Bath 1s [1 shilling]; or 10s per Dozen Tickets" "HOURS FOR SWIMMING BATHS: Ladies and Gentlemen, from 6 a.m. to Sunset, Sundays 6 a.m. to 10 a.m." "Every information can be obtained from the Manager, J. Kirkpatrick" "HOT SEA-WATER BATHS ... strongly recommended by the Medical Faculty" "Hot and Cold Fresh Water Baths" "Showers etc." "LIST OF CHARGES ... Single Season Ticket, Single Monthly Ticket, Single Bath without towel ... with towel.. Tickets per dozen without towel, with towel..." "The Baths are situated at the end of Gillies Street, in the rear of the Post Office, and are of salt water pumped by gas motor continuously from the sea. The Swimming Bath is 100 feet long by 50 feet wide, of graduating depth; and a second bath for ladies' use solely, 60 feet long by 30 feet wide. The hot Sea-water Baths in connection with this institution have been extolled far and wide for their wonderfully curative powers in cases of rheumatism, sciatica, and nervous afflictions generally. As a tonic to an enfeebled system, they are incomparable, These Baths, the most complete in the Southern Hemisphere, have been recently re-erected and fitted with marble plunges, and everything provided for the comfort and convenience of invalids and visitors." "F.W. NIVEN & Co, LITHOS, BALLARAT"flagstaff hill, warrnambool, warrnambool swimming baths, hot sea water baths warrnambool, warrnambool baths company, f.w. niven & co, warrnambool therapudic baths, town of warrnambool, swimming baths, hot sea water baths, salt water baths, ladies' baths, gentlemen's baths, warrnambool town baths, j kirkpatrick -
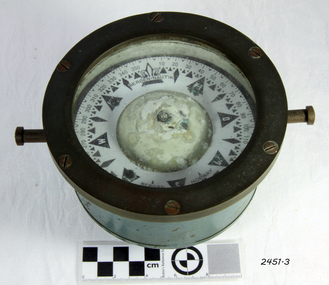 Flagstaff Hill Maritime Museum and Village
Compass, c. 1930s
... using a free moving magnetised needle, indicating north and south. This is a medium sized compass and was suitable for mounting in a fixed brass binnacle or a portable wooden box. The compass fluid was typically lamp oil, or a mixture of alcohol and water...using a free moving magnetised needle, indicating north and south. This is a medium sized compass and was suitable for mounting in a fixed brass binnacle or a portable wooden box. The compass fluid was typically lamp oil, or a mixture of alcohol and water ...The nautical compass is used for determining directions, using a free moving magnetised needle, indicating north and south. This is a medium sized compass and was suitable for mounting in a fixed brass binnacle or a portable wooden box. The compass fluid was typically lamp oil, or a mixture of alcohol and water. This compass, based on its pattern, was probably manufactured around the 1930s. The compass’s maker, Bergen Nautik, was a 20th Century compass manufacturer, making compasses from the 1900s but no longer in business.The factory was located in Hordaland County, Bergen, on the west coast of Norway. This compass is not a very significant marine item as it was made in the 20th century. Examples of the same compass that have been salvaged can be purchased today mounted either in a wooden box or a brass pedestal.Compass; marine or ship's compass, brass, gimbal mounting, in blue metal casing. Manufacturer’s inscription is on the face. Made by Bergen Nautik of Bergen in Norway. Circa 1930s."BERGEN . NAUTIK", "BERGEN", "NORWAY" flagstaff hill, warrnambool, shipwrecked coast, flagstaff hill maritime museum, maritime museum, shipwreck coast, flagstaff hill maritime village, great ocean road, compass, nautical compass, marine compass, maritime compass, technical instrument, navigation instrument, bergen nautik, 20th-century marine compass, gimbal compass, ship's compass, bergan nautik, norway, 1930s marine compass
