Showing 2382 items
matching first place
-
 Moorabbin Air Museum
Photograph (Item) - Ansett Photo Album of Historical Australian Tourist places and possible promo pics for magazines
-
 Ballarat Tramway Museum
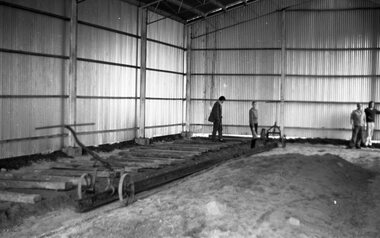
Negative - Set of 4, Warren Doubleday, May or June 1972
Black and white negative - 4 scanned images - of the laying of the first track inside the BTPS depot - placing sleepers and rail on No. 3 road. May or June 1972,trams, tramways, btps, trackwork, depot -
Moorabbin Air Museum
Book (Item) - Piper Aztec C Owner's Handbook PA-23-250 ( Six Place)
This Handbook For Airplanes With Serial Nos. 27-3050,27-3154 And Up -
Moorabbin Air Museum
Drawing (Item) - Lever Lift Seat Drawing & Photos .L.A. Rumbold & Co Ltd Kingsgate Place London N.W 6 Part No. M/233
-
 Ballarat Tramway Museum
Newspaper, The Courier Ballarat, Celebrating 25th anniversary, 7/01/2000 12:00:00 AM
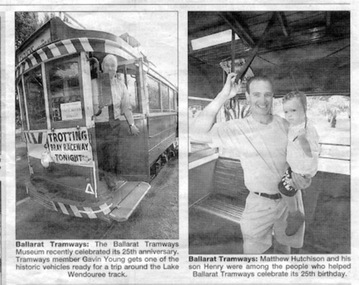
... . Item within the People and places section. The first photo... and places section. The first photo - Gavin Young standing ...Newspaper clipping from the Ballarat Courier of 7/1/2000 featuring two photographs taken on 26/12/1999 during the 25th anniversary celebrations of the operations of the tramway by the BTM. Item within the People and places section. The first photo - Gavin Young standing in the doorway of tramcar No. 40. The second - Mr. Matthew Hutchison holding his son Henry inside a tram - possibly No. 13 - see also item 1290. "7 Jan 1999 Courier" in black ink, top right hand corner - date was actually 2000.trams, tramways, btm, visitors, 25th anniversary -
 Ballarat Tramway Museum
Newspaper, Herald & Weekly Times Ltd, "A Place in the Sun", "Save the Trams", 1971
Set of two Newspaper clippings pasted onto a single sheet of paper with two Punch holes on the left hand side. Clipping from The Courier, Ballarat, 19/8/1971; two letters to the Editor, about the closure of the Ballarat tramways, that some of the trams and line should be saved and what the aims of the BTPS are. The first from a person titled "All Het Up", and the second from John Anderson of P.O. Box 145 Box Hill. The second clipping from The Sun, Melbourne dated 14/7/1971 written by Keith Dunstan in his column, "A Place in the Sun" about the forthcoming closure of the Ballarat and Bendigo systems. Has a photo of a Bendigo Birney tram and notes their rarity. The second part is about the formation of the BTPS, which has 100 paid up members and quotes Shane McCarthy, a committeeman. Both cuttings in two portions.In red ink in lower edge of first cutting "19/8/71". On sheet of paper, various pencil / ink markings - with date Dec. 1963. Possibly paper used by Donor at his job with the former machinery makers, Ronaldson and Tippet.trams, tramways, closure, btps, birney, preservation -
 Ballarat Tramway Museum
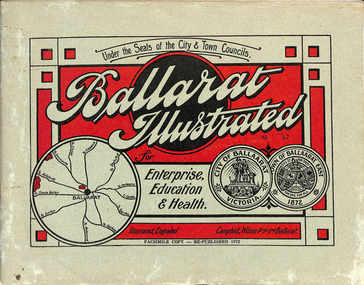
Book, "Ballarat Illustrated", 1972
Original c 1914 (see below), facsimile copy - re-published 1972. Original features photos of Ballarat City and Town, its buildings, parks and the various industries and organisations that were in Ballarat at the time of publication, including ESCo. Many photos features ESCo trams. Photos sepia toned. Has some red colour block printing on the front cover and rear, for Star Oil Engines. On inside back cover is a map with the places of interest and tram route map, marked in red. Pages are un-numbered. Original published by Ballarat East Town Council and Ballaarat City Council. On cover has number stamped in black in, "No. 87" (assume facsimile copy No.). Photos with publication show tram No. 21, built 1913 and ESCo photo page shows Mr. Pringle as Manager. Mr Pringle became manager in January 1911, As there is no photos of the "Avenue of Honour", or other mention of the first world war, assume original published about 1913 or 1914. Original shows Engravings and printing by "Campbell Wilson Prop Ltd, Ballarat". See Other Information as well for more listing details. High Resolution image added 31/8/2012 of i2 of ESCo page and i3 for Ballarat identies and sheet i4 extracted for Mr Pringle. PDF scan of full document added 21/5/2019 - see images btm633-1i.pdf and btm633-2i.pdf Notes on "Ballarat Illustrated" Reg. Item No. 733 From notes made by Neville Gower 12/1/1997 Cover: Inside front cover: Last paragraph, "Facilities for Travelling" - Electric trams serve all parts of Ballarat. Page 3: Street Scene, Municipal Town Hall, showing tram wiring Page 7: Street Scene, Lydiard St. North, intersection and tramway centre, with ESCo tram No. 21 in the bottom photo. Other photos features trams as well in Sturt St and Lydiard St. North. Page 9: Street Scene, Top photo of Sturt St. from Lydiard St. looking east, shows piles on right-hand side of road. Car parked by Post Office has a car registration number "9007". Bottom photo, an tram climbing hill, shows double trolley in the street, with early English type of pull offs. Page 13: Street Scenes and Historic Buildings: One of five photos, shows Victoria St. looking East, with tram track prominent in photo and how stone work was set up about the rails and overhead poles. Page 23: Street scene, Gardens North Entrance gates, shows details of gates near St. Aidans Drive. Note double trolley wire on poles, and style of insulators. No trams in photo, three ladies walking down the track. Page 37: Street Scene; Lydiard St views, top left hand photo, shows Railway station and railway gates with signal gantry and horse drawn vehicles. Tram tracks apparent. Bottom left hand photo shows Lydiard St. North, near Post Office, double track with centre poles - Single wire per track. Top right hand photo, showing Cemetery gates in background. Bottom right hand photo - from north end of Lydiard St. South, looking north, with an ESCo tram in background. Also has a parked car on left hand side. Page 45: Street Scenes - Bridge St; top photo at west end of Bridge St. with ESCo No. 11 with possibly double trolley wire in photo. Bottom photo at east end of Bridge St. with tram in background, shows junction. Double trolley heading out to Mt. Pleasant, single trolley for Victoria St. Page 45: Street Scenes - Bridge St; top photo at west end of Bridge St. with ESCo No. 11 with possibly double trolley wire in photo. Bottom photo at east end of Bridge St. with tram in background, shows junction. Double trolley heading out to Mt. Pleasant, single trolley for Victoria St. Page 61: Street Scenes and Historic Buildings - Public Institutions Ballarat - top left hand photo of the Hospital shows some tram track in foreground, with double trolley wire. Top right photo is of the Orphanage, the name of the tram terminus for many years. Page 68: Electric Supply Co. of Victoria's pages - top photo showing powerhouse in background, across the lake, can hardly see anything for the trees, except for the chimney. Bottom photos of the steam Turbo Generators and the switchboard. Gives Mr. P.J. Pringle as Chief Engineer and General Manager. He took over in Jan. 1911. Page 69: Ballarat East Views - features photo of Black Hill open cut, Ballarat East Railway Station, Ballarat Fire Station and "Victoria St. looking East", repeat of photo printed on page 12, but slightly darker. Image on system includes fire station and railway station, - Ballarat East. Page 78: Series of photos of various Ballarat VIP's of the era, fourth one in on top line features "P.J.Pringle, Electric Supply Co." Inside Back cover - map of Ballarat including tram lines and places of interest marked in red. Gives a detailed photographic presentation of Ballarat in 1914.80 page book with, in addition, light green card covers, titled "Ballarat Illustrated". Loose copy of page 9 and 10 held.trams, tramways, ballarat, local history, heritage buildings, esco -
 Ballarat Tramway Museum
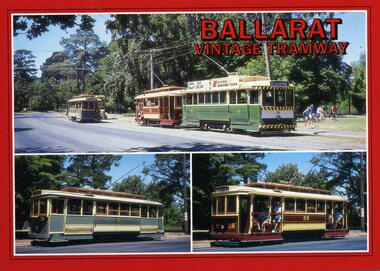
Postcard, Ballarat Tramway Museum (BTM), BTM - Gardens Loop, Feb. 1988
BTM produced postcard featuring three different views of trams in Wendouree Parade taken Dec. 1987. Titled "Ballarat Vintage Tramway" First photograph features BTM trams 27, 26 and 33 at the crossing loop and two close up images of 27 and 26. Card has a wide red border around it. On rear is a place for stamp, address, address for the Ballarat Vintage Tramway and details of the operations of the BTM. Photographs by William F. Scott. Printed by Scancolor Melbourne in Feb. 1988. See also Reg. Item 2007 for another photograph of the same scene. trams, tramways, wendouree parade, postcards, btm, gardens loop, tram 1 -
 Ballarat Tramway Museum
Slide - 35mm slide/s, Peter Moses, 21/08/1971 12:00:00 AM
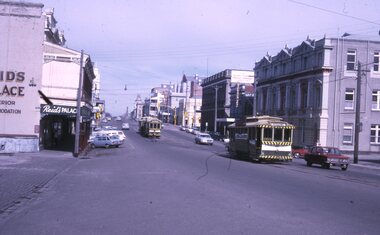
Photo of SEC Ballarat No. 14 and possibly No. 42 (Briquette roof advertisement and features on the same special trams in Reg. item 2064) waiting in Lydiard St. North for the arrival of the ARHS special on Saturday 21/8/1971 to undertake the last tour of Ballarat Tramways, prior to the closure of the system. The first line closure (Victoria St.) took place the following day. Has Reid's Coffee Palace building in the background and other buildings on the east side of Lydiard St. North. Two other single truck cars in the photo as are the railway gates at the station. Kodak cardboard mount slide, taken by Peter Moses 21 August 1971.On back of slide in light black ink "N14 Ballarat / ARHS / 4 trams special Lydiard St" and "P. Moses" in black ink in the upper right hand side of the slide.tramways, trams, arhs, lydiard st north, railway crossing, tram 14, tram 42 -
 Ballarat Tramway Museum
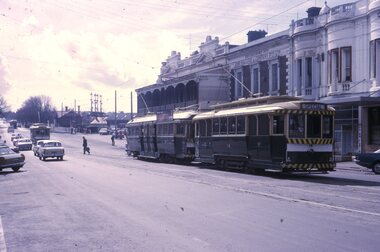
Slide - 35mm slide/s, Peter Moses, 21/08/1971 12:00:00 AM
Photo of SEC Ballarat 26, with No. 14 and possibly No. 42 (Briquette roof advertisement and features on the same special trams in Reg. item 2064) waiting in Lydiard St. North for the arrival of the ARHS special on Saturday 21/8/1971 to undertake the last tour of Ballarat Tramways, prior to the closure of the system. The first line closure (Victoria St.) took place the following day. Has Reid's Coffee Palace building in the background and other buildings on the east and west side of Lydiard St. North. No. 26 has an SEC briquettes roof advertisement Kodak cardboard mount slide, taken by Peter Moses 21 August 1971.On back of slide in light black ink "Ballarat / ARHS outside station / special trams Lydiard St." and "P. Moses" in black ink in the upper right hand side of the slide.tramways, trams, arhs, lydiard st, tram 26 -
 Ballarat Tramway Museum
Slide - 35mm slide/s - set of 4, Peter Moses, 21/08/1971 12:00:00 AM
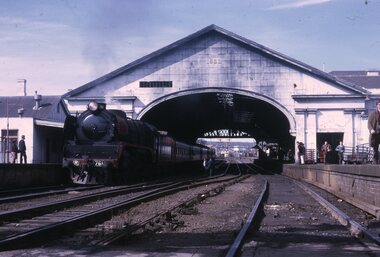
Series of four photographs featuring the Special trains on the occasion of the ARHS special train on Saturday 21/8/1971 to undertake the last tour of Ballarat Tramways, prior to the closure of the system. The first line closure (Victoria St.) took place the following day. .1 - R761 just arrival in platform 2 of the Special train. .2 - ditto .3 - R761 shunting across the Lydiard St. with the Victoria Hotel in the background. .4 - R761 leaving Ballarat station (note slide from a different roll of film). Kodak cardboard mount slide, taken by Peter Moses 21 August 1971. Note: Train/tram tour operated in conjunction with the TMSV.On back of slide: .1 - In black ink "Ballarat / R761 Station" and "P. Moses" in bottom left hand corner. .2 - In black ink "Ballarat / R761 ARHS Train / Ballarat Station" and "P. Moses" in bottom left hand corner. .3 - In blue ink "Ballarat / R761 shunting" and in upper left hand corner "P. Moses". .4 - In red ink "Ballarat / ARHS Train departs" and on other side of slide "P. Moses" in black ink.tramways, trams, arhs, lydiard st north, ballarat railway station -
 Ballarat Tramway Museum
Slide - 35mm slide/s, Peter Moses, 21/08/1971 12:00:00 AM
Photo of SEC Ballarat trams waiting in Lydiard St. North for the passengers to travel on the ARHS/ TMSV specials on Saturday 21/8/1971 to undertake the last tour of Ballarat Tramways, prior to the closure of the system. The first line closure (Victoria St.) took place the following day. The organising group is discussing the arrangements with the SEC tramway inspector. Bob Whitehead, Len Millar, Keith Kings, Eildon Hogan, Jim Dowell and the Inspector? Kodak cardboard mount slide, taken by Peter Moses 21 August 1971.On the rear of the slide in black ink "Ballarat Lydiard St. / ARHS Specials" and "P. Moses" in the bottom right hand corner.tramways, trams, arhs, lydiard st north -
 Ballarat Tramway Museum
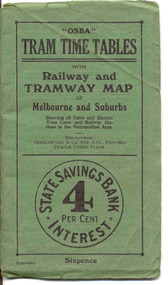
Ephemera - Timetable/s, Osboldstone & Co Pty Ltd and Printers and Publishers Melbourne, "OSBA Tram Time Tables with Railway and Tramway Map, of Melbourne and Suburbs", 1920's
Yields information about the tram timetables applicable to Melbourne's trams, including cable and electric and demonstrates the spread of Melbourne's public transport system in the early 1920's.Forty Eight page printed book contained with oversize green heavy paper covers centre stapled with a coloured map glued into the rear cover of the book titled "OSBA Tram Time Tables with Railway and Tramway Map, of Melbourne and Suburbs". Published c1920 - shows Footscray system, Victoria St Flemington link, does not show Puckle St. Timetables details Fares, first and last cars for cable and electric lines, sections and other details of the various lines. Note page 44 and 45 cannot be accessed, paper not cut correctly during the printing process - leave as is. Map prepared by Gawler and Drummond Architects, shows in colour the cable routes, electric tramways, authorised tramways and railway lines. Municipalities shown in different colours. Map folded into 12 sections. Published by Osboldstone & Co Pty Ltd, Printers and Publishers, Temple Court Place, Melbourne. Price 6d. Full scan of document added as a pdf file 5/6/2019. map, timetables, melbourne, cable trams -
 Ballarat Tramway Museum
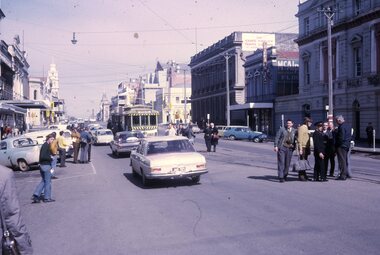
Photograph - Black & White Photograph/s, The Courier Ballarat, Jul. 1971
Yields information about the place - Tramway Centre or City Centre - with trams prior to closure and their bus replacement, how they fitted with their streetscape.Black and White copy photograph of a newspaper photograph taken by The Courier - published - 28/7/1971 of No. 12 & bus at Sturt & Lydiard St corner, showing the approaching end of the tramway era. Follows the first route conversion. Photo taken from the Town Hall, of the intersection of Sturt and Lydiard Streets, with statute of Robert Burns, Titanic Bandstand, Post Office and other buildings in the photograph. See Reg Item 2182 for the Courier Newspaper clipping - heavily cropped. Collected by Alan Bradley from the Ballarat Courier early 1980's. See Excel file "Record of Ballarat Courier Photos SEC era" (Archive Documents) for source of details.On rear stamped "Copyright, The Ballarat Courier Proprietary Limited."tramways, trams, sturt st, tramway centre, bus replacement, robert burns, statues, tram 12 -
 Queenscliffe Maritime Museum
Instrument - Azimuth Mirror
William Thomson described a new "Marine Azimuth Mirror" at the 1877 meeting of the British Association for the Advancement of Science, and patented the design in Britain and the U.S. This instrument is an example of the improved design, with a reflecting prism in place of the original mirror. Thomson introduced this form in the early 1880s. The signature indicates that it was made during the period 1900-1913. A child prodigy, William Thomson went to university at the age of eleven. At twenty-two he was appointed Professor of Natural Philosophy in Glasgow where he set up the first physics laboratory in Great Britain and proved an inspiring teacher. He primarily researched thermodynamics and electricity. On the practical side he was involved in the laying of the Atlantic telegraph cable. He was also the partner of a Glasgow firm that made measuring instruments from his own patents.An instrument of significant importance which made marine navigation easier and more accurate in the early twentieth century.An Azimuth mirror with wooden box.Kelvin & Hughs Ltd Serial No - illegible Made in Great Britainazimuth mirror, william thompson, lord kelvin, naviagtion, marine instruments -
 Otway Districts Historical Society
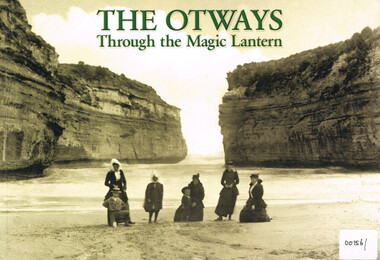
Book, Colac and District Historical Society, The Otways through the magic lantern, 2013
George Sydenham was appointed as Colac Shire Valuer and rate collector in 1890 which threw him into direct contact with the Otway people at a time when the first selectors were suffering badly. He would have heard their frustrations and grievances in great detail. When Secretary to the Colac Committee for the Railway Extension to Beech Forest he used his magic lantern slide shows from 1896 to support his case for a railway, by lauding the place and its potential, both for settlement and for timber production.The Otways through the magic lantern: commentary and glass slides of George Sydenham - lecture held in 1896. George Francis Sydenham. 1st ed. Colac (Vic); Colac and District Historical Society; 2013. iv, 118 p.; illus., map. ISBN 9780 6469 122 02 Soft cover.colac: otway ranges; history; coasts; -
 Otway Districts Historical Society
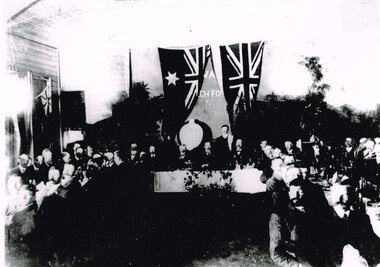
Photograph, Knox Collection, Opening banquet, Colac-Beech Forest railway line, 1902, 27 February 1902
While the first train arrived at Beech Forest on 17 February, 1902, as a special train for a race meeting at Beech Forest Turf Club, two special trains ran for the official opening of the railway by the State Governor, Sir George Sydenham Clarke, KCMG, R.E., F.R.S., that took place on 27 February, 1902. After seeing round the area the guests attended a celebration of the opening at a banquet at Beech Forest. The menu included four impressive courses, coffee and cognac, and included a number of toasts - The King, the Governor, the Minister and the Parliament of the State, Success to the Beech Forest Railway, the Colac Shire Council and the Railway Trust, and the Railway Department, a total of 19 people speaking. The official guests then returned to Colac.B/W. Opening banquet for the Colac-Beech Forest railway line in 1902. The State Governor, Sir George Sydenham Clarke, KCMG, the Premier of Victoria, Hon. A.J. Peacock, MLA, and a number of other important people seated at the top table, with other guests seated to the left and right.beech forest; railways; banquet; colac; -
 Otway Districts Historical Society
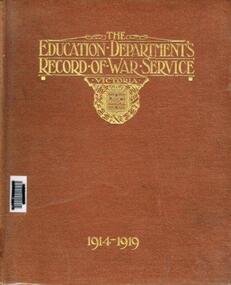
Book, Government Printer, The Education Department's Record of War Service, Victoria, 1914-1919, c.1921
From the beginning of World War 1 in August, 1914, until it ended in November, 1918, teachers from across Victoria enlisted for the Australian Imperial Force and embarked for overseas. Anzac, the Sinai Desert, the vast fields of France, and in Palestine the Education Department soldier-teachers toiled manfully thoughout. Of the 752 enlistments 724 were teachers, two were School Medical Officers, one was a School Nurse, one an Inspector of Schools, while the remaining 24 belonged to the clerical division employed by the Education Department. 146 died. But it was not only teachers who contributed to the war effort. Children and parents gave 400,000 articles of comfort sent abroad, contributed as a rough estimate 460 tons of supplies to hospitals at home, made contributions of £50,000 to The Young Workers' Patriotic Guild, and £217,419 for the war savings effort in the schools, and £422, 470 in general school subscriptions.Hardcover book, bound with brown cloth cover and gold embossed title containing 306 pages, black and white photographs and illustrations and text. This book, published to keep before teachers and children expamples of service and sacrifice in a great cause, is presented to the Hordern Vale School. It should be kept in an honoured place as a souirce of guidance and inspiration for successive generations.great war, wwi, victoria, education department victoria, teachers, enlistments, honors, decorations, war service records, first world war, world war one -
 Bendigo Historical Society Inc.
Document - PETER ELLIS COLLECTION: BUSH MUSIC CLUB COLONIAL BALL, 1990
Small off white coloured booklet Bush Music Club Inc. Colonial Subscription Ball 1990 Dancers Companion (A guide to the Quadrilles) The Quadrille Figure 1 (Le Pantelon) (2x32) 8 Top couples R and L through. (without giving hands). 8 Set & turn Partners 8 Top ladies chain. 4 Top couples promenade across set. 4 Half R and L to place. 32 Side couples repeat Figure 2 (Le 'Ete) (4x24) 4 Top couples advance & retire. 4 Cross over (without changing places with partner). 8 Repeat back to place. 8 Set & turn partners. 24 Sides repeat. 48 Top and Sides repeat. Figure 3 (La Poule) (4x32) 4 Lady 1, Man 2 adv, tough RH, retire to opposite place. 4 Lady 1, Man 2 adv, join LH give RH to partner 4 Line of 4 balance fwd & back twice. 4 Men lead partners to opp. Place. 4 Lady 1, Man 2 adv. & ret. 4 Lady 1, Man 2 adv, honour & ret. 4 Top couples, advance & retire. 4 Half R & L to place. 32 Repeat with Lady 2, Man !. 32 Repeat with Lady 3, Man 4. 32 Repeat with Lady 4, Man 3. The Quadrille Figure 4. (La Pastourelle) (4x32) 4 1st couple advance & retire. 4 1st couple adv, lady join 2nd couple. 4 Line of 3 adv. & ret, 1st man retire. 4 Line of 3 adv. Ladies cross to 1st man. 4 Line of 3 adv. & ret, 2nd man retire. 4 Re-advance, form circle with 2nd man. 4 Circle L half way round. 4 Half R & L to place. 32 Repeat with 2nd couple leading. 32 Repeat with 3rd couple leading. 32 Repeat with 4th couple leading. Figure 5 (La Finale) (4 x 32 + 8) 4 All advance & retire. 4 Turn partners. 4 Ladies adv, curtsey & retire. 4 Men advance, bow & retire. 8 All set & turn corners. 8 Promenade with corner. (men to original place with corner) 96 Repeat 3 times to return to partner. 4 All advance & retire. Turn Partners. Notes: 1 Couples numbered 2 Set & turn is a 'balance' set and open hand turn. The Prince Imperial's Quadrille Figure 1. (4x24) 4 Top couples visit right, honour sides. 4 Top men retire with partner & side lady to opposite place, (ladies facing each other). 8 Ladies grand chain to places 8 All set and turn partners 24 Top couples repeat back to place. 48 Repeat with side couples. Figure 2 (4 x 24) 4 1st Lady, 2nd man adv & turn in centre finish facing 2nd lady. 2 2nd lady pass through to 1st man. 2 Both couples turn out to place. 4 top couples advance & retire. 4 Ladies chain back to place. (Nariel) 8 Chasse-croise. (4 steps past partner RH turn corner 4 steps back, LH turn with partner.) 24 Repeat wth 2nd lady, 1st man leading 24 Repeat wth 3rd lady, 4th man leading 24 Repeat wth 4th lady, 3rd man leading. Figure 3 (4x32) 4 1st lady to centre, curtsey to partner. (RH in RH, ACW turn in to centre) 4 2nd lady to centre, curtsey to partner. 4 3rd lady to centre, curtsey to partner.4 4th lady to centre, curtsey to partner. 8 ladies join hands, circle R, small steps after circle R, Men join circle, (giving RH to partner). 4 Balance for 4 (step lift x 4) 4 Turn partners to place, bow & curtsey. 32 Repeat, Lady 2, 1, 4 & 3 to centre 32 Repeat Lady 3, 4, 2 & 1 to centre 32 Repeat, Lady 4, 3, 1 & 2 to centre The Prince Imperial's Quadrille Figure 4 (4x32) 4 Top couples advance & retire. 4 Top couples adv, ladies move to R, as men retire to place. 8 Line of 3 adv & ret twice. 4 Single men adv, bow and retire. 4 Re-advance and turn to face partner. 4 Circle L half way round (with partner & side couple). 4 Half R & L to place. 32 Repeat with side couples leading. 32 Repeat with top couples leading (men moving to left as ladies retire) 32 Repeat with Side couple leading. (Men moving to left as ladies retire) Figure 5 (4x32 +32) 16 Ladies to the right, (RH turn with corner man then continue round to the right turning each man) 4 1st Lady, 2nd man advance & retire 4 re-advance & turn RH (finish facing partners) 8 set & turn partners (finishing in place) 32 Repeat with 2nd Lady, 1st man leading 32 repeat with 3rd lady, 4th man leading 32 Repeat with 4th Lady, 3rd man leading 16 Ladies to the right again. 4 Men turn partners to centre. 4 All bow and curtsey. 8 Promenade set ( hall) Note: Set & turn is a 'balance' set and open hand turn. The Parisienne Quadrille Figure 1 (1x32) 8 Couples R and L through. (without giving hands) 8 set & turn partners 8 Ladies chain. 4 Couples promenade across set. 4 Half R and L to place. Figure 2 (2x24) 4 Couples advance & retire. 4 Cross over (without changing places with partners) 8 Repeat back to place. 8 Set & turn partners. 24 Repeat. Figure 3 (2x32) 4 Lady 1, Man 2 adv, touch RH, retire to opposite place. 4 Lady 1, Man 2 adv, join LH, give RH to partner. 4 Line of 4 balance fwd & back twice 4 Men lead partners to opp. Place 4 Lady 1, Man 2 adv & retire 4 Lady 1, Man 2 adv, honour & ret. 4 Couples, advance & retire. 4 Half R & L to place. 32 Repeat with Lady 2, Man 1. The Parisienne Quadrille Figure 4. (2x32) 4 1st couple advance & retire. 4 1st couple adv, lady join 2nd couple. 4 Line of 3 adv. & ret, 1st man retire. 4 Line of 3 adv. Ladies cross to 1st man. 4 Line of 3 adv. & ret, 2nd man retire. 4 Re-advance, form circle with 2nd man. 4 Circle L half way round. 4 Half R & L to place. 32 Repeat with 2nd couple leading. Figure 5 (2x32) 4 Couples advance & retire 4 Cross over 8 Repeat back to place. 8 Ladies chain across & back.8 Set & turn partners. 32 Repeat Notes: 1 This 'quadrille' is similar to the first set (1st 4 figures) and is danced as two couple sets. 2 Set & turn is a 'balance' set and open hand turn. The Lancers Quadrille Figure 1 (4x24) 4 1st lady, 2nd man advance & retire, 4 Adv, turn two hands, return to place. 4 1st couple lead through across set 4 2nd couple lead through back 8 all set & turn corners. 24 Repeat, 2nd lady, 1st man leading 24 Repeat 3rd lady, 4th man leading 24 Repeat, 4th lady, 3rd man leading Figure 2 (4x24) 4 1st couple advance & retire. 2 1st lady adv to centre, turn to face partner 2 1st couple honour each other. 8 1st couple set and turn then sides form top & bottom lines 4 Lines advance & retire, 4 Advance and turn partners to place. 24 Repeat with 2nd couple leading 24 Repeat with 3rd couple leading 24 Repeat with 4th couple leading Figure 3. (2x32) 4 Ladies advance, curtsey & retire. 4 Men adv, bow, turn by left, bow to partners, then join RH in centre, (ladies RH on partners left elbow). 8 Promenade round set to place. 4 Ladies adv, curtsey & retire again. 4 Men adv, bow, turn by right, bow to partners, join LH in centre, right arm behind partner. 8 Promenade round to set in place. 32 Repeat. The Lancers Quadrille. Figure 4. (4x24) 8 Top couples visit R then L 4 Right Hands around with LH couple 4 then left hands around. 8 Circle left with that couple. 24 Repeat with side couples leading. 24 repeat, top couples visit L then R. 24 Repeat, side couples visit L then R. Figure 5. (4x48 +24) 8 All grand chain 1/2 way round and honour partners. 8 Continue grand chain to place and honour partners. 8 1st couple visit, return to place, facing out with sides in behind. 2 Change places with partner, 2 All rock fwd and back 2 change places again 2 All rock fwd and back 8 Cast out reform in lines 4 Lines advance & retire 4 Advance & turn partners to place 48 Repeat with 2nd couple leading 48 Repeat with 3rd couple leading 48 Repeat with 4th couple leading. 8 Grand chain 1/2 way round and honour partners. 8 continue grand chain to place and honour partners 8 swing partners (R arm round partner, LH in air) Note: All figures walked. Set & Turn is a 'balance' set and open two hand turn. The Caledonians Quadrille Figure 1. (2x32) 4 Top couples R.H. across, move CW (Ladies hands joined over Mens). 4 then L.H. across, move ACW. 8 Set & swing Partners 8 Top ladies chain. 4 Top couples promenade across set. 4 Half R and L to place. 32 Side couples repeat. Figure 2. (4x24) 8 1st Man advance & retire twice. 8 Set & swing corners. 8 Promenade with corners (to men's position.) 24 2nd man repeat. 48 3rd and 4th man repeat. Figure 3. (4x32) 4 Lady 1, Man 2 advance & retire. 4 Re-advance, 2 hand turn to place. 8 1st & 2nd couples lead through and back. (1st lead through across, 2nd back) 8 Set & swing corners. 4 All advance & retire. 4 Swing partners. 32 Repeat with Lady 2, Man 1. 32 Repeat with Lady 3, Man 4. 32 Repeat with Lady 4, Man 3. The Caledonians Quadrille Figure 4. (4x24) 2 Lady 1, Man 2 advance and stop. 2 Lady 2, Man 1 advance and stop. 4 Turn partners back to place. 2 All ladies to the right 4 steps. 2 All men to the left 4 steps. 2 All ladies to the right 4 steps. 2 All men to the left 4 steps. 4 Promenade to place. 4 Swing partners. 24 Repeat with Lady 2, Man 1 leading. 24 Repeat with Lady 3, Man 4 leading. 24 Repeat with Lady 4, Man 3 leading. Figure 5. (4x48 + 16) 8 1st couple visit. 4 Ladies advance, curtsey & retire. 4 Men advance, bow & retire. 8 All set & swing partners. 8 Grand chain 1/2 way round and honour partners. 4 Promenade to place 4 and swing partners. 8 Chasse-croise, (4 steps past partner, RH to corner balance fwd & back, then 4 steps back, LH to partner balance fwd & back). 48 Repeat with 2nd couple leading. 48 Repeat with 3rd couple leading. 48 Repeat with 4th couple leading. 8 All promenade set. 8 Swing partners. Note: Set & swing is 'normal' set and cross hand swing. The Royal Irish Quadrille Figure 1. (2x32) 8 Top couples to Right, R & L through 8 Set & swing Partners. 8 Ladies chain. 4 Couples promenade across (to the other couples position). 4 Half R & L to place. 32 Repeat with tops to the left. Figure 2. (4x24) 4 Top couples to Right, adv & ret. 4 Cross over (without changing places with partner). 8 Repeat back to place. 8 Set & swing partners. 24 Repeat with top couples to the Left. 48 Tops repeat with Right and Left sides. Figure 3. (4x32) 4 Lady 1,2 and Man on Right, advance, touch RH, retire to opposite place. 4 Advance again, join LH, give RH to partner. 4 Line of 4 balance fwd & back twice. 4 Men Lead partners to opp. Place. 4 Lady 1,2 and opp. Man adv & ret. 4 Advance, honour & retire. 4 Couples, advance & retire. 4 Half R & L to place. 32 Repeat with Ladies 3,4 leading. 64 Repeat with Tops facing left. The Royal Irish Quadrille Figure 4. (4x32) 4 Top couples to Right, adv & ret. 4 Re-adv, Top Ladies join opp. Couple. 4 Line of 3 adv & ret. Top men retire. 4 Line of 3 adv, ladies join other man. 4 Line of 3 adv & ret, Side men retire. 4 Re-advance, form circle with opp. Man. 4 Circle L half way round. 4 Half R & L to place. 32 Repeat with Side ladies leading. 64 Repeat with Top couples facing left. Figure 5. (4 x 32 + 8) 4 All advance & retire. 4 Swing partners. 4 Ladies advance, curtsey & retire. 4 Men advance, bow & retire. 8 All set & swing corners. 8 Promenade with corner. (Men to original place with corner). 96 Repeat 3 times to return to partner. 4 All advance & retire. 4 Swing partners. Notes: 1. This is The Quadrille danced diagonally, with Top couples dancing first with the side couple on their right, then the left. Ie. 1-3 and 2-4 then 1-4 and 2-3. 2. Set & swing is 'normal' set and irish swing.The Eightsome Reel Numbering: Clockwise 1-2-3-4 Part A (40 Bars) 4 All join hands, circle left 4 All circle right. 4 Grand Cross, Ladies join RH. 4 Grand Cross, Men join LH. 8 Set & turn Partners 16 Grand chain right round set. Part B ( 8x48 bars) 1st Lady advance to centre, Others join hands in circle. 8 Circle left and right 4 Set once and turn partner 1st Lady sets to partner then open hand turn once with partner. 4 Set once and turn opposite 1st Lady sets to opposite man, then open hand turn once. 8 Reel of 3, 1st Lady, partner and opposite man 1st Lady remains in centre. 8 Circle left and right again 4 Set once and turn side man 1st lady and man on right. 4 Set once and turn other side man 1st lady and man on left. 8 Reel of 3, 1st lady, and two side men. 48 2nd lady repeat. 96 3rd and 4th ladies repeat. 192 Men repeat same movement. The Eightsome Reel Part C (40 Bars) 8 All circle left and right. 4 Grand cross - Ladies join RH. 4 Grand Cross - Men join LH. 8 All set and turn partners. 16 Grand Chain round set. Note: Set is 'normal' set. Turn is open hand turn. NOTES 1. The Quadrille 2. The Prince Imperials 3. The Parisienne Quadrille 4. The Lancers Quadrille 5. The Caledonians Quadrille 6. The Royal Irish Quadrille 7. The Eightsome Reelperson, individual, peter ellis oam -
 Bendigo Historical Society Inc.
Document - PETER ELLIS COLLECTION: BUSH MUSIC CLUB COLONIAL BALL, 1991
Small yellow booklet outline of a man on left of title and woman on right. Bush Music Club Inc. Colonial Subscription Ball 1991 Dancers Companion (A guide to the Quadrilles) The Quadrille Figure 1 (Le Pantelon) (2x32) 8 Top couples R and L through. (without giving hands). 8 Set & turn Partners 8 Top ladies chain. 4 Top couples promenade across set. 4 Half R and L to place. 32 Side couples repeat Figure 2 (Le 'Ete) (4x24) 4 Top couples advance & retire. 4 Cross over (without changing places with partner). 8 Repeat back to place. 8 Set & turn partners. 24 Sides repeat. 48 Top and Sides repeat. Figure 3 (La Poule) (4x32) 4 Lady 1, Man 2 adv, tough RH, retire to opposite place. 4 Lady 1, Man 2 adv, join LH give RH to partner 4 Line of 4 balance fwd & back twice. 4 Men lead partners to opp. Place. 4 Lady 1, Man 2 adv. & ret. 4 Lady 1, Man 2 adv, honour & ret. 4 Top couples, advance & retire. 4 Half R & L to place. 32 Repeat with Lady 2, Man !. 32 Repeat with Lady 3, Man 4. 32 Repeat with Lady 4, Man 3. The Quadrille Figure 4. (La Pastourelle) (4x32) 4 1st couple advance & retire. 4 1st couple adv, lady join 2nd couple. 4 Line of 3 adv. & ret, 1st man retire. 4 Line of 3 adv. Ladies cross to 1st man. 4 Line of 3 adv. & ret, 2nd man retire. 4 Re-advance, form circle with 2nd man. 4 Circle L half way round. 4 Half R & L to place. 32 Repeat with 2nd couple leading. 32 Repeat with 3rd couple leading. 32 Repeat with 4th couple leading. Figure 5 (La Finale) (4 x 32 + 8) 4 All advance & retire. 4 Turn partners. 4 Ladies adv, curtsey & retire. 4 Men advance, bow & retire. 8 All set & turn corners. 8 Promenade with corner. (men to original place with corner) 96 Repeat 3 times to return to partner. 4 All advance & retire. Turn Partners. Notes: 1 Couples numbered 1 4 2 3 2 Set & turn is a 'balance' set and open hand turn. The Lancers Quadrille Figure 1 (4x24) 4 1st lady, 2nd man advance & retire, 4 Adv, turn two hands, return to place. 4 1st couple lead through across set 4 2nd couple lead through back 8 all set & turn corners. 24 Repeat, 2nd lady, 1st man leading 24 Repeat 3rd lady, 4th man leading 24 Repeat, 4th lady, 3rd man leading Figure 2 (4x24) 4 1st couple advance & retire. 2 1st lady adv to centre, turn to face partner 2 1st couple honour each other. 8 1st couple set and turn then sides form top & bottom lines 4 Lines advance & retire, 4 Advance and turn partners to place. 24 Repeat with 2nd couple leading 24 Repeat with 3rd couple leading 24 Repeat with 4th couple leading Figure 3. (2x32) 4 Ladies advance, curtsey & retire. 4 Men adv, bow, turn by left, bow to partners, then join RH in centre, (ladies RH on partners left elbow). 8 Promenade round set to place. 4 Ladies adv, curtsey & retire again. 4 Men adv, bow, turn by right, bow to partners, join LH in centre, right arm behind partner. 8 Promenade round to set in place. 32 Repeat. The Lancers Quadrille. Figure 4. (4x24) 8 Top couples visit R then L 4 Right Hands around with LH couple 4 then left hands around. 8 Circle left with that couple. 24 Repeat with side couples leading. 24 repeat, top couples visit L then R. 24 Repeat, side couples visit L then R. Figure 5. (4x48 +24) 8 All grand chain 1/2 way round and honour partners. 8 Continue grand chain to place and honour partners. 8 1st couple visit, return to place, facing out with sides in behind. 2 Change places with partner, 2 All rock fwd and back 2 change places again 2 All rock fwd and back 8 Cast out reform in lines 4 Lines advance & retire 4 Advance & turn partners to place 48 Repeat with 2nd couple leading 48 Repeat with 3rd couple leading 48 Repeat with 4th couple leading. 8 Grand chain 1/2 way round and honour partners. 8 continue grand chain to place and honour partners 8 swing partners (R arm round partner, LH in air) Note: All figures walked. Set & Turn is a 'balance' set and open two hand turn. The Prince Imperial's Quadrille Figure 1. (4x24) 4 Top couples visit right, honour sides. 4 Top men retire with partner & side lady to opposite place, (ladies facing each other). 8 Ladies grand chain to places 8 All set and turn partners 24 Top couples repeat back to place. 48 Repeat with side couples. Figure 2 (4 x 24) 4 1st Lady, 2nd man adv & turn in centre finish facing 2nd lady. 2 2nd lady pass through to 1st man. 2 Both couples turn out to place. 4 top couples advance & retire. 4 Ladies chain back to place. (Nariel) 8 Chasse-croise. (4 steps past partner RH turn corner 4 steps back, LH turn with partner.) 24 Repeat with 2nd lady, 1st man leading 24 Repeat with 3rd lady, 4th man leading 24 Repeat wth 4th lady, 3rd man leading. Figure 3 (4x32) 4 1st lady to centre, curtsey to partner. (RH in RH, ACW turn in to centre) 4 2nd lady to centre, curtsey to partner. 4 3rd lady to centre, curtsey to partner.4 4th lady to centre, curtsey to partner. 8 ladies join hands, circle R, small steps after circle R, Men join circle, (giving RH to partner). 4 Balance for 4 (step lift x 4) 4 Turn partners to place, bow & curtsey. 32 Repeat, Lady 2, 1, 4 & 3 to centre 32 Repeat Lady 3, 4, 2 & 1 to centre 32 Repeat, Lady 4, 3, 1 & 2 to centre The Prince Imperial's Quadrille Figure 4 (4x32) 4 Top couples advance & retire. 4 Top couples adv, ladies move to R, as men retire to place. 8 Line of 3 adv & ret twice. 4 Single men adv, bow and retire. 4 Re-advance and turn to face partner. 4 Circle L half way round (with partner & side couple). 4 Half R & L to place. 32 Repeat with side couples leading. 32 Repeat with top couples leading (men moving to left as ladies retire) 32 Repeat with Side couple leading. (Men moving to left as ladies retire) Figure 5 (4x32 +32) 16 Ladies to the right, (RH turn with corner man then continue round to the right turning each man) 4 1st Lady, 2nd man advance & retire 4 re-advance & turn RH (finish facing partners) 8 set & turn partners (finishing in place) 32 Repeat with 2nd Lady, 1st man leading 32 repeat with 3rd lady, 4th man leading 32 Repeat with 4th Lady, 3rd man leading 16 Ladies to the right again. 4 Men turn partners to centre. 4 All bow and curtsey. 8 Promenade set ( hall) Note: Set & turn is a 'balance' set and open hand turn. The Parisienne Quadrille Figure 1 (1x32) 8 Couples R and L through. (without giving hands) 8 set & turn partners 8 Ladies chain. 4 Couples promenade across set. 4 Half R and L to place. Figure 2 (2x24) 4 Couples advance & retire. 4 Cross over (without changing places with partners) 8 Repeat back to place. 8 Set & turn partners. 24 Repeat. Figure 3 (2x32) 4 Lady 1, Man 2 adv, touch RH, retire to opposite place. 4 Lady 1, Man 2 adv, join LH, give RH to partner. 4 Line of 4 balance fwd & back twice 4 Men lead partners to opp. Place 4 Lady 1, Man 2 adv & retire 4 Lady 1, Man 2 adv, honour & ret. 4 Couples, advance & retire. 4 Half R & L to place. 32 Repeat with Lady 2, Man 1. The Parisienne Quadrille Figure 4. (2x32) 4 1st couple advance & retire. 4 1st couple adv, lady join 2nd couple. 4 Line of 3 adv. & ret, 1st man retire. 4 Line of 3 adv. Ladies cross to 1st man. 4 Line of 3 adv. & ret, 2nd man retire. 4 Re-advance, form circle with 2nd man. 4 Circle L half way round. 4 Half R & L to place. 32 Repeat with 2nd couple leading. Figure 5 (2x32) 4 Couples advance & retire 4 Cross over 8 Repeat back to place. 8 Ladies chain across & back.8 Set & turn partners. 32 Repeat Notes: 1 This 'quadrille' is similar to the first set (1st 4 figures) and is danced as two couple sets. 2 Set & turn is a 'balance' set and open hand turn. Wellington Waltz 8 Honour Partner, honour corner 8 Circle L 7 steps, then tap, tap 8 Circle R 7 steps, then tap, tap 4 Top couples, 2 side-steps to centre and back with lady turning under man's left arm. 4 Waltz across to opposite side 8 Side couples repeat. 8 Top ladies chain across. (pause in centre, turn twice with opp. Man) 8 Side ladies chain across. 8 Grand Chain half way round set. 8 Waltz to man's place. 64 Repeat with side couples leading. Waltz Cotillon 8 Honour Partner, honour corner 16 1st couple waltz the set. 8 Top ladies cross over.8 Side ladies cross over. 8 Top men cross over. 8 Side men cross over. 16 All waltz back to place. Form top & bottom lines, 8 Adv. & ret, cross over. 8 Adv. & ret, cross back. 16 Waltz chain to meet partner. 16 All waltz back to place. Form top & bottom lines, 8 Adv. & ret, cross over. 8 Adv. & ret, cross back. 16 Waltz chain to meet partner. 16 All waltz back to place. 112 Repeat with 2nd couple leading. 112 Repeat with 3rd couple leading. Side lines adv. & ret. 112 Repeat with 4th couple leading. Side lines adv. & ret. Galopade Quadrille 8 Honour Partner, honour corner 8 All galop round set. (Galop half way round set, on opp. Side change places with partner, continue galop to place.) 8 Top couples R & L through. 8 Side couples R & L through. 8 All set & swing partners. 8 All galop round set. 8 Top ladies chain. 8 Side ladies chain. 8 All set & swing partners. 8 All galop round set. 8 1st couple lead through, 2nd on return 8 3rd couple lead through, 4th on return 8 All set & swing partners. 8 All galop round set. 4 1st lady & 2nd man adv. & ret. 4 2nd lady & 1st man adv. & ret. 4 3rd lady & 4th man adv. & ret. 4 4th lady & 3rd man adv. & ret. 8 All set & swing partners. 8 All galop round set. 4 Ladies advance & retire. 4 Men advance & retire. 8 Double ladies chain. 8 All set & swing partners. 8 All galop round set. 8 Top couples waltz the set 8 Side couples waltz the set 8 All set & swing partners. 32 Waltz the hall. The Caledonians Quadrille Figure 1. (2x32) 4 Top couples R.H. across, move CW (Ladies hands joined over Mens). 4 then L.H. across, move ACW. 8 Set & swing Partners 8 Top ladies chain. 4 Top couples promenade across set. 4 Half R and L to place. 32 Side couples repeat. Figure 2. (4x24) 8 1st Man advance & retire twice. 8 Set & swing corners. 8 Promenade with corners (to men's position.) 24 2nd man repeat. 48 3rd and 4th man repeat. Figure 3. (4x32) 4 Lady 1, Man 2 advance & retire. 4 Re-advance, 2 hand turn to place. 8 1st & 2nd couples lead through and back. (1st lead through across, 2nd back) 8 Set & swing corners. 4 All advance & retire. 4 Swing partners. 32 Repeat wth Lady 2, Man 1. 32 Repeat with Lady 3, Man 4. 32 Repeat with Lady 4, Man 3. The Caledonians Quadrille Figure 4. (4x24) 2 Lady 1, Man 2 advance and stop. 2 Lady 2, Man 1 advance and stop. 4 Turn partners back to place. 2 All ladies to the right 4 steps. 2 All men to the left 4 steps. 2 All ladies to the right 4 steps. 2 All men to the left 4 steps. 4 Promenade to place. 4 Swing partners. 24 Repeat wth Lady 2, Man 1 leading. 24 Repeat wth Lady 3, Man 4 leading. 24 Repeat wth Lady 4, Man 3 leading. Figure 5. (4x48 + 16) 8 1st couple visit. 4 Ladies advance, curtsey & retire. 4 Men advance, bow & retire. 8 All set & swing partners. 8 Grand chain 1/2 way round and honour partners. 4 Promenade to place 4 and swing partners. 8 Chasse-croise, (4 steps past partner, RH to corner balance fwd & back, then 4 steps back, LH to partner balance fwd & back). 48 Repeat with 2nd couple leading. 48 Repeat wth 3rd couple leading. 48 Repeat wth 4th couple leading. 8 All promenade set. 8 Swing partners. Note: Set & swing is 'normal' set and cross hand swing. The Lancers Quadrille (BMC version) Figure 1. (4x32) 8 1st Lady, 2nd man advance & swing in centre (with ballroom hold). 4 Partners move 1/2 way across, Centres keep swinging. 4 Promenade partner to opp. Place. 8 1st couple lead through to place. 8 All swing corners. 32 Repeat with 2nd lady, 1st man. 32 Repeat with 3rd lady, 4th man. 32 Repeat with 4th lady, 3rd man. Figure 2. (4x32) 8 1st couple lead up (to 2nd) & retire. 8 1st couple swing in place Form top & bottom lines. 8 Lines adv & retire twice. 8 Swing partners. 32 Repeat with 2nd couple leading. 32 Repeat with 3rd couple leading. (Forming side lines instead) 32 Repeat with 4th couple leading. (Forming side lines instead) Figure 3. (2x32) 4 Introduction - Ladies to the centre and men form a circle around them. 8 Men circle left. 8 Men circle right. Men form a grand cross (LH) Right arm behind partners. 16 Promenade round set. Ladies return to the centre. 32 Repeat - Circle L & R, & Grand Cross. The Lancers Quadrille (BMC version) Figure 4. (2x48) 8 Top couples visit. 4 Tops RH star. 4 then LH star. 8 Tops basket Left. 8 Tops basket Right. 8 Tops circle Left. Tops circle Right. 48 Repeat with side couples leading. Figure 5. ((4x 16+32) + 24) 8 All grand chain 1/2 way round and honour partners. 8 Promenade with partners to place. 8 1st couple lead up, turn and lead out with side falling in behind. 8 Cast out, reform top & bottom lines. 4 Lines advance & retire. 4 Advance & swing partners to place. 8 Swing partners in place. 48 Repeat with 2nd couple leading. 48 Repeat with 3rd couple leading (forming side lines) 48 Repeat with 4th couple leading. (forming side lines) 8 All grand chain 1/2 way round and honour partners. 8 Promenade with partners to place. 8 Swing partners in place. Note: Normal swing here is with hands crossed. 1. The Quadrille 2.The Lancers Quadrille 3. The Prince Imperials 4. The Parisienne Quadrille 5. The Wellington Waltz 6. The Waltz Cotillon 7. The Galopade Quadrille 8. The Caledonians Quadrille 9. The Lancers Quadrille (BMC)person, individual, peter ellis oam -
 Bendigo Historical Society Inc.
Newspaper - NEWSPAPER CLIPPING 'TALENTED BENDIGONIAN
Unknown Newspaper clip '' Talented Bendigonian. Miss Sadie E. Russell Free place at University. The article includes a photo and states that Miss Russell came from California Gully and was a grand-daughter of Mr. and Mrs. WH Wallis of Smalley Street. She completed her high school course in 1935 and began teaching at Elmore, at the time the article was written was to leave Bendigo to take up a place at the University of Melbourne to complete a BA and MA, Dip Ed. Her father is a direct descendant of Sir Henry Russell first baronet of Swallowfield, Berkshire.newspaper, bendigo -
 Bendigo Historical Society Inc.
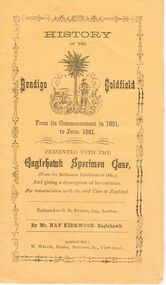
Document - BENDIGO GOLDFIELD - HISTORY OF, FOR MELBOURNE EXHIBITION 1880
Yellow covered booklet 'History of the Bendigo Goldfield from its commencement in 1851 to June 1881' Presented with the Eaglehawk Specimen Case and giving a description of its contents, for transmission with the said case to England. Dedicated to G.D. Peters, Esq, London, by Mr. Hay Kirkwood, Eaglehawk. Inside first page ( un-numbered) 'The Bendigo Goldfield Compiled by Messrs Hay Kirkwood and Wm. Welch. The Rise and Progress. At the latter end of 1851, a few enterprising pioneers, with Captain Harrison, now police magistrate of Castlemaine, made their way from Forest Creek ( Castlemaine ) 30 miles distant, to a place on the Bendigo Creek, now called Golden Square, then a squatter's run, where rich auriferous ground was met with. The new soon spread far and near, and the world was soon startled with the intelligence that another very extensive goldfield had been discovered, the importance of which may be gathered from the fact that in the month of June, in the following year, six months after the first sod was raised, 80,000 ounces of pure native gold was taken by Melbourne.Printer: W. Welch, View Streetbendigo, mining, melbourne exhibition 1880 -
 Bendigo Historical Society Inc.
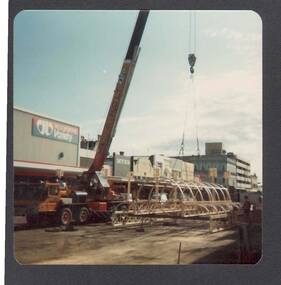
Photograph - BUILDING OF HARGREAVES MALL CANOPIES: MARCH 1982
Coloured photo taken on the 21/3/82 of a crane about to hoist the centre section of the first canopy in front of Woolworths Variety Store into place.bendigo, streetscape, hargreaves mall, building of hargreaves mall canopies - march 1982, woolworths variety, myer -
 Bendigo Historical Society Inc.
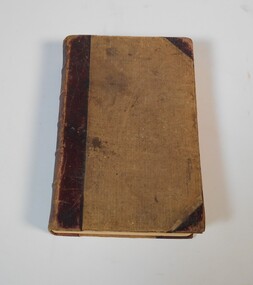
Book - Geographical dictionary
The Gazetteer presents an extensive a to z list of Victorian towns and villages, lakes, rivers and creeks, islands, bays, hills and mountains, runs and other localities and features. Entries include latitude and longitude, populations, proximity to other towns, local industries, coach and mail runs, hotels, churches and schools.Bailliere's Victorian Gazetteer and road guide containing the most recent and accurate information as to every place in the colony. Brown hardcover book, on the spine: Victorian Gazetteer with map 1865. The first and last pages are advertisements. The book has 442 pages listing every place in the colony. The map is not included. Compiled by Robert P. Whitworth. Published by Bailliere, Regent Street Unreadable name on first page and the name of F. Houston in blue pen on first page geographic dictionary, colony of victoria -
 Bendigo Historical Society Inc.
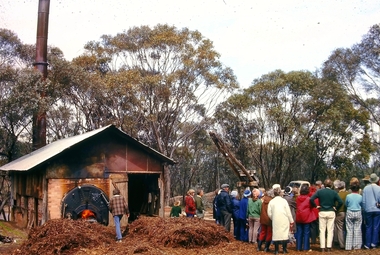
Slide - Peter Ellis Collection, the Whipstick and Eucalyptus Oil Production, Solomon Gully Reserve Quarry Hill, Quarry Hill Golf Course Extensions Some history of the Whipstick, 1970-1990
When the numerous gold mines declined in production, the eucalyptus oil industry became an important source of work. The first eucalyptus oil producer in Bendigo was a chemist called Richard Sandner who operated a plant and refinery in Bridge Street from 1876. By 1900, many other distillers operated on the northern edge of Bendigo and in the Whipstick. In 1926, the Forest Commision established a eucalyptus distillery at Gunyah in Wellsford State Forest. See the Wellsford Forest Note for more information. Today, there are just two eucalypt distilleries operating in Bendigo. Most of the world’s eucalyptus oil is now produced overseas. SOLOMON GULLY CIRCUIT WALK - Solomon Gully Nature Conservation Reserve. Rangers say this is a great place to see heaps of Bendigo Waxflowers. A 1.5km, unsurfaced track. It is rough and steep in places, but suitable for families. Closed shoes with a good drip are recommend. The track is popular with families and runners. There is parking available off Burnside St (opposite Quarry Hill / Bendigo Lawn Cemetery).Peter Ellis Collection, t16 slides of the Whipstick and Eucalyptus Oil Production, Solomon Gully Reserve Quarry Hill, Quarry Hill Golf Course Extensions Some history of the Whipstick.history, bendigo, peter ellis collection, whipstick bendigo, bendigo state forests, eucalyptus oil, solomon gully reserve quarry hill bendigo, whipstick hotel shamrock, magetti's wallace reef wine hall, whipstick, frederick the great mine sebastian, quarry hill golf course -
 Kyneton RSL Sub Branch
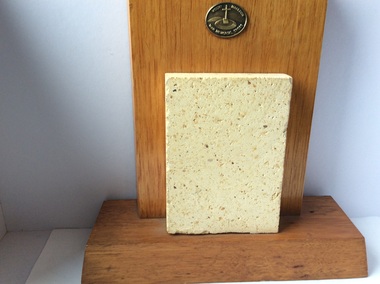
Mt Macedon War Memorial Cross tile, Original completed in 1933, additions made 1941 and restoration 1995
The original idea to create a monument was conceived by William Cameron. The monument was first constructed of cement block tiles and was a memorial to all those who served in WW1. Later gates were added to the precinct in memory of those who served in WW2. Restoration of the Memorial took place in 1995, with the original tiles being replaced by replaced by re-inforced concrete. Mt Macedon Memorial Cross is a significant War Memorial in the district. ANZAC Day dawn service is held at the Mt Macedon Cross, it is an impressive setting.Glazed precast cement block coloured to resemble sandstone, mounted on wooden stand. Centre front is a metal plate inscribed : Mt Macedon War Memorial Cross.On the back of the stand is a printed description of the construction history of the Mt Macedon Memorial Cross. No 77, on white sticker ( previous cataloguing number) memorial -
 Kyneton RSL Sub Branch
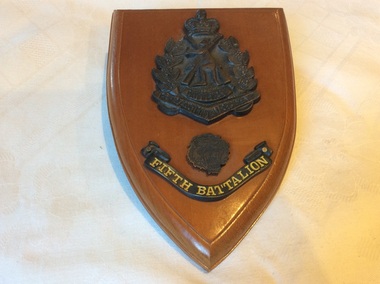
Corps plaque, Fifth Battalion Royal Australian Regiment
5th Battalion, Royal Australian Regiment Units 1 Australian Task Force Vietnam North Vietnamese Army Viet Cong Place Horseshoe Hill Events Tet Offensive Operation Bondi Battle Honour Binh Ba Commanding Officers Warr, John Arnold Kahn, Colin Nicholas Decorations First tour: 1 DSO; 3 MC; 2 MM; 1 MID and bar; 18 MID; Second tour: 1 DSO; 3 MC; 2 DCM; 1 Medal of Gallantry; 3 MM; 11 MID Conflict Vietnam, 1962-1975 References Vietnam Vietnam Vietnam Vietnam Vietnam Vietnam Category Unit Conflict Vietnam, 1962-1975 Unit hierarchy Australian Army Royal Australian Infantry 5th Battalion, Royal Australian Regiment Wooden plaque with 3 separate designs attached.5th Battalion -
 Archive of Vietnamese Boat People
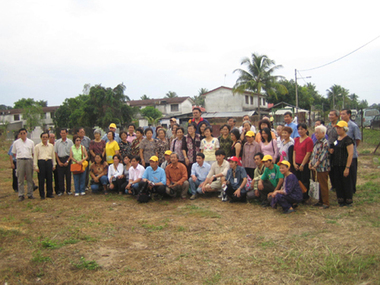
Revisit to the VBP mass grave in Cherang Ruku
Organized by the Archive of Vietnamese Boat People, a group of 48 overseas Vietnamese around the world came to visit the VBP mass grave in Cherang Ruku. The grave was found by the Archive of Vietnamese Boat People. It was the first overseas Vietnamese group ever came to this place.Revisit to the VBP mass grave in Cherang Ruku -
 Australian Institute of Archaeology
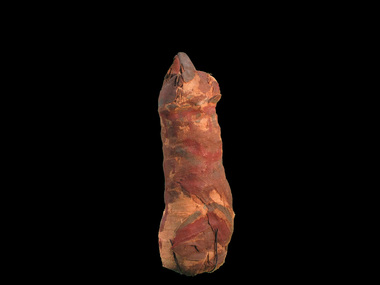
Mummified Cat, Charlie, Pre Ptolemaic - before 330BC
Neutron scans from ANSTO reveal that only portion of the animal, probably a cat, was wrapped in the mummy. Preliminary reports of C14 dating indicates that it dates from about 600BCE. It was discovered in the 1850s in Egypt. Many animals in ancient Egypt were deemed to represent a specific deity. Egyptologists have suggested that in the first millennium B.C. an act of popular piety was to place a mummified animal as a votive offering in a catacomb established at a cult center of that deity. Such an act may be expected to afford protection and bring good fortune. More recently, a close connection between the veneration of sacred animals and the worship of the king has been proposed, with the suggestion that these offerings were obligatory for religious officials and soldiers connected with certain royal cults. Interment of sacred animals was quite common in the Ptolemaic period (304-30 BCE) and continued well into the first half of the Roman period, or the second century CE. Cat cemeteries have been found throughout Egypt, and it is probably the Goddess, Bastet's association with her divine sisters in the wild, the malevolent Sakhmet and other lion-headed goddesses, that accounts for the presence of very large cat catacombs at Saqqara, Thebes, and Beni Hasan, where these leonine deities were particularly revered. There were several ways in which the cats were prepared for deposition; in the simplest cases the bodies were mummified and wrapped in linen strips, which were sometimes dyed different brown tones and woven to form geometric patterns. Usually the limbs were positioned close to the body, making a compact bundle but some mummies held lifelike poses. Egyptians considered certain individual animals to be living manifestations of a god, such as, the Apis bull. Individuals were mummified when they died and buried for eternal life, then replaced by another single living manifestation. Research on animal mummies shows that the majority of mummies found at the large animal cemetery sites are pre-adults who were purposely killed for use, sometimes by breaking the neck. Some mummies are 'substitutes' containing only a few bones or feathers or possibly sticks or sand. Mummified cat remains. -
 Bendigo Historical Society Inc.
Photograph - PETER ELLIS COLLECTION: NORTHCOTT'S CITY BAND
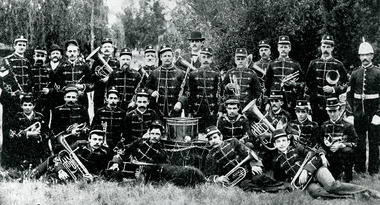
Mr. Northcott served all through the Crimean war, and obtained three service medals. He was most fortunate, as he did not even receive a scratch. While fighting in the trenches one day he happened to glance round, and was surprised to discover that his brother was by his side. They had not seen each other for a long time, and the meeting under such circumstances can be imagined. Two of his brothers, John and William, served throughout the war. At its close he came to Victoria, the gold fever being then at its height. His stay in Bendigo was brief, as the New Zealand rush attracted his attention, but he returned in 1858 to Bendigo, and as the outlook was quiet, he went back to New Zealand in 1859. Finally, in 1860, he settled in the Bendigo district with his father and mother and brother William. They took up some land at Leichardt and remained there for some years. It was about this time that he became prominent in musical circles. He came of a musical family, as his oldest brother, John, was one of the musicians to the Royal Family, and was pensioned by the late Queen Victoria. His younger brother, William, is at the present time one of the leading cornet players in the United States. In 1867 the late Mr. Northcott married Miss Lansell, sister of Mr. Geo. Lansell, her demise having taken place about three months before. When he left Leichardt, Mr. Northcott became Mr. Lansell's general manager, and continued in that capacity for 26 years. While he was manager of the 180 Mine it is estimated that gold to the value of a million sterling was taken from the mine. It is, perhaps, in his capacity as a bandsman, that Mr. Northcott was best known, as he became a familiar figure not only in the chief centres of Victoria but throughout Australia. He first became leader of the old Volunteer Band, and he was subsequently leader of the Battalion Band at Castlemaine. It was when he became leader of the musical combination known as Northcott's Brass Band that his fame and the fame of the band became widespread, as some 25 years ago it was one of the finest bands in Australia, and held that distinction for many years. Although many changes in the personnel of the band have taken place, it still retainsits old name. Mr. Northcott was a cornet player of high ability, and in 1871 he was presented by the citizens of Bendigo with a handsome silver cornet, in recognition of his services as a musician. His home contains a great array of trophies, photographic groups of bandsmen etc., which serve to indicate in a sense the reputation he enjoyed as a bandsman. During his career in Bendigo he invested in mining a good deal, but was not very fortunate in this respect, as he lost a good deal of money on the New Chum line. Naturally he was well known and warmly respected, especially by bandsmen. He was a genial citizen, and made a large circle of sincere friends. He was a member of the Zenith Lodge of Masons, having passed through the chairs twice. He was also a member of the A.O.F., and formerly a member of the School of Mines Administrative Council. It was about this time that he became prominent in musical circles. He came of a musical family, as his oldest brother, John, was one of the musicians to the Royal Family, and was pensioned by the late Queen Victoria. His younger brother, William, was one of the leading cornet players in the United States.Black and white photograph of Northcott's City Band, Bendigo. 3 rows of men in Band Uniform. Drum centre, brass instruments.men laying in grass at front.organisation, band, northcott's city band