Showing 3192 items
matching world war one
-
 Learmonth and District Historical Society Inc.
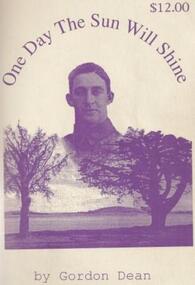
Book, Gordon Dean, "One Day The Sun Will Shine" by Gordon Dean, circa 1993
This book was written by Gordon,V.Dean to document the history of his world war 11 experiences, from 1939 till the end of the war and his return to his hometown of Learmonth and finally back into the workforce.Detailing the experiences of our fighting men and the traumas they suffered.Paperback book,light beige in colour.Has photo of Lake Learmonth with Mount Saddleback in left background, in purple with imediately above a photo of Gordon Dean.The title is inscribed in an arch above photoand authors name is at the bottom.(the price of $12.00 is in the top right corner.)"One Day The Sun Will Shine". by Gordon Dean.gordon dean, world war 11 1939 45, wartime experiences -
 Orbost & District Historical Society
Japanese money
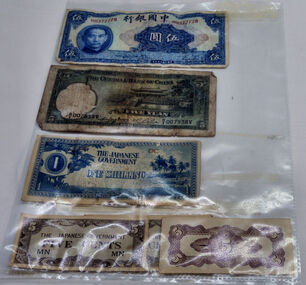
During World War II the Japanese Government printed currency notes, some denominated in the Australian pound, for use in Pacific countries intended for occupation. One shilling notes are typical of the occupation currency used in captured parts of Papua New Guinea during the War. Japanese printed bank notes. Three five cent notes ; one one shilling note and two five yuan notes. -
 Orbost & District Historical Society
identity discs
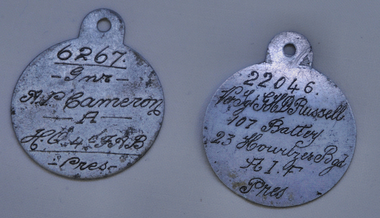
The identity discs of Australian soldiers of the First World War were initially made of aluminum and then made of a fibre material. Like other soldiers of the Great War the Australian 'Diggers' were issued an identity tag or disc. The first official disc was a small flat metal disc of aluminum, then there were two identity discs issued, made of a fibre one was a red disc the other was grey and octagonal. The discs were usually stamped with the information that the Military required. The Regimental number, Regimental name, soldiers' surname and initials and his religion were on the tag. Douglas Russell was a farmer, the son of John Russell, director of the Orbost Butter Factory for 50 years. Alex Pullar Cameron died from injuries in 1919.Two World War 1 identity tags. Both are aluminium and engraved on front. There are loops at the top for a chain around the neck..1 22046 Vet Sgt G.H D. Russell.........Pres. .2 6267 GNR A.P. Cameron................Presworld-war-1 identity-disc russell-g.h.d. cameron-a.p. -
 Orbost & District Historical Society
card wallet, first half 20th century
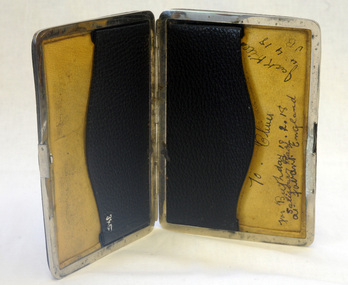
Research by O.D.H.S. suggests that the 'Oliver' who received this wallet from 'John' is likely Oliver George Scott but the identity of 'Jack' or 'John' is unknown. Oliver G Scott was born 19/2/1880, enlisted 13/9/15 after examination by Dr Kerr of Orbost, returned 7/5/19, died 3/8/1920, buried in Bairnsdale. His name is on the Orbost Roll of Honour. He was one of four Scott brothers who enlisted with three of the four dying in action. The Scott family lived at Ensay. A fifth son John was not accepted on medical grounds. Prior to enlisting, Oliver is described as a sawmiller and a single man. This is a personal item with high significance because it was owned by a man who enlisted from Orbost for World War I. It was a gift from one soldier to a mate during World War I and has personal inscriptions.A square black leather card wallet with metal binding and clip. It has two flat leather pouches inside.In pen - "From John to Oliver for birthday 18.2.18. Salisbury Road Fovant England Jack killed 4.4.18wallet -
 Orbost & District Historical Society
First Field Dressings, World War 2, Johnson & Johnson Pty Ltd, 1942, 1943
These packs were Australian army issue to service men and women during World War 2.Many Orbost men served in World War 2. Three field dressing packs made from cloth or waterproof covering and with a black printed label on one side of each pack. The words FIRST FIELD DRESSING and instructions TO OPEN and CONTENTS are printed on each pack. On the bottom of the print area are JOHNSON & JOHNSON PTY LTD, SYDNEY. One pack has the date May 1942, and the other two are December 1943. australian-army first-field-dressings world-war-two -
 Australian Commando Association - Victoria
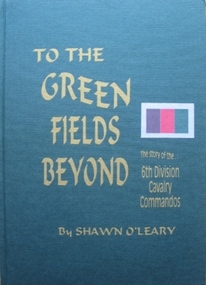
Book - 6th Div, Shawn OLeary, To The Green Fields Beyond:The story of the 6th Division Cavalry Commandos
The comprehensive history of the 6th Australian Division Cavalry Commandos – a (now out of print) reprint of one of the rarer Armoured unit history books. This is the story of one of Australia’s most famous fighting regiments during World War II. As an armoured cavalry unit it fought the Italians and Germans in the sands of the African desert and the Vichy French in the mountains of Syria. Later as a dismounted commando unit it fought the Japanese in the terrifying jungles of New Guinea. The heroism of the men in its ranks and the actions in which they engaged are portrayed in a way which makes battle deeds leap realistically from the pages. “To The Green Fields Beyond” is a documented and detailed book which is of value to everyone who is interested in Australia’s story. Seldom before has such a contribution been made to record of our national history. The book has been approved and sponsored by the Australian War Memorial. The 6th Division Cavalry Regiment was formed in November 1939 and, just two months later, was sent overseas to the Middle East in January 1940. Arriving in Egypt, the regiment immediately went to Palestine, where it joined the rest of the 6th Division and trained using machine-gun carriers and, from October, six old Vickers light tanks. At the end of the year the regiment moved into the Western Desert, where it joined British forces ready for the major offensive to commence on 9 December. Two days later the regiment became the first unit of the 2nd Australian Imperial Force (AIF) to go into action when one of its squadron fought a sharp action against the Italians holding Garn el Grein and Fort Maddalina on 11 and 12 December. By 21 December British forces had captured Sidi Barrrani and the desert was now open for the 6th Division’s advance along the Libyan coast. On 3 January 1941 the division attacked and captured the Italian fort of Bardia. The regiment’s A Squadron, under the command of Major Denzil Macarthur-Onslow, who went on to command the 4th Armoured Brigade, supported the attack. Tobruk was the next Italian fort to be captured, with the regiment again in support and covering the 19th Brigade’s advance. The regiment, though, was under-equipped and without its full compliment of vehicles, using only machine gun carriers. To compensate for this, A Squadron was parity re-equipped with captured Italian light tanks, which had large kangaroos painted on the hulls and turrets to distinguish them from enemy vehicles. After Tobruk, the regiment was used as part of the advance guard in the capture of Derna and then Benghazi. In April the unit moved to Helwan, where it was equipped with Vickers light tanks and machine-gun carriers, and operated with British troops in capturing Sollum. Towards the end of May the regiment moved to Palestine, where it came under the command of the 7th Division for the imminent invasion of Syria. The regiment experienced its heaviest fighting during the Syrian campaign, which began on 7 June. A Squadron was attached to the 21st Brigade and advanced along the coast, where the rugged hills made it difficult to manoeuvre the tanks and carriers. The squadron was relieved by one of the 9th Division Cavalry Regiment’s squadrons on 13 and 14 June. C Squadron, meanwhile, was with the 25th Brigade, and advanced along the Rosh Pinna road, engaging strong enemy defences at Fort Khirbe. C Squadron was relieved by B Squadron, which was later attacked by Vichy French tanks that were supported by heavy artillery and machine-gun fire, which forced the Australians to withdrawal. Always willing or needing to improvise during the campaign, A and B Squadrons both operated three captured French R35 Renault light tanks, while C Squadron provided personnel for a horse troop, quickly nicknamed the “Kelly Gang”, to patrol the high, rugged hills near the Mardjayoun–Banis Road. The regiment remained in Syria as part of the occupation force and returned to Australia in March 1942. It was sent to the Adelaide River, in the Northern Territory, and then later to Murgon, in Queensland. In 1943 and 1944 divisional cavalry regiments were reorganised into cavalry (commando) regiments. In January 1944 the 6th Division Cavalry Regiment became the 2/6th Cavalry (Commando) Regiment. The regiment lost its vehicles and became the administrative headquarters for the 2/7th, 2/9th, and 2/10th Commando Squadrons. The regiment remained with the 6th Division and participated in the Aitpae–Wewak campaign, in New Guinea, during 1945. Includes Nominal Rollnon-fictionThe comprehensive history of the 6th Australian Division Cavalry Commandos – a (now out of print) reprint of one of the rarer Armoured unit history books. This is the story of one of Australia’s most famous fighting regiments during World War II. As an armoured cavalry unit it fought the Italians and Germans in the sands of the African desert and the Vichy French in the mountains of Syria. Later as a dismounted commando unit it fought the Japanese in the terrifying jungles of New Guinea. The heroism of the men in its ranks and the actions in which they engaged are portrayed in a way which makes battle deeds leap realistically from the pages. “To The Green Fields Beyond” is a documented and detailed book which is of value to everyone who is interested in Australia’s story. Seldom before has such a contribution been made to record of our national history. The book has been approved and sponsored by the Australian War Memorial. The 6th Division Cavalry Regiment was formed in November 1939 and, just two months later, was sent overseas to the Middle East in January 1940. Arriving in Egypt, the regiment immediately went to Palestine, where it joined the rest of the 6th Division and trained using machine-gun carriers and, from October, six old Vickers light tanks. At the end of the year the regiment moved into the Western Desert, where it joined British forces ready for the major offensive to commence on 9 December. Two days later the regiment became the first unit of the 2nd Australian Imperial Force (AIF) to go into action when one of its squadron fought a sharp action against the Italians holding Garn el Grein and Fort Maddalina on 11 and 12 December. By 21 December British forces had captured Sidi Barrrani and the desert was now open for the 6th Division’s advance along the Libyan coast. On 3 January 1941 the division attacked and captured the Italian fort of Bardia. The regiment’s A Squadron, under the command of Major Denzil Macarthur-Onslow, who went on to command the 4th Armoured Brigade, supported the attack. Tobruk was the next Italian fort to be captured, with the regiment again in support and covering the 19th Brigade’s advance. The regiment, though, was under-equipped and without its full compliment of vehicles, using only machine gun carriers. To compensate for this, A Squadron was parity re-equipped with captured Italian light tanks, which had large kangaroos painted on the hulls and turrets to distinguish them from enemy vehicles. After Tobruk, the regiment was used as part of the advance guard in the capture of Derna and then Benghazi. In April the unit moved to Helwan, where it was equipped with Vickers light tanks and machine-gun carriers, and operated with British troops in capturing Sollum. Towards the end of May the regiment moved to Palestine, where it came under the command of the 7th Division for the imminent invasion of Syria. The regiment experienced its heaviest fighting during the Syrian campaign, which began on 7 June. A Squadron was attached to the 21st Brigade and advanced along the coast, where the rugged hills made it difficult to manoeuvre the tanks and carriers. The squadron was relieved by one of the 9th Division Cavalry Regiment’s squadrons on 13 and 14 June. C Squadron, meanwhile, was with the 25th Brigade, and advanced along the Rosh Pinna road, engaging strong enemy defences at Fort Khirbe. C Squadron was relieved by B Squadron, which was later attacked by Vichy French tanks that were supported by heavy artillery and machine-gun fire, which forced the Australians to withdrawal. Always willing or needing to improvise during the campaign, A and B Squadrons both operated three captured French R35 Renault light tanks, while C Squadron provided personnel for a horse troop, quickly nicknamed the “Kelly Gang”, to patrol the high, rugged hills near the Mardjayoun–Banis Road. The regiment remained in Syria as part of the occupation force and returned to Australia in March 1942. It was sent to the Adelaide River, in the Northern Territory, and then later to Murgon, in Queensland. In 1943 and 1944 divisional cavalry regiments were reorganised into cavalry (commando) regiments. In January 1944 the 6th Division Cavalry Regiment became the 2/6th Cavalry (Commando) Regiment. The regiment lost its vehicles and became the administrative headquarters for the 2/7th, 2/9th, and 2/10th Commando Squadrons. The regiment remained with the 6th Division and participated in the Aitpae–Wewak campaign, in New Guinea, during 1945. Includes Nominal Rollww2, australian commandos, australian special forces, world war 2 -
 Australian Commando Association - Victoria
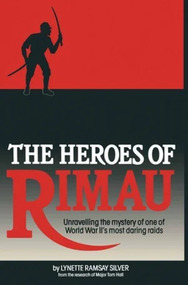
Book, Lenette Ramsay Silver, The Heros of RIMAU
On September 11, 1944, the British submarine "Porpoise" slipped quietly from Fremantle Harbour, bound for Indonesia. It was carrying the 23 Australian and British members of Operation Rimau who, under the leadership of the remarkable Lieutenant-Colonel Ivan Lyon of the Gordon Highlanders, intended to repeat the successful Jaywick raid of 1943 by blowing up 60 ships in Japanese-occupied Singapore Harbour, 19 days later, the preliminary part of the operation successfully completed, the submarine commander bade farewell to the raiders at Pedjantan Island, promising to return to pick them up in 38 days' time. A handful of Chinese and Malays and the conquering Japanese were the only people ever to see the 23 men again. According to the scant official post-war record, the mission was an utter failure. All of the party were captured of killed - ten of them beheaded in Singapore only five weeks before the Japanese surrender in, it was claimed, a ceremonial execution. The fate of eleven of the others remains officially unknown. After a 31 year search, Major Tom Hall, with the assistance of writer Lynette Silver, has overturned the official version and uncovered the truth. Aided by thousands of Japanese and Allied documents and by the first-hand accounts of several Indonesians and Malays, sole witnesses to the events of 1944, they have established the fate of every member of the party and unravelled the story of "The Heroes of Rimau" - a story that has for 45 years been all but lost, distorted by hearsay and fantasy, by military cover-ups and conspiracy, by official bungling, ineptitude and apathy. This book not only chronicles a feat of extraordinary daring in the face of overwhelming odds - a gripping tale of inspired courage, self-sacrifice and eventual tragedy - it also exposes the appalling sequence of events which has, until now, resulted in the shameful suppression of the truth about one of the most amazing stories to emerge from World War II.Self-government publication comprising 314 pages with some black-and-white photographs.non-fictionOn September 11, 1944, the British submarine "Porpoise" slipped quietly from Fremantle Harbour, bound for Indonesia. It was carrying the 23 Australian and British members of Operation Rimau who, under the leadership of the remarkable Lieutenant-Colonel Ivan Lyon of the Gordon Highlanders, intended to repeat the successful Jaywick raid of 1943 by blowing up 60 ships in Japanese-occupied Singapore Harbour, 19 days later, the preliminary part of the operation successfully completed, the submarine commander bade farewell to the raiders at Pedjantan Island, promising to return to pick them up in 38 days' time. A handful of Chinese and Malays and the conquering Japanese were the only people ever to see the 23 men again. According to the scant official post-war record, the mission was an utter failure. All of the party were captured of killed - ten of them beheaded in Singapore only five weeks before the Japanese surrender in, it was claimed, a ceremonial execution. The fate of eleven of the others remains officially unknown. After a 31 year search, Major Tom Hall, with the assistance of writer Lynette Silver, has overturned the official version and uncovered the truth. Aided by thousands of Japanese and Allied documents and by the first-hand accounts of several Indonesians and Malays, sole witnesses to the events of 1944, they have established the fate of every member of the party and unravelled the story of "The Heroes of Rimau" - a story that has for 45 years been all but lost, distorted by hearsay and fantasy, by military cover-ups and conspiracy, by official bungling, ineptitude and apathy. This book not only chronicles a feat of extraordinary daring in the face of overwhelming odds - a gripping tale of inspired courage, self-sacrifice and eventual tragedy - it also exposes the appalling sequence of events which has, until now, resulted in the shameful suppression of the truth about one of the most amazing stories to emerge from World War II. -
 Australian Commando Association - Victoria
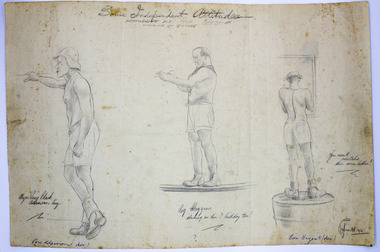
Work on paper - Sketch, Corporal Francis John Papworth, Some Independent Attitudes - Katherine 1942, June-July 1942
Drawing done on location by Francis John 'Curly' Papworth whilst serving in Katherine, Northern Territory during World War Two. This work of soldiers is significant as a work produced by a serving soldier on location during WWII and is a unique example of an artistic work showing the men and their surroundings at the time. Strong provenance as part of the family collection. Pencil sketch on white paper of three bare chested male figures, two left profile and one rear view. All attired in shorts and boots. Information relating to the figures and location are written on the work. Signature right hand corner: Papworth 42. Written in pencil at top of page: Some Independent Attitudes/Katherine N.T. 1942, June/July Working in the Q Store. Beneath each figure written in pencil and ink left to right: Figure 1: Maj Percy Black Adamsom Esq. (in blue ink below: Perc Adamson Dec) Figure 2: Reg Moggins, working on his Birthday too! (in blue ink below: ?) Figure 3: You can't mistake this one either! (in blue ink below: Con Nugent, Dec)soldiers, wwii, world war 2, second world war, artists, wartime, francis john papworth -
 Australian Commando Association - Victoria
Book, No Turning Back: Top Secret Intelligence Operation in Borneo During World War II Behind Japanese Lines
Twenty-two young New Zealand soldiers were posted to a clandestine intelligence unit in Melbourne called the Allied Intelligence Bureau. Their task was to undertake espionage and sabotage lines of communication, train natives as soldiers for local resistance and set up a radio link back to Australia. This is the account of the experiences of one soldier’s operation in Borneo – and is an account of their divine protection. Soft cover 174 pageSigned by author.ww2, australian special operations, nz special forces in ww2 -
 Australian Commando Association - Victoria
New Zealand's Secret Hero's: Don Stott and Z Special Unit
The incredible tale of ‘Z’ Special Unit – a group of mainly New Zealand and Australian commandos and saboteurs who parachuted into enemy-occupied territory to fight the war, sometimes single-handedly.The story begins in Greece, with the extraordinary sabotage feats of Don Stott and his friend Bob Morton. Stott’s success in blowing up the strategically crucial Asopos Viaduct was one of the greatest such exploits of World War II and changed the course of the war in Greece”.Soft cover 168 pagesww2, australian special operations, australian special forces, australian commandos, new zealand commandos -
 Australian Commando Association - Victoria
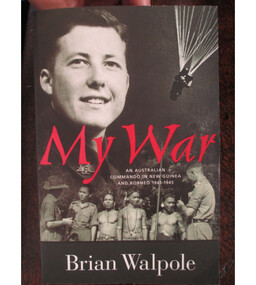
Book, My War: An Australian Commando in New Guinea and Borneo 1943 to 1945
Brian Walpole, the author, was a Australian Commando and special operations operative behind enemy lines in New Guinea and Borneo during WW2. Brian was a commando with the Australian 2/3 Independent Company. He went to New Guinea in January 1943 and remained until the fall of the Japanese base at Salamaua in September. He fought on the Bobdubi Ridge. His commanding officer was the well-regarded George Warfe, whose portrait was sketched by war artist Ivor Hele. Brian blazed a trail through the New Guinea jungle which appears on some maps as Walpole’s Track, discovering and naming the ambush site Goodview Junction. Soon afterwards (July 1943) Goodview Junction was the scene of a key campaign victory which contributed to George Warfe being awarded the Military Cross.Brian’s Special Operations training mostly took place at Careening Bay (Western Australia) and Fraser Island (Queensland). He arrived in Borneo at the time of the 9th Division’s landing at Labuan Island, and took part in two SRD operations – Colt and Semut 3. After the surrender, Walpole's work continued as many of the Japanese did not recognise the surrender and continued to fight on. Brian relates how on the 14th of September 1945 while still an operative in SRD he was able to save POWs from certain death and after a firefight arrested 10 Japanese soldiers at Simanggang Borneo. He was alone and had been assisted in the battle by 20 headhunters from the jungles along the Rejang River. One of the people saved was a young nurse in her 20s, Lena Ricketts. ww2, australian special operations, australian commando, new guinea, borneo, world war ii -
 Australian Commando Association - Victoria
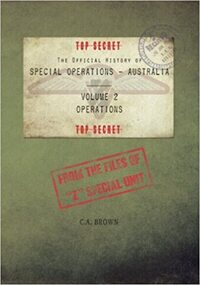
Book - Official History of Special Operations Australia- Volume 2 Operations
Popularly known today as Z Special Unit, or by the wartime cover names of Inter-Allied Services Department (ISD) and Services Reconnaissance Department (SRD), Special Operations Australia (SOA) was the Special Operations component of the US-led Allied Intelligence Bureau in the Pacific Theatre during the Second World War. From the secret files of Z Special Unit, and the second in a set of five volumes, Volume 2 - Operations describes almost two hundred separate "Z" Operations. Through the examination of this volume, the strategic role of the Special Operations - Australia organisation becomes apparent. Students of history will easily identify the ebb and flow of the Allied campaigns in the Pacific Theatre, with many of the operations of SOA being precursors to larger Allied offensives. Several serious blunders by SRD headquarters are also identified, one of which in particular had the capacity to compromise one of the greatest secrets of the Second World War and could have cost thousands of Allied lives...special operations australia, australian commandos, world war ii, special forces -
 Australian Commando Association - Victoria
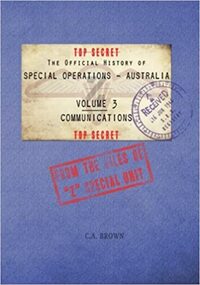
Book, The Official History of Special Operations Australia Vol. 3- Communications
Popularly known today as Z Special Unit, or by the wartime cover names of Inter-Allied Services Department (ISD) and Services Reconnaissance Department (SRD), Special Operations Australia (SOA) was the Special Operations component of the US-led Allied Intelligence Bureau in the Pacific Theatre during the Second World War. From the secret files of Z Special Unit, and the third in a set of five volumes, Volume 3 - Communications describes the communications links and equipment which were the lifeline for "Z" Operatives in the field. From "Z's" early days relying on Dutch military communications stations in Melbourne and Darwin to the establishment of dedicated "Z" communications stations in Darwin, Morotai and Labuan, Vol 3 provides the only comprehensive history of these sites ever committed to paper. Radio and Special Forces enthusiasts will be agog at the appendices in this volume, which not only include copies of the actual operating instructions and technical manuals for much of the specialist SOE communications hardware used by "Z" during the war, but also the once-top secret SOE ciphers and codes used by Z parties in the field. The Official History of Special Operations Australia, Volume 3 - Communications is a unique record of one of the most important aspects of Second World War Special Operations.australian special operations, special forces, world war ii -
 Red Cliffs Military Museum
Certificate, Despatch Notice, (estimated); 1918
Is one of 4 certificates framed together in a frame 55cm W x 55cm H belonging to Bdr. Joesph Moore.Photocopy of original certificate of despatchThe War of 1914-1918/ Australian Imperial Force/ 1272 Gnr. (A.Bomdr.) J. Moore, 51st By Field Artilery./ was mentioned in a despatch from/Field Marshal Sir Douglas Haig. KT., G.C.B., G.C.V.O., K.C.J.E./ dated 7th April 1918/ for gallant and distinguished services in the Field/ I have it in Command from the King to record His Majesty's/ high aprreciation of the services rendered. (indecipherable signature)/ Secretary of State for War.1918, moore, joseph, world, war, 1, despatch, field, marsh, sir, douglas, haig, ioffice, 1914 1918 -
 Red Cliffs Military Museum
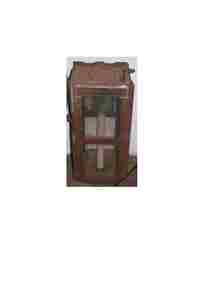
Lantern, E.A. Harper & Sons, WW1 Candle Lantern, 1916 (exact)
Tin construction, with sections for eight glass panels (1 missing, 1 incomplete. Perforated tin panels top and base. steel wire bracket for holding or hanging on top. Steel wire sliding latches on top and base as well as one side, when both are unlatched all sides are hinged and lantern can be folded up for storage. Contains a candle (not original), 2 stamped tin labels.1) Use 1/2 candles only. 2) E.A. Harper & Sons/1916/Redfern N.S.W.lantern, , e, world, war, a, harper, son s, 1916, renfern n s w, candle, folding, one -
 Red Cliffs Military Museum
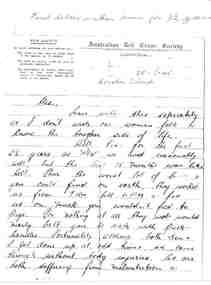
Letter
Letter written from (unknown) POW imprisioned by the Japanese on Morotai Island from 1942 - 1945 to (unknown) friend. Descriptive of life and treatment in POW camp. The island was captured by the Japanese in early 1942. Morotai's southern plain was taken by American forces in September 1944 during the Battle of Morotai, and used as a staging point for the Allied invasion of the Philippines in early 1945, and of Borneo in May and June of that year. Japanese soldier Teruo Nakamura was discovered in the Morotai jungle in 1974, as one of the WWII Japanese soldiers who held out subsequent to the Japanese military's surrender.Photocopy of letter, 4 pages, originally written in ink on (unofficial) Australian Red Cross form.Added to head of letter at a later date is inscription ' First letter written home for 3 1/2 years'.Top left hand- FOR SAFETY/ IN YOUR LETTERS DO NOT REFER TO:-/ The name of your ship or other ships in the convoy, or its escorts./The date of sailing, ports of call, or probable destination./ The description of troops, their loca-/tion or any other information/ which, if intercepted, would be of/ value to the enemy. In your Top right hand- Australian Red Cross Society/ (UNOFFICIAL)/ 25-8-45/ (added at later date 'Morotri Island')/ Alex, Have witten this especially/ as i don't wish our women folk to know the tougher side of life./Well Alex for the first/ 2 1/2 years as POWs we lived reasonably/ well, but the last 15 months was like /hell. Heres the worst lot of b-s/ you could find on earth, they worked /us from 7AM till 6 PM, & fed/ us on muck you wouldn't feed to/ Pigs. I'm nothing at all they would 2, pow, morotri island, morotai island, world war, prisoner of war, australian red cross society -
 The Beechworth Burke Museum
Photograph, c.1914
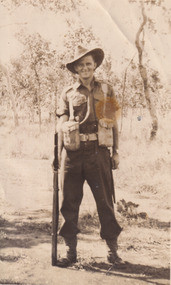
This photograph depicts a soldier, credited on the reverse as Fred Foster. The young man is dressed in military attire and is standing tall with a gun beside him. He is located in the Australian bush and the date of the photograph is unknown. Frederick “Fred” Arthur Foster was nephew to famous Bushranger Edward “Ned” Kelly. He was born on the 15th of March 1889 in Forbes, New South Wales. He was the eldest son of Catherine “Kate” Kelly and William Henry “Bricky” Foster. After the death of his mother in October of 1898 from apparent drowning, Foster (then aged 9) was raised by his grandmother Ellen Kelly (née Quinn) at Eleven Mile Creek in Victoria. On the 29th of June 1915, 26 year old Foster travelled to Melbourne, Victoria and enlisted in the Australian Army. He was a Private in the 17th Infantry Battalion (originally C.Company, 47th battalion). He previously was attached to the 55th Battalion but transferred in 1916. Prior to enlisting in the army, Foster worked as a Bee Keeper and served in the 16th Light Horse regiment at Benalla. Foster had blue eyes, brown hair and was of Presbyterian faith. On the 28th of February 1917, Foster travelled to France aboard SS “Golden Eagle”. He was killed in action in Lagnicourt, France on the 15th of April 1917 at 28 years old. The Battle in Lagnicourt France, on the Western Front, occurred from the 1st of March to the 30th of April of 1917 and was the location of fierce fighting between Germany and the British Empire. Germany became aware of a weakness they had along the Hindenburg Line, one of these weaknesses was located in Lagnicourt which is a small village in Northern France. Therefore, the Germans decided to launch a counter-attack in this area on the 15th of April at dawn. During this fight, German forces captured several batteries of the 1st Australian Division’s artillery but the Australians led a strong counter-attack by four of their battalions and recaptured the village and most of the guns from the German forces. German forces were forced into a premature withdrawal. This battle was not undertaken in typical WW1 “trench” style warfare. Instead, the battle was up on the ground in what was described as “old open style warfare”. In this battle, slightly more than 1000 casualties were Australian, with 300 of these prisoners of war. German forces suffered a loss of over 2300 casualties with 360 taken captive. Foster was one of 43 in his regiment who died, 87 were wounded and 51 reported missing. Foster was buried at location in Lagnicourt and whilst the grave was initially marked, it is now unknown. Foster’s service, alongside those who fell at Lagnicourt, is commemorated at the Australian National Memorial in Villers-Bretonneux, France along with other national Australian memorial sites.Photography played an important part in World War 1. Photographs of men in their military uniforms served as propaganda during the Great War to reassure civilians back at home of the military prowess of their nation and the bravery of their men. It did this while hiding the true horrors which faced the men in battle. These photographs, which includes those taken at home prior to embarking overseas like Fred Foster’s, act as censored memory for those who have lost a loved one at war. It enables families to remember their relatives in their youth and standing proudly rather than having to face the actual danger and horror which faced these men at the front line. The battle of Lagnicourt France was a victory for the European Empire and therefore, men who lost their lives protecting their countries became heroes and were awarded posthumous medals for their service. Photos of soldiers in their uniforms, were undertaken by men like Foster, so their families would be able to retain their memories and likeness before they embarked for war. Many men were killed or horribly wounded so these images were important for reminding families about their sons/ husbands/ brothers/ cousins and friends. This photo is a part of the Burke Museum Kelly album which includes numerous photographs relating to the Kelly Gang. As the son of Kate Kelly and William “Bricky” Foster, Fred Foster is an important part of the Kelly story after the execution of Edward “Ned” Kelly which has information it can impart relating to the history of the family after 1880. Whilst an important element of the Kelly Album, Foster’s photograph is also historically important in its own right for its connection to the Great War and the experiences of a soldier at the Western Front.Original sepia rectangular photograph developed on matte photographic paper, unmounted.Reverse: (Top right corner of reverse:) FRED FOSTER/ (Top centre of reverse:) Kate Kelly's son.kelly album, fred foster, kate kelly, photograph, australian soldier, the kelly gang, australian bush, burke museum, sepia photo, gum trees, family of the kelly gang, world war i, langnicourt, france, great war, 1917, ned kelly, frederick foster, william "bricky" foster, ellen kelly, military history, australian military -
 The Beechworth Burke Museum
Photograph, 1916-17
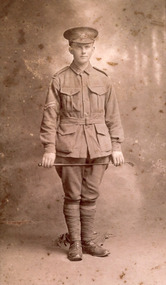
... War One, with almost half a million lives were lost on all ...Portrait of William Edward Peach in First World War military uniform, holding a crop in front of his thighs with military kit on the ground behind him. A Beechworth postal employee who enlisted in 1915, this photograph is probably taken in 1917, as he is a corporal in the photo and was promoted to this rank in May 1917. This photograph is of historic significance as it depicts William Edward Peach, a Beechworth postal assistant who enlisted in the Australian Imperial Force (AIF) on his nineteenth birthday, 5 August 1915, which required his parents' permission. He was decorated with the military medal for his courage in battle 4/5 October 1917 at the Battle of Broodseinde Ridge near Ypres, the most successful allied attack of the Third Battle of Ypres (31 July to 10 November 1917), also known as the Battle of Paschendale, which saw the greatest loss of human life during World War One, with almost half a million lives were lost on all sides. According to the recommendation for his military medal, Peach 'displayed conspicuous courage and initiative', taking charge after his platoon commander became a casualty, handling the men 'under heavy fire with great skill'. He also assisted the Company Commander in reorganising their military objectives. The photograph is of social as well as historic significance for the Beechworth community, because it provides a direct link between local, national and international histories in relation to Australia' s participation in one of WWI's best-known battles. The record has strong research potential given the ongoing public and scholarly interest in war, history, and especially the ANZAC legend, which is commemorated annually on 25 April, known as ANZAC Day. Peach is also one of the diarists of WWI, including of this significant period of Australian military history, from 1916 to 18, which can be accessed via the Australian War Memorial. Sepia rectangular photograph printed on gloss Kodak photographic paper mounted on board. Reverse: BMM 8779 item catalogue number pencilled in right-hand bottom corner.military medal, defending australia and victoria, military service, hmat a64 demosthenes, wipers, anzac, burke museum, beechworth, ypres, australian military services, beechworth post office, first world war, wartime, our boys, belgium, flanders fields, ww1, british war medal, victory medal, broodseinde, third battle of ypres -
 The Beechworth Burke Museum
Photograph, c1930
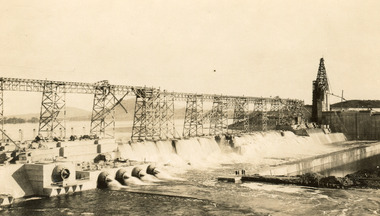
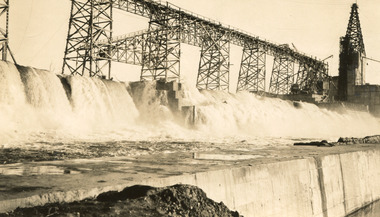
Taken on 25 October 1930, various houses with the Hume Dam under construction are depicted in the background. The construction of the Hume Dam took place from 1919 to 1936. At the time of construction, it was the second largest dam in the world. It was also one of the earliest civil projects developed after the Federation. Some of the Dam workers consisted of World War I veterans. Dam workers often settled their families in Mitta Junction Village and Wodonga. Archaeological surveys were completed by Austral Archaeology, which was done when the Department of Land & Water Conservation was doing work to improve Hume Dam. The archaeological report that came out of the survey recommended three sites of interest where archaeological excavation should be done: Camp Ganger’s Quarters, Stableman’s Quarters, and the Industrial Dump. The excavation uncovered artefacts. Mitta Mitta: Mitta Mitta is situated between Mount Welcome and Mount Misery. It is named after the river that explorers Hume and Hovell discovered in 1824. The town would eventually become a huge gold mining town. Mitta Mitta is called Midamodunga by the local Indigenous peoples Wodonga: Wodonga is situated on the Murray River and is part of North East Victoria. Hume and Hovell: Hamilton Hume (1979-1873) and William Hilton Hovell (1786-1875). W. H. Hovell was born in Norfolk England and Hume was born in Parramatta, New South Wales Hovell and Hume undertook an exploration journey in 1824 and thought they discovered a river, which turned out to be the Murray River. They returned home in 1825, but returned to the area in 1826 and discovered coal in the area. This photo is historically significant as it shows the Hume Dam under construction in 1930. The Dam was named after Hamilton Hume, who is an important historical figure for this area as he helped discover the area where resources were found.Sepia rectangular photograph printed unmountedReverse: 84-19-5 / 1997.3185/ Values & spillway. / When completed the wall / will be as high as the / scaffolding. [featuring trademark: kodak print]construction, houses, veterans, mitta junction village, hume dam, world war i, federation, wodonga, archaeological survey, excavation, austral archaeology, department of land & water conservation, camp ganger's quarter's, stableman's quarters, industrial dump, artefacts, mitta mitta, mount welcome, mount misery, murray river, hamilton hume, william hilton hovell, hume and hovell expedition -
 The Beechworth Burke Museum
Photograph, c1930
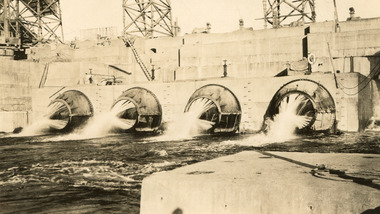
Taken on 25 October 1930, various houses with the Hume Dam under construction are depicted in the background. The construction of the Hume Dam took place from 1919 to 1936. At the time of construction, it was the second largest dam in the world. It was also one of the earliest civil projects developed after the Federation. Some of the Dam workers consisted of World War I veterans. Dam workers often settled their families in Mitta Junction Village and Wodonga. Archaeological surveys were completed by Austral Archaeology, which was done when the Department of Land & Water Conservation was doing work to improve Hume Dam. The archaeological report that came out of the survey recommended three sites of interest where archaeological excavation should be done: Camp Ganger’s Quarters, Stableman’s Quarters, and the Industrial Dump. The excavation uncovered artefacts. Mitta Mitta: Mitta Mitta is situated between Mount Welcome and Mount Misery. It is named after the river that explorers Hume and Hovell discovered in 1824. The town would eventually become a huge gold mining town. Mitta Mitta is called Midamodunga by the local Indigenous peoples Wodonga: Wodonga is situated on the Murray River and is part of North East Victoria. Hume and Hovell: Hamilton Hume (1979-1873) and William Hilton Hovell (1786-1875). W. H. Hovell was born in Norfolk England and Hume was born in Parramatta, New South Wales Hovell and Hume undertook an exploration journey in 1824 and thought they discovered a river, which turned out to be the Murray River. They returned home in 1825, but returned to the area in 1826 and discovered coal in the area.This photo is historically significant as it shows the Hume Dam under construction in 1930. The Dam was named after Hamilton Hume, who is an important historical figure for this area as he helped discover the area where resources were found.Sepia rectangular photograph printed unmountedReverse: 84-19-2/ 1997.3188/ These are the four / release valves they are / not always open (illegible) this / when closed the water flows / over the spillway. [featuring trademark: kodak print] photograph number: 354construction, houses, veterans, mitta junction village, hume dam, world war i, federation, wodonga, archaeological survey, excavation, austral archaeology, department of land & water conservation, camp ganger's quarter's, stableman's quarters, industrial dump, artefacts, mitta mitta, mount welcome, mount misery, murray river, hamilton hume, william hilton hovell, hume and hovell expedition -
 The Beechworth Burke Museum
Photograph, 25 October 1930
Taken on 25 October 1930, various houses with the Hume Dam under construction are depicted in the background. The construction of the Hume Dam took place from 1919 to 1936. At the time of construction, it was the second largest dam in the world. It was also one of the earliest civil projects developed after the Federation. Some of the Dam workers consisted of World War I veterans. Dam workers often settled their families in Mitta Junction Village and Wodonga. Archaeological surveys were completed by Austral Archaeology, which was done when the Department of Land & Water Conservation was doing work to improve Hume Dam. The archaeological report that came out of the survey recommended three sites of interest where archaeological excavation should be done: Camp Ganger’s Quarters, Stableman’s Quarters, and the Industrial Dump. The excavation uncovered artefacts. Mitta Mitta: Mitta Mitta is situated between Mount Welcome and Mount Misery. It is named after the river that explorers Hume and Hovell discovered in 1824. The town would eventually become a huge gold mining town. Mitta Mitta is called Midamodunga by the local Indigenous peoples Wodonga: Wodonga is situated on the Murray River and is part of North East Victoria. Hume and Hovell: Hamilton Hume (1979-1873) and William Hilton Hovell (1786-1875). W. H. Hovell was born in Norfolk England and Hume was born in Parramatta, New South Wales Hovell and Hume undertook an exploration journey in 1824 and thought they discovered a river, which turned out to be the Murray River. They returned home in 1825, but returned to the area in 1826 and discovered coal in the area.This photo is historically significant as it shows the Hume Dam under construction in 1930. The Dam was named after Hamilton Hume, who is an important historical figure for this area as he helped discover the area where resources were found.Sepia rectangular photograph printed unmountedReverse: 84-19-6/ 1997.3187/ The spillway [featuring trademark: kodak print] construction, houses, veterans, mitta junction village, hume dam, world war i, federation, wodonga, archaeological survey, excavation, austral archaeology, department of land & water conservation, camp ganger's quarter's, stableman's quarters, industrial dump, artefacts, mitta mitta, mount welcome, mount misery, murray river, hamilton hume, william hilton hovell, hume and hovell expedition -
 The Beechworth Burke Museum
Photograph, 25 October 1930
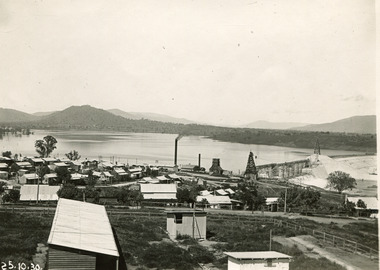
Taken on 25 October 1930, various houses with the Hume Dam under construction are depicted in the background. The construction of the Hume Dam took place from 1919 to 1936. At the time of construction, it was the second largest dam in the world. It was also one of the earliest civil projects developed after the Federation. Some of the Dam workers consisted of World War I veterans. Dam workers often settled their families in Mitta Junction Village and Wodonga. Archaeological surveys were completed by Austral Archaeology, which was done when the Department of Land & Water Conservation was doing work to improve Hume Dam. The archaeological report that came out of the survey recommended three sites of interest where archaeological excavation should be done: Camp Ganger’s Quarters, Stableman’s Quarters, and the Industrial Dump. The excavation uncovered artefacts. Mitta Mitta: Mitta Mitta is situated between Mount Welcome and Mount Misery. It is named after the river that explorers Hume and Hovell discovered in 1824. The town would eventually become a huge gold mining town. Mitta Mitta is called Midamodunga by the local Indigenous peoples Wodonga: Wodonga is situated on the Murray River and is part of North East Victoria. Hume and Hovell: Hamilton Hume (1979-1873) and William Hilton Hovell (1786-1875). W. H. Hovell was born in Norfolk England and Hume was born in Parramatta, New South Wales Hovell and Hume undertook an exploration journey in 1824 and thought they discovered a river, which turned out to be the Murray River. They returned home in 1825, but returned to the area in 1826 and discovered coal in the area.This photo is historically significant as it shows the Hume Dam under construction in 1930. The Dam was named after Hamilton Hume, who is an important historical figure for this area as he helped discover the area where resources were found.Black and white rectangular photograph printer unmountedReverse: 84-20-1/ 1997.3147construction, houses, veterans, mitta junction village, hume dam, world war i, federation, wodonga, archaeological survey, excavation, austral archaeology, department of land & water conservation, camp ganger's quarter's, stableman's quarters, industrial dump, artefacts, mitta mitta, mount welcome, mount misery, murray river, hamilton hume, william hilton hovell, hume and hovell expedition -
 The Beechworth Burke Museum
Photograph, 25 October 1930
Taken on 25 October 1930, various houses with the Hume Dam under construction are depicted in the background. The construction of the Hume Dam took place from 1919 to 1936. At the time of construction, it was the second largest dam in the world. It was also one of the earliest civil projects developed after the Federation. Some of the Dam workers consisted of World War I veterans. Dam workers often settled their families in Mitta Junction Village and Wodonga. Archaeological surveys were completed by Austral Archaeology, which was done when the Department of Land & Water Conservation was doing work to improve Hume Dam. The archaeological report that came out of the survey recommended three sites of interest where archaeological excavation should be done: Camp Ganger’s Quarters, Stableman’s Quarters, and the Industrial Dump. The excavation uncovered artefacts. Mitta Mitta: Mitta Mitta is situated between Mount Welcome and Mount Misery. It is named after the river that explorers Hume and Hovell discovered in 1824. The town would eventually become a huge gold mining town. Mitta Mitta is called Midamodunga by the local Indigenous peoples Wodonga: Wodonga is situated on the Murray River and is part of North East Victoria. Hume and Hovell: Hamilton Hume (1979-1873) and William Hilton Hovell (1786-1875). W. H. Hovell was born in Norfolk England and Hume was born in Parramatta, New South Wales Hovell and Hume undertook an exploration journey in 1824 and thought they discovered a river, which turned out to be the Murray River. They returned home in 1825, but returned to the area in 1826 and discovered coal in the area. This photo is historically significant as it shows the Hume Dam under construction in 1930. The Dam was named after Hamilton Hume, who is an important historical figure for this area as he helped discover the area where resources were found. Black and white rectangular photograph printer unmountedReverse: 1997.3145/ 84-20-2construction, houses, veterans, mitta junction village, hume dam, world war i, federation, wodonga, archaeological survey, excavation, austral archaeology, department of land & water conservation, camp ganger's quarter's, stableman's quarters, industrial dump, artefacts, mitta mitta, mount welcome, mount misery, murray river, hamilton hume, william hilton hovell, hume and hovell expedition -
 The Beechworth Burke Museum
Audio - Oral History, Joyce Snow
Joyce Snow was born in Avenel and came to Beechworth at the age of twenty-three. She grew up at Bundarta, a place just out of Shepparton. Her father was a soldier who was part of the 37th Battallion while her mother's family were some of the pioneers of Beechworth--the Duracks. She finished school at about thirteen years old, did a correspondence course, and when she was old enough, she went training for nursing. Joyce was a trained nurse at the old Mooroopna Base, Hospital. She working at a Hospital in Shepparton when Manpower sent her to Beechworth. She arrived at Beechworth in 1943 at a train in Wangaratta. She had been a nurse in Beechworth for more than seven years. She got married in Beechworth and had three children, two girls and one boy. By the time of her third child, she studied a one year supplementary course on Psychy at May Day. Joyce had nursed prisoners of the First World War. She shared about the differences of medical practice back then in comparison to now. This oral history recording was part of a project conducted by Jennifer Williams in the year 2000 to capture the everyday life and struggles in Beechworth during the twentieth century. This project involved recording seventy oral histories on cassette tapes of local Beechworth residents which were then published in a book titled: Listen to what they say: voices of twentieth century Beechworth. These cassette tapes were digitised in July 2021 with funds made available by the Friends of the Burke.Joyce Snow's account of her life in the early 20th century is historically and socially significant to the cultural heritage of the region. She gave information about the settlements and life of the prisoners of First World War, the early forms of entertainment, education system and societal roles. She also mentioned changes in employment and migrant communities. This oral history account is socially and historically significant as these accounts provide a unique insight into the day-to-day life of the town's residents during the 20th century, many of which will have now been lost if they had not been preserved.This is a digital copy of a recording that was originally captured on a cassette tape. The cassette tape is black with a horizontal white strip and is currently stored in a clear flat plastic rectangular container. It holds up 40 minutes of recordings on each side.Joyce Snowburke museum, beechworth, hospital, oral history, nursing, nurse, first world war, prisoners of war, tatatura, moonrapna, peritontitis, doctors, tuck shops, largactil, rock films, victoria park, kings in grass castle, durack, duracks, glory box, d'oylies -
 Greensborough Historical Society
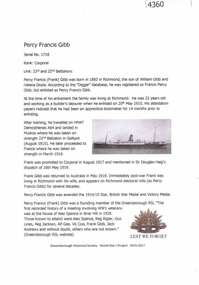
Article, Greensborough Historical Society et al, Percy Francis Gibb, 1914-1918
A short article about Percy Francis Gibb and his service in World War 1. Percy Gibb was a founding member of the Greensborough RSL.One page, text and colour images.world war 1 project, percy francis gibb -
 Greensborough Historical Society
Article, Greensborough Historical Society et al, James George Gosstray, 1914-1918
A short article about James George Gosstray and his service in World War 1. At the time of his enlistment, James was living in Diamond Creek.One page, text and colour images.world war 1 project, james george gosstray -
 Greensborough Historical Society
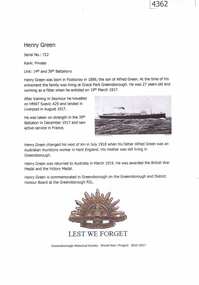
Article, Greensborough Historical Society et al, Henry Green, 1914-1918
A short article about Henry Green and his service in World War 1. At the time of his enlistment, Henry was living at Grace Park GreensboroughOne page, text and colour images.world war 1 project, henry green -
 Greensborough Historical Society
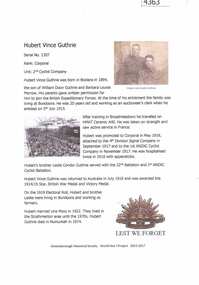
Article, Greensborough Historical Society et al, Hubert Vince Guthrie, 1914-1918
A short article about Hubert Vince Guthrie and his service in World War 1. At the time of his enlistment, Hubert was living at BundooraOne page, text and colour images.world war 1 project, hubert vince guthrie -
 Greensborough Historical Society
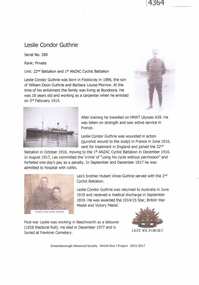
Article, Greensborough Historical Society et al, Leslie Condor Guthrie, 1914-1918
A short article about Leslie Condor Guthrie and his service in World War 1. At the time of his enlistment, Leslie was living at BundooraOne page, text and colour images.world war 1 project, leslie condor guthrie -
 Greensborough Historical Society
Article, Greensborough Historical Society et al, Roy James Halse, 1914-1918
A short article about Roy James Halse and his service in Roy's father, Alfred lived in Greensborough.One page, text and colour images.world war 1 project, roy james halse