Showing 11790 items
matching william-paterson
-
 Beechworth Honey Archive
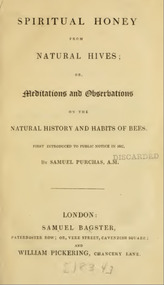
Publication, e-book, Spiritual honey from natural hives or meditation and observations on the natural history and habits of bees (Purchas, S.), London, 1834
-
 Port Fairy Historical Society Museum and Archives
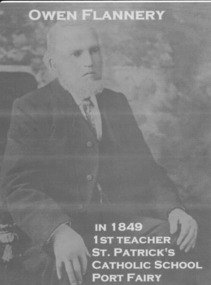
Photograph, 1849
Owen Flannery the first teacher at the St Patricks Catholic School 1849Social significance relating to schools and the catholic religionBlack and White photographowen flannery, teacher, st patricks, catholic, school -
 The 5th/6th Battalion Royal Victoria Regiment Historical Collection
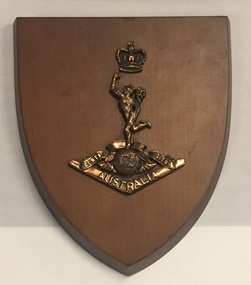
Plaque - Presentation Plaque, RASigs
Shield shaped presentation plaque made of varnished wood. Located centrally on the plaque is a bronze coloured RASigs badgewark vc club, ra sigs, plaque -
 The 5th/6th Battalion Royal Victoria Regiment Historical Collection
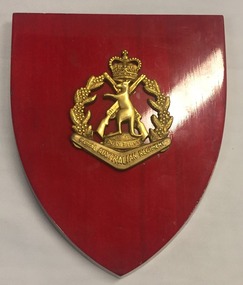
Plaque - Presentation Plaque, Royal New South Wales Regiment
Shield shaped plaque made from a red varnished wood. Located centrally is a large gold coloured Royal New South Wales Regiment badge. To the right of the badge is a slight chip in the wooden plaque.rnswr, infantry, hat badge, plaque, wark vc club -
 The 5th/6th Battalion Royal Victoria Regiment Historical Collection
Plaque - Presentation Plaque, 6th Battalion Royal Victorian Regiment
Wooden, shield shaped plaque, that is varnished in a red coloured varnish. The varnish is badly chipped. Located centrally on the plaque is a large Royal Victorian Regiment badge. This is located above a silver banner with "6th Battalion" embossed on it.6 rvr, army reserve, infantry, hat badge -
 The 5th/6th Battalion Royal Victoria Regiment Historical Collection
Plaque - Presentation Plaque, Royal Australian Artillery
Shield shaped plaque made from stained timber. Located centrally is a bronze coloured, large, Royal Australian Artillery hat badge.wark vc club, raa, artillery, plaque -
 The 5th/6th Battalion Royal Victoria Regiment Historical Collection
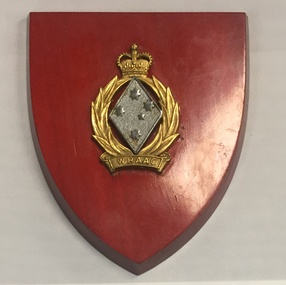
Plaque - Presentation Plaque, Women Royal Australian Army Corps
Shield shaped plaque made of timber varnished in a red colour. Located centrally is a WRAAC badge made of two pieces, a gold wreath with crown and banner located behind a silver kite with a southern cross on it. women, wraac, plaque, hat badge, wark vc club -
 The 5th/6th Battalion Royal Victoria Regiment Historical Collection
Plaque - Presentation Plaque, Royal Australian Regiment
Shield shape plaque made of timber that has been varnished red in colour. A large, gold coloured Royal Australian Regiment badge is affixed to the front of the plaque.rar, infantry, hat badge, plaque, army, wark vc club -
The 5th/6th Battalion Royal Victoria Regiment Historical Collection
Plaque - Presentation Plaque, The Rats of Tobruk Association
Shield shaped plaque made of varnished timber with yellow Rats of Tobruk "T" badge affixed to the front ww2, wark vc club, tobruk, plaque -
 Victorian Bands' League
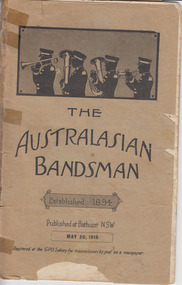
Journal, The Australian Bandsman 32(10), 20/05/1919
Bound journalnon-fictionaustralian -- brass bands -- music, australian -- brass bands -- history, australian -- brass bands -- news and information, australia -- world war one -- history, australia -- influenza pandemic -- 1919 -
 Working Heritage Crown Land Collection
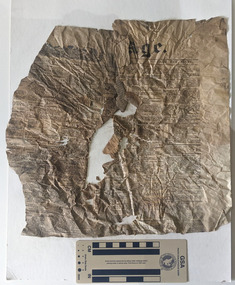
Newspaper - Fragment of The Age newspaper, January 2 1872
Damaged and weathered newspaper page. There is a large rip through the centre of the page. The Age, Tuesday January 2, 1872historic newspaper, 1872, former royal mint -
 Working Heritage Crown Land Collection
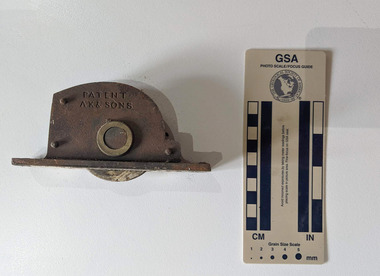
Functional object - Iron Pully
Corroded iron wall-mount with pully mechanismPatent AK & Sonsformer royal mint, historic building -
 Working Heritage Crown Land Collection
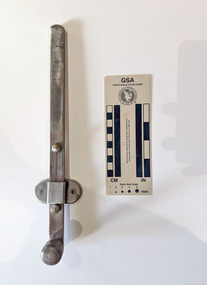
Functional object - Door Bolt
Iron door bolt with wall platehistoric building, former royal mint -
 Working Heritage Crown Land Collection
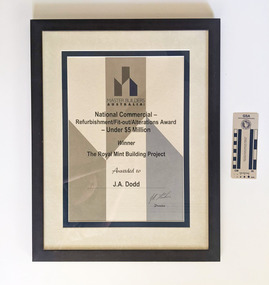
Award - Mint Award, Master Builder's Award for the Mint
Framed award with text and an angular block colour design Master Builders Australia Inc National Commercial-Refurbishment/Fit-out/Alterations Award- Under $5 Million Winner The Royal Mint Building Project Awarded to J.A.Doddawards, historic building, former royal mint -
 Bendigo Historical Society Inc.
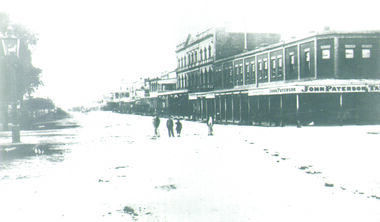
Photograph - PALL MALL, 1876
Black and White Photo of Pall Mall, Building at the Corner of Pall Mall and Mitchell Streets has the Sign 'John Paterson' and 'John Paterson Tailor', 4 small children are at the centre of the photo, Beehive Building, Shamrock Building in the distance, Markings on rear of the photo are 'Pall Mall', 'Holterman Collection 1876'buildings, commercial, pall mall, john paterson, beehive, shamrock -
 Bendigo Historical Society Inc.
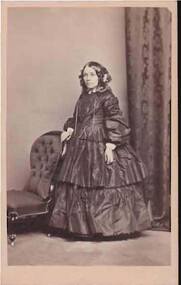
Photograph - PORTRAIT OF A LADY
Small portrait of a lady standing beside a chair with her right hand resting on the chair. She is wearing a high neck, long sleeve and a layered skirt which is very wide at the hemline. She has curls in her hair and a necklace? This is tucked into her waistband.Paterson Bros. Photographic Artists. 8 Bourke Street E, Melbournephotograph, portrait, female, portrait of a lady, paterson bros. -
 Bendigo Historical Society Inc.
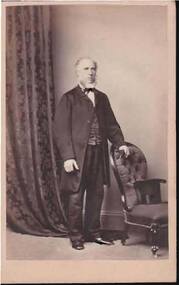
Photograph - PORTRAIT OF A MAN
Small portrait of a man wearing a three piece suit which has a knee-length coat and a bow tie. He is standing beside a chair with his left hand resting on the back of the chair. There is a long curtain behind him to his right.Paterson Bro's. Photographic Artists. 8 Bourke Street, E. Melbournephotograph, portrait, male, portrait of a man -
Glenelg Shire Council Cultural Collection
Photograph - Photograph - Portland Harbour, n.d
Port of Portland Authority Archivesport of portland archives, portland harbour -
 Charlton Golden Grains Museum Inc
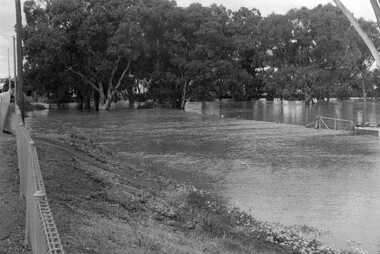
Photograph, 1973 flooded Avoca River
B/W photograph of 1973 flooded Avoca River. View West side of Paterson Bridge behind Shire Office -
Lakes Entrance Regional Historical Society (operating as Lakes Entrance History Centre & Museum)
Photograph, Lakes Post Newspaper, 1/12/1998 12:00:00 AM
Other number 03670.1Colour photograph of Racquetball team Strange Ones Nino Paganella, Daniel Coad, Marg Paterson Lakes Entrance Victoriasports -
Lakes Entrance Regional Historical Society (operating as Lakes Entrance History Centre & Museum)
Photograph, Lakes Post Newspaper, 1994
William Durley's wife had a confectionary shop, they were the parents-in-law of Alexander Murray businessman, sawmiller and builder of Kia Ora House Lakes EntranceBlack and white photograph of headstone of William Durley an early resident of area, in Garden Cemetery Lakes Entrance Victoriacemeteries, associations -
 Bendigo Military Museum
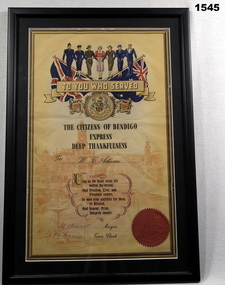
Certificate - CERTIFICATE WW2, FRAMED, Post WW2
William Charles Atkinson enlisted in the RAAF on 9.2.1944 age 18 years. On discharge from the Air Force he held the rank of LAC in No 7 Aircraft Depot.From the citizens of Bendigo to WC Atkinson. Signed by Mayor A Truscott and town clerk.Written on rear: "William Charles Atkinson 147081 RAAF” , “Frank Palmozzo”documents-certificates, frame accessories, raaf, atkinson -
Whitehorse Historical Society Inc.
Document, Nomination Form, 1933
Nomination formNomination form - Shire of Blackburn and Mitcham, Blackburn Riding, for George William Sweetland, annual council elections, 24 Aug 1933.Nomination form politics and government, shire of blackburn and mitcham, sweetland, george william, local government elections -
 Orbost & District Historical Society
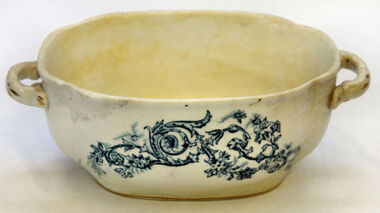
dish, The use of 'ENGLAND' denotes a date after 1891
China dish used for gravy, sauces etc. White with gold edging on handles and around base. Blue floral pattern on front and back.Underneath-W&E Corn. England Porcelain Royale Mona dish pottery corn-w. & e. staffordshire domestic crockery porcelain -
 Flagstaff Hill Maritime Museum and Village
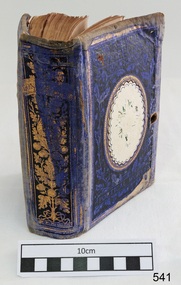
Book - Literary Work, Henry Wardsworth Longfellow, The Poetical Works of Henry Wadsworth Longfellow, (short title on cover is ‘Longfellow’s Poetical Works’), 1877
This well-produced but water-damaged book of Longfellows Poetry, was part of the former Warrnambool Mechanics Institute Library and Museum collection. The custody of this collection was assumed by Flagstaff Hill Maritime Village in the 1970s. Supporting provenance indicates the book was retrieved from the sea at Loch Ard Gorge soon after the shipwreck of the same name in June 1878. This book was given to the Warrnambool Museum curator Joseph Archibald by its finder, the Warrnambool Standard editor Henry Davis in October 1883. A letter from Mr Davis describing the poignant circumstances of his discovery is also in the Flagstaff Hill collection. A transcript of this letter is displayed next to the book in the Great Circle Gallery at the Maritime Village (reg. no. 2292). The story behind this book prompted Mr Archibald to write to the sole surviving female passenger from the LOCH ARD, Eva Carmichael, asking if the book was hers. Miss Carmichael replied by handwritten letter in January 1884, advising that the volume of poems did not belong to her: “We had a ‘Longfellow’, but our book had a green cover”. This letter is also in the Flagstaff Hill collection (reg. no. 2290.4).The book is rare as it has survived a shipwreck in relatively good condition. It is an example of personal possessions carried by a shipboard passenger in the 1870s. It holds significance for its connection to the renowned poet, Henry Wardsworth Longfellow. The book is important for its probable association with the wreck of the vessel Loch Ard in 1878. The LOCH ARD shipwreck is of State significance and is listed on the Victorian Heritage Register S417. A volume of poetry by Henry Wadsworth Longfellow. It is bound in blue-purple cloth on thick board, with black lettering and curling-vine design, framed by gold border. In the centre of the front cover is a raised smooth-white ellipse with crimped edges, now worn bare but with traces of an original brightly coloured floral design. This white centre of supple leather is also framed by a decorative gold border. The upper case lettering on the front cover reads ‘Longfellow’s Poetical Works’. The edges of the blue material are faded and worn. The pages are corrugated by water damage but their original gold-edged condition is still evident. The front and back covers are scored with singed holes approximately 1.5cm diameter, situated about the centre edge of each side and in roughly corresponding positions. These holes may be from an original book-latch or fastening. However they have since been damaged by a hot piercing object, which has blackened the holes and extended the damage into the enclosed pages. The spine of the book features a stylised oak tree in gold, rising from bared roots to serrated leaves and acorns. The letters “LON[DON]” at the top of the spine and “W.P.NI[MM]O” at the bottom. The book cover has separated from the majority of stitched pages, along with a number of title pages, which are now loosed from the binding. The books condition is fragile from a handling perspective, but stable in terms of further deterioration. ‘Inscribed “Loch Ard June 1 1878” in pencil within ― believed to be a salvage from the shipwreck’ (Mechanics Institute Library auditor, June 1996).warrnambool, shipwrecked-coast, flagstaff-hill, flagstaff-hill-maritime-museum, longfellow’s poems, loch ard, eva carmichael, warrnambool mechanics institute library, warrnambool museum, joseph archibald, henry davis, william p. nimmo, poetry, heny longfellow, henry wadsworth longfellow, poetical works, 1870s, 1877, longfellow’s poetical works -
 Supreme Court of Victoria Library
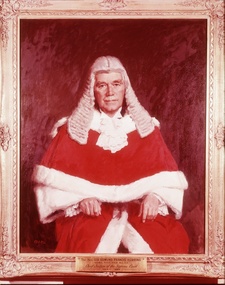
Portrait, Sir Edmund Herring, 1964
The portrait of Chief Justice Sir Edmund Herring is significant because of whom it portrays and who painted it. Sir Edmund Herring (1892-1982), had a military career before becoming the Chief Justice of Victoria in 1944. Sir Edmund served as an artillery officer with the British Army in World War One and was awarded the Military Cross. While he returned to the Law between the wars, becoming Kings Counsel in 1936, he continued his military associations through the Australian Militia forces rising to colonel by the start of the Second World War. At the outset of World War Two Herring was appointed as Commander of the Royal Artillery for the Australian Sixth Division. Herring saw service in North Africa and Greece and was in charge of Australian Northern forces in 1942, afterwards working with General Blamey in Papua New Guinea. It was at this time that Herring confirmed the death sentences of 22 Papuans who had been found guilty of murder and treason. Sir Edmund was appointed Chief Justice, straight from his army command in 1944. As Chief Justice he quickly established the Law Reform Committee and after the war oversaw the extension of the Supreme Court buildings, with the creation of new Courts. He was considered an able administrator, but his refusal to appoint Joan Rosanove a Queen’s Counsel throughout the 1950s, did not sit well with many legal practitioners. After his retirement from the Bench, he continued in his many public activities, including trustee of the Shrine of Remembrance and the Australian War Memorial and a member of the Melbourne Grammar School Council, as well as Lieutenant Governor of the State of Victoria a position he held from 1945 to 1972. Herring was also an outspoken social critic, between the wars he had been a member of the White Guard, who were a far right group acting against communism. During the Cold War period of the 1950s, Herring spoke out in favour of the British Empire and the American alliance. The portrait of Chief Justice Sir Edmund Herring is significant because of whom it portrays and who painted it. The portrait of Sir Edmund Herring is the second one that Sir William Dargie (1912-2003), completed of Sir Edmund, his first effort in 1944/45 won the Archibald prize. Dargie won the Archibald prize a record eight times.Portrait in oils of Sir Edmund Herring, Chief Justice of the Supreme Court of Victoria (1944-1964). Sir Edmund is seated, this is a half portrait, dressed in his red judicial robes. The sitter takes up most of the frame and there is very little extra information in the picture. signed lower left "Dargie'. Plaque with the following details : Sir Edmund Francis Herring, KCMG, KBE, DSO, MC, ED. Chief Justice of the Supreme Court, 1944-1964.judges, herring -
 Flagstaff Hill Maritime Museum and Village
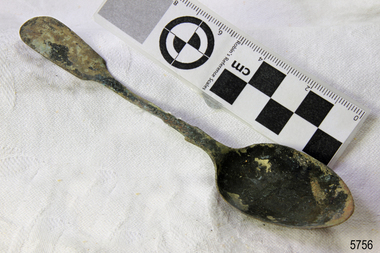
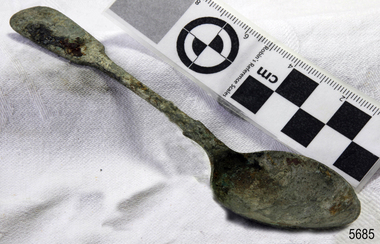
Domestic object - Spoon, c. 1878
Unrestored tea spoon from the wreck of the LOCH ARD. The spoon design has a flattened fiddle-back handle, with a thin stem or shank, flared collar, and elongated bowl. The spoons metallic composition is a thin layer of brass alloy which has partially corroded back to a nickel-silver base metal. HISTORY OF THE LOCH ARD The LOCH ARD belonged to the famous Loch Line which sailed many ships from England to Australia. Built in Glasgow by Barclay, Curdle and Co. in 1873, the LOCH ARD was a three-masted square rigged iron sailing ship. The ship measured 262ft 7" (79.87m) in length, 38ft (11.58m) in width, 23ft (7m) in depth and had a gross tonnage of 1693 tons. The LOCH ARD's main mast measured a massive 150ft (45.7m) in height. LOCH ARD made three trips to Australia and one trip to Calcutta before its final voyage. LOCH ARD left England on March 2, 1878, under the command of Captain Gibbs, a newly married, 29 year old. She was bound for Melbourne with a crew of 37, plus 17 passengers and a load of cargo. The general cargo reflected the affluence of Melbourne at the time. On board were straw hats, umbrella, perfumes, clay pipes, pianos, clocks, confectionary, linen and candles, as well as a heavier load of railway irons, cement, lead and copper. There were items included that intended for display in the Melbourne International Exhibition in 1880. The voyage to Port Phillip was long but uneventful. At 3am on June 1, 1878, Captain Gibbs was expecting to see land and the passengers were becoming excited as they prepared to view their new homeland in the early morning. But LOCH ARD was running into a fog which greatly reduced visibility. Captain Gibbs was becoming anxious as there was no sign of land or the Cape Otway lighthouse. At 4am the fog lifted. A man aloft announced that he could see breakers. The sheer cliffs of Victoria's west coast came into view, and Captain Gibbs realised that the ship was much closer to them than expected. He ordered as much sail to be set as time would permit and then attempted to steer the vessel out to sea. On coming head on into the wind, the ship lost momentum, the sails fell limp and LOCH ARD's bow swung back. Gibbs then ordered the anchors to be released in an attempt to hold its position. The anchors sank some 50 fathoms - but did not hold. By this time LOCH ARD was among the breakers and the tall cliffs of Mutton Bird Island rose behind the ship. Just half a mile from the coast, the ship's bow was suddenly pulled around by the anchor. The captain tried to tack out to sea, but the ship struck a reef at the base of Mutton Bird Island, near Port Campbell. Waves broke over the ship and the top deck was loosened from the hull. The masts and rigging came crashing down knocking passengers and crew overboard. When a lifeboat was finally launched, it crashed into the side of LOCH ARD and capsized. Tom Pearce, who had launched the boat, managed to cling to its overturned hull and shelter beneath it. He drifted out to sea and then on the flood tide came into what is now known as LOCH ARD Gorge. He swam to shore, bruised and dazed, and found a cave in which to shelter. Some of the crew stayed below deck to shelter from the falling rigging but drowned when the ship slipped off the reef into deeper water. Eva Carmichael had raced onto deck to find out what was happening only to be confronted by towering cliffs looming above the stricken ship. In all the chaos, Captain Gibbs grabbed Eva and said, "If you are saved Eva, let my dear wife know that I died like a sailor". That was the last Eva Carmichael saw of the captain. She was swept off the ship by a huge wave. Eva saw Tom Pearce on a small rocky beach and yelled to attract his attention. He dived in and swam to the exhausted woman and dragged her to shore. He took her to the cave and broke open case of brandy which had washed up on the beach. He opened a bottle to revive the unconscious woman. A few hours later Tom scaled a cliff in search of help. He followed hoof prints and came by chance upon two men from nearby Glenample Station three and a half miles away. In a state of exhaustion, he told the men of the tragedy. Tom returned to the gorge while the two men rode back to the station to get help. By the time they reached LOCH ARD Gorge, it was cold and dark. The two shipwreck survivors were taken to Glenample Station to recover. Eva stayed at the station for six weeks before returning to Ireland, this time by steamship. In Melbourne, Tom Pearce received a hero's welcome. He was presented with the first gold medal of the Royal Humane Society of Victoria and a £1000 cheque from the Victorian Government. Concerts were performed to honour the young man's bravery and to raise money for those who lost family in the LOCH ARD disaster. Of the 54 crew members and passengers on board, only two survived: the apprentice, Tom Pearce and the young woman passenger, Eva Carmichael, who lost all of her family in the tragedy. Ten days after the LOCH ARD tragedy, salvage rights to the wreck were sold at auction for £2,120. Cargo valued at £3,000 was salvaged and placed on the beach, but most washed back into the sea when another storm developed. The wreck of LOCH ARD still lies at the base of Mutton Bird Island. Much of the cargo has now been salvaged and some was washed up into what is now known as LOCH ARD Gorge. Cargo and artefacts have also been illegally salvaged over many years before protective legislation was introduced. One of the most unlikely pieces of cargo to have survived the shipwreck was a Minton porcelain peacock - one of only seven in the world. The peacock was destined for the Melbourne International Exhibition in 1880. It had been well packed, which gave it adequate protection during the violent storm. Today, the Minton peacock can be seen at the Flagstaff Hill Maritime Museum in Warrnambool. From Australia's most dramatic shipwreck it has now become Australia's most valuable shipwreck artefact and is one of very few 'objects' on the Victorian State Heritage Register. The LOCH ARD shipwreck is of State significance – Victorian Heritage Register S 417. Flagstaff Hill’s collection of artefacts from LOCH ARD is significant for being one of the largest collections of artefacts from this shipwreck in Victoria. It is significant for its association with the shipwreck, which is on the Victorian Heritage Register (VHR S417). The collection is significant because of the relationship between the objects, as together they have a high potential to interpret the story of the LOCH ARD. The LOCH ARD collection is archaeologically significant as the remains of a large international passenger and cargo ship. The LOCH ARD collection is historically significant for representing aspects of Victoria’s shipping history and its potential to interpret sub-theme 1.5 of Victoria’s Framework of Historical Themes (living with natural processes). The collection is also historically significant for its association with the LOCH ARD, which was one of the worst and best known shipwrecks in Victoria’s history. Unrestored tea spoon from the wreck of the LOCH ARD. The spoon design has a flattened fiddle-back handle, with a thin stem or shank, flared collar, and elongated bowl. The spoons metallic composition is a thin layer of brass alloy which has partially corroded back to a nickel-silver base metal. Approximately 35% of original electroplating remains, with some verdigris. Outlines of three makers marks are visible on the lower rear of handle (Circle, Circle, Diamond) and details of one are legible (Maltese Cross).flagstaff hill maritime museum, shipwreck coast, great ocean road, loch line, loch ard, mutton bird island, electroplated cutlery, loch ard shipwreck, nickel silver, william page & co, birmingham, brass plating, makers marks -
 Flagstaff Hill Maritime Museum and Village
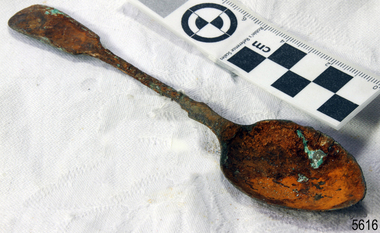
Spoon, circa 1878
HISTORY OF THE LOCH ARD The LOCH ARD belonged to the famous Loch Line which sailed many ships from England to Australia. Built in Glasgow by Barclay, Curdle and Co. in 1873, the LOCH ARD was a three-masted square rigged iron sailing ship. The ship measured 262ft 7" (79.87m) in length, 38ft (11.58m) in width, 23ft (7m) in depth and had a gross tonnage of 1693 tons. The LOCH ARD's main mast measured a massive 150ft (45.7m) in height. LOCH ARD made three trips to Australia and one trip to Calcutta before its final voyage. LOCH ARD left England on March 2, 1878, under the command of Captain Gibbs, a newly married, 29 year old. She was bound for Melbourne with a crew of 37, plus 17 passengers and a load of cargo. The general cargo reflected the affluence of Melbourne at the time. On board were straw hats, umbrella, perfumes, clay pipes, pianos, clocks, confectionary, linen and candles, as well as a heavier load of railway irons, cement, lead and copper. There were items included that intended for display in the Melbourne International Exhibition in 1880. The voyage to Port Phillip was long but uneventful. At 3am on June 1, 1878, Captain Gibbs was expecting to see land and the passengers were becoming excited as they prepared to view their new homeland in the early morning. But LOCH ARD was running into a fog which greatly reduced visibility. Captain Gibbs was becoming anxious as there was no sign of land or the Cape Otway lighthouse. At 4am the fog lifted. A man aloft announced that he could see breakers. The sheer cliffs of Victoria's west coast came into view, and Captain Gibbs realised that the ship was much closer to them than expected. He ordered as much sail to be set as time would permit and then attempted to steer the vessel out to sea. On coming head on into the wind, the ship lost momentum, the sails fell limp and LOCH ARD's bow swung back. Gibbs then ordered the anchors to be released in an attempt to hold its position. The anchors sank some 50 fathoms - but did not hold. By this time LOCH ARD was among the breakers and the tall cliffs of Mutton Bird Island rose behind the ship. Just half a mile from the coast, the ship's bow was suddenly pulled around by the anchor. The captain tried to tack out to sea, but the ship struck a reef at the base of Mutton Bird Island, near Port Campbell. Waves broke over the ship and the top deck was loosened from the hull. The masts and rigging came crashing down knocking passengers and crew overboard. When a lifeboat was finally launched, it crashed into the side of LOCH ARD and capsized. Tom Pearce, who had launched the boat, managed to cling to its overturned hull and shelter beneath it. He drifted out to sea and then on the flood tide came into what is now known as LOCH ARD Gorge. He swam to shore, bruised and dazed, and found a cave in which to shelter. Some of the crew stayed below deck to shelter from the falling rigging but drowned when the ship slipped off the reef into deeper water. Eva Carmichael had raced onto deck to find out what was happening only to be confronted by towering cliffs looming above the stricken ship. In all the chaos, Captain Gibbs grabbed Eva and said, "If you are saved Eva, let my dear wife know that I died like a sailor". That was the last Eva Carmichael saw of the captain. She was swept off the ship by a huge wave. Eva saw Tom Pearce on a small rocky beach and yelled to attract his attention. He dived in and swam to the exhausted woman and dragged her to shore. He took her to the cave and broke open case of brandy which had washed up on the beach. He opened a bottle to revive the unconscious woman. A few hours later Tom scaled a cliff in search of help. He followed hoof prints and came by chance upon two men from nearby Glenample Station three and a half miles away. In a state of exhaustion, he told the men of the tragedy. Tom returned to the gorge while the two men rode back to the station to get help. By the time they reached LOCH ARD Gorge, it was cold and dark. The two shipwreck survivors were taken to Glenample Station to recover. Eva stayed at the station for six weeks before returning to Ireland, this time by steamship. In Melbourne, Tom Pearce received a hero's welcome. He was presented with the first gold medal of the Royal Humane Society of Victoria and a £1000 cheque from the Victorian Government. Concerts were performed to honour the young man's bravery and to raise money for those who lost family in the LOCH ARD disaster. Of the 54 crew members and passengers on board, only two survived: the apprentice, Tom Pearce and the young woman passenger, Eva Carmichael, who lost all of her family in the tragedy. Ten days after the LOCH ARD tragedy, salvage rights to the wreck were sold at auction for £2,120. Cargo valued at £3,000 was salvaged and placed on the beach, but most washed back into the sea when another storm developed. The wreck of LOCH ARD still lies at the base of Mutton Bird Island. Much of the cargo has now been salvaged and some was washed up into what is now known as LOCH ARD Gorge. Cargo and artefacts have also been illegally salvaged over many years before protective legislation was introduced. One of the most unlikely pieces of cargo to have survived the shipwreck was a Minton porcelain peacock - one of only nine in the world. The peacock was destined for the Melbourne International Exhibition in 1880. It had been well packed, which gave it adequate protection during the violent storm. Today, the Minton peacock can be seen at the Flagstaff Hill Maritime Museum in Warrnambool. From Australia's most dramatic shipwreck it has now become Australia's most valuable shipwreck artefact and is one of very few 'objects' on the Victorian State Heritage Register. The LOCH ARD shipwreck is of State significance – Victorian Heritage Register S 417. Flagstaff Hill’s collection of artefacts from LOCH ARD is significant for being one of the largest collections of artefacts from this shipwreck in Victoria. It is significant for its association with the shipwreck, which is on the Victorian Heritage Register (VHR S417). The collection is significant because of the relationship between the objects, as together they have a high potential to interpret the story of the LOCH ARD. The LOCH ARD collection is archaeologically significant as the remains of a large international passenger and cargo ship. The LOCH ARD collection is historically significant for representing aspects of Victoria’s shipping history and its potential to interpret sub-theme 1.5 of Victoria’s Framework of Historical Themes (living with natural processes). The collection is also historically significant for its association with the LOCH ARD, which was one of the worst and best known shipwrecks in Victoria’s history. Unrestored tea spoon from the wreck of the LOCH ARD. The spoon design has a flattened fiddle-back handle, with a thin stem or shank, flared collar, and elongated bowl. The spoons metallic composition is a thin layer of brass alloy which has partially corroded back to a nickel-silver base metal. Bowl is split and verdigris stained packing paper is stuck to rear of spoon. flagstaff hill, warrnambool, shipwrecked coast, flagstaff hill maritime museum, maritime museum, shipwreck coast, flagstaff hill maritime village, great ocean road, loch line, loch ard, captain gibbs, eva carmichael, tom pearce, glenample station, mutton bird island, loch ard gorge, electroplated cutlery, loch ard shipwreck, nickel silver, william page & co, birmingham, brass plating, makers marks -
 Flagstaff Hill Maritime Museum and Village
Spoon, circa 1878
Tea spoon from the wreck of the LOCH ARD HISTORY OF THE LOCH ARD The LOCH ARD belonged to the famous Loch Line which sailed many ships from England to Australia. Built in Glasgow by Barclay, Curdle and Co. in 1873, the LOCH ARD was a three-masted square rigged iron sailing ship. The ship measured 262ft 7" (79.87m) in length, 38ft (11.58m) in width, 23ft (7m) in depth and had a gross tonnage of 1693 tons. The LOCH ARD's main mast measured a massive 150ft (45.7m) in height. LOCH ARD made three trips to Australia and one trip to Calcutta before its final voyage. LOCH ARD left England on March 2, 1878, under the command of Captain Gibbs, a newly married, 29 year old. She was bound for Melbourne with a crew of 37, plus 17 passengers and a load of cargo. The general cargo reflected the affluence of Melbourne at the time. On board were straw hats, umbrella, perfumes, clay pipes, pianos, clocks, confectionary, linen and candles, as well as a heavier load of railway irons, cement, lead and copper. There were items included that intended for display in the Melbourne International Exhibition in 1880. The voyage to Port Phillip was long but uneventful. At 3am on June 1, 1878, Captain Gibbs was expecting to see land and the passengers were becoming excited as they prepared to view their new homeland in the early morning. But LOCH ARD was running into a fog which greatly reduced visibility. Captain Gibbs was becoming anxious as there was no sign of land or the Cape Otway lighthouse. At 4am the fog lifted. A man aloft announced that he could see breakers. The sheer cliffs of Victoria's west coast came into view, and Captain Gibbs realised that the ship was much closer to them than expected. He ordered as much sail to be set as time would permit and then attempted to steer the vessel out to sea. On coming head on into the wind, the ship lost momentum, the sails fell limp and LOCH ARD's bow swung back. Gibbs then ordered the anchors to be released in an attempt to hold its position. The anchors sank some 50 fathoms - but did not hold. By this time LOCH ARD was among the breakers and the tall cliffs of Mutton Bird Island rose behind the ship. Just half a mile from the coast, the ship's bow was suddenly pulled around by the anchor. The captain tried to tack out to sea, but the ship struck a reef at the base of Mutton Bird Island, near Port Campbell. Waves broke over the ship and the top deck was loosened from the hull. The masts and rigging came crashing down knocking passengers and crew overboard. When a lifeboat was finally launched, it crashed into the side of LOCH ARD and capsized. Tom Pearce, who had launched the boat, managed to cling to its overturned hull and shelter beneath it. He drifted out to sea and then on the flood tide came into what is now known as LOCH ARD Gorge. He swam to shore, bruised and dazed, and found a cave in which to shelter. Some of the crew stayed below deck to shelter from the falling rigging but drowned when the ship slipped off the reef into deeper water. Eva Carmichael had raced onto deck to find out what was happening only to be confronted by towering cliffs looming above the stricken ship. In all the chaos, Captain Gibbs grabbed Eva and said, "If you are saved Eva, let my dear wife know that I died like a sailor". That was the last Eva Carmichael saw of the captain. She was swept off the ship by a huge wave. Eva saw Tom Pearce on a small rocky beach and yelled to attract his attention. He dived in and swam to the exhausted woman and dragged her to shore. He took her to the cave and broke open case of brandy which had washed up on the beach. He opened a bottle to revive the unconscious woman. A few hours later Tom scaled a cliff in search of help. He followed hoof prints and came by chance upon two men from nearby Glenample Station three and a half miles away. In a state of exhaustion, he told the men of the tragedy. Tom returned to the gorge while the two men rode back to the station to get help. By the time they reached LOCH ARD Gorge, it was cold and dark. The two shipwreck survivors were taken to Glenample Station to recover. Eva stayed at the station for six weeks before returning to Ireland, this time by steamship. In Melbourne, Tom Pearce received a hero's welcome. He was presented with the first gold medal of the Royal Humane Society of Victoria and a £1000 cheque from the Victorian Government. Concerts were performed to honour the young man's bravery and to raise money for those who lost family in the LOCH ARD disaster. Of the 54 crew members and passengers on board, only two survived: the apprentice, Tom Pearce and the young woman passenger, Eva Carmichael, who lost all of her family in the tragedy. Ten days after the LOCH ARD tragedy, salvage rights to the wreck were sold at auction for £2,120. Cargo valued at £3,000 was salvaged and placed on the beach, but most washed back into the sea when another storm developed. The wreck of LOCH ARD still lies at the base of Mutton Bird Island. Much of the cargo has now been salvaged and some was washed up into what is now known as LOCH ARD Gorge. Cargo and artefacts have also been illegally salvaged over many years before protective legislation was introduced. One of the most unlikely pieces of cargo to have survived the shipwreck was a Minton porcelain peacock - one of only seven in the world. The peacock was destined for the Melbourne International Exhibition in 1880. It had been well packed, which gave it adequate protection during the violent storm. Today, the Minton peacock can be seen at the Flagstaff Hill Maritime Museum in Warrnambool. From Australia's most dramatic shipwreck it has now become Australia's most valuable shipwreck artefact and is one of very few 'objects' on the Victorian State Heritage Register. The LOCH ARD shipwreck is of State significance – Victorian Heritage Register S 417 Flagstaff Hill’s collection of artefacts from LOCH ARD is significant for being one of the largest collections of artefacts from this shipwreck in Victoria. It is significant for its association with the shipwreck, which is on the Victorian Heritage Register (VHR S417). The collection is significant because of the relationship between the objects, as together they have a high potential to interpret the story of the LOCH ARD. The LOCH ARD collection is archaeologically significant as the remains of a large international passenger and cargo ship. The LOCH ARD collection is historically significant for representing aspects of Victoria’s shipping history and its potential to interpret sub-theme 1.5 of Victoria’s Framework of Historical Themes (living with natural processes). The collection is also historically significant for its association with the LOCH ARD, which was one of the worst and best known shipwrecks in Victoria’s history. Unrestored tea spoon from the wreck of the LOCH ARD. The spoon design has a flattened fiddle-back handle, with a thin stem or shank, flared collar, and elongated bowl. The spoons metallic composition is a thin layer of brass alloy which has partially corroded back to a nickel-silver base metal. flagstaff hill, warrnambool, shipwrecked coast, flagstaff hill maritime museum, maritime museum, shipwreck coast, flagstaff hill maritime village, great ocean road, loch line, loch ard, captain gibbs, eva carmichael, tom pearce, glenample station, mutton bird island, loch ard gorge, tea spoon, spoon -
 Warrnambool and District Historical Society Inc.
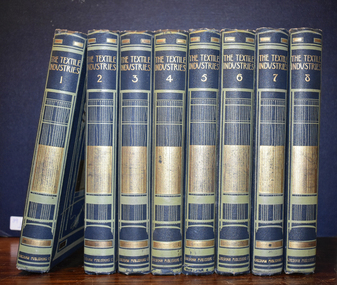
Book, William S. Murphy, The Textile Industries ( eight volumes)
Technical information on the textile industryThese volumes have blue hard covers with pale green printing and stylised images of a loom and spindles in gold. The spines also feature a loom. The pages contain printed text, a colour photo, diagrams and black and white illustrations on inserted pages.non-fictionTechnical information on the textile industrywarrnambool woollen mill, textile industries