Showing 1832 items
matching william st
-
 Ballarat Tramway Museum
Ephemera - Timetable/s, Melbourne and Metropolitan Tramways Board (MMTB), Set of 24 MMTB Melbourne tram timetables, 1969
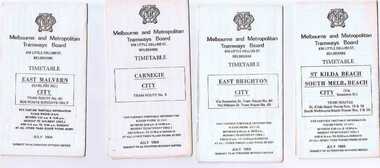
... 55 & 56, West Coburg - City - (William St.) - Domain Road... Coburg - City - (William St.) - Domain Road. .16 - Route 57 ...Set of 24 MMTB timetables for various routes, dated July 1969. Generally includes Sat and Suns, Good Friday and Christmas day as well as weekdays, unless noted otherwise. Also includes a map of the route, detailed time points, sections, connecting services, fares, and organisation address - 616 Little Collins St. Melbourne. Have been folded into ten portions. All on white paper unless noted otherwise. Items shown with an # - have a sticker modifying timetable information details on the front page. 1154.1 - Route 4 - Carnegie - City .2 - Route 4D - East Malvern (Darling Road) - City # .3 - Route 5 - Malvern Burk Road, - City # .4 - Route 6 - Glen Iris - City # .5 - Route 7 - Camberwell - City # .6 - Route 8 - Toorak - City # .7 - Routes 9, 10 and 12 - South Melbourne and St Kilda Beach - City (Brunswick St.) - via Collins St. .8 - Routes 10, 11 - West Preston and routes 9 & 9A Northcote .9 - Routes 15 & 22 - Moreland and 1 & 21 - East Coburg .10 - Route - 15 & 16 - St Kilda Beach and 1 & 2A - South Melbourne Beach - via Swanston St. .11 - Route 19 - North Coburg - City # .12 - Route 42 - Mont Albert - City # .13 - Routes 48 - North Balwyn and Burwood - City .14 - as above, but for Saturdays and Sundays on pink paper .15 - Routes 55 & 56, West Coburg - City - (William St.) - Domain Road. .16 - Route 57 - West Maribyrnong - City .17 - Route 59 - Essendon (Aerodrome) - City .18 - Route 64 & 65 - East Brighton - City .19 - Route 69 - Kew Cotham Road - St. Kilda Beach # .20 - Route 70 - Wattle Park - City # .21 - Routes 77 - Prahran - City, 78 - North Richmond - Prahran, 79 - North Richmond - St Kilda Beach .22 - Route 82 - Footscray to Moonee Ponds .23 - Route 88 - East Preston - City and Route 96, East Brunswick - City .24 - as above but for Saturdays and Sundays on pink paper. Images of a sample of documents added 16-11-2013.mmtb, timetables, melbourne -
 Bendigo Historical Society Inc.
Document - KOCH'S PIONEER QUARTZ MINING AND CRUSHING COMPANY, NO LIABILITY - SHARE CERTIFICATE
... 48164 to 48213 in the name of William Grattan of St Kilda... 48164 to 48213 in the name of William Grattan of St Kilda ...Koch's Pioneer Quartz Mining and Crushing Company, No Liability Long Gully Bendigo Share Certificate. Distinctive Numbers 48164 to 48213 in the name of William Grattan of St Kilda. Certificate Number 2930. Dated 7th December 1911. Signed by ?, Hugh Boyd, Directors and J. H. Craig, Manager. On the back is a map of the lease showing where the shaft is and a measurement of 450 yards from one side of the lease to the other beside the shaft. The lease is an irregular shape. Adjoining leases mentioned are Windmill Hill Co., G. Lansell's Sandhurst Mine, Cornish United Co. and the Hercules & Energetic Co. Arthur T. Walker, M. S. printed at the bottom. Albert Richardson Collectionmining, parish map, koch's pioneer, koch's pioneer quartz mining and crushing company, no liability, koch's pioneer quartz mining and crushing company, no liability share certificate, william grattan, hugh boyd, j h craig, arthur t walker, windmill hill co., g lansell's sandhurst mine, cornish united co., hercules & energetic co. -
 Federation University Historical Collection
Photograph - Little Gem tintype, American Studio, Portrait of a Woman, (exact)
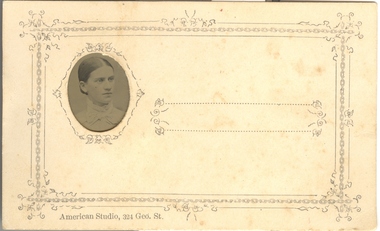
... by 1885. The studio addresses were: 23 King William St, Adelaide... by 1885. The studio addresses were: 23 King William St, Adelaide ...The tintype (or ferrotype or Melainotype) was produced on metallic sheet (not, actually, tin) instead of glass. The plate was coated with collodion and sensitized just before use. It was introduced by Adolphe Alexandre Martin in 1853. The most common size was about the same as the carte-de-visite, 5.5cm x 9.0cm, but both larger and smaller ferrotypes were made. The smallest were "Little Gem" tintypes, about the size of a postage-stamp, made simultaneously on a single plate in a camera with 12 or 16 lenses. They were often produced by travelling photographers, and were cheaper than Ambrotypes so made photography available to working classes, not just to the more well-to-do. The print would come out laterally reversed (as one sees oneself in a mirror). Being quite rugged, tintypes could be sent by post. Tintypes were eventually superseded by gelatin emulsion dry plates in the 1880s, though street photographers in various parts of the world continued with this process until the 1950s. (Above information abridged from http://www.rleggat.com/photohistory/history/tintype.htm) The firm of Gove and Allen opened in Sydney in 1880 and were responsible for the belated popularizing of the gem tintype in Australia. The firm traded as both The American Gem Studio and The American Studio. Others franchises were opened in Melbourne, Ballarat and Sandhurst (Bendigo). The Sandhurst branch closed in 1882 and Adelaide in 1884. All Gove and Allen studios had ceased trading by 1885. The studio addresses were: 23 King William St, Adelaide; 324 George St, Sydney; 95 Swanston St, Melbourne; Howard Place, Sandhurst; 7 Queen St, Brisbane; The card mounts used in Gove and Allen studios in Australia are identical to those used in America. They were initially made of plain white card with embossing around the oval image opening in the mount while some also had simple geometric and floral printed designs as well. Although Gove and Allen studios produced the majority of gem tintypes in Australia, other studios offered them including: - London, American & Sydney Photo Company, 328 George St, Sydney; - David Edelsten, 55 & 57 Bourke St, Melbourne; - Burman's Portrait Rooms, St. George's Hall, 209 Bourke St, Melbourne; - Bell's Gem Portrait Studio, 57 Bourke St East, Melbourne; - R. H. Kenny, Bridge St, Ballarat; - Marinus W. Bent, Sandhurst (Bendigo); - George Fisher, Victoria; - Anson Brothers, Hobart Town. (Abridged information from http://members.ozemail.com.au/~msafier/photos/tintypes.html) A tintype portrait of a woman's head, attached to a card.Printed lower left hand side of the card "American Studio, 324 Geo. St."tintype, american studio, woman, unidentified woman, women, photograph -
 Federation University Historical Collection
Photograph - Tintype, Portrait of two young girls
... by 1885. The studio addresses were: 23 King William St, Adelaide... by 1885. The studio addresses were: 23 King William St, Adelaide ...The tintype (or ferrotype or Melainotype) was produced on metallic sheet (not, actually, tin) instead of glass. The plate was coated with collodion and sensitized just before use. It was introduced by Adolphe Alexandre Martin in 1853. The most common size was about the same as the carte-de-visite, 5.5cm x 9.0cm, but both larger and smaller ferrotypes were made. The smallest were "Little Gem" tintypes, about the size of a postage-stamp, made simultaneously on a single plate in a camera with 12 or 16 lenses. They were often produced by travelling photographers, and were cheaper than Ambrotypes so made photography available to working classes, not just to the more well-to-do. The print would come out laterally reversed (as one sees oneself in a mirror). Being quite rugged, tintypes could be sent by post. Tintypes were eventually superseded by gelatin emulsion dry plates in the 1880s, though street photographers in various parts of the world continued with this process until the 1950s. (Above information abridged from http://www.rleggat.com/photohistory/history/tintype.htm) The firm of Gove and Allen opened in Sydney in 1880 and were responsible for the belated popularizing of the gem tintype in Australia. The firm traded as both The American Gem Studio and The American Studio. Others franchises were opened in Melbourne, 6 Sturt St Ballarat and Sandhurst (Bendigo). The Sandhurst branch closed in 1882 and Adelaide in 1884. All Gove and Allen studios had ceased trading by 1885. The studio addresses were: 23 King William St, Adelaide; 324 George St, Sydney; 95 Swanston St, Melbourne; Howard Place, Sandhurst; 7 Queen St, Brisbane; The card mounts used in Gove and Allen studios in Australia are identical to those used in America. They were initially made of plain white card with embossing around the oval image opening in the mount while some also had simple geometric and floral printed designs as well. Although Gove and Allen studios produced the majority of gem tintypes in Australia, other studios offered them including: - London, American & Sydney Photo Company, 328 George St, Sydney; - David Edelsten, 55 & 57 Bourke St, Melbourne; - Burman's Portrait Rooms, St. George's Hall, 209 Bourke St, Melbourne; - Bell's Gem Portrait Studio, 57 Bourke St East, Melbourne; - R. H. Kenny, Bridge St, Ballarat; - Marinus W. Bent, Sandhurst (Bendigo); - George Fisher, Victoria; - Anson Brothers, Hobart Town. (Abridged information from http://members.ozemail.com.au/~msafier/photos/tintypes.html) .2) A tintype portrait of two girls heads, attached to a card. The girls are wearing a cloak with a large bow at the frontlittle gem, women, children, photography, tintype -
 Federation University Historical Collection
Photograph - Little Gem tintype, Portrait of a Man
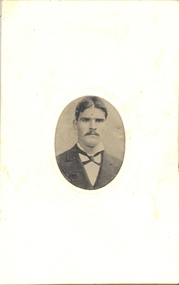
... by 1885. The studio addresses were: 23 King William St, Adelaide... by 1885. The studio addresses were: 23 King William St, Adelaide ...The tintype (or ferrotype or Melainotype) was produced on metallic sheet (not, actually, tin) instead of glass. The plate was coated with collodion and sensitized just before use. It was introduced by Adolphe Alexandre Martin in 1853. The most common size was about the same as the carte-de-visite, 5.5cm x 9.0cm, but both larger and smaller ferrotypes were made. The smallest were "Little Gem" tintypes, about the size of a postage-stamp, made simultaneously on a single plate in a camera with 12 or 16 lenses. They were often produced by travelling photographers, and were cheaper than Ambrotypes so made photography available to working classes, not just to the more well-to-do. The print would come out laterally reversed (as one sees oneself in a mirror). Being quite rugged, tintypes could be sent by post. Tintypes were eventually superseded by gelatin emulsion dry plates in the 1880s, though street photographers in various parts of the world continued with this process until the 1950s. (Above information abridged from http://www.rleggat.com/photohistory/history/tintype.htm) The firm of Gove and Allen opened in Sydney in 1880 and were responsible for the belated popularizing of the gem tintype in Australia. The firm traded as both The American Gem Studio and The American Studio. Others franchises were opened in Melbourne, Ballarat and Sandhurst (Bendigo). The Sandhurst branch closed in 1882 and Adelaide in 1884. All Gove and Allen studios had ceased trading by 1885. The studio addresses were: 23 King William St, Adelaide; 324 George St, Sydney; 95 Swanston St, Melbourne; Howard Place, Sandhurst; 7 Queen St, Brisbane; The card mounts used in Gove and Allen studios in Australia are identical to those used in America. They were initially made of plain white card with embossing around the oval image opening in the mount while some also had simple geometric and floral printed designs as well. Although Gove and Allen studios produced the majority of gem tintypes in Australia, other studios offered them including: - London, American & Sydney Photo Company, 328 George St, Sydney; - David Edelsten, 55 & 57 Bourke St, Melbourne; - Burman's Portrait Rooms, St. George's Hall, 209 Bourke St, Melbourne; - Bell's Gem Portrait Studio, 57 Bourke St East, Melbourne; - R. H. Kenny, Bridge St, Ballarat; - Marinus W. Bent, Sandhurst (Bendigo); - George Fisher, Victoria; - Anson Brothers, Hobart Town. (Abridged information from http://members.ozemail.com.au/~msafier/photos/tintypes.html) .4) A tintype portrait of a man, attached to a card. little gem, tintype, man, unidentified man -
 Federation University Historical Collection
Photograph - Photograph - Little Gem tintype, Possibly American Studio, Portrait of a child
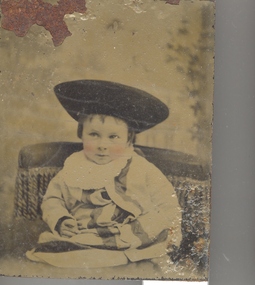
... by 1885. The studio addresses were: 23 King William St, Adelaide... by 1885. The studio addresses were: 23 King William St, Adelaide ...The tintype (or ferrotype or Melainotype) was produced on metallic sheet (not, actually, tin) instead of glass. The plate was coated with collodion and sensitized just before use. It was introduced by Adolphe Alexandre Martin in 1853. The most common size was about the same as the carte-de-visite, 5.5cm x 9.0cm, but both larger and smaller ferrotypes were made. The smallest were "Little Gem" tintypes, about the size of a postage-stamp, made simultaneously on a single plate in a camera with 12 or 16 lenses. They were often produced by travelling photographers, and were cheaper than Ambrotypes so made photography available to working classes, not just to the more well-to-do. The print would come out laterally reversed (as one sees oneself in a mirror). Being quite rugged, tintypes could be sent by post. Tintypes were eventually superseded by gelatin emulsion dry plates in the 1880s, though street photographers in various parts of the world continued with this process until the 1950s. (Above information abridged from http://www.rleggat.com/photohistory/history/tintype.htm) The firm of Gove and Allen opened in Sydney in 1880 and were responsible for the belated popularizing of the gem tintype in Australia. The firm traded as both The American Gem Studio and The American Studio. Others franchises were opened in Melbourne, Ballarat and Sandhurst (Bendigo). The Sandhurst branch closed in 1882 and Adelaide in 1884. All Gove and Allen studios had ceased trading by 1885. The studio addresses were: 23 King William St, Adelaide; 324 George St, Sydney; 95 Swanston St, Melbourne; Howard Place, Sandhurst; 7 Queen St, Brisbane; The card mounts used in Gove and Allen studios in Australia are identical to those used in America. They were initially made of plain white card with embossing around the oval image opening in the mount while some also had simple geometric and floral printed designs as well. Although Gove and Allen studios produced the majority of gem tintypes in Australia, other studios offered them including: - London, American & Sydney Photo Company, 328 George St, Sydney; - David Edelsten, 55 & 57 Bourke St, Melbourne; - Burman's Portrait Rooms, St. George's Hall, 209 Bourke St, Melbourne; - Bell's Gem Portrait Studio, 57 Bourke St East, Melbourne; - R. H. Kenny, Bridge St, Ballarat; - Marinus W. Bent, Sandhurst (Bendigo); - George Fisher, Victoria; - Anson Brothers, Hobart Town. (Abridged information from http://members.ozemail.com.au/~msafier/photos/tintypes.html) A tintype portrait of a child, attached to a card. little gem, child, hat -
 Federation University Historical Collection
Photograph - Photograph - Little Gem tintype, American Studio, Portrait of a Woman
... by 1885. The studio addresses were: 23 King William St, Adelaide... by 1885. The studio addresses were: 23 King William St, Adelaide ...The tintype (or ferrotype or Melainotype) was produced on metallic sheet (not, actually, tin) instead of glass. The plate was coated with collodion and sensitized just before use. It was introduced by Adolphe Alexandre Martin in 1853. The most common size was about the same as the carte-de-visite, 5.5cm x 9.0cm, but both larger and smaller ferrotypes were made. The smallest were "Little Gem" tintypes, about the size of a postage-stamp, made simultaneously on a single plate in a camera with 12 or 16 lenses. They were often produced by travelling photographers, and were cheaper than Ambrotypes so made photography available to working classes, not just to the more well-to-do. The print would come out laterally reversed (as one sees oneself in a mirror). Being quite rugged, tintypes could be sent by post. Tintypes were eventually superseded by gelatin emulsion dry plates in the 1880s, though street photographers in various parts of the world continued with this process until the 1950s. (Above information abridged from http://www.rleggat.com/photohistory/history/tintype.htm) The firm of Gove and Allen opened in Sydney in 1880 and were responsible for the belated popularizing of the gem tintype in Australia. The firm traded as both The American Gem Studio and The American Studio. Others franchises were opened in Melbourne, 6 Sturt St Ballarat and Sandhurst (Bendigo). The Sandhurst branch closed in 1882 and Adelaide in 1884. All Gove and Allen studios had ceased trading by 1885. The studio addresses were: 23 King William St, Adelaide; 324 George St, Sydney; 95 Swanston St, Melbourne; Howard Place, Sandhurst; 7 Queen St, Brisbane; The card mounts used in Gove and Allen studios in Australia are identical to those used in America. They were initially made of plain white card with embossing around the oval image opening in the mount while some also had simple geometric and floral printed designs as well. Although Gove and Allen studios produced the majority of gem tintypes in Australia, other studios offered them including: - London, American & Sydney Photo Company, 328 George St, Sydney; - David Edelsten, 55 & 57 Bourke St, Melbourne; - Burman's Portrait Rooms, St. George's Hall, 209 Bourke St, Melbourne; - Bell's Gem Portrait Studio, 57 Bourke St East, Melbourne; - R. H. Kenny, Bridge St, Ballarat; - Marinus W. Bent, Sandhurst (Bendigo); - George Fisher, Victoria; - Anson Brothers, Hobart Town. (Abridged information from http://members.ozemail.com.au/~msafier/photos/tintypes.html) A tintype portrait of a woman's head, attached to a card. Printed on the lower edge of the card "Allen & Gove, American Studion, 6 Sturt St, Ballarat"ballarat, american studio, little gem, allen gove, tintype, woman, unidentified woman, photography -
 Federation University Historical Collection
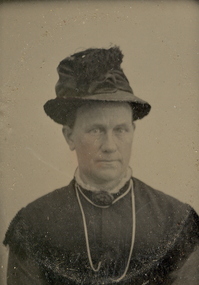
Photograph - Little Gem tintype, Portrait of a Woman in a hat
... by 1885. The studio addresses were: 23 King William St, Adelaide... by 1885. The studio addresses were: 23 King William St, Adelaide ...The tintype (or ferrotype or Melainotype) was produced on metallic sheet (not, actually, tin) instead of glass. The plate was coated with collodion and sensitized just before use. It was introduced by Adolphe Alexandre Martin in 1853. The most common size was about the same as the carte-de-visite, 5.5cm x 9.0cm, but both larger and smaller ferrotypes were made. The smallest were "Little Gem" tintypes, about the size of a postage-stamp, made simultaneously on a single plate in a camera with 12 or 16 lenses. They were often produced by travelling photographers, and were cheaper than Ambrotypes so made photography available to working classes, not just to the more well-to-do. The print would come out laterally reversed (as one sees oneself in a mirror). Being quite rugged, tintypes could be sent by post. Tintypes were eventually superseded by gelatin emulsion dry plates in the 1880s, though street photographers in various parts of the world continued with this process until the 1950s. (Above information abridged from http://www.rleggat.com/photohistory/history/tintype.htm) The firm of Gove and Allen opened in Sydney in 1880 and were responsible for the belated popularizing of the gem tintype in Australia. The firm traded as both The American Gem Studio and The American Studio. Others franchises were opened in Melbourne, Ballarat and Sandhurst (Bendigo). The Sandhurst branch closed in 1882 and Adelaide in 1884. All Gove and Allen studios had ceased trading by 1885. The studio addresses were: 23 King William St, Adelaide; 324 George St, Sydney; 95 Swanston St, Melbourne; Howard Place, Sandhurst; 7 Queen St, Brisbane; The card mounts used in Gove and Allen studios in Australia are identical to those used in America. They were initially made of plain white card with embossing around the oval image opening in the mount while some also had simple geometric and floral printed designs as well. Although Gove and Allen studios produced the majority of gem tintypes in Australia, other studios offered them including: - London, American & Sydney Photo Company, 328 George St, Sydney; - David Edelsten, 55 & 57 Bourke St, Melbourne; - Burman's Portrait Rooms, St. George's Hall, 209 Bourke St, Melbourne; - Bell's Gem Portrait Studio, 57 Bourke St East, Melbourne; - R. H. Kenny, Bridge St, 6 Sturt St Ballarat; - Marinus W. Bent, Sandhurst (Bendigo); - George Fisher, Victoria; - Anson Brothers, Hobart Town. (Abridged information from http://members.ozemail.com.au/~msafier/photos/tintypes.html) .9) A tintype portrait of a woman's head, attached to a card. The cheeks have been hand coloured.little gem, woman, unidentified woman, women, photography -
 Federation University Historical Collection
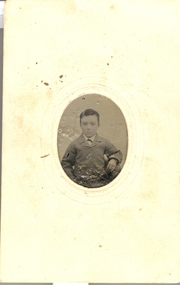
Photograph - Little Gem tintype, Possibly American Studio, Portrait of a Boy
... by 1885. The studio addresses were: 23 King William St, Adelaide... by 1885. The studio addresses were: 23 King William St, Adelaide ...The tintype (or ferrotype or Melainotype) was produced on metallic sheet (not, actually, tin) instead of glass. The plate was coated with collodion and sensitized just before use. It was introduced by Adolphe Alexandre Martin in 1853. The most common size was about the same as the carte-de-visite, 5.5cm x 9.0cm, but both larger and smaller ferrotypes were made. The smallest were "Little Gem" tintypes, about the size of a postage-stamp, made simultaneously on a single plate in a camera with 12 or 16 lenses. They were often produced by travelling photographers, and were cheaper than Ambrotypes so made photography available to working classes, not just to the more well-to-do. The print would come out laterally reversed (as one sees oneself in a mirror). Being quite rugged, tintypes could be sent by post. Tintypes were eventually superseded by gelatin emulsion dry plates in the 1880s, though street photographers in various parts of the world continued with this process until the 1950s. (Above information abridged from http://www.rleggat.com/photohistory/history/tintype.htm) The firm of Gove and Allen opened in Sydney in 1880 and were responsible for the belated popularizing of the gem tintype in Australia. The firm traded as both The American Gem Studio and The American Studio. Others franchises were opened in Melbourne, Ballarat and Sandhurst (Bendigo). The Sandhurst branch closed in 1882 and Adelaide in 1884. All Gove and Allen studios had ceased trading by 1885. The studio addresses were: 23 King William St, Adelaide; 324 George St, Sydney; 95 Swanston St, Melbourne; Howard Place, Sandhurst; 7 Queen St, Brisbane; The card mounts used in Gove and Allen studios in Australia are identical to those used in America. They were initially made of plain white card with embossing around the oval image opening in the mount while some also had simple geometric and floral printed designs as well. Although Gove and Allen studios produced the majority of gem tintypes in Australia, other studios offered them including: - London, American & Sydney Photo Company, 328 George St, Sydney; - David Edelsten, 55 & 57 Bourke St, Melbourne; - Burman's Portrait Rooms, St. George's Hall, 209 Bourke St, Melbourne; - Bell's Gem Portrait Studio, 57 Bourke St East, Melbourne; - R. H. Kenny, Bridge St, 6 Sturt St Ballarat; - Marinus W. Bent, Sandhurst (Bendigo); - George Fisher, Victoria; - Anson Brothers, Hobart Town. (Abridged information from http://members.ozemail.com.au/~msafier/photos/tintypes.html) .9) A tintype portrait of a child's head and torso, attached to a card. The boy is wearing a suit and the cheeks have been hand coloured.little gem -
 Federation University Historical Collection
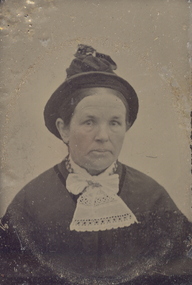
Photograph - Little Gem tintype, Portrait of a Woman in a Hat
... by 1885. The studio addresses were: 23 King William St, Adelaide... by 1885. The studio addresses were: 23 King William St, Adelaide ...The tintype (or ferrotype or Melainotype) was produced on metallic sheet (not, actually, tin) instead of glass. The plate was coated with collodion and sensitized just before use. It was introduced by Adolphe Alexandre Martin in 1853. The most common size was about the same as the carte-de-visite, 5.5cm x 9.0cm, but both larger and smaller ferrotypes were made. The smallest were "Little Gem" tintypes, about the size of a postage-stamp, made simultaneously on a single plate in a camera with 12 or 16 lenses. They were often produced by travelling photographers, and were cheaper than Ambrotypes so made photography available to working classes, not just to the more well-to-do. The print would come out laterally reversed (as one sees oneself in a mirror). Being quite rugged, tintypes could be sent by post. Tintypes were eventually superseded by gelatin emulsion dry plates in the 1880s, though street photographers in various parts of the world continued with this process until the 1950s. (Above information abridged from http://www.rleggat.com/photohistory/history/tintype.htm) The firm of Gove and Allen opened in Sydney in 1880 and were responsible for the belated popularizing of the gem tintype in Australia. The firm traded as both The American Gem Studio and The American Studio. Others franchises were opened in Melbourne, Ballarat and Sandhurst (Bendigo). The Sandhurst branch closed in 1882 and Adelaide in 1884. All Gove and Allen studios had ceased trading by 1885. The studio addresses were: 23 King William St, Adelaide; 324 George St, Sydney; 95 Swanston St, Melbourne; Howard Place, Sandhurst; 7 Queen St, Brisbane; The card mounts used in Gove and Allen studios in Australia are identical to those used in America. They were initially made of plain white card with embossing around the oval image opening in the mount while some also had simple geometric and floral printed designs as well. Although Gove and Allen studios produced the majority of gem tintypes in Australia, other studios offered them including: - London, American & Sydney Photo Company, 328 George St, Sydney; - David Edelsten, 55 & 57 Bourke St, Melbourne; - Burman's Portrait Rooms, St. George's Hall, 209 Bourke St, Melbourne; - Bell's Gem Portrait Studio, 57 Bourke St East, Melbourne; - R. H. Kenny, Bridge St, 6 Sturt St Ballarat; - Marinus W. Bent, Sandhurst (Bendigo); - George Fisher, Victoria; - Anson Brothers, Hobart Town. (Abridged information from http://members.ozemail.com.au/~msafier/photos/tintypes.html) A tintype portrait of a woman's head and shoulders, attached to a card. The cheeks have been hand coloured.little gem, woman, unidentified woman, women, photography -
 Federation University Historical Collection
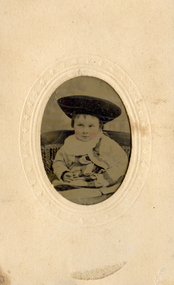
Photograph - Photo - Little Gem tintype, Possibly American Studio, Portrait of a child
... by 1885. The studio addresses were: 23 King William St, Adelaide... by 1885. The studio addresses were: 23 King William St, Adelaide ...The tintype (or ferrotype or Melainotype) was produced on metallic sheet (not, actually, tin) instead of glass. The plate was coated with collodion and sensitized just before use. It was introduced by Adolphe Alexandre Martin in 1853. The most common size was about the same as the carte-de-visite, 5.5cm x 9.0cm, but both larger and smaller ferrotypes were made. The smallest were "Little Gem" tintypes, about the size of a postage-stamp, made simultaneously on a single plate in a camera with 12 or 16 lenses. They were often produced by travelling photographers, and were cheaper than Ambrotypes so made photography available to working classes, not just to the more well-to-do. The print would come out laterally reversed (as one sees oneself in a mirror). Being quite rugged, tintypes could be sent by post. Tintypes were eventually superseded by gelatin emulsion dry plates in the 1880s, though street photographers in various parts of the world continued with this process until the 1950s. (Above information abridged from http://www.rleggat.com/photohistory/history/tintype.htm) The firm of Gove and Allen opened in Sydney in 1880 and were responsible for the belated popularizing of the gem tintype in Australia. The firm traded as both The American Gem Studio and The American Studio. Others franchises were opened in Melbourne, Ballarat and Sandhurst (Bendigo). The Sandhurst branch closed in 1882 and Adelaide in 1884. All Gove and Allen studios had ceased trading by 1885. The studio addresses were: 23 King William St, Adelaide; 324 George St, Sydney; 95 Swanston St, Melbourne; Howard Place, Sandhurst; 7 Queen St, Brisbane; The card mounts used in Gove and Allen studios in Australia are identical to those used in America. They were initially made of plain white card with embossing around the oval image opening in the mount while some also had simple geometric and floral printed designs as well. Although Gove and Allen studios produced the majority of gem tintypes in Australia, other studios offered them including: - London, American & Sydney Photo Company, 328 George St, Sydney; - David Edelsten, 55 & 57 Bourke St, Melbourne; - Burman's Portrait Rooms, St. George's Hall, 209 Bourke St, Melbourne; - Bell's Gem Portrait Studio, 57 Bourke St East, Melbourne; - R. H. Kenny, Bridge St, Ballarat; - Marinus W. Bent, Sandhurst (Bendigo); - George Fisher, Victoria; - Anson Brothers, Hobart Town. (Abridged information from http://members.ozemail.com.au/~msafier/photos/tintypes.html) .5) A tintype portrait of a child, attached to a card. little gem, photography, child, portrait -
 Melbourne Tram Museum
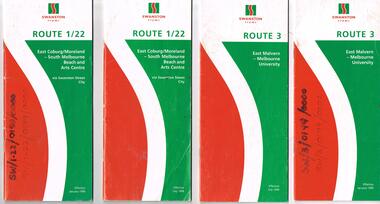
Ephemera - Timetable, Swanston Trams, Set of Swanston Trams timetables, 1999
... William St - January 1999 - 32 pages .15 - ditto July 1999 .16... - West Coburg - Domain Interchanges via William St - January 1999 ...Set of Swanston Trams timetables, red white green cover with route number on cover, giving details of popular destination, check points, use of Metcards and contact details, tram hire, frequency, a Welcome to Swanston Trams, description of route and route map. Has a fold out with a feed back form. .1 - Route 1/22 - East Coburg / Moreland - South Melbourne Beach and Arts Centre - January 1999 - 40 pages. .2 - ditto - July 1999. .3 - Route 3 - East Malvern - University - July 1999 - 28 pages .4 - ditto - January 1999 .5 - Route 5 - Malvern (Burke Rd) - University - July 1999 - 24 pages .6 - Route 6 - Glen Iris - City - January 1999 - 28 pages .7 - ditto - July 1999. .8 - Route 8 - Toorak - January 1999 - 32 pages .9 - ditto July 1999 .10 - Route 16 - St Kilda Beach - University - January 1999 - 28 pages .11 - ditto July 1999 .12 - Route 19 - North Coburg - City - January 1999 - 48 pages .13 - ditto July 1999 .14 - Route 55 - West Coburg - Domain Interchanges via William St - January 1999 - 32 pages .15 - ditto July 1999 .16 - Route 57 - West Maribyrnong - City - January 1999 .17 - ditto July 1999 .18 - Route 59 - Airport West - City - June 1999 .19 - Route 64 - East Brighton - University - January 1999 - 28 pages .20 - ditto July 1999 .21 - Route 67 - Carnegie - City - January 1999 - 28 pages .22 - ditto July 1999 .23 - Route 69 - Kew Cotham Rd - St Kilda Beach - January 1999 - 28 pages .24 - ditto July 1999 .25 - Route 72 - Camberwell - University - January 1999 - 28 pages .26 - ditto July 1999 .27 - Route 78/79 - North Richmond - Prahran or St Kilda Beach - January 1999 - 28 pages .28 - ditto July 1999 .29 - Route 82 - Moonee Ponds - Footscray - January 1999 - 20 pages .30 - ditto July 1999Some have number notes and notes written inside about changes or errors in ink. See History.trams, tramways, swanston trams, tram services, timetables, route 1, route 22, route 3, route 5, route 6, route 8, route 16, route 19, route 55, route 57, route 59, route 64, route 67, route 69, route 72, route 78, route 79, route 82 -
 Bendigo Historical Society Inc.
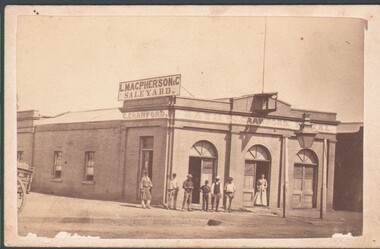
Photograph - WES HARRY COLLECTION: SANDHURST PHOTOS, 1850's, 1879
... Sawers, Richard Baker Anderson of Kenilworth, Mitchell St... Anderson of Kenilworth, Mitchell St, William Webb Anderson, Stella ...Group of four sepia toned photographs of businesses in Sandhurst. (a) L. Macpherson's horse bazaar, Charing Cross, 1850's, (b) Southern Cross Hotel, R. Hansen, Saddler, Macpherson's saleyards. Photographed by Chevalier, Pall Mall, Sandhurst © W. Anderson and son, Commercial House, Mitchell Street Sandhurst, 1879, (d) C. Crawford, Bath Hotel (meals 1/- , beds 1/-) Circa 1850's. For information on Lewis Macpherson, Charles Crawford, Christian Hansen, Charles Hansen, Charles Rohrs, Robert Sawers, Jane Sawers, Richard Baker Anderson of Kenilworth, Mitchell St, William Webb Anderson, Stella Anderson, Richard E. Anderson, Albert Henry Anderson - See Research field for further information.Chevalier, Pall Mall, Sandhurstbuildings, commercial, various, l. macpherson and co. saleyards, c. crawford bath hotel, w. anderson and son, mitchell st, southern cross hotel, r. hansen saddler. hansen & rohrs. christian hansen. charles hansen. louis macpherson.. lewis macpherson. charles crawford. jane sawers. robert sawers. anderson, richard baker. w. anderson and sons. -
 Melbourne Tram Museum
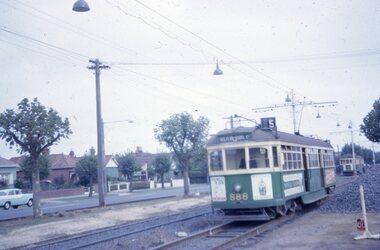
Album - Robert Thomson Slide Collection, "Melbourne AETA 1964"
... St RT214 March 1964 - tram 779 - "West Coburg via William St... St RT214 March 1964 - tram 779 - "West Coburg via William St ...Photo - see pdf file for further information. Number Brief Description RT198 SW6 888 Dandenong Rd 1-4-64 - "Malvern Rd Burke Rd" - route 5 RT199 W2 552 Dandenong Rd 1-4-64 - "City" - route 5 RT200 W3 655 Dandenong Rd 1-4-64 - "City" - route 64 RT201 SW6 951 St Kilda Beach 1-4-64 - "Kew Cotham Rd" - route 69 RT202 10 W3 667 East Coburg 1-4-64 - "South Melb Beach" - route 1 RT203 W5 826 top of Latrobe St (?) 1-4-64 - "City via La Trobe St" - RT204 L 105 Carnegie 1-4-64 -"city" - route 4 RT205 L 101 Carnegie 1-4-64 - "University" - route 4 RT206 tram 612 - "Burwood" - Batman Ave (?) RT207 Y1 611 Batman Ave 4-4-64 - "Wattle Park Elgar Rd" RT208 Hawthorn Depot 25-3-64 - trams 582 & 841 RT209 L 105 City Swanston St 25-3-64 route 4B RT210 SW6 853 Chapel St Richmond 25-3-64 -"Prahran" - route 77 RT211 L 102 City Swanston St 25-3-64 - "Carnegie" - route 4 RT212 27-4-62 - tram 495 - "Camberwell" - route 7 & tram 334 RT213 tram 11 - "Special" Flinders St RT214 March 1964 - tram 779 - "West Coburg via William St" - route 55 RT215 March 1964 W7 Collins St - tram 1024 - "Northcote via St Georges Rd" - route 9A RT216 March 1964 Victoria Parade - tram 892 - "City" - route 42 RT217 March 1964 Spring St - tram 1034 - "East Preston" - route 88 RT218 March 1964 Essendon Terminus - tram 741 - "City" - route 59 RT219 1964 AETA Convention - tram 672 - "City" RT220 1964 AETA Convention - tram 672 - "West Coburg Bell St" RT221 1964 AETA Convention - tram 676 - "Leura Grove" RT222 1964 AETA Convention - tram 672 - "Special" tram bridge RT223 1964 AETA Convention - tram 672 - "Special" RT224 1964 AETA Convention - tram 676 - "Burwood" RT225 1964 AETA Convention - tram 672 - "City" - route 59 RT226 1964 AETA Convention - tram 672 - "Special" RT227 1964 AETA Convention - tram 469 - "Special" & tram 895 - "City" - route 2A RT228 1964 AETA Convention - tram south melb depot works yard Demonstrates the work of Robert Thomson in photography, collection and/or production of slidesAssembled album in a black presentation folder of 31 colour slides, collected or produced by Robert Thomson. All photographs have been scanned and placed on the Museum's G drive. A list of all photographs with details has been compiled. melbourne, tramways, trams, mmtb, hawthorn depot, sw6 class, w2 class, w3 class, w4 class, w5 class, w7 class, y class, y1 class, x2 class, sw5 class, l class, south melbourne per-way yard, tram 11, tram 3, tram 9, tram 485, tram 676, tram 672, tram 1024, tram 1034, tram 841, tram 469, tram 611, tram 612, tram 101, tram 102, tram 105, tram 826, tram 779, tram 741, tram 655, tram 467, tram 552, tram 582, tram 495, tram 334, tram 888, tram 951, tram 853, tram 892, tram 895, route 59, route 2a, route 88, route 42, route 9a, route 55, route 7, route 4, route 77, route 4b, route 1, route 69, route 64, route 5 -
 Ballarat Clarendon College
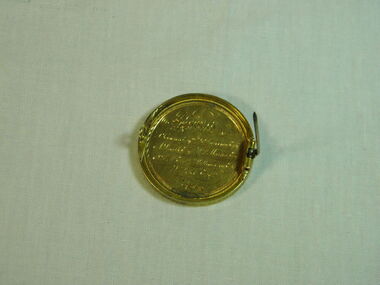
Medal, 1869 (exact); Made prior to November 1869
... (born 3/02/1856) was the eldest son of the Rev. William... (born 3/02/1856) was the eldest son of the Rev. William ...This medal is one of only a few medals donated by a group of generous gentlemen as tokens of their appreciation of the talent and industry of high achieving students in the years 1869 - 1870. The medal was awarded to Charles J Henderson when he completed his Matriculation Examination at the very young age of 13 years. The 1869 College annual report states that this examination, which granted entry into Melbourne University, was held in Ballarat for the first time in 1869. Candidates had to pass in at least six of the nine possible subjects in order to pass. Charles Henderson (born 3/02/1856) was the eldest son of the Rev. William Henderson of St Anderw's Kirk, Ballarat, distinguished founder of Ballarat College. Charles was only the third student enrolled at Ballarat College in July 1864. The Ballarat College annual report 1869 states the medal was awarded in appreciation of his 'success in passing so creditably the Matriculation examination at the age of thirteen years'. This medal has historic significance because it dates from the first decade of the history of the College. It has social significance because the recipient was the third student enrolled at Ballarat College, the eldest son of the founder of the College. The medal is unique and is one of only a few privately donated between 1869-1870 by a group of gentlemen affiliated with the college.This gold-plated round-shaped medal has front embossed with Minerva head, name of school and school motto. The rear of the medal is inscribed with names of medal donors. There is a straight metal pin hinged to the right side of the rear of the medal. There is a small catch attached to left side of the rear of the medal. The side edge of the medal is inscribed with name of the recipient and title of the award. The medal is housed in a rectangular cardboard box and nestled in cotton wool.The box has a blue lid and white base.Embossed around inner edge of medal front "Studiis Claritudo Venit. Ballarat College". Inscribed on rear of medal 'Presented by T. Cowan Esq.. G. Duncan Esq.. / A. Smith Esq.. W. P Martin Esq.. / J. Bell Esq..J. williamson Esq.. / S. Pike Esq..'; Maker's mark stamped below rear side inscription 'J.T.S'. Inscribed around circumference of medal 'C. J Henderson Matriculation Examination, Nov 1869'.medal, minerva, matriculation, 1869, c j henderson, thomas cowan, james willliamson, gilbert duncan, adam smith, w p martin, john bell, s pike, matriculation examination, gold medal, ballarat college school motto, ballarat college, school motto, studiis claritudo venit -
 Federation University Historical Collection
Photograph - Photograph - Sepia, G.L.Massingham, Photographs - Watson Family, 1 1905; .7 c1844
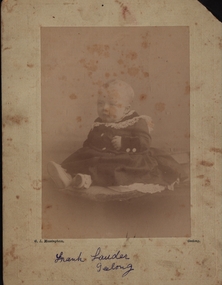
... and Edith Emma Watson (b Yung). Emma married Thomas William Watson... Yung). Emma married Thomas William Watson at St Paul's Anglican ...This collection of items belonged to Emma Eliza Jane Watson's (bPhillips) son and daughter-in-law, John Richard and Edith Emma Watson (b Yung). Emma married Thomas William Watson at St Paul's Anglican Church , 11/11/1865.They lived in Sebastapol, Ballarat North and lastly at "Gracedale" Yendon - a small farm. They had 10 children and also brought up three grandhildren. .7 Emma Eliza Jane Phillips was born on 25th April 1844 in Barrabool (Geelong), the daughter of Richard and Elizabeth Anne Phillips (b Goodenough). Sometime in the 1850"s after the death of Richard and the breakup of her marriage to Anthony Beck, Elizabeth moves to Ballarat with her children. The eldest boy Richard William Phillips would have been in his late teens. Elizabeth died on 4th August 1858 (aged 42?) before any of her children married. Emma married Thomas Watson in Ballarat. .1 Black memorial card with gold ink for Henrietta Tierney who was the wife of Daniel Tierney of the Victorian Police. Henrietta died April 28, 1905, aged 25 years. .2 Black and white photographic post card of two girls (Florence and Esma) addressed to Mrs Watson from Maurice H. It was sent from Mascoffs, High Street, Rushworth. c 1910-1915. .3 Black and white photograph of two children (Alma and Ida Watson) sent as a 1920 Christmas Greeting to Auntie Edie and Uncle Jack (Watson) from Ted and Jean Watson. Sent from "Kia Ora", Olinda Court, Bendigo. .4 Embossed presentation folder containing a black and white photo of two women and a man who is in an air force uniform. Inscription - "With love to mother from Bill 6th May '42" (possibly Beatty family NSW - connection through Richard Henry Watson's wife Margaret Alison Pike. Richard (Harry) was the son of this collection's owner Edith Emma Watson) .5 Post Card addressed to Jack and Edith .6 Sepia photograph of Ethel, 1890 .7 Sepia photograph of a small child sitting on a cushion . G.L. Massingham. Geelong. Frank Lauder (Hand written in biro) Verso: Gran Emma Eliza Jane Watson b Phillips in Geelong (Barrabool) .8 Two army officers seated on rocks between large cactus plants, possibly overseas in WW1. .9 Black and white photograph of three sisters .10 Black and white photograph of Reverend Stubbings, Mrs Stubbings and their daughter Jackie Stubbings.watson, emma eliza jane phillips, elizabeth anne goodenough, richard phillips, g.l.massingham, geelong, barrabool, reg. g evans, post card -
 Melbourne Tram Museum
Ephemera - Timetable, The Met, Set of 18 Tram Timetables, produced by The Met, 1986 - 1988
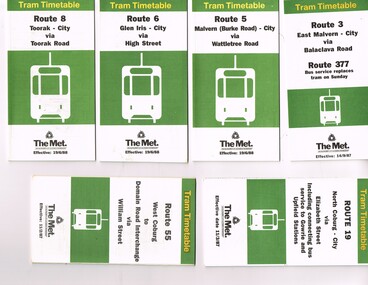
... Interchange via William St - 11/2/1987 .7 - Route 57 - West... Coburg - Domain Interchange via William St - 11/2/1987 .7 ...Set of 18 Tram Timetables, produced by The Met for various routes, white cover with two green, multi fold horizontal sheet, giving a route map, description, notes, time points, information contact details and types of tickets (Neighbourhood and Travelcards) and where they could be purchased. .1 - Route 3 - East Malvern - City via Balaclava Road - replaced by bus 377 on Sundays - dated 14/9/1987 .2 - Route 5 - Malvern Burke Road - City via Wattletree Road - 19/6/1988 .3 - Route 6 - Glen Iris - City via High St - 19/6/1988 .4 - Route 8 - Toorak - City via Toorak Road - 19/6/1988 .5 - Route 19 - North Coburg - City via Elizabeth St including connecting bus service to Gowrie and Upfield stations - 11/3/1987 .6 - Route 55 - West Coburg - Domain Interchange via William St - 11/2/1987 .7 - Route 57 - West Maribyrnong - City via North Melbourne - Route 357 bus replaces tram on Sunday - 1/12/1986 .8 - Route 59 - Airport West - City via Essendon -1/12/1986 .9 - Route 64 - East Brighton - City via Hawthorn Road - 14/9/1987 .10 - Route 67 - Carnegie - City via Glenhuntly Road - 14/9/1987 .11 - Route 69 - Kew (Cotham Road) - St Kilda Beach via Glenferrie Road - 19/6/1988 .12- Route 72 - Camberwell - City via Malvern Road - 19/6/1988 .13 - Route 75 - East Burwood - City via Flinders St - 15/2/1988 .14 - Route 78, Route 79, North Richmond - Prahran via Chapel St and North Richmond - St Kilda Beach via Chapel St - 13/7/1987 .15 - Route 82 - Footscray Moonee Ponds via Highpoint City and Route 223 bus replacement for Saturday afternoon and all day Sunday. 3/8/1987 .16 - Route 88 - Bundoora - City via Preston .17 - Route 96 - East Brunswick - St Kilda Beach via Bourke St City - 22/11/1987 .18 - Route 111 - Royal Exhibition Buildings - Port Melbourne via Bourke St City - 20/12/1987. (2nd copy added 1/4/20201( .19 - Route 600 - St Kilda - Middle Brighton via Elwood - 1/12/1986 Full Image of .5 added 9/4/17 following a query about route 19 timetables - see image i6.trams, tramways, timetables, tickets, tram services, route 3, route 5, route 6, route 19, route 55, route 57, route 59, route 64, route 8, route 67, route 69, route 72, route 75, route 78, route 78, route 79, route 82, route 88, route 86, route 111, route 600 -
 Melbourne Tram Museum
Map, Melbourne & Metropolitan Tramways Board (MMTB), MMTB Route Maps, 1979
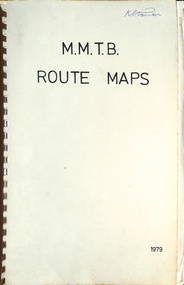
... , 14 - William St tram routes - R12/77 - Route 55, 56, and 63... - William St tram routes - R12/77 - Route 55, 56, and 63 - South ...Series of colour maps for various tram and bus routes, dated 1979. Also contained, not scanned are letters, reports, and specifications for printing these maps for use in shelters etc. Some have the Transport Information Centre telephone printed on them. Some are finished with a plastic laminate finish on either one or both sides. Show the major cross streets, parks, schools, other tram routes, major stop numbers, and railway lines. See also item 3909 for another example of these. Trams 1 - City route guide - R9/77 - showing all route numbers and destinations that passed through the CBD. 2 - Bourke St tram routes - R4/77 - East Brunswick Blyth St and East Preston Tyler St and intermediate routes, routes 95, 96, 97, 90, 89 and 88. 3 - Malvern, East Malvern, Carnegie, and East Brighton Tram Routes (from St Kilda Junction) - R1/79 - shows routes 5, 3, 67, 66, 61, 62, and 64. 4 - Elizabeth St tram routes - R12/77 - Essendon Airport, West Maribyrnong, North Coburg lines, routes 50, 58, 60, 54, 57, 52. 49, 59, 18, 20 and 19 5 - Flinders St tram routes - R5/78 - North Balwyn, East Burwood, routes 48, 40, 41, Hartwell, 28, 74 and 75 6 - Kew - St Kilda Beach - R1/79 - Route 69. 7 - Mont - Albert City - R11/77, shows routes 43. 47. 45. 44 8 - St Kilda Rd Tram Routes R12/77 - details South Melbourne Beach, route 1 and route 2 and St Kilda Beach routes 15, 16, and 55 otherwise shows where the various routes branch off St Kilda Road 9 - Batman Ave tram routes - R9/77 - Wattle Park, North Richmond and Prahran - routes 70, 71, 78 and 79. 10 - Footscray - Moonee Ponds - R3/81 - Route 82 11 - Swanston St tram guide - R1/79 - lists all routes and route numbers that branch or cross Swanston St between Grattan St and St Kilda Junction. 12 - Toorak Camberwell and Glen Iris tram route with Camberwell Junction and Malvern Town Hall, R1/79, routes 8, 7, 6, 72, and 73 shown. 13 - West Preston - Beach tram routes - R12/77 - routes 10, 11, 9 and 12, 14 - William St tram routes - R12/77 - Route 55, 56, and 63 - South Melbourne Depot and Domain. Buses 1 - Footscray, Sunshine, Deer Park, Nth Altona & Fishermans Bend - R2/79 2 - Box Hill bus routes to Templestowe, Heidelberg & East Kew - R6/78 - notes superseded by R3/82 3 - Plan of Russell St Melbourne bus departure bays. 4 - Box Hill, Mitcham & Ringwood bus routes to East Doncaster & Warrandyte - R3/82 5 - City - Warrandyte & East Doncaster bus routes - R3/82 & R6/78 6 - Bulleen - City - Port Melbourne - Garden City Bus route - R6/78 7 - North Altona - City bus route - 11/78 8 - Clifton Hill - Elsternwick - R2/79 9 - La Trobe - Northland - West Heidelberg - City Bus Service via East Freeway - 11/79 and R3/81 10 - Box Hill, Mitcham & Ringwood Bus Routes to East Doncaster & Warrandyte - R10/84 - with the Metropolitan Transit logo.Yields information about tram and bus routes in late 1970s early 1980s.Book - brown comb binding, card and clear plastic covers containing both bound and unbound maps and documents.K C Painter on front cover in ink.tramways, mmtb, tram routes, maps, bus routes, route numbers, routes, route guide -
 Montmorency/Eltham RSL Sub Branch
Medal - Medal Group, WW1, 82069 Pte. A. Warner
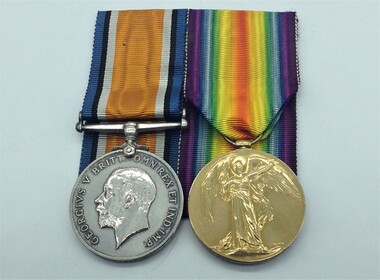
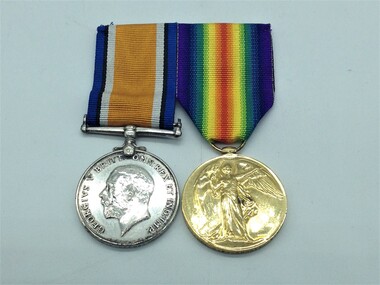
... by William McMillan, shows St George, naked on horseback and armed... of India". The reverse, designed by William McMillan, shows St ...Pte Albert WARNER (3537) was a driver with 4th Australian Machine Gun Bn. He died in action in France on 18 Aug 1918 and is buried in a cemetery near Picardie (see AWM person records)British War Medal - The medal was struck by the Royal Mint, is a silver disc 36mm in diameter with a straight clasp suspended without swivel. The obverse shows Sir Bertram Mackennal's bare headed effigy of King George V facing left with the legend 'GEORGIVS V BRITT:OMN:REX ET IND:IMD - "George V, King of all the British Isles & Emperor of India". The reverse, designed by William McMillan, shows St George, naked on horseback and armed with a short sword, an allegory of the physical & mental strength which achieved victory of Prussianism. The horse tramples on the Prussian eagle shield and the emblems of death, a skull and cross bones. In the background are ocean waves and just off centre near the right upper time is the risen sun of victory. The years 1914-1918 appear on the perimeter in the left and right fields respectively. The watered silk ribbon is 32mm wide with 3mm wide royal blue band, 2mm wide black band, 3mm wide white band repeated in reverse order and separated by 16mm wide orange band. Victory Medal - The medal is bronze disc 36mm in diameter with a winged figure of Victory on the obverse. The reverse has the words 'THE GREAT WAR FOR CIVILIZATION 1914-1918', all surrounded by a laurel leaf. The watered silk ribbon is 32mm wided has two rainbow design with the violet from each rainbow on the outside edges, moving through to a central red stripe where both rainbows meet.The recipients name, rank, service number and unit are impressed on the bottom edge of the medal - 82069, PTE WARNER R.A.M.C -
 Montmorency/Eltham RSL Sub Branch
Medal - Medal Group, WW1, 2166 Lieutenant Reginald Frank Barratt
... by William McMillan, shows St George, naked on horseback and armed..., designed by William McMillan, shows St George, naked on horseback ...Information from "The AIF Project" Lieutenant Reginald Frank Barratt was born in 1879 in Withington, Manchester, Lancashire, England. Regimental number 2166. 3rd Field Artillery Brigade, Military District 3 and Military District 6. Arrived in Australia in 1903 aged 24. Address was Mount Street, Heidelberg, Victoria. Occupation - Farmer. Enlistment date was 17th August 1914. Served with the 68 Battery Royal Field Artillery during the South African War. Rank on enlistment was Sergeant. Embarkation details - Unit embarked from Melbourne, Victoria on board Transport A2 Geelong on 19th September 1914. Rank Lieutenant - Unit 1st Divisional Ammunition Column. Information from the Roll of Honour - Awarded Royal Human Society Medal for saving three lives from drowning in Orange River during South African War. Wounded at Zillebeke, near Ypres, Belgium. Died of wounds 22nd August 1917 at the age of 38. Buried at Bedford House Cemetery, Enclosure No 2, (Plot 1, R0w F, Grave 23), Zillebeke, Belgium. Panel number , Roll of Honour Australian War Memorial British War Medal - The medal was struck by the Royal Mint, is a silver disc 36mm in diameter with a straight clasp suspended without swivel. The obverse shows Sir Bertram Mackennal's bare headed effigy of King George V facing left with the legend 'GEORGIVS V BRITT:OMN:REX ET IND:IMD - "George V, King of all the British Isles & Emperor of India". The reverse, designed by William McMillan, shows St George, naked on horseback and armed with a short sword, an allegory of the physical & mental strength which achieved victory of Prussianism. The horse tramples on the Prussian eagle shield and the emblems of death, a skull and cross bones. In the background are ocean waves and just off centre near the right upper time is the risen sun of victory. The years 1914-1918 appear on the perimeter in the left and right fields respectively. The watered silk ribbon is 32mm wide with 3mm wide royal blue band, 2mm wide black band, 3mm wide white band repeated in reverse order and separated by 16mm wide orange band. Victory Medal - The medal is bronze disc 36mm in diameter with a winged figure of Victory on the obverse. The reverse has the words 'THE GREAT WAR FOR CIVILIZATION 1914-1918', all surrounded by a laurel leaf. The watered silk ribbon is 32mm wided has two rainbow design with the violet from each rainbow on the outside edges, moving through to a central red stripe where both rainbows meet.The recipients name, rank and unit are impressed on the bottom edge of the medals - Lieut F Barratt AIF -
 Eltham District Historical Society Inc
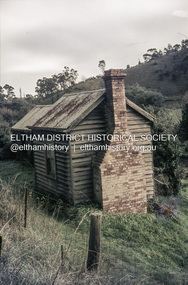
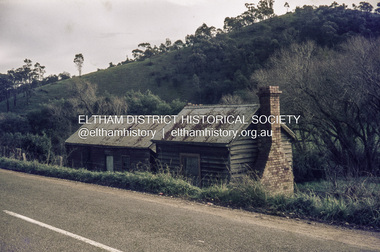
Slide, Pills Cottage, Heidelberg-Kinglake Road, Cottles Bridge, Vic, c.1970
... Andrews near 1575 Heidelberg-Kinglake Road, St Andrews. William... Andrews near 1575 Heidelberg-Kinglake Road, St Andrews. William ...Pills Cottage about halfway from Cottles Bridge to St Andrews near 1575 Heidelberg-Kinglake Road, St Andrews. William John "Bill" Pill was born on 19th June 1894 at Diamond Creek He was brutally murdered on 21st December 1958 age 64, in his cottage. His father was John Henry Pill, born 24 November 1856, Lalone, Perranzabuloe, Cornwall, England, He died 21 December 1930 at Cottles Bridge, His mother was Jessie Ann Whatmough, born 6th June 1870. She died 21 August 1921. William John "Bill '' Pill, grew tomatoes on his rich two and a half acres. In 2024 his second cousin Steve Whatmough recalled visiting Bill in 1957 with his parents (Eric and Nancy Whatmough) and Bill showing them his tomatoes. He had a very large aeroplane propeller set up at one end on his tomato crop. He would run the propeller on frosty mornings to keep away the frost damage. His tomatoes would ripen early and would receive a premium price for them. The cottage consisted of two buildings. The one closest in the right side of the photo was the kitchen. The second building that also has a chimney was his bedroom and living room.35 mm colour positive transparency Mount - Agfacolor Service (Blue)heidelberg-kinglake road, pills cottage, st andrews, william john pill, bill pill, john henry pill, jessie ann pill (nee whatmough), market gardener, murder, cottles bridge (vic.), tomato farm, mount - agfacolor service (blue), scan - 35mm positive -
 Eltham District Historical Society Inc
Slide, Pills Cottage, Heidelberg-Kinglake Road, Cottles Bridge, Vic, c.1970
... Andrews near 1575 Heidelberg-Kinglake Road, St Andrews. William... Andrews near 1575 Heidelberg-Kinglake Road, St Andrews. William ...Pills Cottage about halfway from Cottles Bridge to St Andrews near 1575 Heidelberg-Kinglake Road, St Andrews. William John "Bill" Pill was born on 19th June 1894 at Diamond Creek He was brutally murdered on 21st December 1958 age 64, in his cottage. His father was John Henry Pill, born 24 November 1856, Lalone, Perranzabuloe, Cornwall, England, He died 21 December 1930 at Cottles Bridge, His mother was Jessie Ann Whatmough, born 6th June 1870. She died 21 August 1921. William John "Bill '' Pill, grew tomatoes on his rich two and a half acres. In 2024 his second cousin Steve Whatmough recalled visiting Bill in 1957 with his parents (Eric and Nancy Whatmough) and Bill showing them his tomatoes. He had a very large aeroplane propeller set up at one end on his tomato crop. He would run the propeller on frosty mornings to keep away the frost damage. His tomatoes would ripen early and would receive a premium price for them. The cottage consisted of two buildings. The one closest in the right side of the photo was the kitchen. The second building that also has a chimney was his bedroom and living room.35 mm colour positive transparency Mount - Agfacolor Service (Blue)bill pill, cottles bridge (vic.), heidelberg-kinglake road, jessie ann pill (nee whatmough), john henry pill, market gardener, mount - agfacolor service (blue), murder, pills cottage, scan - 35mm positive, st andrews, tomato farm, william john pill -
 Melbourne Tram Museum
Album - Ron Scholten Slide Collection, Ron Scholten
... at William St with Cable Cars RSC11 L 104 on the fan of the new shed... at William St with Cable Cars RSC11 L 104 on the fan of the new shed ...Photo - see pdf file for further information. Number Brief Description RSC1 PCC 1041 at the gates of Preston Workshops on a test run without it’s trolley retriever RSC2 PCC 1041 in Glenhuntly Road on Route 67 en route to Carnegie crossing the Railway Gates at Glenhuntly Station RSC3 W2 482 stored at Malvern Depot with Olympic Park on the Destination RSC4 Cable Car Set 64 in Swanston St outside Princess Bridge Station in Bound with open top Double Deck Bus, Trak Motors ? Departing from Flinders St Station RSC5 W3 669 in St George Rd at Sumner St en route to Preston Workshops for scrapping RSC6 Cable Car in Lygon St en route to Carlton RSC7 PCC 1041 turning from St Georges Rd into Miller St to enter Preston Workshops RSC8 Flinders St Station with cable cars RSC9 PCC 1041 in strife on it’s maiden day in service. Trams on route 88 delayed in Queens Parade Clifton Hill RSC10 Flinders St at William St with Cable Cars RSC11 L 104 on the fan of the new shed at Malvern Depot on a TMSV tour RSC12 Cable Set 1 after it’s restoration at Preston Workshops on the fan near the front gate RSC13 X1 466 at a suburban terminus of the Footscray System RSC14 X2 680 at Point Ormond Terminus RSC15 An ex Launceston Tram at the outside terminus of the Penny Royal Complex Tramway in Launceston RSC16 Q 148 at Preston Workshops awaiting disposal RSC17 Elizabeth St with Cable Cars RSC18 Elizabeth and Bourke St corner outside the GPO with cable cars RSC19 Collins St with Cable Cars RSC20 A photo taken from the observation deck of the ICI building showing a view of Parliament house with a w class tram in Nicholson St RSC21 Auburn Horse car with a posed photo of all the tramwaymen employed RSC22 Cheltenham Double Deck Horsecar with a full load of passengers RSC23 City of Northcote cable trailer 3 at a terminus RSC24 City of Northcote Cable cars passing in High St Northcote RSC25 St Kilda Rd at Princes Bridge with Cable Cars RSC26 Flinders St with Cable Cars RSC27 Cable Cars RSC28 Bourke St looking towards Elizabeth St from Queen St RSC29 Cable cars in Bourke St at Elizabeth St looking East RSC30 Cable cars in Elizabeth St at the terminus at Flinders St RSC31 Cable cars in Bourke St at Swanston St looking west RSC32 Cable cars in Swanston St at Flinders St looking North RSC33 Cable cars in Collins St near Russell St RSC34 Cable cars in Elizabeth St at Bourke St RSC35 Cable cars in Collins St at Elizabeth St RSC36 Cable Cars in Swanston St at Flinders St RSC37 Cable cars in Collins St RSC38 Cable Cars RSC39 Cable cars in St Kilda Rd near Princes Bridge RSC40 Cable cars in Collins St East of Swanston St RSC41 Cable cars in Spring St outside Parliament house RSC42 K 92 in M&MTB Chocolate and cream livery but with a P&MTT Destination box on Route 14 RSC43 Thornbury depot viewed from Miller St and St Georges rd. Two W2 class cars are laying over between the peaks RSC44 Z3 201 in Met Livery passes D1 3510 in new M Tram livery. A Staff member in uniform stands in the doorway. Dandenong Rd RSC45 D1 3530 advertising Heinekin Super Golf on Route 55 in Royal Park RSC46 D1 3504 in M Tram livery on the reserved track in Matthews Ave near Essendon Airport showing Route 81 Travancore . I suspect it is a private enthusiasts charter due to the Malvern W class run number in the rear windscreen RSC47 D1 3504 on Route 64 in Dandenong Rd in M Tram Livery RSC48 D1 3504 in M Tram Livery at Airport West Terminus RSC49 D1 3504 in M Tram Livery in Union Rd outside the Showgrounds RSC50 D1 3504 at West Maribyrnong Terminus in M Tram Livery RSC51 D1 3503 in M Tram Livery in Malvern Depot RSC52 SW6 960 and VR 53 in Harbour Esplanade for the NMEL&T Co Centenary RSC53 Hawthorn Tramways Trust 32 in Harbour Esplanade for the NMEL&T Co Centenary RSC54 VR 53 & B 2042 in Harbour Esplanade for the NMEL&T Co Centenary RSC55 VR 53 & C 3016 in Harbour Esplanade for the NMEL&T Co Centenary RSC56 NMEL&T Co 13 usually V214 in Harbour Esplanade for the NMEL&T Co Centenary RSC57 NMEL&T Co 13 usually V214 at Preston Workshops for the NMEL&T Co Centenary RSC58 Hawthorn Tramways Trust Lettering on HTT 32 in Harbour Esplanade for the NMEL&T Co Centenary RSC59 Hawthorn Tramways Trust 32 in Harbour Esplanade for the NMEL&T Co Centenary RSC60 Hawthorn Tramways Trust 32in Harbour Esplanade for the NMEL&T Co Centenary RSC61 Hawthorn Tramways Trust 32 in Harbour Esplanade for the NMEL&T Co Centenary RSC62 NMEL&T Co 13 usually V214 at Preston Workshops for the NMEL&T Co Centenary RSC63 W2 516 and another on route 59 wait to shunt at Essendon Airdrome Terminus as W2 571 on route 49 departs. This was the last day of operation. RSC64 Australia’s First Electric Tram at Box Hill with Tramwaymen including H J Hilton who is in the centre RSC65 W2 484 en route to St Kilda Junction and another wait for passengers after a race meeting at Caulfield Racecourse RSC66 X1 463 on the Footscray system en route to Russell St RSC67 Geelong 35 on Chilwell Route, Formerly HTT 13, M&MTB 119, then Bendigo 1 and Ballarat 37 RSC68 P&MTT 4 on Opening Day of the system in Glenferrie Rd RSC69 Bendigo 6 in McCrae St near the Depot end route to North Bendigo RSC70 P&MTT 4 in Glenferrie on opening day of the System RSC71 Scrubber 3 stripped and awaiting scrapping at Preston Workshops RSC72 Scrubber 4 at South Melbourne Depot RSC73 Q 191 & 139 at Preston Workshops awaiting scrapping RSC74 Rail Grinder 3 at Preston Workshops as purchased from Sydney RSC75 Y 469 waits to shunt at Wattle Park Terminus as Y1 613 departs on driver training duties RSC76 VR 53 on the outside roads at Essendon Depot RSC77 W5 796 with three doors and square windows running out of Brunswick Depot in Cameron St, with a supplementary destination board showing “City via Swanston St” RSC78 W2 258 on the wheel grinder road at Brunswick depot RSC79 X2 676 on a TMSV tour, W5 817 & 836 & VR 53 on the open roads at Essendon Depot RSC80 PCC 1041 on test, passes W71035 in High St Preston RSC81 D1 class production number 7 as delivered on test in Matthews Ave RSC82 W2 383 on route 5 turning from the reserved track in Dandenong Rd into St Kilda Rd at St Kilda Junction RSC83 Z3 204 as advertising tram for Vodaphone Grand Prix running into Malvern Depot new shed RSC84 Z1 4 on test in St Georges Rd RSC85 PCC 1041 on Route 96 in Burke St near Exhibition St RSC86 Z1 3 without numbers on test turning from Miller St in St Georges Rd RSC87 Track components stored in Coldblo Rd at Malvern Depot with Z class cars adjacent RSC88 D1 3501 in M Tram Livery on Route 55 in Peel St at Franklin St RSC89 C 3001 in Yarra Trams Livery Porto 018 & D13502 in M Tram Livery on Display in Harbourside Esplanade RSC90 D1 class tram production number 7, in as delivered condition on test in Matthews Ave RSC91 D1 3503 inside Malvern Depot RSC92 SW6 955 and W6 974 in St Kilda at City Rd at Dusk RSC93 Freight Car 19 at Preston Workshops in green Livery RSC94 Rail Grinder 3 in green Livery at South Melb Per Way Yard RSC95 A SW6 class car on route 50 shunting at Elizabeth St Terminus at night, taken from Flinders St Station RSC96 W2 588 & 435 in St Kilda Rd at Batman Ave RSC97 Y1 613 in service at Wattle Park Terminus RSC98 W2 588 in Wellington Parade en-route to the City with a Grand Final Load of passengers followed closely by 384 RSC99 W2 558 on a MCG Footy Special entering the Simpson St sidings RSC100 W3 657 & an L Class in the new shed at Malvern Depot RSC101 Y1 613 in St Kilda Rd on an enthusiasts tour in St Kilda Rd south of St Kilda jun RSC102 Y1 613 on an enthusiasts tour in Clarendon St with the two extra tracks on the Viaduct under construction RSC103 W6 976 on the fan of the new shed at Malvern Depot RSC104 W7 1024 as an advertising car for Bank of NSW at the route 1 terminus at South Melb Beach RSC105 PCC 980 on route 96 in Nicholson St near North Fitzroy Depot RSC106 SW6 890 with dash canopy lighting in Market St on the opening day of William St Services RSC107 W2 444 with big numbers heads a line of footy specials in Simpson St Sidings RSC108 Cable Cars in Elizabeth St RSC109 NMEL&T co 2 with a trailer outside the power station in Mount Alexander Rd RSC110 Alf Twentyman’s cable car set in his Northcote backyard RSC111 Cable Cars in Queens Parade Clifton Hill RSC112 Cable cars in Collins St outside the Townhall RSC113 PCC 1041 at Carnegie terminus RSC114 Cable cars in Elizabeth St RSC115 Cable cars in Collins St near Swanston St RSC116 HTT 19 turns from Riversdale Rd into Camberwell Rd at Camberwell Junction RSC117 W1 419 official builders photo of first car of the class RSC118 Cable car with a full load of passengers RSC119 W1 422 illuminated for the visit of T.R.H. The Duke and Duchess of York RSC120 PCC 1041 in strife on it’s maiden day in service. Trams on route 88 delayed in Queens Parade Clifton Hill RSC121 Bendigo birney in Finn St near North Bendigo terminus RSC122 SW6 in St Kilda Rd at Domain Rd at night RSC123 All 3 of Alf Twentyman’s cable cars in his Northcote backyard RSC124 Cable trailer 256 being unloaded into the shed at Bylands RSC125 Cable grip car 1 being removed from the Melbourne Museum RSC126 Alf Twentyman's cable cars in his Northcote Backyard RSC127 Alf Twentyman's cable cars in his Northcote Backyard RSC128 Alf Twentyman's cable cars in his Northcote Backyard RSC129 Alf Twentyman's cable cars in his Northcote Backyard RSC130 W class car in Swanston St at Collins St RSC131 Y1 469, L & W3 on the run out of Glenhuntly Depot on a tour RSC132 W7 1024 as an advertising tram for Bank of NSW at Clifton Hill RSC133 W2 496 on a footy special in Simpson St Sidings RSC134 W2 as originally converted to a test car at Preston Workshops RSC135 W3 667 in Brunswick Depot with Ellen Butland at the controls RSC136 W3 669 on it’s final run at Victoria Prd & Brunswick St RSC137 W2 571 in Wellington Prd at Clarendon St with a Footy Final load of Passengers RSC138 Y1 613 shunts at Spencer St Terminus as X217 waits on Australia Day Pageant RSC139 PCC 1041 on Rt 96 in Burke St outside the Southern Cross Hotel RSC140 890 with accident damage on the outside roads at Preston Workshops c1978 RSC141 535 on Rt 4 at the old St Kilda Jun c1967 RSC142 1041 on Rt 88 turns from Bourke St into Spring St 1973 RSC143 102 on a tour at Albert Park Beach Terminus Feb 1972 RSC144 833, 835 & 834 in the shed at Malvern Depot c1976 RSC145 281 in Wellington Parade on a football very crowded special c1974 RSC146 464 Ballarat Rd 1960 RSC147 181 Explosives Fty - at Footscray Station - July 1960 RSC148 181 Williamstown Road 1960 RSC149 Cable car set at Alf Twentyman’s c1970 RSC150 X 217 at Malvern Depot c1970 RSC151 X1 465 and T181 Footscray Football ground in Barkly St. c1960 RSC152 Scrubber 5 at South Melbourne depot c1960 RSC153 X1 465 Footscray to Russell St, c1960 RSC154 X1 467 Leeds St Footscray 1960 RSC155 PMTT 4 Glenferrie Road, 1910 RSC156 S 164 at Malvern Depot c1970 RSC157 T178 Footscray c1960 RSC158 Cleaner No. 7 at South Melbourne depot c1960 RSC159 Two Y classes at Princes Bridge / Batman Ave mid 1950s RSC160 Swanston St – Nu color vue slide – M142 Demonstrates the work of Ron Scholten in photography, collection and/or production of duplicate slidesAssembled album in a black presentation folder of 160 colour slides, 8 slide sleeves, collected or produced by Ron Scholten. Many are TMSV or Windsor Publications slides. All photographs have been scanned and placed on the Museum's G drive. A list of all photographs with details has been compiled. melbourne, tramways, trams, cable trams -
 Melbourne Tram Museum
Album - Charles Craig - part 1 of 2, 1950s to 1970s
... turning into William St from La Trobe St CC109 X2 677 Glenhuntly... into William St from La Trobe St CC109 X2 677 Glenhuntly Road ...Photo - see pdf file for further information. Number Brief Description CC1 S178 at Elsternwick level crossing track works CC2 Building East Preston Depot 1955 CC3 Camberwell depot – post WW2 – lots of trams and a black cat CC4 W2 584 and SW6 958 northbound – Chapel St and Brighton Road CC5 W2 357 – southbound, Chapel St Brighton Road CC6 Pascoe Vale Road, Raceday working – note the signal CC7 The Preston Workshops - The Argus, post WW2, 223, 647 et al CC8 923 or is it 922 being built at Preston – The Argus photo - CC8A 832 being positioned onto trucks at Preston after an overhaul – Argus Photo – see also CC306 CC9 Footscray depot` CC10 W5 797 in St Kilda Road during track works – 1950s CC11 W2 457 at Kew Post Office CC12 Wellington Parade – W2 432, 492 and 337 – special event CC13 Swan St line up of trams – football? Or other special event – Sinclair’s bus on the right side. CC14 W2 630 being washed at a depot – The Argus photo CC15 Royal Park line at Flemington Road – W2 355 and W5 786 CC16 Nicholson St track construction from a tram cab CC17 T181 on tour at Gordon St CC18 T181 on Maribyrnong Bridge CC19 Ditto at River St just off bridge CC20 As for CC18 CC21 At Raleigh Rd CC22 T181 at Footscray depot CC23 Track construction, Nicholson, just north of Gertrude CC24 Commissioning overhead Bourke St tram 988 CC25 Queens Parade – 997 and 994 CC26 Swapping trolley wheel to skid – commissioning CC27 Track construction in Gertrude St CC28 985 in Queens Parade running special CC29 997 in Queens Parade CC30 1033 at North Fitzroy – AETA Special CC31 Bourke St at Elizabeth St – has passengers on board CC32 W6 985, 996 Queens Parade, Mk 3 bus 333 CC33 As above CC34 Showing construction at Nicholson & Gertrude – Bourke St CC35 W2 223 on Burnley temporary bridge – VR track expansion CC36 W5 823 – ditto CC37 Tram on old bridge prior to removal CC38 W2 433 on temporary bridge with new bridge beams and old track CC39 Looking down showing temporary single track – Swan St CC40 Tait train passing under tram bridge CC41 SW6 on single line – off loading CC42 W2 547 at City Road Junction CC43 City Road Jtn – 1969 – 596 and 771 CC44 City Road Jtn – 1969 – 596 and 771 (same as CC45 438 in Flinders St CC46 355 somewhere CC47 552 somewhere CC47A 364 at Preston Workshops? CC48 W2 334 on Traverser – Preston Workshops CC49 Wellington pade – large line up of trams, c1950 925, and 611 CC50 W2 493 Franklin st – advertising for Savings Certificates CC51 Possibly 551 with advertising for fund raising for Blind institute CC52 249 at Hawthorn – Riversdale Junction – with a Tally Ho and Village Fair Aux. board CC53 MMTB Postcard of 511 CC54 Wattle Park terminus with Single line warning sign CC55 Wattle Park Duplication CC56 36 at Domain Junction – 833 CC57 36 at Domain Junction CC58 36 at Domain Junction with 810 and 833 CC59 36 in Swanston by Flinders St Station CC60 36 in Spencer St at A’Beckett CC61 36 crossing Collins St CC62 36 crossing Collins St CC63 36 northbound in St Kilda Road with Shrine in background CC64 36 northbound in Swanston St at Flinders St CC65 Postcard – Ballarat 36 in Domain Road CC66 Postcard - Stampshow – Hawthorn Horse tram CC67 Postcard - Stampshow – Peace cable tram CC68 Postcard - 1041 and cable car set 1 at Preston CC69 Postcard - Colins & Elizabeth – greetings from old Melbourne CC70 Postcard - Cable car set at Preston CC71 Postcard - Twentyman’s cable cars CC72 Postcard - Nu-color-vue – horse tram 256 CC73 Cable car set – Market & Flinders CC74 Cable trams at Twentymans’ in their shed CC75 Cable tram track at Bourke & Spencer prior to removal CC76 Cable tram bogie at Preston Workshops – used as a dolly CC77 Cable trams at Twentymans’ CC78 Postcard - Valentines – Bourke looking west from Swanston CC79 Postcard - Rose 3938 – Bourke at Swanston – the Leviathan building CC80 Postcard - Valentines – Elizabeth St looking south from Collins – No. 19 CC81 Postcard - Rose P4765 – Bourke St Melbourne CC82 Postcard - Rose 4090 – cable tram passing Parliament house CC83 Postcard - Valentines – GPO Elizabeth St CC84 Interior of cable trailer with clothing on a set CC85 Elizabeth St looking north CC86 Cigarette card - Collins St No. 41- WD HO Wills CC87 Postcard - Rialto building with cable set CC88 Postcard - Valentines - Swanston at Flinders looking north CC89 CC90 Q 150 Hanna St – dated on rear CC91 176 turning – photo ex Alan Jungworth CC92 161 on Princes Bridge – minimum fare 4d sign and Inspector CC93 459 at Point Ormond CC94 158 at Gordon St – side on view CC95 X 217 in Swanston St CC96 X 217 in Swanston St with an East Brighton destination CC97 T177 CC98 T177 Peel St – no destination roll – being transferred? CC99 X1 462 in Glenhuntly Road to Point Ormond CC100 X1 462 in Glenhuntly Road to Elsternwick Rly Station CC101 X1 462 in Glenhuntly Road to Point Ormond CC102 Q 150 Hanna St CC103 190 at Camberwell Depot CC104 T182 at Footscray CC105 X1 466 and W2 at Footscray CC106 190 at Camberwell Depot CC107 X1 467 Barkly St Footscray CC108 X2 679 turning into William St from La Trobe St CC109 X2 677 Glenhuntly Road with Point Ormond Destination CC110 Postcard T180 CC111 Postcard format – X1 467 on a truck – see also CC178 CC112 Postcard format – X1 467 at Wantirna South CC113 Q200 and SW6 896 at Thornbury – has labels on rear CC114 T177, Ballarat Road – has labels on rear CC115 T178 at Point Ormond CC116 Postcard X1 465 and 466 CC117 Postcard – X2 676 CC118 Postcard – TMSV X2 217 CC119 810 on temporary bridging – 24-12-67 CC120 W2 575 – Queens Parade junction in, still temporary bridging, substation under construction CC121 Forming Queens Parade Junction base slab CC122 W2 596 prior to tramway works – all tracks still in position CC123 It’s a mass of reinforcing – bridging being formed CC124 Looking north with substation being built CC125 Looking east with some rather tight curves, Wellington St still in use CC126 SW6 958 ex Wellington St with all tracks and signal box and buildings. CC127 Victoria Pde at Gisborne looking east – at least 4 cars CC128 SW6 893? With dash canopy lights and SW6 862 and a man with a newspaper CC129 SW6 894 on the S curves, with tram in Wellington St CC130 Similar photo CC131 W2 564 turning into Wellington St – the concrete tracks are not that old CC132 W2 552 running out of Wellington St CC133 W5 732 from Fitzroy St into St Kilda Road with next iteration in position – very wonky CC134 W5 764 turning into Fitzroy St CC135 SW6 947 turning from Wellington St CC136 W2 586 running out of High St CC137 W2 500 turning into Wellington St CC138 W2 543 in Wellington St inbound CC139 L103 with St Kilda Junction destination, and a tower truck on right CC140 Workmen – new track in Queensway in use CC141 Ditto CC142 L103 in Queensway, and another car in bound CC143 Looking east along Wellington St which has been taken out of use. Also a MMTB Roller CC144 W5 824 and a W2 and all types of wobbly temporary track CC145 W2 354 to High St CC146 Sw6 947 on the S bends CC147 W2 500 looking north – tram on the S bends CC148 SW6 896 leaving the S bend CC149 W2 357 and a MMTB City bus with trees/gardens on the side CC150 W5 817 Elliot Ave – see also CC302 CC151 W2 552 – note the large trolley bridge CC152 W2 550 at depot or workshops CC153 1B truck CC154 SW2 432 CC155 W2 155 at Glenhuntly CC156 SW6 937 on AETA tour? CC157 X2 677 on Footscray service – Ballarat Rd? CC158 W2 641 – High St Kew? CC159 SW6 847 – Power St Hawthorn CC160 Simpson St – big line up CC161 W2 546 truck No. 1? CC162 W2s at Glenhuntly depot CC163 No. 15 truck under 899 CC164 206 and other junk at Preston Workshops CC165 W in Swanston St Melbourne – Rose series card CC166 Y1 613 Batman Ave?? or William St at Collins CC167 Tram plans CC168 X 217 Swanston St – see also 95 and 96 CC169 217 in Swanston St – same as 95 CC169A 192 in St Kilda Road at Princes bridge CC170 192 in St Kilda Road at Princes bridge CC171 Bendigo 3 arriving Malvern depot – being unloaded CC172 Ditto CC173 T180 at a depot CC174 X1 463 wheel set CC175 C30 – dog car side view – close up CC176 C30 dog car CC177 206 and 30 at Preston Workshops CC178 X1 467 on a truck – see CC111 also CC179 42 CC180 42 at a depot, no destination box CC181 W2 556 1A type truck CC182 Flinders St Station – Rose Series CC183 W7 1035 Spring – Nicholson St CC184 W7 1022 MMTB Post Card CC185 Adelaide 178 – has on rear – R. Lilburn 4/82 CC186 Adelaide 175 – has on rear – R. Lilburn 4/82 CC187 Y1 610 on AETA tour CC188 Y1 610 on AETA tour with large group – Point Ormond CC189 AETA display – has GH55-32 in pencil on rear CC190 AETA display – has GH55-29 in pencil on rear CC191 Y1 610 on AETA tour with large group – Point Ormond CC192 VR 53 at Footscray CC193 VR cars 40 and 34 at Elwood wash dock CC194 W7 1024 as the 1970 Christmas tram CC195 Geelong – loading a set of 22E trucks CC196 Geelong 10 and 23 running an AETA special CC197 Geelong – AETA special CC198 Geelong 7 at Junction CC199 Geelong 10, in the city CC200 Geelong 33 with Belmont destination CC201 Geelong 15 Eastern Park destination 29-3-1948 CC202 Geelong 23 at Railway Station – 29-3-1948 CC203 Geelong 23 at Railway Station – 29-3-1948 CC204 Geelong – loading a bogie tram CC205 Geelong – loading a bogie tram CC206 Geelong 40 – loaded on truck CC207 Geelong 40 – on jacks CC208 Geelong 40 on jacks – 19 behind CC209 Geelong 38 with two workers on either side CC210 – 214 Australian Historic Tramways stamp folder and set CC215 Bendigo 17 at depot – has dup JBS on rear CC216 Bendigo 20, 29 bogie and straight sill car at Charing Cross CC217 Bendigo one man bogie Pall Mall CC218 Bendigo – Bogie 23, other cars and welding truck at depot CC219 Bendigo 7 with Quarry Hill destination CC220 Bendigo 21 with Lake Weerona destination CC221 ESCo 18 Ballarat CC222 Ballarat bogie 22 on AETA special CC223 Ditto CC224 Ballarat 34 at Stones Corner – R Lilburn CC225 Ballarat 15 in Bridge St – R Lilburn CC226 Ballarat 40 at Gardens – R Lilburn CC227 Ballarat 37 running out of depot – R Lilburn CC228 Postcard – Valentines – Sturt St with loaded horse tram trailer CC229 AETA Geelong tram tour ticket – 29-3-1948 CC230 Postcard – Geelong – Valentine 2114 – T&G building CC231 Postcard – PMTT ! – High St Malvern CC232 Postcard – Empire – Glenferrie Road, Malvern at Wattletree Rd CC233 Postcard Y469, MMTB CC234 Postcard Z2 Spring St CC235 Postcard – Z1 MMTB CC236 Postcard – Stamp Show W1 431 CC237 Postcard – Stamp show B2005 CC238 Postcard – Stamp show W6 982 CC239 Postcard – Valentines 1264 – Johnstone Park with tram in distance CC240 Postcard – Rose 10711 – Swanston and Lonsdale – Hospital and W232 CC241 Postcard – Rose 4827 – Fitzroy St St Kilda W2 362 and 548 CC242 Postcard – Valentines – 939 – St Kilda War Memorial, W and a R? CC243 Postcard – Valentines – 572 – St Kilda War Memorial, W 413 and 140? CC244 Postcard – Valentines – 938 – Uper and Lower Esplanade – L 104 CC245 Postcard – St Kilda Rd at Princes Bridge Y1 and W CC246 Postcard – Biscay BG82 – W5 814 - CC247 Postcard – Biscay 796112 – Bourke St looking west CC248 Postcard – Biscay 796109 – Bourke St looking east CC249 Postcard – Biscay 2AUS58 – Z5 Bourke St CC250 Postcard – Biscay BG 249 – Swanston St CC251 Postcard – National View – St Kilda Rd – shrine and Prince Henrys W2 405 CC252 Postcard – Nu color vue – 11 ML 156 – St Kilda Rd CC253 Postcard – Nu color vue – 11 ML 153 – Swanston St CC254 Postcard – Nu Color vue – Collins St 442 CC255 Postcard – Pitt card – Adelaide – H 364 at Victoria St CC256 Postcard – SPER L/P 154 CC257 Postcard – BTMS – 550 CC258 Postcard – SPER – Brisbane 295 CC259 Adelaide 131 at Burnside – has R Lilburn on card, c1911 CC260 Adelaide 194 CC261 Adelaide 235, with two crew, The News photo CC262 Rockhampton, outside post office – has source of photo details CC263 Sydney – 2086 and 2062 arriving Circular Quay CC264 Sydney – P class – Pitt St? CC265 Sydney – 1610 at Circular Quay CC266 Brisbane 99 and 468 CC267 Sydney with bridge behind CC268 Steam tram Paramatta Park – 103 CC269 Sydney – Museum Station =- Elizabeth St CC270 Sydney – weed burner 137S at a loop Demonstrates the work of Charles Craig in photography and collection of prints.Assembled album in a black presentation folder of 270 photographs from the Charles Craig Collection - 86 sleeves - part 1 of 2. All photographs have been scanned and placed on the Museum's G drive. A list of all photographs with details where possible has been compiled. Victorian Provincial, Launceston, Hobart and Sydney tram photos have been transferred to other Museums, image files retained.melbourne, tramways, tramcars, trams, charles craig, st kilda junction, trackworks -
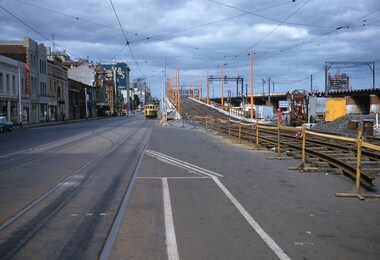 Melbourne Tram Museum
Slide - Set of 5, Keith Kings, 15/11/1959 12:00:00 AM
... . Keith notes - 317 to Spencer St terminus in Flinders St from Cnr... for Kings St bridge overpass Flinders St between William and Market ...Set of five Colour slides, Kodak, white cardboard mount of track laying and the construction of the Flinders Street overpass during November 1959. .1 - Photo showing the tram line in the pre location position with the new track over the first stage of the overpass read to be cut in. 15/11/1959. Tram running a route 46. Keith notes - 317 to Spencer St terminus in Flinders St from Cnr of Spencer with temporary track ready for trams on the overpass. .2 - track being tested on 21/11/1959 - has the Flinders St station and signal gantry in the background. On the bridge is a sign for Coffey Ford. Keith notes - 903 stranded on temporary track as test car for Kings St bridge overpass Flinders St between William and Market Sts. .3 - tram 903 testing the track, has a number of workers in the view - 22/11/1959 Keith's notes - 903 first tram (on its second use) testing Flinders St overpass track and approach curves on east side. .4 - trams 939 (route 46) and 350 (route 27, Spencer St) at the east end of the new bridge with people watching. Note the "cars stop here" on the orange pole near the bottom of the ramp. 22/11/1959 Keith's notes - 939 - first passenger tram over Flinders St overpass on return journey and 350 second passenger tram. .5 - tram 939 first passenger car over the bridge at the western end of the new bridge with many workers in the background. Also Markillies Hotel. Also shows the reinforcing in the side of the bridge for the next section of the bridge to be built following this stage. 22/11/1959 Keith's notes - 939 first passenger tram over Flinders St overpass over King St. Slide Number K(l)(287), K(m)(275), K(m)(278), K(m)(287), K(m)(282) respectively.Extensive handwriting on rear in ink giving the photographic details of exposure.trams, tramways, flinders st, track equipment, track construction, trackwork, route 46, testing, king st, tram 371, tram 903, tram 939, tram 350 -
 Ballarat Tramway Museum
Album - Postcards & Photographs - Vic Solomons and others - Australian Tramways, Vic Solomons, 2023
... Card William St Perth WA Unknown Perth 5 Post Card Perth from... Card William St Perth WA Unknown Perth 5 Post Card Perth from ...Contains 184 images of postcards and photographs collected primarily by Vic Solomons of Sydney, with others from the collection of Wal Jack and Warren Doubleday. Covers almost all of Australia's tramway systems. 1 Post Card Hay St Perth Looking East No 3 Unknown Perth 2 Post Card Cars 30 & 90 both on Route 19 pass in Barrack St looking South Perth WA 1935.02.18 Perth 3 Post Card Hay St Looking East Perth WA Unknown Perth 4 Post Card William St Perth WA Unknown Perth 5 Post Card Perth from Shaftsbury Hotel Unknown Perth 6 Post Card Hay St Perth WA Looking East Unknown Perth 7 Post Card Barrack St Perth Unknown Perth 8 Post Card Murray Views No 3 High St Showing Town Hall Fremantle WA Unknown Fremantle 9 Post Card High St Fremantle WA Unknown Fremantle 10 Post Card View of Bolder City Golden Mile in the Background (Section No 1) 1908.08.20 Kalgoolie 11 Post Card Hannan St Kalgoolie 1900.08.19 Kalgoolie 12 Post Card Hannan St Kalgoolie WA (No 2) Unknown Kalgoolie 13 Post Card Intersection Hannan & Maritana Sts Kalgoolie WA Unknown Kalgoolie 14 Post Card Hannan St Kalgoolie Unknown Kalgoolie 15 Post Card Lane Street Bolder City Unknown Kalgoolie 16 Post Card Hobart Double Deck Tram Unknown Hobart 17 Post Card Macquarie St Hobart Unknown Hobart 18 Photo Liverpool Street Hobart Unknown Hobart 19 Photo Hobart 21 Unknown Hobart 20 Photo Hobart 14 in Elizabeth St Hobart Unknown Hobart 21 Post Card Macquarie St Hobart Unknown Hobart 22 Post Card Macquarie St Hobart Tas Unknown Hobart 23 Photo Double Decker Tram 3 at G.P.O. Hobart Tas No 31 Unknown Hobart 24 Post Card Double Decker Tram 19 Hobart Tas A B Series No 24 Unknown Hobart 25 Photo Hobart Municipal Tramways Tas No 95 Unknown Hobart 26 Post Card Elizabeth St Hobart Unknown Hobart 27 Post Card Elizabeth St Hobart Unknown Hobart 28 Post Card Elizabeth St Hobart Unknown Hobart 29 Post Card Elizabeth St Hobart Tas Unknown Hobart 30 Post Card HMT 21 with crew at Beach Road Terminus Unknown Hobart 31 Post Card HMT 9 & another with crew at Beach Road Terminus. Front cover photo of Destination GPO 1921.01.00 Hobart 32 Post Card Cascade Road and Mount Wellington Hobart Unknown Hobart 33 Post Card Elizabeth St Hobart Unknown Hobart 34 Post Card Elizabeth St Hobart Unknown Hobart 35 Post Card Elizabeth St Hobart 1915.04.07 Hobart 36 Post Card Macquarie St Hobart Tas Unknown Hobart 37 Post Card Macquarie St showing Post Office Hobart 1908.03.12 Hobart 38 Post Card Hobart Municipal Tramways 21 Unknown Hobart 39 Post Card Elizabeth St Hobart Tas Unknown Hobart 40 Post Card Liverpool Street Hobart Unknown Hobart 41 Post Card Electric Tram Launceston Tas 446 W J Little Photo 1919.02.08 Launbceston 42 Post Card Launceston Tram no 3 1911.08.30 Launbceston 43 Post Card Launceston Tram no 3 passes tram No 1 Unknown Launbceston 44 Post Card Tram 6 at Trevallyn a popular suburb Launceston Tasmania Unknown Launbceston 45 Post Card Tram 7 at Trevallyn Road Terminus Launceston Tasmania Unknown Launbceston 46 Post Card Tram 4 in Brisbane St Launceston Unknown Launbceston 47 Post Card Tram 9 in Brisbane St Launceston Tasmania Unknown Launbceston 48 Post Card Camerom Street Launceston Tasmania Unknown Launbceston 49 Post Card Murray Views No 15 Jetty Road Glenelg Terminus 1962-02-08 Adelaide 50 Post Card Bay Tram at Jetty Road Terminus Glenelg SA Unknown Adelaide 51 Post Card Tram 3 in King William Street Adelaide S Aust Unknown Adelaide 52 Post Card Valentine Series No 3065 The Old Horse Tram Victor Harbour Unknown Victor Harbour 53 Post Card Bourke Street Melbourne with Cable Car Looking East 1904.04.25 Melbourne 54 Post Card Opening of New Electric Tramway Elsternwick 1913-11-13 Melbourne 55 Post Card Cable trams in Clarendon St Sth Melb Unknown Melbourne 56 Post Card Pall Mall from Charing Cross Bendigo Unknown Bendigo 57 Post Card Tram 4 & 7 pass at The Fountain and Mitchell Street Bendigo Vic Rose Series P 3198 Unknown Bendigo 58 Post Card M&MTB 133 at Charing Cross bound for Eaglehawk Bendigo Vic Murray Views No 45 Unknown Bendigo 59 Post Card Pall Mall Bendigo Vic Unknown Bendigo 60 Post Card Charing Cross & Mitchell St Bendigo Trams passing 1919.00.00 Bendigo 61 Post Card Pall Mall Looking East Unknown Bendigo 62 Post Card Electric Trams and City Hotel Bendigo Vic Unknown Bendigo 63 Post Card Moorabool Street Geelong V 23 Unknown Geelong 64 Post Card Murray Views No 3 Moorabool Street Geelong Vic Unknown Geelong 65 Post Card The Rose Series P 2487 Ryrie Street Geelong Vic Unknown Geelong 66 Post Card Southern Cross Series 2696 Ryrie Stret Geelong Vic Unknown Geelong 67 Post Card The Rose Series P 1490 Ryrie Street Geelong Vic 1920-03-04 Geelong 68 Post Card Valentine Series No 1568 Lower Sturt Street Ballarat Unknown Ballarat 69 Post Card Rose Series P 1710 Sturt Street Ballarat Victoria Unknown Ballarat 70 Post Card Sturt Street Ballarat Victoria Unknown Ballarat 71 Post Card Horse Tram In Sturt Street Ballarat 1905.11.10 Ballarat 72 Post Card Sturt Street Ballarat Looking North-West Unknown Ballarat 73 Post Card Shoppes Square Sturt Street Ballarat Looking North Unknown Ballarat 74 Post Card Junction Sturt and Lydiard Streets Ballarat 1909-09-01 Ballarat 75 Post Card The Electric Supply Co Souvenir Tram Ticket No 3085of the opening of Electric System August 18 1905 1905.08.18 Ballarat 76 Post Card Sturt Street Ballarat Victoria 1907.11.25 Ballarat 77 Post Card Off to the Gardens Electric Tram Ballarat Unknown Ballarat 78 Post Card Sturt Street Ballarat 1907.04.16 Ballarat 79 Post Card Sturt Street Ballarat Looking East Electric tram with Double Deck Trailer 1911.04.17 Ballarat 80 Post Card Sturt Street Ballarat Looking East Unknown Ballarat 81 Post Card Sturt Street Ballarat Looking West 1911.03.01 Ballarat 82 Post Card Town Hall and Sturt Street Ballarat Unknown Ballarat 83 Post Card Lydiard Street Ballarat 1906.11.23 Ballarat 84 Post Card Looking North along Adelaide Street from George Street Brisbane Sidues Series No 764 Unknown Brisbane 85 Post Card Looking South along Queen Street from the Creek Street Intersection Brisbane Qld Sirues Series No 1379 Unknown Brisbane 86 Post Card George Street from near Supreme Court Brisbane Unknown Brisbane 87 Post Card Queen and Eagle Streets Brisbane 1907.07.04 Brisbane 88 Post Card Queen Street showing His Majesty’s Theatre Brisbane Unknown Brisbane 89 Post Card Queen Street Treasury Building 1908.01.20 Brisbane 90 Post Card G P O and Queen Street Brisbane Unknown Brisbane 91 Post Card Queen Street Brisbane Looking from Wharf Street Unknown Brisbane 92 Post Card Customs House Brisbane 1905.02.16 Brisbane 93 Post Card Queen St Brisbane 1905.09.16 Brisbane 94 Post Card Queen St Brisbane 1907.11.19 Brisbane 95 Post Card Treasury Buildings Brisbane Unknown Brisbane 96 Post Card Queen and Eagle Streets Brisbane Unknown Brisbane 97 Post Card The Valley Corner Brisbane Unknown Brisbane 98 Post Card Brisbane Queen Street opposite General Post Office Unknown Brisbane 99 Post Card North Quay and Milton Beach Brisbane Q Unknown Brisbane 100 Post Card Victoria Bridge Brisbane South Side 1907.08.14 Brisbane 101 Post Card Victoria Bridge Brisbane Unknown Brisbane 102 Post Card Breakfast Creek Bridge Brisbane Q Unknown Brisbane 103 Post Card Melbourne Street Station South Brisbane Queensland Unknown Brisbane 104 Post Card General Post Office Queen Street Brisbane 1955.09.23 Brisbane 105 Post Card Customs House Brisbane 1904.11.04 Brisbane 106 Post Card Queen St Brisbane 1919.11.00 Brisbane 107 Post Card Queen St Brisbane Sidues Series No 627 Unknown Brisbane 108 Post Card Creek Street Brisbane Queensland Unknown Brisbane 109 Post Card Customs House and Garden Reach Brisbane Queensland 1910.00.08 Brisbane 110 Post Card Queen and Creek Streets Brisbane 1909.06.07 Brisbane 111 Post Card Queensland National Bank andd Queen Street Brisbane Queensland Unknown Brisbane 112 Post Card Queen Street and Treasury Buildings Brisbane 0000.09.07 Brisbane 113 Post Card Queen Street showing “Courier” Buildings Brisbane Unknown Brisbane 114 Post Card Intersection George & Roma Streets Brisbane Q 1916.05.11 Brisbane 115 Post Card Adelaide Street Brisbane Q Unknown Brisbane 116 Post Card G P O Queen Street Brisbane Q Unknown Brisbane 117 Post Card Treasury Building Brisbane 1906.03-20 Brisbane 118 Post Card Queen and Eagle Streets Brisbane 1907.02.01 Brisbane 119 Post Card Queen St Brisbane Unknown Brisbane 120 Post Card Queen St Brisbane Q Unknown Brisbane 121 Post Card Victoria Bridge Brisbane 1906.07.30 Brisbane 122 Post Card An Unusual View showing Head of Queen Street Victoria Bridge & South SideSuburbs Brisbane Q Unknown Brisbane 123 Post Card Petries Bight Brisbane Q Unknown Brisbane 124 Post Card South End Victoria Bridge Brisbane Q Unknown Brisbane 125 Post Card Customs House Brisbane Unknown Brisbane 126 Post Card Photo of toastrack car circa 1910 Unknown Brisbane 127 Post Card Treasury Buildings Brisbane Unknown Brisbane 128 Post Card East Street Rockhampton with Steam Tram & trailer Unknown Rockhampton 129 Post Card Post Office Rockhampton with steam tram Unknown Rockhampton 130 Post Card East Street Rockhampton with Steam Trams Rose Series P 7154 Unknown Rockhampton 131 Post Card William Street Rockhampton Rose Series P 7156 Unknown Rockhampton 132 Post Card Central East Street Rockhampton Q with Steam Trams Unknown Rockhampton 133 Photo Sturt St Ballarat Unknown Ballarat 134 Photo Bridge Street Ballarat Unknown Ballarat 135 Post Card George St Sydney Unknown Sydney 136 Post Card Elizabeth St Sydney Unknown Sydney 137 Post Card Railway Square Unknown Sydney 138 Post Card Sydney Harbor Bridge - pending receipt 139 Post Card Kings Cross - Mowbray Series with description on rear from C Roy G Field Unknown Sydney 140 Post Card Kings Cross - Mowbray Series with description on rear from C Roy G Field Unknown Sydney 141 Post Card Central Railway Station Sydney - Rose Series P6033 1954-01-26 Sydney 142 Post card William Street Darlinghurst looking towards City - Rose Series P6602 unknown Sydney 143 Post Card Circular Quay Sydney - Rose Series P6680 Unknown Sydney 144 Post Card View at Manly NSW - Rose Series B1003 Unknown Sydney 145 Post Card Hunter St Newcastle NSW - Rose Series P7843 Unknown Newcastle 146 Post Card Bank Corner Newcastle NSW - Mowbray Series No. 155 Unknown Newcastle 147 Post Card Hunter St Newcastle NSW Unknown Newcastle 148 Post Card Criterion Hotel Hunter St Newcastle NSW Unknown Newcastle 149 Photo Horse tram at Newtown Station 1894 to 1898 - PTC photo c1894 Newtown 150 Photo Steam tram motor No 3 at Railway Square 1879 1879 Sydney 151 Photo Railway steam tram c1900 with a horse drawn double deck bus c1900 Sydney 152 Photo Steam motor 5A and doubled deck bus Unknown Sydney 153 Photo Steam motor 53A with detail notes on rear 1922 Sydney 154 Photo Cable tram set at Milsons Point ferry terminal c1900 Sydney 155 Photo Early Sydney electric car - Ocean St - Rose Bay Unknown Sydney 156 Photo George St looking souoth c1905 c1905 Sydney 157 Photo Tram 165 at Circular Quay Unknown Sydney 158 Photo Tramcar ferry or transporter at The Spit Unknown Sydney 159 Photo tram 882 George St at Marti Place, 1937 1937 Sydney 160 Photo Tram 826 Railway Sq area Unknown Sydney 161 Photo Railway Sq in background, Broadway with double decker bus and toastrack car late 1930s Sydney 162 Photo Coupled St Pitt St? - photo Ben Parle Feb. 1950 Sydney 163 Photo Electric tram No. 2 - North Sydney with side trolley pole running Unknown Sydney 164 Photo George St - Horden's Corner Unknown Sydney 165 Photo George St at Martin Place c1920 Sydney 166 Photo Castlereagh St Sydney c1928 c1928 Sydney 167 Photo Railway Sqare c1920 c1920 Sydney 168 Photo Darling St Countereweight Unknown Sydney 169 Photo Trolley bus depot Unknown Sydney 170 Photo Trolley bus No. 14 Unknown Sydney 171 Photo Newcastle Railway Station with steam tram - Wharf Road?? Unknown Newcastle 172 Photo High St West Maitland - steam tram Unknown Maitland 173 Photo High St West Maitland - steam tram Unknown Maitland 174 Post Card Argent St near tram terminal Broken Hill NSW c1900 Broken Hill 175 postcard Argent St looking south Broken Hill - with Ken Magor's notes on rear Unknown Broken Hill 176 Photo Toronto - steam tram 61A Unknown Toronto 177 Photo 124A trial run 1911? Sutherland - Cronulla line 1911 Sutherland 178 Photo 103A at a tram stop Unknown Sydney 179 Photo Cable tram set at Crows Nest terminus grip car 12, trailer 22 Unknown Sydney 180 Photo Cable tram Queens Square Sydney 1903 Sydney 181 Photo cars 2078 and 2077 Chatswood late 1950s Sydney 182 Photo car 1877 Balmain area late 1950s Sydney 183 Photo Trolley bus - Rockdale destination Late 1950s Sydney 184 Photo Broken Hill steam tram - motor 18A North Tram Unknown Broken Hill 185 Photo Millars Point Sydney NSW - ferry/tram interchange, unknown Sydney All items imaged including the rear or back where there was writing of information. All files stored on the Museum's Photo Collections directory. Demonstrates through the medium of many images, Australian tramway systems and Ballarat's place in them.Album - heavy card covers, plastic lined with postcard or 6x4 photo sleeves.australia, tramways, postcards, photographs, steam trams, horse trams, cable trams, trolley buses -
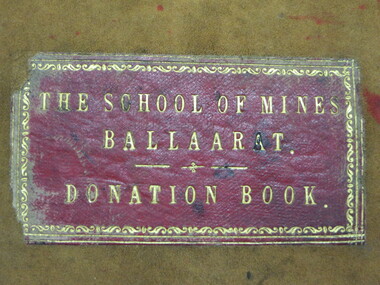 Federation University Historical Collection
Book - Ledger, Ballarat School of Mines Donation Book, 1878 - 1895, 1878-1895
... > 305. C. Retallack, Ballarat
314. William Henry Shaw...> 305. C. Retallack, Ballarat
314. William Henry Shaw ...The Donation Book relates to the Ballarat School of Mines Museum which opened in 1872. Very few of these items are still held by Federation University. The Museum was emptied in the 1960s with items being distrubuted to the Ballarat Historical Society, returned to original lenders (ie Pern Collection), of disposed of. Donations to the Ballarat School of Mines include: 34. M. Hamburger, Ballarat - bunsen burner 41. W.H. Shaw, Phoenix Foundry - 81 nos of 'Engineer' 89. Juvenile Industrial Exhibition Association Committee per Joseph Flude - dies used for striking medals awarded to successful exhibits. 165. Ferdinand Von Mueller 172 Ferdinand Von Mueller o hortus siccus 6 197. James Stoddart 203. Edward Gazzard, North Creswick - Model of safety Cage invented and made by donor 218. E. Morey 222. Alfred Lestor 228. J.J. Sleep, Ballarat, patent Lever escarpment Clock (displayed in laboratories) 237. Bernard Smith (Warden) per favor of James M. Bickett - Bust of Mr John Lynch, Smythesdale. (Note: This item is not in the present Federation University Historical Collection) 241. James Oddie, J.P., Ballarat, Copy of 'the Chemist and Druggist' 267. John Lynch Junior, Smythesdale - Cast of "Golden Age" nugget, found at Browns by Co-operative party, 12 men. Weight 75 oz, 12 dwts, 12 grs.(Note: This item is not in the present Federation University Historical Collection) 270. Isaac Davis, Main Road, Ballarat 294. W. H. Shaw, Ballarat - 94 nos of 'The Engineer' 295. Rivett Henry Bland, Clunes - Specimen of water pipe from the Port Phillip Company's mine encrusted with carbonites of lime and magnesium (Note: This item is not in the present Federation University Historical Collection) 299. D.J. Williams, Queenscliff - 1 case shells from Fiji 305. C. Retallack, Ballarat 314. William Henry Shaw, Ballarat - glass case 323. W. Longley, Ballarat - Botanical Specimen (Note: This item is not in the present Federation University Historical Collection) 327. W. H. Angove, Perth 337. J. Cosmo Newbery, B Sc, Melbourne 343. James Hector, M.D., New Zealand 353. R.S. Mitchell, Ballarat - 8 specimens live plants (medicinal) (for the Ballarat School of Mines Garden) 355. W. Magee, Ballarat - Sugar cane plants and seeds (for the Ballarat School of Mines Garden) 363. James Hector, Wellington, new Zealand 371. William Wesley, 28 Essex St, Strand, London - Scientific book circular 380. Jacob Upfold (deceased) per favor of the trustees - bequest of steam engine indicator and belongings (boothe and case) 381. Joseph Mitchell, 22 Macarthur Street, Ballarat - sod of turf cut from Warboy's High Few, County Huntingdon, England, 1872. 394. W.H. Barnard 401. James Orr 418. F. Ratte, Sydney 440. Alfred Mica Smith, Sandhurst (Bendigo), Inaugural Address, delivered to the Bendigo School of Mines Science Society, June 20. 1881 by P.H. Macgillivray, MA, MRCS, FLS, President. (Note: This item is not in the present Federation University Historical Collection) (Note: This item is not in the present Federation University Historical Collection) 446. C. C. Shoppee, Ballarat 462. Dr Bunce, Ballarat 468. James Black, Mining Manager "Kerrit Bureet' 479. J.S. North, Mining Manager No. 2 Queen Co, Black Hill Ballarat. 505. Smith Tibbitts - A block of ancient leaves from the Nigtingbool Estate near Haddon on the Ballarat district from shaft 80 feet deep. (Note: This item is not in the present Federation University Historical Collection) 512. F.W. Niven, Ballarat - "A Handy Book to Tasmania" 522. James Hector, Wellington, New Zealand 549. C.E. Grainger, Manager Ballarat Woollen Mills - samples of dyed and raw wools 600. (4 July 1882) Henry Sutton, Ballarat - 13th annual report of the Aeronautical Society of Great Britain; 2 papers from the Proceedings of the Royal Society, nos 217 and 218- 1882, "One a new electrical storage battery by Henry Sutton, Ballarat, Victoria. 608. H. Glenny J.P., Ballarat - Specimen of Asbestos from Tasmania 610. M.H. Edelmann, Munich, Germany 674. W.H. Shaw, Phoenix Foundry - Steel boring 95 feet long taken from bed-plate of locomotive engine. 675 - H.R. Hancock J.P. pre favour Mr James Pryor, Moonta Mines 676. Baron Ferdinand Von Mueller KCMG, etc, Melbourne 678. E.F.A. Gaunt, Royal Navy, H.M.S. Nelson, per favour Lyde Gaunt - Specimen of manganese ore from the mines - Russell - New Zealand 728. Dr Pinnock, Ballarat 760. Simon Morrison, Ballarat 784. James Shugg, Hamilton - 1 case fossils from Muddy Creek, near Hamilton. (Note: This item is not in the present Federation University Historical Collection) 786. W. Bolam (inspector of Schools), Melbourne - 2 spears and 1 fishing prong Fijian 806. James Oddie, Ballarat 708. Henry G. Hanks, San Francisco 786. W. Bolam (Inspector of Government Schools Melbourne) - 2 spears and one fishing prong Fijian 824. Henrique Gorceixm Onro Preto, Brazil 840. W. Laplau, Ballarat - Gas furnace with a large assortment of fittings, also large gas holder and oil-heating apparatus 854. Robert Borch, Main Road, Ballarat - Improved safety chain (Note: This item is not in the present Federation University Historical Collection) 928. James Oddie 944. James P. Munroe, Registrar, Massachusetts 952. L.E. Cutter per favour of Mr F.J. Martell - Unexploded bomb shell from the Eureka Stockade 957. H. Glenny, Hobart 962. George Hart, Ballarat - eagle 976. Henry Sutton, Ballarat - 1 volume "Plattner on the Blowpipe" 978. J.W. Flatow, 45 Madeline Street, Carlton, Melbourne 984. Charles C Shoppee Ballarat - Copies of ancient coins 989-95 - Specimens from Moonta, South Australia 985. W.H. Wooster BOlwarra - books microscope related 1179. James Oddie - Live hedgehog 1181 C. Crisp, Bacchus Marsh, Portugal Copper Coin, 1785 1248 James Oddie, Solomon Islands - Bow and arrows & Spears 1285. C. Colyer, Smythesdale 1327. John L. McKenna, Smeaton - Fragment of Stone Axe. 1395. Mrs O. Skoglund, Nerrina 1428. Daniel Brophy, Ballarat - Collection of mineral specimen form Silverton (Collected by Mrs James Murray) 1442. Henry Sutton, Ballarat - Specimens of fossil fruits collected at Haddon by Charles Brown. 1444. Mining Department - Underground Mine Workings from Band of Hope and others. 1517. W.H. Wooster, Ballarat 1592. Bishop of Ballarat - Stone Axe and other native items 1669. H. McHaffier, Napoleons - 1 Spanish silver coin 1681. James Oddie, Dunedin 1688. W. Burbridge, Ballarat - Native Tomahawk from Metung 1708. A. Doepel, Ballarat 1712. Marty Guerin, Ballarat 1735. Bella Guerin. M.A., Ballarat - Copy Wide Awake Vol 1 No 7 May 28th 1887 and The Bulletin, March 19th 1887. 1747. Bella Geurin M.A., Ballarat - Copy Wide Awake Vol 1 No 8 June 4 1887 1751. Bella Geurin M.A., Ballarat - Copy Wide Awake Vol 1 No 9 June 11th 1887 1842. Linnean Society, London England - Charter, By Laws, Proceedings, Transactions, Journals 1853. W.J. Corbould, Silverton, NSW - chloride of silver from Pinnacles, Broken Hill, Silverton 1888. W. J. Corbould, Sample of metallic silver from Silverton, NSW 1928. E. Morey, Ballarat - Steam Engine 1937. Henry Sutton A.S.I.E., Ballarat - Plate Electric Machine, chimes and Sportman (number crossed out) 1951. Henry Sutton A.S.I.E., Ballarat - Plate Electric Machine, chimes and Sportman 1981. Harrie Wood (per W.H.B.[Barnard?), Ballarat 1996. W.H. Shaw, Phoenix Foundry - Papers "The Vict Engineer July 1887, May June July August 1888 and others 2014. Harrie Wood, Sydney - Report Department of Mines, 18872027. W.J. Bechervaise - Copy of Book by Baldwin Spencer 2034. A.G. Randall - Native Hatchet 2045. W.H. Corbould, Silverton, Collection of silver ores 2051. Fowler, Tarnagulla - Native Tomahawk 2123-2131. James Oddie, London 2163. Roff. F. Taplier, Sturt Street - Native Tomahawk 2178. Syd. Johnson, Meredith - Native Tomahawk, Greenstone 2184. Mr Tupp for Hall - Native Spear and Club 2292. Emmanuel Steinfeld, Melbourne 2313. A. Atwood, Rowlands Factory, Dana Street 2361. Dr Pinnock, Ballarat - Collection of Living Sponges 2363. P. Curnow, Ballarat - Piece of wood with stone naturally embedded 2364. R. Dowling, Waubra 2875. Mrs C, Flude, Ballarat - Collection of (5) mineral specimens 3460. Joseph Weir, Ballarat - Sample of rolled Annibar 3466. J. Hart, Ballarat - Native Shield - supposed to have been made by King Billy 4784. Mr. O. Woolnaugh, Pleasant Street - Four Native Tomahawks 6469. L. Balhausen, Ballarat 3472. John English, Smeaton - three samples of auriferous wash dirt 3607. Columbia College, New York - Handbook of Information of the Columbia College in the Ciry of New York 1892-3. 3672. L.A. Samuels, Bendigo 3724. P. Paperhagen 3736. The Late Rivett Henry Bland per John Noble Wilson - Collection of mineral specimens and fossils 3752. G.A. Denny, South Africa 3755. J. Carroll, Ballarat - Specimen of Native bread found in Ballarat East. 4765. J. Donnelly, Springs, Bungaree I. Fowler, Coolgardie, Specimen of Gold Bearing Quartz ballarat school of mines, doantions, museum, ballarat school of mines museum, safety cage, botanical garden, materia medica garden, library, bella guerin, james oddie, phoenix foundry, w.h. shaw, john lynch, henry sutton, aboriginal, stone axe, tomahawk, geological specimens, moonta, fedinand krause, oddie collection of minerals, thomas bath, spears, solomon islands, king billy, bows and arrows, ancient coins, birds eggs, snakes -
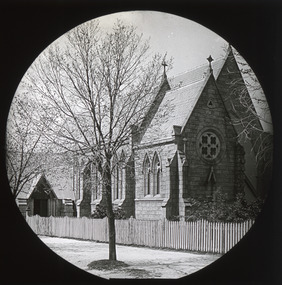 The Beechworth Burke Museum
Photograph - Lantern Slide, c1900
Taken in the year 1900, this glass slide captures an image of St. Joseph's Church, a Roman Catholic Church that is still present today at 9 Church Street, Beechworth. This was one of many churches that was established in Beechworth during the second half of the nineteenth-century. This trend began with a focus on Anglican faith; however, in the early 1850s, Father Patrick Smyth, a priest from Maynooth, Ireland, advocated for the establishment of a Roman Catholic Church in the town. Roman Catholicism quickly grew to be the second largest religious group in the area; this was primarily due to the work of Father William Tierney, a priest from Dublin who arrived in Beechworth in 1859. Tierney personally fostered the growth of many Catholic schools and churches in Beechworth, as he viewed it to be a significant area for the prosperity of the religion. St. Josephs Church was officially established in 1866, with the Bishop of Melbourne, Dr Goold, laying the foundational stone of the building. The estimated cost of the building in its entirety was approximately twenty-thousand pounds. Further additions to the building - including a second aisle, tower and spire - were proposed for the church, but were ultimately never built. Lantern slides, sometimes called 'magic lantern' slides, are glass plates on which an image has been secured for the purpose of projection. Glass slides were etched or hand-painted for this purpose from the Eighteenth Century but the process became more popular and accessible to the public with the development of photographic-emulsion slides used with a 'Magic Lantern' device in the mid-Nineteenth Century. Photographic lantern slides comprise a double-negative emulsion layer (forming a positive image) between thin glass plates that are bound together. A number of processes existed to form and bind the emulsion layer to the base plate, including the albumen, wet plate collodion, gelatine dry plate and woodburytype techniques. Lantern slides and magic lantern technologies are seen as foundational precursors to the development of modern photography and film-making techniques.This glass slide captures social and historical significance as it represents the development of Beechworth as a prosperous and thriving town; a development that occurred during the second half of the nineteenth-century. It also shows the development of religious institutions in the area, specifically the growth of Catholicism. Thin translucent sheet of glass with a circular image printed on the front and framed in a black backing. It is held together by metal strips to secure the edges of the slide.burke museum, beechworth, lantern slide, slide, glass slide, plate, burke museum collection, photograph, monochrome, churches beechworth, st. joseph's church, catholicism beechworth, roman catholic churches beechworth, father patrick smyth, father william tierney -
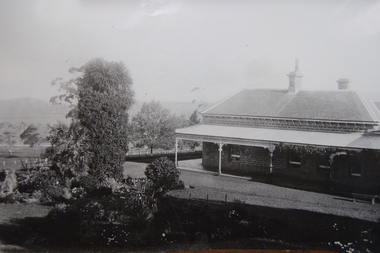 Camperdown & District Historical Society
Photograph - Renny Hill homestead, Camperdown, c1890s
''Renny Hill'', built c1876, was the home of William Andrew Taylor (1849-1927) and Isabella Park Taylor, nee Dawson (1842-1929). Isabella was a friend to First Nations people and together with her father, James Dawson, recorded their languages and customs. William Taylor was a farmer, Councillor and civic leader. In 1883 he gifted the world's oldest statue of Robert Burns to the people of Camperdown.Black and white image of ''Renny Hill'' homestead, Camperdown Renny Hill built 1876? Built for Isabella Park (Dawson) Taylor and William Taylormt sugarloaf, mount sugarloaf, cdhs, renny hill, djargurd wurrung, djargurdwurrung, cdhsfirstnations -
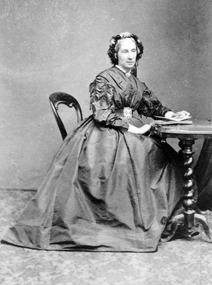 Camperdown & District Historical Society
Photograph - Isabella Taylor (nee Dawson), c1890
Isabella Park Taylor, nee Dawson (1842-1929), friend of Western Victorian First Nations people, and student of their languages and customs. Isabella grew up at "Kangatong" (1844-1866) in the company of First Nations people and became fluent in their languages. With her father, James Dawson, she wrote the book "Australian Aborigines" (1881). She married William Andrew Taylor in 1877 and they built a fine homestead on their property at "Renny Hill'' near Camperdown, Victoria. Together they had two children, Effie, born 1878 and Katherine in 1880.Studio portrait of Isabella Taylor (nee Dawson) sitting at an occasional table.cdhs, cdhsfirstnations, djargurd wurrung, djargurdwurrung