Showing 6 items matching " tram 389"
-
 Melbourne Tram Museum
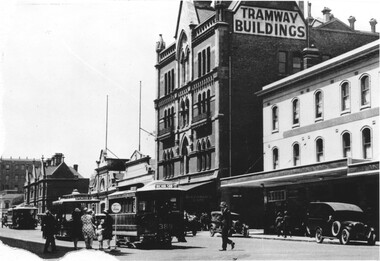
Photograph - Cable tram 389 Bourke St, late 1930s
... Cable tram 389 Bourke St...Photo of a cable tram set, trailer 389 at the Bourke St terminus shortly after its arrival. ...Melbourne Tram Museum 8 Wallen Road Hawthorn melbourne Photo of a cable tram set, trailer 389 at the Bourke St terminus shortly after its arrival. ...Photo of a cable tram set, trailer 389 at the Bourke St terminus shortly after its arrival. Passengers are waiting in the Safety Zone, for the shunting to be completed before returning to Nicholson St. in the background are the Bourke St West Police station, Hudson's Stores, the MTO Co. Head office building and Carlyons Hotel. Under the awning of the MTOC Head office building is Buchanan;s Cafe. Photo late 1930sYields information about the Bourke St cable tram terminus, late 1930sBlack and white print with a plain backtrams, tramways, tram 306, cable trams, bourke st -
 Melbourne Tram Museum
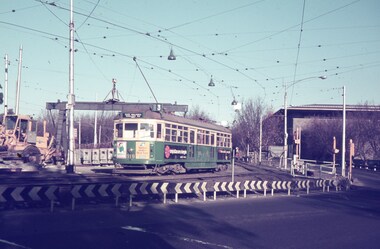
Slide - Set of 7, Keith Caldwell, 17/06/1971 12:00:00 AM
... ... tram 389...In the background is the National Gallery of Victoria building. .2 - W2 819 outbound, route 8 Toorak, with Shrine of Remembrance in the background. .3 - W2 389 ditto for Glen Iris, Route 6 .4 - W2 349 outbound for East Brighton, route 64 and inbound W2 633, city, route 67. .5 - SW6 854 inbound using the new track on the bridge, but temporary track remains in front of the tram. ...Melbourne Tram Museum 8 Wallen Road Hawthorn melbourne Trams tramways St Kilda Rd Temporary Track Trackwork Overhead Alexandra Ave Princes Bridge Bridges Route 3 Route 67 Route 64 Route 8 Route 6 Route 72 W6 class W2 class tram 919 tram 905 tram 819 tram 389 tram 349 tram 633 tram 854 tram 768 tram 845 tram 854 .1 has in pencil "17.6.71" and "Alex Av Opass constrn" and .7 "20.6.71" Set of seven Agfa colour slide, blue and white plastic mount, photo by Keith Caldwell of a track deviation during the construction of the Alexandria Avenue underpass at the north end of St Kilda Road. ...Set of seven Agfa colour slide, blue and white plastic mount, photo by Keith Caldwell of a track deviation during the construction of the Alexandria Avenue underpass at the north end of St Kilda Road. Shows the deviation, temporary track ("on the fly), overhead works and after the bridge has been completed, the permanent track is brought into use. All have the Arts Centre in the background. Slides 1 to 4 - 17/6/1971, 5 to 7 - 20/6/1971, after the change over from the temporary track to the permanent track. .1 - W6 919 outbound, East Malvern Route 3 - has a large gantry beam in the background and an advertisement for briquettes and Norton Bear tape. In the background is the National Gallery of Victoria building. .2 - W2 819 outbound, route 8 Toorak, with Shrine of Remembrance in the background. .3 - W2 389 ditto for Glen Iris, Route 6 .4 - W2 349 outbound for East Brighton, route 64 and inbound W2 633, city, route 67. .5 - SW6 854 inbound using the new track on the bridge, but temporary track remains in front of the tram. Overhead crews at work. W5 768 following. Both trams are travelling on the wrong line or "bang road" Tram have a Stillwell Ford and Ferris Car radio adverts. .6 - SW6 905 inbound, route 67. Also running wrong line. In the background is a rail mounted overhead trolley tower and Bedford truck MZR129. .7 - SW6 845 in bound route 8 followed by SW6 854, route 72. Both trams are running on the wrong line. An excavator in the background is working on removing the deviation track. 845 has various adverts including one for Uniroyal Tyres..1 has in pencil "17.6.71" and "Alex Av Opass constrn" and .7 "20.6.71"trams, tramways, st kilda rd, temporary track, trackwork, overhead, alexandra ave, princes bridge, bridges, route 3, route 67, route 64, route 8, route 6, route 72, w6 class, w2 class, tram 919, tram 905, tram 819, tram 389, tram 349, tram 633, tram 854, tram 768, tram 845, tram 854 -
 Melbourne Tram Museum
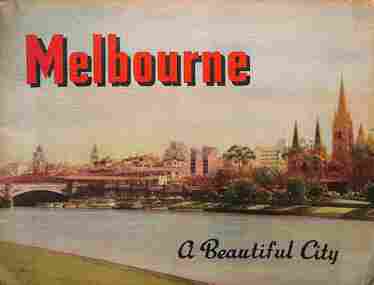
Book, Nucolorvue Publishing, "Melbourne - a Beautiful City", c1953
... Has photos of Melburne landmarks, Collins St, Flinders St, Bourke St (with cable tram track), Flinders St Station, trams in streets, (W2 389, W5 777) St Kilda Road, the various parks, Royal Melbourne Hospital, St Kilda Beach, Yarra River, and Elizabeth St....Has photos of Melburne landmarks, Collins St, Flinders St, Bourke St (with cable tram track), Flinders St Station, trams in streets, (W2 389, W5 777) St Kilda Road, the various parks, Royal Melbourne Hospital, St Kilda Beach, Yarra River, and Elizabeth St. ...Published by Nucolorvue Productions of Mentone Melbourne, c1953 featuring colour photos of many locations in Melbourne, including an introduction. Has photos of Melburne landmarks, Collins St, Flinders St, Bourke St (with cable tram track), Flinders St Station, trams in streets, (W2 389, W5 777) St Kilda Road, the various parks, Royal Melbourne Hospital, St Kilda Beach, Yarra River, and Elizabeth St.Demonstrates a Nucolorvue production about Melbourne in the early 1950s.Book - 36 pages, colour printed, centre stapled. Printed on stippled paper.Has the stamp of "Queensland Book Depot, 61 Adelaide St Brisbane" on the inside front cover and pencil notes.mmtb, trams, tramways, souvenirs, melbourne, travel books -
 Melbourne Tram Museum
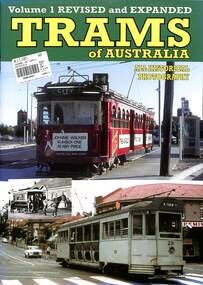
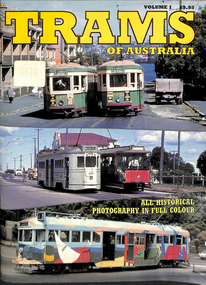
Book, Topmill Pty Ltd, Trams of Australia Vol 1 revised - Topmill
... Includes Melbourne trams 670, 611, 613, 106, 469, 25, 389, 214, 1008, 234, 975, 814, 279, 2112, 812, 442, 917, 2027. ...Includes Melbourne trams 670, 611, 613, 106, 469, 25, 389, 214, 1008, 234, 975, 814, 279, 2112, 812, 442, 917, 2027. ...Book published by Topmill, featuring images and background information on tram types including horse, cable, steam and electric trams. Has photos of Sydney, Brisbane, Melbourne, Adelaide, Hobart, Ballarat, Bendigo, Geelong, Rockhampton and Kalgoorlie. Many in colour. Includes photographs of tram museums. Includes Melbourne trams 670, 611, 613, 106, 469, 25, 389, 214, 1008, 234, 975, 814, 279, 2112, 812, 442, 917, 2027. Melbourne photographs by Ray Marsh and Ken Smith.Book - 40 full colour A4 pages + card cover, centre stapled, titled "Trams of Australia Vol. 1" revised and expanded.trams, tramcars, melbourne, sydney, brisbane, adelaide, tram museums, ballarat, bendigo -
 Melbourne Tram Museum
Book, Topmill Pty Ltd, "Trams of Australia Vol. 1", c1985
... Melbourne trams featured are: W2 234 Transporting Art L106 Y469 Z25 W2 389 V 214 W6 975 W7 1008 SW6 936 and 956 SW5 814 A279 B2 2112 SW5 812 W2 442 - Restaurant Tram B2 2112 SW6 911 B2 2017 Melbourne photos by Ray Marsh, other photos by Arthur Perry and Noel Reed. ...Melbourne trams featured are: W2 234 Transporting Art L106 Y469 Z25 W2 389 V 214 W6 975 W7 1008 SW6 936 and 956 SW5 814 A279 B2 2112 SW5 812 W2 442 - Restaurant Tram B2 2112 SW6 911 B2 2017 Melbourne photos by Ray Marsh, other photos by Arthur Perry and Noel Reed. ...Book - 32 full A4 colour pages + card cover, titled "Trams of Australia Vol. 1", featuring trams in Melbourne, Sydney, Brisbane, Adelaide, and museum operations in Ballarat, Bendigo, Brisbane and Sydney. Melbourne trams featured are: W2 234 Transporting Art L106 Y469 Z25 W2 389 V 214 W6 975 W7 1008 SW6 936 and 956 SW5 814 A279 B2 2112 SW5 812 W2 442 - Restaurant Tram B2 2112 SW6 911 B2 2017 Melbourne photos by Ray Marsh, other photos by Arthur Perry and Noel Reed. See Reg Item 6186 for a revised and enlarged version.trams, tramways, melbourne, sydney, brisbane, adelaide, ballarat, bendigo, w2 class, transporting art, sw5 class, sw6 class, w7 class, restaurant tram -
 Melbourne Tram Museum
Slide - Set of 6, Keith Caldwell, March 1967?
... trams passing the intersection of Flinders and Swanston St. Slides undated - c1967/68, possibly 3/68, aligns with similar scene and time on Reg Item 4315 .1 - W4 670 crossing Flinders St with both the driver and conductor in the view. Has destination of Hanna St. .2 - L102 crossing route 61 to South Caulfield Junction. Has adverts for Tolley's Brandy and a fast courier. In the background is SW6 940 (University 2A) and W2 389...trams passing the intersection of Flinders and Swanston St. Slides undated - c1967/68, possibly 3/68, aligns with similar scene and time on Reg Item 4315 .1 - W4 670 crossing Flinders St with both the driver and conductor in the view. Has destination of Hanna St. .2 - L102 crossing route 61 to South Caulfield Junction. Has adverts for Tolley's Brandy and a fast courier. In the background is SW6 940 (University 2A) and W2 389 ...Set of six Agfa colour blue white plastic mount slides, photo by Keith Caldwell of trams passing the intersection of Flinders and Swanston St. Slides undated - c1967/68, possibly 3/68, aligns with similar scene and time on Reg Item 4315 .1 - W4 670 crossing Flinders St with both the driver and conductor in the view. Has destination of Hanna St. .2 - L102 crossing route 61 to South Caulfield Junction. Has adverts for Tolley's Brandy and a fast courier. In the background is SW6 940 (University 2A) and W2 389? (East Malvern, route 4D) .3 - W3 668 to South Melbourne Beach, route 1 .4 - W3 669, route 1 to South Melbourne Beach, has advert for White Crow sauce. .5 - W2 627, North Balwyn with other trams at the Swanston St stop, including a SW6 on route 64 .6 - a long line up of up to 9 trams northbound at the Swanston St stop outside Flinders St Station, led by SW6 917 (University, route 64) with adverts Suptuned, Sony and "take my advice" featuring an owl. Following is another SW6, 913? with adverts for Tiger Paw, also a route 64. In the background is the Flinders St station awing with a Craven Filer cigarette advert.. Photos have Young and Jackson, the Classic Restaurant Coffee lounge bar in the view, Coles,.1 - "BXBU" and on .3, .1 also has W4" in ink.trams, tramways, flinders st, swanston st, w4 class, w3 class, l class, sw6 class, w2 class, hanna st, south caulfield, university, route 2a, route 4d, east malvern, st kilda beach, route 1, route 64, north balwyn, tram 670, tram 102, tram 668, tram 669, tram 627, tram 913