Showing 120 items matching "1st australian division"
-
 Warrnambool RSL Sub Branch
Photograph - Photograph of Australian Servicemen training in Egypt in WW1, 1st Australian Division, Australian Imperial Force EGYPT 1914-1915, unknown
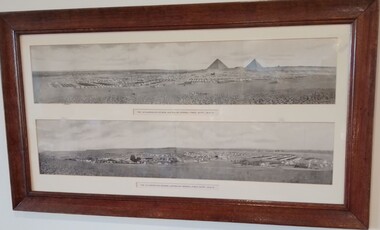
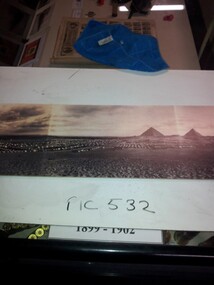
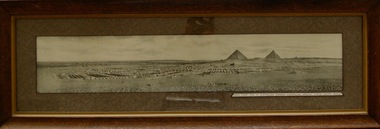
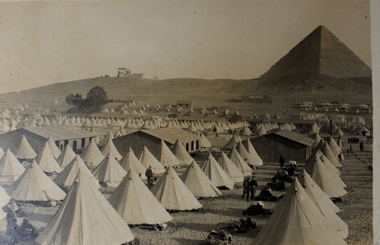
... 1st Australian Division, Australian Imperial Force EGYPT 1914-1915......1st Australian Division...Shows AIF Camp with pyramids in background. 1st Australian Division, Australian Imperial Force EGYPT 1914-1915 Photograph Photograph of Australian Servicemen training in Egypt in WW1 ...WW1 AIF Training Camp in Egypt prior to deploying to Gallipoli The photograph shows the living conditions (Tents). It also shows the vastness of the site and suggests large numbers of servicemen. These two photographs are historically significant. They demonstrate the conditions that the soldiers in training experienced before they arrived at the front-line. They give the modern viewer some understanding of what it was like in Egypt. It is also very significant because it keeps the memories alive. Professionally framed work, two pictures one above the other. Shows AIF Camp with pyramids in background.Brown frameaif training, gallipoli, 1st australian division, egypt, ww1, australian imperial force -
 Bendigo Military Museum
Photograph - PHOTOGRAPH WW1, FRAMED, c.1914-15
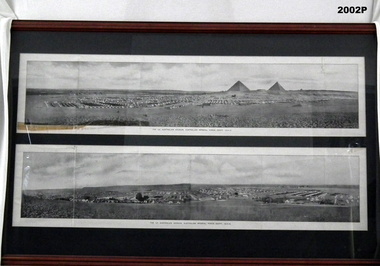
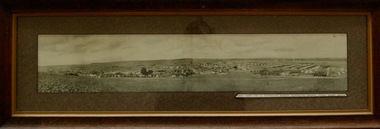
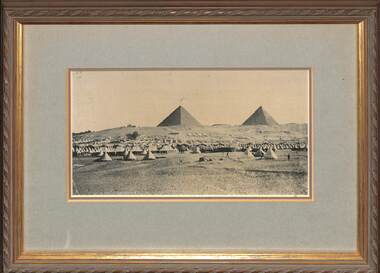
... ...1st Australian Division...Large timber frame, mid brown colour, dark green mount with glass. 2 black &white panoramic photos of the 1st Australian Division, Egypt. Camp scenes with tents, pyramids & sand....Below photos in black ink: "The 1st Australian Division, Australian Imperial Force - Egypt, 1914-15" Handwritten in black felt tip pen: "Property Bendigo RSL Museum, Peter Ball"...Bendigo Military Museum 37 - 39 Pall Mall Bendigo goldfields The two images were part of a book called, The All Australian Memorial as part of a fold out section. the two pages were lose in the book. photography-photographs military history - army eygpt pyramids 1st Australian Division Below photos in black ink: "The 1st Australian Division, Australian Imperial Force - Egypt, 1914-15" Handwritten in black felt tip pen: "Property Bendigo RSL Museum, Peter Ball" Large timber frame, mid brown colour, dark green mount with glass. 2 black &white panoramic photos of the 1st Australian Division, Egypt. ...The two images were part of a book called, The All Australian Memorial as part of a fold out section. the two pages were lose in the book.Large timber frame, mid brown colour, dark green mount with glass. 2 black &white panoramic photos of the 1st Australian Division, Egypt. Camp scenes with tents, pyramids & sand.Below photos in black ink: "The 1st Australian Division, Australian Imperial Force - Egypt, 1914-15" Handwritten in black felt tip pen: "Property Bendigo RSL Museum, Peter Ball"photography-photographs, military history - army, eygpt pyramids, 1st australian division -
 Camberwell RSL Sub-Branch
Photo, Australian 1st Division in Mena Camp, 10 miles from center of Cairo. March 1915, 1915
... Australian 1st Division in Mena Camp, 10 miles from center of Cairo. ...Australian 1st Division Camp at Mena...Interesting photo showing the Mena camp of the Australian 1st Division from two perspectives. The spread was over several miles and some idea of the size can be made from the images of the Pyramids....Camberwell RSL Sub-Branch 403 Camberwell Road Camberwell melbourne Australian 1st Division Camp at Mena Unique Interesting photo showing the Mena camp of the Australian 1st Division from two perspectives. ...Australian 1st Division Camp at MenaUniqueInteresting photo showing the Mena camp of the Australian 1st Division from two perspectives. The spread was over several miles and some idea of the size can be made from the images of the Pyramids. -
 4th/19th Prince of Wales's Light Horse Regiment Unit History Room
Framed Photograph, Mena Camp -The 1st Australian Division, Australian Imperial Force - Egypt, 1914-15, abt 1915
... Mena Camp -The 1st Australian Division, Australian Imperial Force - Egypt, 1914-15...Framed black & white photo of Mena Camp in wood frame Mena Camp -The 1st Australian Division, Australian Imperial Force - Egypt, 1914-15 Framed Photograph ...On mobilisation, the Australian 4th Light Horse Regiment was originally destined to go to the Salisbury Plain UK for training. However the Australian troops were diverted to Egypt to defend the Suez Canal from a threat from Turkey. A camp was set up at Mena, near the Pyramids.Framed black & white photo of Mena Camp in wood frameMay your comradeship be as lasting as that still prevailing in our Regiment. With compliments from 4 ALH. -
 Lilydale RSL Sub Branch
Book - Book (Paperback), Number 106 R E Goode @nd Field Ambulance 1st Australian Division
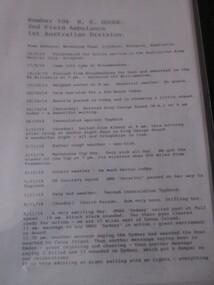
... Number 106 R E Goode @nd Field Ambulance 1st Australian Division...Lilydale RSL Sub Branch 52 Anderson Street Lilydale yarra-valley-and-the-dandenong-ranges Typewritten and photocopied transcription of Diary of Re Goode Book Number 106 R E Goode @nd Field Ambulance 1st Australian Division Book Book (Paperback) ...Typewritten and photocopied transcription of Diary of Re GoodeBook non-fictionTypewritten and photocopied transcription of Diary of Re Goode -
Beechworth RSL Sub-Branch
Print - Picture 11th Battalion Cheop Pyramid 1915, Contingent of the 1st Division Australian Imperial Force AIF / 11th Battalion Before Deployment to Gallipoli / Cheop Pyramid, Sunday 10th January 1915
... Contingent of the 1st Division Australian Imperial Force AIF / 11th Battalion Before Deployment to Gallipoli / Cheop Pyramid, Sunday 10th January 1915...Top centre is the AIF Badge, bottom left is the Battalion Patch, Bottom right is a miniature set of the three medals and centre is the Title " Contingent of the 1st Division Australian Imperial Force AIF / 11th Battalion Before Deployment to Gallipoli / Cheop Pyramid, Sunday 10th January 1915"...Contingent of the 1st Division Australian Imperial Force AIF / 11th Battalion Before Deployment to Gallipoli / Cheop Pyramid, Sunday 10th January 1915"...Top centre is the AIF Badge, bottom left is the Battalion Patch, Bottom right is a miniature set of the three medals and centre is the Title " Contingent of the 1st Division Australian Imperial Force AIF / 11th Battalion Before Deployment to Gallipoli / Cheop Pyramid, Sunday 10th January 1915" Contingent of the 1st Division Australian Imperial Force AIF / 11th Battalion Before Deployment to Gallipoli / Cheop Pyramid, Sunday 10th January 1915 Print Picture 11th Battalion Cheop Pyramid 1915 ...This item was either purchased or donated to the Sub Branch. Apart form being a a very famous picture of the 11th Battalion on the Pyramid Cheop. The 11 battalion was formed in Western Australia has no connection to the people of BeechworthA wooden framed collage of the print of 11th Battalion Before Deployment to Gallipoli on Cheop Pyramid, Egypt, Sunday 10th January 1915. Top centre is the AIF Badge, bottom left is the Battalion Patch, Bottom right is a miniature set of the three medals and centre is the Title " Contingent of the 1st Division Australian Imperial Force AIF / 11th Battalion Before Deployment to Gallipoli / Cheop Pyramid, Sunday 10th January 1915"Contingent of the 1st Division Australian Imperial Force AIF / 11th Battalion Before Deployment to Gallipoli / Cheop Pyramid, Sunday 10th January 1915"https://11btn.wags.org.au/ -
 Running Rabbits Military Museum operated by the Upwey Belgrave RSL Sub Branch
Photograph
... Photo of 1st Australian Division Mena Camp Egypt 1915...Running Rabbits Military Museum operated by the Upwey Belgrave RSL Sub Branch 1 Mast Gully Road Upwey melbourne Photo WW1 Army Photo of 1st Australian Division Mena Camp Egypt 1915 Photograph ...Photo of 1st Australian Division Mena Camp Egypt 1915photo, ww1, army -
 Wangaratta RSL Sub Branch
Document - Citation, Military Medal
... Military Medal 1120 Private Roy Llewellyn Sandow 5th Australian Infantry Battalion attached 1st Australian Divisional Signal Company 1st Australian Division...Private Sandow died of wounds on 22 September 1917 and was buried at Lijssenthoek Military Cemetery. roy llewellyn sandow polygon wood belgium 1917 ww1 5th australian infantry battalion Military Medal 1120 Private Roy Llewellyn Sandow 5th Australian Infantry Battalion attached 1st Australian Divisional Signal Company 1st Australian Division Cream coloured citation with Australian Coat of Arms above black type contained in black border. ...During the attack on Polygon Wood Belgium on 20th September 1917 Pte Sandow displayed conspicuousu gallantry - He was an operator on Amplification and Power Buzzer Station in a chain of communication and in the enemy barrage he patrolled and repaired lines and earths utterly regardless of personal danger. While in the performance of his duty his leg was shot away. He however completed his task. It was largely due to this man's effort that good communication was maintained. Private Sandow died of wounds on 22 September 1917 and was buried at Lijssenthoek Military Cemetery. Cream coloured citation with Australian Coat of Arms above black type contained in black border.Military Medal 1120 Private Roy Llewellyn Sandow 5th Australian Infantry Battalion attached 1st Australian Divisional Signal Company 1st Australian Divisionroy llewellyn sandow, polygon wood, belgium, 1917, ww1, 5th australian infantry battalion -
 Lara RSL Sub Branch
Photograph, Mena Camp Egypt 1914-15
... Mena Camp-1st Australian Division. Australian Imperial Force-Egypt. 1914-15....1st Australian Imperial Forces(AIF) before the Landing at Gallipoli. The camp was located 16Kms from Cairo.Built around Mena House, it was a luxury hotel built next to the Pyramids of Giza (originally spelt Gizeh) supplied with its own purpose built tram-line to Cairo. The centre road up the middle of the camp was known as Artillery Road. The initial force consisted of 20,000 men. The Camp was a major training facility for the 1st Australian Imperial Force in 1014-15. mena camp, egypt, gallipoli, cairo, lara r.s.l. training camps, australian imperial force. Mena Camp-1st Australian Division ...The Mena Camp, Egypt, was the training camp for the 1st Australian Imperial Forces(AIF) before the Landing at Gallipoli. The camp was located 16Kms from Cairo.Built around Mena House, it was a luxury hotel built next to the Pyramids of Giza (originally spelt Gizeh) supplied with its own purpose built tram-line to Cairo. The centre road up the middle of the camp was known as Artillery Road. The initial force consisted of 20,000 men.The Camp was a major training facility for the 1st Australian Imperial Force in 1014-15.Rectangular shaped glass covered picture frame showing a photo of Mena Camp-1914/15.Mena Camp-1st Australian Division. Australian Imperial Force-Egypt. 1914-15.mena camp, egypt, gallipoli, cairo, lara r.s.l. training camps, australian imperial force. -
 Bendigo Historical Society Inc.
Postcard - ACC LOCK COLLECTION: SEPIA PHOTO OF A DAMAGED STRUCTURE, POSTCARD, 1914-1918
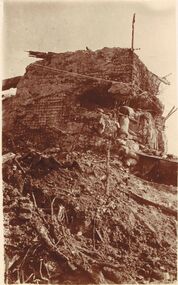
... ... 1st Australia Division...'Pozieres - ("Gibraltar") after capture by 1st Australia Division July 1916'...'Pozieres - ("Gibraltar") after capture by 1st Australia Division July 1916' Postcard ACC LOCK COLLECTION: SEPIA PHOTO OF A DAMAGED STRUCTURE, POSTCARD ...Postcard, WW1, sepia photo of a damaged structure that could have been an observation post or a defensive rocky outcrop at Pozieres. Had been given the nickname 'Gibraltar' judging by the handwritten comment on the back. 'Pozieres - ("Gibraltar") after capture by 1st Australia Division July 1916'postcard, postcard, ww1, france, pozieres, 1st australia division -
 Wangaratta RSL Sub Branch
Card, Christmas 1918, 1918
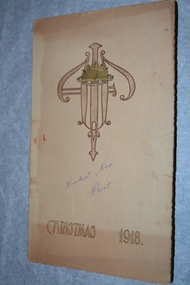
... Christmas Card, 1918 “Fondest Love Bert” handwritten on front Inside - Greetings from 1st Australian Divisional Headquarters Staff - In the Field Sketch of Red Chateau, Villers Bretonneux...Wangaratta RSL Sub Branch 2-4 Templeton Street Wangaratta high-country Christmas Card, 1918 “Fondest Love Bert” handwritten on front Inside - Greetings from 1st Australian Divisional Headquarters Staff - In the Field Sketch of Red Chateau, Villers Bretonneux 1918 1st australian divisional headquarters red chateau villers bretonneux Christmas card Christmas 1918 Fondest Love,Bert Beige cardboard folded in half with rising sun and decorative emblem on front and sketch of trees on rear. ...Christmas Card, 1918 “Fondest Love Bert” handwritten on front Inside - Greetings from 1st Australian Divisional Headquarters Staff - In the Field Sketch of Red Chateau, Villers BretonneuxBeige cardboard folded in half with rising sun and decorative emblem on front and sketch of trees on rear.Christmas 1918 Fondest Love,Bert1918, 1st australian divisional headquarters, red chateau, villers bretonneux, christmas card -
 Melbourne Legacy
Postcard, Troops camped at the Pyramids, Egypt, 1915
... Message on reverse of postcard is dated 7.2.15 and says: "This is a view of part of Mena camp where the 1st Australian Division has been camped. We have had fine weather and very cold nights. ...This type of souvenir would have been familiar to the first Legatees as they had served in World War 1 and many had passed through Egypt. world war one war correspondence souvenir Message on reverse of postcard is dated 7.2.15 and says: "This is a view of part of Mena camp where the 1st Australian Division has been camped. We have had fine weather and very cold nights. ...This postcard was sent by "O.G." to J. Gawler on 7 February 1915 from an Army camp in Egypt. The postcard appears to have been hung up by a thumb tack as there is a small hole at the top centre of the card. This item is representative of the letters and postcards that were sent home to war by servicemen during the First World War and was a way to maintain a connection to their loved ones during difficult and uncertain times. Postcards were a very common form of communication in the first World War. This postcard also records places for those who didn't have cameras. This type of souvenir would have been familiar to the first Legatees as they had served in World War 1 and many had passed through Egypt.The front image of the postcard is a photograph of a camp of white canvas tents lined up in rows in front of a pyramid. Several soldiers can be seen walking throughout the campsite. On the reverse is a message written in black ink. There is also a small hole in the top centre of the postcard.Message on reverse of postcard is dated 7.2.15 and says: "This is a view of part of Mena camp where the 1st Australian Division has been camped. We have had fine weather and very cold nights. Weigh nearly 11 stone now. O.G." Addressed to: "Mr J M Gawler, Collins St, Melbourne"world war one, war correspondence, souvenir -
 Sunshine and District Historical Society Incorporated
Photograph - Alexander Robert Learmonth 1st Victorian Brigade Artillery Desert Camp Cairo Photograph
... Australian Imperial Force, including the Victorian artillery units, was originally meant to train in England. Overcrowding there forced a change of plans, and when the convoy reached the Suez Canal in late 1914, the troops were diverted to Egypt instead. Most of the 1st Division...5710 - Alexander Robert Learmonth 1st Victorian Brigade Artillery Desert Camp Cairo Photograph Front.jpg 5710 - Alexander Robert Learmonth 1st Victorian Brigade Artillery Desert Camp Cairo Photograph Back.jpg Alexander Robert Learmonth VX919 25th Battery 1st Victorian Brigade Artillary 1st Australian Division A.I.F. An ANZAC on Gallipoli desert camp near Cairo 1915 Standing to right of tents ...1st Division Mena Training Camp, Giza Plateau, Egypt. He is standing to the right of the tent, bottom right-hand side. Alexander Robert Learmonth World War 1914 - 1918 Cairo Egypt ANZAC Gallipoli Mena Camp Giza Plateau Pyramid Learmonth Crescent Sunshine 5710 - Alexander Robert Learmonth 1st Victorian Brigade Artillery Desert Camp Cairo Photograph Front.jpg 5710 - Alexander Robert Learmonth 1st Victorian Brigade Artillery Desert Camp Cairo Photograph Back.jpg Alexander Robert Learmonth VX919 25th Battery 1st Victorian Brigade Artillary 1st Australian Division A.I.F. ...Alexander Robert Learmonth was a former Sunshine Resident, H.V. McKay / Massey Ferguson employee. He served in the Australian Army during WW1 and was one of the first 1000 volunteer recruits to signed up. Learmonth Crescent, Sunshine West was named after him. The Australian Imperial Force, including the Victorian artillery units, was originally meant to train in England. Overcrowding there forced a change of plans, and when the convoy reached the Suez Canal in late 1914, the troops were diverted to Egypt instead. Most of the 1st Division, including its artillery brigades (which contained many Victorian batteries), trained at the Mena Camp 1914 to 1915, about 10 miles from central Cairo, on the Giza Plateau with the Pyramids and Sphinx as the backdrop. This is a rare photograph of a known Sunshine resident, Alexander Robert Learmonth, taken in 1915, at the A.I.F. 1st Division Mena Training Camp, Giza Plateau, Egypt. He is standing to the right of the tent, bottom right-hand side.5710 - Alexander Robert Learmonth 1st Victorian Brigade Artillery Desert Camp Cairo Photograph Front.jpg 5710 - Alexander Robert Learmonth 1st Victorian Brigade Artillery Desert Camp Cairo Photograph Back.jpg Alexander Robert Learmonth VX919 25th Battery 1st Victorian Brigade Artillary 1st Australian Division A.I.F. An ANZAC on Gallipoli desert camp near Cairo 1915 Standing to right of tents alexander robert learmonth, world war 1914 - 1918, cairo, egypt, anzac, gallipoli, mena camp, giza plateau, pyramid, learmonth crescent sunshine -
 Bendigo Historical Society Inc.
Book - "Diggers And Mates. Victorian World War 1 Veterans In Profile.", 1995
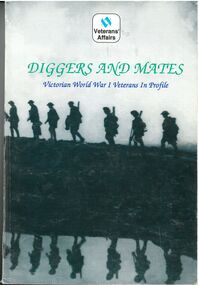
... Soft cover book with image of 'Supporting Troops of the 1st Australian Division photographed on a duckboard track near Ypres, Belgium, 1917. ...Soft cover book with image of 'Supporting Troops of the 1st Australian Division photographed on a duckboard track near Ypres, Belgium, 1917. ...John Henry Lockett OAM (22 January 1891 – 25 May 2002) was the oldest man ever in Australia when he died aged 111 years, 123 days. As one of the last surviving veterans of World War I, he was acclaimed as a national hero during the last decade of his life. Lockett was born in the small Victorian town of Waanyarra, near Bendigo. He left school aged nine to work on a local farm. Later, he worked for his uncles in the Mallee. On 24 March 1916, he travelled to Mildura to enlist in the Australian Imperial Force. He served in France with the 38th Battalion, earning promotion to sergeant and was discharged on 20 September 1919. https://en.wikipedia.org/wiki/Jack_Lockett After the war, Jack returned to The Mallee and selected a 640 acres (260 ha) block of land in Linga, Victoria, deciding to make his living as a farmer. In 1923, he married Maybell Ingwerson and they had four children together. In 1963, the couple retired to Bendigo in 1953, leaving the farmland (which now covered more than 130,000 acres (53,000 ha), in the care of their children and grandchildren. "Diggers And mates. Victorian World War 1 Veterans In Profile." Compiled by Kylie McKenzie. Preamble by Con Sciacca, Minister for Veterans' Affairs. Foreward by Brian Flynn, Deputy Commissioner for Veterans' Affairs. Produced by the Commonwealth Department of Veteran's Affairs, Melbourne. Printed by the Australian Government Publishing Service in 1995. Contains a collection of the experiences and insights of many of Victoria's then surviving World war 1 veterans. Soft cover book with image of 'Supporting Troops of the 1st Australian Division photographed on a duckboard track near Ypres, Belgium, 1917. Titles printed in Green and dark blue. Vererans' Affairs logo in centre at top of front cover. Book includes service particulars of each service person, personal particulars of person, and image(s) of service person at time of publication (1995) and whilst in service. Includes an article on Jack Lockett - serviceman 43 as presented in book . jack lockett, world war 1 -
 Bendigo Historical Society Inc.
Document - BOOKLET - 'THANKS FOR THE MEMORY', Early 1940s'?
... Re the visit of US 1st Marine Division in Australia during WWII. Written/illustrated by Diana Gibson and Audrie Gullet. ...Re the visit of US 1st Marine Division in Australia during WWII. Written/illustrated by Diana Gibson and Audrie Gullet. ...Booklet - 'Thanks for the Memory'. Re the visit of US 1st Marine Division in Australia during WWII. Written/illustrated by Diana Gibson and Audrie Gullet. Illustrated 12 stapled pages. ( A number of references to Melbourne but none to Bendigo) Signed by the authors on back cover.person, individual -
 Bendigo Military Museum
Education kit, Department of Veterans Affairs, WE REMEMBER ANZAC, 2) 2014, .4) 2014, .5) 2014, .6) 2014
... Illustrated - sepia and colour - in silhouette - Troops of 1st Australian Division and members of 4 RAR. Pages - cut, plain, white, illustrated colour, black & white photographs from Boer War to Afghanistan. .7) .8) Card, cardboard with Webkey attached. ...Illustrated - sepia and colour - in silhouette - Troops of 1st Australian Division and members of 4 RAR. Pages - cut, plain, white, illustrated colour, black & white photographs from Boer War to Afghanistan. .7) .8) Card, cardboard with Webkey attached. ...WE REMEMBER ANZAC - 100 years of ANZAC - THE SPIRIT LIVES 2014-2018 - SECONDARY RESOURCE .1) .2) 'WE REMEMBER ANZAC' .3) 'COMMEMORATIVE CEREMONY' .4) 'Memories & Memorabilia - Recognising and Preserving Australia's War Heritage' .5) 'Candour. Stories in the words of those who served 1914-1918.' .6) Over a Century of Service 2015 (Calendar) .7) 'ANZAC CENTENARY' .8) 'ANZAC PORTAL' .9) '2015 Anzac Day School's Awards'.1) Box folder - cardboard, white & gold print front, spine, back. Illustrated - collage colour photographs - medals, poppy, rising sun badge, soldier in silhouette. .2) Softcover, cardboard with fold in front flap, white & gold print, spiral bound, colour collage photographs - poppy, medals, troops. Pages - 86 pages, cut, plain, white, illustrated black & white, colour photographs, work sheets. .3) DVD inside cover flap. .4) Soft cover, cardboard, spiral bound, black, print front, illustrated sepia photograph soldier with letter and slouch hat. Pages - 88 pages, cut, plain, white, illustrated black & white, colour photographs, posters. .5) Soft cover, cardboard, white print front & back, illustrated - collage colour and sepia photographs of service personnel, letters, pens, brooch. Pages - 56 pages, cut, plain, white, illustrated colour, black & white photographs, medals, paintings. .6) Calender - soft cover, cardboard, light brown and black print front and back. Illustrated - sepia and colour - in silhouette - Troops of 1st Australian Division and members of 4 RAR. Pages - cut, plain, white, illustrated colour, black & white photographs from Boer War to Afghanistan. .7) .8) Card, cardboard with Webkey attached. Card - white & dark red print, small colour, sepia illustrations. .8) Key - metal with words printed - 'ANZAC PORTAL'. In plastic pocket. .9) Leaflet - lightweight cardboard black, white, yellow print front and back. Illustrated - black & white photograph of troop ship dockside. educational kit, anzac centenary -
 The Beechworth Burke Museum
Photograph, c.1914
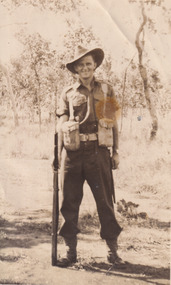
... During this fight, German forces captured several batteries of the 1st Australian Division’s artillery but the Australians led a strong counter-attack by four of their battalions and recaptured the village and most of the guns from the German forces. ...During this fight, German forces captured several batteries of the 1st Australian Division’s artillery but the Australians led a strong counter-attack by four of their battalions and recaptured the village and most of the guns from the German forces. ...This photograph depicts a soldier, credited on the reverse as Fred Foster. The young man is dressed in military attire and is standing tall with a gun beside him. He is located in the Australian bush and the date of the photograph is unknown. Frederick “Fred” Arthur Foster was nephew to famous Bushranger Edward “Ned” Kelly. He was born on the 15th of March 1889 in Forbes, New South Wales. He was the eldest son of Catherine “Kate” Kelly and William Henry “Bricky” Foster. After the death of his mother in October of 1898 from apparent drowning, Foster (then aged 9) was raised by his grandmother Ellen Kelly (née Quinn) at Eleven Mile Creek in Victoria. On the 29th of June 1915, 26 year old Foster travelled to Melbourne, Victoria and enlisted in the Australian Army. He was a Private in the 17th Infantry Battalion (originally C.Company, 47th battalion). He previously was attached to the 55th Battalion but transferred in 1916. Prior to enlisting in the army, Foster worked as a Bee Keeper and served in the 16th Light Horse regiment at Benalla. Foster had blue eyes, brown hair and was of Presbyterian faith. On the 28th of February 1917, Foster travelled to France aboard SS “Golden Eagle”. He was killed in action in Lagnicourt, France on the 15th of April 1917 at 28 years old. The Battle in Lagnicourt France, on the Western Front, occurred from the 1st of March to the 30th of April of 1917 and was the location of fierce fighting between Germany and the British Empire. Germany became aware of a weakness they had along the Hindenburg Line, one of these weaknesses was located in Lagnicourt which is a small village in Northern France. Therefore, the Germans decided to launch a counter-attack in this area on the 15th of April at dawn. During this fight, German forces captured several batteries of the 1st Australian Division’s artillery but the Australians led a strong counter-attack by four of their battalions and recaptured the village and most of the guns from the German forces. German forces were forced into a premature withdrawal. This battle was not undertaken in typical WW1 “trench” style warfare. Instead, the battle was up on the ground in what was described as “old open style warfare”. In this battle, slightly more than 1000 casualties were Australian, with 300 of these prisoners of war. German forces suffered a loss of over 2300 casualties with 360 taken captive. Foster was one of 43 in his regiment who died, 87 were wounded and 51 reported missing. Foster was buried at location in Lagnicourt and whilst the grave was initially marked, it is now unknown. Foster’s service, alongside those who fell at Lagnicourt, is commemorated at the Australian National Memorial in Villers-Bretonneux, France along with other national Australian memorial sites.Photography played an important part in World War 1. Photographs of men in their military uniforms served as propaganda during the Great War to reassure civilians back at home of the military prowess of their nation and the bravery of their men. It did this while hiding the true horrors which faced the men in battle. These photographs, which includes those taken at home prior to embarking overseas like Fred Foster’s, act as censored memory for those who have lost a loved one at war. It enables families to remember their relatives in their youth and standing proudly rather than having to face the actual danger and horror which faced these men at the front line. The battle of Lagnicourt France was a victory for the European Empire and therefore, men who lost their lives protecting their countries became heroes and were awarded posthumous medals for their service. Photos of soldiers in their uniforms, were undertaken by men like Foster, so their families would be able to retain their memories and likeness before they embarked for war. Many men were killed or horribly wounded so these images were important for reminding families about their sons/ husbands/ brothers/ cousins and friends. This photo is a part of the Burke Museum Kelly album which includes numerous photographs relating to the Kelly Gang. As the son of Kate Kelly and William “Bricky” Foster, Fred Foster is an important part of the Kelly story after the execution of Edward “Ned” Kelly which has information it can impart relating to the history of the family after 1880. Whilst an important element of the Kelly Album, Foster’s photograph is also historically important in its own right for its connection to the Great War and the experiences of a soldier at the Western Front.Original sepia rectangular photograph developed on matte photographic paper, unmounted.Reverse: (Top right corner of reverse:) FRED FOSTER/ (Top centre of reverse:) Kate Kelly's son.kelly album, fred foster, kate kelly, photograph, australian soldier, the kelly gang, australian bush, burke museum, sepia photo, gum trees, family of the kelly gang, world war i, langnicourt, france, great war, 1917, ned kelly, frederick foster, william "bricky" foster, ellen kelly, military history, australian military -
 Lara RSL Sub Branch
Framed Photograph of Anzac cove, Anzac Cove 1915
... General William Birdwood, commander of Anzac, made his headquarters in a gully overlooking the cove, as did the commanders of the New Zealand and Australian Division and the Australian 1st Division. It was on 29 April that General Birdwood recommended that the original landing site between the two headlands be known as "Anzac Cove" and that the surrounding, hitherto nameless, area occupied by his corps be known as "Anzac". ...General William Birdwood, commander of Anzac, made his headquarters in a gully overlooking the cove, as did the commanders of the New Zealand and Australian Division and the Australian 1st Division. It was on 29 April that General Birdwood recommended that the original landing site between the two headlands be known as "Anzac Cove" and that the surrounding, hitherto nameless, area occupied by his corps be known as "Anzac". ...Gallipoli Campaign 1915-6[edit] The first objective for soldiers coming ashore in enemy-held territory was to establish a beachhead, that is a safe section of beach protected from enemy attack where supplies and extra troops could be safely brought ashore. Anzac Cove was always within 1 kilometre (3,300 ft) of the front-line, well within the range of Turkish artillery though spurs from the high ground of Plugge's Plateau, which rose above Arıburnu, provided some protection. General William Birdwood, commander of Anzac, made his headquarters in a gully overlooking the cove, as did the commanders of the New Zealand and Australian Division and the Australian 1st Division. It was on 29 April that General Birdwood recommended that the original landing site between the two headlands be known as "Anzac Cove" and that the surrounding, hitherto nameless, area occupied by his corps be known as "Anzac". Anzac Cove is a small cove on the Gallipoli peninsula in Turkey. It became famous as the site of World War I landing of the ANZACs (Australian and New Zealand Army Corps) on 25 April 1915. The cove is 600 metres (2,000 ft) long, bounded by the headlands of Arıburnu to the north and Little Arıburnu, known as Hell Spit, to the south. Following the landing at Anzac Cove, the beach became the main base for the Australian and New Zealand troops for the eight months of the Gallipoli campaign. Rectangular shaped glass covered picture frame showing Anzac Cove.world war 1,gallipoli,anzac cove,lara r.s.l. ww1 -
 Melbourne Legacy
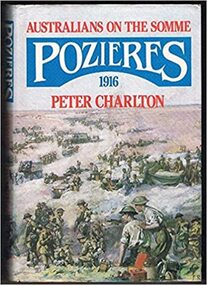
Book, Australians on the Somme. Pozieres 1916, 1986
... Between 23 July and 5 August 1916, the Australian 1st and 2nd Divisions captured Pozières village and Pozières heights, a ridge 500 metres east of the village. ...Between 23 July and 5 August 1916, the Australian 1st and 2nd Divisions captured Pozières village and Pozières heights, a ridge 500 metres east of the village. ...A book about the fighting around the French village of Pozieres in 1916. Many of the early legatees fought on the Western Front and some, including founder Stan Savige, fought at Pozieres. There is a photo in the book of Brigadier-General Gellibrand and his staff, including Savige, eating breakfast in a shell hole. Back in Australia after the war Gellibrand inspired Savige to found a club like the Remembrance Club he had founded in Hobart. Thus Savige founded Legacy. Speeches by Legatees Kemsley and Armstrong in later years showed they had also fought in the Pozieres area. Some research has shown: The fighting around Pozières was part of the brave actions of the Australians during the battle of the Somme from July 1916. Between 23 July and 5 August 1916, the Australian 1st and 2nd Divisions captured Pozières village and Pozières heights, a ridge 500 metres east of the village. The 4th Division then continued the attack north along the ridge, the Australians in ten days of continuous action reached Mouquet Farm. The farm resisted capture until 26 September 1916. In less than seven weeks in the fighting at Pozières and Mouquet Farm three Australian divisions suffered 23,000 casualties. Of these, 6,800 men were killed or died of wounds. It was a loss comparable with the casualties sustained by the Australians over eight months at Gallipoli in 1915.A book about a battle that was important to the early legatees.Hardcover book x 318 pages about the Somme battles of World War One.Handwritten 'Melbourne Legacy Library WW1 in black ink on the fly leaf. Also a sticker saying property of Rob Allison on title page.somme, pozieres, battles, aif -
 Bendigo Military Museum
Book - THE AUSTRALIAN SOLDIERS POCKET BOOK, Victorian RSL State Branch, 1940
... Australian Comfort Funds, Victorian Division 1940. "Refer to Inscriptions and markings". Passchendaele Barracks Trust Pocket Book Victorian RSL. PBT 114 Inside book, “Pay Book 118989. F.C. EDLIN. 41236 Private 2/24th 100 Splatt Street, SWAN HILL, VICTORIA. E.Q.EDLIN, Swan Hill, Victoria, Aus. 1st ...The Australian Soldiers Pocket Book containing useful information for Australian Soldiers. This was presented to members of the 2nd A.I.F. with best wishes from the Australian Comfort Funds, Victorian Division 1940. "Refer to Inscriptions and markings".Small pocket book was first compiled and issued in Victoria under the auspices of the Victorian RSL. The information in this book has been gathered and strung together by men who have first hand knowledge of the requirement of war service.Inside book, “Pay Book 118989. F.C. EDLIN. 41236 Private 2/24th 100 Splatt Street, SWAN HILL, VICTORIA. E.Q.EDLIN, Swan Hill, Victoria, Aus. 1st May 1907, 7st,12lbs, 10.2.41, Height 5ft 6". Rifle No. 26207”passchendaele barracks trust, pocket book, victorian rsl., pbt 114 -
 Bendigo Military Museum
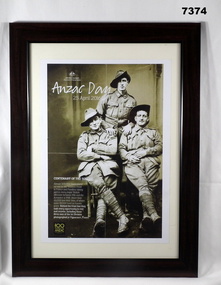
Poster - POSTER - FRAMED, Aust Govt, Department of Veteran's Affairs, 2016
... Australians served on the Western Front in France and Flanders, taking part in every major British offensive between 1916 and the Armistice in 1918. More than 46,000 lost their lives of whom some 18,000 have no known grave. Behind the front line they took every opportunity to rest and recover, including these three men of the 1st Division...Australians served on the Western Front in France and Flanders, taking part in every major British offensive between 1916 and the Armistice in 1918. More than 46,000 lost their lives of whom some 18,000 have no known grave. Behind the front line they took every opportunity to rest and recover, including these three men of the 1st Division ...Acknowledgment of Centenary of ANZAC Day. "Almost 300.000 Australians served on the Western Front in France and Flanders, taking part in every major British offensive between 1916 and the Armistice in 1918. More than 46,000 lost their lives of whom some 18,000 have no known grave. Behind the front line they took every opportunity to rest and recover, including these three men of the 1st Division, photographed in Vignacourt, France.Poster - Sepia coloured. Cream coloured border, dark brown plastic material frame. Glass protection.“ANZAC DAY 25 April 2016” “Centenary of the Somme”, “Three Men of the 1 Division". poster, centenary of the somme -
 Bendigo Military Museum
Postcard - POSTCARDS WW1
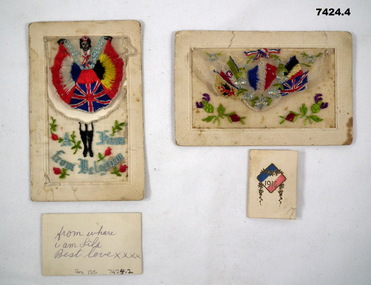
... Hospital 27.4.1916 (unclear) rejoin unit 28.4.1916, embark for France 2.6.1916, taken on strength of 1st Anzac Army Corps LH Regt 7.7.1916, hospital 4.10.1917 with “Boils, Debility”, from here he is diagnosed with Chronic Bronchitis and returns to Australia 21.4.1918, discharged Medically unfit 17.7.1918. Postcards France 1. Address on back "Mrs. A.D. Norman, 52 Laity St, Richmond, Vict". 2. Message on back "From where I am Lila, Best Love xxxx". 3. Written on card, No, Division ...Postcards from “Patrick Joesph Frawley”. Enlisted No 563 on 6.4.1915 age 21 years in 13th Light Horse B Sqd, embarked for Eygpt 28.5.1915, record is unclear as states again embarked 5.9.1915 and then disembark Eygpt from Mudros early 1916, does not clearly state going to Gallipoli. Hospital 27.4.1916 (unclear) rejoin unit 28.4.1916, embark for France 2.6.1916, taken on strength of 1st Anzac Army Corps LH Regt 7.7.1916, hospital 4.10.1917 with “Boils, Debility”, from here he is diagnosed with Chronic Bronchitis and returns to Australia 21.4.1918, discharged Medically unfit 17.7.1918.1. White postcard. French writing and address on back. Front has silk embroidered material attached with a small card in pocket. Embroidered image of woman in dress with UK/Belgium/French flags on it. 2. Small card with picture of child holding presents, playing in the snow and message "A Loving Kiss" and message on back., 3. White postcard. On back a short message. On front silk embroidered pocket. Embroidered flags of UK, France, Belgium, Italy and one other. 4. Small folded card with French flag on front & 1916, and message inside.1. Address on back "Mrs. A.D. Norman, 52 Laity St, Richmond, Vict". 2. Message on back "From where I am Lila, Best Love xxxx". 3. Written on card, No, Division and short message. 4. Written on card "Greetings from France" and "P.J. Frawley - to my Love". postcards, france -
 Bendigo Military Museum
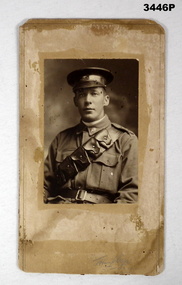
Photograph - PHOTOGRAPH WW1, c. 1914 - 1919
... He marries Louisa Jane Hobbs in England on 5.1 1916. ( Australian Divisions have not arrived in France at this time) from then on it states he transfers to the 1st Aust Div Supply Column then later No 1 Aust Div Motor Transport Coy. ...He marries Louisa Jane Hobbs in England on 5.1 1916. ( Australian Divisions have not arrived in France at this time) from then on it states he transfers to the 1st Aust Div Supply Column then later No 1 Aust Div Motor Transport Coy. ...George Bailey Jackson (born Bendigo, enlisted Albert Park) No 2172 on 16.11.1914 in the 300th Mechanical Transport ASC (17th Divisional Ammunition Column 9th Army Service Corp age 25 years 1 month. This part and his records are confusing. Embarks 22.12.1914 (does not state where to) Embark 9.7.1915 from Southampton and disembarks at Rouen France 10.7.1915. He marries Louisa Jane Hobbs in England on 5.1 1916. ( Australian Divisions have not arrived in France at this time) from then on it states he transfers to the 1st Aust Div Supply Column then later No 1 Aust Div Motor Transport Coy. Discharged from the Army on 28.3.1919. Refer Cat No 3445P for his Fathers (William) service.Sepia photo, head & chest portrait of a WWI soldier. There are some badges on his epaulette. He is wearing a leather bandolier, peaked cap with Rising Sun badge, a light coloured shirt. Mounted on cardboard back piece.On back: “Driver George B Jackson ANZAC”photography-photographs, military history - army -
 Bendigo Military Museum
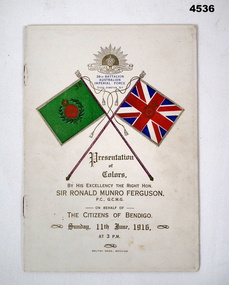
Pamphlet - PAMPHLET, 38th BATT COLOURS, Bolton Bros, June 1916
... The 38th Bn began recruiting on March 1st 1916 as part of the recruitment to raise a 3rd Division in Australia for overseas service, on the first day 201 men had enlisted....Bendigo Military Museum 37 - 39 Pall Mall Bendigo goldfields The 38th Bn began recruiting on March 1st 1916 as part of the recruitment to raise a 3rd Division in Australia for overseas service, on the first day 201 men had enlisted. ...The 38th Bn began recruiting on March 1st 1916 as part of the recruitment to raise a 3rd Division in Australia for overseas service, on the first day 201 men had enlisted.Pamphlet re the presentation of the 38th Battalion Colours on Sunday 11th June 1916, cover with 4 pages of internal, front cover has Rising Sun at top, the two Colours under then description of the timing by Sir Roland Munro Ferguson P.C, G.C.M.G on behalf of the Citizens of Bendigo, inside 4 pages re the presentation, all print in blue type.colours, 38th battalion aif, pamphlets -
 Bendigo Military Museum
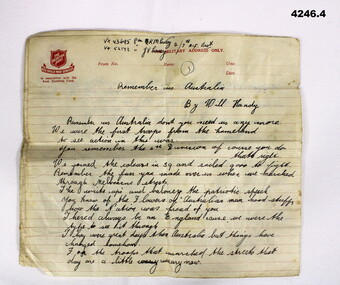
Literary work - REMEMBER US AUSTRALIA
... 1st Guard Bn. The first page relates to joining the 6th Division AIF in 1939 and Marching through Melbourne. These items were in the collection Lawrence Vernon Andrews VX114736. Refer Cat No 4228 for his service details. Poetry Will Handy 6th Division Main heading, “Remember us Australia ...The two names hand written are, VX43695 KM Casey (Kevin Michael), VX52172 JV Casey (John Vincent) The 2/7th AIF ..... ? Kevin was discharged in the 2/17th Bn and John in 2/1st Guard Bn. The first page relates to joining the 6th Division AIF in 1939 and Marching through Melbourne. These items were in the collection Lawrence Vernon Andrews VX114736. Refer Cat No 4228 for his service details..1) - .4) Four pages of poetry on ruled Salvation Army letter head in red, hand writing is in black pen. Two names have been written on the paper in ink at the top of the pageMain heading, “Remember us Australia by Will Handy”.poetry, will handy, 6th division -
 4th/19th Prince of Wales's Light Horse Regiment Unit History Room
Instrument - Trumpet, Cavalry, Couesnon Cie, 1901 (exact)
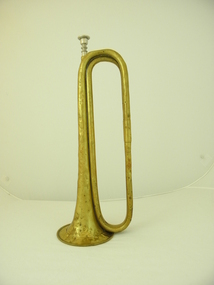
... 1st Light Horse Brigade – the first Australian mounted formation raised by Australia during the First World War. The regiment sailed from Brisbane on 25 September and disembarked in Egypt on 9 December. The 2nd Light Horse Regiment deployed to Gallipoli without its horses and landed there on 12 May 1915, joining the New Zealand and Australian Division. ...1st Light Horse Brigade – the first Australian mounted formation raised by Australia during the First World War. The regiment sailed from Brisbane on 25 September and disembarked in Egypt on 9 December. The 2nd Light Horse Regiment deployed to Gallipoli without its horses and landed there on 12 May 1915, joining the New Zealand and Australian Division. ...The 2nd Light Horse Regiment was raised at Enoggera in Queensland on 18 August 1914. Its recruits came mainly from Queensland but some hailed from the northern rivers district of New South Wales. The 2nd was one of three regiments of the 1st Light Horse Brigade – the first Australian mounted formation raised by Australia during the First World War. The regiment sailed from Brisbane on 25 September and disembarked in Egypt on 9 December. The 2nd Light Horse Regiment deployed to Gallipoli without its horses and landed there on 12 May 1915, joining the New Zealand and Australian Division. It played a defensive role for most of the campaign but did attack the Turkish trenches opposite Quinn’s Post, one of the most contested positions along the ANZAC Line. The first assault wave was mown down and fortunately the officer commanding the attack had the wisdom and courage to call it off. The 2nd was withdrawn from the front line in September and left the peninsula on 18 December. Back in Egypt, the 2nd Light Horse joined the ANZAC Mounted Division. Between January and May 1916, the regiment was deployed to protect the Nile valley from bands of pro-Turkish Senussi Arabs. On 18 May, as part of its parent brigade, it joined the forces defending the Suez Canal. The 1st Light Horse Brigade played a significant role in turning back the Turkish advance on the canal at the battle of Romani on 4 August. In ensuing days the regiments of the brigade participated in the immediate follow-up of the defeated Turks, but were soon withdrawn to rest. The 2nd Light Horse Regiment rejoined the Allied advance across the Sinai in November and was subsequently involved in the fighting to secure the Turkish outposts on the Palestine frontier – Maghdaba on 23 December 1916 and Rafa on 9 January 1917. A stint of protective duty along the line of communications through the Sinai followed. The 2nd’s next major engagement was the abortive second battle of Gaza on 19 April. Gaza finally fell on 7 November, after a wide outflanking move via Beersheba, in which the 1st Light Horse Brigade played a part. With the capture of Gaza, the Turkish position in southern Palestine collapsed. The 2nd Light Horse Regiment participated in the advance to Jaffa that followed, and was then committed to operations to clear and occupy the west bank of the Jordan River. It was involved in the Amman (24–27 February) and Es Salt (30 April–4 May) raids and the repulse of a major German and Turkish attack on 14 July 1918. The final British offensive of the campaign was launched along the Mediterranean coast on 19 September 1918, with the ANZAC Mounted Division taking part in a subsidiary effort east of the Jordan aimed at Amman. Turkey surrendered on 30 October 1918. The 2nd Light Horse Regiment sailed for Australia on 13 March 1919 without their horses, which were either shot or transferred to Indian cavalry units. Events in the daily routine of the soldier were signalled by bugle and trumpet calls. This trumpet is signicant because historically, it was issued to the 2nd Australian Light Horse Regiment in 1912. This Regiment served with distinction in Gallipoli and Palestine in World War 1. It is probable, but not confirmed, that tthe trumpet was used by the Regiment during these operations. Each light horse regiment was divided into four squadrons. Each squadron had a trumpeter sergeant, equipped with a cavalry trumpet, who was employed at the Squadron Headquarters Technically called a cavalry trumpet, this brass instrument can be described as a "simple trumpet" ie. the direct forerunner of the modern valve trumpet. It is in E flat not B flat as is the bugle. Both were carried slung over the player's body by means of green tasselled cords.Crest with inscription: "Exposition Universelle De Paris" with circular logo with inscribed "1900". "Hors Concours Membre De Jury". Logo formed of initials (not deciphered). "Couesnon Cie 94 Rue Dangouleme Paris". Bomb burst type logo with "01" in centre. "W H Paling & Co Ltd Sydney NSW Brisbane" On bell: "Mounted Rifles (2nd ALH)" trumpet, cavalry, musical instrument, 2nd light horse, mounted rifles -
4th/19th Prince of Wales's Light Horse Regiment Unit History Room
Domestic object - Silver tray
... Australian armoured car despatched to the war was manned by volunteers of this Corps. On 1 July 1929 the 19th Light Horse (Yarrowee Light Horse) ceased to be maintained. In 1935 the 19th Light Horse (Armoured Car) Regiment became the 1st Armoured Car Regiment (Wimmera Regiment) forming part of the 2nd Cavalry Division with detachments at Horsham, Nhill, Dimboola, Rupanyip and Murtoa....Australian armoured car despatched to the war was manned by volunteers of this Corps. On 1 July 1929 the 19th Light Horse (Yarrowee Light Horse) ceased to be maintained. In 1935 the 19th Light Horse (Armoured Car) Regiment became the 1st Armoured Car Regiment (Wimmera Regiment) forming part of the 2nd Cavalry Division with detachments at Horsham, Nhill, Dimboola, Rupanyip and Murtoa. nhill 1st armoured car regiment silverware troop competitions On front: "FIRST ARMOURED CAR REGT TROOP DRILL CONTEST A Sqn, B Sqn, C Sqn 1934." ...On 19 May 1908 authority was given for the formation of the 'Australian Volunteer Automibile Corps'. This Corps was disbanded in 1916, but during its short life it proved to be the forerunner, but not the ancestor, of the present day Royal Australian Armoured Corps. During World War 1 the first Australian armoured car despatched to the war was manned by volunteers of this Corps. On 1 July 1929 the 19th Light Horse (Yarrowee Light Horse) ceased to be maintained. In 1935 the 19th Light Horse (Armoured Car) Regiment became the 1st Armoured Car Regiment (Wimmera Regiment) forming part of the 2nd Cavalry Division with detachments at Horsham, Nhill, Dimboola, Rupanyip and Murtoa.Electroplated nickel EPNS silver tray, oblong with bowed sides. Tray patterned with concentric striations. 14.5 cm elliptical space in centre containing inscriptions. On front: "FIRST ARMOURED CAR REGT TROOP DRILL CONTEST A Sqn, B Sqn, C Sqn 1934." On back: Hallmark - G 712 6 pointed star containing "8" over boomerang. EPNS S&Snhill, 1st armoured car regiment, silverware, troop competitions -
 4th/19th Prince of Wales's Light Horse Regiment Unit History Room
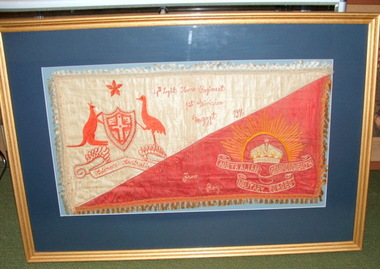
Souvenir - Scarf, framed, 1916
... The Australian Coat of Arms (in red) is at the upper left. Embroidered in red at top centre: "4th Light Horse Regiment 1st Division Egypt 1916". ...The Australian Coat of Arms (in red) is at the upper left. Embroidered in red at top centre: "4th Light Horse Regiment 1st Division Egypt 1916". ...Sgt Roy Arthur Heuston Taggart, 4th Australian Light Horse Regiment, Grazier of Hawthorn, born 4 Sep 1888, enlisted 19 July 1915, 12th Reinforcements. Awarded Distinguished Conduct Medal for outstanding services during Flanders operations.Historic item by original member of 4ALHRectangular embroidery in glass fronted wooden frame. Background is colour patch of the 4th Australian Light Horse Regiment, diagonally divided with upper left section white and lower part red. The Australian Coat of Arms (in red) is at the upper left. Embroidered in red at top centre: "4th Light Horse Regiment 1st Division Egypt 1916". In gold thread at bottom right: Aust Army rising sun badge. . It is edged with white tassels at top and left and gold tassels at right and lower edge.Embroidered in gold thread : "From Roy"embroidery, 4th light horse, roy taggart, scarf as gift to family -
 Bendigo Military Museum
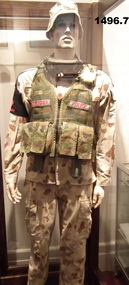
Uniform - UNIFORM IRAQ, C. 2005
... 1st Australian Armoured Corp Regiment, He was discharged in 1977. He re enlisted in 1982 and joined the Military Police. In 1984 he was promoted to Cpl Instructor, then Sgt 1989, promoted to Platoon Sgt in 1991 and WO2 in 1995. In 1999 served on exchange with the British Military Police on a 6 month exchange. While on exchange served in Bosnia. In 2000 he received Commander 2nd Division...1st Australian Armoured Corp Regiment, He was discharged in 1977. He re enlisted in 1982 and joined the Military Police. In 1984 he was promoted to Cpl Instructor, then Sgt 1989, promoted to Platoon Sgt in 1991 and WO2 in 1995. In 1999 served on exchange with the British Military Police on a 6 month exchange. While on exchange served in Bosnia. In 2000 he received Commander 2nd Division ...Uniform worn in Iraq by Greg Westhead. Greg enlisted in the Australian Army in 1974 and served in B Sqd 1st Australian Armoured Corp Regiment, He was discharged in 1977. He re enlisted in 1982 and joined the Military Police. In 1984 he was promoted to Cpl Instructor, then Sgt 1989, promoted to Platoon Sgt in 1991 and WO2 in 1995. In 1999 served on exchange with the British Military Police on a 6 month exchange. While on exchange served in Bosnia. In 2000 he received Commander 2nd Division Commendation for services to Training in defensive Tactics and Close Personel Protection. Promoted to RSM 2002.In 2004 he received a Conspicious Service Medal in the Australia Day Honours list. He was posted to Iraq with the 1st Al Muthanna Task Group in 2005 for 6 months. During 2008/9 he was posted to the USMC in California. 2009/10 he served in Afghanistan for 6 months as WO1 detainee Supervisor. 2012 deployed to the Multi National Force & Observers, Siani Eygpt as the Australian contingent RSM for 7 months. He transferred to the Army Reserve in 2013 as ADF WO1 Senior Instructor Small Arms Training. On reaching the age of 65 he retired from the Army in 2018.Uniform from Iraq Desert pattern, May. - Nov 2005 .1) Shirt with “MP” sleeves attached .2) pants .3) Hat .4) Goggles .5) & .6) Boots .7) Vest with 1 sterile wound dressing pack in pocket uniforms-army, desert pattern, westhead