Showing 64 items matching "bendigo-golden square- cars"
-
 Bendigo Historical Society Inc.
Photograph - LENZ COLLECTION: DECORATED CAR
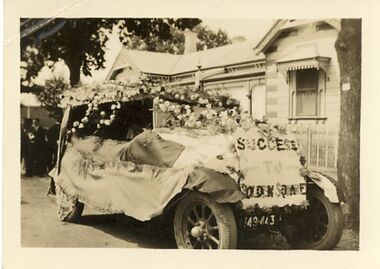
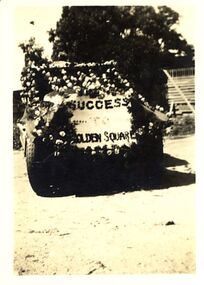
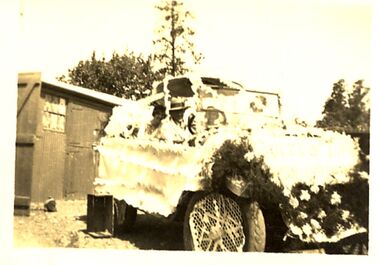
... ...Bendigo-Golden Square- Cars...History House 11 Mackenzie Street Bendigo goldfields PHOTOGRAPH House Victorian Bendigo-Golden Square- Cars Small black and white photograph of a car decorated with flowers and a banner on front which reads Success To Golden Square in background a Victorian weatherboard house and a group of men. ...Small black and white photograph of a car decorated with flowers and a banner on front which reads Success To Golden Square in background a Victorian weatherboard house and a group of men.photograph, house, victorian, bendigo-golden square- cars -
 Bendigo Historical Society Inc.
Photograph - LENZ COLLECTION: DECORATED CAR, 1929
... ...Bendigo-Golden Square- Celebrations-cars...Small black and white photograph of a car decorated with flowers and foliage, the Golden Square Uniting Church can be seen in the background. Stamped on back Kalma Film Service Bendigo & date 16/3/29. ...History House 11 Mackenzie Street Bendigo goldfields PHOTOGRAPH Building church Bendigo-Golden Square- Celebrations-cars Small black and white photograph of a car decorated with flowers and foliage, the Golden Square Uniting Church can be seen in the background. ...Small black and white photograph of a car decorated with flowers and foliage, the Golden Square Uniting Church can be seen in the background. Stamped on back Kalma Film Service Bendigo & date 16/3/29. Front of car has sign reading Queen Of ? Golden Square.photograph, building, church, bendigo-golden square- celebrations-cars -
 Bendigo Historical Society Inc.
Document - BASIL MILLER COLLECTION: CERTIFICATE OF REGISTRATION OF MOTOR CAR, Feb 11, 1939
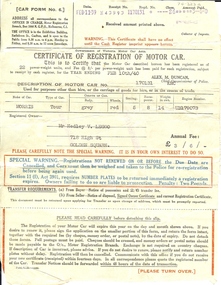
... History House 11 Mackenzie Street Bendigo goldfields PERSON Individual basil miller Government of Victoria issued 'Certificate of Registration of Motor Car'. Issued to Mr Hedley V Leggo of 718 High Street, Golden Square for a grey and red Morris tourer. ...Government of Victoria issued 'Certificate of Registration of Motor Car'. Issued to Mr Hedley V Leggo of 718 High Street, Golden Square for a grey and red Morris tourer. On back are pasted two transfer of Registration documents.person, individual, basil miller -
 Bendigo Historical Society Inc.
Photograph - BASIL MILLER COLLECTION: GOLDEN SQUARE TERMINUS
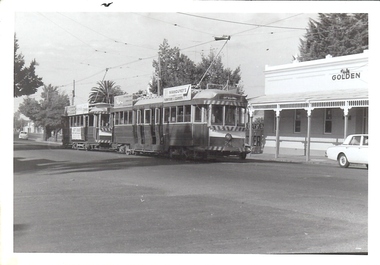
... History House 11 Mackenzie Street Bendigo goldfields PERSON Individual basil miller Black and white photograph of two(2) trams at the Golden Square terminus. Building to the right is Golden Square Hotel at the corner of Maple Street. Note advertising on tram for 'Mamouney's'. Half of white car ...Black and white photograph of two(2) trams at the Golden Square terminus. Building to the right is Golden Square Hotel at the corner of Maple Street. Note advertising on tram for 'Mamouney's'. Half of white car on right side. Reverse: Stamped in black No. 'E938'.person, individual, basil miller -
 Bendigo Historical Society Inc.
Document - BASIL MILLER COLLECTION: EASTER MONDAY, 11 APRIL 1966, c1966
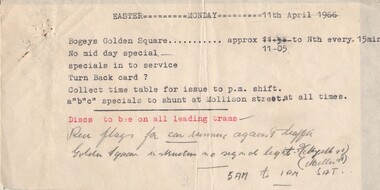
... bendigo trams Typed document. Heading: Easter Monday 11 April 1966. Body: Bogeys Golden Square, approx 11-05 to Nth every 15 mins. No midday special. Specials in to service. Turn Back card? Collect time table for issue to pm. Shift. a'b'c'' specials to shunt at Mollison street at all times. (in red) Discs to be on all leading trams. (in pencil) Red flags for car ...Typed document. Heading: Easter Monday 11 April 1966. Body: Bogeys Golden Square, approx 11-05 to Nth every 15 mins. No midday special. Specials in to service. Turn Back card? Collect time table for issue to pm. Shift. a'b'c'' specials to shunt at Mollison street at all times. (in red) Discs to be on all leading trams. (in pencil) Red flags for car summer against traffic Golden Square intersection no signal light? (Myrtle St) (Miller St) . 5am to 1 pm Sat.organization, business, bendigo trams -
 Bendigo Historical Society Inc.
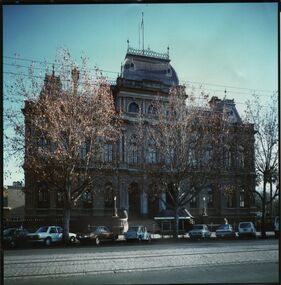
Photograph - AULSEBROOK AND MARTIN COLLECTION: LAW COURTS PALL MALL
... Bendigo. Cars parked kerbside in front of building, pedestrian seat with roof on pavement edge. Trees on roadside, tram tracks in foreground. Photo appears to be 1980's. Stamped on back of photo 'Aulsebrook & Martin Pty Ltd., Photographers, 6 Ruth St., Golden Square 3555 Phone 054 437565...BENDIGO Buildings Law Courts Pall Mall Colour photo: Law Courts, Pall Mall, Bendigo. Cars parked kerbside in front of building, pedestrian seat with roof on pavement edge. Trees on roadside, tram tracks in foreground. Photo appears to be 1980's. Stamped on back of photo 'Aulsebrook & Martin Pty Ltd., Photographers, 6 Ruth St., Golden Square ...Colour photo: Law Courts, Pall Mall, Bendigo. Cars parked kerbside in front of building, pedestrian seat with roof on pavement edge. Trees on roadside, tram tracks in foreground. Photo appears to be 1980's. Stamped on back of photo 'Aulsebrook & Martin Pty Ltd., Photographers, 6 Ruth St., Golden Square 3555 Phone 054 437565bendigo, buildings, law courts pall mall -
 Bendigo Historical Society Inc.
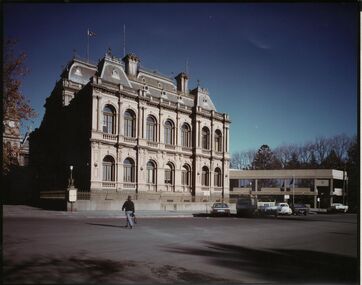
Photograph - AUSLEBROOK AND MARTIN COLLECTION: LAW COURTS, BULL STREET VIEW
... Bendigo. Photo taken from Bull Street side of building, Police Station on RH side of image. Cars parked kerbside. Woman crossing Bull Street.. Stamped on back of photo 'Aulsebrook & Martin Pty Ltd., Photographers, 6 Ruth St., Golden Square 3555 Phone 054 437565...Bendigo. Photo taken from Bull Street side of building, Police Station on RH side of image. Cars parked kerbside. Woman crossing Bull Street.. Stamped on back of photo 'Aulsebrook & Martin Pty Ltd., Photographers, 6 Ruth St., Golden Square 3555 Phone 054 437565 Photograph AUSLEBROOK AND MARTIN COLLECTION: LAW COURTS, BULL STREET VIEW ...Colour photo: Law Courts, Bendigo. Photo taken from Bull Street side of building, Police Station on RH side of image. Cars parked kerbside. Woman crossing Bull Street.. Stamped on back of photo 'Aulsebrook & Martin Pty Ltd., Photographers, 6 Ruth St., Golden Square 3555 Phone 054 437565bendigo, buildings, law courts, pall mall -
 Bendigo Historical Society Inc.
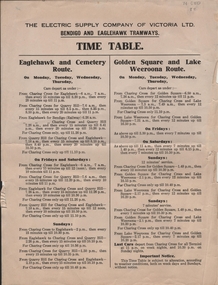
Document - BASIL MILLER COLLECTION: ELECTRIC SUPPLY COMPANY BENDIGO AND EAGLEHAWK TRAMWAYS TIMETABLE
... Timetable for Bendigo and Eaglehawk tramways, un-dated, light buff colour with black print. Timetable shows Eaglehawk and Cemetery route; Golden Square and Lake Weeroona routes. On bottom: Last Cars...History House 11 Mackenzie Street Bendigo goldfields TRAMWAYS History tramways timetable Timetable for Bendigo and Eaglehawk tramways, un-dated, light buff colour with black print. Timetable shows Eaglehawk and Cemetery route; Golden Square and Lake Weeroona routes. On bottom: Last Cars ...Timetable for Bendigo and Eaglehawk tramways, un-dated, light buff colour with black print. Timetable shows Eaglehawk and Cemetery route; Golden Square and Lake Weeroona routes. On bottom: Last Cars depart from Charing Cross for all termini at 11 p.m. on week nights, and 10.30 on Sunday nights.tramways, history, tramways timetable -
 Eltham District Historical Society Inc
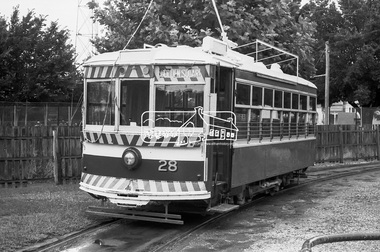
Photograph, Golden Square route Bendigo Tramways No. 28 parked, possibly near the Arnold Street Tram Depot, Bendigo, January 1972, Jan 1972
... arnold street depot, bendigo, bendigo tramways no. 28, eaglehawk, george coop collection, golden square, tram, Birney (USA) tram car...Eltham District Historical Society Inc 728 Main Rd Eltham melbourne Birney (USA manufacture) tram car arnold street depot, bendigo, bendigo tramways no. 28, eaglehawk, george coop collection, golden square, tram, Birney (USA) tram car Digital TIFF file Scan of 35mm Ilford FP3 black and white negative transparency Golden Square route Bendigo Tramways No. 28 parked, possibly near the Arnold Street Tram Depot, Bendigo, January 1972 Photograph Photograph George Coop George Coop ...Birney (USA manufacture) tram carDigital TIFF file Scan of 35mm Ilford FP3 black and white negative transparencyarnold street depot, bendigo, bendigo tramways no. 28, eaglehawk, george coop collection, golden square, tram, birney (usa) tram car -
 Bendigo Historical Society Inc.
Postcard - Alice McGregor Postcard Collection, 1900 - 1920
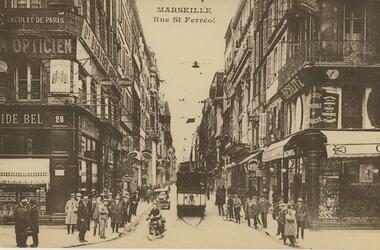
... Bendigo in 1937 aged 26. In Victoria in 1938, Alice Mary Salter married James Thomas McGregor (born Victoria 1917, died Victoria 1983, buried Fawkner Cemetery) Lived: 1968; 22 Wade Street Golden Square Alice McGregor Died: 1999 aged 91 at Anne Caudle Centre, Bendigo Buried: Kangaroo Flat Cemetery See additional research. Postcard Album of Alice McGregor contained 86 post cards. POSTCARD Collector Alice McGregor No addressee, sender or date Rear is blank Postcard Album of Alice McGregor containing 86 postcards. See 1400 B & W photo of the Rue St. Ferreol, Marseille, France Showing a tram down the middle of the street and a car ...Alice McGREGOR Born: 1908; unknown parents. Possibly adopted by the Salter family? Electoral Roll 1936: Highland Terrace Kangaroo Flat. Alice Mary Salter and William Robert Salter living together; presumed to be sister and brother. William Robert Salter was killed in a MVA in Bendigo in 1937 aged 26. In Victoria in 1938, Alice Mary Salter married James Thomas McGregor (born Victoria 1917, died Victoria 1983, buried Fawkner Cemetery) Lived: 1968; 22 Wade Street Golden Square Alice McGregor Died: 1999 aged 91 at Anne Caudle Centre, Bendigo Buried: Kangaroo Flat Cemetery See additional research. Postcard Album of Alice McGregor contained 86 post cards.Postcard Album of Alice McGregor containing 86 postcards. See 1400 B & W photo of the Rue St. Ferreol, Marseille, France Showing a tram down the middle of the street and a car and motorcycle. 5-storied shop buildings on either side Pedestrians on pavements No addressee, sender or date Rear is blank postcard, collector, alice mcgregor -
 Bendigo Historical Society Inc.
Postcard - Alice McGregor Postcard Collection, 1900 - 1920
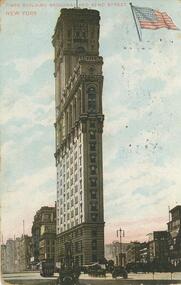
... Golden Square Alice McGregor Died: 1999 aged 91 at Anne Caudle Centre, Bendigo Buried: Kangaroo Flat Cemetery See additional research. Postcard Album of Alice McGregor contained 86 post cards. POSTCARD Collector Alice McGregor Addressed to W.A. Jeff Esq, Highbank, Christchurch, New Zealand. Dated 13/11/07. Sender unidentified. Postcard Album of Alice McGregor contained 86 post cards. See 1400. Colour photo of the Times Building on the corner of Broadway and 42nd Street Tram and cars ...Alice McGREGOR Born: 1908; unknown parents. Possibly adopted by the Salter family? Electoral Roll 1936: Highland Terrace Kangaroo Flat. Alice Mary Salter and William Robert Salter living together; presumed to be sister and brother. William Robert Salter was killed in a MVA in Bendigo in 1937 aged 26. In Victoria in 1938, Alice Mary Salter married James Thomas McGregor (born Victoria 1917, died Victoria 1983, buried Fawkner Cemetery) Lived: 1968; 22 Wade Street Golden Square Alice McGregor Died: 1999 aged 91 at Anne Caudle Centre, Bendigo Buried: Kangaroo Flat Cemetery See additional research. Postcard Album of Alice McGregor contained 86 post cards.Postcard Album of Alice McGregor contained 86 post cards. See 1400. Colour photo of the Times Building on the corner of Broadway and 42nd Street Tram and cars in foreground. USA flag in top right corner. Addressed to W.A. Jeff Esq, Highbank, Christchurch, New Zealand. Dated 13/11/07. Sender unidentified. postcard, collector, alice mcgregor -
 Bendigo Historical Society Inc.
Postcard - GLADYS DEAN COLLECTION: POSTCARD, 1906 - 1908
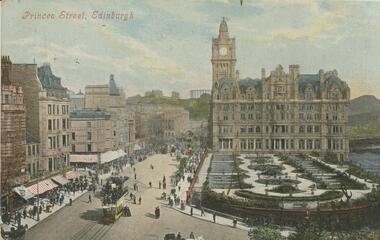
... Bendigo goldfields POSTCARD Valentines Series Coloured photographic postcard. Image depicts a street looking to a gothic styled building behind a formal garden. Buildings line the other side of the street which has trams and horse drawn carriages driving and people walking and crossing the street. The words Princes Street Edinburgh are printed in red along the top left hand side. Car is addressed to Miss Dean Esmond Golden Square ...Coloured photographic postcard. Image depicts a street looking to a gothic styled building behind a formal garden. Buildings line the other side of the street which has trams and horse drawn carriages driving and people walking and crossing the street. The words Princes Street Edinburgh are printed in red along the top left hand side. Car is addressed to Miss Dean Esmond Golden Square and has a one penny stamp affixed. Handwriting is on the opposite side. The words Valentines Series are printed on the left hand side.Valentines Seriespostcard -
 Bendigo Historical Society Inc.
Photograph - LENZ COLLECTION: DECORATED CAR, 1932
... History House 11 Mackenzie Street Bendigo goldfields PHOTOGRAPH Bengio-Golden Square-Celebration-Car Small black and white photograph of a car decorated with flowers and foliage sign on front reads Success To Golden Square dated on back 19/3/32. ...Small black and white photograph of a car decorated with flowers and foliage sign on front reads Success To Golden Square dated on back 19/3/32.photograph, bengio-golden square-celebration-car -
 Bendigo Historical Society Inc.
Photograph - LENZ COLLECTION: DECORATED CAR, 1929
... ...Bendigo-Golden Square-Celebration-Car...Small black and white photograph of a car decorated with flowers and foliage sign on front reads Queen Of ? Golden Square, stamped on back Kalma Film Service Bendigo and dat 16/3/29....History House 11 Mackenzie Street Bendigo goldfields PHOTOGRAPH Bendigo-Golden Square-Celebration-Car Small black and white photograph of a car decorated with flowers and foliage sign on front reads Queen Of ? ...Small black and white photograph of a car decorated with flowers and foliage sign on front reads Queen Of ? Golden Square, stamped on back Kalma Film Service Bendigo and dat 16/3/29.photograph, bendigo-golden square-celebration-car -
 Bendigo Historical Society Inc.
Newspaper - JENNY FOLEY COLLECTION: FUELLED UP
... Bendigo Advertiser "The way we were" from Saturday, October 4, 2003. Fuelled up: the Economy Run vehicle, which travelled from Melbourne to Sydney, fills up with petrol at Woodman's Garage, now the Cheesecake shop in Golden Square. Leaning over the car...Bendigo Advertiser "The way we were" from Saturday, October 4, 2003. Fuelled up: the Economy Run vehicle, which travelled from Melbourne to Sydney, fills up with petrol at Woodman's Garage, now the Cheesecake shop in Golden Square. Leaning over the car ...Bendigo Advertiser "The way we were" from Saturday, October 4, 2003. Fuelled up: the Economy Run vehicle, which travelled from Melbourne to Sydney, fills up with petrol at Woodman's Garage, now the Cheesecake shop in Golden Square. Leaning over the car is Barry White and John Browell, while Len Woodman fills it with petrol.newspaper, bendigo advertiser, the way we were -
 Bendigo Historical Society Inc.
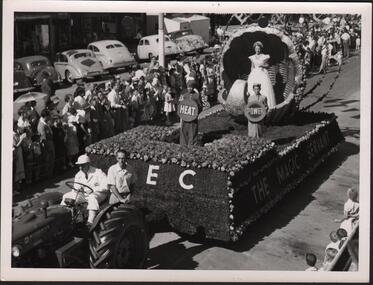
Photograph - HANRO COLLECTION: A COLLECTION OF STREET EASTER PARADE PHOTOGRAPHS
... cars of the day are parked at the road edge. The second is of the White Christmas Golden Square Mothers Club. A truck is decorated with a large Christmas tree with children dressed for winter. At the right is a sign*Bendigo...Bendigo. Parade. Golden Square Mothers Club. A Collection of Street Parade Photographs: Three photos all black and white. The first is of the S.E.C. float with *The Magic Servant* being pulled by a tractor with two men aboard. The float is of grass and flowers. Three children are on the float holding signs of Heat, Power, ?. A girl stands in a decorative shell. The street scene is lined with many people and cars ...BHS CollectionA Collection of Street Parade Photographs: Three photos all black and white. The first is of the S.E.C. float with *The Magic Servant* being pulled by a tractor with two men aboard. The float is of grass and flowers. Three children are on the float holding signs of Heat, Power, ?. A girl stands in a decorative shell. The street scene is lined with many people and cars of the day are parked at the road edge. The second is of the White Christmas Golden Square Mothers Club. A truck is decorated with a large Christmas tree with children dressed for winter. At the right is a sign*Bendigo Olympic Pool Fun is now open* on the balcony with a crowd of people. The streets are lined with spectators with flags flying above the parade. The Third is a float carrying a train with VR in flowers on the side and a floral display on the float. A crown of flowers at the front and the train on rails is featured. The train is No: B60 and is named the *Harold W. Clapp* All photos are of Bendigo's streetscape. All three photo's have two holes 7.4cm apart for housing in a folder. Box 116Aphotograph, streetscape, bendigo, bendigo. parade. golden square mothers club. -
 Bendigo Historical Society Inc.
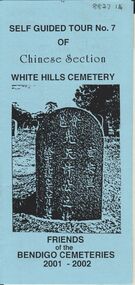
Document - BENDIGO CEMETERIES COLLECTION: SELF GUIDED TOUR NO.7 DOCUMENT
... Bendigo Cemeteries 2-001 - 2002. Theme 'A hundred years after Federation' Map with numbered grave sites, with descriptions e.g. Louey Ah Pon, passenger involved in a fatal car accident with a bus on High St., a market gardener of Golden Square. ...Bendigo Cemeteries 2-001 - 2002. Theme 'A hundred years after Federation' Map with numbered grave sites, with descriptions e.g. Louey Ah Pon, passenger involved in a fatal car accident with a bus on High St., a market gardener of Golden Square. ...BHS CollectionBlue coloured document, trifold. Self Guided Tour No. 7 of Chinese Section, White Hills Cemetery, Friends of the Bendigo Cemeteries 2-001 - 2002. Theme 'A hundred years after Federation' Map with numbered grave sites, with descriptions e.g. Louey Ah Pon, passenger involved in a fatal car accident with a bus on High St., a market gardener of Golden Square. Chung Fook Jao, committed suicide in his hut on the New Chum Mine site where he had worked the tailing for many years.Friends of the Bendigo Cemeteries 2000bendigo, cemetery, white hills cemetery tour -
 Bendigo Historical Society Inc.
Document - Bendigo Tramways Brochure, abt 1950s
... Bendigo's first tramway battery-electric carriages operated between Sanhurst and Eaglehawk. In 1892 Battery-electrics were replaced by steam tram cars on the Bendigo Railway Station track to Eaglehawk. In 1903 Electric traction overhead was inaugurated extending to Quarry Hill, Golden Square...Bendigo's first tramway battery-electric carriages operated between Sanhurst and Eaglehawk. In 1892 Battery-electrics were replaced by steam tram cars on the Bendigo Railway Station track to Eaglehawk. In 1903 Electric traction overhead was inaugurated extending to Quarry Hill, Golden Square ...In 1890 Bendigo's first tramway battery-electric carriages operated between Sanhurst and Eaglehawk. In 1892 Battery-electrics were replaced by steam tram cars on the Bendigo Railway Station track to Eaglehawk. In 1903 Electric traction overhead was inaugurated extending to Quarry Hill, Golden Square and Lake Weeroona. In 1913 Open cross-seat cars added for the service Quarry Hill to Eaglehawk. In 1945 Traction bogie cars replaced older cars. In 1947 Birney safety cars (dead man controllers) replaced older carsBrochure, a "Welcome to Bendigo, and "Evolution of Bendigo Tramways." 8668.1 Brochure is titled "Welcome to Bendigo," on the front a photo of Charing Cross and Trams, also the Bendigo City Coat of Arms. Inside two pages and descriptions of six tram showing the "Evolution of Bendigo tramways." On the rear is a map of the tramways and places of interest to visit. The brochure was "Printed for the preservation committee in co-operation with the Royal Historical Society of Victoria (Bendigo and District Branch) All donations for a preservation fund."history, bendigo tramways, evolution of bendigo tramways -
 Bendigo Historical Society Inc.
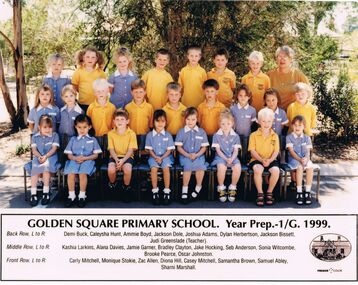
Photograph - GOLDEN SQUARE LAUREL STREET P.S. COLLECTION: PHOTOGRAPH - GSPS YEAR PREP.-1/G 1999
... Bendigo goldfields EDUCATION Primary golden square laurel st p.s. Golden Square Laurel Street P.S. Collection - Photograph - Golden Square Primary School Year Prep.-1/G 1999 Demi Buck Caleysha Hunt Ammie Boyd Jackson Dole Joshua Adams Dylan Herbertson Jackson Bissett Judi Greenslade (Teacher) Kashia Larkins Alana Davies Jamie Garner Bradley Clayton Jake Hocking Seb Anderson Sonia Witcombe Brooke Pearce Oscar Johnston Carly Mitchell Monique Stokie Zac Allen Diona Hill Casey Mitchell Samantha Brown Samuel Abley Sharni Marshall Coloured photograph of the Golden Square Primary School Year Prep.-1/G 1999 class and their teacher. ...Coloured photograph of the Golden Square Primary School Year Prep.-1/G 1999 class and their teacher. The children are wearing school uniform. Their names are: Back Row, L to R: Demi Buck, Caleysha Hunt, Ammie Boyd, Jackson Dole, Joshua Adams, Dylan Herbertson, Jackson Bissett, Judi Greenslade (Teacher). Middle Row, L to R: Kashia Larkins, Alana Davies, Jamie Garner, Bradley Clayton, Jake Hocking, Seb Anderson, Sonia Witcombe, Brooke Pearce, Oscar Johnston. Front Row, L to R: Carly Mitchell, Monique Stokie, Zac Allen, Diona Hill, Casey Mitchell, Samantha Brown, Samuel Abley, Sharni Marshall,education, primary, golden square laurel st p.s., golden square laurel street p.s. collection - photograph - golden square primary school year prep.-1/g 1999, demi buck, caleysha hunt, ammie boyd, jackson dole, joshua adams, dylan herbertson, jackson bissett, judi greenslade (teacher), kashia larkins, alana davies, jamie garner, bradley clayton, jake hocking, seb anderson, sonia witcombe, brooke pearce, oscar johnston, carly mitchell, monique stokie, zac allen, diona hill, casey mitchell, samantha brown, samuel abley, sharni marshall -
 Bendigo Historical Society Inc.
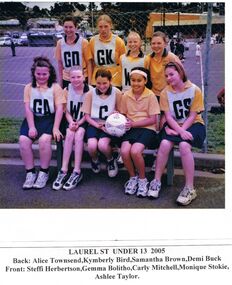
Photograph - GOLDEN SQUARE LAUREL STREET P.S. COLLECTION: PHOTOGRAPH OF LAUREL ST UNDER 13 NETBALL 2005
... Bendigo goldfields EDUCATION Primary golden square laurel st p.s. Golden Square Laurel Street P.S. Collection - Photograph - Laurel St Under 13 2005 Alice Townsend Kymberly Bird Samantha Brown Demi Buck Steffi Herbertson Gemma Bolitho Carly Mitchell Monique Stokie Ashlee Taylor Colour photograph of the Laurel St Under 13 netball 2005. ...Colour photograph of the Laurel St Under 13 netball 2005. Their names are: Back: Alice Townsend, Kymberly Bird, Samantha Brown, Demi Buck. Front: Steffi Herbertson, Gemma Bolitho, Carly Mitchell, Monique Stokie, Ashlee Taylor. Two girls in the front row are holding a ball between them.education, primary, golden square laurel st p.s., golden square laurel street p.s. collection - photograph - laurel st under 13 2005, alice townsend, kymberly bird, samantha brown, demi buck, steffi herbertson, gemma bolitho, carly mitchell, monique stokie, ashlee taylor -
 Bendigo Historical Society Inc.
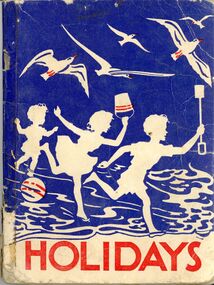
Book - GOLDEN SQUARE LAUREL STREET P.S. COLLECTION: HOLIDAYS
... Bendigo goldfields EDUCATION Primary golden square laurel st p.s. Golden Square Laurel Street P.S. Collection - Holidays Education Department W M Houston Marjorie Howden Shane Rodda Holidays. The Victorian Readers Second Book, Education Department, Victoria. First Edition 1953. W.M.Houston, Government Printer, Melbourne. Illustrated by Marjorie Howden. Coloured picture in the front of the book shows a family about to get into the car ...Holidays. The Victorian Readers Second Book, Education Department, Victoria. First Edition 1953. W.M.Houston, Government Printer, Melbourne. Illustrated by Marjorie Howden. Coloured picture in the front of the book shows a family about to get into the car. There is the father, the mother holding a toddler, a boy holding a Scottie dog and a girl holding a cat and a doll beside a blue car. The book has larger printing and tells of their holiday.education, primary, golden square laurel st p.s., golden square laurel street p.s. collection - holidays, education department, w m houston, marjorie howden, shane rodda -
 Bendigo Historical Society Inc.
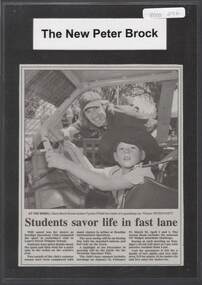
Photograph - GOLDEN SQUARE P.S. LAUREL ST. 1189 COLLECTION: GARRY MONTI AND TYRONE O'NEILL
... History House 11 Mackenzie Street Bendigo goldfields EDUCATION Primary golden square laurel st p.s. Copy of newspaper article showing Garry Monti, student Tyrone O'Neill inside a speedway car. ...Copy of newspaper article showing Garry Monti, student Tyrone O'Neill inside a speedway car. Bendigo Speedway Club visited Laurel Street Primary School.education, primary, golden square laurel st p.s. -
 Bendigo Historical Society Inc.
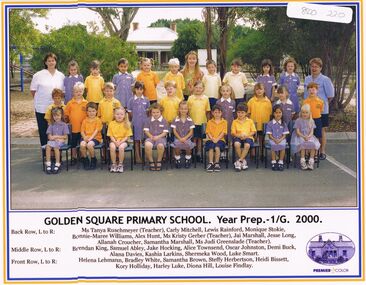
Photograph - GOLDEN SQUARE LAUREL STREET P.S. COLLECTION: YEAR PREP-1G 2000
... History House 11 Mackenzie Street Bendigo goldfields BENDIGO Education golden square primary school Colour photo of students : back row Ms Tanya Ruschmeyer, Carly Mitchell, Lewis Rainford, Monique Stokie, Bonnie-Maree Williams, Alex Hunt, Ms Kristy Gerber Teacher, Jai Marshall, Jesse Long, Allanah Croucher, Samantha Marshall, Ms Judi Greenslade, Teacher. ...Colour photo of students : back row Ms Tanya Ruschmeyer, Carly Mitchell, Lewis Rainford, Monique Stokie, Bonnie-Maree Williams, Alex Hunt, Ms Kristy Gerber Teacher, Jai Marshall, Jesse Long, Allanah Croucher, Samantha Marshall, Ms Judi Greenslade, Teacher. Middle row: Brendan King, Samuel Abley, Jake Hocking, Alice Townsend, Oscar Johnston, Demi Buck, Alana Davies, Kashia Larkins, Shermeka Wood, Luke Smart. Front row: Helena Lehmann, Bradley White, Samantha Brown, Steffy Herbertson, Heidi Bissett, Kory Holliday, Harley Luke, Diona Hill, Louise Findlay.bendigo, education, golden square primary school -
Bendigo Historical Society Inc.
Document - GOLDEN SQUARE METHODIST, CHILDREN'S PICNIC TO RAVENSWOOD, 1915
... Golden Sq. Meth. S. S. Scholars (Under16) free and will receive Tickets on entering train. Tickets good for trains leaving Bendigo noon and 3.15; Ravenswood 4.20 and 10.30. Teachers will kindly assist in carring out the arrangments. It is desired to strictly adhere to the programme. Bring own cups and pannikins. Hot water and milg provided. Document GOLDEN SQUARE ...Golden Square Methodist, Children's Picnic to Ravenswood, Saturday, October 23, 1915. Program includes time of train depature from Bendigo and Golden Square to arrive at Ravenswood 2 o'clock. Sports and races 2.20 to 3.30. Ginger Beer (free) - Children and Adults 3.30. Ice Cream (free - Children Only 3.45. Children's Tea (Free) 4 - followed by Lollies. Adults Afternoon Tea (Free) 4.30 followed by Ice Cream. Ginger Beer (Free) - Children and Adults 5.15. Sports and Games 5.30 to ? Train leaves 8.15 Moonlight. Six hours of solid enjoyment! No time to get tired or to wander about! No special invitation to anyone - Open to all! Railway ticket covers everything. Adults, 1/6; Children, 1/- Female Teachers and Senior Scholars, 1/3, obtainable at Mr R Saunder's or Railway Station prior to train leaving. Golden Sq. Meth. S. S. Scholars (Under16) free and will receive Tickets on entering train. Tickets good for trains leaving Bendigo noon and 3.15; Ravenswood 4.20 and 10.30. Teachers will kindly assist in carring out the arrangments. It is desired to strictly adhere to the programme. Bring own cups and pannikins. Hot water and milg provided.Bolton Bros, Printers, Bendigochurch, celebration, golden square methodist -
 Bendigo Historical Society Inc.
Document - LYDIA CHANCELLOR COLLECTION; DONATIONS AUSTRALIAN COMFORTS FUND GOLDEN SQUARE
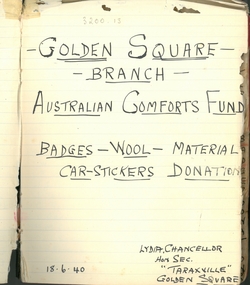
... History House 11 Mackenzie Street Bendigo goldfields ORGANIZATION Club / society Lydia Chancellor Collection Australian Comfort Fund World War II Lydia Chancellor Document. Hard cover book with the title inside the front cover ' Golden Square Branch Australian Comforts Fund. Badges, wool, material, car ...Document. Hard cover book with the title inside the front cover ' Golden Square Branch Australian Comforts Fund. Badges, wool, material, car-stickers, donations. Badges, wool, material, car-stickers, donations. Also inside the front cover are the words Lydia Chancellor, Hon. Sec. 'Taraxville' Golden Square. 18-6-40.Lydia Chancellororganization, club / society, lydia chancellor collection, australian comfort fund, world war ii -
Bendigo Historical Society Inc.
Document - LYDIA CHANCELLOR COLLECTION; CAR STICKERS AUSTRALIAN COMFORTS FUND SUBSCRIBER 1940
... Bendigo goldfields ORGANIZATION Club / society australian comforts fund Lydia Chancellor Objects. Car stickers 2 different sizes. 12.5 cm(45 of) in diameter with 6 point star red on white background with the words 'AUSTRALIAN COMFORTS FUND. Subscriber 1940.' 8.5 cm(40 of) in diameter with 6 point star with the same wording and colour combination. All the wording is in white against the red background of the star. The stickers are in an envelope addressed to Mrs. L. Chancellor, ' Taraxville', Golden Square ...Objects. Car stickers 2 different sizes. 12.5 cm(45 of) in diameter with 6 point star red on white background with the words 'AUSTRALIAN COMFORTS FUND. Subscriber 1940.' 8.5 cm(40 of) in diameter with 6 point star with the same wording and colour combination. All the wording is in white against the red background of the star. The stickers are in an envelope addressed to Mrs. L. Chancellor, ' Taraxville', Golden Square. On the rear surface, of each of the stars, there is a black four and five digit number.Lydia Chancellororganization, club / society, australian comforts fund -
 Bendigo Historical Society Inc.
Document - CORNISH COLLECTION: DOCUMENTS RELATED TO VARIOUS CORNISH ENTERPRISES IN BENDIGO
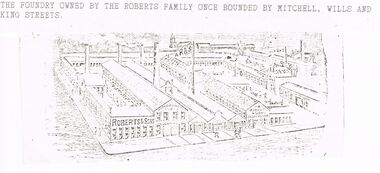
... Photograph of old Robinson photo of Bendigo Stamper Grating Factory, Epsom and five men posed in front of large timber building (badly cut photo with LH edge missing. original photo (9 x 13) of ''Former Bendigo Cornish Fuse Factory'' (handwritten inscription on reverse) taken in recent times (hint - car in driveway); f. copy from un-named book of J Nankervis's Ham and Bacon Curing Factory, Golden Square - drawing of the establishment and a photos of winning display of small goods at the Bendigo Show (no date); g. copy from un-named book of photo of premises of A J Williams, Lily and McKenzie Streets - wooden structure with sign indicating Hardware Merchants and ??...Photograph of old Robinson photo of Bendigo Stamper Grating Factory, Epsom and five men posed in front of large timber building (badly cut photo with LH edge missing. original photo (9 x 13) of ''Former Bendigo Cornish Fuse Factory'' (handwritten inscription on reverse) taken in recent times (hint - car in driveway); f. copy from un-named book of J Nankervis's Ham and Bacon Curing Factory, Golden Square - drawing of the establishment and a photos of winning display of small goods at the Bendigo Show (no date); g. copy from un-named book of photo of premises of A J Williams, Lily and McKenzie Streets - wooden structure with sign indicating Hardware Merchants and ?? ...Documents and copies of photos related to various Cornish enterprises in Bendigo: a. Line drawing (faint) of foundry owned by the Roberts family (Mitchell, Wills and King streets); b. copy of article from unknown source re United Iron Works with details of the firm and Roberts principals - William Roberts, Abraham Roberts and Arthur Roberts - with copies of photographic portraits (Bartlett Bros.) - bad copy with LH side of text partly illegible; c. copy of article titled 'Goyne's Battery Gratings re John Goyne and history of the business (submitted by person living at ''Rosemundy'', Goynes Road, Epsom - Goyne's home then on 20 acres); d. Photograph of old Robinson photo of Bendigo Stamper Grating Factory, Epsom and five men posed in front of large timber building (badly cut photo with LH edge missing. original photo (9 x 13) of ''Former Bendigo Cornish Fuse Factory'' (handwritten inscription on reverse) taken in recent times (hint - car in driveway); f. copy from un-named book of J Nankervis's Ham and Bacon Curing Factory, Golden Square - drawing of the establishment and a photos of winning display of small goods at the Bendigo Show (no date); g. copy from un-named book of photo of premises of A J Williams, Lily and McKenzie Streets - wooden structure with sign indicating Hardware Merchants and ??Mines Furnisher?? , showing three horse-driven small wagons (delivery?); h. copy of photo of Cornish store(1880s) at White Hills - mention of Frederick Stuckenschmidt (married Miss Mary Smith), William Mathews (original owner?) - corner brick building with family posed outside alongside horse and light cart;. reproduction of exhibit in Bendigo Spring Show, 1915 , the ''Made in Bendigo Exhibition'' - first prize awarded to Messrs H M Legg & Co. Progress Jams, preserves, tomato sauce, tomatoes products, candied peels etc. (folded and small tear).bendigo, buildings, early bendigo businesses, bendigo stamper grating factory. epsom. j. nankervic ham and bacon curing establishment. golden square. bendigo cornish fuse factory. cornish stores. messrs h. m. leggo and co. abraham roberts. arthur roberts. william roberts. goyne's battery gratings. -
 Ballarat Tramway Museum
Negative, Wal Jack, 6/01/1963 12:00:00 AM
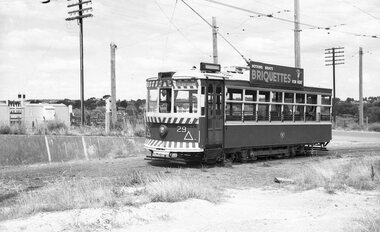
... Negative and Digital images of the Wal Jack Bendigo Negative file of Bendigo Birney No. 29 at the North Bendigo terminus with the railway level crossing in the background. Tram has the destination of Golden Square and a Briquettes roof advertisement. Based on the cars...Ballarat Tramway Museum South Gardens Reserve Wendouree Parade Ballarat Ballarat goldfields Trams tramways Bendigo North Bendigo Level Crossings tram 29 Negative and Digital images of the Wal Jack Bendigo Negative file of Bendigo Birney No. 29 at the North Bendigo terminus with the railway level crossing in the background. Tram has the destination of Golden Square and a Briquettes roof advertisement. Based on the cars ...Negative and Digital images of the Wal Jack Bendigo Negative file of Bendigo Birney No. 29 at the North Bendigo terminus with the railway level crossing in the background. Tram has the destination of Golden Square and a Briquettes roof advertisement. Based on the cars in the photo and Reg Item 452, date could be 6-1-1963trams, tramways, bendigo, north bendigo, level crossings, tram 29 -
 Ballarat Tramway Museum
Photograph - Black & White Photograph/s, 8/04/1903 12:00:00 AM
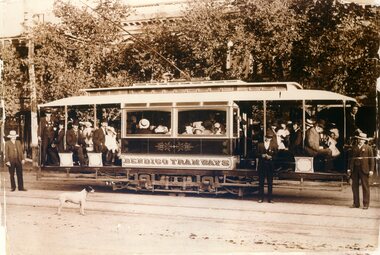
... Bendigo Electric tramcar at the time of opening trails with many people on board, crews, a dog, in the Ball Mall area. Shows details of the car decoration, painting, crew uniforms, seating arrangements, truck arrangements. Information provided with photographs says "Trial run on route to Golden Square...Golden Square 8.4.1903", "copies from Leonard C. Bennetts Collection" and a "William F Scott" address label in the bottom right hand corner. copy 2- has "12" in a circle on the top left hand front. Back has been covered by a sheet of paper, but has similar notes to copy 1 and cropping instructions. Black and White reproduction (copy by scanning and reprinting) of a sepia toned image of an ESCo Bendigo Electric tramcar at the time of opening trails with many people on board, crews, a dog, in the Ball Mall area. Shows details of the car ...Black and White reproduction (copy by scanning and reprinting) of a sepia toned image of an ESCo Bendigo Electric tramcar at the time of opening trails with many people on board, crews, a dog, in the Ball Mall area. Shows details of the car decoration, painting, crew uniforms, seating arrangements, truck arrangements. Information provided with photographs says "Trial run on route to Golden Square 8.4.1903", copied from Leonard C. Bennetts collection by William Scott. Shows edges and edge damage of original photograph. Two copies held.Copy 1 - has "20)" in the top left hand and right hand corners of the front of the photograph. On the rear "140)" in ink in the top left hand corner. In pencil and ink "Bendigo Tramways (Company electric) / Trial run on route to Golden Square 8.4.1903", "copies from Leonard C. Bennetts Collection" and a "William F Scott" address label in the bottom right hand corner. copy 2- has "12" in a circle on the top left hand front. Back has been covered by a sheet of paper, but has similar notes to copy 1 and cropping instructions.trams, tramways, bendigo, pall mall, golden square, trials, esco -
 Ballarat Tramway Museum
Album - Photo Album, Keith Kings, Jul. 1970
... Denmead from Keith Kings. 2 Title sheet – “BALLARAT” 3 1903 Small photo of SEC Monogram from Geelong No. 1 1904 Photo of SEC plaques etc at Wendouree office 4 1905 Photo of front of Wendouree Parade depot – 1957 - with trams 40 and 25 in photo. 5 1906 Photo of Ballarat 23 at depot 6 1907 Photo of Ballarat 29 in depot. 7 1908 Photo of Ballarat 17 in Wendouree Parade 8 1909 Photo of Ballarat 21 at depot. 9 1910 Photo of Ballarat 15 and 31 in Sturt St. 10 1911 Photo of Ballarat No. 40 Sturt St. 11 1912 Photo of Ballarat No. 38 – Wendouree Parade 12 1913 Photo of Scrubber car in depot. 13 Title sheet – “BENDIGO” 14 1914 Photo of Bendigo depot 15 1915 Photo of Bendigo No. 17, 1949. 16 1916 Photo of Bendigo 22 and 4 at Eaglehawk. 17 1917 Photo of Bendigo 12 at Golden Square. 18 1918 Photo of Bendigo 13 and 26 at Eaglehawk terminus. 19 1919 Photo of Bendigo 17 (bogie) at Quarry Hill terminus. 20 1920 Photo of Bendigo 18 at Charing Cross 21 1921 Photo of Bendigo Birneys 28 and 29 at Charing Cross 22 1922 Photo of original sprinkler and track cleaning car in Bendigo depot 23 1923 Photo of Bendigo 2nd track cleaning car 24. 1924 Photo of trams at Manchester Loop, 1958. 25. ...Denmead from Keith Kings. 2 Title sheet – “BALLARAT” 3 1903 Small photo of SEC Monogram from Geelong No. 1 1904 Photo of SEC plaques etc at Wendouree office 4 1905 Photo of front of Wendouree Parade depot – 1957 - with trams 40 and 25 in photo. 5 1906 Photo of Ballarat 23 at depot 6 1907 Photo of Ballarat 29 in depot. 7 1908 Photo of Ballarat 17 in Wendouree Parade 8 1909 Photo of Ballarat 21 at depot. 9 1910 Photo of Ballarat 15 and 31 in Sturt St. 10 1911 Photo of Ballarat No. 40 Sturt St. 11 1912 Photo of Ballarat No. 38 – Wendouree Parade 12 1913 Photo of Scrubber car in depot. 13 Title sheet – “BENDIGO” 14 1914 Photo of Bendigo depot 15 1915 Photo of Bendigo No. 17, 1949. 16 1916 Photo of Bendigo 22 and 4 at Eaglehawk. 17 1917 Photo of Bendigo 12 at Golden Square. 18 1918 Photo of Bendigo 13 and 26 at Eaglehawk terminus. 19 1919 Photo of Bendigo 17 (bogie) at Quarry Hill terminus. 20 1920 Photo of Bendigo 18 at Charing Cross 21 1921 Photo of Bendigo Birneys 28 and 29 at Charing Cross 22 1922 Photo of original sprinkler and track cleaning car in Bendigo depot 23 1923 Photo of Bendigo 2nd track cleaning car 24. 1924 Photo of trams at Manchester Loop, 1958. 25. ...Album comprises heavy cardboard covers with brown Rexene covers, with inside papers of heavy dark grey photo album paper, 36 leaves of dark grey photo paper and two brass interscrews within black grommets. See Condition Details re damage to back cover. Album contains 32 photos - personal prints of Keith Kings. Title page has been hand written to Les Denmead, dated 6/7/1970, thanking Mr. Denmead for his assistance over the years. Photos divided into the three SEC Provincial Tramway cities, each with a typed name proceeding the set of photos. Two further photos of Geelong were at the rear of the album, but were not in position when catalogued. One of these photos may be Reg. Item 1874 - photo of Geelong scrubber tram. Each of the photographs have been separately registered, as shown in the table below. Scanned images made of front and back of the photos. Back has Keith Kings ID number, description, notes and date of photo. Conservation Notes prepared - within the cataloguing sheet - see related documents. Folio Reg. Notes Item No. 1 Handwritten note to Mr. L. J. Denmead from Keith Kings. 2 Title sheet – “BALLARAT” 3 1903 Small photo of SEC Monogram from Geelong No. 1 1904 Photo of SEC plaques etc at Wendouree office 4 1905 Photo of front of Wendouree Parade depot – 1957 - with trams 40 and 25 in photo. 5 1906 Photo of Ballarat 23 at depot 6 1907 Photo of Ballarat 29 in depot. 7 1908 Photo of Ballarat 17 in Wendouree Parade 8 1909 Photo of Ballarat 21 at depot. 9 1910 Photo of Ballarat 15 and 31 in Sturt St. 10 1911 Photo of Ballarat No. 40 Sturt St. 11 1912 Photo of Ballarat No. 38 – Wendouree Parade 12 1913 Photo of Scrubber car in depot. 13 Title sheet – “BENDIGO” 14 1914 Photo of Bendigo depot 15 1915 Photo of Bendigo No. 17, 1949. 16 1916 Photo of Bendigo 22 and 4 at Eaglehawk. 17 1917 Photo of Bendigo 12 at Golden Square. 18 1918 Photo of Bendigo 13 and 26 at Eaglehawk terminus. 19 1919 Photo of Bendigo 17 (bogie) at Quarry Hill terminus. 20 1920 Photo of Bendigo 18 at Charing Cross 21 1921 Photo of Bendigo Birneys 28 and 29 at Charing Cross 22 1922 Photo of original sprinkler and track cleaning car in Bendigo depot 23 1923 Photo of Bendigo 2nd track cleaning car 24. 1924 Photo of trams at Manchester Loop, 1958. 25. Title sheet – “GEELONG” 26 1925 Photo of Geelong 19 in front of the depot. 27 1926 Photo of Geelong depot 28 1927 Photo of Geelong No. 3 at East terminus 29 1928 Photo of Geelong No. 23 outside depot. 30 1929 Photo of Geelong No. 16 at Eastern Park terminus. 31 1930 Photo of Geelong No. 28 at depot 32 1931 Photo of Geelong Birney No. 14 at Eastern Park terminus. 33 1932 Photo of Geelong No. 32 at Moorabool St. 34 1933 Photo of Geelong No. 37 outside depot 35 1934 Photo of Geelong No. 39 at West terminus 36. No photo – marks of four corners remained. 37 – back cover No photo – marks of four corners remained. Photos not to be taken out of the album unless for photographic copying. Use image files. Photo Album - The Commercial Photo Album - No. 1 - 36 leaves. See hand written note from Keith Kings to Mr. L. J. Denmead. Dated 6/7/70.trams, tramways, ballarat, bendigo, geelong, photo album