Showing 29 items matching "dry finishing"
-
 National Wool Museum
Photograph Album, The Valley Worsted Mills, Geelong
... ...Dry finishing...Wet finishing at the Valley Mill, Geelong, c.1920s. Dry finishing at the Valley Mill, Geelong, c.1920s. ...PHOTOGRAPHS THE / VALLEY WORSTED MILLS / GEELONG WOOL SORTING / WOOL SCOURING / WOOLLEN CARDING / WORSTED CARDING / COMBING & DRAWING / WOOLLEN SPINNING / WORSTED SPINNING / WINDING / WARPING / WEAVING / MENDING / WET FINISHING / DRY FINISHING / WAREHOUSE C.J. Frazer Photographer / Melbourne...Wet finishing at the Valley Mill, Geelong, c.1920s. Dry finishing at the Valley Mill, Geelong, c.1920s. ...Photograph album containing 15 photographs of the textile processes which took place at the Valley Worsted Mill which was established in 1923.Photograph album contains 15 photographic postcards of textile processes from the Valley Mill, c.1920s. Valley Mill, Geelong, c.1920s. Wool sorting at the Valley Mill, Geelong, c.1920s. Wool scouring at the Valley Mill, Geelong, c.1920s. Woollen carding at the Valley Mill, Geelong, c.1920s. Worsted carding at the Valley Mill, Geelong, c.1920s. Combing and drawing at the Valley Mill, Geelong, c.1920s. Woollen spinning at the Valley Mill, Geelong, c.1920s. Worsted spinning at the Valley Mill, Geelong, c.1920s. Winding at the Valley Mill, Geelong, c.1920s. Warping at the Valley Mill, Geelong, c.1920s. Weaving at the Valley Mill, Geelong, c.1920s. Mending at the Valley Mill, Geelong, c.1920s. Wet finishing at the Valley Mill, Geelong, c.1920s. Dry finishing at the Valley Mill, Geelong, c.1920s. Warehouse at the Valley Mill, Geelong, c.1920s.PHOTOGRAPHS THE / VALLEY WORSTED MILLS / GEELONG WOOL SORTING / WOOL SCOURING / WOOLLEN CARDING / WORSTED CARDING / COMBING & DRAWING / WOOLLEN SPINNING / WORSTED SPINNING / WINDING / WARPING / WEAVING / MENDING / WET FINISHING / DRY FINISHING / WAREHOUSE C.J. Frazer Photographer / Melbournetextile mills warehouses, weaving, textile production, textile mills, valley worsted mill, scouring, carding, combing, drawing, spinning, winding, warping, wet finishing, mending, milling, dry finishing, textile mills - warehouses -
 National Wool Museum
Photograph
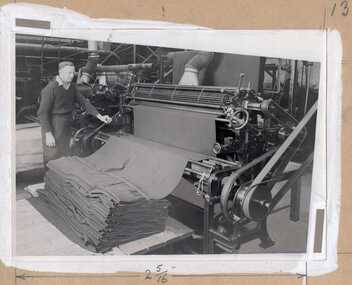
... ...dry finishing...Depicts the dry finishing room from one of the Godfrey Hirst mills in 1966. ...National Wool Museum 26 Moorabool Street Geelong geelong-and-the-bellarine-peninsula Depicts the dry finishing room from one of the Godfrey Hirst mills in 1966. ...Depicts the dry finishing room from one of the Godfrey Hirst mills in 1966. In 1966 McKendrick Consolidated Industries Ltd purchased Godfrey Hirst Ltd to operate a carpet manufacturing concern and this photo was taken at the time of the takeover.Proof IAN HAWTHORNE / PHOTOGRAPHER / Commercial, Portrait, Wedding, Colour Processor / Upstairs, 140 Moorabool St., Geelong Ph. 98096textile finishing, godfrey hirst and co. pty ltd, dry finishing, raising machinery -
 National Wool Museum
Photograph
... ...Dry finishing...Textile Mills - operation Dry finishing Cloth shearing Photograph ...Depicts the a cloth shearing machine within a mill, c.1950s. Part of a series of photos depicting the various operations within a textile mill, all of which have been edited for publication.textile mills - operation, dry finishing, cloth shearing -
 National Wool Museum
Photograph
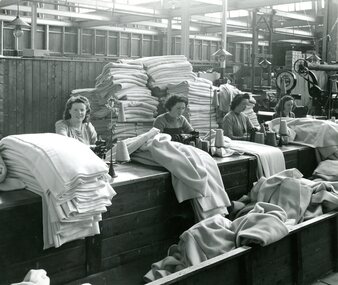
... ...Dry finishing...Textile Mills - operation Dry finishing Selvaging Photograph Photograph ...Depicts the sewing of blanket selvages / edges within a mill, c.1950s. Part of a series of photos depicting the various operations within a textile mill, all of which have been edited for publication.textile mills - operation, dry finishing, selvaging -
 Bendigo Historical Society Inc.
Clothing - SCHOOL UNIFORM DRESS
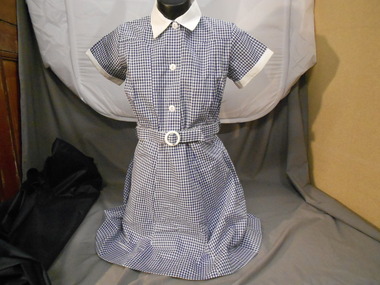
... Blue and white swing tag ''Buxwear Drip dry finish 12 Norman Buck elo P/l....Blue and white swing tag ''Buxwear Drip dry finish 12 Norman Buck elo P/l. Blue and white checked gingham waisted girl's school uniform dress. ...Blue and white checked gingham waisted girl's school uniform dress. White fabric collar. Short sleeves with fabric cuffs. Skirt has six gored panels. Bodice has front opening with three white plastic buttons. Yoke across front and back. Inverted pleat at centre back. Two pleats on either side of front opening.Matching belt, 11400.261. Two belt keepers at sides.Original cloth label and swing label with care and washing instructions.Inside collar ''Buxwear rgd Quality school wear, Norman W. Buck P/L 12''. Cardboard label stapled to clothing label ''The Beehive'' DC AE 587 $23.99. Blue and white swing tag ''Buxwear Drip dry finish 12 Norman Buck elo P/l.costume, female, gir'ls school uniform dress -
 Southern Sherbrooke Historical Society Inc.
Work on paper - Wine bottle label
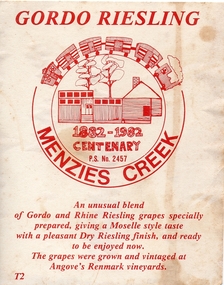
... 'GORDO RIESLING/An unusual blend/ of Gordo and Riesling grapes specially/ prepared, giving a Moselle style taste/with a pleasant Dry Riesling finish, and ready/to be enjoyed now./The grapes were grown and vintaged at/ Angove's Renmark vineyards.' ...'GORDO RIESLING/An unusual blend/ of Gordo and Riesling grapes specially/ prepared, giving a Moselle style taste/with a pleasant Dry Riesling finish, and ready/to be enjoyed now./The grapes were grown and vintaged at/ Angove's Renmark vineyards.' ...Colour photograph of a fundraising wine bottle label promoting the centenary of the Menzies Creek State School. Label is off-white with red printing. 'GORDO RIESLING/An unusual blend/ of Gordo and Riesling grapes specially/ prepared, giving a Moselle style taste/with a pleasant Dry Riesling finish, and ready/to be enjoyed now./The grapes were grown and vintaged at/ Angove's Renmark vineyards.' The label features the (then) school logo, designed to mark the school's centenary, with artwork by Tanya Mayer and Konrad Matta. -
 Emerald Museum & Nobelius Heritage Park
Container - Home Repair Ink Tan Bottle, Ascot Manufacturing Co, Circa Mid 20th Century
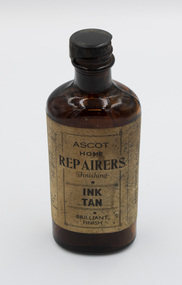
... Inside the bottle is a dry powder, likely the dried remains of the finishing ink. The label is degraded with block spots and faded text.... powder, likely the dried remains of the finishing ink. The label is degraded with block spots and faded text. ...This bottle of finishing ink was manufacturer by Ascot Manufacturing Co., a subsidiary of Melbourne pharmaceutical company Rocke Tompsitt & Co Ltd. Finishing ink was used by cobblers - and in this case, by shoe and boot owners at home - to colour and polish the raw cut edge of leather and to repair worn or damaged edges of shoe soles. It is difficult to determine exactly when this was made or used without more detailed records of Ascot Manufacturing's catalogue, but Rocke Tompsitt ceased independently operating in 1978 and their ownership of Ascot dates back at least to 1945, if not earlier. Rocke Tompsitt was founded in 1908.Finishing ink was historically used in the area for domestic maintenance of shoes and boots. This bottle was made by a defunct company in a style no longer in use.A bottle made of brown glass, with a brown paper label on the front side. The plastic lid is damaged, with only half of the screw cap remaining. Inside the bottle is a dry powder, likely the dried remains of the finishing ink. The label is degraded with block spots and faded text.Front Label: "ASCOT / HOME / REPAIRERS / Finishing / INK / TAN / BRILLIANT / FINISH" Right Label: "ROCKE TOMPSITT & CO. LTD / MELBOURNE / MX 3493"clothes, domestic life -
 Bendigo Military Museum
Uniform - WORKWEAR, RAN, Australian Defence Industries
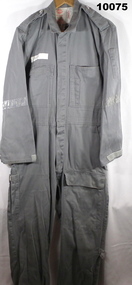
... DRY CLEANABLE (A)/ MADE IN AUSTRALIA/ NATO STOCK NO./ 8415-66-139-5544/ SIZE/ 92r/ 395". "NATIONAL TEXTILES PTY LTD/ 'PROBAN" with extensive information on the Flame Retardant Finish and laundry care. ...DRY CLEANABLE (A)/ MADE IN AUSTRALIA/ NATO STOCK NO./ 8415-66-139-5544/ SIZE/ 92r/ 395". "NATIONAL TEXTILES PTY LTD/ 'PROBAN" with extensive information on the Flame Retardant Finish and laundry care. ...Refer Cat No. 10069.4 for details.RAN Uniform, overalls, mid grey colour cotton fabric with 'DURABLE FLAME RESISTENT FINISH". Collar, shoulder epaulettes, elastic waist at back, metal press stud closure. Name label, white cotton, front right side. Two inset side pockets, five patch pockets. Manufacturer's information - two white cotton/polyester labels back below collar.Name label on front - black ink pen "VARGA". Manufacturer's details - black and red ink print. "KING GEE/ ALL COTTON/ 311 gm/ PREMIUM QUALITY/ HEAVYWEIGTH DRIL/ PRE-SHRUNK/ WARM MACHINE WASH/ DO NOT BOIL/ MILD DETERGENT. WARM RINSE/ DO NOT BLEACH, TUMBLE DRY WARM/ WARM IRON/ DO NOT OVERDRY/ DRY CLEANABLE (A)/ MADE IN AUSTRALIA/ NATO STOCK NO./ 8415-66-139-5544/ SIZE/ 92r/ 395". "NATIONAL TEXTILES PTY LTD/ 'PROBAN" with extensive information on the Flame Retardant Finish and laundry care. uniform, ran, work wear, rachel bowman, varga -
 Kiewa Valley Historical Society
Tipping Dray
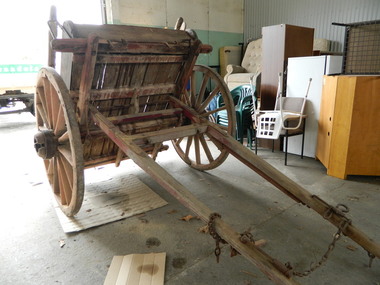
... dry). This tipping dray was owned by John Briggs who carried gravel on the Tawonga to German Creek Road from 1894 to 1895. Workers were paid 2/- (shillings) per day to cover sections that were called 'a paddock' resulting in workers finishing at 10 or 11 pm. ...The dray was pulled by a horse and used to transport road building materials such as gravel. The tray carried 0.7 of a cubic metre which would have weighed about 1 tonne (varying on the load being wet or dry).This tipping dray was owned by John Briggs who carried gravel on the Tawonga to German Creek Road from 1894 to 1895. Workers were paid 2/- (shillings) per day to cover sections that were called 'a paddock' resulting in workers finishing at 10 or 11 pm. The road opened on the 17th March 1896 at a cost of 1700 pounds. See KVHS 0960 for newspaper article re Tom Briggs and making (and photo) of the Tawonga Gap road.Old single axil wooden dray with wooden spoke wheels and a tipping wooden tray.tipping dray. john briggs. tawonga. german creek. road building. transport. -
 Bendigo Historical Society Inc.
Document - Blotting Paper, 1930's, possibly post 1936
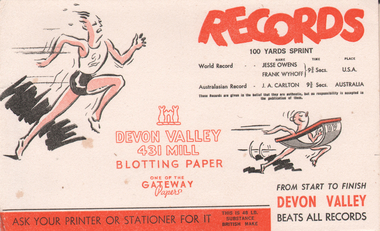
... dry. gold mining gold Margaret Roberts Collection Bendigo blotting paper Cream coloured blotting paper, bi-fold, two copies. Printed on front: ' Records, 100 yards sprint' Records of Jesse Owens, Frank Wyhoff and J.A. Carlton recorded. 'Devon Valley 431 Mill, Blotting Paper'. Drawing of man running, dressed in shorts and singlet on left hand side of blotter... 'From start to finish ...Mining journal information was recorded in ink. Blotting paper was required to ensure that the ink was dry.Cream coloured blotting paper, bi-fold, two copies. Printed on front: ' Records, 100 yards sprint' Records of Jesse Owens, Frank Wyhoff and J.A. Carlton recorded. 'Devon Valley 431 Mill, Blotting Paper'. Drawing of man running, dressed in shorts and singlet on left hand side of blotter... 'From start to finish Devon Valley beats all records' on bottom right of blotter. Blotter was located in a mining journal in the Margaret Roberts Collection.gold mining, gold, margaret roberts collection, bendigo, blotting paper -
 Flagstaff Hill Maritime Museum and Village
Container - Ink Bottle & Case, 1934 – Mid 1950’s
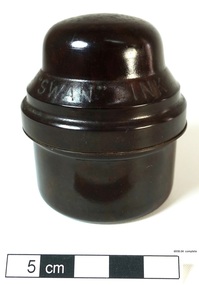
... finish, the lid screws on and off perfectly. The maker’s name is embossed on lid and base of the Bakelite container. The inkwell contains a glass Ink bottle with a tiny amount of dried up ink Swan triple filtered ink inside. ...finish, the lid screws on and off perfectly. The maker’s name is embossed on lid and base of the Bakelite container. The inkwell contains a glass Ink bottle with a tiny amount of dried up ink Swan triple filtered ink inside. ...Pens, nib pens and later fountain pens, with suitable inks, were commonly used for writing communications from the 18th century to the mod 20th century. Fountain pens continue to be used and enjoyed. Dip pens with a wide variety of nibs are used for calligraphy writing, a hobby enjoyed by many people. The quality of the pen handle, the nib and the ink all work together to produce fine handwriting that expresses the character and mood of the writer. This Bakelite ink case has been specifically moulded to snugly contain an ink bottle, with just enough room to wrap the bottle with a padding or card or blotting paper. The screw top lid fits the case well and this container would be a good way to travel with ink because any spillage would be kept within the waterproof case. The Bakelite material is lightweight and strong. Ink bottle cases, or travelling cases, have been made as an accessory for nib pen writers. The first patent for a “pocket-case for bottles”, a wooden case, was applied for in the US in 1891. Other materials such as steel, pewter and aluminum as well as Bakelite have also been used. The British Museum has an elaborately decorated bronze ink pot holder that is inlaid with turquoise. Today ink bottle cases are even available in fabric with loops to attach to a belt. Bakelite, the material used for this ink bottle case, is made from synthetic materials and is an early form of plastic, developed in 1907 and used extensively until the 1940’s. It is still in used today for specific applications but has been largely replaced by more modern forms of plastics. This ink bottle case carries the imprint of Mabie, Todd & Co. (Aust.) Pty. Ltd. This form of company name was used from 1938 to the mid 1950’s. The Swan ink bottle’s information says it was made by Mabie, Todd & Co. Ltd., London and Sydney, so dates the ink bottle from about 1908 until 1934. (Australian newspapers display advertisements dated 1908 until 1934 for Sydney wholesalers and agents for Mabie, Todd & Co. Ltd.) ABOUT PERSONAL FOUNTAIN PENS (FOUNT PENS) A 1917 newspaper advertisement recommends that the owner of a “Swan” doesn’t lend it to anyone else to use due to its qualities of it personalised to the owner. It reads “Don’t lend your “Swan” fountpen, recommend it, but don’t let other people use it. You see, a good pen doesn’t wear, but its “tamper” (or spring) works into the writer’s pressure and manner of holding. Another person with a dashing style of writing may strain it do that it will no longer feel just like your own.” This personalisation of nib pens may be the reason that legal documents in the past being acceptable only if they were signed using a ‘wet ink’ pen. Forgeries of signatures could be easily detected as the nib takes on the character of the pen’s owner. A ballpoint pen was not acceptable. This is a strong contrast to modern times when a digital signature is widely accepted. ABOUT MABIE TODD Pty Ltd. The American company Mabie Todd began by making pencil cases in New York in the 1860’s. The Bard Brothers, makers of Gold nibs, joined Mabie Todd and the company was established in the 1870’s as Mabie Todd and Bard. In 1878 the company filed a patent for the design of a fountain pen and in 1884 the first Swan fountain pen was released. In 1884 a Mabie Todd and Bard office and showroom was established in London. In 1906 the company’s name changed to Mabie Todd & Co, New York. The UK offices also used this new name and in 1907 the UK began producing their own Swan pens. Manufacturing was going so well in England that New York sold their rights to European and Colonial business to the new Mabie Todd & Company Ltd of England. By the end of the 1930’s all components for the pens were being made in the UK; the pens in the London factory, the gold nibs in Birmingham and the ink in Liverpool. Newspaper articles from 1934 stated that Mabie Todd were large buyers of Tasmanian iridium, which had been welded with gold and used since 1834 for the tips of nib and fountain pens. Fountain pen points were the largest market buyers for Tasmanian iridium, which was classed as “the best in the world”. Production growth continued up until WWII times, when the headquarters and main factory were destroyed. Mabie Todd & Company Ltd of England rebuilt out of the inner city and by 1946 pen production began again. The market for nib and fountain pens was diminishing by this time, with people beginning to use the new ballpoint ‘Biro’ pens. The Mabie Todd bought shares in Biro Pens and in 1952 became Biro Swan. They went on to make more ballpoint pens than any other manufacturer in Britain. The ink refills that Biro-Swan produced came in five different viscosity or thickness xhoices, depending on the season and location of where the pen would be used . Along with the ballpoint pens, Biro-Swan also introduced a range of Calligraph pens to attract those following the new trend for italic writing. In 1948 Mr. T. Burke, a director for Mabie Todd & Co. (Aust.) Pty Ltd., announced that there would be a £40,000 factory built in Sydney in 1949 for the manufacture of ink. The plant for the factory would be imported from overseas. Sadly the company struggled against competition and in 1956 Mabie Todd closed business and no more Swan pens were produced. The ink bottle and container was donated to Flagstaff Hill Maritime Village by the family of Doctor William Roy Angus, Surgeon and Oculist. It is part of the “W.R. Angus Collection” includes historical medical equipment, surgical instruments and material once belonging to Dr Edward Ryan and Dr Thomas Francis Ryan, (both of Nhill, Victoria) as well as Dr Angus’ own belongings. The Collection’s history spans the medical practices of the two Doctors Ryan, from 1885-1926 plus that of Dr Angus, up until 1969. ABOUT THE “W.R.ANGUS COLLECTION” Doctor William Roy Angus M.B., B.S., Adel., 1923, F.R.C.S. Edin.,1928 (also known as Dr Roy Angus) was born in Murrumbeena, Victoria in 1901 and lived until 1970. He qualified as a doctor in 1923 at University of Adelaide, was Resident Medical Officer at the Royal Adelaide Hospital in 1924 and for a period was house surgeon to Sir (then Mr.) Henry Simpson Newland. Dr Angus was briefly an Assistant to Dr Riddell of Kapunda, then commenced private practice at Curramulka, Yorke Peninsula, SA, where he was physician, surgeon and chemist. In 1926, he was appointed as new Medical Assistant to Dr Thomas Francis Ryan (T.F. Ryan, or Tom), in Nhill, Victoria, where his experiences included radiology and pharmacy. In 1927 he was Acting House Surgeon in Dr Tom Ryan’s absence. Dr Angus had become engaged to Gladys Forsyth and they decided he further his studies overseas in the UK in 1927. He studied at London University College Hospital and at Edinburgh Royal Infirmary and in 1928, was awarded FRCS (Fellow from the Royal College of Surgeons), Edinburgh. He worked his passage back to Australia as a Ship’s Surgeon on the on the Australian Commonwealth Line’s T.S.S. Largs Bay. Dr Angus married Gladys in 1929, in Ballarat. (They went on to have one son (Graham 1932, born in SA) and two daughters (Helen (died 12/07/1996) and Berenice (Berry), both born at Mira, Nhill ) According to Berry, her mother Gladys made a lot of their clothes. She was very talented and did some lovely embroidery including lingerie for her trousseau and beautifully handmade baby clothes. Dr Angus was a ‘flying doctor’ for the A.I.M. (Australian Inland Ministry) Aerial Medical Service in 1928 . Its first station was in the remote town of Oodnadatta, where Dr Angus was stationed. He was locum tenens there on North-South Railway at 21 Mile Camp. He took up this ‘flying doctor’ position in response to a call from Dr John Flynn; the organisation was later known as the Flying Doctor Service, then the Royal Flying Doctor Service. A lot of his work during this time involved dental surgery also. Between 1928-1932 he was surgeon at the Curramulka Hospital, Yorke Peninsula, South Australia. In 1933 Dr Angus returned to Nhill and purchased a share of the Nelson Street practice and Mira hospital (a 2 bed ward at the Nelson Street Practice) from Dr Les Middleton one of the Middleton Brothers, the current owners of what previously once Dr Tom Ryan’s practice. Dr Tom and his brother had worked as surgeons included eye surgery. Dr Tom Ryan performed many of his operations in the Mira private hospital on his premises. He had been House Surgeon at the Nhill Hospital 1902-1926. Dr Tom Ryan had one of the only two pieces of radiology equipment in Victoria during his practicing years – The Royal Melbourne Hospital had the other one. Over the years Dr Tom Ryan had gradually set up what was effectively a training school for country general-practitioner-surgeons. Each patient was carefully examined, including using the X-ray machine, and any surgery was discussed and planned with Dr Ryan’s assistants several days in advance. Dr Angus gained experience in using the X-ray machine there during his time as assistant to Dr Ryan. When Dr Angus bought into the Nelson Street premises in Nhill he was also appointed as the Nhill Hospital’s Honorary House Surgeon 1933-1938. His practitioner’s plate from his Nhill surgery is now mounted on the doorway to the Port Medical Office at Flagstaff Hill Maritime Village, Warrnambool. When Dr Angus took up practice in the Dr Edward and Dr Tom Ryan’s old premises he obtained their extensive collection of historical medical equipment and materials spanning 1884-1926. A large part of this collection is now on display at the Port Medical Office at Flagstaff Hill Maritime Village in Warrnambool. In 1939 Dr Angus and his family moved to Warrnambool where he purchased “Birchwood,” the 1852 home and medical practice of Dr John Hunter Henderson, at 214 Koroit Street. (This property was sold in1965 to the State Government and is now the site of the Warrnambool Police Station. and an ALDI sore is on the land that was once their tennis court). The Angus family was able to afford gardeners, cooks and maids; their home was a popular place for visiting dignitaries to stay whilst visiting Warrnambool. Dr Angus had his own silk worm farm at home in a Mulberry tree. His young daughter used his centrifuge for spinning the silk. Dr Angus was appointed on a part-time basis as Port Medical Officer (Health Officer) in Warrnambool and held this position until the 1940’s when the government no longer required the service of a Port Medical Officer in Warrnambool; he was thus Warrnambool’s last serving Port Medical Officer. (Masters of immigrant ships arriving in port reported incidents of diseases, illness and death and the Port Medical Officer made a decision on whether the ship required Quarantine and for how long, in this way preventing contagious illness from spreading from new immigrants to the residents already in the colony.) Dr Angus was a member of the Australian Medical Association, for 35 years and surgeon at the Warrnambool Base Hospital 1939-1942, He served with the Australian Department of Defence as a Surgeon Captain during WWII 1942-45, in Ballarat, Victoria, and in Bonegilla, N.S.W., completing his service just before the end of the war due to suffering from a heart attack. During his convalescence he carved an intricate and ‘most artistic’ chess set from the material that dentures were made from. He then studied ophthalmology at the Royal Melbourne Eye and Ear Hospital and created cosmetically superior artificial eyes by pioneering using the intrascleral cartilage. Angus received accolades from the Ophthalmological Society of Australasia for this work. He returned to Warrnambool to commence practice as an ophthalmologist, pioneering in artificial eye improvements. He was Honorary Consultant Ophthalmologist to Warrnambool Base Hospital for 31 years. He made monthly visits to Portland as a visiting surgeon, to perform eye surgery. He represented the Victorian South-West subdivision of the Australian Medical Association as its secretary between 1949 and 1956 and as chairman from 1956 to 1958. In 1968 Dr Angus was elected member of Spain’s Barraquer Institute of Barcelona after his research work in Intrasclearal cartilage grafting, becoming one of the few Australian ophthalmologists to receive this honour, and in the following year presented his final paper on Living Intrasclearal Cartilage Implants at the Inaugural Meeting of the Australian College of Ophthalmologists in Melbourne In his personal life Dr Angus was a Presbyterian and treated Sunday as a Sabbath, a day of rest. He would visit 3 or 4 country patients on a Sunday, taking his children along ‘for the ride’ and to visit with him. Sunday evenings he would play the pianola and sing Scottish songs to his family. One of Dr Angus’ patients was Margaret MacKenzie, author of a book on local shipwrecks that she’d seen as an eye witness from the late 1880’s in Peterborough, Victoria. In the early 1950’s Dr Angus, painted a picture of a shipwreck for the cover jacket of Margaret’s book, Shipwrecks and More Shipwrecks. She was blind in later life and her daughter wrote the actual book for her. Dr Angus and his wife Gladys were very involved in Warrnambool’s society with a strong interest in civic affairs. He had an interest in people and the community They were both involved in the creation of Flagstaff Hill, including the layout of the gardens. After his death (28th March 1970) his family requested his practitioner’s plate, medical instruments and some personal belongings be displayed in the Port Medical Office surgery at Flagstaff Hill Maritime Village, and be called the “W. R. Angus Collection”. The ink bottle case is significant for its association with writing methods commonly used during the colonisation of Australia until the mid-20th century. The protective Bakelite case demonstrates the value placed on caring for the user’s supply of ink and protecting other belongings of the user, enabling writers to easily carry and safely transport their ink without the concern of spilling it. The case’s design is a good example of the use of new technology. The properties of Bakelite have enabled its moulded design and make it waterproof and lightweight, easily cleaned, closely fitted to the shape of the ink bottle within and lid and base join together using a smooth screwing action. The maker’s marks have also been moulded into the Bakelite, therefore not distracting from the simple but elegant design. This ink bottle case also represents the period of early to mid-20th century when handwriting materials for writers using ink and nib pens were imported into Australia and developed for the Australian market and sold by wholesalers on behalf of overseas companies. Vintage brown Bakelite travelling ink bottle case (or holder, pot, well) containing glass ink bottle and original textured cardboard liner, made by Swan Ink, Mabie, Todd & Co. (Aust) Pty.. Ltd. The Bakelite container is shaped to fit snugly around the ink bottle. It still retains its original shiny finish, the lid screws on and off perfectly. The maker’s name is embossed on lid and base of the Bakelite container. The inkwell contains a glass Ink bottle with a tiny amount of dried up ink Swan triple filtered ink inside. The bottle is cylindrical with curved shoulders tapering to a neck of around 2cm. The white metal screw-on lid and the white and red paper label on the side of the bottle both have a printed description of the ink and maker. Circa 1934-1950’sBAKELITE INK CASE - embossed on either side of the lid “ “SWAN” INK / ”SWAN” INK “ - embossed into base, written in a circle “MABIE TODD & Co (Aust.) PTY. LTD.” GLASS BOTTLE – printed on lid “SWAN”/ [corporate logo combining letters ‘M, T, co’]/TRIPLE FILTERED/ INK.” - printed on label “SWAN” INK /FOR FOUNTAIN & / STEEL PENS / A BLUE BLACK INK OF/ THE FINEST QUALITY/ MADE IN ENGLAND/ MABIE. TODD & CO LTD …….. LONDON. SYDNEY/ Makers of “SWAN” Pens, Gold Pens & Ink“ - moulded into the base of the ink bottle and written around the bottom outside edge of the bottle are the words “THIS BOTTLE ALWAYS REMAINS THE PROPERTY OF/ MABIE TODD/AUST”flagstaff hill, warrnambool, shipwrecked coast, flagstaff hill maritime museum, maritime museum, shipwreck coast, flagstaff hill maritime village, great ocean road, ink bottle holder, ink bottle case, ink bottle pot, travelling inkwell, portable inkwell, travelling ink pot, travelling ink bottle case, ink bottle, inkwell, ink well, swan ink, bakelite, dip pen ink, nib pen ink, fountain pen, fontpen, writing methods, stationery, mabie todd & co, swan fountain pens, biro-swan -
 Flagstaff Hill Maritime Museum and Village
Domestic object - Plate
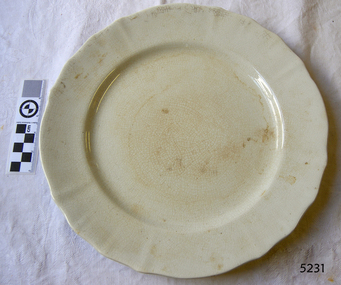
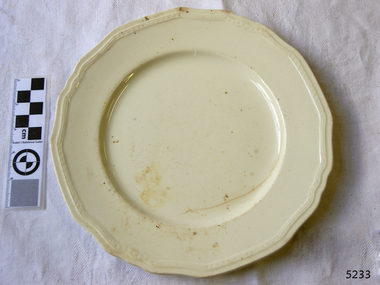
... Trimming thrown work: If you are planning to trim (or turn) your thrown work (and you should be), make sure you bag it well – your work should be leather hard to almost dry for easiest trimming. Use this step to finish the work completely – use a metal kidney to polish the surface, or a slightly damp sponge to give a freshly thrown look. ...Trimming thrown work: If you are planning to trim (or turn) your thrown work (and you should be), make sure you bag it well – your work should be leather hard to almost dry for easiest trimming. Use this step to finish the work completely – use a metal kidney to polish the surface, or a slightly damp sponge to give a freshly thrown look. ...The Process of Making Pottery Decorating, Firing, Glazing, Making, Technical There is a rhythm and flow to clay. It can’t be done all at once! Even the making process! It can take weeks to get everything done, especially if you can only work on your pottery once a week! Even though we have three hour classes, it’s often just not enough time! Here is an overview of some of the processes so you have a bit more grasp on some of the technical stuff! Step One – Design There are SO many ideas out there for making stuff in clay! From delicate porcelain jewellery, through to heavy sculptural work and everything in between. Deciding your direction is sometimes not that easy – when you first start, try everything, you will naturally gravitate to the style that you enjoy! The options and variations are endless and can get a wee bit overwhelming too! Check in with me before you start to ensure your ideas will work, what order you might do things, how you could achieve the look you are seeking and any other technical data required! Step Two – Making Clay is thixotropic. This means that as you work with it, the clay first gets sloppier and wetter, before is begins to dry in the atmosphere. For most things, you simply can’t do all parts of the project at once. An example of work order might look like: Get last weeks work out from the shelves Prepare clay for today’s work – roll your clay, prepare balls for throwing, make the first stage of a pinch pot) Clean up last week’s work and put it on the shelf for bisque firing Check that you have any glazing to do – and do enough of it that you will have time to finish your main project Do the next step of your next project – there might be a further step that can’t be complete immediately, in that case, wrap your work well and put onto the shelves. Letting your work rest for a while can really help keep your work clean and professional looking. Many things require bagging under plastic to keep it ready for work the next week – put your name on the outside of the bag so you can find your work easily. We have stickers and markers. Consider how you want to decorate your work – coloured slip can be applied at a fairly wet stage (remembering that it will make your work even wetter!). Trying to apply slip to dry clay won’t work! If you want to do sgraffito – you will need to keep the work leather hard (a state of dryness where you can still work the clay with a little effort and a little water and care). Step Three – Drying Most of the time your work can go into the rack uncovered to let it dry out for the following week. If you want to continue forming or shaping you will need to double bag your work – put your work on a suitable sized bat and put the bat in a bag so the base of the bag is under the bat, then put another bag over the top of the work and tuck the top of the bag under the bat. If you want to trim (or turn) your thrown work the following week, it should also be double bagged. If your work is large, delicate, or of uneven thicknesses, you should lightly cover your work for drying. When considering the drying process, bare in mind the weather, humidity and wind! The hotter and dryer, the faster things dry and work can dry unevenly in the shelves – this can lead to cracking – another time to lightly cover your work for drying. Step Four – Trimming and Cleaning Up Your work is dry! It is called greenware now and it is at it’s most fragile! Handle everything with two hands. I often refer to soft hands – keep everything gentle and with your fingers spread as much as possible. Try to not pick up things like plates too much, and always with both hands! Before your work can be bisque fired it should be “cleaned up”. You work won’t go into the kiln if it has sharp edges – when glazed, sharp edges turn into razor blades! Use a piece of fly wire to rub the work all over – this will scratch a little so be light handed. Use a knife or metal kidney to scrape any areas that require a bit more dynamic treatment than the fly wire offers! Finally, a very light wipe over with a slightly damp sponge can help soften and soothe all of your edges and dags! Trimming thrown work: If you are planning to trim (or turn) your thrown work (and you should be), make sure you bag it well – your work should be leather hard to almost dry for easiest trimming. Use this step to finish the work completely – use a metal kidney to polish the surface, or a slightly damp sponge to give a freshly thrown look. Wipe the sponge around the rim after trimming, and check the inside of the pot for dags! Trimming slip cast work: Usually I will trim the rims of your work on the wheel the following day to make that stage easier, however you will still need to check your work for lumps and bumps. Last but not least – check that your name is still clearly on the bottom of your work. Step Five – Bisque Firing When the work is completely dry it can go into the bisque kiln. The bisque kiln is fired to 1000°C. This process burns off the water in the clay as well as some of the chemically bound water. The structure of the clay is not altered that much at this temperature. Inside the bisque kiln, the work is stacked a little, small bowl inside a larger bowl and onto a heavy plate. Smaller items like decorations or drink coasters might get stacked several high. Consideration is paid to the weight of the stack and shape of the work. A bisque kiln can fire about one and a half times the amount of work that the glaze kiln can fire. The firing takes about 10 hours to complete the cycle and about two days to cool down. Once it has been emptied the work is placed in the glaze room ready for you to decorate! Step Six – Glazing Decorating your work with colour can be a lot of fun – and time consuming! There are three main options for surface treatment at this stage: Oxide Washes Underglazes Glazes Washes and underglazes do not “glaze” the work – It will still need a layer of glaze to fully seal the clay (washes don’t need glaze on surfaces not designed for food or liquid as they can gloss up a little on their own). Underglazes are stable colourants that turn out pretty much how they look in the jar. They can be mixed with each other to form other colours and can be used like water colours to paint onto your work. Mostly they should have a clear glaze on top to seal them. Oxides are a different species – the pink oxide (cobalt) wash turns out bright blue for instance. They don’t always need a glaze on top, and some glazes can change the colour of the wash! The glazes need no other “glaze” on top! Be careful of unknown glaze interactions – you can put any combination of glaze in a bowl or on a plate, but only a single glaze on the outside of any vertical surface! Glazes are a chemical reaction under heat. We don’t know the exact chemicals in the Mayco glazes we use. I can guess by the way they interact with each other, however, on the whole, you need to test every idea you have, and not run the test on a vertical surface! Simply put, glaze is a layer of glass like substance that bonds with the clay underneath. Clay is made of silica, alumina and water. Glaze is made of mostly silica. Silica has a melting point of 1700°C and we fire to 1240°C. The silica requires a “flux” to help it melt at the lower temperature. Fluxes can be all sorts of chemicals – a common one is calcium – calcium has a melting point of 2500°C, however, together they both melt at a much lower temperature! Colourants are metal oxides like cobalt (blue), chrome (green through black), copper (green, blue, even red!), manganese (black, purple and pink) iron (red brown), etc. Different chemicals in the glaze can have dramatic effects. for example, barium carbonate (which we don’t use) turns manganese bright pink! Other elements can turn manganese dioxide brown, blue, purple and reddish brown. Manganese dioxide is a flux in and of itself as well. So, glazes that get their black and purple colours, often interact with other glazes and RUN! Our mirror black is a good example – it mixes really well with many glazes because it fluxes them – causes them to melt faster. It will also bring out many beautiful colours in the glazes because it’s black colouring most definitely comes from manganese dioxide! Glaze chemistry is a whole subject on it’s own! We use commercial Mayco glazes on purpose – for their huge range of colour possibilities, stability, cool interactions, artistic freedom with the ability to easily brush the glazes on and ease of use. We currently have almost 50 glazes on hand! A major project is to test the interactions of all glazes with each other. That is 2,500 test tiles!!!! I’m going to make the wall behind the wheels the feature wall of pretty colours! Step Seven – Glaze (Gloss or sometimes called “Glost”) Firing Most of the time this is the final stage of making your creation (but not always!) The glaze kiln goes to 1240°C. This is called cone 6, or midrange. It is the low end of stoneware temperatures. Stoneware clays and glazes are typically fired at cone 8 – 10, that is 1260 – 1290°C. The energy requirement to go from 1240°C to 1280°C is almost a 30% more! Our clay is formulated to vitrify (mature, turn “glass-like”) at 1240°, as are our glazes. A glaze kiln take around 12 hours to reach temperature and two to three days to cool down. Sometimes a third firing process is required – this is for decoration that is added to work after the glaze firing. For example – adding precious metals and lustres. this firing temperature is usually around 600 – 800°C depending upon the techniques being used. There are many students interested in gold and silver trims – we will be doing this third type of firing soon! After firing your work will be in the student finished work shelves. Remember to pay for it before you head out the door! There is a small extra charge for using porcelain clay (it’s more than twice the price of regular clay), and for any third firing process! Once your work has been fired it can not turn back into clay for millennia – so don’t fire it if you don’t like it! Put it in the bucket for recycling. https://firebirdstudios.com.au/the-process-of-making-pottery/Ceramics have evolved over thousands of years.White earthenware dinner plate. Crazing evident all over.Backstamped ‘Made in England S LTD’flagstaff hill, warrnambool, shipwrecked-coast, flagstaff-hill, flagstaff-hill-maritime-museum, maritime-museum, shipwreck-coast, flagstaff-hill-maritime-village, ceramics, tableware -
 Flagstaff Hill Maritime Museum and Village
Domestic object - Plate, Johnson Bros
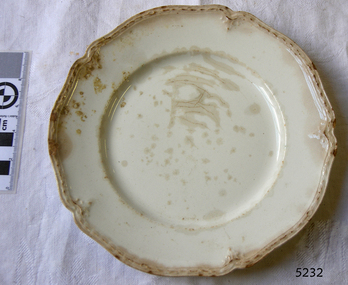
... Trimming thrown work: If you are planning to trim (or turn) your thrown work (and you should be), make sure you bag it well – your work should be leather hard to almost dry for easiest trimming. Use this step to finish the work completely – use a metal kidney to polish the surface, or a slightly damp sponge to give a freshly thrown look. ...Trimming thrown work: If you are planning to trim (or turn) your thrown work (and you should be), make sure you bag it well – your work should be leather hard to almost dry for easiest trimming. Use this step to finish the work completely – use a metal kidney to polish the surface, or a slightly damp sponge to give a freshly thrown look. ...The Process of Making Pottery Decorating, Firing, Glazing, Making, Technical There is a rhythm and flow to clay. It can’t be done all at once! Even the making process! It can take weeks to get everything done, especially if you can only work on your pottery once a week! Even though we have three hour classes, it’s often just not enough time! Here is an overview of some of the processes so you have a bit more grasp on some of the technical stuff! Step One – Design There are SO many ideas out there for making stuff in clay! From delicate porcelain jewellery, through to heavy sculptural work and everything in between. Deciding your direction is sometimes not that easy – when you first start, try everything, you will naturally gravitate to the style that you enjoy! The options and variations are endless and can get a wee bit overwhelming too! Check in with me before you start to ensure your ideas will work, what order you might do things, how you could achieve the look you are seeking and any other technical data required! Step Two – Making Clay is thixotropic. This means that as you work with it, the clay first gets sloppier and wetter, before is begins to dry in the atmosphere. For most things, you simply can’t do all parts of the project at once. An example of work order might look like: Get last weeks work out from the shelves Prepare clay for today’s work – roll your clay, prepare balls for throwing, make the first stage of a pinch pot) Clean up last week’s work and put it on the shelf for bisque firing Check that you have any glazing to do – and do enough of it that you will have time to finish your main project Do the next step of your next project – there might be a further step that can’t be complete immediately, in that case, wrap your work well and put onto the shelves. Letting your work rest for a while can really help keep your work clean and professional looking. Many things require bagging under plastic to keep it ready for work the next week – put your name on the outside of the bag so you can find your work easily. We have stickers and markers. Consider how you want to decorate your work – coloured slip can be applied at a fairly wet stage (remembering that it will make your work even wetter!). Trying to apply slip to dry clay won’t work! If you want to do sgraffito – you will need to keep the work leather hard (a state of dryness where you can still work the clay with a little effort and a little water and care). Step Three – Drying Most of the time your work can go into the rack uncovered to let it dry out for the following week. If you want to continue forming or shaping you will need to double bag your work – put your work on a suitable sized bat and put the bat in a bag so the base of the bag is under the bat, then put another bag over the top of the work and tuck the top of the bag under the bat. If you want to trim (or turn) your thrown work the following week, it should also be double bagged. If your work is large, delicate, or of uneven thicknesses, you should lightly cover your work for drying. When considering the drying process, bare in mind the weather, humidity and wind! The hotter and dryer, the faster things dry and work can dry unevenly in the shelves – this can lead to cracking – another time to lightly cover your work for drying. Step Four – Trimming and Cleaning Up Your work is dry! It is called greenware now and it is at it’s most fragile! Handle everything with two hands. I often refer to soft hands – keep everything gentle and with your fingers spread as much as possible. Try to not pick up things like plates too much, and always with both hands! Before your work can be bisque fired it should be “cleaned up”. You work won’t go into the kiln if it has sharp edges – when glazed, sharp edges turn into razor blades! Use a piece of fly wire to rub the work all over – this will scratch a little so be light handed. Use a knife or metal kidney to scrape any areas that require a bit more dynamic treatment than the fly wire offers! Finally, a very light wipe over with a slightly damp sponge can help soften and soothe all of your edges and dags! Trimming thrown work: If you are planning to trim (or turn) your thrown work (and you should be), make sure you bag it well – your work should be leather hard to almost dry for easiest trimming. Use this step to finish the work completely – use a metal kidney to polish the surface, or a slightly damp sponge to give a freshly thrown look. Wipe the sponge around the rim after trimming, and check the inside of the pot for dags! Trimming slip cast work: Usually I will trim the rims of your work on the wheel the following day to make that stage easier, however you will still need to check your work for lumps and bumps. Last but not least – check that your name is still clearly on the bottom of your work. Step Five – Bisque Firing When the work is completely dry it can go into the bisque kiln. The bisque kiln is fired to 1000°C. This process burns off the water in the clay as well as some of the chemically bound water. The structure of the clay is not altered that much at this temperature. Inside the bisque kiln, the work is stacked a little, small bowl inside a larger bowl and onto a heavy plate. Smaller items like decorations or drink coasters might get stacked several high. Consideration is paid to the weight of the stack and shape of the work. A bisque kiln can fire about one and a half times the amount of work that the glaze kiln can fire. The firing takes about 10 hours to complete the cycle and about two days to cool down. Once it has been emptied the work is placed in the glaze room ready for you to decorate! Step Six – Glazing Decorating your work with colour can be a lot of fun – and time consuming! There are three main options for surface treatment at this stage: Oxide Washes Underglazes Glazes Washes and underglazes do not “glaze” the work – It will still need a layer of glaze to fully seal the clay (washes don’t need glaze on surfaces not designed for food or liquid as they can gloss up a little on their own). Underglazes are stable colourants that turn out pretty much how they look in the jar. They can be mixed with each other to form other colours and can be used like water colours to paint onto your work. Mostly they should have a clear glaze on top to seal them. Oxides are a different species – the pink oxide (cobalt) wash turns out bright blue for instance. They don’t always need a glaze on top, and some glazes can change the colour of the wash! The glazes need no other “glaze” on top! Be careful of unknown glaze interactions – you can put any combination of glaze in a bowl or on a plate, but only a single glaze on the outside of any vertical surface! Glazes are a chemical reaction under heat. We don’t know the exact chemicals in the Mayco glazes we use. I can guess by the way they interact with each other, however, on the whole, you need to test every idea you have, and not run the test on a vertical surface! Simply put, glaze is a layer of glass like substance that bonds with the clay underneath. Clay is made of silica, alumina and water. Glaze is made of mostly silica. Silica has a melting point of 1700°C and we fire to 1240°C. The silica requires a “flux” to help it melt at the lower temperature. Fluxes can be all sorts of chemicals – a common one is calcium – calcium has a melting point of 2500°C, however, together they both melt at a much lower temperature! Colourants are metal oxides like cobalt (blue), chrome (green through black), copper (green, blue, even red!), manganese (black, purple and pink) iron (red brown), etc. Different chemicals in the glaze can have dramatic effects. for example, barium carbonate (which we don’t use) turns manganese bright pink! Other elements can turn manganese dioxide brown, blue, purple and reddish brown. Manganese dioxide is a flux in and of itself as well. So, glazes that get their black and purple colours, often interact with other glazes and RUN! Our mirror black is a good example – it mixes really well with many glazes because it fluxes them – causes them to melt faster. It will also bring out many beautiful colours in the glazes because it’s black colouring most definitely comes from manganese dioxide! Glaze chemistry is a whole subject on it’s own! We use commercial Mayco glazes on purpose – for their huge range of colour possibilities, stability, cool interactions, artistic freedom with the ability to easily brush the glazes on and ease of use. We currently have almost 50 glazes on hand! A major project is to test the interactions of all glazes with each other. That is 2,500 test tiles!!!! I’m going to make the wall behind the wheels the feature wall of pretty colours! Step Seven – Glaze (Gloss or sometimes called “Glost”) Firing Most of the time this is the final stage of making your creation (but not always!) The glaze kiln goes to 1240°C. This is called cone 6, or midrange. It is the low end of stoneware temperatures. Stoneware clays and glazes are typically fired at cone 8 – 10, that is 1260 – 1290°C. The energy requirement to go from 1240°C to 1280°C is almost a 30% more! Our clay is formulated to vitrify (mature, turn “glass-like”) at 1240°, as are our glazes. A glaze kiln take around 12 hours to reach temperature and two to three days to cool down. Sometimes a third firing process is required – this is for decoration that is added to work after the glaze firing. For example – adding precious metals and lustres. this firing temperature is usually around 600 – 800°C depending upon the techniques being used. There are many students interested in gold and silver trims – we will be doing this third type of firing soon! After firing your work will be in the student finished work shelves. Remember to pay for it before you head out the door! There is a small extra charge for using porcelain clay (it’s more than twice the price of regular clay), and for any third firing process! Once your work has been fired it can not turn back into clay for millennia – so don’t fire it if you don’t like it! Put it in the bucket for recycling. https://firebirdstudios.com.au/the-process-of-making-pottery/Ceramics have evolved over thousands of years.A white earthenware side plate with a gadroon edge. Has water marks and chips on front.‘Johnson Bros England Reg No 15587’flagstaff hill, warrnambool, shipwrecked-coast, flagstaff-hill, flagstaff-hill-maritime-museum, maritime-museum, shipwreck-coast, flagstaff-hill-maritime-village, johnson bros, ceramics, tableware -
 Flagstaff Hill Maritime Museum and Village
Domestic object - Plate, Alfred Meakin
... Trimming thrown work: If you are planning to trim (or turn) your thrown work (and you should be), make sure you bag it well – your work should be leather hard to almost dry for easiest trimming. Use this step to finish the work completely – use a metal kidney to polish the surface, or a slightly damp sponge to give a freshly thrown look. ...Trimming thrown work: If you are planning to trim (or turn) your thrown work (and you should be), make sure you bag it well – your work should be leather hard to almost dry for easiest trimming. Use this step to finish the work completely – use a metal kidney to polish the surface, or a slightly damp sponge to give a freshly thrown look. ...The Process of Making Pottery Decorating, Firing, Glazing, Making, Technical There is a rhythm and flow to clay. It can’t be done all at once! Even the making process! It can take weeks to get everything done, especially if you can only work on your pottery once a week! Even though we have three hour classes, it’s often just not enough time! Here is an overview of some of the processes so you have a bit more grasp on some of the technical stuff! Step One – Design There are SO many ideas out there for making stuff in clay! From delicate porcelain jewellery, through to heavy sculptural work and everything in between. Deciding your direction is sometimes not that easy – when you first start, try everything, you will naturally gravitate to the style that you enjoy! The options and variations are endless and can get a wee bit overwhelming too! Check in with me before you start to ensure your ideas will work, what order you might do things, how you could achieve the look you are seeking and any other technical data required! Step Two – Making Clay is thixotropic. This means that as you work with it, the clay first gets sloppier and wetter, before is begins to dry in the atmosphere. For most things, you simply can’t do all parts of the project at once. An example of work order might look like: Get last weeks work out from the shelves Prepare clay for today’s work – roll your clay, prepare balls for throwing, make the first stage of a pinch pot) Clean up last week’s work and put it on the shelf for bisque firing Check that you have any glazing to do – and do enough of it that you will have time to finish your main project Do the next step of your next project – there might be a further step that can’t be complete immediately, in that case, wrap your work well and put onto the shelves. Letting your work rest for a while can really help keep your work clean and professional looking. Many things require bagging under plastic to keep it ready for work the next week – put your name on the outside of the bag so you can find your work easily. We have stickers and markers. Consider how you want to decorate your work – coloured slip can be applied at a fairly wet stage (remembering that it will make your work even wetter!). Trying to apply slip to dry clay won’t work! If you want to do sgraffito – you will need to keep the work leather hard (a state of dryness where you can still work the clay with a little effort and a little water and care). Step Three – Drying Most of the time your work can go into the rack uncovered to let it dry out for the following week. If you want to continue forming or shaping you will need to double bag your work – put your work on a suitable sized bat and put the bat in a bag so the base of the bag is under the bat, then put another bag over the top of the work and tuck the top of the bag under the bat. If you want to trim (or turn) your thrown work the following week, it should also be double bagged. If your work is large, delicate, or of uneven thicknesses, you should lightly cover your work for drying. When considering the drying process, bare in mind the weather, humidity and wind! The hotter and dryer, the faster things dry and work can dry unevenly in the shelves – this can lead to cracking – another time to lightly cover your work for drying. Step Four – Trimming and Cleaning Up Your work is dry! It is called greenware now and it is at it’s most fragile! Handle everything with two hands. I often refer to soft hands – keep everything gentle and with your fingers spread as much as possible. Try to not pick up things like plates too much, and always with both hands! Before your work can be bisque fired it should be “cleaned up”. You work won’t go into the kiln if it has sharp edges – when glazed, sharp edges turn into razor blades! Use a piece of fly wire to rub the work all over – this will scratch a little so be light handed. Use a knife or metal kidney to scrape any areas that require a bit more dynamic treatment than the fly wire offers! Finally, a very light wipe over with a slightly damp sponge can help soften and soothe all of your edges and dags! Trimming thrown work: If you are planning to trim (or turn) your thrown work (and you should be), make sure you bag it well – your work should be leather hard to almost dry for easiest trimming. Use this step to finish the work completely – use a metal kidney to polish the surface, or a slightly damp sponge to give a freshly thrown look. Wipe the sponge around the rim after trimming, and check the inside of the pot for dags! Trimming slip cast work: Usually I will trim the rims of your work on the wheel the following day to make that stage easier, however you will still need to check your work for lumps and bumps. Last but not least – check that your name is still clearly on the bottom of your work. Step Five – Bisque Firing When the work is completely dry it can go into the bisque kiln. The bisque kiln is fired to 1000°C. This process burns off the water in the clay as well as some of the chemically bound water. The structure of the clay is not altered that much at this temperature. Inside the bisque kiln, the work is stacked a little, small bowl inside a larger bowl and onto a heavy plate. Smaller items like decorations or drink coasters might get stacked several high. Consideration is paid to the weight of the stack and shape of the work. A bisque kiln can fire about one and a half times the amount of work that the glaze kiln can fire. The firing takes about 10 hours to complete the cycle and about two days to cool down. Once it has been emptied the work is placed in the glaze room ready for you to decorate! Step Six – Glazing Decorating your work with colour can be a lot of fun – and time consuming! There are three main options for surface treatment at this stage: Oxide Washes Underglazes Glazes Washes and underglazes do not “glaze” the work – It will still need a layer of glaze to fully seal the clay (washes don’t need glaze on surfaces not designed for food or liquid as they can gloss up a little on their own). Underglazes are stable colourants that turn out pretty much how they look in the jar. They can be mixed with each other to form other colours and can be used like water colours to paint onto your work. Mostly they should have a clear glaze on top to seal them. Oxides are a different species – the pink oxide (cobalt) wash turns out bright blue for instance. They don’t always need a glaze on top, and some glazes can change the colour of the wash! The glazes need no other “glaze” on top! Be careful of unknown glaze interactions – you can put any combination of glaze in a bowl or on a plate, but only a single glaze on the outside of any vertical surface! Glazes are a chemical reaction under heat. We don’t know the exact chemicals in the Mayco glazes we use. I can guess by the way they interact with each other, however, on the whole, you need to test every idea you have, and not run the test on a vertical surface! Simply put, glaze is a layer of glass like substance that bonds with the clay underneath. Clay is made of silica, alumina and water. Glaze is made of mostly silica. Silica has a melting point of 1700°C and we fire to 1240°C. The silica requires a “flux” to help it melt at the lower temperature. Fluxes can be all sorts of chemicals – a common one is calcium – calcium has a melting point of 2500°C, however, together they both melt at a much lower temperature! Colourants are metal oxides like cobalt (blue), chrome (green through black), copper (green, blue, even red!), manganese (black, purple and pink) iron (red brown), etc. Different chemicals in the glaze can have dramatic effects. for example, barium carbonate (which we don’t use) turns manganese bright pink! Other elements can turn manganese dioxide brown, blue, purple and reddish brown. Manganese dioxide is a flux in and of itself as well. So, glazes that get their black and purple colours, often interact with other glazes and RUN! Our mirror black is a good example – it mixes really well with many glazes because it fluxes them – causes them to melt faster. It will also bring out many beautiful colours in the glazes because it’s black colouring most definitely comes from manganese dioxide! Glaze chemistry is a whole subject on it’s own! We use commercial Mayco glazes on purpose – for their huge range of colour possibilities, stability, cool interactions, artistic freedom with the ability to easily brush the glazes on and ease of use. We currently have almost 50 glazes on hand! A major project is to test the interactions of all glazes with each other. That is 2,500 test tiles!!!! I’m going to make the wall behind the wheels the feature wall of pretty colours! Step Seven – Glaze (Gloss or sometimes called “Glost”) Firing Most of the time this is the final stage of making your creation (but not always!) The glaze kiln goes to 1240°C. This is called cone 6, or midrange. It is the low end of stoneware temperatures. Stoneware clays and glazes are typically fired at cone 8 – 10, that is 1260 – 1290°C. The energy requirement to go from 1240°C to 1280°C is almost a 30% more! Our clay is formulated to vitrify (mature, turn “glass-like”) at 1240°, as are our glazes. A glaze kiln take around 12 hours to reach temperature and two to three days to cool down. Sometimes a third firing process is required – this is for decoration that is added to work after the glaze firing. For example – adding precious metals and lustres. this firing temperature is usually around 600 – 800°C depending upon the techniques being used. There are many students interested in gold and silver trims – we will be doing this third type of firing soon! After firing your work will be in the student finished work shelves. Remember to pay for it before you head out the door! There is a small extra charge for using porcelain clay (it’s more than twice the price of regular clay), and for any third firing process! Once your work has been fired it can not turn back into clay for millennia – so don’t fire it if you don’t like it! Put it in the bucket for recycling. https://firebirdstudios.com.au/the-process-of-making-pottery/Ceramics have evolved over thousands of years.Earthenware dessert plate, cream colour. Made by Alfred Meakin, England. Backstamped ‘Alfred Meakin England’. flagstaff hill, warrnambool, shipwrecked-coast, flagstaff-hill, flagstaff-hill-maritime-museum, maritime-museum, shipwreck-coast, flagstaff-hill-maritime-village, alfred meakin, ceramics, earthenware, kitchenware -
 City of Moorabbin Historical Society (Operating the Box Cottage Museum)
Manufactured Object, shoe polish gold kid, 20thC
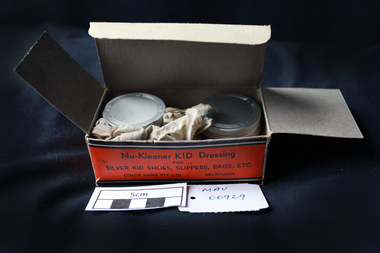
... Shoe polish is not a cleaning product, and therefore the footwear should be both clean and dry before application. shoes boots clothing boot preservation leather kid-leather personal effects handbags moorabbin colour shine pty ltd / curton co. pty. ltd 'top of box ' NU-KLEENER / SHOE DRESSING / GOLD KID / Cant B Beat ( drum soldier trade mark )' side THIS DRESSING IS SCIENTIFICALLY PREPARED BY EXPERTS TO ENSURE NOT ONLY A PERFECT FINISH, BUT ALSO AS A PRESERVATIVE OF THE ARTICLE TREATED,'/ Colour Shine Pty Ltd Melbourne. ...Shoe polish is a waxy paste, cream, or liquid used to polish, shine, and waterproof leather shoes or boots to extend the footwear's life, and restore, maintain and improve their appearance. Shoe polish is not a cleaning product, and therefore the footwear should be both clean and dry before application. A cardboard box containing 1 jar of creme polish and 1 jar of gold powder with 2 cloths to be used for preserving 'silver kid shoes, slippers, bags etc.''top of box ' NU-KLEENER / SHOE DRESSING / GOLD KID / Cant B Beat ( drum soldier trade mark )' side THIS DRESSING IS SCIENTIFICALLY PREPARED BY EXPERTS TO ENSURE NOT ONLY A PERFECT FINISH, BUT ALSO AS A PRESERVATIVE OF THE ARTICLE TREATED,'/ Colour Shine Pty Ltd Melbourne. Instructions for use on either end of box . Inside lid a stamp 'Curton Co. Pty Ltd. Melbourne' Jar 1 'NU-KLEENER GOLD KID CREME' Jar 2 'NU-KLEENER GOLD KID POWDER'shoes, boots, clothing, boot preservation, leather, kid-leather, personal effects, handbags, moorabbin, colour shine pty ltd / curton co. pty. ltd -
 Flagstaff Hill Maritime Museum and Village
Domestic object - Jug
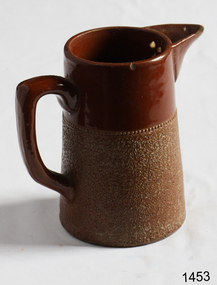
... Trimming thrown work: If you are planning to trim (or turn) your thrown work (and you should be), make sure you bag it well – your work should be leather hard to almost dry for easiest trimming. Use this step to finish the work completely – use a metal kidney to polish the surface, or a slightly damp sponge to give a freshly thrown look. ...Trimming thrown work: If you are planning to trim (or turn) your thrown work (and you should be), make sure you bag it well – your work should be leather hard to almost dry for easiest trimming. Use this step to finish the work completely – use a metal kidney to polish the surface, or a slightly damp sponge to give a freshly thrown look. ...The Process of Making Pottery Decorating, Firing, Glazing, Making, Technical There is a rhythm and flow to clay. It can’t be done all at once! Even the making process! It can take weeks to get everything done, especially if you can only work on your pottery once a week! Even though we have three hour classes, it’s often just not enough time! Here is an overview of some of the processes so you have a bit more grasp on some of the technical stuff! Step One – Design There are SO many ideas out there for making stuff in clay! From delicate porcelain jewellery, through to heavy sculptural work and everything in between. Deciding your direction is sometimes not that easy – when you first start, try everything, you will naturally gravitate to the style that you enjoy! The options and variations are endless and can get a wee bit overwhelming too! Check in with me before you start to ensure your ideas will work, what order you might do things, how you could achieve the look you are seeking and any other technical data required! Step Two – Making Clay is thixotropic. This means that as you work with it, the clay first gets sloppier and wetter, before is begins to dry in the atmosphere. For most things, you simply can’t do all parts of the project at once. An example of work order might look like: Get last weeks work out from the shelves Prepare clay for today’s work – roll your clay, prepare balls for throwing, make the first stage of a pinch pot) Clean up last week’s work and put it on the shelf for bisque firing Check that you have any glazing to do – and do enough of it that you will have time to finish your main project Do the next step of your next project – there might be a further step that can’t be complete immediately, in that case, wrap your work well and put onto the shelves. Letting your work rest for a while can really help keep your work clean and professional looking. Many things require bagging under plastic to keep it ready for work the next week – put your name on the outside of the bag so you can find your work easily. We have stickers and markers. Consider how you want to decorate your work – coloured slip can be applied at a fairly wet stage (remembering that it will make your work even wetter!). Trying to apply slip to dry clay won’t work! If you want to do sgraffito – you will need to keep the work leather hard (a state of dryness where you can still work the clay with a little effort and a little water and care). Step Three – Drying Most of the time your work can go into the rack uncovered to let it dry out for the following week. If you want to continue forming or shaping you will need to double bag your work – put your work on a suitable sized bat and put the bat in a bag so the base of the bag is under the bat, then put another bag over the top of the work and tuck the top of the bag under the bat. If you want to trim (or turn) your thrown work the following week, it should also be double bagged. If your work is large, delicate, or of uneven thicknesses, you should lightly cover your work for drying. When considering the drying process, bare in mind the weather, humidity and wind! The hotter and dryer, the faster things dry and work can dry unevenly in the shelves – this can lead to cracking – another time to lightly cover your work for drying. Step Four – Trimming and Cleaning Up Your work is dry! It is called greenware now and it is at it’s most fragile! Handle everything with two hands. I often refer to soft hands – keep everything gentle and with your fingers spread as much as possible. Try to not pick up things like plates too much, and always with both hands! Before your work can be bisque fired it should be “cleaned up”. You work won’t go into the kiln if it has sharp edges – when glazed, sharp edges turn into razor blades! Use a piece of fly wire to rub the work all over – this will scratch a little so be light handed. Use a knife or metal kidney to scrape any areas that require a bit more dynamic treatment than the fly wire offers! Finally, a very light wipe over with a slightly damp sponge can help soften and soothe all of your edges and dags! Trimming thrown work: If you are planning to trim (or turn) your thrown work (and you should be), make sure you bag it well – your work should be leather hard to almost dry for easiest trimming. Use this step to finish the work completely – use a metal kidney to polish the surface, or a slightly damp sponge to give a freshly thrown look. Wipe the sponge around the rim after trimming, and check the inside of the pot for dags! Trimming slip cast work: Usually I will trim the rims of your work on the wheel the following day to make that stage easier, however you will still need to check your work for lumps and bumps. Last but not least – check that your name is still clearly on the bottom of your work. Step Five – Bisque Firing When the work is completely dry it can go into the bisque kiln. The bisque kiln is fired to 1000°C. This process burns off the water in the clay as well as some of the chemically bound water. The structure of the clay is not altered that much at this temperature. Inside the bisque kiln, the work is stacked a little, small bowl inside a larger bowl and onto a heavy plate. Smaller items like decorations or drink coasters might get stacked several high. Consideration is paid to the weight of the stack and shape of the work. A bisque kiln can fire about one and a half times the amount of work that the glaze kiln can fire. The firing takes about 10 hours to complete the cycle and about two days to cool down. Once it has been emptied the work is placed in the glaze room ready for you to decorate! Step Six – Glazing Decorating your work with colour can be a lot of fun – and time consuming! There are three main options for surface treatment at this stage: Oxide Washes Underglazes Glazes Washes and underglazes do not “glaze” the work – It will still need a layer of glaze to fully seal the clay (washes don’t need glaze on surfaces not designed for food or liquid as they can gloss up a little on their own). Underglazes are stable colourants that turn out pretty much how they look in the jar. They can be mixed with each other to form other colours and can be used like water colours to paint onto your work. Mostly they should have a clear glaze on top to seal them. Oxides are a different species – the pink oxide (cobalt) wash turns out bright blue for instance. They don’t always need a glaze on top, and some glazes can change the colour of the wash! The glazes need no other “glaze” on top! Be careful of unknown glaze interactions – you can put any combination of glaze in a bowl or on a plate, but only a single glaze on the outside of any vertical surface! Glazes are a chemical reaction under heat. We don’t know the exact chemicals in the Mayco glazes we use. I can guess by the way they interact with each other, however, on the whole, you need to test every idea you have, and not run the test on a vertical surface! Simply put, glaze is a layer of glass like substance that bonds with the clay underneath. Clay is made of silica, alumina and water. Glaze is made of mostly silica. Silica has a melting point of 1700°C and we fire to 1240°C. The silica requires a “flux” to help it melt at the lower temperature. Fluxes can be all sorts of chemicals – a common one is calcium – calcium has a melting point of 2500°C, however, together they both melt at a much lower temperature! Colourants are metal oxides like cobalt (blue), chrome (green through black), copper (green, blue, even red!), manganese (black, purple and pink) iron (red brown), etc. Different chemicals in the glaze can have dramatic effects. for example, barium carbonate (which we don’t use) turns manganese bright pink! Other elements can turn manganese dioxide brown, blue, purple and reddish brown. Manganese dioxide is a flux in and of itself as well. So, glazes that get their black and purple colours, often interact with other glazes and RUN! Our mirror black is a good example – it mixes really well with many glazes because it fluxes them – causes them to melt faster. It will also bring out many beautiful colours in the glazes because it’s black colouring most definitely comes from manganese dioxide! Glaze chemistry is a whole subject on it’s own! We use commercial Mayco glazes on purpose – for their huge range of colour possibilities, stability, cool interactions, artistic freedom with the ability to easily brush the glazes on and ease of use. We currently have almost 50 glazes on hand! A major project is to test the interactions of all glazes with each other. That is 2,500 test tiles!!!! I’m going to make the wall behind the wheels the feature wall of pretty colours! Step Seven – Glaze (Gloss or sometimes called “Glost”) Firing Most of the time this is the final stage of making your creation (but not always!) The glaze kiln goes to 1240°C. This is called cone 6, or midrange. It is the low end of stoneware temperatures. Stoneware clays and glazes are typically fired at cone 8 – 10, that is 1260 – 1290°C. The energy requirement to go from 1240°C to 1280°C is almost a 30% more! Our clay is formulated to vitrify (mature, turn “glass-like”) at 1240°, as are our glazes. A glaze kiln take around 12 hours to reach temperature and two to three days to cool down. Sometimes a third firing process is required – this is for decoration that is added to work after the glaze firing. For example – adding precious metals and lustres. this firing temperature is usually around 600 – 800°C depending upon the techniques being used. There are many students interested in gold and silver trims – we will be doing this third type of firing soon! After firing your work will be in the student finished work shelves. Remember to pay for it before you head out the door! There is a small extra charge for using porcelain clay (it’s more than twice the price of regular clay), and for any third firing process! Once your work has been fired it can not turn back into clay for millennia – so don’t fire it if you don’t like it! Put it in the bucket for recycling. https://firebirdstudios.com.au/the-process-of-making-pottery/The form of the jug has been in use for many centuries.Stoneware jug. Two tone brown glaze with pierced lip behind spout. Spout chipped.None.flagstaff hill, warrnambool, shipwrecked-coast, flagstaff-hill, flagstaff-hill-maritime-museum, maritime-museum, shipwreck-coast, flagstaff-hill-maritime-village, jug, ceramic jug -
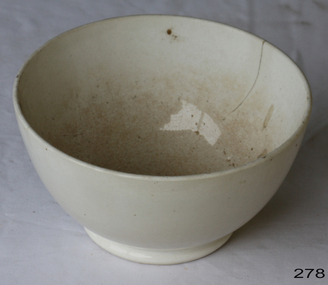 Flagstaff Hill Maritime Museum and Village
Domestic object - Bowl, Late 19th or early 20th Century
... Trimming thrown work: If you are planning to trim (or turn) your thrown work (and you should be), make sure you bag it well – your work should be leather hard to almost dry for easiest trimming. Use this step to finish the work completely – use a metal kidney to polish the surface, or a slightly damp sponge to give a freshly thrown look. ...Trimming thrown work: If you are planning to trim (or turn) your thrown work (and you should be), make sure you bag it well – your work should be leather hard to almost dry for easiest trimming. Use this step to finish the work completely – use a metal kidney to polish the surface, or a slightly damp sponge to give a freshly thrown look. ...The Process of Making Pottery Decorating, Firing, Glazing, Making, Technical There is a rhythm and flow to clay. It can’t be done all at once! Even the making process! It can take weeks to get everything done, especially if you can only work on your pottery once a week! Even though we have three hour classes, it’s often just not enough time! Here is an overview of some of the processes so you have a bit more grasp on some of the technical stuff! Step One – Design There are SO many ideas out there for making stuff in clay! From delicate porcelain jewellery, through to heavy sculptural work and everything in between. Deciding your direction is sometimes not that easy – when you first start, try everything, you will naturally gravitate to the style that you enjoy! The options and variations are endless and can get a wee bit overwhelming too! Check in with me before you start to ensure your ideas will work, what order you might do things, how you could achieve the look you are seeking and any other technical data required! Step Two – Making Clay is thixotropic. This means that as you work with it, the clay first gets sloppier and wetter, before is begins to dry in the atmosphere. For most things, you simply can’t do all parts of the project at once. An example of work order might look like: Get last weeks work out from the shelves Prepare clay for today’s work – roll your clay, prepare balls for throwing, make the first stage of a pinch pot) Clean up last week’s work and put it on the shelf for bisque firing Check that you have any glazing to do – and do enough of it that you will have time to finish your main project Do the next step of your next project – there might be a further step that can’t be complete immediately, in that case, wrap your work well and put onto the shelves. Letting your work rest for a while can really help keep your work clean and professional looking. Many things require bagging under plastic to keep it ready for work the next week – put your name on the outside of the bag so you can find your work easily. We have stickers and markers. Consider how you want to decorate your work – coloured slip can be applied at a fairly wet stage (remembering that it will make your work even wetter!). Trying to apply slip to dry clay won’t work! If you want to do sgraffito – you will need to keep the work leather hard (a state of dryness where you can still work the clay with a little effort and a little water and care). Step Three – Drying Most of the time your work can go into the rack uncovered to let it dry out for the following week. If you want to continue forming or shaping you will need to double bag your work – put your work on a suitable sized bat and put the bat in a bag so the base of the bag is under the bat, then put another bag over the top of the work and tuck the top of the bag under the bat. If you want to trim (or turn) your thrown work the following week, it should also be double bagged. If your work is large, delicate, or of uneven thicknesses, you should lightly cover your work for drying. When considering the drying process, bare in mind the weather, humidity and wind! The hotter and dryer, the faster things dry and work can dry unevenly in the shelves – this can lead to cracking – another time to lightly cover your work for drying. Step Four – Trimming and Cleaning Up Your work is dry! It is called greenware now and it is at it’s most fragile! Handle everything with two hands. I often refer to soft hands – keep everything gentle and with your fingers spread as much as possible. Try to not pick up things like plates too much, and always with both hands! Before your work can be bisque fired it should be “cleaned up”. You work won’t go into the kiln if it has sharp edges – when glazed, sharp edges turn into razor blades! Use a piece of fly wire to rub the work all over – this will scratch a little so be light handed. Use a knife or metal kidney to scrape any areas that require a bit more dynamic treatment than the fly wire offers! Finally, a very light wipe over with a slightly damp sponge can help soften and soothe all of your edges and dags! Trimming thrown work: If you are planning to trim (or turn) your thrown work (and you should be), make sure you bag it well – your work should be leather hard to almost dry for easiest trimming. Use this step to finish the work completely – use a metal kidney to polish the surface, or a slightly damp sponge to give a freshly thrown look. Wipe the sponge around the rim after trimming, and check the inside of the pot for dags! Trimming slip cast work: Usually I will trim the rims of your work on the wheel the following day to make that stage easier, however you will still need to check your work for lumps and bumps. Last but not least – check that your name is still clearly on the bottom of your work. Step Five – Bisque Firing When the work is completely dry it can go into the bisque kiln. The bisque kiln is fired to 1000°C. This process burns off the water in the clay as well as some of the chemically bound water. The structure of the clay is not altered that much at this temperature. Inside the bisque kiln, the work is stacked a little, small bowl inside a larger bowl and onto a heavy plate. Smaller items like decorations or drink coasters might get stacked several high. Consideration is paid to the weight of the stack and shape of the work. A bisque kiln can fire about one and a half times the amount of work that the glaze kiln can fire. The firing takes about 10 hours to complete the cycle and about two days to cool down. Once it has been emptied the work is placed in the glaze room ready for you to decorate! Step Six – Glazing Decorating your work with colour can be a lot of fun – and time consuming! There are three main options for surface treatment at this stage: Oxide Washes Underglazes Glazes Washes and underglazes do not “glaze” the work – It will still need a layer of glaze to fully seal the clay (washes don’t need glaze on surfaces not designed for food or liquid as they can gloss up a little on their own). Underglazes are stable colourants that turn out pretty much how they look in the jar. They can be mixed with each other to form other colours and can be used like water colours to paint onto your work. Mostly they should have a clear glaze on top to seal them. Oxides are a different species – the pink oxide (cobalt) wash turns out bright blue for instance. They don’t always need a glaze on top, and some glazes can change the colour of the wash! The glazes need no other “glaze” on top! Be careful of unknown glaze interactions – you can put any combination of glaze in a bowl or on a plate, but only a single glaze on the outside of any vertical surface! Glazes are a chemical reaction under heat. We don’t know the exact chemicals in the Mayco glazes we use. I can guess by the way they interact with each other, however, on the whole, you need to test every idea you have, and not run the test on a vertical surface! Simply put, glaze is a layer of glass like substance that bonds with the clay underneath. Clay is made of silica, alumina and water. Glaze is made of mostly silica. Silica has a melting point of 1700°C and we fire to 1240°C. The silica requires a “flux” to help it melt at the lower temperature. Fluxes can be all sorts of chemicals – a common one is calcium – calcium has a melting point of 2500°C, however, together they both melt at a much lower temperature! Colourants are metal oxides like cobalt (blue), chrome (green through black), copper (green, blue, even red!), manganese (black, purple and pink) iron (red brown), etc. Different chemicals in the glaze can have dramatic effects. for example, barium carbonate (which we don’t use) turns manganese bright pink! Other elements can turn manganese dioxide brown, blue, purple and reddish brown. Manganese dioxide is a flux in and of itself as well. So, glazes that get their black and purple colours, often interact with other glazes and RUN! Our mirror black is a good example – it mixes really well with many glazes because it fluxes them – causes them to melt faster. It will also bring out many beautiful colours in the glazes because it’s black colouring most definitely comes from manganese dioxide! Glaze chemistry is a whole subject on it’s own! We use commercial Mayco glazes on purpose – for their huge range of colour possibilities, stability, cool interactions, artistic freedom with the ability to easily brush the glazes on and ease of use. We currently have almost 50 glazes on hand! A major project is to test the interactions of all glazes with each other. That is 2,500 test tiles!!!! I’m going to make the wall behind the wheels the feature wall of pretty colours! Step Seven – Glaze (Gloss or sometimes called “Glost”) Firing Most of the time this is the final stage of making your creation (but not always!) The glaze kiln goes to 1240°C. This is called cone 6, or midrange. It is the low end of stoneware temperatures. Stoneware clays and glazes are typically fired at cone 8 – 10, that is 1260 – 1290°C. The energy requirement to go from 1240°C to 1280°C is almost a 30% more! Our clay is formulated to vitrify (mature, turn “glass-like”) at 1240°, as are our glazes. A glaze kiln take around 12 hours to reach temperature and two to three days to cool down. Sometimes a third firing process is required – this is for decoration that is added to work after the glaze firing. For example – adding precious metals and lustres. this firing temperature is usually around 600 – 800°C depending upon the techniques being used. There are many students interested in gold and silver trims – we will be doing this third type of firing soon! After firing your work will be in the student finished work shelves. Remember to pay for it before you head out the door! There is a small extra charge for using porcelain clay (it’s more than twice the price of regular clay), and for any third firing process! Once your work has been fired it can not turn back into clay for millennia – so don’t fire it if you don’t like it! Put it in the bucket for recycling. https://firebirdstudios.com.au/the-process-of-making-pottery/ The bowl is an example of kitchenware used in the 19th century and still in use today.Bowl white ceramic. Crack on side. Badly stained.Backstamp very faint and unable to be read.flagstaff hill, warrnambool, shipwrecked-coast, flagstaff-hill, flagstaff-hill-maritime-museum, maritime-museum, shipwreck-coast, flagstaff-hill-maritime-village, mixing bowl, food preparation, kitchen equipment, ceramic -
 Flagstaff Hill Maritime Museum and Village
Domestic object - Bowl
... Trimming thrown work: If you are planning to trim (or turn) your thrown work (and you should be), make sure you bag it well – your work should be leather hard to almost dry for easiest trimming. Use this step to finish the work completely – use a metal kidney to polish the surface, or a slightly damp sponge to give a freshly thrown look. ...Trimming thrown work: If you are planning to trim (or turn) your thrown work (and you should be), make sure you bag it well – your work should be leather hard to almost dry for easiest trimming. Use this step to finish the work completely – use a metal kidney to polish the surface, or a slightly damp sponge to give a freshly thrown look. ...The Process of Making Pottery Decorating, Firing, Glazing, Making, Technical There is a rhythm and flow to clay. It can’t be done all at once! Even the making process! It can take weeks to get everything done, especially if you can only work on your pottery once a week! Even though we have three hour classes, it’s often just not enough time! Here is an overview of some of the processes so you have a bit more grasp on some of the technical stuff! Step One – Design There are SO many ideas out there for making stuff in clay! From delicate porcelain jewellery, through to heavy sculptural work and everything in between. Deciding your direction is sometimes not that easy – when you first start, try everything, you will naturally gravitate to the style that you enjoy! The options and variations are endless and can get a wee bit overwhelming too! Check in with me before you start to ensure your ideas will work, what order you might do things, how you could achieve the look you are seeking and any other technical data required! Step Two – Making Clay is thixotropic. This means that as you work with it, the clay first gets sloppier and wetter, before is begins to dry in the atmosphere. For most things, you simply can’t do all parts of the project at once. An example of work order might look like: Get last weeks work out from the shelves Prepare clay for today’s work – roll your clay, prepare balls for throwing, make the first stage of a pinch pot) Clean up last week’s work and put it on the shelf for bisque firing Check that you have any glazing to do – and do enough of it that you will have time to finish your main project Do the next step of your next project – there might be a further step that can’t be complete immediately, in that case, wrap your work well and put onto the shelves. Letting your work rest for a while can really help keep your work clean and professional looking. Many things require bagging under plastic to keep it ready for work the next week – put your name on the outside of the bag so you can find your work easily. We have stickers and markers. Consider how you want to decorate your work – coloured slip can be applied at a fairly wet stage (remembering that it will make your work even wetter!). Trying to apply slip to dry clay won’t work! If you want to do sgraffito – you will need to keep the work leather hard (a state of dryness where you can still work the clay with a little effort and a little water and care). Step Three – Drying Most of the time your work can go into the rack uncovered to let it dry out for the following week. If you want to continue forming or shaping you will need to double bag your work – put your work on a suitable sized bat and put the bat in a bag so the base of the bag is under the bat, then put another bag over the top of the work and tuck the top of the bag under the bat. If you want to trim (or turn) your thrown work the following week, it should also be double bagged. If your work is large, delicate, or of uneven thicknesses, you should lightly cover your work for drying. When considering the drying process, bare in mind the weather, humidity and wind! The hotter and dryer, the faster things dry and work can dry unevenly in the shelves – this can lead to cracking – another time to lightly cover your work for drying. Step Four – Trimming and Cleaning Up Your work is dry! It is called greenware now and it is at it’s most fragile! Handle everything with two hands. I often refer to soft hands – keep everything gentle and with your fingers spread as much as possible. Try to not pick up things like plates too much, and always with both hands! Before your work can be bisque fired it should be “cleaned up”. You work won’t go into the kiln if it has sharp edges – when glazed, sharp edges turn into razor blades! Use a piece of fly wire to rub the work all over – this will scratch a little so be light handed. Use a knife or metal kidney to scrape any areas that require a bit more dynamic treatment than the fly wire offers! Finally, a very light wipe over with a slightly damp sponge can help soften and soothe all of your edges and dags! Trimming thrown work: If you are planning to trim (or turn) your thrown work (and you should be), make sure you bag it well – your work should be leather hard to almost dry for easiest trimming. Use this step to finish the work completely – use a metal kidney to polish the surface, or a slightly damp sponge to give a freshly thrown look. Wipe the sponge around the rim after trimming, and check the inside of the pot for dags! Trimming slip cast work: Usually I will trim the rims of your work on the wheel the following day to make that stage easier, however you will still need to check your work for lumps and bumps. Last but not least – check that your name is still clearly on the bottom of your work. Step Five – Bisque Firing When the work is completely dry it can go into the bisque kiln. The bisque kiln is fired to 1000°C. This process burns off the water in the clay as well as some of the chemically bound water. The structure of the clay is not altered that much at this temperature. Inside the bisque kiln, the work is stacked a little, small bowl inside a larger bowl and onto a heavy plate. Smaller items like decorations or drink coasters might get stacked several high. Consideration is paid to the weight of the stack and shape of the work. A bisque kiln can fire about one and a half times the amount of work that the glaze kiln can fire. The firing takes about 10 hours to complete the cycle and about two days to cool down. Once it has been emptied the work is placed in the glaze room ready for you to decorate! Step Six – Glazing Decorating your work with colour can be a lot of fun – and time consuming! There are three main options for surface treatment at this stage: Oxide Washes Underglazes Glazes Washes and underglazes do not “glaze” the work – It will still need a layer of glaze to fully seal the clay (washes don’t need glaze on surfaces not designed for food or liquid as they can gloss up a little on their own). Underglazes are stable colourants that turn out pretty much how they look in the jar. They can be mixed with each other to form other colours and can be used like water colours to paint onto your work. Mostly they should have a clear glaze on top to seal them. Oxides are a different species – the pink oxide (cobalt) wash turns out bright blue for instance. They don’t always need a glaze on top, and some glazes can change the colour of the wash! The glazes need no other “glaze” on top! Be careful of unknown glaze interactions – you can put any combination of glaze in a bowl or on a plate, but only a single glaze on the outside of any vertical surface! Glazes are a chemical reaction under heat. We don’t know the exact chemicals in the Mayco glazes we use. I can guess by the way they interact with each other, however, on the whole, you need to test every idea you have, and not run the test on a vertical surface! Simply put, glaze is a layer of glass like substance that bonds with the clay underneath. Clay is made of silica, alumina and water. Glaze is made of mostly silica. Silica has a melting point of 1700°C and we fire to 1240°C. The silica requires a “flux” to help it melt at the lower temperature. Fluxes can be all sorts of chemicals – a common one is calcium – calcium has a melting point of 2500°C, however, together they both melt at a much lower temperature! Colourants are metal oxides like cobalt (blue), chrome (green through black), copper (green, blue, even red!), manganese (black, purple and pink) iron (red brown), etc. Different chemicals in the glaze can have dramatic effects. for example, barium carbonate (which we don’t use) turns manganese bright pink! Other elements can turn manganese dioxide brown, blue, purple and reddish brown. Manganese dioxide is a flux in and of itself as well. So, glazes that get their black and purple colours, often interact with other glazes and RUN! Our mirror black is a good example – it mixes really well with many glazes because it fluxes them – causes them to melt faster. It will also bring out many beautiful colours in the glazes because it’s black colouring most definitely comes from manganese dioxide! Glaze chemistry is a whole subject on it’s own! We use commercial Mayco glazes on purpose – for their huge range of colour possibilities, stability, cool interactions, artistic freedom with the ability to easily brush the glazes on and ease of use. We currently have almost 50 glazes on hand! A major project is to test the interactions of all glazes with each other. That is 2,500 test tiles!!!! I’m going to make the wall behind the wheels the feature wall of pretty colours! Step Seven – Glaze (Gloss or sometimes called “Glost”) Firing Most of the time this is the final stage of making your creation (but not always!) The glaze kiln goes to 1240°C. This is called cone 6, or midrange. It is the low end of stoneware temperatures. Stoneware clays and glazes are typically fired at cone 8 – 10, that is 1260 – 1290°C. The energy requirement to go from 1240°C to 1280°C is almost a 30% more! Our clay is formulated to vitrify (mature, turn “glass-like”) at 1240°, as are our glazes. A glaze kiln take around 12 hours to reach temperature and two to three days to cool down. Sometimes a third firing process is required – this is for decoration that is added to work after the glaze firing. For example – adding precious metals and lustres. this firing temperature is usually around 600 – 800°C depending upon the techniques being used. There are many students interested in gold and silver trims – we will be doing this third type of firing soon! After firing your work will be in the student finished work shelves. Remember to pay for it before you head out the door! There is a small extra charge for using porcelain clay (it’s more than twice the price of regular clay), and for any third firing process! Once your work has been fired it can not turn back into clay for millennia – so don’t fire it if you don’t like it! Put it in the bucket for recycling. https://firebirdstudios.com.au/the-process-of-making-pottery/ This bowl is an example of kitchenware used in the 19th century and still in use today.Bowl white ceramic plain that has two sets of edging around lip. Inside bowl has plaster designed to look like cooking mixture.flagstaff hill, warrnambool, shipwrecked-coast, flagstaff-hill, flagstaff-hill-maritime-museum, maritime-museum, shipwreck-coast, flagstaff-hill-maritime-village, kitchen equipment, ceramic -
 Flagstaff Hill Maritime Museum and Village
Domestic object - Bowl, J & G Meakin, Late 19th or early 20th Century
... Trimming thrown work: If you are planning to trim (or turn) your thrown work (and you should be), make sure you bag it well – your work should be leather hard to almost dry for easiest trimming. Use this step to finish the work completely – use a metal kidney to polish the surface, or a slightly damp sponge to give a freshly thrown look. ...Trimming thrown work: If you are planning to trim (or turn) your thrown work (and you should be), make sure you bag it well – your work should be leather hard to almost dry for easiest trimming. Use this step to finish the work completely – use a metal kidney to polish the surface, or a slightly damp sponge to give a freshly thrown look. ...The Process of Making Pottery Decorating, Firing, Glazing, Making, Technical There is a rhythm and flow to clay. It can’t be done all at once! Even the making process! It can take weeks to get everything done, especially if you can only work on your pottery once a week! Even though we have three hour classes, it’s often just not enough time! Here is an overview of some of the processes so you have a bit more grasp on some of the technical stuff! Step One – Design There are SO many ideas out there for making stuff in clay! From delicate porcelain jewellery, through to heavy sculptural work and everything in between. Deciding your direction is sometimes not that easy – when you first start, try everything, you will naturally gravitate to the style that you enjoy! The options and variations are endless and can get a wee bit overwhelming too! Check in with me before you start to ensure your ideas will work, what order you might do things, how you could achieve the look you are seeking and any other technical data required! Step Two – Making Clay is thixotropic. This means that as you work with it, the clay first gets sloppier and wetter, before is begins to dry in the atmosphere. For most things, you simply can’t do all parts of the project at once. An example of work order might look like: Get last weeks work out from the shelves Prepare clay for today’s work – roll your clay, prepare balls for throwing, make the first stage of a pinch pot) Clean up last week’s work and put it on the shelf for bisque firing Check that you have any glazing to do – and do enough of it that you will have time to finish your main project Do the next step of your next project – there might be a further step that can’t be complete immediately, in that case, wrap your work well and put onto the shelves. Letting your work rest for a while can really help keep your work clean and professional looking. Many things require bagging under plastic to keep it ready for work the next week – put your name on the outside of the bag so you can find your work easily. We have stickers and markers. Consider how you want to decorate your work – coloured slip can be applied at a fairly wet stage (remembering that it will make your work even wetter!). Trying to apply slip to dry clay won’t work! If you want to do sgraffito – you will need to keep the work leather hard (a state of dryness where you can still work the clay with a little effort and a little water and care). Step Three – Drying Most of the time your work can go into the rack uncovered to let it dry out for the following week. If you want to continue forming or shaping you will need to double bag your work – put your work on a suitable sized bat and put the bat in a bag so the base of the bag is under the bat, then put another bag over the top of the work and tuck the top of the bag under the bat. If you want to trim (or turn) your thrown work the following week, it should also be double bagged. If your work is large, delicate, or of uneven thicknesses, you should lightly cover your work for drying. When considering the drying process, bare in mind the weather, humidity and wind! The hotter and dryer, the faster things dry and work can dry unevenly in the shelves – this can lead to cracking – another time to lightly cover your work for drying. Step Four – Trimming and Cleaning Up Your work is dry! It is called greenware now and it is at it’s most fragile! Handle everything with two hands. I often refer to soft hands – keep everything gentle and with your fingers spread as much as possible. Try to not pick up things like plates too much, and always with both hands! Before your work can be bisque fired it should be “cleaned up”. You work won’t go into the kiln if it has sharp edges – when glazed, sharp edges turn into razor blades! Use a piece of fly wire to rub the work all over – this will scratch a little so be light handed. Use a knife or metal kidney to scrape any areas that require a bit more dynamic treatment than the fly wire offers! Finally, a very light wipe over with a slightly damp sponge can help soften and soothe all of your edges and dags! Trimming thrown work: If you are planning to trim (or turn) your thrown work (and you should be), make sure you bag it well – your work should be leather hard to almost dry for easiest trimming. Use this step to finish the work completely – use a metal kidney to polish the surface, or a slightly damp sponge to give a freshly thrown look. Wipe the sponge around the rim after trimming, and check the inside of the pot for dags! Trimming slip cast work: Usually I will trim the rims of your work on the wheel the following day to make that stage easier, however you will still need to check your work for lumps and bumps. Last but not least – check that your name is still clearly on the bottom of your work. Step Five – Bisque Firing When the work is completely dry it can go into the bisque kiln. The bisque kiln is fired to 1000°C. This process burns off the water in the clay as well as some of the chemically bound water. The structure of the clay is not altered that much at this temperature. Inside the bisque kiln, the work is stacked a little, small bowl inside a larger bowl and onto a heavy plate. Smaller items like decorations or drink coasters might get stacked several high. Consideration is paid to the weight of the stack and shape of the work. A bisque kiln can fire about one and a half times the amount of work that the glaze kiln can fire. The firing takes about 10 hours to complete the cycle and about two days to cool down. Once it has been emptied the work is placed in the glaze room ready for you to decorate! Step Six – Glazing Decorating your work with colour can be a lot of fun – and time consuming! There are three main options for surface treatment at this stage: Oxide Washes Underglazes Glazes Washes and underglazes do not “glaze” the work – It will still need a layer of glaze to fully seal the clay (washes don’t need glaze on surfaces not designed for food or liquid as they can gloss up a little on their own). Underglazes are stable colourants that turn out pretty much how they look in the jar. They can be mixed with each other to form other colours and can be used like water colours to paint onto your work. Mostly they should have a clear glaze on top to seal them. Oxides are a different species – the pink oxide (cobalt) wash turns out bright blue for instance. They don’t always need a glaze on top, and some glazes can change the colour of the wash! The glazes need no other “glaze” on top! Be careful of unknown glaze interactions – you can put any combination of glaze in a bowl or on a plate, but only a single glaze on the outside of any vertical surface! Glazes are a chemical reaction under heat. We don’t know the exact chemicals in the Mayco glazes we use. I can guess by the way they interact with each other, however, on the whole, you need to test every idea you have, and not run the test on a vertical surface! Simply put, glaze is a layer of glass like substance that bonds with the clay underneath. Clay is made of silica, alumina and water. Glaze is made of mostly silica. Silica has a melting point of 1700°C and we fire to 1240°C. The silica requires a “flux” to help it melt at the lower temperature. Fluxes can be all sorts of chemicals – a common one is calcium – calcium has a melting point of 2500°C, however, together they both melt at a much lower temperature! Colourants are metal oxides like cobalt (blue), chrome (green through black), copper (green, blue, even red!), manganese (black, purple and pink) iron (red brown), etc. Different chemicals in the glaze can have dramatic effects. for example, barium carbonate (which we don’t use) turns manganese bright pink! Other elements can turn manganese dioxide brown, blue, purple and reddish brown. Manganese dioxide is a flux in and of itself as well. So, glazes that get their black and purple colours, often interact with other glazes and RUN! Our mirror black is a good example – it mixes really well with many glazes because it fluxes them – causes them to melt faster. It will also bring out many beautiful colours in the glazes because it’s black colouring most definitely comes from manganese dioxide! Glaze chemistry is a whole subject on it’s own! We use commercial Mayco glazes on purpose – for their huge range of colour possibilities, stability, cool interactions, artistic freedom with the ability to easily brush the glazes on and ease of use. We currently have almost 50 glazes on hand! A major project is to test the interactions of all glazes with each other. That is 2,500 test tiles!!!! I’m going to make the wall behind the wheels the feature wall of pretty colours! Step Seven – Glaze (Gloss or sometimes called “Glost”) Firing Most of the time this is the final stage of making your creation (but not always!) The glaze kiln goes to 1240°C. This is called cone 6, or midrange. It is the low end of stoneware temperatures. Stoneware clays and glazes are typically fired at cone 8 – 10, that is 1260 – 1290°C. The energy requirement to go from 1240°C to 1280°C is almost a 30% more! Our clay is formulated to vitrify (mature, turn “glass-like”) at 1240°, as are our glazes. A glaze kiln take around 12 hours to reach temperature and two to three days to cool down. Sometimes a third firing process is required – this is for decoration that is added to work after the glaze firing. For example – adding precious metals and lustres. this firing temperature is usually around 600 – 800°C depending upon the techniques being used. There are many students interested in gold and silver trims – we will be doing this third type of firing soon! After firing your work will be in the student finished work shelves. Remember to pay for it before you head out the door! There is a small extra charge for using porcelain clay (it’s more than twice the price of regular clay), and for any third firing process! Once your work has been fired it can not turn back into clay for millennia – so don’t fire it if you don’t like it! Put it in the bucket for recycling. https://firebirdstudios.com.au/the-process-of-making-pottery/This bowl was made by renowned pottery company J & G Meakin of England. The firm was established in the mid-1800's. The bowl is an example of kitchenware used in the 19th century and still in use today.Bowl; white ceramic, round and tapering inwards towards base. Made by J and G Meakin England.On base, 'Ironstone China Reg SOL 391413' with symbolflagstaff hill, flagstaff hill maritime museum and village, warrnambool, maritime museum, maritime village, great ocean road, shipwreck coast, mixing bowl, food preparation, j & g meakin, pottery, stoke-on-trent, kitchen equipment, ceramic -
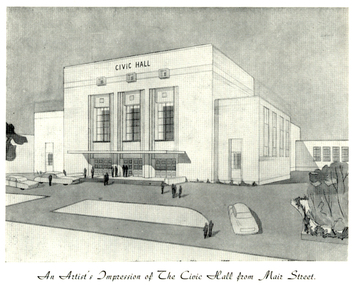 Federation University Historical Collection
Programme, The Opening of Civic Hall, 1956, 1956
... dried hard wood and totals 40,000 lineal feet. * The dimensions of the Main Auditorium, 100ft by 86 ft, including the side promenades each 82ft by 13ft. *The Main stage, of reinforced concret with parquette finish...dried hard wood and totals 40,000 lineal feet. * The dimensions of the Main Auditorium, 100ft by 86 ft, including the side promenades each 82ft by 13ft. *The Main stage, of reinforced concret with parquette finish ...The City of Ballarat unanimously resolved to erect a Civic Hall in Mair Street in 1951. The architects, Gordon Murphy, of Melbourne, and H.L. and L.J. Coburn, of Ballarat, were commissioned in 1952. The Council constructed the foundations and footings for the building under the supervision of the former City engineer, Mr L.H. Finch, in 1953. These footings are of massed concrete. The design for the building took advantage of the cross fall of the land, providing for the Small Hall to be entered from the Doveton Street frontage through a foyer under the Main Stage, the structure is steel with brick panels, with accommodation for 1,592 persons in the Main Hall and 440 persons in the Lower Hall. The front facade faces Mair Street, set back from the building line to provide for the entrance drive-ways and kerbed gardens. Tenders were invited on a firm price basis. A young Ballarat master Builter, Walter Benbow Trahar was the successful tenderer, the contract price being 139,841 pounds. the work was commenced in 1953 and has proceeded in spite of material and labour difficulties until its completion. The following statistics are of interest:- * The foundations contained 200 cubic yards of concrete. * The constructional steel work weighs approximately 270 tons. * The reinforcing steel 47 tons. * Reinforced concrete in the structure, 1,100 cubic yards. * The approximate number of bricks in the building, 580,000. * The flooring is of selected kiln-dried hard wood and totals 40,000 lineal feet. * The dimensions of the Main Auditorium, 100ft by 86 ft, including the side promenades each 82ft by 13ft. *The Main stage, of reinforced concret with parquette finish measures 62 ft by 40ft. *The floor area of the Lower Hall is 74 ft by 38 ft, and has a stage dimensions of 40ft by 20 ft. * Each hall has independent heating and ventillating systems. Where possible the material in the building was furnished from local business houses. The public address installation, which provided for additional microphones, is on the main Stage. There is inter-communication throughout the building connecting the front office, with the bioscope box, the stages in both the large and lower halls, and the Hallkeeper's residence. Local craftsmen have completed the painting, plaster work, and the electrical installation; local produced materials being used in the construction of the buildings with the exception of the timber for the Main Floor, the roofing and the structural steel. The City of Ballarat Councillors in 1956 were Councillors N. T. Callow, F.J. Cutts, K.C. Webb, W.E. Roff, O.W. Curnow, F.T. Woodward, Allan C. Pittard, A.W. Nicholson, J.A. Chisholm, G.L. Scott, F.W. Oliver, A.D. Mason. The Town clerk was H.R. Maddern and the City Engineer was G. Murrowood. A City of Ballarat Council meeting of 25 September 2013 voted to demolish the Ballarat Civic Hall. The Council heard from nearly 50 members of the public during a marathon six-hour meeting. Councilors John Birt, Des Hudson, Amy Johnson, Josh Morris, Peter Innes, John Philips supported the motion to demolish Civic Hall. Councillors Samantha McIntosh, Vicki Coltman and Belinda Coates voted against the motion.Six page souvenir Program of citizens' entertainment on the occasion of the Opening of Ballarat Civic Hall on in August 1956. The front cover features the City of Ballarat Coat of Arms. The programme starts with a message from the Mayor, Cr Neil T. Carrow. It includes the Concert Programme directed by James H. Davey, an asrtist's impression of the Civic Hall from Mair Street, and information relative to the New Civic Hall. The programme features images of the City of Ballarat Coat of Arms, Cr N.T. Callow, , James H, Davey, and an artist's impression of the Ballarat Civic Hall. Mayor Neil Callow's Message: "To-day, our citizens witness the fulfilment of the most extensive Municipal undertaking in the City's period of recent prosperity and development. Their Hall now fills a requirement of which they have been deprived since the Coliseum building was destroyed by fire over 20 years ago. The building has been designed as an all purpose structure and I am hopeful the citizens will use it and enjoy it to its fullest extent. Your Council and its Architects have planned as broadly as possible for the benefit of all to-day and for years to come. We are proud of the work executed by a Ballaarat Master Builder whose work is a monument to the City's craftsmen. I feel I should also remind this assembly that the women of Ballaarat, back in 1951, provided funds which have been applied in the purchase of a Grand Piano and two Upright Pianos which are now installed in this building. The sincere hope of myself and your Councillors is that this Hall and its amenities will prove of immense value to the development of the cultural and artistic tastes of this community and that it will be freely used for these and many other purposes. From now on this magnificent building and its furnishings and equipment will be available to all. I strongly exhort you to use and protect it. My hope is that the citizens will, for many years to come, enjoy the amenities which it has to offer. ballarat civic hall, civic hall, architecture, finch, art deco, city of ballarat, coat of arms, city of ballarat coat of arms, callow, shugg, lemke, oates, gullan, tuuri, john, robertson, sorrell, antonio, gordon murphy, walter benbow trahar, trahar, coburn, h.l. coburn, l.j. coburn, n.t. callow -
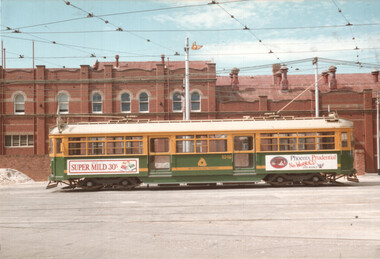 Melbourne Tram Museum
Photograph - The Met, W7 1018 at Malvern Depot and interior photo - set of 2, c1984
... drying and used in sandboxes. The tram has The Met logo and "Metropolitan Transit" name on the side. Photographer unknown, c1984 - vicsig.net records the tram had an 01 overhaul in August 1984 and was repainted to Met Green and yellow. The second photo is an interior showing the interior finish...drying and used in sandboxes. The tram has The Met logo and "Metropolitan Transit" name on the side. Photographer unknown, c1984 - vicsig.net records the tram had an 01 overhaul in August 1984 and was repainted to Met Green and yellow. The second photo is an interior showing the interior finish ...Colour print of The Met, W7 class tram No. 1018 at Malvern Depot - side on view. Has adverts for Wills cigarettes and Phoenix Prudential insurance. In the background is the original Malvern depot office buildings. In the front of the tram is a pile of sand, possibly before drying and used in sandboxes. The tram has The Met logo and "Metropolitan Transit" name on the side. Photographer unknown, c1984 - vicsig.net records the tram had an 01 overhaul in August 1984 and was repainted to Met Green and yellow. The second photo is an interior showing the interior finish and details of the tram.Yields information about tram 1018 following its 01 overhaul and repainting in The Met livery and the interior finish of the tram.Colour print with a plain back - set of 2.tramways, the met, malvern depot, w7 class, tram 1018, interior -
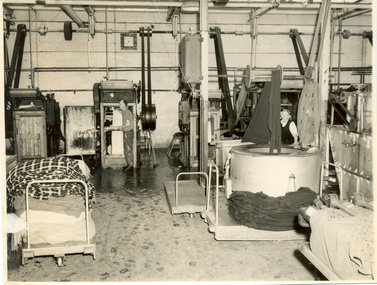 National Wool Museum
Photograph, Finishing room R S & S
... drying machinery, R S & S mill. Textile Machinery Textile Mills - history Textile Mills - staff Textile Mills Returned Soldiers and Sailors Mill Dyeing Milling Scouring Finishing Kidman Mr G. ...Milling and drying machinery, R S & S mill.R S & S finishing room/ L-millimg & scouring machines/ with wring-dryer ROBERT POCKLEY/ PHOTOGRAPHER/... G Kidmantextile machinery textile mills - history textile mills - staff textile mills, returned soldiers and sailors mill, dyeing, milling, scouring, finishing, kidman, mr g. l., textile machinery, textile mills - history, textile mills - staff, textile mills -
 National Wool Museum
Card
... It looks the process of dry blowing the cloth, which fixes the width and imparts lustre. Textile Finishing Australian Woollen Mills Pty Ltd Stamina Clothing Company No. 15 Dry blowing at the Crusader Mills. ...This card is the fifteenth in a set of 16 information cards produced by the Stamina Clothing Company re: Australian Woollen Mills as give aways. It looks the process of dry blowing the cloth, which fixes the width and imparts lustre.Card no. 15 from the Crusader Mills information card set, c.1945-55. Verso of card no. 15 from the Crusader Mills information card set, c.1945-55.No. 15 Dry blowing at the Crusader Mills.textile finishing, australian woollen mills pty ltd stamina clothing company -
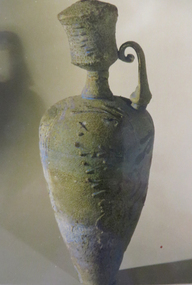 Federation University Art Collection
Ceramic, Dry Glaze Bottle by Alan Peascod, c1980
... His creative repertoire includes dry glazed vessels, alkaline glazes, majolica, saturated metals, and many post firing finishes. ...His creative repertoire includes dry glazed vessels, alkaline glazes, majolica, saturated metals, and many post firing finishes. ...Alan PEASCOD (1943-2007). Born England. Arrived Australia 1952. Alan Peascod was one of Australia’s most highly acclaimed ceramic artists. For over 35 years his work has been at the forefront of the Australian ceramics movement, developing radical techniques previously unexplored with his developments in unusual glazes and firing methods. His creative repertoire includes dry glazed vessels, alkaline glazes, majolica, saturated metals, and many post firing finishes. Alan's work with the very difficult reduced lustre technique is highly regarded. He was taught the method by Professor Said El Sadr in Cairo, Egypt in 1972 and this led to lifelong research of the technique throughout the Middle East and Europe. His work in the field led to the completion of his doctoral studies at the University of Wollongong in 1994. This study also led to satirical figurative sculpture themes dealing with the human condition. This work is part of the Jan Feder Memorial Ceramics Collection. Jan Feder was an alumna of the Gippsland Campus who studied ceramics on the campus. She passed away in the mid 1980s. Her student peers raised funds to buy ceramic works in her memory. They bought works from visiting lecturers who became leading ceramic artists around the world, as well as from many of the staff who taught there.Blue and green dry glaze bottle. alan peascod, ceramics, gippsland, jan feder memorial ceramics collection, gippsland campus, visiting artist -
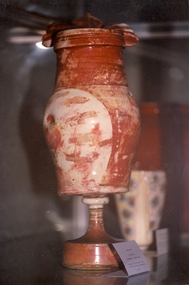 Federation University Art Collection
Ceramic, 'Whitebait I' by Alan Peascod, 1989
... His creative repertoire includes dry glazed vessels, alkaline glazes, majolica, saturated metals, and many post firing finishes. ...His creative repertoire includes dry glazed vessels, alkaline glazes, majolica, saturated metals, and many post firing finishes. ...Alan PEASCOD (1943-2007). Born England. Arrived Australia 1952. Alan Peascod was one of Australia’s most highly acclaimed ceramic artists. For over 35 years his work has been at the forefront of the Australian ceramics movement, developing radical techniques previously unexplored with his developments in unusual glazes and firing methods. His creative repertoire includes dry glazed vessels, alkaline glazes, majolica, saturated metals, and many post firing finishes. Alan's work with the very difficult reduced lustre technique is highly regarded. He was taught the method by Professor Said El Sadr in Cairo, Egypt in 1972 and this led to lifelong research of the technique throughout the Middle East and Europe. His work in the field led to the completion of his doctoral studies at the University of Wollongong in 1994. This study also led to satirical figurative sculpture themes dealing with the human condition. This item is part of the Federation University Art Collection. The Art Collection features over 1000 works and was listed as a 'Ballarat Treasure' in 2007. Lustre glazed earthenware form with sgraffito decoration.art, artwork, ceramics, alan peascod, available, available ceramics, lustre glaze, university of woolongong -
 Rutherglen Historical Society
Tin. Boot Polish, Wm Day & Son
... Finish / by rubbing lightly with a soft dry / cloth. This polish preserves the / leather and gives the boot / longer life / Sole proprietors / Wm. ...Finish / by rubbing lightly with a soft dry / cloth. This polish preserves the / leather and gives the boot / longer life / Sole proprietors / Wm. ...Used for polishing & preserving boot leatherRound green tin of boot polish with printing in black & gilt paint"Liddy's OBB Boot Polish / Do Not Use Too Much On Brush / Keep Lid On Tightly" On side: "Liddy's OBB Boot Polish 5 1/2 ozs Netweight When Packed." On bottom: "Directions / apply small quantity / with tip of clean brush and / polish off with a soft brush. Finish / by rubbing lightly with a soft dry / cloth. This polish preserves the / leather and gives the boot / longer life / Sole proprietors / Wm. Day & Son / Fitzroy melbourne / Nett Contents / 5 1/2 ozs."boot polish, liddy, leather care -
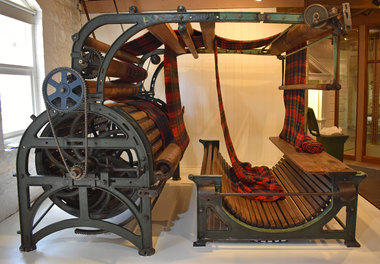 National Wool Museum
Machine - Teasel Gig, c1890
... finish fabrics. It uses the prickly flower head off the teasle plant (Dispsacus Fullonum) to do the delicate work to raise the surface, or nap, the woollen cloth. At least 1,500 teasle heads are needed for one gig. The teasel is a thistle like plant whose dried...finish fabrics. It uses the prickly flower head off the teasle plant (Dispsacus Fullonum) to do the delicate work to raise the surface, or nap, the woollen cloth. At least 1,500 teasle heads are needed for one gig. The teasel is a thistle like plant whose dried ...When the fabric is removed from the loom it is often stiff, rough and uneven. There are a number of finishing processes, both mechanical and chemical that give wool fabrics their special look and feel. The fabric is often scoured again to remove oils and dirt picked up during manufacture. It is then pressed. For a soft and fluffy surface, the fabric is brushed. For a smooth surface, it is shorn. For centuries, machines similar to this teasle gig were used to finish fabrics. It uses the prickly flower head off the teasle plant (Dispsacus Fullonum) to do the delicate work to raise the surface, or nap, the woollen cloth. At least 1,500 teasle heads are needed for one gig. The teasel is a thistle like plant whose dried heads are used on the teasel gig. They are fixed to frames around the drum, or gig. The gig turns in the opposite direction to the flow of the cloth until the nap is raised. Also spelled as Teazel Gig.Large metal machine with wooden rollers and teasel covered drum.textile finishing, raising, raising machinery, teasel gig, fabric, wool processing, plants, thistle, drum -
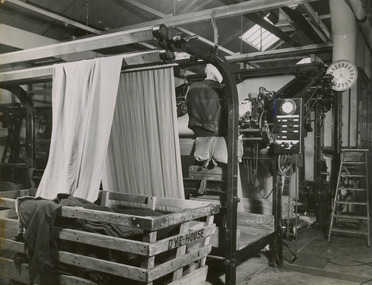 National Wool Museum
Photograph - Tentering, 1960s
... finishing as a folded fabric. It includes all the steps in between in this process, including shearing, transporting, selling, washing and the many different steps in the process of turning a single thread of wool into fabric. Wool Industry Working Life Women Boonoke Station Farming Sheep Farming Agriculture Sheep Stations Transport Wool Processing Shearing Textile Industry Wool AUSTRALIAN NATIONAL PUBLICITY / ASSOCIATION / FLINDERS STREET RAILWAY BUILDING, / MELBOURNE AUSTRALIA / W12 / W12. Tentering (Drying ...One of fifty one photographs originally in a photo album found in the National Wool Museum’s office. The album was water damaged and the images were removed for conservation. The images follow the process of wool. Beginning in a sheep paddock and finishing as a folded fabric. It includes all the steps in between in this process, including shearing, transporting, selling, washing and the many different steps in the process of turning a single thread of wool into fabric.Black and white image showing a man standing at a machine during the tentering process.AUSTRALIAN NATIONAL PUBLICITY / ASSOCIATION / FLINDERS STREET RAILWAY BUILDING, / MELBOURNE AUSTRALIA / W12 / W12. Tentering (Drying).wool industry, working life, women, boonoke station, farming, sheep farming, agriculture, sheep stations, transport, wool processing, shearing, textile industry, wool -
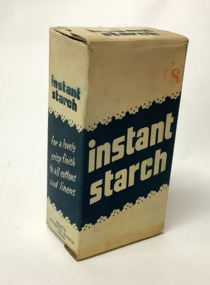 Williamstown Historical Society Inc
Domestic object - Packet of Reckitts Instant Starch
... dried the material maintained a stiff and wrinkle-resistant texture. Starch Laundry Front: "instant starch" Top: "reckitt's instant starch" Right: "Reckitt's instant starch/ No boiling - just add to cold water/ perfect starching/ easy ironing. From the makers of Reckitt's Blue. left: instant starch/ for a lovely crisp finish ...Traditionally, cotton and linen clothing, particularly shirts and collars, were starched after being washed and rinsed. They were dunked into a starch solution, usually made from finely ground corn or rice flour and water. When this solution dried the material maintained a stiff and wrinkle-resistant texture. Cardboard box of instant starch, produced by Reckitt's Household Division. Cream coloured carton with dark blue/cream band and cream and red script.Front: "instant starch" Top: "reckitt's instant starch" Right: "Reckitt's instant starch/ No boiling - just add to cold water/ perfect starching/ easy ironing. From the makers of Reckitt's Blue. left: instant starch/ for a lovely crisp finish to all cottons and linens/ RECKITT/HOUSEHOLD DIVISION/ 10046D. Bottom: Instant Starch Back: reckitt's intstant starch/ directionsstarch, laundry