
Showing 305 items matching "hard edged"
-
 Federation University Art Collection
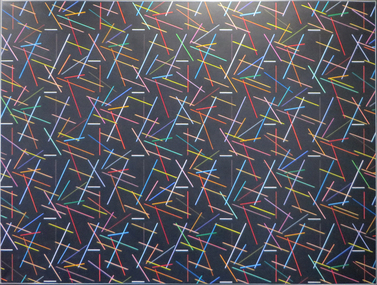
Painting, Lesley Dumbrell, "Tiger, Tiger" by Leslie Dumbrell, 1994
... ...hard-edged abstraction...After completing a Diploma of Art (Painting) at the Royal Melbourne Institute of Technology (RMIT) in Melbourne in 1962, Leslie Dumbrell adopted the international style of colour field and hard-edged abstraction. She taught alongside Peter Booth, James Doolin and Alun Leech-Jones at RMIT and Prahran College of Advanced Education. ...The Art Collection features over 2000 works and was listed as a 'Ballarat Treasure' in 2007. art artwork dumbrell hard-edged abstraction colour field Leslie Dumbrell A large painted canvas with precise, brightly coloured geometric patterns on a black background. ...Leslie DUMBRELL (14 October 1941 - ) Born Melbourne, Victoria Leslie Dumbrell was a pioneer of geometric abstraction in Australia. After completing a Diploma of Art (Painting) at the Royal Melbourne Institute of Technology (RMIT) in Melbourne in 1962, Leslie Dumbrell adopted the international style of colour field and hard-edged abstraction. She taught alongside Peter Booth, James Doolin and Alun Leech-Jones at RMIT and Prahran College of Advanced Education. In 1966 Dumbrell was appointed to the Prahran College of Advanced Education teacing with Alan Leach-Jones and Jim Doolin. This item is part of the Federation University Art Collection. The Art Collection features over 2000 works and was listed as a 'Ballarat Treasure' in 2007.Geometric AbstractionA large painted canvas with precise, brightly coloured geometric patterns on a black background. Dumbrell uses colour and line to create optical effects which often convey the illusion of movement. art, artwork, dumbrell, hard-edged abstraction, colour field, leslie dumbrell -
 Federation University Art Collection
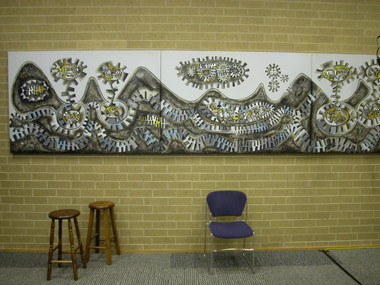
Painting - Oil on Canvas, Johnson, George, 'Symbols of Life' by George Johnson, 1965
... ...hard edged...At the unveiling of this work at the Ballarat Teachers' College Johnson's work was described at belonging to the "Hard Edged" school of abstract painters who had set themselves far above the mass of abstract painters by the vitality and artistic ability displayed in their work. ...The Art Collection features over 2000 works and was listed as a 'Ballarat Treasure' in 2007. art artwork george johnson johnson ballarat teachers' college art collection mural hard edged A painted mural in three panels, including hession collage. ...George JOHNSON (18 August 1926- ) Born Nelson, New Zealand Arrived Australia 1953 George Johnson's formalised abstractions usually feature a pattern of small related geometrical shapes which give life, luminosity and fluidity to forms which might be mechanical and lifeless. Later his forms become become much larger and more architonic. The work of George Johnson debuted at the Herald Outdoor Art Show in 1953. The George Johnson Mural was commissioned by the Ballarat Teachers' College Students' Representative Council in 1965. It was purchased with funds raised by staff and students. At the unveiling of this work at the Ballarat Teachers' College Johnson's work was described at belonging to the "Hard Edged" school of abstract painters who had set themselves far above the mass of abstract painters by the vitality and artistic ability displayed in their work. Of the work John JOhnson said "We are all part of life and are growing and developing in many different ways, the process of development is often taking place without us even being aware of it. In my painting the embryo shapes appear and grow. I have tried to make the mural symbolic of life and growth. I do not thank that anything has been left to chance in the mural. Everything is working, and, I feel, working well. It has balance and harmony - and perhaps discord, as does life - one malfunction or imbalance throws everything out." This item is part of the Federation University Art Collection. The Art Collection features over 2000 works and was listed as a 'Ballarat Treasure' in 2007.A painted mural in three panels, including hession collage. art, artwork, george johnson, johnson, ballarat teachers' college art collection, mural, hard edged -
 Clunes Museum
Book, R. CLAY PRINTER, The Rose Bud
... BLUE HARD COVERED GILT EDGE BOOK 250 PAGES...LAST PAGE: PRINTED STICKER "BAXTER PRINTER 49 BARTHOLEMEW CLOSE" BLUE HARD COVERED GILT EDGE BOOK 250 PAGES The Rose Bud Book BOOK R. ...RELIGIOUS CONTENT AIMED AT YOUNG PEOPLEBLUE HARD COVERED GILT EDGE BOOK 250 PAGESnon-fictionRELIGIOUS CONTENT AIMED AT YOUNG PEOPLElocal history, book, hudson, laura -
 Whitehorse Historical Society Inc.
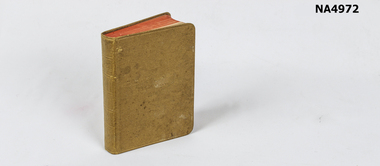
Book - Bible, c1914
... Buff-coloured, hard-cover, pages edged red. Inscription painted inside front cover from Lord Roberts. ...Buff-coloured, hard-cover, pages edged red. Inscription painted inside front cover from Lord Roberts. ...From the Collection of Charles HonybunPocket-sized New Testament. Buff-coloured, hard-cover, pages edged red. Inscription painted inside front cover from Lord Roberts. Selection of Hymns at end of Testament.books, religion, ww1, charles henry honybun -
 Warrnambool and District Historical Society Inc.
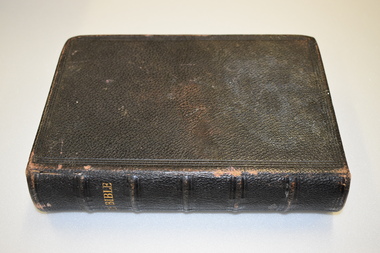
Book, Holy Bible, 1881
... Brown leather hard cover with pages edged in gold. 1125 pages.It has side notes. ...Brown leather hard cover with pages edged in gold. 1125 pages.It has side notes. ...This is a typical family bible from the 1880's. It was owned by the Morgan family of Allansford but from the names in the back appears to have connections to the Cumming family also of Allansford.The original owners were John and Sarah Morgan who were great grandparents of the donor.A typical family bible which has connections to a local family.Brown leather hard cover with pages edged in gold. 1125 pages.It has side notes. There is part of a inscription on the front fly. The fragment of the inscription reads "Present ** Miss Anne** on the occasion ** by her frie***. In the back is a list of names and birth dates. Moreton St Clare Cumming born 23rd February 1904 at Allansford. Thomas Arthur Clyde Cumming born 24 March 1905 at Allansford. Alice Edith Frances Cumming born 21st June 1907 at Allansford.George Henry Reginald Cumming born 2nd January 1910 at Allansford. Linda Myrtle Cumming died 30th October 1895, Ivy Stella Mary Cumming born 27 August '89 at Flaxman Street Warrnambool, Jessie Elizabeth Doris Cumming Born Warrnambool 17th August 1899 Flaxman St Wallace Alan Lancelot born 3rd July 1902 at Allansford. holy bible, morgans of allansford, cumming family -
 Warrnambool and District Historical Society Inc.
Legal record - Letter Book, G.S. Mackay, Circa 1920
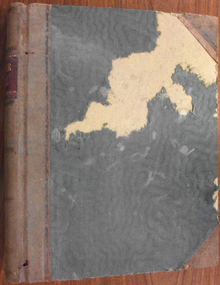
... Dark green fabric cover with light brown suede spine and cover edges. Hard cover. Green patterned paper inside front and back covers. ...Club 35 St Georges Square London S.W.1 Dark green fabric cover with light brown suede spine and cover edges. Hard cover. Green patterned paper inside front and back covers. ...This book contains private letters which G. S. Mackay wrote to his daughter, Meta? and his aunt in the 1920’s. G. S. Mackay was born in Sutherlandshire Scotland in 1850. He qualified as a solicitor and came to Australia in 1884 and later to Warrnambool in 1893. He served as a Warrnambool City Councillor and also held a number of important positions within the Presbyterian Church. He was one of the earliest and strongest supporters of the Warrnambool High School. Many of the letters within this book are to his daughter who studied medicine in Glasgow in the early 1900’s. G. S Mackay was prominent in legal, civic and religious life in Warrnambool almost from the time of his arrival in 1893 until his death in 1926. Many of these letters are of a religious nature and as such display that aspect and personal thoughts of Mr Mackay’s personal life. Dark green fabric cover with light brown suede spine and cover edges. Hard cover. Green patterned paper inside front and back covers. Alphabetical index at front. Pale fine yellow pages numbered up to 502. L. ****Queen Douglas, Newpark West Calder, MidLothian 14 miles from Edin’h Ry Stn Newpark. Meta Selby The Calouda(?) Club 35 St Georges Square London S.W.1 warrnambool, g.s. mackay letter book, solicitor, g. s mackay councillor. -
 Flagstaff Hill Maritime Museum and Village
Tool - Compass Saw, Mid to late 20th Century
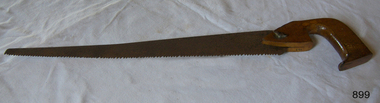
... A saw is a tool consisting of a tough blade, wire, or chain with a hard-toothed edge. It is used to cut through material, very often wood, though sometimes metal or stone. ...A saw is a tool consisting of a tough blade, wire, or chain with a hard-toothed edge. It is used to cut through material, very often wood, though sometimes metal or stone. ...A saw is a tool consisting of a tough blade, wire, or chain with a hard-toothed edge. It is used to cut through material, very often wood, though sometimes metal or stone. The cut is made by placing the toothed edge against the material and moving it forcefully forth and less vigorously back or continuously forward. This force may be applied by hand, or powered by steam, water, electricity or other power sources. An abrasive saw has a powered circular blade designed to cut through metal or ceramic. In ancient Egypt, open (unframed) saws made of copper are documented as early as the Early Dynastic Period, circa 3,100–2,686 BC. Many copper saws were found in tombs dating to the 31st century BC. Models of saws have been found in many contexts throughout Egyptian history. As the saw developed, teeth were raked to cut only on the pull stroke and set with the teeth projecting only on one side, rather than in the modern fashion with an alternating set. Saws were also made of bronze and later iron. In the Iron Age, frame saws were developed holding the thin blades in tension. The earliest known sawmill is the Roman Hierapolis sawmill from the third century AD used for cutting stone.The subject item is believed to date from around the mid to late 20th century and is regarded as a modern item. The maker is unknown but the pattern or design and type of wood used indicate it is a tool of modern manufacture. Compass saw blade with wooden handle attached with wingnut.Noneflagstaff hill, warrnambool, flagstaff-hill, flagstaff-hill-maritime-museum, maritime-museum, shipwreck-coast, flagstaff-hill-maritime-village, wood cutting, wood saw, cross cut saw, cabinet makers tools, wood working tools, tool -
 Flagstaff Hill Maritime Museum and Village
Tool - Wood Saw, Mid to late 20th century
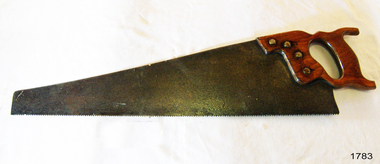
... A saw is a tool consisting of a tough blade, wire, or chain with a hard-toothed edge. It is used to cut through material, very often wood, though sometimes metal or stone. ...A saw is a tool consisting of a tough blade, wire, or chain with a hard-toothed edge. It is used to cut through material, very often wood, though sometimes metal or stone. ...A saw is a tool consisting of a tough blade, wire, or chain with a hard-toothed edge. It is used to cut through material, very often wood, though sometimes metal or stone. The cut is made by placing the toothed edge against the material and moving it forcefully forth and less vigorously back or continuously forward. This force may be applied by hand, or powered by steam, water, electricity or other power sources. An abrasive saw has a powered circular blade designed to cut through metal or ceramic. In ancient Egypt, open (unframed) saws made of copper are documented as early as the Early Dynastic Period, circa 3,100–2,686 BC. Many copper saws were found in tombs dating to the 31st century BC. Models of saws have been found in many contexts throughout Egyptian history. As the saw developed, teeth were raked to cut only on the pull stroke and set with the teeth projecting only on one side, rather than in the modern fashion with an alternating set. Saws were also made of bronze and later iron. In the Iron Age, frame saws were developed holding the thin blades in tension. The earliest known sawmill is the Roman Hierapolis sawmill from the third century AD used for cutting stone. The subject item at this time cannot be associated with an historical event, person or place, provenance is unknown, as the maker is unknown but the pattern or design and type of wood used indicate it is a tool of modern manufacture around the mid to late 20th century.Wood hand saw with wooden handle attached to saw by 4 rivets. No blade markings Noneflagstaff hill, warrnambool, flagstaff-hill, flagstaff-hill-maritime-museum, maritime-museum, shipwreck-coast, flagstaff-hill-maritime-village, handsaw, wood saw, carpenders tools, cabinet makers tools, wood cutting -
 Flagstaff Hill Maritime Museum and Village
Tool - Saw, Mid 20th Century
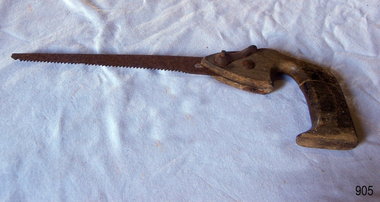
... A saw is a tool consisting of a tough blade, wire, or chain with a hard-toothed edge. It is used to cut through material, very often wood, though sometimes metal or stone. ...A saw is a tool consisting of a tough blade, wire, or chain with a hard-toothed edge. It is used to cut through material, very often wood, though sometimes metal or stone. ...A saw is a tool consisting of a tough blade, wire, or chain with a hard-toothed edge. It is used to cut through material, very often wood, though sometimes metal or stone. The cut is made by placing the toothed edge against the material and moving it forcefully forth and less vigorously back or continuously forward. This force may be applied by hand, or powered by steam, water, electricity or other power sources. An abrasive saw has a powered circular blade designed to cut through metal or ceramic. In ancient Egypt, open (unframed) saws made of copper are documented as early as the Early Dynastic Period, circa 3,100–2,686 BC. Many copper saws were found in tombs dating to the 31st century BC. Models of saws have been found in many contexts throughout Egyptian history. As the saw developed, teeth were raked to cut only on the pull stroke and set with the teeth projecting only on one side, rather than in the modern fashion with an alternating set. Saws were also made of bronze and later iron. In the Iron Age, frame saws were developed holding the thin blades in tension. The earliest known sawmill is the Roman Hierapolis sawmill from the third century AD used for cutting stone.The subject item is believed to date from around the mid to late 20th century and is regarded as a modern item. The maker is unknown but the pattern or design and type of wood used indicate it is a tool of modern manufacture. Compass saw blade with wooden with open handle blade attached with wingnut lever at side to adjust long narrow blade Noneflagstaff hill, warrnambool, flagstaff-hill, flagstaff-hill-maritime-museum, maritime-museum, shipwreck-coast, flagstaff-hill-maritime-village, wood cutting, wood saw, cross cut saw, cabinet makers tools, wood working tools, tool -
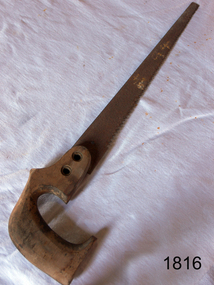 Flagstaff Hill Maritime Museum and Village
Tool - Compass Saw, Mid to late 20th Century
... A saw is a tool consisting of a tough blade, wire, or chain with a hard-toothed edge. It is used to cut through material, very often wood, though sometimes metal or stone. ...A saw is a tool consisting of a tough blade, wire, or chain with a hard-toothed edge. It is used to cut through material, very often wood, though sometimes metal or stone. ...A saw is a tool consisting of a tough blade, wire, or chain with a hard-toothed edge. It is used to cut through material, very often wood, though sometimes metal or stone. The cut is made by placing the toothed edge against the material and moving it forcefully forth and less vigorously back or continuously forward. This force may be applied by hand, or powered by steam, water, electricity or other power sources. An abrasive saw has a powered circular blade designed to cut through metal or ceramic. In ancient Egypt, open (unframed) saws made of copper are documented as early as the Early Dynastic Period, circa 3,100–2,686 BC. Many copper saws were found in tombs dating to the 31st century BC. Models of saws have been found in many contexts throughout Egyptian history. As the saw developed, teeth were raked to cut only on the pull stroke and set with the teeth projecting only on one side, rather than in the modern fashion with an alternating set. Saws were also made of bronze and later iron. In the Iron Age, frame saws were developed holding the thin blades in tension. The earliest known sawmill is the Roman Hierapolis sawmill from the third century AD used for cutting stone.The subject item is believed to date from around the mid to late 20th century and is regarded as a modern item. The maker is unknown but the pattern or design and type of wood used indicate it is a tool of modern manufacture.Compass saw with wooden handle and metal blade. Small teeth. flagstaff hill, warrnambool, flagstaff-hill, flagstaff-hill-maritime-museum, maritime-museum, shipwreck-coast, flagstaff-hill-maritime-village, wood cutting, wood saw, cross cut saw, cabinet makers tools, wood working tools, tool, compass saw -
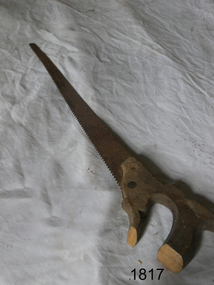 Flagstaff Hill Maritime Museum and Village
Tool - Compass Saw, Mid to late 20th Century
... A saw is a tool consisting of a tough blade, wire, or chain with a hard-toothed edge. It is used to cut through material, very often wood, though sometimes metal or stone. ...A saw is a tool consisting of a tough blade, wire, or chain with a hard-toothed edge. It is used to cut through material, very often wood, though sometimes metal or stone. ...A saw is a tool consisting of a tough blade, wire, or chain with a hard-toothed edge. It is used to cut through material, very often wood, though sometimes metal or stone. The cut is made by placing the toothed edge against the material and moving it forcefully forth and less vigorously back or continuously forward. This force may be applied by hand, or powered by steam, water, electricity or other power sources. An abrasive saw has a powered circular blade designed to cut through metal or ceramic. In ancient Egypt, open (unframed) saws made of copper are documented as early as the Early Dynastic Period, circa 3,100–2,686 BC. Many copper saws were found in tombs dating to the 31st century BC. Models of saws have been found in many contexts throughout Egyptian history. As the saw developed, teeth were raked to cut only on the pull stroke and set with the teeth projecting only on one side, rather than in the modern fashion with an alternating set. Saws were also made of bronze and later iron. In the Iron Age, frame saws were developed holding the thin blades in tension. The earliest known sawmill is the Roman Hierapolis sawmill from the third century AD used for cutting stone.The subject item is believed to date from around the mid to late 20th century and is regarded as a modern item. The maker is unknown but the pattern or design and type of wood used indicate it is a tool of modern manufacture. Compass saw with wooden handle broken and metal blade. Small teeth.Noneflagstaff hill, warrnambool, flagstaff-hill, flagstaff-hill-maritime-museum, maritime-museum, shipwreck-coast, flagstaff-hill-maritime-village, wood cutting, wood saw, cross cut saw, cabinet makers tools, wood working tools, tool, compass saw -
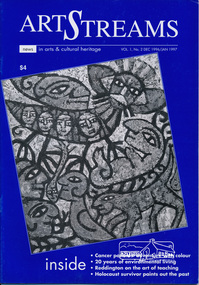 Eltham District Historical Society Inc
Journal, Peter Doughtery, ArtStreams: News in arts and cultural heritage; Vol. 1, No. 2, Dec 1996/Jan 1997, 1996
... Vol. 1, No. 2 Dec 1996/Jan 1997 CONTENTS ADVENTURE WITH COLOUR Teenage cancer patients challenge their illness with art 3 CD REVIEWS New music by local musicians 5 LIVE AND LET LIVE 20 years of environmental living 6 AUSTRALIA REVISITED Artist Charles Reddington ponders live 30 years on 8 POETRY REVIEW Anne Delaney looks at new work by Jennifer Harrison and Jordie Albiston 11 PHOTOGRAPHY Katherine Jones aims at hard edges 16 IMAGES FROM A DARK PAST Holocaust survivor paints out a traumatic part of his life 18 MORALITY OF JUSTICE The Truth Game - a play by Ray Mooney 21 ART FROM THE HEART An exhibition that crosses boundaries 22 SHORT STORY New story from an emerging writer 25 ART IN THE CEMETERY Darebin launches a new project to decorate its new mausoleum 28 LISTINGS Artists, performers and galleries 29 KEYWORDS 895 Main Road, 1994 Moet et Chandon Fellowship, Adventure with Colour, Alan Bonney, Alan Constable, Alun Leach-Jones, Amada Laming, Anne Connor & Associates, Anne Delaney, Anthony Day, Art Streams Magazine, Artist-in-residence, Arts by the Waters, Arts project Australia, Auschwitz, Banyule Jazz Festival, Barbara Veheary, Bend of Islands Conservation Association (BICA), Bend of Islands Estate, Bend of Islands, Bill Downing, Bulleen Art & Garden Centre, Bulleen Nursery, Caffe Poco, Carlton Courthouse Theatre, Catani Boulevard, Catherine Oxley Reserve, Charles Reddington, Charlie Dowley, Cheryl Daye, Chris McAuliffe, Clifton Pugh, Colin Lanceley, Cornelia Selover, Creativitie et Handicap Mental (CREAHM), Cynthia Hardman, Cyril Tawney, Damian Eyre, Daniel Lillford, Danuta Michalska, Darebin Arts and Entertainment Centre, Darebin City Council, Department of Fine Arts, Donald Campbell, Dora Zable, Dorothy Berry, dunmoochin, E.H. ...Vol. 1, No. 2 Dec 1996/Jan 1997 CONTENTS ADVENTURE WITH COLOUR Teenage cancer patients challenge their illness with art 3 CD REVIEWS New music by local musicians 5 LIVE AND LET LIVE 20 years of environmental living 6 AUSTRALIA REVISITED Artist Charles Reddington ponders live 30 years on 8 POETRY REVIEW Anne Delaney looks at new work by Jennifer Harrison and Jordie Albiston 11 PHOTOGRAPHY Katherine Jones aims at hard edges 16 IMAGES FROM A DARK PAST Holocaust survivor paints out a traumatic part of his life 18 MORALITY OF JUSTICE The Truth Game - a play by Ray Mooney 21 ART FROM THE HEART An exhibition that crosses boundaries 22 SHORT STORY New story from an emerging writer 25 ART IN THE CEMETERY Darebin launches a new project to decorate its new mausoleum 28 LISTINGS Artists, performers and galleries 29 KEYWORDS 895 Main Road, 1994 Moet et Chandon Fellowship, Adventure with Colour, Alan Bonney, Alan Constable, Alun Leach-Jones, Amada Laming, Anne Connor & Associates, Anne Delaney, Anthony Day, Art Streams Magazine, Artist-in-residence, Arts by the Waters, Arts project Australia, Auschwitz, Banyule Jazz Festival, Barbara Veheary, Bend of Islands Conservation Association (BICA), Bend of Islands Estate, Bend of Islands, Bill Downing, Bulleen Art & Garden Centre, Bulleen Nursery, Caffe Poco, Carlton Courthouse Theatre, Catani Boulevard, Catherine Oxley Reserve, Charles Reddington, Charlie Dowley, Cheryl Daye, Chris McAuliffe, Clifton Pugh, Colin Lanceley, Cornelia Selover, Creativitie et Handicap Mental (CREAHM), Cynthia Hardman, Cyril Tawney, Damian Eyre, Daniel Lillford, Danuta Michalska, Darebin Arts and Entertainment Centre, Darebin City Council, Department of Fine Arts, Donald Campbell, Dora Zable, Dorothy Berry, dunmoochin, E.H. ...Vol. 1, No. 2 Dec 1996/Jan 1997 CONTENTS ADVENTURE WITH COLOUR Teenage cancer patients challenge their illness with art 3 CD REVIEWS New music by local musicians 5 LIVE AND LET LIVE 20 years of environmental living 6 AUSTRALIA REVISITED Artist Charles Reddington ponders live 30 years on 8 POETRY REVIEW Anne Delaney looks at new work by Jennifer Harrison and Jordie Albiston 11 PHOTOGRAPHY Katherine Jones aims at hard edges 16 IMAGES FROM A DARK PAST Holocaust survivor paints out a traumatic part of his life 18 MORALITY OF JUSTICE The Truth Game - a play by Ray Mooney 21 ART FROM THE HEART An exhibition that crosses boundaries 22 SHORT STORY New story from an emerging writer 25 ART IN THE CEMETERY Darebin launches a new project to decorate its new mausoleum 28 LISTINGS Artists, performers and galleries 29 KEYWORDS 895 Main Road, 1994 Moet et Chandon Fellowship, Adventure with Colour, Alan Bonney, Alan Constable, Alun Leach-Jones, Amada Laming, Anne Connor & Associates, Anne Delaney, Anthony Day, Art Streams Magazine, Artist-in-residence, Arts by the Waters, Arts project Australia, Auschwitz, Banyule Jazz Festival, Barbara Veheary, Bend of Islands Conservation Association (BICA), Bend of Islands Estate, Bend of Islands, Bill Downing, Bulleen Art & Garden Centre, Bulleen Nursery, Caffe Poco, Carlton Courthouse Theatre, Catani Boulevard, Catherine Oxley Reserve, Charles Reddington, Charlie Dowley, Cheryl Daye, Chris McAuliffe, Clifton Pugh, Colin Lanceley, Cornelia Selover, Creativitie et Handicap Mental (CREAHM), Cynthia Hardman, Cyril Tawney, Damian Eyre, Daniel Lillford, Danuta Michalska, Darebin Arts and Entertainment Centre, Darebin City Council, Department of Fine Arts, Donald Campbell, Dora Zable, Dorothy Berry, dunmoochin, E.H. Cameron, Edward (Ned) Haughton, Edward Car, Elizabeth Vercoe, Eltham High School, Eltham Living and Learning Centre, Environmental Living Zone (ELZ), Eric Bogle, Eucalypso, Felix Tuszynski, Food For All Seasons, Frank Hodgkinson, Fulli Andrinopoulos, Gallery of Georges of Collins Street, Gallery of Slavic Art, Glen Agnes Bend of Islands Estate, Glen Agnes Estate, Gongflers drive, Greg O'Leary, Harold (Jimmy) Fuller, Helen O'Grady Children's Drama Academy, Henley Road, Ian Doolan Hamilton, Ian Gawler, Inside Out/Outside In, Ironbark Road, Janice McBride, Jennifer Harrison, Jennifer McGregor, Jessie Agnes Haughton, Jimmy Pike, Joan Blakey, John Mackay Northe, John Rasmussen, Jordie Albiston, Julian Martin, Kangaroo Ground, Katherine Jones, Kelvin Heffernan, Kew Coattage, Kitty Ginter, Lavita Mossop, Les darcy, Les Gyori, Life with Jane, Lorraine Larter, Luc Boulange, Luciana Giardina, Manningham Artspace, Manningham City Council, Mariann Moxon, Mark Capozzi, Mark Chapman, Mark Wilkinson, Maxine Ryder, Melbourne Police Pipe Band, Mick Woiwod, Mike O'Rourke, Monica Burns, Montsalvat, Myra Hilgendorf, Nancye Ball, Page family, Pam Crohan, Pam Dougherty, Poetry, Preston Public Cemetery, Ray Mooney, Richard Haese, Robert Hughes, Robyn Kirkpatrick, Roger Lemke, Ron Hanson, Sandra Harvey, Shire of Eltham Office site, Shire of Healesville, Shire of Nillumbik, Shire Offices, Sounds by the Waters, Stelio Costa, Steven Tynan, Steven Worrell, Stewart Whiffin, Sue Howard, Sue Whiffin, Sugarloaf Reservoir, Sydney Ball, The Art of Australia, The Mews, The Truth Game, Tom Fantl, Tony Inglese, Tuszynski Survey Exhibition, University of Melbourne, Valerio Ciccone, victorian artists supplies, Watson Creek Bridge, Watsons Creek, Wayne Marnell, Woody Guthrie, Yarra Brae Dam, Yarra River"Peter Dougherty has been involved in the local art scene for many years. As publisher and editor of the arts magazine Artstreams, his comments on the various branches of the arts are widely respected. His "The Arts" column in the Diamond Valley Leader presents a brief summary for a much wider cross section of the local community. Peter also operates his own gallery and the Artstreams Cafe at the St Andrews market. Peter has a wealth of knowledge about present day and historical aspects of local art and artists." - Eltham District Historical Society Newsletter No. 161, March 2005Colour front and back cover with feature articles and literary pieces with photographs and advertisements printed in black and white. 36 pages, 30 cm. Vol. 1, no. 1 (Nov. 1996) - Vol. 10, no. 5 (summer ed. 2005/06) art streams, feliz tuszynski, elizabeth vercoe, eucalypso, bend of islands, charles reddington, jennifer harrison, jordie albiston, katherine jones, anne bonney, mick woiwood, anne connor, anne delaney, ray mooney, pam dougherty, arts project australia, lavita mossop, preston public cemetery, helen o'grady children's drama academy, bulleen nursery -
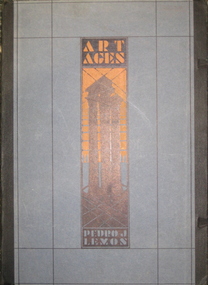 Federation University Historical Collection
Book, Art Ages, 1929 (exact)
... Blue, large, hard cover. Black tape edges and spine. Title is written in orange on front cover. ...Blue, large, hard cover. Black tape edges and spine. Title is written in orange on front cover. ...Pedro J. Lemos was an educator and artist. He was also the editor of the School of Arts Magazine and Director of Stanford University Museum of Fine Arts. He was born in 1882 and died in 1954. This art portfolio contains ten periods of art history: Egyptian, Assyrian, Grecian, Roman, Byzantine, Romanesque, Saracenic, Gothic, Renaissance and Georgian. Some of the images are: The Temple of Luxor in Egypt, Temple of Zeus, the Arch of Titus, Gothic cathedral in Cologne, Assyrian furniture and weapons, Greek architectural decorations, Byzantine costumes, Renaissance weapons and household articles, plus much more. Blue, large, hard cover. Black tape edges and spine. Title is written in orange on front cover. Ribbon ties stitched to the edge of the cover used to close book by tying them together. Loose pages showing coloured and b/w illustrations of the ages of art. Includes fold-out text booklet with five pages. The book has a number of coloured prints of examples of art through the ages, including Egyptian, Assyrian, Grecian, Roman, Byzantine, Romanesque, Saracenic, Gothic, Renaissance and Georgian. Inside the front cover there is a plate titled "Ballarat Techincal Art School Library no. R/400". It is also stamped with the publisher's details. art, art ages, pedro j lemos, historic art, egyptian art, grecian art, roman art, byzantine art, romanesque art, saracenic art, gothic art, renaissance art, american colonial art, assyrian art, ancient costumes, ancient weapons, ancient instruments, ancient household articles, ancient furniture, ancient architectural, textile decorations -
 Brunswick Community History Group
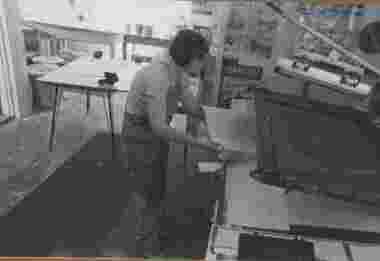
Photograph - Screen printing, Red Letter Press, Brunswick, Tanya McIntyre, 1984
... If the ink is pushed much further to the right side the ink will be too close to the screen edge and hard to get at later.’ ...If the ink is pushed much further to the right side the ink will be too close to the screen edge and hard to get at later.’ Photograph Screen printing, Red Letter Press, Brunswick Tanya McIntyre Roslyn King ...One of a set of eight mounted black and white photographs of Roslyn (Ros) King silk screen printing the 1985 BCHG calendar and showing the sequence of steps taken to silk screen print it, 1 November 1984, Red Letter Press, Brunswick. About this photograph Ros King wrote: ‘The squeegee is almost back in position – about 10-15 cm from the wood frame. If the ink is pushed much further to the right side the ink will be too close to the screen edge and hard to get at later.’ -
 Flagstaff Hill Maritime Museum and Village
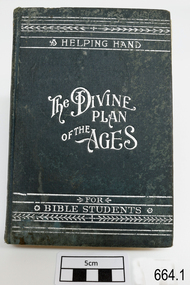
Book - Reference Religious Ideology, Charles Taze Russell, Millennial Dawn Vol 1 The Plan of the Ages, 1905
... Allegheny, PA USA 1905 Date: 1905 Further Information: Blue hard cover book with white text to lettering and front board edge pattern design...Allegheny, PA USA 1905 Date: 1905 Further Information: Blue hard cover book with white text to lettering and front board edge pattern design Millennial Dawn Vol 1 The Plan of the Ages Book Reference Religious Ideology Charles Taze Russell Watch Tower Bible & Tract Society ...Millennial Dawn, Vol. 1 (The Plan of the Ages) was published in 1905 by the Watch Tower Bible & Tract Society and is a central text in the history of modern American millenarianism. The subject book was originally published in 1886 under the title The Plan of the Ages, and later re-titled The Divine Plan of the Ages as part of the Studies in the Scriptures series. Volume 1 lays out the foundational theological framework of Charles Taze Russell's religious movement. The book argues that God operates through distinct chronological "dispensations" or ages, such as the Patriarchal Age, the Jewish Age, and the Gospel Age, leading up to the "Millennial Age". Its primary themes include the harmonising of the scriptures while attempting to systematically reconcile Old and New Testament prophecies.Millennial Dawn Vol 1 (The Plan of The Ages) Author: Charles Taze Russell Publisher: Watch Tower Bible & Tract Society. Allegheny, PA USA 1905 Date: 1905 Further Information: Blue hard cover book with white text to lettering and front board edge pattern designnon-fictionMillennial Dawn, Vol. 1 (The Plan of the Ages) was published in 1905 by the Watch Tower Bible & Tract Society and is a central text in the history of modern American millenarianism. The subject book was originally published in 1886 under the title The Plan of the Ages, and later re-titled The Divine Plan of the Ages as part of the Studies in the Scriptures series. Volume 1 lays out the foundational theological framework of Charles Taze Russell's religious movement. The book argues that God operates through distinct chronological "dispensations" or ages, such as the Patriarchal Age, the Jewish Age, and the Gospel Age, leading up to the "Millennial Age". Its primary themes include the harmonising of the scriptures while attempting to systematically reconcile Old and New Testament prophecies.flagstaff hill, warrnambool, shipwrecked-coast, flagstaff-hill, flagstaff-hill-maritime-museum, maritime-museum, shipwreck-coast, millennial dawn vol 1 the plan of the ages, book, religious works, watch tower bible & tract society, charles taze russell, jehova witness, bible studies -
 Flagstaff Hill Maritime Museum and Village
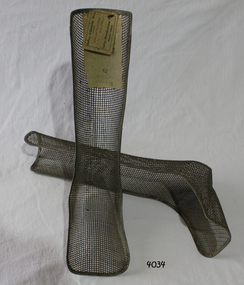
Splint, c. 1910-1920
... Stiff wire mesh with a hard metal border around the edges, shaped as a food and half leg, with printed paper labels attached to the top. ...Stiff wire mesh with a hard metal border around the edges, shaped as a food and half leg, with printed paper labels attached to the top. ...This is a pair of vintage DePuy wire mesh splints made to support a broken leg while the bone mended. The design was in use before and during WWI. It replaced the wooden splints previously used to reset bones in the late nineteenth to early 20th century. This new splint was invented by a traveling pharmaceutical salesman, Revra DePuy. He began manufacturing in his Warsaw, Indiana in 1895; the first commercial manufacture of orthopaedic equipment in the world . The company eventually became Johnson & Johnson. This pair of splints was donated to Flagstaff Hill Maritime Village by the family of Doctor William Roy Angus, Surgeon and Oculist. It is part of the “W.R. Angus Collection” that includes historical medical equipment, surgical instruments and material once belonging to Dr Edward Ryan and Dr Thomas Francis Ryan, (both of Nhill, Victoria) as well as Dr Angus’ own belongings. The Collection’s history spans the medical practices of the two Doctors Ryan, from 1885-1926 plus that of Dr Angus, up until 1969. These splints would have belonged to Dr Tom Ryan before being passed onto Dr. W.R. Angus. ABOUT THE “W.R.ANGUS COLLECTION” Doctor William Roy Angus M.B., B.S., Adel., 1923, F.R.C.S. Edin.,1928 (also known as Dr Roy Angus) was born in Murrumbeena, Victoria in 1901 and lived until 1970. He qualified as a doctor in 1923 at University of Adelaide, was Resident Medical Officer at the Royal Adelaide Hospital in 1924 and for a period was house surgeon to Sir (then Mr.) Henry Simpson Newland. Dr Angus was briefly an Assistant to Dr Riddell of Kapunda, then commenced private practice at Curramulka, Yorke Peninsula, SA, where he was physician, surgeon and chemist. In 1926, he was appointed as new Medical Assistant to Dr Thomas Francis Ryan (T.F. Ryan, or Tom), in Nhill, Victoria, where his experiences included radiology and pharmacy. In 1927 he was Acting House Surgeon in Dr Tom Ryan’s absence. Dr Angus had become engaged to Gladys Forsyth and they decided he would take time to further his studies overseas in the UK in 1927. He studied at London University College Hospital and at Edinburgh Royal Infirmary and in 1928, was awarded FRCS (Fellow from the Royal College of Surgeons), Edinburgh. He worked his passage back to Australia as a Ship’s Surgeon on the on the Australian Commonwealth Line’s T.S.S. Largs Bay. Dr Angus married Gladys in 1929, in Ballarat. (They went on to have one son (Graham 1932, born in SA) and two daughters (Helen (died 12/07/1996) and Berenice (Berry), both born at Mira, Nhill ) Dr Angus was a ‘flying doctor’ for the A.I.M. (Australian Inland Ministry) Aerial Medical Service in 1928 . The organisation began in South Australia through the Presbyterian Church in that year, with its first station being in the remote town of Oodnadatta, where Dr Angus was stationed. He was locum tenens there on North-South Railway at 21 Mile Camp. He took up this ‘flying doctor’ position in response to a call from Dr John Flynn; the organisation was later known as the Flying Doctor Service, then the Royal Flying Doctor Service. A lot of his work during this time involved dental surgery also. Between 1928-1932 he was surgeon at the Curramulka Hospital, Yorke Peninsula, South Australia. In 1933 Dr Angus returned to Nhill where he’d previously worked as Medical Assistant and purchased a share of the Nelson Street practice and Mira hospital from Dr Les Middleton one of the Middleton Brothers, the current owners of what was once Dr Tom Ryan’s practice. Dr L Middleton was House Surgeon to the Nhill Hospital 1926-1933, when he resigned. [Dr Tom Ryan’s practice had originally belonged to his older brother Dr Edward Ryan, who came to Nhill in 1885. Dr Edward saw patients at his rooms, firstly in Victoria Street and in 1886 in Nelson Street, until 1901. The Nelson Street practice also had a 2 bed ward, called Mira Private Hospital ). Dr Edward Ryan was House Surgeon at the Nhill Hospital 1884-1902 . He also had occasions where he successfully performed veterinary surgery for the local farmers too. Dr Tom Ryan then purchased the practice from his brother in 1901. Both Dr Edward and Dr Tom Ryan work as surgeons included eye surgery. Dr Tom Ryan performed many of his operations in the Mira private hospital on his premises. He too was House Surgeon at the Nhill Hospital 1902-1926. Dr Tom Ryan had one of the only two pieces of radiology equipment in Victoria during his practicing years – The Royal Melbourne Hospital had the other one. Over the years Dr Tom Ryan gradually set up what was effectively a training school for country general-practitioner-surgeons. Each patient was carefully examined, including using the X-ray machine, and any surgery was discussed and planned with Dr Ryan’s assistants several days in advance. Dr Angus gained experience in using the X-ray machine there during his time as assistant to Dr Ryan. Dr Tom Ryan moved from Nhill in 1926. He became a Fellow of the Royal Australasian College of Surgeons in 1927, soon after its formation, a rare accolade for a doctor outside any of the major cities. He remained a bachelor and died suddenly on 7th Dec 1955, aged 91, at his home in Ararat. Scholarships and prizes are still awarded to medical students in the honour of Dr T.F. Ryan and his father, Dr Michael Ryan, and brother, John Patrick Ryan. ] When Dr Angus bought into the Nelson Street premises in Nhill he was also appointed as the Nhill Hospital’s Honorary House Surgeon 1933-1938. His practitioner’s plate from his Nhill surgery states “HOURS Daily, except Tuesdays, Fridays and Saturday afternoons, 9-10am, 2-4pm, 7-8pm. Sundays by appointment”. This plate is now mounted on the doorway to the Port Medical Office at Flagstaff Hill Maritime Village, Warrnambool. Dr Edward Ryan and Dr Tom Ryan had an extensive collection of historical medical equipment and materials spanning 1884-1926 and when Dr Angus took up practice in their old premises he obtained this collection, a large part of which is now on display at the Port Medical Office at Flagstaff Hill Maritime Village in Warrnambool. During his time in Nhill Dr Angus was involved in the merging of the Mira Hospital and Nhill Public Hospital into one public hospital and the property titles passed on to Nhill Hospital in 1939. In 1939 Dr Angus and his family moved to Warrnambool where he purchased “Birchwood,” the 1852 home and medical practice of Dr John Hunter Henderson, at 214 Koroit Street. (This property was sold in1965 to the State Government and is now the site of the Warrnambool Police Station. ). The Angus family was able to afford gardeners, cooks and maids; their home was a popular place for visiting dignitaries to stay whilst visiting Warrnambool. Dr Angus had his own silk worm farm at home in a Mulberry tree. His young daughter used his centrifuge for spinning the silk. Dr Angus was appointed on a part-time basis as Port Medical Officer (Health Officer) in Warrnambool and held this position until the 1940’s when the government no longer required the service of a Port Medical Officer in Warrnambool; he was thus Warrnambool’s last serving Port Medical Officer. (The duties of a Port Medical Officer were outlined by the Colonial Secretary on 21st June, 1839 under the terms of the Quarantine Act. Masters of immigrant ships arriving in port reported incidents of diseases, illness and death and the Port Medical Officer made a decision on whether the ship required Quarantine and for how long, in this way preventing contagious illness from spreading from new immigrants to the residents already in the colony.) Dr Angus was a member of the Australian Medical Association, for 35 years and surgeon at the Warrnambool Base Hospital 1939-1942, He served as a Surgeon Captain during WWII1942-45, in Ballarat, Victoria, and in Bonegilla, N.S.W., completing his service just before the end of the war due to suffering from a heart attack. During his convalescence he carved an intricate and ‘most artistic’ chess set from the material that dentures were made from. He then studied ophthalmology at the Royal Melbourne Eye and Ear Hospital and created cosmetically superior artificial eyes by pioneering using the intrascleral cartilage. Angus received accolades from the Ophthalmological Society of Australasia for this work. He returned to Warrnambool to commence practice as an ophthalmologist, pioneering in artificial eye improvements. He was Honorary Consultant Ophthalmologist to Warrnambool Base Hospital for 31 years. He made monthly visits to Portland as a visiting surgeon, to perform eye surgery. He represented the Victorian South-West subdivision of the Australian Medical Association as its secretary between 1949 and 1956 and as chairman from 1956 to 1958. In 1968 Dr Angus was elected member of Spain’s Barraquer Institute of Barcelona after his research work in Intrasclearal cartilage grafting, becoming one of the few Australian ophthalmologists to receive this honour, and in the following year presented his final paper on Living Intrasclearal Cartilage Implants at the Inaugural Meeting of the Australian College of Ophthalmologists in Melbourne In his personal life Dr Angus was a Presbyterian and treated Sunday as a Sabbath, a day of rest. He would visit 3 or 4 country patients on a Sunday, taking his children along ‘for the ride’ and to visit with him. Sunday evenings he would play the pianola and sing Scottish songs to his family. One of Dr Angus’ patients was Margaret MacKenzie, author of a book on local shipwrecks that she’d seen as an eye witness from the late 1880’s in Peterborough, Victoria. In the early 1950’s Dr Angus, painted a picture of a shipwreck for the cover jacket of Margaret’s book, Shipwrecks and More Shipwrecks. She was blind in later life and her daughter wrote the actual book for her. Dr Angus and his wife Gladys were very involved in Warrnambool’s society with a strong interest in civic affairs. Their interests included organisations such as Red Cross, Rostrum, Warrnambool and District Historical Society (founding members), Wine and Food Society, Steering Committee for Tertiary Education in Warrnambool, Local National Trust, Good Neighbour Council, Housing Commission Advisory Board, United Services Institute, Legion of Ex-Servicemen, Olympic Pool Committee, Food for Britain Organisation, Warrnambool Hospital, Anti-Cancer Council, Boys’ Club, Charitable Council, National Fitness Council and Air Raid Precautions Group. He was also a member of the Steam Preservation Society and derived much pleasure from a steam traction engine on his farm. He had an interest in people and the community He and his wife Gladys were both involved in the creation of Flagstaff Hill, including the layout of the gardens. After his death (28th March 1970) his family requested his practitioner’s plate, medical instruments and some personal belongings be displayed in the Port Medical Office surgery at Flagstaff Hill Maritime Village, and be called the “W. R. Angus Collection”. The pair of splints was made by the world’s oldest orthopedic company, founded in 1895. The splint was a part of Dr. Tom Ryan’s equipment that was passed onto Dr W.R. Angus. It is part of the collection of historical medical equipment used in Western Victoria in the late 19th and early 20th century. The W.R. Angus Collection is significant for still being located at the site it is connected with, Doctor Angus being the last Port Medical Officer in Warrnambool. The collection of medical instruments and other equipment is culturally significant, being an historical example of medicine from late 19th to mid-20th century. Dr Angus assisted Dr Tom Ryan, a pioneer in the use of X-rays and in ocular surgery. Splint, (pair of 2) from the W.R. Angus Collection. Stiff wire mesh with a hard metal border around the edges, shaped as a food and half leg, with printed paper labels attached to the top. Labels show manufacturer and instructions. Made for supporting Tibia and Fibula bones. Label attached to one split reads "DePuy Adjustable Wire / PATENTED / Tibia and Fibula Splint / No. 32 Medium Posterior / DePuy Manufacturing Co. / Warsaw, Indiana""DePuy Adjustable Wire / PATENTED / Tibia and Fibula Splint / No. 32 Medium Posterior / DePuy Manufacturing Co. / Warsaw, Indiana"flagstaff hill, warrnambool, shipwrecked coast, flagstaff hill maritime museum, maritime museum, shipwreck coast, flagstaff hill maritime village, great ocean road, dr w r angus, dr ryan, surgical instrument, t.s.s. largs bay, warrnambool base hospital, nhill base hospital, mira hospital, flying doctor, medical treatment, medical history, medical education, medical text book, wire mesh splint, wire mesh cast, orthopaedic medical equipment, bone setting equipment, 1910’s medical equipment, medical artefact -
 Federation University Historical Collection
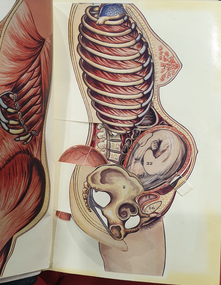
Book, Eulalia S. Richards, Ladies' Handbook of Home Treatment, 1945, 1945
... Black hard covered book of 1038 pp with index, colour and b/w.illus. binding is textured with leather spine and corners. the book begins with a colour fold-out figure of a pregnant woman plus other colour plates. Page edges...This book was located at the University of Ballarat School of Nursing until donation in 2011. nursing medicine eulalia richards eulalia s richards medical women scarlet fever Diptheria Black hard covered book of 1038 pp with index, colour and b/w.illus. binding is textured with leather spine and corners. the book begins with a colour fold-out figure of a pregnant woman plus other colour plates. Page edges ...Black hard covered book of 1038 pp with index, colour and b/w.illus. binding is textured with leather spine and corners. the book begins with a colour fold-out figure of a pregnant woman plus other colour plates. Page edges are marbled. The envelope in the back contains a small booklet,"Directions for Emergency Confinement In The Home" non-fictionnursing, medicine, eulalia richards, eulalia s richards, medical, women, scarlet fever, diptheria -
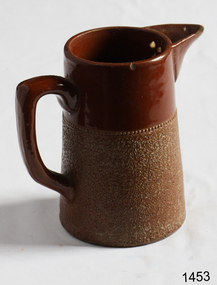 Flagstaff Hill Maritime Museum and Village
Domestic object - Jug
... edges and dags! Trimming thrown work: If you are planning to trim (or turn) your thrown work (and you should be), make sure you bag it well – your work should be leather hard to almost dry for easiest trimming. ...edges and dags! Trimming thrown work: If you are planning to trim (or turn) your thrown work (and you should be), make sure you bag it well – your work should be leather hard to almost dry for easiest trimming. ...The Process of Making Pottery Decorating, Firing, Glazing, Making, Technical There is a rhythm and flow to clay. It can’t be done all at once! Even the making process! It can take weeks to get everything done, especially if you can only work on your pottery once a week! Even though we have three hour classes, it’s often just not enough time! Here is an overview of some of the processes so you have a bit more grasp on some of the technical stuff! Step One – Design There are SO many ideas out there for making stuff in clay! From delicate porcelain jewellery, through to heavy sculptural work and everything in between. Deciding your direction is sometimes not that easy – when you first start, try everything, you will naturally gravitate to the style that you enjoy! The options and variations are endless and can get a wee bit overwhelming too! Check in with me before you start to ensure your ideas will work, what order you might do things, how you could achieve the look you are seeking and any other technical data required! Step Two – Making Clay is thixotropic. This means that as you work with it, the clay first gets sloppier and wetter, before is begins to dry in the atmosphere. For most things, you simply can’t do all parts of the project at once. An example of work order might look like: Get last weeks work out from the shelves Prepare clay for today’s work – roll your clay, prepare balls for throwing, make the first stage of a pinch pot) Clean up last week’s work and put it on the shelf for bisque firing Check that you have any glazing to do – and do enough of it that you will have time to finish your main project Do the next step of your next project – there might be a further step that can’t be complete immediately, in that case, wrap your work well and put onto the shelves. Letting your work rest for a while can really help keep your work clean and professional looking. Many things require bagging under plastic to keep it ready for work the next week – put your name on the outside of the bag so you can find your work easily. We have stickers and markers. Consider how you want to decorate your work – coloured slip can be applied at a fairly wet stage (remembering that it will make your work even wetter!). Trying to apply slip to dry clay won’t work! If you want to do sgraffito – you will need to keep the work leather hard (a state of dryness where you can still work the clay with a little effort and a little water and care). Step Three – Drying Most of the time your work can go into the rack uncovered to let it dry out for the following week. If you want to continue forming or shaping you will need to double bag your work – put your work on a suitable sized bat and put the bat in a bag so the base of the bag is under the bat, then put another bag over the top of the work and tuck the top of the bag under the bat. If you want to trim (or turn) your thrown work the following week, it should also be double bagged. If your work is large, delicate, or of uneven thicknesses, you should lightly cover your work for drying. When considering the drying process, bare in mind the weather, humidity and wind! The hotter and dryer, the faster things dry and work can dry unevenly in the shelves – this can lead to cracking – another time to lightly cover your work for drying. Step Four – Trimming and Cleaning Up Your work is dry! It is called greenware now and it is at it’s most fragile! Handle everything with two hands. I often refer to soft hands – keep everything gentle and with your fingers spread as much as possible. Try to not pick up things like plates too much, and always with both hands! Before your work can be bisque fired it should be “cleaned up”. You work won’t go into the kiln if it has sharp edges – when glazed, sharp edges turn into razor blades! Use a piece of fly wire to rub the work all over – this will scratch a little so be light handed. Use a knife or metal kidney to scrape any areas that require a bit more dynamic treatment than the fly wire offers! Finally, a very light wipe over with a slightly damp sponge can help soften and soothe all of your edges and dags! Trimming thrown work: If you are planning to trim (or turn) your thrown work (and you should be), make sure you bag it well – your work should be leather hard to almost dry for easiest trimming. Use this step to finish the work completely – use a metal kidney to polish the surface, or a slightly damp sponge to give a freshly thrown look. Wipe the sponge around the rim after trimming, and check the inside of the pot for dags! Trimming slip cast work: Usually I will trim the rims of your work on the wheel the following day to make that stage easier, however you will still need to check your work for lumps and bumps. Last but not least – check that your name is still clearly on the bottom of your work. Step Five – Bisque Firing When the work is completely dry it can go into the bisque kiln. The bisque kiln is fired to 1000°C. This process burns off the water in the clay as well as some of the chemically bound water. The structure of the clay is not altered that much at this temperature. Inside the bisque kiln, the work is stacked a little, small bowl inside a larger bowl and onto a heavy plate. Smaller items like decorations or drink coasters might get stacked several high. Consideration is paid to the weight of the stack and shape of the work. A bisque kiln can fire about one and a half times the amount of work that the glaze kiln can fire. The firing takes about 10 hours to complete the cycle and about two days to cool down. Once it has been emptied the work is placed in the glaze room ready for you to decorate! Step Six – Glazing Decorating your work with colour can be a lot of fun – and time consuming! There are three main options for surface treatment at this stage: Oxide Washes Underglazes Glazes Washes and underglazes do not “glaze” the work – It will still need a layer of glaze to fully seal the clay (washes don’t need glaze on surfaces not designed for food or liquid as they can gloss up a little on their own). Underglazes are stable colourants that turn out pretty much how they look in the jar. They can be mixed with each other to form other colours and can be used like water colours to paint onto your work. Mostly they should have a clear glaze on top to seal them. Oxides are a different species – the pink oxide (cobalt) wash turns out bright blue for instance. They don’t always need a glaze on top, and some glazes can change the colour of the wash! The glazes need no other “glaze” on top! Be careful of unknown glaze interactions – you can put any combination of glaze in a bowl or on a plate, but only a single glaze on the outside of any vertical surface! Glazes are a chemical reaction under heat. We don’t know the exact chemicals in the Mayco glazes we use. I can guess by the way they interact with each other, however, on the whole, you need to test every idea you have, and not run the test on a vertical surface! Simply put, glaze is a layer of glass like substance that bonds with the clay underneath. Clay is made of silica, alumina and water. Glaze is made of mostly silica. Silica has a melting point of 1700°C and we fire to 1240°C. The silica requires a “flux” to help it melt at the lower temperature. Fluxes can be all sorts of chemicals – a common one is calcium – calcium has a melting point of 2500°C, however, together they both melt at a much lower temperature! Colourants are metal oxides like cobalt (blue), chrome (green through black), copper (green, blue, even red!), manganese (black, purple and pink) iron (red brown), etc. Different chemicals in the glaze can have dramatic effects. for example, barium carbonate (which we don’t use) turns manganese bright pink! Other elements can turn manganese dioxide brown, blue, purple and reddish brown. Manganese dioxide is a flux in and of itself as well. So, glazes that get their black and purple colours, often interact with other glazes and RUN! Our mirror black is a good example – it mixes really well with many glazes because it fluxes them – causes them to melt faster. It will also bring out many beautiful colours in the glazes because it’s black colouring most definitely comes from manganese dioxide! Glaze chemistry is a whole subject on it’s own! We use commercial Mayco glazes on purpose – for their huge range of colour possibilities, stability, cool interactions, artistic freedom with the ability to easily brush the glazes on and ease of use. We currently have almost 50 glazes on hand! A major project is to test the interactions of all glazes with each other. That is 2,500 test tiles!!!! I’m going to make the wall behind the wheels the feature wall of pretty colours! Step Seven – Glaze (Gloss or sometimes called “Glost”) Firing Most of the time this is the final stage of making your creation (but not always!) The glaze kiln goes to 1240°C. This is called cone 6, or midrange. It is the low end of stoneware temperatures. Stoneware clays and glazes are typically fired at cone 8 – 10, that is 1260 – 1290°C. The energy requirement to go from 1240°C to 1280°C is almost a 30% more! Our clay is formulated to vitrify (mature, turn “glass-like”) at 1240°, as are our glazes. A glaze kiln take around 12 hours to reach temperature and two to three days to cool down. Sometimes a third firing process is required – this is for decoration that is added to work after the glaze firing. For example – adding precious metals and lustres. this firing temperature is usually around 600 – 800°C depending upon the techniques being used. There are many students interested in gold and silver trims – we will be doing this third type of firing soon! After firing your work will be in the student finished work shelves. Remember to pay for it before you head out the door! There is a small extra charge for using porcelain clay (it’s more than twice the price of regular clay), and for any third firing process! Once your work has been fired it can not turn back into clay for millennia – so don’t fire it if you don’t like it! Put it in the bucket for recycling. https://firebirdstudios.com.au/the-process-of-making-pottery/The form of the jug has been in use for many centuries.Stoneware jug. Two tone brown glaze with pierced lip behind spout. Spout chipped.None.flagstaff hill, warrnambool, shipwrecked-coast, flagstaff-hill, flagstaff-hill-maritime-museum, maritime-museum, shipwreck-coast, flagstaff-hill-maritime-village, jug, ceramic jug -
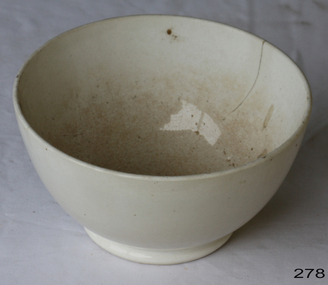 Flagstaff Hill Maritime Museum and Village
Domestic object - Bowl, Late 19th or early 20th Century
... edges and dags! Trimming thrown work: If you are planning to trim (or turn) your thrown work (and you should be), make sure you bag it well – your work should be leather hard to almost dry for easiest trimming. ...edges and dags! Trimming thrown work: If you are planning to trim (or turn) your thrown work (and you should be), make sure you bag it well – your work should be leather hard to almost dry for easiest trimming. ...The Process of Making Pottery Decorating, Firing, Glazing, Making, Technical There is a rhythm and flow to clay. It can’t be done all at once! Even the making process! It can take weeks to get everything done, especially if you can only work on your pottery once a week! Even though we have three hour classes, it’s often just not enough time! Here is an overview of some of the processes so you have a bit more grasp on some of the technical stuff! Step One – Design There are SO many ideas out there for making stuff in clay! From delicate porcelain jewellery, through to heavy sculptural work and everything in between. Deciding your direction is sometimes not that easy – when you first start, try everything, you will naturally gravitate to the style that you enjoy! The options and variations are endless and can get a wee bit overwhelming too! Check in with me before you start to ensure your ideas will work, what order you might do things, how you could achieve the look you are seeking and any other technical data required! Step Two – Making Clay is thixotropic. This means that as you work with it, the clay first gets sloppier and wetter, before is begins to dry in the atmosphere. For most things, you simply can’t do all parts of the project at once. An example of work order might look like: Get last weeks work out from the shelves Prepare clay for today’s work – roll your clay, prepare balls for throwing, make the first stage of a pinch pot) Clean up last week’s work and put it on the shelf for bisque firing Check that you have any glazing to do – and do enough of it that you will have time to finish your main project Do the next step of your next project – there might be a further step that can’t be complete immediately, in that case, wrap your work well and put onto the shelves. Letting your work rest for a while can really help keep your work clean and professional looking. Many things require bagging under plastic to keep it ready for work the next week – put your name on the outside of the bag so you can find your work easily. We have stickers and markers. Consider how you want to decorate your work – coloured slip can be applied at a fairly wet stage (remembering that it will make your work even wetter!). Trying to apply slip to dry clay won’t work! If you want to do sgraffito – you will need to keep the work leather hard (a state of dryness where you can still work the clay with a little effort and a little water and care). Step Three – Drying Most of the time your work can go into the rack uncovered to let it dry out for the following week. If you want to continue forming or shaping you will need to double bag your work – put your work on a suitable sized bat and put the bat in a bag so the base of the bag is under the bat, then put another bag over the top of the work and tuck the top of the bag under the bat. If you want to trim (or turn) your thrown work the following week, it should also be double bagged. If your work is large, delicate, or of uneven thicknesses, you should lightly cover your work for drying. When considering the drying process, bare in mind the weather, humidity and wind! The hotter and dryer, the faster things dry and work can dry unevenly in the shelves – this can lead to cracking – another time to lightly cover your work for drying. Step Four – Trimming and Cleaning Up Your work is dry! It is called greenware now and it is at it’s most fragile! Handle everything with two hands. I often refer to soft hands – keep everything gentle and with your fingers spread as much as possible. Try to not pick up things like plates too much, and always with both hands! Before your work can be bisque fired it should be “cleaned up”. You work won’t go into the kiln if it has sharp edges – when glazed, sharp edges turn into razor blades! Use a piece of fly wire to rub the work all over – this will scratch a little so be light handed. Use a knife or metal kidney to scrape any areas that require a bit more dynamic treatment than the fly wire offers! Finally, a very light wipe over with a slightly damp sponge can help soften and soothe all of your edges and dags! Trimming thrown work: If you are planning to trim (or turn) your thrown work (and you should be), make sure you bag it well – your work should be leather hard to almost dry for easiest trimming. Use this step to finish the work completely – use a metal kidney to polish the surface, or a slightly damp sponge to give a freshly thrown look. Wipe the sponge around the rim after trimming, and check the inside of the pot for dags! Trimming slip cast work: Usually I will trim the rims of your work on the wheel the following day to make that stage easier, however you will still need to check your work for lumps and bumps. Last but not least – check that your name is still clearly on the bottom of your work. Step Five – Bisque Firing When the work is completely dry it can go into the bisque kiln. The bisque kiln is fired to 1000°C. This process burns off the water in the clay as well as some of the chemically bound water. The structure of the clay is not altered that much at this temperature. Inside the bisque kiln, the work is stacked a little, small bowl inside a larger bowl and onto a heavy plate. Smaller items like decorations or drink coasters might get stacked several high. Consideration is paid to the weight of the stack and shape of the work. A bisque kiln can fire about one and a half times the amount of work that the glaze kiln can fire. The firing takes about 10 hours to complete the cycle and about two days to cool down. Once it has been emptied the work is placed in the glaze room ready for you to decorate! Step Six – Glazing Decorating your work with colour can be a lot of fun – and time consuming! There are three main options for surface treatment at this stage: Oxide Washes Underglazes Glazes Washes and underglazes do not “glaze” the work – It will still need a layer of glaze to fully seal the clay (washes don’t need glaze on surfaces not designed for food or liquid as they can gloss up a little on their own). Underglazes are stable colourants that turn out pretty much how they look in the jar. They can be mixed with each other to form other colours and can be used like water colours to paint onto your work. Mostly they should have a clear glaze on top to seal them. Oxides are a different species – the pink oxide (cobalt) wash turns out bright blue for instance. They don’t always need a glaze on top, and some glazes can change the colour of the wash! The glazes need no other “glaze” on top! Be careful of unknown glaze interactions – you can put any combination of glaze in a bowl or on a plate, but only a single glaze on the outside of any vertical surface! Glazes are a chemical reaction under heat. We don’t know the exact chemicals in the Mayco glazes we use. I can guess by the way they interact with each other, however, on the whole, you need to test every idea you have, and not run the test on a vertical surface! Simply put, glaze is a layer of glass like substance that bonds with the clay underneath. Clay is made of silica, alumina and water. Glaze is made of mostly silica. Silica has a melting point of 1700°C and we fire to 1240°C. The silica requires a “flux” to help it melt at the lower temperature. Fluxes can be all sorts of chemicals – a common one is calcium – calcium has a melting point of 2500°C, however, together they both melt at a much lower temperature! Colourants are metal oxides like cobalt (blue), chrome (green through black), copper (green, blue, even red!), manganese (black, purple and pink) iron (red brown), etc. Different chemicals in the glaze can have dramatic effects. for example, barium carbonate (which we don’t use) turns manganese bright pink! Other elements can turn manganese dioxide brown, blue, purple and reddish brown. Manganese dioxide is a flux in and of itself as well. So, glazes that get their black and purple colours, often interact with other glazes and RUN! Our mirror black is a good example – it mixes really well with many glazes because it fluxes them – causes them to melt faster. It will also bring out many beautiful colours in the glazes because it’s black colouring most definitely comes from manganese dioxide! Glaze chemistry is a whole subject on it’s own! We use commercial Mayco glazes on purpose – for their huge range of colour possibilities, stability, cool interactions, artistic freedom with the ability to easily brush the glazes on and ease of use. We currently have almost 50 glazes on hand! A major project is to test the interactions of all glazes with each other. That is 2,500 test tiles!!!! I’m going to make the wall behind the wheels the feature wall of pretty colours! Step Seven – Glaze (Gloss or sometimes called “Glost”) Firing Most of the time this is the final stage of making your creation (but not always!) The glaze kiln goes to 1240°C. This is called cone 6, or midrange. It is the low end of stoneware temperatures. Stoneware clays and glazes are typically fired at cone 8 – 10, that is 1260 – 1290°C. The energy requirement to go from 1240°C to 1280°C is almost a 30% more! Our clay is formulated to vitrify (mature, turn “glass-like”) at 1240°, as are our glazes. A glaze kiln take around 12 hours to reach temperature and two to three days to cool down. Sometimes a third firing process is required – this is for decoration that is added to work after the glaze firing. For example – adding precious metals and lustres. this firing temperature is usually around 600 – 800°C depending upon the techniques being used. There are many students interested in gold and silver trims – we will be doing this third type of firing soon! After firing your work will be in the student finished work shelves. Remember to pay for it before you head out the door! There is a small extra charge for using porcelain clay (it’s more than twice the price of regular clay), and for any third firing process! Once your work has been fired it can not turn back into clay for millennia – so don’t fire it if you don’t like it! Put it in the bucket for recycling. https://firebirdstudios.com.au/the-process-of-making-pottery/ The bowl is an example of kitchenware used in the 19th century and still in use today.Bowl white ceramic. Crack on side. Badly stained.Backstamp very faint and unable to be read.flagstaff hill, warrnambool, shipwrecked-coast, flagstaff-hill, flagstaff-hill-maritime-museum, maritime-museum, shipwreck-coast, flagstaff-hill-maritime-village, mixing bowl, food preparation, kitchen equipment, ceramic -
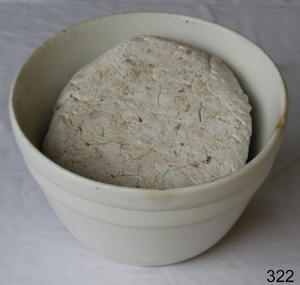 Flagstaff Hill Maritime Museum and Village
Domestic object - Bowl
... edges and dags! Trimming thrown work: If you are planning to trim (or turn) your thrown work (and you should be), make sure you bag it well – your work should be leather hard to almost dry for easiest trimming. ...edges and dags! Trimming thrown work: If you are planning to trim (or turn) your thrown work (and you should be), make sure you bag it well – your work should be leather hard to almost dry for easiest trimming. ...The Process of Making Pottery Decorating, Firing, Glazing, Making, Technical There is a rhythm and flow to clay. It can’t be done all at once! Even the making process! It can take weeks to get everything done, especially if you can only work on your pottery once a week! Even though we have three hour classes, it’s often just not enough time! Here is an overview of some of the processes so you have a bit more grasp on some of the technical stuff! Step One – Design There are SO many ideas out there for making stuff in clay! From delicate porcelain jewellery, through to heavy sculptural work and everything in between. Deciding your direction is sometimes not that easy – when you first start, try everything, you will naturally gravitate to the style that you enjoy! The options and variations are endless and can get a wee bit overwhelming too! Check in with me before you start to ensure your ideas will work, what order you might do things, how you could achieve the look you are seeking and any other technical data required! Step Two – Making Clay is thixotropic. This means that as you work with it, the clay first gets sloppier and wetter, before is begins to dry in the atmosphere. For most things, you simply can’t do all parts of the project at once. An example of work order might look like: Get last weeks work out from the shelves Prepare clay for today’s work – roll your clay, prepare balls for throwing, make the first stage of a pinch pot) Clean up last week’s work and put it on the shelf for bisque firing Check that you have any glazing to do – and do enough of it that you will have time to finish your main project Do the next step of your next project – there might be a further step that can’t be complete immediately, in that case, wrap your work well and put onto the shelves. Letting your work rest for a while can really help keep your work clean and professional looking. Many things require bagging under plastic to keep it ready for work the next week – put your name on the outside of the bag so you can find your work easily. We have stickers and markers. Consider how you want to decorate your work – coloured slip can be applied at a fairly wet stage (remembering that it will make your work even wetter!). Trying to apply slip to dry clay won’t work! If you want to do sgraffito – you will need to keep the work leather hard (a state of dryness where you can still work the clay with a little effort and a little water and care). Step Three – Drying Most of the time your work can go into the rack uncovered to let it dry out for the following week. If you want to continue forming or shaping you will need to double bag your work – put your work on a suitable sized bat and put the bat in a bag so the base of the bag is under the bat, then put another bag over the top of the work and tuck the top of the bag under the bat. If you want to trim (or turn) your thrown work the following week, it should also be double bagged. If your work is large, delicate, or of uneven thicknesses, you should lightly cover your work for drying. When considering the drying process, bare in mind the weather, humidity and wind! The hotter and dryer, the faster things dry and work can dry unevenly in the shelves – this can lead to cracking – another time to lightly cover your work for drying. Step Four – Trimming and Cleaning Up Your work is dry! It is called greenware now and it is at it’s most fragile! Handle everything with two hands. I often refer to soft hands – keep everything gentle and with your fingers spread as much as possible. Try to not pick up things like plates too much, and always with both hands! Before your work can be bisque fired it should be “cleaned up”. You work won’t go into the kiln if it has sharp edges – when glazed, sharp edges turn into razor blades! Use a piece of fly wire to rub the work all over – this will scratch a little so be light handed. Use a knife or metal kidney to scrape any areas that require a bit more dynamic treatment than the fly wire offers! Finally, a very light wipe over with a slightly damp sponge can help soften and soothe all of your edges and dags! Trimming thrown work: If you are planning to trim (or turn) your thrown work (and you should be), make sure you bag it well – your work should be leather hard to almost dry for easiest trimming. Use this step to finish the work completely – use a metal kidney to polish the surface, or a slightly damp sponge to give a freshly thrown look. Wipe the sponge around the rim after trimming, and check the inside of the pot for dags! Trimming slip cast work: Usually I will trim the rims of your work on the wheel the following day to make that stage easier, however you will still need to check your work for lumps and bumps. Last but not least – check that your name is still clearly on the bottom of your work. Step Five – Bisque Firing When the work is completely dry it can go into the bisque kiln. The bisque kiln is fired to 1000°C. This process burns off the water in the clay as well as some of the chemically bound water. The structure of the clay is not altered that much at this temperature. Inside the bisque kiln, the work is stacked a little, small bowl inside a larger bowl and onto a heavy plate. Smaller items like decorations or drink coasters might get stacked several high. Consideration is paid to the weight of the stack and shape of the work. A bisque kiln can fire about one and a half times the amount of work that the glaze kiln can fire. The firing takes about 10 hours to complete the cycle and about two days to cool down. Once it has been emptied the work is placed in the glaze room ready for you to decorate! Step Six – Glazing Decorating your work with colour can be a lot of fun – and time consuming! There are three main options for surface treatment at this stage: Oxide Washes Underglazes Glazes Washes and underglazes do not “glaze” the work – It will still need a layer of glaze to fully seal the clay (washes don’t need glaze on surfaces not designed for food or liquid as they can gloss up a little on their own). Underglazes are stable colourants that turn out pretty much how they look in the jar. They can be mixed with each other to form other colours and can be used like water colours to paint onto your work. Mostly they should have a clear glaze on top to seal them. Oxides are a different species – the pink oxide (cobalt) wash turns out bright blue for instance. They don’t always need a glaze on top, and some glazes can change the colour of the wash! The glazes need no other “glaze” on top! Be careful of unknown glaze interactions – you can put any combination of glaze in a bowl or on a plate, but only a single glaze on the outside of any vertical surface! Glazes are a chemical reaction under heat. We don’t know the exact chemicals in the Mayco glazes we use. I can guess by the way they interact with each other, however, on the whole, you need to test every idea you have, and not run the test on a vertical surface! Simply put, glaze is a layer of glass like substance that bonds with the clay underneath. Clay is made of silica, alumina and water. Glaze is made of mostly silica. Silica has a melting point of 1700°C and we fire to 1240°C. The silica requires a “flux” to help it melt at the lower temperature. Fluxes can be all sorts of chemicals – a common one is calcium – calcium has a melting point of 2500°C, however, together they both melt at a much lower temperature! Colourants are metal oxides like cobalt (blue), chrome (green through black), copper (green, blue, even red!), manganese (black, purple and pink) iron (red brown), etc. Different chemicals in the glaze can have dramatic effects. for example, barium carbonate (which we don’t use) turns manganese bright pink! Other elements can turn manganese dioxide brown, blue, purple and reddish brown. Manganese dioxide is a flux in and of itself as well. So, glazes that get their black and purple colours, often interact with other glazes and RUN! Our mirror black is a good example – it mixes really well with many glazes because it fluxes them – causes them to melt faster. It will also bring out many beautiful colours in the glazes because it’s black colouring most definitely comes from manganese dioxide! Glaze chemistry is a whole subject on it’s own! We use commercial Mayco glazes on purpose – for their huge range of colour possibilities, stability, cool interactions, artistic freedom with the ability to easily brush the glazes on and ease of use. We currently have almost 50 glazes on hand! A major project is to test the interactions of all glazes with each other. That is 2,500 test tiles!!!! I’m going to make the wall behind the wheels the feature wall of pretty colours! Step Seven – Glaze (Gloss or sometimes called “Glost”) Firing Most of the time this is the final stage of making your creation (but not always!) The glaze kiln goes to 1240°C. This is called cone 6, or midrange. It is the low end of stoneware temperatures. Stoneware clays and glazes are typically fired at cone 8 – 10, that is 1260 – 1290°C. The energy requirement to go from 1240°C to 1280°C is almost a 30% more! Our clay is formulated to vitrify (mature, turn “glass-like”) at 1240°, as are our glazes. A glaze kiln take around 12 hours to reach temperature and two to three days to cool down. Sometimes a third firing process is required – this is for decoration that is added to work after the glaze firing. For example – adding precious metals and lustres. this firing temperature is usually around 600 – 800°C depending upon the techniques being used. There are many students interested in gold and silver trims – we will be doing this third type of firing soon! After firing your work will be in the student finished work shelves. Remember to pay for it before you head out the door! There is a small extra charge for using porcelain clay (it’s more than twice the price of regular clay), and for any third firing process! Once your work has been fired it can not turn back into clay for millennia – so don’t fire it if you don’t like it! Put it in the bucket for recycling. https://firebirdstudios.com.au/the-process-of-making-pottery/ This bowl is an example of kitchenware used in the 19th century and still in use today.Bowl white ceramic plain that has two sets of edging around lip. Inside bowl has plaster designed to look like cooking mixture.flagstaff hill, warrnambool, shipwrecked-coast, flagstaff-hill, flagstaff-hill-maritime-museum, maritime-museum, shipwreck-coast, flagstaff-hill-maritime-village, kitchen equipment, ceramic -
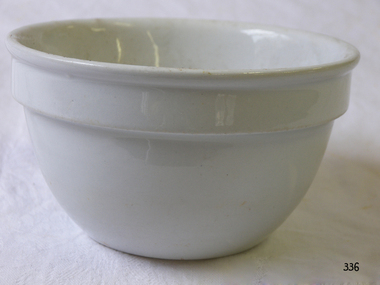 Flagstaff Hill Maritime Museum and Village
Domestic object - Bowl, J & G Meakin, Late 19th or early 20th Century
... edges and dags! Trimming thrown work: If you are planning to trim (or turn) your thrown work (and you should be), make sure you bag it well – your work should be leather hard to almost dry for easiest trimming. ...edges and dags! Trimming thrown work: If you are planning to trim (or turn) your thrown work (and you should be), make sure you bag it well – your work should be leather hard to almost dry for easiest trimming. ...The Process of Making Pottery Decorating, Firing, Glazing, Making, Technical There is a rhythm and flow to clay. It can’t be done all at once! Even the making process! It can take weeks to get everything done, especially if you can only work on your pottery once a week! Even though we have three hour classes, it’s often just not enough time! Here is an overview of some of the processes so you have a bit more grasp on some of the technical stuff! Step One – Design There are SO many ideas out there for making stuff in clay! From delicate porcelain jewellery, through to heavy sculptural work and everything in between. Deciding your direction is sometimes not that easy – when you first start, try everything, you will naturally gravitate to the style that you enjoy! The options and variations are endless and can get a wee bit overwhelming too! Check in with me before you start to ensure your ideas will work, what order you might do things, how you could achieve the look you are seeking and any other technical data required! Step Two – Making Clay is thixotropic. This means that as you work with it, the clay first gets sloppier and wetter, before is begins to dry in the atmosphere. For most things, you simply can’t do all parts of the project at once. An example of work order might look like: Get last weeks work out from the shelves Prepare clay for today’s work – roll your clay, prepare balls for throwing, make the first stage of a pinch pot) Clean up last week’s work and put it on the shelf for bisque firing Check that you have any glazing to do – and do enough of it that you will have time to finish your main project Do the next step of your next project – there might be a further step that can’t be complete immediately, in that case, wrap your work well and put onto the shelves. Letting your work rest for a while can really help keep your work clean and professional looking. Many things require bagging under plastic to keep it ready for work the next week – put your name on the outside of the bag so you can find your work easily. We have stickers and markers. Consider how you want to decorate your work – coloured slip can be applied at a fairly wet stage (remembering that it will make your work even wetter!). Trying to apply slip to dry clay won’t work! If you want to do sgraffito – you will need to keep the work leather hard (a state of dryness where you can still work the clay with a little effort and a little water and care). Step Three – Drying Most of the time your work can go into the rack uncovered to let it dry out for the following week. If you want to continue forming or shaping you will need to double bag your work – put your work on a suitable sized bat and put the bat in a bag so the base of the bag is under the bat, then put another bag over the top of the work and tuck the top of the bag under the bat. If you want to trim (or turn) your thrown work the following week, it should also be double bagged. If your work is large, delicate, or of uneven thicknesses, you should lightly cover your work for drying. When considering the drying process, bare in mind the weather, humidity and wind! The hotter and dryer, the faster things dry and work can dry unevenly in the shelves – this can lead to cracking – another time to lightly cover your work for drying. Step Four – Trimming and Cleaning Up Your work is dry! It is called greenware now and it is at it’s most fragile! Handle everything with two hands. I often refer to soft hands – keep everything gentle and with your fingers spread as much as possible. Try to not pick up things like plates too much, and always with both hands! Before your work can be bisque fired it should be “cleaned up”. You work won’t go into the kiln if it has sharp edges – when glazed, sharp edges turn into razor blades! Use a piece of fly wire to rub the work all over – this will scratch a little so be light handed. Use a knife or metal kidney to scrape any areas that require a bit more dynamic treatment than the fly wire offers! Finally, a very light wipe over with a slightly damp sponge can help soften and soothe all of your edges and dags! Trimming thrown work: If you are planning to trim (or turn) your thrown work (and you should be), make sure you bag it well – your work should be leather hard to almost dry for easiest trimming. Use this step to finish the work completely – use a metal kidney to polish the surface, or a slightly damp sponge to give a freshly thrown look. Wipe the sponge around the rim after trimming, and check the inside of the pot for dags! Trimming slip cast work: Usually I will trim the rims of your work on the wheel the following day to make that stage easier, however you will still need to check your work for lumps and bumps. Last but not least – check that your name is still clearly on the bottom of your work. Step Five – Bisque Firing When the work is completely dry it can go into the bisque kiln. The bisque kiln is fired to 1000°C. This process burns off the water in the clay as well as some of the chemically bound water. The structure of the clay is not altered that much at this temperature. Inside the bisque kiln, the work is stacked a little, small bowl inside a larger bowl and onto a heavy plate. Smaller items like decorations or drink coasters might get stacked several high. Consideration is paid to the weight of the stack and shape of the work. A bisque kiln can fire about one and a half times the amount of work that the glaze kiln can fire. The firing takes about 10 hours to complete the cycle and about two days to cool down. Once it has been emptied the work is placed in the glaze room ready for you to decorate! Step Six – Glazing Decorating your work with colour can be a lot of fun – and time consuming! There are three main options for surface treatment at this stage: Oxide Washes Underglazes Glazes Washes and underglazes do not “glaze” the work – It will still need a layer of glaze to fully seal the clay (washes don’t need glaze on surfaces not designed for food or liquid as they can gloss up a little on their own). Underglazes are stable colourants that turn out pretty much how they look in the jar. They can be mixed with each other to form other colours and can be used like water colours to paint onto your work. Mostly they should have a clear glaze on top to seal them. Oxides are a different species – the pink oxide (cobalt) wash turns out bright blue for instance. They don’t always need a glaze on top, and some glazes can change the colour of the wash! The glazes need no other “glaze” on top! Be careful of unknown glaze interactions – you can put any combination of glaze in a bowl or on a plate, but only a single glaze on the outside of any vertical surface! Glazes are a chemical reaction under heat. We don’t know the exact chemicals in the Mayco glazes we use. I can guess by the way they interact with each other, however, on the whole, you need to test every idea you have, and not run the test on a vertical surface! Simply put, glaze is a layer of glass like substance that bonds with the clay underneath. Clay is made of silica, alumina and water. Glaze is made of mostly silica. Silica has a melting point of 1700°C and we fire to 1240°C. The silica requires a “flux” to help it melt at the lower temperature. Fluxes can be all sorts of chemicals – a common one is calcium – calcium has a melting point of 2500°C, however, together they both melt at a much lower temperature! Colourants are metal oxides like cobalt (blue), chrome (green through black), copper (green, blue, even red!), manganese (black, purple and pink) iron (red brown), etc. Different chemicals in the glaze can have dramatic effects. for example, barium carbonate (which we don’t use) turns manganese bright pink! Other elements can turn manganese dioxide brown, blue, purple and reddish brown. Manganese dioxide is a flux in and of itself as well. So, glazes that get their black and purple colours, often interact with other glazes and RUN! Our mirror black is a good example – it mixes really well with many glazes because it fluxes them – causes them to melt faster. It will also bring out many beautiful colours in the glazes because it’s black colouring most definitely comes from manganese dioxide! Glaze chemistry is a whole subject on it’s own! We use commercial Mayco glazes on purpose – for their huge range of colour possibilities, stability, cool interactions, artistic freedom with the ability to easily brush the glazes on and ease of use. We currently have almost 50 glazes on hand! A major project is to test the interactions of all glazes with each other. That is 2,500 test tiles!!!! I’m going to make the wall behind the wheels the feature wall of pretty colours! Step Seven – Glaze (Gloss or sometimes called “Glost”) Firing Most of the time this is the final stage of making your creation (but not always!) The glaze kiln goes to 1240°C. This is called cone 6, or midrange. It is the low end of stoneware temperatures. Stoneware clays and glazes are typically fired at cone 8 – 10, that is 1260 – 1290°C. The energy requirement to go from 1240°C to 1280°C is almost a 30% more! Our clay is formulated to vitrify (mature, turn “glass-like”) at 1240°, as are our glazes. A glaze kiln take around 12 hours to reach temperature and two to three days to cool down. Sometimes a third firing process is required – this is for decoration that is added to work after the glaze firing. For example – adding precious metals and lustres. this firing temperature is usually around 600 – 800°C depending upon the techniques being used. There are many students interested in gold and silver trims – we will be doing this third type of firing soon! After firing your work will be in the student finished work shelves. Remember to pay for it before you head out the door! There is a small extra charge for using porcelain clay (it’s more than twice the price of regular clay), and for any third firing process! Once your work has been fired it can not turn back into clay for millennia – so don’t fire it if you don’t like it! Put it in the bucket for recycling. https://firebirdstudios.com.au/the-process-of-making-pottery/This bowl was made by renowned pottery company J & G Meakin of England. The firm was established in the mid-1800's. The bowl is an example of kitchenware used in the 19th century and still in use today.Bowl; white ceramic, round and tapering inwards towards base. Made by J and G Meakin England.On base, 'Ironstone China Reg SOL 391413' with symbolflagstaff hill, flagstaff hill maritime museum and village, warrnambool, maritime museum, maritime village, great ocean road, shipwreck coast, mixing bowl, food preparation, j & g meakin, pottery, stoke-on-trent, kitchen equipment, ceramic -
 Flagstaff Hill Maritime Museum and Village
Domestic object - Sharpening Steel
... edge deforms due to forceful contact with bone). These scenarios also lead Western trends toward blades tempered to a lower level of hardness (and thus lower brittleness). In East Asia, notably Japan, harder...edge deforms due to forceful contact with bone). These scenarios also lead Western trends toward blades tempered to a lower level of hardness (and thus lower brittleness). In East Asia, notably Japan, harder ...A honing steel, sometimes referred to as a sharpening steel, whet steel, sharpening stick, sharpening rod, butcher's steel, and chef's steel, is a rod of steel, ceramic or diamond-coated steel used to restore keenness to dulled blade edges. They are flat, oval, or round in cross-section and up to 30 centimetres (1 ft) long. The steel and ceramic honing steels may have longitudinal ridges, whereas the diamond-coated steels are smooth but embedded with abrasive diamond particles. Non-abrasive honing rods such as smooth ceramic or ribbed steel are able to remove small amounts of metal via adhesive wear. In normal use, the rod is applied to the blade at a slightly higher angle than that of the bevel, resulting in the formation of a micro-bevel. The term "hone" is associated with light maintenance performed on a blade without the effort and precision normally associated with sharpening, so the name "hone" was borrowed. In the 1980s, ceramic abrasives became increasingly popular and proved an equal, if not superior, method for accomplishing the same daily maintenance tasks; manufacturers replaced steels with ceramic (and later, manufactured diamond abrasive) sharpening "steels" that were actually hones. Use Honing steels are used by lightly placing the near edge of the blade against the base of the steel, then sliding the blade away from yourself along the steel while moving it down – the blade moves diagonally, while the steel remains stationary. This should be done with the blade held at an angle to the steel, usually about 20°, and repeating on the opposite side at the same angle. This is repeated five to ten times per side. Steeling It is often recommended that steeling be performed immediately before or after using a knife and can be done daily. By contrast, knives are generally sharpened much less frequently. A traditional smooth honing steel is of no use if the edge is blunt, because it removes no material; instead it fixes deformations along the edge of a sharp blade, technically known as burnishing. There has long been speculation about the efficacy of steeling (re-aligning the edge) vs honing (removing minor deformation with abrasives); studies tend to favour abrasives for daily maintenance, especially in high-carbide-volume "stainless" steels (such as the popular CPM S30V steel, which tends to "tear out" when steeled rather than re-forming an edge.) Small honing steel for outdoor activities Usage trends Steels have traditionally been used in the West, especially in heavy-use scenarios (e.g. butchering, where the edge deforms due to forceful contact with bone). These scenarios also lead Western trends toward blades tempered to a lower level of hardness (and thus lower brittleness). In East Asia, notably Japan, harder knives are preferred, so there is little need for steeling intra-day, as the edge does not deform as much. Instead, the blade is honed as needed on a waterstone. While tradition has kept the practice of steeling alive in Western kitchens, the majority of honing steels sold are abrasive rather than smooth, and knives are harder and more frequently made of stainless steel, which does not respond to traditional steeling techniques as well as high-carbon/low alloy tool steels.The sharpening steel is essential to maintain the sharpness of carving and other knives.Steel knife sharpener with bone handle. Part of a carving set.None.flagstaff hill, warrnambool, shipwrecked-coast, flagstaff-hill, flagstaff-hill-maritime-museum, maritime-museum, shipwreck-coast, flagstaff-hill-maritime-village, sharpening steel, carving set, kitchen equipment -
 Flagstaff Hill Maritime Museum and Village
Award - Medal, James Patten, 18-041890
... edge "ROYAL HUMANE SOCIETY OF AUSTRALASIA INSTD. A.D. 1874", in the centre "AWARDED TO" Engraved in the centre "James Patten/ 18th April / 1890" CASE LID: "PRESENTED BY / THE ROYAL HUMANE SOCIETY / OF AUSTRALASIA / TO / JAS. PATTEN. / 21ST MAY 1890." Medal awarded to James Patten by the Royal Humane Society of Australasia for his bravery on18 April 1890 and presented to him on 21 May 1890. Bronze medal in hard ...The Bronze Medal and Certificate of Merit of the Royal Humane Society of Australasia were awarded to James Patten for the bravery he displayed on 18th April 1890, and presented to him on 21st May 1890. The Royal Humane Society of Australasia was founded in 1874 with the aim to recognise those who risked their lives to save others and to assist those whose acts of bravery caused them or their surviving dependants to be disadvantaged in some way. Details of the incident were published in the Argus, Saturday 19 April 1890, page 11 - "FATAL BOATING ACCIDENT, (BY TELEGRAPH FROM OUR CORRESPONDENT.), WARRNAMBOOL, FRIDAY A fatal boating disaster occurred in Lady Bay this morning, the victim being Joseph Lowe, licensee of the Bay View Hotel, South Warrnambool. The deceased, in company with two lads named James Ferrier and James Patten, went out in a small dingy to shoot musk ducks. The water was perfectly smooth, and the party were tempted to proceed as far as the mouth of the Hopkins River. In their eagerness they neglected to keep clear of the breakers, and were presently carried in on the crest of a large wave, and the boat cap sized within a cable's length of the shore, precipitating the occupants into the water. Patten and Lowe stuck to the overturned boat, Ferrier striking out for the shore, which he reached in an exhausted state. In the meantime his companions had been washed off the boat, and were struggling in the breakers. Lowe was unable to swim, and Patten kept him afloat, at the same time making gallant attempts to get him ashore, but finally had to leave him to his fate. Ferrier, seeing Lowe's danger, undressed and swam out, but became exhausted. Ferrier and Patten were both found in a fainting condition by persons who saw the catastrophe from the jetty, and ran along the beach to render assistance. Attempts were subsequently made to rescue Lowe's body, which could be seen washing abort in the surf. These proved unsuccessful, and no hope is now entertained of recovering it. Lowe was a smart young man, 28 years of age, and unmarried. He was formerly bar-man at the Commercial Hotel here, having been engaged in Melbourne ..." This medal recognises the bravery of James Patten, a local citizen who risked his life to save the life of his friend Joseph Lowe whilst at sea and was recognised for this act by the Royal Humane Society of Australasia.Medal awarded to James Patten by the Royal Humane Society of Australasia for his bravery on18 April 1890 and presented to him on 21 May 1890. Bronze medal in hard black rectangular case. Lid and base have centre hinge and brass spring button catch. Case is padded and lined with blue silk and has a fitted hook. The round medal has a bronze bar with pin closure, dark blue, braided ribbon with brass swivel mount. The case has a gold embossed rectangular border on the lid and base. Embossed inscription on lid. The obverse shows a woman on the left in long robe placing a wreath on the head of a kneeling man at right, with the five stars of the Southern Cross constellation above his head. A motto is inscribed around the edge. The reverse has inscriptions around the edge, a wreath of two overlapping olive branches, and engraved text.OBVERSE: Embossed around "VIRTUTE PARATUM" REVERSE: Embossed on the medal around the edge "ROYAL HUMANE SOCIETY OF AUSTRALASIA INSTD. A.D. 1874", in the centre "AWARDED TO" Engraved in the centre "James Patten/ 18th April / 1890" CASE LID: "PRESENTED BY / THE ROYAL HUMANE SOCIETY / OF AUSTRALASIA / TO / JAS. PATTEN. / 21ST MAY 1890."flagstaff hill, warrnambool, flagstaff-hill, maritime museum, maritime village, shipwreck-coast, flagstaff hill maritime museum & village, bronze medal 1890, royal humane society of australasia, james patten, medal, australian award medal, commemorative medal, numismatics, life saving, lifesaving, rescue, bravery, drowning, joseph lowe, james ferrier, lady bay, hopkins river, boating accident, certificate of merit, north eastern bight -
 The Beechworth Burke Museum
Geological specimen - Ribbonstone-banded Chert
... Chert was commonly used in the Stone Age as a result of conchoidal fracturing causing very sharp edges, allowing early peoples to fashion weapons and cutting tools. It also rates a 7 on the Mohs Scale, making it a very hard and durable stone that maintains its sharpness. ...Chert is a sedimentary rock composed of microcrystalline or cryptocrystalline quartz. While usually biological in origin, chert may also occur as a chemical precipitate or a diagenetic replacement--the product of petrified trees. Chert, also known as flint, was a common tool for early peoples during the stone age. It forms in limestone and chalk sediments as silicon dioxide microcrystals which grow into nodules of chert. Chert is found in many mines across the Northern Territory, however this specimen is sourced from the Mount Todd gold mine in Katherine. Its use in weaponry, both during the Stone Age and during the 18th century. Chert produces a spark when struck against steel, meaning t hat it can be used to start fires and fire guns. Chert was thus used in flintlock firearms, in which the gunpowder is ignited by a flint hammer striking a steel plate. Chert was commonly used in the Stone Age as a result of conchoidal fracturing causing very sharp edges, allowing early peoples to fashion weapons and cutting tools. It also rates a 7 on the Mohs Scale, making it a very hard and durable stone that maintains its sharpness. As a result, the significance of chert as a signifier of early indigenous Australian life makes this specimen important. It is also known that chert is a valuable mineral that was used as a trading commodity. Chert has also been valuable during the 1700s, proving itself to a be an important historical specimen in matters of war. A solid silicon dioxide mineral in shades of brown, white, and beigeburke museum, northern territory, chert, flint, minerals, geological specimen, katherine, mount todd gold mine, katherine northern territory -
 Flagstaff Hill Maritime Museum and Village
Caulking Iron
... This thin edged iron was used to stitch or make the oakum or caulking cotton into the seam before setting it down hard with the set irons. ...This thin edged iron was used to stitch or make the oakum or caulking cotton into the seam before setting it down hard with the set irons. ...Owner of tools Jim Gillespie Clayton VictoriaCaulking iron or making Iron. This thin edged iron was used to stitch or make the oakum or caulking cotton into the seam before setting it down hard with the set irons. Iron has a chipped edge.flagstaff hill, warrnambool, shipwrecked-coast, flagstaff-hill, flagstaff-hill-maritime-museum, maritime-museum, shipwreck-coast, flagstaff-hill-maritime-village -
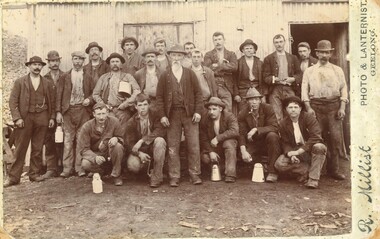 Federation University Historical Collection
Photograph, R. Millist, Hanlon Consols Mine Rokewood, 1901
... hard floor. Mining continued, but once the No2 shaft workings met up with the old No1 shaft workings at the end of 1902 there was not much wash remaining. The mine was let on tribute in June 1903 and a drive was put in to test deeper ground. The company was wound up in February 1904 and the plant sold. From what they discovered, the manager concluded that the mine sat at the edge...hard floor. Mining continued, but once the No2 shaft workings met up with the old No1 shaft workings at the end of 1902 there was not much wash remaining. The mine was let on tribute in June 1903 and a drive was put in to test deeper ground. The company was wound up in February 1904 and the plant sold. From what they discovered, the manager concluded that the mine sat at the edge ...The photo depicts one shift of mine hands at Hanlon Consols Mine Rokewod in 1901. ist on the left is George Edgar Yung. George was born in Ararat the son of Yohann Godlip and Christina (b Weller)Yung. They lived at Happy Valley near Linton. and Piggoreet. Yohann was a miner and died in the All Nations Mine collapse at Derwnt Jack's in 1877. Interesting to note in the following information that the Hanlon Consol mamager, William Maughan was also the manager of the Try Again Mine in Piggoreet. He was also on the six man school committee of Piggoreet Common School No. 726. (Is this why George Yung ended up working in Rokewood because of a previous connection at Piggoreet? George married Clara Emma Smith from Happy Valley and worked in a mine at Allendale. They later moved to Yendon) About the Hanlon gold mining company near Rokewood. 1901 - Information Bendigo Prospecting Club, 21/08/2020. Information provided once again by Peter McCarthy. Christopher Hanlon had put down a line of bores south of the Rokewood main street, looking for a continuation of the Break O’Day lead which had been worked for two or three miles with highly payable results, though in a primitive manner. Ground was being paddocked 30 feet deep and made to pay. The bores suggested the sinking would be about 70 feet and a shaft site was selected at the back of Stanbrook’s Hotel. The Hanlon Gold Mining Company was formed in March 1895 and the shaft was bottomed at 68 feet, getting just over an ounce of gold from the shaft bottom. By January 1896, the poppet heads were up, and steam plant was nearly ready. The mine produced 846 oz by September, which was not as good as expected, but they installed a second puddling machine. The mine was profitable for the next three years, with periods of prospecting and the need to install steam pumps in 1897. A second shaft was sunk in 1899, which bottomed at 86 feet on good wash and was sunk on to 109 feet. 1743 oz of gold had been produced in six months to September 1899, but the No1 shaft was let on tribute as the No2 workings were opened and machinery installed the following year. The No1 shaft tributors broke even in 1900 and in 1901 the shaft was shut down, with the No1 shaft machinery sold late in 1902. By September 1901, the mine had produced gold worth £66,124 and the No2 shaft main drive was in 346 feet, with gold being found mainly in crevices in the hard floor. Mining continued, but once the No2 shaft workings met up with the old No1 shaft workings at the end of 1902 there was not much wash remaining. The mine was let on tribute in June 1903 and a drive was put in to test deeper ground. The company was wound up in February 1904 and the plant sold. From what they discovered, the manager concluded that the mine sat at the edge of an ancient coastline and the gold was in a beach deposit. The total gold production from the mine was worth £73,294. J Lee Archer JP, shareholder, was the manager of the Bank of Victoria in Ballarat. Born in Tasmania, he came to Victoria with his parents and first came to Ballarat in 1855 as a junior clerk with the bank. He died in 1902 aged 64. Alexander J. Peacock was a legal manager and a share broker. In 1897 Peacock, born in Creswick, had been elected as one of the Victorian delegates to the Constitutional Convention which wrote the Australian Constitution. He later became a politician, state treasurer and three times state premier of Victoria and was knighted KCGM. He died in 1933 aged 72. William Maughan, director, was an English miner who came to Victoria in the 1850s and became a mine manager, managing the Try Again at Piggoreet, Ryan’s Freehold and the Madam Berry, among others. He died in Williamstown in 1915 aged 85. Sepia photographRhs front of photo: R. Millist Phto & Lanternist Geelong Verso (upside down): ONE SHIFT OF MINE HANDS HANLON CONSOLS MINE ROKEWOOD 1901 Grandfather Yung 1st on left rokewood, hanlon consols mine, shift of mine workers 1901, gold mines, george edgar godlip yung, william maughan -
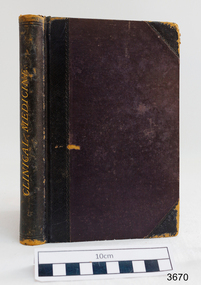 Flagstaff Hill Maritime Museum and Village
Journal - Notebook, mid 20th century
... hard covered book, dark blue, part of the W.R. Angus Collection. Book's covers have reinforced corners. Pages are blank, blue lined note paper. Edges...hard covered book, dark blue, part of the W.R. Angus Collection. Book's covers have reinforced corners. Pages are blank, blue lined note paper. Edges ...This notebook belonged to Dr. Angus although it is still unused. It was donated to Flagstaff Hill Maritime Village by the family of Doctor William Roy Angus, Surgeon and Oculist. It is part of the “W.R. Angus Collection” that includes historical medical equipment, surgical instruments and material once belonging to Dr Edward Ryan and Dr Thomas Francis Ryan, (both of Nhill, Victoria) as well as Dr Angus’ own belongings. The Collection’s history spans the medical practices of the two Doctors Ryan, from 1885-1926 plus that of Dr Angus, up until 1969. ABOUT THE “W.R.ANGUS COLLECTION” Doctor William Roy Angus M.B., B.S., Adel., 1923, F.R.C.S. Edin.,1928 (also known as Dr Roy Angus) was born in Murrumbeena, Victoria in 1901 and lived until 1970. He qualified as a doctor in 1923 at University of Adelaide, was Resident Medical Officer at the Royal Adelaide Hospital in 1924 and for a period was house surgeon to Sir (then Mr.) Henry Simpson Newland. Dr Angus was briefly an Assistant to Dr Riddell of Kapunda, then commenced private practice at Curramulka, Yorke Peninsula, SA, where he was physician, surgeon and chemist. In 1926, he was appointed as new Medical Assistant to Dr Thomas Francis Ryan (T.F. Ryan, or Tom), in Nhill, Victoria, where his experiences included radiology and pharmacy. In 1927 he was Acting House Surgeon in Dr Tom Ryan’s absence. Dr Angus had become engaged to Gladys Forsyth and they decided he would take time to further his studies overseas in the UK in 1927. He studied at London University College Hospital and at Edinburgh Royal Infirmary and in 1928, was awarded FRCS (Fellow from the Royal College of Surgeons), Edinburgh. He worked his passage back to Australia as a Ship’s Surgeon on the on the Australian Commonwealth Line’s T.S.S. Largs Bay. Dr Angus married Gladys in 1929, in Ballarat. (They went on to have one son (Graham 1932, born in SA) and two daughters (Helen (died 12/07/1996) and Berenice (Berry), both born at Mira, Nhill ) Dr Angus was a ‘flying doctor’ for the A.I.M. (Australian Inland Ministry) Aerial Medical Service in 1928 . The organisation began in South Australia through the Presbyterian Church in that year, with its first station being in the remote town of Oodnadatta, where Dr Angus was stationed. He was locum tenens there on North-South Railway at 21 Mile Camp. He took up this ‘flying doctor’ position in response to a call from Dr John Flynn; the organisation was later known as the Flying Doctor Service, then the Royal Flying Doctor Service. A lot of his work during this time involved dental surgery also. Between 1928-1932 he was surgeon at the Curramulka Hospital, Yorke Peninsula, South Australia. In 1933 Dr Angus returned to Nhill where he’d previously worked as Medical Assistant and purchased a share of the Nelson Street practice and Mira hospital from Dr Les Middleton one of the Middleton Brothers, the current owners of what was once Dr Tom Ryan’s practice. Dr L Middleton was House Surgeon to the Nhill Hospital 1926-1933, when he resigned. [Dr Tom Ryan’s practice had originally belonged to his older brother Dr Edward Ryan, who came to Nhill in 1885. Dr Edward saw patients at his rooms, firstly in Victoria Street and in 1886 in Nelson Street, until 1901. The Nelson Street practice also had a 2 bed ward, called Mira Private Hospital ). Dr Edward Ryan was House Surgeon at the Nhill Hospital 1884-1902 . He also had occasions where he successfully performed veterinary surgery for the local farmers too. Dr Tom Ryan then purchased the practice from his brother in 1901. Both Dr Edward and Dr Tom Ryan work as surgeons included eye surgery. Dr Tom Ryan performed many of his operations in the Mira private hospital on his premises. He too was House Surgeon at the Nhill Hospital 1902-1926. Dr Tom Ryan had one of the only two pieces of radiology equipment in Victoria during his practicing years – The Royal Melbourne Hospital had the other one. Over the years Dr Tom Ryan gradually set up what was effectively a training school for country general-practitioner-surgeons. Each patient was carefully examined, including using the X-ray machine, and any surgery was discussed and planned with Dr Ryan’s assistants several days in advance. Dr Angus gained experience in using the X-ray machine there during his time as assistant to Dr Ryan. Dr Tom Ryan moved from Nhill in 1926. He became a Fellow of the Royal Australasian College of Surgeons in 1927, soon after its formation, a rare accolade for a doctor outside any of the major cities. He remained a bachelor and died suddenly on 7th Dec 1955, aged 91, at his home in Ararat. Scholarships and prizes are still awarded to medical students in the honour of Dr T.F. Ryan and his father, Dr Michael Ryan, and brother, John Patrick Ryan. ] When Dr Angus bought into the Nelson Street premises in Nhill he was also appointed as the Nhill Hospital’s Honorary House Surgeon 1933-1938. His practitioner’s plate from his Nhill surgery states “HOURS Daily, except Tuesdays, Fridays and Saturday afternoons, 9-10am, 2-4pm, 7-8pm. Sundays by appointment”. This plate is now mounted on the doorway to the Port Medical Office at Flagstaff Hill Maritime Village, Warrnambool. Dr Edward Ryan and Dr Tom Ryan had an extensive collection of historical medical equipment and materials spanning 1884-1926 and when Dr Angus took up practice in their old premises he obtained this collection, a large part of which is now on display at the Port Medical Office at Flagstaff Hill Maritime Village in Warrnambool. During his time in Nhill Dr Angus was involved in the merging of the Mira Hospital and Nhill Public Hospital into one public hospital and the property titles passed on to Nhill Hospital in 1939. In 1939 Dr Angus and his family moved to Warrnambool where he purchased “Birchwood,” the 1852 home and medical practice of Dr John Hunter Henderson, at 214 Koroit Street. (This property was sold in1965 to the State Government and is now the site of the Warrnambool Police Station. ). The Angus family was able to afford gardeners, cooks and maids; their home was a popular place for visiting dignitaries to stay whilst visiting Warrnambool. Dr Angus had his own silk worm farm at home in a Mulberry tree. His young daughter used his centrifuge for spinning the silk. Dr Angus was appointed on a part-time basis as Port Medical Officer (Health Officer) in Warrnambool and held this position until the 1940’s when the government no longer required the service of a Port Medical Officer in Warrnambool; he was thus Warrnambool’s last serving Port Medical Officer. (The duties of a Port Medical Officer were outlined by the Colonial Secretary on 21st June, 1839 under the terms of the Quarantine Act. Masters of immigrant ships arriving in port reported incidents of diseases, illness and death and the Port Medical Officer made a decision on whether the ship required Quarantine and for how long, in this way preventing contagious illness from spreading from new immigrants to the residents already in the colony.) Dr Angus was a member of the Australian Medical Association, for 35 years and surgeon at the Warrnambool Base Hospital 1939-1942, He served as a Surgeon Captain during WWII 1941-45, in Ballarat, Victoria, and in Bonegilla, N.S.W., completing his service just before the end of the war due to suffering from a heart attack. During his convalescence he carved an intricate and ‘most artistic’ chess set from the material that dentures were made from. He then studied ophthalmology at the Royal Melbourne Eye and Ear Hospital and created cosmetically superior artificial eyes by pioneering using the intrascleral cartilage. Angus received accolades from the Ophthalmological Society of Australasia for this work. He returned to Warrnambool to commence practice as an ophthalmologist, pioneering in artificial eye improvements. He was Honorary Consultant Ophthalmologist to Warrnambool Base Hospital for 31 years. He made monthly visits to Portland as a visiting surgeon, to perform eye surgery. He represented the Victorian South-West subdivision of the Australian Medical Association as its secretary between 1949 and 1956 and as chairman from 1956 to 1958. In 1968 Dr Angus was elected member of Spain’s Barraquer Institute of Barcelona after his research work in Intrasclearal cartilage grafting, becoming one of the few Australian ophthalmologists to receive this honour, and in the following year presented his final paper on Living Intrasclearal Cartilage Implants at the Inaugural Meeting of the Australian College of Ophthalmologists in Melbourne In his personal life Dr Angus was a Presbyterian and treated Sunday as a Sabbath, a day of rest. He would visit 3 or 4 country patients on a Sunday, taking his children along ‘for the ride’ and to visit with him. Sunday evenings he would play the pianola and sing Scottish songs to his family. One of Dr Angus’ patients was Margaret MacKenzie, author of a book on local shipwrecks that she’d seen as an eye witness from the late 1880’s in Peterborough, Victoria. In the early 1950’s Dr Angus, painted a picture of a shipwreck for the cover jacket of Margaret’s book, Shipwrecks and More Shipwrecks. She was blind in later life and her daughter wrote the actual book for her. Dr Angus and his wife Gladys were very involved in Warrnambool’s society with a strong interest in civic affairs. Their interests included organisations such as Red Cross, Rostrum, Warrnambool and District Historical Society (founding members), Wine and Food Society, Steering Committee for Tertiary Education in Warrnambool, Local National Trust, Good Neighbour Council, Housing Commission Advisory Board, United Services Institute, Legion of Ex-Servicemen, Olympic Pool Committee, Food for Britain Organisation, Warrnambool Hospital, Anti-Cancer Council, Boys’ Club, Charitable Council, National Fitness Council and Air Raid Precautions Group. He was also a member of the Steam Preservation Society and derived much pleasure from a steam traction engine on his farm. He had an interest in people and the community He and his wife Gladys were both involved in the creation of Flagstaff Hill, including the layout of the gardens. After his death (28th March 1970) his family requested his practitioner’s plate, medical instruments and some personal belongings be displayed in the Port Medical Office surgery at Flagstaff Hill Maritime Village, and be called the “W. R. Angus Collection”. The W.R. Angus Collection is significant for still being located at the site it is connected with, Doctor Angus being the last Port Medical Officer in Warrnambool. The collection of medical instruments and other equipment is culturally significant, being an historical example of medicine from late 19th to mid-20th century. Dr Angus assisted Dr Tom Ryan, a pioneer in the use of X-rays and in ocular surgery. Notebook, leather bound, hard covered book, dark blue, part of the W.R. Angus Collection. Book's covers have reinforced corners. Pages are blank, blue lined note paper. Edges of pages have red marble pattern. Cover is inscribed in gold lettering “CLINICAL MEDICINE”Cover is inscribed in gold lettering “CLINICAL MEDICINE”flagstaff hill, warrnambool, shipwrecked coast, flagstaff hill maritime museum, maritime museum, shipwreck coast, flagstaff hill maritime village, great ocean road, dr w r angus, dr ryan, surgical instrument, t.s.s. largs bay, warrnambool base hospital, nhill base hospital, mira hospital, flying doctor, medical treatment, medical history, medical education, medical text book, notebook, clinical notebook, medical administration -
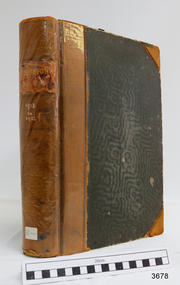 Flagstaff Hill Maritime Museum and Village
Book - Library Record Book, Ralph Eric Pattison, Warrnambool Mechanics’ Institute (WMI) Accessions Book (1913–1922), before 1918
... Hard cover, olive green cover with brown protective cloth on corners. Page edges have colored marble pattern. ...Hand written notes inside cover "RA 02749457 MEC,000451" Hard cover, olive green cover with brown protective cloth on corners. Page edges have colored marble pattern. ...Library record book from the Warrnambool Mechanics Institute known as an "Accessions Book" the book shows the type and number of books as listed in the Mechanics Institute. This specific volume is part of the Pattison Collection, named after Ralph Eric Pattison, the city librarian who began the Herculean task of organising the (WMI) massive, disorganised collection in 1935. The Record books from this period are "meticulous records" that typically include. titles and Authors of all books purchased or donated. Acquisition Dates Providing a timeline of the districts literary and intellectual interests. Costs and Suppliers often showing books ordered from Melbourne or overseas. In addition how the books were classified and how the library was organised before modern Dewey Decimal systems were fully implemented. The Warrnambool Mechanics’ Institute (WMI) Accessions Book (1913–1922) is a primary historical record that documents the acquisition of library materials during a pivotal era for the institution. In UK in early 1800's the word 'mechanic' was applied to a broader range of skills such as working man, tradesman or artisan. Mechanics' Institutes were formed originally for voluntary, self-funded organisations, to improve the education of working men and to instruct them on their various trades. The germ of the idea came from a class formed in 1799 by Professor George Birbeck in Glasgow, Scotland, for journeymen mechanics (apprentice trade workers), with the first Institutes being organised in London and Manchester in the 1820's. By then the original aim had broadened and the Mechanics' Institutes were established as popular agencies of adult education. The Mechanics' Institutes were run by committees that provided facilities for a meeting room, hall suitable for lectures, and a library. Funding was raised locally and often supplemented by grants from government agencies for the purchase of books and other resources. Activities were community based. In Australia, Mechanics' Institutes were set up in New South Wales and in Tasmania in the late 1820's. Mechanics' Institutes began in Victoria, with the first one in Melbourne dating from 1839, providing similar services but in time offered services tailored to their specific area.Hard cover, olive green cover with brown protective cloth on corners. Page edges have colored marble pattern. non-fictionLibrary record book from the Warrnambool Mechanics Institute known as an "Accessions Book" the book shows the type and number of books as listed in the Mechanics Institute. This specific volume is part of the Pattison Collection, named after Ralph Eric Pattison, the city librarian who began the Herculean task of organising the (WMI) massive, disorganised collection in 1935. The Record books from this period are "meticulous records" that typically include. titles and Authors of all books purchased or donated. Acquisition Dates Providing a timeline of the districts literary and intellectual interests. Costs and Suppliers often showing books ordered from Melbourne or overseas. In addition how the books were classified and how the library was organised before modern Dewey Decimal systems were fully implemented. The Warrnambool Mechanics’ Institute (WMI) Accessions Book (1913–1922) is a primary historical record that documents the acquisition of library materials during a pivotal era for the institution. In UK in early 1800's the word 'mechanic' was applied to a broader range of skills such as working man, tradesman or artisan. Mechanics' Institutes were formed originally for voluntary, self-funded organisations, to improve the education of working men and to instruct them on their various trades. The germ of the idea came from a class formed in 1799 by Professor George Birbeck in Glasgow, Scotland, for journeymen mechanics (apprentice trade workers), with the first Institutes being organised in London and Manchester in the 1820's. By then the original aim had broadened and the Mechanics' Institutes were established as popular agencies of adult education. The Mechanics' Institutes were run by committees that provided facilities for a meeting room, hall suitable for lectures, and a library. Funding was raised locally and often supplemented by grants from government agencies for the purchase of books and other resources. Activities were community based. In Australia, Mechanics' Institutes were set up in New South Wales and in Tasmania in the late 1820's. Mechanics' Institutes began in Victoria, with the first one in Melbourne dating from 1839, providing similar services but in time offered services tailored to their specific area.flagstaff hill, warrnambool, shipwrecked coast, flagstaff hill maritime museum, maritime museum, shipwreck coast, flagstaff hill maritime village, great ocean road, warrnambool mechanics' institute, mechanics' institute records warrnambool, record book c1918, patterson collection, library books, ralph patterson, mechanics institute, warrnambool council, book collection -
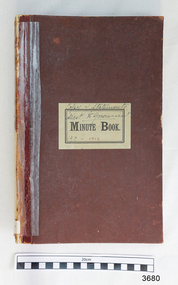 Flagstaff Hill Maritime Museum and Village
Record Book, c. 1910
... Hard cover, brown, pages have blue lines with red left margins, edges of pages have marbled pattern....Hard cover, brown, pages have blue lines with red left margins, edges of pages have marbled pattern. ...In UK in early 1800's the word 'mechanic' was applied to a broader range of skills such as working man, tradesman or artisan. Mechanics' Institutes were formed originally for voluntary, self-funded organisations, to improve the education of working men and to instruct them on their various trades. The germ of the idea came from a class formed in 1799 by Professor George Birbeck in Glasgow, Scotland, for journeymen mechanics (apprentice trade workers), with the first Institutes being organised in London and Manchester in the 1820's. By then the original aim had broadened and the Mechanics' Institutes were established as popular agencies of adult education. The Mechanics' Institutes were run by committees that provided facilities for a meeting room, hall suitable for lectures, and a library. Funding was raised locally and often supplemented by grants from government agencies for the purchase of books and other resources. Activities were community based. In Australia, Mechanics' Institutes were set up in New South Wales and in Tasmania in the late 1820's. Mechanics' Institutes began in Victoria, with the first one in Melbourne dating from 1839, providing similar services but in time offered services tailored to their specific area. Warrnambool's Mechanics' Institute (or Institution as it was sometimes called) was one of the earliest in Victoria. On 17th October 1853 a meeting was held where it was resolved to request the Lieutenant Governor of the Colony to grant land for the erection of a Mechanics' Institutes building. A committee was formed at the meeting and Richard Osburne chaired the first meeting of this committee. The land on the North West corner of Banyan and Merri Streets was granted but there were no funds to erect the building. The Formal Rights of the Warrnambool Mechanics' Institute's encompassed its aims and these were officially adopted in1859; "This Institution has for its object the diffusion of literary, scientific, and other useful knowledge amongst its members, excluding all controversial subjects, religious or political. "These objects are sought to be obtained by means of a circulating library, a reading room, the establishment of classes, debates, and the occasional delivery of lectures on natural and experimental philosophy, mechanics, astronomy, chemistry, natural history, literature, and the useful and ornamental arts, particularly those which have a more immediate reference to the colony." The Warrnambool Mechanics' Institute opened its first reading room in November1884 in the National School building at the corner of Banyan and Timor Streets. The Institute was funded by member subscription, payable on a quarterly, half yearly or yearly basis. Samuel Hannaford, the Manager of the Warrnambool Bank of Australasia, was the first Honorary Secretary of the Mechanics' Institutes, and an early President and Vice-President. He also gave several of the early lectures in the Reading Room. Another early Secretary, Librarian and lecturer was Marmaduke Fisher, the teacher at the National School. Lecture topics included The Poets and Poetry of Ireland', 'The Birth and Development of the Earth', 'The Vertebrae - with Remarks on the pleasures resulting from the study of Natural History' and 'Architecture'. In q856 the Reading Room was moved to James Hider's shop in Timor Street, and by 1864 it was located in the bookshop of Davies and Read. In the 1860's the Mechanics' Institute struggled as membership waned but in 1866, after a series of fund raising efforts, the committee was able to purchase land in Liebig Street, on a site then called Market Square, between the weighbridge and the fire station. A Mechanics' Institute building was opened at this site in August 1871. The following year four more rooms were added to the main Reading Room and in 1873 the Artisan School of Design was incorporated into the Institute. The same year Joseph Archibald established a Museum; however it deteriorated when he was transferred to Bendigo in 1877. In 1880, with Archibald's return to Warrnambool, the Museum was re-established, and in 1885 a new building was built at the back of the Institute to accommodate the re-created School of Design, the Art Gallery and the Museum. In 1887 the Museum section was moved to the former court house in Timor Street (for some time the walls of the building formed part of the TAFE cafeteria but all is now demolished)). In 1911 the Museum was transferred back to the original building and the management of the Mechanics' Institute was handed over to the Warrnambool City Council. The Museum and Art Gallery became one and housed many fine works of art., and the Library continued to grow. The building was well patronised, with records showing that at the beginning of the 20th century there were between 500 and 800 visitors. During World War One the monthly figures were in the thousands, with 3,400 people visiting in January 1915. The Museum was a much loved Institution in Warrnambool until the contents of the Museum and Art Gallery were removed to make room for the Warrnambool City Council Engineers' Department. The contents were stored but many of the items were scattered or lost. In 1975 the original building was demolished and the site became occupied by the Civic Centre, which included the new City Library. (The library was temporarily located in the old Palais building in Koroit Street.) In the process of reorganisation the Collection was distributed amongst the community groups: - The new City Library took some of the historic books and some important documents, historic photographs and newspapers. - The Art Gallery kept the 19th Century art collection and some of the artefacts from the museum. - The Historic Society has some items - The State Museum has some items - Some items were destroyed - Flagstaff Hill Maritime Village has old newspapers, Government Gazettes, most of the Mechanics' Institute Library, ledgers and documents connected to the Mechanics' Institute Library, some framed and unframed art works and some photographs. The Warrnambool Mechanics' Institute Library book collection is deemed to be of great importance because it is one of the few collections in an almost intact state, and many of the books are now very rare and of great value. NOTE: Pages of this book have been digitally recorded and archived.The Warrnambool Mechanics Institute book collection has historical and social significance for its strong association with the Mechanics Institute movement and the important role it played in the intellectual, cultural and social development of people throughout the latter part of the nineteenth century and the early twentieth century. The collection of books is a rare example of an early lending library and its significance is enhanced by the survival of an original collection of many volumes. Record Book, Warrnambool Mechanics Institute, Copy of Statements sent to Government, 1910-1912. Hard cover, brown, pages have blue lines with red left margins, edges of pages have marbled pattern.flagstaff hill, warrnambool, shipwrecked coast, flagstaff hill maritime museum, maritime museum, shipwreck coast, flagstaff hill maritime village, great ocean road, warrnambool mechanics' institute, mechanics' institute records warrnambool, record book 1910 -
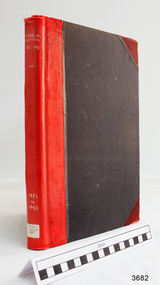 Flagstaff Hill Maritime Museum and Village
Record Book, c. 1887
... Record book, Warrnambool Mechanics Institute Financial Statements 1887-1893, Hard cover, black with red spine and red corner protection. Page edges have marbled pattern, pages have accounting columns....The collection of books is a rare example of an early lending library and its significance is enhanced by the survival of an original collection of many volumes. flagstaff hill warrnambool shipwrecked coast flagstaff hill maritime museum maritime museum shipwreck coast flagstaff hill maritime village great ocean road warrnambool mechanics' institute mechanics' institute records warrnambool record book c. 1887 Record book, Warrnambool Mechanics Institute Financial Statements 1887-1893, Hard cover, black with red spine and red corner protection. Page edges have marbled pattern, pages have accounting columns. ...In UK in early 1800's the word 'mechanic' was applied to a broader range of skills such as working man, tradesman or artisan. Mechanics' Institutes were formed originally for voluntary, self-funded organisations, to improve the education of working men and to instruct them on their various trades. The germ of the idea came from a class formed in 1799 by Professor George Birbeck in Glasgow, Scotland, for journeymen mechanics (apprentice trade workers), with the first Institutes being organised in London and Manchester in the 1820's. By then the original aim had broadened and the Mechanics' Institutes were established as popular agencies of adult education. The Mechanics' Institutes were run by committees that provided facilities for a meeting room, hall suitable for lectures, and a library. Funding was raised locally and often supplemented by grants from government agencies for the purchase of books and other resources. Activities were community based. In Australia, Mechanics' Institutes were set up in New South Wales and in Tasmania in the late 1820's. Mechanics' Institutes began in Victoria, with the first one in Melbourne dating from 1839, providing similar services but in time offered services tailored to their specific area. Warrnambool's Mechanics' Institute (or Institution as it was sometimes called) was one of the earliest in Victoria. On 17th October 1853 a meeting was held where it was resolved to request the Lieutenant Governor of the Colony to grant land for the erection of a Mechanics' Institutes building. A committee was formed at the meeting and Richard Osburne chaired the first meeting of this committee. The land on the North West corner of Banyan and Merri Streets was granted but there were no funds to erect the building. The Formal Rights of the Warrnambool Mechanics' Institute's encompassed its aims and these were officially adopted in1859; "This Institution has for its object the diffusion of literary, scientific, and other useful knowledge amongst its members, excluding all controversial subjects, religious or political. "These objects are sought to be obtained by means of a circulating library, a reading room, the establishment of classes, debates, and the occasional delivery of lectures on natural and experimental philosophy, mechanics, astronomy, chemistry, natural history, literature, and the useful and ornamental arts, particularly those which have a more immediate reference to the colony." The Warrnambool Mechanics' Institute opened its first reading room in November1884 in the National School building at the corner of Banyan and Timor Streets. The Institute was funded by member subscription, payable on a quarterly, half yearly or yearly basis. Samuel Hannaford, the Manager of the Warrnambool Bank of Australasia, was the first Honorary Secretary of the Mechanics' Institutes, and an early President and Vice-President. He also gave several of the early lectures in the Reading Room. Another early Secretary, Librarian and lecturer was Marmaduke Fisher, the teacher at the National School. Lecture topics included The Poets and Poetry of Ireland', 'The Birth and Development of the Earth', 'The Vertebrae - with Remarks on the pleasures resulting from the study of Natural History' and 'Architecture'. In q856 the Reading Room was moved to James Hider's shop in Timor Street, and by 1864 it was located in the bookshop of Davies and Read. In the 1860's the Mechanics' Institute struggled as membership waned but in 1866, after a series of fund raising efforts, the committee was able to purchase land in Liebig Street, on a site then called Market Square, between the weighbridge and the fire station. A Mechanics' Institute building was opened at this site in August 1871. The following year four more rooms were added to the main Reading Room and in 1873 the Artisan School of Design was incorporated into the Institute. The same year Joseph Archibald established a Museum; however it deteriorated when he was transferred to Bendigo in 1877. In 1880, with Archibald's return to Warrnambool, the Museum was re-established, and in 1885 a new building was built at the back of the Institute to accommodate the re-created School of Design, the Art Gallery and the Museum. In 1887 the Museum section was moved to the former court house in Timor Street (for some time the walls of the building formed part of the TAFE cafeteria but all is now demolished)). In 1911 the Museum was transferred back to the original building and the management of the Mechanics' Institute was handed over to the Warrnambool City Council. The Museum and Art Gallery became one and housed many fine works of art., and the Library continued to grow. The building was well patronised, with records showing that at the beginning of the 20th century there were between 500 and 800 visitors. During World War One the monthly figures were in the thousands, with 3,400 people visiting in January 1915. The Museum was a much loved Institution in Warrnambool until the contents of the Museum and Art Gallery were removed to make room for the Warrnambool City Council Engineers' Department. The contents were stored but many of the items were scattered or lost. In 1975 the original building was demolished and the site became occupied by the Civic Centre, which included the new City Library. (The library was temporarily located in the old Palais building in Koroit Street.) In the process of reorganisation the Collection was distributed amongst the community groups: - The new City Library took some of the historic books and some important documents, historic photographs and newspapers. - The Art Gallery kept the 19th Century art collection and some of the artefacts from the museum. - The Historic Society has some items - The State Museum has some items - Some items were destroyed - Flagstaff Hill Maritime Village has old newspapers, Government Gazettes, most of the Mechanics' Institute Library, ledgers and documents connected to the Mechanics' Institute Library, some framed and unframed art works and some photographs. The Warrnambool Mechanics' Institute Library book collection is deemed to be of great importance because it is one of the few collections in an almost intact state, and many of the books are now very rare and of great value. NOTE: Pages of this book have been digitally recorded and archived.The Warrnambool Mechanics Institute book collection has historical and social significance for its strong association with the Mechanics Institute movement and the important role it played in the intellectual, cultural and social development of people throughout the latter part of the nineteenth century and the early twentieth century. The collection of books is a rare example of an early lending library and its significance is enhanced by the survival of an original collection of many volumes. Record book, Warrnambool Mechanics Institute Financial Statements 1887-1893, Hard cover, black with red spine and red corner protection. Page edges have marbled pattern, pages have accounting columns.flagstaff hill, warrnambool, shipwrecked coast, flagstaff hill maritime museum, maritime museum, shipwreck coast, flagstaff hill maritime village, great ocean road, warrnambool mechanics' institute, mechanics' institute records warrnambool, record book c. 1887
