Showing 53 items matching "help where it is needed"
-
 Marysville & District Historical Society
THE TRIANGLE NEWS-VOL 36 NO 8-MARCH 13 2009
... ...help where it is needed...Marysville & District Historical Society 39 Darwin Street Marysville yarra-valley-and-the-dandenong-ranges marysville victoria australia the final hurrah buxton firefighters what's on when at the golf course buxton hotel concert deadline disclaimer narby free range eggs mmt inc lake mountain mystic mountains tourism update on community health black saturday bushfires mt cathedral baptist church service disaster relief assistance australian scholarships group -asg members triangle advertisers portable community hub dhs help where it is needed bikes & helmets sunshine coaches school uniforms dylan's buggy shane warne foundation bushfire relief fund marysville bowlers advertisements other help dr margaret miller fire related enquiries the victorian bushfire case management service meeting reports bushfire clean up mayor's chair the victorian bushfire recovery & reconstruction authority christine nixon marysville golf & bowls club cafe culture series free concert sausage sizzle marysville golf course need for feed bushfire benefit country music festival brewer's choice marysville & triangle social bbq councillor comment funeral services church notice mops st thomas church pets service marysville & triangle development group -matdg marysville real estate THE TRIANGLE NEWS-VOL 36 NO 8-MARCH 13 2009 ...marysville, victoria, australia, the final hurrah, buxton firefighters, what's on when at the golf course, buxton hotel concert, deadline, disclaimer, narby free range eggs, mmt inc, lake mountain, mystic mountains tourism, update on community health, black saturday bushfires, mt cathedral baptist church service, disaster relief assistance, australian scholarships group -asg members, triangle advertisers, portable community hub, dhs, help where it is needed, bikes & helmets, sunshine coaches, school uniforms, dylan's buggy, shane warne foundation bushfire relief fund, marysville bowlers, advertisements, other help, dr margaret miller, fire related enquiries, the victorian bushfire case management service, meeting reports, bushfire clean up, mayor's chair, the victorian bushfire recovery & reconstruction authority, christine nixon, marysville golf & bowls club, cafe culture series, free concert, sausage sizzle, marysville golf course, need for feed, bushfire benefit, country music festival, brewer's choice, marysville & triangle social bbq, councillor comment, funeral services, church notice, mops, st thomas church pets service, marysville & triangle development group -matdg, marysville real estate -
 Warrnambool and District Historical Society Inc.
Booklet, The Shipley Stud 1918, 1918
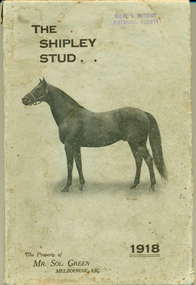
... Sol Green was known for his philanthropic gestures extending help where needed on various fronts. Shortly before his death in 1948 he donated 47000 pounds to five Melbourne hospitals....Sol Green was known for his philanthropic gestures extending help where needed on various fronts. Shortly before his death in 1948 he donated 47000 pounds to five Melbourne hospitals. ...Sol Green came to Australia as a penniless migrant who made his fortune as a bookmaker. He was inducted into the Australian Racing Museum Hall of fame in 2002. He purchased the Shipley stud from George Rolfe about 1905 and set about turning the Ayrford cattle property into a successful horse stud. His horse Comedy King won the Melbourne Cup in 1910 and was retired to stud in 1912. He became one of the top 10 Australian Stallions in the ensuing years. He dispersed his stud at Shipley in 1918 and this catalogue lists the stock sold that day. The property remained in the Green family and continued as a dairy farm with cheese factory and piggery by his son Bob Green. Sol Green was known for his philanthropic gestures extending help where needed on various fronts. Shortly before his death in 1948 he donated 47000 pounds to five Melbourne hospitals.This catalogue has significance firstly on a local level in that Shipley was an important farm in the district and secondly that it was owned by Mr Sol Green who was a person of standing within the racing industry as a bookmaker but also as a stud owner and owner of the 1910 Melbourne cup winner. This catalogue lists the stock which he had established at Shipley in a relatively short period of time.Light grey card cover with horse in brown. The title is in top left corner in brown text with the date 1918 in bottom right. Compilers details on back cover. 164 Pages. It has black and white plates of two horses, Comedy King and White Star* Mallinson Pomborneit 9/1/18. Light paper pasted inside front cover “Colac and District Historical Society, Donor Miss Betty Mallinson 1960. There are purchasers’ names and the purchase price paid, written at the base of each page. warrnambool, allansford, shipley, sol green, comedy king, white star 1918, shipley dispersal sale, shipley stud -
 Christ Church Anglican Parish of Warrnambool
Memorial Window: Susan FLEETWOOD, "Saint Mary"
... ./ By her devoted affection to her family and friends, and/ her generous help to all who were in need and distress/ she won the love and gratitude of many./ "Then are they glad because they are at rest, and so/ He bringeth them into the haven where they would be..../ By her devoted affection to her family and friends, and/ her generous help to all who were in need and distress/ she won the love and gratitude of many./ "Then are they glad because they are at rest, and so/ He bringeth them into the haven where they would be ...The inscription tells of the person, Susan Fleetwood. That Susan Fleetwood was the daughter of William Rutledge, and the wife of Thomas Falkner Fleetwood places her with two men of historical importance in Warrnambool and district.Stained glass lancet window, west wall, north nave, second light from the left in the group of five lights, Depicting the Blessed Virgin Mary facing towards the central light of the Crucifixion, the predominant colours are blues and purple/magenta. Towards the top of the design is an angel holding the Alpha symbol. At the peak of the design is a golden crown. To the Glory of God, and in loving memory of/ Susan, daughter of William and Eliza Rutledge/ of Farnham Park Dennington, and wife of/Thomas Falkner Fleetwood/ born at Port Fairy, July 9th 1848, Entered into rest April 18th 1932./ By her devoted affection to her family and friends, and/ her generous help to all who were in need and distress/ she won the love and gratitude of many./ "Then are they glad because they are at rest, and so/ He bringeth them into the haven where they would be."/ This window is erected by her Son and Daughter.rutledge, fleetwood, st mary -
 Bendigo Historical Society Inc.
Newspaper - LONG GULLY HISTORY GROUP COLLECTION: THE MINE FLOODING CRISIS - FINALE OF THE VICTORIA QUARTZ
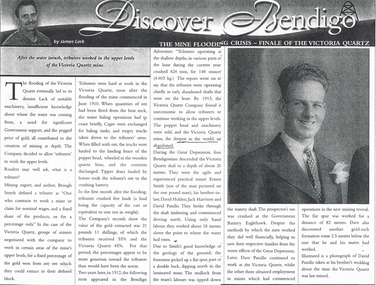
... where the water was coming from, need for Government support, and the pegged price of gold, all contributed to the cessation of deep mining. The Victoria Quartz decided to allow tributers for work the upper levels. By 1913, the Company found it uneconomic to allow the tributers to continue working the upper levels and the poppet head and machinery were sold. During the Great Depression Ernest Smith, Davic Holden, Jack Harrison and David Patullo worked above the water line and did well enough to help...where the water was coming from, need for Government support, and the pegged price of gold, all contributed to the cessation of deep mining. The Victoria Quartz decided to allow tributers for work the upper levels. By 1913, the Company found it uneconomic to allow the tributers to continue working the upper levels and the poppet head and machinery were sold. During the Great Depression Ernest Smith, Davic Holden, Jack Harrison and David Patullo worked above the water line and did well enough to help ...Copy of an article from the Bendigo Weekly titled Discover Bendigo The Mine Flooding Crisis - Finale of the Victoria Quartz by James Lerk. The lack of suitable machinery, insufficient knowledge of where the water was coming from, need for Government support, and the pegged price of gold, all contributed to the cessation of deep mining. The Victoria Quartz decided to allow tributers for work the upper levels. By 1913, the Company found it uneconomic to allow the tributers to continue working the upper levels and the poppet head and machinery were sold. During the Great Depression Ernest Smith, Davic Holden, Jack Harrison and David Patullo worked above the water line and did well enough to help their families from the worst effects of the Great Depression. Later Dave Patullo continued to work at the Victoria Quartz while the other three obtained employment in other mines. The article has a photo of David Patullo.bendigo, history, long gully history group, the long gully history group - the mine flooding crisis - finale of the victoria quartz, bendigo weekly, james lerk, victoria quartz mine, brough smyth, bendigo advertiser, victoria quartz company, great depression, ernest smith, david holden, jack harrison, david patullo, government battery eaglehawk -
 Ringwood and District Historical Society
Magazine, Nature Notes magazines 1981 (Vol 18) Issues 1-10
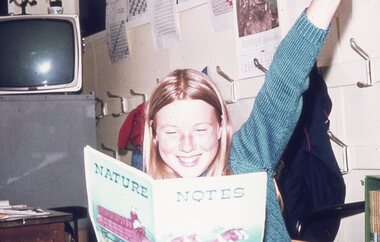
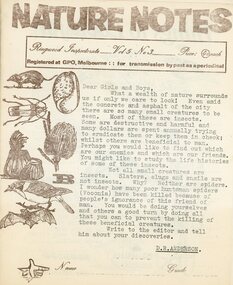
... help purchase many items needed throughout the school. These magazines were packed with really good nature information and taught children how to look after their environment using articles, puzzles, riddles, questions and quizzes. There were special characters as well like 'Wally the Wombat' and 'Ernie the Echidna' for the children to follow on various adventures every month. Children would enjoy watching them crop up in each edition. The magazine stayed with us at Ringwood East until 1986, when due to restructuring and various other things was moved to Healesville Sanctuary where...help purchase many items needed throughout the school. These magazines were packed with really good nature information and taught children how to look after their environment using articles, puzzles, riddles, questions and quizzes. There were special characters as well like 'Wally the Wombat' and 'Ernie the Echidna' for the children to follow on various adventures every month. Children would enjoy watching them crop up in each edition. The magazine stayed with us at Ringwood East until 1986, when due to restructuring and various other things was moved to Healesville Sanctuary where ...Printed magazinesFrom “The History of Ringwood East Primary School 1924-1990” 'Nature Notes' was a children's nature magazine, produced at Ringwood East Primary School for approximately 10 years. It came to us from Blackburn Lake Primary School and before that Blackburn South Primary School. It was originally developed by Harry Hopkins in 1964. He was a District Inspector of schools and also President of the Gould League at the time. Fred Rodgers and Len Delacca were original contributors, Fred writing on native flora and Len writing on native flora [fauna]. It came to Ringwood East in 1975 with Keith Dyer, a teacher on the staff, as editor. The magazine had a large circulation, supplying to schools, private subscribers and societies as well as sending many complimentary copies to libraries, and museums; distribution was throughout Australia. The Magazine continued to grow under consequent editors, Anne Gibson (who also developed 'Probe' a junior version of 'Nature Notes' designed for grades 2 and 4), Barry Archibald, Colin Bull, Russell Hall, Deborah Brydon and Mandy Charmichael. The editors would research, compile, edit and print the magazine which was a monthly issue. The parents would then come in on a Monday to collate, fold and staple. This usually was a morning’s work but this depended on how many helping hands there were. The Wednesday was packing and posting day and in the early days the parents used to deliver the local orders to save costs. Subscribers were sought through advertisements in various school literature and material. The Parents Club received an annual remuneration for their hard work and in turn were able to help purchase many items needed throughout the school. These magazines were packed with really good nature information and taught children how to look after their environment using articles, puzzles, riddles, questions and quizzes. There were special characters as well like 'Wally the Wombat' and 'Ernie the Echidna' for the children to follow on various adventures every month. Children would enjoy watching them crop up in each edition. The magazine stayed with us at Ringwood East until 1986, when due to restructuring and various other things was moved to Healesville Sanctuary where it adopted a new format and name. From here it has since folded and so the end of 'Nature Notes'. 'Nature Notes' was a very successful magazine. Many people through the years devoted a lot of time and energy to its production and readers throughout Australia, as well as its many creators and producers during its 20-year existence, mourn its passing. Written from material supplied by Barry Archibald (editor 'Nature Notes' 1977-78) Margaret Preece & Lois Aders (parents in charge of collating and packaging during its last years of existence. -
 Ringwood and District Historical Society
Magazine, Nature Notes magazines 1982 (Vol 19) Issues 1-10
... help purchase many items needed throughout the school. These magazines were packed with really good nature information and taught children how to look after their environment using articles, puzzles, riddles, questions and quizzes. There were special characters as well like 'Wally the Wombat' and 'Ernie the Echidna' for the children to follow on various adventures every month. Children would enjoy watching them crop up in each edition. The magazine stayed with us at Ringwood East until 1986, when due to restructuring and various other things was moved to Healesville Sanctuary where...help purchase many items needed throughout the school. These magazines were packed with really good nature information and taught children how to look after their environment using articles, puzzles, riddles, questions and quizzes. There were special characters as well like 'Wally the Wombat' and 'Ernie the Echidna' for the children to follow on various adventures every month. Children would enjoy watching them crop up in each edition. The magazine stayed with us at Ringwood East until 1986, when due to restructuring and various other things was moved to Healesville Sanctuary where ...Printed magazinesFrom “The History of Ringwood East Primary School 1924-1990” 'Nature Notes' was a children's nature magazine, produced at Ringwood East Primary School for approximately 10 years. It came to us from Blackburn Lake Primary School and before that Blackburn South Primary School. It was originally developed by Harry Hopkins in 1964. He was a District Inspector of schools and also President of the Gould League at the time. Fred Rodgers and Len Delacca were original contributors, Fred writing on native flora and Len writing on native flora [fauna]. It came to Ringwood East in 1975 with Keith Dyer, a teacher on the staff, as editor. The magazine had a large circulation, supplying to schools, private subscribers and societies as well as sending many complimentary copies to libraries, and museums; distribution was throughout Australia. The Magazine continued to grow under consequent editors, Anne Gibson (who also developed 'Probe' a junior version of 'Nature Notes' designed for grades 2 and 4), Barry Archibald, Colin Bull, Russell Hall, Deborah Brydon and Mandy Charmichael. The editors would research, compile, edit and print the magazine which was a monthly issue. The parents would then come in on a Monday to collate, fold and staple. This usually was a morning’s work but this depended on how many helping hands there were. The Wednesday was packing and posting day and in the early days the parents used to deliver the local orders to save costs. Subscribers were sought through advertisements in various school literature and material. The Parents Club received an annual remuneration for their hard work and in turn were able to help purchase many items needed throughout the school. These magazines were packed with really good nature information and taught children how to look after their environment using articles, puzzles, riddles, questions and quizzes. There were special characters as well like 'Wally the Wombat' and 'Ernie the Echidna' for the children to follow on various adventures every month. Children would enjoy watching them crop up in each edition. The magazine stayed with us at Ringwood East until 1986, when due to restructuring and various other things was moved to Healesville Sanctuary where it adopted a new format and name. From here it has since folded and so the end of 'Nature Notes'. 'Nature Notes' was a very successful magazine. Many people through the years devoted a lot of time and energy to its production and readers throughout Australia, as well as its many creators and producers during its 20-year existence, mourn its passing. Written from material supplied by Barry Archibald (editor 'Nature Notes' 1977-78) Margaret Preece & Lois Aders (parents in charge of collating and packaging during its last years of existence. -
 Ringwood and District Historical Society
Magazine, Nature Notes magazines 1983 (Vol 20) Issues 1-5, 7-10
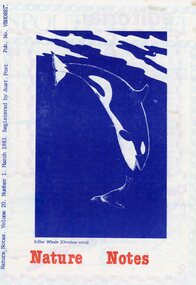
... help purchase many items needed throughout the school. These magazines were packed with really good nature information and taught children how to look after their environment using articles, puzzles, riddles, questions and quizzes. There were special characters as well like 'Wally the Wombat' and 'Ernie the Echidna' for the children to follow on various adventures every month. Children would enjoy watching them crop up in each edition. The magazine stayed with us at Ringwood East until 1986, when due to restructuring and various other things was moved to Healesville Sanctuary where...help purchase many items needed throughout the school. These magazines were packed with really good nature information and taught children how to look after their environment using articles, puzzles, riddles, questions and quizzes. There were special characters as well like 'Wally the Wombat' and 'Ernie the Echidna' for the children to follow on various adventures every month. Children would enjoy watching them crop up in each edition. The magazine stayed with us at Ringwood East until 1986, when due to restructuring and various other things was moved to Healesville Sanctuary where ...Printed magazinesFrom “The History of Ringwood East Primary School 1924-1990” 'Nature Notes' was a children's nature magazine, produced at Ringwood East Primary School for approximately 10 years. It came to us from Blackburn Lake Primary School and before that Blackburn South Primary School. It was originally developed by Harry Hopkins in 1964. He was a District Inspector of schools and also President of the Gould League at the time. Fred Rodgers and Len Delacca were original contributors, Fred writing on native flora and Len writing on native flora [fauna]. It came to Ringwood East in 1975 with Keith Dyer, a teacher on the staff, as editor. The magazine had a large circulation, supplying to schools, private subscribers and societies as well as sending many complimentary copies to libraries, and museums; distribution was throughout Australia. The Magazine continued to grow under consequent editors, Anne Gibson (who also developed 'Probe' a junior version of 'Nature Notes' designed for grades 2 and 4), Barry Archibald, Colin Bull, Russell Hall, Deborah Brydon and Mandy Charmichael. The editors would research, compile, edit and print the magazine which was a monthly issue. The parents would then come in on a Monday to collate, fold and staple. This usually was a morning’s work but this depended on how many helping hands there were. The Wednesday was packing and posting day and in the early days the parents used to deliver the local orders to save costs. Subscribers were sought through advertisements in various school literature and material. The Parents Club received an annual remuneration for their hard work and in turn were able to help purchase many items needed throughout the school. These magazines were packed with really good nature information and taught children how to look after their environment using articles, puzzles, riddles, questions and quizzes. There were special characters as well like 'Wally the Wombat' and 'Ernie the Echidna' for the children to follow on various adventures every month. Children would enjoy watching them crop up in each edition. The magazine stayed with us at Ringwood East until 1986, when due to restructuring and various other things was moved to Healesville Sanctuary where it adopted a new format and name. From here it has since folded and so the end of 'Nature Notes'. 'Nature Notes' was a very successful magazine. Many people through the years devoted a lot of time and energy to its production and readers throughout Australia, as well as its many creators and producers during its 20-year existence, mourn its passing. Written from material supplied by Barry Archibald (editor 'Nature Notes' 1977-78) Margaret Preece & Lois Aders (parents in charge of collating and packaging during its last years of existence. -
 Ringwood and District Historical Society
Magazine, Nature Notes magazines 1984 (Vol 21) Issues 1-5, 7-10
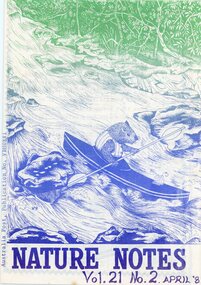
... help purchase many items needed throughout the school. These magazines were packed with really good nature information and taught children how to look after their environment using articles, puzzles, riddles, questions and quizzes. There were special characters as well like 'Wally the Wombat' and 'Ernie the Echidna' for the children to follow on various adventures every month. Children would enjoy watching them crop up in each edition. The magazine stayed with us at Ringwood East until 1986, when due to restructuring and various other things was moved to Healesville Sanctuary where...help purchase many items needed throughout the school. These magazines were packed with really good nature information and taught children how to look after their environment using articles, puzzles, riddles, questions and quizzes. There were special characters as well like 'Wally the Wombat' and 'Ernie the Echidna' for the children to follow on various adventures every month. Children would enjoy watching them crop up in each edition. The magazine stayed with us at Ringwood East until 1986, when due to restructuring and various other things was moved to Healesville Sanctuary where ...Printed magazinesFrom “The History of Ringwood East Primary School 1924-1990” 'Nature Notes' was a children's nature magazine, produced at Ringwood East Primary School for approximately 10 years. It came to us from Blackburn Lake Primary School and before that Blackburn South Primary School. It was originally developed by Harry Hopkins in 1964. He was a District Inspector of schools and also President of the Gould League at the time. Fred Rodgers and Len Delacca were original contributors, Fred writing on native flora and Len writing on native flora [fauna]. It came to Ringwood East in 1975 with Keith Dyer, a teacher on the staff, as editor. The magazine had a large circulation, supplying to schools, private subscribers and societies as well as sending many complimentary copies to libraries, and museums; distribution was throughout Australia. The Magazine continued to grow under consequent editors, Anne Gibson (who also developed 'Probe' a junior version of 'Nature Notes' designed for grades 2 and 4), Barry Archibald, Colin Bull, Russell Hall, Deborah Brydon and Mandy Charmichael. The editors would research, compile, edit and print the magazine which was a monthly issue. The parents would then come in on a Monday to collate, fold and staple. This usually was a morning’s work but this depended on how many helping hands there were. The Wednesday was packing and posting day and in the early days the parents used to deliver the local orders to save costs. Subscribers were sought through advertisements in various school literature and material. The Parents Club received an annual remuneration for their hard work and in turn were able to help purchase many items needed throughout the school. These magazines were packed with really good nature information and taught children how to look after their environment using articles, puzzles, riddles, questions and quizzes. There were special characters as well like 'Wally the Wombat' and 'Ernie the Echidna' for the children to follow on various adventures every month. Children would enjoy watching them crop up in each edition. The magazine stayed with us at Ringwood East until 1986, when due to restructuring and various other things was moved to Healesville Sanctuary where it adopted a new format and name. From here it has since folded and so the end of 'Nature Notes'. 'Nature Notes' was a very successful magazine. Many people through the years devoted a lot of time and energy to its production and readers throughout Australia, as well as its many creators and producers during its 20-year existence, mourn its passing. Written from material supplied by Barry Archibald (editor 'Nature Notes' 1977-78) Margaret Preece & Lois Aders (parents in charge of collating and packaging during its last years of existence. -
 Ringwood and District Historical Society
Magazine, Nature Notes magazines 1985 (Vol 22) Issues 1-9
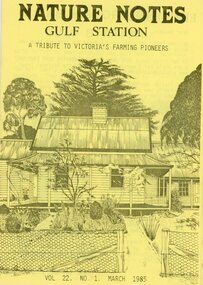
... help purchase many items needed throughout the school. These magazines were packed with really good nature information and taught children how to look after their environment using articles, puzzles, riddles, questions and quizzes. There were special characters as well like 'Wally the Wombat' and 'Ernie the Echidna' for the children to follow on various adventures every month. Children would enjoy watching them crop up in each edition. The magazine stayed with us at Ringwood East until 1986, when due to restructuring and various other things was moved to Healesville Sanctuary where...help purchase many items needed throughout the school. These magazines were packed with really good nature information and taught children how to look after their environment using articles, puzzles, riddles, questions and quizzes. There were special characters as well like 'Wally the Wombat' and 'Ernie the Echidna' for the children to follow on various adventures every month. Children would enjoy watching them crop up in each edition. The magazine stayed with us at Ringwood East until 1986, when due to restructuring and various other things was moved to Healesville Sanctuary where ...Printed magazinesFrom “The History of Ringwood East Primary School 1924-1990” 'Nature Notes' was a children's nature magazine, produced at Ringwood East Primary School for approximately 10 years. It came to us from Blackburn Lake Primary School and before that Blackburn South Primary School. It was originally developed by Harry Hopkins in 1964. He was a District Inspector of schools and also President of the Gould League at the time. Fred Rodgers and Len Delacca were original contributors, Fred writing on native flora and Len writing on native flora [fauna]. It came to Ringwood East in 1975 with Keith Dyer, a teacher on the staff, as editor. The magazine had a large circulation, supplying to schools, private subscribers and societies as well as sending many complimentary copies to libraries, and museums; distribution was throughout Australia. The Magazine continued to grow under consequent editors, Anne Gibson (who also developed 'Probe' a junior version of 'Nature Notes' designed for grades 2 and 4), Barry Archibald, Colin Bull, Russell Hall, Deborah Brydon and Mandy Charmichael. The editors would research, compile, edit and print the magazine which was a monthly issue. The parents would then come in on a Monday to collate, fold and staple. This usually was a morning’s work but this depended on how many helping hands there were. The Wednesday was packing and posting day and in the early days the parents used to deliver the local orders to save costs. Subscribers were sought through advertisements in various school literature and material. The Parents Club received an annual remuneration for their hard work and in turn were able to help purchase many items needed throughout the school. These magazines were packed with really good nature information and taught children how to look after their environment using articles, puzzles, riddles, questions and quizzes. There were special characters as well like 'Wally the Wombat' and 'Ernie the Echidna' for the children to follow on various adventures every month. Children would enjoy watching them crop up in each edition. The magazine stayed with us at Ringwood East until 1986, when due to restructuring and various other things was moved to Healesville Sanctuary where it adopted a new format and name. From here it has since folded and so the end of 'Nature Notes'. 'Nature Notes' was a very successful magazine. Many people through the years devoted a lot of time and energy to its production and readers throughout Australia, as well as its many creators and producers during its 20-year existence, mourn its passing. Written from material supplied by Barry Archibald (editor 'Nature Notes' 1977-78) Margaret Preece & Lois Aders (parents in charge of collating and packaging during its last years of existence. -
 Ringwood and District Historical Society
Magazine, Probe magazines 1978 (Vol 4) Issues 1-5, 7-10
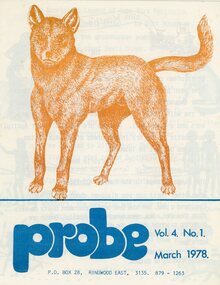
... help purchase many items needed throughout the school. These magazines were packed with really good nature information and taught children how to look after their environment using articles, puzzles, riddles, questions and quizzes. There were special characters as well like 'Wally the Wombat' and 'Ernie the Echidna' for the children to follow on various adventures every month. Children would enjoy watching them crop up in each edition. The magazine stayed with us at Ringwood East until 1986, when due to restructuring and various other things was moved to Healesville Sanctuary where...help purchase many items needed throughout the school. These magazines were packed with really good nature information and taught children how to look after their environment using articles, puzzles, riddles, questions and quizzes. There were special characters as well like 'Wally the Wombat' and 'Ernie the Echidna' for the children to follow on various adventures every month. Children would enjoy watching them crop up in each edition. The magazine stayed with us at Ringwood East until 1986, when due to restructuring and various other things was moved to Healesville Sanctuary where ...Printed magazinesFrom “The History of Ringwood East Primary School 1924-1990” 'Nature Notes' was a children's nature magazine, produced at Ringwood East Primary School for approximately 10 years. It came to us from Blackburn Lake Primary School and before that Blackburn South Primary School. It was originally developed by Harry Hopkins in 1964. He was a District Inspector of schools and also President of the Gould League at the time. Fred Rodgers and Len Delacca were original contributors, Fred writing on native flora and Len writing on native flora [fauna]. It came to Ringwood East in 1975 with Keith Dyer, a teacher on the staff, as editor. The magazine had a large circulation, supplying to schools, private subscribers and societies as well as sending many complimentary copies to libraries, and museums; distribution was throughout Australia. The Magazine continued to grow under consequent editors, Anne Gibson (who also developed 'Probe' a junior version of 'Nature Notes' designed for grades 2 and 4), Barry Archibald, Colin Bull, Russell Hall, Deborah Brydon and Mandy Charmichael. The editors would research, compile, edit and print the magazine which was a monthly issue. The parents would then come in on a Monday to collate, fold and staple. This usually was a morning’s work but this depended on how many helping hands there were. The Wednesday was packing and posting day and in the early days the parents used to deliver the local orders to save costs. Subscribers were sought through advertisements in various school literature and material. The Parents Club received an annual remuneration for their hard work and in turn were able to help purchase many items needed throughout the school. These magazines were packed with really good nature information and taught children how to look after their environment using articles, puzzles, riddles, questions and quizzes. There were special characters as well like 'Wally the Wombat' and 'Ernie the Echidna' for the children to follow on various adventures every month. Children would enjoy watching them crop up in each edition. The magazine stayed with us at Ringwood East until 1986, when due to restructuring and various other things was moved to Healesville Sanctuary where it adopted a new format and name. From here it has since folded and so the end of 'Nature Notes'. 'Nature Notes' was a very successful magazine. Many people through the years devoted a lot of time and energy to its production and readers throughout Australia, as well as its many creators and producers during its 20-year existence, mourn its passing. Written from material supplied by Barry Archibald (editor 'Nature Notes' 1977-78) Margaret Preece & Lois Aders (parents in charge of collating and packaging during its last years of existence. -
 Ringwood and District Historical Society
Magazine, Probe magazines 1979 (Vol 5) Issues 8-10
... help purchase many items needed throughout the school. These magazines were packed with really good nature information and taught children how to look after their environment using articles, puzzles, riddles, questions and quizzes. There were special characters as well like 'Wally the Wombat' and 'Ernie the Echidna' for the children to follow on various adventures every month. Children would enjoy watching them crop up in each edition. The magazine stayed with us at Ringwood East until 1986, when due to restructuring and various other things was moved to Healesville Sanctuary where...help purchase many items needed throughout the school. These magazines were packed with really good nature information and taught children how to look after their environment using articles, puzzles, riddles, questions and quizzes. There were special characters as well like 'Wally the Wombat' and 'Ernie the Echidna' for the children to follow on various adventures every month. Children would enjoy watching them crop up in each edition. The magazine stayed with us at Ringwood East until 1986, when due to restructuring and various other things was moved to Healesville Sanctuary where ...Printed magazinesFrom “The History of Ringwood East Primary School 1924-1990” 'Nature Notes' was a children's nature magazine, produced at Ringwood East Primary School for approximately 10 years. It came to us from Blackburn Lake Primary School and before that Blackburn South Primary School. It was originally developed by Harry Hopkins in 1964. He was a District Inspector of schools and also President of the Gould League at the time. Fred Rodgers and Len Delacca were original contributors, Fred writing on native flora and Len writing on native flora [fauna]. It came to Ringwood East in 1975 with Keith Dyer, a teacher on the staff, as editor. The magazine had a large circulation, supplying to schools, private subscribers and societies as well as sending many complimentary copies to libraries, and museums; distribution was throughout Australia. The Magazine continued to grow under consequent editors, Anne Gibson (who also developed 'Probe' a junior version of 'Nature Notes' designed for grades 2 and 4), Barry Archibald, Colin Bull, Russell Hall, Deborah Brydon and Mandy Charmichael. The editors would research, compile, edit and print the magazine which was a monthly issue. The parents would then come in on a Monday to collate, fold and staple. This usually was a morning’s work but this depended on how many helping hands there were. The Wednesday was packing and posting day and in the early days the parents used to deliver the local orders to save costs. Subscribers were sought through advertisements in various school literature and material. The Parents Club received an annual remuneration for their hard work and in turn were able to help purchase many items needed throughout the school. These magazines were packed with really good nature information and taught children how to look after their environment using articles, puzzles, riddles, questions and quizzes. There were special characters as well like 'Wally the Wombat' and 'Ernie the Echidna' for the children to follow on various adventures every month. Children would enjoy watching them crop up in each edition. The magazine stayed with us at Ringwood East until 1986, when due to restructuring and various other things was moved to Healesville Sanctuary where it adopted a new format and name. From here it has since folded and so the end of 'Nature Notes'. 'Nature Notes' was a very successful magazine. Many people through the years devoted a lot of time and energy to its production and readers throughout Australia, as well as its many creators and producers during its 20-year existence, mourn its passing. Written from material supplied by Barry Archibald (editor 'Nature Notes' 1977-78) Margaret Preece & Lois Aders (parents in charge of collating and packaging during its last years of existence. -
 Ringwood and District Historical Society
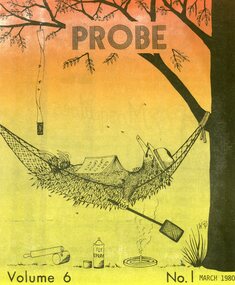
Magazine, Probe magazines 1980 (Vol 6) Issues 1-10
... help purchase many items needed throughout the school. These magazines were packed with really good nature information and taught children how to look after their environment using articles, puzzles, riddles, questions and quizzes. There were special characters as well like 'Wally the Wombat' and 'Ernie the Echidna' for the children to follow on various adventures every month. Children would enjoy watching them crop up in each edition. The magazine stayed with us at Ringwood East until 1986, when due to restructuring and various other things was moved to Healesville Sanctuary where...help purchase many items needed throughout the school. These magazines were packed with really good nature information and taught children how to look after their environment using articles, puzzles, riddles, questions and quizzes. There were special characters as well like 'Wally the Wombat' and 'Ernie the Echidna' for the children to follow on various adventures every month. Children would enjoy watching them crop up in each edition. The magazine stayed with us at Ringwood East until 1986, when due to restructuring and various other things was moved to Healesville Sanctuary where ...Printed magazinesFrom “The History of Ringwood East Primary School 1924-1990” 'Nature Notes' was a children's nature magazine, produced at Ringwood East Primary School for approximately 10 years. It came to us from Blackburn Lake Primary School and before that Blackburn South Primary School. It was originally developed by Harry Hopkins in 1964. He was a District Inspector of schools and also President of the Gould League at the time. Fred Rodgers and Len Delacca were original contributors, Fred writing on native flora and Len writing on native flora [fauna]. It came to Ringwood East in 1975 with Keith Dyer, a teacher on the staff, as editor. The magazine had a large circulation, supplying to schools, private subscribers and societies as well as sending many complimentary copies to libraries, and museums; distribution was throughout Australia. The Magazine continued to grow under consequent editors, Anne Gibson (who also developed 'Probe' a junior version of 'Nature Notes' designed for grades 2 and 4), Barry Archibald, Colin Bull, Russell Hall, Deborah Brydon and Mandy Charmichael. The editors would research, compile, edit and print the magazine which was a monthly issue. The parents would then come in on a Monday to collate, fold and staple. This usually was a morning’s work but this depended on how many helping hands there were. The Wednesday was packing and posting day and in the early days the parents used to deliver the local orders to save costs. Subscribers were sought through advertisements in various school literature and material. The Parents Club received an annual remuneration for their hard work and in turn were able to help purchase many items needed throughout the school. These magazines were packed with really good nature information and taught children how to look after their environment using articles, puzzles, riddles, questions and quizzes. There were special characters as well like 'Wally the Wombat' and 'Ernie the Echidna' for the children to follow on various adventures every month. Children would enjoy watching them crop up in each edition. The magazine stayed with us at Ringwood East until 1986, when due to restructuring and various other things was moved to Healesville Sanctuary where it adopted a new format and name. From here it has since folded and so the end of 'Nature Notes'. 'Nature Notes' was a very successful magazine. Many people through the years devoted a lot of time and energy to its production and readers throughout Australia, as well as its many creators and producers during its 20-year existence, mourn its passing. Written from material supplied by Barry Archibald (editor 'Nature Notes' 1977-78) Margaret Preece & Lois Aders (parents in charge of collating and packaging during its last years of existence. -
 Ringwood and District Historical Society
Magazine, Probe magazines 1981 (Vol 7) Issues 1-2, 4-10
... help purchase many items needed throughout the school. These magazines were packed with really good nature information and taught children how to look after their environment using articles, puzzles, riddles, questions and quizzes. There were special characters as well like 'Wally the Wombat' and 'Ernie the Echidna' for the children to follow on various adventures every month. Children would enjoy watching them crop up in each edition. The magazine stayed with us at Ringwood East until 1986, when due to restructuring and various other things was moved to Healesville Sanctuary where...help purchase many items needed throughout the school. These magazines were packed with really good nature information and taught children how to look after their environment using articles, puzzles, riddles, questions and quizzes. There were special characters as well like 'Wally the Wombat' and 'Ernie the Echidna' for the children to follow on various adventures every month. Children would enjoy watching them crop up in each edition. The magazine stayed with us at Ringwood East until 1986, when due to restructuring and various other things was moved to Healesville Sanctuary where ...Printed magazinesFrom “The History of Ringwood East Primary School 1924-1990” 'Nature Notes' was a children's nature magazine, produced at Ringwood East Primary School for approximately 10 years. It came to us from Blackburn Lake Primary School and before that Blackburn South Primary School. It was originally developed by Harry Hopkins in 1964. He was a District Inspector of schools and also President of the Gould League at the time. Fred Rodgers and Len Delacca were original contributors, Fred writing on native flora and Len writing on native flora [fauna]. It came to Ringwood East in 1975 with Keith Dyer, a teacher on the staff, as editor. The magazine had a large circulation, supplying to schools, private subscribers and societies as well as sending many complimentary copies to libraries, and museums; distribution was throughout Australia. The Magazine continued to grow under consequent editors, Anne Gibson (who also developed 'Probe' a junior version of 'Nature Notes' designed for grades 2 and 4), Barry Archibald, Colin Bull, Russell Hall, Deborah Brydon and Mandy Charmichael. The editors would research, compile, edit and print the magazine which was a monthly issue. The parents would then come in on a Monday to collate, fold and staple. This usually was a morning’s work but this depended on how many helping hands there were. The Wednesday was packing and posting day and in the early days the parents used to deliver the local orders to save costs. Subscribers were sought through advertisements in various school literature and material. The Parents Club received an annual remuneration for their hard work and in turn were able to help purchase many items needed throughout the school. These magazines were packed with really good nature information and taught children how to look after their environment using articles, puzzles, riddles, questions and quizzes. There were special characters as well like 'Wally the Wombat' and 'Ernie the Echidna' for the children to follow on various adventures every month. Children would enjoy watching them crop up in each edition. The magazine stayed with us at Ringwood East until 1986, when due to restructuring and various other things was moved to Healesville Sanctuary where it adopted a new format and name. From here it has since folded and so the end of 'Nature Notes'. 'Nature Notes' was a very successful magazine. Many people through the years devoted a lot of time and energy to its production and readers throughout Australia, as well as its many creators and producers during its 20-year existence, mourn its passing. Written from material supplied by Barry Archibald (editor 'Nature Notes' 1977-78) Margaret Preece & Lois Aders (parents in charge of collating and packaging during its last years of existence. -
 Ringwood and District Historical Society
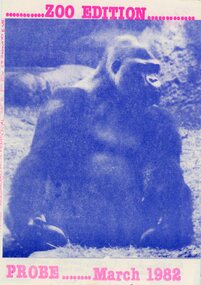
Magazine, Probe magazines 1982 (Vol 8) Issues 1-2, 4-10
... help purchase many items needed throughout the school. These magazines were packed with really good nature information and taught children how to look after their environment using articles, puzzles, riddles, questions and quizzes. There were special characters as well like 'Wally the Wombat' and 'Ernie the Echidna' for the children to follow on various adventures every month. Children would enjoy watching them crop up in each edition. The magazine stayed with us at Ringwood East until 1986, when due to restructuring and various other things was moved to Healesville Sanctuary where...help purchase many items needed throughout the school. These magazines were packed with really good nature information and taught children how to look after their environment using articles, puzzles, riddles, questions and quizzes. There were special characters as well like 'Wally the Wombat' and 'Ernie the Echidna' for the children to follow on various adventures every month. Children would enjoy watching them crop up in each edition. The magazine stayed with us at Ringwood East until 1986, when due to restructuring and various other things was moved to Healesville Sanctuary where ...Printed magazinesFrom “The History of Ringwood East Primary School 1924-1990” 'Nature Notes' was a children's nature magazine, produced at Ringwood East Primary School for approximately 10 years. It came to us from Blackburn Lake Primary School and before that Blackburn South Primary School. It was originally developed by Harry Hopkins in 1964. He was a District Inspector of schools and also President of the Gould League at the time. Fred Rodgers and Len Delacca were original contributors, Fred writing on native flora and Len writing on native flora [fauna]. It came to Ringwood East in 1975 with Keith Dyer, a teacher on the staff, as editor. The magazine had a large circulation, supplying to schools, private subscribers and societies as well as sending many complimentary copies to libraries, and museums; distribution was throughout Australia. The Magazine continued to grow under consequent editors, Anne Gibson (who also developed 'Probe' a junior version of 'Nature Notes' designed for grades 2 and 4), Barry Archibald, Colin Bull, Russell Hall, Deborah Brydon and Mandy Charmichael. The editors would research, compile, edit and print the magazine which was a monthly issue. The parents would then come in on a Monday to collate, fold and staple. This usually was a morning’s work but this depended on how many helping hands there were. The Wednesday was packing and posting day and in the early days the parents used to deliver the local orders to save costs. Subscribers were sought through advertisements in various school literature and material. The Parents Club received an annual remuneration for their hard work and in turn were able to help purchase many items needed throughout the school. These magazines were packed with really good nature information and taught children how to look after their environment using articles, puzzles, riddles, questions and quizzes. There were special characters as well like 'Wally the Wombat' and 'Ernie the Echidna' for the children to follow on various adventures every month. Children would enjoy watching them crop up in each edition. The magazine stayed with us at Ringwood East until 1986, when due to restructuring and various other things was moved to Healesville Sanctuary where it adopted a new format and name. From here it has since folded and so the end of 'Nature Notes'. 'Nature Notes' was a very successful magazine. Many people through the years devoted a lot of time and energy to its production and readers throughout Australia, as well as its many creators and producers during its 20-year existence, mourn its passing. Written from material supplied by Barry Archibald (editor 'Nature Notes' 1977-78) Margaret Preece & Lois Aders (parents in charge of collating and packaging during its last years of existence. -
 Ringwood and District Historical Society
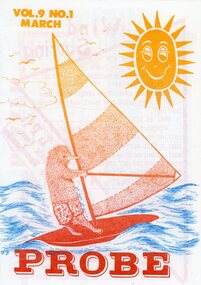
Magazine, Probe magazines 1983 (Vol 9) Issues 1, 3-10
... help purchase many items needed throughout the school. These magazines were packed with really good nature information and taught children how to look after their environment using articles, puzzles, riddles, questions and quizzes. There were special characters as well like 'Wally the Wombat' and 'Ernie the Echidna' for the children to follow on various adventures every month. Children would enjoy watching them crop up in each edition. The magazine stayed with us at Ringwood East until 1986, when due to restructuring and various other things was moved to Healesville Sanctuary where...help purchase many items needed throughout the school. These magazines were packed with really good nature information and taught children how to look after their environment using articles, puzzles, riddles, questions and quizzes. There were special characters as well like 'Wally the Wombat' and 'Ernie the Echidna' for the children to follow on various adventures every month. Children would enjoy watching them crop up in each edition. The magazine stayed with us at Ringwood East until 1986, when due to restructuring and various other things was moved to Healesville Sanctuary where ...Printed magazinesFrom “The History of Ringwood East Primary School 1924-1990” 'Nature Notes' was a children's nature magazine, produced at Ringwood East Primary School for approximately 10 years. It came to us from Blackburn Lake Primary School and before that Blackburn South Primary School. It was originally developed by Harry Hopkins in 1964. He was a District Inspector of schools and also President of the Gould League at the time. Fred Rodgers and Len Delacca were original contributors, Fred writing on native flora and Len writing on native flora [fauna]. It came to Ringwood East in 1975 with Keith Dyer, a teacher on the staff, as editor. The magazine had a large circulation, supplying to schools, private subscribers and societies as well as sending many complimentary copies to libraries, and museums; distribution was throughout Australia. The Magazine continued to grow under consequent editors, Anne Gibson (who also developed 'Probe' a junior version of 'Nature Notes' designed for grades 2 and 4), Barry Archibald, Colin Bull, Russell Hall, Deborah Brydon and Mandy Charmichael. The editors would research, compile, edit and print the magazine which was a monthly issue. The parents would then come in on a Monday to collate, fold and staple. This usually was a morning’s work but this depended on how many helping hands there were. The Wednesday was packing and posting day and in the early days the parents used to deliver the local orders to save costs. Subscribers were sought through advertisements in various school literature and material. The Parents Club received an annual remuneration for their hard work and in turn were able to help purchase many items needed throughout the school. These magazines were packed with really good nature information and taught children how to look after their environment using articles, puzzles, riddles, questions and quizzes. There were special characters as well like 'Wally the Wombat' and 'Ernie the Echidna' for the children to follow on various adventures every month. Children would enjoy watching them crop up in each edition. The magazine stayed with us at Ringwood East until 1986, when due to restructuring and various other things was moved to Healesville Sanctuary where it adopted a new format and name. From here it has since folded and so the end of 'Nature Notes'. 'Nature Notes' was a very successful magazine. Many people through the years devoted a lot of time and energy to its production and readers throughout Australia, as well as its many creators and producers during its 20-year existence, mourn its passing. Written from material supplied by Barry Archibald (editor 'Nature Notes' 1977-78) Margaret Preece & Lois Aders (parents in charge of collating and packaging during its last years of existence. -
 Ringwood and District Historical Society
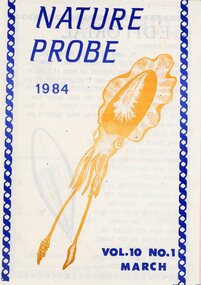
Magazine, Probe magazines 1984 (Vol 10) Issues 1-5, 7-10
... help purchase many items needed throughout the school. These magazines were packed with really good nature information and taught children how to look after their environment using articles, puzzles, riddles, questions and quizzes. There were special characters as well like 'Wally the Wombat' and 'Ernie the Echidna' for the children to follow on various adventures every month. Children would enjoy watching them crop up in each edition. The magazine stayed with us at Ringwood East until 1986, when due to restructuring and various other things was moved to Healesville Sanctuary where...help purchase many items needed throughout the school. These magazines were packed with really good nature information and taught children how to look after their environment using articles, puzzles, riddles, questions and quizzes. There were special characters as well like 'Wally the Wombat' and 'Ernie the Echidna' for the children to follow on various adventures every month. Children would enjoy watching them crop up in each edition. The magazine stayed with us at Ringwood East until 1986, when due to restructuring and various other things was moved to Healesville Sanctuary where ...Printed magazinesFrom “The History of Ringwood East Primary School 1924-1990” 'Nature Notes' was a children's nature magazine, produced at Ringwood East Primary School for approximately 10 years. It came to us from Blackburn Lake Primary School and before that Blackburn South Primary School. It was originally developed by Harry Hopkins in 1964. He was a District Inspector of schools and also President of the Gould League at the time. Fred Rodgers and Len Delacca were original contributors, Fred writing on native flora and Len writing on native flora [fauna]. It came to Ringwood East in 1975 with Keith Dyer, a teacher on the staff, as editor. The magazine had a large circulation, supplying to schools, private subscribers and societies as well as sending many complimentary copies to libraries, and museums; distribution was throughout Australia. The Magazine continued to grow under consequent editors, Anne Gibson (who also developed 'Probe' a junior version of 'Nature Notes' designed for grades 2 and 4), Barry Archibald, Colin Bull, Russell Hall, Deborah Brydon and Mandy Charmichael. The editors would research, compile, edit and print the magazine which was a monthly issue. The parents would then come in on a Monday to collate, fold and staple. This usually was a morning’s work but this depended on how many helping hands there were. The Wednesday was packing and posting day and in the early days the parents used to deliver the local orders to save costs. Subscribers were sought through advertisements in various school literature and material. The Parents Club received an annual remuneration for their hard work and in turn were able to help purchase many items needed throughout the school. These magazines were packed with really good nature information and taught children how to look after their environment using articles, puzzles, riddles, questions and quizzes. There were special characters as well like 'Wally the Wombat' and 'Ernie the Echidna' for the children to follow on various adventures every month. Children would enjoy watching them crop up in each edition. The magazine stayed with us at Ringwood East until 1986, when due to restructuring and various other things was moved to Healesville Sanctuary where it adopted a new format and name. From here it has since folded and so the end of 'Nature Notes'. 'Nature Notes' was a very successful magazine. Many people through the years devoted a lot of time and energy to its production and readers throughout Australia, as well as its many creators and producers during its 20-year existence, mourn its passing. Written from material supplied by Barry Archibald (editor 'Nature Notes' 1977-78) Margaret Preece & Lois Aders (parents in charge of collating and packaging during its last years of existence. -
 Ringwood and District Historical Society
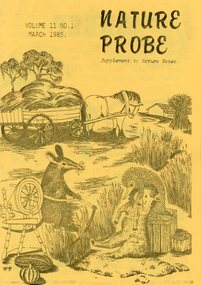
Magazine, Probe magazines 1985 (Vol 11) Issues 1-9
... help purchase many items needed throughout the school. These magazines were packed with really good nature information and taught children how to look after their environment using articles, puzzles, riddles, questions and quizzes. There were special characters as well like 'Wally the Wombat' and 'Ernie the Echidna' for the children to follow on various adventures every month. Children would enjoy watching them crop up in each edition. The magazine stayed with us at Ringwood East until 1986, when due to restructuring and various other things was moved to Healesville Sanctuary where...help purchase many items needed throughout the school. These magazines were packed with really good nature information and taught children how to look after their environment using articles, puzzles, riddles, questions and quizzes. There were special characters as well like 'Wally the Wombat' and 'Ernie the Echidna' for the children to follow on various adventures every month. Children would enjoy watching them crop up in each edition. The magazine stayed with us at Ringwood East until 1986, when due to restructuring and various other things was moved to Healesville Sanctuary where ...Printed magazinesFrom “The History of Ringwood East Primary School 1924-1990” 'Nature Notes' was a children's nature magazine, produced at Ringwood East Primary School for approximately 10 years. It came to us from Blackburn Lake Primary School and before that Blackburn South Primary School. It was originally developed by Harry Hopkins in 1964. He was a District Inspector of schools and also President of the Gould League at the time. Fred Rodgers and Len Delacca were original contributors, Fred writing on native flora and Len writing on native flora [fauna]. It came to Ringwood East in 1975 with Keith Dyer, a teacher on the staff, as editor. The magazine had a large circulation, supplying to schools, private subscribers and societies as well as sending many complimentary copies to libraries, and museums; distribution was throughout Australia. The Magazine continued to grow under consequent editors, Anne Gibson (who also developed 'Probe' a junior version of 'Nature Notes' designed for grades 2 and 4), Barry Archibald, Colin Bull, Russell Hall, Deborah Brydon and Mandy Charmichael. The editors would research, compile, edit and print the magazine which was a monthly issue. The parents would then come in on a Monday to collate, fold and staple. This usually was a morning’s work but this depended on how many helping hands there were. The Wednesday was packing and posting day and in the early days the parents used to deliver the local orders to save costs. Subscribers were sought through advertisements in various school literature and material. The Parents Club received an annual remuneration for their hard work and in turn were able to help purchase many items needed throughout the school. These magazines were packed with really good nature information and taught children how to look after their environment using articles, puzzles, riddles, questions and quizzes. There were special characters as well like 'Wally the Wombat' and 'Ernie the Echidna' for the children to follow on various adventures every month. Children would enjoy watching them crop up in each edition. The magazine stayed with us at Ringwood East until 1986, when due to restructuring and various other things was moved to Healesville Sanctuary where it adopted a new format and name. From here it has since folded and so the end of 'Nature Notes'. 'Nature Notes' was a very successful magazine. Many people through the years devoted a lot of time and energy to its production and readers throughout Australia, as well as its many creators and producers during its 20-year existence, mourn its passing. Written from material supplied by Barry Archibald (editor 'Nature Notes' 1977-78) Margaret Preece & Lois Aders (parents in charge of collating and packaging during its last years of existence. -
 Ringwood and District Historical Society
Slide, Slides describing creation of Nature Notes and Probe school magazines "The Story"
... help purchase many items needed throughout the school. These magazines were packed with really good nature information and taught children how to look after their environment using articles, puzzles, riddles, questions and quizzes. There were special characters as well like 'Wally the Wombat' and 'Ernie the Echidna' for the children to follow on various adventures every month. Children would enjoy watching them crop up in each edition. The magazine stayed with us at Ringwood East until 1986, when due to restructuring and various other things was moved to Healesville Sanctuary where...help purchase many items needed throughout the school. These magazines were packed with really good nature information and taught children how to look after their environment using articles, puzzles, riddles, questions and quizzes. There were special characters as well like 'Wally the Wombat' and 'Ernie the Echidna' for the children to follow on various adventures every month. Children would enjoy watching them crop up in each edition. The magazine stayed with us at Ringwood East until 1986, when due to restructuring and various other things was moved to Healesville Sanctuary where ...SlidesFrom “The History of Ringwood East Primary School 1924-1990” 'Nature Notes' was a children's nature magazine, produced at Ringwood East Primary School for approximately 10 years. It came to us from Blackburn Lake Primary School and before that Blackburn South Primary School. It was originally developed by Harry Hopkins in 1964. He was a District Inspector of schools and also President of the Gould League at the time. Fred Rodgers and Len Delacca were original contributors, Fred writing on native flora and Len writing on native flora [fauna]. It came to Ringwood East in 1975 with Keith Dyer, a teacher on the staff, as editor. The magazine had a large circulation, supplying to schools, private subscribers and societies as well as sending many complimentary copies to libraries, and museums; distribution was throughout Australia. The Magazine continued to grow under consequent editors, Anne Gibson (who also developed 'Probe' a junior version of 'Nature Notes' designed for grades 2 and 4), Barry Archibald, Colin Bull, Russell Hall, Deborah Brydon and Mandy Charmichael. The editors would research, compile, edit and print the magazine which was a monthly issue. The parents would then come in on a Monday to collate, fold and staple. This usually was a morning’s work but this depended on how many helping hands there were. The Wednesday was packing and posting day and in the early days the parents used to deliver the local orders to save costs. Subscribers were sought through advertisements in various school literature and material. The Parents Club received an annual remuneration for their hard work and in turn were able to help purchase many items needed throughout the school. These magazines were packed with really good nature information and taught children how to look after their environment using articles, puzzles, riddles, questions and quizzes. There were special characters as well like 'Wally the Wombat' and 'Ernie the Echidna' for the children to follow on various adventures every month. Children would enjoy watching them crop up in each edition. The magazine stayed with us at Ringwood East until 1986, when due to restructuring and various other things was moved to Healesville Sanctuary where it adopted a new format and name. From here it has since folded and so the end of 'Nature Notes'. 'Nature Notes' was a very successful magazine. Many people through the years devoted a lot of time and energy to its production and readers throughout Australia, as well as its many creators and producers during its 20-year existence, mourn its passing. Written from material supplied by Barry Archibald (editor 'Nature Notes' 1977-78) Margaret Preece & Lois Aders (parents in charge of collating and packaging during its last years of existence. -
 Ringwood and District Historical Society
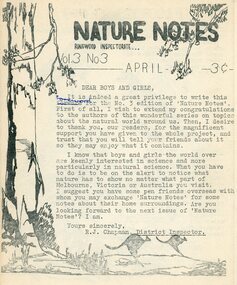
Magazine, Nature Notes magazines 1966 (Vol 3) Issues 3 & 8 only
... help purchase many items needed throughout the school. These magazines were packed with really good nature information and taught children how to look after their environment using articles, puzzles, riddles, questions and quizzes. There were special characters as well like 'Wally the Wombat' and 'Ernie the Echidna' for the children to follow on various adventures every month. Children would enjoy watching them crop up in each edition. The magazine stayed with us at Ringwood East until 1986, when due to restructuring and various other things was moved to Healesville Sanctuary where...help purchase many items needed throughout the school. These magazines were packed with really good nature information and taught children how to look after their environment using articles, puzzles, riddles, questions and quizzes. There were special characters as well like 'Wally the Wombat' and 'Ernie the Echidna' for the children to follow on various adventures every month. Children would enjoy watching them crop up in each edition. The magazine stayed with us at Ringwood East until 1986, when due to restructuring and various other things was moved to Healesville Sanctuary where ...Printed magazinesFrom “The History of Ringwood East Primary School 1924-1990” 'Nature Notes' was a children's nature magazine, produced at Ringwood East Primary School for approximately 10 years. It came to us from Blackburn Lake Primary School and before that Blackburn South Primary School. It was originally developed by Harry Hopkins in 1964. He was a District Inspector of schools and also President of the Gould League at the time. Fred Rodgers and Len Delacca were original contributors, Fred writing on native flora and Len writing on native flora [fauna]. It came to Ringwood East in 1975 with Keith Dyer, a teacher on the staff, as editor. The magazine had a large circulation, supplying to schools, private subscribers and societies as well as sending many complimentary copies to libraries, and museums; distribution was throughout Australia. The Magazine continued to grow under consequent editors, Anne Gibson (who also developed 'Probe' a junior version of 'Nature Notes' designed for grades 2 and 4), Barry Archibald, Colin Bull, Russell Hall, Deborah Brydon and Mandy Charmichael. The editors would research, compile, edit and print the magazine which was a monthly issue. The parents would then come in on a Monday to collate, fold and staple. This usually was a morning’s work but this depended on how many helping hands there were. The Wednesday was packing and posting day and in the early days the parents used to deliver the local orders to save costs. Subscribers were sought through advertisements in various school literature and material. The Parents Club received an annual remuneration for their hard work and in turn were able to help purchase many items needed throughout the school. These magazines were packed with really good nature information and taught children how to look after their environment using articles, puzzles, riddles, questions and quizzes. There were special characters as well like 'Wally the Wombat' and 'Ernie the Echidna' for the children to follow on various adventures every month. Children would enjoy watching them crop up in each edition. The magazine stayed with us at Ringwood East until 1986, when due to restructuring and various other things was moved to Healesville Sanctuary where it adopted a new format and name. From here it has since folded and so the end of 'Nature Notes'. 'Nature Notes' was a very successful magazine. Many people through the years devoted a lot of time and energy to its production and readers throughout Australia, as well as its many creators and producers during its 20-year existence, mourn its passing. Written from material supplied by Barry Archibald (editor 'Nature Notes' 1977-78) Margaret Preece & Lois Aders (parents in charge of collating and packaging during its last years of existence. -
 Ringwood and District Historical Society
Archive, Parent Record for Nature Notes & Probe magazines Collection
... help purchase many items needed throughout the school. These magazines were packed with really good nature information and taught children how to look after their environment using articles, puzzles, riddles, questions and quizzes. There were special characters as well like 'Wally the Wombat' and 'Ernie the Echidna' for the children to follow on various adventures every month. Children would enjoy watching them crop up in each edition. The magazine stayed with us at Ringwood East until 1986, when due to restructuring and various other things was moved to Healesville Sanctuary where...help purchase many items needed throughout the school. These magazines were packed with really good nature information and taught children how to look after their environment using articles, puzzles, riddles, questions and quizzes. There were special characters as well like 'Wally the Wombat' and 'Ernie the Echidna' for the children to follow on various adventures every month. Children would enjoy watching them crop up in each edition. The magazine stayed with us at Ringwood East until 1986, when due to restructuring and various other things was moved to Healesville Sanctuary where ...Parent Record for Archive collection of photographs, documents, minutes etc relating to the Nature Notes and Probe magazines published by the Ringwood Electorate State/Primary SchoolsFrom “The History of Ringwood East Primary School 1924-1990” 'Nature Notes' was a children's nature magazine, produced at Ringwood East Primary School for approximately 10 years. It came to us from Blackburn Lake Primary School and before that Blackburn South Primary School. It was originally developed by Harry Hopkins in 1964. He was a District Inspector of schools and also President of the Gould League at the time. Fred Rodgers and Len Delacca were original contributors, Fred writing on native flora and Len writing on native flora [fauna]. It came to Ringwood East in 1975 with Keith Dyer, a teacher on the staff, as editor. The magazine had a large circulation, supplying to schools, private subscribers and societies as well as sending many complimentary copies to libraries, and museums; distribution was throughout Australia. The Magazine continued to grow under consequent editors, Anne Gibson (who also developed 'Probe' a junior version of 'Nature Notes' designed for grades 2 and 4), Barry Archibald, Colin Bull, Russell Hall, Deborah Brydon and Mandy Charmichael. The editors would research, compile, edit and print the magazine which was a monthly issue. The parents would then come in on a Monday to collate, fold and staple. This usually was a morning’s work but this depended on how many helping hands there were. The Wednesday was packing and posting day and in the early days the parents used to deliver the local orders to save costs. Subscribers were sought through advertisements in various school literature and material. The Parents Club received an annual remuneration for their hard work and in turn were able to help purchase many items needed throughout the school. These magazines were packed with really good nature information and taught children how to look after their environment using articles, puzzles, riddles, questions and quizzes. There were special characters as well like 'Wally the Wombat' and 'Ernie the Echidna' for the children to follow on various adventures every month. Children would enjoy watching them crop up in each edition. The magazine stayed with us at Ringwood East until 1986, when due to restructuring and various other things was moved to Healesville Sanctuary where it adopted a new format and name. From here it has since folded and so the end of 'Nature Notes'. 'Nature Notes' was a very successful magazine. Many people through the years devoted a lot of time and energy to its production and readers throughout Australia, as well as its many creators and producers during its 20-year existence, mourn its passing. Written from material supplied by Barry Archibald (editor 'Nature Notes' 1977-78) Margaret Preece & Lois Aders (parents in charge of collating and packaging during its last years of existence. -
 Ringwood and District Historical Society
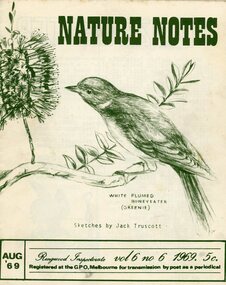
Magazine, Nature Notes magazines 1968 (Vol 5) Issues 3 to 10
... help purchase many items needed throughout the school. These magazines were packed with really good nature information and taught children how to look after their environment using articles, puzzles, riddles, questions and quizzes. There were special characters as well like 'Wally the Wombat' and 'Ernie the Echidna' for the children to follow on various adventures every month. Children would enjoy watching them crop up in each edition. The magazine stayed with us at Ringwood East until 1986, when due to restructuring and various other things was moved to Healesville Sanctuary where...help purchase many items needed throughout the school. These magazines were packed with really good nature information and taught children how to look after their environment using articles, puzzles, riddles, questions and quizzes. There were special characters as well like 'Wally the Wombat' and 'Ernie the Echidna' for the children to follow on various adventures every month. Children would enjoy watching them crop up in each edition. The magazine stayed with us at Ringwood East until 1986, when due to restructuring and various other things was moved to Healesville Sanctuary where ...Printed magazinesFrom “The History of Ringwood East Primary School 1924-1990” 'Nature Notes' was a children's nature magazine, produced at Ringwood East Primary School for approximately 10 years. It came to us from Blackburn Lake Primary School and before that Blackburn South Primary School. It was originally developed by Harry Hopkins in 1964. He was a District Inspector of schools and also President of the Gould League at the time. Fred Rodgers and Len Delacca were original contributors, Fred writing on native flora and Len writing on native flora [fauna]. It came to Ringwood East in 1975 with Keith Dyer, a teacher on the staff, as editor. The magazine had a large circulation, supplying to schools, private subscribers and societies as well as sending many complimentary copies to libraries, and museums; distribution was throughout Australia. The Magazine continued to grow under consequent editors, Anne Gibson (who also developed 'Probe' a junior version of 'Nature Notes' designed for grades 2 and 4), Barry Archibald, Colin Bull, Russell Hall, Deborah Brydon and Mandy Charmichael. The editors would research, compile, edit and print the magazine which was a monthly issue. The parents would then come in on a Monday to collate, fold and staple. This usually was a morning’s work but this depended on how many helping hands there were. The Wednesday was packing and posting day and in the early days the parents used to deliver the local orders to save costs. Subscribers were sought through advertisements in various school literature and material. The Parents Club received an annual remuneration for their hard work and in turn were able to help purchase many items needed throughout the school. These magazines were packed with really good nature information and taught children how to look after their environment using articles, puzzles, riddles, questions and quizzes. There were special characters as well like 'Wally the Wombat' and 'Ernie the Echidna' for the children to follow on various adventures every month. Children would enjoy watching them crop up in each edition. The magazine stayed with us at Ringwood East until 1986, when due to restructuring and various other things was moved to Healesville Sanctuary where it adopted a new format and name. From here it has since folded and so the end of 'Nature Notes'. 'Nature Notes' was a very successful magazine. Many people through the years devoted a lot of time and energy to its production and readers throughout Australia, as well as its many creators and producers during its 20-year existence, mourn its passing. Written from material supplied by Barry Archibald (editor 'Nature Notes' 1977-78) Margaret Preece & Lois Aders (parents in charge of collating and packaging during its last years of existence. -
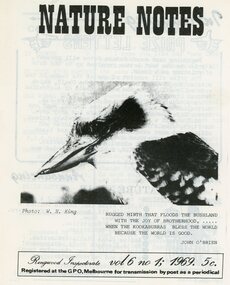 Ringwood and District Historical Society
Magazine, Nature Notes magazines 1969 (Vol 6) Issues 1 to 2, 4 to 10
... help purchase many items needed throughout the school. These magazines were packed with really good nature information and taught children how to look after their environment using articles, puzzles, riddles, questions and quizzes. There were special characters as well like 'Wally the Wombat' and 'Ernie the Echidna' for the children to follow on various adventures every month. Children would enjoy watching them crop up in each edition. The magazine stayed with us at Ringwood East until 1986, when due to restructuring and various other things was moved to Healesville Sanctuary where...help purchase many items needed throughout the school. These magazines were packed with really good nature information and taught children how to look after their environment using articles, puzzles, riddles, questions and quizzes. There were special characters as well like 'Wally the Wombat' and 'Ernie the Echidna' for the children to follow on various adventures every month. Children would enjoy watching them crop up in each edition. The magazine stayed with us at Ringwood East until 1986, when due to restructuring and various other things was moved to Healesville Sanctuary where ...Printed magazinesFrom “The History of Ringwood East Primary School 1924-1990” 'Nature Notes' was a children's nature magazine, produced at Ringwood East Primary School for approximately 10 years. It came to us from Blackburn Lake Primary School and before that Blackburn South Primary School. It was originally developed by Harry Hopkins in 1964. He was a District Inspector of schools and also President of the Gould League at the time. Fred Rodgers and Len Delacca were original contributors, Fred writing on native flora and Len writing on native flora [fauna]. It came to Ringwood East in 1975 with Keith Dyer, a teacher on the staff, as editor. The magazine had a large circulation, supplying to schools, private subscribers and societies as well as sending many complimentary copies to libraries, and museums; distribution was throughout Australia. The Magazine continued to grow under consequent editors, Anne Gibson (who also developed 'Probe' a junior version of 'Nature Notes' designed for grades 2 and 4), Barry Archibald, Colin Bull, Russell Hall, Deborah Brydon and Mandy Charmichael. The editors would research, compile, edit and print the magazine which was a monthly issue. The parents would then come in on a Monday to collate, fold and staple. This usually was a morning’s work but this depended on how many helping hands there were. The Wednesday was packing and posting day and in the early days the parents used to deliver the local orders to save costs. Subscribers were sought through advertisements in various school literature and material. The Parents Club received an annual remuneration for their hard work and in turn were able to help purchase many items needed throughout the school. These magazines were packed with really good nature information and taught children how to look after their environment using articles, puzzles, riddles, questions and quizzes. There were special characters as well like 'Wally the Wombat' and 'Ernie the Echidna' for the children to follow on various adventures every month. Children would enjoy watching them crop up in each edition. The magazine stayed with us at Ringwood East until 1986, when due to restructuring and various other things was moved to Healesville Sanctuary where it adopted a new format and name. From here it has since folded and so the end of 'Nature Notes'. 'Nature Notes' was a very successful magazine. Many people through the years devoted a lot of time and energy to its production and readers throughout Australia, as well as its many creators and producers during its 20-year existence, mourn its passing. Written from material supplied by Barry Archibald (editor 'Nature Notes' 1977-78) Margaret Preece & Lois Aders (parents in charge of collating and packaging during its last years of existence. -
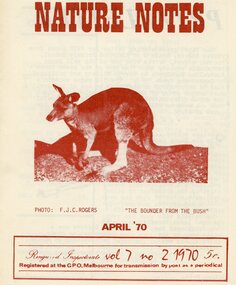 Ringwood and District Historical Society
Magazine, Nature Notes magazines 1970 (Vol 7) Issues 2 to 10
... help purchase many items needed throughout the school. These magazines were packed with really good nature information and taught children how to look after their environment using articles, puzzles, riddles, questions and quizzes. There were special characters as well like 'Wally the Wombat' and 'Ernie the Echidna' for the children to follow on various adventures every month. Children would enjoy watching them crop up in each edition. The magazine stayed with us at Ringwood East until 1986, when due to restructuring and various other things was moved to Healesville Sanctuary where...help purchase many items needed throughout the school. These magazines were packed with really good nature information and taught children how to look after their environment using articles, puzzles, riddles, questions and quizzes. There were special characters as well like 'Wally the Wombat' and 'Ernie the Echidna' for the children to follow on various adventures every month. Children would enjoy watching them crop up in each edition. The magazine stayed with us at Ringwood East until 1986, when due to restructuring and various other things was moved to Healesville Sanctuary where ...Printed magazinesFrom “The History of Ringwood East Primary School 1924-1990” 'Nature Notes' was a children's nature magazine, produced at Ringwood East Primary School for approximately 10 years. It came to us from Blackburn Lake Primary School and before that Blackburn South Primary School. It was originally developed by Harry Hopkins in 1964. He was a District Inspector of schools and also President of the Gould League at the time. Fred Rodgers and Len Delacca were original contributors, Fred writing on native flora and Len writing on native flora [fauna]. It came to Ringwood East in 1975 with Keith Dyer, a teacher on the staff, as editor. The magazine had a large circulation, supplying to schools, private subscribers and societies as well as sending many complimentary copies to libraries, and museums; distribution was throughout Australia. The Magazine continued to grow under consequent editors, Anne Gibson (who also developed 'Probe' a junior version of 'Nature Notes' designed for grades 2 and 4), Barry Archibald, Colin Bull, Russell Hall, Deborah Brydon and Mandy Charmichael. The editors would research, compile, edit and print the magazine which was a monthly issue. The parents would then come in on a Monday to collate, fold and staple. This usually was a morning’s work but this depended on how many helping hands there were. The Wednesday was packing and posting day and in the early days the parents used to deliver the local orders to save costs. Subscribers were sought through advertisements in various school literature and material. The Parents Club received an annual remuneration for their hard work and in turn were able to help purchase many items needed throughout the school. These magazines were packed with really good nature information and taught children how to look after their environment using articles, puzzles, riddles, questions and quizzes. There were special characters as well like 'Wally the Wombat' and 'Ernie the Echidna' for the children to follow on various adventures every month. Children would enjoy watching them crop up in each edition. The magazine stayed with us at Ringwood East until 1986, when due to restructuring and various other things was moved to Healesville Sanctuary where it adopted a new format and name. From here it has since folded and so the end of 'Nature Notes'. 'Nature Notes' was a very successful magazine. Many people through the years devoted a lot of time and energy to its production and readers throughout Australia, as well as its many creators and producers during its 20-year existence, mourn its passing. Written from material supplied by Barry Archibald (editor 'Nature Notes' 1977-78) Margaret Preece & Lois Aders (parents in charge of collating and packaging during its last years of existence. -
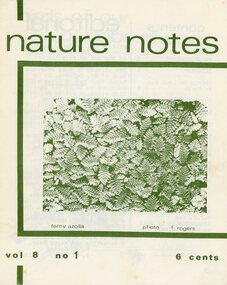 Ringwood and District Historical Society
Magazine, Nature Notes magazines 1971 (Vol 8) Issues 1 to 10
... help purchase many items needed throughout the school. These magazines were packed with really good nature information and taught children how to look after their environment using articles, puzzles, riddles, questions and quizzes. There were special characters as well like 'Wally the Wombat' and 'Ernie the Echidna' for the children to follow on various adventures every month. Children would enjoy watching them crop up in each edition. The magazine stayed with us at Ringwood East until 1986, when due to restructuring and various other things was moved to Healesville Sanctuary where...help purchase many items needed throughout the school. These magazines were packed with really good nature information and taught children how to look after their environment using articles, puzzles, riddles, questions and quizzes. There were special characters as well like 'Wally the Wombat' and 'Ernie the Echidna' for the children to follow on various adventures every month. Children would enjoy watching them crop up in each edition. The magazine stayed with us at Ringwood East until 1986, when due to restructuring and various other things was moved to Healesville Sanctuary where ...Printed magazinesFrom “The History of Ringwood East Primary School 1924-1990” 'Nature Notes' was a children's nature magazine, produced at Ringwood East Primary School for approximately 10 years. It came to us from Blackburn Lake Primary School and before that Blackburn South Primary School. It was originally developed by Harry Hopkins in 1964. He was a District Inspector of schools and also President of the Gould League at the time. Fred Rodgers and Len Delacca were original contributors, Fred writing on native flora and Len writing on native flora [fauna]. It came to Ringwood East in 1975 with Keith Dyer, a teacher on the staff, as editor. The magazine had a large circulation, supplying to schools, private subscribers and societies as well as sending many complimentary copies to libraries, and museums; distribution was throughout Australia. The Magazine continued to grow under consequent editors, Anne Gibson (who also developed 'Probe' a junior version of 'Nature Notes' designed for grades 2 and 4), Barry Archibald, Colin Bull, Russell Hall, Deborah Brydon and Mandy Charmichael. The editors would research, compile, edit and print the magazine which was a monthly issue. The parents would then come in on a Monday to collate, fold and staple. This usually was a morning’s work but this depended on how many helping hands there were. The Wednesday was packing and posting day and in the early days the parents used to deliver the local orders to save costs. Subscribers were sought through advertisements in various school literature and material. The Parents Club received an annual remuneration for their hard work and in turn were able to help purchase many items needed throughout the school. These magazines were packed with really good nature information and taught children how to look after their environment using articles, puzzles, riddles, questions and quizzes. There were special characters as well like 'Wally the Wombat' and 'Ernie the Echidna' for the children to follow on various adventures every month. Children would enjoy watching them crop up in each edition. The magazine stayed with us at Ringwood East until 1986, when due to restructuring and various other things was moved to Healesville Sanctuary where it adopted a new format and name. From here it has since folded and so the end of 'Nature Notes'. 'Nature Notes' was a very successful magazine. Many people through the years devoted a lot of time and energy to its production and readers throughout Australia, as well as its many creators and producers during its 20-year existence, mourn its passing. Written from material supplied by Barry Archibald (editor 'Nature Notes' 1977-78) Margaret Preece & Lois Aders (parents in charge of collating and packaging during its last years of existence. -
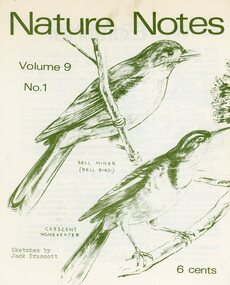 Ringwood and District Historical Society
Magazine, Nature Notes magazines 1972 (Vol 9) Issues 1, 3-4, 6 to 10
... help purchase many items needed throughout the school. These magazines were packed with really good nature information and taught children how to look after their environment using articles, puzzles, riddles, questions and quizzes. There were special characters as well like 'Wally the Wombat' and 'Ernie the Echidna' for the children to follow on various adventures every month. Children would enjoy watching them crop up in each edition. The magazine stayed with us at Ringwood East until 1986, when due to restructuring and various other things was moved to Healesville Sanctuary where...help purchase many items needed throughout the school. These magazines were packed with really good nature information and taught children how to look after their environment using articles, puzzles, riddles, questions and quizzes. There were special characters as well like 'Wally the Wombat' and 'Ernie the Echidna' for the children to follow on various adventures every month. Children would enjoy watching them crop up in each edition. The magazine stayed with us at Ringwood East until 1986, when due to restructuring and various other things was moved to Healesville Sanctuary where ...Printed magazinesFrom “The History of Ringwood East Primary School 1924-1990” 'Nature Notes' was a children's nature magazine, produced at Ringwood East Primary School for approximately 10 years. It came to us from Blackburn Lake Primary School and before that Blackburn South Primary School. It was originally developed by Harry Hopkins in 1964. He was a District Inspector of schools and also President of the Gould League at the time. Fred Rodgers and Len Delacca were original contributors, Fred writing on native flora and Len writing on native flora [fauna]. It came to Ringwood East in 1975 with Keith Dyer, a teacher on the staff, as editor. The magazine had a large circulation, supplying to schools, private subscribers and societies as well as sending many complimentary copies to libraries, and museums; distribution was throughout Australia. The Magazine continued to grow under consequent editors, Anne Gibson (who also developed 'Probe' a junior version of 'Nature Notes' designed for grades 2 and 4), Barry Archibald, Colin Bull, Russell Hall, Deborah Brydon and Mandy Charmichael. The editors would research, compile, edit and print the magazine which was a monthly issue. The parents would then come in on a Monday to collate, fold and staple. This usually was a morning’s work but this depended on how many helping hands there were. The Wednesday was packing and posting day and in the early days the parents used to deliver the local orders to save costs. Subscribers were sought through advertisements in various school literature and material. The Parents Club received an annual remuneration for their hard work and in turn were able to help purchase many items needed throughout the school. These magazines were packed with really good nature information and taught children how to look after their environment using articles, puzzles, riddles, questions and quizzes. There were special characters as well like 'Wally the Wombat' and 'Ernie the Echidna' for the children to follow on various adventures every month. Children would enjoy watching them crop up in each edition. The magazine stayed with us at Ringwood East until 1986, when due to restructuring and various other things was moved to Healesville Sanctuary where it adopted a new format and name. From here it has since folded and so the end of 'Nature Notes'. 'Nature Notes' was a very successful magazine. Many people through the years devoted a lot of time and energy to its production and readers throughout Australia, as well as its many creators and producers during its 20-year existence, mourn its passing. Written from material supplied by Barry Archibald (editor 'Nature Notes' 1977-78) Margaret Preece & Lois Aders (parents in charge of collating and packaging during its last years of existence. -
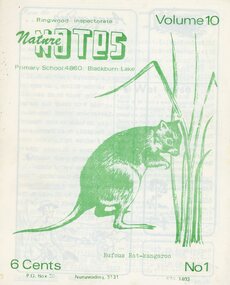 Ringwood and District Historical Society
Magazine, Nature Notes magazines 1973 (Vol 10) Issues 1-4, 6-10
... help purchase many items needed throughout the school. These magazines were packed with really good nature information and taught children how to look after their environment using articles, puzzles, riddles, questions and quizzes. There were special characters as well like 'Wally the Wombat' and 'Ernie the Echidna' for the children to follow on various adventures every month. Children would enjoy watching them crop up in each edition. The magazine stayed with us at Ringwood East until 1986, when due to restructuring and various other things was moved to Healesville Sanctuary where...help purchase many items needed throughout the school. These magazines were packed with really good nature information and taught children how to look after their environment using articles, puzzles, riddles, questions and quizzes. There were special characters as well like 'Wally the Wombat' and 'Ernie the Echidna' for the children to follow on various adventures every month. Children would enjoy watching them crop up in each edition. The magazine stayed with us at Ringwood East until 1986, when due to restructuring and various other things was moved to Healesville Sanctuary where ...Printed magazinesFrom “The History of Ringwood East Primary School 1924-1990” 'Nature Notes' was a children's nature magazine, produced at Ringwood East Primary School for approximately 10 years. It came to us from Blackburn Lake Primary School and before that Blackburn South Primary School. It was originally developed by Harry Hopkins in 1964. He was a District Inspector of schools and also President of the Gould League at the time. Fred Rodgers and Len Delacca were original contributors, Fred writing on native flora and Len writing on native flora [fauna]. It came to Ringwood East in 1975 with Keith Dyer, a teacher on the staff, as editor. The magazine had a large circulation, supplying to schools, private subscribers and societies as well as sending many complimentary copies to libraries, and museums; distribution was throughout Australia. The Magazine continued to grow under consequent editors, Anne Gibson (who also developed 'Probe' a junior version of 'Nature Notes' designed for grades 2 and 4), Barry Archibald, Colin Bull, Russell Hall, Deborah Brydon and Mandy Charmichael. The editors would research, compile, edit and print the magazine which was a monthly issue. The parents would then come in on a Monday to collate, fold and staple. This usually was a morning’s work but this depended on how many helping hands there were. The Wednesday was packing and posting day and in the early days the parents used to deliver the local orders to save costs. Subscribers were sought through advertisements in various school literature and material. The Parents Club received an annual remuneration for their hard work and in turn were able to help purchase many items needed throughout the school. These magazines were packed with really good nature information and taught children how to look after their environment using articles, puzzles, riddles, questions and quizzes. There were special characters as well like 'Wally the Wombat' and 'Ernie the Echidna' for the children to follow on various adventures every month. Children would enjoy watching them crop up in each edition. The magazine stayed with us at Ringwood East until 1986, when due to restructuring and various other things was moved to Healesville Sanctuary where it adopted a new format and name. From here it has since folded and so the end of 'Nature Notes'. 'Nature Notes' was a very successful magazine. Many people through the years devoted a lot of time and energy to its production and readers throughout Australia, as well as its many creators and producers during its 20-year existence, mourn its passing. Written from material supplied by Barry Archibald (editor 'Nature Notes' 1977-78) Margaret Preece & Lois Aders (parents in charge of collating and packaging during its last years of existence. -
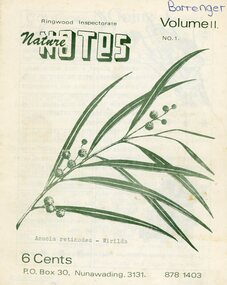 Ringwood and District Historical Society
Magazine, Nature Notes magazines 1974 (Vol 11) Issues 1-10
... help purchase many items needed throughout the school. These magazines were packed with really good nature information and taught children how to look after their environment using articles, puzzles, riddles, questions and quizzes. There were special characters as well like 'Wally the Wombat' and 'Ernie the Echidna' for the children to follow on various adventures every month. Children would enjoy watching them crop up in each edition. The magazine stayed with us at Ringwood East until 1986, when due to restructuring and various other things was moved to Healesville Sanctuary where...help purchase many items needed throughout the school. These magazines were packed with really good nature information and taught children how to look after their environment using articles, puzzles, riddles, questions and quizzes. There were special characters as well like 'Wally the Wombat' and 'Ernie the Echidna' for the children to follow on various adventures every month. Children would enjoy watching them crop up in each edition. The magazine stayed with us at Ringwood East until 1986, when due to restructuring and various other things was moved to Healesville Sanctuary where ...Printed magazinesFrom “The History of Ringwood East Primary School 1924-1990” 'Nature Notes' was a children's nature magazine, produced at Ringwood East Primary School for approximately 10 years. It came to us from Blackburn Lake Primary School and before that Blackburn South Primary School. It was originally developed by Harry Hopkins in 1964. He was a District Inspector of schools and also President of the Gould League at the time. Fred Rodgers and Len Delacca were original contributors, Fred writing on native flora and Len writing on native flora [fauna]. It came to Ringwood East in 1975 with Keith Dyer, a teacher on the staff, as editor. The magazine had a large circulation, supplying to schools, private subscribers and societies as well as sending many complimentary copies to libraries, and museums; distribution was throughout Australia. The Magazine continued to grow under consequent editors, Anne Gibson (who also developed 'Probe' a junior version of 'Nature Notes' designed for grades 2 and 4), Barry Archibald, Colin Bull, Russell Hall, Deborah Brydon and Mandy Charmichael. The editors would research, compile, edit and print the magazine which was a monthly issue. The parents would then come in on a Monday to collate, fold and staple. This usually was a morning’s work but this depended on how many helping hands there were. The Wednesday was packing and posting day and in the early days the parents used to deliver the local orders to save costs. Subscribers were sought through advertisements in various school literature and material. The Parents Club received an annual remuneration for their hard work and in turn were able to help purchase many items needed throughout the school. These magazines were packed with really good nature information and taught children how to look after their environment using articles, puzzles, riddles, questions and quizzes. There were special characters as well like 'Wally the Wombat' and 'Ernie the Echidna' for the children to follow on various adventures every month. Children would enjoy watching them crop up in each edition. The magazine stayed with us at Ringwood East until 1986, when due to restructuring and various other things was moved to Healesville Sanctuary where it adopted a new format and name. From here it has since folded and so the end of 'Nature Notes'. 'Nature Notes' was a very successful magazine. Many people through the years devoted a lot of time and energy to its production and readers throughout Australia, as well as its many creators and producers during its 20-year existence, mourn its passing. Written from material supplied by Barry Archibald (editor 'Nature Notes' 1977-78) Margaret Preece & Lois Aders (parents in charge of collating and packaging during its last years of existence. -
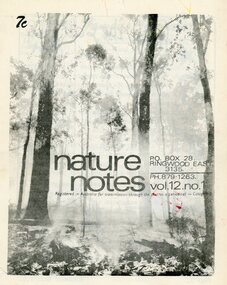 Ringwood and District Historical Society
Magazine, Nature Notes magazines 1975 (Vol 12) Issues 1-10
... help purchase many items needed throughout the school. These magazines were packed with really good nature information and taught children how to look after their environment using articles, puzzles, riddles, questions and quizzes. There were special characters as well like 'Wally the Wombat' and 'Ernie the Echidna' for the children to follow on various adventures every month. Children would enjoy watching them crop up in each edition. The magazine stayed with us at Ringwood East until 1986, when due to restructuring and various other things was moved to Healesville Sanctuary where...help purchase many items needed throughout the school. These magazines were packed with really good nature information and taught children how to look after their environment using articles, puzzles, riddles, questions and quizzes. There were special characters as well like 'Wally the Wombat' and 'Ernie the Echidna' for the children to follow on various adventures every month. Children would enjoy watching them crop up in each edition. The magazine stayed with us at Ringwood East until 1986, when due to restructuring and various other things was moved to Healesville Sanctuary where ...Printed magazinesFrom “The History of Ringwood East Primary School 1924-1990” 'Nature Notes' was a children's nature magazine, produced at Ringwood East Primary School for approximately 10 years. It came to us from Blackburn Lake Primary School and before that Blackburn South Primary School. It was originally developed by Harry Hopkins in 1964. He was a District Inspector of schools and also President of the Gould League at the time. Fred Rodgers and Len Delacca were original contributors, Fred writing on native flora and Len writing on native flora [fauna]. It came to Ringwood East in 1975 with Keith Dyer, a teacher on the staff, as editor. The magazine had a large circulation, supplying to schools, private subscribers and societies as well as sending many complimentary copies to libraries, and museums; distribution was throughout Australia. The Magazine continued to grow under consequent editors, Anne Gibson (who also developed 'Probe' a junior version of 'Nature Notes' designed for grades 2 and 4), Barry Archibald, Colin Bull, Russell Hall, Deborah Brydon and Mandy Charmichael. The editors would research, compile, edit and print the magazine which was a monthly issue. The parents would then come in on a Monday to collate, fold and staple. This usually was a morning’s work but this depended on how many helping hands there were. The Wednesday was packing and posting day and in the early days the parents used to deliver the local orders to save costs. Subscribers were sought through advertisements in various school literature and material. The Parents Club received an annual remuneration for their hard work and in turn were able to help purchase many items needed throughout the school. These magazines were packed with really good nature information and taught children how to look after their environment using articles, puzzles, riddles, questions and quizzes. There were special characters as well like 'Wally the Wombat' and 'Ernie the Echidna' for the children to follow on various adventures every month. Children would enjoy watching them crop up in each edition. The magazine stayed with us at Ringwood East until 1986, when due to restructuring and various other things was moved to Healesville Sanctuary where it adopted a new format and name. From here it has since folded and so the end of 'Nature Notes'. 'Nature Notes' was a very successful magazine. Many people through the years devoted a lot of time and energy to its production and readers throughout Australia, as well as its many creators and producers during its 20-year existence, mourn its passing. Written from material supplied by Barry Archibald (editor 'Nature Notes' 1977-78) Margaret Preece & Lois Aders (parents in charge of collating and packaging during its last years of existence. -
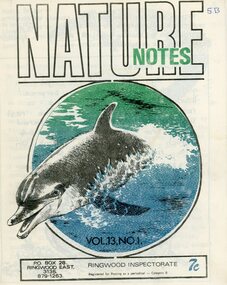 Ringwood and District Historical Society
Magazine, Nature Notes magazines 1976 (Vol 13) Issues 1-10
... help purchase many items needed throughout the school. These magazines were packed with really good nature information and taught children how to look after their environment using articles, puzzles, riddles, questions and quizzes. There were special characters as well like 'Wally the Wombat' and 'Ernie the Echidna' for the children to follow on various adventures every month. Children would enjoy watching them crop up in each edition. The magazine stayed with us at Ringwood East until 1986, when due to restructuring and various other things was moved to Healesville Sanctuary where...help purchase many items needed throughout the school. These magazines were packed with really good nature information and taught children how to look after their environment using articles, puzzles, riddles, questions and quizzes. There were special characters as well like 'Wally the Wombat' and 'Ernie the Echidna' for the children to follow on various adventures every month. Children would enjoy watching them crop up in each edition. The magazine stayed with us at Ringwood East until 1986, when due to restructuring and various other things was moved to Healesville Sanctuary where ...Printed magazinesFrom “The History of Ringwood East Primary School 1924-1990” 'Nature Notes' was a children's nature magazine, produced at Ringwood East Primary School for approximately 10 years. It came to us from Blackburn Lake Primary School and before that Blackburn South Primary School. It was originally developed by Harry Hopkins in 1964. He was a District Inspector of schools and also President of the Gould League at the time. Fred Rodgers and Len Delacca were original contributors, Fred writing on native flora and Len writing on native flora [fauna]. It came to Ringwood East in 1975 with Keith Dyer, a teacher on the staff, as editor. The magazine had a large circulation, supplying to schools, private subscribers and societies as well as sending many complimentary copies to libraries, and museums; distribution was throughout Australia. The Magazine continued to grow under consequent editors, Anne Gibson (who also developed 'Probe' a junior version of 'Nature Notes' designed for grades 2 and 4), Barry Archibald, Colin Bull, Russell Hall, Deborah Brydon and Mandy Charmichael. The editors would research, compile, edit and print the magazine which was a monthly issue. The parents would then come in on a Monday to collate, fold and staple. This usually was a morning’s work but this depended on how many helping hands there were. The Wednesday was packing and posting day and in the early days the parents used to deliver the local orders to save costs. Subscribers were sought through advertisements in various school literature and material. The Parents Club received an annual remuneration for their hard work and in turn were able to help purchase many items needed throughout the school. These magazines were packed with really good nature information and taught children how to look after their environment using articles, puzzles, riddles, questions and quizzes. There were special characters as well like 'Wally the Wombat' and 'Ernie the Echidna' for the children to follow on various adventures every month. Children would enjoy watching them crop up in each edition. The magazine stayed with us at Ringwood East until 1986, when due to restructuring and various other things was moved to Healesville Sanctuary where it adopted a new format and name. From here it has since folded and so the end of 'Nature Notes'. 'Nature Notes' was a very successful magazine. Many people through the years devoted a lot of time and energy to its production and readers throughout Australia, as well as its many creators and producers during its 20-year existence, mourn its passing. Written from material supplied by Barry Archibald (editor 'Nature Notes' 1977-78) Margaret Preece & Lois Aders (parents in charge of collating and packaging during its last years of existence. -
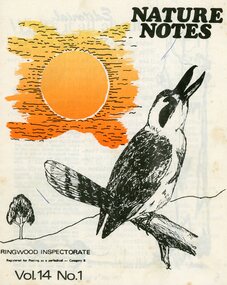 Ringwood and District Historical Society
Magazine, Nature Notes magazines 1977 (Vol 14) Issues 1-10
... help purchase many items needed throughout the school. These magazines were packed with really good nature information and taught children how to look after their environment using articles, puzzles, riddles, questions and quizzes. There were special characters as well like 'Wally the Wombat' and 'Ernie the Echidna' for the children to follow on various adventures every month. Children would enjoy watching them crop up in each edition. The magazine stayed with us at Ringwood East until 1986, when due to restructuring and various other things was moved to Healesville Sanctuary where...help purchase many items needed throughout the school. These magazines were packed with really good nature information and taught children how to look after their environment using articles, puzzles, riddles, questions and quizzes. There were special characters as well like 'Wally the Wombat' and 'Ernie the Echidna' for the children to follow on various adventures every month. Children would enjoy watching them crop up in each edition. The magazine stayed with us at Ringwood East until 1986, when due to restructuring and various other things was moved to Healesville Sanctuary where ...Printed magazinesFrom “The History of Ringwood East Primary School 1924-1990” 'Nature Notes' was a children's nature magazine, produced at Ringwood East Primary School for approximately 10 years. It came to us from Blackburn Lake Primary School and before that Blackburn South Primary School. It was originally developed by Harry Hopkins in 1964. He was a District Inspector of schools and also President of the Gould League at the time. Fred Rodgers and Len Delacca were original contributors, Fred writing on native flora and Len writing on native flora [fauna]. It came to Ringwood East in 1975 with Keith Dyer, a teacher on the staff, as editor. The magazine had a large circulation, supplying to schools, private subscribers and societies as well as sending many complimentary copies to libraries, and museums; distribution was throughout Australia. The Magazine continued to grow under consequent editors, Anne Gibson (who also developed 'Probe' a junior version of 'Nature Notes' designed for grades 2 and 4), Barry Archibald, Colin Bull, Russell Hall, Deborah Brydon and Mandy Charmichael. The editors would research, compile, edit and print the magazine which was a monthly issue. The parents would then come in on a Monday to collate, fold and staple. This usually was a morning’s work but this depended on how many helping hands there were. The Wednesday was packing and posting day and in the early days the parents used to deliver the local orders to save costs. Subscribers were sought through advertisements in various school literature and material. The Parents Club received an annual remuneration for their hard work and in turn were able to help purchase many items needed throughout the school. These magazines were packed with really good nature information and taught children how to look after their environment using articles, puzzles, riddles, questions and quizzes. There were special characters as well like 'Wally the Wombat' and 'Ernie the Echidna' for the children to follow on various adventures every month. Children would enjoy watching them crop up in each edition. The magazine stayed with us at Ringwood East until 1986, when due to restructuring and various other things was moved to Healesville Sanctuary where it adopted a new format and name. From here it has since folded and so the end of 'Nature Notes'. 'Nature Notes' was a very successful magazine. Many people through the years devoted a lot of time and energy to its production and readers throughout Australia, as well as its many creators and producers during its 20-year existence, mourn its passing. Written from material supplied by Barry Archibald (editor 'Nature Notes' 1977-78) Margaret Preece & Lois Aders (parents in charge of collating and packaging during its last years of existence.