
Showing 37 items matching "how it all started"
-
 Ballarat Tramway Museum
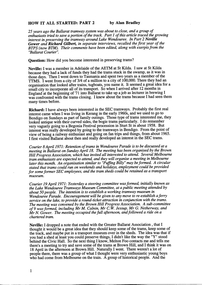
Document - Typed Notes, Alan Bradley, "How it all started: Part 2", 1996
... "How it all started: Part 2"...Items looks at the establishment of the BTPS, the construction of the depot, alternative proposals, the six trams the BTPS received, setting up the Co-Op and moving the trams in. "How it all started: Part 2" Document Typed Notes Alan Bradley ...Set of notes, ten A4 pages, prepared by Alan Bradley on the founding of the BTPS and the preservation of Ballarat Trams. Notes based on interviews with Richard Gilbert and Neville Gower, along with subsidiary notes on related items from The Courier. Part 1 in Fares Please! - 7/1996. Items looks at the establishment of the BTPS, the construction of the depot, alternative proposals, the six trams the BTPS received, setting up the Co-Op and moving the trams in.btps, preservation, depot, museum -
 Moorabbin Air Museum
Book - BRISTOL BEAUFIGHTER, Beaufighters and Mosquitos The Balkans, Malaya and the Sudan
... How it all started...Bristol Beaufighter How it all started Pilot/navigator or air gunner Canada A long way to go Mediterranean idyll Adriatic adventure The road to Mandalay Up & down the Nile Photos & maps Overview of author's flying experiences & life in WW2 RAF, circa 2016 Beaufighters and Mosquitos The Balkans, Malaya and the Sudan Book BRISTOL BEAUFIGHTER ...Overview of author's flying experiences & life in WW2 RAF, circa 2016non-fictionOverview of author's flying experiences & life in WW2 RAF, circa 2016how it all started, pilot/navigator or air gunner, canada, a long way to go, mediterranean idyll, adriatic adventure, the road to mandalay, up & down the nile, photos & maps -
 Bendigo Historical Society Inc.
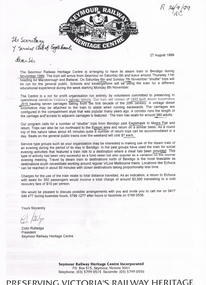
Document - LONG GULLY HISTORY GROUP COLLECTION: SEYMOUR RAILWAY HERITAGE CENTRE INCORPORATED
... The last page mentions How it all started, Our aims, Depot Facilities, Depot Visitors and Memberships....The last page mentions How it all started, Our aims, Depot Facilities, Depot Visitors and Memberships. ...A letter to The Secretary, Y Service Club of Eaglehawk from Colin Rutledge, President, Seymour Heritage Centre, dated 27 August 1999. Letter mentions the Heritage Centre is arranging to have its steam train in Bendigo during November 1999. Train and carriages are mentions and perhaps a vintage diesel locomotive. A number of short trips are mentioned and the time and cost. Some longer rides are also mentioned for the evening, preferably north of Bendigo. Number of passengers and charges are also mentioned. Two pages are also included which mentions the Fleet, Carriages and For more information. The last page mentions How it all started, Our aims, Depot Facilities, Depot Visitors and Memberships.bendigo, history, long gully history group, the long gully history group - seymour railway heritage centre incorporated, y service club of eaglehawk, colin rutledge, seymour loco steam preservation group, victorian railways locomotive depot, spirit of progress, transport corporation -
 Bendigo Historical Society Inc.
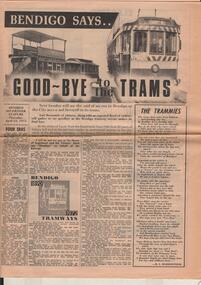
Document - BASIL MILLER COLLECTION: BENDIGO SAYS GOOD-BYE TO THE TRAMS, c1972
... The Trammies, covering Ballarat, Geelong in the form of a poem. 1927 and all that, by Basil Miller, remembering his 45 years of service with the trams. How it all started, The twin communities of Sandhurst and Eaglehawk were relatively early in considering the possibility of operating street tramways within their boundaries. ...The Trammies, covering Ballarat, Geelong in the form of a poem. 1927 and all that, by Basil Miller, remembering his 45 years of service with the trams. How it all started, The twin communities of Sandhurst and Eaglehawk were relatively early in considering the possibility of operating street tramways within their boundaries. ...13 April 1972. Bendigo Says Good-bye to the Trams. A1 sheet - double sided. Tramway history 1890 - 1972, 2 copies. At the stroke of 5 pm from Eaglehawk Town Hall clock 82 years of history will end as the last tram makes its sentimental journey to the city, while at the Bendigo Cemetery - the Quarry Hill line terminus - another tram will be leaving for its last resting place. Other articles include: Four Eras, of trams. The Trammies, covering Ballarat, Geelong in the form of a poem. 1927 and all that, by Basil Miller, remembering his 45 years of service with the trams. How it all started, The twin communities of Sandhurst and Eaglehawk were relatively early in considering the possibility of operating street tramways within their boundaries. Cabs, Battery Cars, Construction, Strikes, Bendigo 1890 to 1972 - Tramways. Man and his Mates, continued from previous page, Explosion, Touchy Task, A Quickey, Horrors. Electric in 1903, There was excitement galore in the City during April, 1903 - and the Advertiser recorded the progress of the new-fangled electric machine. One man's Memories, Tough times, humour, tragedy and comradeship - they all came flooding back as former Bendigo tramway-man Tom Griffiths recently turned the clock back. Keb Sir Keb Sir? 'Keg sir? Tram off the line,' was the call of the cabbies when a train pulled in at the Bendigo railway station. Altered Shopping Trend, With advent of the electric tram in Bendigo came change in shopping habits.bendigo trams -
 Flagstaff Hill Maritime Museum and Village
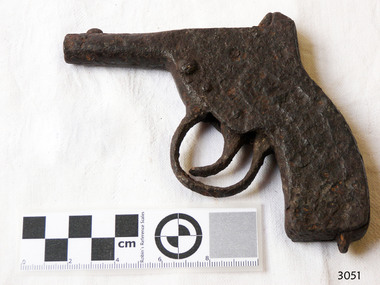
Toy Gun, 1911
... all of the famous cap gun manufacturers either sold out to other toy companies or started manufacturing other types of toys. Before it was deemed dangerous or politically incorrect for young children to point pistols at each other and fire at will, cap guns were a staple of toy chests. The item demonstrates how ...This cap gun was found by a local Warrnambool resident in about 1971. Cap guns first appeared following the end of the American Civil War in the mid-1860s, when firearms companies experimented with toy guns to stay in business. Cap guns became especially popular when the heroes of cinema and television rode through the West ridding the territories of villains. Many cap guns were named after or endorsed by leading matinee idols like Roy Rogers, Gene Autry, Hopalong Cassidy, The Lone Ranger, Tonto, Dale Evans, Marshal Matt Dillon, or any of countless others. Cap guns became popular after the second world war and children all over the world emulated their heroes and collected and played with these toy guns. Eventually all of the famous cap gun manufacturers either sold out to other toy companies or started manufacturing other types of toys. Before it was deemed dangerous or politically incorrect for young children to point pistols at each other and fire at will, cap guns were a staple of toy chests. The item demonstrates how society has changed its attitudes and now regard these types of toys as morally unacceptable as they tend to promote violent attitudes towards others. The item demonstrates significantly how our societies social attitudes have changed since world war two from general societal acceptance of such toys to one of distaste.Toy gun; cap gun. Cast iron toy pistol with metal trigger. Name "National" in raised embossing in the casting on the handle on both sides of the gun. Made in 1911."National" flagstaff hill, warrnambool, shipwrecked-coast, flagstaff-hill, flagstaff-hill-maritime-museum, maritime-museum, shipwreck-coast, flagstaff-hill-maritime-village, toys, cap gun, national fireworks distrubuting company, toy guns, toy pistol -
 Federation University Historical Collection
Booklet, The Ballarat School of Mines and Industries 1870-1920 Jubilee Booklet, 1920 (estimated)
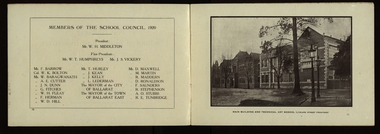
... all parts of the globe. School of Mines boys have played a great part in developing the mining fields of Western Australia, South Australia, and africa, while old students who have made a name in their profession are constantly dropping in to see how the old place is getting along. It was not to be expected, however, that the Ballarat School would be left without rivals, its very success inspiring competition. Mining Schools were started...all parts of the globe. School of Mines boys have played a great part in developing the mining fields of Western Australia, South Australia, and africa, while old students who have made a name in their profession are constantly dropping in to see how the old place is getting along. It was not to be expected, however, that the Ballarat School would be left without rivals, its very success inspiring competition. Mining Schools were started ...The first school of Mines in Australia was established at Ballarat in 1870. At the time of its jubilee (1930) the following people were members of the School Council: W.H. Middleton (President), W.T. Humphreys (VP), J.S. Vickery (VP), F. Barrow, Col. W.K. Bolton, William Baragwanath, A.E. Cutter, J.N. Dunn, G. Fitches, W.H. Fleay, F. Herman. W.D. Hill, T. Hurley, K. Kean. J. Kelly, L. Lederman, Mayor of Ballarat, Mayour of Ballarat East, D. Maxwell, M. Martin, R. Maddern, D. Ronaldson, F. Saunders, R. Stephenson, A.O. Stubbs, R.E. Tunbridge. The School Staff in 1920 comprised: Herbert H. Smith, Walter Rowbotham, Reginald L. Cutter, M.C. Young, Hilda Wardle, M. Wiliamson, P.S. Richards, L.H. Archibald, J. Woods, Ken Moss, W. Kenneth, Mrs McIlvena. B. Robinson, S. Rowe, E. Hope-Jones, Miss Abrams, L.St.G.P. Austin, Alfred Mica Smith, J.R. Pound, Herbert R. Murphy, N.H. Junner, Maurice Copland, L.H. Archibald, E.J.A. McConnon, Newton King, D.m. Hull, T.R. Gordon, John M. Sutherland, T.K. Jebb, Dick Richards, C. Tonkin, A.W. Steane, J. Paterson, H.W. Malin, R.V. Maddison, S.M. Mayo, F.A. King, W.H. Steane, T.R. Gordon, T.A. Williams, H. Waldron, G. Black, E.J. McConnon, R.V. Duncan. R. Cutter, E.G. Vawdrey, Hilda WardleWhite stapled booklet - landscape format - 20pp + soft covers with blue writing. Includes an historical sketch of the Ballarat School of Mines. Contains images of the school from around 1920. The history outlined in the booklet follows: 'Ballarat has helped to influence the life and destinies of Australia in many ways, the recital of which would perhaps prove tedious to the citizens of less favoured localities! However, it can be said, without much fear of contradiction, that only less known thought Australia than its fame as a gold field is the reputation won for it by its school of Mines, ... Ballarat was still quite a new place when the School was founded, but a very propserous and popular place all the same, with a go-ahead lot of citizens brim full of the spirit of enterprise which seemsto animate mining populations generally. Money was plentiful, and they launched out into ventures, which later, were to develop and take the place of the gold mines, while what is more to the point, they understood the value of education. the old digging days were passing away. So far as Ballarat itself was concerned the day of the cradle and tin dish had already passed into an antiquity "as dead and distant as the age of the Tubal Caon," said dir redmond Barry on declaring the School open. Mining had become a serious business, and the mining engineer, the metallurgist, and the geologist had become a power in the land. In these circumstances the suggestions to found a School of Mines met with ready acceptance. The late Mr James M. Bickett had the honor of bringing forward the proposition at a meeting of the Ballarat Mining Board in October, 1869. it was agreed to, and the Government, having been approached for assistance, granted a lease of the old Supreme Court buildings at a nominal reantal. A modest sum, including 100 pounds from the Borough Council of Ballarat West, was subscribed by a number of sympathisers, and on the 26th October, 1870, the inaugural address was delivered by Sir Redmond Barry, the first President of the School. Classes were commenced on the 23rd January, 1871. The students at first were mostly adults. They were chiefly men emloyed at the mines, who had the wisdom and energy to devote their spare time to study, and, though their attendance was somewhat irregular, they made very good progress. Old prints which have been preserved show them at work at furnaces, big bearded men of the old-fashioned type of miner. It is interesting to note that among those who gave evidence and encouragement was Sir Roderick Murchison, who many years before had advised Cornish miners to emigrate to Australia to search for gold, and who in 1848 was in possession of gold ore sent from this country. Sir Roderick sent a parcel of books for the library, and gave useful advice as to the curriculum which should be adopted. The Museum, which now contains a most valuable collection of minerals, was one of the first things attended to, and the reports presented to the Council from time to time speak of additions being made from all parts of the world. New equipment was constantly being added to the School, a good deal of assay work was done, and some specimens were sent from the East Indies for examination as far back as 1873. By this time there was a difficulty in providing accomodation for the students who wished to enrol, and the number of instructors had grown from two to four. In 1882 the first building was being erected on what was then part of the gaol reserve. A little more than ten years afterwards a buildnig formerly serving as a Methodist Church was absorbed, while later on, the demand for accomodation increasing, the attack upon the gaol was renewed. The School continued to grow in reputation and size, and became the science centre of the district, and in 1889 a learge new building was opened by Sir Alexander Peacock. Students came from over seas as well as from all the States of Australia, and after going through their courses they took with them the name and fame of the old School to all parts of the globe. School of Mines boys have played a great part in developing the mining fields of Western Australia, South Australia, and africa, while old students who have made a name in their profession are constantly dropping in to see how the old place is getting along. It was not to be expected, however, that the Ballarat School would be left without rivals, its very success inspiring competition. Mining Schools were started in other parts of Australia, and, at the same time, Victoria ceased to hold first place as a mining state. On the other hand there was a great advance in manufacturing, and the demand for technicaly trained men became a great and as insistent as ever it had been for trained mining men. The Council was quick to adapt the school to the new conditions, and the result is seen in the institution, which is one of Ballarat's proudest possession. Instruction is given in all branches of technical work, and the classes are filled with students who are building up for Ballarat a reputation as an industrial centre, which promises to equal that which it formerly held as a mining town. Owing to its bracing climate, its abundant opportunities for recreations, and its accessibilty, Ballarat as a city is an ideal place for educational purposed, and is yearly becoming more and more appreciated throughout the State. The chairman of one of Ballarat's biggests industries claims that the workman can do twice the day's work here that he can do in Melbourne. he was a little enthusiastic over it, perhaps, but it is a well-known fact that the healthy and invigourating Ballarat climate is conducive to both physical and mental activity, and the records of the School provide ample proof of it. One of the most interesting and successful branches of the School of Mines and Industries - if the name be enlarged with the enlargement of its scope - is the Technical Art School. "The City of Statues" has from its earliest days been a stronghold of art. Art schools have flourised here, and in 1905 the Education Department came to the conclusion that the best thing to do with them was to place them under the management of the School of Mines Council. A magnificent new Technical Art School was built at a cost of some 12,000 pounds on the site of the old Supreme Court building, and was formally opened on the 23rd July, 1915. The results have not only been justified but surpassed all anticipations. The most comprehensive list of subjects is taught, and this list is constantly added to. Students have flocked to the art School, which may be said to occupy a unique position in Australia, and its record of success is really astonishing. Its students supply art teachers for the newer schools that are being built, and many occupy leading positinos in important business houses. So well is its reputation known that orders are constantly being received, not only from Victoria, but from other States, for honor boards and challenge shields to be designed and made. The most recent addition to the School of Mines and Industries is the Junior Technical School, for which a new building is now being erected on a portion of the gaol site, transferred to the School of Mines Counci by the Government. At the present moment temporary quarters are being occupied. Some students after passing through the Junior School go straight to employment, continuing perhaps to attend the evening trade classes, while others move on to the senior School. In a review of the work of the School of Mines mention must be made of a series of industrial research carried out under supervision of the Principal. One in particular, regarding the suitability of the local ores for the manufacture of pigments attracted much attention, while the experiemtns on the manufacture of white potery from Victorian clayes were considered of sufficient importance by the Federal Advisory Council of Science and Industry to warrant the appointment of a special investigator. The results of these have been most encouraging, and may have far-reaching consequences. The vocational training of returned soldiers also should not be overlooked. The work was taken in hand from the first, before the Repatriation Department gave assistance, and now with the help of the department of the School has become one of the largest vocational training centres in Victoria outside of Melbourne. The soldiers, trained in a variety of occupations, have made remarkable progress, and already considerable numbers have found employment in local workshops and factories. To sum up, the School is divided into the following departments, each well staffed and equipped: - The School of Mines, science, and Engineering; the Techncial Art School, the Boys' Junior Technical School, the Girl's Preparatory Technical Classes, Trade Classes, and the Commercial School. The school of Mines, science and Engineering, comprises the following branches: - Mining, Metallurgy, Geology, Electrical Engineering, Civil Engineering, Mechanical Engineering, Applied Chemistry, and Pharmacy. Battery treatments, Cyanide Testing, Smelting, Assays, and Clay Testing from a regular part of the School's work. Students gaining qualifications obtain concession in their courses at the university, should they proceed there to continue their studies. The technical Art school curriculum includes training in all branches of pictorial and applied art, an Architectural Diploma Course, a Draughtman's Course, technical Art teachers' Course, Photography,Ticket Writing, Art Metal Work, Woodcarving, Needlework, and Leather work. The Trade Classes give instruction in Telephone Mechanics, telegraphy, Carpentry, Cabinet Making, Plumbing, Blacksmithing, Fitting, Electric Wiring, and Printing. Numerous Scholarships are offered every year, and altogether students will find few places to equal the Ballarat School of Mines and Industries as a training place for their life's work. One of the first in the continent to be established, its Jubilee finds it still in the front rank, keeping pace with the times, and offering to the youths of this country the means of taking advantage of Australia's teeming opportunities. william, battery, smith, herbert, drawing from the antique, ballarat school of mines botanical gardens, ballarat school of mines, redmond barry, alfred mica smith, james bickett, museum, dick richards, ballarat junior technical school, s m b, ballarat school of mines and industries, ballarat technical art school, model mine, james m bickett, j m bickett, roderick murchison, vocational training rooms, wesley church, methodist church, alexander peacock, lathes, repatriation, repatriatin department, war service, school council, baragwanath, gold mining, mining laboratory, plaster cast, r.w. richards, anniversary, jubilee -
 Flagstaff Hill Maritime Museum and Village
Domestic object - Jug
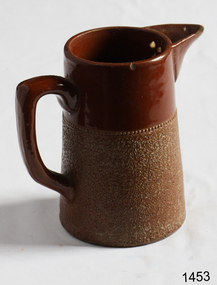
... start to ensure your ideas will work, what order you might do things, how you could achieve the look you are seeking and any other technical data required! Step Two – Making Clay is thixotropic. This means that as you work with it, the clay first gets sloppier and wetter, before is begins to dry in the atmosphere. For most things, you simply can’t do all...start to ensure your ideas will work, what order you might do things, how you could achieve the look you are seeking and any other technical data required! Step Two – Making Clay is thixotropic. This means that as you work with it, the clay first gets sloppier and wetter, before is begins to dry in the atmosphere. For most things, you simply can’t do all ...The Process of Making Pottery Decorating, Firing, Glazing, Making, Technical There is a rhythm and flow to clay. It can’t be done all at once! Even the making process! It can take weeks to get everything done, especially if you can only work on your pottery once a week! Even though we have three hour classes, it’s often just not enough time! Here is an overview of some of the processes so you have a bit more grasp on some of the technical stuff! Step One – Design There are SO many ideas out there for making stuff in clay! From delicate porcelain jewellery, through to heavy sculptural work and everything in between. Deciding your direction is sometimes not that easy – when you first start, try everything, you will naturally gravitate to the style that you enjoy! The options and variations are endless and can get a wee bit overwhelming too! Check in with me before you start to ensure your ideas will work, what order you might do things, how you could achieve the look you are seeking and any other technical data required! Step Two – Making Clay is thixotropic. This means that as you work with it, the clay first gets sloppier and wetter, before is begins to dry in the atmosphere. For most things, you simply can’t do all parts of the project at once. An example of work order might look like: Get last weeks work out from the shelves Prepare clay for today’s work – roll your clay, prepare balls for throwing, make the first stage of a pinch pot) Clean up last week’s work and put it on the shelf for bisque firing Check that you have any glazing to do – and do enough of it that you will have time to finish your main project Do the next step of your next project – there might be a further step that can’t be complete immediately, in that case, wrap your work well and put onto the shelves. Letting your work rest for a while can really help keep your work clean and professional looking. Many things require bagging under plastic to keep it ready for work the next week – put your name on the outside of the bag so you can find your work easily. We have stickers and markers. Consider how you want to decorate your work – coloured slip can be applied at a fairly wet stage (remembering that it will make your work even wetter!). Trying to apply slip to dry clay won’t work! If you want to do sgraffito – you will need to keep the work leather hard (a state of dryness where you can still work the clay with a little effort and a little water and care). Step Three – Drying Most of the time your work can go into the rack uncovered to let it dry out for the following week. If you want to continue forming or shaping you will need to double bag your work – put your work on a suitable sized bat and put the bat in a bag so the base of the bag is under the bat, then put another bag over the top of the work and tuck the top of the bag under the bat. If you want to trim (or turn) your thrown work the following week, it should also be double bagged. If your work is large, delicate, or of uneven thicknesses, you should lightly cover your work for drying. When considering the drying process, bare in mind the weather, humidity and wind! The hotter and dryer, the faster things dry and work can dry unevenly in the shelves – this can lead to cracking – another time to lightly cover your work for drying. Step Four – Trimming and Cleaning Up Your work is dry! It is called greenware now and it is at it’s most fragile! Handle everything with two hands. I often refer to soft hands – keep everything gentle and with your fingers spread as much as possible. Try to not pick up things like plates too much, and always with both hands! Before your work can be bisque fired it should be “cleaned up”. You work won’t go into the kiln if it has sharp edges – when glazed, sharp edges turn into razor blades! Use a piece of fly wire to rub the work all over – this will scratch a little so be light handed. Use a knife or metal kidney to scrape any areas that require a bit more dynamic treatment than the fly wire offers! Finally, a very light wipe over with a slightly damp sponge can help soften and soothe all of your edges and dags! Trimming thrown work: If you are planning to trim (or turn) your thrown work (and you should be), make sure you bag it well – your work should be leather hard to almost dry for easiest trimming. Use this step to finish the work completely – use a metal kidney to polish the surface, or a slightly damp sponge to give a freshly thrown look. Wipe the sponge around the rim after trimming, and check the inside of the pot for dags! Trimming slip cast work: Usually I will trim the rims of your work on the wheel the following day to make that stage easier, however you will still need to check your work for lumps and bumps. Last but not least – check that your name is still clearly on the bottom of your work. Step Five – Bisque Firing When the work is completely dry it can go into the bisque kiln. The bisque kiln is fired to 1000°C. This process burns off the water in the clay as well as some of the chemically bound water. The structure of the clay is not altered that much at this temperature. Inside the bisque kiln, the work is stacked a little, small bowl inside a larger bowl and onto a heavy plate. Smaller items like decorations or drink coasters might get stacked several high. Consideration is paid to the weight of the stack and shape of the work. A bisque kiln can fire about one and a half times the amount of work that the glaze kiln can fire. The firing takes about 10 hours to complete the cycle and about two days to cool down. Once it has been emptied the work is placed in the glaze room ready for you to decorate! Step Six – Glazing Decorating your work with colour can be a lot of fun – and time consuming! There are three main options for surface treatment at this stage: Oxide Washes Underglazes Glazes Washes and underglazes do not “glaze” the work – It will still need a layer of glaze to fully seal the clay (washes don’t need glaze on surfaces not designed for food or liquid as they can gloss up a little on their own). Underglazes are stable colourants that turn out pretty much how they look in the jar. They can be mixed with each other to form other colours and can be used like water colours to paint onto your work. Mostly they should have a clear glaze on top to seal them. Oxides are a different species – the pink oxide (cobalt) wash turns out bright blue for instance. They don’t always need a glaze on top, and some glazes can change the colour of the wash! The glazes need no other “glaze” on top! Be careful of unknown glaze interactions – you can put any combination of glaze in a bowl or on a plate, but only a single glaze on the outside of any vertical surface! Glazes are a chemical reaction under heat. We don’t know the exact chemicals in the Mayco glazes we use. I can guess by the way they interact with each other, however, on the whole, you need to test every idea you have, and not run the test on a vertical surface! Simply put, glaze is a layer of glass like substance that bonds with the clay underneath. Clay is made of silica, alumina and water. Glaze is made of mostly silica. Silica has a melting point of 1700°C and we fire to 1240°C. The silica requires a “flux” to help it melt at the lower temperature. Fluxes can be all sorts of chemicals – a common one is calcium – calcium has a melting point of 2500°C, however, together they both melt at a much lower temperature! Colourants are metal oxides like cobalt (blue), chrome (green through black), copper (green, blue, even red!), manganese (black, purple and pink) iron (red brown), etc. Different chemicals in the glaze can have dramatic effects. for example, barium carbonate (which we don’t use) turns manganese bright pink! Other elements can turn manganese dioxide brown, blue, purple and reddish brown. Manganese dioxide is a flux in and of itself as well. So, glazes that get their black and purple colours, often interact with other glazes and RUN! Our mirror black is a good example – it mixes really well with many glazes because it fluxes them – causes them to melt faster. It will also bring out many beautiful colours in the glazes because it’s black colouring most definitely comes from manganese dioxide! Glaze chemistry is a whole subject on it’s own! We use commercial Mayco glazes on purpose – for their huge range of colour possibilities, stability, cool interactions, artistic freedom with the ability to easily brush the glazes on and ease of use. We currently have almost 50 glazes on hand! A major project is to test the interactions of all glazes with each other. That is 2,500 test tiles!!!! I’m going to make the wall behind the wheels the feature wall of pretty colours! Step Seven – Glaze (Gloss or sometimes called “Glost”) Firing Most of the time this is the final stage of making your creation (but not always!) The glaze kiln goes to 1240°C. This is called cone 6, or midrange. It is the low end of stoneware temperatures. Stoneware clays and glazes are typically fired at cone 8 – 10, that is 1260 – 1290°C. The energy requirement to go from 1240°C to 1280°C is almost a 30% more! Our clay is formulated to vitrify (mature, turn “glass-like”) at 1240°, as are our glazes. A glaze kiln take around 12 hours to reach temperature and two to three days to cool down. Sometimes a third firing process is required – this is for decoration that is added to work after the glaze firing. For example – adding precious metals and lustres. this firing temperature is usually around 600 – 800°C depending upon the techniques being used. There are many students interested in gold and silver trims – we will be doing this third type of firing soon! After firing your work will be in the student finished work shelves. Remember to pay for it before you head out the door! There is a small extra charge for using porcelain clay (it’s more than twice the price of regular clay), and for any third firing process! Once your work has been fired it can not turn back into clay for millennia – so don’t fire it if you don’t like it! Put it in the bucket for recycling. https://firebirdstudios.com.au/the-process-of-making-pottery/The form of the jug has been in use for many centuries.Stoneware jug. Two tone brown glaze with pierced lip behind spout. Spout chipped.None.flagstaff hill, warrnambool, shipwrecked-coast, flagstaff-hill, flagstaff-hill-maritime-museum, maritime-museum, shipwreck-coast, flagstaff-hill-maritime-village, jug, ceramic jug -
 Flagstaff Hill Maritime Museum and Village
Domestic object - Bowl, Late 19th or early 20th Century
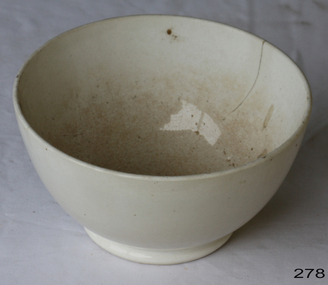
... start to ensure your ideas will work, what order you might do things, how you could achieve the look you are seeking and any other technical data required! Step Two – Making Clay is thixotropic. This means that as you work with it, the clay first gets sloppier and wetter, before is begins to dry in the atmosphere. For most things, you simply can’t do all...start to ensure your ideas will work, what order you might do things, how you could achieve the look you are seeking and any other technical data required! Step Two – Making Clay is thixotropic. This means that as you work with it, the clay first gets sloppier and wetter, before is begins to dry in the atmosphere. For most things, you simply can’t do all ...The Process of Making Pottery Decorating, Firing, Glazing, Making, Technical There is a rhythm and flow to clay. It can’t be done all at once! Even the making process! It can take weeks to get everything done, especially if you can only work on your pottery once a week! Even though we have three hour classes, it’s often just not enough time! Here is an overview of some of the processes so you have a bit more grasp on some of the technical stuff! Step One – Design There are SO many ideas out there for making stuff in clay! From delicate porcelain jewellery, through to heavy sculptural work and everything in between. Deciding your direction is sometimes not that easy – when you first start, try everything, you will naturally gravitate to the style that you enjoy! The options and variations are endless and can get a wee bit overwhelming too! Check in with me before you start to ensure your ideas will work, what order you might do things, how you could achieve the look you are seeking and any other technical data required! Step Two – Making Clay is thixotropic. This means that as you work with it, the clay first gets sloppier and wetter, before is begins to dry in the atmosphere. For most things, you simply can’t do all parts of the project at once. An example of work order might look like: Get last weeks work out from the shelves Prepare clay for today’s work – roll your clay, prepare balls for throwing, make the first stage of a pinch pot) Clean up last week’s work and put it on the shelf for bisque firing Check that you have any glazing to do – and do enough of it that you will have time to finish your main project Do the next step of your next project – there might be a further step that can’t be complete immediately, in that case, wrap your work well and put onto the shelves. Letting your work rest for a while can really help keep your work clean and professional looking. Many things require bagging under plastic to keep it ready for work the next week – put your name on the outside of the bag so you can find your work easily. We have stickers and markers. Consider how you want to decorate your work – coloured slip can be applied at a fairly wet stage (remembering that it will make your work even wetter!). Trying to apply slip to dry clay won’t work! If you want to do sgraffito – you will need to keep the work leather hard (a state of dryness where you can still work the clay with a little effort and a little water and care). Step Three – Drying Most of the time your work can go into the rack uncovered to let it dry out for the following week. If you want to continue forming or shaping you will need to double bag your work – put your work on a suitable sized bat and put the bat in a bag so the base of the bag is under the bat, then put another bag over the top of the work and tuck the top of the bag under the bat. If you want to trim (or turn) your thrown work the following week, it should also be double bagged. If your work is large, delicate, or of uneven thicknesses, you should lightly cover your work for drying. When considering the drying process, bare in mind the weather, humidity and wind! The hotter and dryer, the faster things dry and work can dry unevenly in the shelves – this can lead to cracking – another time to lightly cover your work for drying. Step Four – Trimming and Cleaning Up Your work is dry! It is called greenware now and it is at it’s most fragile! Handle everything with two hands. I often refer to soft hands – keep everything gentle and with your fingers spread as much as possible. Try to not pick up things like plates too much, and always with both hands! Before your work can be bisque fired it should be “cleaned up”. You work won’t go into the kiln if it has sharp edges – when glazed, sharp edges turn into razor blades! Use a piece of fly wire to rub the work all over – this will scratch a little so be light handed. Use a knife or metal kidney to scrape any areas that require a bit more dynamic treatment than the fly wire offers! Finally, a very light wipe over with a slightly damp sponge can help soften and soothe all of your edges and dags! Trimming thrown work: If you are planning to trim (or turn) your thrown work (and you should be), make sure you bag it well – your work should be leather hard to almost dry for easiest trimming. Use this step to finish the work completely – use a metal kidney to polish the surface, or a slightly damp sponge to give a freshly thrown look. Wipe the sponge around the rim after trimming, and check the inside of the pot for dags! Trimming slip cast work: Usually I will trim the rims of your work on the wheel the following day to make that stage easier, however you will still need to check your work for lumps and bumps. Last but not least – check that your name is still clearly on the bottom of your work. Step Five – Bisque Firing When the work is completely dry it can go into the bisque kiln. The bisque kiln is fired to 1000°C. This process burns off the water in the clay as well as some of the chemically bound water. The structure of the clay is not altered that much at this temperature. Inside the bisque kiln, the work is stacked a little, small bowl inside a larger bowl and onto a heavy plate. Smaller items like decorations or drink coasters might get stacked several high. Consideration is paid to the weight of the stack and shape of the work. A bisque kiln can fire about one and a half times the amount of work that the glaze kiln can fire. The firing takes about 10 hours to complete the cycle and about two days to cool down. Once it has been emptied the work is placed in the glaze room ready for you to decorate! Step Six – Glazing Decorating your work with colour can be a lot of fun – and time consuming! There are three main options for surface treatment at this stage: Oxide Washes Underglazes Glazes Washes and underglazes do not “glaze” the work – It will still need a layer of glaze to fully seal the clay (washes don’t need glaze on surfaces not designed for food or liquid as they can gloss up a little on their own). Underglazes are stable colourants that turn out pretty much how they look in the jar. They can be mixed with each other to form other colours and can be used like water colours to paint onto your work. Mostly they should have a clear glaze on top to seal them. Oxides are a different species – the pink oxide (cobalt) wash turns out bright blue for instance. They don’t always need a glaze on top, and some glazes can change the colour of the wash! The glazes need no other “glaze” on top! Be careful of unknown glaze interactions – you can put any combination of glaze in a bowl or on a plate, but only a single glaze on the outside of any vertical surface! Glazes are a chemical reaction under heat. We don’t know the exact chemicals in the Mayco glazes we use. I can guess by the way they interact with each other, however, on the whole, you need to test every idea you have, and not run the test on a vertical surface! Simply put, glaze is a layer of glass like substance that bonds with the clay underneath. Clay is made of silica, alumina and water. Glaze is made of mostly silica. Silica has a melting point of 1700°C and we fire to 1240°C. The silica requires a “flux” to help it melt at the lower temperature. Fluxes can be all sorts of chemicals – a common one is calcium – calcium has a melting point of 2500°C, however, together they both melt at a much lower temperature! Colourants are metal oxides like cobalt (blue), chrome (green through black), copper (green, blue, even red!), manganese (black, purple and pink) iron (red brown), etc. Different chemicals in the glaze can have dramatic effects. for example, barium carbonate (which we don’t use) turns manganese bright pink! Other elements can turn manganese dioxide brown, blue, purple and reddish brown. Manganese dioxide is a flux in and of itself as well. So, glazes that get their black and purple colours, often interact with other glazes and RUN! Our mirror black is a good example – it mixes really well with many glazes because it fluxes them – causes them to melt faster. It will also bring out many beautiful colours in the glazes because it’s black colouring most definitely comes from manganese dioxide! Glaze chemistry is a whole subject on it’s own! We use commercial Mayco glazes on purpose – for their huge range of colour possibilities, stability, cool interactions, artistic freedom with the ability to easily brush the glazes on and ease of use. We currently have almost 50 glazes on hand! A major project is to test the interactions of all glazes with each other. That is 2,500 test tiles!!!! I’m going to make the wall behind the wheels the feature wall of pretty colours! Step Seven – Glaze (Gloss or sometimes called “Glost”) Firing Most of the time this is the final stage of making your creation (but not always!) The glaze kiln goes to 1240°C. This is called cone 6, or midrange. It is the low end of stoneware temperatures. Stoneware clays and glazes are typically fired at cone 8 – 10, that is 1260 – 1290°C. The energy requirement to go from 1240°C to 1280°C is almost a 30% more! Our clay is formulated to vitrify (mature, turn “glass-like”) at 1240°, as are our glazes. A glaze kiln take around 12 hours to reach temperature and two to three days to cool down. Sometimes a third firing process is required – this is for decoration that is added to work after the glaze firing. For example – adding precious metals and lustres. this firing temperature is usually around 600 – 800°C depending upon the techniques being used. There are many students interested in gold and silver trims – we will be doing this third type of firing soon! After firing your work will be in the student finished work shelves. Remember to pay for it before you head out the door! There is a small extra charge for using porcelain clay (it’s more than twice the price of regular clay), and for any third firing process! Once your work has been fired it can not turn back into clay for millennia – so don’t fire it if you don’t like it! Put it in the bucket for recycling. https://firebirdstudios.com.au/the-process-of-making-pottery/ The bowl is an example of kitchenware used in the 19th century and still in use today.Bowl white ceramic. Crack on side. Badly stained.Backstamp very faint and unable to be read.flagstaff hill, warrnambool, shipwrecked-coast, flagstaff-hill, flagstaff-hill-maritime-museum, maritime-museum, shipwreck-coast, flagstaff-hill-maritime-village, mixing bowl, food preparation, kitchen equipment, ceramic -
 Flagstaff Hill Maritime Museum and Village
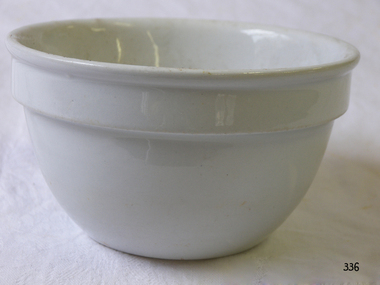
Domestic object - Bowl
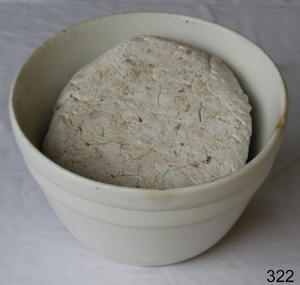
... start to ensure your ideas will work, what order you might do things, how you could achieve the look you are seeking and any other technical data required! Step Two – Making Clay is thixotropic. This means that as you work with it, the clay first gets sloppier and wetter, before is begins to dry in the atmosphere. For most things, you simply can’t do all...start to ensure your ideas will work, what order you might do things, how you could achieve the look you are seeking and any other technical data required! Step Two – Making Clay is thixotropic. This means that as you work with it, the clay first gets sloppier and wetter, before is begins to dry in the atmosphere. For most things, you simply can’t do all ...The Process of Making Pottery Decorating, Firing, Glazing, Making, Technical There is a rhythm and flow to clay. It can’t be done all at once! Even the making process! It can take weeks to get everything done, especially if you can only work on your pottery once a week! Even though we have three hour classes, it’s often just not enough time! Here is an overview of some of the processes so you have a bit more grasp on some of the technical stuff! Step One – Design There are SO many ideas out there for making stuff in clay! From delicate porcelain jewellery, through to heavy sculptural work and everything in between. Deciding your direction is sometimes not that easy – when you first start, try everything, you will naturally gravitate to the style that you enjoy! The options and variations are endless and can get a wee bit overwhelming too! Check in with me before you start to ensure your ideas will work, what order you might do things, how you could achieve the look you are seeking and any other technical data required! Step Two – Making Clay is thixotropic. This means that as you work with it, the clay first gets sloppier and wetter, before is begins to dry in the atmosphere. For most things, you simply can’t do all parts of the project at once. An example of work order might look like: Get last weeks work out from the shelves Prepare clay for today’s work – roll your clay, prepare balls for throwing, make the first stage of a pinch pot) Clean up last week’s work and put it on the shelf for bisque firing Check that you have any glazing to do – and do enough of it that you will have time to finish your main project Do the next step of your next project – there might be a further step that can’t be complete immediately, in that case, wrap your work well and put onto the shelves. Letting your work rest for a while can really help keep your work clean and professional looking. Many things require bagging under plastic to keep it ready for work the next week – put your name on the outside of the bag so you can find your work easily. We have stickers and markers. Consider how you want to decorate your work – coloured slip can be applied at a fairly wet stage (remembering that it will make your work even wetter!). Trying to apply slip to dry clay won’t work! If you want to do sgraffito – you will need to keep the work leather hard (a state of dryness where you can still work the clay with a little effort and a little water and care). Step Three – Drying Most of the time your work can go into the rack uncovered to let it dry out for the following week. If you want to continue forming or shaping you will need to double bag your work – put your work on a suitable sized bat and put the bat in a bag so the base of the bag is under the bat, then put another bag over the top of the work and tuck the top of the bag under the bat. If you want to trim (or turn) your thrown work the following week, it should also be double bagged. If your work is large, delicate, or of uneven thicknesses, you should lightly cover your work for drying. When considering the drying process, bare in mind the weather, humidity and wind! The hotter and dryer, the faster things dry and work can dry unevenly in the shelves – this can lead to cracking – another time to lightly cover your work for drying. Step Four – Trimming and Cleaning Up Your work is dry! It is called greenware now and it is at it’s most fragile! Handle everything with two hands. I often refer to soft hands – keep everything gentle and with your fingers spread as much as possible. Try to not pick up things like plates too much, and always with both hands! Before your work can be bisque fired it should be “cleaned up”. You work won’t go into the kiln if it has sharp edges – when glazed, sharp edges turn into razor blades! Use a piece of fly wire to rub the work all over – this will scratch a little so be light handed. Use a knife or metal kidney to scrape any areas that require a bit more dynamic treatment than the fly wire offers! Finally, a very light wipe over with a slightly damp sponge can help soften and soothe all of your edges and dags! Trimming thrown work: If you are planning to trim (or turn) your thrown work (and you should be), make sure you bag it well – your work should be leather hard to almost dry for easiest trimming. Use this step to finish the work completely – use a metal kidney to polish the surface, or a slightly damp sponge to give a freshly thrown look. Wipe the sponge around the rim after trimming, and check the inside of the pot for dags! Trimming slip cast work: Usually I will trim the rims of your work on the wheel the following day to make that stage easier, however you will still need to check your work for lumps and bumps. Last but not least – check that your name is still clearly on the bottom of your work. Step Five – Bisque Firing When the work is completely dry it can go into the bisque kiln. The bisque kiln is fired to 1000°C. This process burns off the water in the clay as well as some of the chemically bound water. The structure of the clay is not altered that much at this temperature. Inside the bisque kiln, the work is stacked a little, small bowl inside a larger bowl and onto a heavy plate. Smaller items like decorations or drink coasters might get stacked several high. Consideration is paid to the weight of the stack and shape of the work. A bisque kiln can fire about one and a half times the amount of work that the glaze kiln can fire. The firing takes about 10 hours to complete the cycle and about two days to cool down. Once it has been emptied the work is placed in the glaze room ready for you to decorate! Step Six – Glazing Decorating your work with colour can be a lot of fun – and time consuming! There are three main options for surface treatment at this stage: Oxide Washes Underglazes Glazes Washes and underglazes do not “glaze” the work – It will still need a layer of glaze to fully seal the clay (washes don’t need glaze on surfaces not designed for food or liquid as they can gloss up a little on their own). Underglazes are stable colourants that turn out pretty much how they look in the jar. They can be mixed with each other to form other colours and can be used like water colours to paint onto your work. Mostly they should have a clear glaze on top to seal them. Oxides are a different species – the pink oxide (cobalt) wash turns out bright blue for instance. They don’t always need a glaze on top, and some glazes can change the colour of the wash! The glazes need no other “glaze” on top! Be careful of unknown glaze interactions – you can put any combination of glaze in a bowl or on a plate, but only a single glaze on the outside of any vertical surface! Glazes are a chemical reaction under heat. We don’t know the exact chemicals in the Mayco glazes we use. I can guess by the way they interact with each other, however, on the whole, you need to test every idea you have, and not run the test on a vertical surface! Simply put, glaze is a layer of glass like substance that bonds with the clay underneath. Clay is made of silica, alumina and water. Glaze is made of mostly silica. Silica has a melting point of 1700°C and we fire to 1240°C. The silica requires a “flux” to help it melt at the lower temperature. Fluxes can be all sorts of chemicals – a common one is calcium – calcium has a melting point of 2500°C, however, together they both melt at a much lower temperature! Colourants are metal oxides like cobalt (blue), chrome (green through black), copper (green, blue, even red!), manganese (black, purple and pink) iron (red brown), etc. Different chemicals in the glaze can have dramatic effects. for example, barium carbonate (which we don’t use) turns manganese bright pink! Other elements can turn manganese dioxide brown, blue, purple and reddish brown. Manganese dioxide is a flux in and of itself as well. So, glazes that get their black and purple colours, often interact with other glazes and RUN! Our mirror black is a good example – it mixes really well with many glazes because it fluxes them – causes them to melt faster. It will also bring out many beautiful colours in the glazes because it’s black colouring most definitely comes from manganese dioxide! Glaze chemistry is a whole subject on it’s own! We use commercial Mayco glazes on purpose – for their huge range of colour possibilities, stability, cool interactions, artistic freedom with the ability to easily brush the glazes on and ease of use. We currently have almost 50 glazes on hand! A major project is to test the interactions of all glazes with each other. That is 2,500 test tiles!!!! I’m going to make the wall behind the wheels the feature wall of pretty colours! Step Seven – Glaze (Gloss or sometimes called “Glost”) Firing Most of the time this is the final stage of making your creation (but not always!) The glaze kiln goes to 1240°C. This is called cone 6, or midrange. It is the low end of stoneware temperatures. Stoneware clays and glazes are typically fired at cone 8 – 10, that is 1260 – 1290°C. The energy requirement to go from 1240°C to 1280°C is almost a 30% more! Our clay is formulated to vitrify (mature, turn “glass-like”) at 1240°, as are our glazes. A glaze kiln take around 12 hours to reach temperature and two to three days to cool down. Sometimes a third firing process is required – this is for decoration that is added to work after the glaze firing. For example – adding precious metals and lustres. this firing temperature is usually around 600 – 800°C depending upon the techniques being used. There are many students interested in gold and silver trims – we will be doing this third type of firing soon! After firing your work will be in the student finished work shelves. Remember to pay for it before you head out the door! There is a small extra charge for using porcelain clay (it’s more than twice the price of regular clay), and for any third firing process! Once your work has been fired it can not turn back into clay for millennia – so don’t fire it if you don’t like it! Put it in the bucket for recycling. https://firebirdstudios.com.au/the-process-of-making-pottery/ This bowl is an example of kitchenware used in the 19th century and still in use today.Bowl white ceramic plain that has two sets of edging around lip. Inside bowl has plaster designed to look like cooking mixture.flagstaff hill, warrnambool, shipwrecked-coast, flagstaff-hill, flagstaff-hill-maritime-museum, maritime-museum, shipwreck-coast, flagstaff-hill-maritime-village, kitchen equipment, ceramic -
 Flagstaff Hill Maritime Museum and Village
Domestic object - Bowl, J & G Meakin, Late 19th or early 20th Century
... start to ensure your ideas will work, what order you might do things, how you could achieve the look you are seeking and any other technical data required! Step Two – Making Clay is thixotropic. This means that as you work with it, the clay first gets sloppier and wetter, before is begins to dry in the atmosphere. For most things, you simply can’t do all...start to ensure your ideas will work, what order you might do things, how you could achieve the look you are seeking and any other technical data required! Step Two – Making Clay is thixotropic. This means that as you work with it, the clay first gets sloppier and wetter, before is begins to dry in the atmosphere. For most things, you simply can’t do all ...The Process of Making Pottery Decorating, Firing, Glazing, Making, Technical There is a rhythm and flow to clay. It can’t be done all at once! Even the making process! It can take weeks to get everything done, especially if you can only work on your pottery once a week! Even though we have three hour classes, it’s often just not enough time! Here is an overview of some of the processes so you have a bit more grasp on some of the technical stuff! Step One – Design There are SO many ideas out there for making stuff in clay! From delicate porcelain jewellery, through to heavy sculptural work and everything in between. Deciding your direction is sometimes not that easy – when you first start, try everything, you will naturally gravitate to the style that you enjoy! The options and variations are endless and can get a wee bit overwhelming too! Check in with me before you start to ensure your ideas will work, what order you might do things, how you could achieve the look you are seeking and any other technical data required! Step Two – Making Clay is thixotropic. This means that as you work with it, the clay first gets sloppier and wetter, before is begins to dry in the atmosphere. For most things, you simply can’t do all parts of the project at once. An example of work order might look like: Get last weeks work out from the shelves Prepare clay for today’s work – roll your clay, prepare balls for throwing, make the first stage of a pinch pot) Clean up last week’s work and put it on the shelf for bisque firing Check that you have any glazing to do – and do enough of it that you will have time to finish your main project Do the next step of your next project – there might be a further step that can’t be complete immediately, in that case, wrap your work well and put onto the shelves. Letting your work rest for a while can really help keep your work clean and professional looking. Many things require bagging under plastic to keep it ready for work the next week – put your name on the outside of the bag so you can find your work easily. We have stickers and markers. Consider how you want to decorate your work – coloured slip can be applied at a fairly wet stage (remembering that it will make your work even wetter!). Trying to apply slip to dry clay won’t work! If you want to do sgraffito – you will need to keep the work leather hard (a state of dryness where you can still work the clay with a little effort and a little water and care). Step Three – Drying Most of the time your work can go into the rack uncovered to let it dry out for the following week. If you want to continue forming or shaping you will need to double bag your work – put your work on a suitable sized bat and put the bat in a bag so the base of the bag is under the bat, then put another bag over the top of the work and tuck the top of the bag under the bat. If you want to trim (or turn) your thrown work the following week, it should also be double bagged. If your work is large, delicate, or of uneven thicknesses, you should lightly cover your work for drying. When considering the drying process, bare in mind the weather, humidity and wind! The hotter and dryer, the faster things dry and work can dry unevenly in the shelves – this can lead to cracking – another time to lightly cover your work for drying. Step Four – Trimming and Cleaning Up Your work is dry! It is called greenware now and it is at it’s most fragile! Handle everything with two hands. I often refer to soft hands – keep everything gentle and with your fingers spread as much as possible. Try to not pick up things like plates too much, and always with both hands! Before your work can be bisque fired it should be “cleaned up”. You work won’t go into the kiln if it has sharp edges – when glazed, sharp edges turn into razor blades! Use a piece of fly wire to rub the work all over – this will scratch a little so be light handed. Use a knife or metal kidney to scrape any areas that require a bit more dynamic treatment than the fly wire offers! Finally, a very light wipe over with a slightly damp sponge can help soften and soothe all of your edges and dags! Trimming thrown work: If you are planning to trim (or turn) your thrown work (and you should be), make sure you bag it well – your work should be leather hard to almost dry for easiest trimming. Use this step to finish the work completely – use a metal kidney to polish the surface, or a slightly damp sponge to give a freshly thrown look. Wipe the sponge around the rim after trimming, and check the inside of the pot for dags! Trimming slip cast work: Usually I will trim the rims of your work on the wheel the following day to make that stage easier, however you will still need to check your work for lumps and bumps. Last but not least – check that your name is still clearly on the bottom of your work. Step Five – Bisque Firing When the work is completely dry it can go into the bisque kiln. The bisque kiln is fired to 1000°C. This process burns off the water in the clay as well as some of the chemically bound water. The structure of the clay is not altered that much at this temperature. Inside the bisque kiln, the work is stacked a little, small bowl inside a larger bowl and onto a heavy plate. Smaller items like decorations or drink coasters might get stacked several high. Consideration is paid to the weight of the stack and shape of the work. A bisque kiln can fire about one and a half times the amount of work that the glaze kiln can fire. The firing takes about 10 hours to complete the cycle and about two days to cool down. Once it has been emptied the work is placed in the glaze room ready for you to decorate! Step Six – Glazing Decorating your work with colour can be a lot of fun – and time consuming! There are three main options for surface treatment at this stage: Oxide Washes Underglazes Glazes Washes and underglazes do not “glaze” the work – It will still need a layer of glaze to fully seal the clay (washes don’t need glaze on surfaces not designed for food or liquid as they can gloss up a little on their own). Underglazes are stable colourants that turn out pretty much how they look in the jar. They can be mixed with each other to form other colours and can be used like water colours to paint onto your work. Mostly they should have a clear glaze on top to seal them. Oxides are a different species – the pink oxide (cobalt) wash turns out bright blue for instance. They don’t always need a glaze on top, and some glazes can change the colour of the wash! The glazes need no other “glaze” on top! Be careful of unknown glaze interactions – you can put any combination of glaze in a bowl or on a plate, but only a single glaze on the outside of any vertical surface! Glazes are a chemical reaction under heat. We don’t know the exact chemicals in the Mayco glazes we use. I can guess by the way they interact with each other, however, on the whole, you need to test every idea you have, and not run the test on a vertical surface! Simply put, glaze is a layer of glass like substance that bonds with the clay underneath. Clay is made of silica, alumina and water. Glaze is made of mostly silica. Silica has a melting point of 1700°C and we fire to 1240°C. The silica requires a “flux” to help it melt at the lower temperature. Fluxes can be all sorts of chemicals – a common one is calcium – calcium has a melting point of 2500°C, however, together they both melt at a much lower temperature! Colourants are metal oxides like cobalt (blue), chrome (green through black), copper (green, blue, even red!), manganese (black, purple and pink) iron (red brown), etc. Different chemicals in the glaze can have dramatic effects. for example, barium carbonate (which we don’t use) turns manganese bright pink! Other elements can turn manganese dioxide brown, blue, purple and reddish brown. Manganese dioxide is a flux in and of itself as well. So, glazes that get their black and purple colours, often interact with other glazes and RUN! Our mirror black is a good example – it mixes really well with many glazes because it fluxes them – causes them to melt faster. It will also bring out many beautiful colours in the glazes because it’s black colouring most definitely comes from manganese dioxide! Glaze chemistry is a whole subject on it’s own! We use commercial Mayco glazes on purpose – for their huge range of colour possibilities, stability, cool interactions, artistic freedom with the ability to easily brush the glazes on and ease of use. We currently have almost 50 glazes on hand! A major project is to test the interactions of all glazes with each other. That is 2,500 test tiles!!!! I’m going to make the wall behind the wheels the feature wall of pretty colours! Step Seven – Glaze (Gloss or sometimes called “Glost”) Firing Most of the time this is the final stage of making your creation (but not always!) The glaze kiln goes to 1240°C. This is called cone 6, or midrange. It is the low end of stoneware temperatures. Stoneware clays and glazes are typically fired at cone 8 – 10, that is 1260 – 1290°C. The energy requirement to go from 1240°C to 1280°C is almost a 30% more! Our clay is formulated to vitrify (mature, turn “glass-like”) at 1240°, as are our glazes. A glaze kiln take around 12 hours to reach temperature and two to three days to cool down. Sometimes a third firing process is required – this is for decoration that is added to work after the glaze firing. For example – adding precious metals and lustres. this firing temperature is usually around 600 – 800°C depending upon the techniques being used. There are many students interested in gold and silver trims – we will be doing this third type of firing soon! After firing your work will be in the student finished work shelves. Remember to pay for it before you head out the door! There is a small extra charge for using porcelain clay (it’s more than twice the price of regular clay), and for any third firing process! Once your work has been fired it can not turn back into clay for millennia – so don’t fire it if you don’t like it! Put it in the bucket for recycling. https://firebirdstudios.com.au/the-process-of-making-pottery/This bowl was made by renowned pottery company J & G Meakin of England. The firm was established in the mid-1800's. The bowl is an example of kitchenware used in the 19th century and still in use today.Bowl; white ceramic, round and tapering inwards towards base. Made by J and G Meakin England.On base, 'Ironstone China Reg SOL 391413' with symbolflagstaff hill, flagstaff hill maritime museum and village, warrnambool, maritime museum, maritime village, great ocean road, shipwreck coast, mixing bowl, food preparation, j & g meakin, pottery, stoke-on-trent, kitchen equipment, ceramic -
Federation University Historical Collection
Booklet, The Ballarat School of Mines and Industries 1870-1920 Jubilee Booklet, 1920 (estimated)
... all parts of the globe. School of Mines boys have played a great part in developing the mining fields of Western Australia, South Australia, and africa, while old students who have made a name in their profession are constantly dropping in to see how the old place is getting along. It was not to be expected, however, that the Ballarat School would be left without rivals, its very success inspiring competition. Mining Schools were started...all parts of the globe. School of Mines boys have played a great part in developing the mining fields of Western Australia, South Australia, and africa, while old students who have made a name in their profession are constantly dropping in to see how the old place is getting along. It was not to be expected, however, that the Ballarat School would be left without rivals, its very success inspiring competition. Mining Schools were started ...The first school of Mines in Australia was established at Ballarat in 1870. At the time of its jubilee (1930) the following people were members of the School Council: W.H. Middleton (President), W.T. Humphreys (VP), J.S. Vickery (VP), F. Barrow, Col. W.K. Bolton, William Baragwanath, A.E. Cutter, J.N. Dunn, G. Fitches, W.H. Fleay, F. Herman. W.D. Hill, T. Hurley, K. Kean. J. Kelly, L. Lederman, Mayor of Ballarat, Mayour of Ballarat East, D. Maxwell, M. Martin, R. Maddern, D. Ronaldson, F. Saunders, R. Stephenson, A.O. Stubbs, R.E. Tunbridge. The School Staff in 1920 comprised: Herbert H. Smith, Walter Rowbotham, Reginald L. Cutter, M.C. Young, Hilda Wardle, M. Wiliamson, P.S. Richards, L.H. Archibald, J. Woods, Ken Moss, W. Kenneth, Mrs McIlvena. B. Robinson, S. Rowe, E. Hope-Jones, Miss Abrams, L.St.G.P. Austin, Alfred Mica Smith, J.R. Pound, Herbert R. Murphy, N.H. Junner, Maurice Copland, L.H. Archibald, E.J.A. McConnon, Newton King, D.m. Hull, T.R. Gordon, John M. Sutherland, T.K. Jebb, Dick Richards, C. Tonkin, A.W. Steane, J. Paterson, H.W. Malin, R.V. Maddison, S.M. Mayo, F.A. King, W.H. Steane, T.R. Gordon, T.A. Williams, H. Waldron, G. Black, E.J. McConnon, R.V. Duncan. R. Cutter, E.G. Vawdrey, Hilda WardleWhite stapled booklet - landscape format - 20pp + soft covers with blue writing. Includes an historical sketch of the Ballarat School of Mines. Contains images of the school from around 1920. The history outlined in the booklet follows: 'Ballarat has helped to influence the life and destinies of Australia in many ways, the recital of which would perhaps prove tedious to the citizens of less favoured localities! However, it can be said, without much fear of contradiction, that only less known thought Australia than its fame as a gold field is the reputation won for it by its school of Mines, ... Ballarat was still quite a new place when the School was founded, but a very propserous and popular place all the same, with a go-ahead lot of citizens brim full of the spirit of enterprise which seemsto animate mining populations generally. Money was plentiful, and they launched out into ventures, which later, were to develop and take the place of the gold mines, while what is more to the point, they understood the value of education. the old digging days were passing away. So far as Ballarat itself was concerned the day of the cradle and tin dish had already passed into an antiquity "as dead and distant as the age of the Tubal Caon," said dir redmond Barry on declaring the School open. Mining had become a serious business, and the mining engineer, the metallurgist, and the geologist had become a power in the land. In these circumstances the suggestions to found a School of Mines met with ready acceptance. The late Mr James M. Bickett had the honor of bringing forward the proposition at a meeting of the Ballarat Mining Board in October, 1869. it was agreed to, and the Government, having been approached for assistance, granted a lease of the old Supreme Court buildings at a nominal reantal. A modest sum, including 100 pounds from the Borough Council of Ballarat West, was subscribed by a number of sympathisers, and on the 26th October, 1870, the inaugural address was delivered by Sir Redmond Barry, the first President of the School. Classes were commenced on the 23rd January, 1871. The students at first were mostly adults. They were chiefly men emloyed at the mines, who had the wisdom and energy to devote their spare time to study, and, though their attendance was somewhat irregular, they made very good progress. Old prints which have been preserved show them at work at furnaces, big bearded men of the old-fashioned type of miner. It is interesting to note that among those who gave evidence and encouragement was Sir Roderick Murchison, who many years before had advised Cornish miners to emigrate to Australia to search for gold, and who in 1848 was in possession of gold ore sent from this country. Sir Roderick sent a parcel of books for the library, and gave useful advice as to the curriculum which should be adopted. The Museum, which now contains a most valuable collection of minerals, was one of the first things attended to, and the reports presented to the Council from time to time speak of additions being made from all parts of the world. New equipment was constantly being added to the School, a good deal of assay work was done, and some specimens were sent from the East Indies for examination as far back as 1873. By this time there was a difficulty in providing accomodation for the students who wished to enrol, and the number of instructors had grown from two to four. In 1882 the first building was being erected on what was then part of the gaol reserve. A little more than ten years afterwards a buildnig formerly serving as a Methodist Church was absorbed, while later on, the demand for accomodation increasing, the attack upon the gaol was renewed. The School continued to grow in reputation and size, and became the science centre of the district, and in 1889 a learge new building was opened by Sir Alexander Peacock. Students came from over seas as well as from all the States of Australia, and after going through their courses they took with them the name and fame of the old School to all parts of the globe. School of Mines boys have played a great part in developing the mining fields of Western Australia, South Australia, and africa, while old students who have made a name in their profession are constantly dropping in to see how the old place is getting along. It was not to be expected, however, that the Ballarat School would be left without rivals, its very success inspiring competition. Mining Schools were started in other parts of Australia, and, at the same time, Victoria ceased to hold first place as a mining state. On the other hand there was a great advance in manufacturing, and the demand for technicaly trained men became a great and as insistent as ever it had been for trained mining men. The Council was quick to adapt the school to the new conditions, and the result is seen in the institution, which is one of Ballarat's proudest possession. Instruction is given in all branches of technical work, and the classes are filled with students who are building up for Ballarat a reputation as an industrial centre, which promises to equal that which it formerly held as a mining town. Owing to its bracing climate, its abundant opportunities for recreations, and its accessibilty, Ballarat as a city is an ideal place for educational purposed, and is yearly becoming more and more appreciated throughout the State. The chairman of one of Ballarat's biggests industries claims that the workman can do twice the day's work here that he can do in Melbourne. he was a little enthusiastic over it, perhaps, but it is a well-known fact that the healthy and invigourating Ballarat climate is conducive to both physical and mental activity, and the records of the School provide ample proof of it. One of the most interesting and successful branches of the School of Mines and Industries - if the name be enlarged with the enlargement of its scope - is the Technical Art School. "The City of Statues" has from its earliest days been a stronghold of art. Art schools have flourised here, and in 1905 the Education Department came to the conclusion that the best thing to do with them was to place them under the management of the School of Mines Council. A magnificent new Technical Art School was built at a cost of some 12,000 pounds on the site of the old Supreme Court building, and was formally opened on the 23rd July, 1915. The results have not only been justified but surpassed all anticipations. The most comprehensive list of subjects is taught, and this list is constantly added to. Students have flocked to the art School, which may be said to occupy a unique position in Australia, and its record of success is really astonishing. Its students supply art teachers for the newer schools that are being built, and many occupy leading positinos in important business houses. So well is its reputation known that orders are constantly being received, not only from Victoria, but from other States, for honor boards and challenge shields to be designed and made. The most recent addition to the School of Mines and Industries is the Junior Technical School, for which a new building is now being erected on a portion of the gaol site, transferred to the School of Mines Counci by the Government. At the present moment temporary quarters are being occupied. Some students after passing through the Junior School go straight to employment, continuing perhaps to attend the evening trade classes, while others move on to the senior School. In a review of the work of the School of Mines mention must be made of a series of industrial research carried out under supervision of the Principal. One in particular, regarding the suitability of the local ores for the manufacture of pigments attracted much attention, while the experiemtns on the manufacture of white potery from Victorian clayes were considered of sufficient importance by the Federal Advisory Council of Science and Industry to warrant the appointment of a special investigator. The results of these have been most encouraging, and may have far-reaching consequences. The vocational training of returned soldiers also should not be overlooked. The work was taken in hand from the first, before the Repatriation Department gave assistance, and now with the help of the department of the School has become one of the largest vocational training centres in Victoria outside of Melbourne. The soldiers, trained in a variety of occupations, have made remarkable progress, and already considerable numbers have found employment in local workshops and factories. To sum up, the School is divided into the following departments, each well staffed and equipped: - The School of Mines, science, and Engineering; the Techncial Art School, the Boys' Junior Technical School, the Girl's Preparatory Technical Classes, Trade Classes, and the Commercial School. The school of Mines, science and Engineering, comprises the following branches: - Mining, Metallurgy, Geology, Electrical Engineering, Civil Engineering, Mechanical Engineering, Applied Chemistry, and Pharmacy. Battery treatments, Cyanide Testing, Smelting, Assays, and Clay Testing from a regular part of the School's work. Students gaining qualifications obtain concession in their courses at the university, should they proceed there to continue their studies. The technical Art school curriculum includes training in all branches of pictorial and applied art, an Architectural Diploma Course, a Draughtman's Course, technical Art teachers' Course, Photography,Ticket Writing, Art Metal Work, Woodcarving, Needlework, and Leather work. The Trade Classes give instruction in Telephone Mechanics, telegraphy, Carpentry, Cabinet Making, Plumbing, Blacksmithing, Fitting, Electric Wiring, and Printing. Numerous Scholarships are offered every year, and altogether students will find few places to equal the Ballarat School of Mines and Industries as a training place for their life's work. One of the first in the continent to be established, its Jubilee finds it still in the front rank, keeping pace with the times, and offering to the youths of this country the means of taking advantage of Australia's teeming opportunities. william, battery, smith, herbert, drawing from the antique, ballarat school of mines botanical gardens, ballarat school of mines, redmond barry, alfred mica smith, james bickett, museum, dick richards, ballarat junior technical school, s m b, ballarat school of mines and industries, ballarat technical art school, model mine, james m bickett, j m bickett, roderick murchison, vocational training rooms, wesley church, methodist church, alexander peacock, lathes, repatriation, repatriatin department, war service, school council, baragwanath, gold mining, mining laboratory, plaster cast, r.w. richards, anniversary, jubilee -
 Flagstaff Hill Maritime Museum and Village
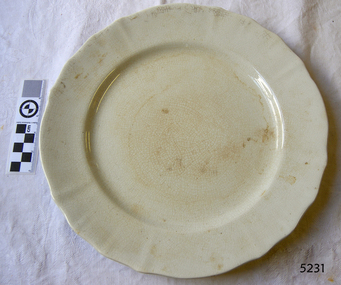
Domestic object - Plate
... start to ensure your ideas will work, what order you might do things, how you could achieve the look you are seeking and any other technical data required! Step Two – Making Clay is thixotropic. This means that as you work with it, the clay first gets sloppier and wetter, before is begins to dry in the atmosphere. For most things, you simply can’t do all...start to ensure your ideas will work, what order you might do things, how you could achieve the look you are seeking and any other technical data required! Step Two – Making Clay is thixotropic. This means that as you work with it, the clay first gets sloppier and wetter, before is begins to dry in the atmosphere. For most things, you simply can’t do all ...The Process of Making Pottery Decorating, Firing, Glazing, Making, Technical There is a rhythm and flow to clay. It can’t be done all at once! Even the making process! It can take weeks to get everything done, especially if you can only work on your pottery once a week! Even though we have three hour classes, it’s often just not enough time! Here is an overview of some of the processes so you have a bit more grasp on some of the technical stuff! Step One – Design There are SO many ideas out there for making stuff in clay! From delicate porcelain jewellery, through to heavy sculptural work and everything in between. Deciding your direction is sometimes not that easy – when you first start, try everything, you will naturally gravitate to the style that you enjoy! The options and variations are endless and can get a wee bit overwhelming too! Check in with me before you start to ensure your ideas will work, what order you might do things, how you could achieve the look you are seeking and any other technical data required! Step Two – Making Clay is thixotropic. This means that as you work with it, the clay first gets sloppier and wetter, before is begins to dry in the atmosphere. For most things, you simply can’t do all parts of the project at once. An example of work order might look like: Get last weeks work out from the shelves Prepare clay for today’s work – roll your clay, prepare balls for throwing, make the first stage of a pinch pot) Clean up last week’s work and put it on the shelf for bisque firing Check that you have any glazing to do – and do enough of it that you will have time to finish your main project Do the next step of your next project – there might be a further step that can’t be complete immediately, in that case, wrap your work well and put onto the shelves. Letting your work rest for a while can really help keep your work clean and professional looking. Many things require bagging under plastic to keep it ready for work the next week – put your name on the outside of the bag so you can find your work easily. We have stickers and markers. Consider how you want to decorate your work – coloured slip can be applied at a fairly wet stage (remembering that it will make your work even wetter!). Trying to apply slip to dry clay won’t work! If you want to do sgraffito – you will need to keep the work leather hard (a state of dryness where you can still work the clay with a little effort and a little water and care). Step Three – Drying Most of the time your work can go into the rack uncovered to let it dry out for the following week. If you want to continue forming or shaping you will need to double bag your work – put your work on a suitable sized bat and put the bat in a bag so the base of the bag is under the bat, then put another bag over the top of the work and tuck the top of the bag under the bat. If you want to trim (or turn) your thrown work the following week, it should also be double bagged. If your work is large, delicate, or of uneven thicknesses, you should lightly cover your work for drying. When considering the drying process, bare in mind the weather, humidity and wind! The hotter and dryer, the faster things dry and work can dry unevenly in the shelves – this can lead to cracking – another time to lightly cover your work for drying. Step Four – Trimming and Cleaning Up Your work is dry! It is called greenware now and it is at it’s most fragile! Handle everything with two hands. I often refer to soft hands – keep everything gentle and with your fingers spread as much as possible. Try to not pick up things like plates too much, and always with both hands! Before your work can be bisque fired it should be “cleaned up”. You work won’t go into the kiln if it has sharp edges – when glazed, sharp edges turn into razor blades! Use a piece of fly wire to rub the work all over – this will scratch a little so be light handed. Use a knife or metal kidney to scrape any areas that require a bit more dynamic treatment than the fly wire offers! Finally, a very light wipe over with a slightly damp sponge can help soften and soothe all of your edges and dags! Trimming thrown work: If you are planning to trim (or turn) your thrown work (and you should be), make sure you bag it well – your work should be leather hard to almost dry for easiest trimming. Use this step to finish the work completely – use a metal kidney to polish the surface, or a slightly damp sponge to give a freshly thrown look. Wipe the sponge around the rim after trimming, and check the inside of the pot for dags! Trimming slip cast work: Usually I will trim the rims of your work on the wheel the following day to make that stage easier, however you will still need to check your work for lumps and bumps. Last but not least – check that your name is still clearly on the bottom of your work. Step Five – Bisque Firing When the work is completely dry it can go into the bisque kiln. The bisque kiln is fired to 1000°C. This process burns off the water in the clay as well as some of the chemically bound water. The structure of the clay is not altered that much at this temperature. Inside the bisque kiln, the work is stacked a little, small bowl inside a larger bowl and onto a heavy plate. Smaller items like decorations or drink coasters might get stacked several high. Consideration is paid to the weight of the stack and shape of the work. A bisque kiln can fire about one and a half times the amount of work that the glaze kiln can fire. The firing takes about 10 hours to complete the cycle and about two days to cool down. Once it has been emptied the work is placed in the glaze room ready for you to decorate! Step Six – Glazing Decorating your work with colour can be a lot of fun – and time consuming! There are three main options for surface treatment at this stage: Oxide Washes Underglazes Glazes Washes and underglazes do not “glaze” the work – It will still need a layer of glaze to fully seal the clay (washes don’t need glaze on surfaces not designed for food or liquid as they can gloss up a little on their own). Underglazes are stable colourants that turn out pretty much how they look in the jar. They can be mixed with each other to form other colours and can be used like water colours to paint onto your work. Mostly they should have a clear glaze on top to seal them. Oxides are a different species – the pink oxide (cobalt) wash turns out bright blue for instance. They don’t always need a glaze on top, and some glazes can change the colour of the wash! The glazes need no other “glaze” on top! Be careful of unknown glaze interactions – you can put any combination of glaze in a bowl or on a plate, but only a single glaze on the outside of any vertical surface! Glazes are a chemical reaction under heat. We don’t know the exact chemicals in the Mayco glazes we use. I can guess by the way they interact with each other, however, on the whole, you need to test every idea you have, and not run the test on a vertical surface! Simply put, glaze is a layer of glass like substance that bonds with the clay underneath. Clay is made of silica, alumina and water. Glaze is made of mostly silica. Silica has a melting point of 1700°C and we fire to 1240°C. The silica requires a “flux” to help it melt at the lower temperature. Fluxes can be all sorts of chemicals – a common one is calcium – calcium has a melting point of 2500°C, however, together they both melt at a much lower temperature! Colourants are metal oxides like cobalt (blue), chrome (green through black), copper (green, blue, even red!), manganese (black, purple and pink) iron (red brown), etc. Different chemicals in the glaze can have dramatic effects. for example, barium carbonate (which we don’t use) turns manganese bright pink! Other elements can turn manganese dioxide brown, blue, purple and reddish brown. Manganese dioxide is a flux in and of itself as well. So, glazes that get their black and purple colours, often interact with other glazes and RUN! Our mirror black is a good example – it mixes really well with many glazes because it fluxes them – causes them to melt faster. It will also bring out many beautiful colours in the glazes because it’s black colouring most definitely comes from manganese dioxide! Glaze chemistry is a whole subject on it’s own! We use commercial Mayco glazes on purpose – for their huge range of colour possibilities, stability, cool interactions, artistic freedom with the ability to easily brush the glazes on and ease of use. We currently have almost 50 glazes on hand! A major project is to test the interactions of all glazes with each other. That is 2,500 test tiles!!!! I’m going to make the wall behind the wheels the feature wall of pretty colours! Step Seven – Glaze (Gloss or sometimes called “Glost”) Firing Most of the time this is the final stage of making your creation (but not always!) The glaze kiln goes to 1240°C. This is called cone 6, or midrange. It is the low end of stoneware temperatures. Stoneware clays and glazes are typically fired at cone 8 – 10, that is 1260 – 1290°C. The energy requirement to go from 1240°C to 1280°C is almost a 30% more! Our clay is formulated to vitrify (mature, turn “glass-like”) at 1240°, as are our glazes. A glaze kiln take around 12 hours to reach temperature and two to three days to cool down. Sometimes a third firing process is required – this is for decoration that is added to work after the glaze firing. For example – adding precious metals and lustres. this firing temperature is usually around 600 – 800°C depending upon the techniques being used. There are many students interested in gold and silver trims – we will be doing this third type of firing soon! After firing your work will be in the student finished work shelves. Remember to pay for it before you head out the door! There is a small extra charge for using porcelain clay (it’s more than twice the price of regular clay), and for any third firing process! Once your work has been fired it can not turn back into clay for millennia – so don’t fire it if you don’t like it! Put it in the bucket for recycling. https://firebirdstudios.com.au/the-process-of-making-pottery/Ceramics have evolved over thousands of years.White earthenware dinner plate. Crazing evident all over.Backstamped ‘Made in England S LTD’flagstaff hill, warrnambool, shipwrecked-coast, flagstaff-hill, flagstaff-hill-maritime-museum, maritime-museum, shipwreck-coast, flagstaff-hill-maritime-village, ceramics, tableware -
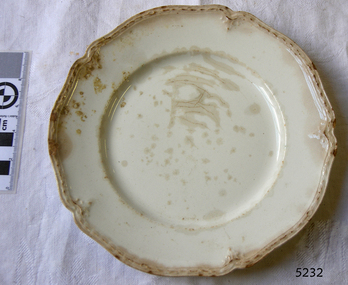 Flagstaff Hill Maritime Museum and Village
Domestic object - Plate, Johnson Bros
... start to ensure your ideas will work, what order you might do things, how you could achieve the look you are seeking and any other technical data required! Step Two – Making Clay is thixotropic. This means that as you work with it, the clay first gets sloppier and wetter, before is begins to dry in the atmosphere. For most things, you simply can’t do all...start to ensure your ideas will work, what order you might do things, how you could achieve the look you are seeking and any other technical data required! Step Two – Making Clay is thixotropic. This means that as you work with it, the clay first gets sloppier and wetter, before is begins to dry in the atmosphere. For most things, you simply can’t do all ...The Process of Making Pottery Decorating, Firing, Glazing, Making, Technical There is a rhythm and flow to clay. It can’t be done all at once! Even the making process! It can take weeks to get everything done, especially if you can only work on your pottery once a week! Even though we have three hour classes, it’s often just not enough time! Here is an overview of some of the processes so you have a bit more grasp on some of the technical stuff! Step One – Design There are SO many ideas out there for making stuff in clay! From delicate porcelain jewellery, through to heavy sculptural work and everything in between. Deciding your direction is sometimes not that easy – when you first start, try everything, you will naturally gravitate to the style that you enjoy! The options and variations are endless and can get a wee bit overwhelming too! Check in with me before you start to ensure your ideas will work, what order you might do things, how you could achieve the look you are seeking and any other technical data required! Step Two – Making Clay is thixotropic. This means that as you work with it, the clay first gets sloppier and wetter, before is begins to dry in the atmosphere. For most things, you simply can’t do all parts of the project at once. An example of work order might look like: Get last weeks work out from the shelves Prepare clay for today’s work – roll your clay, prepare balls for throwing, make the first stage of a pinch pot) Clean up last week’s work and put it on the shelf for bisque firing Check that you have any glazing to do – and do enough of it that you will have time to finish your main project Do the next step of your next project – there might be a further step that can’t be complete immediately, in that case, wrap your work well and put onto the shelves. Letting your work rest for a while can really help keep your work clean and professional looking. Many things require bagging under plastic to keep it ready for work the next week – put your name on the outside of the bag so you can find your work easily. We have stickers and markers. Consider how you want to decorate your work – coloured slip can be applied at a fairly wet stage (remembering that it will make your work even wetter!). Trying to apply slip to dry clay won’t work! If you want to do sgraffito – you will need to keep the work leather hard (a state of dryness where you can still work the clay with a little effort and a little water and care). Step Three – Drying Most of the time your work can go into the rack uncovered to let it dry out for the following week. If you want to continue forming or shaping you will need to double bag your work – put your work on a suitable sized bat and put the bat in a bag so the base of the bag is under the bat, then put another bag over the top of the work and tuck the top of the bag under the bat. If you want to trim (or turn) your thrown work the following week, it should also be double bagged. If your work is large, delicate, or of uneven thicknesses, you should lightly cover your work for drying. When considering the drying process, bare in mind the weather, humidity and wind! The hotter and dryer, the faster things dry and work can dry unevenly in the shelves – this can lead to cracking – another time to lightly cover your work for drying. Step Four – Trimming and Cleaning Up Your work is dry! It is called greenware now and it is at it’s most fragile! Handle everything with two hands. I often refer to soft hands – keep everything gentle and with your fingers spread as much as possible. Try to not pick up things like plates too much, and always with both hands! Before your work can be bisque fired it should be “cleaned up”. You work won’t go into the kiln if it has sharp edges – when glazed, sharp edges turn into razor blades! Use a piece of fly wire to rub the work all over – this will scratch a little so be light handed. Use a knife or metal kidney to scrape any areas that require a bit more dynamic treatment than the fly wire offers! Finally, a very light wipe over with a slightly damp sponge can help soften and soothe all of your edges and dags! Trimming thrown work: If you are planning to trim (or turn) your thrown work (and you should be), make sure you bag it well – your work should be leather hard to almost dry for easiest trimming. Use this step to finish the work completely – use a metal kidney to polish the surface, or a slightly damp sponge to give a freshly thrown look. Wipe the sponge around the rim after trimming, and check the inside of the pot for dags! Trimming slip cast work: Usually I will trim the rims of your work on the wheel the following day to make that stage easier, however you will still need to check your work for lumps and bumps. Last but not least – check that your name is still clearly on the bottom of your work. Step Five – Bisque Firing When the work is completely dry it can go into the bisque kiln. The bisque kiln is fired to 1000°C. This process burns off the water in the clay as well as some of the chemically bound water. The structure of the clay is not altered that much at this temperature. Inside the bisque kiln, the work is stacked a little, small bowl inside a larger bowl and onto a heavy plate. Smaller items like decorations or drink coasters might get stacked several high. Consideration is paid to the weight of the stack and shape of the work. A bisque kiln can fire about one and a half times the amount of work that the glaze kiln can fire. The firing takes about 10 hours to complete the cycle and about two days to cool down. Once it has been emptied the work is placed in the glaze room ready for you to decorate! Step Six – Glazing Decorating your work with colour can be a lot of fun – and time consuming! There are three main options for surface treatment at this stage: Oxide Washes Underglazes Glazes Washes and underglazes do not “glaze” the work – It will still need a layer of glaze to fully seal the clay (washes don’t need glaze on surfaces not designed for food or liquid as they can gloss up a little on their own). Underglazes are stable colourants that turn out pretty much how they look in the jar. They can be mixed with each other to form other colours and can be used like water colours to paint onto your work. Mostly they should have a clear glaze on top to seal them. Oxides are a different species – the pink oxide (cobalt) wash turns out bright blue for instance. They don’t always need a glaze on top, and some glazes can change the colour of the wash! The glazes need no other “glaze” on top! Be careful of unknown glaze interactions – you can put any combination of glaze in a bowl or on a plate, but only a single glaze on the outside of any vertical surface! Glazes are a chemical reaction under heat. We don’t know the exact chemicals in the Mayco glazes we use. I can guess by the way they interact with each other, however, on the whole, you need to test every idea you have, and not run the test on a vertical surface! Simply put, glaze is a layer of glass like substance that bonds with the clay underneath. Clay is made of silica, alumina and water. Glaze is made of mostly silica. Silica has a melting point of 1700°C and we fire to 1240°C. The silica requires a “flux” to help it melt at the lower temperature. Fluxes can be all sorts of chemicals – a common one is calcium – calcium has a melting point of 2500°C, however, together they both melt at a much lower temperature! Colourants are metal oxides like cobalt (blue), chrome (green through black), copper (green, blue, even red!), manganese (black, purple and pink) iron (red brown), etc. Different chemicals in the glaze can have dramatic effects. for example, barium carbonate (which we don’t use) turns manganese bright pink! Other elements can turn manganese dioxide brown, blue, purple and reddish brown. Manganese dioxide is a flux in and of itself as well. So, glazes that get their black and purple colours, often interact with other glazes and RUN! Our mirror black is a good example – it mixes really well with many glazes because it fluxes them – causes them to melt faster. It will also bring out many beautiful colours in the glazes because it’s black colouring most definitely comes from manganese dioxide! Glaze chemistry is a whole subject on it’s own! We use commercial Mayco glazes on purpose – for their huge range of colour possibilities, stability, cool interactions, artistic freedom with the ability to easily brush the glazes on and ease of use. We currently have almost 50 glazes on hand! A major project is to test the interactions of all glazes with each other. That is 2,500 test tiles!!!! I’m going to make the wall behind the wheels the feature wall of pretty colours! Step Seven – Glaze (Gloss or sometimes called “Glost”) Firing Most of the time this is the final stage of making your creation (but not always!) The glaze kiln goes to 1240°C. This is called cone 6, or midrange. It is the low end of stoneware temperatures. Stoneware clays and glazes are typically fired at cone 8 – 10, that is 1260 – 1290°C. The energy requirement to go from 1240°C to 1280°C is almost a 30% more! Our clay is formulated to vitrify (mature, turn “glass-like”) at 1240°, as are our glazes. A glaze kiln take around 12 hours to reach temperature and two to three days to cool down. Sometimes a third firing process is required – this is for decoration that is added to work after the glaze firing. For example – adding precious metals and lustres. this firing temperature is usually around 600 – 800°C depending upon the techniques being used. There are many students interested in gold and silver trims – we will be doing this third type of firing soon! After firing your work will be in the student finished work shelves. Remember to pay for it before you head out the door! There is a small extra charge for using porcelain clay (it’s more than twice the price of regular clay), and for any third firing process! Once your work has been fired it can not turn back into clay for millennia – so don’t fire it if you don’t like it! Put it in the bucket for recycling. https://firebirdstudios.com.au/the-process-of-making-pottery/Ceramics have evolved over thousands of years.A white earthenware side plate with a gadroon edge. Has water marks and chips on front.‘Johnson Bros England Reg No 15587’flagstaff hill, warrnambool, shipwrecked-coast, flagstaff-hill, flagstaff-hill-maritime-museum, maritime-museum, shipwreck-coast, flagstaff-hill-maritime-village, johnson bros, ceramics, tableware -
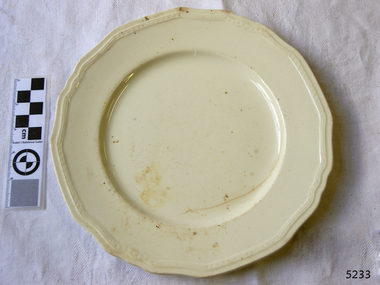 Flagstaff Hill Maritime Museum and Village
Domestic object - Plate, Alfred Meakin
... start to ensure your ideas will work, what order you might do things, how you could achieve the look you are seeking and any other technical data required! Step Two – Making Clay is thixotropic. This means that as you work with it, the clay first gets sloppier and wetter, before is begins to dry in the atmosphere. For most things, you simply can’t do all...start to ensure your ideas will work, what order you might do things, how you could achieve the look you are seeking and any other technical data required! Step Two – Making Clay is thixotropic. This means that as you work with it, the clay first gets sloppier and wetter, before is begins to dry in the atmosphere. For most things, you simply can’t do all ...The Process of Making Pottery Decorating, Firing, Glazing, Making, Technical There is a rhythm and flow to clay. It can’t be done all at once! Even the making process! It can take weeks to get everything done, especially if you can only work on your pottery once a week! Even though we have three hour classes, it’s often just not enough time! Here is an overview of some of the processes so you have a bit more grasp on some of the technical stuff! Step One – Design There are SO many ideas out there for making stuff in clay! From delicate porcelain jewellery, through to heavy sculptural work and everything in between. Deciding your direction is sometimes not that easy – when you first start, try everything, you will naturally gravitate to the style that you enjoy! The options and variations are endless and can get a wee bit overwhelming too! Check in with me before you start to ensure your ideas will work, what order you might do things, how you could achieve the look you are seeking and any other technical data required! Step Two – Making Clay is thixotropic. This means that as you work with it, the clay first gets sloppier and wetter, before is begins to dry in the atmosphere. For most things, you simply can’t do all parts of the project at once. An example of work order might look like: Get last weeks work out from the shelves Prepare clay for today’s work – roll your clay, prepare balls for throwing, make the first stage of a pinch pot) Clean up last week’s work and put it on the shelf for bisque firing Check that you have any glazing to do – and do enough of it that you will have time to finish your main project Do the next step of your next project – there might be a further step that can’t be complete immediately, in that case, wrap your work well and put onto the shelves. Letting your work rest for a while can really help keep your work clean and professional looking. Many things require bagging under plastic to keep it ready for work the next week – put your name on the outside of the bag so you can find your work easily. We have stickers and markers. Consider how you want to decorate your work – coloured slip can be applied at a fairly wet stage (remembering that it will make your work even wetter!). Trying to apply slip to dry clay won’t work! If you want to do sgraffito – you will need to keep the work leather hard (a state of dryness where you can still work the clay with a little effort and a little water and care). Step Three – Drying Most of the time your work can go into the rack uncovered to let it dry out for the following week. If you want to continue forming or shaping you will need to double bag your work – put your work on a suitable sized bat and put the bat in a bag so the base of the bag is under the bat, then put another bag over the top of the work and tuck the top of the bag under the bat. If you want to trim (or turn) your thrown work the following week, it should also be double bagged. If your work is large, delicate, or of uneven thicknesses, you should lightly cover your work for drying. When considering the drying process, bare in mind the weather, humidity and wind! The hotter and dryer, the faster things dry and work can dry unevenly in the shelves – this can lead to cracking – another time to lightly cover your work for drying. Step Four – Trimming and Cleaning Up Your work is dry! It is called greenware now and it is at it’s most fragile! Handle everything with two hands. I often refer to soft hands – keep everything gentle and with your fingers spread as much as possible. Try to not pick up things like plates too much, and always with both hands! Before your work can be bisque fired it should be “cleaned up”. You work won’t go into the kiln if it has sharp edges – when glazed, sharp edges turn into razor blades! Use a piece of fly wire to rub the work all over – this will scratch a little so be light handed. Use a knife or metal kidney to scrape any areas that require a bit more dynamic treatment than the fly wire offers! Finally, a very light wipe over with a slightly damp sponge can help soften and soothe all of your edges and dags! Trimming thrown work: If you are planning to trim (or turn) your thrown work (and you should be), make sure you bag it well – your work should be leather hard to almost dry for easiest trimming. Use this step to finish the work completely – use a metal kidney to polish the surface, or a slightly damp sponge to give a freshly thrown look. Wipe the sponge around the rim after trimming, and check the inside of the pot for dags! Trimming slip cast work: Usually I will trim the rims of your work on the wheel the following day to make that stage easier, however you will still need to check your work for lumps and bumps. Last but not least – check that your name is still clearly on the bottom of your work. Step Five – Bisque Firing When the work is completely dry it can go into the bisque kiln. The bisque kiln is fired to 1000°C. This process burns off the water in the clay as well as some of the chemically bound water. The structure of the clay is not altered that much at this temperature. Inside the bisque kiln, the work is stacked a little, small bowl inside a larger bowl and onto a heavy plate. Smaller items like decorations or drink coasters might get stacked several high. Consideration is paid to the weight of the stack and shape of the work. A bisque kiln can fire about one and a half times the amount of work that the glaze kiln can fire. The firing takes about 10 hours to complete the cycle and about two days to cool down. Once it has been emptied the work is placed in the glaze room ready for you to decorate! Step Six – Glazing Decorating your work with colour can be a lot of fun – and time consuming! There are three main options for surface treatment at this stage: Oxide Washes Underglazes Glazes Washes and underglazes do not “glaze” the work – It will still need a layer of glaze to fully seal the clay (washes don’t need glaze on surfaces not designed for food or liquid as they can gloss up a little on their own). Underglazes are stable colourants that turn out pretty much how they look in the jar. They can be mixed with each other to form other colours and can be used like water colours to paint onto your work. Mostly they should have a clear glaze on top to seal them. Oxides are a different species – the pink oxide (cobalt) wash turns out bright blue for instance. They don’t always need a glaze on top, and some glazes can change the colour of the wash! The glazes need no other “glaze” on top! Be careful of unknown glaze interactions – you can put any combination of glaze in a bowl or on a plate, but only a single glaze on the outside of any vertical surface! Glazes are a chemical reaction under heat. We don’t know the exact chemicals in the Mayco glazes we use. I can guess by the way they interact with each other, however, on the whole, you need to test every idea you have, and not run the test on a vertical surface! Simply put, glaze is a layer of glass like substance that bonds with the clay underneath. Clay is made of silica, alumina and water. Glaze is made of mostly silica. Silica has a melting point of 1700°C and we fire to 1240°C. The silica requires a “flux” to help it melt at the lower temperature. Fluxes can be all sorts of chemicals – a common one is calcium – calcium has a melting point of 2500°C, however, together they both melt at a much lower temperature! Colourants are metal oxides like cobalt (blue), chrome (green through black), copper (green, blue, even red!), manganese (black, purple and pink) iron (red brown), etc. Different chemicals in the glaze can have dramatic effects. for example, barium carbonate (which we don’t use) turns manganese bright pink! Other elements can turn manganese dioxide brown, blue, purple and reddish brown. Manganese dioxide is a flux in and of itself as well. So, glazes that get their black and purple colours, often interact with other glazes and RUN! Our mirror black is a good example – it mixes really well with many glazes because it fluxes them – causes them to melt faster. It will also bring out many beautiful colours in the glazes because it’s black colouring most definitely comes from manganese dioxide! Glaze chemistry is a whole subject on it’s own! We use commercial Mayco glazes on purpose – for their huge range of colour possibilities, stability, cool interactions, artistic freedom with the ability to easily brush the glazes on and ease of use. We currently have almost 50 glazes on hand! A major project is to test the interactions of all glazes with each other. That is 2,500 test tiles!!!! I’m going to make the wall behind the wheels the feature wall of pretty colours! Step Seven – Glaze (Gloss or sometimes called “Glost”) Firing Most of the time this is the final stage of making your creation (but not always!) The glaze kiln goes to 1240°C. This is called cone 6, or midrange. It is the low end of stoneware temperatures. Stoneware clays and glazes are typically fired at cone 8 – 10, that is 1260 – 1290°C. The energy requirement to go from 1240°C to 1280°C is almost a 30% more! Our clay is formulated to vitrify (mature, turn “glass-like”) at 1240°, as are our glazes. A glaze kiln take around 12 hours to reach temperature and two to three days to cool down. Sometimes a third firing process is required – this is for decoration that is added to work after the glaze firing. For example – adding precious metals and lustres. this firing temperature is usually around 600 – 800°C depending upon the techniques being used. There are many students interested in gold and silver trims – we will be doing this third type of firing soon! After firing your work will be in the student finished work shelves. Remember to pay for it before you head out the door! There is a small extra charge for using porcelain clay (it’s more than twice the price of regular clay), and for any third firing process! Once your work has been fired it can not turn back into clay for millennia – so don’t fire it if you don’t like it! Put it in the bucket for recycling. https://firebirdstudios.com.au/the-process-of-making-pottery/Ceramics have evolved over thousands of years.Earthenware dessert plate, cream colour. Made by Alfred Meakin, England. Backstamped ‘Alfred Meakin England’. flagstaff hill, warrnambool, shipwrecked-coast, flagstaff-hill, flagstaff-hill-maritime-museum, maritime-museum, shipwreck-coast, flagstaff-hill-maritime-village, alfred meakin, ceramics, earthenware, kitchenware -
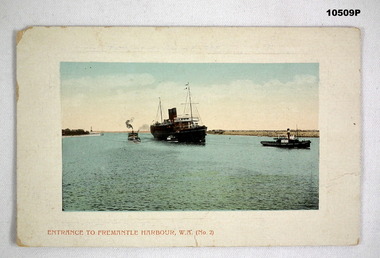 Bendigo Military Museum
Postcard - PHOTOGRAPHIC POSTCARD, P. Falk & Co Ltd, Unknown
... how I am going to start work again. We have had dreadful weather, nothing but wind and dust, I would much rather live in Melbourne. Love to all...how I am going to start work again. We have had dreadful weather, nothing but wind and dust, I would much rather live in Melbourne. Love to all ...There is a Post Office stamp on top right side. Fees in Australasia and Great Britain 1 penny. Other places 1 1/2 pennies.A colourised postcard depicting a two funnel ship coming into Fremantle Harbour. The ship has 2 masts, the bridge is white. There is a tug boat in front of the ship. There is a small vessel against the starboard side. Two smaller vessels are between the ship and shore. All appear to be coal fired. The actual picture has a white border of approx 15mm size.Written on the back is:- “Date Sep 9th. Trafalgar Railway Station, W.A” “Dear Miss McIntyre. I hope you are quite well. I should have written to you before, but I have been dreadfully lazy. i do not know how I am going to start work again. We have had dreadful weather, nothing but wind and dust, I would much rather live in Melbourne. Love to all from Mat”postcard, fremantle wa -
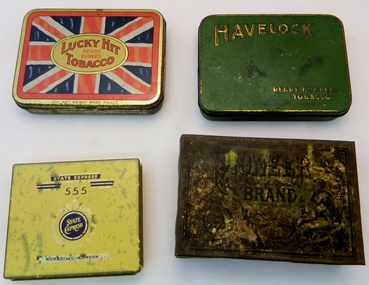 Kiewa Valley Historical Society
Tins - Tobacco (Lucky Hit) x4, Mid to late 1900s Possibly c1910
... started to creep into all areas of society whether city or rural. This was the era that highlighted the use of roll your own cigarettes, especially when the costs of "tailor made" cigarettes were taxed at an increasing amount. Roll your own cigarettes also provided an avenue for the consumption of illicit drug use. The significance of this ready rubbed tobacco tin to this rural region is, stems from how ...The British Australasian Tobacco Co. (based in Melbourne and Sydney. The parent company was founded in England, circa 1902). This item "Lucky Hit" was the fore runner of the "Lucky Strike" brand name. The ready rubbed tobacco held within the tin was mainly used by those smokers who rolled their own cigarettes. These smokers would have mainly used their palm and formed a cup then placing their choice of the amount of tobacco to be rolled. This would then be placed on the fine cigarette paper and rolled and sealed (using saliva in the mouth) into the required shape. There were mechanical "roll you own" gadgets on the market but most rural users, especially males used their palms. The quantity of tobacco used to make up the cigarette was up to the individual user. The thinner that the cigarette was rolled the longer and more economical did the supply last. The by -products of this method were nicotine stained fingers and hands. "Chain" smokers were easily identified and could therefore be discriminated against obtaining smoke sensitive employment. The two world wars (1914-18 and1939-45) produced a significant rise in the consumption of cigarette use by men and the eventual overflow to women. Cigarette smoking before the 1900s was seen as rough and uncouth (socially frowned upon), however after the introduction of overseas films (U.K. and U.S.A.) and film stars presenting smoking as socially acceptable the rise of smoking cigarettes, especially roll you own (American western movies) in rural areas was an accepted way of life. Things however started to change in the mid 1900s when medical evidence pointed to the health problems of regular smokers. Governments were now implementing non smoking education material. Restrictions on where and when smoking was permitted and acceptable started to creep into all areas of society whether city or rural. This was the era that highlighted the use of roll your own cigarettes, especially when the costs of "tailor made" cigarettes were taxed at an increasing amount. Roll your own cigarettes also provided an avenue for the consumption of illicit drug use.The significance of this ready rubbed tobacco tin to this rural region is, stems from how much influence that the Western novels and overseas films (portraying rural lifestyles) played in shaping the rural social and working mores of the Kiewa Valley. The post war depression (financially) resulted in more smokers turning away from expensive machine (tailor) made cigarettes to the roll your own, using ready rubbed tobacco. This tobacco tin relays a long ago era, when personal contact, and not something that has been written down by some "unknown", was valued as the true appraisal of a member of the community. This was especially relevant in a small regional area such as the Kiewa Valley. Although social networking was not as fast then as the internet provides now, appearances, manners, fashion and etiquette with first impressions high on the order of evaluating someone in the community. Pointer such as the brand of tobacco smoked was part of the rural assessment method. Up until the demise of the Australian Tobacco Industry, circa 2004, the Kiewa Valley and surrounding district was part of a vibrant producer of tobacco leaves. The remnants of this industry still remain today but the drying sheds (for tobacco leaves) are now used to store hay for the valley's dairy and beef cattle industries. Tins 2,3 and 4 were found (in 2009) at Wallace's Hut on the Bogong High Plains. This tobacco tin is constructed from tin plated thin rolled steel. The lid is attached by two pressed and formed (from the main frame) hinges using the nip and tuck construction method. The lid and outside frame have been gold & silver anodised. Tins 2,3 and 4 have the Union Jack on the front lid. One is too rusty to read. The other two have "A blend containing choice selected Australian grown leaf" in white across the bottom on the red border and above the "2oz net weight when packed". In the centre and on the outside of the lid and surrounded by a reproduction of the "Union Jack" is stamped, "Lucky Hit Tobacco" within these words are also stamped "Ready Rubbed". The bottom of the lid is stamped (in smaller script) "2oz NET WEIGHT WHEN PACKED" and underneath this and on the rim of the lid is "THE BRITISH AUSTRALASIAN TOBACCO CO. PTY. LTD. MELBOURNE" on the inside of the lid and stamped in black print on a gold anodised lid is " NOTICE "(underlined) "Every tin of genuine "Lucky Hit has the name of the Manufacturing Company printed on wax paper lining; also on the band or wrapper with which the tin is sealed. THE BRITISH-AUSTRALIAN TOBACCO CO. PTY. LTD., MELBOURNE" and underneath this and underlined is " None genuine without the band or wrapper" On the hinge side of the lid is "LUCKY HIT READY RUBBED TOBACCO" Tins 2,3 and 4 Vary to the above inscription.roll your own, cigarette tins, smoking accessories, personal effects, tobacco containers, tobacco -
 Kiewa Valley Historical Society
Tin Tobacco, Mid to late 1900s
... started to creep into all areas of society whether city or rural. This was the era that highlighted the use of roll your own cigarettes, especially when the costs of "tailor made" cigarettes were taxed at an increasing amount. Roll your own cigarettes also provided an avenue for the consumption of illicit drug use. The significance of this ready rubbed tobacco tin to this rural region is, stems from how ...The British Australasian Tobacco Co. (based in Melbourne and Sydney. The parent company was founded in England, circa 1902). This item "HAVELOCK" is one of many ready rubbed tobacco tins produced by the British Australasian Tobacco Company.The ready rubbed tobacco held within the tin was mainly used by those smokers who rolled their own cigarettes. These smokers would have mainly used their palm and formed a cup then placing their choice of the amount of tobacco to be rolled. This would then be placed on the fine cigarette paper and rolled and sealed (using saliva in the mouth) into the required shape. There were mechanical "roll you own" gadgets on the market but most rural users, especially males used their palms. The quantity of tobacco used to make up the cigarette was up to the individual user. The thinner that the cigarette was rolled the longer and more economical did the supply last. The by -products of this method were nicotine stained fingers and hands. "Chain" smokers were easily identified and could therefore be discriminated against obtaining smoke sensitive employment. The two world wars (1914-18 and1939-45) produced a significant rise in the consumption of cigarette use by men and the eventual overflow to women. Cigarette smoking before the 1900s was seen as rough and uncouth (socially frowned upon), however after the introduction of overseas films (U.K. and U.S.A.) and film stars presenting smoking as socially acceptable, the rise of smoking cigarettes, especially roll you own (American western movies) in rural areas was an accepted way of life. Things however started to change in the mid 1900s when medical evidence pointed to the health problems of regular smokers. Governments were now implementing non smoking education material. Restrictions on where and when smoking was permitted and acceptable started to creep into all areas of society whether city or rural. This was the era that highlighted the use of roll your own cigarettes, especially when the costs of "tailor made" cigarettes were taxed at an increasing amount. Roll your own cigarettes also provided an avenue for the consumption of illicit drug use.The significance of this ready rubbed tobacco tin to this rural region is, stems from how much influence that the Western novels and overseas films (portraying rural lifestyles) played in shaping the rural social and working mores of the Kiewa Valley. The post war depression (financially) resulted in more smokers turning away from expensive machine (tailor) made cigarettes to the roll your own, using ready rubbed tobacco. This tobacco tin relays a long ago era, when personal contact, and not something that has been written down by some "unknown", was valued as the true appraisal of a member of the community. This was especially relevant in a small regional area such as the Kiewa Valley. Although social networking was not as fast then as the internet provides now, appearances, manners, fashion and etiquette with first impressions high on the order of evaluating someone in the community. Pointer such as the brand of tobacco smoked was part of the rural assessment method. Up until the demise of the Australian Tobacco Industry, circa 2004, the Kiewa Valley and surrounding district was part of a vibrant producer of tobacco leaves. The remnants of this industry still remain today but the drying sheds (for tobacco leaves) are now used to store hay for the valley's dairy and beef cattle industries.This tobacco tin is constructed from tin plated thin rolled steel. The lid is attached by two pressed and formed (from the main frame) hinges using the nip and tuck construction method.The lid and outside frame have had a green "weave" pattern anodised to the metal.On the outside of the lid and at the top left is stamped, in gold coloured letters "HAVELOCK". The bottom of the lid is stamped (in smaller script) "READY RUBBED TOBACCO" and below this in smaller lettering "2oz NET WEIGHT WHEN PACKED". On the rim of the lid is "THE BRITISH AUSTRALASIAN TOBACCO CO. PTY. LTD." Inside of the lid and stamped in black print on a gold anodised lid is "Every tin of genuine HAVELOCK Ready Rubbed Tobacco has the mane Havelock printed on the paper lining, and also on the band or wrapping sealing the tin. On the hinge side of the lid is "HAVELOCK READY RUBBED"roll your own, cigarette tins, smoking accessories, personal effects, tobacco containers -
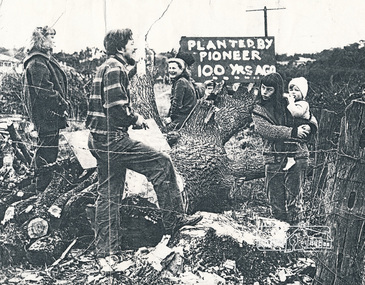 Eltham District Historical Society Inc
Photograph, Protesters against tree felling, Eltham, 1958, 1956
... how universal and powerful the movement has been. Eltham was fighting the S.E.C. and other government authorities in the 40's and 50's over the retention of indigenous trees. In the Christmas season of 1956 our conflict with them came to a dramatic confrontation that made headline news in all the daily papers for a week. It started...how universal and powerful the movement has been. Eltham was fighting the S.E.C. and other government authorities in the 40's and 50's over the retention of indigenous trees. In the Christmas season of 1956 our conflict with them came to a dramatic confrontation that made headline news in all the daily papers for a week. It started ..."Photocopy of original owned by Lesley Martin. L-R: Matcham Skipper, Lesley Martin, Margot Knox with with Hamish" Protest against the depradations of the State Electricty Commission 1956 - Alistair Knox (1980), We are what we stand on, pp48-49 “The fact that the number of trees in central Eltham has more than doubled since 1945 is an indication of how universal and powerful the movement has been. Eltham was fighting the S.E.C. and other government authorities in the 40's and 50's over the retention of indigenous trees. In the Christmas season of 1956 our conflict with them came to a dramatic confrontation that made headline news in all the daily papers for a week. It started in the Herald, was repeated in the Sun and taken up by the Age two days later. After four days, it was appearing in the New York Times. Some S.E.C. workers cut down two 100-year-old oak trees in Franklin Street. The inner Eltham community launched a frontal attack on bureaucratic bungling and arrogance that they have never forgotten. When the chairman of the Commission delivered his New Year's speech some weeks later, he emphasised that the commission's first responsibility was to protect trees. This was the antithesis of their previous attitude. For many years to come, tree-lopping Commission workers always pretended they were not there when our small explosive group passed by. With Council assistance, we also carried out free native tree plantings on the nature strips of most roads in the Central Riding in the l 950's, when the rhododendron and the gladioli flanked by pampas grass and flowering fruit trees were still being introduced into the most 'desirable' eastern suburbs.”Photocopy of original owned by Lesley Martin. L-R: woman?, Matcham Skipper, Lesley Martin, Margot Knox with baby Hamishevents, matcham skipper, leslie martin, margot knox, hamish knox, trees, lesly martin -
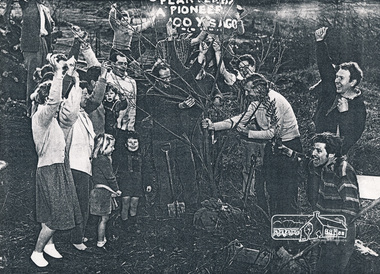 Eltham District Historical Society Inc
Photograph, Protesters against tree felling, Eltham, 1956
... how universal and powerful the movement has been. Eltham was fighting the S.E.C. and other government authorities in the 40's and 50's over the retention of indigenous trees. In the Christmas season of 1956 our conflict with them came to a dramatic confrontation that made headline news in all the daily papers for a week. It started...how universal and powerful the movement has been. Eltham was fighting the S.E.C. and other government authorities in the 40's and 50's over the retention of indigenous trees. In the Christmas season of 1956 our conflict with them came to a dramatic confrontation that made headline news in all the daily papers for a week. It started ..."Photocopy of an original which was published in the Herald 2 Aug 1956 showing a group of Eltham residents protesting against tree felling undertaking a ceremonial tree planting L-R foreground (adults): Susan, Mavis and Laurel Gill; Hal Peck; Alistair Knox (centre); Tim Burstall; Jack Gill; Gordon Ford; Matcham Skipper" Protest against the depradations of the State Electricty Commission 1956 - Alistair Knox (1980), We are what we stand on, pp48-49 “The fact that the number of trees in central Eltham has more than doubled since 1945 is an indication of how universal and powerful the movement has been. Eltham was fighting the S.E.C. and other government authorities in the 40's and 50's over the retention of indigenous trees. In the Christmas season of 1956 our conflict with them came to a dramatic confrontation that made headline news in all the daily papers for a week. It started in the Herald, was repeated in the Sun and taken up by the Age two days later. After four days, it was appearing in the New York Times. Some S.E.C. workers cut down two 100-year-old oak trees in Franklin Street. The inner Eltham community launched a frontal attack on bureaucratic bungling and arrogance that they have never forgotten. When the chairman of the Commission delivered his New Year's speech some weeks later, he emphasised that the commission's first responsibility was to protect trees. This was the antithesis of their previous attitude. For many years to come, tree-lopping Commission workers always pretended they were not there when our small explosive group passed by. With Council assistance, we also carried out free native tree plantings on the nature strips of most roads in the Central Riding in the l 950's, when the rhododendron and the gladioli flanked by pampas grass and flowering fruit trees were still being introduced into the most 'desirable' eastern suburbs.”Photocopy of an original which was published in the Herald 2 Aug 1958 showing a group of Eltham residents protesting against tree felling undertaking a ceremonial tree planting L-R foreground (adults): Susan, Mavis and Laurel Gill; Hal Peck; Alistair Knox (centre); Tim Burstall; Jack Gill; Gordon Ford; Matcham Skipperevents, susan gill, mavis gill, laurel gill, jack gill, hal peck, tim burstall, gordon ford, matcham skipper, alistair knox, trees -
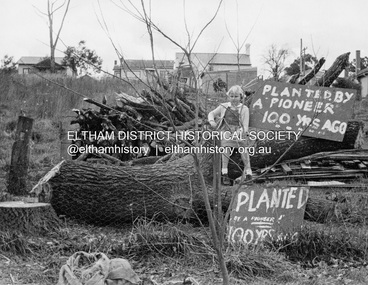 Eltham District Historical Society Inc
Photograph - Black and White Print, George W. Bell, Tree Protest, Franklin Street, Eltham, 1956
... how universal and powerful the movement has been. Eltham was fighting the S.E.C. and other government authorities in the 40's and 50's over the retention of indigenous trees. In the Christmas season of 1956 our conflict with them came to a dramatic confrontation that made headline news in all the daily papers for a week. It started...how universal and powerful the movement has been. Eltham was fighting the S.E.C. and other government authorities in the 40's and 50's over the retention of indigenous trees. In the Christmas season of 1956 our conflict with them came to a dramatic confrontation that made headline news in all the daily papers for a week. It started ...This was a protest that came about when some S.E.C. workers cut down two 100-year old Oak trees in Franklin Street. We have examined aerial photos from February 1956 and two large trees are present near where number 91 is today and were gone in a January 1960 image. Alistair Knox wrote about their protest against the depradations of the State Electricty Commission in his 1980 book, We are what we stand on, pp48-49. You can read about online at https://alistairknox.org/chapters/45 “Protest against the depradations of the State Electricity Commission 1956” - Alistair Knox (1980), We are what we stand on, pp48-49 “The fact that the number of trees in central Eltham has more than doubled since 1945 is an indication of how universal and powerful the movement has been. Eltham was fighting the S.E.C. and other government authorities in the 40's and 50's over the retention of indigenous trees. In the Christmas season of 1956 our conflict with them came to a dramatic confrontation that made headline news in all the daily papers for a week. It started in the Herald, was repeated in the Sun and taken up by the Age two days later. After four days, it was appearing in the New York Times.” “Some S.E.C. workers cut down two 100-year-old oak trees in Franklin Street. The inner Eltham community launched a frontal attack on bureaucratic bungling and arrogance that they have never forgotten.” “When the chairman of the Commission delivered his New Year's speech some weeks later, he emphasised that the commission's first responsibility was to protect trees. This was the antithesis of their previous attitude. For many years to come, tree-lopping Commission workers always pretended they were not there when our small explosive group passed by. With Council assistance, we also carried out free native tree plantings on the nature strips of most roads in the Central Riding in the l 950's, when the rhododendron and the gladioli flanked by pampas grass and flowering fruit trees were still being introduced into the most 'desirable' eastern suburbs.” The protest involved personalities such as Matcham Skipper; Lesley Martin; Alistair and Margot Knox and youn Hamish; Jack, Susan, Mavis and Laurel Gill; Hal Peck; Tim Burstall and Gordon Ford The location is about halfway between Main Road and Bible Street looking north, around number 91. Looking up the hill in a northerly direction, the house on the left is George Stebbing's original cottage at 88 Pitt Street, built around 1861. Little is recorded of this early Eltham builder and we have no picture of him. He arrived from England in August 1857 and settled at Eltham after a short period at Kangaroo Ground. His occupation is often listed as a farmer but he built a number of important buildings between 1860 and 1880. Those remaining include Shillinglaw Cottage (c.1858), St. Margaret’s Church (1860), Uniting Church (formerly Methodist Church 1880) and his house at 88 Pitt Street (1861). This photo was possibly used in a presentation by Russell Yeoman to the 10 November 2004 Society meeting on "Significant Trees, Wildflowers and Local Gardens" - Research by Peter Pidgeon, EDHS, June 2026 Black and white print on photo paper Also black and white slide copy of print Mount - white 7 dots (Technodia Italy)trees, eltham, protests, george w bell collection, significant tree, alistair knox, george w. bell collection, gordon ford, hal peck, hamish knox, jack gill, laurel gill, lesley martin, margot knox, matcham skipper, mavis gill, stebbing cottage, susan gill, tim burstall -
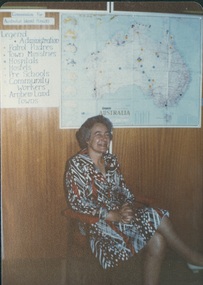 Uniting Church Archives - Synod of Victoria
Colour photo, Prior to 1977
... how conditions could be improved for them. As we developed the school at St Philip’s, Frances worked with me on so many things. She would visit the College each week for Chapel, run a Sunday school for little kids and the service for all the boarders. When the school was ready to start...how conditions could be improved for them. As we developed the school at St Philip’s, Frances worked with me on so many things. She would visit the College each week for Chapel, run a Sunday school for little kids and the service for all the boarders. When the school was ready to start ...Everyone seemed to know Frances – it was November 1985 – I met Frances at the Victorian Synod office as she lent me her office to interview staff for St Philip’s which I was taking over in 1986. The interviews completed, she took me to a nearby coffee shop where we had a delightful chat. I came away much the richer, more informed about St Philip’s and feeling I had known Frances forever. And so started our 23 year friendship, with me hearing the first of many stories – for Frances was a wonderfully gifted story teller with a capacity to turn the past into life, and its characters into real people. It seems fitting that a person destined to add to Australia’s history should be born down the beach from Mendonca’s Mahogany ship – Port Fairy on the 28 January 1924. There she went to school – first to primary school then to Camperdown’s Higher Elementary School which went to Year 10. She was the eldest of four children with three brothers, Jock, Norman and Rod. After Year 10, Frances took a job in Camperdown as a dental nurse. She tackled this successfully until deciding to study at Rolland House in Carlton to become a Deaconess. Jock, her brother, recalls asking Frances what made her decide to be a Deaconess. At a Presbyterian Fellowship camp at Warrnambool, Frances and the others were sleeping in the Church Hall on palliases. During the night she awoke and her eye was drawn to a stained glass window, unusually brightly lit. On the window were the words “Follow Me”. Without flinching Frances took the words to heart and decided to serve God as a Deaconess, and during her time with the Australian Inland Mission she became quite a legend. What a patriot Frances was! She loved the stories of pioneers and knew well the history of where she had come from – the Western District. A keen follower of cricket, she would be right up with the last test and the issues of the team. Originally a Melbourne football supporter, she became an avid Geelong supporter and would often score at the annual self destruct St Philip’s vs Flynn Church match. She loved the gladiatorial, albeit often suicidal display. And though an Aussie through and through she loved her Scottish roots. Through her stories, she could easily transport a person in the Centralian landscape onto the heather of the Highlands. In spite of her love for Scotland, the city which was her favourite was New York. Frances – truly a citizen of the world. As a citizen of the world Frances fought for Indigenous and migrant women’s rights and was active in the World Council of Churches, sponsoring local and overseas women to study in Australia and to return to their homes as trained teachers and theologians. Up until recently she was involved in the Spina Bifida and Hydro Cephalis Association of SA. By the time she had taken up with the AIM Frances had a well tuned desire for social justice. To her it was important that the poor and less fortunate were given a go. She felt that the Labor Party provided her best avenue to push her social justice desires. After joining the party in 1956, she quickly became a respected member of the party and worked tirelessly for it, being honoured in the end with life membership. In the party she knew everyone and everyone knew her. She introduced me to Bob Hawke and when I spoke to Gough Whitlam once on a plane, he affirmed to me his friendship with Frances. In her cottage was a picture of her with Kevin Rudd with his arm around her. She is remembered by her party colleagues as someone who had a real compassion for helping people. She believed in the traditional ethic of the Labor Party which is to help those who are less fortunate. Interestingly, she supported St Philip’s moving from solely being a residential college to a school because we had chosen a relatively low fee base to enable maximum access for people and our boarding house continued to, and still does, offer accommodation to any student wishing to attend schools in Alice. Having supported the outback for years from the engine rooms of the mission arm of the church in Victoria, Frances then decided to move to Alice for her retirement. Settling in the little cottage at the far south eastern corner of Old Timers, this became to me, my family and I’m sure to plenty of people, Frances’ Cottage. But moving to Alice was hardly moving into retirement. She quickly became Chaplain at St Philip’s where she clearly showed her love for the children and staff and a real belief in St Philip’s role – to provide access to education for isolated children. She became a stalwart of the Adelaide House Museum, a wonderful member of the congregation, a powerful contributor to the Presbytery and the Annual Synod. Frances was strong, never flinched on a point of principle and discussed things face to face so that you truly knew where you stood with her. She had a great feeling for the pastoralists and knew many of them well. As Chaplain of the College she related well to the children and in addition, knew many of their families. She also felt deeply for the Indigenous people and regularly tackled the issue of how conditions could be improved for them. As we developed the school at St Philip’s, Frances worked with me on so many things. She would visit the College each week for Chapel, run a Sunday school for little kids and the service for all the boarders. When the school was ready to start she wrote the College prayer, said now every week by all students. The prayer says so much about Frances. She pioneered the RE program, teaching RE and in addition to Sunday, visited staff and students every Wednesday. At Presentation Night she presented a homily and provided the blessing – always a strong presence in front of the College community. She was so much part of St Philip’s that when we built the new boarding house in 1990 it seemed so obvious to call it McKechnie House. As a faithful servant of Adelaide House for years and an enthusiastic member of the National Trust, Frances was the first chairperson of the committee, a driving force to redevelop Adelaide House and she worked tirelessly to present John Flynn’s Hospital in the best light. She helped to deliver the stories of Flynn and McKay and the Outback missionaries to so many people and was instrumental in producing meaningful displays. I enjoyed walking around the museum with her intensely, enjoying her detailed stories of the past missionary era and I know many others would have as well. As a loyal and loving member of the Flynn Church, and being such a comrade of Fred McKay’s, Frances understood intricately the symbols which lie within the architecture. Once again, as a story teller, each one had a yarn attached to it. Over her twenty-three years as a member of the Flynn Church she has made a wonderful contribution. As a charismatic personality people were naturally attracted to Frances and were touched and affected by her. Peter Robson, twenty-two years at St Philip’s, remembers her asking him why he had stayed so long at the College. He explained to her that it was her address one day in Chapel in the early times that inspired him to keep going. With great wisdom she had said, “You can’t conquer something, unless you allow it to conquer you.” St Philip’s had conquered him. Wherever she went, whomever she was with, she had a real and lasting impact. Frances brought the reality of the Outback to so many as she addressed congregations around Victoria. She started the Australian Church Women’s Fellowship in the Northern Territory in 1997. She was also involved in setting up the Institute for Aboriginal Development. I believe that Frances should have been recognised nationally for her work with an AM. However, she was the Northern Territory finalist in the Senior Australian of the Year Awards in 2003. In 2004 she was awarded an OBE – not from the Queen but at Old Timers. This is a coveted award which means “Over Bloody Eighty”. Frances was part of it all, in the river, at a bush dance, at a dinner, at a service, at a party, at a meeting, at a footy game, at a cricket game, at Synod, at Presbytery, at Labour meetings, I could go on. Frances McKechnie, what a wonderful Australian. (Eulogy by Chris Tudor) Frances McKechnie died mid-2008. Deaconess Frances McKechnie is seated in front of a map of Australia marked with Australian Inland Mission places identified.At the time the photo was taken, McKechnie was the Victorian Regional Officer for the Australian Inland Mission (Presbyterian). At one stage, she worked for National Mission Frontier Services from 1968 to 1986. See below for the eulogy at her funeral by Chris Tudor. (Frances died May or June 2008.)deaconess frances mckechnie; australian inland mission; presbyterian church -
 Victorian Aboriginal Corporation for Languages
Book, Paul Byron et al, H2W2 : how to do an arts project, where to get help, 2004
... How to start your own creative project - all you need to know in one resource. ...arts and youth Australian arts arts management government funding fundraising colour illustrations, colour photographs, b&w photographs How to start your own creative project - all you need to know in one resource. ...How to start your own creative project - all you need to know in one resource. Contact, attitudes, management issues, safety etc.colour illustrations, colour photographs, b&w photographsarts and youth, australian arts, arts management, government funding, fundraising -
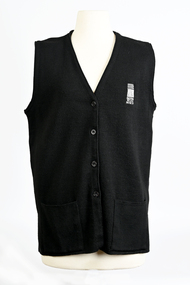 National Wool Museum
Textile - Black Woollen Vest, 2000s
... how to be a ‘good’ housekeeper. I enjoyed all the domestic subjects. Ray and I were engaged in August 1963. We purchased our engagement ring in Melbourne and went to dinner at the Playboy Club in Melbourne to celebrate. In preparation for our wedding, I spent many hours making my own wedding dress (with assistance from my mother). We were married at 11 am on Saturday, the 10th April 1965 at St. Matthew’s, Church of England, Geelong. When Ray retired, he responded to an advertisement for volunteers at the National Wool Museum to be a volunteer. He started...how to be a ‘good’ housekeeper. I enjoyed all the domestic subjects. Ray and I were engaged in August 1963. We purchased our engagement ring in Melbourne and went to dinner at the Playboy Club in Melbourne to celebrate. In preparation for our wedding, I spent many hours making my own wedding dress (with assistance from my mother). We were married at 11 am on Saturday, the 10th April 1965 at St. Matthew’s, Church of England, Geelong. When Ray retired, he responded to an advertisement for volunteers at the National Wool Museum to be a volunteer. He started ...This vest was worn by Lynette Wekwerth when she worked as a volunteer in the National Wool Museum shop during the early 2000s. Lynette volunteered at the National Wool Museum for 25 years from 2001 until her passing in 2025, and was a much loved and respected member of the team. "I was born at Coonara Private Hospital at 173 Yarra Street, Geelong, on the 29th of March 1944, the third of five children. My father was in the RAAF when I was born, and on leaving the air force he became a carpenter/joiner. When I was young, we had the bread and milk delivered. There was a special tin for the bread and a big billy for the milk left of the front veranda to collect these items. My mother, elder sister, Wendy and my younger sister Zaidee, all went to “Physical Culture” held downstairs under the old Plaza Theatre building in Ryrie Street. We girls made our own sports clothes to do exercises (rods, dumbbells, and song and dance). It kept us fit, and we all won medals at some stage at the end-of-year concert. I was the only girl of my age in the street where I lived. There were boys my age, so I learned to play cricket and kick a football, all of which I did well. I attended Tate Street and then went on to Matthew Flinders Girls Secondary College in 1956. Matthew Flinders was a domestic arts school, where I learnt sewing, cookery, home management, and how to be a ‘good’ housekeeper. I enjoyed all the domestic subjects. Ray and I were engaged in August 1963. We purchased our engagement ring in Melbourne and went to dinner at the Playboy Club in Melbourne to celebrate. In preparation for our wedding, I spent many hours making my own wedding dress (with assistance from my mother). We were married at 11 am on Saturday, the 10th April 1965 at St. Matthew’s, Church of England, Geelong. When Ray retired, he responded to an advertisement for volunteers at the National Wool Museum to be a volunteer. He started in 1998. The year that the ‘Pharaohs exhibition’ started. That was fine by me, as he wouldn’t be getting under my feet. At this time I was playing golf regularly and didn’t want to miss out on this activity. I joined the volunteers in the Wool Museum in March/April 2001. I was allocated to the Museum Shop and thoroughly enjoyed being a member of the shop staff. I then became shop assistant. I enjoyed talking and serving the customers. I was soon asked if I would mind repairing some of the garments that may have pulled a thread or a minor fault. I also enjoyed doing ‘stock taking’ in the shop. (Not many staff enjoyed this job, but I did.) In those early days, the Museum staff wore the red blazer and the black wool cardigan." - Lynette WekwerthBlack woollen vest with four buttons at the front, and two pockets. Vest has National Wool Museum logo on left chest. printed [label]: BELLA / Collection / made in australia / WEKWERTH / TO FIT / SIZE / 12working life, volunteer, national wool museum, clothing, uniform, lynette wekwerth, staff, employment, wool clothing, geelong -
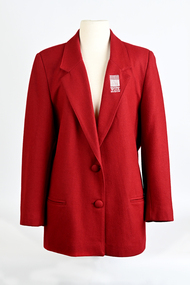 National Wool Museum
Textile - Red Woollen Jacket, Sabena, 2000s
... how to be a ‘good’ housekeeper. I enjoyed all the domestic subjects. Ray and I were engaged in August 1963. We purchased our engagement ring in Melbourne and went to dinner at the Playboy Club in Melbourne to celebrate. In preparation for our wedding, I spent many hours making my own wedding dress (with assistance from my mother). We were married at 11 am on Saturday, the 10th April 1965 at St. Matthew’s, Church of England, Geelong. When Ray retired, he responded to an advertisement for volunteers at the National Wool Museum to be a volunteer. He started...how to be a ‘good’ housekeeper. I enjoyed all the domestic subjects. Ray and I were engaged in August 1963. We purchased our engagement ring in Melbourne and went to dinner at the Playboy Club in Melbourne to celebrate. In preparation for our wedding, I spent many hours making my own wedding dress (with assistance from my mother). We were married at 11 am on Saturday, the 10th April 1965 at St. Matthew’s, Church of England, Geelong. When Ray retired, he responded to an advertisement for volunteers at the National Wool Museum to be a volunteer. He started ...This jacket was worn by Lynette Wekwerth when she worked as a volunteer in the National Wool Museum shop during the early 2000s. Lynette volunteered at the National Wool Museum for 25 years from 2001 until her passing in 2025, and was a much loved and respected member of the team. "I was born at Coonara Private Hospital at 173 Yarra Street, Geelong, on the 29th of March 1944, the third of five children. My father was in the RAAF when I was born, and on leaving the air force he became a carpenter/joiner. When I was young, we had the bread and milk delivered. There was a special tin for the bread and a big billy for the milk left of the front veranda to collect these items. My mother, elder sister, Wendy and my younger sister Zaidee, all went to “Physical Culture” held downstairs under the old Plaza Theatre building in Ryrie Street. We girls made our own sports clothes to do exercises (rods, dumbbells, and song and dance). It kept us fit, and we all won medals at some stage at the end-of-year concert. I was the only girl of my age in the street where I lived. There were boys my age, so I learned to play cricket and kick a football, all of which I did well. I attended Tate Street and then went on to Matthew Flinders Girls Secondary College in 1956. Matthew Flinders was a domestic arts school, where I learnt sewing, cookery, home management, and how to be a ‘good’ housekeeper. I enjoyed all the domestic subjects. Ray and I were engaged in August 1963. We purchased our engagement ring in Melbourne and went to dinner at the Playboy Club in Melbourne to celebrate. In preparation for our wedding, I spent many hours making my own wedding dress (with assistance from my mother). We were married at 11 am on Saturday, the 10th April 1965 at St. Matthew’s, Church of England, Geelong. When Ray retired, he responded to an advertisement for volunteers at the National Wool Museum to be a volunteer. He started in 1998. The year that the ‘Pharaohs exhibition’ started. That was fine by me, as he wouldn’t be getting under my feet. At this time I was playing golf regularly and didn’t want to miss out on this activity. I joined the volunteers in the Wool Museum in March/April 2001. I was allocated to the Museum Shop and thoroughly enjoyed being a member of the shop staff. I then became shop assistant. I enjoyed talking and serving the customers. I was soon asked if I would mind repairing some of the garments that may have pulled a thread or a minor fault. I also enjoyed doing ‘stock taking’ in the shop. (Not many staff enjoyed this job, but I did.) In those early days, the Museum staff wore the red blazer and the black wool cardigan." - Lynette WekwerthRed jacket with two buttons and two pockets at the front, and two decorative buttons on each cuff. Jacket has National Wool Museum logo on the left lapel. printed [label]: SABENA / 14working life, volunteer, national wool museum, clothing, uniform, lynette wekwerth, staff, employment, wool clothing, geelong -
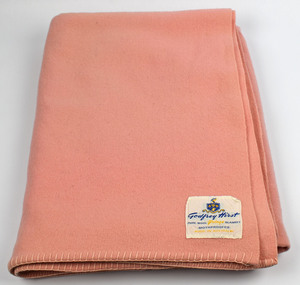 National Wool Museum
Textile - Blanket, Godfrey Hirst, 1950s
... It showed how particular colours were in fashion in the early decades, based mostly around depths of pastel pinks, mints, lemons and baby blues with brighter colours arriving in the 1960s then the browns and oranges in heavier tones in the 1970s. Note from collector- "For more than 100 years blankets were made all over Australia in over 100 woollen mills. My aim, is to preserve 100 examples of these wonderful pieces of history. Ten years ago I started ...Note from collector: I would stack plain blankets of the same base colour and arrange them by shade to make up a colour palette. It showed how particular colours were in fashion in the early decades, based mostly around depths of pastel pinks, mints, lemons and baby blues with brighter colours arriving in the 1960s then the browns and oranges in heavier tones in the 1970s. Note from collector- "For more than 100 years blankets were made all over Australia in over 100 woollen mills. My aim, is to preserve 100 examples of these wonderful pieces of history. Ten years ago I started collecting the iconic Onkaparinga travel rugs, so that on movie nights at home there would be plenty to go around. Everyone had their favourite; even the cat had his own – a small red tartan one. Keeping an eye out for those travel rugs at op-shops and markets, collectable stores and bazaars, led to noticing vintage blankets. I'd never really thought about them before or paid much attention though of course I had grown up with them at my grandmother's. When I discovered my first Laconia cream blanket with blue stripes, my eyes just went gaga. Well that was it, I was hooked and since then over 500 blankets have passed through my hands. These common, everyday items, found in all households for so many decades, were traditional engagement gifts. Pairs were prized wedding presents turning into family heirlooms. They were fashionable dressers of beds, givers of warmth, bestowers of security and reliability. The comfort found in these objects resonates with almost all of us; we grew up with them ourselves or fondly recall them in a grandparent’s home. There is no modern replacement with the integrity of these old blankets, many of them now older than most of us. They are romantic, sensible, special, familiar, nostalgic and nothing else feels so appropriate in so many situations. No offense to the great Aussie doona, but from hippie to hipster, at a music festival, picnic, campsite or couch, a vintage blanket is something coveted by all. This industry that employed tens of thousands and must have been such a huge contributor to the economy is almost completely lost now. Blanket Fever is an ode to everything that came before: the land, the sheep, the shearers, the hands, the mills, the weavers, the designers, the distributors, the department stores. To the grandparents that gave them, the people that received them, the families that kept them; thank you. I’m passionate about my collection of Australian blankets manufactured in mostly Victoria, South Australia and Tasmania from the 1930s to the end of the 1960s. The collection has blankets from each of these four decades representing the styles and fashions of their time and includes dated advertisements which help determine the eras the blankets are from." Queen Sized, dusty pink blanketGodfrey Hirst/Pure Wool Pelage Blanket/Mothproofed/Made in Australiawool, blanket, blanket fever, godfrey hirst, geelong -
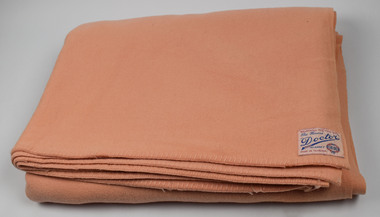 National Wool Museum
Textile - Blanket, Kelsall and Kemp, 1950s
... It showed how particular colours were in fashion in the early decades, based mostly around depths of pastel pinks, mints, lemons and baby blues with brighter colours arriving in the 1960s then the browns and oranges in heavier tones in the 1970s. Collector's note: "For more than 100 years blankets were made all over Australia in over 100 woollen mills. My aim, is to preserve 100 examples of these wonderful pieces of history. Ten years ago I started ...Collector says: "I would stack plain blankets of the same base colour and arrange them by shade to make up a colour palette. It showed how particular colours were in fashion in the early decades, based mostly around depths of pastel pinks, mints, lemons and baby blues with brighter colours arriving in the 1960s then the browns and oranges in heavier tones in the 1970s.Collector's note: "For more than 100 years blankets were made all over Australia in over 100 woollen mills. My aim, is to preserve 100 examples of these wonderful pieces of history. Ten years ago I started collecting the iconic Onkaparinga travel rugs, so that on movie nights at home there would be plenty to go around. Everyone had their favourite; even the cat had his own – a small red tartan one. Keeping an eye out for those travel rugs at op-shops and markets, collectable stores and bazaars, led to noticing vintage blankets. I'd never really thought about them before or paid much attention though of course I had grown up with them at my grandmother's. When I discovered my first Laconia cream blanket with blue stripes, my eyes just went gaga. Well that was it, I was hooked and since then over 500 blankets have passed through my hands. These common, everyday items, found in all households for so many decades, were traditional engagement gifts. Pairs were prized wedding presents turning into family heirlooms. They were fashionable dressers of beds, givers of warmth, bestowers of security and reliability. The comfort found in these objects resonates with almost all of us; we grew up with them ourselves or fondly recall them in a grandparent’s home. There is no modern replacement with the integrity of these old blankets, many of them now older than most of us. They are romantic, sensible, special, familiar, nostalgic and nothing else feels so appropriate in so many situations. No offense to the great Aussie doona, but from hippie to hipster, at a music festival, picnic, campsite or couch, a vintage blanket is something coveted by all. This industry that employed tens of thousands and must have been such a huge contributor to the economy is almost completely lost now. Blanket Fever is an ode to everything that came before: the land, the sheep, the shearers, the hands, the mills, the weavers, the designers, the distributors, the department stores. To the grandparents that gave them, the people that received them, the families that kept them; thank you. I’m passionate about my collection of Australian blankets manufactured in mostly Victoria, South Australia and Tasmania from the 1930s to the end of the 1960s. The collection has blankets from each of these four decades representing the styles and fashions of their time and includes dated advertisements which help determine the eras the blankets are from."Queen sized blanket, soft pastel pinkWarranted 100% Pure Wool/The Famous "Doctor" Regd/Blanket Made in Tasmania/in Emblem "K&K" (first K mirror image)/Regdwool, blanket, blanket fever, the famous doctor, kelsall and kemp, tasmania -
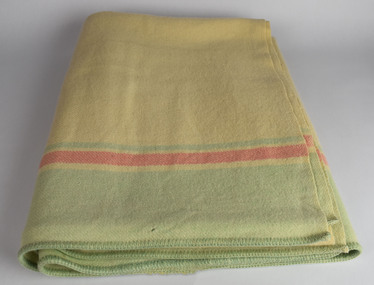 National Wool Museum
Textile - Blanket
... how I felt finding this simple, beautiful, well kept blanket. Collector's note: "For more than 100 years blankets were made all over Australia in over 100 woollen mills. My aim, is to preserve 100 examples of these wonderful pieces of history. Ten years ago I started ...Collector says: "As a general rule I only collected blankets with a label, but there are always exceptions. The colour ways of these 3 are just so gorgeous I had to include them - especially as the brown and blue from the Bass Valley op shop was 1 dollar! The cream one with the mint panel + watermelon stripe is one of my favourite blankets ever despite no label - it looks like the blanket version of the Agnes Martin painting called Gratitude which is exactly how I felt finding this simple, beautiful, well kept blanket. Collector's note: "For more than 100 years blankets were made all over Australia in over 100 woollen mills. My aim, is to preserve 100 examples of these wonderful pieces of history. Ten years ago I started collecting the iconic Onkaparinga travel rugs, so that on movie nights at home there would be plenty to go around. Everyone had their favourite; even the cat had his own – a small red tartan one. Keeping an eye out for those travel rugs at op-shops and markets, collectable stores and bazaars, led to noticing vintage blankets. I'd never really thought about them before or paid much attention though of course I had grown up with them at my grandmother's. When I discovered my first Laconia cream blanket with blue stripes, my eyes just went gaga. Well that was it, I was hooked and since then over 500 blankets have passed through my hands. These common, everyday items, found in all households for so many decades, were traditional engagement gifts. Pairs were prized wedding presents turning into family heirlooms. They were fashionable dressers of beds, givers of warmth, bestowers of security and reliability. The comfort found in these objects resonates with almost all of us; we grew up with them ourselves or fondly recall them in a grandparent’s home. There is no modern replacement with the integrity of these old blankets, many of them now older than most of us. They are romantic, sensible, special, familiar, nostalgic and nothing else feels so appropriate in so many situations. No offense to the great Aussie doona, but from hippie to hipster, at a music festival, picnic, campsite or couch, a vintage blanket is something coveted by all. This industry that employed tens of thousands and must have been such a huge contributor to the economy is almost completely lost now. Blanket Fever is an ode to everything that came before: the land, the sheep, the shearers, the hands, the mills, the weavers, the designers, the distributors, the department stores. To the grandparents that gave them, the people that received them, the families that kept them; thank you. I’m passionate about my collection of Australian blankets manufactured in mostly Victoria, South Australia and Tasmania from the 1930s to the end of the 1960s. The collection has blankets from each of these four decades representing the styles and fashions of their time and includes dated advertisements which help determine the eras the blankets are from."Double sized cream blanket with watermelon and mint stripesNo inscriptionwool, blanket, blanket fever, no label -
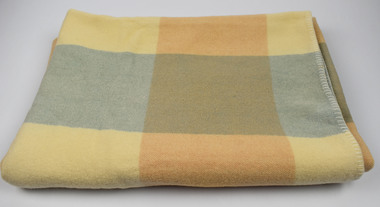 National Wool Museum
Textile - Blanket, 1960s
... how I felt finding this simple, beautiful, well kept blanket. Collector's note: "For more than 100 years blankets were made all over Australia in over 100 woollen mills. My aim, is to preserve 100 examples of these wonderful pieces of history. Ten years ago I started ...Collector says: "As a general rule I only collected blankets with a label, but there are always exceptions. The colour ways of these 3 are just so gorgeous I had to include them - especially as the brown and blue from the Bass Valley op shop was 1 dollar! The cream one with the mint panel + watermelon stripe is one of my favourite blankets ever despite no label - it looks like the blanket version of the Agnes Martin painting called Gratitude which is exactly how I felt finding this simple, beautiful, well kept blanket.Collector's note: "For more than 100 years blankets were made all over Australia in over 100 woollen mills. My aim, is to preserve 100 examples of these wonderful pieces of history. Ten years ago I started collecting the iconic Onkaparinga travel rugs, so that on movie nights at home there would be plenty to go around. Everyone had their favourite; even the cat had his own – a small red tartan one. Keeping an eye out for those travel rugs at op-shops and markets, collectable stores and bazaars, led to noticing vintage blankets. I'd never really thought about them before or paid much attention though of course I had grown up with them at my grandmother's. When I discovered my first Laconia cream blanket with blue stripes, my eyes just went gaga. Well that was it, I was hooked and since then over 500 blankets have passed through my hands. These common, everyday items, found in all households for so many decades, were traditional engagement gifts. Pairs were prized wedding presents turning into family heirlooms. They were fashionable dressers of beds, givers of warmth, bestowers of security and reliability. The comfort found in these objects resonates with almost all of us; we grew up with them ourselves or fondly recall them in a grandparent’s home. There is no modern replacement with the integrity of these old blankets, many of them now older than most of us. They are romantic, sensible, special, familiar, nostalgic and nothing else feels so appropriate in so many situations. No offense to the great Aussie doona, but from hippie to hipster, at a music festival, picnic, campsite or couch, a vintage blanket is something coveted by all. This industry that employed tens of thousands and must have been such a huge contributor to the economy is almost completely lost now. Blanket Fever is an ode to everything that came before: the land, the sheep, the shearers, the hands, the mills, the weavers, the designers, the distributors, the department stores. To the grandparents that gave them, the people that received them, the families that kept them; thank you. I’m passionate about my collection of Australian blankets manufactured in mostly Victoria, South Australia and Tasmania from the 1930s to the end of the 1960s. The collection has blankets from each of these four decades representing the styles and fashions of their time and includes dated advertisements which help determine the eras the blankets are from."Double sized, checked blanket, brown, blue and creamNo inscriptionwool, blanket, blanket fever, no label -
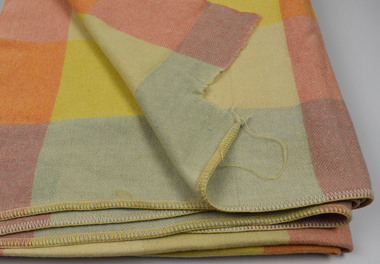 National Wool Museum
Textile - Blanket, 1960s
... how I felt finding this simple, beautiful, well kept blanket." Collector's note: "For more than 100 years blankets were made all over Australia in over 100 woollen mills. My aim, is to preserve 100 examples of these wonderful pieces of history. Ten years ago I started ...Collector says: As a general rule I only collected blankets with a label, but there are always exceptions. The colour ways of these 3 are just so gorgeous I had to include them - especially as the brown and blue from the Bass Valley op shop was 1 dollar! The cream one with the mint panel + watermelon stripe is one of my favourite blankets ever despite no label - it looks like the blanket version of the Agnes Martin painting called Gratitude which is exactly how I felt finding this simple, beautiful, well kept blanket."Collector's note: "For more than 100 years blankets were made all over Australia in over 100 woollen mills. My aim, is to preserve 100 examples of these wonderful pieces of history. Ten years ago I started collecting the iconic Onkaparinga travel rugs, so that on movie nights at home there would be plenty to go around. Everyone had their favourite; even the cat had his own – a small red tartan one. Keeping an eye out for those travel rugs at op-shops and markets, collectable stores and bazaars, led to noticing vintage blankets. I'd never really thought about them before or paid much attention though of course I had grown up with them at my grandmother's. When I discovered my first Laconia cream blanket with blue stripes, my eyes just went gaga. Well that was it, I was hooked and since then over 500 blankets have passed through my hands. These common, everyday items, found in all households for so many decades, were traditional engagement gifts. Pairs were prized wedding presents turning into family heirlooms. They were fashionable dressers of beds, givers of warmth, bestowers of security and reliability. The comfort found in these objects resonates with almost all of us; we grew up with them ourselves or fondly recall them in a grandparent’s home. There is no modern replacement with the integrity of these old blankets, many of them now older than most of us. They are romantic, sensible, special, familiar, nostalgic and nothing else feels so appropriate in so many situations. No offense to the great Aussie doona, but from hippie to hipster, at a music festival, picnic, campsite or couch, a vintage blanket is something coveted by all. This industry that employed tens of thousands and must have been such a huge contributor to the economy is almost completely lost now. Blanket Fever is an ode to everything that came before: the land, the sheep, the shearers, the hands, the mills, the weavers, the designers, the distributors, the department stores. To the grandparents that gave them, the people that received them, the families that kept them; thank you. I’m passionate about my collection of Australian blankets manufactured in mostly Victoria, South Australia and Tasmania from the 1930s to the end of the 1960s. The collection has blankets from each of these four decades representing the styles and fashions of their time and includes dated advertisements which help determine the eras the blankets are from."Double sized multicolour checked blanketNo inscriptionwool, blanket, blanket fever, no label -
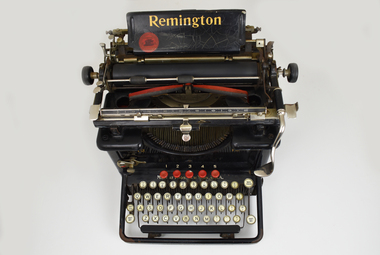 National Wool Museum
Functional object - Typewriter, Remington Typewriter Company, c.1925
... started as early as 8 and could finish around 5.30. The second phase of work began with the account sales to be prepared for the sellers of the wool. These detailed all the weights, descriptions of wool, brands, and prices. One Sales account could have multitudes of lot numbers, all needing to be individually described. Various charges needed to be deducted such as finance for woolpacks, extra stock, or farmers who were given a loan to live on during the season. Details of how...started as early as 8 and could finish around 5.30. The second phase of work began with the account sales to be prepared for the sellers of the wool. These detailed all the weights, descriptions of wool, brands, and prices. One Sales account could have multitudes of lot numbers, all needing to be individually described. Various charges needed to be deducted such as finance for woolpacks, extra stock, or farmers who were given a loan to live on during the season. Details of how ...This Remington No.12 typewriter is of the typebar, front-strike class. It was made by the Remington Typewriter Company of Ilion, New York, U.S.A. in about 1925. The Model No. 12 was introduced in 1922 and was one of the first 'visible writer' machines, in which the typed characters were visible to the operator. Previous models were of the upstrike class in which the characters were typed on the underside of the platen. To see what had been typed the operator had to raise the platen, meaning the typist was typing blind much of the time. This machine was used by Margaret Ganly née Burn in the 1930s. It was purchased for her by one of the sons of William Pride, a famous saddle maker in Geelong, William was Margaret’s grandfather. The typewriter was donated with original sales receipt and servicing tools. Margaret worked at Dennys for 7 years during the 1930s. The typewriter is accompanied with a story written by Margaret about her time working at the company. Margret married Jack Ganly, a fellow employee of Dennys. The Ganly name was well known within Dennys, with three generations of the Ganly family working at the company. WORKING CONDITIONS & OFFICE WORK DUTIES. Written by Margaret Burn in 2021. Worked at Dennys Lascelles in the 1930s. In the 1930s coming out of the Depression, jobs were hard to come by and had to be clung to by efficiency and subserviency. There was no union to protect workers – bosses could be tough and rough. Dennys Lascelles revolved around fortnightly wool sales in the “season” – September to May. Sale day was always a day of suppressed excitement. Preparation from a clerical point of view was complete and we now awaited the aftermath of the actual wool auction. The building teemed with people. There were country people down to see their wool sold, buyers of many nationalities, or from the big cities, who were coming in and out of the building all day. Their role was to inspect the acres of wool bales displayed on the show floors; however, caterers were present to feed clients, and there was plenty of social interactions on top of business. The office staff did not go home but waited until the first figures came back from the wool sales and the machines went in to action, both human and mechanical, preparing the invoices for the buyers’ firms. This comprised of lists of lot numbers, weights, prices per lb., and the total prices paid. A lot of this was done by old-school typewriters, making this work a big, heavy, tiring job. Before the finished lists could be dispatched, they were collated on an “abstract”. The lists had to balance with the catalogue from which the invoices had been prepared. This never happened automatically. All the paperwork had to be split up amongst pairs of workers and checked until discrepancies were found. This would happen until midnight but occasionally went until 2 or 3 am. Once complete, the invoices could then be rushed off to the buyers’ firms usually in Melbourne, and hire cars took the staff home. It was back on the job the next morning, usually around 8.30. The office hours varied according to the size of the sale and work involved. Some days started as early as 8 and could finish around 5.30. The second phase of work began with the account sales to be prepared for the sellers of the wool. These detailed all the weights, descriptions of wool, brands, and prices. One Sales account could have multitudes of lot numbers, all needing to be individually described. Various charges needed to be deducted such as finance for woolpacks, extra stock, or farmers who were given a loan to live on during the season. Details of how payment was to be made was also noted, whether the seller was to be paid by cheque, to a bank, or credited to their account with the company (which often left the seller still in debt). For a couple of months in the winter, things were quieter when staff took holidays and were sometimes given afternoons off. But there were still weekly skin sales and stock sales around the state. The annual end of June figures to be prepared for a big company like Dennys with branches all around the state also kept the staff busy. In good years there was sometimes a bonus. On sale days there was a bar open for the clients and wool buyers. This added to the excitement for the young girls, who were strictly barred from using it, but somehow managed to sneak a gin and tonic. This is how I had my first ever, before the evening meal. There was also the romantic notion in some minds, with all the influx of males, that some of us might end up on a wealthy station, or be noticed by an exotic buyer. To my knowledge, this never happened at Dennys Lascelles Limited. Group staff photo at Dennys Lascelles Limited. Margaret Burn. Age 18 or 19. Jack Ganly (Margaret’s future husband). 22.The typewriter has a black painted metal frame. The top section of the typewriter consists of a cylindrical platen on a carriage featuring plated metal fittings. A curved folding paper guide sits behind the platen and moves on the horizontal axis when the user types on the keyboard. A horizontal semicircular type basket with typebar links the top section to the lower keyboard. The ink ribbon is carried between two spools on a horizontal axis, one on each side of the type-basket. At the rear, a paper tray features gold lettering which reads ‘Remington’. At the front, a four-row QWERTY keyboard is found with 42-character keys total. 'SHIFT LOCK' and 'SHIFT KEY' are to the left of the keyboard, 'BACK SPACER' and 'SHIFT KEY' to the right. All keys are circular, white with black lettering. At the top of the keyboard are five circular red keys with the numbers 1-5 displayed behind their respective keys. A Spacebar is found along the front of the keyboard. The typewriter is accompanied by a cardboard box. This box contains the original sales receipt, on blue paper with grey lead handwriting. It also contains spare parts, a spare ribbon stretched between two spools, and cleaning tools such as brushes of differing sizes. Serial Number. Engraved. "LX45395" Gold lettering. Paper tray. “Remington” Gold Lettering. Behind keyboard. “Made in Ilion, New York, U.S.A. Gold Lettering. Mirrored both sides of type-basket. “12”remington, dennys lascelles ltd, worker conditions 1930s
