Showing 37 items matching "light metal work"
-
 Federation University Historical Collection
Certificate, Education Department, Victoria, Victorian Education Department Certificates, 1916-1928
... ...light metal work...Ballarat Technical Art School was a division of the Ballarat School of Mines. ann duke plain needlework victor greenhalgh frank tate ballarat technical art school arnold j. allen florence allen m.a. ansen dressmaking modelling human figure from cast ruby e. allison drawing fro memory nancy b. angwin maude arberry douglas w. arch muriel j. arch eileen bailey annie c. baker percy j. baker general design light metal work bessie m. barbery commerical arithmetic decorative needlework bert bernaldo drawing from a flat example lorna m. mccallum brush drawing stanley g.a. barnett millinery mavis g. beacham theodore k. beckwith isabel j. bell kelva e. bellingham leslie bennett olive van berkel elizabeth e. berry beatrice m. blake thomas g. blake catherine m. bowers nancy w. bowe clarice v. branagh harold r. brown architecture modelling the head from life henry bull light metalwork ivan d. brown thyra j. brown henry j. bull leila m. burford embossed leathwork lettering drawing fro dressmakers irene m. burke josephine m. callery modelling mona r. callow herbert cameron lillias cameron william e. carlyon doris l. carter ruth e. catt hiram e. chamberlain stephen chambers jack d. chand jack d. chard clara v. clegg beryl e. coad john c. collins keith m. collins robert g. collins kathleen m. conway athol b. cornish ballantyne cottier douglas s. cotton lilith s. christmas perspective doreen coughlan ivy g. crompton phyllis culliver joan m. cuthbertson alan r. cutter john l. daniel arthur dansey katherine d'arcy dorothy f. darling myrtle f. darling reginal a. davey gwladys h. davies annie dellaca henry a. deller ivy f. denovan joyce doepel bessie donacaster charles o. dowie horace b. dowsing walter dunstan mary dwyer allan r. egglestone melville g. ellingsen hugh o. elliott beryl r. ellis cecil f. engish allan e. evans matson l. eves olive j. fairlie robert j. falla mavis felstead lena featherston albert c. ferguson alma ferguson hilda m. ferguson john f. ferguson beatrice m. field clarice f. fisher philip h. fleischer building construction olive p. francis agnes fraser essie gale gilbert foster pearle fricke effie gascoigne enid m. gates clarice gear james a. geary sylvia f. greenhalgh evelyn f. geddes thomas j. gibson wavie b. gilbert edna m. gilmer nancy govan eula h. gower doris e. gray lesley j. gower henry n. graham victor e. greenhalgh melva e. gribble human anatomy roy k. griggs jack gullan robert gullan alma m. gunn dorothy j. hallan lucy hamilton james hammer dorothy e. hamond christopher j. hanlon catherin hardess lily haymes gladys hedges irene h. hewitt john hill victor j. hill olive hillings john a. hobill frances k. holmes gertrude m. hopkins alice horan marjorie hudson linda m. hughes lydia hughes winifred humphreys commercial english agnes a. humphries colin hunt kathleen hutchinson francis n. king jean king hilda knox john kopke isabel a. kopke hazel jackson freda jacobi agnes james william r. james alexander johnson edward j. jones eleanor w.h. jones nellie kau thomas kean francis kelly roy k. kelly thomas g. kierce theo e. leonard esther f. leviston bessie lockett norman h. long ena mackay gwenda e. mann robert v. maddison herbert w. malin dorothy m. marriott john c. mcarthur james p. mcculloch doris mcdougall cyril mcgibbony thelma mcgibbony jean mcgregor kenneth mciver constance m. mckenzie elsie j. mckissock alexander k.mcleod grace b. mclean john f.w. mclean rebecca mcphan vera meeny edna merritt dougald miller florence h. mingst agnes m. monteith doreen j. montgomery jean e. montgomery robert w.p. montgomery margaret b. moore harry e. morrish james mow gwendoline r. neagle gerald r. newson robert j. nicol helen f. nicholl george m. norton edward s. oliver mavis e. oliver hector h, osborne henry parker norma e. parr doris m. patterson elsie pearce celia pearlman leslie pearlman edna pearson william j. perriman eulalie perry ernest b. pinney charles e. peverill clarence r. pittock raymond b. pitts phyllis polson cynthia b. power bessie puzey john m. punshon evelyn a.v. ramsay robert i ramsay william a. rattray drawing for builders and artisans george h. reed fred reeves mavis i. regelhuth george r. renkin annie e. reynolds lizzie rice eileen l. richards henry c. riegelhuth gladys m. riley charles a. rimmington amy robson ernest w. robson florence a. rogers dorothy rppney kathleen rooney hugh n. ross stella m. rowe agnes w. ryan rosaling e. sage cora sandberg eric c. sanders douglas f. scott sylvia e. selkirk dorine a. shearer gladys sheldon emily e. simper veri slattery florence c. smith hilda m. spencer rose spiers mopna g. spiller alma m. stapleton joyce w. stark marcus m. stone commercial correspondence beatrice m. stuart ena v. sullivan margaret a. sydes rita tainsh norman b. tamlyn arthur w. thane alma m. thomas david e. thomas william h. thompson william m. thomas edgatr j.t. tippett sidnet tippett gladys tongway mavis toop hugh d. trainor annie e. treloar john h. treloar eilleen trumain linda f. treewk percival a. trompf percy trompf jean tunbridge ruth e. tunbridge allan j. twaits irene m. utting elizabeth van beek william a. wade agnes a. walker james a. walker vera v. aller john walsh marjorie walters rex warrillow edith watson bernice e. webb constance i weeks ina m. westcott pearl whan violet wheeler myrtle d. whitfield annie whitl richard l. whitla charles f. whitla grace a. wilcock murray a. wilkie andrew w. william arthur williams baden p. williams david d. williams grace f. williams maude h. williams mavis m. williams james williamson ivy wilson hector g wilson frederick w.r. wilson david s. wood Stamped Ballarat School of Mines No.10 Stamped signature "Frank Tate" 373 certificates in 2 boxes. ...Ballarat Technical Art School was a division of the Ballarat School of Mines.373 certificates in 2 boxes. Most appear to be related to subjects undertaken at the Ballarat Technical Art School. Director of education stamped signature Frank Tate.Stamped Ballarat School of Mines No.10 Stamped signature "Frank Tate"ann duke, plain needlework, victor greenhalgh, frank tate, ballarat technical art school, arnold j. allen, florence allen, m.a. ansen, dressmaking, modelling human figure from cast, ruby e. allison, drawing fro memory, nancy b. angwin, maude arberry, douglas w. arch, muriel j. arch, eileen bailey, annie c. baker, percy j. baker, general design, light metal work, bessie m. barbery, commerical arithmetic, decorative needlework, bert bernaldo, drawing from a flat example, lorna m. mccallum, brush drawing, stanley g.a. barnett, millinery, mavis g. beacham, theodore k. beckwith, isabel j. bell, kelva e. bellingham, leslie bennett, olive van berkel, elizabeth e. berry, beatrice m. blake, thomas g. blake, catherine m. bowers, nancy w. bowe, clarice v. branagh, harold r. brown, architecture, modelling the head from life, henry bull, light metalwork, ivan d. brown, thyra j. brown, henry j. bull, leila m. burford, embossed leathwork, lettering, drawing fro dressmakers, irene m. burke, josephine m. callery, modelling, mona r. callow, herbert cameron, lillias cameron, william e. carlyon, doris l. carter, ruth e. catt, hiram e. chamberlain, stephen chambers, jack d. chand, jack d. chard, clara v. clegg, beryl e. coad, john c. collins, keith m. collins, robert g. collins, kathleen m. conway, athol b. cornish, ballantyne cottier, douglas s. cotton, lilith s. christmas, perspective, doreen coughlan, ivy g. crompton, phyllis culliver, joan m. cuthbertson, alan r. cutter, john l. daniel, arthur dansey, katherine d'arcy, dorothy f. darling, myrtle f. darling, reginal a. davey, gwladys h. davies, annie dellaca, henry a. deller, ivy f. denovan, joyce doepel, bessie donacaster, charles o. dowie, horace b. dowsing, walter dunstan, mary dwyer, allan r. egglestone, melville g. ellingsen, hugh o. elliott, beryl r. ellis, cecil f. engish, allan e. evans, matson l. eves, olive j. fairlie, robert j. falla, mavis felstead, lena featherston, albert c. ferguson, alma ferguson, hilda m. ferguson, john f. ferguson, beatrice m. field, clarice f. fisher, philip h. fleischer, building construction, olive p. francis, agnes fraser, essie gale, gilbert foster, pearle fricke, effie gascoigne, enid m. gates, clarice gear, james a. geary, sylvia f. greenhalgh, evelyn f. geddes, thomas j. gibson, wavie b. gilbert, edna m. gilmer, nancy govan, eula h. gower, doris e. gray, lesley j. gower, henry n. graham, victor e. greenhalgh, melva e. gribble, human anatomy, roy k. griggs, jack gullan, robert gullan, alma m. gunn, dorothy j. hallan, lucy hamilton, james hammer, dorothy e. hamond, christopher j. hanlon, catherin hardess, lily haymes, gladys hedges, irene h. hewitt, john hill, victor j. hill, olive hillings, john a. hobill, frances k. holmes, gertrude m. hopkins, alice horan, marjorie hudson, linda m. hughes, lydia hughes, winifred humphreys, commercial english, agnes a. humphries, colin hunt, kathleen hutchinson, francis n. king, jean king, hilda knox, john kopke, isabel a. kopke, hazel jackson, freda jacobi, agnes james, william r. james, alexander johnson, edward j. jones, eleanor w.h. jones, nellie kau, thomas kean, francis kelly, roy k. kelly, thomas g. kierce, theo e. leonard, esther f. leviston, bessie lockett, norman h. long, ena mackay, gwenda e. mann, robert v. maddison, herbert w. malin, dorothy m. marriott, john c. mcarthur, james p. mcculloch, doris mcdougall, cyril mcgibbony, thelma mcgibbony, jean mcgregor, kenneth mciver, constance m. mckenzie, elsie j. mckissock, alexander k.mcleod, grace b. mclean, john f.w. mclean, rebecca mcphan, vera meeny, edna merritt, dougald miller, florence h. mingst, agnes m. monteith, doreen j. montgomery, jean e. montgomery, robert w.p. montgomery, margaret b. moore, harry e. morrish, james mow, gwendoline r. neagle, gerald r. newson, robert j. nicol, helen f. nicholl, george m. norton, edward s. oliver, mavis e. oliver, hector h, osborne, henry parker, norma e. parr, doris m. patterson, elsie pearce, celia pearlman, leslie pearlman, edna pearson, william j. perriman, eulalie perry, ernest b. pinney, charles e. peverill, clarence r. pittock, raymond b. pitts, phyllis polson, cynthia b. power, bessie puzey, john m. punshon, evelyn a.v. ramsay, robert i ramsay, william a. rattray, drawing for builders and artisans, george h. reed, fred reeves, mavis i. regelhuth, george r. renkin, annie e. reynolds, lizzie rice, eileen l. richards, henry c. riegelhuth, gladys m. riley, charles a. rimmington, amy robson, ernest w. robson, florence a. rogers, dorothy rppney, kathleen rooney, hugh n. ross, stella m. rowe, agnes w. ryan, rosaling e. sage, cora sandberg, eric c. sanders, douglas f. scott, sylvia e. selkirk, dorine a. shearer, gladys sheldon, emily e. simper, veri slattery, florence c. smith, hilda m. spencer, rose spiers, mopna g. spiller, alma m. stapleton, joyce w. stark, marcus m. stone, commercial correspondence, beatrice m. stuart, ena v. sullivan, margaret a. sydes, rita tainsh, norman b. tamlyn, arthur w. thane, alma m. thomas, david e. thomas, william h. thompson, william m. thomas, edgatr j.t. tippett, sidnet tippett, gladys tongway, mavis toop, hugh d. trainor, annie e. treloar, john h. treloar, eilleen trumain, linda f. treewk, percival a. trompf, percy trompf, jean tunbridge, ruth e. tunbridge, allan j. twaits, irene m. utting, elizabeth van beek, william a. wade, agnes a. walker, james a. walker, vera v. aller, john walsh, marjorie walters, rex warrillow, edith watson, bernice e. webb, constance i weeks, ina m. westcott, pearl whan, violet wheeler, myrtle d. whitfield, annie whitl, richard l. whitla, charles f. whitla, grace a. wilcock, murray a. wilkie, andrew w. william, arthur williams, baden p. williams, david d. williams, grace f. williams, maude h. williams, mavis m. williams, james williamson, ivy wilson, hector g wilson, frederick w.r. wilson, david s. wood -
 Flagstaff Hill Maritime Museum and Village
Functional object - Gas Tap, Before 1878
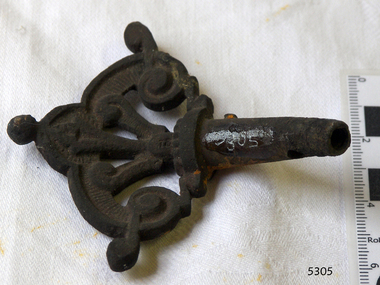
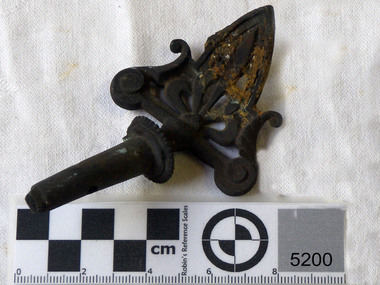
... Brass gas light tap with fancy metal work on the end. Recovered from the wreck of the Loch Ard. ...The collections historically significance is that it is associated unfortunately with the worst and best-known shipwreck in Victoria's history. flagstaff hill warrnambool shipwrecked coast flagstaff hill maritime museum maritime museum shipwreck coast flagstaff hill maritime village great ocean road loch line loch ard captain gibbs eva carmichael tom pearce glenample station mutton bird island loch ard gorge brass gas tap gas tap light fitting Brass gas light tap with fancy metal work on the end. Recovered from the wreck of the Loch Ard. ...History of the Loch Ard: The Loch Ard got it’s name from ”Loch Ard” a loch which lies to the west of Aberfoyle, and to the east of Loch Lomond. It means "high lake" in Scottish Gaelic.The vessel belonged to the famous Loch Line which sailed many vessels from England to Australia. The Loch Ard was built in Glasgow by Barclay, Curdle and Co. in 1873, the vessel was a three-masted square-rigged iron sailing ship that measured 79.87 meters in length, 11.58 m in width, and 7 m in depth with a gross tonnage of 1693 tons with a mainmast that measured a massive 45.7 m in height. Loch Ard made three trips to Australia and one trip to Calcutta before its fateful voyage. Loch Ard left England on March 2, 1878, under the command of 29-year-old Captain Gibbs, who was newly married. The ship was bound for Melbourne with a crew of 37, plus 17 passengers. The general cargo reflected the affluence of Melbourne at the time. Onboard were straw hats, umbrella, perfumes, clay pipes, pianos, clocks, confectionery, linen and candles, as well as a heavier load of railway irons, cement, lead and copper. There were other items included that were intended for display in the Melbourne International Exhibition of 1880. The voyage to Port Phillip was long but uneventful. Then at 3 am on June 1, 1878, Captain Gibbs was expecting to see land. But the Loch Ard was running into a fog which greatly reduced visibility. Captain Gibbs was becoming anxious as there was no sign of land or the Cape Otway lighthouse. At 4 am the fog lifted and a lookout aloft announced that he could see breakers. The sheer cliffs of Victoria's west coast came into view, and Captain Gibbs realised that the ship was much closer to them than expected. He ordered as much sail to be set as time would permit and then attempted to steer the vessel out to sea. On coming head-on into the wind, the ship lost momentum, the sails fell limp and Loch Ard's bow swung back towards land. Gibbs then ordered the anchors to be released in an attempt to hold its position. The anchors sank some 50 fathoms - but did not hold. By this time the ship was among the breakers and the tall cliffs of Mutton Bird Island rose behind. Just half a mile from the coast, the ship's bow was suddenly pulled around by the anchor. The captain tried to tack out to sea, but the ship struck a reef at the base of Mutton Bird Island, near Port Campbell. Waves subsequently broke over the ship and the top deck became loosened from the hull. The masts and rigging came crashing down knocking passengers and crew overboard. When a lifeboat was finally launched, it crashed into the side of Loch Ard and capsized. Tom Pearce, who had launched the boat, managed to cling to its overturned hull and shelter beneath it. He drifted out to sea and then on the flood tide came into what is now known as Loch Ard Gorge. He swam to shore, bruised and dazed, and found a cave in which to shelter. Some of the crew stayed below deck to shelter from the falling rigging but drowned when the ship slipped off the reef into deeper water. Eva Carmichael a passenger had raced onto the deck to find out what was happening only to be confronted by towering cliffs looming above the stricken ship. In all the chaos, Captain Gibbs grabbed Eva and said, "If you are saved Eva, let my dear wife know that I died like a sailor". That was the last Eva Carmichael saw of the captain. She was swept off the ship by a huge wave. Eva saw Tom Pearce on a small rocky beach and yelled to attract his attention. He dived in and swam to the exhausted woman and dragged her to shore. He took her to the cave and broke the open case of brandy which had washed up on the beach. He opened a bottle to revive the unconscious woman. A few hours later Tom scaled a cliff in search of help. He followed hoof prints and came by chance upon two men from nearby Glenample Station three and a half miles away. In a complete state of exhaustion, he told the men of the tragedy. Tom then returned to the gorge while the two men rode back to the station to get help. By the time they reached Loch Ard Gorge, it was cold and dark. The two shipwreck survivors were taken to Glenample Station to recover. Eva stayed at the station for six weeks before returning to Ireland by steamship. In Melbourne, Tom Pearce received a hero's welcome. He was presented with the first gold medal of the Royal Humane Society of Victoria and a £1000 cheque from the Victorian Government. Concerts were performed to honour the young man's bravery and to raise money for those who lost family in the disaster. Of the 54 crew members and passengers on board, only two survived: the apprentice, Tom Pearce and the young woman passenger, Eva Carmichael, who lost her family in the tragedy. Ten days after the Loch Ard tragedy, salvage rights to the wreck were sold at auction for £2,120. Cargo valued at £3,000 was salvaged and placed on the beach, but most washed back into the sea when another storm developed. The wreck of Loch Ard still lies at the base of Mutton Bird Island. Much of the cargo has now been salvaged and some items were washed up into Loch Ard Gorge. Cargo and artefacts have also been illegally salvaged over many years before protective legislation was introduced in March 1982. One of the most unlikely pieces of cargo to have survived the shipwreck was a Minton majolica peacock- one of only nine in the world. The peacock was destined for the Melbourne 1880 International Exhibition in. It had been well packed, which gave it adequate protection during the violent storm. Today the Minton peacock can be seen at the Flagstaff Hill Maritime Museum in Warrnambool. From Australia's most dramatic shipwreck it has now become Australia's most valuable shipwreck artifact and is one of very few 'objects' on the Victorian State Heritage Register.The shipwreck of the Loch Ard is of significance for Victoria and is registered on the Victorian Heritage Register ( S 417). Flagstaff Hill has a varied collection of artefacts from Loch Ard and its collection is significant for being one of the largest accumulation of artefacts from this notable Victorian shipwreck. The collections object is to also give us a snapshot into history so we are able to interpret the story of this tragic event. The collection is also archaeologically significant as it represents aspects of Victoria's shipping history that allows us to interpret Victoria's social and historical themes of the time. The collections historically significance is that it is associated unfortunately with the worst and best-known shipwreck in Victoria's history. Brass gas light tap with fancy metal work on the end. Recovered from the wreck of the Loch Ard. flagstaff hill, warrnambool, shipwrecked coast, flagstaff hill maritime museum, maritime museum, shipwreck coast, flagstaff hill maritime village, great ocean road, loch line, loch ard, captain gibbs, eva carmichael, tom pearce, glenample station, mutton bird island, loch ard gorge, brass gas tap, gas tap, light fitting -
 Bendigo Military Museum
Uniform - SHIRT, TROUSERS, WORK DRESS - ARMY, Australian Defence Industries, pre-2004
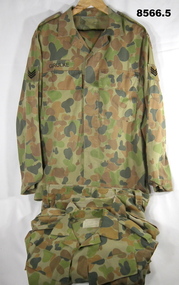
... Work dress, colours light to dark greens through to light to dark brown. Cotton/polyester fabric. Khaki colour plastic buttons. 1. Shirt - older style female work dress. Collar, shoulder epaulettes, two front pockets with concealed button closure flaps. White polyester fabric manufacturers label, back below collar. Print illegible. 2. Trousers - older style female work dress. Two side pockets, two large patch side pockets with nylon and metal...Work dress, colours light to dark greens through to light to dark brown. Cotton/polyester fabric. Khaki colour plastic buttons. 1. Shirt - older style female work dress. Collar, shoulder epaulettes, two front pockets with concealed button closure flaps. White polyester fabric manufacturers label, back below collar. Print illegible. 2. Trousers - older style female work dress. Two side pockets, two large patch side pockets with nylon and metal ...DPCU (Disruptive Pattern Camouflage Uniform). Work dress, colours light to dark greens through to light to dark brown. Cotton/polyester fabric. Khaki colour plastic buttons. 1. Shirt - older style female work dress. Collar, shoulder epaulettes, two front pockets with concealed button closure flaps. White polyester fabric manufacturers label, back below collar. Print illegible. 2. Trousers - older style female work dress. Two side pockets, two large patch side pockets with nylon and metal zipper closure, one back pocket with buttons. Belt loops and nylon and metal zipper fly. Khaki colour cotton fabric pocket lining. Elastic ankle drawstring with plastic lock clip.Manufacturers information on label - print illegible. 1. Handwritten in black ink pen "12/ 12/ 77R".uniform, army, work dress, dpcu -
 Bendigo Military Museum
Uniform - SHIRT, TROUSERS, WORK DRESS - ARMY, Australian Defence Industries, 2008
... work dress. Colours light to dark green through to light to dark brown. Cotton/polyester fabric. Dark green colour plastic buttons. 1. Shirt - new style, collar, one front epaulette, two front pockets with nylon/metal zipper closure, two sleeve pockets with concealed button closure flaps. ...work dress. Colours light to dark green through to light to dark brown. Cotton/polyester fabric. Dark green colour plastic buttons. 1. Shirt - new style, collar, one front epaulette, two front pockets with nylon/metal zipper closure, two sleeve pockets with concealed button closure flaps. ...DPCU (Disruptive Pattern Camouflage Uniform) work dress. Colours light to dark green through to light to dark brown. Cotton/polyester fabric. Dark green colour plastic buttons. 1. Shirt - new style, collar, one front epaulette, two front pockets with nylon/metal zipper closure, two sleeve pockets with concealed button closure flaps. White polyester fabric. Manufacturers label, back below collar. Print illegible. 2. Trousers - new style. Two side pockets, two large patch side pockets with nylon metal zipper, one back pocket. Belt loops and nylon/metal zipper fly. Khaki colour cotton fabric pocket lining. White polyester fabric manufacturers label on front right pocket lining. Ankle elastic drawstring.Manufacturers information on label - black ink print. 2. "ADA/ VICTORIA 2008/ ^ / SPECIFICATION ARMY (AUST) 6542/ NSN 8415 66 152 1054/ SIZE 85R/ NAME/ SERVICE NO/ 75% COTTON 25% POLYESTER/ WARM MACHINE WASH 40 deg c/ RINSE WELL WARM IRON/ DO NOT IRON OVER HOOK AND PILE/ DO NOT BLEACH/ DO NOT STARCH/ MAY BE TUMBLED DRY 40dc/ MADE IN AUSTRALIA."uniform, army, work dress, dpcu -
 Bendigo Military Museum
Uniform - JACKET, WORK DRESS - ARMY, Australian Defence Industries, 2008
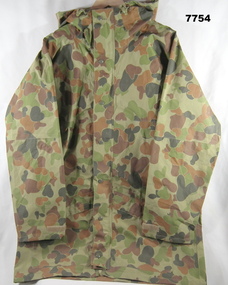
... DCPU (Disruptive Pattern Camouflage Uniform) Work dress jacket - Colours light to dark green through to light to dark brown. Gore-Tex fabric for wet weather. Hood with peak and elastic drawstring with plastic lock clip. Plastic/metal...LIGHT/ COOL IRON/ FABRIC CONTENT/ FACE/LINER: 100% POLYESTER/ LAMINATE: PTFE" Label 2. "BATCH NO./5301011". DCPU (Disruptive Pattern Camouflage Uniform) Work dress jacket - Colours light to dark green through to light to dark brown. Gore-Tex fabric for wet weather. Hood with peak and elastic drawstring with plastic lock clip. Plastic/metal ...DCPU (Disruptive Pattern Camouflage Uniform) Work dress jacket - Colours light to dark green through to light to dark brown. Gore-Tex fabric for wet weather. Hood with peak and elastic drawstring with plastic lock clip. Plastic/metal two ended zipper and metal press studs - front fastening. Two front pockets with loop and hook (Velcro) fasteners. Two interior nylon mesh pocket with zipper. Sleeves at wrist - loop and hook adjustable strap. White colour polyester fabric manufacturers label on front zipper. Manufacturers information on label - black ink print. Label 1 "GSSM/www.gssm.com.au/MAR 2008/O/N 248007/ N/S/N 8415 - 66 - 145- 7093/ SIZE:L/ CHEST: 100-110CM /NAME/SERVICE" "CARE INSTRUCTIONS/ MACHINE WASHABLE: 40c/ DO NOT BLEACH/ DO NOT SPIN DRY/ DO NOT WRING/HAND TO DRY/ LIGHT/ COOL IRON/ FABRIC CONTENT/ FACE/LINER: 100% POLYESTER/ LAMINATE: PTFE" Label 2. "BATCH NO./5301011". uniform, army, work dress, dpcu -
 Bendigo Military Museum
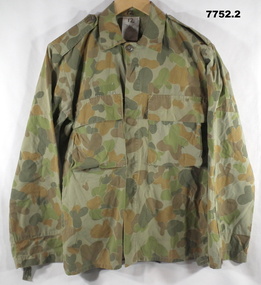
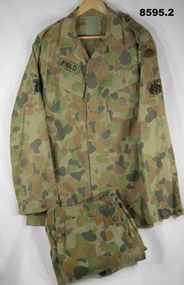
Uniform - SHIRT, TROUSERS, WORKDRESS, ARMY, Australian Defence Industries, 1990 - 1994
... light to dark brown. Cotton/polyester fabric. Khaki colour plastic buttons. 1. Shirt work dress, collar, shoulder epaulettes, two front pockets with concealed button closure flaps. Front - five buttons with concealed placket, long sleeves with cuff. Name patch has been sewn on "FIELD". Australian Army Rising Sun patch, top left sleeve. Rank insignia - Australian Coat of Arms - Warrant officer Class One on both sleeves. Manufacturers label - green cotton fabric - below collar. 2. Trousers - new style. Two side pockets, two large patch side pockets with two button closer flaps. One back patch pocket with button. Belt loops with buttons. Nylon/metal...light to dark brown. Cotton/polyester fabric. Khaki colour plastic buttons. 1. Shirt work dress, collar, shoulder epaulettes, two front pockets with concealed button closure flaps. Front - five buttons with concealed placket, long sleeves with cuff. Name patch has been sewn on "FIELD". Australian Army Rising Sun patch, top left sleeve. Rank insignia - Australian Coat of Arms - Warrant officer Class One on both sleeves. Manufacturers label - green cotton fabric - below collar. 2. Trousers - new style. Two side pockets, two large patch side pockets with two button closer flaps. One back patch pocket with button. Belt loops with buttons. Nylon/metal ...Original owner - 'FIELD'.Shirt and Trousers Word dress. 1. & 2. DPCU (Disruptive Pattern Camouflage Uniform) work dress. Colours light to dark green through to light to dark brown. Cotton/polyester fabric. Khaki colour plastic buttons. 1. Shirt work dress, collar, shoulder epaulettes, two front pockets with concealed button closure flaps. Front - five buttons with concealed placket, long sleeves with cuff. Name patch has been sewn on "FIELD". Australian Army Rising Sun patch, top left sleeve. Rank insignia - Australian Coat of Arms - Warrant officer Class One on both sleeves. Manufacturers label - green cotton fabric - below collar. 2. Trousers - new style. Two side pockets, two large patch side pockets with two button closer flaps. One back patch pocket with button. Belt loops with buttons. Nylon/metal zipper fly. DPCU pocket lining. Manufacturers label - on right front pocket.Manufacturers information - black ink print. 1. "VICTORIA/ 1990/ ^/ ???? 66.130.0039/ SIZE 107L/ NAME/ SERVICE NO/ MACHINE WASHABLE/ DRIP DRY ONLY/ DO NOT IRON/ DO NOT STARCH/ DO NOT BLEACH". 2. "VICTORIA/ 1994/ ^/ 8415.66.134.8920/ SIZE 95L/ CUT NO 2200/ SERVICE NO/ NAME/ 50% POLYESTER 50% COTTON/ MACHINE WASHABLE DRIP DRY ONLY/ DO NOT IRON DO NOT STARCH/ DO NOT BLEACH".uniforms, army, work dress, dpcu, passchendaele barracks trust -
 Bendigo Military Museum
Uniform - SHIRT, TROUSERS, WORK DRESS - ARMY, Australian Defence Industries, 1995
... Work dress. Colours light to dark green through to light to dark brown. Cotton/polyester fabric. Khaki colour plastic buttons. 1. 2. & 3. Shirts - work dress. Collar, shoulder epaulettes, two front pockets with concealed button closure flaps. Front five buttons with concealed placket. Long sleeves with cuff. 1. Name patch has been sewn on "GRULKE". Rank Insignia on both sleeves - 3 stripes - Sergeant. Australia colour patch - top left sleeve. 4. & 5. Trousers - new style, two side pockets, two large patch side pockets with two button closer flaps. One back patch pocket with button. Belt loops with buttons. Nylon/metal...Work dress. Colours light to dark green through to light to dark brown. Cotton/polyester fabric. Khaki colour plastic buttons. 1. 2. & 3. Shirts - work dress. Collar, shoulder epaulettes, two front pockets with concealed button closure flaps. Front five buttons with concealed placket. Long sleeves with cuff. 1. Name patch has been sewn on "GRULKE". Rank Insignia on both sleeves - 3 stripes - Sergeant. Australia colour patch - top left sleeve. 4. & 5. Trousers - new style, two side pockets, two large patch side pockets with two button closer flaps. One back patch pocket with button. Belt loops with buttons. Nylon/metal ...DPCU (Disruptive Pattern Camouflage Uniform) Work dress. Colours light to dark green through to light to dark brown. Cotton/polyester fabric. Khaki colour plastic buttons. 1. 2. & 3. Shirts - work dress. Collar, shoulder epaulettes, two front pockets with concealed button closure flaps. Front five buttons with concealed placket. Long sleeves with cuff. 1. Name patch has been sewn on "GRULKE". Rank Insignia on both sleeves - 3 stripes - Sergeant. Australia colour patch - top left sleeve. 4. & 5. Trousers - new style, two side pockets, two large patch side pockets with two button closer flaps. One back patch pocket with button. Belt loops with buttons. Nylon/metal zipper fly. DPCU pocket lining. Manufacturers label on right front pocket lining.Manufacturer's information on label - black ink print. 2. "ADA/ VICTORIA/ 1995/ ^ / 8415-66-130-0027/ SIZE 92s/ SERVICE NO/ NAME/ 50% POLYESTER 50% COTTON/ MACHINE WASHABLE/ DRIP DRY ONLY/ DO NOT IRON DO NOT STARCH/ DO NOT BLEACH/ A1". 4. & 5. "ADI/ VICTORIA/ 1995/ ^ 8415-66-134-8921/ SIZE 95r/ CUT NO 3603/ SERVICE NO/ NAME/ 50% POLYESTER 50% COTTON/ MACHINE WASHABLE DRIP DRY ONLY/ DO NOT IRON DO NOT STARCH/ DO NOT BLEACH"passchendaele barracks trust, uniform, army, work dress, dpcu -
 Kiewa Valley Historical Society
Papers - The Kiewa Hydro Electric Scheme x2, 1973 and 1993
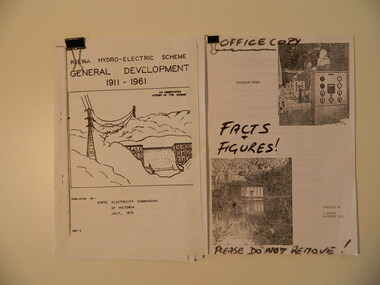
... The first is and abbreviated history of the scheme published by the SEC, the second is similar with 'facts & figures' accessed by Bill Sutton, (Mt Beauty resident and SEC worker) whose father worked on the scheme, and who enjoyed speaking to visitors and groups about the history of the area including some of the light hearted aspects of the history. kiewa hydro electric scheme state electricity commission of victoria bill sutton The Kiewa Hydro Electric Scheme General Development 1911 - 1961 by SECV, July 1973. Consists of 22 A4 pages held within a folded A3 sheet Victorian Hydro compiled by W. Sutton Nov. 1993. Office Copy / Facts & Figures. Consists of 44 A4 pages held by a metal ...1. Chronological account of the Kiewa Hydro Electric Scheme from 1911 to 1961 2.Victorian Hydro with technical facts and figures, with Aboriginal History of the region, Settlement of the Kiewa Valley, Origin of Names Both accounts are a history of the Kiewa Hydro Electric Scheme constructed by the State Electricity Commission of Victoria. The first is and abbreviated history of the scheme published by the SEC, the second is similar with 'facts & figures' accessed by Bill Sutton, (Mt Beauty resident and SEC worker) whose father worked on the scheme, and who enjoyed speaking to visitors and groups about the history of the area including some of the light hearted aspects of the history.The Kiewa Hydro Electric Scheme General Development 1911 - 1961 by SECV, July 1973. Consists of 22 A4 pages held within a folded A3 sheet Victorian Hydro compiled by W. Sutton Nov. 1993. Office Copy / Facts & Figures. Consists of 44 A4 pages held by a metal clip.kiewa hydro electric scheme, state electricity commission of victoria, bill sutton -
 Federation University Historical Collection
Document - Document - Syllabus, Education Department, Victoria,Technical Schools, Syllabuses
... light...public analysts...sheet metal work...They outline the requirements for various subjects, covering the following: .1: Sound and Light; .2: Course for Public Analysts, Day and Evening; .3: Sheet Metal Work; .4 Land, Engineering and Mine Surveying (1914); .5: Surveying (1921); .6: Physics (1924); 7: Iron, Steel and Engineering Alloys (1924); .8: Instrument Making(1924); .9: Elementary Science (1924); .10: Shorthand (1925); .11: Elementary Science- for Girls (1926); .12: Physic- Women's School (1928); .13: Typewriting (1929); .14: Painting and Decorating (1929); .15: Plumbing and Gasfitting (1929); .16: Plastering (1929); .17: Signwriting (1929); .18 Plumbing and Gasfitting (1937); .19: Course for Fibrous Plastering (1937); .20: Plumbing and Gasfitting (1938); .21: Course for Fitting and/or Turning and Machinist (1948). ...This is a 48 page booklet. technical schools syllabuses victoria education department sound and light public analysts sheet metal work land engineering and mine survey surveying physics iron steel and engineering alloys instrument making elementary science shorthand elementary science for girls physics women's schools typewriting painting and decorating plumbing and gasfitting plastering signwriting fibrous plastering fitting and/or turning machinist 1914 1921 1924 1925 1926 1928 1929 1937 1938 1949 21 A5 sheets typed Education Department, Victoria,Technical Schools, Syllabuses Document Document - Syllabus ...Technical Schools Syllabuses produced by the Education Department of Victoria. Items cover the period between 1914 and 1948. They outline the requirements for various subjects, covering the following: .1: Sound and Light; .2: Course for Public Analysts, Day and Evening; .3: Sheet Metal Work; .4 Land, Engineering and Mine Surveying (1914); .5: Surveying (1921); .6: Physics (1924); 7: Iron, Steel and Engineering Alloys (1924); .8: Instrument Making(1924); .9: Elementary Science (1924); .10: Shorthand (1925); .11: Elementary Science- for Girls (1926); .12: Physic- Women's School (1928); .13: Typewriting (1929); .14: Painting and Decorating (1929); .15: Plumbing and Gasfitting (1929); .16: Plastering (1929); .17: Signwriting (1929); .18 Plumbing and Gasfitting (1937); .19: Course for Fibrous Plastering (1937); .20: Plumbing and Gasfitting (1938); .21: Course for Fitting and/or Turning and Machinist (1948). This is a 48 page booklet. 21 A5 sheets typedtechnical schools, syllabuses, victoria, education department, sound and light, public analysts, sheet metal work, land engineering and mine survey, surveying, physics, iron steel and engineering alloys, instrument making, elementary science, shorthand, elementary science for girls, physics women's schools, typewriting, painting and decorating, plumbing and gasfitting, plastering, signwriting, fibrous plastering, fitting and/or turning, machinist, 1914, 1921, 1924, 1925, 1926, 1928, 1929, 1937, 1938, 1949 -
 Bendigo Historical Society Inc.
Book - LONG GULLY HISTORY GROUP COLLECTION:HERITAGE TRADE & SERVICES DIRECTORY
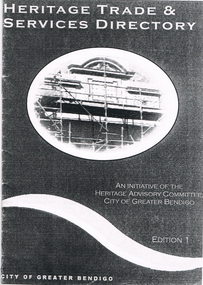
... Listed are: Architectural Hardware; Architects; Blacksmiths; Brickwork - General; Builders; Castings - Iron and Non Ferrous Metals; Cement Decoration and Rendering; Chimney Pots; Chimney Restoration; Chimney Sweeps; Colour Consultant; Concrete - Pre-cast; Damp Control; Drafting Service; Fabric; Fencing; Fire Mantels and Inserts; Floor Coverings; Furniture Restoration and French Polishing; Garden Renovations; Glass - Etching; Glass - Leadlighting; Guttering, Galvanised Iron and Sheet Metal Work; Interior Decorating; Joinery and Carpentry; Light Fittings; Masonry Cleaning; Paint; Painters and Decorators; Paint Stripping; Plasters and Associated Products; Resurfacing - Enameling; Resurfacing - Powder Coating; Restumping and Underpinning; Roof Restoration - Iron; Roof Restoration - Slate; Roof Restoration - Terracotta; Second Hand Materials; Stone - Quarries and Cutting; Stonemasons; Tile Layers; Tiles; Turning and Verandah Roofing....Listed are: Architectural Hardware; Architects; Blacksmiths; Brickwork - General; Builders; Castings - Iron and Non Ferrous Metals; Cement Decoration and Rendering; Chimney Pots; Chimney Restoration; Chimney Sweeps; Colour Consultant; Concrete - Pre-cast; Damp Control; Drafting Service; Fabric; Fencing; Fire Mantels and Inserts; Floor Coverings; Furniture Restoration and French Polishing; Garden Renovations; Glass - Etching; Glass - Leadlighting; Guttering, Galvanised Iron and Sheet Metal Work; Interior Decorating; Joinery and Carpentry; Light Fittings; Masonry Cleaning; Paint; Painters and Decorators; Paint Stripping; Plasters and Associated Products; Resurfacing - Enameling; Resurfacing - Powder Coating; Restumping and Underpinning; Roof Restoration - Iron; Roof Restoration - Slate; Roof Restoration - Terracotta; Second Hand Materials; Stone - Quarries and Cutting; Stonemasons; Tile Layers; Tiles; Turning and Verandah Roofing. ...Copy of a Heritage Trade & Services Directory Edition 1, dated April 2001. Compiled by City of Greater Bendigo Heritage Advisory Committee. Front cover has an oval picture of part of a building with scaffolding in front of it. Listed are: Architectural Hardware; Architects; Blacksmiths; Brickwork - General; Builders; Castings - Iron and Non Ferrous Metals; Cement Decoration and Rendering; Chimney Pots; Chimney Restoration; Chimney Sweeps; Colour Consultant; Concrete - Pre-cast; Damp Control; Drafting Service; Fabric; Fencing; Fire Mantels and Inserts; Floor Coverings; Furniture Restoration and French Polishing; Garden Renovations; Glass - Etching; Glass - Leadlighting; Guttering, Galvanised Iron and Sheet Metal Work; Interior Decorating; Joinery and Carpentry; Light Fittings; Masonry Cleaning; Paint; Painters and Decorators; Paint Stripping; Plasters and Associated Products; Resurfacing - Enameling; Resurfacing - Powder Coating; Restumping and Underpinning; Roof Restoration - Iron; Roof Restoration - Slate; Roof Restoration - Terracotta; Second Hand Materials; Stone - Quarries and Cutting; Stonemasons; Tile Layers; Tiles; Turning and Verandah Roofing.bendigo, history, long gully history group, the long gully history group - heritage trade & services directory, heritage advisory committee, city of greater bendigo -
 Flagstaff Hill Maritime Museum and Village
Functional object - Gas Tap, ca 1878
... Brass gas light tap fitting has fancy metal work at the end. Recovered from the Loch Ard wreck. ...The collections historically significance is that it is associated unfortunately with the worst and best-known shipwreck in Victoria's history. flagstaff hill warrnambool shipwrecked coast flagstaff hill maritime museum maritime museum shipwreck coast flagstaff hill maritime village great ocean road loch line loch ard captain gibbs eva carmichael tom pearce glenample station mutton bird island loch ard gorge gas tap brass gas tap None Brass gas light tap fitting has fancy metal work at the end. Recovered from the Loch Ard wreck. ...History of the Loch Ard: The Loch Ard got it’s name from ”Loch Ard” a loch which lies to the west of Aberfoyle, and to the east of Loch Lomond. It means "high lake" in Scottish Gaelic.The vessel belonged to the famous Loch Line which sailed many vessels from England to Australia. The Loch Ard was built in Glasgow by Barclay, Curdle and Co. in 1873, the vessel was a three-masted square-rigged iron sailing ship that measured 79.87 meters in length, 11.58 m in width, and 7 m in depth with a gross tonnage of 1693 tons with a mainmast that measured a massive 45.7 m in height. Loch Ard made three trips to Australia and one trip to Calcutta before its fateful voyage. Loch Ard left England on March 2, 1878, under the command of 29-year-old Captain Gibbs, who was newly married. The ship was bound for Melbourne with a crew of 37, plus 17 passengers. The general cargo reflected the affluence of Melbourne at the time. Onboard were straw hats, umbrella, perfumes, clay pipes, pianos, clocks, confectionery, linen and candles, as well as a heavier load of railway irons, cement, lead and copper. There were other items included that were intended for display in the Melbourne International Exhibition of 1880. The voyage to Port Phillip was long but uneventful. Then at 3 am on June 1, 1878, Captain Gibbs was expecting to see land. But the Loch Ard was running into a fog which greatly reduced visibility. Captain Gibbs was becoming anxious as there was no sign of land or the Cape Otway lighthouse. At 4 am the fog lifted and a lookout aloft announced that he could see breakers. The sheer cliffs of Victoria's west coast came into view, and Captain Gibbs realised that the ship was much closer to them than expected. He ordered as much sail to be set as time would permit and then attempted to steer the vessel out to sea. On coming head-on into the wind, the ship lost momentum, the sails fell limp and Loch Ard's bow swung back towards land. Gibbs then ordered the anchors to be released in an attempt to hold its position. The anchors sank some 50 fathoms - but did not hold. By this time the ship was among the breakers and the tall cliffs of Mutton Bird Island rose behind. Just half a mile from the coast, the ship's bow was suddenly pulled around by the anchor. The captain tried to tack out to sea, but the ship struck a reef at the base of Mutton Bird Island, near Port Campbell. Waves subsequently broke over the ship and the top deck became loosened from the hull. The masts and rigging came crashing down knocking passengers and crew overboard. When a lifeboat was finally launched, it crashed into the side of Loch Ard and capsized. Tom Pearce, who had launched the boat, managed to cling to its overturned hull and shelter beneath it. He drifted out to sea and then on the flood tide came into what is now known as Loch Ard Gorge. He swam to shore, bruised and dazed, and found a cave in which to shelter. Some of the crew stayed below deck to shelter from the falling rigging but drowned when the ship slipped off the reef into deeper water. Eva Carmichael a passenger had raced onto the deck to find out what was happening only to be confronted by towering cliffs looming above the stricken ship. In all the chaos, Captain Gibbs grabbed Eva and said, "If you are saved Eva, let my dear wife know that I died like a sailor". That was the last Eva Carmichael saw of the captain. She was swept off the ship by a huge wave. Eva saw Tom Pearce on a small rocky beach and yelled to attract his attention. He dived in and swam to the exhausted woman and dragged her to shore. He took her to the cave and broke the open case of brandy which had washed up on the beach. He opened a bottle to revive the unconscious woman. A few hours later Tom scaled a cliff in search of help. He followed hoof prints and came by chance upon two men from nearby Glenample Station three and a half miles away. In a complete state of exhaustion, he told the men of the tragedy. Tom then returned to the gorge while the two men rode back to the station to get help. By the time they reached Loch Ard Gorge, it was cold and dark. The two shipwreck survivors were taken to Glenample Station to recover. Eva stayed at the station for six weeks before returning to Ireland by steamship. In Melbourne, Tom Pearce received a hero's welcome. He was presented with the first gold medal of the Royal Humane Society of Victoria and a £1000 cheque from the Victorian Government. Concerts were performed to honour the young man's bravery and to raise money for those who lost family in the disaster. Of the 54 crew members and passengers on board, only two survived: the apprentice, Tom Pearce and the young woman passenger, Eva Carmichael, who lost her family in the tragedy. Ten days after the Loch Ard tragedy, salvage rights to the wreck were sold at auction for £2,120. Cargo valued at £3,000 was salvaged and placed on the beach, but most washed back into the sea when another storm developed. The wreck of Loch Ard still lies at the base of Mutton Bird Island. Much of the cargo has now been salvaged and some items were washed up into Loch Ard Gorge. Cargo and artefacts have also been illegally salvaged over many years before protective legislation was introduced in March 1982. One of the most unlikely pieces of cargo to have survived the shipwreck was a Minton majolica peacock- one of only nine in the world. The peacock was destined for the Melbourne 1880 International Exhibition in. It had been well packed, which gave it adequate protection during the violent storm. Today the Minton peacock can be seen at the Flagstaff Hill Maritime Museum in Warrnambool. From Australia's most dramatic shipwreck it has now become Australia's most valuable shipwreck artifact and is one of very few 'objects' on the Victorian State Heritage Register.The shipwreck of the Loch Ard is of significance for Victoria and is registered on the Victorian Heritage Register ( S 417). Flagstaff Hill has a varied collection of artefacts from Loch Ard and its collection is significant for being one of the largest accumulation of artefacts from this notable Victorian shipwreck. The collections object is to also give us a snapshot into history so we are able to interpret the story of this tragic event. The collection is also archaeologically significant as it represents aspects of Victoria's shipping history that allows us to interpret Victoria's social and historical themes of the time. The collections historically significance is that it is associated unfortunately with the worst and best-known shipwreck in Victoria's history. Brass gas light tap fitting has fancy metal work at the end. Recovered from the Loch Ard wreck. Noneflagstaff hill, warrnambool, shipwrecked coast, flagstaff hill maritime museum, maritime museum, shipwreck coast, flagstaff hill maritime village, great ocean road, loch line, loch ard, captain gibbs, eva carmichael, tom pearce, glenample station, mutton bird island, loch ard gorge, gas tap, brass gas tap -
 Flagstaff Hill Maritime Museum and Village
Domestic object - Plate
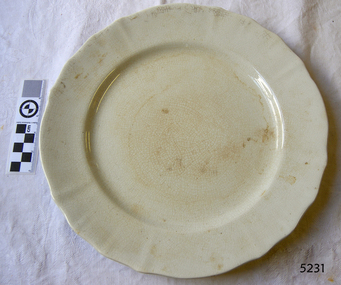
... Use a piece of fly wire to rub the work all over – this will scratch a little so be light handed. Use a knife or metal kidney to scrape any areas that require a bit more dynamic treatment than the fly wire offers! ...Use a piece of fly wire to rub the work all over – this will scratch a little so be light handed. Use a knife or metal kidney to scrape any areas that require a bit more dynamic treatment than the fly wire offers! ...The Process of Making Pottery Decorating, Firing, Glazing, Making, Technical There is a rhythm and flow to clay. It can’t be done all at once! Even the making process! It can take weeks to get everything done, especially if you can only work on your pottery once a week! Even though we have three hour classes, it’s often just not enough time! Here is an overview of some of the processes so you have a bit more grasp on some of the technical stuff! Step One – Design There are SO many ideas out there for making stuff in clay! From delicate porcelain jewellery, through to heavy sculptural work and everything in between. Deciding your direction is sometimes not that easy – when you first start, try everything, you will naturally gravitate to the style that you enjoy! The options and variations are endless and can get a wee bit overwhelming too! Check in with me before you start to ensure your ideas will work, what order you might do things, how you could achieve the look you are seeking and any other technical data required! Step Two – Making Clay is thixotropic. This means that as you work with it, the clay first gets sloppier and wetter, before is begins to dry in the atmosphere. For most things, you simply can’t do all parts of the project at once. An example of work order might look like: Get last weeks work out from the shelves Prepare clay for today’s work – roll your clay, prepare balls for throwing, make the first stage of a pinch pot) Clean up last week’s work and put it on the shelf for bisque firing Check that you have any glazing to do – and do enough of it that you will have time to finish your main project Do the next step of your next project – there might be a further step that can’t be complete immediately, in that case, wrap your work well and put onto the shelves. Letting your work rest for a while can really help keep your work clean and professional looking. Many things require bagging under plastic to keep it ready for work the next week – put your name on the outside of the bag so you can find your work easily. We have stickers and markers. Consider how you want to decorate your work – coloured slip can be applied at a fairly wet stage (remembering that it will make your work even wetter!). Trying to apply slip to dry clay won’t work! If you want to do sgraffito – you will need to keep the work leather hard (a state of dryness where you can still work the clay with a little effort and a little water and care). Step Three – Drying Most of the time your work can go into the rack uncovered to let it dry out for the following week. If you want to continue forming or shaping you will need to double bag your work – put your work on a suitable sized bat and put the bat in a bag so the base of the bag is under the bat, then put another bag over the top of the work and tuck the top of the bag under the bat. If you want to trim (or turn) your thrown work the following week, it should also be double bagged. If your work is large, delicate, or of uneven thicknesses, you should lightly cover your work for drying. When considering the drying process, bare in mind the weather, humidity and wind! The hotter and dryer, the faster things dry and work can dry unevenly in the shelves – this can lead to cracking – another time to lightly cover your work for drying. Step Four – Trimming and Cleaning Up Your work is dry! It is called greenware now and it is at it’s most fragile! Handle everything with two hands. I often refer to soft hands – keep everything gentle and with your fingers spread as much as possible. Try to not pick up things like plates too much, and always with both hands! Before your work can be bisque fired it should be “cleaned up”. You work won’t go into the kiln if it has sharp edges – when glazed, sharp edges turn into razor blades! Use a piece of fly wire to rub the work all over – this will scratch a little so be light handed. Use a knife or metal kidney to scrape any areas that require a bit more dynamic treatment than the fly wire offers! Finally, a very light wipe over with a slightly damp sponge can help soften and soothe all of your edges and dags! Trimming thrown work: If you are planning to trim (or turn) your thrown work (and you should be), make sure you bag it well – your work should be leather hard to almost dry for easiest trimming. Use this step to finish the work completely – use a metal kidney to polish the surface, or a slightly damp sponge to give a freshly thrown look. Wipe the sponge around the rim after trimming, and check the inside of the pot for dags! Trimming slip cast work: Usually I will trim the rims of your work on the wheel the following day to make that stage easier, however you will still need to check your work for lumps and bumps. Last but not least – check that your name is still clearly on the bottom of your work. Step Five – Bisque Firing When the work is completely dry it can go into the bisque kiln. The bisque kiln is fired to 1000°C. This process burns off the water in the clay as well as some of the chemically bound water. The structure of the clay is not altered that much at this temperature. Inside the bisque kiln, the work is stacked a little, small bowl inside a larger bowl and onto a heavy plate. Smaller items like decorations or drink coasters might get stacked several high. Consideration is paid to the weight of the stack and shape of the work. A bisque kiln can fire about one and a half times the amount of work that the glaze kiln can fire. The firing takes about 10 hours to complete the cycle and about two days to cool down. Once it has been emptied the work is placed in the glaze room ready for you to decorate! Step Six – Glazing Decorating your work with colour can be a lot of fun – and time consuming! There are three main options for surface treatment at this stage: Oxide Washes Underglazes Glazes Washes and underglazes do not “glaze” the work – It will still need a layer of glaze to fully seal the clay (washes don’t need glaze on surfaces not designed for food or liquid as they can gloss up a little on their own). Underglazes are stable colourants that turn out pretty much how they look in the jar. They can be mixed with each other to form other colours and can be used like water colours to paint onto your work. Mostly they should have a clear glaze on top to seal them. Oxides are a different species – the pink oxide (cobalt) wash turns out bright blue for instance. They don’t always need a glaze on top, and some glazes can change the colour of the wash! The glazes need no other “glaze” on top! Be careful of unknown glaze interactions – you can put any combination of glaze in a bowl or on a plate, but only a single glaze on the outside of any vertical surface! Glazes are a chemical reaction under heat. We don’t know the exact chemicals in the Mayco glazes we use. I can guess by the way they interact with each other, however, on the whole, you need to test every idea you have, and not run the test on a vertical surface! Simply put, glaze is a layer of glass like substance that bonds with the clay underneath. Clay is made of silica, alumina and water. Glaze is made of mostly silica. Silica has a melting point of 1700°C and we fire to 1240°C. The silica requires a “flux” to help it melt at the lower temperature. Fluxes can be all sorts of chemicals – a common one is calcium – calcium has a melting point of 2500°C, however, together they both melt at a much lower temperature! Colourants are metal oxides like cobalt (blue), chrome (green through black), copper (green, blue, even red!), manganese (black, purple and pink) iron (red brown), etc. Different chemicals in the glaze can have dramatic effects. for example, barium carbonate (which we don’t use) turns manganese bright pink! Other elements can turn manganese dioxide brown, blue, purple and reddish brown. Manganese dioxide is a flux in and of itself as well. So, glazes that get their black and purple colours, often interact with other glazes and RUN! Our mirror black is a good example – it mixes really well with many glazes because it fluxes them – causes them to melt faster. It will also bring out many beautiful colours in the glazes because it’s black colouring most definitely comes from manganese dioxide! Glaze chemistry is a whole subject on it’s own! We use commercial Mayco glazes on purpose – for their huge range of colour possibilities, stability, cool interactions, artistic freedom with the ability to easily brush the glazes on and ease of use. We currently have almost 50 glazes on hand! A major project is to test the interactions of all glazes with each other. That is 2,500 test tiles!!!! I’m going to make the wall behind the wheels the feature wall of pretty colours! Step Seven – Glaze (Gloss or sometimes called “Glost”) Firing Most of the time this is the final stage of making your creation (but not always!) The glaze kiln goes to 1240°C. This is called cone 6, or midrange. It is the low end of stoneware temperatures. Stoneware clays and glazes are typically fired at cone 8 – 10, that is 1260 – 1290°C. The energy requirement to go from 1240°C to 1280°C is almost a 30% more! Our clay is formulated to vitrify (mature, turn “glass-like”) at 1240°, as are our glazes. A glaze kiln take around 12 hours to reach temperature and two to three days to cool down. Sometimes a third firing process is required – this is for decoration that is added to work after the glaze firing. For example – adding precious metals and lustres. this firing temperature is usually around 600 – 800°C depending upon the techniques being used. There are many students interested in gold and silver trims – we will be doing this third type of firing soon! After firing your work will be in the student finished work shelves. Remember to pay for it before you head out the door! There is a small extra charge for using porcelain clay (it’s more than twice the price of regular clay), and for any third firing process! Once your work has been fired it can not turn back into clay for millennia – so don’t fire it if you don’t like it! Put it in the bucket for recycling. https://firebirdstudios.com.au/the-process-of-making-pottery/Ceramics have evolved over thousands of years.White earthenware dinner plate. Crazing evident all over.Backstamped ‘Made in England S LTD’flagstaff hill, warrnambool, shipwrecked-coast, flagstaff-hill, flagstaff-hill-maritime-museum, maritime-museum, shipwreck-coast, flagstaff-hill-maritime-village, ceramics, tableware -
 Flagstaff Hill Maritime Museum and Village
Domestic object - Plate, Johnson Bros
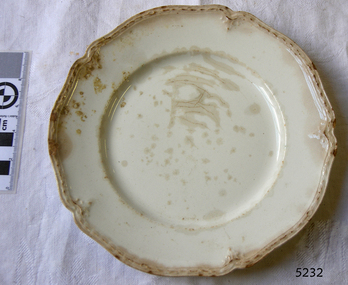
... Use a piece of fly wire to rub the work all over – this will scratch a little so be light handed. Use a knife or metal kidney to scrape any areas that require a bit more dynamic treatment than the fly wire offers! ...Use a piece of fly wire to rub the work all over – this will scratch a little so be light handed. Use a knife or metal kidney to scrape any areas that require a bit more dynamic treatment than the fly wire offers! ...The Process of Making Pottery Decorating, Firing, Glazing, Making, Technical There is a rhythm and flow to clay. It can’t be done all at once! Even the making process! It can take weeks to get everything done, especially if you can only work on your pottery once a week! Even though we have three hour classes, it’s often just not enough time! Here is an overview of some of the processes so you have a bit more grasp on some of the technical stuff! Step One – Design There are SO many ideas out there for making stuff in clay! From delicate porcelain jewellery, through to heavy sculptural work and everything in between. Deciding your direction is sometimes not that easy – when you first start, try everything, you will naturally gravitate to the style that you enjoy! The options and variations are endless and can get a wee bit overwhelming too! Check in with me before you start to ensure your ideas will work, what order you might do things, how you could achieve the look you are seeking and any other technical data required! Step Two – Making Clay is thixotropic. This means that as you work with it, the clay first gets sloppier and wetter, before is begins to dry in the atmosphere. For most things, you simply can’t do all parts of the project at once. An example of work order might look like: Get last weeks work out from the shelves Prepare clay for today’s work – roll your clay, prepare balls for throwing, make the first stage of a pinch pot) Clean up last week’s work and put it on the shelf for bisque firing Check that you have any glazing to do – and do enough of it that you will have time to finish your main project Do the next step of your next project – there might be a further step that can’t be complete immediately, in that case, wrap your work well and put onto the shelves. Letting your work rest for a while can really help keep your work clean and professional looking. Many things require bagging under plastic to keep it ready for work the next week – put your name on the outside of the bag so you can find your work easily. We have stickers and markers. Consider how you want to decorate your work – coloured slip can be applied at a fairly wet stage (remembering that it will make your work even wetter!). Trying to apply slip to dry clay won’t work! If you want to do sgraffito – you will need to keep the work leather hard (a state of dryness where you can still work the clay with a little effort and a little water and care). Step Three – Drying Most of the time your work can go into the rack uncovered to let it dry out for the following week. If you want to continue forming or shaping you will need to double bag your work – put your work on a suitable sized bat and put the bat in a bag so the base of the bag is under the bat, then put another bag over the top of the work and tuck the top of the bag under the bat. If you want to trim (or turn) your thrown work the following week, it should also be double bagged. If your work is large, delicate, or of uneven thicknesses, you should lightly cover your work for drying. When considering the drying process, bare in mind the weather, humidity and wind! The hotter and dryer, the faster things dry and work can dry unevenly in the shelves – this can lead to cracking – another time to lightly cover your work for drying. Step Four – Trimming and Cleaning Up Your work is dry! It is called greenware now and it is at it’s most fragile! Handle everything with two hands. I often refer to soft hands – keep everything gentle and with your fingers spread as much as possible. Try to not pick up things like plates too much, and always with both hands! Before your work can be bisque fired it should be “cleaned up”. You work won’t go into the kiln if it has sharp edges – when glazed, sharp edges turn into razor blades! Use a piece of fly wire to rub the work all over – this will scratch a little so be light handed. Use a knife or metal kidney to scrape any areas that require a bit more dynamic treatment than the fly wire offers! Finally, a very light wipe over with a slightly damp sponge can help soften and soothe all of your edges and dags! Trimming thrown work: If you are planning to trim (or turn) your thrown work (and you should be), make sure you bag it well – your work should be leather hard to almost dry for easiest trimming. Use this step to finish the work completely – use a metal kidney to polish the surface, or a slightly damp sponge to give a freshly thrown look. Wipe the sponge around the rim after trimming, and check the inside of the pot for dags! Trimming slip cast work: Usually I will trim the rims of your work on the wheel the following day to make that stage easier, however you will still need to check your work for lumps and bumps. Last but not least – check that your name is still clearly on the bottom of your work. Step Five – Bisque Firing When the work is completely dry it can go into the bisque kiln. The bisque kiln is fired to 1000°C. This process burns off the water in the clay as well as some of the chemically bound water. The structure of the clay is not altered that much at this temperature. Inside the bisque kiln, the work is stacked a little, small bowl inside a larger bowl and onto a heavy plate. Smaller items like decorations or drink coasters might get stacked several high. Consideration is paid to the weight of the stack and shape of the work. A bisque kiln can fire about one and a half times the amount of work that the glaze kiln can fire. The firing takes about 10 hours to complete the cycle and about two days to cool down. Once it has been emptied the work is placed in the glaze room ready for you to decorate! Step Six – Glazing Decorating your work with colour can be a lot of fun – and time consuming! There are three main options for surface treatment at this stage: Oxide Washes Underglazes Glazes Washes and underglazes do not “glaze” the work – It will still need a layer of glaze to fully seal the clay (washes don’t need glaze on surfaces not designed for food or liquid as they can gloss up a little on their own). Underglazes are stable colourants that turn out pretty much how they look in the jar. They can be mixed with each other to form other colours and can be used like water colours to paint onto your work. Mostly they should have a clear glaze on top to seal them. Oxides are a different species – the pink oxide (cobalt) wash turns out bright blue for instance. They don’t always need a glaze on top, and some glazes can change the colour of the wash! The glazes need no other “glaze” on top! Be careful of unknown glaze interactions – you can put any combination of glaze in a bowl or on a plate, but only a single glaze on the outside of any vertical surface! Glazes are a chemical reaction under heat. We don’t know the exact chemicals in the Mayco glazes we use. I can guess by the way they interact with each other, however, on the whole, you need to test every idea you have, and not run the test on a vertical surface! Simply put, glaze is a layer of glass like substance that bonds with the clay underneath. Clay is made of silica, alumina and water. Glaze is made of mostly silica. Silica has a melting point of 1700°C and we fire to 1240°C. The silica requires a “flux” to help it melt at the lower temperature. Fluxes can be all sorts of chemicals – a common one is calcium – calcium has a melting point of 2500°C, however, together they both melt at a much lower temperature! Colourants are metal oxides like cobalt (blue), chrome (green through black), copper (green, blue, even red!), manganese (black, purple and pink) iron (red brown), etc. Different chemicals in the glaze can have dramatic effects. for example, barium carbonate (which we don’t use) turns manganese bright pink! Other elements can turn manganese dioxide brown, blue, purple and reddish brown. Manganese dioxide is a flux in and of itself as well. So, glazes that get their black and purple colours, often interact with other glazes and RUN! Our mirror black is a good example – it mixes really well with many glazes because it fluxes them – causes them to melt faster. It will also bring out many beautiful colours in the glazes because it’s black colouring most definitely comes from manganese dioxide! Glaze chemistry is a whole subject on it’s own! We use commercial Mayco glazes on purpose – for their huge range of colour possibilities, stability, cool interactions, artistic freedom with the ability to easily brush the glazes on and ease of use. We currently have almost 50 glazes on hand! A major project is to test the interactions of all glazes with each other. That is 2,500 test tiles!!!! I’m going to make the wall behind the wheels the feature wall of pretty colours! Step Seven – Glaze (Gloss or sometimes called “Glost”) Firing Most of the time this is the final stage of making your creation (but not always!) The glaze kiln goes to 1240°C. This is called cone 6, or midrange. It is the low end of stoneware temperatures. Stoneware clays and glazes are typically fired at cone 8 – 10, that is 1260 – 1290°C. The energy requirement to go from 1240°C to 1280°C is almost a 30% more! Our clay is formulated to vitrify (mature, turn “glass-like”) at 1240°, as are our glazes. A glaze kiln take around 12 hours to reach temperature and two to three days to cool down. Sometimes a third firing process is required – this is for decoration that is added to work after the glaze firing. For example – adding precious metals and lustres. this firing temperature is usually around 600 – 800°C depending upon the techniques being used. There are many students interested in gold and silver trims – we will be doing this third type of firing soon! After firing your work will be in the student finished work shelves. Remember to pay for it before you head out the door! There is a small extra charge for using porcelain clay (it’s more than twice the price of regular clay), and for any third firing process! Once your work has been fired it can not turn back into clay for millennia – so don’t fire it if you don’t like it! Put it in the bucket for recycling. https://firebirdstudios.com.au/the-process-of-making-pottery/Ceramics have evolved over thousands of years.A white earthenware side plate with a gadroon edge. Has water marks and chips on front.‘Johnson Bros England Reg No 15587’flagstaff hill, warrnambool, shipwrecked-coast, flagstaff-hill, flagstaff-hill-maritime-museum, maritime-museum, shipwreck-coast, flagstaff-hill-maritime-village, johnson bros, ceramics, tableware -
 Flagstaff Hill Maritime Museum and Village
Domestic object - Plate, Alfred Meakin
... Use a piece of fly wire to rub the work all over – this will scratch a little so be light handed. Use a knife or metal kidney to scrape any areas that require a bit more dynamic treatment than the fly wire offers! ...Use a piece of fly wire to rub the work all over – this will scratch a little so be light handed. Use a knife or metal kidney to scrape any areas that require a bit more dynamic treatment than the fly wire offers! ...The Process of Making Pottery Decorating, Firing, Glazing, Making, Technical There is a rhythm and flow to clay. It can’t be done all at once! Even the making process! It can take weeks to get everything done, especially if you can only work on your pottery once a week! Even though we have three hour classes, it’s often just not enough time! Here is an overview of some of the processes so you have a bit more grasp on some of the technical stuff! Step One – Design There are SO many ideas out there for making stuff in clay! From delicate porcelain jewellery, through to heavy sculptural work and everything in between. Deciding your direction is sometimes not that easy – when you first start, try everything, you will naturally gravitate to the style that you enjoy! The options and variations are endless and can get a wee bit overwhelming too! Check in with me before you start to ensure your ideas will work, what order you might do things, how you could achieve the look you are seeking and any other technical data required! Step Two – Making Clay is thixotropic. This means that as you work with it, the clay first gets sloppier and wetter, before is begins to dry in the atmosphere. For most things, you simply can’t do all parts of the project at once. An example of work order might look like: Get last weeks work out from the shelves Prepare clay for today’s work – roll your clay, prepare balls for throwing, make the first stage of a pinch pot) Clean up last week’s work and put it on the shelf for bisque firing Check that you have any glazing to do – and do enough of it that you will have time to finish your main project Do the next step of your next project – there might be a further step that can’t be complete immediately, in that case, wrap your work well and put onto the shelves. Letting your work rest for a while can really help keep your work clean and professional looking. Many things require bagging under plastic to keep it ready for work the next week – put your name on the outside of the bag so you can find your work easily. We have stickers and markers. Consider how you want to decorate your work – coloured slip can be applied at a fairly wet stage (remembering that it will make your work even wetter!). Trying to apply slip to dry clay won’t work! If you want to do sgraffito – you will need to keep the work leather hard (a state of dryness where you can still work the clay with a little effort and a little water and care). Step Three – Drying Most of the time your work can go into the rack uncovered to let it dry out for the following week. If you want to continue forming or shaping you will need to double bag your work – put your work on a suitable sized bat and put the bat in a bag so the base of the bag is under the bat, then put another bag over the top of the work and tuck the top of the bag under the bat. If you want to trim (or turn) your thrown work the following week, it should also be double bagged. If your work is large, delicate, or of uneven thicknesses, you should lightly cover your work for drying. When considering the drying process, bare in mind the weather, humidity and wind! The hotter and dryer, the faster things dry and work can dry unevenly in the shelves – this can lead to cracking – another time to lightly cover your work for drying. Step Four – Trimming and Cleaning Up Your work is dry! It is called greenware now and it is at it’s most fragile! Handle everything with two hands. I often refer to soft hands – keep everything gentle and with your fingers spread as much as possible. Try to not pick up things like plates too much, and always with both hands! Before your work can be bisque fired it should be “cleaned up”. You work won’t go into the kiln if it has sharp edges – when glazed, sharp edges turn into razor blades! Use a piece of fly wire to rub the work all over – this will scratch a little so be light handed. Use a knife or metal kidney to scrape any areas that require a bit more dynamic treatment than the fly wire offers! Finally, a very light wipe over with a slightly damp sponge can help soften and soothe all of your edges and dags! Trimming thrown work: If you are planning to trim (or turn) your thrown work (and you should be), make sure you bag it well – your work should be leather hard to almost dry for easiest trimming. Use this step to finish the work completely – use a metal kidney to polish the surface, or a slightly damp sponge to give a freshly thrown look. Wipe the sponge around the rim after trimming, and check the inside of the pot for dags! Trimming slip cast work: Usually I will trim the rims of your work on the wheel the following day to make that stage easier, however you will still need to check your work for lumps and bumps. Last but not least – check that your name is still clearly on the bottom of your work. Step Five – Bisque Firing When the work is completely dry it can go into the bisque kiln. The bisque kiln is fired to 1000°C. This process burns off the water in the clay as well as some of the chemically bound water. The structure of the clay is not altered that much at this temperature. Inside the bisque kiln, the work is stacked a little, small bowl inside a larger bowl and onto a heavy plate. Smaller items like decorations or drink coasters might get stacked several high. Consideration is paid to the weight of the stack and shape of the work. A bisque kiln can fire about one and a half times the amount of work that the glaze kiln can fire. The firing takes about 10 hours to complete the cycle and about two days to cool down. Once it has been emptied the work is placed in the glaze room ready for you to decorate! Step Six – Glazing Decorating your work with colour can be a lot of fun – and time consuming! There are three main options for surface treatment at this stage: Oxide Washes Underglazes Glazes Washes and underglazes do not “glaze” the work – It will still need a layer of glaze to fully seal the clay (washes don’t need glaze on surfaces not designed for food or liquid as they can gloss up a little on their own). Underglazes are stable colourants that turn out pretty much how they look in the jar. They can be mixed with each other to form other colours and can be used like water colours to paint onto your work. Mostly they should have a clear glaze on top to seal them. Oxides are a different species – the pink oxide (cobalt) wash turns out bright blue for instance. They don’t always need a glaze on top, and some glazes can change the colour of the wash! The glazes need no other “glaze” on top! Be careful of unknown glaze interactions – you can put any combination of glaze in a bowl or on a plate, but only a single glaze on the outside of any vertical surface! Glazes are a chemical reaction under heat. We don’t know the exact chemicals in the Mayco glazes we use. I can guess by the way they interact with each other, however, on the whole, you need to test every idea you have, and not run the test on a vertical surface! Simply put, glaze is a layer of glass like substance that bonds with the clay underneath. Clay is made of silica, alumina and water. Glaze is made of mostly silica. Silica has a melting point of 1700°C and we fire to 1240°C. The silica requires a “flux” to help it melt at the lower temperature. Fluxes can be all sorts of chemicals – a common one is calcium – calcium has a melting point of 2500°C, however, together they both melt at a much lower temperature! Colourants are metal oxides like cobalt (blue), chrome (green through black), copper (green, blue, even red!), manganese (black, purple and pink) iron (red brown), etc. Different chemicals in the glaze can have dramatic effects. for example, barium carbonate (which we don’t use) turns manganese bright pink! Other elements can turn manganese dioxide brown, blue, purple and reddish brown. Manganese dioxide is a flux in and of itself as well. So, glazes that get their black and purple colours, often interact with other glazes and RUN! Our mirror black is a good example – it mixes really well with many glazes because it fluxes them – causes them to melt faster. It will also bring out many beautiful colours in the glazes because it’s black colouring most definitely comes from manganese dioxide! Glaze chemistry is a whole subject on it’s own! We use commercial Mayco glazes on purpose – for their huge range of colour possibilities, stability, cool interactions, artistic freedom with the ability to easily brush the glazes on and ease of use. We currently have almost 50 glazes on hand! A major project is to test the interactions of all glazes with each other. That is 2,500 test tiles!!!! I’m going to make the wall behind the wheels the feature wall of pretty colours! Step Seven – Glaze (Gloss or sometimes called “Glost”) Firing Most of the time this is the final stage of making your creation (but not always!) The glaze kiln goes to 1240°C. This is called cone 6, or midrange. It is the low end of stoneware temperatures. Stoneware clays and glazes are typically fired at cone 8 – 10, that is 1260 – 1290°C. The energy requirement to go from 1240°C to 1280°C is almost a 30% more! Our clay is formulated to vitrify (mature, turn “glass-like”) at 1240°, as are our glazes. A glaze kiln take around 12 hours to reach temperature and two to three days to cool down. Sometimes a third firing process is required – this is for decoration that is added to work after the glaze firing. For example – adding precious metals and lustres. this firing temperature is usually around 600 – 800°C depending upon the techniques being used. There are many students interested in gold and silver trims – we will be doing this third type of firing soon! After firing your work will be in the student finished work shelves. Remember to pay for it before you head out the door! There is a small extra charge for using porcelain clay (it’s more than twice the price of regular clay), and for any third firing process! Once your work has been fired it can not turn back into clay for millennia – so don’t fire it if you don’t like it! Put it in the bucket for recycling. https://firebirdstudios.com.au/the-process-of-making-pottery/Ceramics have evolved over thousands of years.Earthenware dessert plate, cream colour. Made by Alfred Meakin, England. Backstamped ‘Alfred Meakin England’. flagstaff hill, warrnambool, shipwrecked-coast, flagstaff-hill, flagstaff-hill-maritime-museum, maritime-museum, shipwreck-coast, flagstaff-hill-maritime-village, alfred meakin, ceramics, earthenware, kitchenware -
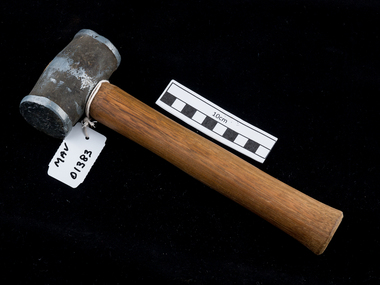 City of Moorabbin Historical Society (Operating the Box Cottage Museum)
Tool - Hammer small sledge, c1900, c1900
... It is useful for light demolition work, driving masonry nails, and for use with a steel chisel when cutting stone or metal. ...It is useful for light demolition work, driving masonry nails, and for use with a steel chisel when cutting stone or metal. ...A hammer is a tool consisting of a weighted "head" fixed to a long handle that is swung to deliver an impact to a small area of an object. This is a small sledgehammer whose relatively light weight and short handle allow single-handed use. It is useful for light demolition work, driving masonry nails, and for use with a steel chisel when cutting stone or metal. Among the early settlers in Moorabbin Shire were blacksmiths who made tools for the other settlers who were establishing the homes, market gardens, farms, orchards and various businesses. Early settlers were self reliant and repaired their own equipment for kitchen,dairy, farm, horses, carts using various tools . This hammer is typical of the type used by early settlers in Moorabbin Shire c1900This is a small sledge hammer with a wood handle and double sided round metal headearly settlers, market gardeners, blacksmiths, tools, building equipment, hammers, moorabbin shire, bentleigh, mckinnon, highett, cheltenham,mcewan james pty ltd, melbourne, bunnings pty ltd, -
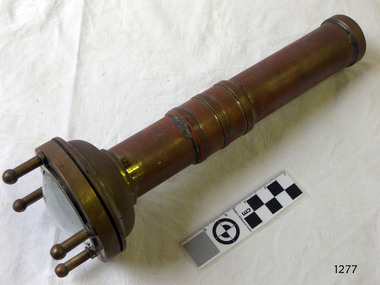 Flagstaff Hill Maritime Museum and Village
Tool - Torch, 1935-1960
... work. They have to be self-contained, the older ones are powered by an accumulator type battery which could be recharged. Some models were fitted with a switch to turn the light off saving on the battery power. The lens is of a convex type and magnifies the light. Sometimes there was a protective grill across the glass or prongs to protect the glass from an impact. When fully charged the battery would last about seven hours. Torches are made from non-ferrous metal...work. They have to be self-contained, the older ones are powered by an accumulator type battery which could be recharged. Some models were fitted with a switch to turn the light off saving on the battery power. The lens is of a convex type and magnifies the light. Sometimes there was a protective grill across the glass or prongs to protect the glass from an impact. When fully charged the battery would last about seven hours. Torches are made from non-ferrous metal ...Diver's Submarine Electric Torches were first developed to give illumination for close examination work. They have to be self-contained, the older ones are powered by an accumulator type battery which could be recharged. Some models were fitted with a switch to turn the light off saving on the battery power. The lens is of a convex type and magnifies the light. Sometimes there was a protective grill across the glass or prongs to protect the glass from an impact. When fully charged the battery would last about seven hours. Torches are made from non-ferrous metal so as not to corrode in their watery environment. Siebe Gorman & Co Ltd has been producing hand-held, battery-powered, submarine electric torches for divers and the Ministry of Defence (MOD) since the 1920s. In 1961, the famous diving manufacturer C.E. Heinke merged with Siebe Gorman, and for a short while, torches were made with the combined 'Siebe Heinke' inscription. However, this linked inscription was later dropped, with a return to the Siebe Gorman name tag. Date of manufacture for these torches can be determined by their Admiralty Pattern (AP) number that was used to identify a particular item and were for naval stores use. Before NATO stock coding became more widely used, earlier MOD torches often have a simple four-digit group of AP numbers such as AP4456 or AP4458. In 1975 Siebe Gorman moved from their Neptune Works at Chessington in Surrey to a new location at Cwmbran in Wales and by this time their manufacture of diving equipment had declined. (For additional historic company information on Siebe & Gorman see notes section this document.)The item is significant as it gives us a snapshot into marine history and the development of diving equipment generally, especially that used for salvage operations before and during WW2. The company that made the torch Siebe Gorman was a leading inventor, developer and innovator of marine equipment with its early developments in helmets, compressors and other diving equipment. Items that are today eagerly sought after for maritime collections around the world. The items that have been donated to the Flagstaff Hill collection give us an insight as to how divers operated and the dangers they faced doing a very necessary and dangerous job.Diver's Torch brass with heavy glass screw on piece with four lugs attached contact spring inside. Leather hand strap missing."Siebe Gorman and Co Ltd, Makers, London." Has "A.P.4458" inscribed on front above glassflagstaff hill, warrnambool, shipwrecked coast, flagstaff hill maritime museum, maritime museum, shipwreck coast, flagstaff hill maritime village, great ocean road, siebe, gorman, diver's torch, torch, diver, diving accessories -
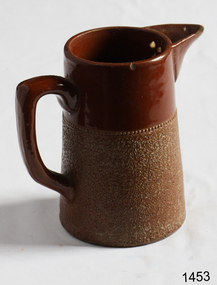 Flagstaff Hill Maritime Museum and Village
Domestic object - Jug
... Use a piece of fly wire to rub the work all over – this will scratch a little so be light handed. Use a knife or metal kidney to scrape any areas that require a bit more dynamic treatment than the fly wire offers! ...Use a piece of fly wire to rub the work all over – this will scratch a little so be light handed. Use a knife or metal kidney to scrape any areas that require a bit more dynamic treatment than the fly wire offers! ...The Process of Making Pottery Decorating, Firing, Glazing, Making, Technical There is a rhythm and flow to clay. It can’t be done all at once! Even the making process! It can take weeks to get everything done, especially if you can only work on your pottery once a week! Even though we have three hour classes, it’s often just not enough time! Here is an overview of some of the processes so you have a bit more grasp on some of the technical stuff! Step One – Design There are SO many ideas out there for making stuff in clay! From delicate porcelain jewellery, through to heavy sculptural work and everything in between. Deciding your direction is sometimes not that easy – when you first start, try everything, you will naturally gravitate to the style that you enjoy! The options and variations are endless and can get a wee bit overwhelming too! Check in with me before you start to ensure your ideas will work, what order you might do things, how you could achieve the look you are seeking and any other technical data required! Step Two – Making Clay is thixotropic. This means that as you work with it, the clay first gets sloppier and wetter, before is begins to dry in the atmosphere. For most things, you simply can’t do all parts of the project at once. An example of work order might look like: Get last weeks work out from the shelves Prepare clay for today’s work – roll your clay, prepare balls for throwing, make the first stage of a pinch pot) Clean up last week’s work and put it on the shelf for bisque firing Check that you have any glazing to do – and do enough of it that you will have time to finish your main project Do the next step of your next project – there might be a further step that can’t be complete immediately, in that case, wrap your work well and put onto the shelves. Letting your work rest for a while can really help keep your work clean and professional looking. Many things require bagging under plastic to keep it ready for work the next week – put your name on the outside of the bag so you can find your work easily. We have stickers and markers. Consider how you want to decorate your work – coloured slip can be applied at a fairly wet stage (remembering that it will make your work even wetter!). Trying to apply slip to dry clay won’t work! If you want to do sgraffito – you will need to keep the work leather hard (a state of dryness where you can still work the clay with a little effort and a little water and care). Step Three – Drying Most of the time your work can go into the rack uncovered to let it dry out for the following week. If you want to continue forming or shaping you will need to double bag your work – put your work on a suitable sized bat and put the bat in a bag so the base of the bag is under the bat, then put another bag over the top of the work and tuck the top of the bag under the bat. If you want to trim (or turn) your thrown work the following week, it should also be double bagged. If your work is large, delicate, or of uneven thicknesses, you should lightly cover your work for drying. When considering the drying process, bare in mind the weather, humidity and wind! The hotter and dryer, the faster things dry and work can dry unevenly in the shelves – this can lead to cracking – another time to lightly cover your work for drying. Step Four – Trimming and Cleaning Up Your work is dry! It is called greenware now and it is at it’s most fragile! Handle everything with two hands. I often refer to soft hands – keep everything gentle and with your fingers spread as much as possible. Try to not pick up things like plates too much, and always with both hands! Before your work can be bisque fired it should be “cleaned up”. You work won’t go into the kiln if it has sharp edges – when glazed, sharp edges turn into razor blades! Use a piece of fly wire to rub the work all over – this will scratch a little so be light handed. Use a knife or metal kidney to scrape any areas that require a bit more dynamic treatment than the fly wire offers! Finally, a very light wipe over with a slightly damp sponge can help soften and soothe all of your edges and dags! Trimming thrown work: If you are planning to trim (or turn) your thrown work (and you should be), make sure you bag it well – your work should be leather hard to almost dry for easiest trimming. Use this step to finish the work completely – use a metal kidney to polish the surface, or a slightly damp sponge to give a freshly thrown look. Wipe the sponge around the rim after trimming, and check the inside of the pot for dags! Trimming slip cast work: Usually I will trim the rims of your work on the wheel the following day to make that stage easier, however you will still need to check your work for lumps and bumps. Last but not least – check that your name is still clearly on the bottom of your work. Step Five – Bisque Firing When the work is completely dry it can go into the bisque kiln. The bisque kiln is fired to 1000°C. This process burns off the water in the clay as well as some of the chemically bound water. The structure of the clay is not altered that much at this temperature. Inside the bisque kiln, the work is stacked a little, small bowl inside a larger bowl and onto a heavy plate. Smaller items like decorations or drink coasters might get stacked several high. Consideration is paid to the weight of the stack and shape of the work. A bisque kiln can fire about one and a half times the amount of work that the glaze kiln can fire. The firing takes about 10 hours to complete the cycle and about two days to cool down. Once it has been emptied the work is placed in the glaze room ready for you to decorate! Step Six – Glazing Decorating your work with colour can be a lot of fun – and time consuming! There are three main options for surface treatment at this stage: Oxide Washes Underglazes Glazes Washes and underglazes do not “glaze” the work – It will still need a layer of glaze to fully seal the clay (washes don’t need glaze on surfaces not designed for food or liquid as they can gloss up a little on their own). Underglazes are stable colourants that turn out pretty much how they look in the jar. They can be mixed with each other to form other colours and can be used like water colours to paint onto your work. Mostly they should have a clear glaze on top to seal them. Oxides are a different species – the pink oxide (cobalt) wash turns out bright blue for instance. They don’t always need a glaze on top, and some glazes can change the colour of the wash! The glazes need no other “glaze” on top! Be careful of unknown glaze interactions – you can put any combination of glaze in a bowl or on a plate, but only a single glaze on the outside of any vertical surface! Glazes are a chemical reaction under heat. We don’t know the exact chemicals in the Mayco glazes we use. I can guess by the way they interact with each other, however, on the whole, you need to test every idea you have, and not run the test on a vertical surface! Simply put, glaze is a layer of glass like substance that bonds with the clay underneath. Clay is made of silica, alumina and water. Glaze is made of mostly silica. Silica has a melting point of 1700°C and we fire to 1240°C. The silica requires a “flux” to help it melt at the lower temperature. Fluxes can be all sorts of chemicals – a common one is calcium – calcium has a melting point of 2500°C, however, together they both melt at a much lower temperature! Colourants are metal oxides like cobalt (blue), chrome (green through black), copper (green, blue, even red!), manganese (black, purple and pink) iron (red brown), etc. Different chemicals in the glaze can have dramatic effects. for example, barium carbonate (which we don’t use) turns manganese bright pink! Other elements can turn manganese dioxide brown, blue, purple and reddish brown. Manganese dioxide is a flux in and of itself as well. So, glazes that get their black and purple colours, often interact with other glazes and RUN! Our mirror black is a good example – it mixes really well with many glazes because it fluxes them – causes them to melt faster. It will also bring out many beautiful colours in the glazes because it’s black colouring most definitely comes from manganese dioxide! Glaze chemistry is a whole subject on it’s own! We use commercial Mayco glazes on purpose – for their huge range of colour possibilities, stability, cool interactions, artistic freedom with the ability to easily brush the glazes on and ease of use. We currently have almost 50 glazes on hand! A major project is to test the interactions of all glazes with each other. That is 2,500 test tiles!!!! I’m going to make the wall behind the wheels the feature wall of pretty colours! Step Seven – Glaze (Gloss or sometimes called “Glost”) Firing Most of the time this is the final stage of making your creation (but not always!) The glaze kiln goes to 1240°C. This is called cone 6, or midrange. It is the low end of stoneware temperatures. Stoneware clays and glazes are typically fired at cone 8 – 10, that is 1260 – 1290°C. The energy requirement to go from 1240°C to 1280°C is almost a 30% more! Our clay is formulated to vitrify (mature, turn “glass-like”) at 1240°, as are our glazes. A glaze kiln take around 12 hours to reach temperature and two to three days to cool down. Sometimes a third firing process is required – this is for decoration that is added to work after the glaze firing. For example – adding precious metals and lustres. this firing temperature is usually around 600 – 800°C depending upon the techniques being used. There are many students interested in gold and silver trims – we will be doing this third type of firing soon! After firing your work will be in the student finished work shelves. Remember to pay for it before you head out the door! There is a small extra charge for using porcelain clay (it’s more than twice the price of regular clay), and for any third firing process! Once your work has been fired it can not turn back into clay for millennia – so don’t fire it if you don’t like it! Put it in the bucket for recycling. https://firebirdstudios.com.au/the-process-of-making-pottery/The form of the jug has been in use for many centuries.Stoneware jug. Two tone brown glaze with pierced lip behind spout. Spout chipped.None.flagstaff hill, warrnambool, shipwrecked-coast, flagstaff-hill, flagstaff-hill-maritime-museum, maritime-museum, shipwreck-coast, flagstaff-hill-maritime-village, jug, ceramic jug -
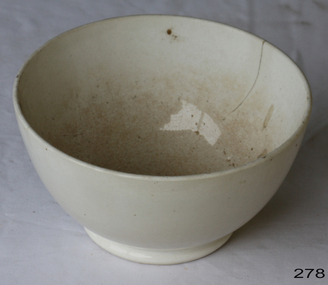 Flagstaff Hill Maritime Museum and Village
Domestic object - Bowl, Late 19th or early 20th Century
... Use a piece of fly wire to rub the work all over – this will scratch a little so be light handed. Use a knife or metal kidney to scrape any areas that require a bit more dynamic treatment than the fly wire offers! ...Use a piece of fly wire to rub the work all over – this will scratch a little so be light handed. Use a knife or metal kidney to scrape any areas that require a bit more dynamic treatment than the fly wire offers! ...The Process of Making Pottery Decorating, Firing, Glazing, Making, Technical There is a rhythm and flow to clay. It can’t be done all at once! Even the making process! It can take weeks to get everything done, especially if you can only work on your pottery once a week! Even though we have three hour classes, it’s often just not enough time! Here is an overview of some of the processes so you have a bit more grasp on some of the technical stuff! Step One – Design There are SO many ideas out there for making stuff in clay! From delicate porcelain jewellery, through to heavy sculptural work and everything in between. Deciding your direction is sometimes not that easy – when you first start, try everything, you will naturally gravitate to the style that you enjoy! The options and variations are endless and can get a wee bit overwhelming too! Check in with me before you start to ensure your ideas will work, what order you might do things, how you could achieve the look you are seeking and any other technical data required! Step Two – Making Clay is thixotropic. This means that as you work with it, the clay first gets sloppier and wetter, before is begins to dry in the atmosphere. For most things, you simply can’t do all parts of the project at once. An example of work order might look like: Get last weeks work out from the shelves Prepare clay for today’s work – roll your clay, prepare balls for throwing, make the first stage of a pinch pot) Clean up last week’s work and put it on the shelf for bisque firing Check that you have any glazing to do – and do enough of it that you will have time to finish your main project Do the next step of your next project – there might be a further step that can’t be complete immediately, in that case, wrap your work well and put onto the shelves. Letting your work rest for a while can really help keep your work clean and professional looking. Many things require bagging under plastic to keep it ready for work the next week – put your name on the outside of the bag so you can find your work easily. We have stickers and markers. Consider how you want to decorate your work – coloured slip can be applied at a fairly wet stage (remembering that it will make your work even wetter!). Trying to apply slip to dry clay won’t work! If you want to do sgraffito – you will need to keep the work leather hard (a state of dryness where you can still work the clay with a little effort and a little water and care). Step Three – Drying Most of the time your work can go into the rack uncovered to let it dry out for the following week. If you want to continue forming or shaping you will need to double bag your work – put your work on a suitable sized bat and put the bat in a bag so the base of the bag is under the bat, then put another bag over the top of the work and tuck the top of the bag under the bat. If you want to trim (or turn) your thrown work the following week, it should also be double bagged. If your work is large, delicate, or of uneven thicknesses, you should lightly cover your work for drying. When considering the drying process, bare in mind the weather, humidity and wind! The hotter and dryer, the faster things dry and work can dry unevenly in the shelves – this can lead to cracking – another time to lightly cover your work for drying. Step Four – Trimming and Cleaning Up Your work is dry! It is called greenware now and it is at it’s most fragile! Handle everything with two hands. I often refer to soft hands – keep everything gentle and with your fingers spread as much as possible. Try to not pick up things like plates too much, and always with both hands! Before your work can be bisque fired it should be “cleaned up”. You work won’t go into the kiln if it has sharp edges – when glazed, sharp edges turn into razor blades! Use a piece of fly wire to rub the work all over – this will scratch a little so be light handed. Use a knife or metal kidney to scrape any areas that require a bit more dynamic treatment than the fly wire offers! Finally, a very light wipe over with a slightly damp sponge can help soften and soothe all of your edges and dags! Trimming thrown work: If you are planning to trim (or turn) your thrown work (and you should be), make sure you bag it well – your work should be leather hard to almost dry for easiest trimming. Use this step to finish the work completely – use a metal kidney to polish the surface, or a slightly damp sponge to give a freshly thrown look. Wipe the sponge around the rim after trimming, and check the inside of the pot for dags! Trimming slip cast work: Usually I will trim the rims of your work on the wheel the following day to make that stage easier, however you will still need to check your work for lumps and bumps. Last but not least – check that your name is still clearly on the bottom of your work. Step Five – Bisque Firing When the work is completely dry it can go into the bisque kiln. The bisque kiln is fired to 1000°C. This process burns off the water in the clay as well as some of the chemically bound water. The structure of the clay is not altered that much at this temperature. Inside the bisque kiln, the work is stacked a little, small bowl inside a larger bowl and onto a heavy plate. Smaller items like decorations or drink coasters might get stacked several high. Consideration is paid to the weight of the stack and shape of the work. A bisque kiln can fire about one and a half times the amount of work that the glaze kiln can fire. The firing takes about 10 hours to complete the cycle and about two days to cool down. Once it has been emptied the work is placed in the glaze room ready for you to decorate! Step Six – Glazing Decorating your work with colour can be a lot of fun – and time consuming! There are three main options for surface treatment at this stage: Oxide Washes Underglazes Glazes Washes and underglazes do not “glaze” the work – It will still need a layer of glaze to fully seal the clay (washes don’t need glaze on surfaces not designed for food or liquid as they can gloss up a little on their own). Underglazes are stable colourants that turn out pretty much how they look in the jar. They can be mixed with each other to form other colours and can be used like water colours to paint onto your work. Mostly they should have a clear glaze on top to seal them. Oxides are a different species – the pink oxide (cobalt) wash turns out bright blue for instance. They don’t always need a glaze on top, and some glazes can change the colour of the wash! The glazes need no other “glaze” on top! Be careful of unknown glaze interactions – you can put any combination of glaze in a bowl or on a plate, but only a single glaze on the outside of any vertical surface! Glazes are a chemical reaction under heat. We don’t know the exact chemicals in the Mayco glazes we use. I can guess by the way they interact with each other, however, on the whole, you need to test every idea you have, and not run the test on a vertical surface! Simply put, glaze is a layer of glass like substance that bonds with the clay underneath. Clay is made of silica, alumina and water. Glaze is made of mostly silica. Silica has a melting point of 1700°C and we fire to 1240°C. The silica requires a “flux” to help it melt at the lower temperature. Fluxes can be all sorts of chemicals – a common one is calcium – calcium has a melting point of 2500°C, however, together they both melt at a much lower temperature! Colourants are metal oxides like cobalt (blue), chrome (green through black), copper (green, blue, even red!), manganese (black, purple and pink) iron (red brown), etc. Different chemicals in the glaze can have dramatic effects. for example, barium carbonate (which we don’t use) turns manganese bright pink! Other elements can turn manganese dioxide brown, blue, purple and reddish brown. Manganese dioxide is a flux in and of itself as well. So, glazes that get their black and purple colours, often interact with other glazes and RUN! Our mirror black is a good example – it mixes really well with many glazes because it fluxes them – causes them to melt faster. It will also bring out many beautiful colours in the glazes because it’s black colouring most definitely comes from manganese dioxide! Glaze chemistry is a whole subject on it’s own! We use commercial Mayco glazes on purpose – for their huge range of colour possibilities, stability, cool interactions, artistic freedom with the ability to easily brush the glazes on and ease of use. We currently have almost 50 glazes on hand! A major project is to test the interactions of all glazes with each other. That is 2,500 test tiles!!!! I’m going to make the wall behind the wheels the feature wall of pretty colours! Step Seven – Glaze (Gloss or sometimes called “Glost”) Firing Most of the time this is the final stage of making your creation (but not always!) The glaze kiln goes to 1240°C. This is called cone 6, or midrange. It is the low end of stoneware temperatures. Stoneware clays and glazes are typically fired at cone 8 – 10, that is 1260 – 1290°C. The energy requirement to go from 1240°C to 1280°C is almost a 30% more! Our clay is formulated to vitrify (mature, turn “glass-like”) at 1240°, as are our glazes. A glaze kiln take around 12 hours to reach temperature and two to three days to cool down. Sometimes a third firing process is required – this is for decoration that is added to work after the glaze firing. For example – adding precious metals and lustres. this firing temperature is usually around 600 – 800°C depending upon the techniques being used. There are many students interested in gold and silver trims – we will be doing this third type of firing soon! After firing your work will be in the student finished work shelves. Remember to pay for it before you head out the door! There is a small extra charge for using porcelain clay (it’s more than twice the price of regular clay), and for any third firing process! Once your work has been fired it can not turn back into clay for millennia – so don’t fire it if you don’t like it! Put it in the bucket for recycling. https://firebirdstudios.com.au/the-process-of-making-pottery/ The bowl is an example of kitchenware used in the 19th century and still in use today.Bowl white ceramic. Crack on side. Badly stained.Backstamp very faint and unable to be read.flagstaff hill, warrnambool, shipwrecked-coast, flagstaff-hill, flagstaff-hill-maritime-museum, maritime-museum, shipwreck-coast, flagstaff-hill-maritime-village, mixing bowl, food preparation, kitchen equipment, ceramic -
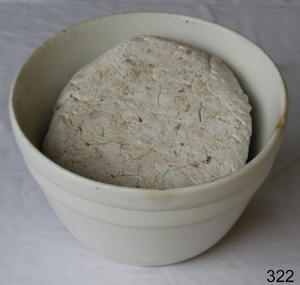 Flagstaff Hill Maritime Museum and Village
Domestic object - Bowl
... Use a piece of fly wire to rub the work all over – this will scratch a little so be light handed. Use a knife or metal kidney to scrape any areas that require a bit more dynamic treatment than the fly wire offers! ...Use a piece of fly wire to rub the work all over – this will scratch a little so be light handed. Use a knife or metal kidney to scrape any areas that require a bit more dynamic treatment than the fly wire offers! ...The Process of Making Pottery Decorating, Firing, Glazing, Making, Technical There is a rhythm and flow to clay. It can’t be done all at once! Even the making process! It can take weeks to get everything done, especially if you can only work on your pottery once a week! Even though we have three hour classes, it’s often just not enough time! Here is an overview of some of the processes so you have a bit more grasp on some of the technical stuff! Step One – Design There are SO many ideas out there for making stuff in clay! From delicate porcelain jewellery, through to heavy sculptural work and everything in between. Deciding your direction is sometimes not that easy – when you first start, try everything, you will naturally gravitate to the style that you enjoy! The options and variations are endless and can get a wee bit overwhelming too! Check in with me before you start to ensure your ideas will work, what order you might do things, how you could achieve the look you are seeking and any other technical data required! Step Two – Making Clay is thixotropic. This means that as you work with it, the clay first gets sloppier and wetter, before is begins to dry in the atmosphere. For most things, you simply can’t do all parts of the project at once. An example of work order might look like: Get last weeks work out from the shelves Prepare clay for today’s work – roll your clay, prepare balls for throwing, make the first stage of a pinch pot) Clean up last week’s work and put it on the shelf for bisque firing Check that you have any glazing to do – and do enough of it that you will have time to finish your main project Do the next step of your next project – there might be a further step that can’t be complete immediately, in that case, wrap your work well and put onto the shelves. Letting your work rest for a while can really help keep your work clean and professional looking. Many things require bagging under plastic to keep it ready for work the next week – put your name on the outside of the bag so you can find your work easily. We have stickers and markers. Consider how you want to decorate your work – coloured slip can be applied at a fairly wet stage (remembering that it will make your work even wetter!). Trying to apply slip to dry clay won’t work! If you want to do sgraffito – you will need to keep the work leather hard (a state of dryness where you can still work the clay with a little effort and a little water and care). Step Three – Drying Most of the time your work can go into the rack uncovered to let it dry out for the following week. If you want to continue forming or shaping you will need to double bag your work – put your work on a suitable sized bat and put the bat in a bag so the base of the bag is under the bat, then put another bag over the top of the work and tuck the top of the bag under the bat. If you want to trim (or turn) your thrown work the following week, it should also be double bagged. If your work is large, delicate, or of uneven thicknesses, you should lightly cover your work for drying. When considering the drying process, bare in mind the weather, humidity and wind! The hotter and dryer, the faster things dry and work can dry unevenly in the shelves – this can lead to cracking – another time to lightly cover your work for drying. Step Four – Trimming and Cleaning Up Your work is dry! It is called greenware now and it is at it’s most fragile! Handle everything with two hands. I often refer to soft hands – keep everything gentle and with your fingers spread as much as possible. Try to not pick up things like plates too much, and always with both hands! Before your work can be bisque fired it should be “cleaned up”. You work won’t go into the kiln if it has sharp edges – when glazed, sharp edges turn into razor blades! Use a piece of fly wire to rub the work all over – this will scratch a little so be light handed. Use a knife or metal kidney to scrape any areas that require a bit more dynamic treatment than the fly wire offers! Finally, a very light wipe over with a slightly damp sponge can help soften and soothe all of your edges and dags! Trimming thrown work: If you are planning to trim (or turn) your thrown work (and you should be), make sure you bag it well – your work should be leather hard to almost dry for easiest trimming. Use this step to finish the work completely – use a metal kidney to polish the surface, or a slightly damp sponge to give a freshly thrown look. Wipe the sponge around the rim after trimming, and check the inside of the pot for dags! Trimming slip cast work: Usually I will trim the rims of your work on the wheel the following day to make that stage easier, however you will still need to check your work for lumps and bumps. Last but not least – check that your name is still clearly on the bottom of your work. Step Five – Bisque Firing When the work is completely dry it can go into the bisque kiln. The bisque kiln is fired to 1000°C. This process burns off the water in the clay as well as some of the chemically bound water. The structure of the clay is not altered that much at this temperature. Inside the bisque kiln, the work is stacked a little, small bowl inside a larger bowl and onto a heavy plate. Smaller items like decorations or drink coasters might get stacked several high. Consideration is paid to the weight of the stack and shape of the work. A bisque kiln can fire about one and a half times the amount of work that the glaze kiln can fire. The firing takes about 10 hours to complete the cycle and about two days to cool down. Once it has been emptied the work is placed in the glaze room ready for you to decorate! Step Six – Glazing Decorating your work with colour can be a lot of fun – and time consuming! There are three main options for surface treatment at this stage: Oxide Washes Underglazes Glazes Washes and underglazes do not “glaze” the work – It will still need a layer of glaze to fully seal the clay (washes don’t need glaze on surfaces not designed for food or liquid as they can gloss up a little on their own). Underglazes are stable colourants that turn out pretty much how they look in the jar. They can be mixed with each other to form other colours and can be used like water colours to paint onto your work. Mostly they should have a clear glaze on top to seal them. Oxides are a different species – the pink oxide (cobalt) wash turns out bright blue for instance. They don’t always need a glaze on top, and some glazes can change the colour of the wash! The glazes need no other “glaze” on top! Be careful of unknown glaze interactions – you can put any combination of glaze in a bowl or on a plate, but only a single glaze on the outside of any vertical surface! Glazes are a chemical reaction under heat. We don’t know the exact chemicals in the Mayco glazes we use. I can guess by the way they interact with each other, however, on the whole, you need to test every idea you have, and not run the test on a vertical surface! Simply put, glaze is a layer of glass like substance that bonds with the clay underneath. Clay is made of silica, alumina and water. Glaze is made of mostly silica. Silica has a melting point of 1700°C and we fire to 1240°C. The silica requires a “flux” to help it melt at the lower temperature. Fluxes can be all sorts of chemicals – a common one is calcium – calcium has a melting point of 2500°C, however, together they both melt at a much lower temperature! Colourants are metal oxides like cobalt (blue), chrome (green through black), copper (green, blue, even red!), manganese (black, purple and pink) iron (red brown), etc. Different chemicals in the glaze can have dramatic effects. for example, barium carbonate (which we don’t use) turns manganese bright pink! Other elements can turn manganese dioxide brown, blue, purple and reddish brown. Manganese dioxide is a flux in and of itself as well. So, glazes that get their black and purple colours, often interact with other glazes and RUN! Our mirror black is a good example – it mixes really well with many glazes because it fluxes them – causes them to melt faster. It will also bring out many beautiful colours in the glazes because it’s black colouring most definitely comes from manganese dioxide! Glaze chemistry is a whole subject on it’s own! We use commercial Mayco glazes on purpose – for their huge range of colour possibilities, stability, cool interactions, artistic freedom with the ability to easily brush the glazes on and ease of use. We currently have almost 50 glazes on hand! A major project is to test the interactions of all glazes with each other. That is 2,500 test tiles!!!! I’m going to make the wall behind the wheels the feature wall of pretty colours! Step Seven – Glaze (Gloss or sometimes called “Glost”) Firing Most of the time this is the final stage of making your creation (but not always!) The glaze kiln goes to 1240°C. This is called cone 6, or midrange. It is the low end of stoneware temperatures. Stoneware clays and glazes are typically fired at cone 8 – 10, that is 1260 – 1290°C. The energy requirement to go from 1240°C to 1280°C is almost a 30% more! Our clay is formulated to vitrify (mature, turn “glass-like”) at 1240°, as are our glazes. A glaze kiln take around 12 hours to reach temperature and two to three days to cool down. Sometimes a third firing process is required – this is for decoration that is added to work after the glaze firing. For example – adding precious metals and lustres. this firing temperature is usually around 600 – 800°C depending upon the techniques being used. There are many students interested in gold and silver trims – we will be doing this third type of firing soon! After firing your work will be in the student finished work shelves. Remember to pay for it before you head out the door! There is a small extra charge for using porcelain clay (it’s more than twice the price of regular clay), and for any third firing process! Once your work has been fired it can not turn back into clay for millennia – so don’t fire it if you don’t like it! Put it in the bucket for recycling. https://firebirdstudios.com.au/the-process-of-making-pottery/ This bowl is an example of kitchenware used in the 19th century and still in use today.Bowl white ceramic plain that has two sets of edging around lip. Inside bowl has plaster designed to look like cooking mixture.flagstaff hill, warrnambool, shipwrecked-coast, flagstaff-hill, flagstaff-hill-maritime-museum, maritime-museum, shipwreck-coast, flagstaff-hill-maritime-village, kitchen equipment, ceramic -
 Flagstaff Hill Maritime Museum and Village
Domestic object - Bowl, J & G Meakin, Late 19th or early 20th Century
... Use a piece of fly wire to rub the work all over – this will scratch a little so be light handed. Use a knife or metal kidney to scrape any areas that require a bit more dynamic treatment than the fly wire offers! ...Use a piece of fly wire to rub the work all over – this will scratch a little so be light handed. Use a knife or metal kidney to scrape any areas that require a bit more dynamic treatment than the fly wire offers! ...The Process of Making Pottery Decorating, Firing, Glazing, Making, Technical There is a rhythm and flow to clay. It can’t be done all at once! Even the making process! It can take weeks to get everything done, especially if you can only work on your pottery once a week! Even though we have three hour classes, it’s often just not enough time! Here is an overview of some of the processes so you have a bit more grasp on some of the technical stuff! Step One – Design There are SO many ideas out there for making stuff in clay! From delicate porcelain jewellery, through to heavy sculptural work and everything in between. Deciding your direction is sometimes not that easy – when you first start, try everything, you will naturally gravitate to the style that you enjoy! The options and variations are endless and can get a wee bit overwhelming too! Check in with me before you start to ensure your ideas will work, what order you might do things, how you could achieve the look you are seeking and any other technical data required! Step Two – Making Clay is thixotropic. This means that as you work with it, the clay first gets sloppier and wetter, before is begins to dry in the atmosphere. For most things, you simply can’t do all parts of the project at once. An example of work order might look like: Get last weeks work out from the shelves Prepare clay for today’s work – roll your clay, prepare balls for throwing, make the first stage of a pinch pot) Clean up last week’s work and put it on the shelf for bisque firing Check that you have any glazing to do – and do enough of it that you will have time to finish your main project Do the next step of your next project – there might be a further step that can’t be complete immediately, in that case, wrap your work well and put onto the shelves. Letting your work rest for a while can really help keep your work clean and professional looking. Many things require bagging under plastic to keep it ready for work the next week – put your name on the outside of the bag so you can find your work easily. We have stickers and markers. Consider how you want to decorate your work – coloured slip can be applied at a fairly wet stage (remembering that it will make your work even wetter!). Trying to apply slip to dry clay won’t work! If you want to do sgraffito – you will need to keep the work leather hard (a state of dryness where you can still work the clay with a little effort and a little water and care). Step Three – Drying Most of the time your work can go into the rack uncovered to let it dry out for the following week. If you want to continue forming or shaping you will need to double bag your work – put your work on a suitable sized bat and put the bat in a bag so the base of the bag is under the bat, then put another bag over the top of the work and tuck the top of the bag under the bat. If you want to trim (or turn) your thrown work the following week, it should also be double bagged. If your work is large, delicate, or of uneven thicknesses, you should lightly cover your work for drying. When considering the drying process, bare in mind the weather, humidity and wind! The hotter and dryer, the faster things dry and work can dry unevenly in the shelves – this can lead to cracking – another time to lightly cover your work for drying. Step Four – Trimming and Cleaning Up Your work is dry! It is called greenware now and it is at it’s most fragile! Handle everything with two hands. I often refer to soft hands – keep everything gentle and with your fingers spread as much as possible. Try to not pick up things like plates too much, and always with both hands! Before your work can be bisque fired it should be “cleaned up”. You work won’t go into the kiln if it has sharp edges – when glazed, sharp edges turn into razor blades! Use a piece of fly wire to rub the work all over – this will scratch a little so be light handed. Use a knife or metal kidney to scrape any areas that require a bit more dynamic treatment than the fly wire offers! Finally, a very light wipe over with a slightly damp sponge can help soften and soothe all of your edges and dags! Trimming thrown work: If you are planning to trim (or turn) your thrown work (and you should be), make sure you bag it well – your work should be leather hard to almost dry for easiest trimming. Use this step to finish the work completely – use a metal kidney to polish the surface, or a slightly damp sponge to give a freshly thrown look. Wipe the sponge around the rim after trimming, and check the inside of the pot for dags! Trimming slip cast work: Usually I will trim the rims of your work on the wheel the following day to make that stage easier, however you will still need to check your work for lumps and bumps. Last but not least – check that your name is still clearly on the bottom of your work. Step Five – Bisque Firing When the work is completely dry it can go into the bisque kiln. The bisque kiln is fired to 1000°C. This process burns off the water in the clay as well as some of the chemically bound water. The structure of the clay is not altered that much at this temperature. Inside the bisque kiln, the work is stacked a little, small bowl inside a larger bowl and onto a heavy plate. Smaller items like decorations or drink coasters might get stacked several high. Consideration is paid to the weight of the stack and shape of the work. A bisque kiln can fire about one and a half times the amount of work that the glaze kiln can fire. The firing takes about 10 hours to complete the cycle and about two days to cool down. Once it has been emptied the work is placed in the glaze room ready for you to decorate! Step Six – Glazing Decorating your work with colour can be a lot of fun – and time consuming! There are three main options for surface treatment at this stage: Oxide Washes Underglazes Glazes Washes and underglazes do not “glaze” the work – It will still need a layer of glaze to fully seal the clay (washes don’t need glaze on surfaces not designed for food or liquid as they can gloss up a little on their own). Underglazes are stable colourants that turn out pretty much how they look in the jar. They can be mixed with each other to form other colours and can be used like water colours to paint onto your work. Mostly they should have a clear glaze on top to seal them. Oxides are a different species – the pink oxide (cobalt) wash turns out bright blue for instance. They don’t always need a glaze on top, and some glazes can change the colour of the wash! The glazes need no other “glaze” on top! Be careful of unknown glaze interactions – you can put any combination of glaze in a bowl or on a plate, but only a single glaze on the outside of any vertical surface! Glazes are a chemical reaction under heat. We don’t know the exact chemicals in the Mayco glazes we use. I can guess by the way they interact with each other, however, on the whole, you need to test every idea you have, and not run the test on a vertical surface! Simply put, glaze is a layer of glass like substance that bonds with the clay underneath. Clay is made of silica, alumina and water. Glaze is made of mostly silica. Silica has a melting point of 1700°C and we fire to 1240°C. The silica requires a “flux” to help it melt at the lower temperature. Fluxes can be all sorts of chemicals – a common one is calcium – calcium has a melting point of 2500°C, however, together they both melt at a much lower temperature! Colourants are metal oxides like cobalt (blue), chrome (green through black), copper (green, blue, even red!), manganese (black, purple and pink) iron (red brown), etc. Different chemicals in the glaze can have dramatic effects. for example, barium carbonate (which we don’t use) turns manganese bright pink! Other elements can turn manganese dioxide brown, blue, purple and reddish brown. Manganese dioxide is a flux in and of itself as well. So, glazes that get their black and purple colours, often interact with other glazes and RUN! Our mirror black is a good example – it mixes really well with many glazes because it fluxes them – causes them to melt faster. It will also bring out many beautiful colours in the glazes because it’s black colouring most definitely comes from manganese dioxide! Glaze chemistry is a whole subject on it’s own! We use commercial Mayco glazes on purpose – for their huge range of colour possibilities, stability, cool interactions, artistic freedom with the ability to easily brush the glazes on and ease of use. We currently have almost 50 glazes on hand! A major project is to test the interactions of all glazes with each other. That is 2,500 test tiles!!!! I’m going to make the wall behind the wheels the feature wall of pretty colours! Step Seven – Glaze (Gloss or sometimes called “Glost”) Firing Most of the time this is the final stage of making your creation (but not always!) The glaze kiln goes to 1240°C. This is called cone 6, or midrange. It is the low end of stoneware temperatures. Stoneware clays and glazes are typically fired at cone 8 – 10, that is 1260 – 1290°C. The energy requirement to go from 1240°C to 1280°C is almost a 30% more! Our clay is formulated to vitrify (mature, turn “glass-like”) at 1240°, as are our glazes. A glaze kiln take around 12 hours to reach temperature and two to three days to cool down. Sometimes a third firing process is required – this is for decoration that is added to work after the glaze firing. For example – adding precious metals and lustres. this firing temperature is usually around 600 – 800°C depending upon the techniques being used. There are many students interested in gold and silver trims – we will be doing this third type of firing soon! After firing your work will be in the student finished work shelves. Remember to pay for it before you head out the door! There is a small extra charge for using porcelain clay (it’s more than twice the price of regular clay), and for any third firing process! Once your work has been fired it can not turn back into clay for millennia – so don’t fire it if you don’t like it! Put it in the bucket for recycling. https://firebirdstudios.com.au/the-process-of-making-pottery/This bowl was made by renowned pottery company J & G Meakin of England. The firm was established in the mid-1800's. The bowl is an example of kitchenware used in the 19th century and still in use today.Bowl; white ceramic, round and tapering inwards towards base. Made by J and G Meakin England.On base, 'Ironstone China Reg SOL 391413' with symbolflagstaff hill, flagstaff hill maritime museum and village, warrnambool, maritime museum, maritime village, great ocean road, shipwreck coast, mixing bowl, food preparation, j & g meakin, pottery, stoke-on-trent, kitchen equipment, ceramic -
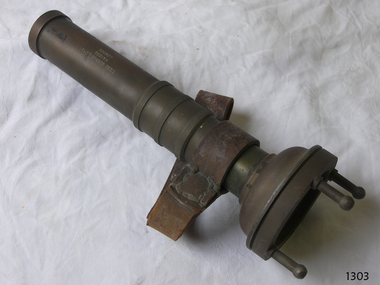 Flagstaff Hill Maritime Museum and Village
Tool - Torch, 1935-1960
... work. They have to be self-contained, the older ones are powered by an accumulator type battery which could be recharged. Some models were fitted with a switch to turn the light off saving on the battery power. The lens is of a convex type and magnifies the light. Sometimes there was a protective grill across the glass or prongs to protect the glass from an impact. When fully charged the battery would last about seven hours. Torches are made from non-ferrous metal...work. They have to be self-contained, the older ones are powered by an accumulator type battery which could be recharged. Some models were fitted with a switch to turn the light off saving on the battery power. The lens is of a convex type and magnifies the light. Sometimes there was a protective grill across the glass or prongs to protect the glass from an impact. When fully charged the battery would last about seven hours. Torches are made from non-ferrous metal ...Diver's Submarine Electric Torches were first developed to give illumination for close examination work. They have to be self-contained, the older ones are powered by an accumulator type battery which could be recharged. Some models were fitted with a switch to turn the light off saving on the battery power. The lens is of a convex type and magnifies the light. Sometimes there was a protective grill across the glass or prongs to protect the glass from an impact. When fully charged the battery would last about seven hours. Torches are made from non-ferrous metal so as not to corrode in their watery environment. Siebe Gorman & Co Ltd has been producing hand-held, battery-powered, submarine electric torches for divers and the Ministry of Defence (MOD) since the 1920s. In 1961, the famous diving manufacturer C.E. Heinke merged with Siebe Gorman, and for a short while, torches were made with the combined 'Siebe Heinke' inscription. However, this linked inscription was later dropped, with a return to the Siebe Gorman name tag. Date of manufacture for these torches can be determined by their Admiralty Pattern (AP) number that was used to identify a particular item and were for naval stores use. Before NATO stock coding became more widely used, earlier MOD torches often have a simple four-digit group of AP numbers such as AP4456 or AP4458. In 1975 Siebe Gorman moved from their Neptune Works at Chessington in Surrey to a new location at Cwmbran in Wales and by this time their manufacture of diving equipment had declined. (For additional historic company information on Siebe & Gorman see notes section this document.)The item is significant as it gives us a snapshot into marine history and the development of diving equipment generally, especially that used for salvage operations before and during WW2. The company that made the torch Siebe Gorman was a leading inventor, developer and innovator of marine equipment with its early developments in helmets, compressors and other diving equipment. Items that are today eagerly sought after for maritime collections around the world. The items that have been donated to the Flagstaff Hill collection give us an insight as to how divers operated and the dangers they faced doing a very necessary and dangerous job.Divers torch, brass with glass lens , screw on piece with three lugs attached. Leather wrist strap attached & loose contact spring inside."Siebe Gorman and Co Ltd, Makers, London." Has A.P.4456 stamped on front faceflagstaff hill, warrnambool, shipwrecked-coast, flagstaff-hill, flagstaff-hill-maritime-museum, maritime-museum, shipwreck-coast, flagstaff-hill-maritime-village -
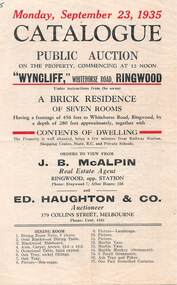 Ringwood and District Historical Society
Flyer - Catalogue, Public Auction - Brick Residence and Contents of Dwelling, "Wyncliff", Whitehorse Road, Ringwood. 1935
... Metal Meat Safe; Wooden Safe; Hand worked Table Cover; Pair Poplin Silk Curtains (new); Leather Table Centre. VERANDAH - 12ft Shelving with doors; 35ft Shelving; Wooden Stand; Axe Stand (wooden); Nine feet Wooden Shop Fittings; Small Filing Cabinet; Three Window Frames & Glass; 38 Pot Plants Fernery; 9 Hanging Baskets Fernery; Electric Shop Sgn Storeroom; 2 Small Electric Shop Signs Storeroom; 2 Garden Sprays; Doll's Pram and Doll; Two Boxes Paint and Slate; Crystal Radio Set; New Canvas Blind & Roller 6ft.; Electric Light Reflectors (two); Two pieces of Painted Baize; Small Vice; Sprinkler; One Gallon Tin of Spray Oil; 2 Packets of "Aresto"; Two Hurricane Lamps; One Pair Spring Balance Scales; Small Pair Spring Balance Scales. ...Metal Meat Safe; Wooden Safe; Hand worked Table Cover; Pair Poplin Silk Curtains (new); Leather Table Centre. VERANDAH - 12ft Shelving with doors; 35ft Shelving; Wooden Stand; Axe Stand (wooden); Nine feet Wooden Shop Fittings; Small Filing Cabinet; Three Window Frames & Glass; 38 Pot Plants Fernery; 9 Hanging Baskets Fernery; Electric Shop Sgn Storeroom; 2 Small Electric Shop Signs Storeroom; 2 Garden Sprays; Doll's Pram and Doll; Two Boxes Paint and Slate; Crystal Radio Set; New Canvas Blind & Roller 6ft.; Electric Light Reflectors (two); Two pieces of Painted Baize; Small Vice; Sprinkler; One Gallon Tin of Spray Oil; 2 Packets of "Aresto"; Two Hurricane Lamps; One Pair Spring Balance Scales; Small Pair Spring Balance Scales. ...Double-sided A5 size advertisement for public auction under instructions from the owner on Monday, September 23, 1935 on the property - seven room brick residence with frontage 456 feet by approximately 280 feet and contentents of dwelling fully listed over 4 pages. Agent - J.B. McAlpin, Ringwood, opp. station. Phone Ringwood 7; after houres 236. Auctioneer - ED. Haughton & Co., 379 Collins Street, Melbourne. Phone Central 4101.Contents of Dwelling List - includes: DINING ROOM - Dining Room Suite - 6 pieces; Oval Blackwood Dining Table; Blackwood Sideboard; Axminster Carpet, Occasional Table hand carved; Oak Trays; Seascape, Landscape and other Pictures; 2 Marble Vases; Marble Monkey and 3 other Small Ornaments; Ash Tray and Poker; One Pair Stencilled Curtains. Two Large Vases, 1 with floral design; Salad Bowl and Servers; One Dozen Dessert Knives; Nine Stainless Teaspoons (new); Plated Vases; Plated Jam Dishes; Plated Cream Bowl; Silver Plated Cake Dish; One Pair Plated Shell Butter Dishes; Lino Border. LOUNGE ROOM - 2 Pictures and 1 pair with Circular Frames; Floral Jardinere and Pot Plant; Cabinet Gramophone "Singola"; Records; Player Piano "Cable"; Piano Stool; 31 Rolls; Roll Cabinet; Quantity of Music; Music Case, Leather; Portable Gramophone "Decca"; Floral Design Jardinere; Wicker Occasional Table; 2 Wicker Chairs; Cane Lounge Settee; Blackwood Bookcase; 9 Volumes Universal Encyclopedia; 10 Vols Children's Encyclopedia; Floral Vase; Black and Gold Vase; One pair Plated Vases; Ash Pan; Lino Border (Lounge Room); One Carpet, green 13.6 x 10.6; One Cushion; Hall Stand; Pedestal; Floral Design Jardinere; Painting on Canvas (Landscape); Hall Runner Carpet 25 feet; Hall Lino 29ft 5 in.; Five Door Mats (small). FIRST BEDROOM - Arm Chair (Leather); English Oak Dressing Table; English Oak Wash Stand Marble Top; Toilet Set (Four pieces); Silk Fire Screen; Blackwood Occasional Table; Black and Gold Vase; Pair China Vases; Pair Glass Vases; Single Glass Vase; One Kewpie Lavender Bag; Bedroom Lino 15.6 x 13.6. SECOND BEDROOM - Arm Chair (Leather); Dressing Table; Wash Stand; 3 Piece Toilet Set; One Vase (Pink Cameo Design); Two Ornaments (one round); Bedroom Lino 13.5 x 12.10; 3 Pictures; 2 Pairs Curtains (applique, stenc'ld); Pair Curtain Poles. THIRD BEDROOM - Lino approx 14ft x 10ft; Two Green Mohair Mats; Pair Pictures (White frames); One Picture ("The Mourners"); Picture ("The Wanderer Found"); Small Picture; Wicker Chair. FOURTH BEDROOM - Duchess Chest 5 drawers; Corner Wardrobe and Curtains; One Single Bed & Wire Mattress; Single Bedding; Lino on floor 14ft x 6ft 6in.; Occasional Table; 3 Pictures; Two Door Mats; Hall Runner (Carpet) 21ft. BREAKFAST ROOM - Two Wicker Chairs; Cushion; Brown Cushion; Four Vienna Chairs; Jardinere; Kerb (Wooden). 3 Pictures; Oil Painting (Canvas); 2 Pictures; Lino 14ft x 14ft; Brown Table Cover; Fruit Set; Robur Tea Pot; Plaque; China Biscuit Barrel; Glass Fruit Bowl; Pair Pickle Jars and Stand; Wooden Inkstand; Pair Ash Trays; Two Marble Vases; Glass Vase; Electric Jug and Electric Toaster (practically new); Picture; Cushion; Pair Lace Curtains; Curtain Rod; Three Lace Curtains; Brass Curtain Rods (3); Lino in Vestibule 10ft x 8 ft; Lino in Kitchen 12.6 x8.6; Coal Scuttle; Two Small Tables (1 Baize Cover). STORE ROOM - Briquette Grate; Three Coir Mats (one new); Three Small Door Mats (new); Glass Fire Screen; 2 Alm Pot Stands; Steel Pot Stand; Lady's Bicycle; 2 Electric Radiators (one large); White Cabinet; Stretcher Bed; Large Cot with Wire Mattress; Kerb; Fender and Irons; Lino on floor 12ft x 12ft; Lino in Storeroom 6ft x 6ft; Three Large Window Blinds; Clothes Horse; Dressmaker's Fitting Stand; Dressmaker's Bust; Window Display Bust; Blouse Stand; Small Display Stand; Meat Cover (Metal); Leather Portmantau; Leather Kit Bag; Four Large Wooden Drawers; Picnic Basket; Mattress, Bolster and Pillow; Cot Quilt; One Long-handled Feather Duster; Feather Duster; Wicker Lounge; Cane Soiled Linen Basket; One New Washing Tub; Copper Preserving Pan; Lino in Laundry 8 x 6 approx; Carpet Sweeper; Small Jardinere; 2 Shopping Baskets; Kitchen Safe; Kitchen Table; Three Buckets; 1 Horse Rub patent (prac new); Wooden Pot Plant Stand; Bird Cage and Stand; Pair Steps; Pair Small Steps; Metal Meat Safe; Wooden Safe; Hand worked Table Cover; Pair Poplin Silk Curtains (new); Leather Table Centre. VERANDAH - 12ft Shelving with doors; 35ft Shelving; Wooden Stand; Axe Stand (wooden); Nine feet Wooden Shop Fittings; Small Filing Cabinet; Three Window Frames & Glass; 38 Pot Plants Fernery; 9 Hanging Baskets Fernery; Electric Shop Sgn Storeroom; 2 Small Electric Shop Signs Storeroom; 2 Garden Sprays; Doll's Pram and Doll; Two Boxes Paint and Slate; Crystal Radio Set; New Canvas Blind & Roller 6ft.; Electric Light Reflectors (two); Two pieces of Painted Baize; Small Vice; Sprinkler; One Gallon Tin of Spray Oil; 2 Packets of "Aresto"; Two Hurricane Lamps; One Pair Spring Balance Scales; Small Pair Spring Balance Scales. WASH HOUSE - Pair Heavy Tracers (2); Pair Reins; Back Band; One Tug; Pair Hames; One Pair Neck Bands (2); Four Manger Balls; Pair Knee Pads; Kicking Strap complete; Leather Head Stall; Collar Pad; Knife Board and Tin Polish; Fork Cleaner; Foot Spray Pump. TOOL SHED - One Stewart Horse Clipper; Approx 120ft Ribbed Hose; 100ft ½in Hose; Child's Scooter; Tin Box; Ferret Box; One Tool Box; Tomato Hoe; Sprinkler; Two Large Augers; Large Watering Can; Medium Watering Can; Small Watering Can; Wooden Tool Chest; Rope, Tackle and two Pulleys; Six pieces of Lino; Three Small Canvas Blinds; Lawn Mower 14in.; Lawn Mower 12in.; Grass Catcher; 8 Pieces Garden Tools; Barrow; Quantity of Timber; Quantity of Flower Pots; Quantity of Wire; 4 Egg & 1 Fowl Crates Feed Room; 1 Gallon Demijohn Feed Room; Quantity of Shelving Feed Room; Quantity of Cement, Lime; Six Small Doors; Roll of Perforated Cardboard; Boot Rack; Coat Rack; 3 Automatic Sanitary Disinfectant; Pair Neck Straps and Rope; One Chimney Top & 3 Vent Bks.; Desk; Large Pump; Large Safe; Pair Sliding Door Rollers & Fittings; Two Wooden Doors; Box Sundries; Wooden Frame and Glass; 2 Vienna Chairs; Delivery Cart; Five Boxes Tiles; Quantity Agricultural Pipes; Wooden Bench; Wood Horse; Earthenware Drain Pipe; Wooden Tool Box; New Brass Spray "Rego"; Two Wood Planes. YARD - Pair Hedge Clippers; Box Containing 2 prs Secateurs & Punch; Box Tools seven pieces; Box Sundries; Lawn Weeder and Seed Sower; Box Tools 6 pieces; Two Saws; Bundle Files; Three Braces; Box of 13 pieces Gimlets etc.; Five Spanners; Box Tools 4 pieces; Four Coal Chisels; Box 7 pieces of Tools; Box of 5 pieces of Tools; Box of Docket Books; One Printing set; Large Figure Printing Set; Small Figure Printing set; Price Ticket Box; Air Brush Writing Set Complete; Six Shelves & Brackets, one Hat Rack, in store room; Box of Three Hammers; Two Boot Lasts; Tin of Polishing Oil; Box of Gardening Sundries; 2 Bicycle Pumps Saddle & Clips; One Covered Baking Dish; 200 c.p. Globe (Vestibule); Two "Dimolite" Fittings; Set of Five Canisters; Earthernware Jar; Two shopping Cases; Dinner Set 11 pieces; Box of Sundry Tins; Alm Fish Pan and Drainer; Two Ventilators; Knife Board & 3 Bread Saws; Soap Box and Jewel Case; Three Glass Articles. OFFICE FURNITURE - Steel Safe (Office Safe); Office Table five drawers; Cabinet 8 drawers; Cupboard three shelves; Selves 2ft3in x 1ft6in; Cheque Protector; Remington Typewriter; Typewriter Adjustable Table; Burroughs Bookkeeping Machine and Stand Complete; Small Office Table; Glass Show Case3ft9 x 2ft.; Four Sheets M. Glass; Five Sheets P. Glass; Gent's Overcoat new; Boy's Pullover New; Small Show Case; Duplicator (complete); Webster's Dictionary; Family doctor's Book. Two Dictionaries; Bundle of Three Books; Art Decorating Book; Bundle of Three Books; Bundle of Three Books; Two Books (Children's); (Multiple) Bundles each containing Three Books; Leather Riding Whip; Tort-shell Inkstand & Calendar; Tort-shell Folding Letter Rack; Water Filter; Thermos Flask and Case; Two Waste Paper Baskets. -
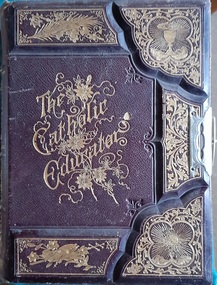 Hymettus Cottage & Garden Ballarat
Work on paper - Book, The Catholic Educator
... metal clasps and ornate gilded illustrations. It epitomised a period of Catholic intellectual excellence under Archbishop Carr of Melbourne when other major Catholic publications such as 'The Austral Light' and 'The Advocate' were being produced. Catholic Melbourne Publishing Austral Light Advocate Carr Edmund Finn The Catholic Educator Work ...non-fictioncatholic, melbourne, publishing, austral light, advocate, carr, edmund finn -
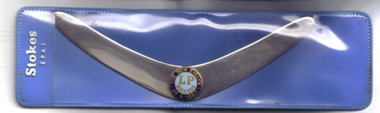 Mount Evelyn History Group
Souvenir boomerang, Russell Stokes, 1967
... metal and enamel work by a Ringwood company that is now over 150 years old. See also item 2003. Russell Stokes metals badges souvenirs Evelyn Ringwood Lubra Bend Yarra Glen Parliament of Victoria. Sleeve has 'Stokes' in white lettering. Stainless steel miniature boomerang with round enamel badge, light ...The boomerang commemorates the successful 1967 election campaign of Russell Stokes, MLA for Evelyn 1958-1973. It was manufactured by his family's firm, Stokes Australasia Limited. Russell Stokes' home was 'Lubra Bend', Yarra Glen.The boomerang is both a souvenir of an election campaign by a long-serving member of the Parliament of Victoria and an example of metal and enamel work by a Ringwood company that is now over 150 years old. See also item 2003.Stainless steel miniature boomerang with round enamel badge, light blue with dark blue border and gold lettering on bend. In plastic display sleeve, blue back, clear front.Sleeve has 'Stokes' in white lettering.russell stokes, metals, badges, souvenirs, evelyn, ringwood, lubra bend, yarra glen, parliament of victoria. -
 Port Fairy Historic Lifeboat Station
Equipment - Tripod, Illuminating Light, Tripod, c.1870
... Timber tripod, to suspend an illumination light, painted Prussian blue, Leather strap to secure legs together when stored or for transport. Metal hook at the apex of the tripod to hang illumination flares to light work area....Port Fairy Historic Lifeboat Station Griffiths Street Port Fairy great-ocean-road A lightweight timber tripod, to carry an illuminating flare to use at night HMSO "Instructions relating to the Rocket Life Saving Apparatus" (1904) page 27, "Description of the Rocket Apparatus for Saving Life from Shipwreck", (1927) page 28 , Timber tripod, to suspend an illumination light, painted Prussian blue, Leather strap to secure legs together when stored or for transport. Metal hook at the apex of the tripod to hang illumination flares to light work area. ...A lightweight timber tripod, to carry an illuminating flare to use at nightHMSO "Instructions relating to the Rocket Life Saving Apparatus" (1904) page 27, "Description of the Rocket Apparatus for Saving Life from Shipwreck", (1927) page 28 , Timber tripod, to suspend an illumination light, painted Prussian blue, Leather strap to secure legs together when stored or for transport. Metal hook at the apex of the tripod to hang illumination flares to light work area. -
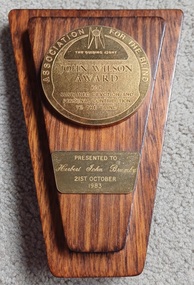 Vision Australia
Plaque - Object, Anpas Pty Ltd, John Wilson award - Brumby, 1983
... work as a volunteer, auxiliary member and committee member. Association for the Blind Herbert John Brumby Association for the Blind The Guiding Light John Wilson Award for sustained devotion and personal contribution to the blind Presented to Herbert John Brumby 21st October 1983 1 wooden block with two metal inserts John Wilson award - Brumby Plaque Object Anpas Pty Ltd ...From 1979, the John Wilson Award was awarded to individuals who made a significant difference to the lives of those around them. In 1983, it was presented to Herbert John Brumby for his work as a volunteer, auxiliary member and committee member.1 wooden block with two metal insertsAssociation for the Blind The Guiding Light John Wilson Award for sustained devotion and personal contribution to the blind Presented to Herbert John Brumby 21st October 1983association for the blind, herbert john brumby -
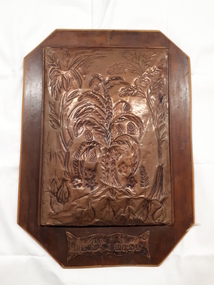 Vision Australia
Photograph - Image, Rainforest copper etching
... Rectangular (hand tooled) worked (raised) copper plaque on wooden base in dark wood frame with light wood edges. (Eight sided backing). Metal...Vision Australia 454 Glenferrie Road Kooyong melbourne Rectangular (hand tooled) worked (raised) copper plaque on wooden base in dark wood frame with light wood edges. (Eight sided backing). Metal ...Rectangular (hand tooled) worked (raised) copper plaque on wooden base in dark wood frame with light wood edges. (Eight sided backing). Metal name plate on base. Design on copper of trees/ leaves/ plants. Two screws and wire on reverse side of base for hanging. "Doris Long" written on masking tape on rear, however creator is unknown.1 x digital image of copper wall hangingRainforest Doris Longrecreation, association for the blind -
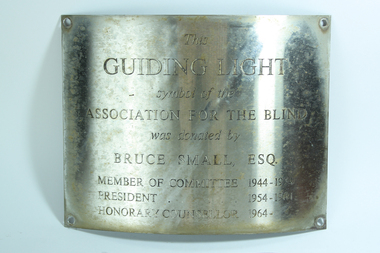 Vision Australia
Plaque - Object, Guiding Light plate, 1964?
... Light structure, which was installed at AFB's Brighton office due to the efforts of President Bruce Small. Although removed some years ago, the structure was a symbol used by the Association for the Blind as a visual way to represent it's work within the community. association for the blind Fundraising Nameplates "This Guiding Light symbol of the Association for the Blind was donated by Bruce Small, Esq. Member of Committee 1944-1954. President 1954-1964. Honorary Counsellor 1964-" 1 metal ...The plaque believed to have been attached to the Guiding Light structure, which was installed at AFB's Brighton office due to the efforts of President Bruce Small. Although removed some years ago, the structure was a symbol used by the Association for the Blind as a visual way to represent it's work within the community. 1 metal plate with engraving "This Guiding Light symbol of the Association for the Blind was donated by Bruce Small, Esq. Member of Committee 1944-1954. President 1954-1964. Honorary Counsellor 1964-"association for the blind, fundraising, nameplates -
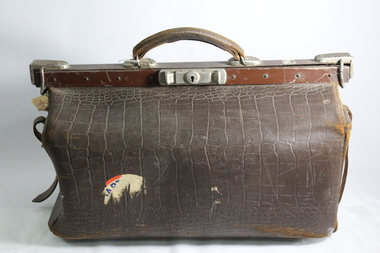 Wodonga & District Historical Society Inc
Functional object - Gladstone Bag c1900s
... work bag This is a small suitcase, called a Gladstone bag, made of stiffened brown leather built over a rigid metal frame. It has a leather handle on top of the metal frame and a metal lock on the side of the frame. There are metal clips at each end of the frame.. Metal straps attached to the sides of the case. The bag is lined with light ...This is a suitcase known as a Gladstone bag. It is named after William Gladstone (1809-1898), a Prime Minister of England. Gladstone bags were first produced by Edward Cole in London in 1854. These bags were commonly used, mainly by men, for business, work and sporting purposes. As it was compact and stored a large amount of material , it was a popular choice for men travelling to their workplace or carrying clothes and equipment to sporting event.This bag has significance as it was widely used by men throughout Australia. The original owner of this bag was a police officer in Bright, Victoria, although it is typical of those used by many local men in their daily life.This is a small suitcase, called a Gladstone bag, made of stiffened brown leather built over a rigid metal frame. It has a leather handle on top of the metal frame and a metal lock on the side of the frame. There are metal clips at each end of the frame.. Metal straps attached to the sides of the case. The bag is lined with light blue material and there are two pockets on one side of the bag, It is accompanied by a matching leather address label.gladstone bag, luggage, work bag -
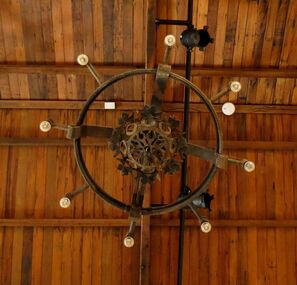 Montsalvat
Chandelier, Untitled
... Montsalvat 7 Hillcrest Avenue Eltham melbourne matcham skipper metal work chandelier None Iron chandelier with central cross and decorative design and eight radiating spokes containing light bulbs. ...Iron chandelier with central cross and decorative design and eight radiating spokes containing light bulbs. Nonematcham skipper, metal work, chandelier