
Showing 18 items matching "prince imperial"
-
 Federation University Historical Collection
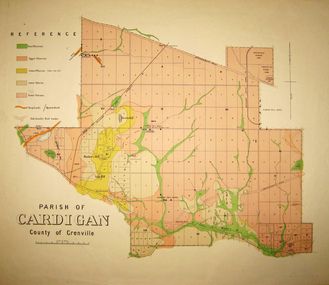
Map - Geological survey, Parish of Cardigan, County of Grenville, c1889
... ...prince imperial...cardigan winter's creek ballarat cattle yards railway prince of wales park, ballarat friendly societies reserve ballarat industrial school reserve green hill bunker's hill sago hill diamond drill bores cardigan propriety half way house ti tree creek albion consols prince imperial winter's freehold company Geological map of the Parish of Cardigan on a cadastral base showing quartz reefs, shafts, alluvial deposits. ...Geological map of the Parish of Cardigan on a cadastral base showing quartz reefs, shafts, alluvial deposits.cardigan, winter's creek, ballarat cattle yards railway, prince of wales park, ballarat, friendly societies reserve, ballarat industrial school reserve, green hill, bunker's hill, sago hill, diamond drill bores, cardigan propriety, half way house, ti tree creek, albion consols, prince imperial, winter's freehold company -
 Disability Sport & Recreation Victoria
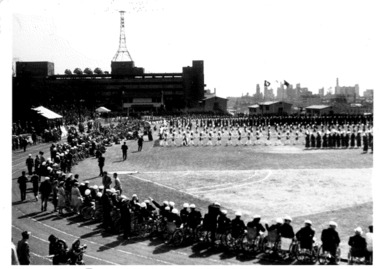
Photograph, Photo from opening ceremony of 1964 Tokyo Paralympic Games, mid 1960s
... The patrons of the Games, His Imperial Highness Prince Akihito and Princess Michiko, were in attendance....The patrons of the Games, His Imperial Highness Prince Akihito and Princess Michiko, were in attendance. 1964 paralympics paralympics Reverse side of the photo has "243 19" written on it. ...This photo is from the opening ceremony of the 1964 Tokyo Paralympics. The Opening Ceremony was held at the Oda Field located within the Olympic village, as nearly 5,000 spectators looked on. The patrons of the Games, His Imperial Highness Prince Akihito and Princess Michiko, were in attendance.Black and white photo from the opening ceremony of the 1964 Paralympic Games held in Tokyo, Japan.Reverse side of the photo has "243 19" written on it.1964 paralympics, paralympics -
 Disability Sport & Recreation Victoria
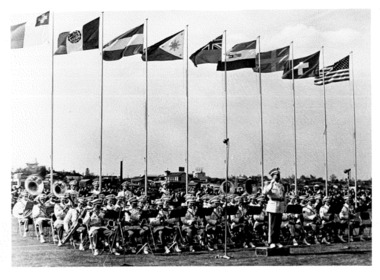
Photograph, Photo from opening ceremony of 1964 Tokyo Paralympic Games, mid 1960s
... The patrons of the Games, His Imperial Highness Prince Akihito and Princess Michiko, were in attendance....The patrons of the Games, His Imperial Highness Prince Akihito and Princess Michiko, were in attendance. 1964 paralympics paralympics Reverse side of the photo has "242 17" written on it. ...This photo is from the opening ceremony of the 1964 Tokyo Paralympics. The Opening Ceremony was held at the Oda Field located within the Olympic village, as nearly 5,000 spectators looked on. The patrons of the Games, His Imperial Highness Prince Akihito and Princess Michiko, were in attendance.Black and white photo from the opening ceremony of the 1964 Paralympic Games held in Tokyo, Japan.Reverse side of the photo has "242 17" written on it.1964 paralympics, paralympics -
 Disability Sport & Recreation Victoria
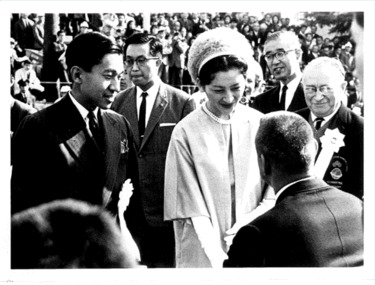
Photograph, Photo from opening ceremony of 1964 Tokyo Paralympic Games, mid 1960s
... The patrons of the Games, His Imperial Highness Prince Akihito and Princess Michiko, were in attendance....The patrons of the Games, His Imperial Highness Prince Akihito and Princess Michiko, were in attendance. 1964 paralympics paralympics Reverse side of the photo has "Tokyo 1964" written on it. ...This photo is from the opening ceremony of the 1964 Tokyo Paralympics. The Opening Ceremony was held at the Oda Field located within the Olympic village, as nearly 5,000 spectators looked on. The patrons of the Games, His Imperial Highness Prince Akihito and Princess Michiko, were in attendance.Black and white photo from the opening ceremony of the 1964 Paralympic Games held in Tokyo, Japan. Prince (and later Emperor) Akihito is pictured with his wife, Princess Michiko with an athlete.Reverse side of the photo has "Tokyo 1964" written on it.1964 paralympics, paralympics -
 Bendigo Historical Society Inc.
Document - PETER ELLIS COLLECTION: BUSH MUSIC CLUB COLONIAL BALL, 1990
... The Quadrille 2. The Prince Imperials 3. The Parisienne Quadrille 4. The Lancers Quadrille 5. ...The Quadrille 2. The Prince Imperials 3. The Parisienne Quadrille 4. The Lancers Quadrille 5. ...Small off white coloured booklet Bush Music Club Inc. Colonial Subscription Ball 1990 Dancers Companion (A guide to the Quadrilles) The Quadrille Figure 1 (Le Pantelon) (2x32) 8 Top couples R and L through. (without giving hands). 8 Set & turn Partners 8 Top ladies chain. 4 Top couples promenade across set. 4 Half R and L to place. 32 Side couples repeat Figure 2 (Le 'Ete) (4x24) 4 Top couples advance & retire. 4 Cross over (without changing places with partner). 8 Repeat back to place. 8 Set & turn partners. 24 Sides repeat. 48 Top and Sides repeat. Figure 3 (La Poule) (4x32) 4 Lady 1, Man 2 adv, tough RH, retire to opposite place. 4 Lady 1, Man 2 adv, join LH give RH to partner 4 Line of 4 balance fwd & back twice. 4 Men lead partners to opp. Place. 4 Lady 1, Man 2 adv. & ret. 4 Lady 1, Man 2 adv, honour & ret. 4 Top couples, advance & retire. 4 Half R & L to place. 32 Repeat with Lady 2, Man !. 32 Repeat with Lady 3, Man 4. 32 Repeat with Lady 4, Man 3. The Quadrille Figure 4. (La Pastourelle) (4x32) 4 1st couple advance & retire. 4 1st couple adv, lady join 2nd couple. 4 Line of 3 adv. & ret, 1st man retire. 4 Line of 3 adv. Ladies cross to 1st man. 4 Line of 3 adv. & ret, 2nd man retire. 4 Re-advance, form circle with 2nd man. 4 Circle L half way round. 4 Half R & L to place. 32 Repeat with 2nd couple leading. 32 Repeat with 3rd couple leading. 32 Repeat with 4th couple leading. Figure 5 (La Finale) (4 x 32 + 8) 4 All advance & retire. 4 Turn partners. 4 Ladies adv, curtsey & retire. 4 Men advance, bow & retire. 8 All set & turn corners. 8 Promenade with corner. (men to original place with corner) 96 Repeat 3 times to return to partner. 4 All advance & retire. Turn Partners. Notes: 1 Couples numbered 2 Set & turn is a 'balance' set and open hand turn. The Prince Imperial's Quadrille Figure 1. (4x24) 4 Top couples visit right, honour sides. 4 Top men retire with partner & side lady to opposite place, (ladies facing each other). 8 Ladies grand chain to places 8 All set and turn partners 24 Top couples repeat back to place. 48 Repeat with side couples. Figure 2 (4 x 24) 4 1st Lady, 2nd man adv & turn in centre finish facing 2nd lady. 2 2nd lady pass through to 1st man. 2 Both couples turn out to place. 4 top couples advance & retire. 4 Ladies chain back to place. (Nariel) 8 Chasse-croise. (4 steps past partner RH turn corner 4 steps back, LH turn with partner.) 24 Repeat wth 2nd lady, 1st man leading 24 Repeat wth 3rd lady, 4th man leading 24 Repeat wth 4th lady, 3rd man leading. Figure 3 (4x32) 4 1st lady to centre, curtsey to partner. (RH in RH, ACW turn in to centre) 4 2nd lady to centre, curtsey to partner. 4 3rd lady to centre, curtsey to partner.4 4th lady to centre, curtsey to partner. 8 ladies join hands, circle R, small steps after circle R, Men join circle, (giving RH to partner). 4 Balance for 4 (step lift x 4) 4 Turn partners to place, bow & curtsey. 32 Repeat, Lady 2, 1, 4 & 3 to centre 32 Repeat Lady 3, 4, 2 & 1 to centre 32 Repeat, Lady 4, 3, 1 & 2 to centre The Prince Imperial's Quadrille Figure 4 (4x32) 4 Top couples advance & retire. 4 Top couples adv, ladies move to R, as men retire to place. 8 Line of 3 adv & ret twice. 4 Single men adv, bow and retire. 4 Re-advance and turn to face partner. 4 Circle L half way round (with partner & side couple). 4 Half R & L to place. 32 Repeat with side couples leading. 32 Repeat with top couples leading (men moving to left as ladies retire) 32 Repeat with Side couple leading. (Men moving to left as ladies retire) Figure 5 (4x32 +32) 16 Ladies to the right, (RH turn with corner man then continue round to the right turning each man) 4 1st Lady, 2nd man advance & retire 4 re-advance & turn RH (finish facing partners) 8 set & turn partners (finishing in place) 32 Repeat with 2nd Lady, 1st man leading 32 repeat with 3rd lady, 4th man leading 32 Repeat with 4th Lady, 3rd man leading 16 Ladies to the right again. 4 Men turn partners to centre. 4 All bow and curtsey. 8 Promenade set ( hall) Note: Set & turn is a 'balance' set and open hand turn. The Parisienne Quadrille Figure 1 (1x32) 8 Couples R and L through. (without giving hands) 8 set & turn partners 8 Ladies chain. 4 Couples promenade across set. 4 Half R and L to place. Figure 2 (2x24) 4 Couples advance & retire. 4 Cross over (without changing places with partners) 8 Repeat back to place. 8 Set & turn partners. 24 Repeat. Figure 3 (2x32) 4 Lady 1, Man 2 adv, touch RH, retire to opposite place. 4 Lady 1, Man 2 adv, join LH, give RH to partner. 4 Line of 4 balance fwd & back twice 4 Men lead partners to opp. Place 4 Lady 1, Man 2 adv & retire 4 Lady 1, Man 2 adv, honour & ret. 4 Couples, advance & retire. 4 Half R & L to place. 32 Repeat with Lady 2, Man 1. The Parisienne Quadrille Figure 4. (2x32) 4 1st couple advance & retire. 4 1st couple adv, lady join 2nd couple. 4 Line of 3 adv. & ret, 1st man retire. 4 Line of 3 adv. Ladies cross to 1st man. 4 Line of 3 adv. & ret, 2nd man retire. 4 Re-advance, form circle with 2nd man. 4 Circle L half way round. 4 Half R & L to place. 32 Repeat with 2nd couple leading. Figure 5 (2x32) 4 Couples advance & retire 4 Cross over 8 Repeat back to place. 8 Ladies chain across & back.8 Set & turn partners. 32 Repeat Notes: 1 This 'quadrille' is similar to the first set (1st 4 figures) and is danced as two couple sets. 2 Set & turn is a 'balance' set and open hand turn. The Lancers Quadrille Figure 1 (4x24) 4 1st lady, 2nd man advance & retire, 4 Adv, turn two hands, return to place. 4 1st couple lead through across set 4 2nd couple lead through back 8 all set & turn corners. 24 Repeat, 2nd lady, 1st man leading 24 Repeat 3rd lady, 4th man leading 24 Repeat, 4th lady, 3rd man leading Figure 2 (4x24) 4 1st couple advance & retire. 2 1st lady adv to centre, turn to face partner 2 1st couple honour each other. 8 1st couple set and turn then sides form top & bottom lines 4 Lines advance & retire, 4 Advance and turn partners to place. 24 Repeat with 2nd couple leading 24 Repeat with 3rd couple leading 24 Repeat with 4th couple leading Figure 3. (2x32) 4 Ladies advance, curtsey & retire. 4 Men adv, bow, turn by left, bow to partners, then join RH in centre, (ladies RH on partners left elbow). 8 Promenade round set to place. 4 Ladies adv, curtsey & retire again. 4 Men adv, bow, turn by right, bow to partners, join LH in centre, right arm behind partner. 8 Promenade round to set in place. 32 Repeat. The Lancers Quadrille. Figure 4. (4x24) 8 Top couples visit R then L 4 Right Hands around with LH couple 4 then left hands around. 8 Circle left with that couple. 24 Repeat with side couples leading. 24 repeat, top couples visit L then R. 24 Repeat, side couples visit L then R. Figure 5. (4x48 +24) 8 All grand chain 1/2 way round and honour partners. 8 Continue grand chain to place and honour partners. 8 1st couple visit, return to place, facing out with sides in behind. 2 Change places with partner, 2 All rock fwd and back 2 change places again 2 All rock fwd and back 8 Cast out reform in lines 4 Lines advance & retire 4 Advance & turn partners to place 48 Repeat with 2nd couple leading 48 Repeat with 3rd couple leading 48 Repeat with 4th couple leading. 8 Grand chain 1/2 way round and honour partners. 8 continue grand chain to place and honour partners 8 swing partners (R arm round partner, LH in air) Note: All figures walked. Set & Turn is a 'balance' set and open two hand turn. The Caledonians Quadrille Figure 1. (2x32) 4 Top couples R.H. across, move CW (Ladies hands joined over Mens). 4 then L.H. across, move ACW. 8 Set & swing Partners 8 Top ladies chain. 4 Top couples promenade across set. 4 Half R and L to place. 32 Side couples repeat. Figure 2. (4x24) 8 1st Man advance & retire twice. 8 Set & swing corners. 8 Promenade with corners (to men's position.) 24 2nd man repeat. 48 3rd and 4th man repeat. Figure 3. (4x32) 4 Lady 1, Man 2 advance & retire. 4 Re-advance, 2 hand turn to place. 8 1st & 2nd couples lead through and back. (1st lead through across, 2nd back) 8 Set & swing corners. 4 All advance & retire. 4 Swing partners. 32 Repeat with Lady 2, Man 1. 32 Repeat with Lady 3, Man 4. 32 Repeat with Lady 4, Man 3. The Caledonians Quadrille Figure 4. (4x24) 2 Lady 1, Man 2 advance and stop. 2 Lady 2, Man 1 advance and stop. 4 Turn partners back to place. 2 All ladies to the right 4 steps. 2 All men to the left 4 steps. 2 All ladies to the right 4 steps. 2 All men to the left 4 steps. 4 Promenade to place. 4 Swing partners. 24 Repeat with Lady 2, Man 1 leading. 24 Repeat with Lady 3, Man 4 leading. 24 Repeat with Lady 4, Man 3 leading. Figure 5. (4x48 + 16) 8 1st couple visit. 4 Ladies advance, curtsey & retire. 4 Men advance, bow & retire. 8 All set & swing partners. 8 Grand chain 1/2 way round and honour partners. 4 Promenade to place 4 and swing partners. 8 Chasse-croise, (4 steps past partner, RH to corner balance fwd & back, then 4 steps back, LH to partner balance fwd & back). 48 Repeat with 2nd couple leading. 48 Repeat with 3rd couple leading. 48 Repeat with 4th couple leading. 8 All promenade set. 8 Swing partners. Note: Set & swing is 'normal' set and cross hand swing. The Royal Irish Quadrille Figure 1. (2x32) 8 Top couples to Right, R & L through 8 Set & swing Partners. 8 Ladies chain. 4 Couples promenade across (to the other couples position). 4 Half R & L to place. 32 Repeat with tops to the left. Figure 2. (4x24) 4 Top couples to Right, adv & ret. 4 Cross over (without changing places with partner). 8 Repeat back to place. 8 Set & swing partners. 24 Repeat with top couples to the Left. 48 Tops repeat with Right and Left sides. Figure 3. (4x32) 4 Lady 1,2 and Man on Right, advance, touch RH, retire to opposite place. 4 Advance again, join LH, give RH to partner. 4 Line of 4 balance fwd & back twice. 4 Men Lead partners to opp. Place. 4 Lady 1,2 and opp. Man adv & ret. 4 Advance, honour & retire. 4 Couples, advance & retire. 4 Half R & L to place. 32 Repeat with Ladies 3,4 leading. 64 Repeat with Tops facing left. The Royal Irish Quadrille Figure 4. (4x32) 4 Top couples to Right, adv & ret. 4 Re-adv, Top Ladies join opp. Couple. 4 Line of 3 adv & ret. Top men retire. 4 Line of 3 adv, ladies join other man. 4 Line of 3 adv & ret, Side men retire. 4 Re-advance, form circle with opp. Man. 4 Circle L half way round. 4 Half R & L to place. 32 Repeat with Side ladies leading. 64 Repeat with Top couples facing left. Figure 5. (4 x 32 + 8) 4 All advance & retire. 4 Swing partners. 4 Ladies advance, curtsey & retire. 4 Men advance, bow & retire. 8 All set & swing corners. 8 Promenade with corner. (Men to original place with corner). 96 Repeat 3 times to return to partner. 4 All advance & retire. 4 Swing partners. Notes: 1. This is The Quadrille danced diagonally, with Top couples dancing first with the side couple on their right, then the left. Ie. 1-3 and 2-4 then 1-4 and 2-3. 2. Set & swing is 'normal' set and irish swing.The Eightsome Reel Numbering: Clockwise 1-2-3-4 Part A (40 Bars) 4 All join hands, circle left 4 All circle right. 4 Grand Cross, Ladies join RH. 4 Grand Cross, Men join LH. 8 Set & turn Partners 16 Grand chain right round set. Part B ( 8x48 bars) 1st Lady advance to centre, Others join hands in circle. 8 Circle left and right 4 Set once and turn partner 1st Lady sets to partner then open hand turn once with partner. 4 Set once and turn opposite 1st Lady sets to opposite man, then open hand turn once. 8 Reel of 3, 1st Lady, partner and opposite man 1st Lady remains in centre. 8 Circle left and right again 4 Set once and turn side man 1st lady and man on right. 4 Set once and turn other side man 1st lady and man on left. 8 Reel of 3, 1st lady, and two side men. 48 2nd lady repeat. 96 3rd and 4th ladies repeat. 192 Men repeat same movement. The Eightsome Reel Part C (40 Bars) 8 All circle left and right. 4 Grand cross - Ladies join RH. 4 Grand Cross - Men join LH. 8 All set and turn partners. 16 Grand Chain round set. Note: Set is 'normal' set. Turn is open hand turn. NOTES 1. The Quadrille 2. The Prince Imperials 3. The Parisienne Quadrille 4. The Lancers Quadrille 5. The Caledonians Quadrille 6. The Royal Irish Quadrille 7. The Eightsome Reelperson, individual, peter ellis oam -
 Bendigo Historical Society Inc.
Document - PETER ELLIS COLLECTION: BUSH MUSIC CLUB COLONIAL BALL, 1991
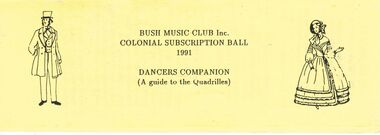
... The Quadrille 2.The Lancers Quadrille 3. The Prince Imperials 4. The Parisienne Quadrille 5. The Wellington Waltz 6. ...The Quadrille 2.The Lancers Quadrille 3. The Prince Imperials 4. The Parisienne Quadrille 5. The Wellington Waltz 6. ...Small yellow booklet outline of a man on left of title and woman on right. Bush Music Club Inc. Colonial Subscription Ball 1991 Dancers Companion (A guide to the Quadrilles) The Quadrille Figure 1 (Le Pantelon) (2x32) 8 Top couples R and L through. (without giving hands). 8 Set & turn Partners 8 Top ladies chain. 4 Top couples promenade across set. 4 Half R and L to place. 32 Side couples repeat Figure 2 (Le 'Ete) (4x24) 4 Top couples advance & retire. 4 Cross over (without changing places with partner). 8 Repeat back to place. 8 Set & turn partners. 24 Sides repeat. 48 Top and Sides repeat. Figure 3 (La Poule) (4x32) 4 Lady 1, Man 2 adv, tough RH, retire to opposite place. 4 Lady 1, Man 2 adv, join LH give RH to partner 4 Line of 4 balance fwd & back twice. 4 Men lead partners to opp. Place. 4 Lady 1, Man 2 adv. & ret. 4 Lady 1, Man 2 adv, honour & ret. 4 Top couples, advance & retire. 4 Half R & L to place. 32 Repeat with Lady 2, Man !. 32 Repeat with Lady 3, Man 4. 32 Repeat with Lady 4, Man 3. The Quadrille Figure 4. (La Pastourelle) (4x32) 4 1st couple advance & retire. 4 1st couple adv, lady join 2nd couple. 4 Line of 3 adv. & ret, 1st man retire. 4 Line of 3 adv. Ladies cross to 1st man. 4 Line of 3 adv. & ret, 2nd man retire. 4 Re-advance, form circle with 2nd man. 4 Circle L half way round. 4 Half R & L to place. 32 Repeat with 2nd couple leading. 32 Repeat with 3rd couple leading. 32 Repeat with 4th couple leading. Figure 5 (La Finale) (4 x 32 + 8) 4 All advance & retire. 4 Turn partners. 4 Ladies adv, curtsey & retire. 4 Men advance, bow & retire. 8 All set & turn corners. 8 Promenade with corner. (men to original place with corner) 96 Repeat 3 times to return to partner. 4 All advance & retire. Turn Partners. Notes: 1 Couples numbered 1 4 2 3 2 Set & turn is a 'balance' set and open hand turn. The Lancers Quadrille Figure 1 (4x24) 4 1st lady, 2nd man advance & retire, 4 Adv, turn two hands, return to place. 4 1st couple lead through across set 4 2nd couple lead through back 8 all set & turn corners. 24 Repeat, 2nd lady, 1st man leading 24 Repeat 3rd lady, 4th man leading 24 Repeat, 4th lady, 3rd man leading Figure 2 (4x24) 4 1st couple advance & retire. 2 1st lady adv to centre, turn to face partner 2 1st couple honour each other. 8 1st couple set and turn then sides form top & bottom lines 4 Lines advance & retire, 4 Advance and turn partners to place. 24 Repeat with 2nd couple leading 24 Repeat with 3rd couple leading 24 Repeat with 4th couple leading Figure 3. (2x32) 4 Ladies advance, curtsey & retire. 4 Men adv, bow, turn by left, bow to partners, then join RH in centre, (ladies RH on partners left elbow). 8 Promenade round set to place. 4 Ladies adv, curtsey & retire again. 4 Men adv, bow, turn by right, bow to partners, join LH in centre, right arm behind partner. 8 Promenade round to set in place. 32 Repeat. The Lancers Quadrille. Figure 4. (4x24) 8 Top couples visit R then L 4 Right Hands around with LH couple 4 then left hands around. 8 Circle left with that couple. 24 Repeat with side couples leading. 24 repeat, top couples visit L then R. 24 Repeat, side couples visit L then R. Figure 5. (4x48 +24) 8 All grand chain 1/2 way round and honour partners. 8 Continue grand chain to place and honour partners. 8 1st couple visit, return to place, facing out with sides in behind. 2 Change places with partner, 2 All rock fwd and back 2 change places again 2 All rock fwd and back 8 Cast out reform in lines 4 Lines advance & retire 4 Advance & turn partners to place 48 Repeat with 2nd couple leading 48 Repeat with 3rd couple leading 48 Repeat with 4th couple leading. 8 Grand chain 1/2 way round and honour partners. 8 continue grand chain to place and honour partners 8 swing partners (R arm round partner, LH in air) Note: All figures walked. Set & Turn is a 'balance' set and open two hand turn. The Prince Imperial's Quadrille Figure 1. (4x24) 4 Top couples visit right, honour sides. 4 Top men retire with partner & side lady to opposite place, (ladies facing each other). 8 Ladies grand chain to places 8 All set and turn partners 24 Top couples repeat back to place. 48 Repeat with side couples. Figure 2 (4 x 24) 4 1st Lady, 2nd man adv & turn in centre finish facing 2nd lady. 2 2nd lady pass through to 1st man. 2 Both couples turn out to place. 4 top couples advance & retire. 4 Ladies chain back to place. (Nariel) 8 Chasse-croise. (4 steps past partner RH turn corner 4 steps back, LH turn with partner.) 24 Repeat with 2nd lady, 1st man leading 24 Repeat with 3rd lady, 4th man leading 24 Repeat wth 4th lady, 3rd man leading. Figure 3 (4x32) 4 1st lady to centre, curtsey to partner. (RH in RH, ACW turn in to centre) 4 2nd lady to centre, curtsey to partner. 4 3rd lady to centre, curtsey to partner.4 4th lady to centre, curtsey to partner. 8 ladies join hands, circle R, small steps after circle R, Men join circle, (giving RH to partner). 4 Balance for 4 (step lift x 4) 4 Turn partners to place, bow & curtsey. 32 Repeat, Lady 2, 1, 4 & 3 to centre 32 Repeat Lady 3, 4, 2 & 1 to centre 32 Repeat, Lady 4, 3, 1 & 2 to centre The Prince Imperial's Quadrille Figure 4 (4x32) 4 Top couples advance & retire. 4 Top couples adv, ladies move to R, as men retire to place. 8 Line of 3 adv & ret twice. 4 Single men adv, bow and retire. 4 Re-advance and turn to face partner. 4 Circle L half way round (with partner & side couple). 4 Half R & L to place. 32 Repeat with side couples leading. 32 Repeat with top couples leading (men moving to left as ladies retire) 32 Repeat with Side couple leading. (Men moving to left as ladies retire) Figure 5 (4x32 +32) 16 Ladies to the right, (RH turn with corner man then continue round to the right turning each man) 4 1st Lady, 2nd man advance & retire 4 re-advance & turn RH (finish facing partners) 8 set & turn partners (finishing in place) 32 Repeat with 2nd Lady, 1st man leading 32 repeat with 3rd lady, 4th man leading 32 Repeat with 4th Lady, 3rd man leading 16 Ladies to the right again. 4 Men turn partners to centre. 4 All bow and curtsey. 8 Promenade set ( hall) Note: Set & turn is a 'balance' set and open hand turn. The Parisienne Quadrille Figure 1 (1x32) 8 Couples R and L through. (without giving hands) 8 set & turn partners 8 Ladies chain. 4 Couples promenade across set. 4 Half R and L to place. Figure 2 (2x24) 4 Couples advance & retire. 4 Cross over (without changing places with partners) 8 Repeat back to place. 8 Set & turn partners. 24 Repeat. Figure 3 (2x32) 4 Lady 1, Man 2 adv, touch RH, retire to opposite place. 4 Lady 1, Man 2 adv, join LH, give RH to partner. 4 Line of 4 balance fwd & back twice 4 Men lead partners to opp. Place 4 Lady 1, Man 2 adv & retire 4 Lady 1, Man 2 adv, honour & ret. 4 Couples, advance & retire. 4 Half R & L to place. 32 Repeat with Lady 2, Man 1. The Parisienne Quadrille Figure 4. (2x32) 4 1st couple advance & retire. 4 1st couple adv, lady join 2nd couple. 4 Line of 3 adv. & ret, 1st man retire. 4 Line of 3 adv. Ladies cross to 1st man. 4 Line of 3 adv. & ret, 2nd man retire. 4 Re-advance, form circle with 2nd man. 4 Circle L half way round. 4 Half R & L to place. 32 Repeat with 2nd couple leading. Figure 5 (2x32) 4 Couples advance & retire 4 Cross over 8 Repeat back to place. 8 Ladies chain across & back.8 Set & turn partners. 32 Repeat Notes: 1 This 'quadrille' is similar to the first set (1st 4 figures) and is danced as two couple sets. 2 Set & turn is a 'balance' set and open hand turn. Wellington Waltz 8 Honour Partner, honour corner 8 Circle L 7 steps, then tap, tap 8 Circle R 7 steps, then tap, tap 4 Top couples, 2 side-steps to centre and back with lady turning under man's left arm. 4 Waltz across to opposite side 8 Side couples repeat. 8 Top ladies chain across. (pause in centre, turn twice with opp. Man) 8 Side ladies chain across. 8 Grand Chain half way round set. 8 Waltz to man's place. 64 Repeat with side couples leading. Waltz Cotillon 8 Honour Partner, honour corner 16 1st couple waltz the set. 8 Top ladies cross over.8 Side ladies cross over. 8 Top men cross over. 8 Side men cross over. 16 All waltz back to place. Form top & bottom lines, 8 Adv. & ret, cross over. 8 Adv. & ret, cross back. 16 Waltz chain to meet partner. 16 All waltz back to place. Form top & bottom lines, 8 Adv. & ret, cross over. 8 Adv. & ret, cross back. 16 Waltz chain to meet partner. 16 All waltz back to place. 112 Repeat with 2nd couple leading. 112 Repeat with 3rd couple leading. Side lines adv. & ret. 112 Repeat with 4th couple leading. Side lines adv. & ret. Galopade Quadrille 8 Honour Partner, honour corner 8 All galop round set. (Galop half way round set, on opp. Side change places with partner, continue galop to place.) 8 Top couples R & L through. 8 Side couples R & L through. 8 All set & swing partners. 8 All galop round set. 8 Top ladies chain. 8 Side ladies chain. 8 All set & swing partners. 8 All galop round set. 8 1st couple lead through, 2nd on return 8 3rd couple lead through, 4th on return 8 All set & swing partners. 8 All galop round set. 4 1st lady & 2nd man adv. & ret. 4 2nd lady & 1st man adv. & ret. 4 3rd lady & 4th man adv. & ret. 4 4th lady & 3rd man adv. & ret. 8 All set & swing partners. 8 All galop round set. 4 Ladies advance & retire. 4 Men advance & retire. 8 Double ladies chain. 8 All set & swing partners. 8 All galop round set. 8 Top couples waltz the set 8 Side couples waltz the set 8 All set & swing partners. 32 Waltz the hall. The Caledonians Quadrille Figure 1. (2x32) 4 Top couples R.H. across, move CW (Ladies hands joined over Mens). 4 then L.H. across, move ACW. 8 Set & swing Partners 8 Top ladies chain. 4 Top couples promenade across set. 4 Half R and L to place. 32 Side couples repeat. Figure 2. (4x24) 8 1st Man advance & retire twice. 8 Set & swing corners. 8 Promenade with corners (to men's position.) 24 2nd man repeat. 48 3rd and 4th man repeat. Figure 3. (4x32) 4 Lady 1, Man 2 advance & retire. 4 Re-advance, 2 hand turn to place. 8 1st & 2nd couples lead through and back. (1st lead through across, 2nd back) 8 Set & swing corners. 4 All advance & retire. 4 Swing partners. 32 Repeat wth Lady 2, Man 1. 32 Repeat with Lady 3, Man 4. 32 Repeat with Lady 4, Man 3. The Caledonians Quadrille Figure 4. (4x24) 2 Lady 1, Man 2 advance and stop. 2 Lady 2, Man 1 advance and stop. 4 Turn partners back to place. 2 All ladies to the right 4 steps. 2 All men to the left 4 steps. 2 All ladies to the right 4 steps. 2 All men to the left 4 steps. 4 Promenade to place. 4 Swing partners. 24 Repeat wth Lady 2, Man 1 leading. 24 Repeat wth Lady 3, Man 4 leading. 24 Repeat wth Lady 4, Man 3 leading. Figure 5. (4x48 + 16) 8 1st couple visit. 4 Ladies advance, curtsey & retire. 4 Men advance, bow & retire. 8 All set & swing partners. 8 Grand chain 1/2 way round and honour partners. 4 Promenade to place 4 and swing partners. 8 Chasse-croise, (4 steps past partner, RH to corner balance fwd & back, then 4 steps back, LH to partner balance fwd & back). 48 Repeat with 2nd couple leading. 48 Repeat wth 3rd couple leading. 48 Repeat wth 4th couple leading. 8 All promenade set. 8 Swing partners. Note: Set & swing is 'normal' set and cross hand swing. The Lancers Quadrille (BMC version) Figure 1. (4x32) 8 1st Lady, 2nd man advance & swing in centre (with ballroom hold). 4 Partners move 1/2 way across, Centres keep swinging. 4 Promenade partner to opp. Place. 8 1st couple lead through to place. 8 All swing corners. 32 Repeat with 2nd lady, 1st man. 32 Repeat with 3rd lady, 4th man. 32 Repeat with 4th lady, 3rd man. Figure 2. (4x32) 8 1st couple lead up (to 2nd) & retire. 8 1st couple swing in place Form top & bottom lines. 8 Lines adv & retire twice. 8 Swing partners. 32 Repeat with 2nd couple leading. 32 Repeat with 3rd couple leading. (Forming side lines instead) 32 Repeat with 4th couple leading. (Forming side lines instead) Figure 3. (2x32) 4 Introduction - Ladies to the centre and men form a circle around them. 8 Men circle left. 8 Men circle right. Men form a grand cross (LH) Right arm behind partners. 16 Promenade round set. Ladies return to the centre. 32 Repeat - Circle L & R, & Grand Cross. The Lancers Quadrille (BMC version) Figure 4. (2x48) 8 Top couples visit. 4 Tops RH star. 4 then LH star. 8 Tops basket Left. 8 Tops basket Right. 8 Tops circle Left. Tops circle Right. 48 Repeat with side couples leading. Figure 5. ((4x 16+32) + 24) 8 All grand chain 1/2 way round and honour partners. 8 Promenade with partners to place. 8 1st couple lead up, turn and lead out with side falling in behind. 8 Cast out, reform top & bottom lines. 4 Lines advance & retire. 4 Advance & swing partners to place. 8 Swing partners in place. 48 Repeat with 2nd couple leading. 48 Repeat with 3rd couple leading (forming side lines) 48 Repeat with 4th couple leading. (forming side lines) 8 All grand chain 1/2 way round and honour partners. 8 Promenade with partners to place. 8 Swing partners in place. Note: Normal swing here is with hands crossed. 1. The Quadrille 2.The Lancers Quadrille 3. The Prince Imperials 4. The Parisienne Quadrille 5. The Wellington Waltz 6. The Waltz Cotillon 7. The Galopade Quadrille 8. The Caledonians Quadrille 9. The Lancers Quadrille (BMC)person, individual, peter ellis oam -
 Federation University Historical Collection
Plan, Station Reserve Bakery Hill, Ballaarat
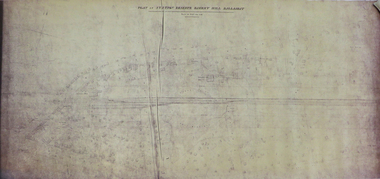
... Main landmarks include Duke of Richmond Hotel, Prince of Wales Hotel, Duke of York Hotel, Welcome Nugget Claim and Shaft, Imperial Hotel, Union Hotel, Kingston St, Otway St, Wellington Claim, Gravel Pits Gold Working and Robert Burns Hotel. .2) Same of above. ...Main landmarks include Duke of Richmond Hotel, Prince of Wales Hotel, Duke of York Hotel, Welcome Nugget Claim and Shaft, Imperial Hotel, Union Hotel, Kingston St, Otway St, Wellington Claim, Gravel Pits Gold Working and Robert Burns Hotel. .2) Same of above. ....1) Oversized photocopy of large plan depicting railway right of way where Mair and Humffray Streets meet. Main landmarks include Duke of Richmond Hotel, Prince of Wales Hotel, Duke of York Hotel, Welcome Nugget Claim and Shaft, Imperial Hotel, Union Hotel, Kingston St, Otway St, Wellington Claim, Gravel Pits Gold Working and Robert Burns Hotel. .2) Same of above. station reserve, bakery hill, railway, ballarat, mair street, humffray street north, duke of york hotel, duke of richmond hotel, union hotel, kingston st, otway st, wellington claim, gravel pits, gold workings, robert burns hotel -
 Lara RSL Sub Branch
The Evolution of the Rising Sun Badge of the Australian Army, Captain D'arcy.2004, 2004
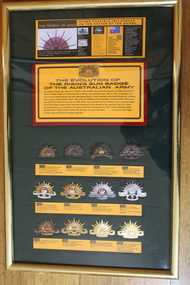
... Prince of Orange, a convict ship that visited Sydney in 1821. The symbol struck a chord with the pre-federation population and many examples still exist on colonial architecture.[4] Proudly worn by soldiers of the 1st and 2nd Australian Imperial Force in both World Wars, the 'Rising Sun' badge has become an integral part of the digger tradition. ...The origins of the rising sun badge are disputed. Rising sun designs had appeared on early Australian colonial coins and military insignia decades before the federation of the Australian colonies in 1901, and may have represented the image of Australia as 'a young nation' and a 'new Britannia'.[2] As early as the 1820s, the symbol of a 'rising sun' was used by various progressive organisations, loosely characterised under the banner "Advance Australia". The rising sun crest used in the New South Wales colonial and State crests was taken from the crest used on the first Advance Australia Arms, circa 1821, and consistently since then.[3] The oldest known example is the 'Advance Australia' coat of arms. The 'Advance Australia Arms' (named because of the motto inscription) became widely used in New South Wales and the neighbouring colonies by private corporations and individuals. Although they never had any official status, they formed the basis for several official coats of arms, including the New South Wales coat of arms. The representation below was reputedly painted for Thomas Silk, the son of the captain of the Prince of Orange, a convict ship that visited Sydney in 1821. The symbol struck a chord with the pre-federation population and many examples still exist on colonial architecture.[4] Proudly worn by soldiers of the 1st and 2nd Australian Imperial Force in both World Wars, the 'Rising Sun' badge has become an integral part of the digger tradition. The distinctive shape of the badge, worn on the upturned side of a slouch hat, is commonly identified with the spirit of Anzac.Glass covered Rectangular Picture Frame showing the Evolution of the Rising Sun Badge of the Australian Army.Gives a brief rundown on the Evolution of Rising Sun Badge with 12 examples and explanatory notes -
 Federation University Historical Collection
Photograph, Marilyn Jeffs, Hotels of Ballarat, 2019
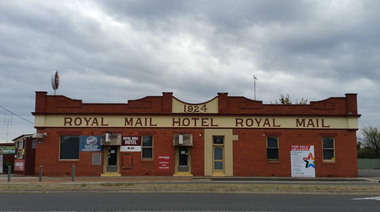
... prince regent hotel...sport globe...sporting globe...jacksons hotel...railway hotel...pwtn...pater lalor hotel...royal highlander hotel...queen's head hotel...red lion hotel...robin hood hotel...military arms hotel...royal oak hotel...western hotel...imperial...hotels ballarat royal mail hotel peter lalor hotel the george hotel x on albert hotel cattleyards inn market hotel bunch of grapes hotel argyle hotel atlantic hotel ballarat hotel black hill hotel blue bell hotel bluebell hotel brown hill hotel canberra hotel carboni carboni's italian kitchen eureka stockade hotel carriers arms hotel eastern station hotel centenary hotel craig's hotel eastern railway hotel freight bar athletic club hotel grapes hotel munster arms hotel golden city hotel golf house hotel irish murphy's camp hotel lake view hotel la porchetta southern cross hotel the mallow hotel meaghers hotel millers arms miners tavern hotel miner's tavern hotel provincial hotel north britain hotel north star hotel oscar's hotel criterian hotel park hotel prince regent house prince regent hotel sport globe sporting globe jacksons hotel railway hotel pwtn pater lalor hotel royal highlander hotel queen's head hotel red lion hotel robin hood hotel military arms hotel royal oak hotel western hotel imperial hotel unicorn hotel union hotel Numerous photographs take by Marilyn Jeffs for use on the Ballarat and District Industrial Heritage Wiki Hotels of Ballarat Photograph Marilyn Jeffs ...Numerous photographs take by Marilyn Jeffs for use on the Ballarat and District Industrial Heritage Wikihotels, ballarat, royal mail hotel, peter lalor hotel, the george hotel, x on albert hotel, cattleyards inn, market hotel, bunch of grapes hotel, argyle hotel, atlantic hotel, ballarat hotel, black hill hotel, blue bell hotel, bluebell hotel, brown hill hotel, canberra hotel, carboni, carboni's italian kitchen, eureka stockade hotel, carriers arms hotel, eastern station hotel, centenary hotel, craig's hotel, eastern railway hotel, freight bar, athletic club hotel, grapes hotel, munster arms hotel, golden city hotel, golf house hotel, irish murphy's, camp hotel, lake view hotel, la porchetta, southern cross hotel, the mallow hotel, meaghers hotel, millers arms, miners tavern hotel, miner's tavern hotel, provincial hotel, north britain hotel, north star hotel, oscar's hotel, criterian hotel, park hotel, prince regent house, prince regent hotel, sport globe, sporting globe, jacksons hotel, railway hotel, pwtn, pater lalor hotel, royal highlander hotel, queen's head hotel, red lion hotel, robin hood hotel, military arms hotel, royal oak hotel, western hotel, imperial hotel, unicorn hotel, union hotel -
 City of Moorabbin Historical Society (Operating the Box Cottage Museum)
Badge - Visit of the Prince of Wales in 1920, 1954
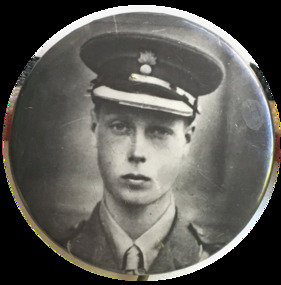
... At the Imperial War Conference in 1917, and again at the conference of overseas Prime Ministers in 1918, King George V had foreshadowed a visit to the Dominions by his eldest son, “when peace comes”. At the end of the War, the King kept his pledge and, following on from successful visits to other countries, including the USA and West Indies in 1919, Edward Albert Christian George Andrew Patrick David, the Prince of Wales, embarked on a journey to Australia. ...At the Imperial War Conference in 1917, and again at the conference of overseas Prime Ministers in 1918, King George V had foreshadowed a visit to the Dominions by his eldest son, “when peace comes”. At the end of the War, the King kept his pledge and, following on from successful visits to other countries, including the USA and West Indies in 1919, Edward Albert Christian George Andrew Patrick David, the Prince of Wales, embarked on a journey to Australia. ...At the Imperial War Conference in 1917, and again at the conference of overseas Prime Ministers in 1918, King George V had foreshadowed a visit to the Dominions by his eldest son, “when peace comes”. At the end of the War, the King kept his pledge and, following on from successful visits to other countries, including the USA and West Indies in 1919, Edward Albert Christian George Andrew Patrick David, the Prince of Wales, embarked on a journey to Australia. The visit was in part to offer official thanks for the support Australia had shown Great Britain during World War I. It was also designed to strengthen the links between Australia and the Empire. The Prince of Wales arrived in Australia on board the HMS Renown in April 1920, having left England the previous month. He spent nine days in Victoria, eleven days in New South Wales, four days in Tasmania, eleven days in Western Australia, six days in South Australia and eight days in Queensland. In all, he visited 110 cities and towns across Australia.Metal badge with photo of Prince of Walesprince of wales, royal visit 1920, badge -
 Sunshine and District Historical Society Incorporated
Photograph - S&DHS photos provided to the Victorian Collections
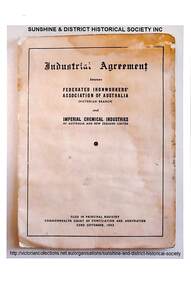
... Imperial Chemical Industries|Quarter Mile Bridge (C1928)|Hugh V. McKay Receipt for Mr. M. Norton|Sunshine Districal Community Hospital brass sign|Braybrook & District Motorcycle Club cloth badge|Braybrook & District Motorcycle Club metal badge|Braybrook Junction Railway Station|Sunshine Town Hall (Memorial Hall) Hampshire Rd|Sunvale Primary School A Scrap Book of Memories1957 - 1997 front cover|Kevin Wheelahan WW1 Memorial Sigh|Framed Helen Kellet signature in wood frame|Close up off Helen Kellet signature|Hellenic Prince Ship|WW1 Medals|Sunshine & District Friendly Societies Dispensary Past Presidents Honour Board|Sunshine State School Swimming Pool Shire of Braybrook Chairmen & Presidents Honour Board|Sunshine High School pennant|Shire of Braybrook Coat of Arms|Spalding 25 Years Service Roll Honour Board|McPhersons Boly & Nuts display|4th Liberty Loan pennant|SSW Supermarket paper bags|Souvenir Programe Diamond Jubille of the Sunshine Harvester|H.V. ...Imperial Chemical Industries|Quarter Mile Bridge (C1928)|Hugh V. McKay Receipt for Mr. M. Norton|Sunshine Districal Community Hospital brass sign|Braybrook & District Motorcycle Club cloth badge|Braybrook & District Motorcycle Club metal badge|Braybrook Junction Railway Station|Sunshine Town Hall (Memorial Hall) Hampshire Rd|Sunvale Primary School A Scrap Book of Memories1957 - 1997 front cover|Kevin Wheelahan WW1 Memorial Sigh|Framed Helen Kellet signature in wood frame|Close up off Helen Kellet signature|Hellenic Prince Ship|WW1 Medals|Sunshine & District Friendly Societies Dispensary Past Presidents Honour Board|Sunshine State School Swimming Pool Shire of Braybrook Chairmen & Presidents Honour Board|Sunshine High School pennant|Shire of Braybrook Coat of Arms|Spalding 25 Years Service Roll Honour Board|McPhersons Boly & Nuts display|4th Liberty Loan pennant|SSW Supermarket paper bags|Souvenir Programe Diamond Jubille of the Sunshine Harvester|H.V. ...Collection of S&DHS photos that were provided to Victorian CollectionsIndustrial Agreement between Federated Ironworkers' Association of Australan and Imperial Chemical Industries|Quarter Mile Bridge (C1928)|Hugh V. McKay Receipt for Mr. M. Norton|Sunshine Districal Community Hospital brass sign|Braybrook & District Motorcycle Club cloth badge|Braybrook & District Motorcycle Club metal badge|Braybrook Junction Railway Station|Sunshine Town Hall (Memorial Hall) Hampshire Rd|Sunvale Primary School A Scrap Book of Memories1957 - 1997 front cover|Kevin Wheelahan WW1 Memorial Sigh|Framed Helen Kellet signature in wood frame|Close up off Helen Kellet signature|Hellenic Prince Ship|WW1 Medals|Sunshine & District Friendly Societies Dispensary Past Presidents Honour Board|Sunshine State School Swimming Pool Shire of Braybrook Chairmen & Presidents Honour Board|Sunshine High School pennant|Shire of Braybrook Coat of Arms|Spalding 25 Years Service Roll Honour Board|McPhersons Boly & Nuts display|4th Liberty Loan pennant|SSW Supermarket paper bags|Souvenir Programe Diamond Jubille of the Sunshine Harvester|H.V. McKay Factory Rules January 1913|H.V. McKay Factory Rules May 1926|Phoenix Fireworks Sold Here postersunshine & district historical society -
 Sunshine and District Historical Society Incorporated
Ephemera - Luncheon Menus From Various English Hotels
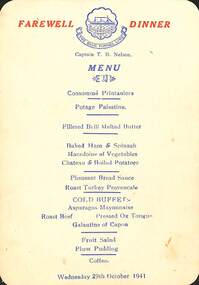
... Imperial Star Luncheon 27th January 1941 2067.03 - Luncheon Menus From Various English Hotels - Rotary Club Of Cape Town Their Royal Highnesses Crown Prince Paul Of Greece Luncheon 7th August 1941 2067.04 - Luncheon Menus From Various English Hotels - RRH Diner 1st August 1941 2067.05 - Luncheon Menus From Various English Hotels - The Swan's Nest Hotel Menu 2067.06 - Luncheon Menus From Various English Hotels - Atheneum Club Drinks Memu 2067.07 - Luncheon Menus From Various English Hotels - Atheneum Club Drinks Memu 2067.08 - Luncheon Menus From Various English Hotels - Atheneum Club Drinks Memu 2067.09 - Luncheon Menus From Various English Hotels - M.V. ...Imperial Star Luncheon 27th January 1941 2067.03 - Luncheon Menus From Various English Hotels - Rotary Club Of Cape Town Their Royal Highnesses Crown Prince Paul Of Greece Luncheon 7th August 1941 2067.04 - Luncheon Menus From Various English Hotels - RRH Diner 1st August 1941 2067.05 - Luncheon Menus From Various English Hotels - The Swan's Nest Hotel Menu 2067.06 - Luncheon Menus From Various English Hotels - Atheneum Club Drinks Memu 2067.07 - Luncheon Menus From Various English Hotels - Atheneum Club Drinks Memu 2067.08 - Luncheon Menus From Various English Hotels - Atheneum Club Drinks Memu 2067.09 - Luncheon Menus From Various English Hotels - M.V. ...2067.01 - Luncheon Menus From Various English Hotels - The Blue Funnell Line Farewell Dinner Captain T. B. Nelson 29th October 1941 2067.02 - Luncheon Menus From Various English Hotels - Blue Star Line S.S. Imperial Star Luncheon 27th January 1941 2067.03 - Luncheon Menus From Various English Hotels - Rotary Club Of Cape Town Their Royal Highnesses Crown Prince Paul Of Greece Luncheon 7th August 1941 2067.04 - Luncheon Menus From Various English Hotels - RRH Diner 1st August 1941 2067.05 - Luncheon Menus From Various English Hotels - The Swan's Nest Hotel Menu 2067.06 - Luncheon Menus From Various English Hotels - Atheneum Club Drinks Memu 2067.07 - Luncheon Menus From Various English Hotels - Atheneum Club Drinks Memu 2067.08 - Luncheon Menus From Various English Hotels - Atheneum Club Drinks Memu 2067.09 - Luncheon Menus From Various English Hotels - M.V. Imperial Star Dinner 27th January 1941 2067.10 - Luncheon Menus From Various English Hotels - M.V. Imperial Star Dinner 29th January 1941 2067.11 - Luncheon Menus From Various English Hotels - The Worcester Royal Porcelain Mitre Hotel Dinner Menu 2067.12 - Luncheon Menus From Various English Hotels - Gleghorns 6 Course Variety Lunch Menu 12th February 1941english hotel -
 St Kilda Historical Society
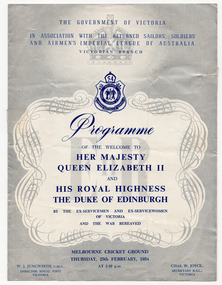
Ephemera - Program, Programme of the Welcome to Her Majesty Queen Elizabeth II and His Royal Highness The Duke of Edinburgh, 1954
... Program of event on 25 February 1954 at Melbourne Cricket Ground to welcome Queen Elizabeth II and Prince Philip, presented by the Victorian Government in association with the Victorian Branch of the Returned Sailors', Soldiers' and Airmen's Imperial League of Australia....Program of event on 25 February 1954 at Melbourne Cricket Ground to welcome Queen Elizabeth II and Prince Philip, presented by the Victorian Government in association with the Victorian Branch of the Returned Sailors', Soldiers' and Airmen's Imperial League of Australia. ...Program of event on 25 February 1954 at Melbourne Cricket Ground to welcome Queen Elizabeth II and Prince Philip, presented by the Victorian Government in association with the Victorian Branch of the Returned Sailors', Soldiers' and Airmen's Imperial League of Australia.Folded white glossy paper, discoloured with age, printed in silver and blue on both sides. Displays the RSL logo.royal visits, queen elizabeth ii -
 Lakes Entrance Historical Society
Map - Victoria Hartland, Princes Highway, Lakes Entrance, Lake Tyers, Aboriginal Station, Ninety Mile Beach, Australian Section Imperial General Staff
... Forest Townships Roads and Streets Beaches Waterways Aboriginal Station Shows Forest, Princes Highway, Lakes Entrance, Lake Tyers, Aboriginal Station, Ninety Mile Beach Map Victoria Hartland, Princes Highway, Lakes Entrance, Lake Tyers, Aboriginal Station, Ninety Mile Beach Australian Section Imperial General Staff ...Shows Forest, Princes Highway, Lakes Entrance, Lake Tyers, Aboriginal Station, Ninety Mile Beachforest, townships, roads and streets, beaches, waterways, aboriginal station -
 Bellarine Historical Society Museum
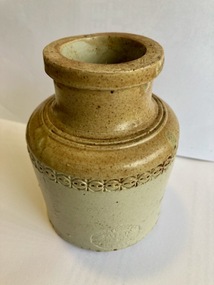
Ceramic - Antique Stoneware Pot, Stephan Green Imperial Potteries, circa 1830
... Traditional salt-glazed stoneware pot produced by Stephen Green Imperial Potteries, Lambeth, London.They manufactured earthenware from 1828 to 1831 and stoneware from 1831 t0 1858. The pottery was located at Princes...Traditional salt-glazed stoneware pot produced by Stephen Green Imperial Potteries, Lambeth, London.They manufactured earthenware from 1828 to 1831 and stoneware from 1831 t0 1858. The pottery was located at Princes ...Traditional salt-glazed stoneware pot produced by Stephen Green Imperial Potteries, Lambeth, London.They manufactured earthenware from 1828 to 1831 and stoneware from 1831 t0 1858. The pottery was located at Princes Street, Lambeth and consisted of two floors containing numerous kilns, a modelling room and a crushing mill.Potteries existed along the Thames River from Roman times between Vauxhall Bridge and Lambeth Bridge. In the eighteenth century the industry concentrated in Staffordshire. Stephen Green was one of three potteries that continued to produce pottery in Lambeth between 1828 and 1858. This pot is somewhat unique having a different mark to standard identifying a patent for double glazing and a unique frieze pattern. It thus may be an early example of stoneware from this company. Due to its unusual trade mark and frieze pattern, this is a rare example of early stoneware produced in the London area in the nineteenth century. The trade mark identifies a patent awarded for double glazing on stoneware. Produced by Stephen Green Imperial Potteries, it is a rare example of pottery for its time and location. Some sources identify it as being produced in 1830.Small earthenware/stoneware traditional salt-glazed storage jar, bi-coloured in cinnamon and cream. Opening measures 4cm. Unusual frieze band at lower end of cinnamon section. Bears an unusual makers impression on bottom section. Slight chip on base. Also firing crack measuring 4 cm on base.Slightly elliptical circle impression with the words 'Stephen Green / Patent / Double Glaze / Imperialstoneware, antique pottery -
 Melbourne Tram Museum
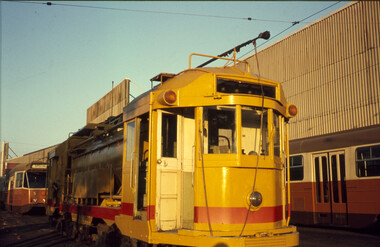
Slide - MMTB and MTA, tramway operations set of 11, Hugh Ballment, 1950s to 1980s
... Princes Bridge. With two Z-class trams. In the background is Flinders St Station, adverts for Optus, Samsung, and Crown Casino, along with decorations for Christmas. Photo HBM123 - MTA Tram 2077, c1996, Bourke St, at Spring St. In the background is Rydges Hotel and the Imperial...Princes Bridge. With two Z-class trams. In the background is Flinders St Station, adverts for Optus, Samsung, and Crown Casino, along with decorations for Christmas. Photo HBM123 - MTA Tram 2077, c1996, Bourke St, at Spring St. In the background is Rydges Hotel and the Imperial ...Set of 11 photos by Hugh Ballment, unless noted, of MTA and MMTB trams: HBM116 - MMTB Tram 7, 10/06/1982, Preston Workshops, Flusher, with Z5 behind and another Z class tram alongside. HBM117 - MMTB Tram 1041, c1976, Mt Alexander Rd, North Essendon. Only has one trolley retriever fitted. Running a Special. HBM118 - MMTB Tram 1041, c1976, Elizabeth St, City terminus, running a route 19, North Coburg. An inspector is talking to the driver. IN the background is a W2 class tram in Flinders St and the Flinders St station building with a Sitmar Cruises sign. HBM119 - MMTB Tram 94, March 1987, Peel St siding, with Vic Market building in the background. HBM120 - MMTB Tram 1041, October 1973, Flinders St, with a Harris train on the viaduct, the large signal gantry, Rodney Mark's, and Holyman in the background. HBM121 - MMTB, July 1981, Elizabeth St terminus, from Flinders St station, showing the terminal arrangements and two trams. In the foreground is a sign for Hosies Hotel. Photo about July 1981, following the installation of a scissors crossover and before an inspector's cabin was installed along with a shelter. HBM122 - MTA, c1996, Swanston St, From Princes Bridge. With two Z-class trams. In the background is Flinders St Station, adverts for Optus, Samsung, and Crown Casino, along with decorations for Christmas. Photo HBM123 - MTA Tram 2077, c1996, Bourke St, at Spring St. In the background is Rydges Hotel and the Imperial Hotel. HBM124 - MTA Tram 809, c1996, High St, Kew, Near back road Kew depot. The tram has a destination of Kew Depot. HBM125 - MTA Tram 175, May 1996, LaTrobe St, At Spencer St. Tram has the destination of Richmond Punt Road and is in an all-over advertising livery for Thai Airlines - which gives a date of May 1996. HBM126 - MTA Tram 136, c1996, Collins St, near William St. The tram has the destination of West Preston. Yields information about Melbourne tram operations, with 1950s to 1980s photos of Melbourne tramways.Kodachrome cardboard and plastic mounts, with notes - set of 11tramways, new tramway, tram 7, mt alexander road, tram 1041, tram 94, peel st, elizabeth st, north essendon, flinders st, tram 2077, tram 175, tram 136, collins st, la trobe st, tram 809, high st, kew depot, bourke st -
 Carlton Football Club
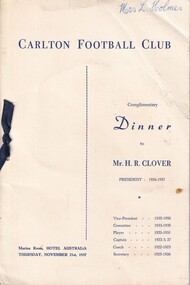
Dinner Program & Menu, Carlton Football Club November 21st 1957 to Mr H R Clover, 1957
... Playing against Richmond again at Princes Park in July, 1921, he let fly with a monster kick that was later measured at 86.26 metres – that’s 94 yards, 2 feet in imperial terms! ...Playing against Richmond again at Princes Park in July, 1921, he let fly with a monster kick that was later measured at 86.26 metres – that’s 94 yards, 2 feet in imperial terms! ...Dinner to Mr H R Clover player Career : 1920-24, 1926-31 Debut : Round 2, 1920 vs. Richmond, aged 25 years, 46 days Carlton Player No. 346 Games : 147 Goals : 396 Guernsey No. 1 Last Game : Semi Final, 1931 vs. Collingwood, aged 36 years, 180 days Height : 185 cm (6 ft. 1 in.) Weight : 86.5 kg (13 stone, 9 lbs.) DOB : 20 March, 1895 League Leading Goalkicker: 1922 Leading Goalkicker: 1920, 1921, 1922, 1923, 1926, 1928 Best and Fairest: 1929 Captain Coach: 1922-1924, 1927 Champion of the Colony: 1921 VFL AFL Hall of Fame Carlton Hall of Fame Team of the Century President: 1956-57 Vice President: 1932, 1935-54 Club Secretary: 1925-26 Horace “Horrie” Clover was Carlton’s star centre half-forward of the 1920’s; a high flying, long-kicking champion who enjoyed a stellar career with the Old Dark Navy Blues, then went on to be one of our longest-serving administrators. But even before he took the field for Carlton, Clover had to conquer the odds on the battlefields of France in World War 1. From Maryborough in central Victoria, Horrie enlisted in the 1st AIF in September 1915. After basic training, he embarked for France with reinforcements for the 7th Battalion in January of 1916. Soon pitched into the horrors of trench warfare, he fought and survived until September of that year, when he was transferred to a machine gun company and promoted to the rank of Corporal. On Christmas day, 1916, Horrie was struck down with acute appendicitis. He was evacuated to a field hospital for emergency surgery, where the doctors discovered that his appendix was gangrenous and that his life was in danger. He was immediately transferred to London for specialist treatment, and months of recuperation. Pronounced unfit for further front-line service, he was repatriated back to Australia in August 1917, and honourably discharged in May of the following year – six months before the Armistice. Having recovered, and keen to have a crack at senior football, Clover trained with Richmond and Melbourne before Carlton gave him an opportunity at VFL level. And how he delivered! In his first match in 1920 – ironically, against Richmond - he kicked four goals from centre half-forward, and hit the post three times! By the end of his first season at Princes Park, Clover was one of Carlton’s drawcards. Former Australian Prime Minister Sir Robert Menzies was just one of the many Carlton fans who were captivated; “he was the most artistic of high marks, unforgettable at half-forward,” said Menzies. Horrie could kick a football, too. A balanced, deceptively quick mover, he was a glorious running drop-kick for goal. Playing against Richmond again at Princes Park in July, 1921, he let fly with a monster kick that was later measured at 86.26 metres – that’s 94 yards, 2 feet in imperial terms! And there are numerous other instances where he roosted the ball more than 70 metres. In round 12 of 1921, he slotted 13 goals in a game against St Kilda; a club record which still stands today. The Blues made the finals in third place in 1921 and battled through to meet Richmond for the Premiership. Then the heavens above the MCG opened up on the day before the decider, turning the ground into a quagmire. In what was to be Clover’s only Grand Final appearance, Richmond won a slogging, mauling contest by four points. While Premiership glory eluded him, Horrie was Carlton’s top goalkicker in three of his first four seasons, including 1922, where his total of 58 was the competition’s best. He was appointed captain of the Blues that same year, and in 1923 took on the dual role of captain-coach. Over 1924 / 1925, he suffered more debilitating illness that prevented him from playing all season. Unable to pull on his football boots, he took on the job of Club Secretary, and continued in that position even after returning to the field in 1926. When he did eventually resume, he formed a new, powerful Carlton forward set-up with a young Harry “Soapy” Vallence at full-forward. Twice more – in 1926 and 1928, Clover’s brilliance and accuracy in front of goal saw him at the top of Carlton’s goal-kicking, and in 1929 – aged 34, he was honoured with the captaincy of Victoria against WA in his ninth and final game in the Big Vee. show_image.php?id=205 Horrie Clover retired as a player in 1931 after 147 games. His total of 396 goals is still ranked fifth best in Carlton’s proud history (only displaced for fourth when Brendan Fevola broke through in 2007/2008) – and it should be remembered that all but a handful of his games were played at centre half-forward, not in the goal square. In 1932 he was elected Vice-President of the Carlton Football Club, but retired after one year. In February 1935 on learning of Terry Ogden's the serious illness, Clover and Newton Chandler offered their services for a blood transfusion for the club's wing man. After a blood test Chandler's blood was accepted. However, Ogden passed away the next month. Clover stood again in 1935, was elected – and spent twenty unbroken years serving his beloved Blues. He even took on the Presidency in 1956, aged 60, and was as vigorous and determined as ever in his two years in the job. Carlton Football Club mourned deeply when Horrie Clover passed away on the first day of January, 1984. Three years later, he was among the first to be inducted into the Carlton Hall of Fame. Testament to his stature in the game as a whole, he was elected to the AFL Hall of Fame in 1996; and May 2000 saw him named as one of four emergencies in Carlton’s Team of the Century. A champion in every sense of the word, he spent 37 years of his remarkable life at Princes Park. Footnote The Argus published an article on Maryborough, April 12 1930, it said; "Clover has been the leading half-forward in League ranks for some time. It takes a specialist to fill the position capably, and the Carisbrook man does this admirably. Like good wine he has improved with age, and besides being one of the greatest half forwards that has ever appeared on a football field, he is about the best all round kicker that has ever played the game. He excells in punting, drop, and place kicking. He is a great marksman and a splendid exponent, one of the greatest the district has produced, besides being a fair cricketer also." When Clover returned to football in 1926, The Argus mentioned that they thought it was the first time a member of the Permit and Umpire Committee had played in a League game. 13 GOAL AWARD Round 12, 1921 At the Carlton AGM held on Monday 27 February 1922, Horrie Clover "was presented with ball used on the occasion, the St.Kilda club having generously donated it to the Carlton officials, who had it mounted for the purpose." (Age February 22 1922) 1922 The Art Of Forward Play Horrie wrote an article for the Sporting Globe August 30 p7 To read click here> http://nla.gov.au/nla.news-article184798404 1928 Idol of Carlton Crowds - Australia's Best Centre Half Forward The Sporting Globe's football writer W. S. "Jumbo" Sharland writes about Horrie Clover To read click here> http://nla.gov.au/nla.news-article183958222 Footballer Who Gambles With Death. Daily Pictorial (Sydney) article about Horrie. http://nla.gov.au/nla.news-article246129350 1932 Jack Worrall on Clover Writing for the Australasian September 03 p7; "Take Horrie Clover as an example, a real specialist, one of the best forwards the game has seen, and the best all-round kick that has ever come under my purview. For that reason he deserves a line to himself. He played the game like a sportsman, was a glorious high mark, and could cover a great distance by either drop, punt, or place kick - a remarkable accomplishment. Many players have been notable kicks in two aspects of the game, yet none have equalled Clover in the three branches. His nearest rival as an all-round kick, though not quite as certain in his efforts, was Frank Caine, of Carlton, who, like Clover, also hailed from the country." 1933 Coming Football Champion Melbourne, Saturday A special warning was issued to the Victorian Football League delegates last night by Mr. D. H. Crone, a Carlton delegate, not to angle for a certain "coming" champion that the Carlton Club had signed up that day. At first delegates were a little puzzled at the statement, but when it was explained that Horrie Clover, former champion half-forward, had that day become the father of of a son they burst into sustained laughter. It was only by persistent ringing of the bell by the chairman that order was restored. (News (Adelaide) May 20 1933 p3) 1933 - The Place Kick A letter to The Argus via the Huon Times about the lack of place kicking expertise in the VFL. The writer mentions that he got Horrie to play football in Maryborough after he saw the then 15 y.o. place kick a ball 63 yards, and later with Carlton, Clover place kicked 8 goals in one match. To read click here> http://nla.gov.au/nla.news-article137253000 Milestones 50 Games: Round 1, 1923 vs Fitzroy 100 Games: Round 18, 1927 vs St Kilda 100 Goals: Round 18, 1921 vs Collingwood 200 Goals: Round 3, 1924 vs St Kilda 300 Goals: Round 11, 1928 vs Geelong Links Articles: The Magical 'Three Goal Average' | A Letter From Horrie | Our Flagless Greats Blueseum: Stat Shot for Horrie Clover | Career Breakdown | Clover's big goals hauls | Clover's Blueseum Image Gallery A dinner to celebrate career Horrie Clover in 1957Four Page Program & Menu 1927 -
 Melbourne Tram Museum
Album - Photo Album, John Etkins, Ray Marsh, 1990's
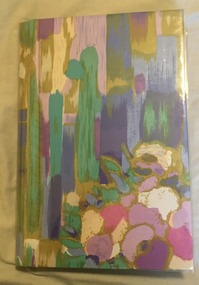
... 1 957 City Circle 1 “hands off our trams” protest march 2 2100, 231 South Melbourne Depot – 10-4-1993 2 676 And many others – Hawthorn Depot 2 217 Princes Bridges 3 380, 104 St Kilda Road 3 106, 104 Essendon Depot 3 431 As a W1 4 1011 Fresh fruit tram, Preston Depot 6-12-1992, 4 824 Day in Day out, Brunswick and Victoria Parade 29-4-1993 4 722 Art tram 5 ? Advert tram – Imperial...1 957 City Circle 1 “hands off our trams” protest march 2 2100, 231 South Melbourne Depot – 10-4-1993 2 676 And many others – Hawthorn Depot 2 217 Princes Bridges 3 380, 104 St Kilda Road 3 106, 104 Essendon Depot 3 431 As a W1 4 1011 Fresh fruit tram, Preston Depot 6-12-1992, 4 824 Day in Day out, Brunswick and Victoria Parade 29-4-1993 4 722 Art tram 5 ? Advert tram – Imperial ...Photo Album - 48 sheets bound with a white circular metal/plastic spiral bound within a heavy duty cardboard cover, with glued cover pages, plastic covered with an index sheet. Allows for three photographs per page. Not known whether the plastic envelope for each photograph is of archival quality. No Manufacture detail, though has a bar code on the bottom left hand corner of the rear cover. Cover is a reproduction from a painted art piece. Listing of photographs given on htd1800-RayMarshalbum.pdf Dates given when written on the rear of the photograph. Compiled by John Etkins from photographs given to him by Ray Marsh. 1990's to 1993 generally. Page Tram/s Notes – dates given when on rear of photograph. 1 226 Loading passengers – ex MMTB Annual Report? 1 957 City Circle 1 “hands off our trams” protest march 2 2100, 231 South Melbourne Depot – 10-4-1993 2 676 And many others – Hawthorn Depot 2 217 Princes Bridges 3 380, 104 St Kilda Road 3 106, 104 Essendon Depot 3 431 As a W1 4 1011 Fresh fruit tram, Preston Depot 6-12-1992, 4 824 Day in Day out, Brunswick and Victoria Parade 29-4-1993 4 722 Art tram 5 ? Advert tram – Imperial China 5 237 Stubbsy tram – TrippleM? 6 856 City Circle – with gas and fuel building – 31-7-1994 6 925 City Circle - with gas and fuel building – 31-7-1994 6 728 City Circle – 10-8-1994 7 246 Navy tram x three pics – July 1992 8 ? Gold tram advertising Georges 8 990 Advertising Telstra– 29-4-1993 8 749 Art tram? 9 990 NRMA - 1-3-1994 9 727, 215 Public Transport 9 920 Advert tram with a picket fence 10 Bendigo 21 Preston Workshops 11-3-1993 10 774? W5 being rebuilt at Preston – 21-10-1991 11 ? Bogie cable trailer at Preston – 29-4-1993 11 922 Interior view of a tram – being modernised – 11-3-1993 11 922 Preston Workshops 29-4-1993 12 1018 Workcare tram at Preston 1994 – 11-8-1994 12 774 Preston Workshops – 20-12-1993 12 8 Preston Workshops – 1-10-1992 13 380 Preston Workshops 13 8 Preston Workshops 13 20, 8 Preston Workshops 14 721 Preston Workshops 20-12-1993 14 ? Tramways painted artist tram featuring a driver and workshop 14 Traverser Preston Workshops 15 2110, 2106 Preston Workshops 15 ? Preston Workshops 15 2130 Interior Preston Workshops 20-12-1993 16 Set of three pics Elizabeth St floods – 17-2-1972 17 Set of three pics Elizabeth St floods – 17-2-1972 18 676 Turning into Swanston St from Batman Ave 18 676 Kew Depot – 10-11-1991 18 237, 676, 611 Kew Depot – 10-11-1991 19 214, 676 South Melbourne Depot – Kingsway 19 217 Spencer St 19 214 Advertising Kew Depot Open Day -8-12-1991 20 231, 676 Advertising Kew Depot Open Day -8-12-1991 20 Zoo tram, 256 Outside Kew Depot 20 214 Hawthorn Open Day with band 21 Zoo tram x 3 pics And horses, Kew Open day 22 231, 431 Kew Depot 22 892, 214 Kew Depot 75 years, Postcard – 1991 22 282 Kew Depot – with the name Monique on the tram and a lady standing alongside 23 238, 233 Kew Depot 23 236, 892, 282 Kew Depot – 25-4-1992 23 232, 236, 282 Kew Depot 24 2112 Port Melbourne line – with long grass – 11-4-1993 24 469, 2037, ? 2015 South Melbourne Depot 24 1018 or 976? Advertising a PTC Open Day – 20-10-1991 – In Swanston St - see Reg Item 1845 25 250 Bourke St 25 2100 Running into Preston Workshops 25 282, 1003 Collins St in the rain 26 Logo PMTT 26 Point cover With P&MTT cast into the cover 26 Foundation Stone Person reblocking in gold, a PMTT Foundation Stone 27 Logo Tramway Board 27 Logo MMTB logo 27 Logo Footscray Tramways Trust 28 217 And 2’gauge W2 – South Melbourne Depot – 20-10-1991 28 164 Somewhere? 28 1018 Advert tram – “Moro”, Preston flyover 29 V214 x 3 pics Kew Depot 30 611 Whitehorse Road, Balwyn 5-10-1991 30 976 x 2 pics Advert tram – have a red instead 31 610 Malvern Depot 31 138 (max tract) Flinders St 31 138 (max tract) Bourke into Spencer 32 844 Victoria Parade with R10 behind 32 264 With a TV interview being undertaken 32 2066 Elizabeth St – 29-4-1993 33 255 x 2 pics Derailed at Kew Depot 33 253 Derailed outside the Beehive Hotel 34 214, 892, 611 Re-enactment of Victoria Bridge to Esplanade service – 10-11-91 34 726 Art tram? – Swanston St with overhead trucks in background 34 10W Reblocking scrubber car at Brunswick Depot 1999 35 2085 At Preston workshops over an inspection track section 35 731 St Georges Road, road being rebuilt – Nov. 1991 35 Preston Jtn Junction at Workshops being relaid 36 1003 St Georges Road, Nov. 1991 trackworks 36 St Georges Rd Track being rebuilt – Nov. 1991 has temp track cross over 36 Victoria St Victoria St being reconstructed 6-9-1992 37 East Burwood Extension works – 18-2-1993 37 East Burwood Re-building crossover – 18-2-1993 37 Victoria St Victoria St being reconstructed 6-9-1992 38 19W, 16W Bylands – 5-12-1993 38 R10 Kew Depot 38 Workers Kew Depot pushing on a post 39 R10 R10 towing a B class tram- Royal Parade? 39 11W, 10W? South Melbourne Depot 39 Overhead Overhead truck at Kew Depot 40 Kew Depot Demolition works opposite depot 40 613? Malvern Depot on special tram 40 256 zoo tram Royal Park tram at Kew Depot 41 B class Bundoora line 1993 41 231, 611 Kew depot 75th anniversary tram 41 469, 287 Kew depot 42 510 Spring St into Bourke St – 28-4-1993. “42nd street promotion. 42 153 High St Northcote, Bundoora 42 611 Kew Depot, Nov. 1991 43 195? Simpson St siding – 25-4-1993 – 7 trams in all 43 646 Route 12, with fire station in background – Gisborne and Victoria 43 961 Burke Road, Camberwell, 10-8-1994 44 760 Art tram 44 938 Sam the tram, Flinders St 44 1014 Gilbert Road, West Preston, June 1994, advert for AGC 45 965 Daimaru advert tram, Swanston St 45 1018 Express post advert tram, Swanston St. 45 1024 Advert – lego exhibition – Swanston St 46 104 Camberwell depot 46 611 Looking towards driver’s controls from interior. 46 W1 Interior photo showing tip over seats 47 Cable car Interior photo – could be zoo tram 47 510 Interior, 28-4-1993 47 214 Kew Depot, night shot, Oct. 1991 48 246, 237 Kew depot, 13-9-1993 – Stubbsy and Energy Victoria advert 48 246, 231, 237 Kew depot, Navy, 75th anniversary of Kew and Fox Fm advert 48 2014, 2072 South Melbourne – tt line? Advert tram 49 59 And six other trams in front of Preston Workshops 49 1024 MMTB Christmas Tram, 1970 49 2001 Camberwell Depot 50 725 Preston depot area – tram has a red upper half 50 725 South Melbourne depot – now has Xmas decorations 50 1026 Bourke St, Christmas 6-12-1993 51 933 Victoria Parade shunt and other A class tram – Autumn 51 829 Art tram 51 39 Advert tram – Crime prevention 52 Connie Connie at night = has jeans on 52 1?? Has a MET inspector standing in front of number – Latrobe uni tram 52 611 Kew Depot 53 237 Fox FM Black Thunder tram at Kew Depot, August 1992 53 237, 611, 892 Victoria Bridge re-enactment – 10-11-1991 53 237 At Kew depot with 4 people, including Hugh Waldron 53 442, 10W South Melbourne Restaurant tram and works car 53 W2 At Wattle Park 53 School art Photo of students holding artwork on the zoo tram 256 at Kew 54 138 And many others 54 469 Launch of the Melbourne Tram by the PTC 54 School art Photo of students holding artwork on the zoo tram 256 at Kew 55 B2 Elizabeth St terminus, Christmas 1994 55 8 Z8 Swanston St, April 1993 55 504 Clifton Pugh – Preston Workshops 56 138, 180, 214 Hawthorn Depot display 56 650, 510 Hawthorn Depot 56 469 Camberwell 57 568 Bridge Road Richmond by cable tram depot 57 ? Advert tram – Falls Creek 57 995 Malvern Road, 18-5-1992 58 457, 217 etc Swanston St display 58 231, 611 Kew 75th Anniversary 58 682 Artist tram at Malvern Depot – 18-5-1992 59 1018 Country Road advert tram 59 8 Z class – decorated tram – Essendon Depot 59 947 Metland Safety Express – safety tram – Kew depot 60 101 x 2pics Decorated for RAAF 70th Anniversary 60 2082 Near East Preston Depot, with destination “Next Stop Mill Park” 61 475 After sale and disposal 61 585 After sale and disposal 61 651 After sale and disposal – Diamond Creek – 9-8-1994 62 386 After sale and disposal – Sunbury 62 590 After sale and disposal – Hall ACT 62 476 After sale and disposal – Kinglake 63 11W Bundoora Extension – track being opened 63 947 Metland Safety Express – safety tram – Kew depot 63 Model 2,3 2’ gauge model trams 64 Model 2 Ditto 64 250 After sale and disposal 64 293 After sale and disposal – Diamond Ck – 9-8-1994 65 246, 231, 237 Kew depot, Navy, 75th anniversary of Kew and Fox Fm advert 65 1002 Advert tram – Salvation Army 65 231, 29 Kew Depot 66 246, 231, 237 Kew depot, Navy, 75th anniversary of Kew and Fox Fm advert 66 646, 935, 1002 Kew depot 66 220, 60 Preston Workshops? 67 851, 814 Malvern Depot 3-9-1992 67 726 Malvern Rd at Glenferrie Road – 18-5-1992 67 237, 133 Victoria Parade 1996 68 814 and others Interior Malvern Depot – 18-5-1992 68 231 75th Kew depot anniversary at depot 68 231 75th Kew depot anniversary at depot 69 1024 Malvern Depot 10-11-1991 69 1011 Advert tram Melbourne City Toyota 69 106, 180 Swanston St 70 190, 568 Camberwell Depot 70 431 Flinders St – tram event 70 20, 138 Camberwell Depot 71 431 Flinders St – tram event 71 237 Fox FM Thunder Tram 71 2057, 2014 Elizabeth St, Vic Market 29-4-1993 72 676, 611, 892 Victoria Bridge re-enactment – 10-11-1991 72 Ceremony Victoria Bridge – mayor and others event 72 214 214 on the bridge 73 164 Lygon St – former outer circle line level crossing in view 73 841 Swanston Walk 29-4-1993 74 821 St Georges Road, April 1993 74 431, 231 Victoria Parade 74 217, 676 Passing Camberwell Depot 75 Oporto 018 Clarendon St 6-3-2003 75 3007 Albert Park – 7-3-2003 75 3001, 018, 3502 Docklands – 10-3-2003 76 Oporto 018 Docklands – 16-1-2003 76 Oporto 018 Flinders St 7-3-2003 76 3502 Swanston St at Flinders St -8-3-2003 77 16 Kew Depot, Jan 1991 77 112, 110 Bundoora 4-9-1992 77 738 Camberwell Feb 1991 78 1011 Thornbury Jan 1991 advert for City Toyota 78 101 Bundoora – RAAF tram 4-9-1992 78 814 Art tram – Swanston St August 1992 79 1024, 469, Z3 Preston Workshops – 469 as the Melbourne Tram – 9-9-1992 79 961 Malvern Depot 3-9-1992 79 242 Single line working in Victoria St 6-9-1992 80 781 Thornbury, the hump, Preston Workshops Jan 1991 80 2104 Preston Workshops 9-9-1992 80 2100 Launch, Preston Workshops 9-9-1992 81 5W + 1A 5 x W at Kew Depot 3-2-1991 81 676 Kew Depot 21-2-1991 81 873, 2016 Brunswick depot 2-3-1991 82 231 Kew Depot Yard – 21-1-1991 82 157, 158 Brunswick Depot – 2-3-1991 82 2057, 873, 158 Brunswick Depot – 2-3-1991 83 802 Art Tram - Franklin St from the signal box 2-3-1991 83 990 990 Evian advert tram, Franklin St signal box 2-3-1991 83 920 GIO Advert Tram with Bushels tea and Yellow Pages? Adverts 84 721 Art Tram, Franklin St signal box 84 976 St Georges Road, Jan 1991 – advert tram Capital society 84 731 St Georges Road, Jan. 1991 Art tram 85 10W Victoria Parade, Brunswick St, 1/3/1991 85 10W, 9 or 11W South Melbourne depot 85 10W Bundoora Terminus 4-2-1991 86 11W City Baths 86 10, 16 Camberwell Depot 6-12-1990 86 944 Glenhuntly Depot 18-2-1991 87 2011 Spring St – Princess Theatre, March 1990 87 294, 239, 277, 243, 259, 280 Kew Depot 87 296 Kew Depot 88 1015, 16 Batman Ave 19-1-1991 88 963, 948, 935, 996, 892 Kew Depot 3-2-1991 88 Victoria St Victoria St Richmond Reconstruction 6-2-1992 89 1014, 990 Batman Ave 19-1-1991 (Image added i5 and rear view added 23-12-2018, scanned for Dale Budd. 89 920 920 – GIO advert tram, 760 art Tram Collins at Spencer 17-10-1990 89 610, 611 Kooyong Station level crossing 30-12-1990 90 95 Royal Park, 15-2-1991 90 2057, 873, 158 Brunswick Depot – 2-3-1991 90 10 Camberwell Depot 6-12-1990 91 Bendigo 44 In Prahran and Malvern Tramways Trust Colours 1986 –Black and white photo. Listed 5-11-2016See note page 1 and on image 3trams, tramways, album, photo album, tramcars, the met, yarra trams, kew depot, brunswick depot, advertising trams, transporting art, preston depot, hawthorn, bundoora, st georges rd, victoria st, camberwell depot, tram r10, 8, 10w, 10, 11w, 16, 16w, oporto 018, 19w, 20, bendigo 21, 29, 39, bendigo 44, 59, 60, 95, 101, 104, 106, 110, 112, 133, 138, 153, 157, 158, 164, 180, 190, 195?, 214, 215, 217, 220, 226, 231, 232, 233, 236, 237, 238, 239, 242, 243, 246, 250, 253, 255, 256, 259, 264, 277, 280, 282, 287, 293, 294, 296, 380, 386, 431, 442, 457, 469, 475, 476, 504, 510, 568, 585, 590, 610, 611, 613?, 646, 651, 676, 682, 721, 722, 725, 726, 727, 728, 731, 738, 749, 760, 774, 781, 802, 814, 821, 824, 829, 841, 844, 851, 856, 873, 892, 920, 922, 925, 933, 935, 938, 944, 947, 948, 957, 961, 963, 965, 976, 990, 995, 996, 1002, 1003, 1011, 1014, 1015, 1018, 1024, 1026, 2001, 2011, 2014, 2015, 2016, 2037, 2057, 2057, 2066, 2072, 2082, 2085, 2100, 2104, 2106, 2112, 2130, 3001, 3007, 3502
