
Showing 188 items matching "quarry hill tram"
-
 Ballarat Tramway Museum
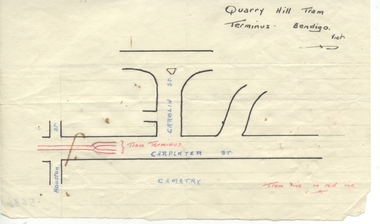
Document - Personal Papers, Wal Jack, "Quarry Hill Tram Terminus Bendigo", late 1940's?
... "Quarry Hill Tram Terminus Bendigo"...Drawing of the Quarry Hill tram terminus showing adjacent streets and tram lines when a Y terminus...."Quarry Hill Tram Terminus Bendigo" Document Personal Papers Wal Jack ...Drawing shows the Y terminus at Quarry Hill. Who prepared the drawing is not known. Prepared using ink on lined or ruled paper. Contained originally within Reg Item 5623 at the front of this note book. For items see btm5623 loose items list.pdf.Yields information about the Quarry Hill terminus as originally built.Drawing of the Quarry Hill tram terminus showing adjacent streets and tram lines when a Y terminus.trams, tramways, bendigo, quarry hill -
 Ballarat Tramway Museum
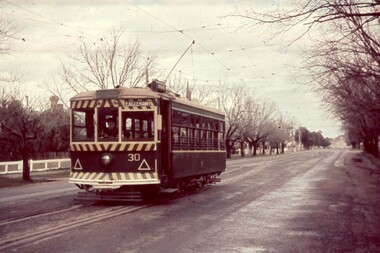
Slide - 35mm slide/s, Travis Jeffrey, c1962
... Quarry Hill... Pinders Loop... tram...Agfa plastic mount (blue base, white cover) with a photo of Bendigo 30 at Pinder's Loop, Carpenter St. Quarry Hill. Tram has the destination of Eaglehawk ....Quarry Hill. Tram has the destination of Eaglehawk . ...Agfa plastic mount (blue base, white cover) with a photo of Bendigo 30 at Pinder's Loop, Carpenter St. Quarry Hill. Tram has the destination of Eaglehawk ."BES 17" in penciltramways, trams, bendigo, quarry hill, pinders loop, tram 30 -
 Ballarat Tramway Museum
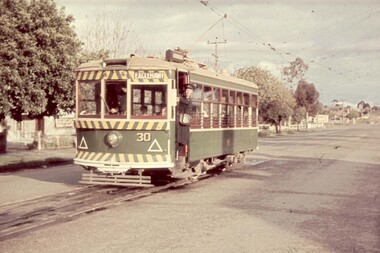
Slide - 35mm slide/s, Travis Jeffrey, c1962
... ... Quarry Hill... tram...Agfa plastic mount (blue base, white cover) with a photo of Bendigo 30 at the Quarry Hill terminus. Tram has the destination of Eaglehawk . ...Tramways trams Bendigo Quarry Hill tram 30 "BES 16" in pencil Agfa plastic mount (blue base, white cover) with a photo of Bendigo 30 at the Quarry Hill terminus. ...Agfa plastic mount (blue base, white cover) with a photo of Bendigo 30 at the Quarry Hill terminus. Tram has the destination of Eaglehawk . Conductor standing in the doorway for the photographer. In the background is the premises for "Northern Terrazzo"."BES 16" in penciltramways, trams, bendigo, quarry hill, tram 30 -
 Ballarat Tramway Museum
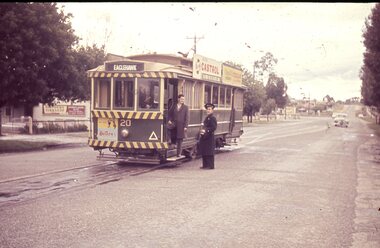
Slide - 35mm slide/s, Travis Jeffrey, c1962
... ... Quarry Hill... tram...Agfa plastic mount (blue base, white cover) with a photo of Bendigo 20 at the Quarry Hill terminus. Tram has the destination of Eaglehawk and has a Castrol Oil, and another company roof advertisements, with Huttons Ham advertisement on the dash panel. ...Tramways trams Bendigo Quarry Hill tram 20 "BES 15" in pencil Agfa plastic mount (blue base, white cover) with a photo of Bendigo 20 at the Quarry Hill terminus. ...Agfa plastic mount (blue base, white cover) with a photo of Bendigo 20 at the Quarry Hill terminus. Tram has the destination of Eaglehawk and has a Castrol Oil, and another company roof advertisements, with Huttons Ham advertisement on the dash panel. Conductor and another person (enthusiast) outside the tram, driver changing ends on the inside. In the background is the premises for "Northern Terrazzo"."BES 15" in penciltramways, trams, bendigo, quarry hill, tram 20 -
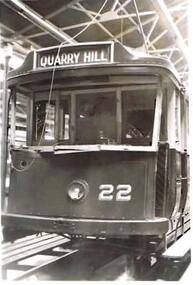 Bendigo Historical Society Inc.
Photograph - NUMBER 22 TRAM-QUARRY HILL
... NUMBER 22 TRAM-QUARRY HILL...Tram 22... Quarry Hill...The tram has the Number 22 painted on its fascade and 'Quarry Hill' in the designation plate. ...Photograph NUMBER 22 TRAM-QUARRY HILL ...Black and White Photograph of Tram being maintained at the workshop depot. The tram has the Number 22 painted on its fascade and 'Quarry Hill' in the designation plate. On rear of photo is written in pencil number 86. Rope hanging across the front left side is used to connect the roller pole to the electricity supply.photograph, tram, no 22, bendigo trams, bendigo tramways, bendigo tramways co.ltd, tram 22, quarry hill -
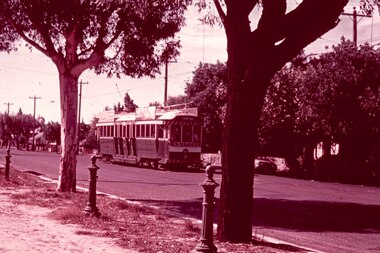 Ballarat Tramway Museum
Slide - 35mm slide/s, Graham Evans, Apr. 1972
... Quarry Hill... Cemetery... tram...White cardboard mount, 35mm slide, from the Association of Railway Enthusiast's film strip titled "Provincial Tramway Film Strip" of Bendigo No. 3 at Quarry Hill terminus. Tram has the destination of Quarry Hill. ...Tramways trams ARE Film Strip Quarry Hill Cemetery tram 3 Stamped on base of slide "11796" and written in ink on top edge "No. 3 Quarry Hill" White cardboard mount, 35mm slide, from the Association of Railway Enthusiast's film strip titled "Provincial Tramway Film Strip" of Bendigo No. 3 at Quarry Hill terminus. ...White cardboard mount, 35mm slide, from the Association of Railway Enthusiast's film strip titled "Provincial Tramway Film Strip" of Bendigo No. 3 at Quarry Hill terminus. Tram has the destination of Quarry Hill. The film strip notes (Reg. Item 2560), provided the following caption details: "Bogie No. 3 arrives at "QUARRY HILL" terminus beside the cast iron hitching posts that lined the roadside outside the dominant feature of the area - the Cemetery. Apr. '72 (Graham Evans)" See image btm2586p.tif for high level scan of image. Stamped on base of slide "11796" and written in ink on top edge "No. 3 Quarry Hill"tramways, trams, are, film strip, quarry hill, cemetery, tram 3 -
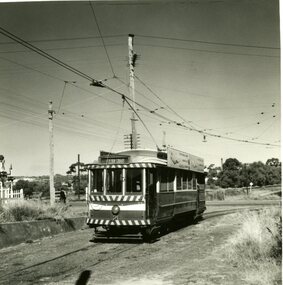 Ballarat Tramway Museum
Photograph - Black & White Photograph/s set of 19, Mar. 1972
... ... Quarry Hill... tram...Has a Peters Ice Cream truck and Sandhurst Fruit Juices truck on right side of photograph. 981.6 - tram 2 at Quarry Hill terminus. 981.7 - tram 2? at one of the loops on the Eaglehawk line, inbound? ...trams tramways Charing Cross Bendigo Golden Square Quarry Hill tram 2 tram 21 tram 7 tram 24 tram 26 On rear of each photo in the top left hand corner is a print number 1 to 19 in ink and location notes, generally "Bendigo" Set of 19 black and white prints, all 89mm square of Bendigo trams, date machine printed on print is "Mar 1972". 981.1 - Tram 21 at North Bendigo terminus, with level crossing in background. ...Set of 19 black and white prints, all 89mm square of Bendigo trams, date machine printed on print is "Mar 1972". 981.1 - Tram 21 at North Bendigo terminus, with level crossing in background. Has destination "Golden Square" and two SEC roof ads. 981.2 - tram 2? at Eaglehawk, with destination "Depot", two SEC roof ads and "Leo A. Hughes Photographer" on side of building in background. 981.3 - tram 2? at Eaglehawk, side on view. 981.4 - tram 26 at Quarry Hill terminus looking back into city. 981.5 - tram 7 en route to North Bendigo at the site of the Bridge St. loop. Has a Peters Ice Cream truck and Sandhurst Fruit Juices truck on right side of photograph. 981.6 - tram 2 at Quarry Hill terminus. 981.7 - tram 2? at one of the loops on the Eaglehawk line, inbound? 981.8 - bogie tram at Charing Cross with fountain in background. Side on view looking south. 981.9 -trams 7 and 21 on Golden Square/North Bendigo line with bogie tram in background, at Charing Cross. Same as item 972. 981.10 - bogie tram at Charing Cross - has buildings in south west corner in background, including Colonial Mutual Life and an advertisement for the Herald newspaper. 981.11 - trams 25, 7 and two other trams at Charing Cross. 981.12 - trams 2 and 26 and three others at Charing Cross. 981.13 - tram 25 at Golden Square terminus, with Rodda's Golden Square Hotel in the background. Tram showing destination of "Nth Bendigo" 981.14 - tram 24, showing "Special" on depot access track. Has two Johnnie Walker roof ads on side. 981.15 - as above, but tram on bridge outside depot. 981.16 - trams 25 and 28 at depot 981.17 - tram 24 showing "Special" on depot access track with a single truck car in background. 981.18 - trams 2 and 26 at Charing Cross. Has advertisements for "Armstrong Tyre Service" and "Cohn's drinks" on buildings in background. 981.19 - Bendigo 2 at location?, about to enter a loop or double track section. Has hotel in background. On rear of each photo in the top left hand corner is a print number 1 to 19 in ink and location notes, generally "Bendigo"trams, tramways, charing cross, bendigo, golden square, quarry hill, tram 2, tram 21, tram 7, tram 24, tram 26 -
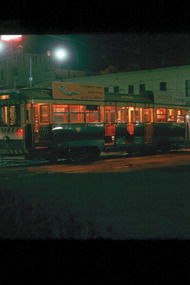 Ballarat Tramway Museum
Slide - 35mm slide/s - set of 8, Noel Simons, 25/02/1972 12:00:00 AM
... Quarry Hill... Mitchell St.... tram...Set of 8 transparencies taken on 25/02/72 on Kodak mounts. 1202.1 - Night photo of Bendigo 5 at Charing Cross, waiting to depart to Quarry Hill. Tram has two SEC roof ads. Has Ezywalkin and the Beehive buildings in the background. 1202.2 - as for 1202.1 1202.3 - as for 1202.1 but further back and 7 and 21 waiting for their runs as well in Pall Mall. 1202.4 - 5 and 2 at Charing Cross, night photo, looking along Mitchell St. with Fountain Plaza on right of photo and Ezywalkin store. 1202.5 - No. 2 at Charing cross, bound for Eaglehawk. ...Tramways trams Bendigo Night Photo Charing Cross Quarry Hill Mitchell St. tram 2 tram 5 tram 7 tram 21 tram 26 Information written on in blue ink and date stamped on purple ink. 1202.1 - "No. 5 at Charing Cross" 1202.2 - "No 5. at Charing Cross" 1202.3 - "Nos. 7, 21 and 5 at Charing Cross" 1202.4 - "Nos. 5 and 2 at Charing Cross" 1202.5 - "No. 2 at Charing Cross" 1202.6 - "No. 26 at Quarry Hill" 1202.7 - "No. 26 in Mitchell St. opposite Wills St." 1202.8 - "No. 26 at Quarry Hill" Set of 8 transparencies taken on 25/02/72 on Kodak mounts. 1202.1 - Night photo of Bendigo 5 at Charing Cross, waiting to depart to Quarry Hill. ...Set of 8 transparencies taken on 25/02/72 on Kodak mounts. 1202.1 - Night photo of Bendigo 5 at Charing Cross, waiting to depart to Quarry Hill. Tram has two SEC roof ads. Has Ezywalkin and the Beehive buildings in the background. 1202.2 - as for 1202.1 1202.3 - as for 1202.1 but further back and 7 and 21 waiting for their runs as well in Pall Mall. 1202.4 - 5 and 2 at Charing Cross, night photo, looking along Mitchell St. with Fountain Plaza on right of photo and Ezywalkin store. 1202.5 - No. 2 at Charing cross, bound for Eaglehawk. Tram has two SEC ads. 1202.6 - No. 26 at Quarry Hill terminus with the cemetery in the background. Tram has two SEC roof ads. 1202.7 - No. 26 in Mitchell St. bound for Eaglehawk, at Wills St. with the Hopetoun Hotel in the background. 1202.8 - as for 1202.6Information written on in blue ink and date stamped on purple ink. 1202.1 - "No. 5 at Charing Cross" 1202.2 - "No 5. at Charing Cross" 1202.3 - "Nos. 7, 21 and 5 at Charing Cross" 1202.4 - "Nos. 5 and 2 at Charing Cross" 1202.5 - "No. 2 at Charing Cross" 1202.6 - "No. 26 at Quarry Hill" 1202.7 - "No. 26 in Mitchell St. opposite Wills St." 1202.8 - "No. 26 at Quarry Hill" tramways, trams, bendigo, night photo, charing cross, quarry hill, mitchell st., tram 2, tram 5, tram 7, tram 21, tram 26 -
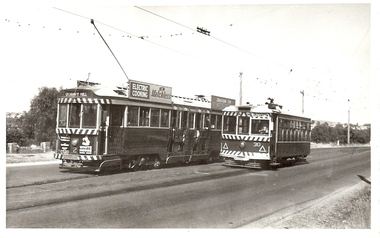 Bendigo Historical Society Inc.
Photograph - BASIL MILLER COLLECTION: TRAMS - BENDIGO TRAMWAYS
... ...Quarry Hill tram...Larger tram on left hand side of image has 'Quarry Hill' on front. Advertising sign on side 'Electric Cooking, Matchless'. ...BHS Collection basil miller Bendigo tramways Quarry Hill tram '3/64' on rear side of photo. Two trams, side by side. ...BHS CollectionTwo trams, side by side. No. 2 and 30. C 1964. Larger tram on left hand side of image has 'Quarry Hill' on front. Advertising sign on side 'Electric Cooking, Matchless'. Smaller tram on right hand side has 'special' on front. '3/64' on rear side of photo.basil miller, bendigo tramways, quarry hill tram -
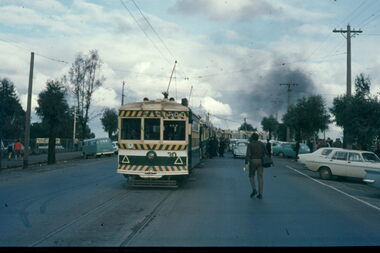 Ballarat Tramway Museum
Slide - Bendigo trams - Quarry Hill - Eaglehawk route - set of 6, Warren Doubleday, 13/9/1970
... ...Quarry Hill...tram...Bendigo Charing Cross Eaglehawk Quarry Hill tram 30 tram 19 tram 25 tram 24 tram 26 tram 3 Signals Have the photographer's slide number written on them. ...Set of six slides of Bendigo trams taken by Warren Doubleday on 13/9/1970 during an ARHS tour to Bendigo - 1 - tram 30 at the head of a long line up at the railway station 2 - tram 19 - part of the convoy 3 - tram 25 - turning into View St 4 - tram 24 leaving a loop on the Eaglehawk line - note the signals on the pole with one showing a green light. 5 - tram 26 outbound to Eaglehawk 6 - tram 3 inbound about to enter a loop - note the red signal on the pole.Yields information about the Bendigo tram system and the tram used on a tour in Sept. 1970.Colour Slide - Anscochrome GAF plastic mounts - set of 6Have the photographer's slide number written on them.bendigo, charing cross, eaglehawk, quarry hill, tram 30, tram 19, tram 25, tram 24, tram 26, tram 3, signals -
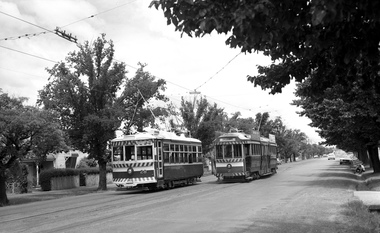 Ballarat Tramway Museum
Photograph - Digital image, John Ward, 1/01/1972 12:00:00 AM
... ... Quarry Hill... tram...Quarry Hill line. No. 28 has the destination of Quarry Hill, while No. 2 Eaglehawk. Photo by John Ward 01 - 01- 1972 Slide title "04751 010172 7207-H SECV Birney tram 28 passing bogie tram 2 in Carpenter St on Quarry Hill line Bendigo Vic"...Trams tramways Bendigo Carpenter St Pinders Loop Quarry Hill tram 28 tram 2 Digital image of the Bendigo 28 crossing No. 2 at Pinders Loop in Carpenter Loop on the Quarry Hill line. ...Digital image of the Bendigo 28 crossing No. 2 at Pinders Loop in Carpenter Loop on the Quarry Hill line. No. 28 has the destination of Quarry Hill, while No. 2 Eaglehawk. Photo by John Ward 01 - 01- 1972 Slide title "04751 010172 7207-H SECV Birney tram 28 passing bogie tram 2 in Carpenter St on Quarry Hill line Bendigo Vic"trams, tramways, bendigo, carpenter st, pinders loop, quarry hill, tram 28, tram 2 -
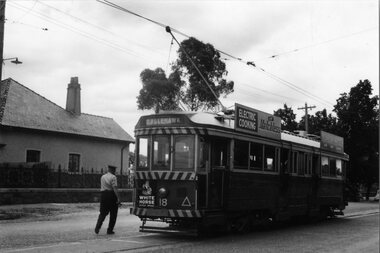 Ballarat Tramway Museum
Photograph - Black & White Photograph/s, Ron Hann, Jan. 1963
... ... Quarry Hill... tram...Black and white print on heavy matt photographic paper of Bendigo 18 at Quarry Hill terminus with the driver walking back to the tramcar. The tram has a White Horse Whiskey advertisement on the front dash panel, and two electric cooking roof advertisements. 2nd copy - laser print - with date etc on rear - added 22/2/2010, copy from Ron Hann. ...Yields information about the Quarry Hill terminus and roof advertisements on the tramcar. tramways trams Bendigo Quarry Hill tram 18 On rear in pencil "18 Quarry Hill 1963" 2nd copy has label "Reference 6/214/28" Photo by Ron Hann" and another label "Bendigo Quarry Hill 01.63" Black and white print on heavy matt photographic paper of Bendigo 18 at Quarry Hill terminus with the driver walking back to the tramcar. ...Yields information about the Quarry Hill terminus and roof advertisements on the tramcar.Black and white print on heavy matt photographic paper of Bendigo 18 at Quarry Hill terminus with the driver walking back to the tramcar. The tram has a White Horse Whiskey advertisement on the front dash panel, and two electric cooking roof advertisements. 2nd copy - laser print - with date etc on rear - added 22/2/2010, copy from Ron Hann. Printed on Fujifilm, Fujicolour Crystal Archive for Frontier"On rear in pencil "18 Quarry Hill 1963" 2nd copy has label "Reference 6/214/28" Photo by Ron Hann" and another label "Bendigo Quarry Hill 01.63"tramways, trams, bendigo, quarry hill, tram 18 -
 Ballarat Tramway Museum
Photograph - Black & White Photograph/s, mid to late 1950's
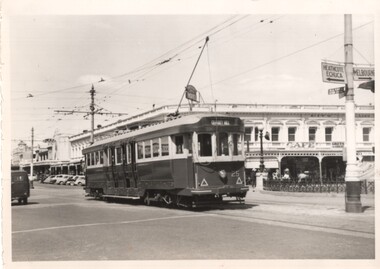
... ... Quarry Hill... tram...Black and white photograph of Bendigo 25, late 1950's crossing the highway at Charing Cross and about to enter Mitchell St. Tram has the destination of Quarry Hill. In the background is City Club Hotel. ...Trams tramways Bendigo Charing Cross Mitchell St Quarry Hill tram 25 In the rear in ink "Bendigo" Black and white photograph of Bendigo 25, late 1950's crossing the highway at Charing Cross and about to enter Mitchell St. ...Black and white photograph of Bendigo 25, late 1950's crossing the highway at Charing Cross and about to enter Mitchell St. Tram has the destination of Quarry Hill. In the background is City Club Hotel. On the right hand side of the photograph is a direction sign and tram stop sign. Photographer unknown - see history of object.In the rear in ink "Bendigo"trams, tramways, bendigo, charing cross, mitchell st, quarry hill, tram 25 -
 Ballarat Tramway Museum
Photograph - SECV Bendigo 24 & 22 at Quarry Hill, Peter Duckett, 1946
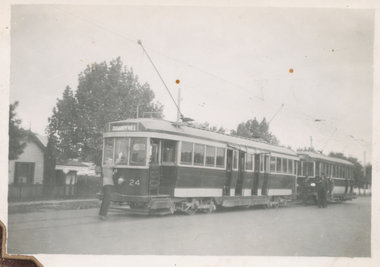
... ... Quarry Hill... tram...Photograph of No. 24 at the Quarry Hill terminus, with No. 22 behind. Poles are being reversed. Tram has the destination of Quarry Hill. ...Yields information about Bendigo trams 24 and 22 and the Quarry Hill terminus. Trams tramways Bendigo Bogie Trams Quarry Hill tram 138 tram 24 In pencil on rear "SEC Bendigo No. 24, ex M&MTB 138" and "Peter Duckett" in bottom right hand corner. ...Photograph of No. 24 at the Quarry Hill terminus, with No. 22 behind. Poles are being reversed. Tram has the destination of Quarry Hill. Photo by Peter Duckett, 1946. Black and White print contained within the Wal Jack Bendigo and Geelong Album, see Reg Item 5003 for more details. Yields information about Bendigo trams 24 and 22 and the Quarry Hill terminus.Black and white photograph with notes on the rear.In pencil on rear "SEC Bendigo No. 24, ex M&MTB 138" and "Peter Duckett" in bottom right hand corner.trams, tramways, bendigo, bogie trams, quarry hill, tram 138, tram 24 -
 Ballarat Tramway Museum
Photograph - Black & White Photograph/s, Wal Jack, 12/04/1959 12:00:00 AM
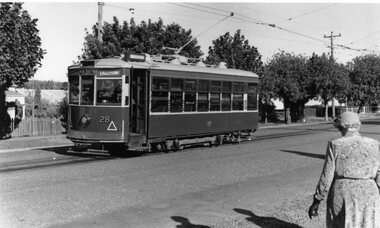
... ... Quarry Hill... tram...Black and white print of Bendigo 28 at the Quarry Hill terminus, 12/4/1959, photo by Wal Jack. Has a lady walking across to the tram - dressed in gloves and hat. ...Yields information about Ballarat's trams, and the City centre area and motor vehicles late 1950's. trams tramways Bendigo Quarry Hill tram 28 On rear of copy "SEC Bendigo #28 / Quarry Hill terminus / 12/4/59 / Wal Jack photo / National Railway Museum. ...Yields information about Ballarat's trams, and the City centre area and motor vehicles late 1950's.Black and white print of Bendigo 28 at the Quarry Hill terminus, 12/4/1959, photo by Wal Jack. Has a lady walking across to the tram - dressed in gloves and hat. Tram has the destination of Eaglehawk. Photo print courtesy of Port Dock Railway Museum, now the National Railway Museum. See worksheet 4311 for letter and details of prints sent to Bill Scott, 19/10/2001. Any photo credit to mention NRM Collection.On rear of copy "SEC Bendigo #28 / Quarry Hill terminus / 12/4/59 / Wal Jack photo / National Railway Museum.trams, tramways, bendigo, quarry hill, tram 28 -
 Ballarat Tramway Museum
Slide - 35mm slide/s - set of 2, Peter Moses, Jan. 1969
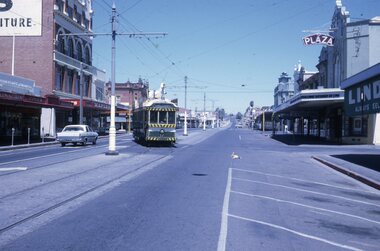
... ... Quarry Hill... tram...Advised that the Sunday run outs in the late morning, early afternoon used this crossover to form the first Eaglehawk tram service. .2 - No. 17, with destination of "Quarry Hill", near the Railway station. ...Tramways trams Bendigo Mitchell St Quarry Hill tram 17 On the rear of the slide: .1 - in red ink "Bendigo Mitchell St." , "6" and "P. ...Set of two photos of SEC Bendigo No. 17 in Mitchell St. Bendigo. .1 - No. 17 using the crossover. Has destination of "Eaglehawk". In the background are the Plaza theatre, Maples store and Coles store. Advised that the Sunday run outs in the late morning, early afternoon used this crossover to form the first Eaglehawk tram service. .2 - No. 17, with destination of "Quarry Hill", near the Railway station. Has a Wilkinson Sword and SEC "Electric Cooking serves you best", roof advertisements. Kodak cardboard mount slide, taken by Peter Moses, Jan. 1969.On the rear of the slide: .1 - in red ink "Bendigo Mitchell St." , "6" and "P. Moses" in black ink. .2 - "3" in red ink and "P. Moses" in black ink.tramways, trams, bendigo, mitchell st, quarry hill, tram 17 -
 Ballarat Tramway Museum
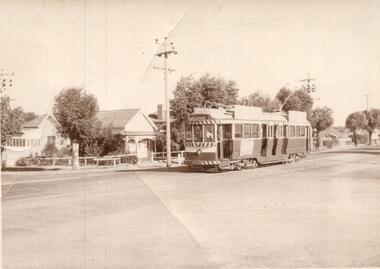
Photograph - Black & White Photograph/s, Neville Gower, 27/03/1971 12:00:00 AM
... ... Quarry Hill ...Tram...Trams Tramways Bendigo Maximum Traction Quarry Hill Tram 17 On rear in ink 'Opposite Cemetery, Quarry Hill route, Bendigo, Sunday pm, 273/71, No. 17' Black & White photograph of Bendigo No. 17 at Quarry Hill terminus 27/3/1971 - Sunday pm with houses in background. ...Black & White photograph of Bendigo No. 17 at Quarry Hill terminus 27/3/1971 - Sunday pm with houses in background. Actual image is 53H x 78W on a sheet of paper 70H x 88W. Reimaged 17/7/2019 both front and back.On rear in ink 'Opposite Cemetery, Quarry Hill route, Bendigo, Sunday pm, 273/71, No. 17'trams, tramways, bendigo, maximum traction, quarry hill , tram 17 -
 Ballarat Tramway Museum
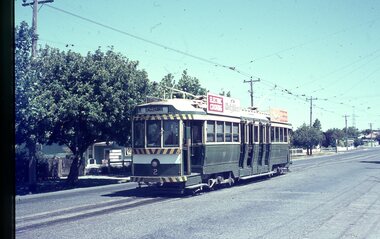
Slide - 35mm slide/s, Travis Jeffrey, late 1960's or early 1970's
... ... Quarry Hill... tram...Quarry Hill terminus. Photo taken late 1960's early 1970's. No. 2 has the destination of Eaglehawk and on the tram two SEC roof advertisements, "Electric Cooking Matchless" and "Everything's fine in my all electric kitchen"....Tramways trams Bendigo Quarry Hill tram 2 "BES 40" in pencil Agfa plastic mount (blue base, white cover) with a photo of Bendigo No. 2 at Quarry Hill terminus. ...Agfa plastic mount (blue base, white cover) with a photo of Bendigo No. 2 at Quarry Hill terminus. Photo taken late 1960's early 1970's. No. 2 has the destination of Eaglehawk and on the tram two SEC roof advertisements, "Electric Cooking Matchless" and "Everything's fine in my all electric kitchen"."BES 40" in penciltramways, trams, bendigo, quarry hill, tram 2 -
 Ballarat Tramway Museum
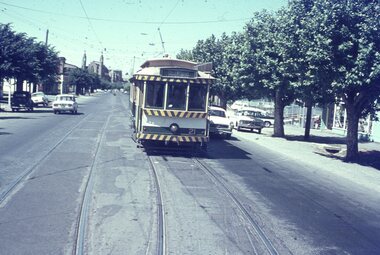
Slide - 35mm slide/s, Travis Jeffrey, late 1960's or early 1970's
... ... Quarry Hill... tram...Tramways trams Bendigo Quarry Hill tram 21 "BES 41" in pencil Agfa plastic mount (blue base, white cover) with a photo of Bendigo No. 21 in the loop at Myrtle St, High St, bound for Golden Square. ...Agfa plastic mount (blue base, white cover) with a photo of Bendigo No. 21 in the loop at Myrtle St, High St, bound for Golden Square. Photo taken late 1960's early 1970's from the window of another tram, either inbound or outbound, at the southern end of the loop. In the background is the Sacred Heart Cathedral ."BES 41" in penciltramways, trams, bendigo, quarry hill, tram 21 -
 Ballarat Tramway Museum
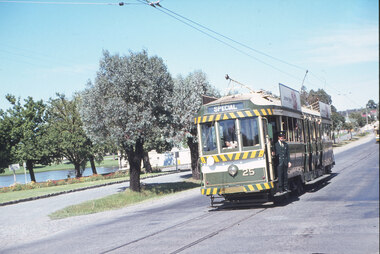
Slide - 35mm slide/s - set of 20, Eldon Hogan, 22/05/1971 12:00:00 AM
... ... Quarry Hill... tram....13 - No. 29 and 30 at the intersection of High St and Brazier St with Church or School hall in the background. .14 - ditto .15 - ditto .16 - No. 25 and the two Birneys at the Eaglehawk terminus. .17 - No. 29 and two other trams at ditto .18 - No. 30 and 19 adjacent to the Lake View Hotel, McCrae St .19 - No. 5 and 25 crossing on the Eaglehawk Line, Ironbark? .20 - No. 29 at Quarry Hill...Tramways trams Bendigo Lake Weeroona Pall Mall Golden Square Eaglehawk Quarry Hill tram 25 tram 30 tram 29 tram 5 tram 18 tram 19 tram 24 tram 25 Set of 20 35mm Agfa colour blue and white plastic mount slide - featuring photos taken during an Association of Railway Enthusiasts Tour by Eldon Hogan. ...Set of 20 35mm Agfa colour blue and white plastic mount slide - featuring photos taken during an Association of Railway Enthusiasts Tour by Eldon Hogan. Folder had the date "22/5/1971" on it. Scanned on the Canon scanner at the depot 15/12/2005 at the time of the installation of the scanner. .1 - No. 25 in Nolan St with Lake Weeroona in the background. .2 - Three Birneys at the Depot junction, 30 and 29 with Conoles Hotel, McCrae St in the background. .3 - No. 5 in front of the Shamrock Hotel, Pall Mall .4 - No. 29 in front of the Shamrock Hotel with Stonemasons sign in the background. .5 - No. 18 ditto .6 - No. 30 and another Birney at the Quarry Hill terminus .7 - No. 24 southbound High St at the Violet St intersection with a "Mine Open" sign in the foreground and the Cathedral in the background. .8 - No. 19 at the Golden Square terminus, with the Golden Square Hotel in the background. .9 - No. 29 - side on view, North Bendigo line? Thunder St? .10 - No. 30 crossing the railway overbridge, inbound from Eaglehawk with a number of photographers in the foreground. .11 - No. 29? ditto .12 - No. 5 outbound - side on view, Thunder St, North Bendigo line? .13 - No. 29 and 30 at the intersection of High St and Brazier St with Church or School hall in the background. .14 - ditto .15 - ditto .16 - No. 25 and the two Birneys at the Eaglehawk terminus. .17 - No. 29 and two other trams at ditto .18 - No. 30 and 19 adjacent to the Lake View Hotel, McCrae St .19 - No. 5 and 25 crossing on the Eaglehawk Line, Ironbark? .20 - No. 29 at Quarry Hilltramways, trams, bendigo, lake weeroona, pall mall, golden square, eaglehawk, quarry hill, tram 25, tram 30, tram 29, tram 5, tram 18, tram 19, tram 24, tram 25 -
 Ballarat Tramway Museum
Slide - 35mm slide/s, Noel Simons, 21/11/1962 12:00:00 AM
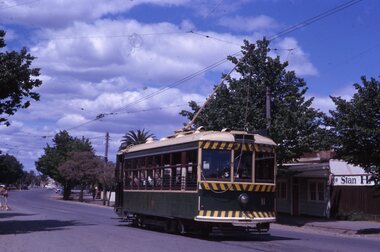
... ... Quarry Hill... tram...Set of 6 transparencies taken on 21/11/1962 on Kodak mounts. 1189.1 - Bendigo No.11 at Quarry Hill terminus. Photo taken looking in along the route. Tram has destination of North Bendigo. 1189.2 - No. 21 in Pall Mall bound for North Bendigo. ...Tramways trams Bendigo Golden Square Pall Mall Mitchell St. Quarry Hill tram 2 tram 11 tram 17 tram 21 Information written on in black ink and date stamped on purple ink. 1189.1 - "Birney car No. 11 in High St. ...Set of 6 transparencies taken on 21/11/1962 on Kodak mounts. 1189.1 - Bendigo No.11 at Quarry Hill terminus. Photo taken looking in along the route. Tram has destination of North Bendigo. 1189.2 - No. 21 in Pall Mall bound for North Bendigo. Tram has roof ads for Mamouney's furniture and SEC. In the background are the National Bank building, Dad and Dave's Cafe and the Beehive Buildings and the London Pharmacy. 1189.3 - No. 2 in Mitchell St, just after crossing over railway bridge. Photo taken after tram has passed photographer. Has what appears to be an SEC road works crew in the background. Has destination of Quarry Hill. 1189.4 - No. 17 climbing Mitchell St. on the start of the single track section, just before crossing the railway bridge. Has destination of Quarry Hill and the large Maples building sign in the background. 1189.5 - as for 1189.4 but after tram has passed photographer. Has an Ilford film roof ad and an SEC roof ad. Railway bridge in the background. 1189.6 - No. 21 at Charing Cross with passengers boarding. Tram has destination of North Bendigo and roof ads for SEC 'Electric Cooking' and Sandhurst Milk. In background are the buildings on the south side of High St. Also has a SEC worker in white overalls sweeping the track.Information written on in black ink and date stamped on purple ink. 1189.1 - "Birney car No. 11 in High St. Bendigo at Golden Square terminus" 1189.2 - "No. 21 in Pall Mall Bendigo near Charing Cross" 1189.3 - "No. 2 in Mitchell St. Bendigo, just after crossing bridge over railway line (Quarry Hill route)" 1189.4 - "No. 17 in Mitchell St. Bendigo, climbing the hill the bridge over the railway line. (Quarry Hill route)" 1189.5 - "No. 17 in Mitchell St., Bendigo approaching bridge over Railway line (Quarry Hill route)" 1189.6 - "No. 21 at Charing Cross, Bendigo"tramways, trams, bendigo, golden square, pall mall, mitchell st., quarry hill, tram 2, tram 11, tram 17, tram 21 -
 Ballarat Tramway Museum
Slide - 35mm slide/s - set of 20, Noel Simons, 21/05/1971 12:00:00 AM
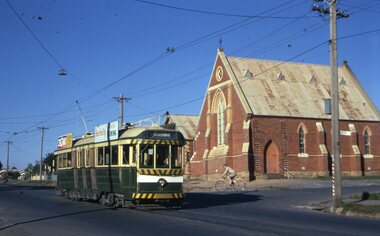
... ... Quarry Hill... Tram...Photo taken after tram has passed photographer. 1197.10 - No.26 bound for Quarry Hill, leaving Long Gully Loop? ...Tramways trams Bendigo Long Gully Railway Bridge Jobs Gully Trackwork Nolan St Quarry Hill Tram Stops Golden Square tram 2 tram 5 tram 17 tram 21 tram 26 tram 28 Information written on in black ink and date stamped on purple ink. 1197.1 - "No. 5 at Creeth St. ...Set of 20 transparencies taken on 21/5/1971 on Kodak mounts. 1197.1 - Bendigo No. 5 en route to Eaglehawk at Creeth St Long Gully. Tram has a SEC roof ad and Cinzano roof ad. 1197.2 - No 5 approaching Needle Loop between Long Gully and California Gully. On left hand side is the City of Bendigo sign, indicating city boundary. 1197.3 - As for 1197.2 but actually entering loop. Photo taken after tram has passed photographer. 1197.4 - No. 26 bound for Eaglehawk descending the railway bridge near Eaglehawk, at Jobs Gully. 1197.5 - as for 1197.4, but after crossing bridge, now ascending a hill. Photo taken after tram has passed photographer. 1197.6 - No. 26 climbing High St. hill Eaglehawk, nearing end of Double track, bound for Quarry Hill. Shows centre of the road poles. 1197.7 - As for 1197.6, with tram entering single track section. Photo taken after tram has passed photographer. Has a BP service station in the background. 1197.8 - No. 26 (bound for Quarry Hill) crossing No. 17 (Eaglehawk) at Job's Gully Loop. 1197.9 - No. 17 climbing railway bridge at Job's Gully, en route to Eaglehawk. Photo taken after tram has passed photographer. 1197.10 - No.26 bound for Quarry Hill, leaving Long Gully Loop? Has the Creeth St. church in l197.l in the far background. Photo taken after tram has passed photographer. 1197.11 - Tramway Point work at the northern end of Long Gully Loop. 1197.12 - No. 17 en route for Quarry Hill turning into View St. from Bamard St. Tram has SEC roof ads "Everything fine in my all electric Kitchen' and 'Electric Cooking is Matchless'. 1197.13 - as for 1197.12, but tram has turned into View St and about to enter the double line track. Photo taken after tram has passed photographer. 1197.14 - No. 21 enters Nolan St after turning from MacRae St. en route to Bendigo. Note sign on its own post noting tram turns "Beware Tram Turns" and stop sign on adjacent pole "Trams stop on Request". No. 21 has two SEC roof ads. 1197.15 - No. 21 in Nolan St. after turning from Bridge St. (White Hills Road). Note signal light for Bridge St. loop on pole corner of street. Photo taken after tram has passed photographer. 1197.16 - No. 2 bound for Eaglehawk at unknown location. 1197.17 - Tram stop sign on a pole "CARS STOP BY REQUEST" 1197.18 - No. 5 in Carpenter St.? en route to Quarry Hill. 1197.19 - No. 28 has just arrive at Golden Square terminus, passengers are disembarking and the trolley pole is being turned. Golden Square Hotel in the background. 1197.20 - No. 28 at Golden Square terminus. Has a "Nothing beats Briquettes for hear roof ad. Information written on in black ink and date stamped on purple ink. 1197.1 - "No. 5 at Creeth St. Long Gully" 1197.2 - "No. 5 approaching Needle Loop between Long Gully and California Gully" 1197.3 - "No. 5 at Needle Loop between Long Gully and California Gully" 1197.4 - "No. 26 crossing railway bridge at Job's Gully near Eaglehawk" 1197.5 - "No. 26 just after crossing railway bridge at Job's Gully near Eaglehawk/ 1197.6 - "No. 26 in High St. Eaglehawk" 1197.7 - "No. 26 at end of double track in High St. Eaglehawk" 1197.8 - "Nos. 26 and 17 crossing at Job's Gully Loop" 1197.9 - "No. 17 crossing railway bridge at Job's Gully near Eaglehawk". 1197.10 - "No. 26 at Long Gully" 1197.11 - 'Northern end of points at Long Gully Loop". 1197.12 - "No. 17 turning into View St. from Bamard St. Bendigo". 1197.13 -'No. 17 at beginning of double track in View St. after leaving Bamard St. Bendigo. 1197.14 - "No. 21 enters Nolan St. from MacRae St. Bendigo." 1197.15 - "No. 21 in Nolan St. Bendigo just after leaving White Hills Road." 1197.16 - "No. 2" 1197.18 - "No. 5" 1197.19 - "Birney car No. 28 at Golden Square Terminus" 1197.20 "Birney car No. 28 at Golden Square Terminus" tramways, trams, bendigo, long gully, railway bridge, jobs gully, trackwork, nolan st, quarry hill, tram stops, golden square, tram 2, tram 5, tram 17, tram 21, tram 26, tram 28 -
 Ballarat Tramway Museum
Photograph - SEC Bendigo tram 17 at the Quarry Hill, Keith Kings, 9/01/1952
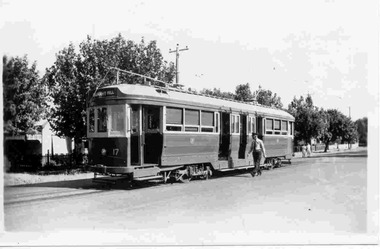
... SEC Bendigo tram 17 at the Quarry Hill......Quarry Hill... tram...Photograph of SEC Bendigo tram 17 at the Quarry Hill terminus. Date of photo 9/1/1952. ...Yields information about Bendigo 17 and the Quarry Hill terminus. trams tramways Bendigo Quarry Hill tram 17 Stamp in top left hand corner and handwritten number with "K.S. ...Black and White photograph contained with Reg. Item 1902 - Photo Album from Keith Kings to Les Denmead 1970. Photograph of SEC Bendigo tram 17 at the Quarry Hill terminus. Date of photo 9/1/1952. Tram showing destination of Quarry Hill. Has driver walking alongside the tram. Keith Kings No. F(k)(3) Black and White print contained within the Wal Jack Bendigo and Geelong Album, see Reg Item 5003 for more details. Added 10/7/2013.Yields information about Bendigo 17 and the Quarry Hill terminus.Black and white print with photographer’s notes on the rear.Stamp in top left hand corner and handwritten number with "K.S. Kings No. F(k)(3) Copyright reserved". In blue ink "Bendigo / No.17 / Quarry Hill terminus / 9/1/52". .1 - has the additional words "ex Melbourne C-44"trams, tramways, bendigo, quarry hill, tram 17 -
 Ballarat Tramway Museum
Slide - SECV Bendigo Birney No. 28 at Quarry Hill, Wal Jack, 12/04/1959
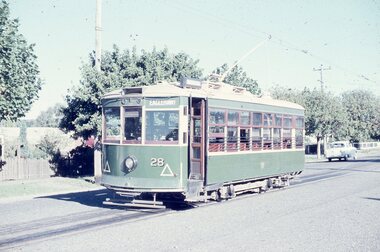
... ... Quarry Hill... tram...Bendigo Birney No. 28 at Quarry Hill Terminus, on 12-4-1959. Destination Eaglehawk shown. Photo over exposed. Tram...Yields information about Bendigo 28 and the Quarry Hill terminus. Tramways trams Bendigo Birney Quarry Hill tram 28 'SEC Bendigo No. 28 Birney at Quarry Hill, 12-4-59' and 'W.Jack' in blue ink Kodak cardboard slide with handwritten notes. ...Bendigo Birney No. 28 at Quarry Hill Terminus, on 12-4-1959. Destination Eaglehawk shown. Photo over exposed. Tram has large triangles on front panels.Yields information about Bendigo 28 and the Quarry Hill terminus.Kodak cardboard slide with handwritten notes.'SEC Bendigo No. 28 Birney at Quarry Hill, 12-4-59' and 'W.Jack' in blue inktramways, trams, bendigo, birney, quarry hill, tram 28 -
 Bendigo Historical Society Inc.
Slide - BENDIGO & EASTER FAIR, 1972
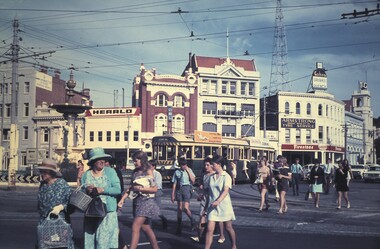
... Bendigo Trams. Quarry Hill tram at Alexandra Fountain, Charring Cross, Bendigo. ...SLIDE Bendigo bendigo trams. tram view point Bendigo Trams. Quarry Hill tram at Alexandra Fountain, Charring Cross, Bendigo. ...Bendigo Trams. Quarry Hill tram at Alexandra Fountain, Charring Cross, Bendigo. View point in background, buildings include news agent, now Whirrake Restaurant, Armstrong Tires and T&G.slide, bendigo, bendigo trams., tram view point -
 Ballarat Tramway Museum
Photograph - Black & White, Bendigo 3 climbing Mitchell St, late 1950's
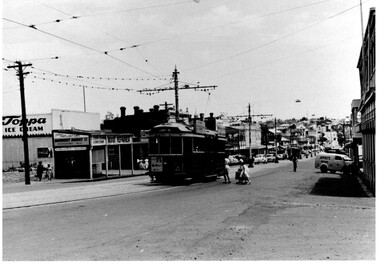
... Quarry Hill... Overhead... tram...Trams tramways Bendigo Mitchell St Quarry Hill Overhead tram 3 "TMSV Sales" stamp on rear. ...Black and White photograph, of Bendigo 3 climbing Mitchell St, near the Railway Station with the Destination of Quarry Hill. Has a Hutton's Ham ad on the front drivers panel and two rood ads. In the background are Sandhurst Dairies shop advertising Toppa Ice Cream, a boot repairer and a van marked Jeffreys Bread parked on the north side of Mitchell St. Nearing the point where the double track became single - see the signal wire insulators in the overhead. Printed on Fujichrome paper. Two copies held."TMSV Sales" stamp on rear. On rear of in ink 'HTT16 = MM N 102 = Geel 32 = BED 3"trams, tramways, bendigo, mitchell st, quarry hill, overhead, tram 3 -
 Ballarat Tramway Museum
Photograph - SECV Bendigo 22 at Quarry Hill, Wal Jack, 1/01/1941
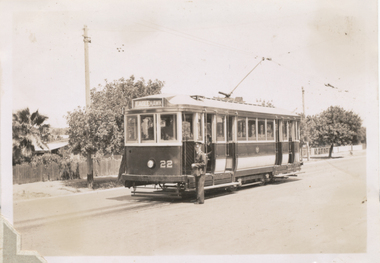
... Quarry Hill... Conductors... tram...Photo of No. 22 at Quarry Hill 1-1-1941, has the conductor standing alongside the front of the tram. ... terminus and tram 22. trams tramways Bendigo Quarry Hill Conductors tram 22 On the rear in blue ink "T160, Bendigo Tramways, No. 22 at Quarry Hill 1-1-41" "W. ...Photo of No. 22 at Quarry Hill 1-1-1941, has the conductor standing alongside the front of the tram. The tram has the destination of Eaglehawk. Photo by Wal Jack, contained within the Wal Jack Bendigo and Geelong Album, see Reg Item 5003 for more details. Printed on Kodak Velox paper. i1 - scan of print in the album i2 - rear of image i3 - scan of negative at 3200dpi added 6/6/2020. Yields information about the Quarry Hill terminus and tram 22.Black and White print with the photographer's notes on the rear.On the rear in blue ink "T160, Bendigo Tramways, No. 22 at Quarry Hill 1-1-41" "W. Jack photo" in bottom right hand corner.trams, tramways, bendigo, quarry hill, conductors, tram 22 -
 Ballarat Tramway Museum
Photograph - SECV Bendigo No. 3 at Quarry Hill, Wal Jack, 7/10/1939
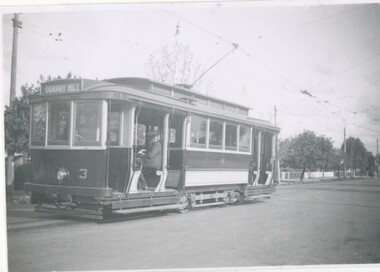
... Quarry Hill... Crews... tram...Photo of No. 3 at Quarry Hill 7-10-1939, has the driver sitting in the front of the tram. The tram has the destination of Quarry Hill. ...Yields information about Bendigo tram No. 3 and the Quarry Hill terminus. trams tramways Bendigo Quarry Hill Crews tram 3 On the rear in blue ink "SEC Bendigo No 3 at Quarry Hill, Rly Picnic Day 7/10/39" with Wal Jack copyright stamp in the top right hand corner and the number "T193" written in. ...Photo of No. 3 at Quarry Hill 7-10-1939, has the driver sitting in the front of the tram. The tram has the destination of Quarry Hill. Photo by Wal Jack. Print contained within the Wal Jack Bendigo and Geelong Album, see Reg Item 5003 for more details. i1 - scan of print in the album i2 - rear of image i3 - scan of negative at 3200dpi added 6/6/2020.Yields information about Bendigo tram No. 3 and the Quarry Hill terminus.Black and White print with photographer's notes on the rear.On the rear in blue ink "SEC Bendigo No 3 at Quarry Hill, Rly Picnic Day 7/10/39" with Wal Jack copyright stamp in the top right hand corner and the number "T193" written in.trams, tramways, bendigo, quarry hill, crews, tram 3 -
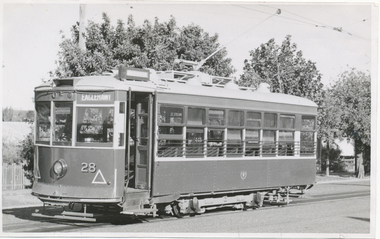 Ballarat Tramway Museum
Photograph - SECV Bendigo Birney No.28 at Quarry Hill, Wal Jack, 12/04/1959
... Quarry Hill... Birney... tram... tramways Bendigo Quarry Hill Birney tram 28 On the rear in black ink "SEC Bendigo #28 at Quarry Hill, about to leave for Eaglehawk, 4.00pm, Sun 12th April 1959", in bottom left hand corner "Wal Jack Photo" Black and white print with photographer’s notes on the rear. ...Photo of Bendigo Birney No.28 at Quarry Hill, Photo Wal Jack, with the destination of Eaglehawk - 12/4/1959.Black and White print contained within the Wal Jack Bendigo and Geelong Album, see Reg Item 5003 for more details. i1 - scan of print in the album i2 - rear of image i3 - scan of negative at 3200dpi added 6/6/2020.Yields information about Bendigo Birney No. 28 and the Quarry Hill terminus. Black and white print with photographer’s notes on the rear.On the rear in black ink "SEC Bendigo #28 at Quarry Hill, about to leave for Eaglehawk, 4.00pm, Sun 12th April 1959", in bottom left hand corner "Wal Jack Photo"trams, tramways, bendigo, quarry hill, birney, tram 28 -
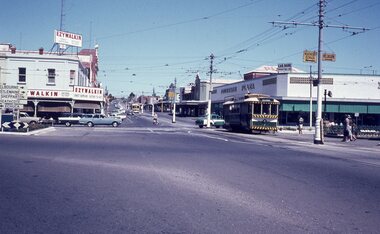 Ballarat Tramway Museum
Slide - 35mm slide/s, early 1960's
... Quarry Hill... Eaglehawk... tram...A Birney tram in background heading for Quarry Hill. Photo shows 'Ezywalkin' and 'Fountain Plaza' buildings, has large white with black lettering road signs on left. ...Tramways trams Bendigo Charing Cross Quarry Hill Eaglehawk tram 7 nil Bendigo Charing Cross, looking east towards railway station, with SEC No. 7 about to depart for Eaglehawk. ...Bendigo Charing Cross, looking east towards railway station, with SEC No. 7 about to depart for Eaglehawk. A Birney tram in background heading for Quarry Hill. Photo shows 'Ezywalkin' and 'Fountain Plaza' buildings, has large white with black lettering road signs on left. On centre pole in front of tram is smaller road direction signs (yellow with black letters) for Echuca, Heathcote and Melbourne. Tram has dash canopy lights, early 1960's.niltramways, trams, bendigo, charing cross, quarry hill, eaglehawk, tram 7
