Showing 48 items matching "signals morse"
-
 Bendigo Military Museum
Pamphlet - PAMPHLET SIGNALS, WAR OFFICE, Aide Memoire - Message writing and Radio Training 1944, 14.5.1944
... ...Signals Morse...Refer Cat No 383.2 for his service history. books-technical Signals Morse military At top in black pencil, “HQ SQD” Cardboard cover, folds out to reveal Radio Training procedure 1944 and morse code. ...Belonged to Thomas Henry ISER V24933 and VX102660 2nd AIF. Refer Cat No 383.2 for his service history.Cardboard cover, folds out to reveal Radio Training procedure 1944 and morse code.At top in black pencil, “HQ SQD”books-technical, signals morse, military -
 Dandenong/Cranbourne RSL Sub Branch
Equipment - Morse Signal Key, Unknown
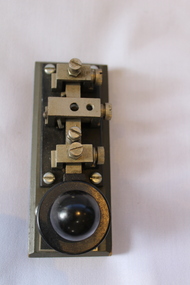
... Morse Signal Key...Morse Signal Key....Dandenong/Cranbourne RSL Sub Branch 44 – 50 Clow Street Dandenong melbourne WWII Historical Significance Type 3rz 018 serial # 2543. AWA Morse Signal Key. Equipment Morse Signal Key AWA ...WWII Historical SignificanceMorse Signal Key.Type 3rz 018 serial # 2543. AWA -
 Bendigo Military Museum
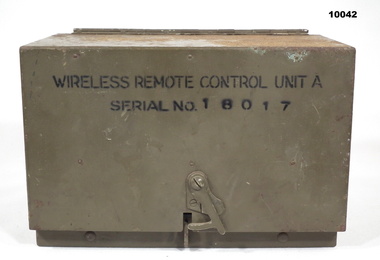
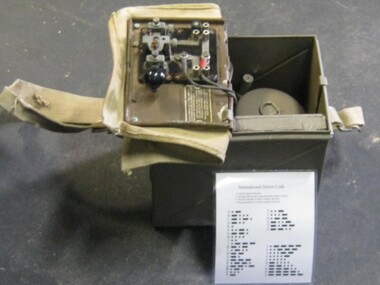
Equipment - WIRELESS REMOTE CONTROL UNIT, Stromberg-Carlson, 1941
... Signals...Army...Morse...Bendigo Military Museum 37 - 39 Pall Mall Bendigo goldfields Wireless Remote Control Unit Signals Army Morse code Inside on Battery cover is: - “Wireless Remote Control Units 'A'./ Stromberg Carlson Serial No....... 1941” Inside on front panel is :- “Serial No. 18017/ D^D Vac No. ...Heavy cast Aluminium box with hinged lid. Colour is drab olive. Each end has a belt loop. There is a semi rotating clip on the front of the lid section to hold it shut. Inside are Morse Key, 3 switches, Buzzer Assembly, 3 terminals and a built in battery box. Inside the lid are the circuits for the device and operating instructions. On lid is stamped 'D^D'. On front is "Wireless Remote Control Unit A, Serial No. 18017. Inside is marked serial 18017. Inside on Battery cover is: - “Wireless Remote Control Units 'A'./ Stromberg Carlson Serial No....... 1941” Inside on front panel is :- “Serial No. 18017/ D^D Vac No. ZA 7533".wireless remote control unit, signals, army, morse code -
 National Vietnam Veterans Museum (NVVM)
Equipment - Equipment, Army, Trainer - Morsecode
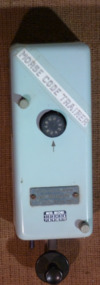
... Signals...Trainer...Morse...This item was donated by Leading Aircraftman Gregory Frederick Mead (A316860) who was with the Royal Australian Air Force and served in Vietnam with Base Support Flight from May 1968 to September 1968 and No. 1 Operational Support Unit from September 1968 to May 1969 Signals Trainer Morse Code Leading Aircraftman Gregory Frederick Mead A316860 Royal Australian Air Force RAAF Base Support Flight No. 1 Operational Support Unit NS No. 5805-99-580-8558 Key telegraph F.I.L.71 Ser.No 2353 Metal, plastic, pale blue paint, black and silver knobs, On/Off switch, morse key. ...This item was donated by Leading Aircraftman Gregory Frederick Mead (A316860) who was with the Royal Australian Air Force and served in Vietnam with Base Support Flight from May 1968 to September 1968 and No. 1 Operational Support Unit from September 1968 to May 1969Metal, plastic, pale blue paint, black and silver knobs, On/Off switch, morse key. Sticky taped on white paper reads Morse Code Trainer.NS No. 5805-99-580-8558 Key telegraph F.I.L.71 Ser.No 2353signals, trainer, morse code, leading aircraftman gregory frederick mead, a316860, royal australian air force, raaf, base support flight, no. 1 operational support unit -
 Bendigo Military Museum
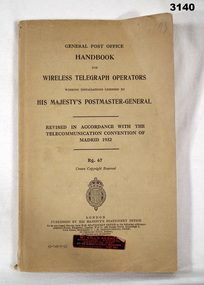
Manual - HANDBOOK, His Majesty's Postmaster General et al, Wireless & Telegraph Operators, 1932
... Text regarding signals, morse code & message procedures....Text regarding signals, morse code & message procedures. Wireless & Telegraph Operators Manual HANDBOOK His Majesty's Postmaster General His Majesty's Stationery Office, London. ...Khaki coloured soft cover with black print. At the bottom is a symbol of His Majesty's Stationery Office, London. 123 pages plus annexes. Illustrated advertising. Text regarding signals, morse code & message procedures.books-manuals/reference/military/signals, wireless -
 Running Rabbits Military Museum operated by the Upwey Belgrave RSL Sub Branch
Signal Lamp
... Short Range Signal Lamp (with Morse key attached)...Running Rabbits Military Museum operated by the Upwey Belgrave RSL Sub Branch 1 Mast Gully Road Upwey melbourne Equipment WW2 Army Short Range Signal Lamp (with Morse key attached) Signal Lamp ...Short Range Signal Lamp (with Morse key attached)equipment, ww2, army -
 Flagstaff Hill Maritime Museum and Village
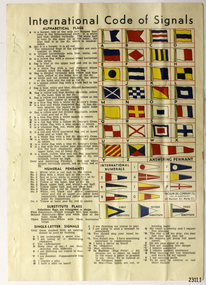
Document
... signals...semaphone alphabet...morse...Signals. Poster containing the Semaphone Alphabet and the Morse Alphabet and Numerals...Flagstaff Hill Maritime Museum and Village 89 Merri Street Warrnambool great-ocean-road flagstaff hill warrnambool shipwrecked-coast flagstaff-hill flagstaff-hill-maritime-museum maritime-museum shipwreck-coast flagstaff-hill-maritime-village poster international code of signals semaphone alphabet morse alphabet Poster containing the International Code of Signals. ...Poster containing the International Code of Signals. Poster containing the Semaphone Alphabet and the Morse Alphabet and Numeralsflagstaff hill, warrnambool, shipwrecked-coast, flagstaff-hill, flagstaff-hill-maritime-museum, maritime-museum, shipwreck-coast, flagstaff-hill-maritime-village, poster, international code of signals, semaphone alphabet, morse alphabet -
 Queenscliffe Maritime Museum
Functional object - Signal Lamp, hand held, black finish with storage box
... Hand held lamp used for Morse code signalling ship-to-ship and ship-to-shore before the introduction of VHF radios were introduced in the mid 1950s....Hand held lamp used for Morse code signalling ship-to-ship and ship-to-shore before the introduction of VHF radios were introduced in the mid 1950s. ...From WWII. Hand held lamp used for Morse code signalling ship-to-ship and ship-to-shore before the introduction of VHF radios were introduced in the mid 1950s.Commonly used signal lamp in WWIIHand Held Aldis signal lamp painted black with storage box.Patt. 53153 Lantern 8 Serial No. E 2987aldis signal lamp, comunications, signals -
 Department of Energy, Environment and Climate Action
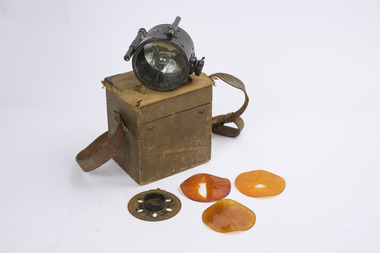
Long Range Signal Lamp
... A portable, electric morse signalling lamp, used for daylight communications The lamp design was patented in 1916 by Oliver Lucas. ...Department of Energy, Environment and Climate Action 71-79 Kyle Road Altona North These lamps were used for military communications during World War 1 and also through to World War 2 Forests Commission Victoria (FCV) Communications Lucas Birmingham 1918 A portable, electric morse signalling lamp, used for daylight communications The lamp design was patented in 1916 by Oliver Lucas. ...These lamps were used for military communications during World War 1 and also through to World War 2A portable, electric morse signalling lamp, used for daylight communications The lamp design was patented in 1916 by Oliver Lucas. This unit was manufactured in 1918 This signalling lamp used an external battery as a power source. An adjustable screen is provided (used with a coloured lens) for night time signalling Includes sight tube Lucas Birmingham 1918forests commission victoria (fcv), communications -
 Bendigo Historical Society Inc.
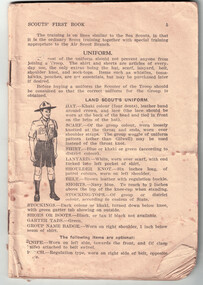
Book - The Australian Scouts' First Book
... The book is a rule and guide book for boy scouts, for example, how to tie knots, how to wear the correct uniform, tests for tenderfoots, signalling, first-aid, Morse code and tests to be undertaken....The book is a rule and guide book for boy scouts, for example, how to tie knots, how to wear the correct uniform, tests for tenderfoots, signalling, first-aid, Morse code and tests to be undertaken. ...The Australian Scouts' First Book was produced in the following editions:- (1) Jan 1931, (2) Sept. 1931, (3) Jan 1933, (4) June 1934, (5) Sept 1935, (6) Sept 1938, (7) Nov 1939 and (8) Jan 1941.Joan Filbey Collection: The Australian scouts' first book : complete tenderfoot and second class test instruction - Pages 5 to 76 are intact - Cover and a few pages are missing. The book is a rule and guide book for boy scouts, for example, how to tie knots, how to wear the correct uniform, tests for tenderfoots, signalling, first-aid, Morse code and tests to be undertaken.history, bendigo, scouts, the australian scouts' first book, joan filbey collection -
 Wangaratta RSL Sub Branch
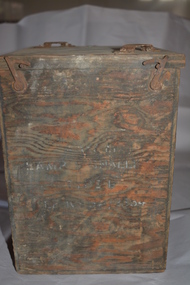
Equipment - Signal Lamp
... This is a WW2 Morse code Signalling Lamp B 5A/2334 in its original wooden box. ...This is a WW2 Morse code Signalling Lamp B 5A/2334 in its original wooden box. ...This is a WW2 Morse code Signalling Lamp B 5A/2334 in its original wooden box. It was probably manufactured by BTH (British Thomson Houston), who were manufacturers of the iconic ‘Aldis Lamp.’ It was used for signalling ship to aircraft and ground to aircraft using morse code.Timber transit box with with hinged opening top secured by non return catches containing black metal round lamp with glass face attached to a low square stand. There are two metal bars attached to lid.Inside lid - Ref No 5A/2338 or 0? Hand painted in white SOS …—-… Box front face - printed in white and barely legible “small lamp”ww2, signalling lamp -
 Bendigo Military Museum
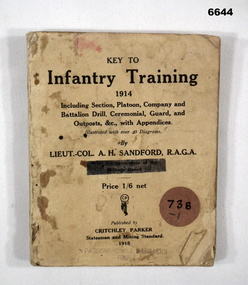
Manual - INFANTRY TRAINING, Critchley Parner, Statesman & Mining Standard, 1914
... Semaphore, morse code signals and the magnetic variations for Aust and NE Capital Cities. ...Semaphore, morse code signals and the magnetic variations for Aust and NE Capital Cities. ...In 1914, Bendigo and Northern Victoria Citizens Force Unit was the 67th (Bendigo) Inf. Castlemaine and Central Vic had the 66th (Mt Alexander) Inf. The book was written by Lt.Col A. H. Sandford R.A.G.A.Cardboard cover booklet. The printing on front cover is black ink. Inside are 128 pages of drill movements. Illustrations. Semaphore, morse code signals and the magnetic variations for Aust and NE Capital Cities. Inside, Page 1 has the embossed stamp of "Bendigo Book Sellers & W. Hampton, Stationery. It has pages of pay for Commonwealth Citizen Forces.Inside written in blue pencil "Simon Auladell"passchendaele barracks trust, 738-i-t 73b, booklet, drill manual -
 National Communication Museum
Equipment - Morse key, Postmaster-General's Department, circa 1920
... A telegraph or Morse key, sends a series of electrical signals down a telegraph line or via radio frequencies; the signals are interpreted as Morse code, a binary form of language constructed of 'dots and dashes', combinations of which correspond to letters of the alphabet. ...Device used to transmit telegraphic messages in Morse code through the manipulation of electric signals. The metal 'key' sits in a central bracket on which it moves up and down aided by a spring, controlled by an operator pushing the black Bakelite knob on the protruding end of the device. ...National Communication Museum 375 Burwood Road Hawthorn melbourne A telegraph or Morse key, sends a series of electrical signals down a telegraph line or via radio frequencies; the signals are interpreted as Morse code, a binary form of language constructed of 'dots and dashes', combinations of which correspond to letters of the alphabet. ...A telegraph or Morse key, sends a series of electrical signals down a telegraph line or via radio frequencies; the signals are interpreted as Morse code, a binary form of language constructed of 'dots and dashes', combinations of which correspond to letters of the alphabet. The motion of the key acts to complete an electrical circuit between the sender and receiver, producing a short pulse 'dot' or longer 'dash,' the space between the code indicates a broken current or wave.Device used to transmit telegraphic messages in Morse code through the manipulation of electric signals. The metal 'key' sits in a central bracket on which it moves up and down aided by a spring, controlled by an operator pushing the black Bakelite knob on the protruding end of the device. The motion presses the key onto a circular metal disc, completing the circuit and sending an electrical pulse to the receiver. The apparatus is secured to a wooden base with wires attached to the terminals; a cut out section of the base suggests wires may have entered through this area, attaching to a battery.Printed ink on base: "PMG"telegraph, telegraphist, morse code, mechanisation -
Federation University Historical Collection
Book, Bedford McNeill, Mining and General Telegraphic Code, 1899, 1899
... Contents include: General suggestions for using code; Morse signals, alphabet and figures; Timetable west of Greenwich; Timetable east of Greenwich; map; Alphabetical Code; Survey of Mineral Properties; Numbers; English Money; American money; Lineal measurement; Weights; Letters; Cables; banks; Finance Companies; Substitutions; Extra Code. ...Contents include: General suggestions for using code; Morse signals, alphabet and figures; Timetable west of Greenwich; Timetable east of Greenwich; map; Alphabetical Code; Survey of Mineral Properties; Numbers; English Money; American money; Lineal measurement; Weights; Letters; Cables; banks; Finance Companies; Substitutions; Extra Code. ...McNeill's Code was arranged to meet the requirements of mining, metallurgical and civil engineers, Directors of Mining, Smelting companies; bankers; stock and share brokers, solicitors, accountants, financiers and general merchants. Bedford McNeil )Assoc. M. Inst. C.E.) was an Associate of the Royal School of Mines; Member of the Institution of Mining and metallurgy and of the north of England Institute of Mining and Mechanical Engineers; and a Fellow of the Geological Society. "OBITUARY - Mr. Bedford McNeill IT is with regret that we announce the death on September 18, due to cerebral hemorrhage, of Mr. Bedford McNeill, the well-known mining engineer, at fifty-five years of age. Apart from his high reputation as a mining engineer, Mr. McNeill’s name was almost a household word in connection with the telegraphic code compiled by him, which was issued originally in 1893, and in an enlarged and revised form in 1908. This code is employed almost without exception by mining-companies and engineers, to whose use it was specially dedicated, and other business men have found it extremely practical for cable communications. [Nature 98, 94-94 (05 October 1916)] Black hard covered book of 807 pages by Bedford McNeil. Contents include: General suggestions for using code; Morse signals, alphabet and figures; Timetable west of Greenwich; Timetable east of Greenwich; map; Alphabetical Code; Survey of Mineral Properties; Numbers; English Money; American money; Lineal measurement; Weights; Letters; Cables; banks; Finance Companies; Substitutions; Extra Code. The book includes the following advertisements: Nobel's Explosives Company; Otto Aerial Ropeways; Tabloid Medicine cases & Chests; Charleton's Report Book for Mining Engineers; Bornhardt's Electrical Firing Machine; On a page towards the front "R. Brook"morse code, mcneill, bedford mcneill, mining, noble's explosives company, otto, charleton, tabloid, bornhadt, brook, r. brook, telegraphy, morse -
 Emerald Museum & Nobelius Heritage Park
Functional object - Signalling Lamp, G.E.C. Mitton, c. 1923
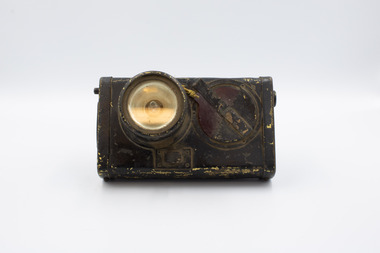
... This electric torch, likely manufactured in 1923, was used in WWII trenches as a way to signal allies using morse code. A small button underneath a thin leather panel on the left face of the lamp would have been used to turn the bulb on and off in quick succession, allowing for messages to be transmitted. ...This electric torch, likely manufactured in 1923, was used in WWII trenches as a way to signal allies using morse code. A small button underneath a thin leather panel on the left face of the lamp would have been used to turn the bulb on and off in quick succession, allowing for messages to be transmitted. ...This electric torch, likely manufactured in 1923, was used in WWII trenches as a way to signal allies using morse code. A small button underneath a thin leather panel on the left face of the lamp would have been used to turn the bulb on and off in quick succession, allowing for messages to be transmitted. The panel of red plastic could be placed over the lense of the lamp, causing it to emit red light as the longer wavelength prevents it from being visible at longer distances as opposed to standard yellow light. The hook on the front face of the lamp allowed a bayonet to be attached by its handle, and the clip on the rear is likely to allow it to be worn on a belt. British manufacturing firm General Electric Company (G.E.C) Mitton was one of several producing similar models of signalling lamp at this time and they were heavily involved in supporting the war effort.This item demonstrates one of the many ways soldiers in Australia were able to communicate without the use of radio transmission and over distances without detection, a key aspect of wartime engineering and electronics development.This signalling lamp is of a rectangular shape with a cylindrical protrusion on its front, similar to that of a camera lense. Within the cylinder is a small light bulb and a panel of glass encloses it. To the right of the cylinder, a circular piece of translucent red plastic rests within a metal casing and is attached to the cylinder with a short piece of string. Below the cylinder is a small hook. On the lamp's rear is a large metal clip, and a small plate with an engraving upon it. The left side of the lamp includes a small, thin panel of leather under which rests a button.Rear, on metal plate: "TORCH ELECTRIC / SIGNAL MK.III / G.E.C. WITTON / NO 3462 / 1923"australia, 1920s, second world war, wwii, world war two -
 Kew Historical Society Inc
Book, Brown, Prior, Anderson Pty Ltd, The Australian Soldiers' Pocket Book : Containing useful information for Australian soldiers, 1940
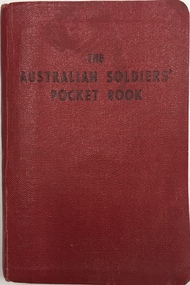
... The 128-page pocket-sized book could be carried everywhere and provided Australian soldiers with a wide range of useful information about the requirements of war service and many other important details such as: The Laws and Customs of War - including Geneva Convention guidelines, notes on spies and insignia of rank; Things a Soldier should Know - including over 60 points; Signaling - including flags, morse code, shipboard bell times and time zone; Decorations Awarded to Australians in the Great War; Arabic and Japanese words; First Aid for gas injuries etc.; Australian Historical Events, facts and figures etc.; and Conduct Overseas - including expectations of behaviour when representing Australia. ...The 128-page pocket-sized book could be carried everywhere and provided Australian soldiers with a wide range of useful information about the requirements of war service and many other important details such as: The Laws and Customs of War - including Geneva Convention guidelines, notes on spies and insignia of rank; Things a Soldier should Know - including over 60 points; Signaling - including flags, morse code, shipboard bell times and time zone; Decorations Awarded to Australians in the Great War; Arabic and Japanese words; First Aid for gas injuries etc.; Australian Historical Events, facts and figures etc.; and Conduct Overseas - including expectations of behaviour when representing Australia. ...Booklet produced in 1940 for members of the 2nd AIF by the Australian Comforts Fund Victorian Division. The 128-page pocket-sized book could be carried everywhere and provided Australian soldiers with a wide range of useful information about the requirements of war service and many other important details such as: The Laws and Customs of War - including Geneva Convention guidelines, notes on spies and insignia of rank; Things a Soldier should Know - including over 60 points; Signaling - including flags, morse code, shipboard bell times and time zone; Decorations Awarded to Australians in the Great War; Arabic and Japanese words; First Aid for gas injuries etc.; Australian Historical Events, facts and figures etc.; and Conduct Overseas - including expectations of behaviour when representing Australia. non-fictionaustralian comforts fund (victoria), second world war 1939-1945, hugh george ferguson -
 Flagstaff Hill Maritime Museum and Village
Photograph - Scene - Warrnambool, C. 1854-1871
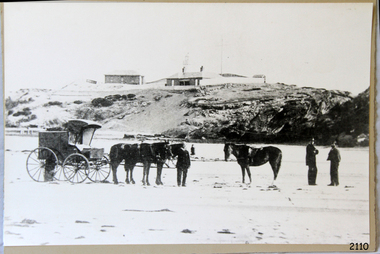
... It was expected that they were competent in Morse code signalling. They would be called to help in times of disasters and shipwrecks and to give official statements about these events. ...It was expected that they were competent in Morse code signalling. They would be called to help in times of disasters and shipwrecks and to give official statements about these events. ...This is an image of the Warrnambool Lighthouse Complex on Middle Island in 1854. The Store, Lighthouse Keeper's Quarters, Lighthouse and Flagstaff are in the background. The foreground shows a covered buggy drawn by two horses and a person in attendance, and another wheeled vehicle behind it with a figure nearby. There is a saddled horse to the right with two males in conversation nearby. The ground is soft, perhaps the riverbed or sandy shore. THE LIGHTHOUSE KEEPERS Lighthouse Keepers were responsible for keeping their Lighthouse’s lights shining at night. They kept a lookout for passing vessels and changes in weather. They were expected to clean, polish and maintain the equipment and buildings. They kept regular and detailed records of who was on watch, and the time the light was lit, trimmed and extinguished. They kept a journal about other events that occurred. They keep regular, accurate Meteorological Logs. It was expected that they were competent in Morse code signalling. They would be called to help in times of disasters and shipwrecks and to give official statements about these events. Many Lighthouse Keepers also volunteered as members of the lifeboat crew. The Lady Bay lighthouses were officially classified as small, so the Keepers had the official titles of Senior Assistant Lighthouse Keeper and Assistant Lighthouse Keeper. They were employed by the Public Service and paid rent to live in the Lighthouse Quarters. They were compulsorily retired at the age of 60, with most receiving a superannuation payment. Despite their time-consuming duties, there was time to follow hobbies and crafts such as growing vegetables, playing musical instruments, making models of buildings including lighthouses, and crafting furniture pieces. An example of a keeper’s skills is the carved fire screen made by /assistant Keeper Thomas Hope in the late 19th century and displayed in the Lighthouse Keeper’s cottage at Flagstaff Hill. Both Alexander and Farncombe had served under Senior Keeper Robert Deverell, who was the first and only Senior Lighthouse Keeper at the Middle Island Complex. John Alexander was the Assistant Keeper in the 1850s. Andrew Farncombe was the last Assistant Keeper at Middle Island, serving there with his family from 1864 to 1871. During 1871 and 1872 the Lighthouse Complex was moved to Flagstaff Hill on Merri Street. Farncombe and Deverell then became the first Keepers and occupants of the Lady Bay Lighthouse Complex at Flagstaff Hill. They continued their service together; overall, Deverell served from 1859 to 1885 and Farncombe from 1864 to 1974. WARRNAMBOOL'S LADY BAY LIGHTHOUSE COMPLEX - The original Lighthouse Complex was built on Middle Island in 1858-1859 then transferred stone-by-stone to Flagstaff Hill in 1871. The Complex comprised the Lighthouse, the Lighthouse Keepers’ Quarters and a Privy. The bluestone Keeper’s Quarters was a cottage divided into two compartments, one for the Senior Keeper and his family, the other for the Assistant Keeper and his family. The bluestone Store was divided into three; a store, a workshop, and an oil store (or office). The Privy comprised a small building also divided into two separate, back-to-back toilets, one for each Keeper and his family. In the 1970s the Flagstaff Hill Planning Board was set up under the chairmanship of John Lindsay. The Board was to make recommendations to the Warrnambool City Council regarding the use of the buildings and the rest of the Crown Land on the site. The Flagstaff Hill Maritime Village opened in 1975 and began renovating the Cottage in stages, during which time evidence of a 1920s fire was found in the eastern section of the cottage. Additions of a porch on the west and a washroom on the east were made in the 1980s. The western part of the building is now a Shipwreck Museum and the east has returned to a late 19th-century Lighthouse Keeper’s cottage and includes the screen made by Assistant Lighthouse Keeper Thomas Hope in the late 19th century. Hope served two periods of time at the Lighthouse. This photograph is significant as a visual record of the original Warrnambool Lighthouse Complex on Middle Island, the origin of what is now the Lady Bay Lighthouse Complex. The photograph is significant for its connection to the Complex, which is now listed on the Victorian Heritage Register, H1520, for being of historical, scientific (technological) and architectural significance to the State of Victoria. The Complex is significant as an example of early colonial development. The photograph is significant for its connection with the important navigational function of the Lighthouses, a function still being performed to this day. The photograph is also significant as it shows an example of buildings organised by the Public Works Department in Victoria in the mid-to-late 19th century. The structures tare still stand strong. Photograph of horses, a buggy and three gentlemen in the foreground and the background shows a lighthouse and accompanying buildings. Printed in black and white. (Another two horse-drawn vehicles are partially visible). The subject is the Lighthouse Complex on Middle Island, Warrnambool, dated between 1854 and 1871.An inscription is handwritten in black pen on the back of the mounting board."The lighthouse and accompanying buildings were / established on Middle Island in 1854, as this / picture shows. In 1871 they were moved to their / present site on Flagstaff Hill."flagstaff hill, flagstaff hill maritime museum, flagstaff hill maritime village, warrnambool, maritime museum, shipwreck coast, lighthouse keeper's cottage, lighthouse residence, lighthouse, chart room, quarters, privy, middle island, beach lighthouse, obelisk, lighthouse complex, lady bay complex, warrnambool port, warrnambool harbour, lady bay, keepers, lighthouse keeper, upper lighthouse, lower lighthouse, assistant keeper, ports and harbours, cottage, meteorological record, 1854, 1871, light keeper -
 Flagstaff Hill Maritime Museum and Village
Document - Plans, Lighthouse Keeper's Quarters Warrnambool, 1858-1909
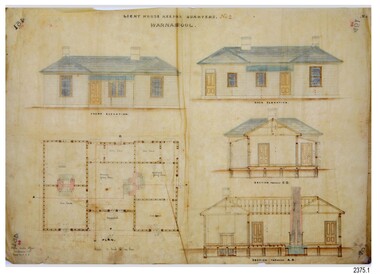
... It was expected that they were competent in Morse code signalling. They would be called to help in times of disasters and shipwrecks, and to give official statements about these events. ...It was expected that they were competent in Morse code signalling. They would be called to help in times of disasters and shipwrecks, and to give official statements about these events. ...The set of seven 1858 plans shows proposed plans for the original Lighthouse Complex that was built on Middle Island in 1858-1859. The whole complex was then transferred to Flagstaff Hill in 1871. The plan, dated 1909, is for proposed additions and repairs to the Quarters at Flagstaff Hill. The plan 'Alterations and Additions' shows alternate plans for changes to the quarters at the Flagstaff Hill location. This plan has no date. The Complex comprised the Lighthouse, the Lighthouse Keepers’ Quarters, the Store (now called the Chart Room) and a Privy, which was not included in these plans. The Keeper’s bluestone Quarters was a cottage divided into two compartments, one for each keeper and his family. The bluestone Store was divided into three; a store, a workshop an oil store (or office). The Privy comprised of a small building also divided into two separate, back-to-back toilets, one for each Keeper and his family. The Flagstaff Hill Keeper's Quarters have had extensions and additions at various times, and these have also been removed at various other times. THE PLANS - *Dec. 1858 (12/58) ‘Lighthouse Keepers Quarters No.2 Warrnambool’ (2375.01)* Public Works Office Melbourne – Front and Back elevations, sections, and floor plan. The drawing shows timber walls. [The floor plan is the closest plan to the current building, however, the walls are timber in this plan.] *Nov. 1858 – No.3 ‘Lighthouse Keepers Quarters Warrnambool’ (2375.02)* Office of Public Works, Melbourne – Back and End elevations and section through. The drawing shows stone walls. One side; Senior Keeper’s bedroom, living room and kitchen with storeroom. Another side; is the Assistant’s bedroom, living room and storeroom. *Nov. 1858 - No.4 ‘Lighthouse Stores Warrnambool’ (2375.03)* Office of Public Works – Front, Side and end elevations, centre section. The drawing shows stone walls. *Nov. 1858 – No.4, ‘Lighthouse Stores No. 2 Warrnambool’ (2375.04)* Office of Public Works – Front, side and end elevations, centre section. The drawing shows timber walls. *Nov. 1858 – ‘Details Lighthouse Keepers Quarters No. 2 Warrnambool’ (2375.05)* Public Works Office Melbourne. The plan shows the foundations, joists and eaves. The drawing shows timber walls. (Nov. 1858 – ‘No.4 ‘Lighthouse No. 2 – Warrnambool’ (2375.06)* Public Works Melbourne (Part of the paper is missing). This plan shows an octagonal tower, internal stairs, a balcony landing, and a weather vane on top. *November 1858 – No. 1, ‘Lighthouse – Warrnambool’ (2375.07)* Office of Public Works Melbourne. This plan shows a round tower, including the stairs, windows on the tower and the weather vane on the top. *4/3/9 [1909] – ‘Additions and Repairs, Lighthouse Quarters, Warrnambool, General Plan’ (2375.8)* Department of Public Works Melbourne’s official stamp is signed by Croft. It shows the floor plans of the Store, Upper Lighthouse and the Quarters. The Store building has three sections; a Store, Work-Shop and Office, with an internal wall between them and separate entries. The Quarters are divided into two dwellings. The Senior Keeper’s side on the left has fireplaces in two of the three bedrooms and there is a pantry and wash house. The Assistant’s side has no fireplaces in the bedrooms and there’s no pantry or washhouse. These plans include proposed changes to the buildings. The Senior Keeper’s Quarters would have a partition on bedroom 2, a bath with plumbing and drainage, a wall moved and a built-in side porch. The Store would also have a built-in porch. The undated plan 'Additions and Alterations' (2375.9) shows alternative arrangements for water tanks, plumbing and such. WARRNAMBOOL'S LADY BAY LIGHTHOUSES- In the 1800s ships sailing from England to Australia began to use Bass Strait as a faster route to Melbourne. Small navigation errors led to many tragic shipwrecks. From 1848 lighthouses were operating along Victoria’s southern coast as a guide for sailors. Coastal towns such as Warrnambool grew and the exchange of trade and passengers were of great benefit. However, the uncertain weather changes, relatively shallow waters and treacherous, hidden rocky reefs were not suitable for a Harbour and in the 1840s and 1850s there were many shipwrecks in the area, with some even stranded in its Lady Bay harbour. A jetty was built in 1850 and a flagstaff to guide seafarers was placed up high on what became known now as Flagstaff Hill. In November 1857 the Victorian Government recommended that Warrnambool Harbour had beacons and two lighthouses to guide vessels into and out of the Harbour safely. The white light of the Middle Island lighthouse was to be used for the first time on September 1, 1859. The red light of the Beach Lighthouse, a wooden obelisk structure, was first operated on March 25, 1860, but in 1868 this light was ‘discontinued’ due to it being too low. Melbourne’s Department of Public Works decided to relocate the Middle Island Lighthouse Complex - Lighthouse, Keeper’s Quarters, Privy, Store Room and even water tanks - to Flagstaff Hill. The lower obelisk was shortened, and a protruding gallery, railing, and external ladder were added, as well as the light from the Beach Lighthouse. A green guiding light was erected on the end of the jetty. The transfer of the Complex began in March 1871. Each shaped stone of the lighthouse was carefully numbered, removed then reassembled on Flagstaff Hill. In 1872 the well was sunk behind the Lighthouse Keeper’s Cottage. The Keepers and families had left Middle Island in April and moved to Flagstaff Hill in October 1871. Vessels entering Lady Bay align the Upper and Lower Lighthouse towers during the day and the lights at night. The Upper Lighthouse is a round tower, the Lower Light is square. The Lighthouses were categorised as harbour lights rather than coastal lights, so they remain under the control of the Victorian Government’s Ports and Harbours section. The lights were originally powered by oil, then acetylene gas, later by electricity, and then converted to solar power in 1988. In 1993 the solar panel was replaced by a battery charger. A decision was made in 1936 to replace the lighthouses’ lights with unattended lights that no longer required Keepers and Assistants. At least 29 Keepers had attended to the lighthouse from its opening in 1859 to when the last official Lightkeepers left In April 1916. The Warrnambool Harbour Board rented out the Quarters from 1916 to 1936. The Board closed down but the rentals continued with other unknown landlords. In the 1970s the Flagstaff Hill Planning Board was set up under the chairmanship of John Lindsay. The Board was to make recommendations to the Warrnambool City Council regarding the use of the buildings and the rest of the Crown Land on the site. The Flagstaff Hill Maritime Village opened in 1975 and began renovating the Cottage in stages, during which time evidence of a 1920s fire was found in the eastern section of the cottage. Additions of a porch on the west and a washroom on the east were made in the 1980s. The western part of the building is now a Shipwreck Museum and the east has returned to a late 19th-century Lighthouse Keeper’s cottage and includes the screen made by Assistant Lighthouse Keeper Thomas Hope during one of his two periods of service there. THE LIGHTHOUSE KEEPERS Lighthouse Keepers were responsible for keeping their Lighthouse’s lights shining at night. They kept a lookout for passing vessels and changes in weather. They were expected to clean, polish and maintain the equipment and buildings. They kept regular and detailed records of who was on watch, and the time the light was lit, trimmed and extinguished. They kept a journal about other events that occurred. They keep regular, accurate Meteorological Logs. It was expected that they were competent in Morse code signalling. They would be called to help in times of disasters and shipwrecks, and to give official statements about these events. Many Lighthouse Keepers also volunteered as members of the lifeboat crew. The Lady Bay lighthouses were officially classified as small, so the Keepers had the official titles of Senior Assistant Lighthouse Keeper and Assistant Lighthouse Keeper. They were employed by the Public Service and paid rent to live in the Lighthouse Quarters. They were compulsorily retired at the age of 60, with most receiving a superannuation payment. Despite their time-consuming duties, there was time to follow hobbies and crafts such as growing vegetables, playing musical instruments, making models of buildings including lighthouses, and crafting furniture pieces. An example of a keeper’s skills is the carved fire screen made by /assistant Keeper Thomas Hope in the early 20th century and displayed in the Lighthouse Keeper’s cottage at Flagstaff Hill. The last occupants of the Middle Island Complex were Senior Keeper Robert Deverell, his Assistant Keeper, Andrew Farncombe, and their families. They all became the first occupants at the Lady Bay Lighthouse Keepers’ Quarters on Merri Street. The Warrnambool Lighthouse Complex plans are the origin of what is now the Lady Bay Lighthouse Complex. They are a record of the people, process and departments involved in bringing the complex into fruition. The plans are significant to the Complex, which is now listed on the Victorian Heritage Register, H1520, for being of historical, scientific (technological) and architectural significance to the State of Victoria. The Complex is significant as an example of early colonial development. The plan are significant for their connection with the important navigational function of the Lighthouses, a function still being performed to this day. The plans are also significant as an example of a product from the Public Works Department in Victoria in the mid-to-late 19th century. The structures built to these plans still stand strong. Plans for the Lighthouse Complex in Warrnambool, including Lighthouses, Keeper's Quarters and Stores. Seven of the plans are on thin fragile paper, one is on thicker, stronger paper. The drawings have been made in pens coloured red and black. They originate from Public Works in Melbourne. Seven were drawn in 1858, one in 1904, the other is not dated.Dec. 1858 - Lighthouse Keepers Quarters No.2 Warrnambool. Public Works Office Melbourne. Nov. 1858 - No.3 ‘Lighthouse Keepers Quarters Warrnambool. Public Works Office Melbourne. Nov. 1858 - No.4 ‘Lighthouse Stores Warrnambool. Office of Public Works. Nov. 1858 - No.4, ‘Lighthouse Stores No. 2 Warrnambool. Office of Public Works. Nov. 1858 - Details Lighthouse Keepers Quarters No. 2 Warrnambool. Public Works Office Melbourne. Nov. 1858 - No.4 ‘Lighthouse No. 2 – Warrnambool. Public Works Melbourne. Nov. 1858 - No. 1, Lighthouse - Warrnambool. Office of Public Works Melbourne. 4/3/9 [1909] - Additions and Repairs, Lighthouse Quarters, Warrnambool, General Plan. Department of Public Works Melbourne. SIGNED "Croft" "15A" on reverse [no date] - Lighthouse Quarters Warrnambool, Additions and Alterations. "9A" on reverseflagstaff hill, warrnambool, lighthouse keeper's cottage, lighthouse residence, lighthouse, plans, public works, melbourne, flagstaff hill maritime museum, maritime museum, shipwreck coast, flagstaff hill maritime village, chart room, quarters, privy, middle island, beach lighthouse, obelisk, lighthouse keeper, assistant keeper, lighthouse complex, lady bay, lady bay complex, keepers, upper lighthouse, lower lighthouse, ports and harbours, cottage, harbour board, flagstaff hill planning board, meteorological record, robert deverell, andrew farncombe, warrnambool port, warrnambool harbour, residence, alterations, repairs, department of works, light keeper -
 Warrnambool and District Historical Society Inc.
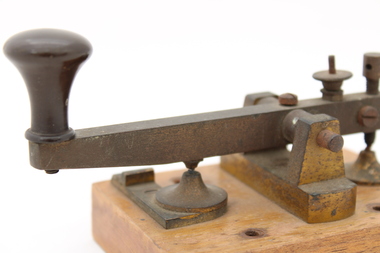
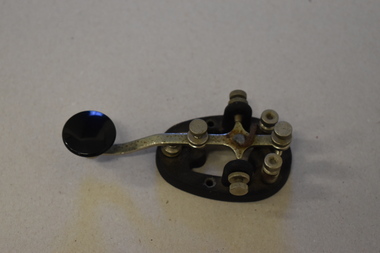
Morse code key, Mid 20th century
... Morse Code is a method of transmitting text information using short and long signals (‘dots and dashes’). ...Morse Code is a method of transmitting text information using short and long signals (‘dots and dashes’). ...This is a Morse Code key. Morse Code is a method of transmitting text information using short and long signals (‘dots and dashes’). It is named after Samuel Morse, the inventor of the telegraph and was developed in the 1860s. It was used extensively in the 1890s for early radio communication before it was possible to transmit voice and continued to be used in the 20th century along with voice transmission , especially by amateur radio persons. It was also used in military and naval communication but not so much today. It is believed that this Morse Code key belonged to Ted Salamy, a jeweller and the first person in Warrnambool to hold an amateur radio licence (1924 Call Sign A3AJ, the 35th licence issued in Victoria).This Morse Code key is of interest as an object more used in the past, especially by amateur radio persons. It is believed to have been the property of Ted Salamy, the first person in Warrnambool to hold an amateur radio licence. This is a metal Morse Code key with an oval metal base. It has three screws inserted in the base and two more screws attached to the sides of the base. There is a key lever on top of the base and this is adjustable. The hinge on which the key lever sits is missing. The lever has a round black knob at one end. ‘Made in U.S.A. H15.682’ Wm.M. Nye Co Inc. Bellevue W.A.’ morse code key, ted salamy,, history of warrnambool -
 Bendigo Military Museum
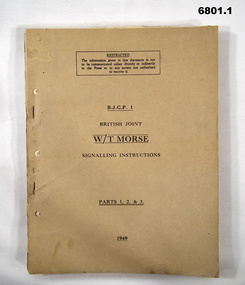
Manual - SIGNALLING INSTRUCTIONS W/T MORSE, British Army, Navy and RAF, 1949
... Morse sig instructions. Chap 2: Specialised forms of WT Procedure, Chap 3: Specialised forms of WT Procedure in limited use. In total there are 290 pages. Fastened with 2 staples. 2. Khaki covered book. Printing on front is in black ink. Pages 119. Chap 4: Title - signalling...Passchendaele Barracks Trust Morse & Signalling instructions Colonel J.W. Swatton 1 & 2. ...Items in the collection re Lt Col J Swatton, refer Cat No 6719.2P for his service details.This is a cardboard covered book(s). They consist of four parts. Part 4 is separate. 1. Khaki covered book. It has black printing on front cover. Internally it is comprised of three chapters, each having a cardboard cover. Chap 1: W/T Morse sig instructions. Chap 2: Specialised forms of WT Procedure, Chap 3: Specialised forms of WT Procedure in limited use. In total there are 290 pages. Fastened with 2 staples. 2. Khaki covered book. Printing on front is in black ink. Pages 119. Chap 4: Title - signalling procedures part 4. Intra Army procedure. It is fastened with 2 staples.1 & 2. Written on back in pencil is, "J.W. Swatton".passchendaele barracks trust, morse & signalling instructions, colonel j.w. swatton -
 Bendigo Military Museum
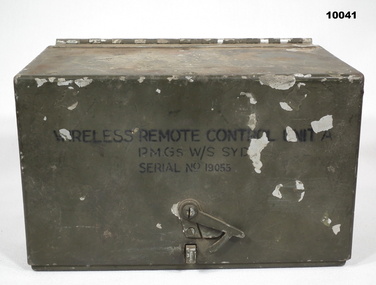
Equipment - WIRELESS REMOTE CONTROL UNIT, PMG, 1944
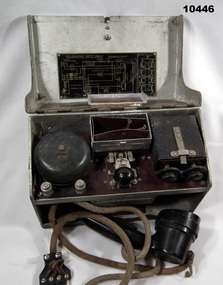
... Bendigo Military Museum 37 - 39 Pall Mall Bendigo goldfields Signals Army Equipment Remote control unit Inside on battery compartment lid is:- "Wireless Remote/ Control Unit A/ PMG W/S STD/ Ser No. 19055/ 1944” Heavy Cast aluminium box with hinged lid. Colour is drab olive. Each end has a belt loop. There is a semi rotating clip on the front of the lid section to hold it shut. Inside are, Morse ...Heavy Cast aluminium box with hinged lid. Colour is drab olive. Each end has a belt loop. There is a semi rotating clip on the front of the lid section to hold it shut. Inside are, Morse key, 3 switches, Buzzer Assembly, 3 terminals and built in battery box. Inside the lid are the circuits for the device and operating instructions. On lid top are numbers 732 and an arrow head. On front is "Wireless Remote Control Unit A, PMG s W/S SYD. Serial No. 19055." Insie the hinge bracket is broken.Inside on battery compartment lid is:- "Wireless Remote/ Control Unit A/ PMG W/S STD/ Ser No. 19055/ 1944”signals, army, equipment, remote control unit -
 Bendigo Military Museum
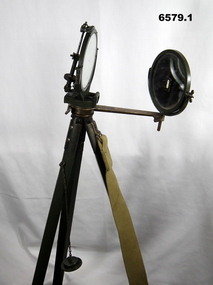
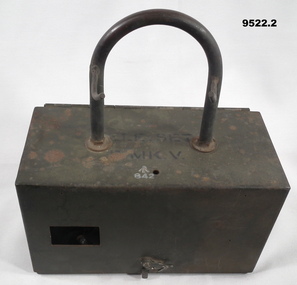
Instrument - Duplex Heliograph Mk V - 1940 with Tripod, LUCO Art Metal Coy Ltd, London, 1940
... signaling by reflecting sunlight with a mirror to send coded messages over long distances. This method was primarily useful in remote areas where other forms of communication were not available. The MkV model, specifically, was widely used by the British Army and other military forces from around 1906 until the mid 1960s. It remained in use with the Australian Army Survey Corps until the mid 1980s. The device typically included a 5 - inch mirror and was often mounted on a tripod for stability. Initially the instrument was used to communicate between survey stations using Morse...signaling by reflecting sunlight with a mirror to send coded messages over long distances. This method was primarily useful in remote areas where other forms of communication were not available. The MkV model, specifically, was widely used by the British Army and other military forces from around 1906 until the mid 1960s. It remained in use with the Australian Army Survey Corps until the mid 1980s. The device typically included a 5 - inch mirror and was often mounted on a tripod for stability. Initially the instrument was used to communicate between survey stations using Morse ...The Heliograph MkV is a fascinating piece of historical surveying and communications equipment. It was primarily used for visual signaling by reflecting sunlight with a mirror to send coded messages over long distances. This method was primarily useful in remote areas where other forms of communication were not available. The MkV model, specifically, was widely used by the British Army and other military forces from around 1906 until the mid 1960s. It remained in use with the Australian Army Survey Corps until the mid 1980s. The device typically included a 5 - inch mirror and was often mounted on a tripod for stability. Initially the instrument was used to communicate between survey stations using Morse code to coordinate their activities. Later when better forms of communication were available, they were used for precise angle alignment where the sunlight reflection from the mirror was targeted between the survey stations to give very accurate results. The MkV was relatively light weight and portable, making it ideal for use in the field. It could be setup and adjusted quickly. The heliograph had an adjustable mirror that could be tilted to reflect sunlight towards a distant receiver. Surveyors could align the mirror using a sighting device. Whilst it was primarily used by the Military it was also used in civil surveying particularly in the remote areas of Australia. The British Army Mark V version uses a flat round mirror with a small unsilvered spot in the centre. The sender aligned the heliograph to the target by looking at the reflected target in the mirror and moving their head until the target was hidden by the unsilvered spot. Keeping their head still, they then adjusted the aiming rod so its cross wires bisected the target, they then turned up the sighting vane, which covered the cross wires with a diagram of a cross, and aligned the mirror with the tangent and elevation screws, so the small shadow that was a reflection of the unsilvered spot hole was on the cross target. This indicated that the sunbeam was pointing at the target. If the sun was in front of the sender, its rays were reflected directly from this mirror to the receiving station. If the sun was behind the sender, the sighting rod was replaced by a second mirror, to capture the sunlight and direct it onto the main mirror to reflect it to the receiving station.. 1 Brish Army "Mance" Mk V A253 Heliograph has two 125mm diameter mirrors on a brass arm with targeting attachments. The Instrument is mounted on a three-legged tripod of brass and mahogany with spiked feet, approximately 1.2 metres high. The instrument was made by LUCO Art Metal Co Ltd, London in 1940. .2 A military green metal carrying safety storage case with khaki shoulder strap.A253 stamped on instrumentroyal australian survey corps, rasvy, fortuna, army survey regiment, army svy regt, asr -
 Bendigo Military Museum
Equipment - LAMP SIGNALLING, PMG Melbourne, 1942
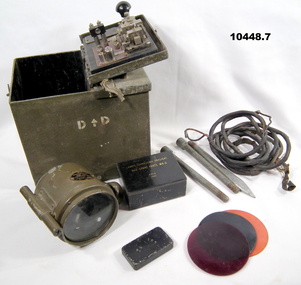
... Inside the lid of the large compartment is a morse code key. Assembly case serial NR. 13155. 2. Lamp signalling daylight assembly, lens width 8 cm. ...Bendigo Military Museum 37 - 39 Pall Mall Bendigo goldfields Signalling Lamps Morse code WW2 1. Stencilled in white paint - on case - “D^D” 1. ...1. Heavy aluminium case, two lids on top, colour drab olive. Belt loops both ends. Inside the smaller compartment, the sides are lined with cardboard. Inside the lid of the large compartment is a morse code key. Assembly case serial NR. 13155. 2. Lamp signalling daylight assembly, lens width 8 cm. A pivoting base mount on bottom. On top is a small tube with cross hair sight for aiming. Also there is a wire spring clip in front of lens for holding coloured filters. Lamp serial NR 13107. 3. Tin, black painted. Box spare parts MKII PMG 1942. 4. Tin small black - various plugs, nuts & bolts. 5. Stake set 3 piece Gal steel. Screw threaded ends (?) Stake end (1). 6. Filters celluloid - red. green Amber. 7. Cable rubber covered 2 core.1. Stencilled in white paint - on case - “D^D”signalling, lamps, morse code, ww2 -
 Bendigo Military Museum
Equipment - TELEPHONE, FIELD, AUSTRALIAN, P.M.G. W/S, 1941
... Signalling Telephone WW2 Stencilled on top of lid is: “TELE SET D MK.V” There is a black broad arrow stencilled on front. Painted roughly on the back, in pink paint, are the letters "C.M.S". Cast aluminium field telephone. The lid assembly hinges from the rear. Inside the lid is a schematic diagram on a metal plate. In the main body of the set is a small shelf. On that shelf are:- a bell, line terminals, morse ...Cast aluminium field telephone. The lid assembly hinges from the rear. Inside the lid is a schematic diagram on a metal plate. In the main body of the set is a small shelf. On that shelf are:- a bell, line terminals, morse key, battery holder, and buzzer assembly. Under the shelf is a four terminal socket for the handpiece. The handpiece is a black Bakelite material. It has a “Press to Talk” switch on the handset. The cable is cotton covered for insulation. At the rear are two webbing straps, 25 mm wide. There is a strap loop for each side.Stencilled on top of lid is: “TELE SET D MK.V” There is a black broad arrow stencilled on front. Painted roughly on the back, in pink paint, are the letters "C.M.S".communications, signalling, telephone, ww2 -
 4th/19th Prince of Wales's Light Horse Regiment Unit History Room
Book, Signal Training (All Arms) 1938, at 1938
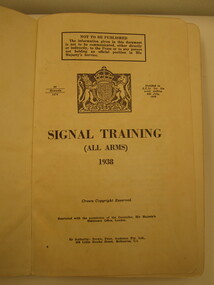
... 4th/19th Prince of Wales's Light Horse Regiment Unit History Room 4/19 PWLH Regiment, Building 78 Simpson Barracks Macleod melbourne manual signals training 26 Manuals 1875 Hard covered book detailing Phonetic Alphabet, Morse and Semaphore Codes, Visual Instruments, Field Cables, Wireless Sets etc Signal Training (All Arms) 1938 Book Book Brown, Prior, Anderson Pty Ltd ...Hard covered book detailing Phonetic Alphabet, Morse and Semaphore Codes, Visual Instruments, Field Cables, Wireless Sets etc26 Manuals 1875manual, signals training -
 Bendigo Military Museum
Instrument - Heliograph Mk V Training Aid - circa 1912, 1912
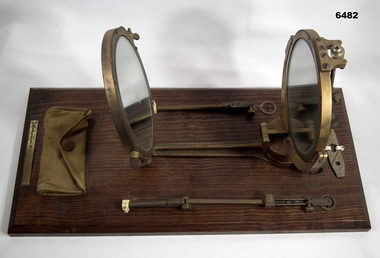
... signaling by reflecting sunlight with a mirror to send coded messages over long distances. This method was primarily useful in remote areas where other forms of communication were not available. The MkV model, specifically, was widely used by the British Army and other military forces from around 1906 until the mid 1960s. It remained in use with the Australian Army Survey Corps until the mid 1980s. The device typically included a 5 - inch mirror and was often mounted on a tripod for stability. Initially the instrument was used to communicate between survey stations using Morse...signaling by reflecting sunlight with a mirror to send coded messages over long distances. This method was primarily useful in remote areas where other forms of communication were not available. The MkV model, specifically, was widely used by the British Army and other military forces from around 1906 until the mid 1960s. It remained in use with the Australian Army Survey Corps until the mid 1980s. The device typically included a 5 - inch mirror and was often mounted on a tripod for stability. Initially the instrument was used to communicate between survey stations using Morse ...The Heliograph MkV is a fascinating piece of historical surveying and communications equipment. It was primarily used for visual signaling by reflecting sunlight with a mirror to send coded messages over long distances. This method was primarily useful in remote areas where other forms of communication were not available. The MkV model, specifically, was widely used by the British Army and other military forces from around 1906 until the mid 1960s. It remained in use with the Australian Army Survey Corps until the mid 1980s. The device typically included a 5 - inch mirror and was often mounted on a tripod for stability. Initially the instrument was used to communicate between survey stations using Morse code to coordinate their activities. Later when better forms of communication were available they were used for precise angle alignment where the sunlight reflection from the mirror was targeted between the survey stations to give very accurate results. The MkV was relatively light weight and portable, making it ideal for use in the field. It could be setup and adjusted quickly. The heliograph had an adjustable mirror that could be tilted to reflect sunlight towards a distant receiver. Surveyors could align the mirror using a sighting device. Whilst it was primarily used by the Military it was also used in civil surveying particularly in the remote areas of Australia. This instrument was used as a training aid to help teach surveyors at the Royal Australian Survey Corps School of Military Survey. Catalog item No 2009 is a tripod that was used to mount the Heliograph whilst being used for surveying.A Heliograph containing two mirrors with brass surrounds mounted on a wooden board as a Training Aid. Item has additional parts attached to the base board."Heliograph Mk V Training Aid"royal australian survey corps, rasvy, fortuna, army survey regiment, army svy regt, asr -
 Bendigo Military Museum
Equipment - FIELD PHONE - MUV, Standard Telephones & Cables Pty Ltd, 1942
... Bendigo Military Museum 37 - 39 Pall Mall Bendigo goldfields WW2 Signals Telephones Stamped inside is “1668”, Stamped “serial 25969” 1. Metal cased field phone. it has a bell, 2 line terminals, a battery compartment, a morse key and a 2 knob buzzer assembly. ...1. Metal cased field phone. it has a bell, 2 line terminals, a battery compartment, a morse key and a 2 knob buzzer assembly. Coming out from inside is a Bakelite earpiece. On a lead on the lid a field modification has been made to support the handset (2) externally. I rear holding strap is missing. 2. Black Bakelite hand piece, press to talk switch and a heavy duty 4 pin plug.Stamped inside is “1668”, Stamped “serial 25969”ww2, signals, telephones -
 Bendigo Military Museum
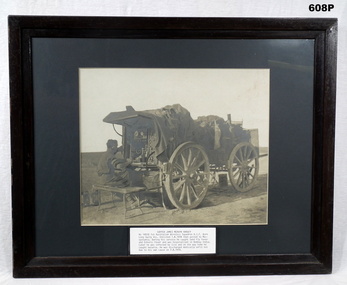
Photograph - PHOTOGRAPH, FRAMED, C. 1917 - 18
... Signal Sqd and joined the unit near Baghdad on 6.4.1918. Discharged from the AIF on 7.8.1919 as medically unfit. Wireless Sqd AIF WW1 Bottom centre: Is a bio of SAPPER JAMES MERVYN HARVEY No 14510 1st Australian Wireless Squadron AIF. Framed, black & white photo of SAPPER JAMES MERVYN HARVEY No 14510 1st Australian Wireless Squadron AIF. He is operating a morse ...JAMES MERVYN HARVEY (telegraphist by trade) No 14510 (born Bendigo, enlisted Bendigo) in the AIF on 1.16.1916 in Australian Wireless Sqd reinforcement 3 aged 21 years 8 months. Embarked for Basra (Iraq) via Bombay 25.7.1916. It appears he was invalided to India on 12.11.1916, does not state why. He joined the Wireless Signal Service Depot in Rawalpindi India on 2.12.1917. Embarked from Bombay to Basra 27.2.1918 as part of 1st Aust & NZ Wireless Signal Sqd and joined the unit near Baghdad on 6.4.1918. Discharged from the AIF on 7.8.1919 as medically unfit.Framed, black & white photo of SAPPER JAMES MERVYN HARVEY No 14510 1st Australian Wireless Squadron AIF. He is operating a morse key mounted on the rear of a specially equipped GS wagon that is unhitched from its horses. The hatless soldier is seated on a folding bench seat & is wearing headphones. Numerous articles of personal kit are draped over the wagon. Bottom centre: Is a bio of SAPPER JAMES MERVYN HARVEY No 14510 1st Australian Wireless Squadron AIF.wireless sqd aif, ww1 -
 Lara RSL Sub Branch
Book, Signals - Story of the Australian Corps of Signals, 1953
... signal corps...wwii...c.h.simpson...motorcycle couriers...signals 7 australian division...lt.commander b.t.r chadd...palestine...spark plug...semiphore...morse...A tribute to the corps that stayed on duty every hour of every day providing and maintaining vital communication channels. signal corps wwii c.h.simpson motorcycle couriers signals 7 australian division lt.commander b.t.r chadd palestine spark plug semiphore morse code field radio a.i.f british signals corps pieter mersk breconshire corp signals new guinea malaysa singapore switchboard carrier pigeons linesmen gaza signal office Signals - Story of the Australian Corps of Signals. ...Little has been written previously about this technical group of men and women and that their duties were under insurmountable difficulties which they faced and overcome in conditions that were encountered in the desert and jungle warfare. Without their constant and never ending services, the task of the force in bringing to a close this fight for freedom would have been greatly handicapped.An outline of the Australian Signals Corps over the years from the campaign in the Middle East to the present day of the victories in New Guinea. A tribute to the corps that stayed on duty every hour of every day providing and maintaining vital communication channels.Signals - Story of the Australian Corps of Signals. Green front and back hardcover with black text and insignia. Photographs, cartoons, illustrations and poems. The inside front and back covers have a photograph montage in green sepia.signal corps, wwii, c.h.simpson, motorcycle couriers, signals 7 australian division, lt.commander b.t.r chadd, palestine, spark plug, semiphore, morse code, field radio, a.i.f, british signals corps, pieter mersk, breconshire corp signals, new guinea, malaysa, singapore, switchboard, carrier pigeons, linesmen, gaza signal office -
 Bendigo Military Museum
Manual - TRAINING MANUAL - SIGNALLING, SIGNALLING, 1915
... Bendigo Military Museum 37 - 39 Pall Mall Bendigo goldfields signalling morse code ww1 Training manual for signalling methods on various aspects of the code SIGNALLING. ...Training manual for signalling methods on various aspects of the codesignalling, morse code, ww1