Showing 222 items matching "white hills station"
-
 Bendigo Historical Society Inc.
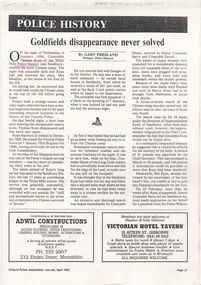
Document - CONSTABLE RYAN COLLECTION: GOLDFIELDS DISAPPEARANCE NEVER SOLVED, April 1991
... ...White Hills Station...History House 11 Mackenzie Street Bendigo goldfields PERSON Individual Constable Thomas Ryan White Hills Station Chinese Camp Back Creek Police Station Constable Hayes Long Gully Police Station Constable Barry Constable Farrell Police Widows and Orphans Fund Hong Kee Ah Wong Wong Ching Young Thomas Ryan Inspector Kennedy Fook Sing Alick Ah Poo Gee Hing Mrs Go Wing Victorian Police Association Journal, Gary Presland Police Museum Photocopied article from the Victoria Police Association Journal of April 1991. ...Photocopied article from the Victoria Police Association Journal of April 1991. Goldfields disappearance never solved.Victorian Police Association Journal, Gary Presland Police Museumperson, individual, constable thomas ryan, white hills station, chinese camp, back creek police station, constable hayes, long gully police station, constable barry, constable farrell, police widows and orphans fund, hong kee, ah wong, wong ching young, thomas ryan, inspector kennedy, fook sing, alick ah poo, gee hing, mrs go wing -
 Bendigo Historical Society Inc.
Document - CONSTABLE RYAN COLLECTION: ANNALS OF BENDIGO, 1886
... Annals of Bendigo: photocopy of article regarding the disappearance of Constable Thomas Ryan of White Hills Police Station, Service No. 1098. 1886. The photocopy only show part of the article....(The Police Association of Victoria) Annals of Bendigo: photocopy of article regarding the disappearance of Constable Thomas Ryan of White Hills Police Station, Service No. 1098. 1886. The photocopy only show part of the article. ...Annals of Bendigo: photocopy of article regarding the disappearance of Constable Thomas Ryan of White Hills Police Station, Service No. 1098. 1886. The photocopy only show part of the article.bendigo, history, police history, https://tpav.org.au/about_us/honour_roll.html. (the police association of victoria) -
 Melton City Libraries
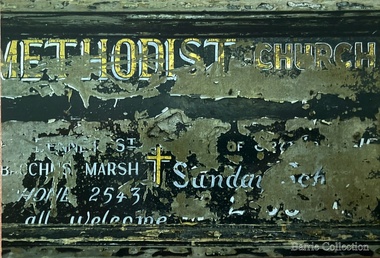
Photograph, Signboard, 1972
... Melton and Toolern Vale have benefited by the generous help of Mr J Browne esquire of White Hills Station Diggers Rest and are now comprised in the Sunshine Circuit. ...Melton and Toolern Vale have benefited by the generous help of Mr J Browne esquire of White Hills Station Diggers Rest and are now comprised in the Sunshine Circuit. ...Edna Barrie handwritten notes – copied 18th October 2013 web The early story of the Wesleyan Methodist Church in Victoria At Melton between Bal [Ballarat] and Melb [Melbourne] was introduced by the Revd Wlm Blamires in 1862 ably seconded by the late Mrs Westlake (afterwards Mrs Spargo). Mr J James, the active and indefatigable Revd Eb Taylor and such workers as Atkinson Corr and Ferris. Mawson and John Dare 1867 the foundation stone of the present church was laid. Revd D Waugh 1867. Melton and Toolern Vale have benefited by the generous help of Mr J Browne esquire of White Hills Station Diggers Rest and are now comprised in the Sunshine Circuit. Written at a later date – Wesleyan 16-4-1867 then Methodist 3-10-1867. Bluestone building cost Lsd 350-13-6. Seating 40 pounds Rev Ken Moore Methodist opened at Brooklyn Rd Melton South c1940 closed c 1972. Timber Church shifted from Staughton Vale, prior to this Services held in Victoria Hall Melton South. The source of the information – ? and date notes were made On the Chart outlining Melton Churches the following additional notes- At opening (nil Plaster, nil ceiling) Slate roof. Closed 1910-1911- most likely from 1867 Express My research - Melton Express noted 15th Aug 1939 porch added to Church at Melton South making the date earlier than 1940. Photographs taken when the building was being used as the UC Opp Shop and demolition of the building showing the porch. Charles Ernest Barrie was prominent in the life of the Methodist Church and established a thriving Sunday School. He built the Chaff Mills at Melton South in 1900. In 1910 he sold the Mill to Glover Onians and moved to a farm at Trundle NSW, where he lived for about a year. In May 1911 he purchased “Darlingsford” in Melton when it came on the market. The address Elizabeth St Moonee Ponds appears in the family records during this period and during WW 1 they also lived at Ascot Vale where the Lang parents lived. On returning after the war to Melton to occupy the Darlingsford house, which had been occupied by a caretaker. The family joined the Presbyterian Church. Evidenced in the Church Minute Book. 1920 What happened to the Methodist Church between 1910 – 1920? How long did it exist while in the Bluestone building in Palmerston St (Heritage listed 2008) When did the church commence in Victoria Hall? Built 1910 on land donated by C E Barrie. I attended the Methodist Church Melton Sth when monthly services were held in the afternoons. We were members of the Presbyterian Church and also supported the Melton Sth Church during the 1950’s Signboard from Melton South Methodist Churchchurches -
 Bendigo Historical Society Inc.
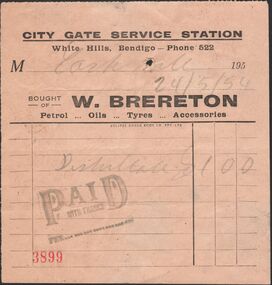
Financial record - INVOICE COLLECTION: Motor industry invoices
... 10934.23a Square Receipt no. 3899 for City Gate Service Station - White Hills, Bendigo. Phone 522 Cash sale 24 May 1954 Bought of W. ...History House 11 Mackenzie Street Bendigo goldfields City Gate Service Station Bendigo Motor Tyre Hospital Bendigo Motor Co. 10934.23a Square Receipt no. 3899 for City Gate Service Station - White Hills, Bendigo. Phone 522 Cash sale 24 May 1954 Bought of W. ...10934.23a Square Receipt no. 3899 for City Gate Service Station - White Hills, Bendigo. Phone 522 Cash sale 24 May 1954 Bought of W. Brereton Petrol... Oils... Tyres... Accessories... paid £100 Paid with thanks made from thin paper, written in pencil. Printed in black ink 10934.23b Large rectangular receipt on pale cream, blue lined paper. Logos and information printed in black ink. Portrait image printed in black ink showing a tire. Market Square Telephone 345 Bendigo, February 1st 1925 Mr. RMS Abbott Bendigo to Bendigo Motor Tyre Hospital (James H. Tubb, proprietor) Receipt was written in black ink. There is also a black ink stamp with the signature of WJ Coaey in the lower third of the receipt. There is a small postage stamp stuck to the page with the signature of WJ Coaey 10934.23c Mitchell Street N. 11130 Phone 786 Bendigo 15/2/1934 Bendigo Motor Co. Vauxhall & Buick Cars. Bedford Trucks sold to Gills George Receipt is printed in blue ink on a rectangular shaped receipt of thin paper 10934.23d 27/6/50 Cash Sale Bought of City Gate Service Station White Hills Bendigo Phone 522 Receipt came from an Eclipse Check book Receipt written in pencilcity gate service station, bendigo motor tyre hospital, bendigo motor co. -
 Warrnambool and District Historical Society Inc.
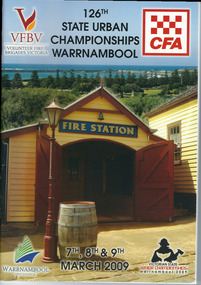
Programme - Booklet, CFA 126 Championship, 2009
... The back cover is white with a Powercor Australia symbol in red and printed material. The front cover is multi-coloured with a photograph of the Fire Station at Flagstaff Hill Maritime Village. ...The back cover is white with a Powercor Australia symbol in red and printed material. The front cover is multi-coloured with a photograph of the Fire Station at Flagstaff Hill Maritime Village. ...The Warrnambool Fire Brigade was formed in 1863. The first fire engine house was in Liebig Street and carters were required to carry water to fire scenes. In 1889 the Council built a new Fire Station on Liebig Street and Warrnambool hosted its own Annual Demonstration in 1894. In 1891 the volunteer brigade became part of the Country Fire Brigade. The Fire Station relocated to Raglan Parade in 1915 and then to Timor Street in 1961. In 1989 the Brigade moved back to Raglan Parade. This booklet is a memento of the State Urban Championships that were held in Warrnambool in 2009 (Volunteer Fire Brigades Victoria and Country Fire Authority)This is a booklet of 96 pages containing printed material, maps, advertisements, photographs and tables. The back cover is white with a Powercor Australia symbol in red and printed material. The front cover is multi-coloured with a photograph of the Fire Station at Flagstaff Hill Maritime Village. The pages are stapled.Front Cover: VFBV, Volunteer Fire Brigades Victoria, CWA, 126th State Urban Championships, 7th, 8th and 9th March 2009, Victorian State Senior Championships, Warrnambool 2009, Warrnambool City Council logowarrnambool fire brigade, state urban championships (2009) -
 Bendigo Military Museum
Photograph - Royal Australian Survey Corps - Map Production Processes, c1990
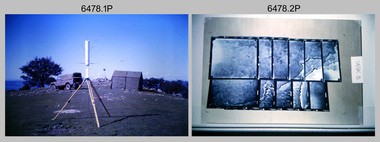
... hill surrounding Lake Hume. Series 3 Land Rover, field party tent and survey station beacon in background. .2) – Photo, black & white, c1980s. ...hill surrounding Lake Hume. Series 3 Land Rover, field party tent and survey station beacon in background. .2) – Photo, black & white, c1980s. ...This is a collection of 20 photographs of Royal Australian Survey Corps phases of map production at the School of Military Survey, Bonegilla, the Army Survey Regiment, Bendigo, and the Army Map Depot, Bandiana circa 1990. Colour photos are on 35mm slide film and were scanned at 96 dpi. They are part of the Army Survey Regiment’s Collection. Photo .1P was probably taken on a survey station overlooking Lake Hume near Albury-Wodonga. The field party occupying the survey station was likely from a Map Control Survey course conducted by the School of Military Survey, Bonegilla. This survey station was part of a geodetic network used in field survey training and RASvy’s Lake Hume Test Range. Photos .3P to .16P were taken at the Army Survey Regiment, Bendigo and photos .17P & .18P were taken at the Army Map Depot, Bandiana. Photo .19P depicts a map of RASvy’s ARA units before the disbandment of 5th Field Survey Squadron, Perth and 2nd Field Survey Squadron, Sydney in 1990. This is a collection of 20 photographs of map production processes taken at the School of Military Survey, Bonegilla, the Army Survey Regiment, Bendigo, and the Army Map Depot, Bandiana circa 1990. Colour photos are on 35mm slide film and were scanned at 96 dpi. They are part of the Army Survey Regiment’s Collection. Photo .2P is printed on photographic and scanned at 300 dpi. .1) – Photo, colour, c1980s. Geodetic Surveying: AN/PRR-14 Geoceiver antenna on hill surrounding Lake Hume. Series 3 Land Rover, field party tent and survey station beacon in background. .2) – Photo, black & white, c1980s. Geodetic Surveying: AN/PRR-14 Geoceiver antennas set up at the School of Military Survey, Bonegilla, Victoria. .3) – Photo, colour, c1990. Aerotriangulation: Wild PUG4 point transfer device, SSGT Bruce Hammond. .4) – Photo, colour, c1990. Aerotriangulation: Zeiss (Jena) Stecometer, SSGT Bruce Hammond. .5) – Photo, colour, c1990. Aerotriangulation: computer tape maintenance, SSGT Noel McNamara. .6) – Photo, colour, c1990. AUTOMAP 2: computer tape maintenance, SPR Nadine (Paul) Read. .7) - Photo, colour, c1990s. AUTOMAP 2: Optronics 4040 scanning/film output in Lithographic Squadron, SGT Sherri (Dally) Burke. .8) - Photo, colour, c1990s. AUTOMAP 2: Benson verification plotter output, SPR Nadine (Paul) Read. .9) – Photo, colour, c1990. Aerotriangulation: data management, SGT Neil ‘Ned’ Kelly. .10) & .11) - Photo, colour, c1990s. AUTOMAP 2: Wild B8 Aviograph stereoplotter Feature Extraction, unidentified technician. .12) - Photo, colour, c1990s. AUTOMAP 2: Graphic Edit Workstation, SPR Nadine (Paul) Read. .13) - Photo, colour, c1990s. AUTOMAP 2: Graphic Edit Workstation, SPR Dawn Hoadley. .14) & .15) - Photo, colour, c1990s. AUTOMAP 2: Graphic Edit Workstation, unidentified technician. .16) – Photo, colour, c1990s. Heidelberg Speedmaster 102 computer-controlled five colour lithographic offset printing press. .17) & .18) – Photo, colour, c1990s. Army Map Depot, unidentified storeman, Bandiana. .19) – Photo, colour, c1990. RASvy ARA Unit Locations before disbandment of field units in Perth and Sydney. .20) – Photo, colour, c1990. Set of overlapping aerial photography..1P, .3P to .20P - Some equipment is identified on the frame of the 35mm slides.royal australian survey corps, rasvy, army survey regiment, army svy regt, fortuna, asr, school of military survey, army map depot -
 Kiewa Valley Historical Society
Photograph - Mt Beauty Camp, Estimated 1950-1951
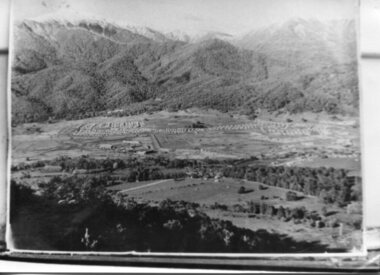
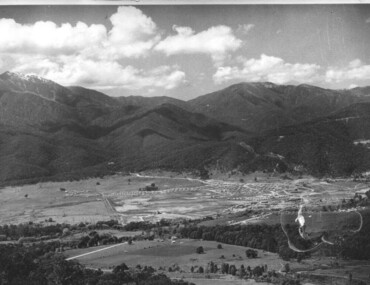
... Hill beyond that. Shows the newly constructed town of Mt. Beauty surrounded by farmland and before the regulating pondage was built to discharge water from the power stations via the West Kiewa tail race tunnel into the Kiewa River. Mt beauty camp SECV construction town Written on the back in black ink - A Campen Copy of black and white ...This photo is of the very newly constructed State Electricity Commission town of Mt. Beauty. The houses up to Nelse street were erected from 1946 onward and then the township was extended beyond Nelse Street in 1950 which places this photograph about 1950/51. There is no evidence of work being commenced on the regulating pondage but the tail race canal can be seen on the centre right of photo. The workmen's camp was enlarged in 1950 to the extent of providing accommodation for a total of 1,200. There are a number of dwellings on Simmonds Creek and the road to Falls Creek can clearly be seen. Snow capped Mt. Bogong is in the upper left of the photo with Mt. Beauty behind the township rising to Big Hill beyond that.Shows the newly constructed town of Mt. Beauty surrounded by farmland and before the regulating pondage was built to discharge water from the power stations via the West Kiewa tail race tunnel into the Kiewa River. Copy of black and white photograph of Mt Beauty CampWritten on the back in black ink - A Campenmt beauty camp, secv, construction town -
 Kiewa Valley Historical Society
Photograph - Folder of Photographs – Photocopied set of 10 black and white photographs (pages 29 - 38) from the display folder put together by KVHS to document life on the Kiewa Valley Hydro-electric Scheme
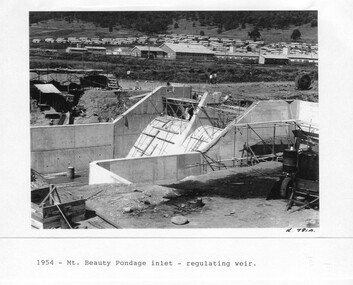
... Large A3 size spiral bound display folder containing 21 pages of photocopied black and white photographs of various aspects of the early days of the Kiewa Valley Hydro-electric scheme including equipment, various work sites and photographs of workers and their families. 1-Mt Beauty Pondage inlet-Regulating weir 2-Langfords Gap Basalt Hill-Tunnel in quarry face.3-Rocky Valley Camp-from Engineering Office 4-Basalt Hill tunnel portal 5-No 1 Pressure Shaft Works Bench 6-No 1 Power Station 7-Overturned haulage wagons on the side of an embankment 8- Group of workers dressed in wet weather gear inside a tunnel 9-Workmen and vehicle in tunnel 10-Howman’s Gap campsite at 4,150 feet ...Mount Beauty, and to a lesser extent Bogong, are among these places. secv; kiewa hydro electric scheme; mt beauty; bogong; construction area 1-1954 – Mt Beauty Pondage inlet – Regulating weir Page number 29 2-28/10/54 – Langfords Gap Basalt Hill – Tunnel in quarry face K7860 Page number 30 3-STATE ELECTRICITY COMMISSION OF VICTORIA Date: 17.8.55 Time: No K8132 Kiewa Hydro Electric Works ROCKY VALLEY CAMP – FROM ENGINEERING OFFICE Page number 31 4-28/10/54 – Basalt Hill tunnel portal K7859 Page number 32 5-No.1 Pressure Shaft Works Bench 5.7.56 Page number 33 6- No. 1 Power Station 26.4.59 Page number 34 7- No markings Page number 35 8-No markings (Wooden board on ground printed with - POLAR A.N.GELATINE DYNAMITE “75” DE 28.8.40) Page number 36 9-No markings Page number 37 10-Howman’s Gap campsite at 4,150 feet Page number 38 Large A3 size spiral bound display folder containing 21 pages of photocopied black and white photographs of various aspects of the early days of the Kiewa Valley Hydro-electric scheme including equipment, various work sites and photographs of workers and their families. 1-Mt Beauty Pondage inlet-Regulating weir 2-Langfords Gap Basalt Hill-Tunnel in quarry face.3-Rocky Valley Camp-from Engineering Office 4-Basalt Hill tunnel portal 5-No 1 Pressure Shaft Works Bench 6-No 1 Power Station 7-Overturned haulage wagons on the side of an embankment 8- Group of workers dressed in wet weather gear inside a tunnel 9-Workmen and vehicle in tunnel 10-Howman’s Gap campsite at 4,150 feet Photograph Folder of Photographs – Photocopied set of 10 black and white photographs (pages 29 - 38) from the display folder put together by KVHS to document life on the Kiewa Valley Hydro-electric Scheme ...Although the Kiewa Hydro-Electric Scheme was first proposed in 1911, construction did not commence until 1938. As part of the push to cut electricity costs and diversify supply, the Victorian Government (circa 1930) initiated the conversion from primarily brown coal supply to hydro – electricity. Field investigations during the 1940’s resulted in a new proposal for a scheme that had more than double the capacity of the 1938 scheme. The Kiewa Hydroelectric Scheme became the largest scheme of its kind in the State Of Victoria and the second largest scheme in Australia. The number of personnel involved in the planning and construction of the scheme increased dramatically. During the late 1940’s, most activity centred around the construction of the West Kiewa Power Station, Rocky Valley Reservoir, McKay Creek Power Station and the Bogong Creek Aqueduct.A common thread across all the larger hydro scheme constructions was the need for workers, both qualified and unqualified who came from around the world seeking a new life for themselves and their families. New accommodation and facilities were required for the army of workers engaged in construction in often remote and wild areas. The SEC had a high demand for timber, and set up the first of a number of sawmills at Bogong Creek in 1939 and set up the first hardwood logging in the headwaters of the Kiewa River. These new ‘towns’ such as Mt Beauty and Bogong, survived, serving the needs of operational personnel and their families, and expanding with growth of new industries. Mount Beauty, and to a lesser extent Bogong, are among these places. Large A3 size spiral bound display folder containing 21 pages of photocopied black and white photographs of various aspects of the early days of the Kiewa Valley Hydro-electric scheme including equipment, various work sites and photographs of workers and their families. 1-Mt Beauty Pondage inlet-Regulating weir 2-Langfords Gap Basalt Hill-Tunnel in quarry face.3-Rocky Valley Camp-from Engineering Office 4-Basalt Hill tunnel portal 5-No 1 Pressure Shaft Works Bench 6-No 1 Power Station 7-Overturned haulage wagons on the side of an embankment 8- Group of workers dressed in wet weather gear inside a tunnel 9-Workmen and vehicle in tunnel 10-Howman’s Gap campsite at 4,150 feet 1-1954 – Mt Beauty Pondage inlet – Regulating weir Page number 29 2-28/10/54 – Langfords Gap Basalt Hill – Tunnel in quarry face K7860 Page number 30 3-STATE ELECTRICITY COMMISSION OF VICTORIA Date: 17.8.55 Time: No K8132 Kiewa Hydro Electric Works ROCKY VALLEY CAMP – FROM ENGINEERING OFFICE Page number 31 4-28/10/54 – Basalt Hill tunnel portal K7859 Page number 32 5-No.1 Pressure Shaft Works Bench 5.7.56 Page number 33 6- No. 1 Power Station 26.4.59 Page number 34 7- No markings Page number 35 8-No markings (Wooden board on ground printed with - POLAR A.N.GELATINE DYNAMITE “75” DE 28.8.40) Page number 36 9-No markings Page number 37 10-Howman’s Gap campsite at 4,150 feet Page number 38 secv; kiewa hydro electric scheme; mt beauty; bogong; construction area -
 Kiewa Valley Historical Society
Photograph - Folder of Photographs – Photocopied set of black and white photographs (pages 49 -58) from the display folder put together by KVHS to document life on the Kiewa Valley Hydro-electric Scheme
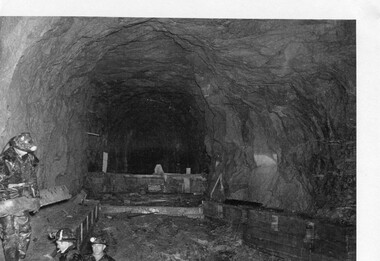
... HILL TUNNEL FACE Page number 49 10-(a) No markings 11- STATE ELECTRICITY COMMISSION OF VICTORIA Date: 20.3.52 Time: No K6979 Kiewa Hydro Electric Works No. 1 HEAD RACE TUNNEL – DRILLING FACE (E.E.E. CONTRACT) ‘The Frenchies’ (E.E.E) as they were affectionately known Page number 50 12-31.5.56 No. 1 Power Station Aggregate Stock Piles. Page number 51 13&14-No markings Page number 52 Large A3 size spiral bound display folder containing photocopied black and white ...Although the Kiewa Hydro-Electric Scheme was first proposed in 1911, construction did not commence until 1938. As part of the push to cut electricity costs and diversify supply, the Victorian Government (circa 1930) initiated the conversion from primarily brown coal supply to hydro – electricity. Field investigations during the 1940’s resulted in a new proposal for a scheme that had more than double the capacity of the 1938 scheme. The Kiewa Hydroelectric Scheme became the largest scheme of its kind in the State Of Victoria and the second largest scheme in Australia. The number of personnel involved in the planning and construction of the scheme increased dramatically. During the late 1940’s, most activity centred around the construction of the West Kiewa Power Station, Rocky Valley Reservoir, McKay Creek Power Station and the Bogong Creek Aqueduct.A common thread across all the larger hydro scheme constructions was the need for workers, both qualified and unqualified who came from around the world seeking a new life for themselves and their families. New accommodation and facilities were required for the army of workers engaged in construction in often remote and wild areas. The SEC had a high demand for timber, and set up the first of a number of sawmills at Bogong Creek in 1939 and set up the first hardwood logging in the headwaters of the Kiewa River. These new ‘towns’ such as Mt Beauty and Bogong, survived, serving the needs of operational personnel and their families, and expanding with growth of new industries. Mount Beauty, and to a lesser extent Bogong, are among these places. Large A3 size spiral bound display folder containing photocopied black and white photographs of various aspects of the early days of the Kiewa Valley Hydro-electric scheme including equipment, various work sites and photographs of workers and their families. 1-Workmen working inside one of the tunnels. 2-Workman drilling in West Kiewa Tunnel 3-Junction Dam wall construction 4&5-2B&W photographs Kiewa House residents ready to go to a ball in Mt Beauty 6-Workmen warming up in front of a fire at No 1 bench 7-Workmen being hauled in at No 4 P.S Shaft 8-No 4 Power Station – Drilling 9-Workmen eating a hot meal in the tunnel. 10-2 photographs (a)Pretty Valley camp showing workman’s huts and construction materials & (b)Worker in Langford Gap Basalt Hill Tunnel face 11-Tunnel entrance (unlabelled) with rail tracks in foreground 12- Workmen drilling at No 1 Head race tunnel-Drilling face 13- No 1 Power Station 14-Workmen at the entrance to one of the SECV tunnels under construction 1-SECV number at bottom of picture Half obscured possibly K8461 Page number 53 2-In West Kiewa Tunnel Page number 54 3- Construction of Junction Dam wall – approximately 1941 Page number 55 4&5- Residents of Kiewa House at Bogong ready to go to the ball at Mt Beauty-1946. Handwritten on a copy of the photo on opposite page Mrs Lorna Crosset filled out the names *Dad was Des Crossett – his daughter is Gael Petcopoulis Greta engaged to John broke it off. Charlie, Rosalind, Bill, Priscilla, Max Lawrence-Dad’s Boss, Mary & Max married, Mary, Kay, Gwen McPherson Mum’s boss, John McCluskey (c) At No. 5 Bench Page number 56 6- STATE ELECTRICITY COMMISSION OF VICTORIA Date: 27.2.51 Time:2.15pm No K6373 Kiewa Hydro Electric Works No. 4 P.S. Shaft – Haulage of men in buckets (b) As above Handwritten at top of photo Appendix 4 page number 57 7- STATE ELECTRICITY COMMISSION OF VICTORIA Date: 6.6.52 Time:… No K7122 Kiewa Hydro Electric Works No. 4 POWER STATION – DRILLING page number 58 8-No markings page number 59 9-(a)Handwritten under photograph Approx. 1948/49 (b) STATE ELECTRICITY COMMISSION OF VICTORIA Date: 28.10.54 Time:.. No K7860 Kiewa Hydro Electric Works LANGFORD GAP BASALT HILL TUNNEL FACE Page number 49 10-(a) No markings 11- STATE ELECTRICITY COMMISSION OF VICTORIA Date: 20.3.52 Time: No K6979 Kiewa Hydro Electric Works No. 1 HEAD RACE TUNNEL – DRILLING FACE (E.E.E. CONTRACT) ‘The Frenchies’ (E.E.E) as they were affectionately known Page number 50 12-31.5.56 No. 1 Power Station Aggregate Stock Piles. Page number 51 13&14-No markings Page number 52 secv; kiewa hydro electric scheme; bogong; mt beauty; construction area -
 Kiewa Valley Historical Society
Photograph - Folder of Photographs – Photocopied set of black and white photographs (pages 39 - 48) from the display folder put together by KVHS to document life on the Kiewa Valley Hydro-electric Scheme
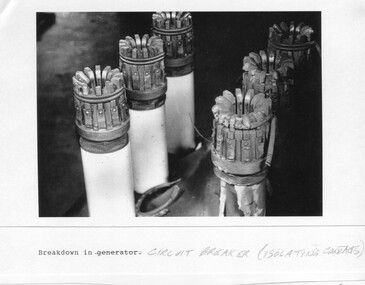
... Large A3 size spiral bound display folder containing photocopied black and white photographs of various aspects of the early days of the Kiewa Valley Hydro-electric scheme including equipment, various work sites and photographs of workers and their families. 1-Breakdown in Circuit Breaker (Isolating Contacts) 2-Big Hill Bench- Site of No 5 Devlopment 3-No 1 Power Station 4-No 1 Pipeline, Anchor No 8 5-Push Dozing-RD8 Tractor 6- Tractor and driver at work 7- Workmen in unnamed tunnel 8- Front page of Journal of SECV Vol 15. ...It is a circuit breaker Signed Ron White Ron was the Principal Hydro Engineer of the SEC Kiewa Scheme Page number 39 2-Big Hill Bench – Site of No. 5 Development (abandoned) Page number 40 3-No 1 Power Station Page number 41 4-No. 1 Pipeline, Anchor No. 8 Page number 42 5-Push Dozing – RD8 Tractor, 12 cubic yard Carryall and FD Cletrac Tractor Page number 43 6-No marking Page number 44 7-No marking Page number 45 8-Journal of State Electricity Commission of Victoria SEC Vol 15 No… April-May, 19… No 1 Pipeline-A view from McKay Portal G Hempenstall and D Sutton stiffening pipe section for transport during construction (….indicates missing text) Page Number 46 9-Rocky Valley Dam Core Wall Page number 47 10-No markings Page number 48 ...Mount Beauty, and to a lesser extent Bogong, are among these places. secv; kiewa hydro electric scheme; construction area; power stations; reservoirs; aqueduct; mt beauty; bogong 1-Breakdown in (generator) Circuit Breaker (Isolating Contacts) Handwritten underneath (This is not a picture of any part of a generator. It is a circuit breaker Signed Ron White Ron was the Principal Hydro Engineer of the SEC Kiewa Scheme Page number 39 2-Big Hill Bench – Site of No. 5 Development (abandoned) Page number 40 3-No 1 Power Station Page number 41 4-No. 1 Pipeline, Anchor No. 8 Page number 42 5-Push Dozing – RD8 Tractor, 12 cubic yard Carryall and FD Cletrac Tractor Page number 43 6-No marking Page number 44 7-No marking Page number 45 8-Journal of State Electricity Commission of Victoria SEC Vol 15 No… April-May, 19… No 1 Pipeline-A view from McKay Portal G Hempenstall and D Sutton stiffening pipe section for transport during construction (….indicates missing text) Page Number 46 9-Rocky Valley Dam Core Wall Page number 47 10-No markings Page number 48 Large A3 size spiral bound display folder containing photocopied black and white photographs of various aspects of the early days of the Kiewa Valley Hydro-electric scheme including equipment, various work sites and photographs of workers and their families. 1-Breakdown in Circuit Breaker (Isolating Contacts) 2-Big Hill Bench- Site of No 5 Devlopment 3-No 1 Power Station 4-No 1 Pipeline, Anchor No 8 5-Push Dozing-RD8 Tractor 6- Tractor and driver at work 7- Workmen in unnamed tunnel 8- Front page of Journal of SECV Vol 15. ...Although the Kiewa Hydro-Electric Scheme was first proposed in 1911, construction did not commence until 1938. As part of the push to cut electricity costs and diversify supply, the Victorian Government (circa 1930) initiated the conversion from primarily brown coal supply to hydro – electricity. Field investigations during the 1940’s resulted in a new proposal for a scheme that had more than double the capacity of the 1938 scheme. The Kiewa Hydroelectric Scheme became the largest scheme of its kind in the State Of Victoria and the second largest scheme in Australia. The number of personnel involved in the planning and construction of the scheme increased dramatically. During the late 1940’s, most activity centered around the construction of the West Kiewa Power Station, Rocky Valley Reservoir, McKay Creek Power Station and the Bogong Creek Aqueduct.A common thread across all the larger hydro scheme constructions was the need for workers, both qualified and unqualified who came from around the world seeking a new life for themselves and their families. New accommodation and facilities were required for the army of workers engaged in construction in often remote and wild areas. The SEC had a high demand for timber, and set up the first of a number of sawmills at Bogong Creek in 1939 and set up the first hardwood logging in the headwaters of the Kiewa River. These new ‘towns’ such as Mt Beauty and Bogong, survived, serving the needs of operational personnel and their families, and expanding with growth of new industries. Mount Beauty, and to a lesser extent Bogong, are among these places. Large A3 size spiral bound display folder containing photocopied black and white photographs of various aspects of the early days of the Kiewa Valley Hydro-electric scheme including equipment, various work sites and photographs of workers and their families. 1-Breakdown in Circuit Breaker (Isolating Contacts) 2-Big Hill Bench- Site of No 5 Devlopment 3-No 1 Power Station 4-No 1 Pipeline, Anchor No 8 5-Push Dozing-RD8 Tractor 6- Tractor and driver at work 7- Workmen in unnamed tunnel 8- Front page of Journal of SECV Vol 15. Photograph of No 1 pipeline viewed from McKay Portal 9-Rocky Valley Dam Core Wall 10-Workmen working inside tunnel loading rocks into a rail truck. 1-Breakdown in (generator) Circuit Breaker (Isolating Contacts) Handwritten underneath (This is not a picture of any part of a generator. It is a circuit breaker Signed Ron White Ron was the Principal Hydro Engineer of the SEC Kiewa Scheme Page number 39 2-Big Hill Bench – Site of No. 5 Development (abandoned) Page number 40 3-No 1 Power Station Page number 41 4-No. 1 Pipeline, Anchor No. 8 Page number 42 5-Push Dozing – RD8 Tractor, 12 cubic yard Carryall and FD Cletrac Tractor Page number 43 6-No marking Page number 44 7-No marking Page number 45 8-Journal of State Electricity Commission of Victoria SEC Vol 15 No… April-May, 19… No 1 Pipeline-A view from McKay Portal G Hempenstall and D Sutton stiffening pipe section for transport during construction (….indicates missing text) Page Number 46 9-Rocky Valley Dam Core Wall Page number 47 10-No markings Page number 48 secv; kiewa hydro electric scheme; construction area; power stations; reservoirs; aqueduct; mt beauty; bogong -
 Kiewa Valley Historical Society
Photograph of Kiewa Valley Panorama, Kiewa Valley from No. 5 Road, Before 1945
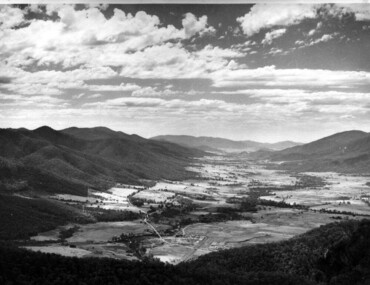
... Station and Big Hill Scenic Lookout. Is an excellent view of the Kiewa Valley before there was little work undertaken to establish the town of Mt. Beauty. Farming was well established with the evidence of huge areas of cleared land. The junction of the East and West Kiewa Rivers can be clearly seen. The first Workmen's camp is near the river and some workshop buildings can also be seen. kiewa valley camp buildings mt. beauty Handwritten on the back of photograph "Kiewa Valley from No. 5 Road". Black and white ...In 1943 a camp for workmen was erected and a commencement made with the erection of plant storage and workshop buildings in the new township of Mt. Beauty. The photograph was probably taken after the completion of these buildings. There is no sign of construction of the town itself. In the latter part of 1945 work was commenced on the Mt. Beauty township area with a medical centre, general trading store and some houses under construction. The No. 5 Road, from where the photograph was taken, is the road to West Kiewa Power Station and Big Hill Scenic Lookout.Is an excellent view of the Kiewa Valley before there was little work undertaken to establish the town of Mt. Beauty. Farming was well established with the evidence of huge areas of cleared land. The junction of the East and West Kiewa Rivers can be clearly seen. The first Workmen's camp is near the river and some workshop buildings can also be seen. Black and white photograph of the Kiewa Valley, looking North.Handwritten on the back of photograph "Kiewa Valley from No. 5 Road".kiewa valley, camp, buildings, mt. beauty -
 Kiewa Valley Historical Society
Photograph of Mt. Beauty, Mt. Beauty from transmission line, Approx 1950/51
... Hill beyond that. Shows the newly constructed town of Mt. Beauty surrounded by farmland and before the regulating pondage was built to discharge water from the power stations via the West Kiewa tail race tunnel into the Kiewa River. mt. beauty construction pondage state electricity commission Hand written on back of photograph "Mt. Beauty from Transmission Line" Black and white ...This photo is of the very newly constructed State Electricity Commission town of Mt. Beauty. The houses up to Nelse street were erected from 1946 onward and then the township was extended beyond Nelse Street in 1950 which places this photograph about 1950/51. There is no evidence of work being commenced on the regulating pondage but the tail race canal can be seen on the centre right of photo. The workmen's camp was enlarged in 1950 to the extent of providing accommodation for a total of 1,200. There are a number of dwellings on Simmonds Creek and the road to Falls Creek can clearly be seen. Snow capped Mt. Bogong is in the upper left of the photo with Mt. Beauty behind the township rising to Big Hill beyond that.Shows the newly constructed town of Mt. Beauty surrounded by farmland and before the regulating pondage was built to discharge water from the power stations via the West Kiewa tail race tunnel into the Kiewa River. Black and white photographHand written on back of photograph "Mt. Beauty from Transmission Line"mt. beauty, construction, pondage, state electricity commission -
 Kiewa Valley Historical Society
Book - Non Fiction History, The Kiewa Story, circa 1993
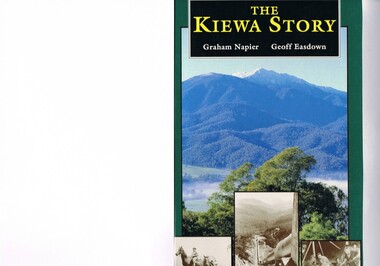
... stations(Pretty Valley and Big Hill) covered in original Scheme. This publication not only covers the development of the Kiewa Valley region with respect to population (within a socio-economical framework) but also the subtle but yet strong physical changes of a relatively pristine alpine region. The demands that an ever growing regional population places on the environment is clearly documented in print and black and white ...This book provides in chronological order the development of the Kiewa Hydro-electricity scheme from the first concept (1911) to final construction work (1961). It covers the first attempt to utilise the power of the Victorian Alps water system. It started from a private syndicate and developed to the current State Electricity Commission of Victoria. The incentive for the Hydro scheme was to make money and not as an alternative to the carbon producing coal fired power plants. These coal fired power plants were increasing in numbers to service an ever increasing demand made by population expansion, especially in cities and large rural settlements. This demand spiraled up after World War II when there was a tremendous spike in immigration numbers due to refugees and displaced persons in Europe. The ability to utilise the untapped water provided by the winter snow fields, for a higher yield in electricity, was a powerful incentive to overcome the physical hardships in this remote Alpine region. Future power requirements may initiate the re-installation of the other two power stations(Pretty Valley and Big Hill) covered in original Scheme. This publication not only covers the development of the Kiewa Valley region with respect to population (within a socio-economical framework) but also the subtle but yet strong physical changes of a relatively pristine alpine region. The demands that an ever growing regional population places on the environment is clearly documented in print and black and white photographs. The working and living conditions of those who constructed and gave life to this hydro scheme is well documented in this book. It may be viewed as spartan now but was relevantly good at that moment in time, especially for those workers fleeing a devastated European environment. The successful planning and consideration to minimising any intrusion upon the natural alpine forests and high plains can viewed as an example (compared to the Tasmanian Hydro schemes) of how future hydro schemes (an inevitable requirement) will proceed. Most rural towns (in the early 1900s) were built by unencumbered rural based citizens, with the exception of Mount Beauty and Falls Creek. These two settlements were brought into life by a State (Victorian) Authority for a specific function and program. They were a gated community, that is, only open to construction workers involved with the hydro scheme. All facilities within these communities were provided by the State Electricity Commission of Victoria. The impact on the social, financial and individual independency of the community, by the transition from the S.E.C .environment to one of local government (Shire of Bright), had in some cases a severe impact.This hard covered book has a green cover with pictures on the front and back covers. The front cover has a coloured picture of a snow covered Mount Bogong taken from the opposite mountain range. The valley between both ranges has a whisk of mist over it. At the bottom of this picture are three black and white photographs covering the construction of the Kiewa Hydro - Electricity Scheme. On the back cover is a photograph, (black and white) detailing the Bogong village and Junction dam containing lake Guy. The inside front cover is a black and white photograph which details the construction of the West Kiewa tailrace tunnel during April 1951. The inside back cover is a black and white photograph of the concrete pour at the Clover Dam circa 1952. All photographs and sketches are in black and white. The pages are approximately 160 g/m2 and those which have photographs are on gloss paper.Book spine: "The Kiewa Story Graham Napier Geoff Easdown" alongside this is a white framed circle with white spokes radiating out and underneath in white lettering SECkiewa valley, hydro scheme, victorian alpine region, electricity generators, graham napier, geoff easdown -
 Emerald Museum & Nobelius Heritage Park
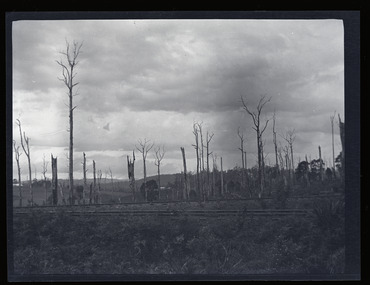
Negative - Image of The Railway Line, Baker & Rouse, Early 20th century
... hills from probably present-day Station Road. This stark image of bare landscape with dead trees recalls both the early timber industry in Gembrook and the practice of wide-spread clearing of land for farming use. Gembrook timber industry Railway 1900 early 20th century Station Rd Handwritten on (not original) packet containing negative: 'Railway line & dead trees /Gembrook' Black and white negative - landscape view - of the railway line at Gembrook. ...This negative is one of a batch of ten images taken apparently around the same time at Gembrook c. early 20th century. This one is of the Ferntree Gully to Gembrook railway line, which was completed in December 1900. The view looks northwards to the hills from probably present-day Station Road. This stark image of bare landscape with dead trees recalls both the early timber industry in Gembrook and the practice of wide-spread clearing of land for farming use.Black and white negative - landscape view - of the railway line at Gembrook. The railway is in the foreground. The landscape is bare apart from dead and ringbarked trees. Negative has been kept inside a packet which is not original.Handwritten on (not original) packet containing negative: 'Railway line & dead trees /Gembrook'gembrook, timber industry, railway, 1900, early 20th century, station rd -
 4th/19th Prince of Wales's Light Horse Regiment Unit History Room
Photo Albums - set of two, c. 1919
... Got him back with us when we countered. 357 Signal station at CANA 358 H Videon in german rig 359 ROD-EL-FARAC 360 Sweetwater Canal ZAG-A-ZOG 361 Hospital train on beach EL-ARISH 362 Jerusalem Road 363 Bedouin camel and young'un 364 Admiralty Offices, PORT SAID 365 Suez Canal PORT SAID 366 Taking wounded to clearing station 367 Hills of 10-60 MALHA 368 Junction Station 369 EL ARISH 370 Wine Distillery LATRON 371 White figures how entrance to Pyramid 372 RAPC Wireless Station 373 Sports in Canal. ...Got him back with us when we countered. 357 Signal station at CANA 358 H Videon in german rig 359 ROD-EL-FARAC 360 Sweetwater Canal ZAG-A-ZOG 361 Hospital train on beach EL-ARISH 362 Jerusalem Road 363 Bedouin camel and young'un 364 Admiralty Offices, PORT SAID 365 Suez Canal PORT SAID 366 Taking wounded to clearing station 367 Hills of 10-60 MALHA 368 Junction Station 369 EL ARISH 370 Wine Distillery LATRON 371 White figures how entrance to Pyramid 372 RAPC Wireless Station 373 Sports in Canal. ...Memorabilia of 908 Dvr Thomas Edward Whyte, 3rd Light Horse Field Ambulance, World War 1 READ THIS. During the last war I sent these pictures home through devious channels. When I lobbed back I found them all pasted in these albums by my young brother Billy. He was only a kid then! Nowadays he is serving up North. Went away with the original 9th Battn. Was in the Blitz on England and served in Libya, Tobruk, Greece, Crete and Palestine and was twice knocked. It's not long since the last upheaval 1914-18 and I wonder if these boys think as we did. This will be the last war? I sincerely hope so. TWSet of two photo albums. Photos pasted into albums with captions in white ink. Photo captions - Vol 1. (? = not legible) 1. Prisoners from ES SALT 2. Dust scene at AUJA FORD. 4th LH BDE 3. ? ? CHEOPS PYRAMID 4. Houses and domain WASSA battle 5 .Pontoon at SERAPELAI 6. SPINX (sic) & PYRAMID 7. The Nile floods occur once yearly and all irrigation centres are alternatively flooded 8. Pontoon bridge over SUEZ Canal at SERAPEUM . Constructed by Aust Engineers 9. The arrival of newspapers and mail 10. Lake IIMSAH-ISMALIA 11. Camp outside Jerusalem. Walls of old city easily discernible 12. Roman walls on beach at MONTAZEH 13. ? ? These boats are used for conveying between steamer & shore 14. Interest shown in the new issue. Through the scarcity of horses Batmen/Grooms and drivers ? allotted donkeys ? ? 15. DAMASCUS GATE JERUSALEM 16. Trumpeter ? 17 Indians making ? for railroad 18. 'SPELLO' Sinai Country 19. Police searching Egyptian labourer 20. Cavalry ?? SHA? 21. Entering ? WADI ? 22. Bedouins at ? 23 No caption 24 No caption 25 Bolar trees EZBEKIEH Gardens CAIRO 26 .Flamingos at NOUZEH Gardens ALEXANDRIA 27 BARAGE 28 KASR-ELNILL Bridge 29 NOUZEH GARDENS 30 AMGS on beach at ? 31 NOUZEH GARDENS - ALEX 32 Mascot of 7th M.V.G. 3RD ALHR 33 Printing on walls inside St Mary's Church. Depicting the Flight from Herod. (Corner torn off photo) 34 Inside Virgin Mary's Church at MATARA 35 ? painting in Church ?? 36 SUEZ Canal. Finish of Arab pony race. ZAL-A-ZIA 37 Admiralty offices at PORT SAID 38 A corner of CHEOP"s PYRAMID 39 The Spinx (sic). Nose was blown off by a shell from one of Napoleon's guns. 40 Monastry on the MT of TEMPTATION 41 Mess orderlies. Foodstuffs in locker given to troops by the AIF 42 Mid day meal on treck 43 Ambulance sand carts for conveying wounded and sick over desert sand 44 3rd ALHB 45 Kaisers Church JERUSALEM. Inside is a large painting figuring the Kaiser & Kaiserine holding a model church. 46 Bedouin women drawing water from well at EL-ARISH 47 2nd ALH BGDE doing route march on JERUSALEM-JERICHO ROAD 48 GEN HODSON GOC Anzac Mounted Divn presenting decorations & investitures on the sands at SHEIKS-ZOWAID 49 Armoured Car 50 Snow at the CEEDERS (sic) on Mt LEBANON 51 Compulsory phenyle bath for all troops in front line area 52 Austrian guns taken at point of bayonet by NZ & 2nd BGDE at GAZA 53 CACHOLETS for carrying wounded 54 The boys found some timber and made a spring board on SUEZ Canal 55 Bedouin wedding. The Bride travels in state amongst rubbish on top of camel. Her father leads conveyance. 56 Australian graves at SHALLAL 57 Camel Transport Company bring rations along beach 58 Billy the mascot holds an offensive & checks advancement 59 Exercising horses at HELMIEH Egypt 60 PONT-DE-QUOBBA Egypt. A suburb of well-to-do Egyptian merchants 61 Demolition stunt at ASLU. Bridge destroyed by Australian Engineers 62 Swimming horses in Great Bitter Lakes Egypt 63 On the move along Wadi 64 On the shores of the Bitter Lakes EL-EGYTE 65 A leave party waiting for the pontoon to swing into position 66 Carting grain 67 Egyptian Brass Band 68 French warboat (sic) in Canal 69 Russian Troops from Mesopotamia passing through SUEZ Canal 70 Prisoners coming in under escort. Turkish & German officers in lead mounted on ponies 71 Turkish prisoners 72 T.B.D in Canal 73 Old trenches on SUEZ CANAL near BITTER LAKES on W Bank 74 Monitor in Canal 75 Block house, trenches & entanglements near Post 62 76 A halt in an Egyptian village EL-MARO' 77 Mobile wireless plant 78 On the road from Canal to Railhead 79 Old Turkish guns in ancient fort at ALEXANDRIA 80 Francenia steaming through Canal 81 After MAGHDABA stunt. Convoy taking wounded form EL-ARISH to railway at 139 82 Indian Camelry 83 Virgin Mary's Church 84 Sluice gate at BARAGE Egypt 85 Hospital at lower W bank of Canal 86 Virgin Mary's tree 87 Sweetwater Canal at ISMAILIA Egypt 88 Halt and Feed. The A.M.C. attached to flying column. 89 Bringing stores ashore at JAFFA 90 H Videon & J Britton astride donks. Horses became scarce through casualties etc and units had donkeys issued to them 91 RAMLEH. The traditional burial place of St John the patron saint of England (sic). 92 Jewish Synagogue at RISHON-COUR-LE-LION (Richard the Lion Hearted) 93 Water tower at HELIOPOLIS 94 Portion of camp on HELIOPOLIS Racecourse 95 Arrival of papers 96 Sand sleigh 97 Boring plant & prisoners taken on the JIFF-JAFFA stunt. Two Austrian officers and party of Turks taken whilst building a concrete gun emplacement 98 The obelisk at MATARIA 99 In an avenue of Australian gums at ZEITOUA 100 Mountain battery gun 101 The 3rd ALH BGDE camped at HELIOPOLIS Racecourse 102 Captured Turkish guns 103 Turkish and Austrian prisoners. JORDAN VALLEY 104 The MT of Temptation Monastery built over spot where Christ spent his 40 days 105 Refugees from ES-SALT at JERICHO 106 3rd LHFA and 8th LH REGT at HELIOPOLIS 107 Fig trees at Roman Wells JIFF JAFFA 108 Inside the Blue Mosque CAIRO 109 Lagoon that was destroyed on JIFF JAFFA stunt 110 Section race at Brigade sports 111 Another tombstone at ALEX 112 Innoculating female date palm 113 Bronze tombstone in a cemetary at ALEXANDRIA 114 Luna Park at HELIOPOLIS 115 Egyptian water buffalo. Used by natives for ploughing etc 116 Russian church. Some call it the "Church of St Mary Magdelene" 117 At pyramids GIZA. Billingsley lost leg & McMullin KIA 118 Pontoon bridge over Suez Canal 119 DURBAN 120 Rescue work 121 Paddy Hanly 122 Motor train for conveying rations between Canal and Railhead. 123 At MUCKSHUBE ? 124 British ??? 125 Bedouins bringing in their harvest from the fields of ABBASSAN-EL-KEBIR Palestine 126 German HD QTRS BEERSHEBA 127 Date ? SINAI 128 Military railroad running through ? at EL-ARISH 129 Street scene at KHAN-YUNIS Palestine. Samson often called at this place to visit his girl. Napoleon narrowly escaped capture here during his ? in 1799 130 Date palms bearing fruit. These do not ? they are ?? 131 Motor ambulance convoy 132 Turkish hospital BEERSHEBA 133 MT CALVARY 134 Town Hall BEERSHEBA 135 Railway station BEERSHEBA 136 ASLUJ 137 Turkish depot MAGDABA 138 DURAN 139 3rd ALAB Hospital 140 Main Street PORT SAID 141 Stock Exchange ALEXANDRIA 142 The "Bull Ring" 14th AGH 143 (Double exposure) 144 Jewish School at DURAN Palestine 145 Damascus Gate JERUSALEM 146 Roller used for grinding clay for making bricks 147 The Harbour at ALEXANDRIA 148 Part of Napoleons Road along sea shore opposite BEELAH 149 Hotel at ALEX. Barred to the troops of course. 150 HELIOPOLIS 151 -153 ALEXANDRIA 154 Ambulance treck 155 Cacholets at the casually clearing station 156 Refugees from ES-SALT entering the Jordan Valley. Mts of MOAB in background 157 Cameliers bring in prisoners 158 The "Niagara". Casualties were from the front line by all descriptions of transport and passed through several field hospitals until they eventually reached the railway. They were sent to KANTARA by train. Despatched from there to PORT SAID by this boat 159 JERICHO 160 Turkish prisoners in JORDAN VALLEY 161 Bedouin nippers of SINAI 162 Bridge destroyed by ALH at ASLUJ 163 Railway sheds at BEERSHEBA. Portion was set afire by retreating Turks 164 ASLUJ Station 165 German Hospice 166 at ASLUJ 167 Suez Canal offices PORT SAID 168 MENA Village from top of Cheops. White lines at left are roads made by Australian troop. First Aust Contingent camped here. 169 A felukeh passing through gate at BARAGE 170 Military railway terminal EL ARISH 171 (No caption) 172 Egyptian family waiting for a train 173 Turkish prisoners and captured material coming in 174 Turkish wounded at BEERSHEBA awaiting removal 175 Two hospital ships at ALEXANDRIA 176 Some of the Bd boys 177 Race meeting 3rd ALHB at TRIPOLI- SYRIA 178 The blacksmith and Rodney Thomas swimming horse in SUEZ CANAL 179 Natives grinding grain 180 Thoroughbred 181 MUKATTAM HILLS 182 Trenches at JIFF JAFFA 183 MacBoyd as a Padre 184 Egyptian Syce having shave by travelling barber 185 The creek outside ALMINA 186 Cameliers 187 Clearing Station on beach at EL-ARISH 188 Wadi at TALLAT-EL-DUMM 189 Motor transport park 190 Some of the boys 191 Pompeys Pillar 192 at MAGHDABA 193 Hospital at JERUSALEM 194 Cheop's Pyramid 195 Golden Gate JERUSALEM 196 Hustling Turks through BEERSHEBA 197 Holy City 198 Mosque of Omar Jerusalem 199 Railway bridge destroyed by ALH at ASLUJ 200 Enemy material captured at SHERIA BEERSHEBA 201-3 These Mosques built with alabaster taken from pyramids at GIZA 204 Pontoon bridge built by our Engineers over RIVER JORDAN 205 3rd Bgde in Koil at MASAID 206 Billy McGhie throwing the weight 207 Nirazeh ? Gardens 208 Motor Ambulance Park 209 Bedouin women in Palestine village 210 ALEXANDRIA 211 Junction Stn 212 Indian Lancers 213 Motor convoy at ESSANI 214 A & B Sections 215 JERUSALEM. Once known as the 'City of Palms' and presented to Cleopatra by Anthony 216 Monastery on the Mount of Temptation. Situated on the Hills of Solomon on E side of Jordan Valley just behind JERICHO 217 DURAN A Jewish village in Palestine 218 One of our planes meets with a mishap on landing 219 Bedouin flocks around NABLUS 220 ES-SALT Road just above Jordan River 221 Halt! Action Front! Getting guns into action from pack 222 Village well 223 Gun inspection 224 WADI GHUZZEE Bridge 225-6 At GIZA Zoo Egypt 227 Syrians gathering olives 228 Smashed plane 229 MacBoyd 230 Bridge across Jordan at GORRONHOER 231 Competitors for Gretna Green. 3rd Bgde sports at TRIPOLIA 232 EL ARISH 233 Main street JAFFA 234 The beach at MARI-KHEB 235 Scene of old Cairo 236 Bedouin market 237 Bridge built over Wadi EL-ARISH. The biblical "River of Egypt". 238 Old water reservoir in native village 239 A "spello" on the track 240 Plane going out on reconnaissance 241 Bomb attached to carrier on a plane 242 Ancient Turkish gun at forts in TRIPOLI - SYRIA 243 Gun inspection 3rd AMGS 244 Old Turkish trenches outside GAZA 245 Wadi KHUZEL Bridge at SHALLA 246 BEERSHEBA 247 Street scene ZAG-A-ZIG 248 Spinx (sic) & Pyramid - GIZA 249 Egyptian Coastguards at ALEXANDRIA 250 A Palestine camp E Troop 3rd MG Sqn 251 B class horses killed in Syria 252 Scene from summit of Pyramid 253 Bert Richmond & an old Turkish Howitzer on MONTAZEH 254 LION'S WELL 255 Australian trenches outside Ferry's Post near Hill 70 256 A street scene in HELIO{PLIS 257 Electric trams at ALEXANDRIA 258 Cleaning harness 259 Swinging pontoon bridge into position at SERAPEUM 260 British Monitor in Suez Canal 261-2 Scenes of Turkish buildings at MAGHDABA. Taken by the ALH The first time in history mounted troops have attacked and taken entrenched positions 263 Aussies at Egypt's ancient monuments 264 Scenes of old CAIRO from MOKATTAM Hils 265 Bridge across canal at BARAGE, 16 miles outside CAIRO 266 Curly and Vic Norton 267 Stumpy McIntyre & Long Pikington 268 In Wadi GHUZZEL near TELL-EL-JEMM 269 Digging post holes for stables 270 Cameliers bring in prisoner. Austrian Officer in black 271 White washing mess shed 272 F Troop 3rd AMGS Sqn 273 Jews at Recruiting Depot at JERUSALEM, forming Jewish Battalion 274 In Jordan Valley, 3rd Machine Gunners have 8 horses killed by an aerial torpedo 275 Turkish prisoners 276 Cocos Island 277 Snow on the Lebanon Ranges 278 Egyptian Hotel 279 Gordon Wake. Note intruders 280 Electric trams at HELIOPOLIS Egypt. Heliopolis built by Belgian firm in 7 years 281 Sweetwater Canal at SERAPEUM 282 The ? wells at JIFF-JAFFA 283 Virgin Mary's well at MATARIA. Boyd, Simpkin & Crowley 284 Cricket for convalescents at MONTAREH 285 Indians working at cutting for military railway 286 Australian Hospital BEERSHEBA 287 Removing wrecked ambulance car from rail road 288 Engineers depot in ? at EL-ARISH 289 Water preservation scheme at SHALLAL 290 German Princes Palace at HELIOPOLOLIS 291 Some of the boys 292 Aussie aerodrome BEELAH 293 EL-JALLAH outside BETHLEHEM 294 Some of the gunners 295 Trying camels in gun carriages. Note sand caterpillar 296 Street outside old city JERUSALEM 297 D.H QRS In EL-ARISH. Hod 298 Cairo Museum 299 Wadi bridge built by Army Engineers 300 A two storied building at GALM used as German HQrs until reached by our guns 301-2 No caption 303 Ambulance with Flying Column 304 Jack Pegg 3 AMGS 305 KHAN YUNIS 306 In the Jewish village of "Rischon le Lion" 307 Wet Canteen BEELAH 308 Motor Transport LATRON 309 Gen Chauvel OC Desert Mounted Column 310 10th LH - Inverness Battery "Railhead" 311 3rd LHFA "SERAPIUM" 312 ESBEKIEN Gardens "LE CAIRE" 313 Camel training and wireless station Hill 60 314 ZAG-A-ZIG Rly Stn 315 One of the Irrigation Canal locks "HELOUAN" 316 Indian Camel Corps 317 Base at Hill 60 318 Aussie transport arriving "ALEXANDRIA" 319 3 ALHB at AL MINA 320 Main entry to city of JAFFA 321 Mosque at DAMASCUS 322 A Turk brought to earth by one of our patrols 323 Brigade boxing contrst 324 Ostrich farm ZEITOUN 325 MATERIA 326 No caption 327 Mail day 328 3rd LHFA entering HELIOPOLIS from MENA 329 M Boyd, L Simpkins, S Crowley 330 Stretcher bearers 331 French Hosp JERUSALEM 332 SERAPIUM 333 Gippo crushing wheel 334 On the move - bully and biscuits 335 V Morton, F Stokes, L Simpkins & Hanley 336 Turkish prisoners - SHERIA 337 Getting used to the mask J Antonio MM 338 Sand carts 339 Model house - MONTAZA Hospital 340 "Abdul" 341 Wood Depot "ESDUD" 342 On troop ship - from Syria 343 Turkish prisoners "JULIUS" 344 TRIPOLI 345 3rd AMGS cook house "BEELAH" 346 Breaking camp "ZEITOUN" 347 Turkish prisoners "GAZA" 348 One of our tanks. About nine were blown out of action at GAZA 349 Camp in HOD-EL-ARISH 350 German HQRS BEERSHEBA 351 Race Course TRIPOLI 352 A Locke & P Leeming 353 Sea planing in Suez Canal 354 MOASCR detail camp 355 KANTARE Suez Canal 356 Four boys of MG Sqn at cards while convalescing . Marked X was a prisoner of war for three days. Got him back with us when we countered. 357 Signal station at CANA 358 H Videon in german rig 359 ROD-EL-FARAC 360 Sweetwater Canal ZAG-A-ZOG 361 Hospital train on beach EL-ARISH 362 Jerusalem Road 363 Bedouin camel and young'un 364 Admiralty Offices, PORT SAID 365 Suez Canal PORT SAID 366 Taking wounded to clearing station 367 Hills of 10-60 MALHA 368 Junction Station 369 EL ARISH 370 Wine Distillery LATRON 371 White figures how entrance to Pyramid 372 RAPC Wireless Station 373 Sports in Canal. ANZAC Day 1916. Prince of Wales is aboard white launch. 374-5 Captured Austrian boat. 40,000 cases of benzine aboard. She was brought into Canal at Port Said. Spies set her afire. She burnt for some considerable time and eventually blew up. 376 Pumping water from Wadi on Muckshabee stunt 377 On trenches 378 Bringing in disabled battle plane 379 Giving a motor transport a lift 380 Old Turkish howitzer. MONTAZZA 381 Jerusalem country 382 Palm Hod in SINAI. Trees do not bear dates until 14 years old. No bees here. Palms innoculated by Bedouin. 383 Camel cacolets for conveying wounded 384 ESKBEKIEL Gardens Cairo 385 LAKE TIMBAH 386 Xmas dinner 1916 387 Gift billies from ACF 388 Section competition 389 In big marquees HELIOPOLIS 390 HM Landships 391 Capt Aberdeen inspecting horses 392 Football. Black vs White 393 The game 394 Old Napoleon fort. 10 mile along coast from ALEX 395 Jewish Cemetery AKRON 396 Ration fatigue 397 Blowing bottom out of Turkish Reservoir to allow soakage 398 Tilley & Farley - 14th AGH 399 At GIZA Zoo. Note height of giraffe 400 On this stunt we destroyed Turkish reservoir of 2 1/2 million gallons 401 Demolition party at wells MUCK-SHUBE 402 3rd ALH Bde HELIOPOLIS Race course 403 HMLS "Lady Wingate" 404 Turks blew out our tanks at GAZA 405 One of our aviators captured by German. Note German wearing Iron Cross. Snapped behind Turkish lines. Original of this snap was dropped at Aust aerodrome to let them know Aussie airman was alright and not killed in capture. Chivalry 406 Sausage observation balloon 407 READY 408 Bomb on carrier 409 Testing 410 B Richmond, Wireless Operator RAFC 411 Loading Bomb 412 Crash in desert 413 Bomb in YMCA at MAZRAR 414 No caption 415 LW Simpkin - Late 3LHFA 416 LEMNOS 417 Shelling the MARSDEN 418 Pontoon across Jordan River 419 Shells on Walkers Ridge 420 Sweetwater Canal 421 LAKE ISMAILIA 422 Indian Lancers on Canal 423 CAIRO Railway Station 424 Destroying Turkish water supplies. Explosives used for breaking clay at bottom of lagoon, help to absorb water 425 Exercising horses at ZEITOUN Egypt 426 In Wadi on MUG-SHUBEE stunt 427 Tractor drawing 60 lb gun towards front line 428 Sultan's mother's place at HELIOPOLIS = City of the Sun 429 Camped on the sands outside RAILHEAD, Jump off for SINAI campaign 430 G Turner & A Lockwood out for a camel ride. 431 GAZA and Nile floods from top of Pyramid 432 Baby refuses to carry his harness and his pal wears an astonished look 433 No caption 434 Turkish Officers 435 Regt HQRS at IBEETA 436 No caption 437 3rd Machine Gun Squadron 3rd ALH Bgde (my unit) 438 Camel Corps at dinner 439 KHEFREN Pyramid snapped from top of Cheops 440 CHEOPS 441 Pyramids 442 MENA from top of Pyramids 443 Snap from Pyramid showing MENA-CAIRO road running through Nile floods 444 MENA village from Pyramid 445 Band of British West Indies Regt 446 Gippo Band 447 Swimming on Med Sea 102 KmA 448 H Maddocks 449 Bedouin and Egyptians utilise any animals for their fields 450 Captured Turkish train - BEERSHEBA 451 Gardens ISMAILIA 452 Gippos used for horse lines etc 453 Canteens at HELIOPOLIS 454 3 ALHB watering in Wadi on ESSANI stunt 454 JAFFA 455 ALEX, Napoleon relics 456 Egyptian water wheel 457 SUEZ 458 WADI GHUZZEE 459 On Reconnaissance at 10-60 460 Goats and sheep captured from hostile Bedouins 461 Pontoon SERAPIUM 462 Aust trenches - Suez Canal. Turks attacked FEB 1916 463 Camel transport 464 3 ALHB Wireless Station. Col Scott 9 LH got DSO on this stunt (MUCK SHUBE) 465 ALEXANDRIA 466 Canal Hospital Ships 467 Ambulance - Sand cart 468 At old Cairo 469 No 1 Casualty Clearing Station 470 3rd Brigade on move 471 3rd LHFB- Making camp SERAPIUM 472 Watering horses 473 Moving up wadi 474 The wells at Wadi GHUZZEE 475 Camel transport SINAI 476 Turkish reservoir destroyed by ALH 477 Wall in a Luxor tomb 478 Entrance to "Temple of Bulls" 479 Bob White 480 Bedouin crops 481 Harem of Montazza, Turkish prince 482 Jack Holmes, Billy McGhee 483 MUDERIA, B Troop post 484 JIFF JAFFA 485 Natives on railroad construction 486 Aust graves SHALLAL 487 The Stumpy Mirror 488 R Nile at MANSUREH 489 Aust graves - BEELAH 490 NOUZEH Gardens - ALEXANDRIA 491 On issue from QMS. Take what comes. Fit does not matter 492 MATARA 493 German Yacht Club - ALEX 494 Old Turkish Howitzer and cannon ball 495 Field hospital 496 Gardens at BARAGE 497 A dispute's ending 498 Snow. MT LEBANON 499 Bedouin sheep 500 Combat in the air 501 no caption 502 Old Napoleon gun 503 Gordon Wake HQ car 504-5 Burying the dead at GAZA 506 Water Polo 507 Brigade boxing comp 508 Field cooker 509 Bridge on Jerusalem road, Blown up by Turks 510 Teaching horses to lay quiet. For protective purposes 511 "Major" and "Bitsy" 512 Bedouin Scarabs 513 Convalescent 514 1. W Billings. Returned to Aust 2. W McMahon KIA 515 Hospital 516 Coming good 517 1st day up - 14th AGH PORT SAID 518 Back again in Regt 519 Billy and Taffy 520 Stew 521 KHAN YUNIS 522 MENA 523 Casualties PORT SAID 524 Washing 525 Mail 526 Gun from the "Emden" mounted in Syney 527 MARSURES 528 Desert bivouac 529 HASSED 530 3RD ALH Bde. Good camp (Extra) All conv's 531 New issue 532 On to another camp (8 LH Regt) 533 Shore - JAFFA on MED SEA Photo Captions Volume 2 (Illegible = ?) 1 The Cedars on Mt Lebanon, according to tradition originated from the staves of the 12 Apostles 2000 years ago. 2 TIBERIUS taken 27th Sept '18 3 NAZARETH taken 20th Sept. German officer and Arab pony 4 TIBERIUS fell on 27th Sep. Von Saunders was the GOC of Turkish Forces in Palestine 5 Jordan Valley & Plains of Jericho run between Mts of Moab & Hills of Solomon. Distance across valley from foot of each range of hills abt 13 miles, looks ? 6 Storm on Sea of Galilee 7 DAMASCUS fell on 1st October. German vehicle park. 8 German funeral near Jerusalem 9 JENIN. German Headquarters. Fell 20th Sept. German field bakery 10 Three pages back will be seen a storm on GALILEE. Note now calm here. This photo taken near spot from which the previous one was taken. German motor launch on Galilee. 11 Captured intact on 20th Sept. German workshops JENIN 12 Turkish aerodrome captured here. Hostile aircraft landed whilst it was in our hands. Aviators greatly surprised and even indignant. Motor smash near EL FULE. 13 German Orderly Room (Ammunition box full of gold), DAMASCUS. All this gold Turkish coin secured by our troops. 14 German artillery on the way to the front near KENETRA. The ALH swooped down on the artillery around this vicinity & captured many field guns. 15 German Despatch Rider on the road to ES SALT. Unsuccessful raids carried out on ES SALT on 30th April & 4th May. This country was hard on men and horses. Goat tracks were used at times but horse were led most of the time. Stunt lasted 14 days in wet weather & horses were only unsaddled for about 2 hours during stunt. 16 Strand, ? , Tiberius, Gallilee 17 German workshop. Captured by ALH 18 One of the dead lying outside GAZA. Killed 19th April 17. We could not bury them before November 19 Some of the boys that fell in the charge at BEERSHEBA. Tibby Cotter 20 Collecting our dead for burial. They were K in A on the 19th April at GAZA. Buried seven months later, 23,000 casualties in one day 21 German U-Boat 22 Page of postage stamps and money - Struck to commemorate Gallipoli victory - Turkish war postage stamps - War duty - Turkish war bank notes 23 Pamphlet. With paper badges affixed These badges were worn by young Egyptian students. Arabic translation means "Egypt for Egyptians Long Live Egypt" This pamphlet was printed under German influence & distributed around ZAG-A-ZIG, the chief centre of hostilities during the recent Egyptian riots. The Young Egyptian Students influenced the Natives to oppose British Administration, what they called Tyranny. They professed to have sufficient competent educated men to govern their own affairs, but our Heads would not hear of it. Consequently the riots. Many ? and soldiers killed. All railways and communications disorganised. It took several months to bring things to their normal ? Pictures of medals 1. In honour of General Falkenhaugh GOC Turkish Forces 2. The Victorious Emperors of Germany, Austria and Turkey 3. Egypt Awakening 24 Those large photographs I sent you were procured for me by a pal who knew the chap that owned the negatives. The owner of these snaps belongs to the 5th Regiment of the 2nd Brigade, and he took the camera from a Turkish Officer. It had only 6 snaps of a spool of 10, and the BIll Jim finished off the spool by taking 4 of the special entry into Jerusalem. The cross indicates those taken by the Australian, the remainder were taken by the Jackos in the vicinity of BEERSHEBA and SHERIA Turkish field bakery 25 Cavalry going up to support their own line. However never had much action against the Turkish horsemen 26 Turkish Electricians in the field. I have an idea that this photo was taken to get the centre figure. He looks dinkum Australian. Note Australian leggings on Turk on the right 27 Turkish machine gunners ready for action. This is very much like the Beersheba country. Turkish officers on the right, and along side him is the range taker with his Barand Stroud. We use these instruments in the Sqn and they cost about 83 (Pound) 28 Turkish General Head Quarters just beyond SHERIA. Note hard rocky country 29 Turkish Cavalry watching a fight and getting ready to go into action. This is at SHERIA, and the heavy fighting lasted several days. Plenty of water and the Jacko's tried their hardest to hold on to this pozzie. Often our chaps met the gamer Turks in the dead of night, because both sides were on the same game, crawling down for water. This stunt is known as the Junction Fight. 30 Official entry Dec 11th. The official entry into Jerusalem. Sir G Allenby in the lead with his staff officers of the French and Italian troops accompanying him. Guard represents New Zealand, Australia, England Wales Scotland Ireland and India entering theJaffa Gate 31 Sir Ronald Storrs made Governor of JERU. Captured 9th Dec 17. Reading the Proclamation, General Allenby wearing white breeches. Troops of other nations were present, and the notables of Jerusalem. It was read from the foot of the Tower of David, a place that has been standing since the time of Christ 32 The first of the British troops entering Jerusalem. A few Turkish officers may b seen walking at the head of the column. Populace in a bad plight, very poor and no tucker, and all were greatly overjoyed at the ?? of the British Hundreds and kiddies ill treated ?? (Part of caption missing) 33 10th LH Regt first to enter JERUSALEM. Mounted officer on the right supposed to be the CO of the first troops to enter Jerusalem. Note mud on the horses. Had very wet and muddy weather 34 Dead Jacko 35 Turkish machine gun and crew 36 Hanging Armenian doctors who refused to join Turkish Army 37 Outside Damascus Gate Jerusalem 38 Turkish patrol lying outside trench at EL BUAJ 39 Burying Aussies at DAMASCUS 40 1. Djemel Pasha 2. General Limon Von Saunders GOC Turkish Forces in Palestine 41 One execution in Egypt. Executing an Egyptian offender 42 Turkish atrocities DAMASCUS 43 Turks occupying trenches outside JERICHO 44 On ASLUJ demolition stunt. Feeding and spelling. Arrived at Rendezvous too early 45 Turkish saw bayonet 46 Captured guns taken at BEERSHEBA & SHERIA 47 Our gunners obtained a direct hit on ammunition train 48 The large and small of the game. At GAZA. 74th CCS in background 49 Around JULIOUS. These Turkish shell dumps were very numerous around this vicinity 50 Captured Turkish Cavalry 51 Cavalry leaders 52 Turkish machine gun & crew 53 Enemy officers. One on left is wearing Iron Cross ribbon 54 Captured Austrian boat afire, Suez Canal Port Said. 40,000 cases of benzine aboard. Fire a mysterious outbreak 55 ? Hotchkiss gunners and enemy aircraft over ? TELL-EL-FARA 56 Types of enemy officers. One of our bikes in their possession. Recaptured later. The five pointed medals worn by these officers is called the Gallipoli Star. Issued to commemorate the Turkish victory at Gallipoli 57 Our batteries put in some good shooting amongst Turkish transport 58 Showing compactness of Turkish trenches 59 Desert homes. The only time we had cover in SINAI was when we camped near a Hod. Then we could use date palm leaves 60 JIFF JAFFA 61 ZAITZOUN 62 10th Regt MGS amongst hills outside JERUSALEM 63 Jews wailing place JERUSALEM 64-5 German post card characters 66 Post Card PHYLAE The Kiosk 67 Post Card Vue du Canal de Suez 68 Post Card No 93 Queen Street, Fort, Colombo 69 Snipers at NALIN Sth Syria. Lousy country for richochets. Nast wounds. (Aust War Memorial Melbourne) 70 Myself on Ginger. This little neddie is boshter jumper 71 Magazine cutting - Lt C H Vautin & German airman G Felmy 72 9th Regt 3rd LHB Judean Hills outside JERUSALEM. (Aust War memorial Melbourne) 73 Sand hills SINAI ? Desert (Aust War Memorial Melbourne) 74 3rd LHB spelling at GALILEE (AWM Melbourne) 75 Jordan Valley outside JERICHO (AWM Melbourne) - lovely Jordan Valley, dust and heat, 1280 ft below sea level 76 Copy of no 69 77 Watering at MATARIA 78 A desert grave - Tpr H R Olver MM 6th LH MGS Beneath this simple cross there lies a comrade true and tried He fought as fights a soldier And like a soldier died 79 B Section. When they first took our Stetsons and issued cumbersome helmets 80 Palestine types of Turkish and German officers 81 Some of the gunners amongst the snows in MT LEBANON 82 The country around JERUSALEM 83 JERUSALEM 84 Fishing ? ? at GALLILEE 85 Jerusalem taken Dec 9th. Official entry on the 11th. Jerusalem (showing) Holy City and Mosque of Omar 86 Turkish shell hits old tomb at ZERNUKAH. Capt Hurley official photographer - AWM Melbourne 87 14th AGH at PORT SAID 88 Human bones at Dead City ABBASSIA 89 3rd ALH Bde at HELIOPOLIS 90 Men wearing gloves 91 Wireless station in course of erection at MATARIA - 28 masts 92 Old slave market at ABBRASSIA. Many excavations performed on projecting wooden frame at corners 93 3rd guns on the move. The beautiful scenery between LATRON & JERUSALEM 94 Bedouin agents 95 Collecting captured enemy material 96 Captured double-engined plane 97 On the march. Country at Eastern SINAI 98 Anzac mosaic found at SHALLAL whilst trench digging now covered with gun etc ready for removal. Was sent to Canberra. 99 A Troop watering. A rotten job at a small well when horses are thirsty 100 The new Jericho road. Running through Hills of Solomon Valley in distance 101 Gun inspection 102 Draining pools at WADI AUJA. Keeping down Malaria carrying mosquitos 103 8th Regt and 3rd AMGS at BEELAH 104 A rendezvous in the Jordan Valley 105 2nd ALHB camped outside JERUSALEM 106 WADI AUJA in the Jordan Valley 107 Hospital train on the beach at EL -ARISH 108 Jacko's 109 Jerries 110 Stables of Turkish Headquarters SHALLAL 111 Early training. Every man to throw and quieten his horse for purpose of taking cover 112 A Troop 3rd Guns at TAALAT-EL-DUMM 113 Watering at WADI GHUZZEE 114 J Rushden KIA at ES-SALT 115 J Carling F Troop 3rd AMGS. Taken prisoner at EL-BURJ. Repatriated after Armistace 116 Captured enemy plane 117 Jacko gun 118 Brig-Gen Galloping Jack Royston. OC 3rd ALH Bde 119 Cleaning ammunition belts in the Hod at MASAID 120 Bringing up the fodder at ABBASSAN-EL-KEBIA 121 Some of the boys amongst the snow on MT LEBANON 122 Turkish barley crops at SHALLAL in Southern Palestine 123 The crops a few weeks after our horses had been in this vicinity 124 Clearing up after a stunt 125 On the move. 5 minute spells for the horses 126 In Jordan Valley. An airial torpedo lobbed amongst 3rd MG Transport horses & killed 28 127 Camel ration convoy coming along beach 128 Field Hospital at ET MALER 129 Desert graves at ROMANI 130 A day on the beach. Wash self, horse and clothing 131 Watering on the beach at BEELAH. Note how close fresh water is to the seashore 132 A patrol caught by a shell 133 Spello 134 Crossing the Wadi 135 Halt! Weights off and feed 136 Gas instruction 137 F Troop at TELL-EL-FARI 138 Xmas Dinner at MASAID 1916-17. Arrived back at this camp Xmas Eve after 5 nights & 4 days in saddle & the capture of MAGHDABA 139 Exercising along the beach at MARA-KHEB 140 Watering at a Bedouin well 141 At Sheikh's ZOWAID 142 3rd Gun Squadron at ABBASSAN-EL-KEBIR 143 Captured plane on its way to Australian Aerodrome 144 One of our planes about to pass over Hod 145 E & F Troop horse lines and horses 146 Sun set on Med Sea 147 Beach scene at EL-ARISH 148 Turkish transport. Small animals but they can pull big loads and they possess large hearts 149 The dressing station JIFF JAFFA ? 150-8 Types of Egyptian women - Nubian - Fellaheen - Sudanese - Low class Gippo - Egyptian - Middle Class -Egyptian Aristocracy - Turkish 159 French girls on beach at PORT SAID 160 Bedouin girls drawing water 161 Egyptian flappers at ALEXANDRIA 162 Post Card- Dame Turque 163 Post Card - Jeunne Fille Arabe 164 Graves of New Zealanders at RISCHON 165 Graves of Australians at DEIR-EL-BELAH 166 Race day. The saddling paddock 167 Bivouacs 168 3rd ALH Brigade at TRIPOLI 169 Advance party putting down horse lines at KHAN YURIS 170 Breaking the desert monotony 171 WADI QUELT. Taken from one of its precipitous banks 172 Turkish stores on N shore of DEAD SEA 173 Watering at Solomon's Pools 174 Waiting for action at - ES DUN (AWM Melbourne) 175 Camel Corps in action SINAI (AWM Melbourne) 176 ALH Time to Camp (part missing) (AWM Melbourne) 177 3rd Machine Gun Squadron IBU-HARITH, Lieut Breed, McLeod, Guppy, Whyte 178 Cartoon sketch - "A Digger" 179 Turkish Cavalry 180 Gun crew of No 2 Sub F Troop, 3rd Gun Sqdn 181 Operating base of JIFF JAFFA stunt 182 One of the British war boats that cooperated with the Land Force 183 Military railway line passing through a Hod in SINAI 184 AL-MINAH The sea port of Tripoli, Syria 185 NAZARETH Taken on 20 Sep 18 186 The Monastery on the Mt of Temptation, Taken from a cave on opposite hill. 187 JAFFA From the beach 188 In Monastery on the Mt of Temptation Rock on which Christ spent his 40 days 189 Cross indicates Garden of Gethsemane. Arrow at Russian Church of St Magdalene. MT of Olives on left 190 The Roman Bath at MONTAZAH. Hewn out of solid rock 191 Mine sweeper ashore near SHEIK'S ZOWAIL 192 Throwing "Chester" for an operation 193 The swimming pozzie at LAKE TIMSAH, ISMAILIA. Half a mile from MOASCAR, the Aust Training Depot 194 The remains of Napoleon's road. Portions can be seen running between BEELAH & GAZA 195 Camels utilised for ambulance work 196 TULKERAM taken on 19th Sep. This stunt started the previous night and this position fell to us the first day. About 60 miles from starting point 197 German officer at mess, JERUSALEM 198 German Headquarters SEMAK 199 TIBERIAS 200 Water preservation scheme at SHALLAL 201 A dip in the Jordan River. Crossed river on night 21-22 April 18 202 Watering and a wash up 203 JERICHO Taken on 21 Feb 18 204 Turkish graves 205 KHAN YUNIS. Southern Palestine, Note how sand ridges from the beach meet vegetation area. Fertile land 20 miles in width. the beginning of PHILISTIA 206 TAUBE-OVER 207 Drawing drinking water in Wadi GHUZZEE 208 The swimming pozzie in JORON 209 Landing stores at EL-ARISH 210 A camp near the wadi 211 Railway line and bridge crossing wadi above SHALLAL 212 The mid-day halt 213 Turks and Aussies at Dressing Station on beach 214 Washing day 215 Bringing supplies ashore 216 Trying mules in a 60 pounder 217 The desert winds have blown away and left this piece standing 218 Pontoons used by the Turks in their attempt to cross Suez Canal Feb 15 219 "HASSEIN" 220 "GIPPO" Mascot of 3rd AMG Sqdn 221 "Biddy" 222 Railhead camp 223 Typical Bedouin 224 Motor Submarine chaser dvr whyte, photos, ww1, light horse field ambulance -
Federation University Historical Collection
Letter, Inward Correspondence to the Ballarat School of Mines, 1910, 08/1910
... hill...Welcome Gold Mine...Stanley B. White...New Golden Gate gold mining company...n.j. wise...H.G. Taylor...Kout Morrien Harrow...L.F. Fairthorne & Sons...H.B. Silberberg & Co...Skipton...Henry F. Hull...Birthday Tunnel Company...L. Hansen...Victorian Railways...Edmund C. Earles...Lawrence...R. Welesteo...Wellington Cyanide Works...Clunes...OCtavius Williams...H.J. Thwaites...Tolarno Station...hill Welcome Gold Mine Stanley B. White New Golden Gate gold mining company n.j. wise H.G. Taylor Kout Morrien Harrow L.F. Fairthorne & Sons H.B. Silberberg & Co Skipton Henry F. Hull Birthday Tunnel Company L. Hansen Victorian Railways Edmund C. Earles Lawrence R. Welesteo Wellington Cyanide Works Clunes OCtavius Williams H.J. Thwaites Tolarno Station ...Inward Correspondence to the Ballarat School of Mines, August 1910letterhead, education department, roland graham, coleraine, m. carew, row brothers, mount gambier, joseph row, r. blackburn, max kohl, wilfred p. avery, jubilee hall, broken hill, frederick e. barclay, pharmacy board victoria, harry shinningham, hobson's gold mining company, macquarie steam brick yards, james dewar, henrey sotheran & co, piccadilly, london, salop, thomas parker, frank tate, dressmaking, steiglitz, telegram, postcard, lahasa fiji, r. palmerf, church of england grammar school of girls, f. abrams, radium hill, welcome gold mine, stanley b. white, new golden gate gold mining company, n.j. wise, h.g. taylor, kout morrien harrow, l.f. fairthorne & sons, h.b. silberberg & co, skipton, henry f. hull, birthday tunnel company, l. hansen, victorian railways, edmund c. earles, lawrence, r. welesteo, wellington cyanide works, clunes, octavius williams, h.j. thwaites, tolarno station, gilbert pa, gilbert palmer, wool sorting, r.j. webster, w.a.t. davies, henry markwald, e. rolland -
 Federation University Historical Collection
Photograph - Photograph - Black and White, Eden Studio, Horne and Watson Families
... Hilda Horne (b 06/05/1888 in Yendon) was the 10th child of Thomas William Watson and Emma Eliza Jane Phillips (who was one of the first white children born in the Barrabool Hills area (Geelong). Thomas worked on the Victorian Railways and was stationed at Yendon where they acquired a small farmlet named Graceland. ...Barker Library (top floor) Mount Helen goldfields Hilda Horne (b 06/05/1888 in Yendon) was the 10th child of Thomas William Watson and Emma Eliza Jane Phillips (who was one of the first white children born in the Barrabool Hills area (Geelong). Thomas worked on the Victorian Railways and was stationed at Yendon where they acquired a small farmlet named Graceland. ...Hilda Horne (b 06/05/1888 in Yendon) was the 10th child of Thomas William Watson and Emma Eliza Jane Phillips (who was one of the first white children born in the Barrabool Hills area (Geelong). Thomas worked on the Victorian Railways and was stationed at Yendon where they acquired a small farmlet named Graceland. Hilda married George Horne in. They lived in a small cottage in Windermere Street, Ballarat.Three black and white photographs of the Horne family .1 Hilda Horne b Watson 06/05/1888 at Yendon, the daughter of Thomas William and Emma Eliza Jane (b Phillips)Watson. .2 Three Watson sisters - Emma Jacka b Watson 30/08/1866 - 03/04/1904, died in childbirth in South Africa (standing); Hilda Horne b Watson 06/05/1888 (seated L); Eva Watson b 4/06/1890 - 08/07/1959 (seated R) married Leo Wise. .3 George Horne aged 6 months, married Hilda Watson..1 Verso: upper Hilda 1910 Horne; Jack in pencil (her brother John Richard Watson) .2 Verso: upper L - The Yeoman Studios ; C- POST CARD; R - postage stamp outline. CORRESPONDENCE / ADRESS ONLY LHS - handwritten "To Jack with love from Eva"; All Watson sisters; RHS Emma Batt( believe incorrect surname) Eva Watson Hilda Horne .3 Verso: Upper L - Eden Studios; C POST CARD; R - postage stamp outline CORRESPONDENCE / ADDRESS ONLY LHS - EDEN STUDIO Sturt Street Ballarat; handwritten in biro -George Horne; in pencil - Georgie 6 months hilda horne, hilda watson, eva watson, emma jacka, emma watson, eden studio, the yeoman studios, yeoman & co -
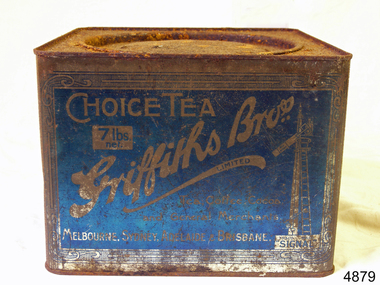 Flagstaff Hill Maritime Museum and Village
Container, Griffiths Bros, 1900 - 1940
... white enamel “Griffiths Tea” signs. These were visible Australia wide on railway fences, stations and other buildings. Griffiths signs let the rail travelers know the distance to where their tea could be enjoyed, with distances being shown as “miles to Griffiths Tea”, These signs were well known along the eastern states railway lines. flagstaff hill warrnambool shipwrecked-coast flagstaff-hill flagstaff-hill-maritime-museum maritime-museum shipwreck-coast flagstaff-hill-maritime-village Choice Tea Griffith Bros 7lb net in white on a blue label Tea container tin Griffiths blue tin with round lid, not hinged. 7lbs net Container Container Griffiths Bros. ...In 1873, English grocer James Griffiths migrated to Melbourne with his wife and cousin in order to start a tea business. By 1875 Griffiths Brothers Teas had become a sensation, providing tea, coffee, cocoa and chocolate all over Australia. The Sydney outlet of the Melbourne-based company was built in 1915. In a memorable advertising campaign, a series of Griffiths signs were situated at varying intervals along the rail lines on fences and building, designed to allow travellers to count down the miles until they could drink up. In 1925, James Griffiths was killed by a train and the tea company was sold to Robur Tea, which itself lasted until 1974. Griffiths’ death meant downsizing within the company with the Sydney building being transferred to the Sydney City Council, who then leased it back to Griffiths Teas. The tea craze was over by 1965, and Griffiths relinquished control of the building to a variety of tenants. Griffiths tea became an intrical part of Australian life, during the late 19th to mid 20th century. The company became a household name through the clever use of outdoor advertising with their blue and white enamel “Griffiths Tea” signs. These were visible Australia wide on railway fences, stations and other buildings. Griffiths signs let the rail travelers know the distance to where their tea could be enjoyed, with distances being shown as “miles to Griffiths Tea”, These signs were well known along the eastern states railway lines. Tea container tin Griffiths blue tin with round lid, not hinged. 7lbs net Choice Tea Griffith Bros 7lb net in white on a blue labelflagstaff hill, warrnambool, shipwrecked-coast, flagstaff-hill, flagstaff-hill-maritime-museum, maritime-museum, shipwreck-coast, flagstaff-hill-maritime-village -
Federation University Historical Collection
Report, Cultural Landscapes Study of Creswick Goldfields Area for Australian Hertiage Commission
... Barker Library (top floor) Mount Helen goldfields goldfields of victoria goldfields tourism marketing tourism creswick creswick goldfields allendale broomfield rocklyn bullengarook mollongghip dean scrub hill clarkes hill creswick railway station creswick school of forestry sawpit gully oak gully creswick cemetery kingston creswick avenue of honour kerrins bridge berry deep leads mine system australasian mine site creswick alluvial workings calembeen park ascot anderson's mill smeaton hepburn lagoon White bound report with clear cover Cultural Landscapes Study of Creswick Goldfields Area for Australian Hertiage Commission Report Chris McConville Chris Olver ...White bound report with clear covergoldfields of victoria, goldfields tourism, marketing, tourism, creswick, creswick goldfields, allendale, broomfield, rocklyn, bullengarook, mollongghip, dean, scrub hill, clarkes hill, creswick railway station, creswick school of forestry, sawpit gully, oak gully, creswick cemetery, kingston, creswick avenue of honour, kerrins bridge, berry deep leads mine system, australasian mine site, creswick alluvial workings, calembeen park, ascot, anderson's mill, smeaton, hepburn lagoon -
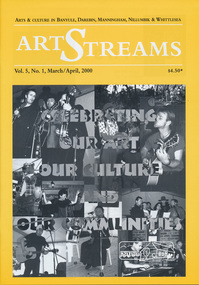 Eltham District Historical Society Inc
Journal, Peter Doughtery, ArtStreams: Arts & Culture in Banyule, Darebin, Manningham, Nillumbik and Whittlesea; Vol. 5, No. 1, Mar-Apr 2000, 2000
... ." - Eltham District Historical Society Newsletter No. 161, March 2005 art streams carly young plenty views golf park dynamic vegies dandenong ranges folk festival felicity gordon sounds of global harmony banyule festival Rosanna Fire Station Community House bulleen art & garden centre were street cafe Were Street hill climb bahnhof cafe Walkers Wheels Peter Glass Eltham Wiregrass Gallery Boroondara Writers Festival Warrandyte Festival Diamond Creek Town Fair Templestowe Village Festival Willy Wonkas ice cream, gourmet food Ciaro to Cracow Fleur de Feliss Florist Mia Mia Gallery festival of kites bi-wize quality paints Kinglake Gallery Andy Cowan Wild Dog Hill Studio montsalvalt Ian Collard geoff achison Bridget Allen Thompsons Pharmacy Volumes Colour front and back cover with feature articles and literary pieces with photographs and advertisements printed in black and white. 36 pages, 30 cm. ...Vol. 5, No. 1, Mar-Apr 2000 CONTENTS ON THE ROAD The Car at Heide 3 ON TOP OF THE WORLD Dandenong Ranges Folk Festival 5 INTERVIEW Felicity Gordon 7 SOUNDS OF HARMONY Gyuto Monks in Eltham 10 BANYULE FESTIVAL 13 WERE ST HILL CLIMB 15 BOROONDARA WRITERS' FESTIVAL 16 WARRANDYTE VILLAGE FESTIVAL 18 DIAMOND CREEK TOWN FAIR 19 TEMPLESTOWE VILLAGE FESTIVAL 20 RECIPES From leading Chefs 21 CAIRO TO CRACOW Middle Eastern Music at Montsalvat 22 POETRY 23 FESTIVAL OF KITES 24 BOOK REVIEW By Michele Lonsdale 25 CD REVIEWS 27 ARTIN ABOUT 28 WINING & DINING 30 ARTISTS SERVICES 32 "Peter Dougherty has been involved in the local art scene for many years. As publisher and editor of the arts magazine Artstreams, his comments on the various branches of the arts are widely respected. His "The Arts" column in the Diamond Valley Leader presents a brief summary for a much wider cross section of the local community. Peter also operates his own gallery and the Artstreams Cafe at the St Andrews market. Peter has a wealth of knowledge about present day and historical aspects of local art and artists." - Eltham District Historical Society Newsletter No. 161, March 2005Colour front and back cover with feature articles and literary pieces with photographs and advertisements printed in black and white. 36 pages, 30 cm. Vol. 1, no. 1 (Nov. 1996) - Vol. 10, no. 5 (summer ed. 2005/06) art streams, carly young, plenty views golf park, dynamic vegies, dandenong ranges folk festival, felicity gordon, sounds of global harmony, banyule festival, rosanna fire station community house, bulleen art & garden centre, were street cafe, were street hill climb, bahnhof cafe, walkers wheels, peter glass, eltham wiregrass gallery, boroondara writers festival, warrandyte festival, diamond creek town fair, templestowe village festival, willy wonkas ice cream, gourmet food, ciaro to cracow, fleur de feliss florist, mia mia gallery, festival of kites, bi-wize quality paints, kinglake gallery, andy cowan, wild dog hill studio, montsalvalt, ian collard, geoff achison, bridget allen, thompsons pharmacy, volumes -
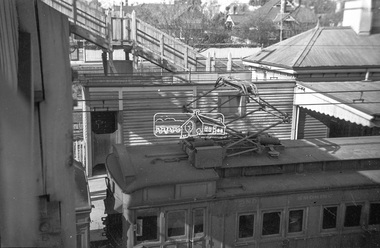 Eltham District Historical Society Inc
Photograph, George Coop, Surrey Hills Railway Station, c.1951
... Eltham District Historical Society Inc 728 Main Rd Eltham melbourne George Coop Collection Red Rattler Surrey Hills Railway Station Tait Train Digital TIFF file Scan of Kopdak 620 black and white negative transparency Surrey Hills Railway Station Photograph Photograph George Coop ...Digital TIFF file Scan of Kopdak 620 black and white negative transparencygeorge coop collection, red rattler, surrey hills railway station, tait train -
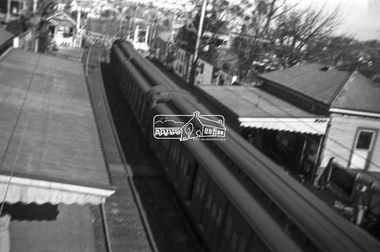 Eltham District Historical Society Inc
Photograph, George Coop, Surrey Hills Railway Station, c.1951
... George Coop Collection Red Rattler Surrey Hills Railway Station Tait Train Digital TIFF file Scan of Kopdak 620 black and white negative transparency Surrey Hills Railway Station Photograph Photograph George Coop ...The photo possibly taken in a hurry (given the misalignment of aim, lack of focus and motion blur) is still significant as it records the style and placement of buildings and advertsing of the day.Digital TIFF file Scan of Kopdak 620 black and white negative transparencygeorge coop collection, red rattler, surrey hills railway station, tait train -
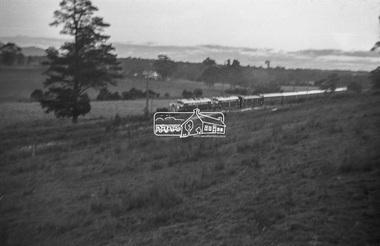 Eltham District Historical Society Inc
Photograph, George Burton Coop, The Royal Train enroute to Lilydale, near Croydon, 6 Mar. 1954
... station and Dorset Rd. bridge at Croydon, and between the Cave Hill Quarry and railway station at Lilydale.” An album of images of the Queen's visit to Victoria is available on the PROV Flickr account at https://www.flickr.com/photos/public-record-office-victoria/7252885616 George Coop Collection Croydon Royal Train Digital TIFF file Scan of Kopdak 620 black and white negative transparency The Royal Train enroute to Lilydale, near Croydon Photograph Photograph George Burton Coop ...Believed to have been taken bewteen Croydon Railway Station and the Dorset Road bridge. Taken late afternnon by George Coop's father. There is a Landrover parked on the grass with a person standing on it - believed to be Security. George recalls originally being located closer to the fence and being ushered up the hill where it was 'safer' to stand. In 1954 at age 27, Queen Elizabeth II was the first reigning British monarch to visit Australia.. She visited Victoria between March 1-10. Where to see the Queen (1954, January 21). Fern Tree Gully and District Times (Boronia, Vic. : 1953-1954), p. 5. Retrieved October 25, 2021, from http://nla.gov.au/nla.news-article264220429 “The Lilydale Shire President, Cr. Burgi, stated that the Royal train en route for Warburton on Saturday, March 6th, would slow down at Croydon and Lilydale. There was little possibility that it would stop at either of these towns. The train would pass through Lilydale at 5.52 p.m. Council had appointed a sub-committee to arrange matters, and had allocated £400 towards expenses. It was suggested that the train slow down between the railway station and Dorset Rd. bridge at Croydon, and between the Cave Hill Quarry and railway station at Lilydale.” An album of images of the Queen's visit to Victoria is available on the PROV Flickr account at https://www.flickr.com/photos/public-record-office-victoria/7252885616Digital TIFF file Scan of Kopdak 620 black and white negative transparencygeorge coop collection, croydon, royal train -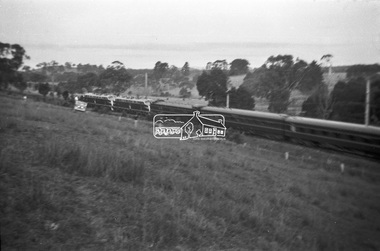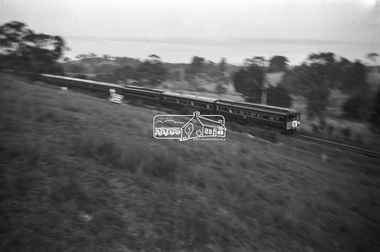
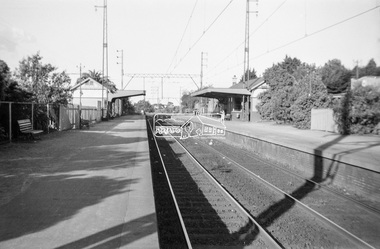 Eltham District Historical Society Inc
Photograph, George Coop, Mont Albert Railway Station, c.1956
... station opened in 1890. It is presumed that this building was demolished when the third line was constructed in 1971. At the same time the nearby Surrey Hills original station buildings were demolished. George noted that he had donated a black and white...station opened in 1890. It is presumed that this building was demolished when the third line was constructed in 1971. At the same time the nearby Surrey Hills original station buildings were demolished. George noted that he had donated a black and white ...Churchill Street shops just visible on right of image. The grass embankment visible in the distance on the left of the track is from where another view looking down the track beside Churchill Street was taken. Shows the original building on the northern platform of the Mont Albert station. The railway line was extended out to Lilydale with work commencing in 1882. Mont Albert station opened in 1890. It is presumed that this building was demolished when the third line was constructed in 1971. At the same time the nearby Surrey Hills original station buildings were demolished. George noted that he had donated a black and white print copy of this image some years earlier to the Surrey Hills Historical Society - see SHP2018/21/6 https://victoriancollections.net.au/items/5d6a450a21ea670e188d05c9Digital TIFF file Scan of Kopdak 620 black and white negative transparencygeorge coop collection, churchill street, mont albert railway station -
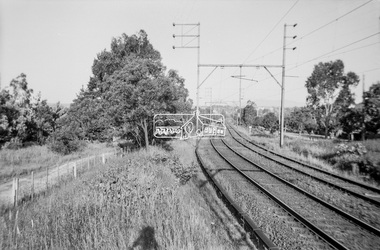 Eltham District Historical Society Inc
Photograph, George Coop, Railway line from Mont Albert to Box Hill, c.1956
... Hill (Dec. 1971). This photo was taken at the same time as the 1956 Mont Albert Railway Station (behind the camera view) See also EDHS_04674-03 both taken from the same location. adjacent to the end of present day Trafalgar Street George Coop Collection Churchill Street Mont Albert Railway Station Digital TIFF file Scan of Kopdak 620 black and white negative transparency Railway line from Mont Albert to Box Hill Photograph Photograph George Coop ...Railway line from Mont Albert to Box Hill, c.1956 - Churchill Street, Mont Albert on right Prior to the Eastern Suburbs Railway Development which added a third set of tracks down the alignment to Box Hill (Dec. 1971). This photo was taken at the same time as the 1956 Mont Albert Railway Station (behind the camera view) See also EDHS_04674-03 both taken from the same location. adjacent to the end of present day Trafalgar StreetDigital TIFF file Scan of Kopdak 620 black and white negative transparencygeorge coop collection, churchill street, mont albert railway station -
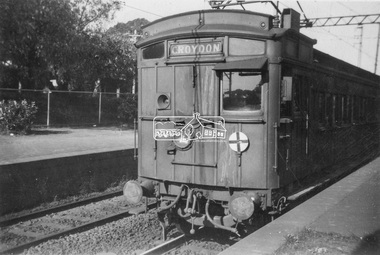 Eltham District Historical Society Inc
Photograph, George Coop, Croydon ('Down line') train at Mont Albert Railway Station, c.1956
... Eltham District Historical Society Inc 728 Main Rd Eltham melbourne George noted that he had donated a black and white print copy of this image some years earlier to the Surrey Hills Historical Society - see SHP2018/21/4 https://victoriancollections.net.au/items/5d6a31c621ea670e1873111b George Coop Collection Mont Albert Railway Station Red Rattler Tait Train Digital TIFF file Scan of black and white 620 format contact print Croydon ('Down line') train at Mont Albert Railway Station Photograph Photograph George Coop ...George noted that he had donated a black and white print copy of this image some years earlier to the Surrey Hills Historical Society - see SHP2018/21/4 https://victoriancollections.net.au/items/5d6a31c621ea670e1873111bDigital TIFF file Scan of black and white 620 format contact printgeorge coop collection, mont albert railway station, red rattler, tait train -
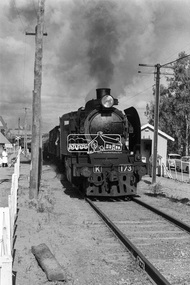 Eltham District Historical Society Inc
Photograph, George Coop, Steam locomotive K-173 departing Echuca Railway Station, 1962
... hill approaching the Iron Bridge. Standing to the left is the Fruit Fly Inspector who was once a common sight at the NSW/Victorian border crossings. George Coop Collection Echuca Echuca Railway Station Fruit Fly Inspection K-173 K-Class Steam Locomotive (VR Newport Workshops) Digital TIFF file Scan of 35mm Ilford FP3 black and white negative transparency Steam locomotive K-173 departing Echuca Railway Station Photograph Photograph George Coop ...Leaving the Echuca yards and charging up the hill approaching the Iron Bridge. Standing to the left is the Fruit Fly Inspector who was once a common sight at the NSW/Victorian border crossings.Digital TIFF file Scan of 35mm Ilford FP3 black and white negative transparencygeorge coop collection, echuca, echuca railway station, fruit fly inspection, k-173, k-class steam locomotive (vr newport workshops) -
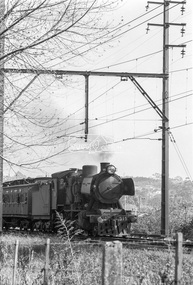 Eltham District Historical Society Inc
Photograph, George Coop, Steam Locomotive J-515 hauling The Vintage Train approaching Box Hill Railway Station, Vic, c.1971
... Eltham District Historical Society Inc 728 Main Rd Eltham melbourne The Vintage Train - which ran the first Sunday of each month George Coop Collection J-515 J-Class Steam Locomotive (Vulcan Foundry) The Vintage Train Digital TIFF file Scan of 35mm Ilford FP3 black and white negative transparency Steam Locomotive J-515 hauling The Vintage Train approaching Box Hill Railway Station, Vic. ...The Vintage Train - which ran the first Sunday of each monthDigital TIFF file Scan of 35mm Ilford FP3 black and white negative transparencygeorge coop collection, j-515, j-class steam locomotive (vulcan foundry), the vintage train