


Physical description
Set of 17 transparencies taken on 20/11/1962 on Kodak mounts.
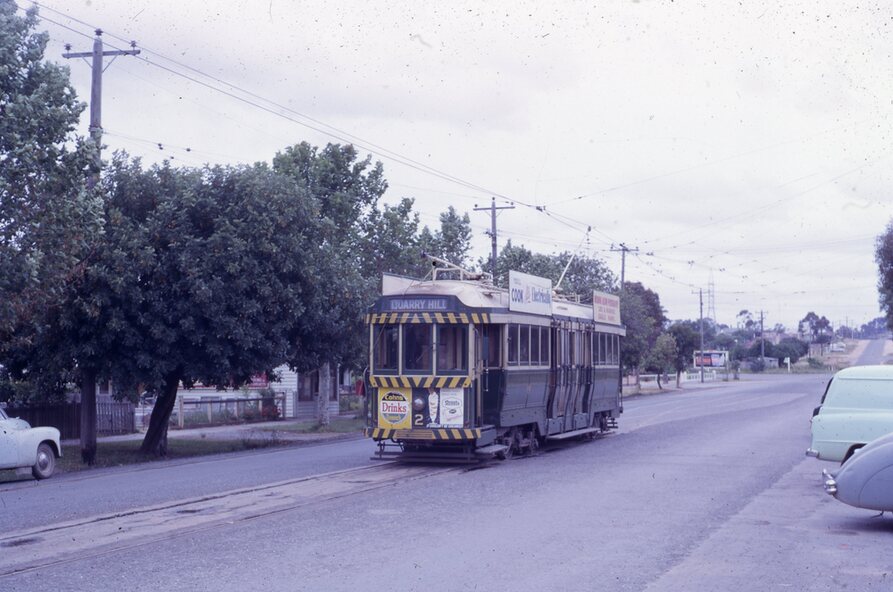
1187.1 - Bendigo No. 2 at the Quarry Hill terminus, showing destination of Quarry Hill. Has Cohns Drinks and Streets Ice Cream ads on dash panel, a SEC 'electric cooking' roof ad and another roof ad. Shows the Y terminus at this location, but tram standing just before it. Overhead in position.
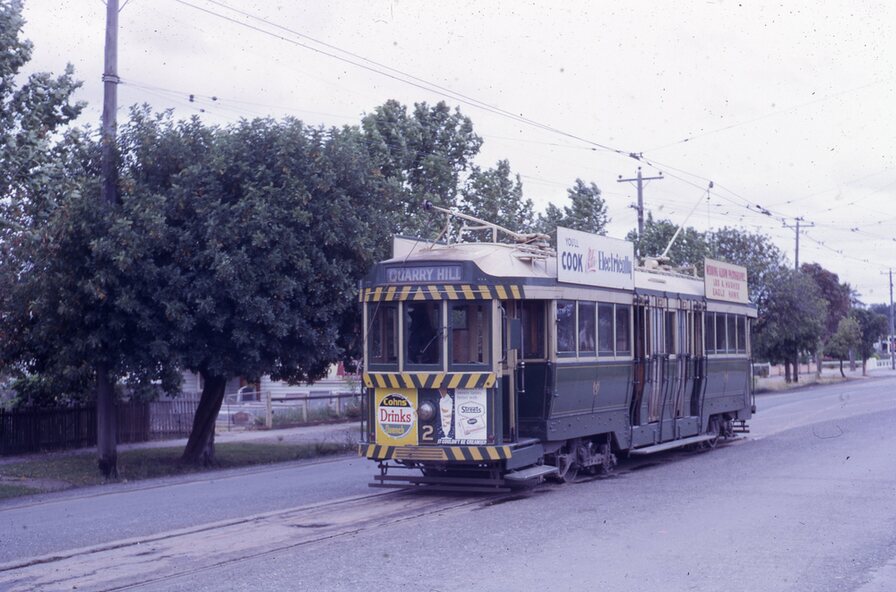
1187.2 - as above, but closer up.
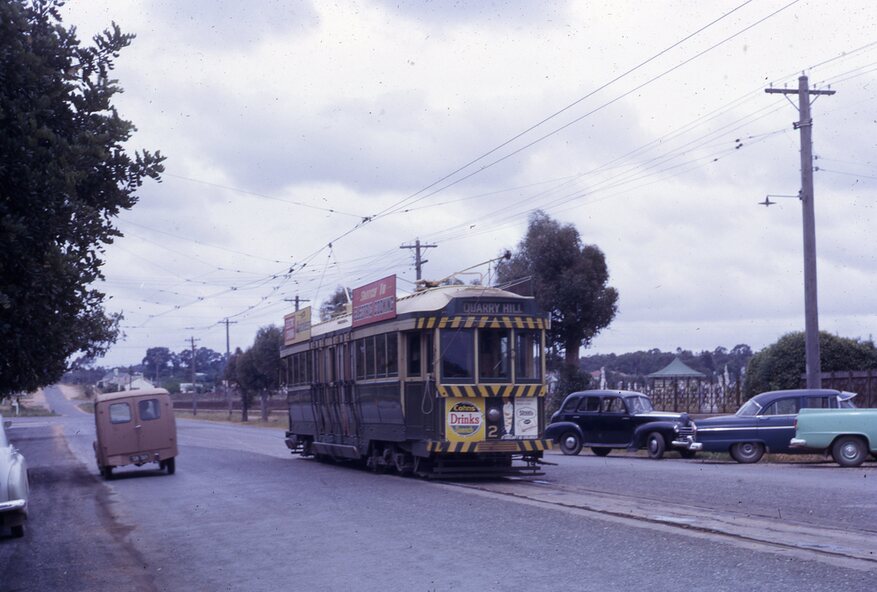
1187.3 - as above, but from the north side, showing cemetery in the background.
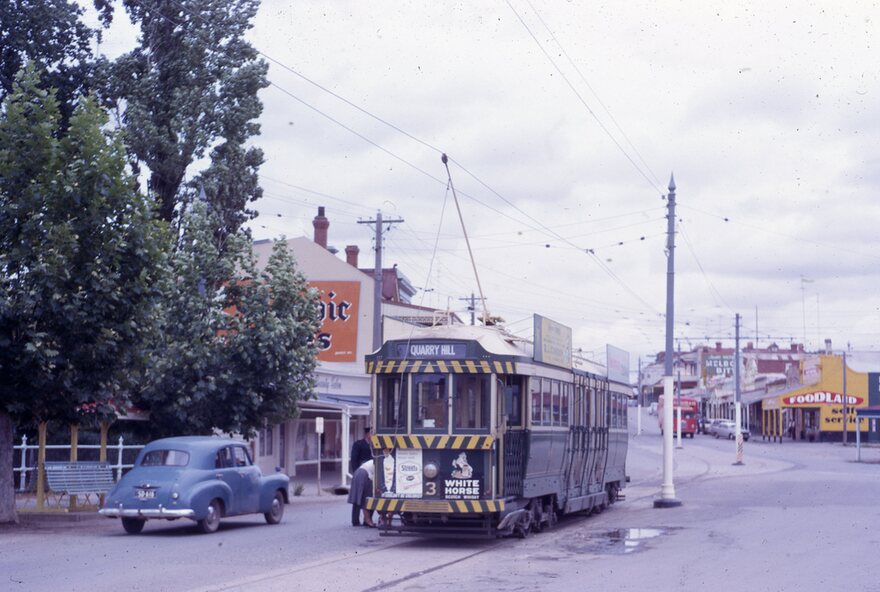
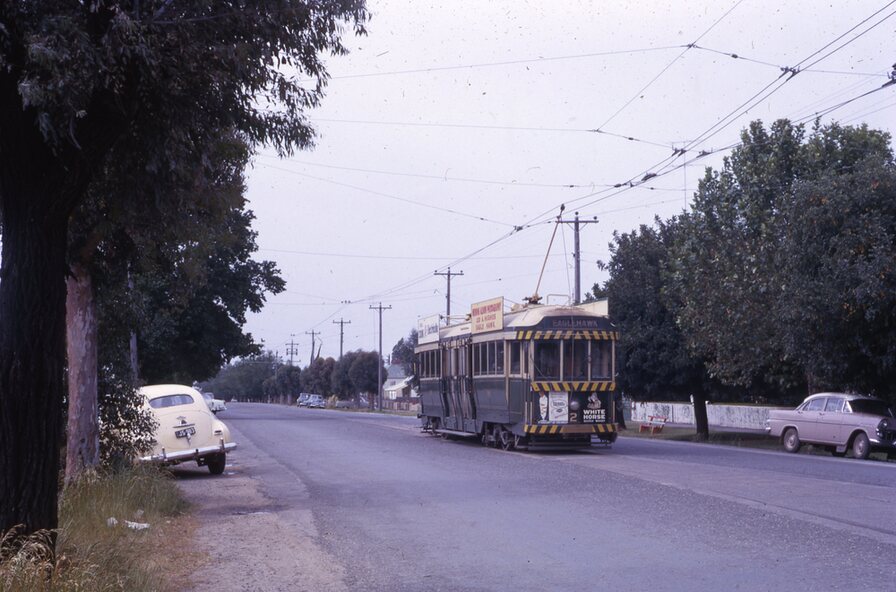
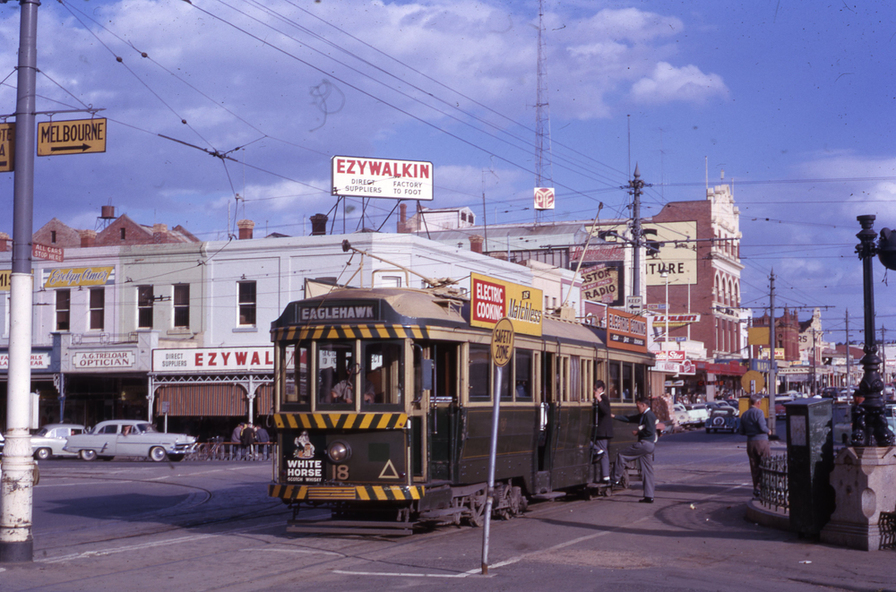
1187.4 - Bendigo No.3 at Eaglehawk terminus. Tram showing destination of Quarry Hill. Has the various buildings at Eaglehawk in the background including the Foodland store. Has Streets Ice cream and White Horse Whiskey ads on the dash panel.
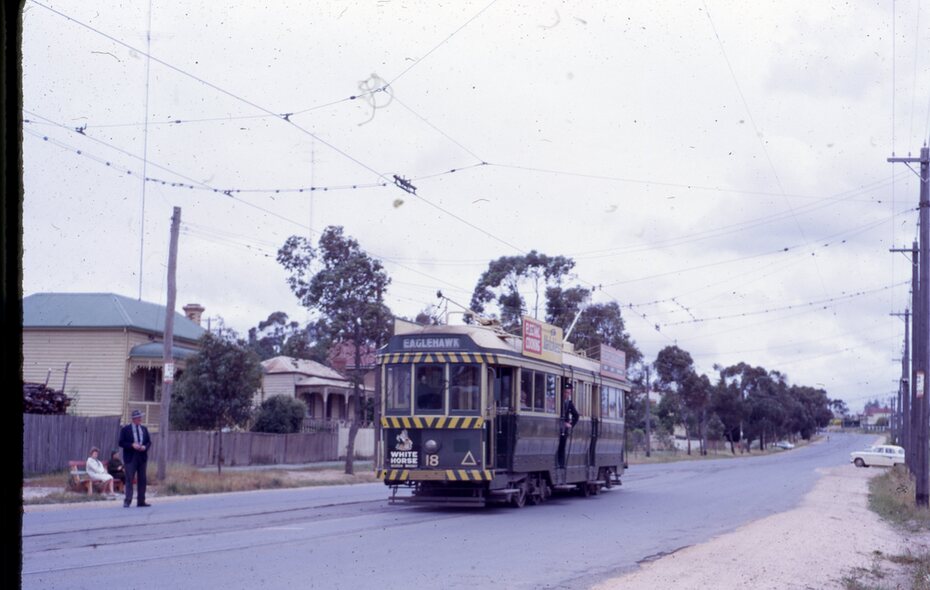
1187.5 - Bendigo No. 18 at Garden Gully crossing loop, in bound, with destination of Eaglehawk. Passengers waiting for an Eaglehawk tram at the stop. Has a white horse whiskey ad on dash panel and SEC roof ads. Conductor standing in doorway looking out.
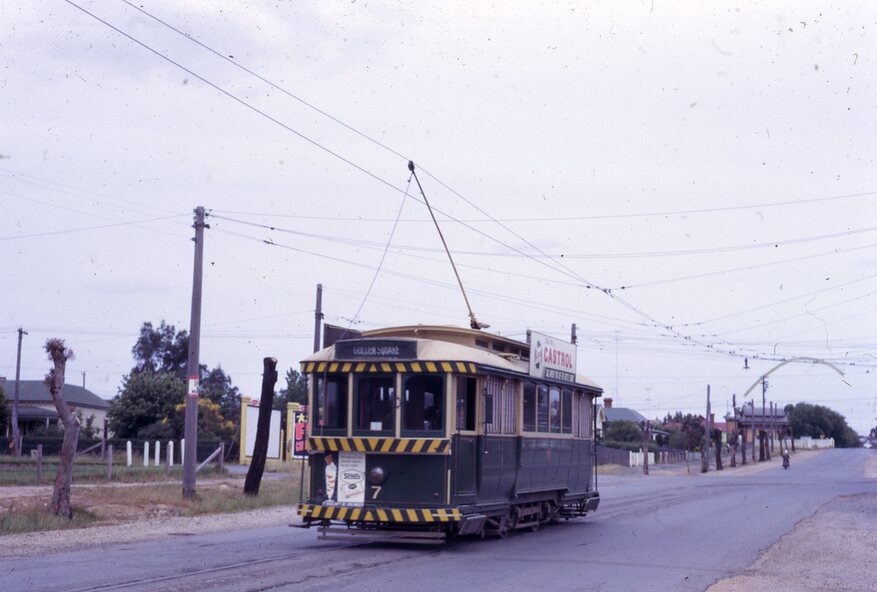
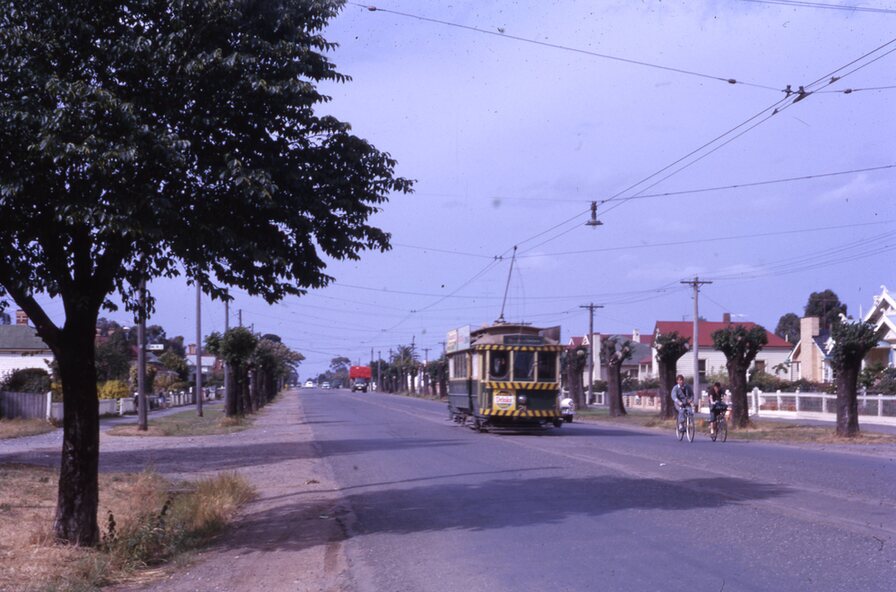
1187.6 - Bendigo No. 7 inbound in Nolan St. at cnr of McCrae St. showing destination of Golden Square. Has Streets Ice cream ad on dash panel and a Castrol Roof ad.
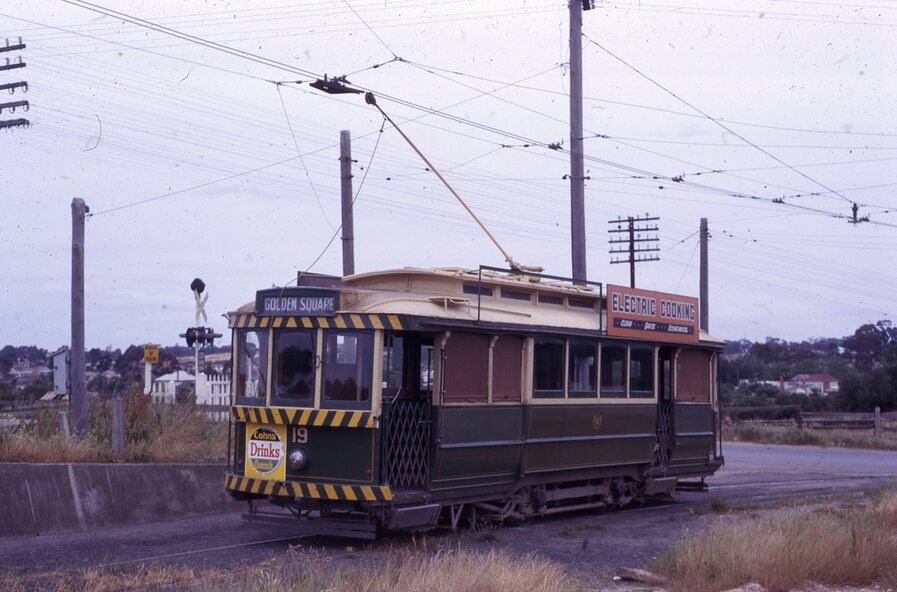
1187.7 - Bendigo No. 19 at the North Bendigo terminus with railway level crossing in background. Tram has a Cohns Drinks ad and an SEC 'Electric Cooking' roof ad.
1187.8 - Bendigo No. 2 at the Quarry Hill terminus, looking back into Bendigo, showing destination of Eaglehawk.
1187.9 - Bendigo No. 21 in McCrae St, near Nolan St outbound for North Bendigo. Photo taken after tram has passed photographer.
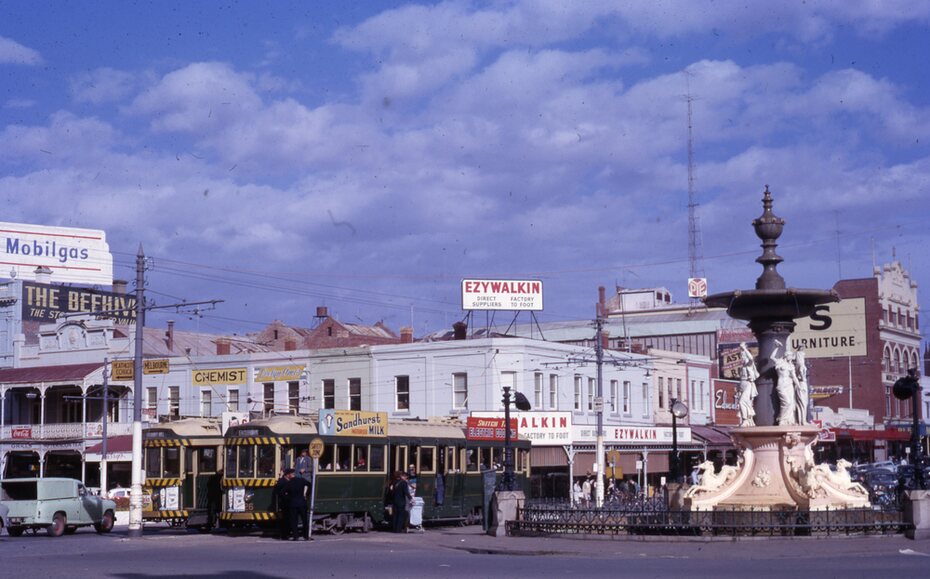
1187.10 - Bendigo Nos. 4 and 26 at Charing Cross in View St. with fountain alongside and the Beehive, Ezywalkin Buildings in the background. No. 26 has a Sandhurst Milk and SEC 'Electric Cooking' roof ad.
1187.11 - close up of 22E maximum traction truck and folded footstep.
1187.12 - Bendigo No. 19 at Charing Cross terminus, after tram has passed photographer, showing destination of North Bendigo, with the Beehive building in the background and passengers boarding tram.
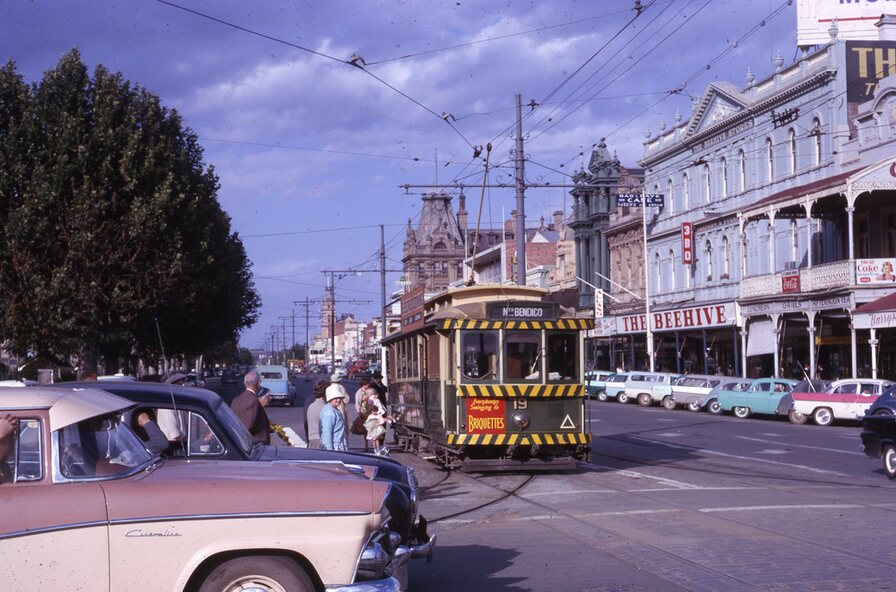
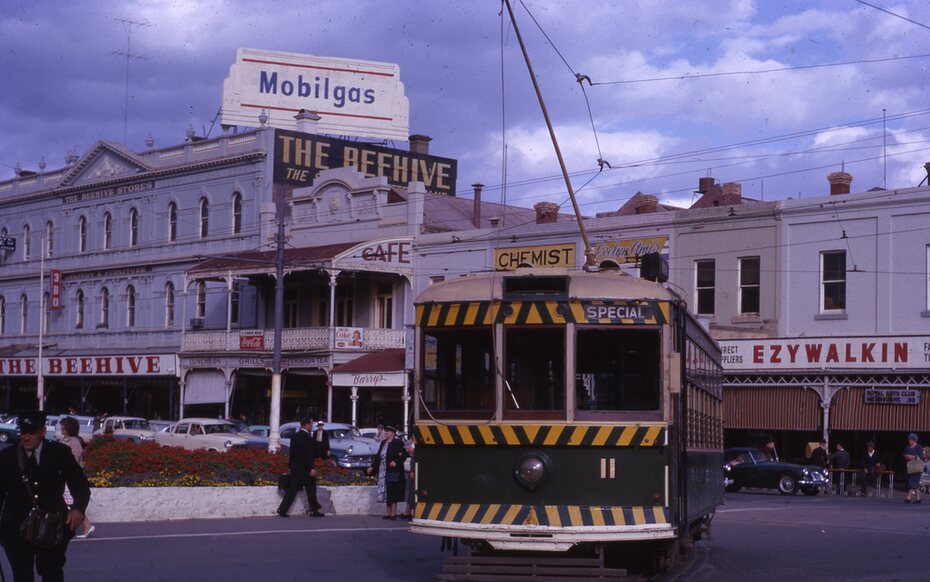
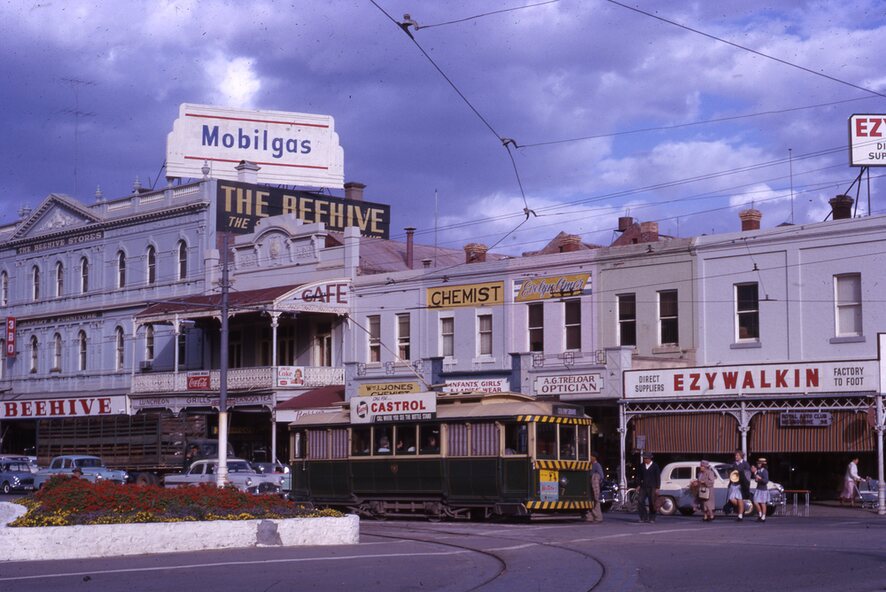
1187.13 - Bendigo No. 11, turning from View St. into Pall Mall, showing Special with the conductor holding point bar. Has the Beehive and Ezywalkin Buildings in the background.
1187.14 - No. 7 at Charing Cross terminus, in Pall Mall, bound for Golden Square. Has the Beehive and Ezywalkin buildings in the background and passengers waiting at the tram stop.
1187.15 - No. 18 at the Charing Cross terminus, bound for Eaglehawk. Has the Beehive and Ezywalkin buildings in the background and passengers waiting at the tram stop. Also has the 'Safety Zone' sign in the photograph.
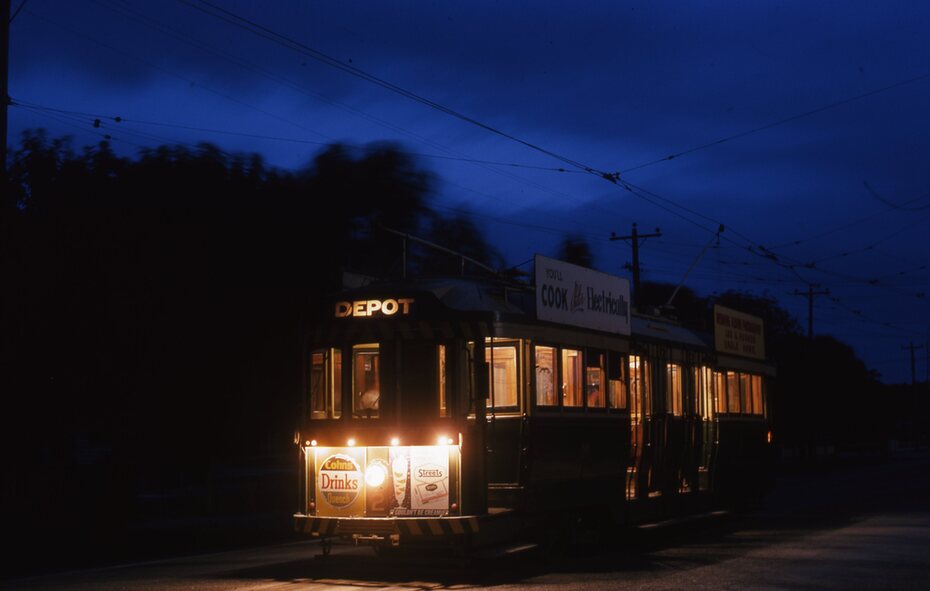
1187.16 - No. 2 at Quarry Hill terminus, night or dusk photo. Tram showing destination of Depot.
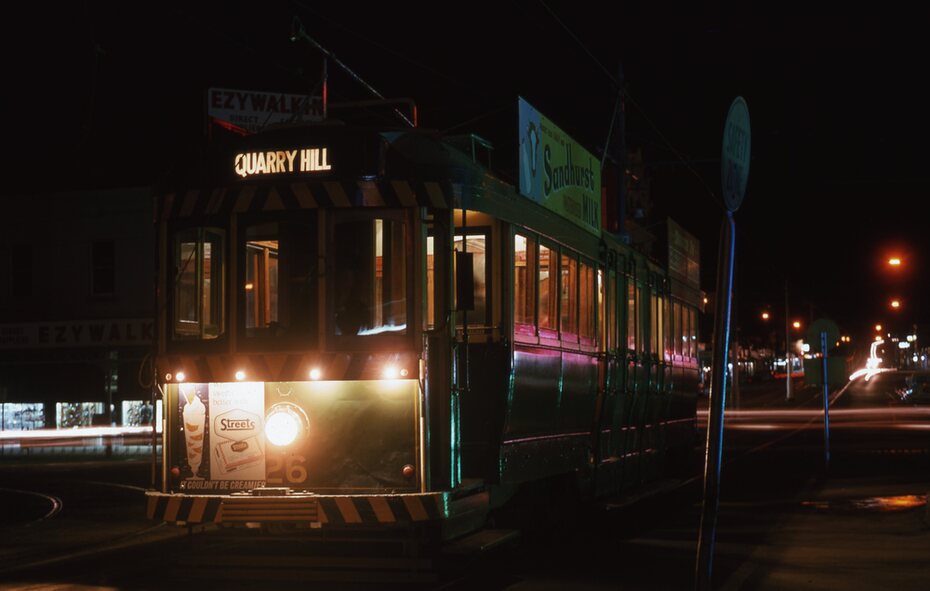
1187.17 - No. 26 at Charing Cross, night photo. Tram has destination of Quarry Hill, but is on the line for Eaglehawk. Photo looks along Mitchell St. Also shows Safety Zone sign.
Inscriptions & markings
Information written on in black ink and date stamped on purple ink.
1187.1 - "No. 2 at Quarry Hill terminus Bendigo"
1187.2 - "No. 2 at Quarry Hill terminus Bendigo"
1187.3 - "No. 2 at Quarry Hill terminus Bendigo"
1187.4 - "No. 3 at Eaglehawk terminus"
1187.5 - "No. 18 in Mt Korong Road, Long Gully at cnr of Havilah Road (Eaglehawk Route)"
1187.6 - "No. 7 in Nolan St. Bendigo, at Cnr of McCrae St., near lake Weeroona, (North Bendigo Route)'
1187.7 - "No. 19 at North Bendigo terminus"
1187.8 - "No. 2 at Quarry Hill terminus"
1187.9 - "No. 21 in McCrae St. Bendigo, near Nolan St. (North Bendigo Route)
1187.10 - "4 and 26 at Alexandra Fountain, Charing Cross Bendigo"
1187.11 - "Truck of Bogie Car, Bendigo Tramways"
1187.12 - "No. 19 in Pall Mall at Charing Cross, Bendigo"
1187.13 - "Birney car No. 11 entering Pall Mall from View St. at Charing Cross Bendigo"
1187.14 - "No. 7 in Pall Mall at Charing Cross, Bendigo"
1187.15 - "No. 18 at Alexandra Fountain, Charing Cross, Bendigo"
1187.16 - "No. 2 at Quarry Hill terminus, Bendigo"
1187.17 - "No. 26 at Alexandra Fountain, Charing Cross, Bendigo"