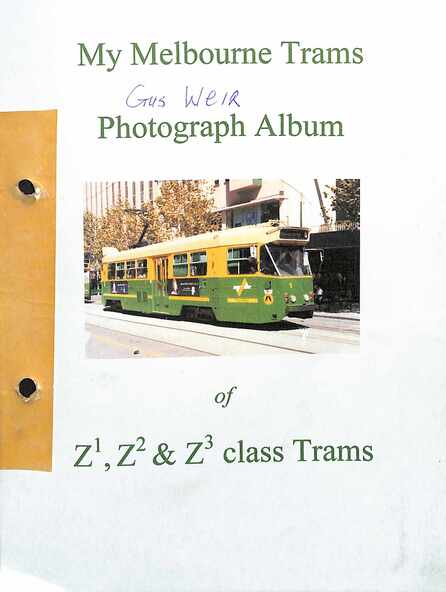


Historical information
Compiled by Gus Weir of the Wellington Tramway Museum, former Wellington tram driver. Comprises some 70 double-sided album sheets for photographs of Melbourne Z1, Z2 and Z3 class trams. Scanned into 6 parts as pdf files. Many photos taken at Domain Interchange, Swanston Walk, Bourke St, St Kilda Road, Elizbeth St and La Trobe St. Photos by Gus himself during Melbourne visits with some by B R Symons, D W Jones, and Michael P Hawkins
Part 1 - Introduction - Z1, 1, 2, 3, 4, 5, 7, 9, 10, 14, 19 & 22.
Part 2 - Z1, 28, 31, 34, 37, 39, 49, 43, 45, 47, 49, 50, 52, 54, 56, 58, 59, 61, 63, 65, 71, 70, 73, 80, 81, 84, 85, 86, 87, 89, 93 & 95.
Part 3 - Z1 & Z2 & Z3 - 96, 100, 101, 108, 112, 113, 114, 115, 116, 117, 120, 122, 123, 125, 126, 128, 199, 136, 137 & 138
Part 4 - Z3 138, 139, 148, 150, 151, 154, 157, 155, 158 (Royal Tram), 160, 163, 164, 166, 167, 168, 169, 170 & 173
Part 5 - Z3 175, 176. 178, 179, 181, 182, 185, 186, 187, 193, 194, 196, 197, 199, 201, 203, & 204
Part 6 - Z3 204, 205, 208, 209, 211, 217, 219, 220, 222, 223, 224, 225, 226, 228, 229 & 230,
Significance
Yields detailed information about Melbourne trams from 1980 to 2011
Physical description
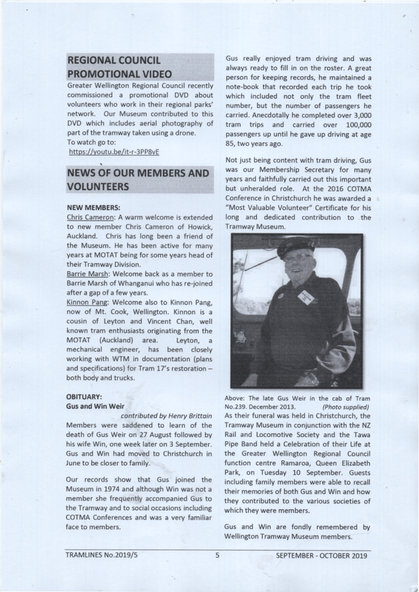
Set of 70 album sheets most with four photos - some blanks to allow for further photos. Each photo has a label on the rear, with details of the photograph location, photographer and date. An insert label on each page gives tram number, location and date. See last image file - Gus Weir Obituary - Wellington Tramway Museum 2019.