Showing 160 items
matching green point
-
 Bendigo Military Museum
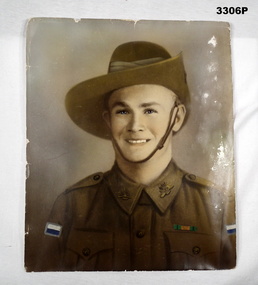
Photograph - PHOTOGRAPH, PORTRAIT WW2, c.WWII
At this point the person is not known.Coloured head & shoulders portrait of an Australian soldier, name unknown. Shown are a green, orange service ribbon WW2, Two colour patches shown white/blue with grey backing.portraits, photography ww2 -
 Bendigo Military Museum
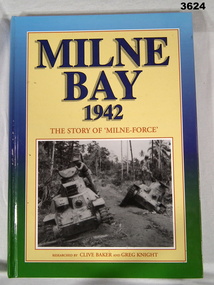
Book - BOOK, WW2, Ligare Pty Ltd, Milne Bay 1942, 2000
Original owner: William John GARLAND, 5th Army Troop. Milne Bay 1942 - The Story of Milne - Force. From book cover: The 1942 battle for Milne Bay was a turning point in the Pacific War, when a garrison of predominantly Australian Infantry and RAAF Fighter Squadrons turned back a Japanese invasion force.Hard cover, cardboard, glossy finish, colour background blue to green with yellow layer. Blue / orange print front, white print spine, black print back. Front cover has black / white photo of bogged Japanese tanks. 496 cut, plain, white, pages. Black & white illustrations, photos, maps.book, milne bay, 1942 -
 Bendigo Military Museum
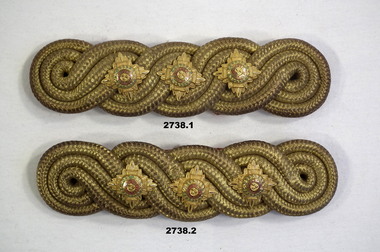
Uniform - EPAULETTES, RANK, c. WW1 era onwards
Ceremonial Captains Rank Epaulettes. .1) & .2) Base is gold braided cord, 8 mm dia. 3 gold 'PIPs' are mounted on base. The PIPs have 4 spikes pointing outwards. In centre of PIPs green enamel leaves circular red enamel ring, Latin inscription: TRIA JUNCTA IN UNO, centre has 3 small gold crowns. The back has a red cotton strap. .3) & .4) As above except a) Aust Mil Forces gold button at one end on top; and b) The spikes are silvered.numismatics - badges (cloth) - army, passchendaele barracks trust, rank -
 Bendigo Military Museum
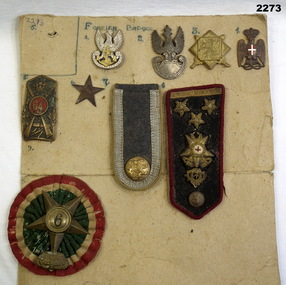
Banner - BADGE COLLECTION MOUNTED, C.WW2
Items in the collection re Ian McLeod RWAFF, refer Cat No 2262.2 for service details.1 Badge silver inscription and crowned eagle. gold anchor and chain in centre. 2 Badge silver bottom half is a shield top half is a crowned eagle with wings outstretched. 3 Badge gold square on a gold square off set 45 degrees in centre is a lion the rear surrounds are two crossed swords. 4 Copper badge of an eagle with large crown there is an enamel white cross in centre of a red enamelled oval the birds claws are holding a lanyard. 5 Copper shield with cross rifles in it there is numbers 64 in red enamel circle in centre a crown is between. 6 Plain star 5 point 3 cm wide 7 grey cloth silver engine the bottom has British coat of arms. 10 cm x 5 cm. 8 Uniform. Black cloth rad binding has gold 3 pips, crown with red cross. crown gold thread. copper button. 9 Cloth rosette green centre white red surrounds 5 pointed brass star number 9 in centre surmounted with a crown.badges, collection, foreign -
 Frankston RSL Sub Branch
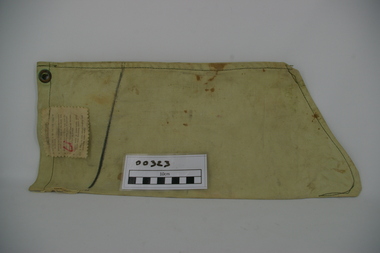
Bag, Water Filter
Single person water filter bag used by World War 2 service personnel to obtain clear water when in the field. This filter type is known as a "Millbank Filter". The filter is in the form of a light green canvas bag shaped like a sock and is designed to collect and filter particles and parasites from groundwater, etc. The canvas is of a fine weave which allows the water to filter slowly from inside the bag. The top of the filter bag has brass eyelets set on opposite sides for hanging from a tree or other point during water filtering. On one side of the bag has been stamped in permanent black ink 'CAT No A.F.0005' and 'M&Co.(N) BROAD ARROW 1945'. A cotton label has been sewn near the bag top with a printed six step instruction list for use of the filter bag. Below this is a line marked in permanent black marker to let the user know when to start collecting the water draining from the bag.The bag is imprinted with the following: 'CAT No A.F.005' and has a square box imprint with 'M&Co.(N) ^ 1945'. -
 Footscray Community Arts
Industrial Hope, De Clario, Emma, 2005 (exact)
Artist StatementGeneral ALL BlurbMEDIUM: Oil on kiln dried redgum. DESCRIPTION: Black, blue and white, wood block, no frame. A realistic depiction of an industrial crane against a predominantly cloud covered sky, the crane is set in the lower centre of the canvas, almost becoming secondary to the sky and cloud which dominate the canvas. The sky set in bright and vibrant blues contrast the darkness of the clouds, ominous and heavy in shades of grey and green the colours seem to reflect the relentless clock of industry. A patch of light behind the crane gives the crane a strong focal point. art, de, fcac, all, emma de clario, clario, marios cafe, marios -
 Footscray Community Arts
Industrial Hope, Emma de Clario, (exact); 2005
MEDIUM: Oil on kiln dried red gum (wood block) DESCRIPTION: Black figure och blue and white background, wood block, no frame. A realistic depiction of an industrial crane against a predominantly cloud covered sky. The crane set in the lower centre of the canvas almost becomes secondary to the sky and cloud which dominate the wood block. The sky set in bright and vibrant blues contrast the darkness of the clouds, ominous and heavy in shades of grey and green, the colours seem to reflect the relentless clock of industry. A patch of light behind the crane gives it a strong focal point. Signed and titled on reverse of imageoil, de, hope, clario, industrial, photograp -
 Montmorency–Eltham RSL Sub Branch
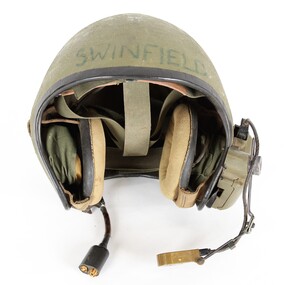
Headwear - Helmet, vehicle, intercom
Worn by Swinfield in IraqWorn by Swinfield in IraqBlack edge trimmed green fibreglass Army vehicle intercom helmet. Adjustable head straps inside helmet, Adjustment strap for right earphone located on ouside of right ear. Earphones mounted inside helmet at each ear side. Voice microphone located at mounting on outside of the left ear connected by black cable to mounting on outside of left ear. Cable connection with clip for helemt connection to vehicle located at outside of left ear. Switch located on mounting on outside of left ear. Plastic mounting box located on ouside of the left ear. Brown leather sweat band on helmet straps on inside front of the helmet. Male and female connections on end of vehicle connection point.Swinfield marked on outside front of helmet. 34B marked on outside of helmet at rear. Roamwell Corp. with number SA-1552,6 marked on plastic mounting on outside of right ear. Front and back markings on microphone. M138/6 marked on back of microphone. ID label on connection point end of vehicle connection cable. -
 Montmorency–Eltham RSL Sub Branch
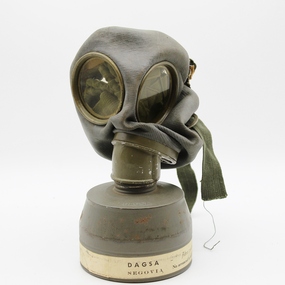
Equipment - Gas Mask
This item and it’s associated canister (Cat.No. 0096.2) are of a style typical of German WW2 gas masks but the use of vinyl instead of rubber and the Spanish manufacture suggests post WW2 manufacture. German WW2-style full-face mask with single attached filter. Seven point harness. Separate lens. Olive green. Metal, vinyl, glass, leather, cotton webbing. “DAGSA” and DAGSA logo on top surface of filter canister. On white tape around filter canister - “Dreager - Blanco” plus 20630 (ink stamp), “DAGSA. SEGOVIA” “Filtro. polivalente para mascara de guerra” (transl: Multipurpose filter for war mask) “No arrancad la tapa protectora haste el instance de su utilizacion” (transl: do not tear off the protective cap until the moment of use) gas mask -
 Montmorency–Eltham RSL Sub Branch
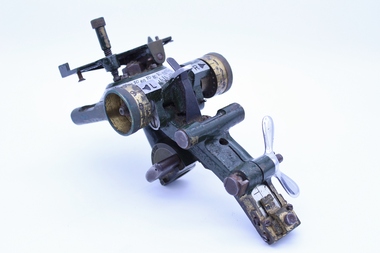
Instrument - Sight, Mortar, Mk1, 3 Inch, WWII, 1941
Manufactured during World War II Manufactured during WWIIWWII 3 inch Mortar sight, Mk1, Lensatic. Dark green coloured brass metal body with brass fittings. Aluminium coloured circular dial with black painted numeric (zero to 180 degrees) and alphabetic (left and right) markings. Silver coloured butterfly nut fitting on lower body for sliding clamp adjustment. Steel screws and nut fittings. Two clear glass levelling bubbles are provided. Left and right adjustment dials, locking clamp provided for fitting of sight to a circular post fitting.SAR 1941 24-36 DD02124-3 TO LOCK (with direction arrow) L R (with arrow point marking) 0 to 9 R 0 to 9 L 0 to 180 R 0 to 180 L 210 GRS SEC CHARGE II I MR 2454 graticule markings 1400 to 600 Graticule markings 2700 to 10003 inch, mortor, sight, australian defence forces, ww ii -
 Montmorency–Eltham RSL Sub Branch
Medal - Medal Group, WW2 Royal Australian Air Force, 56380 LAC Edward Terrence Orlowski
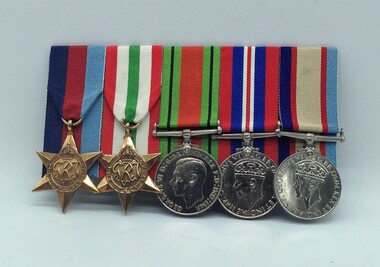
Medals described from left to right: The 1939-45 Star Designed by the Royal Mint Engravers The star has a ring suspender which passes through an eyelet formed above the uppermost part of the star. A six -pointed star, in yellow copper zinc alloyto fit in a 44mm diameter circle. Maximum width of 38mm and 50mm high from the bottom point of the star to the top of the eyelet. Obverse side has a central design of the Royal Cypher "GRI VI" surmounted by a crown. A circlet, the top of which is covered by the crown, surrounds of the cypher and is inscribed "The 1939-1945 Star". The reverse is plain. The ribbon (devised by King George VI) is 32mm wide with equal bands of Navy blue, Army red and Air Force blue. The Italy Star Designed by the Royal Mint Engravers The star has a ring suspender which passes through an eyelet formed above the uppermost part of the star. A six -pointed star, in yellow copper zinc alloy to fit in a 44mm diameter circle. Maximum width of 38mm and 50mm high from the bottom point of the star to the top of the eyelet. Obverse side has a central design of the Royal Cypher "GRI VI" surmounted by a crown. A circlet, the top of which is covered by the crown, surrounds of the cypher and is inscribed "The Italy Star." The reverse is plain. The ribbon (devised by King George VI) is 32mm wide with 7mm red and 6mm white band repeated in reverse and separated by 6mm wide green band. Colours of the Italian flag. The Defence Medal The medal is cupro -nickel. It has an uncrowned effigy of King George vi on the obverse. The reverse has a conventional oak tree centrally placed with a crown above with two lions as supporters. Between the supporters are the dates 1939 - 1945. The base of the medal has the words "The Defence Medal". The ribbon (devised by King George VI) is orange with green outer stripes. Each green stripe has a black pin stripe running down the centre. The green represents the islands of the United Kingdom, the orange represents the enemy attacks and the black represents the black outs. The War Medal The war medal is cupro-nickel with the crowned effigy of King George VI on the observe. The reverse has a lion standing on the double-headed dragon. The top of the ribbon shows the date 1939-1945. The ribbon colours of red, white and blue represent the colours of the union flag. Australian Service Medal 1939-1945 The Australian Service Medal is nickel silver with the crowned effigy of king George VI on the obverse. The reverse has the Australian coat of arms, placed centrally surrounded by the words 'the Australian service medal 1939-1945. The ribbon has a wide khaki central stripe, flanked by two narrow red striped which are in turn flanked by two outer stripes, one of dark blue and the other light blue. The khaki represents the Australian Army, and the red, dark blue and light blue represent the Merchant Navy, RAN, and RAAF respectively.The 1939-45 Star Orlowski E.T. etched on the back of the medal. The Italy Star Orlowski E.T. etched on the back of the medal. The Defence Medal 56380 Orlowski E.T. etched on the rim of the medal. War Medal 1939-45 56380 Orlowski E.T. etched on the rim of the medal. Australian Service medal 1939-1945 Orlowski E. T. etched on the rim of the medal.ww2, medals -
 Mission to Seafarers Victoria
Article, Herald, Seamen's Institute for the Victoria Missions to Seamen, 30 August 1917
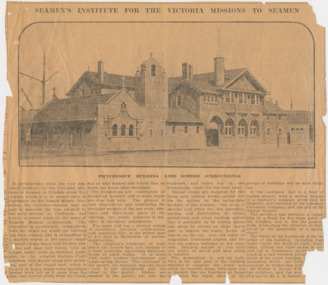
SEAMEN'S INSTITUTE FOR THE VICTORIA MISSIONS TO SEAMEN In architectural style, the new Seamen's Institute for the Victorian Missions to Seamen, in Flinders street Extension which is to be opened early in September by Sir Ronald Munro Ferguson, the Governor-General, may be said to resemble the type adopted by the early settlers in California, and known in recent years by the name of Spanish Mission architecture. This character is particularly sympathetic with the object for which the building has been erected, and is exemplified in a marked degree in the unique chapel tower of oblong shape with its four pinnacles and open bell turret, with an almost rustic cross as terminal point: also in the arcaded Eastern Court cloisters, with simple round arch arcading, and in the chapel roof, which is framed of heavy rough-hewn hardwood timber work left as it came from the saw, and erected green from the forest. but so well framed and bolted that no harm can result from shrinkage. The foundations are constructed of reinforced concrete, and in some places are nine feet wide. The ground is very treacherous, and considering the irregular weights of the one story, two-story, and three-story parts of the building, the result achieved in sta bility is eminently satisfactory. The main hall has a vaulted ceiling of reinforced concrete construction, and, spanning 35f., is the widest span of any floor in Melbourne of similar construction. The chaplain's residence is built above the lecture hall, and consists of a most complete, up-to-date dwelling-house of eight rooms. It is fitted with every modern convenience and labor-saving device. The cupboard in the pantry, for instance, has two faces — one in the diningroom and the other in the pantry. Dishes are washed in the pantry, put into the cupboard, and taken out in the diningroom, ready for the next meal. Special rooms are designed for the many and various works carried out for the sailors by the industrious workers of the mission. One room is shelved and fitted for the reception, sorting, and distribution of books, periodicals, and other reading matter that is parcelled up by willing hands and given to sailors as ships leave port, to beguile the weary hours of leisure on the sea. Any old books or magazines, illustrated papers, and the like are always welcome at the insti tute. Reading matter of this kind can easily be saved and sent along in bundles. The gymnasium is not yet built. This is the only part of the building required to complete the block; and when its concrete dome, with open eye at summit like the Pantheon at Rome is erected, the whole effect of the groups of buildings will be most striking. In the entrance hall is a floor of marble mosaic, with a central feature of a mariner's compass seven foot in diameter, well executed by the Adamant Pavement Company, and the gift of Mr George Russell. The architect has designed a copper ship as a finial for the main gable of the building, and it, like the gymnasium, is awaiting the collection of more funds or the generosity of a special donor. The whole of the woodwork of the in terior of the building, including high dados round the walls of halls, stair cases, billiard and other rooms is car ried out in Tasmanian hardwood, fin ished in a dull beeswax polish, and the floors of the entire building, except the lavatories, which are tiled, are also executed in Tasmanian hardwood. Mr Walter R. Butler, F.R.I.B.A., was the architect, and the work was carried out by Mr A. B. Robertson, builder. PICTURESQUE BUILDING AMID SOMBRE SURROUNDINGSThe article gives a valuable description of the Mission at the end of its construction and before its opening.4 columns article with photograph of the front of the Missionlady fraser, walter richmond butler (1864–1949), architecture, spanish mission, california, reinforced concrete, tasmanian hardwood, gymnasium, norla dome, pantheon, adamant pavement company, george russell, compass, finail, weathervane, chaplain's residence, manse, chapel, courtyard, cloisters, main hall, spannig -
 Greensborough Historical Society
Map, Melbourne and Metropolitan Board of Works. Survey Division, MMBW, Yarra 2500 / 12.23. Janefield and Kangaroo Point, 1977_10
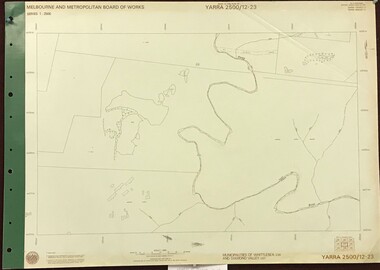
Melbourne and Metropolitan Board of Works. Yarra 2500 [base map] 12-23, Municipalities of Whittlesea 239 and Diamond Valley 257. No streets marked on this map. Includes Plenty River, Kangaroo Point, Janefield Colony and Janefield Reserve.MMBW Map in 1:2500 [scale] series. Cream parchment with green tape reinforcing on edges and punched holes on left edge.mmbw, melbourne and metropolitan board of works, shire of diamond valley, plenty - maps -
 Greensborough Historical Society
Article, Printer Unknown, Greensborough, 1840o
... ). greensborough kangaroo point edward green poulter mann chapman magger ...Details the history of the current Greensborough township. It also mentions the early settlement of Kangaroo Point.Mentions early settlers such as William Poulter, James Chapman, James Mann and Edwin Willis Magger (Maygar).2 page printed document outlining the activities and motives of Edward Bernard Green, an early owner of the area of land that became Greensborough.Pencilled words on front page. greensborough, kangaroo point, edward green, poulter, mann, chapman, magger, mayger, melbourne to sydney mail contract -
 Glenelg Shire Council Cultural Collection
Photograph - Photographs, n.d
Four black and white photos attached to grey cardboard. a) Man sitting on cannon - Battery Point b) The harbour from Battery Point c) The battery, Battery Point d) Henty Memorial, town GreenFront: 'Battery Point Portland' - handwritten, black ink, down left side of mount. 'Henty Memorial' - handwritten, black ink, beneath photo of Henty Memorial -
Glenelg Shire Council Cultural Collection
Headwear - Town Crier's Hat - Syd Cuffe, n.d
Syd Cuffe's Town Crier's hat. Black felt sides, turned up with point in brim at front, back of brim also turned, trimmed in gold fabric black ribbon rosette on front brim, also 4 badges - gold map of Victoria Australia, Victorian flag, silver buffalo (Manitoba) and Canadian flag. Cockatoo feather threaded through gold ribbon on back. two small fabric appliqués on back turned up brim - red maple leafFront: Maker's tag inner crown. Red flower with green stemsyd cuffe, town crier, hat, headwear -
Glenelg Shire Council Cultural Collection
Document - Invitation - Portland Rifle Club, Mar-56
Invitation from the Portland Rifle club, to the official opening of their new range at Point Danger on Sat. 17 MAR 1956. Pale green card, scalloped edges, gold print and edgingFront: 'Mr. H.L. Vivian and Lady' handwritten, blue ink -
Glenelg Shire Council Cultural Collection
Souvenir - Pennant - Heywood Football Club, 1965
From the collection of the Bower Bird Museum, Heywood. The Heywood Football Netball Club was formed in the 1920s and played its first Senior Premiership in 1925 whilst playing in the Heywood and District Football League to its most recent back-to-back premierships in 2018-2019 as part of the South West District Football League.Green triangular fabric pennant, attached to wooden stick, commemorating Heywood Football Club as a finalist, 1965; gold lettering listing players. Heywood Football club badge and Anzac appeal badge. Attached to point pennant.football, heywood, heywood football club, pennant, souvenir, 1965 -
4th/19th Prince of Wales's Light Horse Regiment Unit History Room
Millbank filter bag, M & Co
Personal issue equipment during World War 2 and Vietnam War eras. It did not purify water but stopped one from drinking mud. The filtered water was run in to a water bottle containing sterilizing tablets.Light green cotton bag. Fitted with brass eyelets in top corner for use as hanging point.Manufacturer's stamp: "M & Co. 1945, Defence broad arrow, CAT No A.F. 0005" -
 Kiewa Valley Historical Society
Book - The Autobiography of Ernest Forras, Earnest Escapades Seriously for fun only The autobiography of Ernest Forras with Jan Henderson
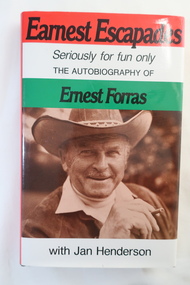
Ernest migrated from Hungary in January 1951 and helped bring commercial development to Australia's fledgling snowfields. He was keen to find Alpine employment, eventually importing ski and sports gear. This book covers his time in Hungary and his visits to the Alpine Ski Resorts - an insight into the early years of skiing in Australia.Ernest visited Falls Creek on the Bogong High Plains in 1951 and describes the area on pages 66 to76 from the point of view of an Hungarian migrant. He visited Falls Creek because his brother had got work on Kiewa Hydro Electric Ssheme.Hard dark brown cover book with dust cover coloured in red, white and green with title in black and a photo of Ernest Forras below. It consists of 190 pages. After page 54 and between Part one and Two, there are 18 pages of photos on photographic paper.Written in shaky writing on inside first page "To Debbie / From Hungary With Love / Ernest Forras 2002 / Mt Beautyernest forras, australian ski resorts from 1951, hungary pre 1951 -
 Warrnambool and District Historical Society Inc.
Booklet, Tide Tables, For the year 1976
Yearly publication showing predicted heights in metres for Port Phillip Heads, Williamstown, Portland and Stony Point (Westernport) and tidal differences for other Ports.This booklet provides tide and port information for the coastline of Victoria for the year 1976. It also has information on other aspects of weather such as wind, cloud and sea descriptions. These booklets were a useful reference for fishermen and those involved in boating along the coast of Victoria. They are published in digital form today.Sold at Stan McPhee Sports store Liebig St Warrnambool Vic showing local tides. Red card wrap around cover. 92 cream coloured pages held with 2 staples. Black print. Ports and harbour seal on the frontBooksellers stamp: ink. blue Stan McPhee Sports, green Liebig St Vic. red ...2953. 6717/75. C.H. Rixon, Government Printer, Melbourne. 51st Edition. Recommended price $3.00. Tables for Sunrise, Sunset/moonrise, moonset and transits at Port Phillip Heads & differences for other Victorian and Tasmanian Lighthouse stations.tide table, warrnambool tide table 1976, southern victorian tides -
 Orbost & District Historical Society
book, J.Ogden and Co, Beeton's Book of Needlework, 1870
Isabella Mary Beeton (née Mayson; 14 March 1836 – 6 February 1865), also known as Mrs Beeton, was an English journalist, editor and writer.In the 19th century, the craft of embroidery became a pastime for women. Needlework creations were crafted to be displayed in the home.This book is an example of a popular book of ithat time.A hard back book with a dark green fabric cover. The title is in gold print -"Beeton's Book of Needlework" inside an ornate gold border. It contains descriptions and instructions for tatting patterns, crochet patterns, knitting patterns, netting patterns, embroidery patterns and point lace patterns. There are six hundred illustrations / engravings. some of the patterns are fold-out.inside cover - "Special first prize to Catherine J. Horne by Mrs William for Needlework" Tarang State Schoolbeeton-isabella needlework-knitting-lacework -
 Orbost & District Historical Society
photograph, 1937
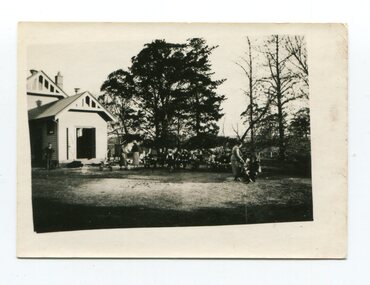
In 1912 the school at Pumpkin Point opened to serve the children of farmers living in the Bete Bolong district. This meant a big change in their way of life because in the past the children had been rowed across the Snowy River each day to attend school at Jarrahmond. Myrtle Bunting was the first HT of the school which had been erected on a block of land purchased from H. Richardson. The school functioned until 1952 when a shortage of pupils caused its closure. As a bus service to Orbost now operated, the school at Pumpkin Point faced permanent closure. J. McKeown bought the building. Students attending the school at this time included Russells, Johnstones, Reeves, Healeys, Kavanaghs, Phillips, Rodwells, Mills, Baileys, Gilberts and Masons. Mr. Oswald S. Green taught at Bete Bolong State School until he was appointed to Rokewood Junction in August 1937. This photograph is associated with the history of education in the Orbost district. There is no longer a school at Bete Bolong.A small black / white photograph of students and teachers standing outside a school.on back - " Bete Bolong School , 1937"bete-bolong-state-school education-orbost -
 Ringwood and District Historical Society
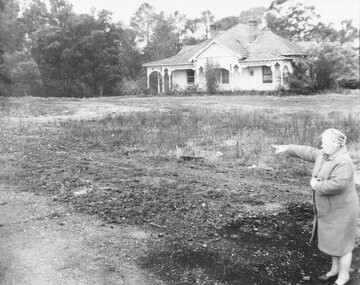
Photograph, Mrs. E.V. Pullin, Chairman Library Promotion Committee pointing to new library site - 1967 - opposite Eastland and the bowling green, Warrandyte Road. Five photographs
Mrs. E.V. Pullin, Chairman Library Promotion Committee pointing to library site - 1967 - opposite Eastland and the bowling green, Warrandyte Road. House on the library site was demolished at the end of 1968 and the library opened on 2nd May 1970. -
 Orbost & District Historical Society
tailor's iron, 1940's
By the late 1800s increasing numbers of Australian working men had at least one good suit as a sign of respectability. Suits could be purchased ready-made, made to measure from a local tailor. The introduction of electric irons meant that the old flat irons and gas stove no longer had to be used. This electric iron would have been used to flatten seams during the tailoring process. This item is representative of a now rare craft that has diminished in the contemporary world.An electric tailor's iron. It has a green base and a black handle. The body of the iron has a flat back and curves to a point at its front. Its handle is metal and is attached with large screws at the top and back side of the base. The top of the handle is covered in black plastic that has finger grooves. there is a black iron resting stand. -
 Australian National Surfing Museum
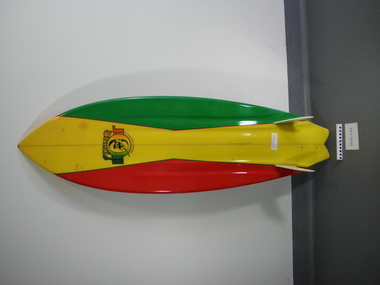
Surfboard, 1979 (estimated); The Piping Hot Twin Fin was produced in 1979 - 1980
Twin fin surfboard manufactured at Piping Hot Boston Road Torquay. Manufactured from polyurethane foam core and laminated fibreglass with fixed fibreglass fins. Shaped by Mike Patterson. This board is has channels running almost full length on the bottom of the board, the wide point forward of centre, swallow tail with flyer. Custom graphics in red, yellow and green top and bottom; from 1979High performance twin fin designs were pioneered by 4 time Professional World Surfing Champion Mark Richards (Newcastle). In this period 1978 -1981 these surfboards represented the pinnacle of surfboard design progression and high performance. This surfboard also represents Piping Hot which was one of Australia's leading surf 'brands' at that time. Piping Hot was a Torquay based company that produced surfboards,wetsuits and surf clothing. Piping Hot Twin Fin surfboard. Manufactured from polyurethane foam core and laminated fibreglass with fixed fibreglass fins. Full plan shape with channels running almost full length on the bottom of the board, the wide point forward of centre, swallow tail with flyer. Legrope plug fitted. Custom graphics in red, yellow and green top and bottom.20cm x 16cm Black red yellow green Piping Hot logo on deck and bottom 60cm down from nose. Hand written makers mark "Shaped by Mike Patterson Custom" in pencil on blank beside stringer forward of the fins on the bottom. "1459" in pencil on bottom near tail. surfboard, fibreglass, twin fin, piping hot, mike patterson, torquay, channel bottom, fred pyke, rod brooks -
 Flagstaff Hill Maritime Museum and Village
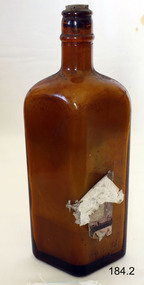
Container - Bottle, Pre 1974
Phenyle has been used for decades as a cleaner and disinfectant. It is well know for its use for cleaning outdoor toilets and easily identified by its strong odour. The brown glass bottle is immediately recognised as containing a poison. We've all seen them in a hundred different mystery movie scenes. The medicine cabinet opens and there, sitting on a shelf, is the incriminating object -- the ominous dark bottle with the skull and crossbones on the label. In off-screen reality, however, poison bottles have quite a different identity -- they are distinctive, varied, colorful -- and definitely collectible. Obviously, the one thing that sets the poison bottle apart from all other bottles is the need for prominent and immediate identification as a receptacle for toxic material, and this was achieved in a number of ways, including shape, color, embossing and labeling. Poisons were commonly found in the home for the purpose of controlling rodents and other pests, and were sold by grocers and druggists. For consumer protection, as far back as 1829, New York State made mandatory the marking of the bottles with the word "poison" in large letters. Then, in the middle of the 19th century, the American Pharmaceutical Association recommended legislation regarding identification of all poison bottles. In 1872 the American Medical Association also made recommendations -- namely that poison bottles be made of colored glass, and also have a rough surface on one side -- making them identifiable even in the dark -- and the word "poison" visible on the other (the skull and crossbones wasn't quite as ubiquitous as those movies led us to believe). However, passing these laws was not easy, and the manufacturers were essentially left to do as they wished. For collectors, the high point of poison bottle manufacturing was the period ranging roughly from the 1870s to the 1930s. At that time some, of the bottles were distinguished by particularly bright colors, such as cobalt blue (the most common) and emerald green. Others, particularly rare and collectible, had unusual -- and appropriate -- shapes, including skulls, leg bones and coffins. In order to better identify these lethal vessels by feel (not forgetting that there were many people in this period who could not read) when groping for them in the dark, they had such elaborate tactile patterns as quilted diamonds, lattices, hobnails and prominent vertical or horizontal ribbing, as well as spiky knobs and ridges. In addition, many had sharp points on top for the same precautionary purpose. Further efforts to distinguish poison bottles from others included uncommon multisided and triangular shapes, and unusual, hard-to-open tops, the predecessors of the modern child-proof openings. https://www.southcoasttoday.com/story/lifestyle/2001/08/19/poison-bottles-steeped-in-history/50352280007/The recognition and awareness of bottles containing poisonpous substances is extremely important for safety reasons.Bottle, brown glass, diamond shaped. "Bright Star" phenyle. Paper label attached, but peeling off and badly damaged. Corked with contents. Text moulded into glass, some with a border of stars. Poisonous contents, not to be taken. Registered Number 2140. Volume is 20 fluid ounces. Printed label "Bright Star". Text is moulded in the glass in raised lettering: "PHENYLE" outlined and decorated with star border. "POISONOUS", "NOT TO BE TAKEN" "V / DM / A" within oval, "REGD NO. 2140" (D and O are smaller and underlined) . Base is marked "F190".flagstaff hill, warrnambool, shipwrecked-coast, flagstaff-hill, flagstaff-hill-maritime-museum, maritime-museum, shipwreck-coast, flagstaff-hill-maritime-village, bright star, phenyl, cleaning and disinfecting chemical, poison, bottles -
 Flagstaff Hill Maritime Museum and Village
Domestic object - Bowl, Late 19th or early 20th Century
The Process of Making Pottery Decorating, Firing, Glazing, Making, Technical There is a rhythm and flow to clay. It can’t be done all at once! Even the making process! It can take weeks to get everything done, especially if you can only work on your pottery once a week! Even though we have three hour classes, it’s often just not enough time! Here is an overview of some of the processes so you have a bit more grasp on some of the technical stuff! Step One – Design There are SO many ideas out there for making stuff in clay! From delicate porcelain jewellery, through to heavy sculptural work and everything in between. Deciding your direction is sometimes not that easy – when you first start, try everything, you will naturally gravitate to the style that you enjoy! The options and variations are endless and can get a wee bit overwhelming too! Check in with me before you start to ensure your ideas will work, what order you might do things, how you could achieve the look you are seeking and any other technical data required! Step Two – Making Clay is thixotropic. This means that as you work with it, the clay first gets sloppier and wetter, before is begins to dry in the atmosphere. For most things, you simply can’t do all parts of the project at once. An example of work order might look like: Get last weeks work out from the shelves Prepare clay for today’s work – roll your clay, prepare balls for throwing, make the first stage of a pinch pot) Clean up last week’s work and put it on the shelf for bisque firing Check that you have any glazing to do – and do enough of it that you will have time to finish your main project Do the next step of your next project – there might be a further step that can’t be complete immediately, in that case, wrap your work well and put onto the shelves. Letting your work rest for a while can really help keep your work clean and professional looking. Many things require bagging under plastic to keep it ready for work the next week – put your name on the outside of the bag so you can find your work easily. We have stickers and markers. Consider how you want to decorate your work – coloured slip can be applied at a fairly wet stage (remembering that it will make your work even wetter!). Trying to apply slip to dry clay won’t work! If you want to do sgraffito – you will need to keep the work leather hard (a state of dryness where you can still work the clay with a little effort and a little water and care). Step Three – Drying Most of the time your work can go into the rack uncovered to let it dry out for the following week. If you want to continue forming or shaping you will need to double bag your work – put your work on a suitable sized bat and put the bat in a bag so the base of the bag is under the bat, then put another bag over the top of the work and tuck the top of the bag under the bat. If you want to trim (or turn) your thrown work the following week, it should also be double bagged. If your work is large, delicate, or of uneven thicknesses, you should lightly cover your work for drying. When considering the drying process, bare in mind the weather, humidity and wind! The hotter and dryer, the faster things dry and work can dry unevenly in the shelves – this can lead to cracking – another time to lightly cover your work for drying. Step Four – Trimming and Cleaning Up Your work is dry! It is called greenware now and it is at it’s most fragile! Handle everything with two hands. I often refer to soft hands – keep everything gentle and with your fingers spread as much as possible. Try to not pick up things like plates too much, and always with both hands! Before your work can be bisque fired it should be “cleaned up”. You work won’t go into the kiln if it has sharp edges – when glazed, sharp edges turn into razor blades! Use a piece of fly wire to rub the work all over – this will scratch a little so be light handed. Use a knife or metal kidney to scrape any areas that require a bit more dynamic treatment than the fly wire offers! Finally, a very light wipe over with a slightly damp sponge can help soften and soothe all of your edges and dags! Trimming thrown work: If you are planning to trim (or turn) your thrown work (and you should be), make sure you bag it well – your work should be leather hard to almost dry for easiest trimming. Use this step to finish the work completely – use a metal kidney to polish the surface, or a slightly damp sponge to give a freshly thrown look. Wipe the sponge around the rim after trimming, and check the inside of the pot for dags! Trimming slip cast work: Usually I will trim the rims of your work on the wheel the following day to make that stage easier, however you will still need to check your work for lumps and bumps. Last but not least – check that your name is still clearly on the bottom of your work. Step Five – Bisque Firing When the work is completely dry it can go into the bisque kiln. The bisque kiln is fired to 1000°C. This process burns off the water in the clay as well as some of the chemically bound water. The structure of the clay is not altered that much at this temperature. Inside the bisque kiln, the work is stacked a little, small bowl inside a larger bowl and onto a heavy plate. Smaller items like decorations or drink coasters might get stacked several high. Consideration is paid to the weight of the stack and shape of the work. A bisque kiln can fire about one and a half times the amount of work that the glaze kiln can fire. The firing takes about 10 hours to complete the cycle and about two days to cool down. Once it has been emptied the work is placed in the glaze room ready for you to decorate! Step Six – Glazing Decorating your work with colour can be a lot of fun – and time consuming! There are three main options for surface treatment at this stage: Oxide Washes Underglazes Glazes Washes and underglazes do not “glaze” the work – It will still need a layer of glaze to fully seal the clay (washes don’t need glaze on surfaces not designed for food or liquid as they can gloss up a little on their own). Underglazes are stable colourants that turn out pretty much how they look in the jar. They can be mixed with each other to form other colours and can be used like water colours to paint onto your work. Mostly they should have a clear glaze on top to seal them. Oxides are a different species – the pink oxide (cobalt) wash turns out bright blue for instance. They don’t always need a glaze on top, and some glazes can change the colour of the wash! The glazes need no other “glaze” on top! Be careful of unknown glaze interactions – you can put any combination of glaze in a bowl or on a plate, but only a single glaze on the outside of any vertical surface! Glazes are a chemical reaction under heat. We don’t know the exact chemicals in the Mayco glazes we use. I can guess by the way they interact with each other, however, on the whole, you need to test every idea you have, and not run the test on a vertical surface! Simply put, glaze is a layer of glass like substance that bonds with the clay underneath. Clay is made of silica, alumina and water. Glaze is made of mostly silica. Silica has a melting point of 1700°C and we fire to 1240°C. The silica requires a “flux” to help it melt at the lower temperature. Fluxes can be all sorts of chemicals – a common one is calcium – calcium has a melting point of 2500°C, however, together they both melt at a much lower temperature! Colourants are metal oxides like cobalt (blue), chrome (green through black), copper (green, blue, even red!), manganese (black, purple and pink) iron (red brown), etc. Different chemicals in the glaze can have dramatic effects. for example, barium carbonate (which we don’t use) turns manganese bright pink! Other elements can turn manganese dioxide brown, blue, purple and reddish brown. Manganese dioxide is a flux in and of itself as well. So, glazes that get their black and purple colours, often interact with other glazes and RUN! Our mirror black is a good example – it mixes really well with many glazes because it fluxes them – causes them to melt faster. It will also bring out many beautiful colours in the glazes because it’s black colouring most definitely comes from manganese dioxide! Glaze chemistry is a whole subject on it’s own! We use commercial Mayco glazes on purpose – for their huge range of colour possibilities, stability, cool interactions, artistic freedom with the ability to easily brush the glazes on and ease of use. We currently have almost 50 glazes on hand! A major project is to test the interactions of all glazes with each other. That is 2,500 test tiles!!!! I’m going to make the wall behind the wheels the feature wall of pretty colours! Step Seven – Glaze (Gloss or sometimes called “Glost”) Firing Most of the time this is the final stage of making your creation (but not always!) The glaze kiln goes to 1240°C. This is called cone 6, or midrange. It is the low end of stoneware temperatures. Stoneware clays and glazes are typically fired at cone 8 – 10, that is 1260 – 1290°C. The energy requirement to go from 1240°C to 1280°C is almost a 30% more! Our clay is formulated to vitrify (mature, turn “glass-like”) at 1240°, as are our glazes. A glaze kiln take around 12 hours to reach temperature and two to three days to cool down. Sometimes a third firing process is required – this is for decoration that is added to work after the glaze firing. For example – adding precious metals and lustres. this firing temperature is usually around 600 – 800°C depending upon the techniques being used. There are many students interested in gold and silver trims – we will be doing this third type of firing soon! After firing your work will be in the student finished work shelves. Remember to pay for it before you head out the door! There is a small extra charge for using porcelain clay (it’s more than twice the price of regular clay), and for any third firing process! Once your work has been fired it can not turn back into clay for millennia – so don’t fire it if you don’t like it! Put it in the bucket for recycling. https://firebirdstudios.com.au/the-process-of-making-pottery/ The bowl is an example of kitchenware used in the 19th century and still in use today.Bowl white ceramic. Crack on side. Badly stained.Backstamp very faint and unable to be read.flagstaff hill, warrnambool, shipwrecked-coast, flagstaff-hill, flagstaff-hill-maritime-museum, maritime-museum, shipwreck-coast, flagstaff-hill-maritime-village, mixing bowl, food preparation, kitchen equipment, ceramic -
 Flagstaff Hill Maritime Museum and Village
Domestic object - Bowl
The Process of Making Pottery Decorating, Firing, Glazing, Making, Technical There is a rhythm and flow to clay. It can’t be done all at once! Even the making process! It can take weeks to get everything done, especially if you can only work on your pottery once a week! Even though we have three hour classes, it’s often just not enough time! Here is an overview of some of the processes so you have a bit more grasp on some of the technical stuff! Step One – Design There are SO many ideas out there for making stuff in clay! From delicate porcelain jewellery, through to heavy sculptural work and everything in between. Deciding your direction is sometimes not that easy – when you first start, try everything, you will naturally gravitate to the style that you enjoy! The options and variations are endless and can get a wee bit overwhelming too! Check in with me before you start to ensure your ideas will work, what order you might do things, how you could achieve the look you are seeking and any other technical data required! Step Two – Making Clay is thixotropic. This means that as you work with it, the clay first gets sloppier and wetter, before is begins to dry in the atmosphere. For most things, you simply can’t do all parts of the project at once. An example of work order might look like: Get last weeks work out from the shelves Prepare clay for today’s work – roll your clay, prepare balls for throwing, make the first stage of a pinch pot) Clean up last week’s work and put it on the shelf for bisque firing Check that you have any glazing to do – and do enough of it that you will have time to finish your main project Do the next step of your next project – there might be a further step that can’t be complete immediately, in that case, wrap your work well and put onto the shelves. Letting your work rest for a while can really help keep your work clean and professional looking. Many things require bagging under plastic to keep it ready for work the next week – put your name on the outside of the bag so you can find your work easily. We have stickers and markers. Consider how you want to decorate your work – coloured slip can be applied at a fairly wet stage (remembering that it will make your work even wetter!). Trying to apply slip to dry clay won’t work! If you want to do sgraffito – you will need to keep the work leather hard (a state of dryness where you can still work the clay with a little effort and a little water and care). Step Three – Drying Most of the time your work can go into the rack uncovered to let it dry out for the following week. If you want to continue forming or shaping you will need to double bag your work – put your work on a suitable sized bat and put the bat in a bag so the base of the bag is under the bat, then put another bag over the top of the work and tuck the top of the bag under the bat. If you want to trim (or turn) your thrown work the following week, it should also be double bagged. If your work is large, delicate, or of uneven thicknesses, you should lightly cover your work for drying. When considering the drying process, bare in mind the weather, humidity and wind! The hotter and dryer, the faster things dry and work can dry unevenly in the shelves – this can lead to cracking – another time to lightly cover your work for drying. Step Four – Trimming and Cleaning Up Your work is dry! It is called greenware now and it is at it’s most fragile! Handle everything with two hands. I often refer to soft hands – keep everything gentle and with your fingers spread as much as possible. Try to not pick up things like plates too much, and always with both hands! Before your work can be bisque fired it should be “cleaned up”. You work won’t go into the kiln if it has sharp edges – when glazed, sharp edges turn into razor blades! Use a piece of fly wire to rub the work all over – this will scratch a little so be light handed. Use a knife or metal kidney to scrape any areas that require a bit more dynamic treatment than the fly wire offers! Finally, a very light wipe over with a slightly damp sponge can help soften and soothe all of your edges and dags! Trimming thrown work: If you are planning to trim (or turn) your thrown work (and you should be), make sure you bag it well – your work should be leather hard to almost dry for easiest trimming. Use this step to finish the work completely – use a metal kidney to polish the surface, or a slightly damp sponge to give a freshly thrown look. Wipe the sponge around the rim after trimming, and check the inside of the pot for dags! Trimming slip cast work: Usually I will trim the rims of your work on the wheel the following day to make that stage easier, however you will still need to check your work for lumps and bumps. Last but not least – check that your name is still clearly on the bottom of your work. Step Five – Bisque Firing When the work is completely dry it can go into the bisque kiln. The bisque kiln is fired to 1000°C. This process burns off the water in the clay as well as some of the chemically bound water. The structure of the clay is not altered that much at this temperature. Inside the bisque kiln, the work is stacked a little, small bowl inside a larger bowl and onto a heavy plate. Smaller items like decorations or drink coasters might get stacked several high. Consideration is paid to the weight of the stack and shape of the work. A bisque kiln can fire about one and a half times the amount of work that the glaze kiln can fire. The firing takes about 10 hours to complete the cycle and about two days to cool down. Once it has been emptied the work is placed in the glaze room ready for you to decorate! Step Six – Glazing Decorating your work with colour can be a lot of fun – and time consuming! There are three main options for surface treatment at this stage: Oxide Washes Underglazes Glazes Washes and underglazes do not “glaze” the work – It will still need a layer of glaze to fully seal the clay (washes don’t need glaze on surfaces not designed for food or liquid as they can gloss up a little on their own). Underglazes are stable colourants that turn out pretty much how they look in the jar. They can be mixed with each other to form other colours and can be used like water colours to paint onto your work. Mostly they should have a clear glaze on top to seal them. Oxides are a different species – the pink oxide (cobalt) wash turns out bright blue for instance. They don’t always need a glaze on top, and some glazes can change the colour of the wash! The glazes need no other “glaze” on top! Be careful of unknown glaze interactions – you can put any combination of glaze in a bowl or on a plate, but only a single glaze on the outside of any vertical surface! Glazes are a chemical reaction under heat. We don’t know the exact chemicals in the Mayco glazes we use. I can guess by the way they interact with each other, however, on the whole, you need to test every idea you have, and not run the test on a vertical surface! Simply put, glaze is a layer of glass like substance that bonds with the clay underneath. Clay is made of silica, alumina and water. Glaze is made of mostly silica. Silica has a melting point of 1700°C and we fire to 1240°C. The silica requires a “flux” to help it melt at the lower temperature. Fluxes can be all sorts of chemicals – a common one is calcium – calcium has a melting point of 2500°C, however, together they both melt at a much lower temperature! Colourants are metal oxides like cobalt (blue), chrome (green through black), copper (green, blue, even red!), manganese (black, purple and pink) iron (red brown), etc. Different chemicals in the glaze can have dramatic effects. for example, barium carbonate (which we don’t use) turns manganese bright pink! Other elements can turn manganese dioxide brown, blue, purple and reddish brown. Manganese dioxide is a flux in and of itself as well. So, glazes that get their black and purple colours, often interact with other glazes and RUN! Our mirror black is a good example – it mixes really well with many glazes because it fluxes them – causes them to melt faster. It will also bring out many beautiful colours in the glazes because it’s black colouring most definitely comes from manganese dioxide! Glaze chemistry is a whole subject on it’s own! We use commercial Mayco glazes on purpose – for their huge range of colour possibilities, stability, cool interactions, artistic freedom with the ability to easily brush the glazes on and ease of use. We currently have almost 50 glazes on hand! A major project is to test the interactions of all glazes with each other. That is 2,500 test tiles!!!! I’m going to make the wall behind the wheels the feature wall of pretty colours! Step Seven – Glaze (Gloss or sometimes called “Glost”) Firing Most of the time this is the final stage of making your creation (but not always!) The glaze kiln goes to 1240°C. This is called cone 6, or midrange. It is the low end of stoneware temperatures. Stoneware clays and glazes are typically fired at cone 8 – 10, that is 1260 – 1290°C. The energy requirement to go from 1240°C to 1280°C is almost a 30% more! Our clay is formulated to vitrify (mature, turn “glass-like”) at 1240°, as are our glazes. A glaze kiln take around 12 hours to reach temperature and two to three days to cool down. Sometimes a third firing process is required – this is for decoration that is added to work after the glaze firing. For example – adding precious metals and lustres. this firing temperature is usually around 600 – 800°C depending upon the techniques being used. There are many students interested in gold and silver trims – we will be doing this third type of firing soon! After firing your work will be in the student finished work shelves. Remember to pay for it before you head out the door! There is a small extra charge for using porcelain clay (it’s more than twice the price of regular clay), and for any third firing process! Once your work has been fired it can not turn back into clay for millennia – so don’t fire it if you don’t like it! Put it in the bucket for recycling. https://firebirdstudios.com.au/the-process-of-making-pottery/ This bowl is an example of kitchenware used in the 19th century and still in use today.Bowl white ceramic plain that has two sets of edging around lip. Inside bowl has plaster designed to look like cooking mixture.flagstaff hill, warrnambool, shipwrecked-coast, flagstaff-hill, flagstaff-hill-maritime-museum, maritime-museum, shipwreck-coast, flagstaff-hill-maritime-village, kitchen equipment, ceramic -
 Flagstaff Hill Maritime Museum and Village
Domestic object - Bowl, J & G Meakin, Late 19th or early 20th Century
The Process of Making Pottery Decorating, Firing, Glazing, Making, Technical There is a rhythm and flow to clay. It can’t be done all at once! Even the making process! It can take weeks to get everything done, especially if you can only work on your pottery once a week! Even though we have three hour classes, it’s often just not enough time! Here is an overview of some of the processes so you have a bit more grasp on some of the technical stuff! Step One – Design There are SO many ideas out there for making stuff in clay! From delicate porcelain jewellery, through to heavy sculptural work and everything in between. Deciding your direction is sometimes not that easy – when you first start, try everything, you will naturally gravitate to the style that you enjoy! The options and variations are endless and can get a wee bit overwhelming too! Check in with me before you start to ensure your ideas will work, what order you might do things, how you could achieve the look you are seeking and any other technical data required! Step Two – Making Clay is thixotropic. This means that as you work with it, the clay first gets sloppier and wetter, before is begins to dry in the atmosphere. For most things, you simply can’t do all parts of the project at once. An example of work order might look like: Get last weeks work out from the shelves Prepare clay for today’s work – roll your clay, prepare balls for throwing, make the first stage of a pinch pot) Clean up last week’s work and put it on the shelf for bisque firing Check that you have any glazing to do – and do enough of it that you will have time to finish your main project Do the next step of your next project – there might be a further step that can’t be complete immediately, in that case, wrap your work well and put onto the shelves. Letting your work rest for a while can really help keep your work clean and professional looking. Many things require bagging under plastic to keep it ready for work the next week – put your name on the outside of the bag so you can find your work easily. We have stickers and markers. Consider how you want to decorate your work – coloured slip can be applied at a fairly wet stage (remembering that it will make your work even wetter!). Trying to apply slip to dry clay won’t work! If you want to do sgraffito – you will need to keep the work leather hard (a state of dryness where you can still work the clay with a little effort and a little water and care). Step Three – Drying Most of the time your work can go into the rack uncovered to let it dry out for the following week. If you want to continue forming or shaping you will need to double bag your work – put your work on a suitable sized bat and put the bat in a bag so the base of the bag is under the bat, then put another bag over the top of the work and tuck the top of the bag under the bat. If you want to trim (or turn) your thrown work the following week, it should also be double bagged. If your work is large, delicate, or of uneven thicknesses, you should lightly cover your work for drying. When considering the drying process, bare in mind the weather, humidity and wind! The hotter and dryer, the faster things dry and work can dry unevenly in the shelves – this can lead to cracking – another time to lightly cover your work for drying. Step Four – Trimming and Cleaning Up Your work is dry! It is called greenware now and it is at it’s most fragile! Handle everything with two hands. I often refer to soft hands – keep everything gentle and with your fingers spread as much as possible. Try to not pick up things like plates too much, and always with both hands! Before your work can be bisque fired it should be “cleaned up”. You work won’t go into the kiln if it has sharp edges – when glazed, sharp edges turn into razor blades! Use a piece of fly wire to rub the work all over – this will scratch a little so be light handed. Use a knife or metal kidney to scrape any areas that require a bit more dynamic treatment than the fly wire offers! Finally, a very light wipe over with a slightly damp sponge can help soften and soothe all of your edges and dags! Trimming thrown work: If you are planning to trim (or turn) your thrown work (and you should be), make sure you bag it well – your work should be leather hard to almost dry for easiest trimming. Use this step to finish the work completely – use a metal kidney to polish the surface, or a slightly damp sponge to give a freshly thrown look. Wipe the sponge around the rim after trimming, and check the inside of the pot for dags! Trimming slip cast work: Usually I will trim the rims of your work on the wheel the following day to make that stage easier, however you will still need to check your work for lumps and bumps. Last but not least – check that your name is still clearly on the bottom of your work. Step Five – Bisque Firing When the work is completely dry it can go into the bisque kiln. The bisque kiln is fired to 1000°C. This process burns off the water in the clay as well as some of the chemically bound water. The structure of the clay is not altered that much at this temperature. Inside the bisque kiln, the work is stacked a little, small bowl inside a larger bowl and onto a heavy plate. Smaller items like decorations or drink coasters might get stacked several high. Consideration is paid to the weight of the stack and shape of the work. A bisque kiln can fire about one and a half times the amount of work that the glaze kiln can fire. The firing takes about 10 hours to complete the cycle and about two days to cool down. Once it has been emptied the work is placed in the glaze room ready for you to decorate! Step Six – Glazing Decorating your work with colour can be a lot of fun – and time consuming! There are three main options for surface treatment at this stage: Oxide Washes Underglazes Glazes Washes and underglazes do not “glaze” the work – It will still need a layer of glaze to fully seal the clay (washes don’t need glaze on surfaces not designed for food or liquid as they can gloss up a little on their own). Underglazes are stable colourants that turn out pretty much how they look in the jar. They can be mixed with each other to form other colours and can be used like water colours to paint onto your work. Mostly they should have a clear glaze on top to seal them. Oxides are a different species – the pink oxide (cobalt) wash turns out bright blue for instance. They don’t always need a glaze on top, and some glazes can change the colour of the wash! The glazes need no other “glaze” on top! Be careful of unknown glaze interactions – you can put any combination of glaze in a bowl or on a plate, but only a single glaze on the outside of any vertical surface! Glazes are a chemical reaction under heat. We don’t know the exact chemicals in the Mayco glazes we use. I can guess by the way they interact with each other, however, on the whole, you need to test every idea you have, and not run the test on a vertical surface! Simply put, glaze is a layer of glass like substance that bonds with the clay underneath. Clay is made of silica, alumina and water. Glaze is made of mostly silica. Silica has a melting point of 1700°C and we fire to 1240°C. The silica requires a “flux” to help it melt at the lower temperature. Fluxes can be all sorts of chemicals – a common one is calcium – calcium has a melting point of 2500°C, however, together they both melt at a much lower temperature! Colourants are metal oxides like cobalt (blue), chrome (green through black), copper (green, blue, even red!), manganese (black, purple and pink) iron (red brown), etc. Different chemicals in the glaze can have dramatic effects. for example, barium carbonate (which we don’t use) turns manganese bright pink! Other elements can turn manganese dioxide brown, blue, purple and reddish brown. Manganese dioxide is a flux in and of itself as well. So, glazes that get their black and purple colours, often interact with other glazes and RUN! Our mirror black is a good example – it mixes really well with many glazes because it fluxes them – causes them to melt faster. It will also bring out many beautiful colours in the glazes because it’s black colouring most definitely comes from manganese dioxide! Glaze chemistry is a whole subject on it’s own! We use commercial Mayco glazes on purpose – for their huge range of colour possibilities, stability, cool interactions, artistic freedom with the ability to easily brush the glazes on and ease of use. We currently have almost 50 glazes on hand! A major project is to test the interactions of all glazes with each other. That is 2,500 test tiles!!!! I’m going to make the wall behind the wheels the feature wall of pretty colours! Step Seven – Glaze (Gloss or sometimes called “Glost”) Firing Most of the time this is the final stage of making your creation (but not always!) The glaze kiln goes to 1240°C. This is called cone 6, or midrange. It is the low end of stoneware temperatures. Stoneware clays and glazes are typically fired at cone 8 – 10, that is 1260 – 1290°C. The energy requirement to go from 1240°C to 1280°C is almost a 30% more! Our clay is formulated to vitrify (mature, turn “glass-like”) at 1240°, as are our glazes. A glaze kiln take around 12 hours to reach temperature and two to three days to cool down. Sometimes a third firing process is required – this is for decoration that is added to work after the glaze firing. For example – adding precious metals and lustres. this firing temperature is usually around 600 – 800°C depending upon the techniques being used. There are many students interested in gold and silver trims – we will be doing this third type of firing soon! After firing your work will be in the student finished work shelves. Remember to pay for it before you head out the door! There is a small extra charge for using porcelain clay (it’s more than twice the price of regular clay), and for any third firing process! Once your work has been fired it can not turn back into clay for millennia – so don’t fire it if you don’t like it! Put it in the bucket for recycling. https://firebirdstudios.com.au/the-process-of-making-pottery/This bowl was made by renowned pottery company J & G Meakin of England. The firm was established in the mid-1800's. The bowl is an example of kitchenware used in the 19th century and still in use today.Bowl; white ceramic, round and tapering inwards towards base. Made by J and G Meakin England.On base, 'Ironstone China Reg SOL 391413' with symbolflagstaff hill, flagstaff hill maritime museum and village, warrnambool, maritime museum, maritime village, great ocean road, shipwreck coast, mixing bowl, food preparation, j & g meakin, pottery, stoke-on-trent, kitchen equipment, ceramic