Showing 1733 items
matching bendigo gardens
-
 Ballarat Tramway Museum
Slide - 35mm slide/s - set of 25, Noel Simons, 26/02/1972 12:00:00 AM
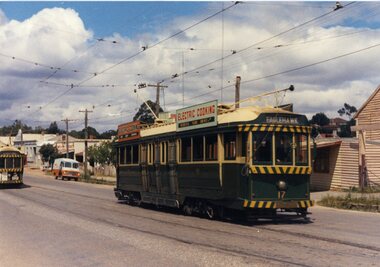
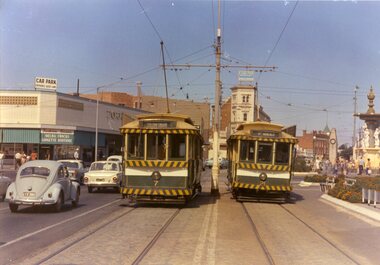
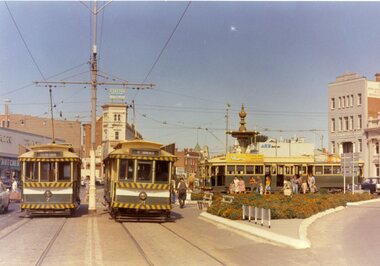
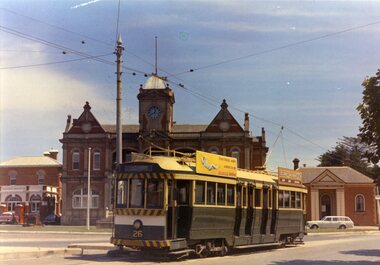
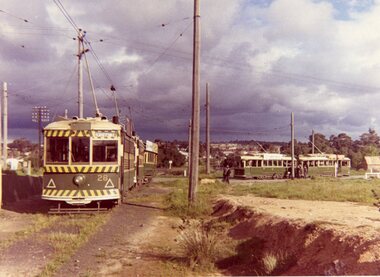
Set of 25 transparencies taken on 26/2/1972 on Kodak mounts. 1204.1 - Bendigo No. 5 - just arrived at Manchester Loop near Havilah Road, Long Gully. Photo taken after tram has passed photographer. 1204.2 - No. 26 in Backhaus St. Long Gully passing William St, en route to Quarry Hill. Photo taken after tram has passed photographer. 1204.3 - No. 5 climbing the High St. Hill Eaglehawk, heading for Quarry Hill with the buildings on the West side of High St. in the background, including the Eaglehawk Town Hall. 1204.4 - as for 1204.3, but tram close up. 1204.5 - as for 1204.3, but after tram has passed photographer. 1204.6 - No. 5 at intersection of Mt Korong Road Ironbark and Calder Highway, with the AMPOL service 'station in the background. Photo taken after tram has passed photographer. 1204.7 - No. 26 en route to Quarry Hill shortly after leaving Needle Loop, passing William St., Long Gully. 1204.8 - No. 5 at California Gully Loop, picking up a passenger, with the shops at Long Gully in the background. Photo taken after tram has passed photographer. 1204.9 - No. 5 in Long Gully, en route to Quarry Hill. Photo taken after tram has passed photographer. 1204.10 - No. 2 at Eaglehawk terminus with the Eaglehawk Town Hall and Post Office in the background. Tram has two SEC roof ads. 1204.11 - No. 2 at Eaglehawk terminus, close up. 1204.12 - as for 1204.11, but through the park gates. 1204.13 - as for 1204.11, but with tram stop shelters in the foreground and buildings on the West side of High St in the background. 1204.14 - No. 2 in Mt. Korong Rd, midway between California Gully Loop and Needle Loop. Photo taken after tram has passed photographer. 1204.15 - No. 5 in Long Gully, en route to Quarry Hill. 1204.16 - as for 1204.15, but with trams departed loop. Has an ESSO service station in the background. 1204.17 - No. 26 leaves Charing Cross up View St.. Photo taken after tram has passed photographer. Has Armstrong Tyre Service, Cohns Drinks ad on a building and the T&G building in the background. Also Firestone ads on the tyre service building. 1204.18 - No. 5 waits at Charing Cross with the Alexandra Fountain in the background. Tram has two SEC roof ads, 'Everything s fine in my all electric kitchen' and 'Electricity Best for Cooking'. Has RACV, Colonial Mutual Life buildings in the background and the planting areas around Charing Cross gardens in the foreground. 1204.19 - No. 21 en route to North Bendigo arrives at Charing Cross, with passengers waiting to board. No. 5 in the background. In the background is the Fountain Gate Plaza building and the City Family Hotel. 1204.20 - as for 1204.19, but with No. 7 en route to Golden Square. 1204.21 - as for 1204.19, but closer up. 1204.22 - as for 1204.18 1204.23 - No. 25 in Nolan St. near the crossing of Bendigo Creek, running a special tram tour. 1204.24 - No. 25 on a special charter, in Weeroona Ave. at Cnr of Caledonia St. passing the Gas works. 1204.25 - Nos. 25 (showing Golden Square), 7 and 26 at Charing Cross. Has fountain in the background.Information written on in blue ink and date stamped on purple ink. 1204.1 - "No. 5 at Manchester Loop, near Havilah Rd. Long Gully." 1204.2 - "No. 26 in Backhaus St. Long Gully passing William St." 1204.3 - "No. 5 in High St. Eaglehawk." 1204.4 - "No. 5 in High St. Eaglehawk." 1204.5 - "No. 5 in High St. Eaglehawk." 1204.6 - "No. 5 in Mt. Korong Rd., Ironbark, passing Calder Highway Junctn." 1204.7 - "No. 26 shortly after leaving Needle Loop, passing William St., Long Gully. No. 5 cresting hill in distance." 1204.8 - "No. 5 at California Gully Loop." 1204.9 - "No. 5 in Long Gully" 1204.10 - "No. 2 at Eaglehawk terminus." 1204.11 - "No. 2 at Eaglehawk terminus." 1204.12 - "No. 2 at Eaglehawk terminus." 1204.13 - "No. 2 at Eaglehawk terminus." 1204.14 - "No. 2 in Mt. Korong Rd, midway between California Gully Loop and Needle Loop. 1204.15 - "Nos. 2 and 26 crossing at Long Gully." 1204.16 - "No. 26 leaves Long Gully loop for Eaglehawk as No. 2 pulls out of the far end towards Bendigo" 1204.17 - "No. 26 beginning the climb up View St. from Charing Cross." 1204.18 - "No. 5 at Charing Cross." 1204.19 - "No 21 arrives at Charing Cross from Golden Square while No. 5 awaits departure time for Eaglehawk." 1204.20 - "Nos. 7, 21, and 2 (behind which is No. 5) at Charing Cross." 1204.21 - "Nos. 7, 21, and 2 at Charing Cross." 1204.22 - "No. 5 at Charing Cross." 1204.23 - "No. 25 in Nolan St. near Bendigo creek crossing" 1204.24 - "No. 25 in Weeroona Ave. at cnr of Caledonia St." 1204.25 - "Nos. 25, 7, 26 and 2 (behind 26) at Charing Cross."tramways, trams, bendigo, eaglehawk, long gully, california gully, charing cross, north bendigo, tram 2, tram 5, tram 7, tram 21, tram 25, tram 26 -
 Ballarat Tramway Museum
Slide - 35mm slide/s - set of 23, Noel Simons, 26/02/1972 12:00:00 AM
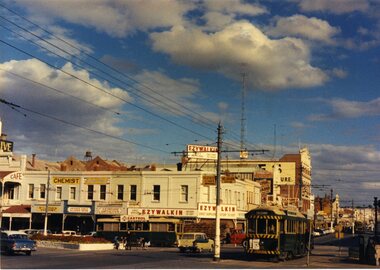
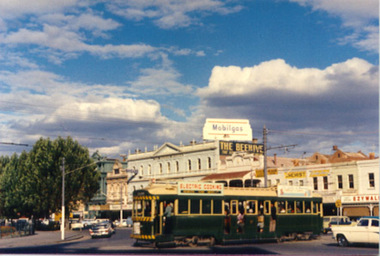
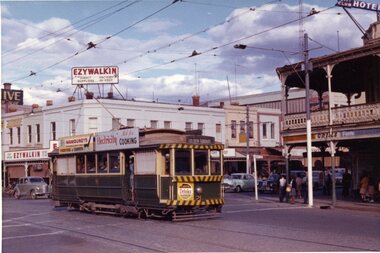
Set of 23 transparencies taken on 26/2/1972 on Kodak mounts. 1205.1 - Bendigo No. 25 on a special tour at Fire Station Loop, en route to Golden Square. 1205.2 - No. 21 and 25 crossing at Fire Station Loop, note photographers on the ground. No. 21 bound for North Bendigo. 1205.3 - as for 1205.3, but with trams departing loop and fire station in the background. 1205.4 - No. 25 at Golden Square Hotel with 'Rodda's Golden Square Hotel' in the background. Tram on a special tour, but showing destination of North Bendigo. 1205.5 - as for 1205.4 - but showing special. Has the end of the track in the photograph. 1205.6 - Nos. 7 and 25 (on a special tour) crossing at Myrtle St. Loop. 1205.7 - No. 7 leaving Myrtle St. loop with the mine poppet head in the background. Photo taken after tram has passed photographer. (Print made of this slide 10/2001 for use in the Gold Gold Gold exhibition of 10/2001 - See Reg. item 1979. 1205.8 - No. 25 entering depot. Tram showing 'special'. Tennis court on right has players. Photo taken after tram has passed photographer. 1205.9 - No. 24 (showing 'special') and No. 20 (showing 'Long Gully') at Bendigo Depot. 1205.10 - No. 24 on a special charter, leaving Bendigo depot. Tram has two 'Johnnie Walker' roof ads. 1205.11 - Bendigo depot with 29, 25 and a bogie car inside the depot doors. 1205.12 - As for 1205.11, but with 28 and 29. 1205.13 - No. 24 standing at front entrance of Bendigo depot with No. 20 in the background. 1205.14 - No. 24 running out into McCrae St showing special, with conductor on front step. 1205.15 - No. 24 in Caledonia St. at corner of Thunder St with the Gasworks in the background. 1205.16 - No. 5 en route for Quarry Hill at Charing cross with No. 26 (en route for Eaglehawk) about to arrive. Has former crossover at this location in the foreground. Has the Ezywalkin building in the background. 1205.17 - No. 5 and 26 at Charing Cross, with the Alexandra Fountain in the foreground and the Beehive and Ezywalkin buildings in the background. No.26 has two SEC roof ads. 1205.18 - Charing Cross looking along Pall Mall with trams 7 and 21 and 26 in the picture. 1205.19 - Charing Cross, with 21 departing for Golden Square and No. 5 heading for Quarry Hill. Has the Ezywalkin and the Beehive buildings in the background. 1205.20 - as for 1205.19, but a few moments later. Adjacent pole has a "NO ROAD" letter in reflectors vertically. 1205.21 - Charing Cross with Nos. 25, 21, 26 and 7, looking south from Pall Mall end. 1205.22 - No. 24 crossing Mitchell St. en route for Golden Square, showing 'special' with the Beehive and Ezywalkin buildings in the background. 1205.23 - Charing Cross with Nos. 24, 21 and 7 in the photo and Fountain Plaza in the background. Print of 1205.7 - stored in box D1.Information written on in blue ink and date stamped on purple ink. 1205.1 - "No. 25 at Fire Station Loop High Street, Golden Square." 1205.2 - "Nos. 25 and 21 crossing at Fire Station Loop, near Golden Square." 1205.3 - "Nos. 25 and 21 crossing at Fire Station Loop, near Golden Square." 1205.4 - "No. 25 at Golden Square terminus." 1205.5 - "No. 25 at Golden Square terminus." 1205.6 - "Nos. 7 and 25 crossing at Myrtle St. Loop." 1205.7 - "No. 7 leaving Myrtle St. Loop." 1205.8 - "No 25, entering Bendigo Depot." 1205.9 - "Nos. 20 and 24 at Bendigo Depot." 1205.10 - "No. 24 at Bendigo Depot." 1205.11 - "Nos. 25 and 29 at Bendigo Depot." 1205.12 - "Birney cars 29 and 28 at Bendigo Depot." 1205.13 - "No. 24 (with 20 beyond) at Bendigo Depot." 1205.14 - "No. 24 entering McCrae St. from Arnold St." 1204.15 - "No. 24 in Caledonia St. at cnr of Thunder St." 1204.16 - "No. 5 waits at Charing Cross as No. 26 arrives from Quarry Hill. Note remains of crossover abandoned on relocation in 1965." 1204.17 - "Nos. 5 and 26 at Charing Cross." 1204.18 - "Nos. 26, 7 and 21 at Charing Cross (No. 5 just visible behind No. 26)." 1204.19 - "No. 21 leaves Charing Cross for Golden Square as No. 5 starts off for Quarry Hill." 1204.20 - "No. 21 swings onto the single track Golden Square line as No. 5 heads into Mitchell St. towards Quarry Hill." 1204.21 - "Nos. 25, 21 and 26 watch No. 7 arrive at Charing Cross from Golden Square." 1204.22 - "No. 24 at Charing Cross crossing Mitchell St." 1204.23 - "Nos. 24, 21 and 7 at Charing Cross."tramways, trams, bendigo, golden square, myrtle st., fire station, depot, charing cross, tram 5, tram 7, tram 20, tram 21, tram 24, tram 25, tram 28, tram 29 -
 Ballarat Tramway Museum
Slide - 35mm slide/s - set of 6, Noel Simons, 28 Feb. 1972
... Bendigo Hayes St. Loop Garden Gully Loop View St. Golden Square ...Set of 6 transparencies taken on 28/2/1972 on Kodak mounts. 1206.1 - Bendigo No. 5 at Hayes St. Loop, en route for Quarry Hill. 1206.2 - No. 5 at Garden Gully Loop, Mt. Korong road, Ironbark. en route to Quarry Hill. Note the water column in the background. 1206.3 - No. 5 in View St. Bendigo, with the Commodore Motel in the background. 1206.4 - No. 6 en route for Golden Square in Fire Station loop, with the fire station building in the background. Photo taken after tram has passed photographer. 1206.5 - No. 6 in High St., running through Golden Square Shopping Centre, en route for Golden Square. Photo taken after tram has passed photographer. 1206.6 - No. 6 arriving at Charing Cross, bound for North Bendigo, with the City Family Hotel, ANZ bank and the Cenotaph (war memorial) in the background.Information written on in blue ink and date stamped on purple ink. 1206.1 - "No. 5 at Hayes Loop, Ironbark." 1206.2 - "No. 5 at Garden Gully Loop, Mt. Korong road, Ironbark." 1206.3 - "No. 5 in View St. just after start of double track near Barnard St." 1206.4 - "No. 6 in High St. at Fire Station loop." 1206.5 - "No. 6 in High St. running through Golden Square shopping centre." 1206.6 - "No. 6 arriving at Charing Cross from Golden Square."tramways, trams, bendigo, hayes st. loop, garden gully loop, view st., golden square, charing cross, tram 5, tram 6 -
 Ballarat Tramway Museum
Slide - 35mm slide/s - set of 12, Noel Simons, 28 Feb. 1972
Set of 12 transparencies taken on 28/2/1972 on Kodak mounts. 1207.1 - Bendigo 26 and 2 at Charing Cross. 26 en route for Eaglehawk, 2 for Quarry Hill. Has the Colonial Mutual Life, Armstrong Tyre Service, and Australian Mutual Provident Society buildings and a Cohns Drinks ad. in the background. 1207.2 - as for 1207.1 but with Alexandra fountain in the foreground. 1207.3 - No. 2 in Mitchell St. heading for Quarry Hill. Photo taken after tram has passed photographer. Has buildings on either side of Mitchell St. in the background, including the Plaza Theatre. 1207.4 - No. 6 en route for Golden Square departing Charing Cross. Has the RACV and ANZ bank in the background. 1207.5 - No. 2 crossing Pall Mall to enter Charing Cross ex Quarry Hill, with the Fountain Plaza in the background. 1207.6 - No. 6 arriving Charing Cross ex Golden Square with No. 21 alongside. No. 21 has the SEC ad. 'Everything's fine in my all electric kitchen.' Has the City Family Hotel and the Fountain Plaza shopping centre in the background. 1207.7 - No. 5 at Charing Cross en route for Quarry Hill with No. 2 behind. No. 2 has two SEC roof ads, 'Everything s fine in my all electric kitchen' and 'Electricity best for cooking'. RACV building in the background. Tram crews are discussing the day in the front of the tram. 1207. 8 - No. 21 in High St. Bendigo with the Cathedral in the background. No. 21 has two SEC roof ads, 'Everything's fine in my all electric kitchen' and 'Electricity best for cooking'. 1207.9 - No. 6 in High St. Bendigo with the Cathedral in the background. 1207.10 - No. 6 in High St. Bendigo, just past Wattle St. Photo taken after the tram has passed the photographer from within the Highway Car Sales yard. 1207.11 - No. 26 bound for Eaglehawk at the end of the double track in View St., note signal contactors, tram stop and section signs mounted on pole. 1207.12 - No. 26 turning from View St. into Barnard St.Information written on in blue ink and date stamped on purple ink. 1207. 1- "Nos. 26 and 2 at Charing Cross." 1207.2 - "Nos. 26 and 2 at Charing Cross." 1207.3 - "No. 2 in Mitchell St. just after leaving Charing Cross." 1207.4 - "No.6 leaving Charing Cross for Golden Square." 1207.5 - "No. 2 arriving at Charing Cross from Quarry Hill." 1207.6 - "No. 21 waits at Charing Cross as No. 6 arrives from Golden Square." 1207.7 - "No 5 at Charing Cross with No. 2 lurking behind." 1207.8 - "No. 21 in High St. at cnr of Wattle St." 1207.9 - "No. 6 in High St. at cnr of Wattle St." 1207.10 - "No. 6 in High St. between Wattle and Vine Sts." 1207.11 - "No. 26 at end of double track in View St. near Barnard. St. 1207.12 - "No. 26 seen at dusk turning from View St. into Barnard St."tramways, trams, bendigo, charing cross, high st, view st., tram 2, tram 5, tram 6, tram 21, tram 26 -
 Ballarat Tramway Museum
Slide - 35mm slide/s set of 7, Noel Simons, 29 Feb. 1972
Set of 7 transparencies taken on 29/2/1972 on Kodak mounts. 1208.1 - Bendigo 18 (en route to Quarry Hill) and 2 (Eaglehawk) in the early morning at Charing cross with the Alexandra fountain and the Fountain Plaza building in the background. 1208.2 - No. 2 descending View St. Photo taken after tram has passed the photographer. 1208.3 - as for 1208.2 at Mackenzie St. intersection 1208.4 - No. 26 ascending View St. with the ANZ bank, T& G in the background. 1208.5 - as for 1208.4, but at Mackenzie St. intersection. Photo taken after tram has passed the photographer. 1208.6 - No. 18 in View St. seen from the lookout tower in Rosalind Park. 1208.7 - No. 7 en route to North Bendigo in Nolan St. Photographed across the Centenary Oval.Information written on in blue ink and date stamped on purple ink. 1208.1 - "Nos. 18 and 2 in the early morning sun at Charing Cross." 1208.2 - "No. 2 descending View St. towards Charing Cross." 1208.3 - "No. 2 in View St. passing Mackenzie St." 1208.4 - "No. 26 in View St. just after leaving Charing Cross." 1208.5 - "No. 26 climbing View St. past Mackenzie St." 1208.6 - "No. 18 climbing View St. seen from lookout tower in Rosalind Park." 1208.7 - "No. 7 in Nolan St. heading towards North Bendigo. / Last picture of a Bendigo tram."tramways, trams, bendigo, charing cross, view st., nolan st., tram 2, tram 7, tram 18, tram 26 -
 Ballarat Tramway Museum
Slide - 35mm slide/s - set of 4, Noel Simons, Apr. 1972
Set of 4 transparencies - copy slides - possibly ARE film strip dated March 1972. 1209.2 and 1209.4 on Kodak Readymount mounts. 1209.1 - Bendigo 5, 6 and 28 on a special tram service in bound to the City on a tour in Caledonia St. about to enter Lucan St, or White Hills Road or Weeroona Ave. (mis match in names in various maps). Gas works in the background. No. 5 has a white disk on the rear of the tram. 1209.2 - Nos 2 and 26 at Charing Cross with the Fountain Plaza in the background. Both trams have the destination of Quarry Hill, though 26 is on the Eaglehawk bound track. 1209.3 - No. 19 at the Golden Square terminus, with the conductor or driver swinging the pole and Billy Rodda's Golden Square hotel in the background. 1209.4 - No. 7 at Fire Station loop, en route to North Bendigo, picking up a passenger with a pram. Part of a set of 20 slides made by the Association of Railway Enthusiast Provincial Tramways film strip. Reference Item 2560 details the ARE Film Strip and provide references to other slides.Information written on in blue ink and date stamped on purple ink. 1209.1 - "Nos 5, 6 and 28 in Caledonia St. about to enter Weeroona Ave." 1209.2 - "Nos 2 and 26 at Charing Cross." 1209.3 - "Swinging the pole on No. 19 at Golden Square Terminus." 1209.4 - "No. 7 inward bound from Golden Square stops at Fire Station Loop."tramways, trams, bendigo, charing cross, golden square, gas works, special trams, tram 2, tram 5, tram 6, tram 7, tram 19, tram 28 -
 Ballarat Tramway Museum
Slide - 35mm slide/s, Noel Simons, Dec. 1972
One transparency on a Kodak Readymount mount, with dark blue border. Photo of Bendigo Trust No. 30 after repainting to the Bendigo trust colour scheme. Has a BCV Television roof ad. Has Fountain Plaza and Ezywalkin buildings in the background. Slide dated Dec. 1972.Information written on in blue ink and date stamped on purple ink. "Birney No. 30 restored to former livery at Charing Cross."tramways, trams, bendigo, charing cross, tram 30 -
 Ballarat Tramway Museum
Slide - 35mm slide/s set of 7, Noel Simons, 1972
Set of 7 transparencies undated on PAKON mounts - appear to be early 1970's. 1212.1 - No. 18 about to enter the Long Gully loop with ESSO service station on the right hand side. 1212.2 - No. 6 in Mitchell Street bound for Charing Cross. Tram has destination of "Rly Station". Has buildings on the east side of Mitchell St. in the background. 1212.3 - No. 7 (North Bendigo) and 29 (Golden Square) crossing. Actual location? 1212.4 - "No 6 showing 'SPECIAL' at Eaglehawk terminus. Has the Foodland store and Fruit shop in the background. 1212.5 - No. 19 at Eaglehawk terminus, on the extension to the normal Eaglehawk terminus. Tram has showing 'Eaglehawk'. Tram has two SEC roof ads. 1212.6 - No. 25 and another Bogie car at Quarry Hill terminus on last day. 1212.7 - No. 18 and 29 at Quarry Hill terminus. No.. 18 showing 'Quarry Hill' - has two SEC roof ads 'Electric Cooking - Matchless' and 'Everything's fine in my all electric kitchen' and No. 29 has a briquettes roof ad.Information typed onto a white label stuck on the slide. 1212.1 - "No. 18 at Long Gully" 1212.2 - "No. 6 in Mitchell Street." 1212.3 - "7 and 29 Lake View Hotel" 1212.4 - "No. 6 at Eaglehawk" 1212.5 - "No. 19 at Eaglehawk Term." 1212.6 - "Last cars Quarry Hill." 1212.7 - "18 & 29 Quarry Hill"tramways, trams, bendigo, long gully, mitchell st., eaglehawk, quarry hill, last tram, tram 6, tram 7, tram 18, tram 19, tram 25, tram 29 -
 Ballarat Tramway Museum
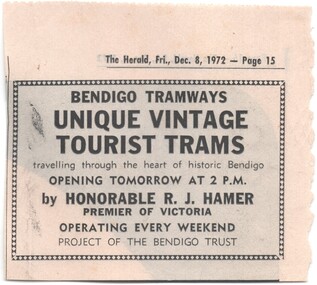
Newspaper, Herald Sun, Opening of Bendigo Tourist Trams - advertisement, 8/12/1972 12:00:00 AM
Newspaper advertisement from the Herald, Friday 8/12/1972 about the opening of the Bendigo Trust - Tourist Tram service, by the Hon. R.. J. Hamer, Premier of Victoria at 2pm the following day Notes as operating every weekend and that a project of the Bendigo Trust.trams, tramways, bendigo, opening, bendigo trust, r.. j. hamer -
 Ballarat Tramway Museum
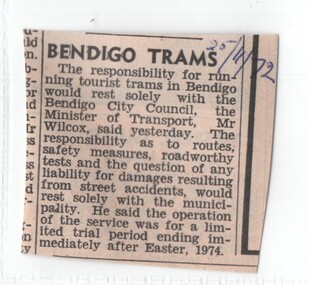
Newspaper, The Courier Ballarat, "Bendigo Trams", 8/12/1972 12:00:00 AM
Newspaper Clipping possibly from The Courier, Ballarat, 25/11/1972 about the responsibility for the trial operation of the trams in Bendigo, up to Easter 1974 was entirely with the Bendigo City Council, stated by the Minister of Transport, Mr. Wilcox. Has an item re Clunes on the back - so therefore possibly the Courier."25/11/72" in black ink in top right hand corner.trams, tramways, bendigo, safety, bendigo trust, v. wilcox -
 Ballarat Tramway Museum
Newspaper, The Courier Ballarat, "Reprieve for Trams", 31/10/1972 12:00:00 AM
Newspaper Clipping possibly from The Courier, Ballarat, 31/10/72, about the decision of the State Cabinet that Bendigo's trams will in the city for the time being. Follows the promise by the SEC of a Birney tram to South Australia - AETM. Quotes Premier, Mr. R. Hamer. No decision as yet on which trams to stay. Appears to be from the Courier, as starts with "MELBOURNE - (AUP)" credit."31/10/72" in blue ink on left hand side.trams, tramways, bendigo, birney, bendigo trust, r. j. hamer -
 Ballarat Tramway Museum
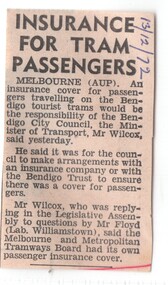
Newspaper, The Courier Ballarat, "Insurance for Tram Passengers", 13/12/1972 12:00:00 AM
Newspaper Clipping possibly from The Courier, Ballarat, 13/12/1972 about the Bendigo City Council or the Trust being responsible for arranging Insurance cover for passengers. Item follows a question in the Legislative Assembly from Mr. Floyd, Labour Williamstown, answered by the Minister of Transport, Mr. V. Wilcox. Appears to be from the Courier, as starts with "MELBOURNE - (AUP)" credit."13/12/72" in top right hand corner in black ink.trams, tramways, bendigo, insurance, bendigo trust, v. wilcox -
 Ballarat Tramway Museum
Newspaper, The Courier Ballarat, "Tourist Trams for Bendigo", 4/11/1972 12:00:00 AM
Newspaper Clipping possibly from The Courier, Ballarat, 4/11/1972, about the opening of the Bendigo Tourist tram service by the Premier Mr. R. Hamer on Dec. 9, 1972. Item mentions the keeping the Birneys in Bendigo, against them going to Adelaide and the Bendigo Trust. Item possibly from the Courier, as mentions the GBA (Greater Ballarat Association), Mr Melton Foo and Mr. Edgar Bartrop."4/11/72" on bottom edge in blue ink and a red ink arrow pointing to the Clipping.trams, tramways, bendigo, opening, bendigo trust, mr. r. hamer -
 Ballarat Tramway Museum
Newspaper, The Courier Ballarat, "Tourist Trams for Bendigo", 24/10/1972 12:00:00 AM
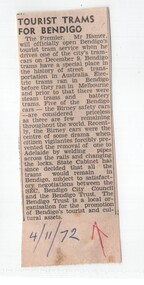
Newspaper Clipping possibly from The Courier, Ballarat, 24/10/1972 about questions to be asked in the Legislative Assembly today by Mr. Floyd (Labour Williamstown) about the running of the trams in Bendigo for tourists and running of trams in Ballarat. Item notes that approved the service between the North Deborah mine and the Chinese Joss House. Item possibly from the Courier as it has Ballarat people funeral notices on the rear."24/10/72" in top right hand corner in black ink.trams, tramways, bendigo, parliamentary questions, mr. floyd, mr. v. wilcox -
 Ballarat Tramway Museum
Newspaper, Michael Ryan, "Save our trams cries Bendigo", 17/09/1970 12:00:00 AM
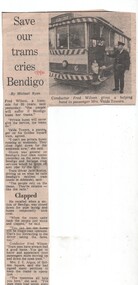
Newspaper Clipping possibly from a newspaper dated 17/9/70 - written by Michael Ryan, reporting on the 'love' of Bendigo's trams by its passengers and crews. Features a photo of Bendigo No. 6, of Conductor Fred Wilson giving a hand to Mrs. Valda Towers. Quotes from Valda Towers, driver Jack Boston, Fred Wilson and a Mrs. J. E. Argus of Golden Square."17/9/70" in red ink adjacent to photo.trams, tramways, bendigo, closure, fred wilson, buses -
 Ballarat Tramway Museum
Newspaper, "Government to finance Bendigo Tourist Trams", 13/9/1973?
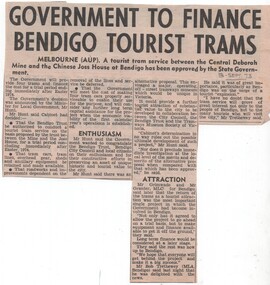
Newspaper Clipping possibly from a newspaper dated 13/9/1973 (should this be 1972 given item 1236?)about the State Government approval of a tourist tram service as a trail between the Central Deborah Mine and the Chinese Joss House for a period ending Easter 1974. Quotes the Minister for Local Government, Mr Hunt. Also mentions local member Mr. Bob Tretherwey MLA and MLC's for Bendigo. Does not appear to be a Melbourne paper, as it gives AUP as the source."13.Sept.73" in pencil in top right hand corner.trams, tramways, bendigo, tourist trams, mr. hunt, bendigo trust -
 Ballarat Tramway Museum
Newspaper, Herald & Weekly Times Ltd, "Bendigo gets the rumble again", 9/12/1972 12:00:00 AM
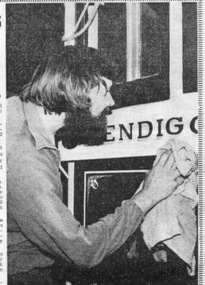
Newspaper Clipping possibly from The Sun, Melbourne, 9/12/1972 with two photographs about the preparation for the opening of the Tourist tram service in Bendigo. Quotes Bendigo Trust Publicity Officer, Daryl McClure, gives details of Government financial assistance and details of the opening on the following day by the Premier, Mr. R. Hamer. Photos are of No. 25 and James Lerk.trams, tramways, bendigo, tourist trams, mr. hamer, opening, bendigo trust -
 Ballarat Tramway Museum
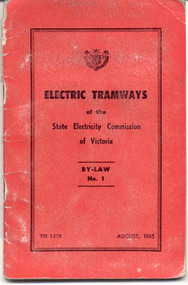
Book, State Electricity Commission of Victoria (SECV), "Electric Tramways of the State Electricity Commission of Victoria - By-Law No. 1 - August, 1965", Aug. 1965
1297 - Booklet with red heavy card cover and 24 pages inside and a four page supplement glued into rear cover giving details of the by-laws operating for the SEC tramways in Ballarat and Bendigo. Gives details of the definitions, fares and charges, sale of tickets, regulating number of passengers, stopping places, nuisances, smoking, dangerous goods, luggage and goods, general matters and fares broken into adult fares for each section and Children's fares and Pensioners' Concession fares for both Ballarat and Bendigo. Note - introduced decimal currency into the fares as well as pence. Document number on front cover "TYE 1-270". This by-law replaced or revoked all previous by-laws and amendments. Came in effect 1/10/1965 with a fare rise. Received Governor In Council approval on 24/8/1965. These fares have been amended in pencil for Ballarat. The amendment pasted into the rear of the booklet is dated 2nd August. 1966 and came into effect on 1/9/1966. 1297.1 - ditto, but actual used copy by D. J. Everett - see Reg. Item 2292 for details of SEC Ballarat Employee. On page one or title sheet, has an additional amendment pasted in - dated 14/1/1969 giving details of fare increases in Ballarat and Bendigo to come into effect 14/1/1969. Single sheet printed both side. See also Reg items 66 and 281 for this sheet of paper by itself. Item added 2/3/2003. 1297.2 - booklet as above for 1297, but without supplements - in as printed condition 8/1965. 1297.3 - as for 1297 with 1966 and two number 1969 supplements pasted into the book. One 1969 supplement at the front and additional at the rear. 1966 supplement pasted into the rear of the book. Has BTPS Catalogue Numbers 207, 208 and 209 written onto the front of the booklet. Four other copies - unnumbered held. Additional items added 10/7/2005. Additional copy of 1297.3 added 6/8/2016 from donation of T. Jeffreys. 1297 - In pencil on pages 15 to 18 showing revised fares and the number "58 676" on page 24 - possibly a telephone number. 1297.3 - has "Ballarat Tramway Preservation Society Catalogue Nos. 207, 208, 209" written in black ink on the top of the cover.trams, tramways, secv rules, by laws, tickets, fares, ballarat, bendigo -
 Ballarat Tramway Museum
Document - Calendar, Topmill Pty Ltd, "Australian Trams 1999 Calendar", 1998
24 Page full colour calendar featuring Australian Trams, published by Top mill Pty Ltd. Cover (1299i5) features Sydney trams outside Central station in Eddy Ave. Other cities represented - Brisbane, Sydney, Adelaide, Perth, Fremantle, Bendigo, Ballarat, Sydney light rail, Hobart and Melbourne. Photos by Hugh Ballment, Dale Budd, Robert Merchant, Arthur Perry and the Sydney Tramway Museum. Priced at $9.95, and has "Parkholme Newsagency and Toys" sticker over bar code section, giving the same price. Distributed by Gordon and Gotch. Ballarat trams - 1299i1 - 33 at depot during hail storm on 20/8/1971 and 1299i2 - BTM trams 14 and 26 at Carlton St. during BTM operations 1970's or early 1980's. Used for month of June. Bendigo trams - 1299i3 - No. 4 at Eaglehawk terminus - 1/2/1971 and 1299i4 - trams 28, 2, 23 and two single truckers at Charing Cross 1970. Used for month of May.tramways, trams, australian trams, ballarat, bendigo, museums -
 Ballarat Tramway Museum
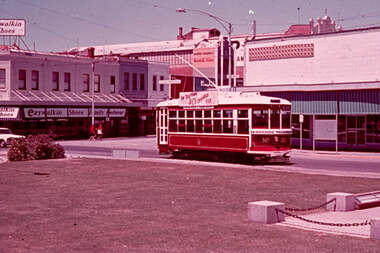
Photograph - Illustration/s, Bendigo Charing Cross
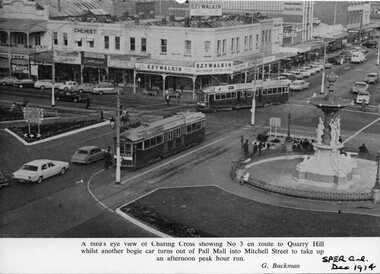
Black and white illustration from the South Pacific Electric Railway Co-op (Sydney Tramway Museum) - Dec.. 1974 calendar of Charing Cross Bendigo from an elevated viewpoint. Overlooks intersection has tram 3 waiting to proceed to Quarry Hill while another bogie tram turns from Pall Mall into Mitchell St. Photo undated, but most likely during the early 1970's. Photo by G. Buckman Has the EZYWALKIN store and other stores in the background.On bottom right hand corner "SPER Calendar Dec. 1974"trams, tramways, bendigo, charing cross, pall mall, mitchell st. -
 Ballarat Tramway Museum
Photograph - Colour Photograph/s, 23/11/1962 12:00:00 AM
967.1 - Colour postcard size print of SEC Bendigo trams 4 and 17 at a crossing Loop on the Eaglehawk line. Photo dated 21.11.1962. Printed on AGFA paper. Both trams fitted with dash canopy lighting, but no large white strip under the driver's windows. 17 showing destination of "Eaglehawk", has two SEC ads on the side re Electric Cook and a White Horse whiskey ad on front panel. Tram 4 showing destination of "Quarry Hill", has two ad panels on roof and two ads on front panel including one Cohn's' Drinks. 967.2 - Colour postcard size print of SEC Bendigo tram 26 in Mitchell St. crossing Hargreaves St. heading for Charing Cross. Photo dated 21.11.1962. Printed on AGFA paper. Trams fitted with dash canopy lighting, but no large white strip under the driver's windows. Has two roof ads and one ad on rear drivers panel. In background of photo are the buildings along Mitchell St. looking down along Mitchell St and into View St. Has Plaza theatre sign in photo above tram. On right hand side, is a van marked "Carrier M. Slattery". Tram has destination of "Quarry Hill" in rear box. 967.3 - Colour postcard size print of SEC Bendigo tram 19 on the North Bendigo line. Photo dated 21.11.1962. Printed on AGFA paper. Trams fitted with dash canopy lighting, but no large white strip under the driver's windows. Has destination "Nth Bendigo" and SEC roof ads and drivers panel ad for Briquettes.On rear top left hand corner "21.11.62" in very wavy handwriting typical of an aged person.bendigo, eaglehawk, mitchell st., north bendigo, tram 4, tram 17, tram 26, tram 19 -
 Ballarat Tramway Museum
Photograph - Colour Photograph/s, 23/11/1962 12:00:00 AM
Colour postcard size print of SEC Bendigo trams 2 and 17 at the California or Thorne St. Loop on the Eaglehawk line. Photo dated 21.11.1962. Printed on AGFA paper. Both trams fitted with dash canopy lighting, but no large white strip under the driver's windows. 17 showing destination of "Eaglehawk", has two SEC ads on the side re Electric Cooking . Tram 2 showing destination of "Quarry Hill", has various ads. On rear top left hand corner "21.11.62" in very wavy handwriting typical of an aged person.bendigo, eaglehawk, tram 2, tram 17 -
 Ballarat Tramway Museum
Photograph - Colour Photograph/s, 23/11/1962 12:00:00 AM
Colour postcard size print of SEC Bendigo trams 26 and a single trucker at Charing Cross with Mitchell St. in the background. Photo dated 21.11.1962. Printed on AGFA paper. Both trams fitted with dash canopy lighting, but no large white strip under the driver's windows. 26 showing destination of "Eaglehawk" with two SEC ads and another ad on the front dash panel. Single trucker has a Castrol ad on the roof. In the background are various buildings along the east side of Pall Mall and along Mitchell St. Pole by the front of 26 has directional signs "Melbourne" and "Heathcote / Echuca". On rear top left hand corner "21.11.62" in very wavy handwriting typical of an aged person.bendigo, pall mall, charing cross, tram 26 -
 Ballarat Tramway Museum
Photograph - Colour Photograph/s, 1962?
Colour postcard size print of an SEC Bendigo Bogie tram at Charing Cross. Photo undated, but could be 21.11.1962. Printed on AGFA paper. Tram fitted with dash canopy lighting, but no large white strip under the driver's windows. Photo out of focus. Has a SEC roof ad and another ad on the roof, non SEC. In background are the various buildings along Pall Mall. Tram well loaded with passengers. Can see the Ezywalkin, The Beehive and large a Mobilgas sign. Two copies held.bendigo, pall mall, charing cross -
 Ballarat Tramway Museum
Photograph - Colour Photograph/s, 1960's
Colour postcard size print of an SEC Bendigo trams 7 and 21 at Charing Cross. Printed on AGFA paper. Photo taken during last years of Bendigo. Trams have dash canopy lighting and large white strip under the driver's windows. Tram 21 showing "North Bendigo" and 7 showing "Golden Square" destinations. Photo has Cenotaph, fountain and buildings on the south east corner of Mitchell St and Pall Mall in background.bendigo, pall mall, charing cross, tram 7, tram 21 -
 Ballarat Tramway Museum
Photograph - Colour Photograph/s, 1960's
Colour postcard size print of an SEC Bendigo trams 7 and 21 at Charing Cross with two bogie trams by fountain. Printed on AGFA paper. Photo taken during last years of Bendigo. Trams have dash canopy lighting and large white strip under the driver's windows. Tram 21 showing "North Bendigo" and 7 showing "Golden Square" destinations. Taken at same time as 971. Photo has Cenotaph, fountain and buildings on the south side Charing Cross in the background, including ANZ bank and RACV office.bendigo, pall mall, charing cross, tram 7, tram 21 -
 Ballarat Tramway Museum
Photograph - Colour Photograph/s, 1960's
Colour postcard size print of an SEC Bendigo trams 24 and 20 parked on the Bendigo depot access track. Tram 24 on bridge showing destination "SPECIAL" with 20 in background. Tram 24 has two roof ads, do not appear to be SEC ads. Depot buildings in background. Both trams fitted with dash canopy lighting and large white strip under cabin. Printed on AGFA paper.bendigo, depot, tram 24, tram 20 -
 Ballarat Tramway Museum
Photograph - Colour Photograph/s, 1960's
Colour postcard size print of an SEC Bendigo tram 26 at the Eaglehawk terminus. Printed on AGFA paper. Tram has SEC roof ads, both re Electric cooking. Has Eaglehawk Post Office, Town Hall and Mechanics Institute in the background. Tram fitted with dash canopy lighting and large white strip under driver's windows. Photo undated, taken late 1960's or early 1970's. Tram has destination of "Eaglehawk".eaglehawk, bendigo, post office, town hall, tram 26 -
 Ballarat Tramway Museum
Photograph - Colour Photograph/s, B. Groves?, 7/12/1962 12:00:00 AM
Colour print of five SECV Bendigo trams at the North Bendigo tram terminus during a 1962 tour. Tram 28 (Birney), another Birney and then three single truckers at the terminus. All have their poles turned to return to the City. Photo shows the nature of the location of the terminus; open paddocks. All trams have been fitted with dash canopy lights. Taken on AGFA paper. On rear is a stamped date "- 7.12.62", looks like a machine imprint.On rear "Tram Tour Bendigo / Mr. B. Groves / 333 Pascoe Vale Road / Essendon W5 / Vict." In top right hand corner is the number "1175" In the stamp appears " 110B / Photo / The? / -7.12.62"birney, bendigo, north bendigo, tram 28 -
 Ballarat Tramway Museum
Photograph - Colour Photograph/s, 21/11/1962 12:00:00 AM
Colour print of Bendigo SECV Bendigo tram 21, leaving Charing Cross for Golden Square. On Kodacolor paper with a Kodak red ink stamp on rear. Tram has dash canopy lights, but no large white strip under the drivers windows. Tram has a good load of passengers on it, with all blinds drawn, showing destination "Golden Square". Fitted with roof ads "Electricity best for Cooking" and an ad Mamouneys - Furniture and Carpets. A Cohn's drinks ad is on the front dash panel. Photo has the Ezywalkin store in background and the City Club Hotel in the right hand side of the photo. Photo dated 21.11.1962.On rear top left hand corner "21 / 21.11.62" in very wavy handwriting, typical of an aged person.charing cross, bendigo, golden square, tram 21