Showing 590 items
matching electric railway
-
 Victorian Railway History Library
Book, Tramway historical society incorporated, All fares please: A pictorial record of the Christchurch electric railways, 1964
... electric railways Ill, maps, p.36. Tramways - New Zealand Urban ...A history of trams in Christchurch - a pictorial and descriptive representation.Ill, maps, p.36.non-fictionA history of trams in Christchurch - a pictorial and descriptive representation.tramways - new zealand, urban transport - new zealand, tramways - christchurch -
 Victorian Railway History Library
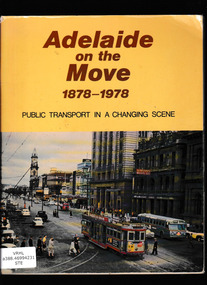
Book, Australian Electric Traction Association, Adelaide on the move1878-1978: Public transport in a changing scene, 1978
... bus and tram and railway system Australian Electric Traction ...The story of the development of public transportation in Adelaide from horse trams to the present bus and tram and railway systemIll, p.96.non-fictionThe story of the development of public transportation in Adelaide from horse trams to the present bus and tram and railway systemtramways - adelaide, horse tramways - adelaide, suburban railways - adelaide -
 Victorian Railway History Library
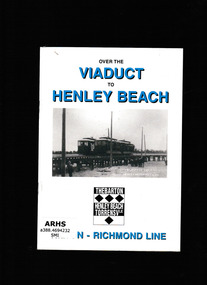
Book, Australian Electric Transport Museum (SA) Inc, Over the viaduct to Henley beach, 1997
The story of the horse and electric tramway to Henley beachIll, p.20.non-fictionThe story of the horse and electric tramway to Henley beachtramways - adelaide, horse tramways - adelaide -
 Victorian Railway History Library
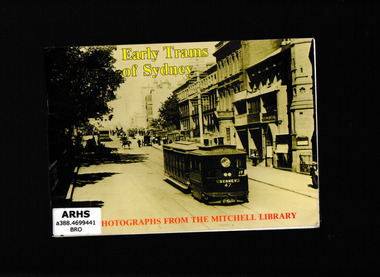
Booklet, Cromarty Press, Early trams of Sydney : photographs from the Field Collection at the Mitchell Library, 1983
A photographic essay of the early trams of Sydney - horse drawn, cable, steam and electric.Ill2, p.64.non-fictionA photographic essay of the early trams of Sydney - horse drawn, cable, steam and electric.tramways - sydney, tramways - rolling stock - sydney. -
 Victorian Railway History Library
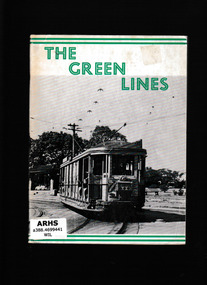
Book, R. Willson, D. Keenan, R. Henderson, The green lines, 1966
The t"Green Lines"were the south western tramway services of the former Sydney metropolitan services.Ill, maps, p.90.non-fictionThe t"Green Lines"were the south western tramway services of the former Sydney metropolitan services.tramways - sydney, urban transport - sydney -
 Victorian Railway History Library
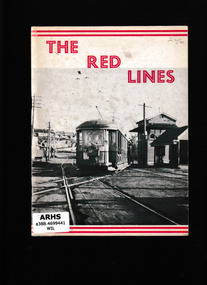
Book, R. Willson, D. Keenan, R. Henderson, The red lines, 1970
The "Red Lines"were the unofficial name for the western tramway services of the former Sydney metropolitan services.Ill, maps, p.86.non-fictionThe "Red Lines"were the unofficial name for the western tramway services of the former Sydney metropolitan services.tramways - sydney, urban transport - sydney -
 Victorian Railway History Library
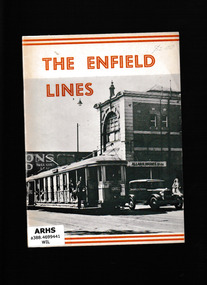
Book, Australian Electric Traction Association, The Enfield lines, 1971
The "Enfield Lines"were the unofficial name for the western tramway services that were isolated from the former Sydney metropolitan services.Ill, maps, p.50.non-fictionThe "Enfield Lines"were the unofficial name for the western tramway services that were isolated from the former Sydney metropolitan services.tramways - sydney, urban transport - sydney -
 Victorian Railway History Library
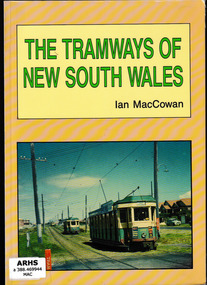
Book, Ian MacCowan, The tramways of New South Wales : a pictorial and detailed history of the horse, steam, cable, and electric passenger tramways in the first formed state of Australia, 1992
An account of the various tramway systems in New South Wales including horse drawn and cable carsIll, maps, p.152.non-fictionAn account of the various tramway systems in New South Wales including horse drawn and cable carstramways - new south wales, steam trams - new south wales, cable tramways - new south wales -
 Wodonga & District Historical Society Inc
Photograph - Fred Rochow Railways Collection - Last 8.30 am pilot at Wodonga, 23 August 1988
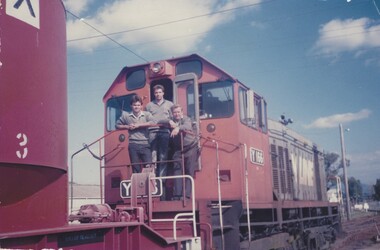
The Fred Rochow Railways Collection incorporates photos related to the operation of the Wodonga Railway Station including different types of trains and railways staff C. 1930 – 1990. It was donated to the Wodonga Historical Society by Fred Rochow, a railwayman who spent many years based in Wodonga. He joined the Victorian Railways on 17th June l947 and retired in 1988. For some time, he was a member of the Australian Federated Union of Locomotive Enginemen and served a term as a member of the Trades Hall Council. He had an extensive knowledge of the struggles that took place to achieve better conditions for railway workers. Fred worked for many years as a fireman and then worked his way up the ranks to driver, experiencing many changes from the days of steam locomotives through to diesel trains, locomotives and even the modern XPT train. He worked throughout Victoria at different stages of his career, with his final working years focused on the northeast of Victoria and the Albury to Melbourne line. After his retirement, Fred continued to share his love of steam miniature trains with the community. This locomotive, the Y166, was one of 25 general purpose diesel-electric locomotives built by Clyde Engineering, Granville NSW for the Victorian Railways between 1963 and 1968. Although built to dieselise Victoria's shunting operations and replace steam locomotives on branch line services, they were also used on mainline goods and passenger services. After closure of many branch lines across the state and the end of short pick-up goods trains, use of the class dropped. The Y166 entered service on 5 June 1968. It was withdrawn from service in November 1990 and eventually scrapped in 1991.This collection has local and statewide significance as it captures images of trains, locomotives and personnel who operated the railway services in Wodonga and throughout Northeast Victoria. The railways played a critical role in opening up Victoria and connecting Australia for trade, business, social communication and transport.Shunter Theo Edwards, Fireman Steve Ryan and Leading Shunter Lorry Beach standing on the front of a diesel pilot train, Y166. This was the last 8.30 am pilot train through Wodonga before the old Wodonga stations was closed and the railway line diverted away from the middle of Wodonga. In June 2011 a new station was opened on the northern edge of the town. On side of train "Y166"fred rochow, victorian railways wodonga, railway employees wodonga, y class diesel locomotives -
 Wodonga & District Historical Society Inc
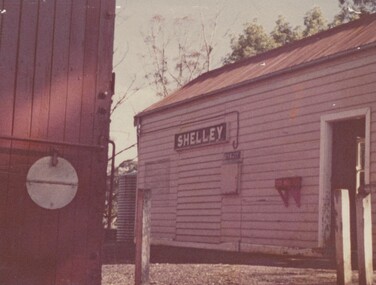
Photograph - Fred Rochow Railways Collection - Shelley Station
The Fred Rochow Railways Collection incorporates photos related to the operation of the Wodonga Railway Station including different types of trains and railways staff C. 1930 – 1990. It was donated to the Wodonga Historical Society by Fred Rochow, a railwayman who spent many years based in Wodonga. He joined the Victorian Railways on 17th June l947 and retired in 1988. For some time, he was a member of the Australian Federated Union of Locomotive Enginemen and served a term as a member of the Trades Hall Council. He had an extensive knowledge of the struggles that took place to achieve better conditions for railway workers. Fred worked for many years as a fireman and then worked his way up the ranks to driver, experiencing many changes from the days of steam locomotives through to diesel trains, locomotives and even the modern XPT train. He worked throughout Victoria at different stages of his career, with his final working years focused on the northeast of Victoria and the Albury to Melbourne line. After his retirement, Fred continued to share his love of steam miniature trains with the community. Shelley Railway Station - Shelley was once Victoria's highest railway station, located 781 metres above sea level. The Shelley Railway Station was opened in 1916 and closed in 1979. The railway was used early in its life to transport farmer’s livestock from the Upper Murray to Wodonga. From the 1950s the railway was used heavily to transport equipment and machinery from Wodonga to the Upper Murray to help build the Snowy Mountains Hydro Electric Scheme. The Snowy Hydro Scheme was completed in 1974 and after several years of low level use, the railway was closed. Some remnants of the Shelley Station passenger platform can still be seen today, along with some information boards. The Shelley Railway Station now forms part of the High Country Rail Trail.This collection has local and statewide significance as it captures images of trains, locomotives and personnel who operated the railway services in Wodonga and throughout Northeast Victoria. The railways played a critical role in opening up Victoria and connecting Australia for trade, business, social communication and transport.Shelley Railway Station. This image shows the tank where the hand brakes were lifted. They were applied again at the "up" side of Koetong for about another 10 miles then lifted near Bullioh.railways wodonga, fred rochow, shelley station, high country rail trail -
 Wodonga & District Historical Society Inc
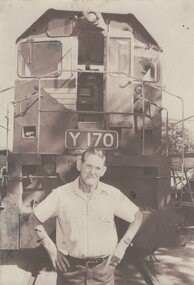
Photograph - Fred Rochow Railways Collection - Les (Pee Wee) Hallawell, 1987
The Fred Rochow Railways Collection incorporates photos related to the operation of the Wodonga Railway Station including different types of trains and railways staff C. 1930 – 1990. It was donated to the Wodonga Historical Society by Fred Rochow, a railwayman who spent many years based in Wodonga. He joined the Victorian Railways on 17th June l947 and retired in 1988. For some time, he was a member of the Australian Federated Union of Locomotive Enginemen and served a term as a member of the Trades Hall Council. He had an extensive knowledge of the struggles that took place to achieve better conditions for railway workers. Fred worked for many years as a fireman and then worked his way up the ranks to driver, experiencing many changes from the days of steam locomotives through to diesel trains, locomotives and even the modern XPT train. He worked throughout Victoria at different stages of his career, with his final working years focused on the northeast of Victoria and the Albury to Melbourne line. After his retirement, Fred continued to share his love of steam miniature trains with the community. This locomotive, the Y170, was one of 25 general purpose diesel-electric locomotives built by Clyde Engineering, Granville NSW for the Victorian Railways between 1963 and 1968. Although built to dieselise Victoria's shunting operations and replace steam locomotives on branch line services, they were also used on mainline goods and passenger services. After closure of many branch lines across the state and the end of short pick-up goods trains, use of the class dropped. This locomotive, the Y170 entered service on 13 July 1968. It was withdrawn from service in April 1988 and was eventually scrapped in 1992.This collection has local and statewide significance as it captures images of trains, locomotives and personnel who operated the railway services in Wodonga and throughout Northeast Victoria. The railways played a critical role in opening up Victoria and connecting Australia for trade, business, social communication and transport.Les Hallawell standing in front of Locomotive Y170. He started with Victoria Railways on16 Mayv1949. . He passed his Driver qualification on 12 July 1955. Les retired in Wodonga on 29 March 1988.railways wodonga, fred rochow, wodonga railway men, y class locomotive, les hallawell -
 Ballarat Tramway Museum
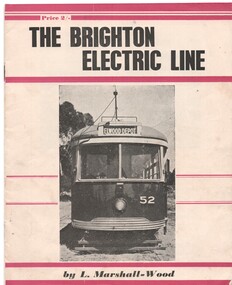
Book, Leon Marshall -Wood, "The Brighton Electric Line", 1956, 1958
.1 - Twenty page booklet on the history of the Brighton Electric Line by Leon Marshall-Wood, published 1956. Gives a brief history of the electric tramway operated by the Victorian Railways between St. Kilda Station and the Brighton Beach railway station, that commenced operation in 1905. The booklet was priced 2/-, published by the Traction Publications. Has 18 photographs, map 1905 and present day (when printed), rolling stock roster and notes and on the rear cover has details of the AETA. Front cover has horizontal crimson stripes. Has details of the AETA on the back cover and listing of some publications. Second copy from Ian Stanley added 24-1-2016. .2 - as for above - second edition, 1958, similar text, different photo layout and different front cover photo. See Reg Item 7631i for a scan of the 1966 edition.On front cover of first copy of .1 - top right hand corner; "N.Z.R.L.S / with compliments" and initials. Under title of book, "Price to Society 18/- Aust. per doz. / Retails 2/-" On page 3 of second copy of .1 - "Ian J Stanley 28 Park Road, South Camberwell, SE6, BK3746" On page 3 of .2 - "Ian J Stanley" in ink.trams, tramways, vr, melbourne, brighton, st kilda -
 Ballarat Tramway Museum
Slide - 35mm slide/s - set of 5, Noel Simons, 19/11/1962 12:00:00 AM
Set of 5 transparencies taken on 19/11/1962 on Kodak mounts. 1186.1 - Bendigo 21 bound for Golden Square at Charing Cross with The Beehive buildings and shops in Pall Mall in the background. Trams has an ad for Cohns drinks on front bumper, SEC Best for Cooking roof ad. and Mamouney's furniture roof ad. Two women passengers boarding. 1186.2 - Bendigo 26 crossing Pall Mall from Mitchell St. bound for Eaglehawk with "Ezywalkin" shop in background. Tram has an SEC 'Electric Cooking' roof ad and a 'Streets Ice cream' ad on front dash. 1186.3 - Bendigo 7 arriving at the Charing Cross stop, bound for North Bendigo. Has a Huttons dash panel ad, a Castrol roof ad. Buildings as for 1186.1. Passengers waiting at the stop. 1186.4 - Bendigo 19 leaving Charing Cross for Golden Square with City Club Hotel alongside and other buildings as for 1186.1 in the background. Tram has Briquettes ad on front dash and SEC 'Electric Cooking' roof ad. 1186.5 - Bendigo 21in High St. at corner of Short St. heading for Charing Cross. Destination half way between Depot and Railway Station. Tram has ads for Cohns Drinks on dash panel, SEC 'Cook with Electricity' and a Sandhurst Milk roof ads.Information written on in black ink and date stamped in purple ink. 1186.1 - "No. 21 in Pall Mall at Charing Cross, Bendigo" 1186.2 - "No. 26 arriving at Alexandra Fountain, Charing Cross, Bendigo" 1186.3 - "No. 7 in Pall Mall at Charing Cross, Bendigo" 1186.4 - "No. 19 in High St., Bendigo, leaving Charing Cross for Golden Square" 1186.5 - "No. 21 in High St. Bendigo, at corner of Short St." tramways, trams, bendigo, charing cross, pall mall, high st., tram 7, tram 19, tram 21, tram 26 -
 Ballarat Tramway Museum
Slide - 35mm slide/s - set of 17, Noel Simons, 20/11/1962 12:00:00 AM
Set of 17 transparencies taken on 20/11/1962 on Kodak mounts. 1187.1 - Bendigo No. 2 at the Quarry Hill terminus, showing destination of Quarry Hill. Has Cohns Drinks and Streets Ice Cream ads on dash panel, a SEC 'electric cooking' roof ad and another roof ad. Shows the Y terminus at this location, but tram standing just before it. Overhead in position. 1187.2 - as above, but closer up. 1187.3 - as above, but from the north side, showing cemetery in the background. 1187.4 - Bendigo No.3 at Eaglehawk terminus. Tram showing destination of Quarry Hill. Has the various buildings at Eaglehawk in the background including the Foodland store. Has Streets Ice cream and White Horse Whiskey ads on the dash panel. 1187.5 - Bendigo No. 18 at Garden Gully crossing loop, in bound, with destination of Eaglehawk. Passengers waiting for an Eaglehawk tram at the stop. Has a white horse whiskey ad on dash panel and SEC roof ads. Conductor standing in doorway looking out. 1187.6 - Bendigo No. 7 inbound in Nolan St. at cnr of McCrae St. showing destination of Golden Square. Has Streets Ice cream ad on dash panel and a Castrol Roof ad. 1187.7 - Bendigo No. 19 at the North Bendigo terminus with railway level crossing in background. Tram has a Cohns Drinks ad and an SEC 'Electric Cooking' roof ad. 1187.8 - Bendigo No. 2 at the Quarry Hill terminus, looking back into Bendigo, showing destination of Eaglehawk. 1187.9 - Bendigo No. 21 in McCrae St, near Nolan St outbound for North Bendigo. Photo taken after tram has passed photographer. 1187.10 - Bendigo Nos. 4 and 26 at Charing Cross in View St. with fountain alongside and the Beehive, Ezywalkin Buildings in the background. No. 26 has a Sandhurst Milk and SEC 'Electric Cooking' roof ad. 1187.11 - close up of 22E maximum traction truck and folded footstep. 1187.12 - Bendigo No. 19 at Charing Cross terminus, after tram has passed photographer, showing destination of North Bendigo, with the Beehive building in the background and passengers boarding tram. 1187.13 - Bendigo No. 11, turning from View St. into Pall Mall, showing Special with the conductor holding point bar. Has the Beehive and Ezywalkin Buildings in the background. 1187.14 - No. 7 at Charing Cross terminus, in Pall Mall, bound for Golden Square. Has the Beehive and Ezywalkin buildings in the background and passengers waiting at the tram stop. 1187.15 - No. 18 at the Charing Cross terminus, bound for Eaglehawk. Has the Beehive and Ezywalkin buildings in the background and passengers waiting at the tram stop. Also has the 'Safety Zone' sign in the photograph. 1187.16 - No. 2 at Quarry Hill terminus, night or dusk photo. Tram showing destination of Depot. 1187.17 - No. 26 at Charing Cross, night photo. Tram has destination of Quarry Hill, but is on the line for Eaglehawk. Photo looks along Mitchell St. Also shows Safety Zone sign. Information written on in black ink and date stamped on purple ink. 1187.1 - "No. 2 at Quarry Hill terminus Bendigo" 1187.2 - "No. 2 at Quarry Hill terminus Bendigo" 1187.3 - "No. 2 at Quarry Hill terminus Bendigo" 1187.4 - "No. 3 at Eaglehawk terminus" 1187.5 - "No. 18 in Mt Korong Road, Long Gully at cnr of Havilah Road (Eaglehawk Route)" 1187.6 - "No. 7 in Nolan St. Bendigo, at Cnr of McCrae St., near lake Weeroona, (North Bendigo Route)' 1187.7 - "No. 19 at North Bendigo terminus" 1187.8 - "No. 2 at Quarry Hill terminus" 1187.9 - "No. 21 in McCrae St. Bendigo, near Nolan St. (North Bendigo Route) 1187.10 - "4 and 26 at Alexandra Fountain, Charing Cross Bendigo" 1187.11 - "Truck of Bogie Car, Bendigo Tramways" 1187.12 - "No. 19 in Pall Mall at Charing Cross, Bendigo" 1187.13 - "Birney car No. 11 entering Pall Mall from View St. at Charing Cross Bendigo" 1187.14 - "No. 7 in Pall Mall at Charing Cross, Bendigo" 1187.15 - "No. 18 at Alexandra Fountain, Charing Cross, Bendigo" 1187.16 - "No. 2 at Quarry Hill terminus, Bendigo" 1187.17 - "No. 26 at Alexandra Fountain, Charing Cross, Bendigo" tramways, trams, bendigo, quarry hill, eaglehawk, north bendigo, maximum traction, night photo, tram 2, tram 3, tram 4, tram 7, tram 11, tram 18, tram 19, tram 21, tram 26 -
 Ballarat Tramway Museum
Slide - 35mm slide/s, Noel Simons, 21/11/1962 12:00:00 AM
Set of 6 transparencies taken on 21/11/1962 on Kodak mounts. 1189.1 - Bendigo No.11 at Quarry Hill terminus. Photo taken looking in along the route. Tram has destination of North Bendigo. 1189.2 - No. 21 in Pall Mall bound for North Bendigo. Tram has roof ads for Mamouney's furniture and SEC. In the background are the National Bank building, Dad and Dave's Cafe and the Beehive Buildings and the London Pharmacy. 1189.3 - No. 2 in Mitchell St, just after crossing over railway bridge. Photo taken after tram has passed photographer. Has what appears to be an SEC road works crew in the background. Has destination of Quarry Hill. 1189.4 - No. 17 climbing Mitchell St. on the start of the single track section, just before crossing the railway bridge. Has destination of Quarry Hill and the large Maples building sign in the background. 1189.5 - as for 1189.4 but after tram has passed photographer. Has an Ilford film roof ad and an SEC roof ad. Railway bridge in the background. 1189.6 - No. 21 at Charing Cross with passengers boarding. Tram has destination of North Bendigo and roof ads for SEC 'Electric Cooking' and Sandhurst Milk. In background are the buildings on the south side of High St. Also has a SEC worker in white overalls sweeping the track.Information written on in black ink and date stamped on purple ink. 1189.1 - "Birney car No. 11 in High St. Bendigo at Golden Square terminus" 1189.2 - "No. 21 in Pall Mall Bendigo near Charing Cross" 1189.3 - "No. 2 in Mitchell St. Bendigo, just after crossing bridge over railway line (Quarry Hill route)" 1189.4 - "No. 17 in Mitchell St. Bendigo, climbing the hill the bridge over the railway line. (Quarry Hill route)" 1189.5 - "No. 17 in Mitchell St., Bendigo approaching bridge over Railway line (Quarry Hill route)" 1189.6 - "No. 21 at Charing Cross, Bendigo"tramways, trams, bendigo, golden square, pall mall, mitchell st., quarry hill, tram 2, tram 11, tram 17, tram 21 -
 Ballarat Tramway Museum
Slide - 35mm slide/s - set of 4, Noel Simons, Apr. 1967
Set of 2 slides made from the Association of Railway Enthusiast Provincial Tramways film strip, possibly during April 1967. 1192.1 and 1192.3 mounted in Kodak Ready Mounts. The others in plain white mounts. Slides dated Dec. 1968. 1192.1 - No. 21 out bound to Golden Square in High St., between Wattle and Vine Streets. Photo taken after tram has passed photographer. Has a sign for "Reid's Furnituorium" in the background. 1192.2 - Bendigo No. 28 dressed up as Myers Christmas tram, passing the Post Office and Courts in Pall Mall. 1192.3 - Bendigo No. 23 at Needle Loop en route to Eaglehawk. Tram has two SEC roof ads, one "Electric Cooking" and the other "Everything fine in my all electric kitchen". 1192.4 - Bendigo scrubber parked at the end of the main depot lead, alongside the depot office buildings.Details in blue ink, date hand stamped in purple ink. 1192.1 - "No. 21 heads along High St for Golden Square between Wattle and Vine Streets." 1192.2 - "Birney No. 28 in Christmas Garb, traverses Pall Mall en route to North Bendigo". 1192.3 - "No. 23 at Needle Loop on its run to Eaglehawk". 1192.4 - "Scrubber car at Bendigo Depot".tramways, trams, north bendigo, bendigo, bridge st loop, depot, tram 21, tram 23, tram 28, tram scrubber -
 Ballarat Tramway Museum
Slide - 35mm slide/s - set of 20, Noel Simons, 21/05/1971 12:00:00 AM
Set of 20 transparencies taken on 21/5/1971 on Kodak mounts. 1197.1 - Bendigo No. 5 en route to Eaglehawk at Creeth St Long Gully. Tram has a SEC roof ad and Cinzano roof ad. 1197.2 - No 5 approaching Needle Loop between Long Gully and California Gully. On left hand side is the City of Bendigo sign, indicating city boundary. 1197.3 - As for 1197.2 but actually entering loop. Photo taken after tram has passed photographer. 1197.4 - No. 26 bound for Eaglehawk descending the railway bridge near Eaglehawk, at Jobs Gully. 1197.5 - as for 1197.4, but after crossing bridge, now ascending a hill. Photo taken after tram has passed photographer. 1197.6 - No. 26 climbing High St. hill Eaglehawk, nearing end of Double track, bound for Quarry Hill. Shows centre of the road poles. 1197.7 - As for 1197.6, with tram entering single track section. Photo taken after tram has passed photographer. Has a BP service station in the background. 1197.8 - No. 26 (bound for Quarry Hill) crossing No. 17 (Eaglehawk) at Job's Gully Loop. 1197.9 - No. 17 climbing railway bridge at Job's Gully, en route to Eaglehawk. Photo taken after tram has passed photographer. 1197.10 - No.26 bound for Quarry Hill, leaving Long Gully Loop? Has the Creeth St. church in l197.l in the far background. Photo taken after tram has passed photographer. 1197.11 - Tramway Point work at the northern end of Long Gully Loop. 1197.12 - No. 17 en route for Quarry Hill turning into View St. from Bamard St. Tram has SEC roof ads "Everything fine in my all electric Kitchen' and 'Electric Cooking is Matchless'. 1197.13 - as for 1197.12, but tram has turned into View St and about to enter the double line track. Photo taken after tram has passed photographer. 1197.14 - No. 21 enters Nolan St after turning from MacRae St. en route to Bendigo. Note sign on its own post noting tram turns "Beware Tram Turns" and stop sign on adjacent pole "Trams stop on Request". No. 21 has two SEC roof ads. 1197.15 - No. 21 in Nolan St. after turning from Bridge St. (White Hills Road). Note signal light for Bridge St. loop on pole corner of street. Photo taken after tram has passed photographer. 1197.16 - No. 2 bound for Eaglehawk at unknown location. 1197.17 - Tram stop sign on a pole "CARS STOP BY REQUEST" 1197.18 - No. 5 in Carpenter St.? en route to Quarry Hill. 1197.19 - No. 28 has just arrive at Golden Square terminus, passengers are disembarking and the trolley pole is being turned. Golden Square Hotel in the background. 1197.20 - No. 28 at Golden Square terminus. Has a "Nothing beats Briquettes for hear roof ad. Information written on in black ink and date stamped on purple ink. 1197.1 - "No. 5 at Creeth St. Long Gully" 1197.2 - "No. 5 approaching Needle Loop between Long Gully and California Gully" 1197.3 - "No. 5 at Needle Loop between Long Gully and California Gully" 1197.4 - "No. 26 crossing railway bridge at Job's Gully near Eaglehawk" 1197.5 - "No. 26 just after crossing railway bridge at Job's Gully near Eaglehawk/ 1197.6 - "No. 26 in High St. Eaglehawk" 1197.7 - "No. 26 at end of double track in High St. Eaglehawk" 1197.8 - "Nos. 26 and 17 crossing at Job's Gully Loop" 1197.9 - "No. 17 crossing railway bridge at Job's Gully near Eaglehawk". 1197.10 - "No. 26 at Long Gully" 1197.11 - 'Northern end of points at Long Gully Loop". 1197.12 - "No. 17 turning into View St. from Bamard St. Bendigo". 1197.13 -'No. 17 at beginning of double track in View St. after leaving Bamard St. Bendigo. 1197.14 - "No. 21 enters Nolan St. from MacRae St. Bendigo." 1197.15 - "No. 21 in Nolan St. Bendigo just after leaving White Hills Road." 1197.16 - "No. 2" 1197.18 - "No. 5" 1197.19 - "Birney car No. 28 at Golden Square Terminus" 1197.20 "Birney car No. 28 at Golden Square Terminus" tramways, trams, bendigo, long gully, railway bridge, jobs gully, trackwork, nolan st, quarry hill, tram stops, golden square, tram 2, tram 5, tram 17, tram 21, tram 26, tram 28 -
 Ballarat Tramway Museum
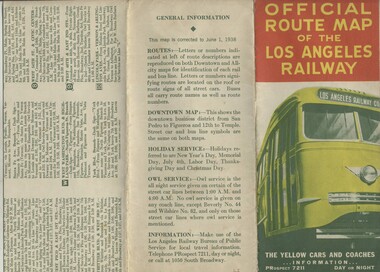
Map, H.P. Noordwal, "Official Route Map of the Los Angeles Railway", Jun. 1938
A (12 section) fold out map of street car (tram) and bus services for Los Angeles, dated June 1, 1938, showing all LAR (Los Angeles Railway) streetcar and coach (tram and bus) services, Pacific Electric lines within area, detailed "downtown" map, route descriptions and points of interest. Record images added 20/8/2013.Three terminus have been marked with pencil "X". On rear car, next to object number is a symbol looking like a "H & S" merged together.trams, tramways, los angeles, street cars, map -
 Ballarat Tramway Museum
Newspaper, The Courier Ballarat, City Honored by six Royal Visits, Mar. 1938
Yields information about Ballarat and its locations or environs late 1938.Pages 11,12, 19 and 20 of the centenary of settlement in the Ballarat district by the Ballarat Courier - March 1938. See also items 186, 198 and 199. Page 11 Royal visits, banking in Ballarat, photos - NW section of Ballarat, railway station in foreground. Ads for J.McKay and Son, Roy Reeds (Men's store) and Ballarat Gas Co. Also photo of "The Corner" in Sturt St. - old Mining Exchange. Page 12 - full page ad for Morseheads, women's store. Page 19 - articles - Ballarat Lighting and Power, ESCo, SEC, electric trams. photos of the Arch of Victory, first electric tram, Lake Wendouree. Advertisements for Austin Spears (cycles), McDougall and Chisholm (drapers), W.E. Longhurst (bread) and the ES&A bank. Also article on South St. Society - music and elocution. Page 20 - articles - Ballarat Gas Co., horse and electric trams, agriculture in district and Ballarat's war record (WWI). Photos of work at Gong Gong Reservoir and Committeemen of the Ballarat Horticultural Society - 1859 to 1885. Ads for Ballarat College, Clarendon, Queens (girls) and Ballarat Grammar schools, Ern Craig Motors (Vauxhall) and Snows men's wear. Record reviewed and images of pages added 7-9-2013 and 10-9-2013trams, tramways, ballarat electricity, centenary, banking, transport, trams, esco -
 Ballarat Tramway Museum
Document - Photocopy, National Tramway Museum Librarian - Rosemary Thacker, "Ballarat Electric Tramway", May. 1997
A4 size copy of p256 of Oct. 6 1905 issue of the Light Railway and Tram Journal, describing opening and details of electrification of Ballarat Tramways in 1905 - details of power supply, trams and personnel. Also mentions ESCo's owners, the British Insulated Wire Co. Hi res scan of copy and letter added 26-5-2016.trams, tramways, ballarat, esco, opening, electrification -
 Ballarat Tramway Museum
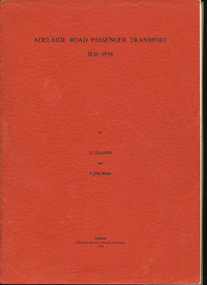
Book, J.C.Radcliffe & C.J.M.Steele, "Adelaide Road Passenger Transport 1836-1958", 1974
A4, 208 page book, soft cover bound, on public road transport in Adelaide, 1836 to 1958. Contents include Adelaide history, railways, horse buses and trams, electric trams, buses, trolley buses, social history and tram closure. Has 23 pages of photographs. Also has contents, references, maps and an index. Bound with red card covers. Written by J.C.Radcliffe and C.J.M.Steele.Inside front cover in black ink "Neville M.Gower / Greenacres / Sth. Australia"trams, tramways, adelaide, tramways, transit systems -
 Ballarat Tramway Museum
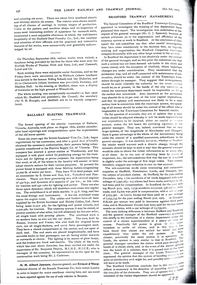
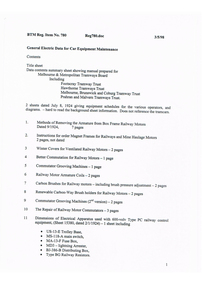
Manual, Doug Prosser, "General Electric Data for Car Equipment Maintenance", 1998
A black plastic folder containing a set of 38 General Electric Data Sheets for MMTB and tramway trust equipment, dated July 8 1924. Contained in folder with flexible clips. Pages have been punched with four holes. Copy of document made for BTM Feb 1998 by Doug Prosser. For scan of list - see btm780sheet.pdf General Electric Data for Car Equipment Maintenance Contents For scan see btm780d1 (5 pages) Title sheet Data contents summary sheet showing manual prepared for Melbourne & Metropolitan Tramways Board Including Footscray Tramway Trust Hawthorne Tramways Trust Melbourne, Brunswick and Coburg Tramway Trust Prahran and Malvern Tramways Trust. 2 sheets dated July 8, 1924 giving equipment schedules for the various operators, and diagrams. - hard to read the background sheet information. Does not reference the tramcars. For scan see btm780d2 (54 sheets - items 1 to 27) 1. Methods of Removing the Armature from Box Frame Railway Motors Dated 9/1924, 7 pages 2. Instructions for order Magnet Frames for Railways and Mine Haulage Motors 2 pages, not dated 3 Winter Covers for Ventilated Railway Motors - 2 pages 4 Better Commutation for Railway Motors - 1 page 5 Commutator Grooving Machines - 1 page 6 Railway Motor Armature Coils - 2 pages 7 Carbon Brushes for Railway motors - including brush pressure adjustment - 2 pages 8 Renewable Carbon-Way Brush holders for Railway Motors - 2 pages 9 Commutator Grooving Machines (2nd version) - 2 pages 10 The Repair of Railway Motor Commutators - 3 pages 11 Dimensions of Electrical Apparatus used with 600-volv Type PC railway control equipment, (Sheet 15380, dated 2/1/1924) - 1 sheet including · US-13-E Trolley Base, · MS-118-A main switch, · MA-13-F Fuse Box, · MD3 - lightning Arrester, · BJ-386-B Distributing Box, · Type BG Railway Resistors. 12 Connections of Type KM-63-BR Railway Controllers and Equipment - Drawing 15257, 1 page, dated 1/3/1921 with dimension details on rear of type K-63-BR railway controller equipment including: · SG Resister, · BK-13-A Insulator, · MR11 - Circuit breaker, · MD3 - Lightning Arrester box, · K63-BR Controller, · US15C Trolley Base. 13 Method of Supporting Railway Resistors using Porcelain Bolt insulators for 600 and 1500 Volt Work. Drawing dated 1/11/1923, No. 15249B - 1 page 14 Dimensions of Electrical Apparatus used with 600-volv Type M railway control equipment, (Sheet 15381, dated 2/1/1924) - 1 sheet including · US-13-E Trolley Base, · MS-118-A main switch, · MA-13-F Fuse Box, · MD3 - lightning Arrester, · BJ-386-B Distributing Box, · Type BG Railway Resistors. 15 Dimensions of Electrical Apparatus used with 600Volt, Type PC Railway Control Equipment. Drawing No. 15382, dated 2/1/1924. Includes: · C129-A Master Controller, · DA82C Coupler sockets, · MS-14-G switch, · MS-46-H switch. 16 Dimensions of Electrical Apparatus used with 600-volv Type M railway control equipment, (Sheet 15383, dated 2/1/1924) - 1 sheet including · C-169-A Controller · DA-69-B Coupler Socket and DC-66-C Coupler Plug · MS-14-G Switch · MS-46-H-Switch 17 Method of Making Tap Connections for Car Cables -= SD 15468, 1/11/1924, 1 page 18 The Repair of 600 Volt Railway Motor Armatures, 64408, 9/2/1924, 4 pages 19 Proper Method of Mounting and Dismounting Railway Motor Pinions. - 2 pages 20 Pinion Pullers for Railway Motors - 2 pages, dated 8/1/1924. 21 The Care of Railway Motor Bearings - 4 pages 22 Oil Scraper Rings for Air Compressors - 64590 - May 1924 - 1 page 23 Finger Bases for type K 63 controller 1 page 24 Adjustment of Drum Controller fingers - 29/1/1924, 64600A - 1 page 25 Star Wheels for Type K Controllers - 64603 - 1 page 26 Soldering Aluminium Controller Cylinder Castings - 2 pages 27 Porcelain Bolt Insulators for Railway Service - and drawing on rear showing mounting arrangement of resistor Grids - 2 pages. For scan see btm780d3 (13 pages) 28 Connections of Armature and Field Winding for GE-201-F and GE 263A railway motors. DS37869 29 Connections of Armature and Field Winding for GE-201-I railway motors. K1629303 30 Connections of Armature and Field Winding for GE-202 motor, DS 10472 31 Connections of Armature and Field Winding for GE-203 A and GE 226 railway motors. DS23869. 32 Connections of Armature and Field Winding for GE-241 motors - K1629077 33 Connections of Armature and Field Winding for CP25A Air compressor 34 Connections of Armature and Field Winding for CP27A Air compressor 35 Connections of Armature and Field Winding for GE-258 and GE 264 railway motors. K1629343. 36A- Dimensions of Type K-63-BR Railway Controller Equipment 36 US-13-E Trolley Base for Railway Service - 3/1/1923, 64823 - 2 pages 37 Copy of M&MTB (Eastern System) Certificate of Competency as Motorman. 38 Photocopies of a series of four photos of 22E trucks under an SEC tramcar. For scan see btm780d4 (40 pages) 39 Sprague G-E Multiple Unit Control, Type PC, Instruction Book 84772 - Oct. 1922 - 40 Pages. Images of sheets added 2-11-15 trams, tramways, general electric, motors, controllers, trolley pole bases -
 Ballarat Tramway Museum
Slide - 35mm slide/s - set of 2, Peter Moses, Jan. 1969
Set of two photos of SEC Bendigo No. 17 in Mitchell St. Bendigo. .1 - No. 17 using the crossover. Has destination of "Eaglehawk". In the background are the Plaza theatre, Maples store and Coles store. Advised that the Sunday run outs in the late morning, early afternoon used this crossover to form the first Eaglehawk tram service. .2 - No. 17, with destination of "Quarry Hill", near the Railway station. Has a Wilkinson Sword and SEC "Electric Cooking serves you best", roof advertisements. Kodak cardboard mount slide, taken by Peter Moses, Jan. 1969.On the rear of the slide: .1 - in red ink "Bendigo Mitchell St." , "6" and "P. Moses" in black ink. .2 - "3" in red ink and "P. Moses" in black ink.tramways, trams, bendigo, mitchell st, quarry hill, tram 17 -
 Ballarat Tramway Museum
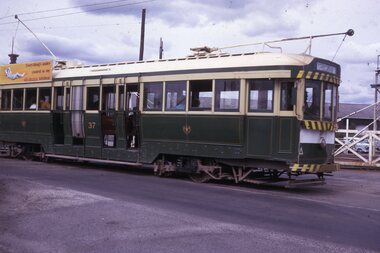
Slide - 35mm slide/s, Peter Moses, Jan. 1969
Photo of SEC Ballarat No.37 passing through the railway gates at Ballarat Railway Station, Lydiard St. North, with the destination of "Sebastopol". Tram has a SEC "Everything's under control in my all-electric kitchen". Kodak cardboard mount slide, taken by Peter Moses assumed Jan. 1969, dated only "Jan", but date lines up with Bendigo slides and type of numbering. Could be 1970.On the rear of the slides in black ink "P. Moses" along bottom left hand corner in black ink.tramways, trams, railway crossing, lydiard st, tram 37 -
 Ballarat Tramway Museum
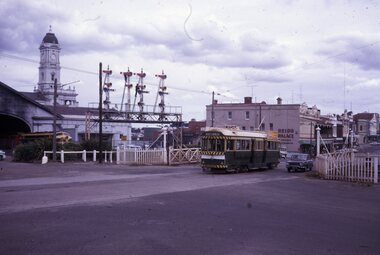
Slide - 35mm slide/s, Peter Moses, Jan. 1969
Photo of SEC Ballarat No.41 passing through the railway gates at Ballarat Railway Station, Lydiard St. North, with the destination of "Lydiard St Nth". Tram has a SEC "Everything's under control in my all-electric kitchen". Reid's Coffee Palace is in the background. Photo shows the Ballarat Railway Station clock tower, part of the train shed and the signals on the station side of the gates. A "B" class locomotive on a passenger train is standing in platform 1 of the station. Kodak cardboard mount slide, taken by Peter Moses assumed Jan. 1969, dated only "Jan", but date lines up with Bendigo slides and type of numbering. Could be 1970.On the rear of the slides in black ink "P. Moses" along bottom left hand corner in black ink.tramways, trams, railway crossing, lydiard st, railway station, reid's coffee palace, tram 41 -
 Ballarat Tramway Museum
Slide - 35mm slide/s - set of 2, Peter Moses, Jan. 1969
2059.1 - Photo of SEC Ballarat No.41 passing through the railway gates at Ballarat Railway Station, Lydiard St. North, with the destination of "Sebastopol". Tram has a SEC "Everything's under control in my all electric kitchen". Reid's Coffee Palace is the background. Photo shows the Ballarat Railway station clock tower, part of the train shed and the signals on the station side of the gates and another bogie tram waiting at the end of the double track in Lydiard St. for No. 41 to pass. 2059.2 - ditto, but with the two trams passing each other. The Provincial Hotel is also in the photograph. Kodak cardboard mount slide, taken by Peter Moses assumed Jan. 1969, dated only "Jan", but date lines up with Bendigo slides and type of numbering. Could be 1970.On the rear of the slides in black ink "P. Moses" along bottom left hand corner in black ink.tramways, trams, railway crossing, lydiard st, railway station, reid's coffee palace, provincial hotel, tram 41 -
 Ballarat Tramway Museum
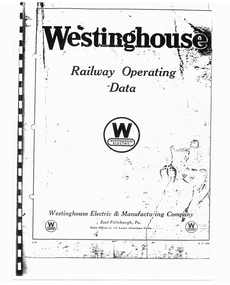
Document - Instruction Book, Westinghouse Brake Company of Australasia Limited and The Westinghouse Brake & Saxby Signal Co. Ltd. of 82 York Road and Kings Cross London, "Westinghouse Railway Operating Data", 2000
Photocopy of 54 data sheets published by Westinghouse Electric & Manufacturing Company of East Pittsburgh Pa, USA c1920. Consists of plastic cover, header page with Westinghouse logo, contents sheets (2 pages), forward, 67 pages (single side photocopy) and heavy rear card cover bound with a green comb binder. Original material lent by Craig Tooke of the Melbourne Tramcar Preservation Association at Haddon. Photocopied by Warren Doubleday March 2000. List of contents produced 30/6/2000 and then bound. Contains data sheets regarding motors, commutators, brushes, armatures, bearings, field coils, pinions, lubrication, air piping, axle collars, resistance grids, gear cases and other technical information. Westinghouse Railway Operating Data 30/6/2000 List of Contents Page No. Care and repair of commutators 1 Undercutting commutators 2 Railway Motor carbon brushes 3 Brush holders 4 Flashing of railway motors 5 Soldering railway armatures 6 Armature Winding 7 Banding armatures 8 Railway Motor Bearings 9 Lubrication of railway motor bearings 10 How to babbitt motor bearings 11 Oil, grease and waster for motors and gears 12 Saturation of motor bearing waste 13 Testing Polarity of Field Coils 14 Charging of storage batteries on Interurban & street rail cars 15 Precautions to be taken with blower installations on motor cars 16 Putting on Railway Motor Pinions 17 How to take armatures out of box frame motors 18 Dipping and Baking of Railway Motors 19 War time dipping and baking outfits 20 Dipping and baking railway motors will decrease troubles 21 Protection of Motor Bearings from Dust 25 Winter Operation of Railway Motor equipments 26 Installation of Air piping to prevent freezing 27 Maintenance of Traction Brake Equipment 28 Maintenance of controller fingers and contacts 29 Hand operated circuit breakers 30 Railway Motor Testing I 31 Railway Motor Testing II 33 Railway Motor Testing III 35 Railway Motor Testing IV 36 Railway Motor Testing V 37 Removing and replacing railway motor armature shaft 39 Mounting and Maintenance of car resistors 40 Lubrication of control apparatus 41 Maintenance of fuse boxes for railway service 42 Does it pay to dip and bake armatures 43 Dipping and Baking as a financial asset 44 Shop Organisation 45 Tinning Malleable Iron Bearing shells 46 Life of armature bearings or railway motors 47 The assembly of complete sets of commutator segments 48 Electric welding as a factor in reclamation 50 Metal to Metal press, shrink and clamping fit allowances 52 Life of railway motor carbon brushes 54 General information of grid resistance design for the operating man 56 Stopping a car by braking with the motors 57 Railway Motor shafts and their maintenance 58 Axle collars 59 Gear cases 60 Ventilated railway motors 62 Revamping Loose armature bearings 64 Life of axle bearings of railway motors 65 Heat-treated bolts for railway service 66 Document imaged over 7 parts 7-9-2016 - see hi res files. trams, tramways, westinghouse, motors, data sheets, technical information -
 Ballarat Tramway Museum
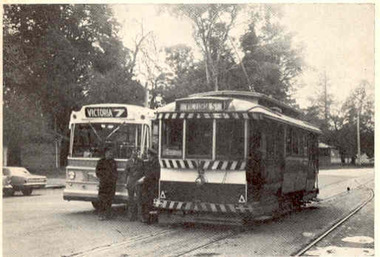
Magazine, Australian Electric Traction Association (AETA), "Electric Traction", Oct. 1971
October 1971 issue of Electric Traction, Vol XXVI No. 10 - featuring Ballarat No. 13 and Davis Bus Lines new bus, both showing destination of Victoria St. on front cover. Note the bus destination uses "Victoria 7" , while the tram has "Victoria St." Sixteen pages, orange banner on front cover. Articles feature closure of Ballarat, Lightweight Electric Intra-City Transit systems and in Search of Gold (Gold minifying traction railways) by A.L Be Bee. On page 8 is an article written by K.S.Kings on the closure of Ballarat, giving details of last services, trams operated, and dates. Features two photos, No. 40 approaching the depot on the final run, 19/9/1971, photo of last tram from Sebastopol at Rubicon St., photo of No. 36 operating in Melbourne during tourism week. Details of this are given in Melbourne news on page 2. See images for these photos. See magazine for photographer details etc.trams, tramways, closure, ballarat, melbourne -
 Ballarat Tramway Museum
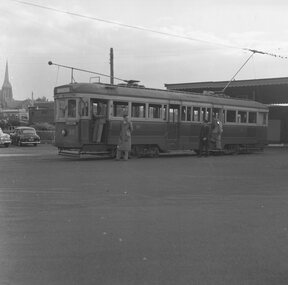
Negative, Geoff Grant, 2/04/1955 12:00:00 AM
Negative No. 268 and colour print made by colour laser printer (stored in folder ) of No. 39 at Geelong Railway station terminus by Geoff Grant on 2/4/1955 while on an Australian Electric Traction Association tour. The rail car the AETA used is in the background. Scanned images - 1550i in jpg and psd formats and 1550p in jpg format..trams, tramways, geelong, aeta, railway, station, tram 39