Showing 1419 items
matching reproductions
-
 Bendigo Military Museum
Painting - PAINTING PRINTS WW1, Post WW1
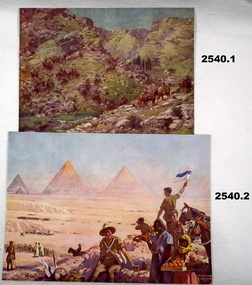
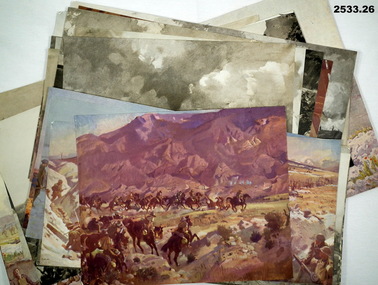
CF Reg No 2533.26, 2539.3, 2541.2, 2542.8Reproductions of paintings held at Australian War Memorial, Canberra depicting location scenes of WWI.Individual descriptions of paintings handwritten on back.illustrations-reproductions, military history - army -
 Bendigo Military Museum
Painting - PAINTING PRINTS WW1, Post WW1
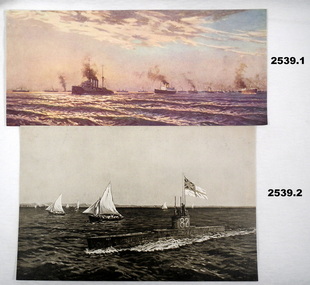
CF Reg No 2533.26, 2540.9, 2541.2, 2542.8Reproductions of paintings held at Australian War Memorial, Canberra depicting naval scenes of WWI.Individual descriptions of paintings hand written on back.illustrations-reproductions, military history - navy -
 Bendigo Military Museum
Painting - ILLUSTRATIONS WW1, post WW1
CF Reg No. 2539.3, 2540.9, 2541.2, 2542.8Reproductions of paintings held at the Australian War Memorial, Canberra depicting battle scenes of WWI.Individual descriptions of paintings handwritten on back.illustrations - reproductions, military history - army -
 Glenelg Shire Council Cultural Collection
Photograph - Photograph - Steam Goods Train, 1920s
Black and white photo (reproduction). Steam goods train, stationary, several men examining it.Back: '839' in pencil -
Glenelg Shire Council Cultural Collection
Photograph - Photograph - Reproduction print, n.d
Possibly from Bowerbird MuseumBalck and white photo (reproduction for printing) of a group of 22 men in suits, rounded corners. -
4th/19th Prince of Wales's Light Horse Regiment Unit History Room
Aide-memoire, NBC Instructions 4/19 PWLH, Jan 1986
A poor quality photocopy reproduction giving information on various agents, their effects, decontamination etc.- Jun 1986nbc warfare -
 Eltham District Historical Society Inc
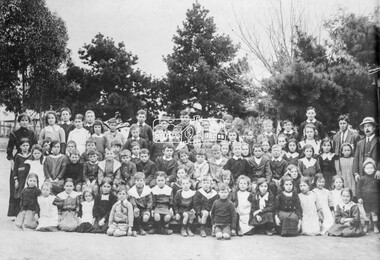
Photograph, School group (unidentified), c.1910
Whole school photo featuring 74 children and three teachers, possibly Kangaroo Ground State SchoolBlack and white photograph print (reproduction) 4x5 large format black and white negative Shire of Eltham stamp schools, school children, school groups -
 Eltham District Historical Society Inc
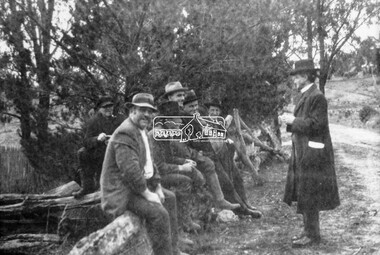
Photograph, Councillor Herbert Hewitt addressing a group men at the roadside, c.1910
Councillor Herbert Hewitt addressing a group of six men at the roadside who are sitting on a fence constructed of logs and stoneBlack and white photograph print (reproduction) 4x5 large format black and white negativecouncillors, herbert hewitt, cr. herbert hewit -
 Eltham District Historical Society Inc
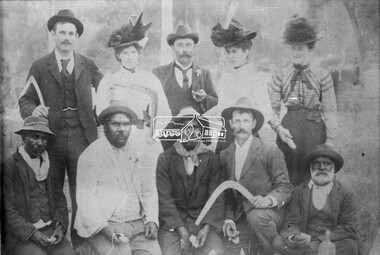
Photograph, Group of men and women, c.1910
A group of ten people pose for a formal photograph. It includes three women and four Aboriginal Australians, with two people holding boomerangs. There is little known about this orphan photograph in the EDHS collection other than it came to us via the Shire of Eltham. Ted Coutie is possibly identified in the centre back. Edwin (Ted) Coutie 1864-1927 of "Summer Hill", Panton Hill was an early pioneer.Black and white photograph print (reproduction) 4x5 large format black and white negativeShire of Eltham Centre back - Ted Coutie? ted coutie, aboriginal australians, boomerang, wurundjeri -
 Eltham District Historical Society Inc
Calendar, Eltham Main Road, looking south from Bridge Street, 1902, 1980c
Reproduction of a sketch by Bill Caldwell on a Neville Emerson Pty Ltd calendar for c.1980hotels, eltham, main road, pitt street -
 Eltham District Historical Society Inc
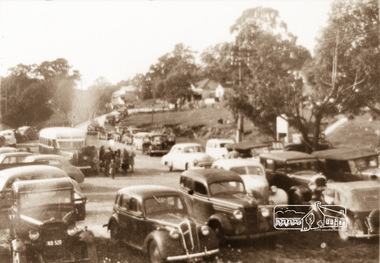
Photograph, Hurstbridge Railway Station Carpark c.1950, 1950c
Reproduction (Jul 1983) of a sepia photograph of Hurstbridge Railway Station Carpark c.1950.hurstbridge, railways, railway station, carparks, buses, motor vehicles -
Federation University Historical Collection
Book, The Banksias Volume 111: Watercolours by Celia Rosser, 2001
Green soft covered book with beautiful colour reproductions of banksias as painted by Celia Rosser. banksia, celia rosser, botany, painting -
 Flagstaff Hill Maritime Museum and Village
Print, Loch Ard
HISTORY OF THE LOCH ARD The LOCH ARD belonged to the famous Loch Line which sailed many ships from England to Australia. Built in Glasgow by Barclay, Curdle and Co. in 1873, the LOCH ARD was a three-masted square rigged iron sailing ship. The ship measured 262ft 7" (79.87m) in length, 38ft (11.58m) in width, 23ft (7m) in depth and had a gross tonnage of 1693 tons. The LOCH ARD's main mast measured a massive 150ft (45.7m) in height. LOCH ARD made three trips to Australia and one trip to Calcutta before its final voyage. LOCH ARD left England on March 2, 1878, under the command of Captain Gibbs, a newly married, 29 year old. She was bound for Melbourne with a crew of 37, plus 17 passengers and a load of cargo. The general cargo reflected the affluence of Melbourne at the time. On board were straw hats, umbrella, perfumes, clay pipes, pianos, clocks, confectionary, linen and candles, as well as a heavier load of railway irons, cement, lead and copper. There were items included that intended for display in the Melbourne International Exhibition in 1880. The voyage to Port Phillip was long but uneventful. At 3am on June 1, 1878, Captain Gibbs was expecting to see land and the passengers were becoming excited as they prepared to view their new homeland in the early morning. But LOCH ARD was running into a fog which greatly reduced visibility. Captain Gibbs was becoming anxious as there was no sign of land or the Cape Otway lighthouse. At 4am the fog lifted. A man aloft announced that he could see breakers. The sheer cliffs of Victoria's west coast came into view, and Captain Gibbs realised that the ship was much closer to them than expected. He ordered as much sail to be set as time would permit and then attempted to steer the vessel out to sea. On coming head on into the wind, the ship lost momentum, the sails fell limp and LOCH ARD's bow swung back. Gibbs then ordered the anchors to be released in an attempt to hold its position. The anchors sank some 50 fathoms - but did not hold. By this time LOCH ARD was among the breakers and the tall cliffs of Mutton Bird Island rose behind the ship. Just half a mile from the coast, the ship's bow was suddenly pulled around by the anchor. The captain tried to tack out to sea, but the ship struck a reef at the base of Mutton Bird Island, near Port Campbell. Waves broke over the ship and the top deck was loosened from the hull. The masts and rigging came crashing down knocking passengers and crew overboard. When a lifeboat was finally launched, it crashed into the side of LOCH ARD and capsized. Tom Pearce, who had launched the boat, managed to cling to its overturned hull and shelter beneath it. He drifted out to sea and then on the flood tide came into what is now known as LOCH ARD Gorge. He swam to shore, bruised and dazed, and found a cave in which to shelter. Some of the crew stayed below deck to shelter from the falling rigging but drowned when the ship slipped off the reef into deeper water. Eva Carmichael had raced onto deck to find out what was happening only to be confronted by towering cliffs looming above the stricken ship. In all the chaos, Captain Gibbs grabbed Eva and said, "If you are saved Eva, let my dear wife know that I died like a sailor". That was the last Eva Carmichael saw of the captain. She was swept off the ship by a huge wave. Eva saw Tom Pearce on a small rocky beach and yelled to attract his attention. He dived in and swam to the exhausted woman and dragged her to shore. He took her to the cave and broke open case of brandy which had washed up on the beach. He opened a bottle to revive the unconscious woman. A few hours later Tom scaled a cliff in search of help. He followed hoof prints and came by chance upon two men from nearby Glenample Station three and a half miles away. In a state of exhaustion, he told the men of the tragedy. Tom returned to the gorge while the two men rode back to the station to get help. By the time they reached LOCH ARD Gorge, it was cold and dark. The two shipwreck survivors were taken to Glenample Station to recover. Eva stayed at the station for six weeks before returning to Ireland, this time by steamship. In Melbourne, Tom Pearce received a hero's welcome. He was presented with the first gold medal of the Royal Humane Society of Victoria and a £1000 cheque from the Victorian Government. Concerts were performed to honour the young man's bravery and to raise money for those who lost family in the LOCH ARD disaster. Of the 54 crew members and passengers on board, only two survived: the apprentice, Tom Pearce and the young woman passenger, Eva Carmichael, who lost all of her family in the tragedy. Ten days after the LOCH ARD tragedy, salvage rights to the wreck were sold at auction for £2,120. Cargo valued at £3,000 was salvaged and placed on the beach, but most washed back into the sea when another storm developed. The wreck of LOCH ARD still lies at the base of Mutton Bird Island. Much of the cargo has now been salvaged and some was washed up into what is now known as LOCH ARD Gorge. Cargo and artefacts have also been illegally salvaged over many years before protective legislation was introduced. One of the most unlikely pieces of cargo to have survived the shipwreck was a Minton porcelain peacock - one of only nine in the world. The peacock was destined for the Melbourne International Exhibition in 1880. It had been well packed, which gave it adequate protection during the violent storm. Today, the Minton peacock can be seen at the Flagstaff Hill Maritime Museum in Warrnambool. From Australia's most dramatic shipwreck it has now become Australia's most valuable shipwreck artefact and is one of very few 'objects' on the Victorian State Heritage Register. Flagstaff Hill’s collection of artefacts from LOCH ARD is significant for being one of the largest collections of artefacts from this shipwreck in Victoria. It is significant for its association with the shipwreck, which is on the Victorian Heritage Register (VHR S417). The collection is significant because of the relationship between the objects, as together they have a high potential to interpret the story of the LOCH ARD. The LOCH ARD collection is archaeologically significant as the remains of a large international passenger and cargo ship. The LOCH ARD collection is historically significant for representing aspects of Victoria’s shipping history and its potential to interpret sub-theme 1.5 of Victoria’s Framework of Historical Themes (living with natural processes). The collection is also historically significant for its association with the LOCH ARD, which was one of the worst and best known shipwrecks in Victoria’s history. Reproduction 0620 of 1000 taken from the original painting of the Loch Ard by Neil Savage.flagstaff hill, warrnambool, shipwrecked coast, flagstaff hill maritime museum, maritime museum, shipwreck coast, flagstaff hill maritime village, great ocean road, loch line, loch ard, captain gibbs, eva carmichael, tom pearce, glenample station, mutton bird island, loch ard gorge, photograph, neil savage -
 St Kilda Historical Society
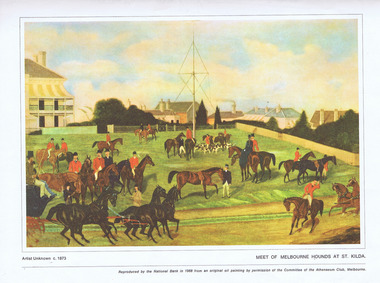
Postcard - Print colour, 1873
Early image of Alfred Square St Kilda with surrounding builldings. Reproduced from the original at the Athenaeum Clubcolour reproduction of original oil painting 1873. Meet of Melbourne hounds in Alfred Square. Meet of Melbourne Hounds at St Kilda painting by permission of the Committee on the Athenaeum club Melbourne -
 Chiltern Athenaeum Trust
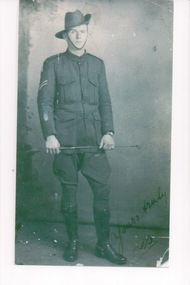
Photograph, 1915-1920
WW1 soldier 1914-1918, Chiltern and Howlong Resident. WW1Sepia coloured reproduction photograph of Allan Newey WW1 Soldier and Howlong and Chiltern resident. ww1, soldier, allan newey -
 Chiltern Athenaeum Trust
Reproduction photograph of Leslie Norman Peel WW1 Soldier in the Great War 1914-1918
WW1 soldier in the Great War 1914-1918 Corporal Leslie Norman Peel. Chiltern Resident, WW1 The Great War 1914-1918reproduction photograph of WW1 soldier in the Great War 1914-1918 Leslie Norman Peel. ww1 soldier, leslie norman peel, chiltern resident, the great war 1914-1918, shire of chiltern roll of honour -
 Clunes Museum
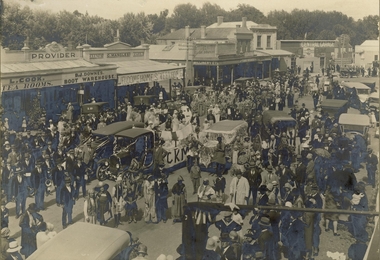
Photograph
ORIGINAL PHOTOGRAPH OWNED BY MR. MICHAEL KIRCE BACK TO CLUNES, 1925..REPRODUCTION SEPIA PHOTOGRAPH OF STREET PARADE IN FRASER STREET, CLUNES. BACK TO CLUNES 1927.On Front; Stamped Hornby's Studio Ballarat. Handwritten in black ink 18/11/27local history, photography, photographs, shops, l.cook, tea rooms, downes boot warehouse, g. mangles, central garage., events and celebrations, back to clunes -
 Tennis Australia
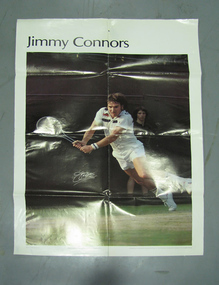
Poster, Advertisement, 1978
A large poster of Jimmy Connors, in action, with reproduction of his signature. Materials: Paper, Inktennis -
 Kew Historical Society Inc
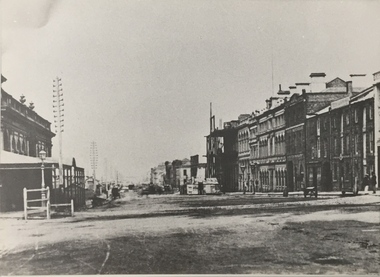
Photograph, Flinders Street, from the corner of Swanston Street, 1874
Flinders Street, from the corner of Swanston Street, 1874. Photographic reproduction, source unknown.melbourne, flinders street, swanston street -
 Surrey Hills Historical Society Collection
Photograph - Mont Albert Primary School, 1926
This was reproduced from a copy of the 1926 flyer relating to the Annual Speech Night. See vertical file re Mont Albert Primary / Mont Albert Central School. It was reproduced with the consent of the school archives in the early 1980's by Kenneth Tudor Hall. Mont Albert Primary was built in 1917 and was designated as a Central School in 1918 when Forms 1 & 2 were added. It remained as such until the 1964 when the secondary years formed the basis of a new high school, known as the Box Hill North High School, (later changed to Koonung Secondary College). The original building was constructed of solid red brick and consisted of seven rooms. In May 1924 a further four rooms, also in red brick, were added. The school opened with an initial enrolment of 147 students in Prep to Grade 6. A further 72 children were admitted during the year, making a total enrolment in the first year of 219. The land facing Kenmare Street was purchased in 1919, adding another 2 acres to the 5.5 acres which the school occupied in 1917. The first Principal was Charles Hyland, who was assisted by three teachers. The first official meeting of the School Council in May 1917 reveals that the building was in some senses a shell, requiring additional input from parents. Mention is made of the need for asphalting of playing areas, providing a letter box and electric lights for the lobby, double room, office and sewing room. Mont Albert was the first School in Victoria to have the interior purely constructed of Victoria hardwood, from floor to ceiling. An Honour Board was erected in 1919. mont albert central school, mont albert primary school, mont albert, schools -
 Lilydale RSL Sub Branch
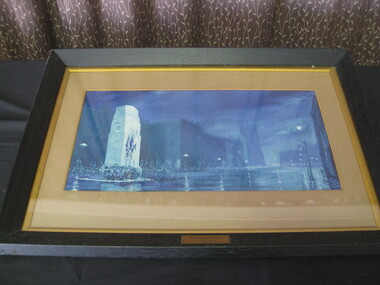
Print - Framed Print, Captain William Frederick Longstaff, Immortal Shrine (Eternal Silence), Painted 1928
Depicts ghostly soldiers marching past the Cenotaph in London on Remembrance Day 1928, reproduction.Plaque on frame "The Immortal Shrine / by / Will Longstaff / copyright registered" -
Canterbury History Group
Book, The History of Ormiston Girls' School 1849 - 1964
Booklet of history of Camberwell Girls' School, includes many reproductions of photographs of staff and students.canterbury, mont albert road, ormiston girls' school, camberwell girls' grammar school, independent schools, teachers, principals, students -
 Melbourne Tram Museum
Slide - Black and white reproduction photograph - Elizabeth St Melbourne, 1920c
Photograph - looking south along Elizabeth Street Melbourne to towards Flinders Street station. Has three cable trams in the photo, including one shunting at the terminus. Has signs for the London Cafe and Federal Cafe in the view, along with many horse-drawn vehicles and a few motor cars. There is a telegraph/telephone line on the east side of the street. Original photo by Rose Stereograph Co. P 957 - see reference. Yields information about the south end of Elizabeth St and the cable tram terminus.Kodachrome cardboard duplicate slide - Black and white reproduction photograph - Elizabeth St c1920 "CB9" in penciltrams, tramways, cable trams, elizabeth street, flinders st station -
 St Kilda Historical Society
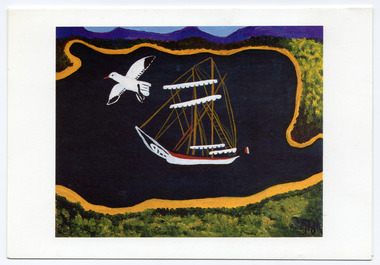
Ephemera - Seasonal card, Season's Greetings from the Commissioners and Staff of the City of Port Phillip, mid 1990s
The reproduced painting on the front of the card is 'Lady of St Kilda' by Mary Mooney 1929. The card was made during the period of the amalgamation of the councils of St Kilda, South Melbourne and Port Melbourne to become Port PhillipFolded white card printed in black. On the front is a reproduction of a painting of a ship in full colourHandwritten message in blue ink: Dan Good Wishes Descity of port phillip -
 Buninyong & District Historical Society
Artwork, other - Colour reproduction of lithograph "Township of Buninyong" c1852, "Township of Buninyong" c1852
Early image of Buninyong c1852 showing evidence of land clearing, cultivation, residential and farm buildings and Mount Buninyong with tree coverBuninyong was one of the earliest settlements Victoria and became a very important place in the history of the goldrushColour reproduction of lithograph "Township of Buninyong" c1852 from the cover of "Three Times Blest"Henry Winkles Township of Buninyong c 1852 Lithograph, originally published in Montgomery Martin's "Australia" Reproduced "Three Times Blest"early settlement, henry winkles, mount buninyong, buninyong -
 Ringwood RSL Sub-Branch
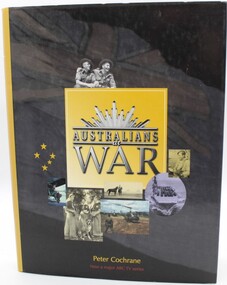
Book Australians at War, Australians at War by Peter Cochrane, Published 2001
Story of Australia at WarHard cover with 272 pages which has reproductions of photos in black and white and colour. -
 Clunes Museum
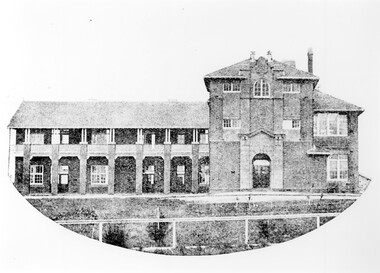
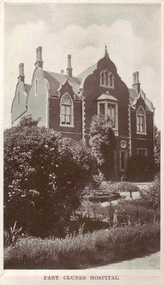
Photograph
PART OF ORIGINAL TWO STORY CLUNES HOSPITAL - LATER REMODELLED TO SINGLE STORY, WHICH WAS LATER BURNT IN 1944 BUSH FIRE..1 SEPIA PHOTOGRAPH COPY OF ORIGINAL CLUNES HOSPITAL, WHEN THE BUILDING CONSISTED OF TWO STORIES .2 BLACK AND WHITE ENLARGED REPRODUCTION PRINTED ON MATTE PHOTOGRAPHIC PAPER .3 BLACK AND WHITE REPRODUCTION PRINTED ON MATTE PHOTOGRAPHIC PAPERPART CLUNES HOSPITALlocal history, document, postcard, hospital [old] -
Glenelg Shire Council Cultural Collection
Film - Video - Portland Bay Swells, 1983
"Portland Bay Swells", celebrating Portland's sesquicentenary. Devised by Ken Harper and the Portland community. Record of performance at Portland Art Centre.Front: (Reproduction of "Portland Bay Swells" Poster) 1983 - (yellow sticker, l. left). Back: (no inscriptions) -
 Victorian Aboriginal Corporation for Languages
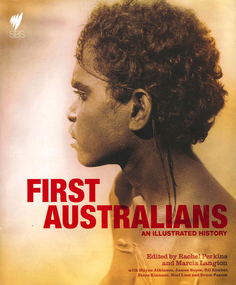
Book, Rachel Perkins, First Australians : an illustrated history, 2008
"A landmark history of Indigenous Australia which accompanies a major nine part Australian television series. It combines the most rigorous academic research with capitvating contemporary story-telling. Richly illustrated book that includes images of the landscape, evocative ninteenth-century photography and Aboriginal art. Written by Australia's leading Indigenous historian and public intellectuals"--Provided by publisher.maps, document reproductions, b&w illustrations, colour illustrations, colour photographs, b&w photographscolonisation, race relations, australian aboriginal history, pictorial histories -
 Victoria Police Museum
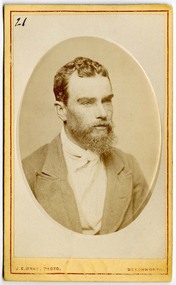
Carte de Visite (William Woods), J.E. Bray, 18/1/1879
Reproductions of this image attribute it to William StricklandBlack and white photograph of William Woods a sympathiser of the Kelly Gang. Photograph is in an oval frame and shows head and shoulders of a bearded man wearing a jacket and tie facing rightRear is inscribed with William Woodswilliam woods, kelly sympathiser, kelly gang, edward kelly, ned kelly, william strickland