Showing 1324 items matching "tram terminus"
-
 Ballarat Tramway Museum
Slide - 35mm slide/s set of 7, Noel Simons, 1972
... terminus. Tram has showing 'Eaglehawk'. Tram has two SEC roof ads... terminus. Tram has showing 'Eaglehawk'. Tram has two SEC roof ads ...Set of 7 transparencies undated on PAKON mounts - appear to be early 1970's. 1212.1 - No. 18 about to enter the Long Gully loop with ESSO service station on the right hand side. 1212.2 - No. 6 in Mitchell Street bound for Charing Cross. Tram has destination of "Rly Station". Has buildings on the east side of Mitchell St. in the background. 1212.3 - No. 7 (North Bendigo) and 29 (Golden Square) crossing. Actual location? 1212.4 - "No 6 showing 'SPECIAL' at Eaglehawk terminus. Has the Foodland store and Fruit shop in the background. 1212.5 - No. 19 at Eaglehawk terminus, on the extension to the normal Eaglehawk terminus. Tram has showing 'Eaglehawk'. Tram has two SEC roof ads. 1212.6 - No. 25 and another Bogie car at Quarry Hill terminus on last day. 1212.7 - No. 18 and 29 at Quarry Hill terminus. No.. 18 showing 'Quarry Hill' - has two SEC roof ads 'Electric Cooking - Matchless' and 'Everything's fine in my all electric kitchen' and No. 29 has a briquettes roof ad.Information typed onto a white label stuck on the slide. 1212.1 - "No. 18 at Long Gully" 1212.2 - "No. 6 in Mitchell Street." 1212.3 - "7 and 29 Lake View Hotel" 1212.4 - "No. 6 at Eaglehawk" 1212.5 - "No. 19 at Eaglehawk Term." 1212.6 - "Last cars Quarry Hill." 1212.7 - "18 & 29 Quarry Hill"tramways, trams, bendigo, long gully, mitchell st., eaglehawk, quarry hill, last tram, tram 6, tram 7, tram 18, tram 19, tram 25, tram 29 -
 Ballarat Tramway Museum
Book, "Ballarat Illustrated", 1972
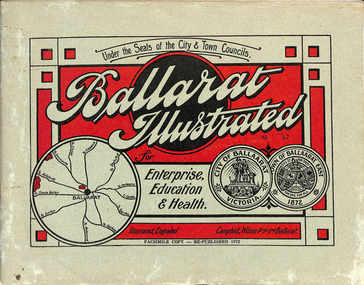
... of the tram terminus for many years. Page 68: Electric Supply Co... photo is of the Orphanage, the name of the tram terminus ...Original c 1914 (see below), facsimile copy - re-published 1972. Original features photos of Ballarat City and Town, its buildings, parks and the various industries and organisations that were in Ballarat at the time of publication, including ESCo. Many photos features ESCo trams. Photos sepia toned. Has some red colour block printing on the front cover and rear, for Star Oil Engines. On inside back cover is a map with the places of interest and tram route map, marked in red. Pages are un-numbered. Original published by Ballarat East Town Council and Ballaarat City Council. On cover has number stamped in black in, "No. 87" (assume facsimile copy No.). Photos with publication show tram No. 21, built 1913 and ESCo photo page shows Mr. Pringle as Manager. Mr Pringle became manager in January 1911, As there is no photos of the "Avenue of Honour", or other mention of the first world war, assume original published about 1913 or 1914. Original shows Engravings and printing by "Campbell Wilson Prop Ltd, Ballarat". See Other Information as well for more listing details. High Resolution image added 31/8/2012 of i2 of ESCo page and i3 for Ballarat identies and sheet i4 extracted for Mr Pringle. PDF scan of full document added 21/5/2019 - see images btm633-1i.pdf and btm633-2i.pdf Notes on "Ballarat Illustrated" Reg. Item No. 733 From notes made by Neville Gower 12/1/1997 Cover: Inside front cover: Last paragraph, "Facilities for Travelling" - Electric trams serve all parts of Ballarat. Page 3: Street Scene, Municipal Town Hall, showing tram wiring Page 7: Street Scene, Lydiard St. North, intersection and tramway centre, with ESCo tram No. 21 in the bottom photo. Other photos features trams as well in Sturt St and Lydiard St. North. Page 9: Street Scene, Top photo of Sturt St. from Lydiard St. looking east, shows piles on right-hand side of road. Car parked by Post Office has a car registration number "9007". Bottom photo, an tram climbing hill, shows double trolley in the street, with early English type of pull offs. Page 13: Street Scenes and Historic Buildings: One of five photos, shows Victoria St. looking East, with tram track prominent in photo and how stone work was set up about the rails and overhead poles. Page 23: Street scene, Gardens North Entrance gates, shows details of gates near St. Aidans Drive. Note double trolley wire on poles, and style of insulators. No trams in photo, three ladies walking down the track. Page 37: Street Scene; Lydiard St views, top left hand photo, shows Railway station and railway gates with signal gantry and horse drawn vehicles. Tram tracks apparent. Bottom left hand photo shows Lydiard St. North, near Post Office, double track with centre poles - Single wire per track. Top right hand photo, showing Cemetery gates in background. Bottom right hand photo - from north end of Lydiard St. South, looking north, with an ESCo tram in background. Also has a parked car on left hand side. Page 45: Street Scenes - Bridge St; top photo at west end of Bridge St. with ESCo No. 11 with possibly double trolley wire in photo. Bottom photo at east end of Bridge St. with tram in background, shows junction. Double trolley heading out to Mt. Pleasant, single trolley for Victoria St. Page 45: Street Scenes - Bridge St; top photo at west end of Bridge St. with ESCo No. 11 with possibly double trolley wire in photo. Bottom photo at east end of Bridge St. with tram in background, shows junction. Double trolley heading out to Mt. Pleasant, single trolley for Victoria St. Page 61: Street Scenes and Historic Buildings - Public Institutions Ballarat - top left hand photo of the Hospital shows some tram track in foreground, with double trolley wire. Top right photo is of the Orphanage, the name of the tram terminus for many years. Page 68: Electric Supply Co. of Victoria's pages - top photo showing powerhouse in background, across the lake, can hardly see anything for the trees, except for the chimney. Bottom photos of the steam Turbo Generators and the switchboard. Gives Mr. P.J. Pringle as Chief Engineer and General Manager. He took over in Jan. 1911. Page 69: Ballarat East Views - features photo of Black Hill open cut, Ballarat East Railway Station, Ballarat Fire Station and "Victoria St. looking East", repeat of photo printed on page 12, but slightly darker. Image on system includes fire station and railway station, - Ballarat East. Page 78: Series of photos of various Ballarat VIP's of the era, fourth one in on top line features "P.J.Pringle, Electric Supply Co." Inside Back cover - map of Ballarat including tram lines and places of interest marked in red. Gives a detailed photographic presentation of Ballarat in 1914.80 page book with, in addition, light green card covers, titled "Ballarat Illustrated". Loose copy of page 9 and 10 held.trams, tramways, ballarat, local history, heritage buildings, esco -
 Ballarat Tramway Museum
Negative - Set of 2, Geoff Grant, 25/06/1955 12:00:00 AM
... Electric Traction Association) on 25/6/1955 at Spencer St. terminus... Parade Ballarat Ballarat goldfields Trams tramways Melbourne ...Negatives No. N358 and N359 and black and white prints made by a laser printer (stored in folder ) of AETA tour (Australian Electric Traction Association) on 25/6/1955 at Spencer St. terminus. Both trams have AETA tour signs and the slogan. 980 has "Save traffic congestion, Move People not vehicles" 1618.1 - 980 and 1001 at the then new Bourke St. terminal at Spencer St. Carlyon's hotel in the background. 1618.2 - 980 and 1001 with the Mail Exchange in the background See also Reg. item 1611 for other photos at the same time. hi res scan made and image updated 23/5/2020. Two prints or copies of the photograph, 101mm square, added 1/6/03. Photo used in the Melbourne Immigration Museum's "Trammies" Exhibition Feb to May 2003. Prints made by the Immigration Museum for use in the making of the display panels. hi res scan made and image updated 23/5/2020.trams, tramways, melbourne, bourke st, spencer st, aeta tour, tram 980 tram w7 1001 -
 Melbourne Tram Museum
Newspaper, Diamond Valley News, “100 miles by tram”, “Party rode through the night”, 13/01/1970 12:00:00 AM
... Newspaper clipping titled: “100 miles by tram” – “Party... terminus, Special tram #469 pulled out of Brunswick depot at 11 ...Newspaper clipping titled: “100 miles by tram” – “Party rode through the night” Diamond Valley News – Tues January 13, 1970 Photo and text of tram # 469, hired by Diamond Valley Miniature railway club, Brunswick depot, Mont Albert terminus, Special tram #469 pulled out of Brunswick depot at 11:00PM on Friday 9 January 1970 on a 100-mile trip. Returned at 10:00AM on Saturday Hired by Diamond Valley Miniature railway club for a social trip, club organiser John Murdoch is a tram driver, drove tram through suburbs. Tram 469 is an American-style body in which driver isn't partitioned from the passengers. Used to carry tourists in 19430's. Tram has been used by confectionary company for its "little box of chocolates" ad on TV. Tram stopped at Mont Albert terminus where group held a birthday party for a member.trams, tramways, brunswick depot, social club, mont albert, model railways, diamond valley miniature railway club, swanston st, latrobe st, tram 469 -
Bendigo Historical Society Inc.
Ephemera - Vintage Bendigo calendar, 2015
... ; March, Electric trams, circa 1910; April, Terminus Hotel, 1966..., Phone boxes, 1980; March, Electric trams, circa 1910; April ...Vintage Bendigo Calendar, 2015. 12-month calendar. Each month features a historic photo of Bendigo. January, BP Five Lions Service Station, 1960's; February, Phone boxes, 1980; March, Electric trams, circa 1910; April, Terminus Hotel, 1966; May, Plaza Theatre, pre 1975; June, Hargreaves Street, circa 1900's; July, Gillies Pie Corner, 1980; August, Favaloro's Cafe, 1960's; September, Dodges and Chevrolets in front of the Lawcourts, circa 1945-54; October, Easter Procession in Pall Mall, circa 1900; November, Sandhurst Town, 1980's; December, looking up View Street from St. Paul's Church. This calendar is not used - no free-hand notations on any dates/months. On the last pages are public holidays for each of the states/territories; and advertisements for three sponsors - Skills Plus, Next Generation and Lost Bendigo.bendigo, business, parade, calendar -
 Melbourne Tram Museum
Slide - Set of 4, Vic Solomons, Jun. 1970
... terminus, taken after .4 .4 - tram 1005 at the Bourke St terminus... terminus, taken after .4 .4 - tram 1005 at the Bourke St terminus ...Slide - set of 4 - 35mm - Kodachrome cardboard mounts. .1 - Tram 808 at the Spencer St stop at the corner of Bourke St with Spencer St Station in the background. Note the route and destination - at the time when North Balwyn and Burwood Routes were combined on Sundays am and evening - and passengers changed at Hawthorn Bridge. Route 74. Has a Fosters Lager advertisement. .2 - As above, tram approaching the stop with the Spencer St station car park in the background. .3 - tram 1005 leaving the Bourke St terminus, taken after .4 .4 - tram 1005 at the Bourke St terminus with tram 838 crossing in the background, has the Station building, Carlyon's Hotel and the Tramways Building. Note the Bundy clock, tram stop signage and safety zone. Route 96. The grey box by the Bundy Clock is thought to be a correspondence box for the satchels that were transported between the depots and head office. Photographed by Vic Solomons June 1970 (based on date stamped on slide)trams, tramways, bourke st, spencer st, railways, stations, route 74, north balwyn, burwood, route 96, letters, mails, tram 808, tram 1005, tram 838 -
 Melbourne Tram Museum
Administrative Record - Table Cards, Melbourne & Metropolitan Tramways Board (MMTB), blank unused form on preprinted cards, c1980 to c2000
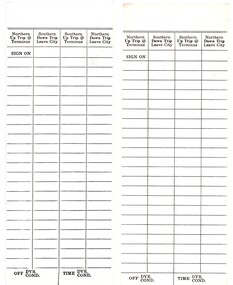
... for Northern and Southern trips from Terminus - Swanston trams? - 210H... trips from Terminus - Swanston trams? - 210H x 79W .2 ...Set of six different Table cards - blank unused form on preprinted card ruled to provide a timetable for crews - drivers and conductors, and hours worked. .1 - printed heavy paper for Northern and Southern trips from Terminus - Swanston trams? - 210H x 79W .2 - as above, but printed on heavy card, both sides .3 -printed on heavy paper, blank with sign on times, giving drivers and conductors, and hours worked - 165H x 80W - understood used with the plastic card holders. - form number 3/572 .4 - as for .2, light paper, double sided - 163H x 80W - form number 3/573 .5 - as for .2, heavy paper double sided - 165H x 80W - form number 3/573 .6 - as for .4 .7 - single sided sheet, printed on light page, 210H x 79W, no form number. See Reg Item 2601 for a sample used and backed onto a sheet of Masonite.trams, tramways, forms, drivers, table cards, conductors -
 Ballarat Tramway Museum
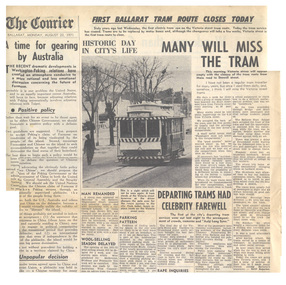
Newspaper, The Courier Ballarat, "Many will miss the Tram", "Departing Trams had Celebrity Farewell", 1971
... at the Victoria St. terminus of tram No. 31. Second clipping, from.... terminus of tram No. 31. Second clipping, from The Courier, dated 8 ...Yields information about the closure of the SEC Ballarat system in particular the Victoria St line. Has a strong association with the article author.Set of two Newspaper clippings pasted onto a single sheet of paper with two Punch holes on the left hand side with one hole through the photograph within the cutting. Clipping from The Courier, Ballarat, Monday, 23/8/1971 (corrected date), of two items in the paper about the closure of the trams in Victoria St. The main item written by a staff reporter recalls the days of travelling regularly on the tram when a student going to and from school, Saturday travelling and as a means of transport. Second item in the same cutting reports on the closure of the Victoria St. route the previous day. Mentions the interest in the trams, the BTPS, and police protection that was not needed. Photograph accompanying the article is of a driver turning the pole at the Victoria St. terminus of tram No. 31. Second clipping, from The Courier, dated 8/9/1971, reports on a collection of historic tram photos in the Commonwealth Bank for the next two weeks, presented by the Tramway Museum Society of Victoria. 1068.2 - full page of The Courier, 23/8/1971, added 10/9/2013 and image added.In red ink in upper right hand corner, "21/8/71" of the first cutting and "8/9/71" in red ink in the top right hand corner of the second cuttingtrams, tramways, closure, victoria st., tmsv, displays -
 Ballarat Tramway Museum
Album - Photo Album, c1970
... by railway station. .9 - Three trams at Sebastopol terminus. .10.... Photos apparently taken on a tram tour. .1 - No. 42 ...Set of 16 photos of Ballarat tram system taken 1970c on a tour by an unknown Qld based person.Photo album containing 16 colour prints. Photo album has heavy card covers, covered in black textured plastic containing 12 clear plastic photo sleeves held with a white comb binder. Photos of Ballarat prior to closure, c1970. Photographer unknown. Donated by Peter Hyde of Brisbane Tramway Museum to BTM 3/2/2010, from a deceased estate. Photos apparently taken on a tram tour. .1 - No. 42 and a single trucker inbound in Sturt St. .2 - taken from tram ascending Bakery St hill in Victoria St. .3 - End of No. 42, with the destination "Haddon St via Drummond Nth" .4 - No. 11 and 42 in Lydiard St Nth, near the railway station. No. 11 showing special. .5 - photo of three people on the tour. .6 - Trams reversing at the Victoria St terminus .7 - ditto .8 - 11, 42 and 12? in Lydiard St North by railway station. .9 - Three trams at Sebastopol terminus. .10 - View in Albert St Sebastopol looking north along the track on the side of the road. .11 - View of the tram crossing in Albert St. .12 - 27 and 42 crossing Albert St Sebastopol. .13 - View of Albert St from the tram, north of the crossing looking at the reserved track 14. - Lydiard St North looking south .15 - 42 at the railway level crossing. .16 - View south of the railway level crossing, three trams, with passengers alighting.trams, tramways, ballarat, albert st, sebastopol, victoria st, sturt st, lydiard st nth, railway crossing -
 Melbourne Tram Museum
Document - Folder with papers, Melbourne & Metropolitan Tramways Board (MMTB), "Notices to Staff", 1924 - 1944
... - 1941 Memo re timing of trams from city terminus account 3KZ... - 1941 Memo re timing of trams from city terminus account 3KZ ...Light grey card folder manufactured by the Roneo Printing Works of Rumford England with the file title "Fire Switches, glued to the top of the folder on the inside back cover. Contains many memos from the MMTB Traffic Managers, Depot Managers about the arrangements for the visit of the Royal Highnesses the Duke and Duchess of York in April 1927. Also contains memo re cable tram arrangements for this event from Port Melbourne depot, arrangements for Christmas holidays and other holidays from about 1924 to 1944, including a map of the procession and printed programs by the Government Printer. Documents either typed or hand written. Other documents include (Sample only): Camberwell extra for December 1944 Shopping Week Memos re traffic arrangements and shunting of trams for the 8 hour day procession Tables for Cable car operations from Port Melbourne depot 5/7/1925 Handwritten car timetables Costs associated with the royal visit Proposed service arrangements for Coburg Lines Christmas and New Year 1929 Cuttings regarding shopping hours for 1929-1930 Football posters - special trams - 1931 and 1932 All Night services - destination rolls to specific bogie trams Memos regarding cancelling of leave in Dec. 1941 Memos regarding services to Fisherman's bend and factory hours - 1941 - 42 Holiday loading returns for Southern System - 1941 Memo re timing of trams from city terminus account 3KZ Christmas Eve Choral festivaltrams, tramways, mmtb, port melbourne depot, notices and information, cable trams, holiday arrangements, royal visit, timetables, world war 2, football, all night services -
 Melbourne Tram Museum
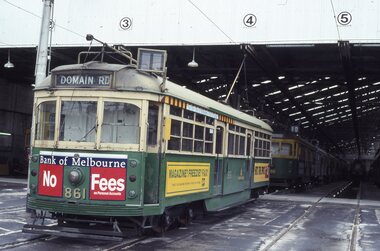
Album - Robert Thomson Slide Collection, "Melbourne 1-10th October 1993"
... - "East Brunswick" - route 96 RT022 Port Melb Terminus - tram 67... - "East Brunswick" - route 96 RT022 Port Melb Terminus - tram 67 ...Photo - see pdf file for further information. Number Brief Description RT001 South Melbourne depot - tram 861 -"Domain Rd" RT002 Fitzroy St, St Kilda - tram 858 - route 16 RT003 "3" - Z class - tram 210 - "City" - route 05 RT004 Swanston St - tram 989 - "University" - route 8 RT005 Swanston St - tram 992 - "City" - route 6 RT006 Swanston St - tram 867 - "City" - route 8 RT007 "2" - Track Relay Wattletree Road RT008 "1" Track Relay Wattletree Road - tram 214 - route 05 RT009 Swanston St - tram 26 - "City - Swanston St" - route 6 RT010 Balaclava Junction - tram 76 - route 09 RT011 "6" - Track Relay Wattletree Road RT012 Fitzroy St - tram 2042 - "East Brunswick" route 96 RT013 Swanston St - tram 985 - "City" - route 8 RT014 "4" - Track Relay Wattletree Road, Malvern East, looking east to terminus at Burke Rd RT015 "5" - Track Relay Wattletree Road RT016 Collins St - tram 923 - "St Kilda Beach" - route 12 RT017 Victoria Pde Siding - tram 67 - "Special" - route 12 RT018 Nth Fitzroy Depot - trams 2037 & 2021 RT019 Park Street - tram 844 - "West Preston" - route 10 RT020 South Melb Beach Ter - tram 49 RT021 St Kilda Line - tram 67 - "East Brunswick" - route 96 RT022 Port Melb Terminus - tram 67 - "Port Melb'ne" - route 111 RT023 Port Melb Line - tram 2038 - "Exhibition Bldg" - route 111 RT024 Sth Melb Depot - tram 937 – “Restaurant" RT025 Collins St - tram 282 - "City" - route 42 RT026 Spring Street - tram 2100 - "City Spencer St" - route 86 RT027 Spring Street - tram 2093 - "Port Melbourne" - route 111 RT028 "1" New Track Spring St RT029 "2" track construction - Spring St RT030 "3" track construction - Spring St RT031 "4" track construction - Spring St RT032 "5" track construction - Spring St Demonstrates the work of Robert Thomson in photography, collection and/or production of slidesAssembled album in a black presentation folder of 32 colour slides, collected or produced by Robert Thomson. All photographs have been scanned and placed on the Museum's G drive. A list of all photographs with details has been compiled. melbourne, tramways, trams, track construction -
 Melbourne Tram Museum
Photograph - Black & White Photograph/s, c1925
... for another photo of this tram at South Melbourne Depot. The second... for another photo of this tram at South Melbourne Depot. The second ...Black and white photograph of 2 trams in Swanston St c1925. Building in background may be the Queen Victoria hospital which places the trams just north of Lonsdale St. Photo has imperfection in top left corner of the image. First tram No. 171 is an S class single-truck California combination tram built by MMTB at Coburg Depot. It entered service in June 1922 and was withdrawn from service and sold in 1953. The tram's destination is shown as "Coburg Cemetery". Several passengers are seen boarding the tram. See page 64 of Destination City 5th Edition for another photo of this tram at South Melbourne Depot. The second tram, 178, is a T class single-truck combination tram with a long saloon, built by Duncan & Fraser, Adelaide for the MBCTT. It entered service in June 1917 as tram number 14C before transfer to the MMTB as T class tram. It was withdrawn from service and sold in 1961. This tram was one of only 6 Melbourne trams fitted with long wheelbase Brill Radiax truck. See page 65 of Destination City 5th Edition for another photo of this tram at Point Ormond terminus.trams, tramways, s class, t class, swanston st, mbctt, tram 171, tram 178, mmtb -
 Ballarat Tramway Museum
Slide - 35mm slide/s - set of 17, Noel Simons, 20/11/1962 12:00:00 AM
... and another roof ad. Shows the Y terminus at this location, but tram... - Bendigo No.3 at Eaglehawk terminus. Tram showing destination ...Set of 17 transparencies taken on 20/11/1962 on Kodak mounts. 1187.1 - Bendigo No. 2 at the Quarry Hill terminus, showing destination of Quarry Hill. Has Cohns Drinks and Streets Ice Cream ads on dash panel, a SEC 'electric cooking' roof ad and another roof ad. Shows the Y terminus at this location, but tram standing just before it. Overhead in position. 1187.2 - as above, but closer up. 1187.3 - as above, but from the north side, showing cemetery in the background. 1187.4 - Bendigo No.3 at Eaglehawk terminus. Tram showing destination of Quarry Hill. Has the various buildings at Eaglehawk in the background including the Foodland store. Has Streets Ice cream and White Horse Whiskey ads on the dash panel. 1187.5 - Bendigo No. 18 at Garden Gully crossing loop, in bound, with destination of Eaglehawk. Passengers waiting for an Eaglehawk tram at the stop. Has a white horse whiskey ad on dash panel and SEC roof ads. Conductor standing in doorway looking out. 1187.6 - Bendigo No. 7 inbound in Nolan St. at cnr of McCrae St. showing destination of Golden Square. Has Streets Ice cream ad on dash panel and a Castrol Roof ad. 1187.7 - Bendigo No. 19 at the North Bendigo terminus with railway level crossing in background. Tram has a Cohns Drinks ad and an SEC 'Electric Cooking' roof ad. 1187.8 - Bendigo No. 2 at the Quarry Hill terminus, looking back into Bendigo, showing destination of Eaglehawk. 1187.9 - Bendigo No. 21 in McCrae St, near Nolan St outbound for North Bendigo. Photo taken after tram has passed photographer. 1187.10 - Bendigo Nos. 4 and 26 at Charing Cross in View St. with fountain alongside and the Beehive, Ezywalkin Buildings in the background. No. 26 has a Sandhurst Milk and SEC 'Electric Cooking' roof ad. 1187.11 - close up of 22E maximum traction truck and folded footstep. 1187.12 - Bendigo No. 19 at Charing Cross terminus, after tram has passed photographer, showing destination of North Bendigo, with the Beehive building in the background and passengers boarding tram. 1187.13 - Bendigo No. 11, turning from View St. into Pall Mall, showing Special with the conductor holding point bar. Has the Beehive and Ezywalkin Buildings in the background. 1187.14 - No. 7 at Charing Cross terminus, in Pall Mall, bound for Golden Square. Has the Beehive and Ezywalkin buildings in the background and passengers waiting at the tram stop. 1187.15 - No. 18 at the Charing Cross terminus, bound for Eaglehawk. Has the Beehive and Ezywalkin buildings in the background and passengers waiting at the tram stop. Also has the 'Safety Zone' sign in the photograph. 1187.16 - No. 2 at Quarry Hill terminus, night or dusk photo. Tram showing destination of Depot. 1187.17 - No. 26 at Charing Cross, night photo. Tram has destination of Quarry Hill, but is on the line for Eaglehawk. Photo looks along Mitchell St. Also shows Safety Zone sign. Information written on in black ink and date stamped on purple ink. 1187.1 - "No. 2 at Quarry Hill terminus Bendigo" 1187.2 - "No. 2 at Quarry Hill terminus Bendigo" 1187.3 - "No. 2 at Quarry Hill terminus Bendigo" 1187.4 - "No. 3 at Eaglehawk terminus" 1187.5 - "No. 18 in Mt Korong Road, Long Gully at cnr of Havilah Road (Eaglehawk Route)" 1187.6 - "No. 7 in Nolan St. Bendigo, at Cnr of McCrae St., near lake Weeroona, (North Bendigo Route)' 1187.7 - "No. 19 at North Bendigo terminus" 1187.8 - "No. 2 at Quarry Hill terminus" 1187.9 - "No. 21 in McCrae St. Bendigo, near Nolan St. (North Bendigo Route) 1187.10 - "4 and 26 at Alexandra Fountain, Charing Cross Bendigo" 1187.11 - "Truck of Bogie Car, Bendigo Tramways" 1187.12 - "No. 19 in Pall Mall at Charing Cross, Bendigo" 1187.13 - "Birney car No. 11 entering Pall Mall from View St. at Charing Cross Bendigo" 1187.14 - "No. 7 in Pall Mall at Charing Cross, Bendigo" 1187.15 - "No. 18 at Alexandra Fountain, Charing Cross, Bendigo" 1187.16 - "No. 2 at Quarry Hill terminus, Bendigo" 1187.17 - "No. 26 at Alexandra Fountain, Charing Cross, Bendigo" tramways, trams, bendigo, quarry hill, eaglehawk, north bendigo, maximum traction, night photo, tram 2, tram 3, tram 4, tram 7, tram 11, tram 18, tram 19, tram 21, tram 26 -
 Melbourne Tram Museum
Album - Robert Thomson Slide Collection, "Melbourne AETA 1964"
... Terminus - tram 741 - "City" - route 59 RT219 1964 AETA Convention... Terminus - tram 741 - "City" - route 59 RT219 1964 AETA Convention ...Photo - see pdf file for further information. Number Brief Description RT198 SW6 888 Dandenong Rd 1-4-64 - "Malvern Rd Burke Rd" - route 5 RT199 W2 552 Dandenong Rd 1-4-64 - "City" - route 5 RT200 W3 655 Dandenong Rd 1-4-64 - "City" - route 64 RT201 SW6 951 St Kilda Beach 1-4-64 - "Kew Cotham Rd" - route 69 RT202 10 W3 667 East Coburg 1-4-64 - "South Melb Beach" - route 1 RT203 W5 826 top of Latrobe St (?) 1-4-64 - "City via La Trobe St" - RT204 L 105 Carnegie 1-4-64 -"city" - route 4 RT205 L 101 Carnegie 1-4-64 - "University" - route 4 RT206 tram 612 - "Burwood" - Batman Ave (?) RT207 Y1 611 Batman Ave 4-4-64 - "Wattle Park Elgar Rd" RT208 Hawthorn Depot 25-3-64 - trams 582 & 841 RT209 L 105 City Swanston St 25-3-64 route 4B RT210 SW6 853 Chapel St Richmond 25-3-64 -"Prahran" - route 77 RT211 L 102 City Swanston St 25-3-64 - "Carnegie" - route 4 RT212 27-4-62 - tram 495 - "Camberwell" - route 7 & tram 334 RT213 tram 11 - "Special" Flinders St RT214 March 1964 - tram 779 - "West Coburg via William St" - route 55 RT215 March 1964 W7 Collins St - tram 1024 - "Northcote via St Georges Rd" - route 9A RT216 March 1964 Victoria Parade - tram 892 - "City" - route 42 RT217 March 1964 Spring St - tram 1034 - "East Preston" - route 88 RT218 March 1964 Essendon Terminus - tram 741 - "City" - route 59 RT219 1964 AETA Convention - tram 672 - "City" RT220 1964 AETA Convention - tram 672 - "West Coburg Bell St" RT221 1964 AETA Convention - tram 676 - "Leura Grove" RT222 1964 AETA Convention - tram 672 - "Special" tram bridge RT223 1964 AETA Convention - tram 672 - "Special" RT224 1964 AETA Convention - tram 676 - "Burwood" RT225 1964 AETA Convention - tram 672 - "City" - route 59 RT226 1964 AETA Convention - tram 672 - "Special" RT227 1964 AETA Convention - tram 469 - "Special" & tram 895 - "City" - route 2A RT228 1964 AETA Convention - tram south melb depot works yard Demonstrates the work of Robert Thomson in photography, collection and/or production of slidesAssembled album in a black presentation folder of 31 colour slides, collected or produced by Robert Thomson. All photographs have been scanned and placed on the Museum's G drive. A list of all photographs with details has been compiled. melbourne, tramways, trams, mmtb, hawthorn depot, sw6 class, w2 class, w3 class, w4 class, w5 class, w7 class, y class, y1 class, x2 class, sw5 class, l class, south melbourne per-way yard, tram 11, tram 3, tram 9, tram 485, tram 676, tram 672, tram 1024, tram 1034, tram 841, tram 469, tram 611, tram 612, tram 101, tram 102, tram 105, tram 826, tram 779, tram 741, tram 655, tram 467, tram 552, tram 582, tram 495, tram 334, tram 888, tram 951, tram 853, tram 892, tram 895, route 59, route 2a, route 88, route 42, route 9a, route 55, route 7, route 4, route 77, route 4b, route 1, route 69, route 64, route 5 -
 Ballarat Tramway Museum
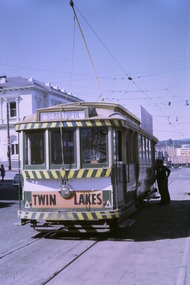
Photograph - Digital image Set of 11, Stuart Loddington, 10 images of Ballarat trams prior to closure, 1971
... and 10 images of Ballarat trams prior to closure, scanned from... Drummond St Sturt St tram 26 tram 27 tram 30 tram 17 tram 12 tram ...Yields information about Ballarat Tramways and trams prior to the closure of the tramway system.Set of 11 digital images, comprising 1 donation text image and 10 images of Ballarat trams prior to closure, scanned from original slides by Stuart Lodington, 1971 prior to closure of the system. .1 - Donation text slide. .2 - No. 26 southbound in Lydiard St North, with the Ballarat Railway Station level crossing gates in the background. .3 - No. 27 and 30 crossing at Bell St Loop, Skipton St. (see also btm4976i4) .4 - No. 17 Wendouree Parade, near Gardens Loop .5 - Single truck tram at Victoria St terminus, taken from the west side of the Buninyong Rail line bridge, with CRB Roadwork sign, Eureka Caravan Park and Meagher Hotel in the background, possibly No. 11, see entry for .10 .6 - No. 12 and 30 crossing at the Urquhart St Loop, Drummond St South. .7 - No. 12 westbound in Sturt St, with Grenville St in the background. .8 - No. 17 at Gardens Loop with the Trolley pole being reversed. .9 - No. 30, Lydiard St North with Reid's Palace building in the background. .10 - No. 11 passing over the Buninyong rail line bridge, with Gardens via Sturt St West and a Twin Lakes sign. Has a number of children alongside the driver. .11 - No. 21 heading northbound in Wendouree Parade, Gardens, just to the north of the now BTM depot junction.trams, tramways, ballarat, level crossings, buninyong railway, lydiard st north, bell st, victoria st, wendouree parade, gardens, drummond st, sturt st, tram 26, tram 27, tram 30, tram 17, tram 12, tram 21, tram 11 -
 Ballarat Tramway Museum
Photograph - Set of 8 colour 35mm slides of Ballarat Trams May 1971, Noel J Simons, 24/5/1971
... . 1172.7 - Bogie tram at the city terminus, on the south side... and the city terminus shelter. 1172.7 - Bogie tram at the city terminus ...Shows a sample of photographs taken about 3 months before the Ballarat Tramway system commenced to close.Yields information about various Ballarat Trams and the streetscape at the time prior to closure in August and September 1971Set of 8 Kodachrome transparencies taken on 24/5/1971 1172.1 - Tram 27 in Wendouree Parade, near Barrett Ave., with destination of Victoria St., passing a tram stop, with a seat and "Warning Oncoming Trams" sign mounted on the pole. Tram has a Twin Lakes advertisement on the front dash and a unknown roof advertisement. See also Reg. Item No. 1174.3 for a later photograph. 1172.2 - No. 32 entering Bridge St. from Sturt St. Photo taken after tram has passed photographer. Has Woolworths and Dickins stores in the background, and many motor vehicles. Tram has destination of Mt Pleasant 1172.3 - No. 13 in bound along Sturt St. West, near Alfred St. looking west along Sturt St. West. Has destination of Mt. Pleasant. 1172.4 - as for 1172.3, but closer up. 1172.5 - No. 17 west bound along Sturt St. passing the Town Hall, with Myers and Queen Victoria's statue in the background. Taken from the north side of Sturt St. through the median strip. 1172.6 - No. 13 at the City terminus, on the south side of Sturt St. with the National Mutual and other buildings up to the Town Hall in the background, including the fountain and the city terminus shelter. 1172.7 - Bogie tram at the city terminus, on the south side of Sturt St. looking from the central median strip, westwards. Has Town Hall in background along with other buildings. 1172. 8 - as above but with Scrubber car behind a bogie tram. Shows fountain and ESCo control box by a pole.wendouree parade, •tram stops, •bridge st, •sturt st. west, •murray st., •sturt st, •town hall, •scrubber tram, tram 27, tram 32, tran 13, tram 17, ballarat, tramways, trams -
 Bendigo Historical Society Inc.
Document - BASIL MILLER COLLECTION: BENDIGO SAYS GOOD-BYE TO THE TRAMS, c1972
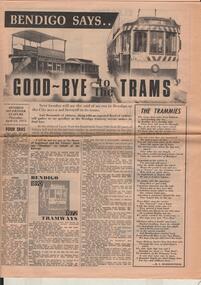
... 13 April 1972. Bendigo Says Good-bye to the Trams. A1 sheet... Hill line terminus - another tram will be leaving for its last ...13 April 1972. Bendigo Says Good-bye to the Trams. A1 sheet - double sided. Tramway history 1890 - 1972, 2 copies. At the stroke of 5 pm from Eaglehawk Town Hall clock 82 years of history will end as the last tram makes its sentimental journey to the city, while at the Bendigo Cemetery - the Quarry Hill line terminus - another tram will be leaving for its last resting place. Other articles include: Four Eras, of trams. The Trammies, covering Ballarat, Geelong in the form of a poem. 1927 and all that, by Basil Miller, remembering his 45 years of service with the trams. How it all started, The twin communities of Sandhurst and Eaglehawk were relatively early in considering the possibility of operating street tramways within their boundaries. Cabs, Battery Cars, Construction, Strikes, Bendigo 1890 to 1972 - Tramways. Man and his Mates, continued from previous page, Explosion, Touchy Task, A Quickey, Horrors. Electric in 1903, There was excitement galore in the City during April, 1903 - and the Advertiser recorded the progress of the new-fangled electric machine. One man's Memories, Tough times, humour, tragedy and comradeship - they all came flooding back as former Bendigo tramway-man Tom Griffiths recently turned the clock back. Keb Sir Keb Sir? 'Keg sir? Tram off the line,' was the call of the cabbies when a train pulled in at the Bendigo railway station. Altered Shopping Trend, With advent of the electric tram in Bendigo came change in shopping habits.bendigo trams -
 Ballarat Tramway Museum
Photograph - Digital image Set of 10, Tony Smith, 5/09/1971 12:00:00 AM
... at the City terminus, north side. Tram showing the destination... bogie tram at the city terminus north with the Town Hall ...Yields information about Ballarat Tramways and trams prior to the closure of the tramway system.Set of 10 digital images of Ballarat trams prior to closure, scanned from original slides by Tony Smith, 1971 prior to closure of the system. This set of slides, possibly on the last weekend of Mt Pleasant services - closure took place on 5/9/1971. . .1 - 17 at the City terminus, north side. Tram showing the destination of Sebastopol and has a Twin Lakes sign. .2 - 26 at the city terminus, south side with Geommola's Pharmacy and Kodak Film advert and Town Hall in the background. .3 - 43 at the City terminus, north side, with destination of Mt Pleasant. Has a number of men at the tram stop. .4 - 14 leaving Bridge St, crossing Grenville St into Sturt St, with destination of City. Has the Dickins and Woolworths Big W store in the background. .5 - 43 at Mt Pleasant terminus with conductor boarding the tram. Tram has destination of Gardens via Sturt St West. In the background is the corner store with adverts for The Sun, Womens Weekly, Coca Cola and Robur Tea. .6 - 43 and 26 Barkly St, about to arrive at the Grant St loop. Both trams inbound. .7 - 43, 26 and 27 at Grant St loop. .8 - 12 (Lydiard St Nth) and another bogie tram at the city terminus north with the Town Hall in the background. .9 - 39 outbound in Barkly St to Mt Pleasant - note the new bus stop signs on either side of the tram. 10 - 27 (City) and 26 turning from Barkly St into Main St with the Ampol petrol station, a general store advertising Escort cigarettes and The Age in the background . On the right hand side is a fish and chips shop advertising crays and drinks.trams, tramways, sturt st, city, grenville st, bridge st, mt pleasant, barkly st, grant st, main st, closure, tram 17, tram 26, tram 43, tram 14, tram 12, tram 27, tram 39 -
 Ballarat Tramway Museum
Slide - 35mm slide/s - set of 19, Noel Simons, 26/02/1972 12:00:00 AM
... terminus, night photo. Tram has arrived at terminus, showing... terminus, night photo. Tram has arrived at terminus, showing Quarry ...Set of 18 transparencies taken on 26/2/1972 on Kodak mounts. 1203.1 - Bendigo 5 at Eaglehawk terminus - with new traffic works. 1203.2 - No. 5 climbing the High St. hill Eaglehawk with the buildings on the east side in the photo. 1203.3 - No 2 descending the road over rail bridge at Job's Gully, heading for Quarry Hill. 1203.4 - as for 1202.3, but more side on. Tram has two SEC roof ads. 1203.5 - as for 1202.4 1203.6 - No. 26 entering Garden Gully Loop, Mt. Korong Road, Ironbark. Tram en route to Eaglehawk. Water column on right hand side of photograph. 1203.7 - No. 2 on the Eaglehawk route, Iron Bark area?, bound for Quarry Hill. 1203.8 - as for 1202.7, but photo taken after tram has past photographer. 1203.9 - No. 5 at Eaglehawk terminus, night photo. Tram has arrived at terminus, showing Quarry Hill, pole turned, but the tram lights have yet to be turned around. 1203.10 - as for 1202.9, but lights have been turned around. 1203.11 - No. 26 climbing the View St. Hill near the Commodore Hotel. Has Campbells Electrical Services building in the background. Photo taken after the tram has passed the photographer. 1203.12 - No. 7 end on photograph, at Golden Square, destination showing Golden Square - night photo. 1203.13 - number not used. 1203.14 - as for 1202.12, but partially side on, has a passenger looking out the tram. 1203.15 - as for 1202.12, but with hotel in the background. 1203.16 - No. 26 and 2 at Charing Cross, night photo. Tram 26 en route to Quarry Hill, 2 to Eaglehawk. 1203.17 - Interior photo of No. 26, at night. 1203.18 - No. 26 at the Quarry Hill terminus as night. 1203.19 - as for 1202.18, but central portion of the tramcar.Information written on in blue ink and date stamped on purple ink. 1203.1 - "No. 5 at Eaglehawk terminus" 1203.1 - "No. 5 in High St. Eaglehawk" 1203.3 - "No. 2" 1203.4 - "No. 2" 1203.5 - "No. 2" 1203.6 - "No. 26 at Garden Gully Loop Mt Korong Rd., Ironbark" 1203.7 - "No. 2" 1203.8 - "No. 2" 1203.9 - "No. 5 at Eaglehawk terminus" 1203.10 - "No. 5 at Eaglehawk terminus" 1203.11 - "No. 26 in View St. Near the Commodore Motel" 1203.12 - "No. 7 at Golden Square Terminus" 1203.14 - "No. 7 at Golden Square Terminus" 1203.15 - "No. 7 at Golden Square Terminus" 1203.16 - "Nos. 26 and 2 at Charing Cross" 1203.17 - "Interior of No. 26" 1203.18 - "No. 26 at the Quarry Hill terminus" 1203.19 - "No. 26 at the Quarry Hill terminus "tramways, trams, bendigo, eaglehawk, bridges, iron bark gully, night photo, quarry hill, golden square, tram 2, tram 5, tram 7, tram 26 -
 Ballarat Tramway Museum
Photograph - Black & White Photograph/s, Geoff Grant, 19/06/1955 12:00:00 AM
... 2610 for colour slide of this terminus and tram and 5898i6... Parade Ballarat Ballarat goldfields Trams Tramways Geelong ...A set of eight 2 1/4" square photographs mounted onto a sheet of manila cardboard - contact prints of each negative. Numbered from left to right, top to bottom are: 476.1 - SECV Ballarat No. 38, possibly at Victoria St - c1955.; 476.2 - SEC Geelong 8 and 39 at Eastern Park terminus - 2/4/1955 476.3 - SEC Geelong No. 4 out the front of the depot building - 8/1/1956 (Negative No. 368) - See Reg Item 7253 for a large format print. 476.4 - SEC Geelong single trucker and bogie at depot - 8/1/1956 (Negative No. 365) 476.5 - SEC Geelong - No. 18 at East terminus - last day of Chilwell 8/1/56 (Negative No. 366) - See Reg Item 7253 for a large format print. 476.6 - SEC Geelong - No. 1 - at a terminus (see also Reg item No. 485) (Negative 367) (See Reg. Item 2610 for colour slide of this terminus and tram and 5898i6) 476.7 - SEC Geelong - No. 1 - at depot - group of people standing in front. (Negative 364) - See Reg Item 7255 for a large format print. 476.8 - SEC Geelong - No. 1 entering depot portal night shot, 8/1/56 (Negative 369) - See Reg Item 7256 for a large format print. Negative envelope has the typed note "Some six views of Geelong trams on the last day of operations of the Chilwell line and East West line" Re 476.7 - See also Reg Item 5898i2 - photo by Keith Kings for a similar or same photograph. Re 476.8 - See also Reg Item 5899i1 - photo by Keith Kings for a similar or same photograph. hi res scan made and image updated 23/5/2020.Niltrams, tramways, geelong, chilwell, ballarat, east, closure , tram 8, tram 39, tram 4, tram 18, tram 1, tram 38 -
 Melbourne Tram Museum
Album - Photo Album, Michael Schrader, General tramway photos, 1995 - 1997
... at intersection of Riversdale and Glenferrie Road with parked trams. .2... and Glenferrie Road with parked trams. .2 - University terminus under ...Album - comprising 23 plastic photo holders in a interleaved pack glued to a heavy plastic sheet covered folder. Matching image and sheet numbers .1 - overhead issue at intersection of Riversdale and Glenferrie Road with parked trams. .2 - University terminus under construction (Dec. 1995) showing track layout and Bendigo tram 808 on City Circle outside Spencer St station and Bourke St. - 1995. .3 - New Exhibition Centre (Jeff's Shed) and trams 852 and A292 in Clarendon St. - Feb. 1996 .3a - Y469 on Zoo Tourist tram - 2/1995 and at the zoo. .4 - Y469 and Z3 200 at the zoo cross over and 469 using the cross over. .5 - Y469 crew photo and overhead work following trackwork in Domain Road at Domain Junction. .6 - Short shunts and bus replacements for Domain Junction works - Z69 and buses. .7 - Volvo bus 89 in Swanston St (replacement) an a view of the Burke Road overpass of the Freeway at Gardiner nearing completion. .8 - ditto showing the new widened level crossing at Gardiner and trams in the distance. Opened Dec. 1995. .9 - Photos showing widening of the freeway at Gardiner and relocation of the creek. .10 - Photos showing the construction of the turnout into the new Southbank Depot - cFeb. 1997. .11 - Photos of four trams and others at South Melbourne depot (closed 8/2/1997) including 981, 954, 923 and 1005 prior to fan trip to move the trams to Malvern Depot. .12 - Photo of one of the trams leaving the depot and two on Queensway Prahran. .13 - Trams 843 and 920 at South Melbourne and 843 and others at Whiteman St shunt. .14 - Tram 843 at Southbank depot entrance on the Port Melbourne Line. .15 - Restaurant trams 442, 937 and 939 at Southbank and tram 114 in Swanston St at Batman Ave. .16 - Z8 leads a fleet of Z class trams in Swanston St and Batman Ave and a large number of buses lined up in Spencer St - Grand Prix tram strike - 1997 .17 - buses buses - Latrobe St and Swanston St. .18 - ditto .19 - Relaying Hawthorn Bridge and relaying Dandenong Road .20 - Track relay Dandenong Road - centre median reserved track with rail wagons .22 - ditto .23 - lifting track into place. Two loose photos - Bundoora terminus, Grand Prix services and Grand Prix information booth.trams, tramways, mmtb, overhead, riversdale rd, glenferrie rd, university, spencer st, city circle, clarendon st, y class, z3 class, a class, trackwork, domain junction, swanston st, burke rd, gardiner, southbank, south melbourne depot, queensway, restaurant tram, dandenong rd, grand prix, bundoora, tram 808, tram 892, tram 292, tram 920, tram 200, tram 69, tram 981, tram 954, tram 923, tram 1005, tram 843, tram 442, tram 937, tram 939, tram 114 -
 Ballarat Tramway Museum
Photograph - Black & White Photograph/s set of 19, Mar. 1972
... ". 981.1 - Tram 21 at North Bendigo terminus, with level crossing... - Tram 21 at North Bendigo terminus, with level crossing ...Set of 19 black and white prints, all 89mm square of Bendigo trams, date machine printed on print is "Mar 1972". 981.1 - Tram 21 at North Bendigo terminus, with level crossing in background. Has destination "Golden Square" and two SEC roof ads. 981.2 - tram 2? at Eaglehawk, with destination "Depot", two SEC roof ads and "Leo A. Hughes Photographer" on side of building in background. 981.3 - tram 2? at Eaglehawk, side on view. 981.4 - tram 26 at Quarry Hill terminus looking back into city. 981.5 - tram 7 en route to North Bendigo at the site of the Bridge St. loop. Has a Peters Ice Cream truck and Sandhurst Fruit Juices truck on right side of photograph. 981.6 - tram 2 at Quarry Hill terminus. 981.7 - tram 2? at one of the loops on the Eaglehawk line, inbound? 981.8 - bogie tram at Charing Cross with fountain in background. Side on view looking south. 981.9 -trams 7 and 21 on Golden Square/North Bendigo line with bogie tram in background, at Charing Cross. Same as item 972. 981.10 - bogie tram at Charing Cross - has buildings in south west corner in background, including Colonial Mutual Life and an advertisement for the Herald newspaper. 981.11 - trams 25, 7 and two other trams at Charing Cross. 981.12 - trams 2 and 26 and three others at Charing Cross. 981.13 - tram 25 at Golden Square terminus, with Rodda's Golden Square Hotel in the background. Tram showing destination of "Nth Bendigo" 981.14 - tram 24, showing "Special" on depot access track. Has two Johnnie Walker roof ads on side. 981.15 - as above, but tram on bridge outside depot. 981.16 - trams 25 and 28 at depot 981.17 - tram 24 showing "Special" on depot access track with a single truck car in background. 981.18 - trams 2 and 26 at Charing Cross. Has advertisements for "Armstrong Tyre Service" and "Cohn's drinks" on buildings in background. 981.19 - Bendigo 2 at location?, about to enter a loop or double track section. Has hotel in background. On rear of each photo in the top left hand corner is a print number 1 to 19 in ink and location notes, generally "Bendigo"trams, tramways, charing cross, bendigo, golden square, quarry hill, tram 2, tram 21, tram 7, tram 24, tram 26 -
 Melbourne Tram Museum
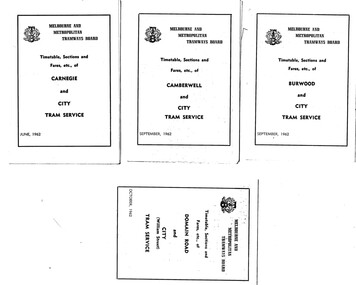
Ephemera - Timetable, Melbourne & Metropolitan Tramways Board (MMTB), Set of 30 MMTB tram timetables, 1962
... information on tram times at the terminus, sections and fares, running..., day of week giving information on tram times at the terminus ...Demonstrates a set of MMTB 1962 timetables.Set of 30 MMTB tram timetables, folded sheets, 4 fold, providing timetables for specific routes, day of week giving information on tram times at the terminus, sections and fares, running times. Some signed by W. J. Richards as Acting Traffic Manager, or R. C. Drummond as Traffic Manager. Route Numbers not given on cover, generally given on inside. Where a All night service was applicable, shown as well. .1 - Burwood - City - 9/1962 .2 - Camberwell - City - 9/1962 .3 - Carnegie - City - 6/1962 .4 - Domain Rd - City - 10/1962 .5 - East Brighton - City - 6/1962 .6 - East Coburg - city - 9/1962 .7 - East Malvern - Darling Rd - City 27/5/1962 .8 - East Preston - City - 11/1962 .9 - Essendon Aerodrome - City - July 1962 .10 - Essendon (Matthews Ave) - City - 7/1962 .11 - Glen Iris - City - 8/1962 .12 - Hawthorn - Spencer St - 7/1962 .13 - Kew Cotham Rd - St Kilda Beach - 8/1962 .14 - Malvern Burke Rd - City - 8/1962 .15 - Mont Albert - City - 7/1962 .16 - Moreland - City - 9/1962 .17 - West Coburg - City 7/1962. .18 - North Balwyn - Spencer St - 7/1962 .19 - North Coburg - City - 6/1962 - has Sunday only Fawkner Railway station service on rear - 6/1962 .20 - North Richmond - Prahran and St Kilda Beach - 7/1962 .21 - Northcote (via St Georges Rd) - City - 7/1962 .22 - Prahran - City - 7/1962 .23 - South Melbourne and St Kilda Beach - City - 6/1962 .24 - St Kilda Beach - City - - 9/1962 .25 - Toorak - City - 8/1962 .26 - Wattle Park - Elgar Rd - City - 9/1962 .27 - West Maribyrnong - City - 7/1962 .28 - West Preston - City - 6/1962 .29 - West Coburg - City - 10/1962 ,30 - East Preston - City - 7/1962Some have "Robert Wilson" stamp on the covers.trams, tramways, timetables, tickets, fares, mmtb, all night services -
 Ballarat Tramway Museum
Slide - 35mm slide/s, Noel Simons, 21/11/1962 12:00:00 AM
... at the terminus, showing ads for "Melbourne Bitter". Tram has two SEC... at the terminus, showing ads for "Melbourne Bitter". Tram has two SEC ...Set of 17 transparencies taken on 21/11/1962 on Kodak mounts. 1188.1 - Bendigo No. 11 at Depot Junction McCrae and Arnold St. with driver/conductor changing points. 1188.2 - Bendigo No. 4 at Charing Cross, side on photo, with City Club Hotel and Alexandra Fountain in the background. Tram has Castrol and SEC 'Electric Cooking' ads. 1188.3 - Bendigo No. 4 climbing View St. after tram has passed photographer. Tram has Streets Ice Cream and Cohns Soft Drinks ad on rear dash panel. In the background are the buildings in View St., including the Princess Theatre. Tram has destination of Eaglehawk. 1188.4 - Trams 2 and 4 crossing at the California Gully or Thorpe St Loop. 1188.5 - Bendigo 4 in Mt Korong Road. Tram inbound with destination of Quarry Hill, just leaving Garden Gully Loop. 1188.6 - Bendigo 4 and 17 crossing at the Hayes St. or Iron Bark Gully Loop. No. 17 bound for Eaglehawk, No. 4, Quarry Hill. 17 has two SEC roof ads and a white horse whiskey ad. 1188.7 - No. 17 bound for Eaglehawk, soon after leaving California Gully. Has large mullock heap in background. 1188.8 - Bendigo 2 and 17 crossing at the Thorpe St. or California Gully Loop. Has butchers shop in background. 1188.9 - Bendigo 17 at the Eaglehawk terminus. Has destination of Quarry Hill. In background is the hotel and shops at the terminus, showing ads for "Melbourne Bitter". Tram has two SEC 'Electric Cooking' ads. Driver and conductor about to assist two lady passengers with a pram and baby. 1188.10 - No. 17 at Eaglehawk terminus, awaiting departure. Has Eaglehawk Town Hall and Post Office in background. Tram has a Whitehorse Whiskey ad on the front dash panel. 1188.11 - No. 3 in High St. Eaglehawk, with destination of Eaglehawk. Has the shops on the south side of High St. in the background, including the Eaglehawk fish shop. Tram has two roof ads, one an SEC roof ad, and Cohns Drinks and Streets Ice cream ads on front dash panel. 1188.12 - as above, but after tram has passed photographer. Note the centre of the road poles. 1188.13 - No. 2 outbound for Eaglehawk at the intersection of Mt. Korong Road and the Calder Highway. Photo taken after the tram has passed the photographer. Has an Ampol service station in the background. 1188.14 - No. 11 leaving the Bendigo depot, crossing the bridge, with the Scrubber car in the background. 1188.15 - No. 21 at the North Bendigo terminus. Tram has destination of Golden Square and Cohns drink ad on front dash and two roof ads on side. 1188.16 - No. 11 on Golden Square route, in High St. at intersection with Old High St. 1188.17 - No. 11 at the Golden Square terminus, conductor turning the pole. Hotel on the left side of the photo. Note the road works barrier and red flag behind the tram. Slide has an end of roll mark on the right hand side of the image.Information written on in black ink and date stamped on purple ink. 1188.1 - "Birney car No. 11 in McCrae St. at Cnr of Arnold about to run into depot, Bendigo" 1188.2 - "No. 4 at Alexandra Fountain, Charing Cross Bendigo" 1188.3 - "No. 4 climbing the View St. Hill from Charing Cross, Bendigo (Eaglehawk Route)" 1188.4 - "No. 4 and 2 at Thorpe St. Loop, California Gully" 1188.5 - "No. 4 in Mt Korong Rd., Long Gully, Near Havilah Rd. (Bendigo) (Eaglehawk Route)" 1188.6 - "Nos. 17 and 4 crossing on Hayes St. Loop, Ironbark, Bendigo" 1188.7 - "No. 17 soon after leaving California Gully (Eaglehawk Route)" 1188.8 - "No.2 and 17 crossing on Thorpe St. Loop, California Gully (Eaglehawk Route)" 1188.9 - "No. 17 at Eaglehawk terminus" 1188.10 - "No. 17 at Eaglehawk terminus" 1188.11 - "No. 3 in High St. Eaglehawk" 1188.12 - "No. 3 nearing Eaglehawk terminus" 1188.13 - "No. 2 in Mt. Korong Rd., Ironbark. Calder highway on left (Eaglehawk route) 1188.14 - "Birney car No. 11 leaving Bendigo depot. Scrubber car at rear" 1188.15 - "No. 21 at North Bendigo Terminus" 1188.16 - "Birney car No. 11 in High St. Bendigo at intersection with Old High Street (Golden Square Route)" 1188.17 - "Birney Car No. 11 at Golden Square terminus, High St., Bendigo". tramways, trams, bendigo, depot junction, charing cross, view st., eaglehawk, north bendigo, golden square, tram 2, tram 3, tram 4, tram 11, tram 17, tram 21, tram scrubber -
 Ballarat Tramway Museum
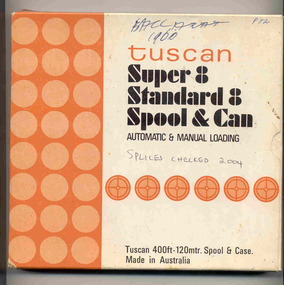
Film - Movie Film & Box, Kodak, 1960
... terminus “Trams leave here for Sebastopol, Gardens, View Point.” 4... of the sign at the City terminus “Trams leave here for Sebastopol ...Yields information in movie film format of Ballarat trams in 1960, how the system operated and was used by people., Yields information in movie film format of Ballarat trams in 1960, how the system operated and was used by people.Movie film - 8mm, approx. 17.5 mins, with leader strip on a plastic reel, within a black and white plastic box, titled "Ballarat No. 1. 1960" contained with a cardboard box, 'Tuscan Super 8 and Standard 8 Spool and Can' . Has been transferred to DVD - see Reg item 4100 as Segment No. 1. Filmed and made by Ben Parle. Also transferred to DVD by Rod Cook Oct. 2015, via Roger Greenwood for use in his DVD, "The City of Ballarat Trams, Gardens & Gold" of 2016. See Reg Item 6883. Synopsis: based on time. 0:00 Starts with bogies cars crossing railway level crossing (34?, 39?) 0:30 SEC Logo 0:45 Ballarat Station sign and intro “Some City Scenes” 0:49 35 turning from Lydiard St Nth to Sturt St towards Grenville St with Commonwealth Bank in view. and then 42 returning 1:19 42 showing Mt Pleasant, turns from Sturt St into Lydiard St Nth 1:53 Tramway road works in Lydiard St Nth, near intersection with Mair St with Jelbart Road roller in use, starts with an SEC roadworks sign. 2:12 39 passing the works out bound to Lydiard St Nth. 2:46 Good view of the roller working before 35 arrives. 3:01 35 passing the works in bound with 3:29 14 crossing Lydiard St in Sturt St, towards Grenville St 3:47 Trams in City Loop 3:55 21 coming up the hill 4:04 31 entering Bridge St from Sturt St with Bucks Head Hotel in the background. 4:27 Overhead work at corner of Sturt and Lydiard, with view of the sign at the City terminus “Trams leave here for Sebastopol, Gardens, View Point.” 4:34 Passengers getting off and then onto 38, ex Lydiard St Nth at city terminus including a young lady wearing gloves and a wheeling a pram hurriedly the photographer. A number of other prams in the view as well as. The Conductor helps to unload the pram. 5:07 41 proceeding up Sturt St, appears to have just rained. 5:26 11 using the Dawson St crossover, with a motor car doing a U turn as well. 6:00 14 descending Sturt St towards the City, filmed at Dawson St. 6:11 Title “The Gardens via Drummond St North Line” 6:16 19 showing Victoria St, turning from Drummond St Nth into Sturt St. 6:28 30 inbound in Drummond St Nth, approach and trailing shots. Trailing shot ahs the hospital in the background. 6:49 31 outbound, Drummond St Nth, approach and trailing shots, trees are in autumn colours. 7:04 12, inbound Drummond St Nth, with Macarthur St in the background, stopping to pick up a lady, approach and trailing shots and then entering the Mill St crossing loop. 7:53 14 outbound in Drummond St Nth, dropping a lady passenger off and then turning into Macarthur St and then tram going away. 8:37 View of overhead junction at View Point Jtn. 8:45 View of “Cars Stop Here” sign and pole sign “To City Only” 8:55 30 inbound in Wendouree Parade, stops to pick up passenger, and then a trailing shot of tram entering Macarthur St loop 9:37 View of “Cars Stop Here”, “End of Section” and timetable boards at Haddon St. 9:50 34, pausing at Haddon St and then proceeding towards depot – approach and trailing shots, with “Warning Oncoming Trams” sign in shot. 10:27 “Warning Oncoming Trams” sign 10:32 34 crossing 12 at the Martin Ave loop 10:48 39? Wendouree Parade, near Barrett Ave, stopping and letting off passengers. 11:24 30 passing depot junction and then trailing shot of it entering Tram Sheds or Depot Loop and then proceeding towards the City. 12:11 Shot of the “Caution Beware of Trams” sign at the depot. 12:14 25 stopping at depot junction and then trailing shot of it going toward Forrest St. 12:47 12 passing Depot Junction, trailing shot. 13:07 Shot of :Electricity Supply Department, Ballarat Branch” sign at depot. 13:13 View of a destination showing “Depot” on a bogie tram 13:15 Title “Some Depot Scenes” 13:19 View of a trolley pole and then 13 leaving the depot through the gates, destination showing “View Point”. 13:54 View of trolley pole and then 32 stopping at the depot gates. 14:08 12 (Sunny view) running out onto Wendouree Parade and then a bogie tram approaching Depot Loop. 14:43 View of 42 running in with a single trucker behind in Wendouree Parade, and another single trucker running out. 15:02 Title “Some Scenes in the Gardens” 15:05 25 running through the Gardens, approach and trailing shots, near our Depot Junction. 15:55 View of “No Parking East of Loop” sign 15:59 View of overhead and then trackwork (with points removed), but overhead still in position at the Old Gardens Loop or Gardens South Loop and then 12 entering the loop from the south and then a trailing shot looking along the Parade. 16:33 View of “Cars Stop Here” and “End of Section” and then timetable boards at Gardens Loop. 16:55 View of 34 leaving the loop 17:14 Title “The End”Written labels giving title information on outside of box.trams, tramways, ballarat, sebastopol, lydiard st north, victoria st, mt pleasant, sturt st west -
 Ballarat Tramway Museum
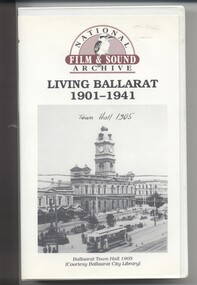
Film - Video cassette tape and box, Chris Long, "Living Ballarat 1901 - 1941", 1990
... climbing Sturt St, Town Hall, tram at Lydiard St terminus coursing... climbing Sturt St, Town Hall, tram at Lydiard St terminus coursing ...Yields information through movie films of the 1960's of Ballarat trams operating in the streets of Ballarat and has a strong association with the maker - National Film and Sound Archives and Chris Long.Video cassette in a plastic case, titled "Living Ballarat - 1901 - 1941, National Film and Sound Archive (1990)". See Reg item 4519 for the DVD version. The DVD was made by Peter Winspur using this tape. Transferred to the Hard Drive 11/1/2010- AV Files - dB text/AV Files/Reg Item 4519/Video_TS (at 12/1/2010) Copyright provisions - National Film and Sound Archive - segments may not be used without their permission, viewing only. Synopsis: based on time - 0.00 - intro, 1901 film, Melbourne, first film in Ballarat, Royal visit to Ballarat, Boer War Monument, first feature length film in Ballarat. 2.50 - Bridge St and Sturt St scenes, filmed from a flat truck pushed by an electric tram, including No. 11 going to City Oval to Lydiard St. 5.00 - Sturt St Military parade, with trams in background and tram running alongside. 6.54 - scene of Alfred Hall and films. 7.32 - scene on Lake Wendouree and paddle steamer - Living Ballarat film - Pathe's Ballarat Gazette local film unit, football ground scene. a children's beauty competition, tree planting at Macarthur St state school, 1911 Ballarat Show, unveiling of the Boer War statue name plates, Lake Wendouree 1912. 13.22 - St Patricks David Pde with trams in the background. 14.24 - Ballarat Kennel club dog show. 15.50 - Royal visit in 1920, Arch of victory opening 17.48 - Day at Macarthur St state school and tree plantation 20.55 - Bakery Hill - Stones Corner with tram tracks, cars, little trams, Sturt St with a tram leaving Grenville St, ESCo 9 turning from Lydiard St to run down to Grenville St. 22.15 - Ballarat Show, Coliseum Hall, 1925, races, machinery shows, boxing troupe. 25.20 - Botanic Gardens Gates, Lake Wendouree area. 25.30 - Gem Picture travelling show - film 26.16 - Formal visit of English pressman to Ballarat, 1925, Botanic Gardens, Eureka Stockade, Avenue of Honor, Moorabool Reservoir. 29.15 - 1927 Fed Govt doco of Ballarat, Black Hill, 1927 Home to Ballarat Festival, Ballarat Commemorative song, Craigs Hotel, Ballarat Post Office, tram centre poles in Lydiard St, tram climbing Sturt St, Town Hall, tram at Lydiard St terminus coursing, 8, Sturt St, view of ESCo Sebastopol car leaving Grenville St, Selkirks Brickworks, the Welcome nugget, Peter Lalor statue, Eureka stockade, sewerage plant, modern housing, Sturt St west, water supply - golf club, the High School, the orphanage, fine homesteads around Ballarat, Lake Wendouree. 41.00 Opening of the Ballarat Aerodrome. 43.11 - Depression work and leading into radio broadcasting - 3BA open 1930, typewriters, radio transmission equipment, radio aerials, boys listening to crystal sets 47.50 - Bluebirds Children session tour to the Gardens, mentions the BTPS, trams 13, 3? and 14 carrying visitors arriving and getting off and picnic. 48.50 - expansion of 3BA transmitter capacity 51.30 - 1934 visit of the Duke of Gloucester - visit to the Lucas factory, views of the work floor and the factory history and then South St band competition at the Showgrounds. 55.10 - South St Music Festivals, Coliseum and fire. 56.25 - Ballarat Floral Festival March 1938 - Victorian Railways arch of welcome. 57.25 - segment in the shot of 12 and 19? in Sturt St 57.45 - colour segment of the festival, 58.39 - Grenville St tram shelter, Bridge St, Sturt St, arches, Main Road, Council Road Roller, Victoria St, Eureka Stockade Reserve, Botanic Gardens, setting up the flowers, wax papers. 1.01.48 - decorated tram, north side of Sturt St, details of the materials used, Crockers. 1.03.20 - Hospital Fund Raising Gala Day - March 1938, special trains arriving Ballarat Railway Station, fund raising procession, pageant at the Showgrounds, fly past. 1.07.35 - 1939 Summer, motor cycle races at Learmonth, City Oval fire brigade demonstrations, Ballarat (East) Fire Station decorated for the 1939 Floral Festival with tram in the background and No. 29, Floral Tram and others. 1.09.25 - July 1914 - Ballarat at War parade, troops. 1.10.10 - credits. Box has images of a tram and town hall on the front and details of the contents on the rear and who made it etc. See images for details. ballarat, 3ba, floral tram, royal visit, buildings, esco -
 Melbourne Tram Museum
Album - Ron Scholten Slide Collection, Ron Scholten
... X2 680 at Point Ormond Terminus RSC15 An ex Launceston Tram... X2 680 at Point Ormond Terminus RSC15 An ex Launceston Tram ...Photo - see pdf file for further information. Number Brief Description RSC1 PCC 1041 at the gates of Preston Workshops on a test run without it’s trolley retriever RSC2 PCC 1041 in Glenhuntly Road on Route 67 en route to Carnegie crossing the Railway Gates at Glenhuntly Station RSC3 W2 482 stored at Malvern Depot with Olympic Park on the Destination RSC4 Cable Car Set 64 in Swanston St outside Princess Bridge Station in Bound with open top Double Deck Bus, Trak Motors ? Departing from Flinders St Station RSC5 W3 669 in St George Rd at Sumner St en route to Preston Workshops for scrapping RSC6 Cable Car in Lygon St en route to Carlton RSC7 PCC 1041 turning from St Georges Rd into Miller St to enter Preston Workshops RSC8 Flinders St Station with cable cars RSC9 PCC 1041 in strife on it’s maiden day in service. Trams on route 88 delayed in Queens Parade Clifton Hill RSC10 Flinders St at William St with Cable Cars RSC11 L 104 on the fan of the new shed at Malvern Depot on a TMSV tour RSC12 Cable Set 1 after it’s restoration at Preston Workshops on the fan near the front gate RSC13 X1 466 at a suburban terminus of the Footscray System RSC14 X2 680 at Point Ormond Terminus RSC15 An ex Launceston Tram at the outside terminus of the Penny Royal Complex Tramway in Launceston RSC16 Q 148 at Preston Workshops awaiting disposal RSC17 Elizabeth St with Cable Cars RSC18 Elizabeth and Bourke St corner outside the GPO with cable cars RSC19 Collins St with Cable Cars RSC20 A photo taken from the observation deck of the ICI building showing a view of Parliament house with a w class tram in Nicholson St RSC21 Auburn Horse car with a posed photo of all the tramwaymen employed RSC22 Cheltenham Double Deck Horsecar with a full load of passengers RSC23 City of Northcote cable trailer 3 at a terminus RSC24 City of Northcote Cable cars passing in High St Northcote RSC25 St Kilda Rd at Princes Bridge with Cable Cars RSC26 Flinders St with Cable Cars RSC27 Cable Cars RSC28 Bourke St looking towards Elizabeth St from Queen St RSC29 Cable cars in Bourke St at Elizabeth St looking East RSC30 Cable cars in Elizabeth St at the terminus at Flinders St RSC31 Cable cars in Bourke St at Swanston St looking west RSC32 Cable cars in Swanston St at Flinders St looking North RSC33 Cable cars in Collins St near Russell St RSC34 Cable cars in Elizabeth St at Bourke St RSC35 Cable cars in Collins St at Elizabeth St RSC36 Cable Cars in Swanston St at Flinders St RSC37 Cable cars in Collins St RSC38 Cable Cars RSC39 Cable cars in St Kilda Rd near Princes Bridge RSC40 Cable cars in Collins St East of Swanston St RSC41 Cable cars in Spring St outside Parliament house RSC42 K 92 in M&MTB Chocolate and cream livery but with a P&MTT Destination box on Route 14 RSC43 Thornbury depot viewed from Miller St and St Georges rd. Two W2 class cars are laying over between the peaks RSC44 Z3 201 in Met Livery passes D1 3510 in new M Tram livery. A Staff member in uniform stands in the doorway. Dandenong Rd RSC45 D1 3530 advertising Heinekin Super Golf on Route 55 in Royal Park RSC46 D1 3504 in M Tram livery on the reserved track in Matthews Ave near Essendon Airport showing Route 81 Travancore . I suspect it is a private enthusiasts charter due to the Malvern W class run number in the rear windscreen RSC47 D1 3504 on Route 64 in Dandenong Rd in M Tram Livery RSC48 D1 3504 in M Tram Livery at Airport West Terminus RSC49 D1 3504 in M Tram Livery in Union Rd outside the Showgrounds RSC50 D1 3504 at West Maribyrnong Terminus in M Tram Livery RSC51 D1 3503 in M Tram Livery in Malvern Depot RSC52 SW6 960 and VR 53 in Harbour Esplanade for the NMEL&T Co Centenary RSC53 Hawthorn Tramways Trust 32 in Harbour Esplanade for the NMEL&T Co Centenary RSC54 VR 53 & B 2042 in Harbour Esplanade for the NMEL&T Co Centenary RSC55 VR 53 & C 3016 in Harbour Esplanade for the NMEL&T Co Centenary RSC56 NMEL&T Co 13 usually V214 in Harbour Esplanade for the NMEL&T Co Centenary RSC57 NMEL&T Co 13 usually V214 at Preston Workshops for the NMEL&T Co Centenary RSC58 Hawthorn Tramways Trust Lettering on HTT 32 in Harbour Esplanade for the NMEL&T Co Centenary RSC59 Hawthorn Tramways Trust 32 in Harbour Esplanade for the NMEL&T Co Centenary RSC60 Hawthorn Tramways Trust 32in Harbour Esplanade for the NMEL&T Co Centenary RSC61 Hawthorn Tramways Trust 32 in Harbour Esplanade for the NMEL&T Co Centenary RSC62 NMEL&T Co 13 usually V214 at Preston Workshops for the NMEL&T Co Centenary RSC63 W2 516 and another on route 59 wait to shunt at Essendon Airdrome Terminus as W2 571 on route 49 departs. This was the last day of operation. RSC64 Australia’s First Electric Tram at Box Hill with Tramwaymen including H J Hilton who is in the centre RSC65 W2 484 en route to St Kilda Junction and another wait for passengers after a race meeting at Caulfield Racecourse RSC66 X1 463 on the Footscray system en route to Russell St RSC67 Geelong 35 on Chilwell Route, Formerly HTT 13, M&MTB 119, then Bendigo 1 and Ballarat 37 RSC68 P&MTT 4 on Opening Day of the system in Glenferrie Rd RSC69 Bendigo 6 in McCrae St near the Depot end route to North Bendigo RSC70 P&MTT 4 in Glenferrie on opening day of the System RSC71 Scrubber 3 stripped and awaiting scrapping at Preston Workshops RSC72 Scrubber 4 at South Melbourne Depot RSC73 Q 191 & 139 at Preston Workshops awaiting scrapping RSC74 Rail Grinder 3 at Preston Workshops as purchased from Sydney RSC75 Y 469 waits to shunt at Wattle Park Terminus as Y1 613 departs on driver training duties RSC76 VR 53 on the outside roads at Essendon Depot RSC77 W5 796 with three doors and square windows running out of Brunswick Depot in Cameron St, with a supplementary destination board showing “City via Swanston St” RSC78 W2 258 on the wheel grinder road at Brunswick depot RSC79 X2 676 on a TMSV tour, W5 817 & 836 & VR 53 on the open roads at Essendon Depot RSC80 PCC 1041 on test, passes W71035 in High St Preston RSC81 D1 class production number 7 as delivered on test in Matthews Ave RSC82 W2 383 on route 5 turning from the reserved track in Dandenong Rd into St Kilda Rd at St Kilda Junction RSC83 Z3 204 as advertising tram for Vodaphone Grand Prix running into Malvern Depot new shed RSC84 Z1 4 on test in St Georges Rd RSC85 PCC 1041 on Route 96 in Burke St near Exhibition St RSC86 Z1 3 without numbers on test turning from Miller St in St Georges Rd RSC87 Track components stored in Coldblo Rd at Malvern Depot with Z class cars adjacent RSC88 D1 3501 in M Tram Livery on Route 55 in Peel St at Franklin St RSC89 C 3001 in Yarra Trams Livery Porto 018 & D13502 in M Tram Livery on Display in Harbourside Esplanade RSC90 D1 class tram production number 7, in as delivered condition on test in Matthews Ave RSC91 D1 3503 inside Malvern Depot RSC92 SW6 955 and W6 974 in St Kilda at City Rd at Dusk RSC93 Freight Car 19 at Preston Workshops in green Livery RSC94 Rail Grinder 3 in green Livery at South Melb Per Way Yard RSC95 A SW6 class car on route 50 shunting at Elizabeth St Terminus at night, taken from Flinders St Station RSC96 W2 588 & 435 in St Kilda Rd at Batman Ave RSC97 Y1 613 in service at Wattle Park Terminus RSC98 W2 588 in Wellington Parade en-route to the City with a Grand Final Load of passengers followed closely by 384 RSC99 W2 558 on a MCG Footy Special entering the Simpson St sidings RSC100 W3 657 & an L Class in the new shed at Malvern Depot RSC101 Y1 613 in St Kilda Rd on an enthusiasts tour in St Kilda Rd south of St Kilda jun RSC102 Y1 613 on an enthusiasts tour in Clarendon St with the two extra tracks on the Viaduct under construction RSC103 W6 976 on the fan of the new shed at Malvern Depot RSC104 W7 1024 as an advertising car for Bank of NSW at the route 1 terminus at South Melb Beach RSC105 PCC 980 on route 96 in Nicholson St near North Fitzroy Depot RSC106 SW6 890 with dash canopy lighting in Market St on the opening day of William St Services RSC107 W2 444 with big numbers heads a line of footy specials in Simpson St Sidings RSC108 Cable Cars in Elizabeth St RSC109 NMEL&T co 2 with a trailer outside the power station in Mount Alexander Rd RSC110 Alf Twentyman’s cable car set in his Northcote backyard RSC111 Cable Cars in Queens Parade Clifton Hill RSC112 Cable cars in Collins St outside the Townhall RSC113 PCC 1041 at Carnegie terminus RSC114 Cable cars in Elizabeth St RSC115 Cable cars in Collins St near Swanston St RSC116 HTT 19 turns from Riversdale Rd into Camberwell Rd at Camberwell Junction RSC117 W1 419 official builders photo of first car of the class RSC118 Cable car with a full load of passengers RSC119 W1 422 illuminated for the visit of T.R.H. The Duke and Duchess of York RSC120 PCC 1041 in strife on it’s maiden day in service. Trams on route 88 delayed in Queens Parade Clifton Hill RSC121 Bendigo birney in Finn St near North Bendigo terminus RSC122 SW6 in St Kilda Rd at Domain Rd at night RSC123 All 3 of Alf Twentyman’s cable cars in his Northcote backyard RSC124 Cable trailer 256 being unloaded into the shed at Bylands RSC125 Cable grip car 1 being removed from the Melbourne Museum RSC126 Alf Twentyman's cable cars in his Northcote Backyard RSC127 Alf Twentyman's cable cars in his Northcote Backyard RSC128 Alf Twentyman's cable cars in his Northcote Backyard RSC129 Alf Twentyman's cable cars in his Northcote Backyard RSC130 W class car in Swanston St at Collins St RSC131 Y1 469, L & W3 on the run out of Glenhuntly Depot on a tour RSC132 W7 1024 as an advertising tram for Bank of NSW at Clifton Hill RSC133 W2 496 on a footy special in Simpson St Sidings RSC134 W2 as originally converted to a test car at Preston Workshops RSC135 W3 667 in Brunswick Depot with Ellen Butland at the controls RSC136 W3 669 on it’s final run at Victoria Prd & Brunswick St RSC137 W2 571 in Wellington Prd at Clarendon St with a Footy Final load of Passengers RSC138 Y1 613 shunts at Spencer St Terminus as X217 waits on Australia Day Pageant RSC139 PCC 1041 on Rt 96 in Burke St outside the Southern Cross Hotel RSC140 890 with accident damage on the outside roads at Preston Workshops c1978 RSC141 535 on Rt 4 at the old St Kilda Jun c1967 RSC142 1041 on Rt 88 turns from Bourke St into Spring St 1973 RSC143 102 on a tour at Albert Park Beach Terminus Feb 1972 RSC144 833, 835 & 834 in the shed at Malvern Depot c1976 RSC145 281 in Wellington Parade on a football very crowded special c1974 RSC146 464 Ballarat Rd 1960 RSC147 181 Explosives Fty - at Footscray Station - July 1960 RSC148 181 Williamstown Road 1960 RSC149 Cable car set at Alf Twentyman’s c1970 RSC150 X 217 at Malvern Depot c1970 RSC151 X1 465 and T181 Footscray Football ground in Barkly St. c1960 RSC152 Scrubber 5 at South Melbourne depot c1960 RSC153 X1 465 Footscray to Russell St, c1960 RSC154 X1 467 Leeds St Footscray 1960 RSC155 PMTT 4 Glenferrie Road, 1910 RSC156 S 164 at Malvern Depot c1970 RSC157 T178 Footscray c1960 RSC158 Cleaner No. 7 at South Melbourne depot c1960 RSC159 Two Y classes at Princes Bridge / Batman Ave mid 1950s RSC160 Swanston St – Nu color vue slide – M142 Demonstrates the work of Ron Scholten in photography, collection and/or production of duplicate slidesAssembled album in a black presentation folder of 160 colour slides, 8 slide sleeves, collected or produced by Ron Scholten. Many are TMSV or Windsor Publications slides. All photographs have been scanned and placed on the Museum's G drive. A list of all photographs with details has been compiled. melbourne, tramways, trams, cable trams -
 Ballarat Tramway Museum
Album - Postcards & Photographs - Vic Solomons and others - Australian Tramways, Vic Solomons, 2023
... Card Tram 7 at Trevallyn Road Terminus Launceston Tasmania... Card Tram 7 at Trevallyn Road Terminus Launceston Tasmania ...Contains 184 images of postcards and photographs collected primarily by Vic Solomons of Sydney, with others from the collection of Wal Jack and Warren Doubleday. Covers almost all of Australia's tramway systems. 1 Post Card Hay St Perth Looking East No 3 Unknown Perth 2 Post Card Cars 30 & 90 both on Route 19 pass in Barrack St looking South Perth WA 1935.02.18 Perth 3 Post Card Hay St Looking East Perth WA Unknown Perth 4 Post Card William St Perth WA Unknown Perth 5 Post Card Perth from Shaftsbury Hotel Unknown Perth 6 Post Card Hay St Perth WA Looking East Unknown Perth 7 Post Card Barrack St Perth Unknown Perth 8 Post Card Murray Views No 3 High St Showing Town Hall Fremantle WA Unknown Fremantle 9 Post Card High St Fremantle WA Unknown Fremantle 10 Post Card View of Bolder City Golden Mile in the Background (Section No 1) 1908.08.20 Kalgoolie 11 Post Card Hannan St Kalgoolie 1900.08.19 Kalgoolie 12 Post Card Hannan St Kalgoolie WA (No 2) Unknown Kalgoolie 13 Post Card Intersection Hannan & Maritana Sts Kalgoolie WA Unknown Kalgoolie 14 Post Card Hannan St Kalgoolie Unknown Kalgoolie 15 Post Card Lane Street Bolder City Unknown Kalgoolie 16 Post Card Hobart Double Deck Tram Unknown Hobart 17 Post Card Macquarie St Hobart Unknown Hobart 18 Photo Liverpool Street Hobart Unknown Hobart 19 Photo Hobart 21 Unknown Hobart 20 Photo Hobart 14 in Elizabeth St Hobart Unknown Hobart 21 Post Card Macquarie St Hobart Unknown Hobart 22 Post Card Macquarie St Hobart Tas Unknown Hobart 23 Photo Double Decker Tram 3 at G.P.O. Hobart Tas No 31 Unknown Hobart 24 Post Card Double Decker Tram 19 Hobart Tas A B Series No 24 Unknown Hobart 25 Photo Hobart Municipal Tramways Tas No 95 Unknown Hobart 26 Post Card Elizabeth St Hobart Unknown Hobart 27 Post Card Elizabeth St Hobart Unknown Hobart 28 Post Card Elizabeth St Hobart Unknown Hobart 29 Post Card Elizabeth St Hobart Tas Unknown Hobart 30 Post Card HMT 21 with crew at Beach Road Terminus Unknown Hobart 31 Post Card HMT 9 & another with crew at Beach Road Terminus. Front cover photo of Destination GPO 1921.01.00 Hobart 32 Post Card Cascade Road and Mount Wellington Hobart Unknown Hobart 33 Post Card Elizabeth St Hobart Unknown Hobart 34 Post Card Elizabeth St Hobart Unknown Hobart 35 Post Card Elizabeth St Hobart 1915.04.07 Hobart 36 Post Card Macquarie St Hobart Tas Unknown Hobart 37 Post Card Macquarie St showing Post Office Hobart 1908.03.12 Hobart 38 Post Card Hobart Municipal Tramways 21 Unknown Hobart 39 Post Card Elizabeth St Hobart Tas Unknown Hobart 40 Post Card Liverpool Street Hobart Unknown Hobart 41 Post Card Electric Tram Launceston Tas 446 W J Little Photo 1919.02.08 Launbceston 42 Post Card Launceston Tram no 3 1911.08.30 Launbceston 43 Post Card Launceston Tram no 3 passes tram No 1 Unknown Launbceston 44 Post Card Tram 6 at Trevallyn a popular suburb Launceston Tasmania Unknown Launbceston 45 Post Card Tram 7 at Trevallyn Road Terminus Launceston Tasmania Unknown Launbceston 46 Post Card Tram 4 in Brisbane St Launceston Unknown Launbceston 47 Post Card Tram 9 in Brisbane St Launceston Tasmania Unknown Launbceston 48 Post Card Camerom Street Launceston Tasmania Unknown Launbceston 49 Post Card Murray Views No 15 Jetty Road Glenelg Terminus 1962-02-08 Adelaide 50 Post Card Bay Tram at Jetty Road Terminus Glenelg SA Unknown Adelaide 51 Post Card Tram 3 in King William Street Adelaide S Aust Unknown Adelaide 52 Post Card Valentine Series No 3065 The Old Horse Tram Victor Harbour Unknown Victor Harbour 53 Post Card Bourke Street Melbourne with Cable Car Looking East 1904.04.25 Melbourne 54 Post Card Opening of New Electric Tramway Elsternwick 1913-11-13 Melbourne 55 Post Card Cable trams in Clarendon St Sth Melb Unknown Melbourne 56 Post Card Pall Mall from Charing Cross Bendigo Unknown Bendigo 57 Post Card Tram 4 & 7 pass at The Fountain and Mitchell Street Bendigo Vic Rose Series P 3198 Unknown Bendigo 58 Post Card M&MTB 133 at Charing Cross bound for Eaglehawk Bendigo Vic Murray Views No 45 Unknown Bendigo 59 Post Card Pall Mall Bendigo Vic Unknown Bendigo 60 Post Card Charing Cross & Mitchell St Bendigo Trams passing 1919.00.00 Bendigo 61 Post Card Pall Mall Looking East Unknown Bendigo 62 Post Card Electric Trams and City Hotel Bendigo Vic Unknown Bendigo 63 Post Card Moorabool Street Geelong V 23 Unknown Geelong 64 Post Card Murray Views No 3 Moorabool Street Geelong Vic Unknown Geelong 65 Post Card The Rose Series P 2487 Ryrie Street Geelong Vic Unknown Geelong 66 Post Card Southern Cross Series 2696 Ryrie Stret Geelong Vic Unknown Geelong 67 Post Card The Rose Series P 1490 Ryrie Street Geelong Vic 1920-03-04 Geelong 68 Post Card Valentine Series No 1568 Lower Sturt Street Ballarat Unknown Ballarat 69 Post Card Rose Series P 1710 Sturt Street Ballarat Victoria Unknown Ballarat 70 Post Card Sturt Street Ballarat Victoria Unknown Ballarat 71 Post Card Horse Tram In Sturt Street Ballarat 1905.11.10 Ballarat 72 Post Card Sturt Street Ballarat Looking North-West Unknown Ballarat 73 Post Card Shoppes Square Sturt Street Ballarat Looking North Unknown Ballarat 74 Post Card Junction Sturt and Lydiard Streets Ballarat 1909-09-01 Ballarat 75 Post Card The Electric Supply Co Souvenir Tram Ticket No 3085of the opening of Electric System August 18 1905 1905.08.18 Ballarat 76 Post Card Sturt Street Ballarat Victoria 1907.11.25 Ballarat 77 Post Card Off to the Gardens Electric Tram Ballarat Unknown Ballarat 78 Post Card Sturt Street Ballarat 1907.04.16 Ballarat 79 Post Card Sturt Street Ballarat Looking East Electric tram with Double Deck Trailer 1911.04.17 Ballarat 80 Post Card Sturt Street Ballarat Looking East Unknown Ballarat 81 Post Card Sturt Street Ballarat Looking West 1911.03.01 Ballarat 82 Post Card Town Hall and Sturt Street Ballarat Unknown Ballarat 83 Post Card Lydiard Street Ballarat 1906.11.23 Ballarat 84 Post Card Looking North along Adelaide Street from George Street Brisbane Sidues Series No 764 Unknown Brisbane 85 Post Card Looking South along Queen Street from the Creek Street Intersection Brisbane Qld Sirues Series No 1379 Unknown Brisbane 86 Post Card George Street from near Supreme Court Brisbane Unknown Brisbane 87 Post Card Queen and Eagle Streets Brisbane 1907.07.04 Brisbane 88 Post Card Queen Street showing His Majesty’s Theatre Brisbane Unknown Brisbane 89 Post Card Queen Street Treasury Building 1908.01.20 Brisbane 90 Post Card G P O and Queen Street Brisbane Unknown Brisbane 91 Post Card Queen Street Brisbane Looking from Wharf Street Unknown Brisbane 92 Post Card Customs House Brisbane 1905.02.16 Brisbane 93 Post Card Queen St Brisbane 1905.09.16 Brisbane 94 Post Card Queen St Brisbane 1907.11.19 Brisbane 95 Post Card Treasury Buildings Brisbane Unknown Brisbane 96 Post Card Queen and Eagle Streets Brisbane Unknown Brisbane 97 Post Card The Valley Corner Brisbane Unknown Brisbane 98 Post Card Brisbane Queen Street opposite General Post Office Unknown Brisbane 99 Post Card North Quay and Milton Beach Brisbane Q Unknown Brisbane 100 Post Card Victoria Bridge Brisbane South Side 1907.08.14 Brisbane 101 Post Card Victoria Bridge Brisbane Unknown Brisbane 102 Post Card Breakfast Creek Bridge Brisbane Q Unknown Brisbane 103 Post Card Melbourne Street Station South Brisbane Queensland Unknown Brisbane 104 Post Card General Post Office Queen Street Brisbane 1955.09.23 Brisbane 105 Post Card Customs House Brisbane 1904.11.04 Brisbane 106 Post Card Queen St Brisbane 1919.11.00 Brisbane 107 Post Card Queen St Brisbane Sidues Series No 627 Unknown Brisbane 108 Post Card Creek Street Brisbane Queensland Unknown Brisbane 109 Post Card Customs House and Garden Reach Brisbane Queensland 1910.00.08 Brisbane 110 Post Card Queen and Creek Streets Brisbane 1909.06.07 Brisbane 111 Post Card Queensland National Bank andd Queen Street Brisbane Queensland Unknown Brisbane 112 Post Card Queen Street and Treasury Buildings Brisbane 0000.09.07 Brisbane 113 Post Card Queen Street showing “Courier” Buildings Brisbane Unknown Brisbane 114 Post Card Intersection George & Roma Streets Brisbane Q 1916.05.11 Brisbane 115 Post Card Adelaide Street Brisbane Q Unknown Brisbane 116 Post Card G P O Queen Street Brisbane Q Unknown Brisbane 117 Post Card Treasury Building Brisbane 1906.03-20 Brisbane 118 Post Card Queen and Eagle Streets Brisbane 1907.02.01 Brisbane 119 Post Card Queen St Brisbane Unknown Brisbane 120 Post Card Queen St Brisbane Q Unknown Brisbane 121 Post Card Victoria Bridge Brisbane 1906.07.30 Brisbane 122 Post Card An Unusual View showing Head of Queen Street Victoria Bridge & South SideSuburbs Brisbane Q Unknown Brisbane 123 Post Card Petries Bight Brisbane Q Unknown Brisbane 124 Post Card South End Victoria Bridge Brisbane Q Unknown Brisbane 125 Post Card Customs House Brisbane Unknown Brisbane 126 Post Card Photo of toastrack car circa 1910 Unknown Brisbane 127 Post Card Treasury Buildings Brisbane Unknown Brisbane 128 Post Card East Street Rockhampton with Steam Tram & trailer Unknown Rockhampton 129 Post Card Post Office Rockhampton with steam tram Unknown Rockhampton 130 Post Card East Street Rockhampton with Steam Trams Rose Series P 7154 Unknown Rockhampton 131 Post Card William Street Rockhampton Rose Series P 7156 Unknown Rockhampton 132 Post Card Central East Street Rockhampton Q with Steam Trams Unknown Rockhampton 133 Photo Sturt St Ballarat Unknown Ballarat 134 Photo Bridge Street Ballarat Unknown Ballarat 135 Post Card George St Sydney Unknown Sydney 136 Post Card Elizabeth St Sydney Unknown Sydney 137 Post Card Railway Square Unknown Sydney 138 Post Card Sydney Harbor Bridge - pending receipt 139 Post Card Kings Cross - Mowbray Series with description on rear from C Roy G Field Unknown Sydney 140 Post Card Kings Cross - Mowbray Series with description on rear from C Roy G Field Unknown Sydney 141 Post Card Central Railway Station Sydney - Rose Series P6033 1954-01-26 Sydney 142 Post card William Street Darlinghurst looking towards City - Rose Series P6602 unknown Sydney 143 Post Card Circular Quay Sydney - Rose Series P6680 Unknown Sydney 144 Post Card View at Manly NSW - Rose Series B1003 Unknown Sydney 145 Post Card Hunter St Newcastle NSW - Rose Series P7843 Unknown Newcastle 146 Post Card Bank Corner Newcastle NSW - Mowbray Series No. 155 Unknown Newcastle 147 Post Card Hunter St Newcastle NSW Unknown Newcastle 148 Post Card Criterion Hotel Hunter St Newcastle NSW Unknown Newcastle 149 Photo Horse tram at Newtown Station 1894 to 1898 - PTC photo c1894 Newtown 150 Photo Steam tram motor No 3 at Railway Square 1879 1879 Sydney 151 Photo Railway steam tram c1900 with a horse drawn double deck bus c1900 Sydney 152 Photo Steam motor 5A and doubled deck bus Unknown Sydney 153 Photo Steam motor 53A with detail notes on rear 1922 Sydney 154 Photo Cable tram set at Milsons Point ferry terminal c1900 Sydney 155 Photo Early Sydney electric car - Ocean St - Rose Bay Unknown Sydney 156 Photo George St looking souoth c1905 c1905 Sydney 157 Photo Tram 165 at Circular Quay Unknown Sydney 158 Photo Tramcar ferry or transporter at The Spit Unknown Sydney 159 Photo tram 882 George St at Marti Place, 1937 1937 Sydney 160 Photo Tram 826 Railway Sq area Unknown Sydney 161 Photo Railway Sq in background, Broadway with double decker bus and toastrack car late 1930s Sydney 162 Photo Coupled St Pitt St? - photo Ben Parle Feb. 1950 Sydney 163 Photo Electric tram No. 2 - North Sydney with side trolley pole running Unknown Sydney 164 Photo George St - Horden's Corner Unknown Sydney 165 Photo George St at Martin Place c1920 Sydney 166 Photo Castlereagh St Sydney c1928 c1928 Sydney 167 Photo Railway Sqare c1920 c1920 Sydney 168 Photo Darling St Countereweight Unknown Sydney 169 Photo Trolley bus depot Unknown Sydney 170 Photo Trolley bus No. 14 Unknown Sydney 171 Photo Newcastle Railway Station with steam tram - Wharf Road?? Unknown Newcastle 172 Photo High St West Maitland - steam tram Unknown Maitland 173 Photo High St West Maitland - steam tram Unknown Maitland 174 Post Card Argent St near tram terminal Broken Hill NSW c1900 Broken Hill 175 postcard Argent St looking south Broken Hill - with Ken Magor's notes on rear Unknown Broken Hill 176 Photo Toronto - steam tram 61A Unknown Toronto 177 Photo 124A trial run 1911? Sutherland - Cronulla line 1911 Sutherland 178 Photo 103A at a tram stop Unknown Sydney 179 Photo Cable tram set at Crows Nest terminus grip car 12, trailer 22 Unknown Sydney 180 Photo Cable tram Queens Square Sydney 1903 Sydney 181 Photo cars 2078 and 2077 Chatswood late 1950s Sydney 182 Photo car 1877 Balmain area late 1950s Sydney 183 Photo Trolley bus - Rockdale destination Late 1950s Sydney 184 Photo Broken Hill steam tram - motor 18A North Tram Unknown Broken Hill 185 Photo Millars Point Sydney NSW - ferry/tram interchange, unknown Sydney All items imaged including the rear or back where there was writing of information. All files stored on the Museum's Photo Collections directory. Demonstrates through the medium of many images, Australian tramway systems and Ballarat's place in them.Album - heavy card covers, plastic lined with postcard or 6x4 photo sleeves.australia, tramways, postcards, photographs, steam trams, horse trams, cable trams, trolley buses -
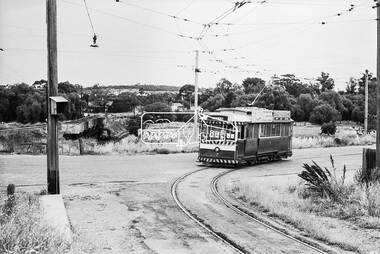 Eltham District Historical Society Inc
Photograph, Bendigo Tramways No. 7 about to arrive at its terminus in North Bendigo near the intersection of Thunder Street and Moray Crescent, January 1972, Jan 1972
The tram line proceeds up to the left just pass Moray Crescent where it terminated alongside the railway line in North Bendigo in 1972Digital TIFF file Scan of 35mm Ilford FP3 black and white negative transparencybendigo, bendigo tramways no. 7, george coop collection, moray crescent, north bendigo, railway crossing, railway line,thunder street, tram -
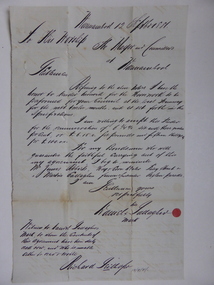 Warrnambool and District Historical Society Inc.
Document, Gallagher, C 1881
In 1858 a tramway was constructed to move goods between Warrnambool township and jetty on Lady Bay which was over a mile away The terminus was established on the southern side of Merri Street. and the track went around the edge of Lake Pertobe reserve. Large stores were also built near where the present railway station is situated to hold produce and carriages. These documents relate to the contract to perform the horse work for the tramway for a period of one year. The horse work involved the transporting of goods by horse drawn tram trucks, all repairs to the tracks , shunting and delivery duties. The tramway operated from 7 am to 6 pm six days a week and a team of six horses was required to perform the work.The tramway was an important part of Warrnambool's infrastructure and history and the documents also include names of local people.001261.1 Pale blue lined paper with red lined outline.Hand written in black pen with names and some other words underlined in red. Two signatures on bottom right with red seal beside each. Witness signature below on left hand side. Of the four pages of the document , only the first page is used. 001261.2 Cream paper lined in blue with heavy black ink writing. A red seal attached beside the tenderer's mark and name. on right side of page. Witness's signature at bottom centre of page.001261.1 James Roberts hay and corn dealer ,Fairy Street Warrnambool, Martin Callaghanfarmer and contractor Raglan Parade Warrnambool. Daniel Gallagher, contractor of Warrnambool. September 1881. 001261.1 Daniel Gallagher .James Roberts Martin Callaghan September 12, 1881.warrnambool, warrnambool history, daniel gallagher, james roberts