Showing 3354 items matching "58/32"
-
 Surrey Hills Historical Society Collection
Work on paper - Vertical file, Chatham Primary School
CHATHAM PRIMARY SCHOOL 4314 -FILE 1 1. Correspondence regarding establishment of the school – all are copies: • Letter from Amy Brown to Secretary of Chatham School Committee (undated) relating to correspondence regarding the establishment of the school • Letter from Education Department to Mr. A.R. Brown, 17.5.1923. • Letter from Department of Public Works to Mrs. Amy R. Brown, 2.10.1923. • Letter from Education Department to Mr. A.R. Brown, 2.11.1923. • Letter from A. Brown to Education Department ?, 7.11.1923. • Letter from E.W. Greenwood, MLA, State Parliament House to Mr. A.R. Brown, 8.11.1923. • Letter from E.W. Greenwood, State Parliament House to Mr. A.R. Brown, 19.11.1923. • Letter from Department of Public Works to Mrs. Amy R. Brown, 5.12.1923. • Letter from Education Department to Mrs. A. Brown, 8.12.1923. • Letter from A. Brown to Mr. Greenwood, 26.7.1925. • Letter from E.W. Greenwood, State Parliament House to Mrs. A. Brown, 14.3.1925. • Letter from E.W. Greenwood, State Parliament House to Mrs. A. Brown, 15.7.1925.Letter from E.W. Greenwood, State Parliament House to Mrs. A. Brown, 16.11.1925. • Letter from Department of Public Works to Mrs. A. R. Brown, 10.11.1926. • Letter from E.W. Greenwood, State Parliament House to Mrs. A. Brown, 2.3.1923. • Letter from E.W. Greenwood, State Parliament House to Mrs. A. Brown, 3.6.1927. • Letter from E.W. Greenwood, State Parliament House to Mrs. A. Brown, 29.6.1927. 2. 2 Mr. Harbert’s account for Shelter Shed, Chatham State School, (undated), (1 page). 3. 4 copies of newspaper cuttings: • ‘Masts tell Edina’s history’, Herald, 4.5.1931 • ‘Edina to have holiday on 80th birthday’, Argus, 4.5.1934, • ‘Edina’s birthday tomorrow’, Age, 4.5.1934, • ‘Old lady of the sea has a birthday’, Star, 4.5.1934 (1 page). 4. ‘The story of the steamship “Edina” a wonderful veteran of the seas’, The Meccano Magazine, A.R. Prince, December, 193 ? (1 page). 5. ‘Ponsford and schoolboys’, (paper and date unknown), (2 pages). 6. Program for ‘Trial by jury’, 16.11.1929 (1 page). 7. ‘What was the joke that the Governor told?’, paper unknown, 5.5.1931 (1 page). 8. ‘History in school flag’, paper and date unknown (1 page). 9. Lists of girl and boy dux 1928 – 1944 (1page). 10. Chatham School 4314 notes (undated) (3 pages). 11. Extracts from Box Hill Reporter, 1927-9, from Alan Holt collection (1 page). 12. Empire day celebrations in Surrey Hills in 1930s, notes from Matt Bowen, 1983 (1 page). 13. Extracts from Box Hill Reporter 1927-8 (1 page). 14. Vision and realisation, 1973 Education Department : Port Phillip Eastern Region: 4314 Chatham notes by H.H. Singleton (1 page). 15. ‘Bell has historic appeal’, paper unknown, c. 1985 (1 page). 16. Background information on the SS Edina bell, Adrian Peniston-Bird, Principal of Chatham Primary School, 1982 (1 page). 17. ‘It’s there for another fifty years’, October, 1985. See also ‘Chatham past and present, a patchwork of people’. (1 page). 18. ‘Miss Marie George’, SHNN No. 40, June/July, 1989 (1 page). 19. ‘Chatham Primary School – a community within the community’, SHNN No. 56, Feb/March, 1992 (1 page). 20. ‘Chatham Primary School – another exciting year begins’, SHNN No. 68, Feb./March, 1994 (1 page). 21. ‘Chatham plans a big reunion’, SHNN No. 77, Aug./Sept. 1995 (1 page). 22. ‘In search of the past’, Progress Press, 15.5.1996 (1 page); features Norma Price & Lale Ramadan 23. ‘Chatham primary’, SHNN No. 82, June/July, 1996 (1 page). 24. ‘Happy Birthday, Chatham Primary’, SHNN No. 84, Oct./Nov. 1996 (1 page). 25. Chatham School Fathers Club, SHNN No. 83, Aug./Sept. 1996 (1 page). 26. Notes by Doug Iversen, 18.7. year unknown, (1 page). 27. Advertisement for Chatham Primary School celebrating 70 years: ‘Take a walk down memory lane’, 10.9.1996, paper unknown (1 page). 28. Chatham Primary School invitation to 70th year celebration – Sat. 19.10.1996 (1 page), AND Back to Chatham (1 page). 29. Flyer: Chatham Primary School Reunion Celebrating 70 years 19.10.1996 (1 page, 2 copies). 30. Program ‘Welcome to Chatham Primary School No. 4314 70th celebration’, undated (1 page, 2 copies). 31. Chatham History trail, undated (1 page). 32. Card with drawing of Chatham Primary School by David Williams, 1995 (1 page). 33. ‘Seems like yesterday’ 1998, paper unknown (1 page). 34. ‘Schools and the environment’, SHNN No. 98, Feb./March, 1999 (1 page). 35. ‘School praises retiring head’, by Kate Morris, 19.6.2000, paper unknown (1 page); features Jan Morris. 36. “Chatham’s class of ‘30” by Meg Freeman, Progress Press, c. July, 2000 (1 page). 37. ‘Recalling a class act’, Progress Press, c. August, 2000 (1 page). 38. List of students enrolling in 1930 (2 pages). 39. Chatham Foundation Day Lunch invitation 31.7.2000, (with contact details of former students on the back, written by Ken Hall) (1 page). 40. ‘Boy in man’s shoes’, Progress Press, 21.8.2000 (1 page). 41. ‘An invitation – Chatham Primary plans for its 75th birthday’, SHNN No. 118, June/July, 2002 (1 page). 42. 75th birthday assembly – August 1st 2002 (1 page). 43. ‘Chatham lands special garden’ (paper and date unknown, possibly Progress Leader) (1 page). 44. ‘Chatham Primary celebrates specialist programs’, SHNN No. 184, June/July 2013 (1 page). 45. ‘City’s sustainable schools awarded this month’, Boroondara Bulletin, April, 2013 (1 page). 46. ‘Chatham Primary walks to win’, SHNN No. 189 March/April 2014 (1 page). 47. ‘School builds pathway to greater sustainability’, Progress Leader, 15.9.2015 (1 page). 48. ‘Schools embrace need for class action’, Age, 7.11.2016 (1 page). 49. Advertisements for 2017 grand fair 4th March, 2 designs (3 pages including 2 copies of one). 50. Chatham primary leads on going green – SHNN No 160, June /July 2009. 51. A history of Chatham Primary School, golden jubilee edition 1977 (9 pages with covers). 52. Photo of Mrs. Frances Le Couteur receiving a gift at Chatham Primary School, golden jubilee 1977 (1 page – a copy). 53. ‘Thank you’ letter to editor from Mrs. Frances Le Couteur (paper unknown), 1977 (1 page). 54. Letter from Chatham School No. 4314 to Mrs. Ethel Cerini, 10.2.193 ? (1 page). 55. Programme for concert held in the 1930s (source possibly Jocelyn Hall) (1 page). 56. ‘Parents’ pride in their school’, Progress Press, 21.5.2019. 57. ‘Bring your bright ideas to life’, Whitehorse Leader, 13.5.2019 (features Otto Hunt). 58. Flyer for school fete, 1986/1987 59. ‘Hearts captured, now for minds’, 2020, no details re paper. 60. ‘Teachers feted with hearts’, Age, 26.5.2020. (Response to COVIDE lock down) 61. ‘Wedding memory renewed’, (? Progress Press). 2.12.1997 features Ivy & Basil Taylor, former Chatham students. 62. Reflections of Principal, Chris Cotching, SHNN No 233, Feb 2022. 63. School brochure, c1998 64. School calendar 2003 65. Copies of photos taken by sue Barnett at the time of the 70th Reunion (8 photos) 66. Signatures of staff and students from 1997 (10 pages) 67. Grand fair raffle tickets, November 2023 -
 Bendigo Military Museum
Photograph - Lithographic Squadron Personnel and Equipment, Army Survey Regiment, Fortuna, Bendigo, 1992
This collection of 34 photos of Lithographic Squadron personnel and equipment was taken in at the Army Survey Regiment, Fortuna, Bendigo, in 1992. The photos were mainly taken in the Camera, Contacting, Printing, BARCRO and Production Control work areas, as well as outside Fortuna’s buildings. Although these photos are not annotated most personnel are positively identified. This is a set of 34 photographs of Lithographic Squadron personnel and equipment at the Army Survey Regiment, Fortuna, Bendigo, 1992. Photographs .1P to .32P are on 35mm negative film and scanned at 96 dpi. Colour photos .33P and .34P are on photographic paper and scanned at 300 dpi. They are part of the Army Survey Regiment’s Collection. .1) - Photo, black & white, 1992, back row L to R: Andrew Arman, unidentified Mark McCulloch, Dale Hudson, front row L to R: Daryl South, unidentified (x2). Janet Murray, LT Dave Weston. .2) - Photo, black & white, 1992, back row L to R: unidentified, CPL Paul Baker, Shona Hastie, front row L to R: LT Craig Hersant, Darren Maher, Chad Hardwick, Rob Jones. .3) - Photo, black & white, 1992, WO2 Steve Egan. .4) - Photo, black & white, 1992, LT Craig Hersant. .5)- Photo, black & white, 1992, CPL Warren Shirley, Jeff Willey, Gary Kerr. .6) - Photo, black & white, 1992, L to R: CPL Penny Knott, Janet Murray, Shona Hastie. .7) - Photo, black & white, 1992, L to R: MAJ Terry Edwards, LT David Weston. .8) - Photo, black & white, 1992, Frank Lenane, WO1 Trevor Osborne. .9) - Photo, black & white, 1992, L to R: WO2 Rob Bogumil, WO2 Steve Egan. .10) - Photo, black & white, 1992, back row L to R: Terry Winzar, Roy Hicks Marty Stradbrook, Janet Murray, Nick Vanderzwan, Mark Bird, front row L to R: SGT Dale Hudson, SSGT Russ Mollenhauer, Ross Anza, SGT Kim Reynolds, SGT Stuart Ridge, WO2 Jeff Willey, Peter Hamilton, Garry Lord, Gavin McLean, unidentified. .11) - Photo, black & white, 1992, Janet Murray, Mick Muzeen. .12) and .13) - Photo, black & white, 1992, Janet Murray. .14) to.16) - Photo, black & white, 1992, SPR Scott Cameron, CPL Warren Shirley. .17) - Photo, black & white, 1992, L to R: SPR Shane Campbell, SGT Brian Paul. .18) - Photo, black & white, 1992, LCPL John Bragg. .19) - Photo, black & white, 1992, SPR Allison (Ottaway) Wooldrage. .20) - Photo, black & white, 1992, map inspection station, LT Colin Davidson. .21) - Photo, black & white, 1992, map inspection station. .22) - Photo, black & white, 1992, map inspection station, LT Colin Davidson. .23) and .24) - Photo, black & white, 1992, map inspection station, SPR Nicole Midgley. .25) - Photo, black & white, 1992, map inspection station. .26) - Photo, black & white, 1992, map inspection station, unidentified. .27) - Photo, black & white, 1992, CPL Penny Knott. .28) - Photo, black & white, 1992, CPL Ken Peters. .29) - Photo, black & white, 1992, WO2 Rob Bogumil. .30) - Photo, black & white, 1992, L to R: WO2 Peter Imeson, WO2 Rob Bogumil. .31) and .32) - Photo, black & white, 1992, L to R: SGT Brian Fauth. .33) - Photo, colour, 1992, Klimch Camera, CPL Damien Cole. .34) - Photo, colour, 1992, Speedmaster Printing Press, L to R: SGT Gary Kerr, unidentified, SGT Kim Reynolds, SPR Shane Campbell.No personnel are identified.royal australian survey corps, rasvy, army survey regiment, army svy regt, fortuna, asr, litho -
Federation University Historical Collection
Music Scores, Boosey & Hawkes Ltd, Handwritten sheet music, mid twentieth century
Frank Wright was a renown resident of Smeaton, where he was born on 2 August 1901. He lived at Laura Villa, and attended Smeaton State School. His father William was a gold miner and his mother's name was Sarah. Their family won many singing and instrumental awards. Frank was tutored by Percy Code and was awarded a gold medal for the highest marks in the ALCM examinations in the British Colonies at the age of seventeen years. He became the Australian Open Cornet Champion by the age of eighteen. A year later, Frank conducted the City of Ballarat Band, and later the Ballarat Soldiers’ Memorial Band. He formed the Frank Wright Frisco Band and Frank Wright and his Coliseum Orchestra. These bands won many South Street awards, and Frank as conductor won many awards in the Australian Band Championship contest. In 1933 Frank Wright sailed to England to conduct the famous St Hilda’s Band and was later appointed Musical Director of the London County Council, where he organized many amazing concerts in parks, in and around the London district. He was made Professor of Brass and Military Band Scoring and conducted at the Guildhall of Music and Drama. Frank was often invited to adjudicate Brass Band Championships around Europe, in Australia, including South Street and in New Zealand. The Frank Wright Medal at the Royal South Street competition is awarded to an individual recognized as making an outstanding contribution to brass music in Australia.Handwritten music scores by Frank Wright, some in his hand. 1). 'The Merry Peasant' by Schumann and arranged in parts for brass band by Frank Wright - 3 pages. 2). 'Threshold' by Frank Wright -9 pages. 3). 'Around the Campfire' in parts - 10 pages. 4).'March (Judas Maccabaeus) by Handel and arranged by Frank Wright for the Boys Brigade (a) is written by Frank in pencil, (b) is written in pen with a brown paper cover. 5). 'Anthony & Cleopatra' arranged for the Boys Brigade (a) in written in pencil, (b) is written in pen. 6). 'O Give Me the Hills' written in pencil - 2 pages 7). 'Beneath this Turf' music by Frank Wright and words written in 1842 by Unknown Author - 3 pages. 8). 'If When that Hour Recalling' music by Frank Wright and poem by Thomas Moore, written in pen for 4 brass parts plus violin - 6 pages. 9). 'So Long', Brass Band arrangement by Frank Wright, written in pencil - 2 pages. 10). 'Gluck: March' arrangement by Frank Wright and written in pencil - 2 pages. 11). 'Occasional March' by Handel, arrangement by Frank Wright and written in pen - 5 pages (3 pages of band parts plus a separate Solo Cornet page). 12). 'Bugle Command: Ceremonial March for Bugles and Brass Band' written by Frank Wright - (a) 6 pages of bands parts plus a separate Solo Cornet page written in pen (b) 4 pages written in pencil and pen. 13). 'Scena' & 'Idyll' - Grade 4 Trombone written by Frank Wright in pen - 2 pages. 14). 'Green Corn' Brass Band arrangement by Frank Wright, written in pencil - 1 page. 15). 'Syrian Air' by Geoffrey Allen and arrangement by Frank Wright, with a buff cover (a) written in pencil - 2 pages (b) photo copy of parts - 2 pages (c) single sheet of music written in pencil, blue pen and red pen with some sections crossed out. 16). 'Gavotte: from the Opera "Rodrigo"' by Handel and arrangement by Frank Wright with a brown paper cover (a) 3 pages written in pencil (b) 3 pages written in pen. 17). 'Tales of Hoffman' arranged by Frank Wright for Brass Band 32 page printed booklet in a buff envelope. 18). 'Will Your Anchor Hold' arranged by Frank Wright for The Boy's Brigade - (a) 2 pages written in pencil with a buff cover plus a page with both pen and pencil notes (b) 2 pages written in pen plus a photo copied page for Solo Cornet. 19). Buff folder of 3 pieces of music written in pen - '1. Riverside', '2. Cenotaph' & '3. London Lights' - 7 pages. 20). 'Preludio Marziale (Martial Prelude)' by Frank Wright (a) written in pencil - 2 pages (b) written in pen - 7 pages (c) 7 page printed copy 21). 'Rondo Theme' (a) music written in pencil on the front of a buff envelope (b) 1 page written in pencil 22). Buff folder with two poems set to music by Frank Wright and written in pen - (a) 'My Heart and Lute' by Thomas Moore - 3 pages plus another 3 pages which may be part of this piece (b) 'The Rose' by Thos Croft (bart) - 3 pages. (c) a Musical Pitch Relation Chart for Pipe Organ. 23). 'Purcellian Suite', Purcell arranged by Frank Wright - 3 pages written in pencil and 4 photocopied pages 24). 'G's pl piano study 27/2/52All hand written 8). Written in pencil on front - You can return this score. Keep parts. 9). Notes to musicians written in pen on page 1. 11). Notes to musicians in pencil on page 4. 13). a correction written in red pencil. -
 Victorian Aboriginal Corporation for Languages
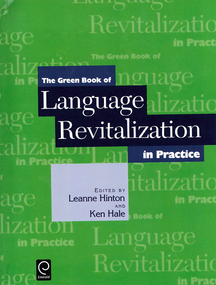
Book, Leanne Hinton, The green book of Language revitalization in practice, 2008
1. Language Revitalization: An Overview /? Leanne Hinton 2. Diversity in Local Language Maintenance and Restoration: A Reason For Optimism /? Anna Ash, Jessie Little Doe Fermino and Ken Hale 3. Federal Language Policy and Indigenous Languages in the United States /? Leanne Hinton 4. "... To Help Assure the Survival and Continuing Vitality of Native American Languages" /? Robert D. Arnold 5. Language Planning /? Leanne Hinton Introduction to the Pueblo Languages /? Leanne Hinton 6. Native Language Planning: A Pilot Process in the Acoma Pueblo Community /? Christine P. Sims 7. The Key To Cultural Survival: Language Planning and Revitalization in the Pueblo de Cochiti /? Regis Pecos and Rebecca Blum-Martinez The Navajo Language: I /? Ken Hale 8. Navajo Head Start Language Study /? Paul R. Platero 9. Introduction to Revitalization of National Indigenous Languages /? Leanne Hinton Introduction to the Welsh Language /? Leanne Hinton 10. Welsh: A European Case of Language Maintenance /? Gerald Morgan Introduction to the Maori Language /? Ken Hale 11. Te Kohanga Reo: Maori Language Revitalization /? Jeanette King An Introduction to the Hawaiian Language /? Leanne Hinton 12. The Movement to Revitalize Hawaiian Language and Culture /? Sam L. No'Eau Warner 13. "Mai Loko Mai O Ka 'I'ini: Proceeding from a Dream": The 'Aha Punana Leo Connection in Hawaiian Language Revitalization /? William H. Wilson and Kauanoe Kamana 14. Teaching Methods /? Leanne Hinton The Karuk Language /? Leanne Hinton 15. Teaching Well, Learning Quickly: Communication-Based Language Instruction /? Terry Supahan and Sarah E. Supahan The Navajo Language: II /? Ken Hale 16. Tsehootsooidi Olta'gi Dine Bizaad Bihoo'aah: A Navajo Immersion Program at Fort Defiance, Arizona /? Marie Arviso and Wayne Holm 17. The Master-Apprentice Language Learning Program /? Leanne Hinton 18. Linguistic Aspects of Language Teaching and Learning in Immersion Contexts /? Ken Hale 19. New Writing Systems /? Leanne Hinton An Introduction to Paiute /? Leanne Hinton and Ken Hale 20. Language Revitalization in the San Juan Paiute Community and the Role of a Paiute Constitution /? Pamela Bunte and Robert Franklin 21. Audio-Video Documentation /? Leanne Hinton Australian Languages /? Ken Hale 22. Strict Locality in Local Language Media: An Australian Example /? Ken Hale The Arapaho Language /? Ken Hale 23. Reflections on the Arapaho Language Project, or When Bambi Spoke Arapaho and Other Tales of Arapaho Language Revitalization Efforts /? Stephen Greymorning Irish /? Ken Hale 24. Continuity and Vitality: Expanding Domains through Irish-Language Radio /? Colleen Cotter The Mono Language /? Ken Hale 25. On Using Multimedia in Language Renewal: Observations from Making the CD-ROM Taitaduhaan /? Paul V. Kroskrity and Jennifer F. Reynolds 26. Can the Web Help Save My Language? /? Laura Buszard-Welcher 27. Training People to Teach Their Language /? Leanne Hinton Inuttut and Innu-aimun /? Ken Hale 28. The Role of the University in the Training of Native Language Teachers: Labrador /? Alana Johns and Irene Mazurkewich Languages of Arizona, Southern California, and Oklahoma /? Leanne Hinton 29. Indigenous Educators as Change Agents: Case Studies of Two Language Institutes /? Teresa L. McCarty, Lucille J. Watahomigie and Akira Y. Yamamoto /? [et al.] The Navajo Language: III /? Ken Hale 30. Promoting Advanced Navajo Language Scholarship /? Clay Slate 31. Sleeping Languages: Can They Be Awakened? /? Leanne Hinton 32. The Use of Linguistic Archives in Language Revitalization: The Native California Language Restoration Workshop /? Leanne Hinton The Ohlone Languages /? Leanne Hinton 33. New Life for a Lost Language /? Linda Yamane.Maps, b&w photographs, tables, word listslanguage policy, language planning, language maintenance, language revitalization, language immersion, language literacy, media and technology, language education and training, sleeping languages, navajo, arapaho -
 Bendigo Military Museum
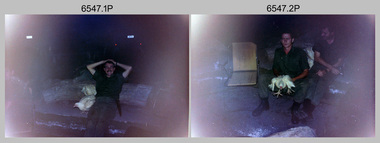
Photograph - 4th Field Survey Squadron Adventurous Training, Mount Remarkable National Park, Flinders Ranges, SA, 4th Field Survey Squadron Adventurous Training, Mount Remarkable National Park, SA, 1987
This is a set of 40 photographs of 4th Field Survey Squadron undergoing adventurous training at Mount Remarkable National Park, South Australia in May 1987. It is evident the training focussed on teamwork, leadership, abseiling, rock climbing, field craft and living off the land survival skills. Elements from units of the Army Reserve also participated in the training. Refer to items 6546.42P and 6548.14P for additional photographs taken during the adventurous training.This is a set of 40 photographs of 4th Field Survey Squadron undergoing adventurous training at Mount Remarkable National Park, South Australia in May 1987. The colour photographs are on 35mm negative film and are part of the Army Survey Regiment’s Collection. The photographs were scanned at 96 dpi. .1) - Photo, colour, 1987. Camp activities, unidentified soldier. .2) - Photo, colour, 1987. Camp activities, unidentified personnel. .3) & .4) - Photo, colour, 1987. Hootchie set-up. .5) - Photo, colour, 1987. Camp activities, unidentified personnel. .6) - Photo, colour, 1987. Hootchie set-up. .7) - Photo, colour, 1987. Camp activities. .8) - Photo, colour, 1987. Hootchie set-up, unidentified officer. .9) - Photo, colour, 1987. Camp activities. Results from foraging the forest for food. .10) - Photo, colour, 1987. Camp set-up. .11) - Photo, colour, 1987. Camp activities. .12) - Photo, colour, 1987. Camp activities. L to R: CPL Jeff Prince, unidentified (x3). .13) to .16) - Photo, colour, 1987. Camp activities. .17) & .18) - Photo, colour, 1987. Mount Remarkable National Park terrain. .19) - Photo, colour, 1987. Hootchie set-up. L to R: unidentified, CPL Jeff Prince, SPR Perry Langeberg, unidentified (x3). .20) - Photo, colour, 1987. Camp activities. .21) - Photo, colour, 1987. Camp activities, unidentified personnel. .22) & .23) - Photo, colour, 1987. Camp set-up. .24) - Photo, colour, 1987. Hootchie set-up. .25) - Photo, colour, 1987. Hootchie set-up, unidentified personnel. .26) - Photo, colour, 1987. Camp activities. L to R: CPL Jeff Prince, SPR Steve Ellis, SGT Peter Imeson, CPL Neale ‘Tex’ Houston, SPR Perry Langeberg, unidentified exchange officer, WO2 Russ Larsen. .27) - Photo, colour, 1987. Hootchie set-up. .28) - Photo, colour, 1987. Camp activities. L to R: SPR Bruce Graham, LT Geoff ‘GT’ Ford, CPL Jamie ‘Fish’ McRae, SGT Wally Chilcott, SPR Shaun Hynes, CPL Kevin Whitty. .29) - Photo, colour, 1987. Camp activities. L to R: unidentified, SPR Todd Hayley, unidentified, WO2 Peter Symmans, SSGT Cam Chapman, CPL Dave Irving. .30) - Photo, colour, 1987. Camp activities. L to R: unidentified (x2), LT Greg Oaten, unidentified (x2), CPL Peter Hardy, unidentified. .31) - Photo, colour, 1987. Camp activities. L to R: CPL Roger Graf, WO2 Bob Rogister, SSM WO1 Bill Griggs, unidentified officer, SPR Simon Reynolds, SPR John Keely. .32) - Photo, colour, 1987. Camp activities. L to R: unidentified, SPR Steve Nokes, SGT Stu Symonds, WO2 Brett ‘Dutchy’ Van Leeuwen, unidentified (x3). .33) - Photo, colour, 1987. Camp activities. L to R: unidentified, SGT Derek Stanmore, CAPT Danny Galbraith, unidentified in foreground. .34) - Photo, colour, 1987. Camp activities. L to R: unidentified (x3), SGT Derek Stanmore, CAPT Danny Galbraith. .35) - Photo, colour, 1987. Camp activities. .36) - Photo, colour, 1987. Camp activities. OC MAJ Peter Cates. .37) - Photo, colour, 1987. Camp activities. L to R: unidentified, CPL Dave Longbottom. .38) - Photo, colour, 1987. Camp activities, unidentified personnel. .39) & .40) - Hootchie set-up..1P to .40P – There are no personnel identified. ‘1987 ADV TRAINING’ annotated on negatives sleeve.royal australian survey corps, rasvy, 4 fd svy sqn -
 University of Melbourne, Burnley Campus Archives
ALbum - Colour prints, Victorian College of Agriculture and Horticulture, Staff Photographs, Unknown
Collection of photographs of staff and some Research Fellows. Some labelled with position at the time and some identified by Ala Shtrauser (former Asst. Librarian), Andrew Smith and Ross Payne. (1-4) Ross Payne (Engineering Technician). (5-6) Ed Smart (Lecturer). (7-8) James Will (Lecturer). (9) Mark McNamara (Librarian.) (10) Rosemary McConnell (Librarian). (11) Kevin Blaze (Lecturer). (12-13) David Aldous Lecturer). (14) Peter McSweeney (Senior Lecturer, Co-ordinator of BAS(H)). (15) Andrew Smith (Gardener). (16) Dr. Cassandra McLean (Senior Lecturer). (17) Sally Cullwick (Librarian). (18) Kat Frame (Librarian). (19) Michael Nechwatal (Handy Person). (20) Ala Hires (Shtrauser) (Library Assistant). (21-22) Peter May (Deputy Head of Campus). (23-25) Geoff Connellan (Senior Lecturer, Horticultural Engineering, Co-ordinator MAS(H)). (26-27) John Rayner (Lecturer). (28) Jamie Pearson (Lecturer). (29) Rod McMillan (Lecturer).(30) Graham Sterry (Printer). (31) Michael Green (Lecturer). (32) Suzanne Trajstman (Counsellor). (33) Greg Moore (Principal). (34-35) Greg Moore, Peter May, Geoff Connellan. (36) Greg Moore, Peter May, David Aldous. ((37-38) John Brereton (Lecturer, Co-ordinator AC(H)). (39-41) Nick Bailey (Lecturer).(42) Karen Van Laak (Admin). (43) Ruth Beilin (Lecturer). (44-46) Clive Sorrell (Lecturer). (47) Jayne Lindholm (Lab. Asst.). (48-49) Phil Kenyon (Arboriculture Lecturer). (50-51) Ross Hall (Lecturer). (52-55) Catherine Jaggs (Admin. Officer).(56) Robin Haylett (Gardener, Amrad). (57-59) Robina Duygen (Office Manager). (60) Julie Cocksedge (Nursery). (61) David Morales (Landscape)? (62) Tony Westmore (Lecturer). (63-64) Stuart Miller (IT). (65) Trish Mooney (Gardener) (66) Michael Looker (Lecturer). (67) Kerry Howard (Lecturer). (68) Alan Shaanks (Nursery, Field Station Tractor Driver). (69) Brian Shields (Lecturer). (70-73) Ian Winstone (Lecturer). 74 Tom Karapidis (Cleaner). (75-76) Ken James (Lecturer). (77-79) Jim Stafford (Property & Services Manager).(80) Kelvin McKenzie (Carpenter). (81-85) Kylie Cannon (General Administrative Officer). (86) Melanie Conomikes (Lecturer). (87) Dr. Sally Stewart-Wade (Lecturer). (88) Geraldine Fay (EH & S Administrator). (89) Rowan Reid (Lecturer). (90) Romduol Buruma (Finance Officer). (91) David Morales (Cleaner). (92) Tony Westmore (Lecturer). (93) Clare Scott. (94) Bata Thomas (Caretaker). (95-96) Nicholas Osborne (Nursery Assistant). (97) John Hensley (Cleaner). (98) Jill Kellow (Environmental Horticulturer Technician). (99) Nicky Jacobs (Counsellor). (100-102) John Delpratt (Lecturer). (103-105) Alex Campbell (Nursery Technician). (106) Christine Gregory (Clerical Assistant). Stamped, "Victorian College of Agriculture & Horticulture-Burnley, Burnley Gardens, Swan St., Richmond Vic 3121 2/1984." (107) Jenny Wilson (Typist) Stamped as previous "2/84" b/w. (108-112) Unidentified. Not scanned. (116) Dr Yue Wang (Research Fellow). (117) Simon Murphy (Senior Forest Researcher). (118) ? (119) Carmel McPhee at Como. Includes 2 different Staff Listings, 1 dated 03 January 1990 with years employed and Last Position.staff, research fellows, ala shtrauser, andrew smith, ross payne, ed smart, james will, mark mcnamara, rosemary mcconnell, kevin blaze, david aldous, peter mcsweeney, cassandra mclean, sally cullwick, kat frame, michael nechwata, peter may, geoff connellan, john rayner, jamie pearson, graham sterry, michael green, suzanne trajstman, greg moore, john brereton, nick bailey, karen van laak, ruth beilin, clive sorrell, jayne lindholm, phil kenyon, ross hall, catherine jaggs, robin haylett, robina duygen, julie cocksedge, david morales, tony westmore stuart miller, trish mooney, michael looker, kerry howard, alan shaanks, brian shields, ian winstone, tom karapidis, ken james, jim stafford, kelvin mckenzie, kylie cannon, melanie conomikes, sally stewart-wade, geraldine fay, rowan reid, romduol buruma, tony westmore, clare scott, bata thomas, nicholas osborne, john hensley, jill kellow, nicky jacobs, john delpratt, alex campbell, christine gregory, vcah, burnley gardens, jenny wilson, yue wang, simon murphy, carmel mcphee, como house -
 Eltham District Historical Society Inc
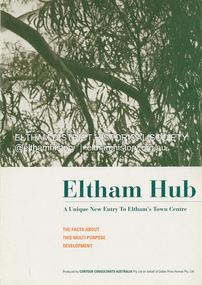
Document - Sales Brochure, Dallas Price Homes Pty Ltd, Eltham Hub: A Unique New Entry To Eltham's Town Centre; the facts about this multi purpose development, 1996
Produced by Contour Consultants Australia Pty Ltd on behalf of Dallas Price Homes Pty Ltd as part of the planning process for redevelopment of the former Eltham Shire Office site at 895 Main Road. In 1963 the Shire of Eltham purchased the Shillinglaw property of approximately 2 acres in Main Road, Eltham for the widening of Main Road and as a site for new Council offices. This land, which contained the Shillinglaw Cottage (c1878-80), was the remaining section of the Shillinglaw family holding that originally comprised 30 acres, being Lot 90 of Holloway's 1851 subdivision. Eltham Council intended to demolish this cottage, but through extensive community action it was saved, funds were raised, and it was relocated to the current site adjacent to the Eltham Library. The new Eltham Shire Offices opened in 1965 were designed to ensure retention of the three Italian Cypress trees that were located outside the Shillinglaw Cottage. In 1971 the building was extended at the southern end to provide additional space, including for the Eltham Library and Council's Engineering Department. Renovations were undertaken to the offices during 1987. The Victorian State Government commenced to restructure local government in 1994, which resulted in the establishment of the Shire of Nillumbik and the cessation of the Shire of Eltham. This new Nillumbik Shire Council was headed by government appointed commissioners, who decided in 1995 to put the former Eltham Shire offices on the market. Eventually in June 1996 the property was sold for $1.1 million and the building was subsequently demolished. A planning application for the site was then submitted to Nillumbik Shire Council in September 1996 for construction of a 24-hour service station, convenience store, cafe/takeaway food premises, a retail facility and community facility. There were many objections to this proposed development and in controversial circumstances a planning permit was granted by the Nillumbik Shire Council commissioners. After protracted actions involving a planning panel and a planning advisory committee, established by the Minister for Local Government, the proposal was eventually rejected as not satisfying the requirements of the planning scheme. In December 1997 the purchaser withdrew from the contract of sale, just prior to Council announcing a withdrawal from the contract. While there have been a number of possible development proposals considered by subsequent Nillumbik Shire Councils, this site has remained vacant since July 1996. TIMELINE (Prepared by Jim Connor, Eltham District Historical Society- March 2018- Based on press, council and personal records) June 1996 - Eltham Shire offices sold to Dallas Price Homes for $1.1 million. July 1996 - Shire office building demolished against community's wishes. Council claimed building riddled with asbestos. September 1996 - Planning application submitted to Nillumbik Shire Council to construct on the site a 24 hours Shell service station, convenience store, Hungry Jacks café/takeaway food premises, a retail facility and community facility. 213 objections and petition of over 1400 signatures received. Minister for Planning and Local Government orders an independent investigation into valuation and sale. 9 October 1996 - Permit granted by Nillumbik Shire Council commissioners, in controversial circumstances. A Planning Special Committee consisting of 3 commissioners and 3 community representatives considered 32 community objections. One commissioner declared a potential conflict of interest so only 2 commissioners were able to vote. After hearing all objections, the community representatives moved a foreshadowed motion to refuse a permit. The commissioners then closed the meeting, formerly opened a council meeting (for about a minute) and approved the application. October 1996 - Community members appealed planning decision to Administrative Appeals Tribunal. November 1996 -Minister for Planning and Local Government Robert McClelland calls appeal in and directs MT to refer this 'major policy issue' to the Governor in Council. February 1997 - Planning panel (Dimity Reed and Margaret Pitt) established to consider submissions. March 1997 - New council elected with five councillors. April 1997 - Three of the five new councillors vote to fight Commissioner's decision to grant a permit. April 1997 - Planning panel (Dimity Reed and Margaret Pitt) conducts hearings at Nillumbik Shire offices. June 1997 -Planning panel rejected Dallas Price Homes proposal as being 'totally inappropriate' for the site and recommends the site be rezoned for 'public purposes'. July 1997 - Dallas Price Homes threatened to sue Council and individual councillors. October 1997 - Report released of an Advisory Committee (Paul Jerome) established by the Minister for Planning and Local Government. Committee considered Dallas Price Homes proposal and an alternative concept plan proposal by Council for a gallery, workshop, offices and cinema community-based development. Advisory Committee recommended Dallas Price Homes proposal be rejected as not satisfying the requirements of the planning scheme and recommended further testing of the financial viability of Council's proposal. December 1997 - Dallas Price Homes withdrew from the contract of sale, just prior to Council announcing a withdrawal from the contract, which expired on 28th November and was not renewed by either side, after previously being extended twice pending a decision by the Minister. Council had to pay developer $58,000 for demolition costs. February 1998 - Dallas Price Homes application rejected by Planning and Local Government Minister. October 1998 - Nillumbik Councillors suspended and an Administrator appointed (until March 1999). The demolition of the former Shire of Eltham offices and proposed sale and development driven by the Commissioners for Nillumbik Shire Council brought the community together in substantial protest at the infrigement of ratepayers democratic say in local government and ciommunity assets combined with protests about inappropraite development of Eltham's Gateway. This issue led to the formation of the Eltham Community Action Group which still operates strongly today (2023) on behalf of the community to ensure appropriate development within the community.895 main road, commissioners, dallas price homes, development application, eltham hub, hungry jacks, nillumbik shire council, re-zoning, shell service station, town planning, eltham gateway, eltham gateway action group, eltham shire offices, shillinglaw cottage, shillinglaw farm, shillinglaw trees, jim connor collection -
 Flagstaff Hill Maritime Museum and Village
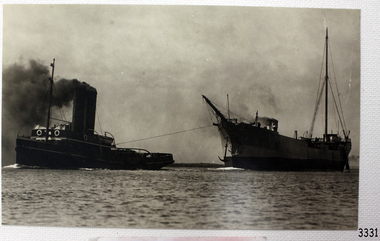
Photograph, C. 1915 - 09/07/1917
This black and white photograph of the tugboat NYORA towing the steam ship INVERNESS-SHIRE was taken between 1915, when the INVERNESS-SHIRE was dis-masted, and 9the July 1917, when NYORA tragically sank. The sailing ship INVERNESS-SHIRE was a four masted steel barque built in 1894 by Robert Duncan & Co. Limited, Glasgow, U.K. (The supervising engineer during the building was William Cumming. He accompanied every ship he’d built on their maiden voyages from UK to Melbourne.) In 1916 she was purchased by A/S Christiansand (Sven O. Stray), Kristiansand, Norway and renamed SVARTSKOG. In October 1920 she disappeared at sea, carrying a cargo of coal, and all hands were lost. The steam powered NYORA was a powerful tugboat and a salvage vessel built by J.P. Rennoldson & Sons Ltd, South Shields, Tyne and Wear, UK. She was originally launched with the name NEPEAN in May 1909, then as NYORA in August 1909 and registered in Melbourne in November 1909 by owners Huddart Parker Pty Ltd. She was made of steel, had triple-compounded steam engines, and her dimensions were 306 ton, 135.0 x 25.1 x 13.6ft. The Melbourne tug NYORA was known as “one of the best known tugs in Victoria, and carried the latest appliances for firefighting and salvage purposes.” She serviced the Port of Melbourne for most of her career. In July 1917 NYORA was towing the American schooner ASTORIA from Port Pirie to Sydney, because ASTORIA’s engines had broken down; she had been delivering a large cargo of timber. On July 9th the vessels were two days out from Port Pirie. At 10:30am NYORA foundered after casting off at Cape Jaffa, 50 miles south of Kingston, South Australia, and sank. Only 2 of the 16 crew survived; NYORA’s Master, Captain W.M. McBain (William Murray) and helmsman, able seaman Gordon Lansley. They were rescued by the two Cape Jaffa light keepers, Jamieson & Clark, who launched the rescue from the Cape Jaffa lighthouse on Margaret Brock Reef. Both men were brought to the lighthouse keeper’s cottage where they recuperated after their long exposure to the rough. (The Queenscliff Sentinal of 14th July 1917 noted that both saved men originated from the same district; Gordon Lansley was from Queenscliff and Captain McBain formerly from Point Lonsdale.) The ASTORIA was “in a very dangerous position ten miles west of the Margaret Brock reef near the Cape Jaffa lighthouse, setting towards the land.” Captain Solly from Beachport later said “Owing to the position … the ship was very fortunate in making Guichen Bay in safety, as she did” (Guichen Bay is south of Robe). Captain Bull, manager of Huddart Packer Pty Ltd, NYORA’s owner, was unable to see any reason for the foundering, as the NYORA was well known for its seaworthiness. At a hearing later on, the Marine Board could blame on no-one either, but found that the ship had been swamped by heavy seas, and had listed to one side when a load of 40 tons of coal in sacks on her deck shifted. The tow line to the ASTORIA was cut to try and save the tug but a huge wave swamped her, crashed open the engine room door and flooded the compartment. It was impossible to launch the lifeboats due to the listing of the sea and NYORA sank within 15 minutes. There was some criticism of the length of time it took Captain Solly and the lifeboat crew to get from Beachport to Cape Jaffa to help with the rescue. However, they had great difficulty in the very strong seas, taking 9 hours just to reach Robe, which was only 32 miles away. There they filled the tanks with ample benzene for the task ahead (impossible to do at sea at the time), took in food and brought on board the Robe Harbour Master, Mr Sneath. The Harbour Master was then able to safely pilot the lifeboat to Cape Jaffa in the smoother coastal waters, saving very much time, but by the time they arrived at Cape Jaffa the 2 survivors had already been taken to the lighthouse on the mainland. There was also a question as to the chances of the ship ASTORIA lowering a lifeboat to help with the disaster. Captain Solly explained that it would have been impossible without sacrificing the lives of the lifeboat crew , due to the great height of the ship out of the water and the roughness of the sea. Captain Svenson, of the ASTORIA, said himself “We are ourselves in a helpless position” and “"Cannot see anything of lifeboats”. One of the 14 lost crew of the NYORA was Hugh Edwards, whose body was not recovered. The descendants of Captain William McBain have continued the seafaring heritage. His son was also a tugboat captain (Captain Norman Clive McBain), working mostly from Reid Street Pier, Williamstown, who would often take his own grandson out to sea to spend time with him on his tugboat. Now that grandson has built a tugboat in memory of his heritage and spends time in it with his own grandson. The Cape Jaffa original lighthouse has been dismantled and moved to Kingston and is now a Lighthouse Museum. The attached photographs of Margaret Brock Reef, and the Cape Jaffa Lighthourse keeper's cottage (now in ruins) is courtesy of Capt. William McBain's great grandson, who visited the area in 2015. There is a model of the NYORA in Museum Victoria, donated by Huddart Packer & Co Ltd. in 1937. This photograph is significant for its association with the tugboat NYORA, that is part of the seafaring history of the Port of Melbourne and associated Victorian ports. Black and White photograph of the tugboat NYORA and steam ship INVERNESS-SHIRE. C. 1915-1917.flagstaff hill, warrnambool, shipwrecked-coast, flagstaff-hill, flagstaff-hill-maritime-museum, maritime-museum, shipwreck-coast, flagstaff-hill-maritime-village, historic maritime photograph, lighthouses, shipwrecks, steamships, j.p. rennoldson & sons ltd, huddart parker pty ltd, nepean, nyora, inverness-shire, astoria, captain w.m. mcbain, william cummings supervising engineer, cape jaffa lighthouse, beachport lifeboat, captain solly, captain svenson, margaret brock reef -
 Eltham District Historical Society Inc
Document - Property Binder, 338 Main Road, Lower Plenty (also 37 Rangeview Road), March 2025
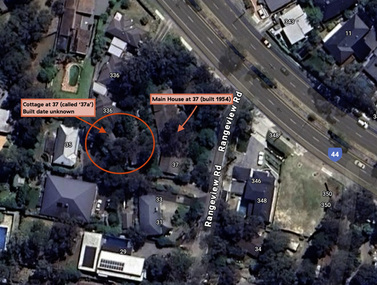
EDHS_03095-338 | EDHS_08635-37 338 Main Road Lower Plenty | 37 Rangeview Road, Lower Plenty Original Mudbrick cottage and studio designed and built by Eltham artist, David Alan Newbury See also EDHS_06090 David Newbury (Artist) David Newbury was married to Clare Margaret Newbury. According to the 1954 Electoral Roll they were living at 36A Murphy Street, South Yarra however around 1953 they purchased Lots 3 and 4 of Main Road Lot Plan LP 23911 in Lower Plenty. A building permit, No. 71, was issued 8 December 1953 for a 5-room house of Vertical Board construction, cost £2,840, builder L. Williams, owner D. Newbury of 36 Murphy Cl., South Yarra. The large house was in fact mostly built of mudbrick, the construction method was only just becoming recognised as an acceptable form in the late 1940s for issuance of a building permit. The house was commenced in 1954, designed by David Newbury and built by David Newbury, Horrie Judd and others. Information from Newbury family friends suggests that a second mudbrick building was constructed in the late 1950s, early 1960s for use as an artist studio by Newbury. The building was connected directly to the water mains at the time and was made suitable for living accommodation during the period Newbury was teaching at Bendigo. Apparently he and Claire rented out the main house during their time in Bendigo and would reside in the studio when visiting Melbourne. No permit for this studio was found in the Building Permit Register, Shire of Eltham, 1949-1960. The last recorded entries in the register are dated May 1960. This would suggest that the studio was constructed post May 1960. It is believed the studio was constructed during the latter period of Newbury’s teaching post in Bendigo so possibly late 1960/1961. In 1963 the Newbury’s address in the Electoral Roll has the property recorded as 220 Main Road, Lower Plenty. Between 1967 to 1980 the Electoral Rolls record the property as 338 Main Road. Today the address is 37 Rangeview Road, Lower Plenty. Contents: 1. Extract from 1942 Shire of Eltham Rate Book. Muriel Gladys Reitsma listed as owner 2. Extract from 1984-85 Shire of Eltham Rate Book for Rangeview Road. (No mention of No. 37 so was probably still listed as 338 Main Road.) 3. Certificate of Title, Vol. 5601 Fol. 1120089 - Issued to David James Graham of Lower Plenty, Builder, Heidelberg for Lot 32 Block B on Plan of Subdivision No. 7606, part of Crown Portion Two, Parish of Nillumbik, County of Evelyn, 29 October 1929 4. Certificate of Title, Vol. 8008 Fol. 076 - Issued to David Alan Newbury of 36 Murphy Street, South Yarra, School Teacher for Lot 3 on Plan of Subdivision No. 23911, part of Crown Portion Two, Parish of Nillumbik, County of Evelyn, 29 October 1953. Amended 24 June 1963 to transfer portion for road widening scheme per Country Roads Board Plan 6889 - Cancelled 24 September 1984 5. Certificate of Title, Vol. 9581 Fol. 583 - Issued to Paul Robert Biber and Althea Constance Biber of 139 Lower Heidelberg Road, Ivanhoe for Lot 3 on Plan of Subdivision No. 23911, part of Crown Portion Two, Parish of Nillumbik, County of Evelyn, 24 September 1984. Derived from Vol. 8008 Fol. 076 L276994V - Cancelled 20 Nov 1992 when subdivided from one to two lots in Vol 10092 Fol. 192 and Vol. 10092 Fol. 193; LP222467B 6. Certificate of Title, Vol. 10092 Fol. 192 - Transfer to Lawrie Mein of 20 Dewar Drive, Hurstbridge of Lot 1 on Plan of Subdivision No. 222467B, lodged 17 Feb 1993, Registered 29 March 1996. Parent Titles Vol 08008 Fol 077, Vol 09581 Fol 583 7. Survey Field Notes of Part of Crown Portion 2, Parish of Nillumbik, County of Evelyn - Portion of land bounded by New Eltham Road. Application 23911 dated 8 Sep 1952 with appended Surveyor Field notes per Application 7098; R.D. Steele, Licensed Surveyor, 18 August 1950 8. Survey Field Notes of Part of Crown Portion 2, Parish of Nillumbik, County of Evelyn - Portion of land bounded by Main Road and Rangeview Road; 2 Lot subdivisions, Vol. 9581 Fol. 583 Part Lot 3 on LP 23911 and Vol. 8008 Fol, 077 Lot 4 on LP 23911; Application 221805 dated 27 November 1989; W.J. Goodison, Licensed Surveyor, and attached Surveyor's Report dated 6 June 1990 (Withdrawn) 9. Survey Field Notes of Part of Crown Portion 2, Parish of Nillumbik, County of Evelyn - Portion of land bounded by Main Road and Rangeview Road; 2 Lot subdivisions, Vol. 9581 Fol. 583 Part Lot 3 on LP 23911 and Vol. 8008 Fol, 077 Lot 4 on LP 23911; Application 222467 dated 20 November 1992 (221805 resubmitted); W.J. Goodison, Licensed Surveyor, and attached Surveyor's Report dated 6 June 1990 Notes: Items 1 to 6 donated electronically Items 7 to 9 sourced from LASSI - SPEAR, Department of Transport and Planning, Victoria State Government, https://maps.land.vic.gov.au/lassi/SpearUI.jsp main road, property, mudbrick, david newbury, phoebe mason collection, rate books, shire of eltham, certificate of title, survey plan, 37 rangeview road, 338 main road, application 23911, lower plenty, map, surveyor field notes, application 221805, application 222467 -
 Bendigo Military Museum
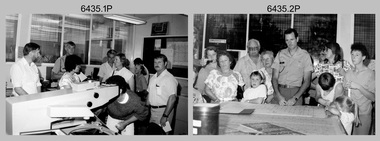
Photograph - Army Survey Regiment Open Day - Map Production, Fortuna, Bendigo, 1990
These 35 photographs were taken at an Army Survey Regiment Open Day at Fortuna Villa, Bendigo on the 24th of February 1990. This occasion was one of several events held to commemorate the 75th anniversary of the formation of the Royal Australian Survey Corps. Although historical tours of Fortuna occurred on a regular basis, this was the first technical open day since 1972. The Royal Australian Survey Corps recognised that an Open Day was the best way for the local community in Bendigo to gain an insight into the unit’s important role as Defence’s map production agency, its technical equipment, and its economic importance to Bendigo. It also gave them an opportunity to tour through historic Fortuna Villa. This occasion is covered in more detail in page 143 of Valerie Lovejoy’s book 'Mapmakers of Fortuna – A history of the Army Survey Regiment’ ISBN: 0-646-42120-4. Refer to items 6434.27P and 6436.18P for more photos of the Open Day taken inside Fortuna, the garden areas and production areas of Lithographic Squadron. Photo prints of some of these photos were scanned and catalogued in items 6247.30P and 6291.6P.These 35 photographs were taken at an Army Survey Regiment Open Day held at Fortuna, Bendigo on the 24th of February 1990. The 35mm colour and black & white negatives photographs were scanned at 96 dpi and are part of the Army Survey Regiment’s Collection. .1) - Photo, black & white, 1990. CPL Neale ‘Tex’ Houston with visitors in Aerotriangulation Section. .2) - Photo, black & white, 1990. L to R: MAJ Peter Clark and WO2 Neil ‘Ned’ Kelly with visitors in Aerotriangulation Section. .3) - Photo, black & white, 1990. SGT Bruce Hammond with visitors in Aerotriangulation Section. .4) - Photo, colour, 1990. SGT Bruce Hammond with visitors in Aerotriangulation Section. .5) - Photo, colour, 1990. SGT Steve Gloster with visitors in Aerotriangulation Section. .6) - Photo, colour, 1990. L to R: CPL Noel Brinsmead and CPL Darren Wilkinson with visitors in Aerotriangulation Section. .7) - Photo, colour, 1990. L to R: CPL Noel Brinsmead with visitors in Aerotriangulation Section. .8) - Photo, colour, 1990. MAJ Peter Clark with visitors in Aerotriangulation Section. .9) - Photo, colour, 1990. CPL Mark Lander with visitors in Plotting Section. .10) - Photo, colour, 1990. SSGT Andy Boath with visitors in Plotting Section. .11) - Photo, colour, 1990. SPR Stuart Bowd with visitors in Plotting Section. .12) - Photo, colour, 1990. CAPT Roger Hancock with visitors in Plotting Section. .13) & .14) - Photo, colour, 1990. AUTOMAP 2 - CPL Peter Peterson with visitors. .15) - Photo, colour, 1990, AUTOMAP 2 - L to R: SSGT Graham Johnston, SPR Grant Davis with civilian visitors. .16) - Photo, colour, 1990, AUTOMAP 2 - L to R: CPL Steve McGuiness, SSGT Graham Johnston with civilian visitors. .17) - Photo, colour, 1990, AUTOMAP 2 - civilian visitors. .19) - Photo, colour, 1990, AUTOMAP 2 - L to R: unidentified, SPR Tony Jackson, CPL Mark Westbrook, SSGT Bob Bright, with civilian visitors. .20) - Photo, colour, 1990, AUTOMAP 2 - L to R: WO2 Adrian ‘Charlie’ Creedy, CPL Mark Westbrook, SPR Mick Duggan with civilian visitors. .21) - Photo, colour, 1990, AUTOMAP 2 - L to R: SPR Mick Duggan, CO LTCOM Rene van den Tol, SSGT Bob Bright, CPL Mark Westbrook with civilian visitors. .22) - Photo, colour, 1990, AUTOMAP 2 - L to R: SPR Damien Nolan, unidentified, SPR Peter Smyth with civilian visitors. .23) - Photo, black & white, 1990, AUTOMAP 2 - L to R: SPR Peter Smyth, CAPT Steve Hledik, SGT Martin Evans, MAJ Neil Taylor with civilian visitors. .24) - Photo, black & white, 1990, AUTOMAP 2 - L to R: SPR Mick Duggan, CPL Mark Westbrook with civilian visitors. .25) - Photo, black & white, 1990, AUTOMAP 2 – LCPL Sandy Winn with civilian visitor. .26) - Photo, black & white, 1990. Display of digital storage media. .27) & .28) - Photo, colour, 1990. Cartography - SPR Ian Baldwin with civilian visitors. .29) - Photo, black & white, 1990. Cartography - SPR Ian Baldwin with civilian visitors. .30) - Photo, black & white, 1990. Cartography - SGT Sherri (Dally) Burke with civilian visitors. .31) - Photo, colour, 1990. Cartography - L to R: SGT Sherri (Dally) Burke, SSGT Dennis Learmonth with civilian visitors. .32) - Photo, colour, 1990. Cartography – SGT Barry Hogan with civilian visitors. .33) & .34) - Photo, colour, 1990. Cartography – CPL Dan Cirsky with civilian visitors. .35) - Photo, colour, 1990. Cartography – L to R: SPR Jeanette (Lane) Dury-Lane, CPL Diane (Thomas) Soutar with civilian visitors..1P to .35P – no annotationsroyal australian survey corps, rasvy, army survey regiment, army svy regt, fortuna, asr, automap 2 -
 Melbourne Tram Museum
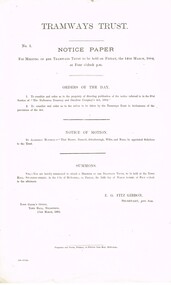
Document - Personal Papers, Melbourne Tramways Trust (MTT), "Notice Papers for 'The Melbourne Tramways Trust' meetings", 1884 -1885
Set of 33 Notice Paper or Meeting Agendas - sent to Trust Members and others for The Melbourne Tramways Trust for period March 1884 to Feb. 1885. Printed by Ferguson and Moore for the Trust. Signed by the Secretary. Covers construction arrangements, appointments, financial, loans, debentures, legislation, arrangements with the Melbourne Tramway and Omnibus Company and other organisations including banks. Notes are the principal items shown in the Orders of the Day. Printed by Fergusson and Moore Meeting No. Date Notes 1 14/3/1884 Appointment of Solicitor, E. G. Fitz Gibbon interim Secretary 2 21/3/1884 Appointment of Solicitors and Bankers 4 4/4/1884 Confer with MTOC and appointment of an Engineer. Signed by Hugh T. Jordan as clerk. 6 18/4/1884 Consider different routes, elect a Works Committee 7 25/4/1884 Confer with Mr. G. Duncan. 8 2/5/1884 Report from Legislative Committee, appointment of Mr. Duncan as Engineer to the Trust. 2nd copy has handwritten note regarding confirmation of the appointment. 9 9/5/1884 Consideration of amendments to the Act. 10 16/5/1884 Authorisation of borrowing of #500,00 and appointment of a Secretary. 11 23/5/1884 Finance report. 12 30/5/1884 Meet with deputation to have Lygon St line extended to Brunswick and payment of accounts. 13 6/6/1884 Applications for Secretary, and petition for Lygon St extension. 14 13/6/1884 Legislative committee report 15 20/6/1884 Advance to MTOC and assist bill through Parliament 16 27/6/1884 Works committee report. Signed by T. Hamilton as Secretary. 17 4/7/1884 Payment of accounts, including G. Duncan and office accounts. 18 11/7/1884 Construction of one line of tramway and another attempt for the Lygon St tramway again. 19 16/7/1884 Reduction of debenture interest rate to 4% and paying for cutting down of Swanston St. 20 1/8/1884 Interest fixed at 4.5%, accounts, construction of Richmond line, and meeting dates. 21 15/8/1884 Payments to MTCo re cost of original Acts. 22 29/8/1884 Sealing of Debentures to England, and accounts 23 5/9/1884 Re amendments to Bill for Tramway Act and payment for patents. 24 19/9/1884 Accounts, overhang of tramcars, completion of tramways. 25 26/9/1884 Tenders for works, finance report, payment of MTT expenses by MTOC. 26 10/10/1884 Works committee Report – copy in file – payments of accounts and recommend acceptance of Duncan’s plans and Richmond line by public tender. 27 Special 20/10/1884 Letter from MTOC re possible delays in the Bill – additional Branches bill. 28 24/10/1884 Finance – debentures now in England, appointment of H. Jordan as Treasurer and accounts. 29 7/11/1884 Works committee and accounts, purchase of cement, letter from Mr. Pyman re rejection of petition. 30 21/11/1884 Shows chairman’s name – Thomas O’Grady, approval of plans etc for the Richmond line. 31 5/12/1884 Works committee, accounts, payment to Mr. Pyman, purchase of equipment and engines for the Northern lines and appointment of an inspecting Engineer in England. Queries from England re sufficiency of the guarantee on the debentures. 32 19/12/1884 Finance Committee report – accounts. 33 9/1/1885 Finance and works – accounts, tenders for cement etc, appoint of an inspector of works, authorise plans for Brunswick, Fitzroy and Spencer St and Collingwood and Nicholson St. 34 23/1/1885 Finance and works – accounts, report on tenders. 35 6/2/1885 Committee reports, accounts, land purchase, appoint of Mr. Carruthers as inspecting Engineer in England – 1% of value of work. For a word version - see: \dbtext\hawthtramcoll\images\htd2001doc.doctrams, tramways, mtt, cable trams, melbourne tramways trust, construction, finances, mto co -
 Tramway Heritage Centre
Photograph Album (part of), Ray Pearson's Photo Album - Trams of Victorian Railways, Ballarat, Bendigo, Geelong
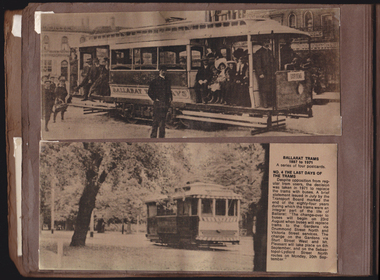
Page 4 of Ray Pearson's Photo Album. Brown card page with two metallic look postcards (landscape format) placed on page using clear plastic photo corners. Both postcard images depict trams in Ballarat. Both postcards have come loose of two of their photo corners (top and bottom on the left) and are not secure on the page.Printed text to back of postcard at top: BALLARAT TRAMS / 1887 to 1971 / A series of four postcards. / NO. 2 EARLY ELECTRIC TRAMS / Electric trams first ran in / Ballarat on 18th Aigust, 1905. / Twelve of the horse trams were / converted to electric cars by lengthening them at both ends. / Eight of the remaining horse / trams were used as trailers to / the motor cars. / The electric trams were / given a secret trial during the / previous night to the opening / date, but the drivers clanged / the gongs so much that it / brought people out of their / beds in night attire. They / formed an unofficial guard of / honour around Wendouree / Parade. / The trams were gaily decor- / ated for Opening Day. As the / line of cars came down Camp / Hill (Sturt Street) filled with / local dignitaries, the brakes on / the last car failed and it crashed / into the one in front. The win- / dows of both cars were / smashed, and the occupants / who had been sitting in state / made an undignified exit. / Seating accommodation was / from 32 to 36. Six small electric / trams were purchased from the / Sydney Tramways in 1905 and / were converted to a similar / pattern to the 12 re-built / Ballarat horse trams. In 1906 / two open summer cars with / open cross seats (popularly / called toast racks) / were intro- / duced. These trams were packed at week-ends with / families en route to picnic by / the lake. A fine printed vertical line runs down the centre of the blank writing space to the left of the body text. Above is written: POSTCARD Printed text to right of image on bottom postcard: BALLARAT TRAMS / 1887 to 1971 / A series of four postcards. / NO. 4 THE LAST DAYS OF THE TRAMS / Despite opposition from reg- / ular tram users, the decision / was taken in 1971 to replace / the trams with buses. A brief / statement issued in July by the / Transport Boar marked the / end of the eighty-four years / during which the trams were an / integral part of the life of / Ballarat: “The change-over to / buses will begin on 23rd / August when buses will replace / trams to the Gardens via / Drummond Street North and / Victoria Street services. The / change on the Gardens via / Sturt Street West and Mt. / Pleasant will take place on 6th / September, and on the Sebas- / topol-Lydiard Street North / routes on Monday, 20th Sep- / tember.” A fine printed vertical line runs down the centre of the blank writing space to the left of the body text. Above is written: POSTCARDpostcard, ballarat trams, ballarat tramways, vintage trams, tram postcard, electric trams -
 Stawell Historical Society Inc
Book, Stawell Joint Venture, Stawell Joint Venture Reports 1976-1992, 1976-1992
Information on various aspects of the Stawell Gold Mine14 Yellow card with Black Plastic Ring Binders for spine. 3 Logos W.M.C. Central Norseman Limited Gold Corporation. Stawell Joint Venture. 2121: Western Mining Corporation Limited & Central Norseman Gold Corporation Limited. Progress report 1979 By R.B. Sloan. A Preliminary Look at the cost of establishing a Gold Production Operation at Stawell By N.R. Hook 1980 22: Western Mining Corporation Limited & Central Norseman Gold Corporation Limited. History of Exploration at Stawell By R.B. Watchorn & Stawell Development Proposal By R.B. Watchorn & N.R. Hooker 1980 23: Western Mining Corporation Limited & Stawell Joint Venture. Preliminary draft Stawell Gold Development Project A report on a proposed Exploration Drive. January 1981 24: Western Mining Corporation Limited & Stawell Joint Venture. Stawell Gold Development Project 1981 25: Western Mining Corporation Limited & Central Norseman Gold Corporation Limited. K Report No, 2595 Stawell Progress Report 1976-1981 26 Western Mining Corporation Limited & Central Norseman Gold Corporation Limited. K Reort No. 2630 Stawell report on teh Wonga Mining Area with recommendations for exploration. 1982 27 Western Mining Corporation Limited ( Incorporated in Victoria). Acting Manager And Agent for and on behalf of the Stawell Joint Venture between Western Mining Corporation Limited & Central Norseman Gold Corporation Limited 28: Western Mining Corporation Limited. Stawell Gold Project: A report on proposed Operations. 1983 29: Western Mining Corporation Limited & Central Norseman Gold Corporation Limited. K Report No. 2870 A report on the Newington - Three Jacks area with recommendations for Exploration 1984 30: Western Mining Corporation Limited & Central Norseman Gold Corporation Limited. Report K 2885 THe Geology, Ore reserves & Exploration Potential of the Wonga Area, Stawell 1984 31: Western Mining Corporation Limited & Stawell Joint Venture. Stawell Gold Project: Davis Open Cut Environment Effects Statement 1986 32: Western Mining Corporation Limited & Central Norseman Gold Corporation Limited. Report. The Stawell Goldfield History of Exploration and Development & Chronology of the Discovery, History & Development of the Stawell Gold Field. 33: Western Mining Corporation Limited & Central Norseman Gold Corporation Limited. K Report 3392 Stawell Exploration Joint Venture Progress report 1982-1991 1991 34: Western Mining Corporation Limited & Central Norseman Gold Corporation Limited. Three Fold out maps on the Treatment Plant. 1. Ball Mill Installation May 1989. 2. Vibrating Screen April 1992. By-Pass / Underflow / Oversize April 1992. 35Western Mining Corporation Limited & Central Norseman Gold Corporation Limited. Stawell - A renaissance. By S.H. Tan. 1986stawell gold mining -
 Ballarat Base Hospital Trained Nurses League
Priscilla Wardle - Trainee Ballarat District Hospital, 27/02/1905 to 01/03/1908 and WW1 Nurse. Also Edith Popplewell & Lily MacKenzie
No 1: Matron Eagleton with Nursing Staff, Ballarat & District Hospital. Priscilla Wardle, far right - trainee nurse 1905-1908. No 2: This could be a group of trainee nurses at Ballarat Hospital. Circa 1906/1907. The nurses with the grey looking sleeves in this black and white photograph may be wearing the lilac uniform of Trainee nurses. The sitting nurse on the far right may already be qualified because she appears to be wearing the white of a trained nurse. Sitting in the middle with the cheeky grin could be Priscilla and the standing nurse on the far left could be Edith Popplewell. No 3: This photograph is labelled 1907 and Priscilla would have just commenced her training. She appears to be “fanning” a female patient presumably to cool her down. This could be upstairs in the Queen Victoria’s Women’s Ward. Priscilla graduated as a nurse in 1908. In this photograph Priscilla was at age 23 years. No 5: Sheila Kelly (left) and Priscilla Wardle. This photograph is labelled 1909 and shows Priscilla in an all white uniform indicating she has qualified as a nurse. Sheila Kelly appears to have darker sleeves/blouse (lilac) and may still be a trainee. No 6: There is a very good chance that this photograph is Edith Popplewell, standing left, Lily MacKenzie , standing on the right and Priscilla seated. Writing in her album is very hard to read but it appears to be “Pop McK & I”. The arm bands with the St John Cross denote they are “charge nurses” maybe in charge of a ward. Taking all this into account the photograph could be circa 1909/1910. No 8 & 9: Priscilla painting what appears to be a gate while wearing her nurse uniform. She has a big grin on her face. Together with Lily MacKenzie they were the principals in the Mount Stuart Private Hospital at 18 Duke Street. Daylesford. This property is now known as Mount Stuart House. Priscilla appears to be on Central Spring Road with the Daylesford Post Office in the background. Photograph 9 is labelled 1914 which would make it near the end of their tenancy between 1911 and 1914. No 10: This photograph raises some questions. Priscilla appears to have darker sleeves /blouse (lilac) which may indicate she is still a trainee however Priscilla is also wearing a “charge nurse” arm band. While my research shows trainee nurses can be a “charge nurse” this is not common practise. The scene appears to be at the door of a house/home. I am not sure if the children’s ward/orphanage at the Ballarat Hospital at this time was in such a building. It could be that it is at the Mount Stuart Hospital but this would mean Priscilla and Lily have duplicated the wearing of the “charge nurse” arm band. The St John’s logo looks different too. Priscilla Isabel “Pearl” Wardle (1884-1967). The armband indicates Priscilla is a Charge Nurse at the Ballarat Hospital. Nothing else known. No 11: Mary & I at Mount Stuart – House Daylesford – This is probably the nursery at the Mount Stuart House Private Hospital being run by Priscilla Isabel “Pearl” Wardle (1884 – 1967) and Selina Lily (Lil) MacKenzie or McKenzie (1882 – 1975) between 1910 and 1914. Mary is certainly Mary Young MacKenzie or McKenzie (1865- 1942) Lily’s stepsister who trained at Ballarat Hospital as “Mary Young “at the same time as Priscilla and Lily. Mount Stuart House still stands at 18 Duke Street Daylesford. Photo date 1912. No 12: Priscilla wearing her distinctive Queen Alexandra’s Imperial Military Nursing Service Reserve cape and badge. Possibly while nursing in London for a month in 1919 after the war. No 12A: Priscilla Wardle - WW1 Diary, OCR enabled. No 13: Priscilla and friends at No. 7 General Hospital, Malassises, Saint Omer, France in July 1915 The old monastery being used as a hospital can be seen in the background. The tents are the nurses quarters. This photograph may have been taken at the same time as the group photograph on page 250 of the diary transcription. Priscilla is thought to be the nurse at the centre in the QAIMNSR uniform. The nurses quarters at the No 7 General Hospital in Saint Omer in France where Priscilla worked for most of the first year of her Diary. Their Monastery (Hospital) at Malassises can be seen in the background. No 15: Priscilla is an Acting Sister working at the 2nd General Hospital for Officers in Havre, France, between March and July 1918. The nurses were enjoying their “tea party”. (see also page 253 of the Diary transcription) No 17: Priscilla at Havre - at 2nd General Hospital (Officers Hospital) in Havre., France Friday 29 March 1918 to Monday 29 July 1918 note the two dark bands on her right sleeve denoting that she is an “Acting Sister”. Priscilla is 34 years of age in this picture and in the three weeks prior to this posting she met Cyril Terence Charles Kirby (1892-1968) her future husband at the 42nd Stationary Hospital in Flixecourt while he was serving with the British Army during the battle and evacuation of Amiens. No 18: Priscilla Wardle at No 8 Stationary Hospital Wimereux, France - from Saturday 24 June 1916 to Tuesday 18 September 1917, Priscilla worked at this hospital for 15 months her longest time in one hospital. during the war. While at Wimereux on Sunday 1 July 1917 she was appointed an Acting Sister. Priscilla once said she disliked nursing in her cape and badges and here she is in her favourite “uniform” for work “the robe” as she called it. She may be leaving the “operating theatre” at Wimereux in this photograph. No 19: Priscilla worked in various operating theatres throughout France. This could be after she became an anaesthetist in 1918 and worked with this team. She is wearing her favourite uniform which is more comfortable. She did not like the collars and capes that were required to be worn. No 20: Priscilla and Sister Michael Meeke? (details not found) are having a quiet drink at the 2nd General Hospital for Officers in Havre, France. Note the dark bands on their sleeves denote their rank as nursing “Sisters”. While it looks like they are smoking look more closely they are in fact holding a “flute” style probably “cocktail” glass. Tea parties and cocktails, Havre could almost have been fun. No 22: 1913 – Ballarat nurse Priscilla Isabell “Pearl” Wardle (1884-1967) in Cannes on the French Riviera during leave from between Friday 20 February 1918 and Friday 6 March 1918.Priscilla is second from the left wearing her distinctive QAIMNSR cape of grey with dark “wine” coloured border. The other nurses are wearing their “travelling” army uniform. They were rudely called “Salvation Army Lassies” by American nurses for the way they were dressed. (see page 232 of Priscilla’s War Diary) The description of 1913 on this photograph is confusing. No 23: Priscilla with her best friend Edith Victoria Donaldson somewhere in the “mysterious far east” on their trip on the Orontes. Priscilla is second from left - this may have been taken at Durban during Priscilla's return to Australia in 1919. No 25: Priscilla Wardle, Ballarat nurse in her Queen Alexandra’s Imperial Military Nursing Service Reserve (QAIMNSR) uniform. Notice the distinctive grey cape with “wine coloured” border Priscilla is also wearing her QAIMNSR qualification badge (medal) on the right side. Because she has no dark (wine coloured) bands on her sleeves so this photograph may be before 1 July 1918. No 26: Priscilla met her husband to be English army Lieutenant Cyril Terrence Charles Kirby during the battle and subsequent evacuation of Amiens in France. As an army nursing “Sister” Priscilla also held the rank of Lieutenant. Priscilla was stationed at the 42nd Stationary Hospital between 7/3/18 and 23/3/18. She had just completed a fortnight break at Cannes on the French Riviera. They were married at Priscilla’s home “Waverley" at 215 Dawson Street Ballarat on Saturday 15 November 1919. Nov 15, 1919 – Mr and Mrs Kirby. The bride Priscilla Isabell “Pearl” Kirby (nee Wardle) (1884-1967) and the groom Cyril Terence Charles Kirby (1892– 1968) on their wedding day. Priscilla was 34 years of age and Cyril 27 years of age however their marriage certificate states that they were both 34 years of age. Their marriage certificate states they were married at Waverley, Dawson St, South, Ballarat in a Presbyterian service conducted by the Rev. John Walker, a Minister of the Presbyterian Church of Australia and the Moderator General of the Church we think for Victoria. Was it in an outdoor setting as the surrounds in this photograph seem to indicate. Their witnesses were Robert and Olive, Priscilla’s brother and sister. Cyril signed as C. Terence. C. Kirby and Priscila signed as Priscilla I. Wardle. The certificate lists Cyril (Terence) as a Bachelor, Born at sea on a British ship and his occupation as Sailor. His father interestingly is listed as Charles John Kirby, of independent means and his mother as Emily Newman. Priscilla is listed as a Spinster, born in Ballarat with occupation as a Nurse. Her father is listed as Henry Thomas Wardle, Timber Merchant and her mother as Isabella Allan. They are both resident at 215 Dawson St. Ballarat which was Waverley the Wardle family home. No 28: Reverse in Poppy’s handwriting: “Lovingly yours Poppy, Dec 1908” Taken the year after Poppy qualified at BBH. No 29: Reverse in Poppy’s handwriting: “With much love to you Cilla, Poppy 1915” This picture was taken in the same year as the Marquette sinking incident. Edith Catheina Popplewell RRC (1884-1972) in her New Zealand Army Nursing Service (NZANS) Uniform. Poppy is at age 29 years in this photograph. Poppy was awarded the Royal Red Cross (RRC) medal for her heroism during the sinking of the Marquette transport ship. She lost her best friend NZ nurse Lorna Ratray. No 30: Taken in Cairo. Poppy is in the centre and wearing her New Zealand army badge and cape. The two nurses on either side are Australian nurses probably wearing their unique silver Australian Army sunrise badge and cape. No 31: Reverse in Poppy’s handwriting: “Ward 7 on Xmas day 1917, with my love, Poppy, A Happy New Year to you – had the sweetest letter from Bobbie”. (Bobbie is Priscilla’s brother Robert). It is thought the nurse in the centre of the three on the left is Poppy. It is 1917 two years after the Marquette sinking. Poppy appears to be a “sister” note the two dark bands on her sleeve. The uniform also matches that of Poppy 2. This photograph is in Post Card form very common during WWI. Edith Popplewell RRC is the “Sister” in the middle of the group of three nurses on the left. She is a sister not a general nurse because of the two bands on her left wrist denoting her rank. She was in fact the Charge Nurse ( in charge) of Ward 7 at this time. Note the Christmas decorations. Poppy is at age 33 years of age in this photograph.Bobbie is Priscilla’s brother Robert Norman “Bobbie” Wardle (1895-1979). No 32: Lilly MacKenzie & Poppy – Otaki - Australian nurse Selina Lily (Lil) MacKenzie sometimes McKenzie (1882– 975) grew up and trained as a nurse in Ballarat Victoria. After completing her training Lily and Priscilla Isabell “Pearl” Wardle (1884 – 1967) conducted the Mount Stuart House Private Hospital in Daylesford Victoria. In late 1913 Lily travelled to Otaki, 32 kms north of Wellington in New Zealand and worked at the Otaki Cottage Hospital with close friend Edith Catheina Popplewell “Poppy” (1884-1976) who also grew up and trained as a nurse at the Ballarat Hospital. In 1914 Lily was matron of a private hospital in Taihape 150kms north of Wellington. Both Lily and Poppy volunteered for New Zealand but as New Zealand were not accepting Australian trained nurses she returned to Australia and enlisted in the Australian Army Nursing Service (AANS) in October 1915. Lily went on to serve in Egypt, England, France and Italy where she was awarded the Royal Red Cross (RRC) medal for her service. This photograph is while Lily and Poppy were working at Otaki Cottage Hospital in New Zealand. Circa 1914. trainee, charge sister, ballarat, hospital, 1905, 1908, ww1, mount stuart house, sleeman, wardle, popplewell, mackenzie, military, queen alexandra's imperial military nursing service reserve, daylesford, nurses, private hospital, edith popplewell, france, cairo, diary, ww1 diary, havre, lily mackenzie, eagleton, matron, otaki, new zealand, donaldson, malassises, kelly, young, kirby, priscilla -
 Flagstaff Hill Maritime Museum and Village
Flange
Ref LA 3 32 256 HISTORY OF THE LOCH ARD The LOCH ARD belonged to the famous Loch Line which sailed many ships from England to Australia. Built in Glasgow by Barclay, Curdle and Co. in 1873, the LOCH ARD was a three-masted square rigged iron sailing ship. The ship measured 262ft 7" (79.87m) in length, 38ft (11.58m) in width, 23ft (7m) in depth and had a gross tonnage of 1693 tons. The LOCH ARD's main mast measured a massive 150ft (45.7m) in height. LOCH ARD made three trips to Australia and one trip to Calcutta before its final voyage. LOCH ARD left England on March 2, 1878, under the command of Captain Gibbs, a newly married, 29 year old. She was bound for Melbourne with a crew of 37, plus 17 passengers and a load of cargo. The general cargo reflected the affluence of Melbourne at the time. On board were straw hats, umbrella, perfumes, clay pipes, pianos, clocks, confectionary, linen and candles, as well as a heavier load of railway irons, cement, lead and copper. There were items included that intended for display in the Melbourne International Exhibition in 1880. The voyage to Port Phillip was long but uneventful. At 3am on June 1, 1878, Captain Gibbs was expecting to see land and the passengers were becoming excited as they prepared to view their new homeland in the early morning. But LOCH ARD was running into a fog which greatly reduced visibility. Captain Gibbs was becoming anxious as there was no sign of land or the Cape Otway lighthouse. At 4am the fog lifted. A man aloft announced that he could see breakers. The sheer cliffs of Victoria's west coast came into view, and Captain Gibbs realised that the ship was much closer to them than expected. He ordered as much sail to be set as time would permit and then attempted to steer the vessel out to sea. On coming head on into the wind, the ship lost momentum, the sails fell limp and LOCH ARD's bow swung back. Gibbs then ordered the anchors to be released in an attempt to hold its position. The anchors sank some 50 fathoms - but did not hold. By this time LOCH ARD was among the breakers and the tall cliffs of Mutton Bird Island rose behind the ship. Just half a mile from the coast, the ship's bow was suddenly pulled around by the anchor. The captain tried to tack out to sea, but the ship struck a reef at the base of Mutton Bird Island, near Port Campbell. Waves broke over the ship and the top deck was loosened from the hull. The masts and rigging came crashing down knocking passengers and crew overboard. When a lifeboat was finally launched, it crashed into the side of LOCH ARD and capsized. Tom Pearce, who had launched the boat, managed to cling to its overturned hull and shelter beneath it. He drifted out to sea and then on the flood tide came into what is now known as LOCH ARD Gorge. He swam to shore, bruised and dazed, and found a cave in which to shelter. Some of the crew stayed below deck to shelter from the falling rigging but drowned when the ship slipped off the reef into deeper water. Eva Carmichael had raced onto deck to find out what was happening only to be confronted by towering cliffs looming above the stricken ship. In all the chaos, Captain Gibbs grabbed Eva and said, "If you are saved Eva, let my dear wife know that I died like a sailor". That was the last Eva Carmichael saw of the captain. She was swept off the ship by a huge wave. Eva saw Tom Pearce on a small rocky beach and yelled to attract his attention. He dived in and swam to the exhausted woman and dragged her to shore. He took her to the cave and broke open case of brandy which had washed up on the beach. He opened a bottle to revive the unconscious woman. A few hours later Tom scaled a cliff in search of help. He followed hoof prints and came by chance upon two men from nearby Glenample Station three and a half miles away. In a state of exhaustion, he told the men of the tragedy. Tom returned to the gorge while the two men rode back to the station to get help. By the time they reached LOCH ARD Gorge, it was cold and dark. The two shipwreck survivors were taken to Glenample Station to recover. Eva stayed at the station for six weeks before returning to Ireland, this time by steamship. In Melbourne, Tom Pearce received a hero's welcome. He was presented with the first gold medal of the Royal Humane Society of Victoria and a £1000 cheque from the Victorian Government. Concerts were performed to honour the young man's bravery and to raise money for those who lost family in the LOCH ARD disaster. Of the 54 crew members and passengers on board, only two survived: the apprentice, Tom Pearce and the young woman passenger, Eva Carmichael, who lost all of her family in the tragedy. Ten days after the LOCH ARD tragedy, salvage rights to the wreck were sold at auction for £2,120. Cargo valued at £3,000 was salvaged and placed on the beach, but most washed back into the sea when another storm developed. The wreck of LOCH ARD still lies at the base of Mutton Bird Island. Much of the cargo has now been salvaged and some was washed up into what is now known as LOCH ARD Gorge. Cargo and artefacts have also been illegally salvaged over many years before protective legislation was introduced. One of the most unlikely pieces of cargo to have survived the shipwreck was a Minton porcelain peacock - one of only nine in the world. The peacock was destined for the Melbourne International Exhibition in 1880. It had been well packed, which gave it adequate protection during the violent storm. Today, the Minton peacock can be seen at the Flagstaff Hill Maritime Museum in Warrnambool. From Australia's most dramatic shipwreck it has now become Australia's most valuable shipwreck artefact and is one of very few 'objects' on the Victorian State Heritage Register. Flagstaff Hill’s collection of artefacts from LOCH ARD is significant for being one of the largest collections of artefacts from this shipwreck in Victoria. It is significant for its association with the shipwreck, which is on the Victorian Heritage Register (VHR S417). The collection is significant because of the relationship between the objects, as together they have a high potential to interpret the story of the LOCH ARD. The LOCH ARD collection is archaeologically significant as the remains of a large international passenger and cargo ship. The LOCH ARD collection is historically significant for representing aspects of Victoria’s shipping history and its potential to interpret sub-theme 1.5 of Victoria’s Framework of Historical Themes (living with natural processes). The collection is also historically significant for its association with the LOCH ARD, which was one of the worst and best known shipwrecks in Victoria’s history. Small square brass Flange with four corner holes and one larger centre hole. Artefact Reg No LA/25. Recovered from the wreck of the Loch Ard.flagstaff hill, warrnambool, shipwrecked coast, flagstaff hill maritime museum, maritime museum, shipwreck coast, flagstaff hill maritime village, great ocean road, loch line, loch ard, captain gibbs, eva carmichael, tom pearce, glenample station, mutton bird island, loch ard gorge, flange -
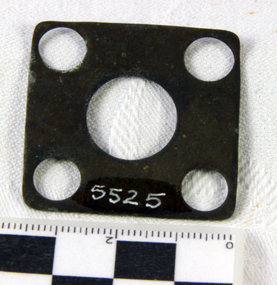 Flagstaff Hill Maritime Museum and Village
Flange
Ref LA 3 32 257 HISTORY OF THE LOCH ARD The LOCH ARD belonged to the famous Loch Line which sailed many ships from England to Australia. Built in Glasgow by Barclay, Curdle and Co. in 1873, the LOCH ARD was a three-masted square rigged iron sailing ship. The ship measured 262ft 7" (79.87m) in length, 38ft (11.58m) in width, 23ft (7m) in depth and had a gross tonnage of 1693 tons. The LOCH ARD's main mast measured a massive 150ft (45.7m) in height. LOCH ARD made three trips to Australia and one trip to Calcutta before its final voyage. LOCH ARD left England on March 2, 1878, under the command of Captain Gibbs, a newly married, 29 year old. She was bound for Melbourne with a crew of 37, plus 17 passengers and a load of cargo. The general cargo reflected the affluence of Melbourne at the time. On board were straw hats, umbrella, perfumes, clay pipes, pianos, clocks, confectionary, linen and candles, as well as a heavier load of railway irons, cement, lead and copper. There were items included that intended for display in the Melbourne International Exhibition in 1880. The voyage to Port Phillip was long but uneventful. At 3am on June 1, 1878, Captain Gibbs was expecting to see land and the passengers were becoming excited as they prepared to view their new homeland in the early morning. But LOCH ARD was running into a fog which greatly reduced visibility. Captain Gibbs was becoming anxious as there was no sign of land or the Cape Otway lighthouse. At 4am the fog lifted. A man aloft announced that he could see breakers. The sheer cliffs of Victoria's west coast came into view, and Captain Gibbs realised that the ship was much closer to them than expected. He ordered as much sail to be set as time would permit and then attempted to steer the vessel out to sea. On coming head on into the wind, the ship lost momentum, the sails fell limp and LOCH ARD's bow swung back. Gibbs then ordered the anchors to be released in an attempt to hold its position. The anchors sank some 50 fathoms - but did not hold. By this time LOCH ARD was among the breakers and the tall cliffs of Mutton Bird Island rose behind the ship. Just half a mile from the coast, the ship's bow was suddenly pulled around by the anchor. The captain tried to tack out to sea, but the ship struck a reef at the base of Mutton Bird Island, near Port Campbell. Waves broke over the ship and the top deck was loosened from the hull. The masts and rigging came crashing down knocking passengers and crew overboard. When a lifeboat was finally launched, it crashed into the side of LOCH ARD and capsized. Tom Pearce, who had launched the boat, managed to cling to its overturned hull and shelter beneath it. He drifted out to sea and then on the flood tide came into what is now known as LOCH ARD Gorge. He swam to shore, bruised and dazed, and found a cave in which to shelter. Some of the crew stayed below deck to shelter from the falling rigging but drowned when the ship slipped off the reef into deeper water. Eva Carmichael had raced onto deck to find out what was happening only to be confronted by towering cliffs looming above the stricken ship. In all the chaos, Captain Gibbs grabbed Eva and said, "If you are saved Eva, let my dear wife know that I died like a sailor". That was the last Eva Carmichael saw of the captain. She was swept off the ship by a huge wave. Eva saw Tom Pearce on a small rocky beach and yelled to attract his attention. He dived in and swam to the exhausted woman and dragged her to shore. He took her to the cave and broke open case of brandy which had washed up on the beach. He opened a bottle to revive the unconscious woman. A few hours later Tom scaled a cliff in search of help. He followed hoof prints and came by chance upon two men from nearby Glenample Station three and a half miles away. In a state of exhaustion, he told the men of the tragedy. Tom returned to the gorge while the two men rode back to the station to get help. By the time they reached LOCH ARD Gorge, it was cold and dark. The two shipwreck survivors were taken to Glenample Station to recover. Eva stayed at the station for six weeks before returning to Ireland, this time by steamship. In Melbourne, Tom Pearce received a hero's welcome. He was presented with the first gold medal of the Royal Humane Society of Victoria and a £1000 cheque from the Victorian Government. Concerts were performed to honour the young man's bravery and to raise money for those who lost family in the LOCH ARD disaster. Of the 54 crew members and passengers on board, only two survived: the apprentice, Tom Pearce and the young woman passenger, Eva Carmichael, who lost all of her family in the tragedy. Ten days after the LOCH ARD tragedy, salvage rights to the wreck were sold at auction for £2,120. Cargo valued at £3,000 was salvaged and placed on the beach, but most washed back into the sea when another storm developed. The wreck of LOCH ARD still lies at the base of Mutton Bird Island. Much of the cargo has now been salvaged and some was washed up into what is now known as LOCH ARD Gorge. Cargo and artefacts have also been illegally salvaged over many years before protective legislation was introduced. One of the most unlikely pieces of cargo to have survived the shipwreck was a Minton porcelain peacock - one of only nine in the world. The peacock was destined for the Melbourne International Exhibition in 1880. It had been well packed, which gave it adequate protection during the violent storm. Today, the Minton peacock can be seen at the Flagstaff Hill Maritime Museum in Warrnambool. From Australia's most dramatic shipwreck it has now become Australia's most valuable shipwreck artefact and is one of very few 'objects' on the Victorian State Heritage Register. Flagstaff Hill’s collection of artefacts from LOCH ARD is significant for being one of the largest collections of artefacts from this shipwreck in Victoria. It is significant for its association with the shipwreck, which is on the Victorian Heritage Register (VHR S417). The collection is significant because of the relationship between the objects, as together they have a high potential to interpret the story of the LOCH ARD. The LOCH ARD collection is archaeologically significant as the remains of a large international passenger and cargo ship. The LOCH ARD collection is historically significant for representing aspects of Victoria’s shipping history and its potential to interpret sub-theme 1.5 of Victoria’s Framework of Historical Themes (living with natural processes). The collection is also historically significant for its association with the LOCH ARD, which was one of the worst and best known shipwrecks in Victoria’s history. Small square brass Flange with four corner holes and one larger centre hole. Artefact Reg No LA/26. Recovered from the wreck of the Loch Ard.flagstaff hill, warrnambool, shipwrecked coast, flagstaff hill maritime museum, maritime museum, shipwreck coast, flagstaff hill maritime village, great ocean road, loch line, loch ard, captain gibbs, eva carmichael, tom pearce, glenample station, mutton bird island, loch ard gorge, flange -
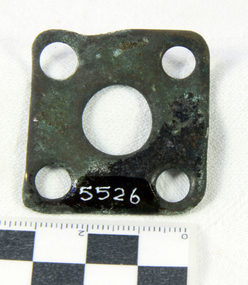 Flagstaff Hill Maritime Museum and Village
Flange
Ref LA 3 32 258 HISTORY OF THE LOCH ARD The LOCH ARD belonged to the famous Loch Line which sailed many ships from England to Australia. Built in Glasgow by Barclay, Curdle and Co. in 1873, the LOCH ARD was a three-masted square rigged iron sailing ship. The ship measured 262ft 7" (79.87m) in length, 38ft (11.58m) in width, 23ft (7m) in depth and had a gross tonnage of 1693 tons. The LOCH ARD's main mast measured a massive 150ft (45.7m) in height. LOCH ARD made three trips to Australia and one trip to Calcutta before its final voyage. LOCH ARD left England on March 2, 1878, under the command of Captain Gibbs, a newly married, 29 year old. She was bound for Melbourne with a crew of 37, plus 17 passengers and a load of cargo. The general cargo reflected the affluence of Melbourne at the time. On board were straw hats, umbrella, perfumes, clay pipes, pianos, clocks, confectionary, linen and candles, as well as a heavier load of railway irons, cement, lead and copper. There were items included that intended for display in the Melbourne International Exhibition in 1880. The voyage to Port Phillip was long but uneventful. At 3am on June 1, 1878, Captain Gibbs was expecting to see land and the passengers were becoming excited as they prepared to view their new homeland in the early morning. But LOCH ARD was running into a fog which greatly reduced visibility. Captain Gibbs was becoming anxious as there was no sign of land or the Cape Otway lighthouse. At 4am the fog lifted. A man aloft announced that he could see breakers. The sheer cliffs of Victoria's west coast came into view, and Captain Gibbs realised that the ship was much closer to them than expected. He ordered as much sail to be set as time would permit and then attempted to steer the vessel out to sea. On coming head on into the wind, the ship lost momentum, the sails fell limp and LOCH ARD's bow swung back. Gibbs then ordered the anchors to be released in an attempt to hold its position. The anchors sank some 50 fathoms - but did not hold. By this time LOCH ARD was among the breakers and the tall cliffs of Mutton Bird Island rose behind the ship. Just half a mile from the coast, the ship's bow was suddenly pulled around by the anchor. The captain tried to tack out to sea, but the ship struck a reef at the base of Mutton Bird Island, near Port Campbell. Waves broke over the ship and the top deck was loosened from the hull. The masts and rigging came crashing down knocking passengers and crew overboard. When a lifeboat was finally launched, it crashed into the side of LOCH ARD and capsized. Tom Pearce, who had launched the boat, managed to cling to its overturned hull and shelter beneath it. He drifted out to sea and then on the flood tide came into what is now known as LOCH ARD Gorge. He swam to shore, bruised and dazed, and found a cave in which to shelter. Some of the crew stayed below deck to shelter from the falling rigging but drowned when the ship slipped off the reef into deeper water. Eva Carmichael had raced onto deck to find out what was happening only to be confronted by towering cliffs looming above the stricken ship. In all the chaos, Captain Gibbs grabbed Eva and said, "If you are saved Eva, let my dear wife know that I died like a sailor". That was the last Eva Carmichael saw of the captain. She was swept off the ship by a huge wave. Eva saw Tom Pearce on a small rocky beach and yelled to attract his attention. He dived in and swam to the exhausted woman and dragged her to shore. He took her to the cave and broke open case of brandy which had washed up on the beach. He opened a bottle to revive the unconscious woman. A few hours later Tom scaled a cliff in search of help. He followed hoof prints and came by chance upon two men from nearby Glenample Station three and a half miles away. In a state of exhaustion, he told the men of the tragedy. Tom returned to the gorge while the two men rode back to the station to get help. By the time they reached LOCH ARD Gorge, it was cold and dark. The two shipwreck survivors were taken to Glenample Station to recover. Eva stayed at the station for six weeks before returning to Ireland, this time by steamship. In Melbourne, Tom Pearce received a hero's welcome. He was presented with the first gold medal of the Royal Humane Society of Victoria and a £1000 cheque from the Victorian Government. Concerts were performed to honour the young man's bravery and to raise money for those who lost family in the LOCH ARD disaster. Of the 54 crew members and passengers on board, only two survived: the apprentice, Tom Pearce and the young woman passenger, Eva Carmichael, who lost all of her family in the tragedy. Ten days after the LOCH ARD tragedy, salvage rights to the wreck were sold at auction for £2,120. Cargo valued at £3,000 was salvaged and placed on the beach, but most washed back into the sea when another storm developed. The wreck of LOCH ARD still lies at the base of Mutton Bird Island. Much of the cargo has now been salvaged and some was washed up into what is now known as LOCH ARD Gorge. Cargo and artefacts have also been illegally salvaged over many years before protective legislation was introduced. One of the most unlikely pieces of cargo to have survived the shipwreck was a Minton porcelain peacock - one of only nine in the world. The peacock was destined for the Melbourne International Exhibition in 1880. It had been well packed, which gave it adequate protection during the violent storm. Today, the Minton peacock can be seen at the Flagstaff Hill Maritime Museum in Warrnambool. From Australia's most dramatic shipwreck it has now become Australia's most valuable shipwreck artefact and is one of very few 'objects' on the Victorian State Heritage Register. Flagstaff Hill’s collection of artefacts from LOCH ARD is significant for being one of the largest collections of artefacts from this shipwreck in Victoria. It is significant for its association with the shipwreck, which is on the Victorian Heritage Register (VHR S417). The collection is significant because of the relationship between the objects, as together they have a high potential to interpret the story of the LOCH ARD. The LOCH ARD collection is archaeologically significant as the remains of a large international passenger and cargo ship. The LOCH ARD collection is historically significant for representing aspects of Victoria’s shipping history and its potential to interpret sub-theme 1.5 of Victoria’s Framework of Historical Themes (living with natural processes). The collection is also historically significant for its association with the LOCH ARD, which was one of the worst and best known shipwrecks in Victoria’s history. Small square brass Flange with four corner holes and one larger centre hole. Has slight bend one side. Artefact Reg No LA/27. Recovered from the wreck of the Loch Ard.flagstaff hill, warrnambool, shipwrecked coast, flagstaff hill maritime museum, maritime museum, shipwreck coast, flagstaff hill maritime village, great ocean road, loch line, loch ard, captain gibbs, eva carmichael, tom pearce, glenample station, mutton bird island, loch ard gorge, flange, brass flange -
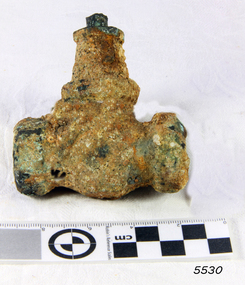 Flagstaff Hill Maritime Museum and Village
Tap
Ref: LA 3 32 273 HISTORY OF THE LOCH ARD The LOCH ARD belonged to the famous Loch Line which sailed many ships from England to Australia. Built in Glasgow by Barclay, Curdle and Co. in 1873, the LOCH ARD was a three-masted square rigged iron sailing ship. The ship measured 262ft 7" (79.87m) in length, 38ft (11.58m) in width, 23ft (7m) in depth and had a gross tonnage of 1693 tons. The LOCH ARD's main mast measured a massive 150ft (45.7m) in height. LOCH ARD made three trips to Australia and one trip to Calcutta before its final voyage. LOCH ARD left England on March 2, 1878, under the command of Captain Gibbs, a newly married, 29 year old. She was bound for Melbourne with a crew of 37, plus 17 passengers and a load of cargo. The general cargo reflected the affluence of Melbourne at the time. On board were straw hats, umbrella, perfumes, clay pipes, pianos, clocks, confectionary, linen and candles, as well as a heavier load of railway irons, cement, lead and copper. There were items included that intended for display in the Melbourne International Exhibition in 1880. The voyage to Port Phillip was long but uneventful. At 3am on June 1, 1878, Captain Gibbs was expecting to see land and the passengers were becoming excited as they prepared to view their new homeland in the early morning. But LOCH ARD was running into a fog which greatly reduced visibility. Captain Gibbs was becoming anxious as there was no sign of land or the Cape Otway lighthouse. At 4am the fog lifted. A man aloft announced that he could see breakers. The sheer cliffs of Victoria's west coast came into view, and Captain Gibbs realised that the ship was much closer to them than expected. He ordered as much sail to be set as time would permit and then attempted to steer the vessel out to sea. On coming head on into the wind, the ship lost momentum, the sails fell limp and LOCH ARD's bow swung back. Gibbs then ordered the anchors to be released in an attempt to hold its position. The anchors sank some 50 fathoms - but did not hold. By this time LOCH ARD was among the breakers and the tall cliffs of Mutton Bird Island rose behind the ship. Just half a mile from the coast, the ship's bow was suddenly pulled around by the anchor. The captain tried to tack out to sea, but the ship struck a reef at the base of Mutton Bird Island, near Port Campbell. Waves broke over the ship and the top deck was loosened from the hull. The masts and rigging came crashing down knocking passengers and crew overboard. When a lifeboat was finally launched, it crashed into the side of LOCH ARD and capsized. Tom Pearce, who had launched the boat, managed to cling to its overturned hull and shelter beneath it. He drifted out to sea and then on the flood tide came into what is now known as LOCH ARD Gorge. He swam to shore, bruised and dazed, and found a cave in which to shelter. Some of the crew stayed below deck to shelter from the falling rigging but drowned when the ship slipped off the reef into deeper water. Eva Carmichael had raced onto deck to find out what was happening only to be confronted by towering cliffs looming above the stricken ship. In all the chaos, Captain Gibbs grabbed Eva and said, "If you are saved Eva, let my dear wife know that I died like a sailor". That was the last Eva Carmichael saw of the captain. She was swept off the ship by a huge wave. Eva saw Tom Pearce on a small rocky beach and yelled to attract his attention. He dived in and swam to the exhausted woman and dragged her to shore. He took her to the cave and broke open case of brandy which had washed up on the beach. He opened a bottle to revive the unconscious woman. A few hours later Tom scaled a cliff in search of help. He followed hoof prints and came by chance upon two men from nearby Glenample Station three and a half miles away. In a state of exhaustion, he told the men of the tragedy. Tom returned to the gorge while the two men rode back to the station to get help. By the time they reached LOCH ARD Gorge, it was cold and dark. The two shipwreck survivors were taken to Glenample Station to recover. Eva stayed at the station for six weeks before returning to Ireland, this time by steamship. In Melbourne, Tom Pearce received a hero's welcome. He was presented with the first gold medal of the Royal Humane Society of Victoria and a £1000 cheque from the Victorian Government. Concerts were performed to honour the young man's bravery and to raise money for those who lost family in the LOCH ARD disaster. Of the 54 crew members and passengers on board, only two survived: the apprentice, Tom Pearce and the young woman passenger, Eva Carmichael, who lost all of her family in the tragedy. Ten days after the LOCH ARD tragedy, salvage rights to the wreck were sold at auction for £2,120. Cargo valued at £3,000 was salvaged and placed on the beach, but most washed back into the sea when another storm developed. The wreck of LOCH ARD still lies at the base of Mutton Bird Island. Much of the cargo has now been salvaged and some was washed up into what is now known as LOCH ARD Gorge. Cargo and artefacts have also been illegally salvaged over many years before protective legislation was introduced. One of the most unlikely pieces of cargo to have survived the shipwreck was a Minton porcelain peacock - one of only nine in the world. The peacock was destined for the Melbourne International Exhibition in 1880. It had been well packed, which gave it adequate protection during the violent storm. Today, the Minton peacock can be seen at the Flagstaff Hill Maritime Museum in Warrnambool. From Australia's most dramatic shipwreck it has now become Australia's most valuable shipwreck artefact and is one of very few 'objects' on the Victorian State Heritage Register. Flagstaff Hill’s collection of artefacts from LOCH ARD is significant for being one of the largest collections of artefacts from this shipwreck in Victoria. It is significant for its association with the shipwreck, which is on the Victorian Heritage Register (VHR S417). The collection is significant because of the relationship between the objects, as together they have a high potential to interpret the story of the LOCH ARD. The LOCH ARD collection is archaeologically significant as the remains of a large international passenger and cargo ship. The LOCH ARD collection is historically significant for representing aspects of Victoria’s shipping history and its potential to interpret sub-theme 1.5 of Victoria’s Framework of Historical Themes (living with natural processes). The collection is also historically significant for its association with the LOCH ARD, which was one of the worst and best known shipwrecks in Victoria’s history. Brass tap. Bronze disease active and heavily concreted. Recovered from the wreck of the Loch Ard. Artefact Reg No LA/12. flagstaff hill, warrnambool, shipwrecked coast, flagstaff hill maritime museum, maritime museum, shipwreck coast, flagstaff hill maritime village, great ocean road, loch line, loch ard, captain gibbs, eva carmichael, tom pearce, glenample station, mutton bird island, loch ard gorge, tap -
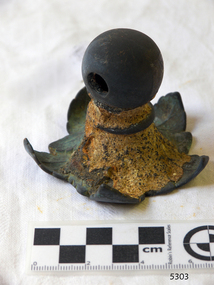 Flagstaff Hill Maritime Museum and Village
Light Fitting
Ref L/29 LA 32 254 HISTORY OF THE LOCH ARD The LOCH ARD belonged to the famous Loch Line which sailed many ships from England to Australia. Built in Glasgow by Barclay, Curdle and Co. in 1873, the LOCH ARD was a three-masted square rigged iron sailing ship. The ship measured 262ft 7" (79.87m) in length, 38ft (11.58m) in width, 23ft (7m) in depth and had a gross tonnage of 1693 tons. The LOCH ARD's main mast measured a massive 150ft (45.7m) in height. LOCH ARD made three trips to Australia and one trip to Calcutta before its final voyage. LOCH ARD left England on March 2, 1878, under the command of Captain Gibbs, a newly married, 29 year old. She was bound for Melbourne with a crew of 37, plus 17 passengers and a load of cargo. The general cargo reflected the affluence of Melbourne at the time. On board were straw hats, umbrella, perfumes, clay pipes, pianos, clocks, confectionary, linen and candles, as well as a heavier load of railway irons, cement, lead and copper. There were items included that intended for display in the Melbourne International Exhibition in 1880. The voyage to Port Phillip was long but uneventful. At 3am on June 1, 1878, Captain Gibbs was expecting to see land and the passengers were becoming excited as they prepared to view their new homeland in the early morning. But LOCH ARD was running into a fog which greatly reduced visibility. Captain Gibbs was becoming anxious as there was no sign of land or the Cape Otway lighthouse. At 4am the fog lifted. A man aloft announced that he could see breakers. The sheer cliffs of Victoria's west coast came into view, and Captain Gibbs realised that the ship was much closer to them than expected. He ordered as much sail to be set as time would permit and then attempted to steer the vessel out to sea. On coming head on into the wind, the ship lost momentum, the sails fell limp and LOCH ARD's bow swung back. Gibbs then ordered the anchors to be released in an attempt to hold its position. The anchors sank some 50 fathoms - but did not hold. By this time LOCH ARD was among the breakers and the tall cliffs of Mutton Bird Island rose behind the ship. Just half a mile from the coast, the ship's bow was suddenly pulled around by the anchor. The captain tried to tack out to sea, but the ship struck a reef at the base of Mutton Bird Island, near Port Campbell. Waves broke over the ship and the top deck was loosened from the hull. The masts and rigging came crashing down knocking passengers and crew overboard. When a lifeboat was finally launched, it crashed into the side of LOCH ARD and capsized. Tom Pearce, who had launched the boat, managed to cling to its overturned hull and shelter beneath it. He drifted out to sea and then on the flood tide came into what is now known as LOCH ARD Gorge. He swam to shore, bruised and dazed, and found a cave in which to shelter. Some of the crew stayed below deck to shelter from the falling rigging but drowned when the ship slipped off the reef into deeper water. Eva Carmichael had raced onto deck to find out what was happening only to be confronted by towering cliffs looming above the stricken ship. In all the chaos, Captain Gibbs grabbed Eva and said, "If you are saved Eva, let my dear wife know that I died like a sailor". That was the last Eva Carmichael saw of the captain. She was swept off the ship by a huge wave. Eva saw Tom Pearce on a small rocky beach and yelled to attract his attention. He dived in and swam to the exhausted woman and dragged her to shore. He took her to the cave and broke open case of brandy which had washed up on the beach. He opened a bottle to revive the unconscious woman. A few hours later Tom scaled a cliff in search of help. He followed hoof prints and came by chance upon two men from nearby Glenample Station three and a half miles away. In a state of exhaustion, he told the men of the tragedy. Tom returned to the gorge while the two men rode back to the station to get help. By the time they reached LOCH ARD Gorge, it was cold and dark. The two shipwreck survivors were taken to Glenample Station to recover. Eva stayed at the station for six weeks before returning to Ireland, this time by steamship. In Melbourne, Tom Pearce received a hero's welcome. He was presented with the first gold medal of the Royal Humane Society of Victoria and a £1000 cheque from the Victorian Government. Concerts were performed to honour the young man's bravery and to raise money for those who lost family in the LOCH ARD disaster. Of the 54 crew members and passengers on board, only two survived: the apprentice, Tom Pearce and the young woman passenger, Eva Carmichael, who lost all of her family in the tragedy. Ten days after the LOCH ARD tragedy, salvage rights to the wreck were sold at auction for £2,120. Cargo valued at £3,000 was salvaged and placed on the beach, but most washed back into the sea when another storm developed. The wreck of LOCH ARD still lies at the base of Mutton Bird Island. Much of the cargo has now been salvaged and some was washed up into what is now known as LOCH ARD Gorge. Cargo and artefacts have also been illegally salvaged over many years before protective legislation was introduced. One of the most unlikely pieces of cargo to have survived the shipwreck was a Minton porcelain peacock - one of only nine in the world. The peacock was destined for the Melbourne International Exhibition in 1880. It had been well packed, which gave it adequate protection during the violent storm. Today, the Minton peacock can be seen at the Flagstaff Hill Maritime Museum in Warrnambool. From Australia's most dramatic shipwreck it has now become Australia's most valuable shipwreck artefact and is one of very few 'objects' on the Victorian State Heritage Register. Flagstaff Hill’s collection of artefacts from LOCH ARD is significant for being one of the largest collections of artefacts from this shipwreck in Victoria. It is significant for its association with the shipwreck, which is on the Victorian Heritage Register (VHR S417). The collection is significant because of the relationship between the objects, as together they have a high potential to interpret the story of the LOCH ARD. The LOCH ARD collection is archaeologically significant as the remains of a large international passenger and cargo ship. The LOCH ARD collection is historically significant for representing aspects of Victoria’s shipping history and its potential to interpret sub-theme 1.5 of Victoria’s Framework of Historical Themes (living with natural processes). The collection is also historically significant for its association with the LOCH ARD, which was one of the worst and best known shipwrecks in Victoria’s history. Light Fitting. Has encrustation and some verdigris on surface. Base has a leaf pattern. Recovered from the wreck of the Loch Ard. Artefact Rego No LA/29.flagstaff hill, warrnambool, shipwrecked coast, flagstaff hill maritime museum, maritime museum, shipwreck coast, flagstaff hill maritime village, great ocean road, loch line, loch ard, captain gibbs, eva carmichael, tom pearce, glenample station, mutton bird island, loch ard gorge, light fitting -
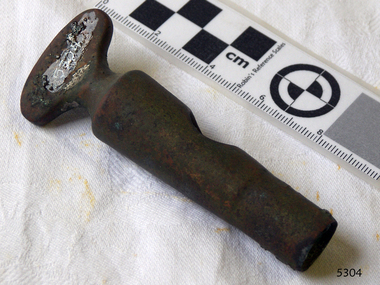 Flagstaff Hill Maritime Museum and Village
Tap
Ref LA 32 260 HISTORY OF THE LOCH ARD The LOCH ARD belonged to the famous Loch Line which sailed many ships from England to Australia. Built in Glasgow by Barclay, Curdle and Co. in 1873, the LOCH ARD was a three-masted square rigged iron sailing ship. The ship measured 262ft 7" (79.87m) in length, 38ft (11.58m) in width, 23ft (7m) in depth and had a gross tonnage of 1693 tons. The LOCH ARD's main mast measured a massive 150ft (45.7m) in height. LOCH ARD made three trips to Australia and one trip to Calcutta before its final voyage. LOCH ARD left England on March 2, 1878, under the command of Captain Gibbs, a newly married, 29 year old. She was bound for Melbourne with a crew of 37, plus 17 passengers and a load of cargo. The general cargo reflected the affluence of Melbourne at the time. On board were straw hats, umbrella, perfumes, clay pipes, pianos, clocks, confectionary, linen and candles, as well as a heavier load of railway irons, cement, lead and copper. There were items included that intended for display in the Melbourne International Exhibition in 1880. The voyage to Port Phillip was long but uneventful. At 3am on June 1, 1878, Captain Gibbs was expecting to see land and the passengers were becoming excited as they prepared to view their new homeland in the early morning. But LOCH ARD was running into a fog which greatly reduced visibility. Captain Gibbs was becoming anxious as there was no sign of land or the Cape Otway lighthouse. At 4am the fog lifted. A man aloft announced that he could see breakers. The sheer cliffs of Victoria's west coast came into view, and Captain Gibbs realised that the ship was much closer to them than expected. He ordered as much sail to be set as time would permit and then attempted to steer the vessel out to sea. On coming head on into the wind, the ship lost momentum, the sails fell limp and LOCH ARD's bow swung back. Gibbs then ordered the anchors to be released in an attempt to hold its position. The anchors sank some 50 fathoms - but did not hold. By this time LOCH ARD was among the breakers and the tall cliffs of Mutton Bird Island rose behind the ship. Just half a mile from the coast, the ship's bow was suddenly pulled around by the anchor. The captain tried to tack out to sea, but the ship struck a reef at the base of Mutton Bird Island, near Port Campbell. Waves broke over the ship and the top deck was loosened from the hull. The masts and rigging came crashing down knocking passengers and crew overboard. When a lifeboat was finally launched, it crashed into the side of LOCH ARD and capsized. Tom Pearce, who had launched the boat, managed to cling to its overturned hull and shelter beneath it. He drifted out to sea and then on the flood tide came into what is now known as LOCH ARD Gorge. He swam to shore, bruised and dazed, and found a cave in which to shelter. Some of the crew stayed below deck to shelter from the falling rigging but drowned when the ship slipped off the reef into deeper water. Eva Carmichael had raced onto deck to find out what was happening only to be confronted by towering cliffs looming above the stricken ship. In all the chaos, Captain Gibbs grabbed Eva and said, "If you are saved Eva, let my dear wife know that I died like a sailor". That was the last Eva Carmichael saw of the captain. She was swept off the ship by a huge wave. Eva saw Tom Pearce on a small rocky beach and yelled to attract his attention. He dived in and swam to the exhausted woman and dragged her to shore. He took her to the cave and broke open case of brandy which had washed up on the beach. He opened a bottle to revive the unconscious woman. A few hours later Tom scaled a cliff in search of help. He followed hoof prints and came by chance upon two men from nearby Glenample Station three and a half miles away. In a state of exhaustion, he told the men of the tragedy. Tom returned to the gorge while the two men rode back to the station to get help. By the time they reached LOCH ARD Gorge, it was cold and dark. The two shipwreck survivors were taken to Glenample Station to recover. Eva stayed at the station for six weeks before returning to Ireland, this time by steamship. In Melbourne, Tom Pearce received a hero's welcome. He was presented with the first gold medal of the Royal Humane Society of Victoria and a £1000 cheque from the Victorian Government. Concerts were performed to honour the young man's bravery and to raise money for those who lost family in the LOCH ARD disaster. Of the 54 crew members and passengers on board, only two survived: the apprentice, Tom Pearce and the young woman passenger, Eva Carmichael, who lost all of her family in the tragedy. Ten days after the LOCH ARD tragedy, salvage rights to the wreck were sold at auction for £2,120. Cargo valued at £3,000 was salvaged and placed on the beach, but most washed back into the sea when another storm developed. The wreck of LOCH ARD still lies at the base of Mutton Bird Island. Much of the cargo has now been salvaged and some was washed up into what is now known as LOCH ARD Gorge. Cargo and artefacts have also been illegally salvaged over many years before protective legislation was introduced. One of the most unlikely pieces of cargo to have survived the shipwreck was a Minton porcelain peacock - one of only nine in the world. The peacock was destined for the Melbourne International Exhibition in 1880. It had been well packed, which gave it adequate protection during the violent storm. Today, the Minton peacock can be seen at the Flagstaff Hill Maritime Museum in Warrnambool. From Australia's most dramatic shipwreck it has now become Australia's most valuable shipwreck artefact and is one of very few 'objects' on the Victorian State Heritage Register. Flagstaff Hill’s collection of artefacts from LOCH ARD is significant for being one of the largest collections of artefacts from this shipwreck in Victoria. It is significant for its association with the shipwreck, which is on the Victorian Heritage Register (VHR S417). The collection is significant because of the relationship between the objects, as together they have a high potential to interpret the story of the LOCH ARD. The LOCH ARD collection is archaeologically significant as the remains of a large international passenger and cargo ship. The LOCH ARD collection is historically significant for representing aspects of Victoria’s shipping history and its potential to interpret sub-theme 1.5 of Victoria’s Framework of Historical Themes (living with natural processes). The collection is also historically significant for its association with the LOCH ARD, which was one of the worst and best known shipwrecks in Victoria’s history. Tap-Keg-Handle, hollow. Recovered from the wreck of the Loch Ard. flagstaff hill, warrnambool, shipwrecked coast, flagstaff hill maritime museum, maritime museum, shipwreck coast, flagstaff hill maritime village, great ocean road, loch line, loch ard, captain gibbs, eva carmichael, tom pearce, glenample station, mutton bird island, loch ard gorge, keg tap, tap -
 Flagstaff Hill Maritime Museum and Village
Bell
Ref: LA 3-32-281 HISTORY OF THE LOCH ARD The LOCH ARD belonged to the famous Loch Line which sailed many ships from England to Australia. Built in Glasgow by Barclay, Curdle and Co. in 1873, the LOCH ARD was a three-masted square rigged iron sailing ship. The ship measured 262ft 7" (79.87m) in length, 38ft (11.58m) in width, 23ft (7m) in depth and had a gross tonnage of 1693 tons. The LOCH ARD's main mast measured a massive 150ft (45.7m) in height. LOCH ARD made three trips to Australia and one trip to Calcutta before its final voyage. LOCH ARD left England on March 2, 1878, under the command of Captain Gibbs, a newly married, 29 year old. She was bound for Melbourne with a crew of 37, plus 17 passengers and a load of cargo. The general cargo reflected the affluence of Melbourne at the time. On board were straw hats, umbrella, perfumes, clay pipes, pianos, clocks, confectionary, linen and candles, as well as a heavier load of railway irons, cement, lead and copper. There were items included that intended for display in the Melbourne International Exhibition in 1880. The voyage to Port Phillip was long but uneventful. At 3am on June 1, 1878, Captain Gibbs was expecting to see land and the passengers were becoming excited as they prepared to view their new homeland in the early morning. But LOCH ARD was running into a fog which greatly reduced visibility. Captain Gibbs was becoming anxious as there was no sign of land or the Cape Otway lighthouse. At 4am the fog lifted. A man aloft announced that he could see breakers. The sheer cliffs of Victoria's west coast came into view, and Captain Gibbs realised that the ship was much closer to them than expected. He ordered as much sail to be set as time would permit and then attempted to steer the vessel out to sea. On coming head on into the wind, the ship lost momentum, the sails fell limp and LOCH ARD's bow swung back. Gibbs then ordered the anchors to be released in an attempt to hold its position. The anchors sank some 50 fathoms - but did not hold. By this time LOCH ARD was among the breakers and the tall cliffs of Mutton Bird Island rose behind the ship. Just half a mile from the coast, the ship's bow was suddenly pulled around by the anchor. The captain tried to tack out to sea, but the ship struck a reef at the base of Mutton Bird Island, near Port Campbell. Waves broke over the ship and the top deck was loosened from the hull. The masts and rigging came crashing down knocking passengers and crew overboard. When a lifeboat was finally launched, it crashed into the side of LOCH ARD and capsized. Tom Pearce, who had launched the boat, managed to cling to its overturned hull and shelter beneath it. He drifted out to sea and then on the flood tide came into what is now known as LOCH ARD Gorge. He swam to shore, bruised and dazed, and found a cave in which to shelter. Some of the crew stayed below deck to shelter from the falling rigging but drowned when the ship slipped off the reef into deeper water. Eva Carmichael had raced onto deck to find out what was happening only to be confronted by towering cliffs looming above the stricken ship. In all the chaos, Captain Gibbs grabbed Eva and said, "If you are saved Eva, let my dear wife know that I died like a sailor". That was the last Eva Carmichael saw of the captain. She was swept off the ship by a huge wave. Eva saw Tom Pearce on a small rocky beach and yelled to attract his attention. He dived in and swam to the exhausted woman and dragged her to shore. He took her to the cave and broke open case of brandy which had washed up on the beach. He opened a bottle to revive the unconscious woman. A few hours later Tom scaled a cliff in search of help. He followed hoof prints and came by chance upon two men from nearby Glenample Station three and a half miles away. In a state of exhaustion, he told the men of the tragedy. Tom returned to the gorge while the two men rode back to the station to get help. By the time they reached LOCH ARD Gorge, it was cold and dark. The two shipwreck survivors were taken to Glenample Station to recover. Eva stayed at the station for six weeks before returning to Ireland, this time by steamship. In Melbourne, Tom Pearce received a hero's welcome. He was presented with the first gold medal of the Royal Humane Society of Victoria and a £1000 cheque from the Victorian Government. Concerts were performed to honour the young man's bravery and to raise money for those who lost family in the LOCH ARD disaster. Of the 54 crew members and passengers on board, only two survived: the apprentice, Tom Pearce and the young woman passenger, Eva Carmichael, who lost all of her family in the tragedy. Ten days after the LOCH ARD tragedy, salvage rights to the wreck were sold at auction for £2,120. Cargo valued at £3,000 was salvaged and placed on the beach, but most washed back into the sea when another storm developed. The wreck of LOCH ARD still lies at the base of Mutton Bird Island. Much of the cargo has now been salvaged and some was washed up into what is now known as LOCH ARD Gorge. Cargo and artefacts have also been illegally salvaged over many years before protective legislation was introduced. One of the most unlikely pieces of cargo to have survived the shipwreck was a Minton porcelain peacock - one of only nine in the world. The peacock was destined for the Melbourne International Exhibition in 1880. It had been well packed, which gave it adequate protection during the violent storm. Today, the Minton peacock can be seen at the Flagstaff Hill Maritime Museum in Warrnambool. From Australia's most dramatic shipwreck it has now become Australia's most valuable shipwreck artefact and is one of very few 'objects' on the Victorian State Heritage Register. Flagstaff Hill’s collection of artefacts from LOCH ARD is significant for being one of the largest collections of artefacts from this shipwreck in Victoria. It is significant for its association with the shipwreck, which is on the Victorian Heritage Register (VHR S417). The collection is significant because of the relationship between the objects, as together they have a high potential to interpret the story of the LOCH ARD. The LOCH ARD collection is archaeologically significant as the remains of a large international passenger and cargo ship. The LOCH ARD collection is historically significant for representing aspects of Victoria’s shipping history and its potential to interpret sub-theme 1.5 of Victoria’s Framework of Historical Themes (living with natural processes). The collection is also historically significant for its association with the LOCH ARD, which was one of the worst and best known shipwrecks in Victoria’s history. Part of the base of a small bronze bell. Green corrosion and some traces of bronze disease. . Artefact Reg no LA/106. Recovered from the wreck of the Loch Ard.flagstaff hill, warrnambool, shipwrecked coast, flagstaff hill maritime museum, maritime museum, shipwreck coast, flagstaff hill maritime village, great ocean road, loch line, loch ard, captain gibbs, eva carmichael, tom pearce, glenample station, mutton bird island, loch ard gorge, bell, bronze bell -
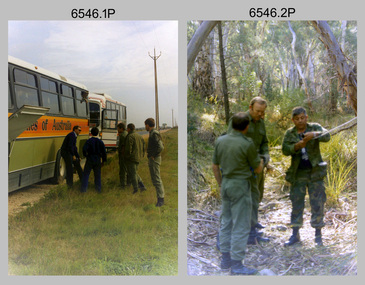 Bendigo Military Museum
Photograph - 4th Field Survey Squadron Adventurous Training Mount Remarkable National Park, SA, 4th Field Survey Squadron Adventurous Training, Mount Remarkable National Park, SA, 1987
This is a set of 42 photographs of 4th Field Survey Squadron undergoing adventurous training at Mount Remarkable National Park, South Australia in May 1987. It is evident the training focussed on teamwork, leadership, abseiling, rock climbing, field craft and living off the land survival skills. Elements from units of the Army Reserve also participated in the training. Refer to items 6547.40P and 6548.14P for additional photographs taken during the adventurous training.This is a set of 42 photographs of 4th Field Survey Squadron undergoing adventurous training at Mount Remarkable National Park in May 1987. The colour photographs are on 35mm negative film and are part of the Army Survey Regiment’s Collection. The photographs were scanned at 96 dpi. .1) - Photo, colour, 1987. L to R: unidentified bus drivers, CAPT Danny Galbraith, unidentified, SGT Stu Symonds. .2) - Photo, colour, 1987. L to R: OC MAJ Peter Cates, SSM WO1 Bill Grigg, unidentified exchange officer. .3) - Photo, colour, 1987. Squadron briefing. .4) - Photo, colour, 1987. Endurance march L to R: unidentified (x4), LCPL Peter McCurdy, unidentified (x3), SPR Damien Killeen, unidentified. .5) - Photo, colour, 1987. Unidentified personnel taking a break during or at end Endurance march. SPR John Keely at far right. .6) - Photo, colour, 1987. Mount Remarkable National Park terrain. .7) - Photo, colour, 1987. Mount Remarkable National Park terrain. SGT Peter Imeson. .8) - Photo, colour, 1987. Mount Remarkable National Park terrain. CPL Jeff Prince. .9) - Photo, colour, 1987. Camp activities. CPL Dave Irving. .10) - Photo, colour, 1987. Camp activities. L to R: unidentified, SPR Perry Langeberg, unidentified (x2), CPL Neale ‘Tex’ Houston, SPR Steve Ellis. .11) to .13) - Photo, colour, 1987. Mount Remarkable National Park terrain. .14) - Photo, colour, 1987. Camp activities. Unidentified. .15) - Photo, colour, 1987. Camp activities. L to R: PTE P. Simpson, SPR Steve Ellis. .16) - Photo, colour, 1987. Hootchie set-up. Unidentified personnel. .17) - Photo, colour, 1987. Hootchie set-up. .18) - Photo, colour, 1987. Camp activities. Unidentified. .19) - Photo, colour, 1987. Camp activities. L to R: SPR Todd Hayley, CPL Jamie McRae. .20) - Photo, colour, 1987. Camp activities. L to R: unidentified, CPL Neale ‘Tex’ Houston, unidentified. .21) - Photo, colour, 1987. Camp activities. L to R: CPL Dave Longbottom, WO2 Brett ‘Dutchy’ Van Leeuwen. .22) - Photo, colour, 1987. Hootchie set-up. .23) - Photo, colour, 1987. Hootchie set-up. CPL Dave Irving. .24) - Photo, colour, 1987. Mount Remarkable National Park terrain. Possibly OC MAJ Peter Cates. .25) - Photo, colour, 1987. Mount Remarkable National Park terrain. .26) & .27) - Photo, colour, 1987. Hootchie set-up. .28) - Photo, colour, 1987. Camp activities. CPL Roger Graf. .29) - Photo, colour, 1987. Camp activities. Possibly water sterilisation. .30) - Photo, colour, 1987. Camp set-up. Unidentified. .31) - Photo, colour, 1987. Hootchie interior. .32) - Photo, colour, 1987. CAPT Danny Galbraith. .33) - Photo, colour, 1987. Camp activities. L to R: LCPL Peter Tuddenham, SPR Todd Hayley, CPL Dave Longbottom, CPL John Ratcliffe, CPL Dave Irving. .34) - Photo, colour, 1987. Hootchie set-up. .35) - Photo, colour, 1987. Hootchie set-up. CPL Peter Hardy. .36) - Photo, colour, 1987. Camp activities. L to R: unidentified (x2), CPL Peter Hardy, LT Greg Oaten. .37) - Photo, colour, 1987. Camp activities. L to R: SPR Shaun Hynes, LT Geoff ‘GT’ Ford, SPR Bruce Graham, unidentified (x2). .38) - Photo, colour, 1987. Camp activities. L to R: SPR Shaun Hynes, LT Geoff ‘GT’ Ford, unidentified, SPR Bruce Graham, in background - CPL Dave Irving. .39) - Photo, colour, 1987. Hootchie set-up. Unidentified. .40) - Photo, colour, 1987. Camp activities. WO2 Brett ‘Dutchy’ Van Leeuwen. .41) & .42) - Photo, colour, 1987. Camp activities. Results from foraging the forest for food..1P to .42P – There are no personnel identified. ‘1987 ADV TRAINING’ annotated on negatives sleeve.royal australian survey corps, rasvy, 4 fd svy sqn -
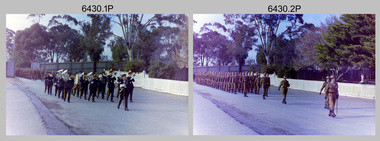 Bendigo Military Museum
Photograph - Army Headquarters (AHQ) Survey Regiment Freedom of Entry Parade, Bendigo CBD, 1970
The Freedom of Entry to the City was an honour conferred by the Bendigo City Council to the AHQ Survey Regiment on the 20th of April 1970. The unit was granted for the first time the privilege of marching into the city with swords drawn, bayonets fixed and drums beating. The honour is usually bestowed upon local regiments, in recognition of their dedicated service, and it is common for military units to periodically exercise their freedom by arranging a parade through the city. The Freedom of Entry Parade occurred on the 14th of June 1970 led by the Regiment’s CO – LTCOL Bill Sprenger MID, MBE; the unit marched up View St in the CBD to the Queen Elizabeth II Oval. The ceremonial parade followed with a march past the guests of honour, Mayor of Bendigo Councillor Clark Jeffrey and military dignitaries. The parade concluded after formal inspections of the troops. A ceremonial scroll was presented to the Bendigo City Council to the AHQ Survey Regiment citing the occasion and was proudly displayed in the entry foyer to Fortuna Villa up to October 2008. The Regiment continued to exercise its Freedom of Entry with anniversary parades in 1977, 1980, 1985, 1990 and 1995. Refer to item 6020.8P for another set of photos of this event scanned from photographic prints.This set of 39 colour photographs were taken on the occasion of the Army Headquarters (AHQ) Survey Regiment’s Freedom of Entry parade to the City of Bendigo on the 14th of June 1970. The photographs are on 35mm negative film. They are part of the Army Survey Regiment’s Collection. The photographic negatives were scanned at 96 dpi. .1) to .2) - Photo, colour, 1970. AHQ Survey Regiment marches to Queen Elizabeth Oval entry, led by CO LTCOL Lionel Sprenger MBE, MID, unidentified 2IC and RSM WO1 John Hogan. .3) to .4) - Photo, colour, 1970. AHQ Survey Regiment at entry to Queen Elizabeth Oval, exercising its right of entry to City of Bendigo. .5) to .6) - Photo, colour, 1970. AHQ Survey Regiment marches down View St in the City of Bendigo. .7) to .11) - Photo, colour, 1970. AHQ Survey Regiment marches up View St in the City of Bendigo. .12) to .13) - Photo, colour, 1970. AHQ Survey Regiment enters Queen Elizabeth Oval, led by CO LTCOL Lionel Sprenger MBE, MID, unidentified 2IC and RSM WO1 John Hogan. .14) - Photo, colour, 1970. One of AHQ Survey Regiment’s squadrons enters Queen Elizabeth Oval. .15) to .19) - Photo, colour, 1970. AHQ Survey Regiment forms up on Queen Elizabeth Oval awaiting arrival of dignitaries. .20) - Photo, colour, 1970. AHQ Survey Regiment inspected by dignitaries. L to R: Director of the Survey Corps COL Frank Buckland OBE, MID; Colonel Commandant BRIG Don Macdonald AM, MID; unidentified General, CO LTCOL Lionel Sprenger MBE, MID, Mayor of Bendigo Councillor Clark Jeffrey, unidentified personnel. .21) to .23) - Photo, colour, 1970. AHQ Survey Regiment inspected by dignitaries. Director of the Survey Corps COL Frank Buckland OBE, MID; Colonel Commandant BRIG Don Macdonald AM, MID; unidentified General, CO LTCOL Lionel Sprenger MBE, MID, Mayor of Bendigo Councillor Clark Jeffrey. WRAAC personnel centre rank - PTE Desi Asaris, rear rank L to R: unidentified, PTE Pat Lumsden, PTE Heather (Turnbull) Slater, SGT Irene (Rankins) Saunders. .24) to .27) - Photo, colour, 1970. Band inspected by dignitaries. Director of the Survey Corps COL Frank Buckland OBE, MID; Colonel Commandant BRIG Don Macdonald AM, MID; unidentified General, CO LTCOL Lionel Sprenger MBE, MID, Mayor of Bendigo Councillor Clark Jeffrey. .28) to .30) - Dignitaries return to dias. Director of the Survey Corps COL Frank Buckland OBE, MID; Colonel Commandant BRIG Don Macdonald AM, MID; unidentified General, CO LTCOL Lionel Sprenger MBE, MID, Mayor of Bendigo Councillor Clark Jeffrey.Director of the Survey Corps COL Frank Buckland OBE, MID; Colonel Commandant BRIG Don Macdonald AM, MID; unidentified General, CO LTCOL Lionel Sprenger MBE, MID, Mayor of Bendigo Councillor Clark Jeffrey. .31) - Photo, colour, 1970. Unidentified Padre’s Freedom of Entry parade address. .32) - Photo, colour, 1970. AHQ Survey Regiment during the unidentified Padre’s Freedom of Entry parade address. .33) to .35) - Photo, colour, 1970. AHQ Survey Regiment led by CO LTCOL Lionel Sprenger MBE, MID, unidentified 2IC and RSM WO1 John Hogan march past the dais to salute the parade dignitaries. .36) - Photo, colour, 1970. Parade dignitaries at the dais: unidentified councillor, Mayor of Bendigo Councillor Clark Jeffrey. Colonel Commandant BRIG Don Macdonald AM, MID; unidentified General. .37) to .38) - Photo, colour, 1970. AHQ Survey Regiment squadrons march past the dais to salute the parade dignitaries. .39) - Photo, colour, 1970. AHQ Survey Regiment WRAAC personnel march past the dais to salute the parade dignitaries. L to R: unidentified (x2), CPL Beryl Parkinson, unidentified (x2), PTE Robyn (Marsh) Kemsley, unidentified, WO2 Marj Knight, PTE Desi Asaris, PTE Heather (Turnbull) Slater, SGT Irene (Rankins) Saunders..1P to .3P – no annotationsroyal australian survey corps, rasvy, army survey regiment, army svy regt, fortuna, asr -
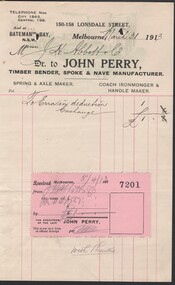 Bendigo Historical Society Inc.
Administrative record - Abbott Collection: 1913 invoices & correspondence - correspondence from 61 individual companies addressed to J.H. Abbott & Co
A wide range of invoices and business letters from 1913 from 66 companies (predominantly Melbourne based companies) addressed to J.H. Abbott 1913 Company correspondence from 61 companies/organisations addressed to Mr. J.H. Abbott: A John Perry, Timber Bender, Spoke & Nave manufacturers - 6 letters and invoices B James Miller & Co, Rope, Twine & Mat Manufacturers - 2 invoices C Dalgety Company Limited, general merchandise - 6 invoices D Gibbs, Bright & Co., Melbourne - 2 letters E Thomas McPherson & Son (McPhersons Pty. Ltd.), Iron & Machinery Merchants - 2 correspondence & 1 invoice F Bickford, Smith & Co., manufacturers of Safety Fuse, Melbourne - 3 letters G Hopkins Bros & Odlum, Machine Belting Manufacturers, Melbourne, H Stewart & Lloyds (Australia) Limited, Glaasgow - 6 letters I The Federal Manure Co., The Australian Explosives and Chemical Coy. Ltd., Melbourne - 8 letters J Ullathorne, Hartridge Co. Ltd., Melbourne - 2 letters & 2 invoices K Richard Linton, Melbourne - 1 letter & 1 invoice L George Russell Prop. Ltd., Iron & Steel Merchants, General Hardware Importers, Melbourne - 1 invoice & 8 letters M J. Kitchen & Sons Ltd., Candle & Soap Manufacturers Glycerine Refiners & Tallow Brokers, Melbourne - 10 letters N G. G. Crespin & Son, Melbourne - 4 letters O Noyes Bros. (Melbourne) Propy. Ltd. - 3 letters P The Eagle & Globe Steel Co., Melbourne - 4 letters & 1 memorandum Q C.S. Green & Son, 368 & 370 Post Office Place, Melbourne - 1 invoice & 1 memorandum R Michaelis, Hallenstein & Co. Proprietary Limited., 382-384 Lonsdale Street, Melbourne - 4 business letters S R.W. Cameron & Co.,34 Queen Street, Melbourne (agent for The Texas Co.) - 2 business letters T Joyce Bros. Ltd., 475 - 481 Flinders Lane (West), Melbourne - 2 business letters U Keep Bros. & Wood, importers of Carriage Materials, 100 Franklin Street, Melbourne - 2 business letters V Lycett Agency Manufacturing Co., P.O. Box 643 G.P.O., Melbourne - 3 business letters W Currie and Richards, Galvanised Iron Merchants, Importers and Spouting Manufacturers, 3 locations Melbourne - 2 business letters X James Outen, Saddlery Goods and Patent Horse and Cow Rugs, 184-186 Queen Street, Melbourne - 2 business letters Y Standard Oil Company of New York, Branch office Australasia, Melbourne - 5 business letters Z Jas. Henty & Co., Manufacturers of Soap, Starch, Candles, Soda Crystals, etc., 95 & 97 William Street, Melbourne - 7 business letters AA John Sanderson & Co., Mercghandise Department 111 William Street, Melbourne - 9 business letters AB Gargoyle Oil Company Pty. Ltd., 90 & 92 William Street, Melbourne - 3 business letters AC Dunlop Rubber Co. of Australasia Ltd.,108 Flinders Street, Melbourne - 3 business letters AD Perry's Australian Fuse manufacturing Company, manufacturers of Safety Fuses for Mining and Other Purposes, Ballarat Road, Footscray - 6 business letters AE Morris & Meeks, Little Collins Street, Melbourne - 4 business letters AF Brown & Dureau Ltd., Mercantile Brokers, Commission and Manufacturers'' Agents, Import and Export, 9 Queen Street, Melbourne - 6 business letters AG Michaelis, Hallenstein & Co. Proprietary Limited, Tanners, Curriers, Leather & Grindery Merchants, Saddlers' Ironmongers, Manufacturers of Glue, Doe Hair & Neatsfoot Oil, 385-384 Lonsdale Street, Melbourne - 2 letters AH Marwald, Son & Lemon, Indenting Agents and Importers, 201-3 William Street Melbourne (Sydney Brisbane, London, Wellington NZ, Fremantle) - 2 business letters AI 32 individual suppliers' invoices and business letters from companies in Bendigo, Melbourne and London (covering a wide range of supplies - glass, rubber, oils, hides, accountants, harvesters, etc.)company invoices and business correspondence -
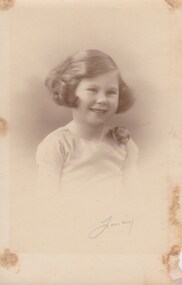 Flagstaff Hill Maritime Museum and Village
Photograph - Portrait, about 1930
This photograph is of Angela Elizabeth Pearce, granddaughter of Tom Pearce - one of only 2 survivors from the shipwreck LOCH ARD. Angela Elizabeth Pearce had written in her grandfather’s Bible in childish handwriting the words “This Bible belongs to Angela E. Pearce”. Angela was born in England in 1925 and died in Woollahra N.S.W. in 1944, aged 19. She was one of Tom Pearce’s granddaughters. Her father, Robert Pearce was Tom’s second son. Tom Pearce is a famous hero, the rescuer of Eva Carmichael, the only other survivor from the 1878 shipwreck of the LOCH ARD. The Bible was given to Tom Pearce in recognition of his bravery at the wreck of the LOCH ARD. It is on loan to Flagstaff Hill Maritime Village from Parks Victoria. The ‘official’ inscription in the Bible reads, “Presented to Mr Thomas Pearce, In recognition of invaluable service performed in saving life when the Loch Ard was wrecked off the coast of Australia., by the Loyal Orange Institution of Victoria, Protestant Hall, Melbourne, August 1878” The photograph is accompanied by a letter, dated 4th May 2010, and is written by Angela’s cousin, Pamela Dormer of Devon, U.K. Her letter includes the words “Dear Mr Abbott, re Tom Pearce’s Bible, As you know, I have been in contact with Mr Peter Yarnis about means by which my grandfather’s presentation Bible can be released to be exhibited with his other effects, like the binoculars at Flagstaff Hill Museum. In the event that it will be, I have enclosed a photograph to join it. When my son Bill Dormer was at Port Campbell he was about to handle his great grandfather’s Bible and was surprised by a childish inscription opposite that of his presentation, which reads (I think this is the way it goes), THIS BIBLE IS THE PROPERTY OF ANGELA ELIZABETH PEARCE. Angela is my late cousin. Her father was Tom Pearce’s second son Robert Strasenburgh Pearce. I and my brother Raymond Simpson are the surviving grandchildren of Tom, by my mother Edith May Pearce, his only daughter. Angela and her mother, at the beginning of W.W.2, evacuated from England to Sydney, N.S.W. but sadly both were dead by early in the 60’s. Robert (my uncle Bobby) went down with his ship on the Malta Convoy, code named PEDESTAL, escorting with other ships the vital oil tanker OHIO to the island. (signed) Pamela Dormer” THE LOCH ARD’S STORY The sailing ship LOCH ARD was built in Glasgow in 1873 and belonged to the famous Loch Line. She made three trips to Australia and one trip to Calcutta before its final voyage which ended in tragedy near Port Campbell. The LOCH ARD left England on March 2, 1878, under the command of Captain Gibbs, a newly married, 29 year old. The ship carried a general cargo which reflected the affluence of Melbourne at the time. On board were straw hats, umbrella, perfumes, clay pipes, pianos, clocks, confectionary, linen and candles, as well as a heavier load of railway irons, cement, lead and copper. LOCH ARD also had a crew of 37, and 17 passengers. The voyage to Port Phillip was long but uneventful. At 3am on June 1, 1878, Captain Gibbs was expecting to see land and the passengers were becoming excited as they prepared to view their new homeland in the early morning. But LOCH ARD was running into a fog which greatly reduced visibility. Captain Gibbs was becoming anxious as there was no sign of land or the Cape Otway lighthouse. At 4am the fog lifted. A man aloft announced that he could see breakers. The sheer cliffs of Victoria's west coast came into view, and Captain Gibbs realised that the ship was much closer to them than expected. He ordered as much sail to be set as time would permit and then attempted to steer the boat out to sea. On coming head on into the wind, the ship lost momentum, the sails fell limp and LOCH ARD's bow swung back. Gibbs then ordered the anchors to be released in an attempt to hold its position. The anchors sank some 50 fathoms - but did not hold. By this time LOCH ARD was among the breakers, and the tall cliffs of Mutton Bird Island rose behind the ship. Just half a mile from the coast, the ship's bow was suddenly pulled around by the anchor. The captain tried to tack out to sea, but the ship struck a reef running out from Mutton Bird Island. Waves broke over the ship and the top deck was loosened from the hull. The masts and rigging came crashing down knocking passengers and crew overboard. It took time to free the lifeboats and when one was finally launched, it crashed into the side of LOCH ARD and capsized. Tom Pearce, who had launched the boat, managed to cling to its overturned hull and shelter beneath it. He drifted out to sea and then on the flood tide came into what is now known as LOCH ARD Gorge. He swam to shore, bruised and dazed and found a cave in which to shelter. Some of the crew stayed below deck to shelter from the falling rigging but drowned when the ship slipped off the reef into deeper water. Eva Carmichael had raced onto deck to find out what was happening only to be confronted by towering cliffs looming above the stricken ship. In all the chaos, Captain Gibbs grabbed Eva and said, "if you are saved Eva, let my dear wife know that I died like a sailor". That was the last Eva Carmichael saw of the captain. She was swept off the ship by a huge wave. Eva saw Tom Pearce on a small rocky beach and yelled to attract his attention. He dived in and swam to the exhausted woman and dragged her to shore. He took her to the cave and broke open a case of brandy which had washed up on the beach. He opened a bottle to revive the unconscious woman. A few hours later Tom scaled a cliff in search of help. He followed hoof prints and came by chance, upon two men from nearby Glenample Station three and a half miles away. In a state of exhaustion, he told the men of the tragedy. Tom returned to the gorge while the two men rode back to the station to get help. By the time they reached LOCH ARD Gorge, it was cold and dark. The two shipwreck survivors were taken to Glenample Station to recover. Eva stayed at the station for six weeks before returning to Ireland, this time by steamship. In Melbourne, Tom Pearce received a hero's welcome. He was presented with the first gold medal of the Royal Humane Society of Victoria and a £1000 cheque from the Victorian Government. Concerts were performed to honour the young man's bravery and to raise money for those who lost family in the LOCH ARD disaster. The media of the time had created one of Australia's first media celebrities. Everyone followed the story of Tom Pearce and Eva Carmichael with great interest and were disappointed when the two went their separate ways. It was felt by many that Tom should have proposed to Eva - given they had spent an evening together unsupervised in the cave and had drunk brandy to keep warm. Coleman Jacobs composed the music “The Young Hero Schottische” and dedicated it, by permission, to Mr. Thomas R. (Tom) Pearce. The sheet music was published in 1878 by the Messieurs Roberts, professors of dancing etc. Melbourne. It was on sale for 3/- (3 shillings) and in aid of the “LOCH ARD” fund. [This is Coleman Jacobs’ only surviving musical work Coleman Jacobs, accomplished pianist, musical performer, singer, composer, professor of music and music teacher, was born in 1827 and died on 4 July 1885, aged 58 years. Coleman Jacobs was buried in the Melbourne Cemetery (grave 461, Church of England section).] The wreck of LOCH ARD still lies at the base of Mutton Bird Island and much of the cargo has been salvaged. Some was washed up into what is now known as LOCH ARD Gorge following the shipwreck. Cargo and artefacts have also been illegally salvaged over many years before protective legislation was introduced. The photographic is of significance because of Tom Pearce and his association with the disaster of the LOCH ARD shipwreck, which is of State significance ― Victorian Heritage Register S417 Flagstaff Hill’s collection of artefacts from LOCH ARD is significant for being one of the largest collections of artefacts from this shipwreck in Victoria. It is significant for its association with the shipwreck, which is on the Victorian Heritage Register (VHR S417). The collection is significant because of the relationship between the objects, as together they have a high potential to interpret the story of the LOCH ARD. The LOCH ARD collection is archaeologically significant as the remains of a large international passenger and cargo ship. The LOCH ARD collection is historically significant for representing aspects of Victoria’s shipping history and its potential to interpret sub-theme 1.5 of Victoria’s Framework of Historical Themes (living with natural processes). The collection is also historically significant for its association with the LOCH ARD, which was one of the worst and best known shipwrecks in Victoria’s history. Photograph, sepia coloured, with accompanying letter. The photograph is a portrait of a young girl in a short sleeved top with a flower on her left shoulder. The girl is "Angela Elizabeth Pearce, granddaughter of Tom Pearce" as inscribed on back of photograph. Tom Pearce was one of two survivors of the 1878 shipwreck LOCH ARD. Included with the photograph is a letter from its donor, Pamela Joan Dormer, other granddaughter of Tom Pearce. The letter dated 4th May 2010 explains the connection between Angela Pearce and Tom Pearce's Bible.Back of photograph, written in blue pen “ANGELA ELIZABETH PEARCE / TOM PEARCE’S GRANDAUGHTER / PHOTO PRESENTED BY / HIS OTHER GRANDAUGHTER / PAMELA JOAN DORMER / 2010” Letter from Pamela Dormer verifying the connection between Angela Pearce and Tom Pearce’s Bible.flagstaff hill, warrnambool, shipwrecked coast, flagstaff hill maritime museum, maritime museum, shipwreck coast, flagstaff hill maritime village, great ocean road, angela pearce, tom pearce, thomas r pearce, eva carmichael, loch ard shipwreck, tom pearce bible, loch ard presentation bible, hero tom pearce, loyal orange institution of victoria, royal humane society of victoria, mutton bird island, coleman jacobs, the young hero schottische -
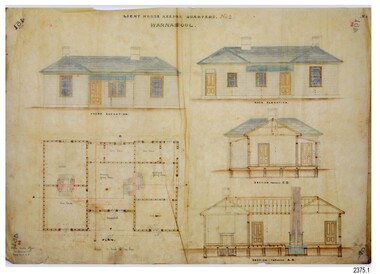 Flagstaff Hill Maritime Museum and Village
Document - Plans, Lighthouse Keeper's Quarters Warrnambool, 1858-1909
The set of seven 1858 plans shows proposed plans for the original Lighthouse Complex that was built on Middle Island in 1858-1859. The whole complex was then transferred to Flagstaff Hill in 1871. The plan, dated 1909, is for proposed additions and repairs to the Quarters at Flagstaff Hill. The plan 'Alterations and Additions' shows alternate plans for changes to the quarters at the Flagstaff Hill location. This plan has no date. The Complex comprised the Lighthouse, the Lighthouse Keepers’ Quarters, the Store (now called the Chart Room) and a Privy, which was not included in these plans. The Keeper’s bluestone Quarters was a cottage divided into two compartments, one for each keeper and his family. The bluestone Store was divided into three; a store, a workshop an oil store (or office). The Privy comprised of a small building also divided into two separate, back-to-back toilets, one for each Keeper and his family. The Flagstaff Hill Keeper's Quarters have had extensions and additions at various times, and these have also been removed at various other times. THE PLANS - *Dec. 1858 (12/58) ‘Lighthouse Keepers Quarters No.2 Warrnambool’ (2375.01)* Public Works Office Melbourne – Front and Back elevations, sections, and floor plan. The drawing shows timber walls. [The floor plan is the closest plan to the current building, however, the walls are timber in this plan.] *Nov. 1858 – No.3 ‘Lighthouse Keepers Quarters Warrnambool’ (2375.02)* Office of Public Works, Melbourne – Back and End elevations and section through. The drawing shows stone walls. One side; Senior Keeper’s bedroom, living room and kitchen with storeroom. Another side; is the Assistant’s bedroom, living room and storeroom. *Nov. 1858 - No.4 ‘Lighthouse Stores Warrnambool’ (2375.03)* Office of Public Works – Front, Side and end elevations, centre section. The drawing shows stone walls. *Nov. 1858 – No.4, ‘Lighthouse Stores No. 2 Warrnambool’ (2375.04)* Office of Public Works – Front, side and end elevations, centre section. The drawing shows timber walls. *Nov. 1858 – ‘Details Lighthouse Keepers Quarters No. 2 Warrnambool’ (2375.05)* Public Works Office Melbourne. The plan shows the foundations, joists and eaves. The drawing shows timber walls. (Nov. 1858 – ‘No.4 ‘Lighthouse No. 2 – Warrnambool’ (2375.06)* Public Works Melbourne (Part of the paper is missing). This plan shows an octagonal tower, internal stairs, a balcony landing, and a weather vane on top. *November 1858 – No. 1, ‘Lighthouse – Warrnambool’ (2375.07)* Office of Public Works Melbourne. This plan shows a round tower, including the stairs, windows on the tower and the weather vane on the top. *4/3/9 [1909] – ‘Additions and Repairs, Lighthouse Quarters, Warrnambool, General Plan’ (2375.8)* Department of Public Works Melbourne’s official stamp is signed by Croft. It shows the floor plans of the Store, Upper Lighthouse and the Quarters. The Store building has three sections; a Store, Work-Shop and Office, with an internal wall between them and separate entries. The Quarters are divided into two dwellings. The Senior Keeper’s side on the left has fireplaces in two of the three bedrooms and there is a pantry and wash house. The Assistant’s side has no fireplaces in the bedrooms and there’s no pantry or washhouse. These plans include proposed changes to the buildings. The Senior Keeper’s Quarters would have a partition on bedroom 2, a bath with plumbing and drainage, a wall moved and a built-in side porch. The Store would also have a built-in porch. The undated plan 'Additions and Alterations' (2375.9) shows alternative arrangements for water tanks, plumbing and such. WARRNAMBOOL'S LADY BAY LIGHTHOUSES- In the 1800s ships sailing from England to Australia began to use Bass Strait as a faster route to Melbourne. Small navigation errors led to many tragic shipwrecks. From 1848 lighthouses were operating along Victoria’s southern coast as a guide for sailors. Coastal towns such as Warrnambool grew and the exchange of trade and passengers were of great benefit. However, the uncertain weather changes, relatively shallow waters and treacherous, hidden rocky reefs were not suitable for a Harbour and in the 1840s and 1850s there were many shipwrecks in the area, with some even stranded in its Lady Bay harbour. A jetty was built in 1850 and a flagstaff to guide seafarers was placed up high on what became known now as Flagstaff Hill. In November 1857 the Victorian Government recommended that Warrnambool Harbour had beacons and two lighthouses to guide vessels into and out of the Harbour safely. The white light of the Middle Island lighthouse was to be used for the first time on September 1, 1859. The red light of the Beach Lighthouse, a wooden obelisk structure, was first operated on March 25, 1860, but in 1868 this light was ‘discontinued’ due to it being too low. Melbourne’s Department of Public Works decided to relocate the Middle Island Lighthouse Complex - Lighthouse, Keeper’s Quarters, Privy, Store Room and even water tanks - to Flagstaff Hill. The lower obelisk was shortened, and a protruding gallery, railing, and external ladder were added, as well as the light from the Beach Lighthouse. A green guiding light was erected on the end of the jetty. The transfer of the Complex began in March 1871. Each shaped stone of the lighthouse was carefully numbered, removed then reassembled on Flagstaff Hill. In 1872 the well was sunk behind the Lighthouse Keeper’s Cottage. The Keepers and families had left Middle Island in April and moved to Flagstaff Hill in October 1871. Vessels entering Lady Bay align the Upper and Lower Lighthouse towers during the day and the lights at night. The Upper Lighthouse is a round tower, the Lower Light is square. The Lighthouses were categorised as harbour lights rather than coastal lights, so they remain under the control of the Victorian Government’s Ports and Harbours section. The lights were originally powered by oil, then acetylene gas, later by electricity, and then converted to solar power in 1988. In 1993 the solar panel was replaced by a battery charger. A decision was made in 1936 to replace the lighthouses’ lights with unattended lights that no longer required Keepers and Assistants. At least 29 Keepers had attended to the lighthouse from its opening in 1859 to when the last official Lightkeepers left In April 1916. The Warrnambool Harbour Board rented out the Quarters from 1916 to 1936. The Board closed down but the rentals continued with other unknown landlords. In the 1970s the Flagstaff Hill Planning Board was set up under the chairmanship of John Lindsay. The Board was to make recommendations to the Warrnambool City Council regarding the use of the buildings and the rest of the Crown Land on the site. The Flagstaff Hill Maritime Village opened in 1975 and began renovating the Cottage in stages, during which time evidence of a 1920s fire was found in the eastern section of the cottage. Additions of a porch on the west and a washroom on the east were made in the 1980s. The western part of the building is now a Shipwreck Museum and the east has returned to a late 19th-century Lighthouse Keeper’s cottage and includes the screen made by Assistant Lighthouse Keeper Thomas Hope during one of his two periods of service there. THE LIGHTHOUSE KEEPERS Lighthouse Keepers were responsible for keeping their Lighthouse’s lights shining at night. They kept a lookout for passing vessels and changes in weather. They were expected to clean, polish and maintain the equipment and buildings. They kept regular and detailed records of who was on watch, and the time the light was lit, trimmed and extinguished. They kept a journal about other events that occurred. They keep regular, accurate Meteorological Logs. It was expected that they were competent in Morse code signalling. They would be called to help in times of disasters and shipwrecks, and to give official statements about these events. Many Lighthouse Keepers also volunteered as members of the lifeboat crew. The Lady Bay lighthouses were officially classified as small, so the Keepers had the official titles of Senior Assistant Lighthouse Keeper and Assistant Lighthouse Keeper. They were employed by the Public Service and paid rent to live in the Lighthouse Quarters. They were compulsorily retired at the age of 60, with most receiving a superannuation payment. Despite their time-consuming duties, there was time to follow hobbies and crafts such as growing vegetables, playing musical instruments, making models of buildings including lighthouses, and crafting furniture pieces. An example of a keeper’s skills is the carved fire screen made by /assistant Keeper Thomas Hope in the early 20th century and displayed in the Lighthouse Keeper’s cottage at Flagstaff Hill. The last occupants of the Middle Island Complex were Senior Keeper Robert Deverell, his Assistant Keeper, Andrew Farncombe, and their families. They all became the first occupants at the Lady Bay Lighthouse Keepers’ Quarters on Merri Street. The Warrnambool Lighthouse Complex plans are the origin of what is now the Lady Bay Lighthouse Complex. They are a record of the people, process and departments involved in bringing the complex into fruition. The plans are significant to the Complex, which is now listed on the Victorian Heritage Register, H1520, for being of historical, scientific (technological) and architectural significance to the State of Victoria. The Complex is significant as an example of early colonial development. The plan are significant for their connection with the important navigational function of the Lighthouses, a function still being performed to this day. The plans are also significant as an example of a product from the Public Works Department in Victoria in the mid-to-late 19th century. The structures built to these plans still stand strong. Plans for the Lighthouse Complex in Warrnambool, including Lighthouses, Keeper's Quarters and Stores. Seven of the plans are on thin fragile paper, one is on thicker, stronger paper. The drawings have been made in pens coloured red and black. They originate from Public Works in Melbourne. Seven were drawn in 1858, one in 1904, the other is not dated.Dec. 1858 - Lighthouse Keepers Quarters No.2 Warrnambool. Public Works Office Melbourne. Nov. 1858 - No.3 ‘Lighthouse Keepers Quarters Warrnambool. Public Works Office Melbourne. Nov. 1858 - No.4 ‘Lighthouse Stores Warrnambool. Office of Public Works. Nov. 1858 - No.4, ‘Lighthouse Stores No. 2 Warrnambool. Office of Public Works. Nov. 1858 - Details Lighthouse Keepers Quarters No. 2 Warrnambool. Public Works Office Melbourne. Nov. 1858 - No.4 ‘Lighthouse No. 2 – Warrnambool. Public Works Melbourne. Nov. 1858 - No. 1, Lighthouse - Warrnambool. Office of Public Works Melbourne. 4/3/9 [1909] - Additions and Repairs, Lighthouse Quarters, Warrnambool, General Plan. Department of Public Works Melbourne. SIGNED "Croft" "15A" on reverse [no date] - Lighthouse Quarters Warrnambool, Additions and Alterations. "9A" on reverseflagstaff hill, warrnambool, lighthouse keeper's cottage, lighthouse residence, lighthouse, plans, public works, melbourne, flagstaff hill maritime museum, maritime museum, shipwreck coast, flagstaff hill maritime village, chart room, quarters, privy, middle island, beach lighthouse, obelisk, lighthouse keeper, assistant keeper, lighthouse complex, lady bay, lady bay complex, keepers, upper lighthouse, lower lighthouse, ports and harbours, cottage, harbour board, flagstaff hill planning board, meteorological record, robert deverell, andrew farncombe, warrnambool port, warrnambool harbour, residence, alterations, repairs, department of works -
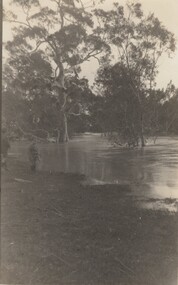 Stawell Historical Society Inc
Photograph, Whitehall Property Greens Creek
Hutchings family 1. Wimmera River in flood below Whitehall running a banker c. 1920. Ted & Col Hutchings in foreground. 2. Wimmera River in flood looking downstream. No date but possibly same time as no. 1. from same place. 3. Looking over the Wimmera River to Island paddock towards Greens Creek 4. Wimmera River half a banker at Whitehall 5. Wimmera River in flood upstream from carpenter's shop looking towards engine house at Whitehall 5a. Wimmera River in flood. Left to right - blacksmith shop and carpenters' shop. 5b. Taken from the same spot with Emily & Ada Hole, E G (Ted) & Col Hutchings. Blacksmith shop & carpenters' shop, Whitehall. 5c. Wimmera River upstream from the carpenters' shop. Foreground is possibly Belladonna lilies which were all over the river bank in 1992. Whitehall. 5d. Looking downstream towards the loose boxes, Whitehall. 5e. Blacksmiths' shop and carpenters' shop from the pumping station. Wimmera River, Whitehall. 6. Wimmera River in flood at Whitehall. 7. Wimmera River half a banker in front of old hut at Whitehall. 8. Wimmera River Emily Hayes, Edward G (Ted) Hutchings & Colin J Hutchings. 9. Morrl-Morrl - Greens Creek Road opposite back paddock. Whitehall. Black Ford in distance. c. 1919 10. Whitehall woolshed north east aspect, Drive to the right of photo 11. Whitehall woolshed - north east aspect showing the drive to the right 11a. Whitehall woolshed - north aspect 11b. Same tree near woolshed 11c. Same tree again in centre, other trees came up after the 23 flood. Woolshed to the right out of photo. 12. Whitehall woolshed - south aspect, sheep entrance end 13. Whitehall. left to right, Stackyard, stables in the centre and the Wimmera River behind following the trees. 14. Whitehall horse paddock c. 1920. left to right, Machinery shed, stable in the centre. Homestead to the right in distance. There is no windmill. 15. Load of wool from Whitehall woolshed to right. 16. Whitehall c. 1920 before the windmill. left to right, garage and mens' hut. Wimmera river runs along the tree line. 16a. Stables, garage and mens' hut after the construction of the windmill. River behind. 17. Whitehall c. 1922. Note windmill addition. Garage to left, Mens' Hut to right. Jack Donnelly & Edward G (Ted) Hutchings with pet lambs. River behind trees. 18. Whitehall gardens. Summer house to the right, pine tree lined drive in the centre background. Ted & Col Hutchings on the lawn. C. 1920 19. Edward G. (Ted) & Colin J. Hutchings in Whitehall garden. Wimmera River in the background. The building behind the fence is the carpenters' shop which the family lived in while house was rebuilt after fire 15 Jan 1877 20. Whitehall c. 1920. left to right, cattle yard, killing house, Wimmera river behind the fence, and the loose box on the right. Black Orpington chooks in foreground. 21. Bay window (original blinds) in the master bedroom. Whitehall 20 Sep 1992 22. Master bedroom (original wallpaper) Joyce & Col Hutchings, Moyu, Ben & Rebecca Roe 20 Sep 1992 23. Col & Ted's bedroom (original) Marble mantlepiece had been removed. Whitehall. 20 Sep 1992 24. Whitehall kitchen. Large yellow meat oven to left of stove, bread oven far left, extreme right is oven where milk heated to skim cream. Chimney was a central one shared with meat oven. Bread oven chimney separate. 20 Sep 1992 25. Whitehall dairy, made of natural stone with dried brick corners. Entrance behind creeper which is over trellis. 20 Sep 1992. This building still remains in 1 Jun 2023 26. Inside charcoal lined meat cellar. Bottom right is concrete vat for pickling meat in brine. Top of brickwork slightly above ground level. Whitehall 20 Sep 1992 27. Fire foreground was stable flooring which was to left of photo. Machinery shed (thatch roof). 4 posts far left remains of cowshed. Large post in centre foreground is the gate post of corral. River to right. 20 Sep 1992 28. Whitehall machinery shed. Posts on far right are cow shed. Over the river is the island paddock. Wimmera river runs behind machinery shed. 20 Sep 1992 29. Posts of 10 sided corral. Killing house by side of gum tree in centre of photo on far side of corral. To left is one of the bales of the cowshed. Whitehall. 20 Sep 1992 29a. Similar photo in the 1920's. To the right is horsebreaking corral, then cow shed, loose box, haystacks and stable on left. Whitehall. 30. Dining room fire place put in the open fire of the mens' hut, only the chimney remains. To the left is the drive & river. Rebecca Roe, Col Hutchings granddaughter. 20 Sep 1992 30a. Looking down the Whitehall Drive. Mens' Hut (Jack Donnelly in doorway) and garage far left. 1920's 30b. The Drive, Whitehall taken from in front of the mens' hut. Wimmera River on the left. Gum tree on left still there 20 Sep 1992. 30c. Reverse from 30a. Whitehall drive from the front gate looking towards the mens' hut and garage. c. 1926 30d. Curly Donohue leaving for Warracknabeal. Ex mail contractor Omeo to Bright Victoria. C. 1926 30e. Looking down the drive towards front gate. Mens' hut on the right, river on the left. 31. Whitehall from the side. Building in centre behind David is separater room. 2 roomed hut to left of separater room and remains of mens' hut chimney. Photo 16 taken from similar spot. 20 Sep 1992 32. Benjamin Roe (Col Hutchings grandson) in the Carpenters' shop. The family lived in this building after the fire in the 1870's. Whitehall 20 Sep 1992 33. Ford across the Wimmera River at Whitehall (River abt. 5 feet higher than normal) 20 Sep 1992 33a. Wimmera River, Whitehall 34. Site of old bridge before Col Hutchings time. Tree in foreground to right still has bolt from bridge work protuding. A large post was in the centre of photo to make equal distance. 20 Sep 1992 35. Entrance to the old ford. Colin J Hutchings & his daughter, Moyu Roe. Wimmera River, Whitehall 20 Sep 1992 36. Summer house at Whitehall 20 Sep 1992 looking down to the orchard, dark green trees in distance old fruit trees. 36a. Edward & Colin Hutchings in front of the Summer house, Whitehall c. 1921 36b. Summer house looking towards front gate. Whitehall. 36c. Grey thrush in nest box which can be seen in previous photo with summer house in the background. Whitehall. 36d. Summer house from the orchard side. Whitehall. 37a. South side of Whitehall. First window Edith Sutherland's room, 2nd window, Ted & Col's room, bay window master bedroom 38. Taken in middle of front path looking towards front gate. Edith Sutherland in garden. Date palm in centre, cotton palm to left. Whitehall c. 1920's 38a. Garden at Whitehall taken from near the cotton palm. 39. Whitehall 20 Sep 1992 Bay window-master bed, small window to r. of bay-Colin Hutchings born in, front door, window to right-dining room, round the corner- drawing room, window on right, spare bed, verandah on left is spare bed. 39a. Whitehall c. 1920's Date palm on the right. 39b. Win, Colin T & Colin J Hutchings. Date palm in background. Whitehall 1943 39c. Edward George, Colin Thomas, Elizabeth Ambler & Colin James Hutchings wearing RAAF uniform. Date Palm in background. Whitehall c. 1943 39c. Front garden of Whitehall looking from the front right side of the house towards the drive & Wimmera River. Date palm on right, cotton palm on left 20 Sep 1992 40. Taken from bottom left corner of front garden looking towards the summer house. Cotton palm on right. River to the left. 41. Elizabeth A Hutchings beside master bedroom window. Whitehall c. 1920 42. Whitehall (photo of a painting by Wallace) owned by Colin T Hutchings 1982. 42a. Whitehall painting by Wallace after restoration now owned by Nick Hutchings 2021 42b. Whitehall c. 1923 42c. Taken from the side garden looking towards the right side of house. Front door is to the left out of photo. The cotton palm is to the left. c. 1923 43. Signpost showing Whitehall 20 Sep 1992, All ground up to the tree line behind the signpost was Whitehall property. 44. Colin T. Hutchings age 9 mths. Mar 1943 Whitehall 45. Colin James, Elizabeth Ambler & Edward George Hutchings. Front garden by the date palm, Whitehall c. 1939-40 45a. Colin James, Edward George, Edward Thomas Hutchings & E. Winifred May & Barney (dog) Whitehall. c. 1939-40. 45b. Colin James & Colin Thomas Hutchings during drought & World War ll c. 1944-45 in front of cotton palm, date palm to right. 46. Garden at Whitehall. Jack Donnelly on the hand mower. Cotton palm on left, date palm behind Jack and roof of carpenters shop to right. 47. Colin J Hutchings on tractor, E. Tom Hutchings behind. Whitehall, c. 1933 48. Jack Donnelly (Tad) & Colin J. Hutchings. Cotton palm to right. Whitehall c. 1917-18 49. Edward G (Ted) & Colin J Hutchings with cockatoo outside the dairy in rear garden. Whitehall c. 1923 50. Taken from the windmill looking across the roof of the mens' hut to the garden, orchard and drive in Winter time. House is behind the trees to right, Wimmera River to the left out of picture. Whitehall. 50a. Not labelled by Col Hutchings. It is an aerial shot looking towards the house in the trees & seems to be taken from the top of a tree...on the river side. 51. E. Tom Hutchings & George Chambers dam sinking. Whitehall. 51a. Tom Hutchings & George Chambers dam sinking. Whitehall. 51b. E. Tom Hutchings dam sinking. 52. Emily Hayes & Ada Hole (sisters) with Tom, Col & Ted Hutchings at the woolshed. 53. E T (Tom) Hutchings on reaper & binder. Whitehall. 54. Orchard looking towards the house. Carpenters' shop and river on the right. Whitehall. 54a. Orchard looking from the house, dark trees in background form part of the drive. 55. Grasshopper plague, Christmas Day 1933. Whitehall 56. Frost on the front lawn, Whitehall. 57. Little red hen & chicks with the river in the background 58. Edward (Ted) G. Hutchings muscovy ducks, hay shed and trees along the river in the background. 58a. Edward (Ted) G Hutchings muscovy ducks. 59. Swimming in the Wimmera River, either Ted or Col Hutchings in the foreground. 60. Looking towards the fowl house and pigsty, Whitehall. 61. Snake on the path, Whitehall. c. 1923 61a. E. Tom Hutchings killing a snake, Whitehall. c. 1923 61b. E. Tom Hutchings killing a snake, Whitehall. c. 1923 62. Notice of clearing sale, Stawell News & Pleasant Creek Chronicle on 5 Apr 1916 where the stock & whole of the household furniture was to be sold by James Hutchings widow. 63. Back to Greens Creek 7 Jun 1987 Colin J Hutchings left and Belle Kindred centre looking at photo 64. Back to Greens Creek 7 Jun 1987 Colin J Hutchings centre, Graham Stewart holding photograph on the right. 65. Colin J Hutchings & Bill Walker. Back to Greens Creek 7 Jun 1987 66. Colin J Hutchings delivering a speech before the plaque unveiling. Back to Greens Creek 7 Jun 1987 67. Graeme Williamson & Colin J Hutchings (2 'old boys') Greens Creek School Site 7 Jun 1987 68. Graeme Williamson talking to Moyu Roe (Hutchings) in background is May Williamson. Back to Greens Creek 7 Jun 1987 69. Greens Creek SS, Edward (Ted) & Colin J Hutchings attended. 70. Original students of first Greens Creek School 7 Jun 1987 Back row left 1. Kindred 3. Colin J Hutchings 4,5,6 not known 7. Graeme Williamson Sitting left 1. Not an original 2,3,4, not known 5. Belle Kindred 71. Terrier at Greens Creek State School 72. The new school students Back to Greens Creek 7 Jun 1987. Perry twins standing in centre and the teacher kneeling front left. 73. Will Rees water colour 1925 signature 74. Will Rees water colour 1925 75. Shearing at Kirkellar. Allen Simpson's 76. Back to Greens Creek 7 Jun 1987 Colin J Hutchings left and Belle Kindred centre looking at photo 77. Back to Greens Creek 7 Jun 1987 Colin J Hutchings centre, Graham Stewart holding photograph on the right. 78. Colin J Hutchings & Bill Walker. Back to Greens Creek 7 Jun 1987 79. Colin J Hutchings delivering a speech before the plaque unveiling. Back to Greens Creek 7 Jun 1987 80. Graeme Williamson & Colin J Hutchings (2 'old boys') Greens Creek School Site 7 Jun 1987 81. Graeme Williamson talking to Moyu Roe (Hutchings) in background is May Williamson. Back to Greens Creek 7 Jun 1987 82. Greens Creek SS, Edward (Ted) & Colin J Hutchings attended. 83. Original students of first Greens Creek School 7 Jun 1987 Back row left 1. Kindred 3. Colin J Hutchings 4,5,6 not known 7. Graeme Williamson Sitting left 1. Not an original 2,3,4, not known 5. Belle Kindred 84. Shearing at Kirkellar. Allen Simpson's 85. Terrier at Greens Creek State School 86. The new school students Back to Greens Creek 7 Jun 1987. Perry twins standing in centre and the teacher kneeling front left. Digital Copy of Parish Maps Kara Karahomestead -
 Bendigo Military Museum
Photograph - Bones Day – Army Survey Regiment Verses RAAF School of Radio at Laverton, Victoria, 1985
The 10 photographs were taken at Bones Day, an annual sports competition between the Army Survey Regiment and the RAAF School of Radio, at Laverton on the 13th of November 1985. The two units took turns each year to host the event. The day competition usually comprised basketball, cricket, cross country, golf, sailing, pistol shooting, squash, rifle shooting, softball, tennis, touch football, tug-of-war and volleyball. The “big bone” trophy comprising a large bone from a beast housed inside a wooden framed glass case, was awarded to the winner of the day competition. The “O.H.A.R.A Rock” was awarded to the shooter with the lowest score in rifle shooting. The evening competition often included darts, carpet bowls, hookey, quoits and billiards/snooker. The “little bone” (a mounted chicken bone) was the consolation trophy awarded to the winner of the evening competition. The 3-hour bus trip for the visiting unit on their return was typically very raucous. The history of the Bones Day competition is best described in the booklet titled - Bones of Contention Souvenir Program. 1965. Refer to Item 6267. This item comprises the cover of a program booklet and a set of 10 photographs taken at Bones Day, an annual sports competition between the Army Survey Regiment and the RAAF School of Radio, held at Laverton on the 13th of November 1985. The photographs were printed on photographic paper and are part of the Army Survey Regiment’s Collection. The colour A4 booklet cover and black and white photographs were scanned at 300 dpi. .1) – A4 size program booklet titled ‘The Bones of Contention’, buff card cover and colour graphics, internal text and cartoon graphics printed in purple. 32 pages dated 1985. .2) - Photo, black & white, 1985. Basketball teams. Back row L to R: unidentified (x2), Bob Croxton, unidentified, Danny Galbraith, unidentified, Steve Burke. Middle row L to R: Rob Jones, unidentified (x2), Sherri (Dally) Burke, unidentified, Evan Allanson, unidentified. Front row L to R: unidentified (x2), Brenton McDonald, unidentified, Max Shaw. .3) - Photo, black & white, 1985. Cricket teams. Back row L to R: unidentified, Bill Griggs, unidentified, Mick Hogan, unidentified, Jim Ash, Dave Wright, Bob Thrower. Middle row L to R: PTE Hudson, unidentified, Brett McAllister, unidentified (x5). Front row L to R: PTE Wigg, unidentified, Brian Partridge, unidentified, Graham Hales, unidentified (x3). .4) - Photo, black & white, 1985. Cross Country teams. Back row L to R: unidentified (x3), Peter Barrett unidentified (x2), Paul Davis, unidentified. Front row L to R: unidentified, Jeff Rudd, unidentified, Greg Rowe, unidentified (x2), Steve Winner, unidentified. .5) - Photo, black & white, 1985. Golf teams. Back row L to R: unidentified (x2), Brian Johnson, unidentified (x2). Front row L to R: Doug Arman, unidentified, Graeme Dowd, unidentified, Peter Imeson, unidentified (x2). .6) - Photo, black & white, 1985. Pistol Shooting teams. Back row L to R: unidentified, Doug Home, unidentified, Tony Clark, Ben Lucas. Front row L to R: unidentified (x2), Daryl Hockings CSM, unidentified, Max Colletti. .7) - Photo, black & white, 1985. Pistol Shooting teams. Back row L to R: unidentified, Greg Sulman, unidentified, Bob Bright, Tom Bloxham, Bob Hopper, unidentified, Bob Garritty. Front row L to R: unidentified (x2), Dan Cirsky, unidentified (x3), Brad Peppler, unidentified. .8) - Photo, black & white, 1985. Softball teams. Back row L to R: Scheryl Delforce, unidentified, Le-Anne (Smallshaw) Shirley, unidentified, Raelene (Munting) Brodie, Carmel (Butler) Fauth, Gill Park. Middle row L to R: unidentified (x2), Viv (Hawkins) Doherty, unidentified, Avril (Bray) Lloyd, unidentified (x6). Front row L to R: Wendy (Leitinger) McCarthy, unidentified, Leah (Hoffman) Peppler, unidentified, Lorraine (Daly) Talbot-Smith, unidentified, Chris Gordon, unidentified. .9) - Photo, black & white, 1985. Tennis teams. Back row L to R: Damien Killeen, unidentified, Ozzie Slade, unidentified, Dennis Learmonth, unidentified. Middle row L to R: Carol Dunstan, unidentified, Ginny (Turner) Rowe, unidentified (x2), Steve Coulson. Front row L to R: unidentified (x4), Col McInness, Peter Ball. .10) - Photo, black & white, 1985. Touch Football teams. Back row L to R: unidentified, Paul Baker, Jeff Willey, Per Andersen, unidentified (x4). Middle row L to R: John ’Junior’ Whaling, Simon ‘Andy’ Capp, Daryl South, Ken Talbot-Smith, unidentified (x4). Front row L to R: Frank Downie, Peter ‘Spoon’ Lefel, Roy Hicks, Greg Oaten, unidentified (x4). .11) - Photo, black & white, 1985. Tug-of-War teams. Back row L to R: unidentified (x2), Steve Burke, unidentified (x3). Middle row L to R: unidentified (x2), JB Zahra, unidentified, Mal Paterson, Geunther Ebenwaldner, unidentified, Peter ‘Spoon’ Lefel. Front row L to R: Kerron South, unidentified, Barry Hogan, unidentified (x2), Brett McAllister. .1 - 'The Bones of Contention' title on booklet cover. Photos .2P to .11P – 'Bones Day 1985' annotated on cover sleeve.royal australian survey corps, rasvy, army survey regiment, army svy regt, fortuna, bones day -
 Ballarat Tramway Museum
Film - Movie Film & Box, Kodak, 1960
Yields information in movie film format of Ballarat trams in 1960, how the system operated and was used by people., Yields information in movie film format of Ballarat trams in 1960, how the system operated and was used by people.Movie film - 8mm, approx. 30mins, with leader strip on a plastic reel, within a black and white plastic box, titled "Ballarat No. 1. 1960". Has been transferred to DVD - see Reg item 4100 as Segment No. 2. Made by Ben Parle. Also transferred to DVD by Rod Cook Oct. 2015, via Roger Greenwood for use in his DVD, "The City of Ballarat Trams, Gardens & Gold" of 2016. See Reg Item 6883. Synopsis: based on time. 0:00 View of typed introduction, noting that this is a pictorial record of Ballarat. 0:10 Title “The Tramways of Ballarat 1960, Part 1” 0:16 13, showing “View Point” at Stones Corner, Bridge St, east end, with trolley pole being turned, while another single trucker heads out towards Mt Pleasant. 0:25 13 leaving Stones Corner, short approach and then longer trailing shot of the tram going towards the City in Bridge St. 0:44 View out of front of tram in Bridge St heading towards the City, with cars in the photo, then passing through city Loop, no trams in the loop and running up to Lydiard St Nth and crossing the road. 1:22 Running up Sturt St from Armstrong St, passes over Dawson St X-over and up to the next intersection, Lyons St. 1:54 Title “The View Point Line” 1:59 19 inbound, in Ripon St, from crossing Mair St, towards camera and then passing away and turning into Sturt St. 2:49 View of a “Warning Oncoming Trams” sign 2:52 19 in Ripon St, going to View Point, crossing Webster St towards camera, then going away through the disconnected Victoria Ave loop, pass the “Warning Oncoming Trams” sign. Note very windy scene with people running across roads. 3:17 19 in Wendouree Parade, in bound, though showing destination View Point, going away from the camera, past the View Point Hotel. 3:39 19 coming towards camera near Excerpt or Devon St and then going away towards the terminus. 4:04 19 at the terminus, stationary, with a single trucker 3?, passing from Macarthur St into Wendouree Parade, behind 19. 4:20 33 coming towards camera in Wendouree Parade from St Aidans Drive, stopping to pick up passenger at Forest St and then going away towards the City, photographed from near the depot, on a wet and windy day. 4:54 35 in Wendouree Parade, coming towards the Camera from St Aidans Drive and then going away with the Gardens Loop area in the background. Tram stops at stop to let a passenger off. 5:28 21 leaving Gardens Loop for the City via the Depot, green light in signal can be seen. 5:43 28?, closely followed by 26 turn from Drummond St South into Sturt St. 6:18 Scene opens with shot of “Sebastopol” destination on a bogie tram. 6:21 Title “The Sebastopol Line” 6:24 21 turning from Sturt St into Drummond St Sth with destination of Bell St and then going away from the camera. 6:55 38 in Drummond St Sth, coming towards the camera and then passing the camera with Sturt St just in the view. 7:10 21, showing Gregory St, in Drummond St Sth, approaching and then going away, entering the Urquhart St Loop, 7:39 34 in Drummond St Sth (location check required (Latrobe?)), approaches camera, picks up passengers and the goes away. 8:09 39 at ? Street, turns from Drummond St Sth into Skipton St, after picking up and setting down passengers, bound for Sebastopol 8:55 35 inbound in Skipton St passes through the Bell Street Loop, and then goes away from the camera. 9:33 42 outbound in Skipton St, approaches the camera, passes and then crosses over the half the road into Albert St. 10:00 39 inbound in Albert St – location? 10:31 34 outbound for Sebastopol, approaches camera and just starts to pass by. 10:36 34 in Grey St crossing loop, crosses 42 inbound. 10:59 39 outbound in Albert St, with shopping centre in bound, approaches camera, passes and then crosses over Albert St. Mid morning scene. 11:39 39 inbound, Albert St south, approaches camera and then passes and the crosses over Albert St. 12:16 41 outbound in Albert St passes the camera, and pulls into the terminus with the conductor getting out on the back bumper to pull the pole down as the tram stops and a passenger walks into the Royal Hotel. 12:39 Title “The Lydiard Street North Line” 12:44 Filmed from the Hotel balcony, 21 inbound in Lydiard St Nth passes over Mair St, stops while 33 passes in the other direction. 13:18 With the red light showing on the Seymour St loop signal, 33 inbound for Sebastopol stops and picks up many passengers, passes the camera and runs past the VRI building in the background and through the loop. Possibly filmed on a Sunday given the ladies dresses and quieter streets. 14:01 30 outbound, passes the camera and stops at Macarthur St. Filmed alongside the brick wall of the cutting. 14:28 30 inbound arrives, passes through the Gregory St loop and then proceeds past the camera, making a stop to pick up passengers. 15:14 28 in Lydiard St Nth – location?, approaches and goes away from the camera, north of Gregory St. 15:34 28 ditto location? 15:53 21 arrives at the terminus with passengers getting on and off. 16:11 View of the a vertical positioned “End of Section” sign on a pole at the terminus and then lifting the camera to see the timetable board and the stop sign. 16:33 31 in Bridge St passing Morseheads and then turning into Sturt St, stops at the Grenville St stop, while another single trucker comes down to the stop from the City. 16:58 31 outbound in Bridge St, with destination of Victoria St. 17:14 Title “The Victoria Street Line” 17:18 31 outbound to Victoria St from Stones Corner. Starts with an overhead shot, shows clock at the Caltex service station,. 17:37 31 inbound approaching Bakery Hill and then descending to the junction after it passes camera. 18:09 25 climbing outbound in Victoria St, passing the camera, to then pass through the King St loop. 18:47 25 inbound in Victoria St, passing the camera, then pass through the King St loop, with St Alypius Church in the background. 19:36 14 approaching the rail bridge in Victoria St and stopping at the 2nd last stop to left of passengers. 20:01 14 leaving the terminus and approaching the camera and the a short sequence going away, to the next stop to pick up quite a few passengers. 20:14 “Trams Stop Here” sign, metal wrap around on a steel pole. 20:16 Title “The Mount Pleasant Line” 20:21 11 inbound in Main St, with a passenger leaping off the tramcar and another getting off just before the junction. 20:45 11 passes the junction and then proceeds away from the camera in Bridge St. 21:04 30 outbound in Main St, then turns into Barkly St, a bus (Eclipse Motors) passes in Main St just before the sequence ends. 21:31 30 inbound near Steinfield St. (exact location?) 21:49 25 approaches the camera, then proceeds away and passes through the Grant St. loop. 22:29 25 inbound, windy day, between Grant and Cobden, (exact location?), with a horse drawn bread van in the view and the breadman walking behind the tram as it passes. 23:02 11 outbound in Barkly St, (exact location?) 23:37 11 inbound in Barkly St (exact location?) 23:44 Mt Pleasant terminus signage 23:50 30 approaches the terminus and then stops with the conductor alighting turning the pole, passengers getting on and off and the driver appearing at the other end. 24:32 Title “The Gardens Via Sturt St. West Line” 24:35 21 outbound in Sturt St near Raglan St, approaches and passes the Camera. 25:09 12, showing City Oval, approaches and passes the camera, outbound near Windermere St. 25:33 13 showing View Point, goes away from the camera – location? 25:44 12 comes from St. West, inbound passes the camera and then stop as the next stop next Talbot St? 26:21 Short sequence of a “Warning Oncoming Trams” sign 26:28 42 inbound in Sturt St West, just before Ripon St, view coming towards camera and then going away to cross Ripon St. 27:10 34 passes through the Parker St loop 27:25 35 or 39 inbound past the college in Sturt St West 28:04 41 outbound at the Russell St curve, passes away from the camera. 28:11 35? inbound passes away from the camera through the Victoria Park or Morrison St loop, swinging out into the roadway. 28:29 View of timetable sign at Hamilton Ave. 28:37 35 turning from Sturt St West into Hamilton Ave, can see the conductor changing over the barrier rails. 29:11 42 inbound, crosses another bogie tram (35?) at Carlton St loop then passes the camera and goes past the Olympic rings monument. 29:42 12 approaches the Carlton St gates. 30:07 12 outbound, crosses a bogie tram in the loop with both trams then leaving the loop. 30:20 Title “End of Part One” Written labels giving title information on outside of box.trams, tramways, ballarat, sebastopol, lydiard st north, victoria st, mt pleasant, sturt st west -
 Ballarat Tramway Museum
Magazine, Melbourne and Metropolitan Tramways Board (MMTB), "Tramway Topics" - M&MTB, 1947 and 1948
16 issues of the, "Tramway Topics" - "The Official Bulletin of The Melbourne & Metropolitan Tramways Board", issues 50, 51, 53 to 61, issued between August 1947 and October 1948. All printed on cream coloured paper. Headings of significance are listed below. Common items were; Retiring and Death Gratuities, Appointments and Promotions, long service records. 918.1 - 50 - August 1947 - 4 pages - Comment from London, Scalers in Sydney, Brisbane Services, PAYE to go, Newcastle wants to own the trams, Diesels in favour, Fares in London and Melbourne, Something like a deficit, a remarkable record (substations), Work of Testing Department, Accidents are Expensive, and Transport Operations Indicted (National City Lines - USA) 918.2 - 51 - Sept. 1947 - 4 pages - Our SW6 tram, Transport in the US, Conductresses again, How bus costs have risen, Footscray Extensions, Of Course you are good (drivers and driving), How Fares Go, 40-Hour week. 918.3 - 53 - November 1947 - 4 pages - No increase in fares, an unusually interesting tram (Glasgow), alcohol and driving do not mix, pedestrian crossing case, how wages have increased, Russia prefers trams, Sydney's "Honesty" joke, Higher Fares wanted, Tramcars as hearses, an editor on Trolley buses, buses lead - but at a cost (Leicester), the Non paying passenger (Sydney) 918.4 - 54 - December 1947 - 4 pages - Christmas 1947 (Chairman's notes on the future), New Stockholm tram, according to use and wont - Birmingham, Trams in the USA, Board re-appointed, Buses few, so coaches are hired (London), transport from Footscray, "Philadelphians must have the best" - so they are given trams!, The Merri Creek Bridge and appreciations. 918.5 - 55 - March 1948 - 4 pages - That 4/- doubts arising over the 5-day week, Buses carried pick-a-back, Sydney to lose L500,000 this year, Trolleybuses, Rapid transit with PCC trams, another compliment (rosters in Perth), the bill for it all (Melbourne tram strike), an Extraordinary award (Washington DC), Prison tram's last load (Sydney), Douglas horse trams, Lord Ashfield, Glasgow's all night buses. 918.6 -56 - April 1948 - 4 pages - The Board's ambassadors (MMTB Conductors), Brisbane's bus routes, Another deficit in sight (Liverpool UK), Poor Paris, The resilient wheel, the 5-day week rosters, a subway and its costs (Detroit), PCC's in Belgium, South London Trams. 918.7 -57 -May 1948 - 4 pages - Spread of Hours Payment - 5 day week, weak breaks, Buses multiply - losses expand (Manchester UK), Static Electricity, L750,000 deficit in Sydney, praise for conductresses, no purchase by Newcastle, a loss at Adelaide, Transport in Switzerland, Denmark's giant bus, new trams for Glasgow, Grants for sports, single deckers out of favour (UK buses), Transport by Water (London). 918.8 - 58 - June 1948 - 8 pages - Stirring up strife (Melb.) No profit - no sharing (Kansas City), Just why - prices and fares in the US, MMTB staff needs from 5 day week, Section fares in the US, trams at L5,500 each (Sheffield), The unfinished dance (Perth and Hay St.), Thanks from Bristol, Interest in Melbourne trams (letters to the Board), Adelaide's Deficit, Fares up in Sydney and Adelaide, Moscow transport, No trolleybuses thankyou in Belgium, thanks to the Traffic staff, the Late Inspector Boardman, 24,000 irregularities (passengers), Sth London trams, Melbourne's trams amazing, Winnipeg's transport Growth and Standing passengers - London. 918.9 - 59 - July 1948 - 4 pages - The Red Light - RACV and red lights on trams, A request from Argentina,, where our SW6's are, the last 5c fare (New York), Work in the Fog, Traffic headaches in the US, Brisbane's Streamlined tram, Safety glass, Now for La Trobe St. The Tramways Band (South St.), Transport Losses in Sydney. 918.10 - 60 - August 1948 - 4 pages - from Pretoria (Comments on Melbourne), Buses with sliding Doors (OPS1), PCC trams, trams of the future (Glasgow), new trams in Rome, Clearing up the Parking Problem (Sacramento), Fantastic figures - world tram car figures - anti tram, Trainer Drivers, the railway trams and disaster to Liverpool trams, Monte Video trams purchased. 918.11 - 61 - September 1948 - 4 pages - The Year's Work (Melbourne), How Absurd (transport management), items from Britain, Tramway Band News, Food from Melbourne (to Scotland floods), London's Extraordinary traffic, New trams for The Hague, who are the road hogs, the La Trobe St. extension, out clothing factory, Preston Workshops, Toil on the tracks, how the money comes in (fares distribution). 918.12 - 62 - October 1948 - 4 pages - Melbourne's tram fares, Bourke St., Sydney's Street Transport, Scientist or Baker (London), Trolleybuses out of favour, London's poor bus fleet, tram and bus fares, The band at Wattle Park, Madras tramway deal, 121 decide for 6000 (Sydney Sunday trams), Preston workshops, A Engineer's tribute, Was the Street Quiz on trams faked? (The Sun). 918.3 - No. 31 - September 1945 - Year in review - trams more reliable than buses, loss on buses to munitions and Fisherman's bend, ticket checking, Hawthorn clothing factory SW6 trams construction, news from cities in Europe, sub-stations. 918.14 - 64 - September 1949 - higher operating expenses and revenue, school children behaviour, headway recording system - communication issues, golf at Wattle Park, Mr Bell lives in Riversdale Rd. 918.15 - 67 - December 1949 - Record Payment to Consolidated Revenue, payment to MFB etc, flat fares, Latrobe St extension - delayed, fare concessions - who pays, 918.16 - 68 - January 1950 - Bourke St conversion - Risson looking for an early start, fitting of radios to MMTB vehicles, Resilient wheels 918.4 - on top edge in pencil is "Mr Russell", and 918.10 ditto.trams, tramways, mmtb, melbourne, tramways