Showing 10219 items
matching k-g-luke
-
 Glenelg Shire Council Cultural Collection
Book, A Port is Built, Sep-81
Book - 'A Port is Built', brown leather bound copy signed by K S Anderson and Malcolm Fraser, 13th NOV 1981. Portland Harbor Trust Commissioners 1950, gold seal on front cover. 'A PORT IS BUILT KS ANDERSON, CBE, MC, PHT' printed on spine in gold> -
 Flagstaff Hill Maritime Museum and Village
Book - Novel, H Rider Haggard, author, Heart of The World, 1894
H. Rider Haggard (1856-1925) (Sir H. Rider Haggard), a British author, wrote fiction and non-fiction works and had letters and articles published in newspapers and journals. His novel, Heart of the World, was an adventure set in Mexico. This book is part of the Pattison Collection at Flagstaff Hill. The book was published in 1895 by the British firm George G Harrap & Co. Ltd. of London, a firm that specialised in high-quality publishing with many of the books containing fine line drawings.The book has additional importance for its connection to the Pattison Collection, which, along with other items at Flagstaff Hill Maritime Village, was originally part of the Warrnambool Mechanics' Institutes’ Collection. The Warrnambool Mechanics’ Institute book collection has historical and social significance for its strong association with the Mechanics Institute movement and its important role in people's intellectual, cultural and social development throughout the latter part of the nineteenth century and the early twentieth century. The collection of books is a rare example of an early lending library and its significance is enhanced by the survival of an original collection of many volumes. The Warrnambool Mechanics' Institute’s publication collection is of both local and state significance.Heart of The World Author: H Rider Haggard (Sir H. Rider Haggard) Publisher: George G Harrap & Co. Ltd. Date: 1894 The red hardcover book has gold embossed lettering on the spine and cover. The Fly page has a logo of flying horse, it also has inscriptions on a label and stickers. This book is part of the Pattison Collection.Label "PAT FIC HAG" Sticker: "Warrnambool Public Library" covered by a sticker "Corangamite Regional Library Service" Inscription: "1300" Logo: [Flying horse or winged horse]flagstaff hill, flagstaff hill maritime museum and village, warrnambool, maritime museum, maritime village, great ocean road, shipwreck coast, pattison collection, ralph eric pattison, warrnambool mechanics’ institute, mechanics’ institute library, warrnambool library, free library, corangamite regional library service, george g. harrap and company, h rider haggard, 1985 novel, sir h. rider haggard, heart of the world, fiction, adventure, 1894, flying horse logo, winged horse logo -
 Mont De Lancey
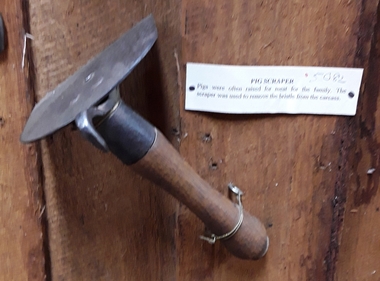
Tool - Pig Scraper, F G Pearson & Co, circa 1914
Used in the 19th century. Pigs were often raised for meat for the family. The scraper was used to remove the bristles from the carcass.A curved metal straight bladed pig scraper used to remove the bristles from a pig's carcass. It has a hook on the top edge to remove the nails from the pig's trotters. It has a short wooden handle attached to the metal on the blade with three rivets. There are two slashers near the flail. On the left is the brand 'Pearson 2532' circa 1914 Made by F G Pearson & Co, Sheffield, Right side (est 1859) Right: brand is indistinct. Used in the 19th century.On the left is the brand 'Pearson 2532' circa 1914 Made by F G Pearson & Co, Sheffield, Right side (est 1859) Right: brand is indistinct.farm equipment, farm tools, pigs, farm -
 Ringwood and District Historical Society
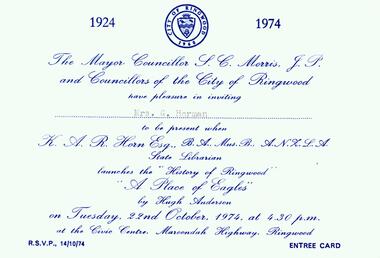
Photograph, Invitation from the Ringwood Council of the City of Ringwood on 22nd October 1974. From the Mayor Cr S Morris JP and the Councillors to Mrs G Horman. Official launch of the "Place of Many Eagles" by KAR Horn BA Mus B State Librarian at the Civic Centre, Maroondah Highway, Ringwood
Invitation from the Ringwood Council of the City of Ringwood on 22nd October 1974. From the Mayor Cr S Morris JP and the Councillors to Mrs G Horman. Official launch of the "Place of Many Eagles" by KAR Horn BA Mus B State Librarian at the Civic Centre, Maroondah Highway, Ringwood. All material is from Gwen Horman’s three albums that she owned. -
 Warrnambool and District Historical Society Inc.
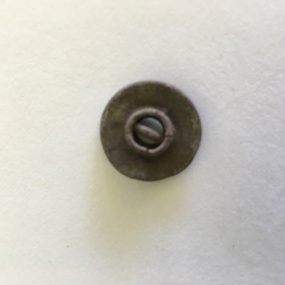
Clothing, G. Wardrop, Tailor, Button, Early 20th century
This button has come from an item of clothing made by George Wardrop, a well-known Victorian tailor who was apprenticed to a Mr J. Jones in Smith Street Collingwood in the late 19th century. George Wardrop was a partner in the Jones firm for seven years before opening his own tailoring business in Collingwood and later in Northcote. The business expanded, with a major store in Melbourne established in the 1930s, (Wardrops, My Tailor) and other stores opening in suburban and regional areas in Victoria. The business lasted until the early 1970s. This button is of interest as it was found in a Warrnambool garden and perhaps came from an item of clothing owned by a local resident and purchased from a Wardrop tailoring shop early in the 20th century.This is a round buff-coloured button with an eyelet and printing around the button edge. The item is slightly bent and discoloured.‘G. Wardrop Collingwood’wardrop, tailor -
 Warrnambool and District Historical Society Inc.
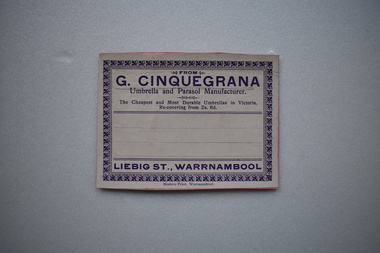
Label, G CINQUEGRANA, Early 20th century
Guiseppe Cinquegrana's umbrella and parasol shop was a prominent one in Liebig Street for over 40 years. He came to Warrnambool about 1890.This label is of some significance as it concerns an umbrella business and this is the only one we know that was ever in Warrnambool.Rectangular white label with purple text, decorative border and lines adhered to a piece of pink cardFROM G. CINQUEGRANA Umbrella and Parasol Manufacturer. The Cheapest and Most Durable Umbrellas in Victoria. Re-covering from 2s. 6d. LIEBIG ST., WARRNAMBOOL Modern Print, Warrnamboolumbrellas, parasols, warrnambool, guiseppe cinquegrana, cinquegrana -
 Ringwood and District Historical Society
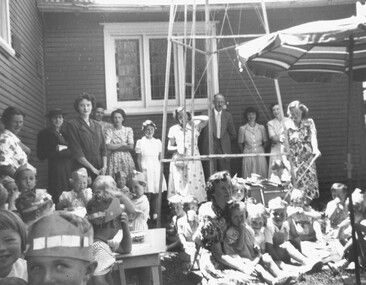
Photograph, 1950 - Parish Hall Xmas Party, Church of England, Ringwood Street, Ringwood. Attendees included Mrs. J. Mason (partly obscured), Mrs. Gray, Mrs. McCrae Snr., Mr. and Mrs. G. Williams
Typed below photograph, "1950 - Parish Hall Xmas Party. Just seen Mrs. J. Mason, Mrs. Gray, Mrs. McCrae Snr., Mr. and Mrs. G. Williams". -
Melbourne Tram Museum
Pamphlet, Minister for Public Transport, "Melbourne's new G class tram", 8/11/2024
Pamphlet titled "Melbourne's new G class tram" - an update on the design and construction, including an aerial view of the new Maidstone depot following a Ministerial visit to the Alstom plant on 8/11/2024 - "Minister for Public and Active Transport Gabrielle Williams today visited Alstom’s factory in Dandenong to announce the start of major works on the Next Generation Trams Project." See htd7796i2 for the Press Release.Yields information about the new G class trams and the new Maidstone depot.Pamphlet - 4 sheets when printedtramcars, new trams, g class, alstom, press release -
 Whitehorse Historical Society Inc.
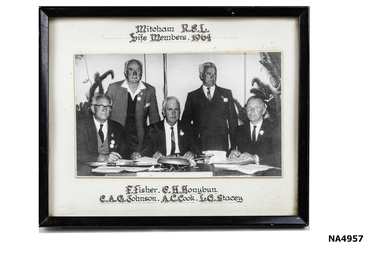
Photograph - Photography, Mitcham RSL Life Members 1964, 1964
Photo taken at 1964 A G M of Mitcham R S L Life members at the timePhotograph of Mitcham R S L Life Members in 1964 Frank Fisher, Charles H Honybun, Cec. A. G. Johnson, Alec C. Cook, Les G. StaceyMitcham R S L Life Members in 1964 Frank Fisher, Charles H Honybun, Cec. A. G. Johnson, Alec C. Cook, Les G. Staceyphotography, photographs / slides / film -
 Uniting Church Archives - Synod of Victoria
Photograph, Rev G F Brookes, Undated
Rev G F Brookes was ordained in 1968 in NSW, his first ministry was Bulli 1967-1968, followed by Cooma-Bombala 1969-1972, Kempsey- Gladstone 1973, OD Indonesia Kupang 1974-1977. He returned to NSW in 1978 when he went to Armidale where he stayed until 1985. He then joined the Commission for Mission from 1986 to October 1998, and Lakemba 11/1998.B&W head and shoulders photo of Rev. G.F. Brookes, wearing coat and tie.rev g f brookes, uca commission for mission -
 Mission to Seafarers Victoria
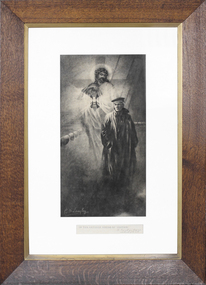
Print - Engraving, In the anxious hours of waiting, 1916-1917
For Trafalgar Day, 20 October 1914, the Archbishop of Canterbury in England had "drawn up a new form of private prayer to be offered up specially for the sailors of the Fleets in the present crisis. He suggested its use particularly at noon as a silent prayer, when those at work may be reminded by the ringing of the " Angelus" bell to lift up their hearts to the Lord. The prayer was as follow: "O Thou that slumberest not nor sleepest, protect, we pray Thee, our sailors from the hidden perils of the sea, from the snares and assaults of the enemy. In the anxious hours of waiting, steady and support those on whom the burdens of responsibility lies heavily, and grant that in dangers often, watching often, in weariness often, they may serve Thee with a quiet mind, through Jesus Christ our Lord. Amen.” The prayer illustrated by English artist G.M. Langley became popular. Prints were sold as gift for 7/9 each with an oak frame. As mentioned in the ' Quarterly Jottings from our log" no 47 midwinter 1917: the etching was gifted to the Mission for display in the new Chapel by the Godfrey sisters. The frame was gifted by their cousin's wife, Mrs William Scott Purves Godfrey ( ' Quarterly Jottings from our log" no 48 Michaelmas 1917).The print was gifted by the Misses Godfrey, influential and long term members and supporters of the Ladies Harbour Light Guild. At the time of the completion of the St Peter's Chapel in September 1917, it was dedicated to the memory of all merchant seamen serving in the long war. The print subject, of the sailor guarded by Jesus was no doubt intended to inspire faith and hope but also acknowledges and reflects the anxious days of waiting not only of the sailors and seafarers negotiating the dangerous waters and oceans but also the challenge for families, experiencing the widespread anxieties of a world at war. Wood framed and glazed engraved print of Jesus Christ with sailor in the foreground and printed inscription on mount belowSignature of artist lower left of print.: G M Langley Printed on mount at lower right: "In the Anxious hours of waiting"g.m. langley, prints, engravings, merchant seamen, seafarers, ww1, godfrey family, ethel augusta godfrey, frederica godfrey, first world war, great war, mrs william scott purves godfrey, rica godfrey, rita godfrey, artwork-paintings -
 Ringwood and District Historical Society
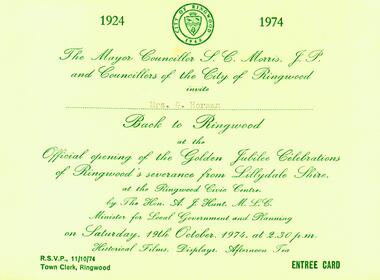
Photograph, Invitation to "Back to Ringwood" from the Ringwood Council of the City of Ringwood on Saturday 19th October 1974. From the Mayor Cr S Morris JP and the Councillors to Mrs G Horman. Official opening of the Golden Jubilee Celebrations of Ringwood's serverance from Lillydale Shire by the Hon AJ Hunt MLC, Minister for Local Government and Planning
Invitation to "Back to Ringwood" from the Ringwood Council of the City of Ringwood on Saturday 19th October 1974. From the Mayor Cr S Morris JP and the Councillors to Mrs G Horman. Official opening of the Golden Jubilee Celebrations of Ringwood's serverance from Lillydale Shire by the Hon AJ Hunt MLC, Minister for Local Government and Planning. All material is from Gwen Horman’s three albums that she owned. -
 Moorabbin Air Museum
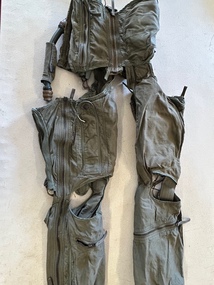
Clothing (Item) - Garment Anti-G Cutaway Type CSU-3/P USAF
MIL-A-25892C(USAF) H.I.Garment Co. DSA 100-1734 U.S Large Regular Stature 67.07-71.24 Weight 191-220 S/N 8475-559-5347 Marking of W/C Knudsen inscribed on label. -
 Stawell Historical Society Inc
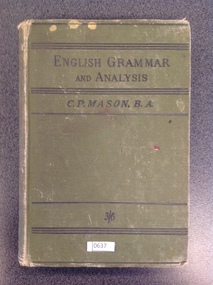
Book, G P Mason B.A, English Grammar and Analysis By C P Mason BA, 1901
School Use by Athol Dane.Athol W K Dane, Belmont Grammar School Stawellstawell education -
 Kiewa Valley Historical Society
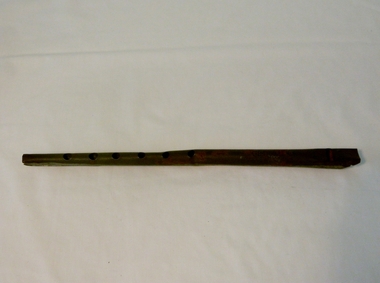
Whistle Penny, circa 1950s
This item is a cheap Penny Whistle made in Thailand Circa 1955. The item was one of the first wave of imports from the growing Asian steel producers. This was an era where cheaper Asia based steel companies did not compete against the stronger, and well established Australian ones. This Penny Whistle was "roughly" made and possibly purchased by the Victorian Education Department for use in school bands and music classes. Schools within the Kiewa Valley would have used them to integrate students the fundamentals of reading music and playing basic musical scores. Later conversion from steel to plastics would have been more conducive to multiple users in a classroom environment (more hygienic and rust proof.This item shows how the "cheaper" invasion of all types of manufactured goods from the Asian regions have altered the purchasing patterns of rural Australians(the more traditional consumer). The cost imbalance of purchasing from "The Mother Country (England)" or European supply versus the Asian manufacturers was due to not only the financial pressures post World War II but also in the elimination of Tariff restrictions placed on non favoured suppliers.This tin Penny Whistle is made from rolled tin(steel), cylindrical in shape, with a wooden Fipple plug at the mouth end and six note holes starting half way down the front side evenly spaced and ending 35mm from the bottom. This whistle is in the key of D"G steel & Co. D"music, wind instruments, whistle, celtic music -
 Lilydale RSL Sub Branch
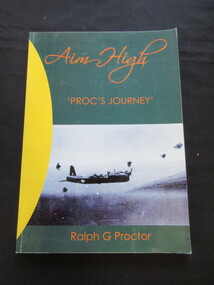
Book, Ralph G Proctor, Aim High -' PROC'S JOURNEY', 2005
Life Stories and Events by Ralph G ProctorBooknon-fictionLife Stories and Events by Ralph G Proctor -
 Wodonga & District Historical Society Inc
Functional object - Cigarette Case - K. D. Watson, Wodonga, 1919
This cigarette case was owned by Kenneth Darnton Watson and carried into battle during World War I. Kenneth Darnton Watson was born at Bendigo on 24 May 1893 to George Darnton Watson and Adelaide Nora Holmes. He was educated at Melbourne Church of England Grammar School, being selected as School Captain in 1913 and a member of the Head of the River rowing team. After finishing school, he worked as a jackaroo on Wanganella Station and later at Mt. Widderin, Skipton, Victoria. When WWI was declared, Kenneth enlisted and after initial training at Maribyrnong, Victoria he left Australia as 2nd Lieutenant with 7th Australian Field Artillery Brigade, to disembark at Plymouth on July 10, 1916. He took part in the Battles of Messines, Menin Road, Polygon Wood and Passchendaele Ridge in 1917. For his efforts in Passchendaele Ridge on 17th December he was awarded the Military Cross "for conspicuous gallantry and devotion to duty." In 1918 he took part in the Battles of Villers-Bretonneux, Hamel and Amiens. He returned to Australia in November 1919 and was discharged on 20th January 1920. In 1922, Kenneth Darnton Watson came to Wodonga where he purchased de Kerilleau, consisting of 2,500 acres, from Mr George Gordon. The two storey brick homestead had been built by William Huon in 1870. On 30th May 1924, he married Phyllis Emily Lenore Austin and they had four children, Ian Darnton 1925, Robert Darnton 1926 Rosemary McPherson 1929 and Faith Holmes 1931. On the land he worked hard, building fences, cattle, sheep and horse yards, and farmed Corriedale sheep, Shorthorn cattle and horses. Mr Watson was an innovative farmer, introducing modern methods of top dressing at de Kerilleau by means of an aircraft. He was also a dedicated community man. He was a member of both Albury and Wodonga Show Committees, Murray Valley Development League, No.1 Region, Graziers' Association of Southern Riverina, Albury Legacy Club, Wodonga RSL, and Wodonga Turf Club including terms as President on several of these organisations. Kenneth was also a Warden of St. Luke's Church of England, Wodonga. Kenneth served as Wodonga Shire President from 1929 to 1931, and was again elected to Council from 1943 to 1945. A most respected and valued member of the local community, Kenneth Darnton Watson died on the 4th of October 1951, aged 58. Lenore Watson lived at de Kerilleau until her death on 15th June 1984. Both are buried in Wodonga.This item is significant because it was owned by a decorated Australian serviceman and prominent member of the Wodonga community.A silver cigarette case owned by Kenneth Darnton Watson of Wodonga. The inside contains straps to hold the cigarettes in place. Both the front and back have been engraved.On front: KDW On back: 1919kenneth darnton watson, watson family wodonga, wodonga community members -
Glenelg Shire Council Cultural Collection
Domestic object - Printed Metal Match Box Cover, G & G (A/ASIA) LTD>, c. 1931
Promotional metal matchbox cover for the Club Hotel Portland. Green Border, cream panels centre front, back and side, with gold fancy border. Text & graphics in black.Front: G & G (A/Asia) Ltd. Picture of a face - smiling underneath "This man drinks Richmond Beer" Turn up other way Face is frowning, underneath "This man wishes he had" Back: 1931 Calendar Side Strike the Club Hotel for a good spot ( J.R. Sullivan Prop) Portland -
 Bendigo Military Museum
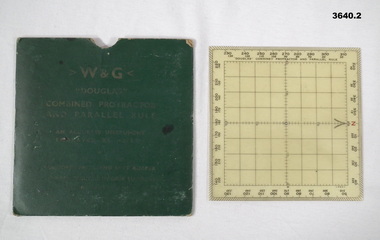
Equipment - PROTRACTOR, SQUARE
Item re Frederick Gardner DAVEY DFC No 410533. Refer Reg No 3536P for his service details. Used in map reading & air navigation. .1) Square green coloured card pocket for storing protractor / rule. Instructions for using the protractor / rule printed on reverse of pocket. .2) Combined protractor & rule. Square clear plastic with degrees markings around the outer edge. North marked in red. Centre area gridded in one centimeter squares..1) Printed on front: W & G DOUGLAS COMBINED PROTRACTOR AND PARALLEL RULE .2) Handwritten in pencil on back: 410533 DAVEY F.G.navigation, maps, equipment -
 Wangaratta RSL Sub Branch
Framed photograph and Medals, L/Cpl. Neville G Rose
Service medals issued to VX95196 - 3/400050 Private Neville George ROSE born 17/5/1926 at Coburg. He served with the 3rd Battalion RAR from 28/9/1950 to 30/10/1950 a total of 33 days when he was killed in action in Korea aged 24 years. Military service records currently closed. Timber frame with maroon felt mount containing photograph of soldier, eight medals with attached ribbons two metal badges and plaque.VX95196 - 3/400050 L/Cpl. Neville G. Rose 2/5th Battalion 2nd A.I.F 1st New Guinea Inft. BN 3rd Royal Aust. Regiment Killed in Action Korea 30/10/1950neville g rose, korea, 2/5th battalion 2nd a.i.f., 3rd rar, killed in action -
 Bendigo Military Museum
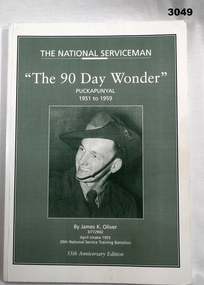
Book - BOOK, NATIONAL SERVICE, James K Oliver, The National Serviceman - 'The 90 Day Wonder' Puckapunyal 1951 - 1959
Cardboard front cover with green head shot photo of soldier. White pages, cut edges, black printing & black & white photos. Front cover below photo: “by James K Oliver, 3/772902, April intake 1955, 20th National Service Training Battalion, 55th Anniversary Edition”books - military, military history - army, national service -
 Bendigo Military Museum
Souvenir - BATAAN MODEL, K Moore, c.2001
.1) Base covered with brown contact with wooden model of HMAS Bataan attached with blu tack. Model painted grey, black & red. Warship wooden stand attached below ship. .2) Perspex lift off cover.“HMAS BATAAN 1945 - 55” printed label attached. “HMAS BATAAN” black print under gold writing. “K MOORE 2001” printed label attached.military history - navy, maritime technology - model ships, bataan -
Moorabbin Air Museum
Machine - Miles Messenger 2A VH-AVQ (G-AJKG)
Historical Details: The AARG aircraft was built by Miles Aircraft (Northern Ireland) Ltd as a production Messenger 2A model in April 1947 and registered as G-AJKG in the UK where it flew with a number of private owners before being sold in May 1953 to the Right Honourable R.. Description: The Miles Messenger was built in England from 1942 on as a liaison aircraft for the Royal Air Force. At the end of the Second World War production continued for the civilian market. A number of Miles Messengers were imported into Australia, including t. Level of Importance: National -
 Kiewa Valley Historical Society
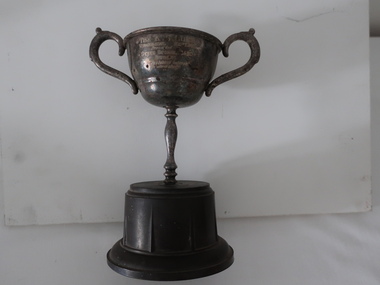
Trophies - Bogong Primary School
Trophies were awarded to recognise achievements in many areas of the school curriculum. Sir Kenneth George Luke (1896-1971) was a successful businessman and VFL football administrator. K.G.Luke was a private mint that made 1956 Olympic Games medals for the Numismatic Association of Victoria. It operated between 1937 and 1974. Note: 'Rosebowl replica' may refer to the Rose Bowl Home of the UCLA Football Layered Wooden Stadium Replica With the Los Angeles Campus Skyline. (A football reference for the shape of the trophy?)Bogong Primary School was built for the workers of the SECV during the construction of the Kiewa Hydro Electric Scheme. The school was well equiped and presented a broad curriculum enjoying participation in many organisations. A. Bakelite base with stained metal cup attached to a metal stem with a cup on top. The cup has 2 curved handles and an inscription between them on one side. B. Bakelite base with a metal stained 'silver' cup attached. The cup has a 'neck' with the cup on top. The cup has one curved handle. The other handle is missing. Previously UKV 058 and UKV 061B. The K. G. Luke / Trophy for replica sustained interest in bird study / presented / State School 4590 / Bogong / for sustained interest / in bird study A. "A.M.V -4 / Pet Parade / Save the Children / Fund bogong primary school, pet parade, bird study, k.g. luke trophy -
 Flagstaff Hill Maritime Museum and Village
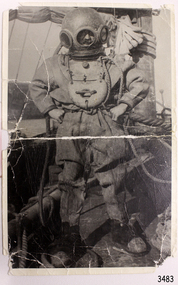
Photograph - Diver, K Tregea, 1900s
This photograph of a deep sea diver on board a vessel is connected to T. Ward. It was possibly part of E.G. Ward's Collection of diving equipment. The photograph was produced in the local town of Timboon. This photograph of an early 1900s diving suit shows part of the history of diving. It is connected to local history through the inscriptions on the back of the photograph; the printer and the name. The south west coast has hundreds of shipwrecks that have been discovered and explored by many divers. Their discoveries have led to us interpreting and understanding more about our history; ship building, exports, immigration, navigation and much more.Black and white photograph, portrait orientation, of a diver dressed in full diving gear standing on board a sailing vessel at sea. Inscriptions on reverse.Handwritten in black pen "T. WARD" Stamped in black ink "REPRODUCED BY" above rectangular stamp. Text within stamp "[K. TREGEA / CALLOWAY ST / TIMBOON VIC"flagstaff hill, warrnambool, shipwrecked-coast, flagstaff-hill, flagstaff-hill-maritime-museum, maritime-museum, shipwreck-coast, flagstaff-hill-maritime-village, photograph, diving gear, diving suit, deep sea diving, deep sea diver, diver, south west victoria, diving photograph, t ward, k tregea, timboon, marine technology, life saving -
Port Melbourne Historical & Preservation Society
Map, G S Williams, City Engineer, City of Port Melbourne, Dec 1963
Map of City of Port Melbourne (brick areas marked in colour), 1963.G. S. Williams (City Engineer)town planning, g s williams, troedel and cooper -
Tatura Irrigation & Wartime Camps Museum
Photograph - original, G. Haire photographer, 1946
Original photograph of grades V1 and V11 Tatura state School No. 1441. Copy L0253Black and white photograph of Tatura State School Group No. 1441. Original photographon back: Photographers name "G. Haire" -
Stawell Historical Society Inc
Map, G C Birch Mining Surveyor, Magdala Cum Moonlight Co. Plan of Stawell Goldfield, c1900
Shows Sloanes & Scotchmans Coy AreaShowing underground drives. c1900G C Birch Mining Surveyor mining, gold, map -
Surrey Hills Historical Society Collection
Folder of real estate advertisements, Folders of real estate advertisements (Streets beginning with G), Various
A4 folders with individual pockets for each property in streets beginning with G located in Surrey Hills and Mont Albert. Folders are ordered by street name and then chronologically by property number. Each property has its own pocket. This may include multiple real estate advertisements collected from sales over time. It may also include copies of any research undertaken by Alan Holt and / or members of the SHNCHC team. These are augmented by cards in the Alan Holt index file and by his property registers of Surrey Hills and Mont Albert.gawler court, george street, gilbert street, gladstone street, glendale street, godfrey court, goodwood street, gordon street, grace court, graham street, grange street, griffin close, grovedale road, guildford road -
 Ringwood and District Historical Society
Photograph, 1950 - Parish Hall Xmas Party, Church of England, Ringwood Street, Ringwood. Mrs. Caughey, Mrs. McCrae Senr. Mr. and Mrs. G. Williams, Mr. John McCrae, Mrs. M. McCall, Mrs. McWilliam, Mrs. Dedman, Mrs. Win Leslie, Director
Typed below photograph, "1950 - Parish Hall Xmas Party. Mrs. Caughey, Mrs. McCrae Senr. Mr. and Mrs. G. Williams, Mr. John McCrae, Mrs. M. McCall, Mrs. McWilliam, Mrs. Dedman, Mrs. Win Leslie, Director".