Showing 476 items matching "bat"
-
 Bendigo Historical Society Inc.
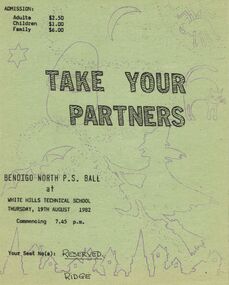
Document - PETER ELLIS COLLECTION: NORTH BENDIGO PRIMARY SCHOOL BALL, 19th August, 1982
Light green program for the Bendigo North Primary School ball held on Thursday, 19th August, 1982 at the White Hills Technical School. Front page has drawings of a spider, moon, star, cat, bat, cooking pot, a witch on a broomstick above outlines of buildings. Name, venue, date and admission price on the front. The centre has the names of the dances and some information about the 'Danse Macabre'. The back has the Acknowledgements to: Judy Hasty, Graham Balaam, Lloyd George, Julie Gillick, Brian Hillman, Roger Hillman, Di Milich, Noel & Heather Ridge, David Tunley, Lexie Ottery, Ian McKenzie, Leslie Campbell, Jeanette Clancy, Merryn Gerrand, Mr & Mrs Ken Gilbee, Jenni Hillman, Janet Holland, Elizabeth Lakey, Val Lee, L Alyss Liiv, Jude Milner, Kerryn Monro, Ken Miles, Laurene Rothenberger, Ruth Roberts, Ruth Sloan, Kaye Trimble, Darren Eastwood, Olga Chafer, Coral McClure, Deanne McNeil, Jenny Mollison, Robyn Murphy, Jane Pattinson, Helen Penna, Neil Ross and Richardsons' Fernery.Bendigo North Primary Schoolentertainment, dance, ball, peter ellis collection, bendigo north primary school, white hills technical school, ridge, judy hasty, graham balaam, lloyd george, julie gillick, brian hillman, roger hillman, di milich, noel & heather ridge, david tunley, lexie ottery, ian mckenzie, leslie campbell, jeanette clancy, merryn gerrand, mr & mrs ken gilbee, jenni hillman, janet holland, elizabeth lakey, val lee, l alyss liiv, jude milner, kerryn monro, ken miles, laurene rothenberger, ruth roberts, ruth sloan, kaye trimble, darren eastwood, olga chafer, coral mcclure, deanne mcneil, jenny mollison, robyn murphy, jane pattinson, helen penna, neil ross, richardsons' fernery -
 Ringwood and District Historical Society
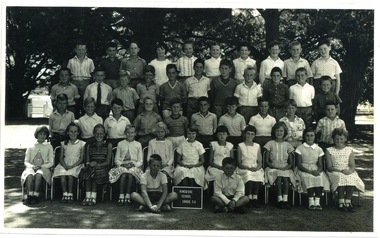
Photograph, Ringwood State School - Class photograph - Grade 2A, 1955
Black and white photograph - Grade 2A, 1955"Attached to photograph" Back Row- L to R: Neville (?), ?, Robert Neave, Douglas Ford, ?, Richard Schurmann, ?, ?, Peter Lewis, Leonard (?), ?, Bill Slater, Geoff Williams. 2nd Row - L to R: Annette Crane, Karen Whitehorse, Cheryl Culmer, ?, Pam Cupples, Heather McKenzie, Francis Patterson, Judy Mitchell, Helen Ringrose, ?, ?, Lorraine McCubbin. 3rd Row - L to R: Rosemary (?), Pat Elliot, Shirley Roney, Judy Caughey, Diane Browning, Judith Whitford, ?, Susan Edwards, Kaye Rutherford, Jenny Thompson, Beverley World, Carol Moore. Front Row - L to R: ?, Jeff Young, ?, ?, ?, roger Vass, Nick Bates, Stuart Brown, David Beith, Neil Clutterbuck, Chris Bronner. Teacher: -
 Red Cliffs Military Museum
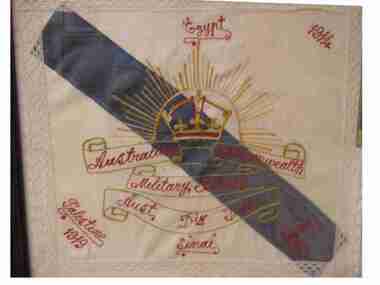
Cushion Cover, Cushion Cover from WW1, (estimated); 1914-1919
John Hughes was Awarded the Military Medal: "for conspicuous good work during operations at/ GIRD TRENCH, near LE SARS, on 14.11.1916./ This N.C.O. was in charge of a party of men engaged in digging a communication trench from/ our jumping off trench to the newly captured GIRD TRENCH. He displayed great courage and coolness under very heavy fire, and his personal efforts were mainly responsible for the completion of the task allotted to his party."// Service number: 3044 Rank: Lance Sergeant Unit: 2nd Pnr Bn Service: Army Conflict: First World War, 1914-1918 Award: Military Medal Date of London Gazette: 22 January 1917 Location in London Gazette: Page 836, position 34 Date of Commonwealth of Australia Gazette: 29 June 1917 Location in Commonwealth of Australia Gazette: Page 1395, position 37A framed embroidered cushion cover from WW1. Sent or brought home by Lt. Jack Hughes. Contained within the same frame is a paper clipping and a photo.1.Cushion cover: from the top down- Egypt.... 1914/ Rising Sun/ scrolls with Australian Commonwealth/ Military Forces/ Aust Div Train/ Palestine Sinai Syria/1919. 2.Newpaper clipping with photo: John Hughes (left) 81, and Hugh Mont/gomery, 87, are the two oldest veterans who/ will be taking part in the Frankston ANZAC/ Day March on Tuesday. Mr Hughes served/ in France and Belgium in WW1 and/ in Darwin in the Second World War. He is a/ holder of the Military Medal./ Mr. Montgomery served with the 29th Bat/talion AIF in France during WW1/ Both men have been residents of the RSL park War Veterans Home for the past eight years.// 3. Photo: Mr. John Hughes.belgium, france, ww1, lt, mm, jack, hughes -
 Brighton Historical Society
Clothing - Dressing gown, circa 1894
This dressing gown belonged to Clara Johnstone Miller (nee Bell, 1866-1910). Clara was the only daughter of Mr James Bell, a councillor of the Shire of Leigh (today a part of Golden Plains Shire) and owner of Woolbrook Homestead in Teesdale, near Geelong. In 1888, Clara married prominent businessman, racehorse owner, racing identity and pastoralist Septimus Miller (1854-1925). Septimus was the sixth of seven children born to Henry 'Money' Miller and Eliza Miller (nee Mattinson). 'Money' Miller was a well known financier and politician and reputedly one of Australia's wealthiest people in his time. In 1889, Clara and Septimus moved into the house 'Cantala' in Dandenong Road, Caulfield, where they hosted lavish receptions for Melbourne's elite. Clara was known as a stylish hostess who wore elegant imported fashions. This dressing gown is believed to have been manufactured by Japanese silk merchant Shiino Shōbei. Following the opening of the port of Yokohama to foreign trade in 1859, Shōbei began producing western-style silk garments, initially selling them to foreigners living in Japan and later exporting them around the world, even exhibiting at the Melbourne International Exhibition of 1880. His popular exports included quilted 'at-home' gowns or dressing gowns similar to this one. They had one child, Gwendoline Stewart Miller, who died in 1902 at the age of thirteen of diabetes - a largely untreatable condition at the time (insulin would not be discovered until 1921). Clara died in 1910, aged only 44. Septimus subsequently married Helen (nee Henderson), with whom he had a son, Ronald (1915-1990). The Millers were buried in the Brighton General Cemetery in a large Gothic-style vault. Upon Clara's death, Septimus sent much of her clothing and Gwendoline's to her mother Mary Bell. Some of these items were passed down to two of Clara's nieces, Miss Mary Bell and Mrs Lois Lillies, who donated them to BHS around 1973.A hand stitched purple pink silk quilted dressing gown with pale pink embroidery from circa 1894. The dressing gown is embroidered from the collar and shoulders though the centre front body to just above the hemline, on the cuffs and remaining pocket in a pale pink Perle thread embroidery featuring leaves and flowers. The entire gown is hand quilted with vertical parallel lines. The gown's neckline features a flat collar and the sleeve head fits on the neat shoulder line. The sleeve head is gathered and full tapering to a loose flat cuff at the wrist. The front of the garment is currently secured by fourteen decorative frogs of two different styles, none of which appear to be original. There is also evidence of a fifteenth toggle that has been removed from the base. The gown's original left hand pocket has been removed and attached to an area around the right breast presumably to patch a hole or obscure some damage. It is unknown when these modifications have been made. The back of the gown features a gathered pink and black concertina pleated silk insert panel from the neck through to the base of the garment. The garment is lined with a very fine pale pink silk over the woollen batting.clara miller, woolbrook, septimus miller, cantala, gwendoline miller, caulfield, brighton general cemetery, shiino shobei, s. shobey -
 Lara RSL Sub Branch
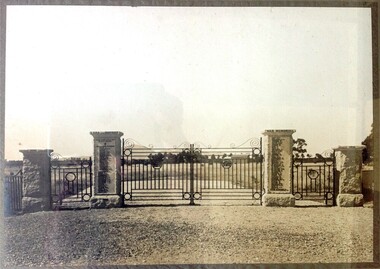
Lara Memorial Gate Photo 1928, Lara Recreation Reserve Memorial Gate Photo 1928, 1928
Following World War One, the present Memorial Gates at the front of the Lara Recreation Reserve (opposite the service station), were erected and the names of 104 men and woman who enlisted from Lara Districts were added. Twenty four paid the supreme sacrifice. They were erected at a cost of £380 by Barklamb Brothers of Caulfield. His Excellency The Governor Lord Somers officially opened the gates on 22 December 1929. RSM Cadwell was in charge of the program. The ceremony involved a large gathering where Lord. Names on Gates of WW1 Veterans Listed below - Following World War One, the present Memorial Gates at the front of the Lara Recreation Reserve (opposite the service station), were erected and the names of 104 men and woman who enlisted from Lara and districts were added. Twenty Four paid the supreme sacrifice. His Excellency The Governor Lord Somers officially opened the gates. RSM Cadwell was in charge of the programme. Sommers inspected a guard of honour from the 23rd Battalion (City of Geelong Regiment). In addition to a parade of returned soldiers, music was provided by the Geelong City Band. Names on Gates of WW1 Veterans Listed below - Andserson W.A. Fry J.F. Mullins M. Bates J. * Gabrielson E. * McDonald H. Bates G. Gardiner H.A. McDonald G. Beggs J.S. Gibbons H. * McHarry E.J. Bennett E.J. (3755) Gibbons W. McEwan G. Beardsell T. Gibbons G. McIntyre J.L. (3421) Branch W.J. (3029) Grass E.J. (687) McIntyre J.W. (7049) Callaghan C. Grass C.H. McIntosh J. Carter W.J. Groves H. McKellar G. Cashmore J.A. Harris W. McLeod R. Cashmore F.J. Heal H. P. (1134) Nicholls J. Cashmore A.G. Heal F.W. (1135) Olive C.A. * Cashmore A.J. Heal E.L. (1133) Oliver D.H. Chirnside J.L. Heyward F.C. * Owens S.J. Clayton J.H. * Heyward W. O'Neill J. Connop J. * Hill E.J. * Parsons M. Connop E. * Howard H.L. (4138) Parker S. Collins F.H. * Inglis H. Perkins C.E. Collins R.B. * Izon C.E. Shannahan J. Collins H. James R. Spitty C. Collins A. Jenkins W. Steele J. Coogan M.T. * Jenkins H. Tayler R. Curle O. Kee H.K. Tayler W.H. (794) Duggan H.J. * Keneally J. Teesdale V.B. (5241) Duggan R. Kent G.G. Thomas D.H. Duggan T.M. Kortright J. Tregilas S. * Dunn W. Lodge J.A. * Trim A. Dodesmaide F. * Lodge G.L. * Tipping S. * Edols R.W. Lodge T.S. * Turnbull J.W. * Farrelly P. Miller P. * Walker H.D. Farrer R. * Minogue P. Watt W. Firth D.H. * Moodie E. Wembridge W.P. * Firth A.C. Morgan C.E. Sister McNaughton K. Foot M.T. Moroney L.F. (4088) Sister McIntosh S. Foot C.H. * The Supreme Sacrifice Sommers inspected a guard of honour from the 23rd Battalion (City of Geelong Regiment). In addition to a parade of returned soldiers, music was provided by the Geelong City Band. The Memorial Gates are of local heritage significance and are included as Heritage Overlays in the Greater Geelong Planning Scheme,unveiled by the govenor Lord Somers on the 22 dec 1929. Read comments on bottom of photoComprising four square granite piers with central vehicular and flanking pedestrian metal gates.The gates commemorate the names of the 104 men and women of the Lara region who served in World War One.lara, memorial gate, ww1, world war 1, lara recreation reserve, lord somers, rsm cadwell, 1928, monument, 23rd battalion, city of geelong regiment, geelong city band -
 Ringwood and District Historical Society
Photograph, St. Mary's School, Bedford Road, Ringwood. 1937-38
Written on backing sheet, "St. Mary's School, Bedford Road, Ringwood. 1937-38. Back Row - K. Rodaughan, D. Hannan, ? Ellis, M. Maidment, J. Davern, D. Morphett, ??, J. Kiker, J. Nolan, F. Hardidge, A. Orr, W. Steeth. 3rd Row - B. Bates, W. Smith, K. Hardidge, J. Ryan, B. Byrne, P. Stratton, W. Davern, F. Barro, ??, J. Lindsay, A. Smith, ? Pratt. 2nd Row - Byrne, ??, G. Robinson, J. Grey, ? Brown, ??, G. Robinson, J. Grey, ? Brown, ? Brown, ??, ??, K. Ryan, W. Connell, W. Orr, J. Bowles, B. Grey, ??. Front Row - L. Hardingham, P. Gridley, ??, J. Orr, P. Alford, ??, P. Davern, V. Orr". -
 Kew Historical Society Inc
Archive (series) - Subject File, Artists I (Kew), 1958-present
Various PartiesReference, Research, InformationKHS OrderInformation file including a collection, largely compiled of newspaper articles/cuttings, relating to artists born or practising in Kew. In addition to the cuttings, there is a catalogue of an exhibition at the Town Hall Gallery - Louis Kahan: Art, theatre and fashion (curated by Laura Jokic, 2016), and biographical entries from various publications including the ADB. There is also an invitation (undated) from the Mayor of Kew, Cr. Kaye Cole, to an exhibition of paintings by Gwen Walker and Donald Cameron in the Mayor’s Room. Alice Marion Ellen Bale (1875-1955), Arthur Loureiro (1860-1932), Frances Derham, Eugenia Meldrum, Max Meldrum, Louis Buvelot, Kitchen Dimensions High Street Kew, Ron Walker, Melissa Peacock, Isobel Davies 6 A'Beckett Street, Hertha Kluge-Pott, Debra Luccio, Elise Martinson, Carole Milton, Louise Minahan, Miranda Millane, Sonja Kan, Holly Walton, Q Art Gallery, Archibald Colquhoun, Amalie Colquhoun, John Perry, Pamela Pretty, Christopher Shelton, Amanda Tuohy, Margot Westhorpe, Ian Wood, James O’Brien, Gaby Jung, Rupert Gray, Ray Gee - 3 Fernhurst Grove, Louis Foletta, Thomas King (Tim) Fitchett, Wendy Fantasia, Marion Cravino, Brett Coelho, Eileen Cambell, Helen Carnage, Erin Carnage, John Bates, Nina Bennett, Donald Cameron, Gwen Walker -
 Ringwood and District Historical Society
Photograph, Ringwood State School - Grade 5A, 1963
Black and white photograph - Grade 5A, 1963."Attached to photograph" Back Row- L to R: Russell Borke, John Snellders, Craig Austin, Barbara Donald, Janet Conlon, Diana Rankin, Debbie Lawrence, Russell Paine, Neil Ratray, Gavin Philips. 2nd Row- L to R: Tommy Colston, Greg Peters, Leslie Reed, Jeffrey Taylor, Gary McCubbin, Gary Davies, ?, John Moon, Barry McDonald, Malcolm Pearson, ?. 3rd Row- L to R: Stephen Gross, Neil Dawe, Jeffrey Fielding, David Kennely, Ian (?), Philip Bates, Jeffrey Ratten, David Kimberly, Robyn Hagar, Malcolm Williams. Front Row- L to R: Karen Williams, Debbie Monk, Elizabeth Clarke, Judy Parker, Linda (?), Jan Thompson, Sally Shaw, Cheryl O'Brien, Rosaland Wiggle, Julie Cook, Rhonda McLeod. On Ground: Michael Craddock, David Connell. Teacher: -
Federation University Historical Collection
Magazine - Booklet, Ballarat School of Mines Students' Magazine, 1944, 1944
List of Full Course Students' 1944, Editorial, News and Notes, Obituary, The Literary Society, Fumes from the Lab, Our Sojourn in Port Pirie, Arts & Crafts Gossip, Sport, Commercial Notes, The Junior Techs, List of Junior Technical School Students' 1944White, blue, green and gold soft covered magazine of 66 pages including advertisements. Artworks Mr Heseltine - By Ruth Mole Mack - By Beryl Grinter Frederick - By Beryl Grinter Stan - By Ruth Mole Scotty - By Joan Walter Jenko - By Ruth Mole Dagwood - By Ruth Mole Along the track - By Neville Reeve Kanga - By Ruth Mole Nev - By Ruth Mole Charlie - By Joan Walter Shergold - By Joan Walter Very friendly people at this beach, everyone's waving at me - By John Procter At the crest of the hill - By Joan Walter Joyce - By Beryl Grinter Mr Procter - By Ruth Mole Phyllis - By Neville Reeve Gwen - By Beryl Grinter Doreen - By William Bates Laurel - By Joan Walter Lorna - By Ruth Mole Ah! an important discovery! wireless poles on Mars - By Frank Daykin Barbara - By Joan Walter Winsome - By Beryl Grinter Kath - By Joan Walter Lola - By Ruth Mole Amy - By Beryl Grinter Laurel - By Beryl Grinter Gwen - By Beryl Grinter June - By Beryl Grinter Peggy - By Beatrice Burgess Winifred - By Ruth Mole Elaine - By M.D Iris - By Ruth Mole Iris - By Ruth Mole Isobel - By Joan Walter Betty - By Joan Walter Nancy - By Neville Reeve Charlie - By Ruth Mole Harold - By Joan Walter Sammy - By Joan Walter Brokie - By Ruth Mole Dick - By Joan Walter Mac - By Ruth Mole Mac - By Beryl Grinter Willie - By Beryl Grinter Deany - By Beryl Grinter Ducky - By Ruth Mole Fitzy - By Joan Walter ballarat school of mines, magazine, percival d. fisher, neville reeve, gwen spiers, p. marxsen, stanley c. sharp, john c. shergold, beatrice e. burgess, john g. procter, alan m. scott, w. reid, elsie coombs, laurence j. george, d. wise, robert j. mckenzie, marian a. beckwith, geoffrey biddington, thelma ellsworth, maxwell a. richards, norma eltringham, k. saunders, john a. mckenzie, beryl grinter, frank d. daykin, dawn wilson, ernest j. poppins, dr pound, mr mein, mr f. g. procter, joan t. walter, peter j. wilson, ruth mole, ian cooper, jack lannen, jack henderson, james duncan, alan wilson, j. baird, ian mclachlan, maxwell lawrence, ken palmer, joy martin, patricia allan, graham lawrie, kevin mclachlan, marion pearce, dimsey, vaughan, wilson, callister, max webster, stan lawrie, eric goon, m. collins, alan paganetti, robert tasman pound, william symons, f. neville. reeve, lester w. roffey, kevin j. whiter, john m. blainey, john middlin, roy e. mawby, phillip p. coulson, john w. jolly, kingsley r. bremmer, basil j. marshall, james s. owen, raymond g. mccahon, lindsay g. pattenden, david t. coburn, bruce j. linklater, muriel coultham, g. harrison, mr cornell, b. brookman, john l. lewis, valerie vickers, robert j. mcmenzie, betty law, miss king, mrs mcilvena, valerie ballinger, grace lawry, mina gallie, eloise prowse, lois strick, kenneth j. lindsay, r. eggleton, w. redfern, w. blundell, l. clifton, w. parker, r. fitzclarence, r. sargent, d. mclachlan, c. mouser, w. trevethan, d. hart, r. bennett, j. beecroft, r. ingleton, k. dean, w. young, b. holloway, w. coad, a. clark, k. innes, k. george, r. willian, j. heys, a. coad, l. dennis, p. banfield, g. pyke, j. humphrey, h. george, f. jacobson, f. savage, c. eltringham, i. scott, a. hughes, h. fumberger, a. smith, m. grinham, c. hoffman, r. swales, joan walter, william bates -
 Melbourne Tram Museum
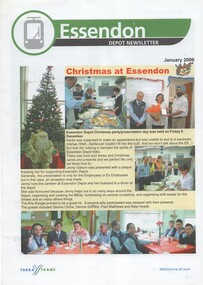
Magazine, Yarra Trams, "Malvern Depot Newsletter", "Essendon Depot Newsletter", 2006
Set of eight magazines printed in the style of a set issue in June 2006 (see Reg Item 1157). .1 - Malvern Depot - 8 pages - with a group photo in front of the depot on the front cover - article on 30 years service of Steve Olsen, Depot Marketing Staff, Tram attendants, new from Brunswick, Public Transport Cricket association, OHS and other notes. .2 - Essendon Depot - Christmas at the depot, Commonwealth Games, Think Tram, and the dog who took a tram ride. .3 - Brunswick depot - Sept. 2005 - departure of Hubert Guyot (CEO), depot works, table tennis, OH& S .4 - East Preston Depot - Sept. 2005 - departure of Hubert Guyot (CEO), message from Manager and Depot Administrator, environmental aspects, table tennis, has photos of lots of staff but no surnames. .5 - Essendon Depot - September 2005 - departure of Hubert Guyot (CEO) - various items and thanks from Lennie Bates. .6 - Malvern Depot - September 2005 - departure of Hubert Guyot (CEO) - some items from above newsletters. .7 - Malvern Depot - March 2006 - Melbourne Uni terminus works started, East Preston going green, Hugh Waldron leaves Malvern for South bank, and tennis report. .8 - Malvern Depot - September 2006 - 100 years of electric trams, late night services, tram photo competition and interview with Hugues Deleu, Ticketing Systems Manager.trams, tramways, yarra trams, malvern depot, essendon depot, brunswick depot, dogs, sports, cricket -
 Ringwood and District Historical Society
Photograph, Ringwood State School - Grade 6C, 1964
Black and white photograph - Grade 6C, 1964."Attached to photograph" Back Row- L to R: Greg Peters, David Pumpa, Norman Pearson, Liz Allen, Robyn Henry, Grace King, Deb Lawrence, Jenny Johnson, Linda Chegwiden, Erica Seffers. 2nd Row- L to R: Chris Eastwood, Graham Haglan, Gary Ladegashes, Gary Morgan, ?, Paul Wilson, Wayne Walton, Stephen Foster, Gavin Philips, Barry McDonald. 3rd Row- L to R: Philip Bates, Michael Craddock, Michael Williams, Stephen Cross, Ron Saines, Neil Dawe, ?, Bruce Barber, Robin Hagar, Paul Martin. Front Row- L to R: Lynette German, Lorraine Tann, Linda Willis, Debby Silvy, Judy Parker, Pam Williams, Julie Cook, Glenda Cooper, Jenny Buchanan, Ann Dowling, Sally Shaw. On Ground: Robert Silvie, ?, Graeme Cleator, David Kennely, Dale Ryan. Teacher: Miss Norman -
 Ringwood and District Historical Society
Photograph, Ringwood State School - Grade 4A, 1962
Black and white photograph - Grade 4A, 1962"Attached to photograph" Back Row- L to R: Russell Bourke, Robert Taylor, Malcolm Pearson, Russell Paine, Gavin Phillips, Neil Rattray, Gary Davies, ?, Barry McDonald, Craig Austin, Gary McCubbin, John Moon. 2nd Row- L to R: Julie Cook, Jan Thompson, Leslie Gray, Leanne Thorpe, Laurie Simpson,, Debbie Lawrence, Elizabeth Clarke, Roslyn wiggle, Diana Rankin, Wilemina Cook, Janet Conlon. 3rd Row- L to R: Tommy Colston, Stephen Cross, Jeffrey Ratten, Roslyn (?), Sally Shaw, Debbie Monk, Rhonda McLeod, Karen Williams, Ian Jones, Leslie Reed, David Connell. Front Row- L to R: Robin Hagar, Greg Peters, Malcolm Williams, Phillip Bates, David Kimberley, Michael Craddock, David Kennely, Neil Dawe, Jeffrey Fields. Teacher: Mr Delacca -
Federation University Historical Collection
Award - Trophy, Six Metre Henk Miller Line Special, 1981
Silver cup with handles relating to the Gippsland Advanced Institute EducationSix metre Henk Miller Line Special The GAIE Annual Raft Perpetual Trophy Hazelwood Pondage 1981 F Golly, S Corlett, G Honeychurch, M Jongerius, P Llewellyn, D Patching, D Wagner 1982 S Corlett, G Honeychurch, P Llewellyn, D Wagner, M Jongerius, D Patching, 1983 C Blowers, A Casser, P Coultox, I Namiltox, A Hassak, S Kallbacka, R Lestin, R Shellcot, T Stevens 1984 D Patching, P Llewellyn, G Honeychurch, N Bates, R Dathan 1985 G Honeychurch, P Llewellyn, G Martin, A Lonneveid, P newman 1986 James (Pas) Bennet Lindsay Fawell 1975 Meredith Annand, Ken Jeanes Tim Gallacher, Jeff Goodchild 1976 Ken Ken Jason, Chris Westaway, Karen Pearce, Charlie Wheelan 1977 Jeff Leamon, Chris Hobson 1978 Jeff Leamon, Ken Jeanes, Greg Vines, Vicki Whitesidef golly, s corlett, g honeychurch, m jongerius, p llewellyn, d patching, d wagner, s corlett, g honeychurch, p llewellyn, d wagner, m jongerius, d patching,, c blowers, a casser, p coultox, i namiltox, a hassak, s kallbacka, r lestin, r shellcot, t stevens, d patching, p llewellyn, g honeychurch, n bates, r dathan, g honeychurch, p llewellyn, g martin, a lonneveid, p newman, james (pas) bennet, lindsay fawell, meredith annand, ken jeanes, tim gallacher, jeff goodchild, ken jason, chris westaway, karen pearce, charlie wheelan, jeff leamon, chris hobson, jeff leamon, ken jeanes, greg vines, vicki whiteside, giae, gippsland institute of advanced education, churchill campus -
 National Wool Museum
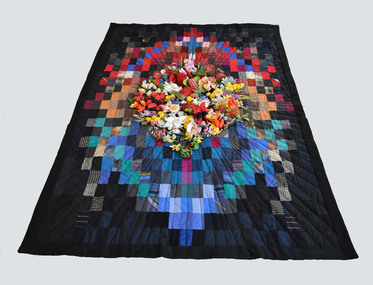
Textile - Quilt, Rosemary A.O. Cameron, Celebration Quilt, 1990
From Rosemary Cameron - This quilt has been made in 100% wool to celebrate the diversity, durability and beauty of pure wool, especially the lightweight cool wools. The woollen patches were kindly donated by Mr. David Jones, managing Director of Fletcher Jones and Staff which were pre-cut samples of European Fabrics in various weights, textures and colours. I had the task of creating a design around the fabrics available, some of which I only had to sample. I chose to surround my design with dark shades to encompass at the top of the quilt, the lightness of the sky and the trees, in the middle the warmth of summer, the dryness of central Australia and at the bottom the rick tones of Opals, our mineral wealth and the internal heart of earth. To add excitement and texture to this design I chose 31 Australian Wildflowers including all the Australian Floral Emblems, some unusual wildflowers and favourite small wildflowers. Twice life size, these flowers have been made of silk wool and cotton, embroidered, painted and beaded by our creative and talented Hamilton Quilters, their results are fantastic! The brilliance and timeless quality of these Australian Wildflowers intensify and complement the colours of the Wool Quilt. The Quilt was hand pieced and hand quilted at quilting bees. It has a woollen batting, binding and backing which was a delight to work with and very easy to quilt. The flowers were assembled and attached in small working bees. To the fifty-two Hamilton Quilters who have worked on this quilt for six months thank you for you hard work and creativity especially Joan H. Lyons for her time, enthusiasm and knowledge when difficulties arose. Joan M. Lyons has worked with me on various stages of this Quilt, her help and support has been tremendous. To my family who have tolerated scraps of wool and silk, photographs, wildflower books and specimens and drawings which have at times almost taken over our house, a year from ideas to completion, thank you for your support and help in many ways.Multi coloured patchwork quilt with native flowers protruding from centre in a diamond shape.Embroidered on back - "The Celebration Quilt" Made in 1990 by The Hamilton Quilters, Designed by Rosemary A.O. Cameron. Made of Pure Wool. Beryl Anderson, Joan Askew, Bett Basham, Marilyn Baulch, Rau Blaby, Pauline Boyd, Aileen Beckwith, Dorothy Beveridge, Ros Brommell, Rosemary Cameron, Gwen Cook, Anne Cordner, Kaylene Cowland, Elaine Denby, Barbara Dolman, Rosalie Duffield, Helen Fry, Glennys Gardner, Nola Gunning, Margaret Irvine, Bev Jeffrey, Emma Jensen, Betty Lacy, Helen Lampard, Joan H. Lyons, Joan M. Lyons, Elaine McDonald, Carole McEwan, Joy McLeod, Joyce McLeod, Mary May, Joan Mallinson, Susan Mason, Anne Menzel, Val Mills, Betty O’Brien, Di Pettigrew, Therese Read, Sherry Robertson, Lee Rowland, Irene Saddler, Nanette Templeton, Glenys Tindall, Liz Wallis, Ruth Walter, Marion Warburton. Alison Waterman, Pat Wilmot, Nola Malcolm, Ann Nicholls, Margaret Rowe, Jill Hillier.celebration, flowers, hamilton quilters, quilt, native flowers -
 National Wool Museum
Document - The Fading Dream of Australian Home Ownership, Design and Photograph, Judy Turner, 1989
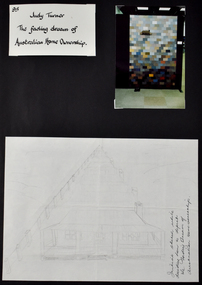
‘The Fading Dream of Australian Home Ownership’ was made by Judy Turner in 1989 for her son Nicholas (then 14 years) after a family discussion about mortgages and rising interest rates (17% at the time), out of concern for his generation. “Perhaps this will keep my son warm when he can’t afford a house”, wrote Judy at the time. As a quilting teacher for over thirty years, Judy was well aware of the ‘wagga’ tradition of making do with what you have and reusing resources to make something useful. The quilt was made using approximately 270 different men’s woollen suiting samples. The fabrics in the quilt were a gift from Micheal Haze who was a travelling men’s ware salesman and friend of the artist’s late husband. The suiting samples were used just as they were, without cutting, and are stacked liked house bricks. The pieces have been machine pieced and tied. The quilt has woollen backing, with no batting. Judy’s son Nicholas, always interested in drawing, and keen to see what his mother was making, helped with the drawing and design of the house. The quilt has been exhibited in Canberra, Armidale and Sydney and featured in publications in Australian and Japan. Judy’s work has been exhibited Nationally and Internationally, including in Japan, Korea, Germany, Switzerland and the United States of America. Judy’s work has featured extensively in publications around the world, and has received many awards. Her work is held in public and private collections across Australia and the USA. As well as a successful career as an artist, Judy spent three decades imparting skills to the next generation as a patient and skilled teacher. ARTIST STATEMENT The medium of my artistic practice is quilt making and my focus is the use of colour and speedy, accurate and efficient methods of making successful quilts. In 1995 I developed an original technique of applying woollen yarn to a woollen background, focusing on the subtle blending of colour to express an idea. Author of Awash With Colour (1997) and co-author with Margaret Rolfe of Successful Scrap Quilts (2002).Folio page depicting three items attached to a black card background. One item is a title written in black ink on white background, another is a photograph of a quilt, the third shows a hand drawn sketch of a house with a verandah.Front: [handwritten] 95 / Judy Turner / The fading dream of / Australian Home Ownership. / Initial sketch while / deciding how to depict / the Fading Dream of / Australian Home Ownership.quilt, wagga, home, house, housing affordability, design -
 National Wool Museum
Textile - Quilt, Judy Turner, The Fading Dream of Australian Home Ownership, 1989
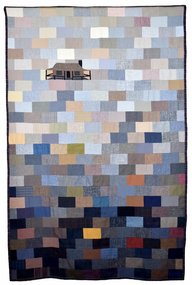
‘The Fading Dream of Australian Home Ownership’ was made by Judy Turner in 1989 for her son Nicholas (then 14 years) after a family discussion about mortgages and rising interest rates (17% at the time), out of concern for his generation. “Perhaps this will keep my son warm when he can’t afford a house”, wrote Judy at the time. As a quilting teacher for over thirty years, Judy was well aware of the ‘wagga’ tradition of making do with what you have and reusing resources to make something useful. The quilt was made using approximately 270 different men’s woollen suiting samples. The fabrics in the quilt were a gift from Micheal Haze who was a travelling men’s ware salesman and friend of the artist’s late husband. The suiting samples were used just as they were, without cutting, and are stacked liked house bricks. The pieces have been machine pieced and tied. The quilt has woollen backing, with no batting. Judy’s son Nicholas, always interested in drawing, and keen to see what his mother was making, helped with the drawing and design of the house. The quilt has been exhibited in Canberra, Armidale and Sydney and featured in publications in Australian and Japan. Judy’s work has been exhibited Nationally and Internationally, including in Japan, Korea, Germany, Switzerland and the United States of America. Judy’s work has featured extensively in publications around the world, and has received many awards. Her work is held in public and private collections across Australia and the USA. As well as a successful career as an artist, Judy spent three decades imparting skills to the next generation as a patient and skilled teacher. ARTIST STATEMENT The medium of my artistic practice is quilt making and my focus is the use of colour and speedy, accurate and efficient methods of making successful quilts. In 1995 I developed an original technique of applying woollen yarn to a woollen background, focusing on the subtle blending of colour to express an idea. Author of Awash With Colour (1997) and co-author with Margaret Rolfe of Successful Scrap Quilts (2002).Quilt featuring block pieces in tones of grey, blue, tan and brown, graduating in light to dark tones from top to bottom. The top third features a house with a verandah.quilt, wagga, home, house, housing affordability, design -
 National Wool Museum
Document - The Fading Dream of Australian Home Ownership, Design and Fabric Sample, Judy Turner, 1989
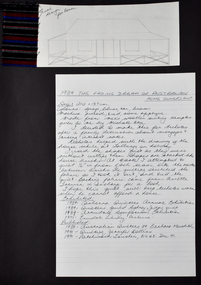
‘The Fading Dream of Australian Home Ownership’ was made by Judy Turner in 1989 for her son Nicholas (then 14 years) after a family discussion about mortgages and rising interest rates (17% at the time), out of concern for his generation. “Perhaps this will keep my son warm when he can’t afford a house”, wrote Judy at the time. As a quilting teacher for over thirty years, Judy was well aware of the ‘wagga’ tradition of making do with what you have and reusing resources to make something useful. The quilt was made using approximately 270 different men’s woollen suiting samples. The fabrics in the quilt were a gift from Micheal Haze who was a travelling men’s ware salesman and friend of the artist’s late husband. The suiting samples were used just as they were, without cutting, and are stacked liked house bricks. The pieces have been machine pieced and tied. The quilt has woollen backing, with no batting. Judy’s son Nicholas, always interested in drawing, and keen to see what his mother was making, helped with the drawing and design of the house. The quilt has been exhibited in Canberra, Armidale and Sydney and featured in publications in Australian and Japan. Judy’s work has been exhibited Nationally and Internationally, including in Japan, Korea, Germany, Switzerland and the United States of America. Judy’s work has featured extensively in publications around the world, and has received many awards. Her work is held in public and private collections across Australia and the USA. As well as a successful career as an artist, Judy spent three decades imparting skills to the next generation as a patient and skilled teacher. ARTIST STATEMENT The medium of my artistic practice is quilt making and my focus is the use of colour and speedy, accurate and efficient methods of making successful quilts. In 1995 I developed an original technique of applying woollen yarn to a woollen background, focusing on the subtle blending of colour to express an idea. Author of Awash With Colour (1997) and co-author with Margaret Rolfe of Successful Scrap Quilts (2002).Folio page depicting three items attached to a black card background. One item is a red, blue, black and white textile sample, another is a hand drawn sketch of a house, the third shows hand written text on lined paper in black ink.Front: [handwritten] Final / design / for housequilt, wagga, home, house, housing affordability, design -
 National Wool Museum
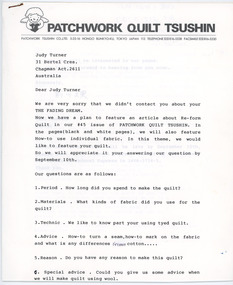
Document - The Fading Dream of Australian Home Ownership, Letters, Judy Turner et al, 1991
‘The Fading Dream of Australian Home Ownership’ was made by Judy Turner in 1989 for her son Nicholas (then 14 years) after a family discussion about mortgages and rising interest rates (17% at the time), out of concern for his generation. “Perhaps this will keep my son warm when he can’t afford a house”, wrote Judy at the time. As a quilting teacher for over thirty years, Judy was well aware of the ‘wagga’ tradition of making do with what you have and reusing resources to make something useful. The quilt was made using approximately 270 different men’s woollen suiting samples. The fabrics in the quilt were a gift from Micheal Haze who was a travelling men’s ware salesman and friend of the artist’s late husband. The suiting samples were used just as they were, without cutting, and are stacked liked house bricks. The pieces have been machine pieced and tied. The quilt has woollen backing, with no batting. Judy’s son Nicholas, always interested in drawing, and keen to see what his mother was making, helped with the drawing and design of the house. The quilt has been exhibited in Canberra, Armidale and Sydney and featured in publications in Australian and Japan. Judy’s work has been exhibited Nationally and Internationally, including in Japan, Korea, Germany, Switzerland and the United States of America. Judy’s work has featured extensively in publications around the world, and has received many awards. Her work is held in public and private collections across Australia and the USA. As well as a successful career as an artist, Judy spent three decades imparting skills to the next generation as a patient and skilled teacher. ARTIST STATEMENT The medium of my artistic practice is quilt making and my focus is the use of colour and speedy, accurate and efficient methods of making successful quilts. In 1995 I developed an original technique of applying woollen yarn to a woollen background, focusing on the subtle blending of colour to express an idea. Author of Awash With Colour (1997) and co-author with Margaret Rolfe of Successful Scrap Quilts (2002).Two typed letters held together with a staple. The first letter has a grey printed letter head which includes a logo of a person with wings holding a heart.[printed] PATCHWORK QUILT TSUSHINquilt, wagga, home, house, housing affordability, design -
 Federation University Historical Collection
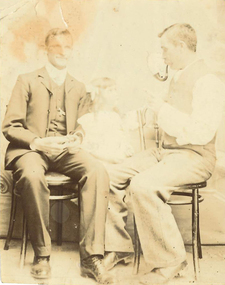
Photograph, James (Jim) Smith of Happy Valley
James (Jim) Smith, (died 03/08/1974, aged 93 years) established an orchard growing snow apples near in Happy Valley after returning from mining activities in South Africa. The orchard was called "Springdallah" and was beside the Linton/Happy Valley Road across from the old Happy Valley railway station. Jim was the son of George Henry Smith (18/12/1840 - 26/11/1903) and Emma Keys Smith born Keys (07/08/1842 - 28/08/1888). George and Emma left Liverpool with other unassisted immigrants on the "Bates Family" ship with baby Clara on 08/06/1863 arriving in Melbourne on 08/06/1863. George and Emma emigrated to Australia on the invitation of Emma's brother Edward Keys who owned a property near the school at Happy Valley on which there were two houses. Teddy offered George and Emma the smaller one to live in. When "Teddy" decided to go into hotel keeping George took over the 200 acres of his property and made it a pleasant orchard and garden called "Cress Green Gardens". George had various secretarial jobs - rate collector; paymaster at the mines; until he became Shire Secretary for the Shire of Grenville, whose centre was Linton and Government Auditor for Western Victoria (1894-1903), the means of transport being horse and buggy. Another son followed his father as Shire Secretary. George and Emma had 14 children, Emma dying giving birth to Emma Keys who lived for 16 months. George later married Annie Bolte with 2 more children being born. Annie later sold the property. The land was used for grazing and the two houses fell into disrepair. In 1995 George's grandson Ernest (Alf) Alfred Watson visited the site and reported a wrought iron gate at the site and a mulberry tree near the site of his grandmother's family home. Bluestone blocks can still be seen in the paddocks from the roadside. The child in the photograph is Phyllis Joy Smith, Jim's eldest daughter. Jim Smith was the brother of Clara Emma Yung nee Smith.Sepia photo of two men and a girl. One of them is Jim Smith who established on orchard at Happy Valley. He also went to South Africa - mining activities. The orchard is now part of Clarkesdale Bird Sanctuary located at 360 Linton-Piggoreet Rd, Linton, Vic. 3360. Verso: Jim Smith South Africa (Mining) Established orchard halfway near Linton and Happy Valley. Clara Emma's brother. jim smith, james smith, clara emma smith, happy valley, yendon, piggoreet, south africa, mining, orchard, edward keys, george henry smith, emma keys smith, clara emma yung, annie bolte, shire of grenville, clarkesdale bird sanctury -
 Flagstaff Hill Maritime Museum and Village
Domestic object - Bowl, Late 19th or early 20th Century
The Process of Making Pottery Decorating, Firing, Glazing, Making, Technical There is a rhythm and flow to clay. It can’t be done all at once! Even the making process! It can take weeks to get everything done, especially if you can only work on your pottery once a week! Even though we have three hour classes, it’s often just not enough time! Here is an overview of some of the processes so you have a bit more grasp on some of the technical stuff! Step One – Design There are SO many ideas out there for making stuff in clay! From delicate porcelain jewellery, through to heavy sculptural work and everything in between. Deciding your direction is sometimes not that easy – when you first start, try everything, you will naturally gravitate to the style that you enjoy! The options and variations are endless and can get a wee bit overwhelming too! Check in with me before you start to ensure your ideas will work, what order you might do things, how you could achieve the look you are seeking and any other technical data required! Step Two – Making Clay is thixotropic. This means that as you work with it, the clay first gets sloppier and wetter, before is begins to dry in the atmosphere. For most things, you simply can’t do all parts of the project at once. An example of work order might look like: Get last weeks work out from the shelves Prepare clay for today’s work – roll your clay, prepare balls for throwing, make the first stage of a pinch pot) Clean up last week’s work and put it on the shelf for bisque firing Check that you have any glazing to do – and do enough of it that you will have time to finish your main project Do the next step of your next project – there might be a further step that can’t be complete immediately, in that case, wrap your work well and put onto the shelves. Letting your work rest for a while can really help keep your work clean and professional looking. Many things require bagging under plastic to keep it ready for work the next week – put your name on the outside of the bag so you can find your work easily. We have stickers and markers. Consider how you want to decorate your work – coloured slip can be applied at a fairly wet stage (remembering that it will make your work even wetter!). Trying to apply slip to dry clay won’t work! If you want to do sgraffito – you will need to keep the work leather hard (a state of dryness where you can still work the clay with a little effort and a little water and care). Step Three – Drying Most of the time your work can go into the rack uncovered to let it dry out for the following week. If you want to continue forming or shaping you will need to double bag your work – put your work on a suitable sized bat and put the bat in a bag so the base of the bag is under the bat, then put another bag over the top of the work and tuck the top of the bag under the bat. If you want to trim (or turn) your thrown work the following week, it should also be double bagged. If your work is large, delicate, or of uneven thicknesses, you should lightly cover your work for drying. When considering the drying process, bare in mind the weather, humidity and wind! The hotter and dryer, the faster things dry and work can dry unevenly in the shelves – this can lead to cracking – another time to lightly cover your work for drying. Step Four – Trimming and Cleaning Up Your work is dry! It is called greenware now and it is at it’s most fragile! Handle everything with two hands. I often refer to soft hands – keep everything gentle and with your fingers spread as much as possible. Try to not pick up things like plates too much, and always with both hands! Before your work can be bisque fired it should be “cleaned up”. You work won’t go into the kiln if it has sharp edges – when glazed, sharp edges turn into razor blades! Use a piece of fly wire to rub the work all over – this will scratch a little so be light handed. Use a knife or metal kidney to scrape any areas that require a bit more dynamic treatment than the fly wire offers! Finally, a very light wipe over with a slightly damp sponge can help soften and soothe all of your edges and dags! Trimming thrown work: If you are planning to trim (or turn) your thrown work (and you should be), make sure you bag it well – your work should be leather hard to almost dry for easiest trimming. Use this step to finish the work completely – use a metal kidney to polish the surface, or a slightly damp sponge to give a freshly thrown look. Wipe the sponge around the rim after trimming, and check the inside of the pot for dags! Trimming slip cast work: Usually I will trim the rims of your work on the wheel the following day to make that stage easier, however you will still need to check your work for lumps and bumps. Last but not least – check that your name is still clearly on the bottom of your work. Step Five – Bisque Firing When the work is completely dry it can go into the bisque kiln. The bisque kiln is fired to 1000°C. This process burns off the water in the clay as well as some of the chemically bound water. The structure of the clay is not altered that much at this temperature. Inside the bisque kiln, the work is stacked a little, small bowl inside a larger bowl and onto a heavy plate. Smaller items like decorations or drink coasters might get stacked several high. Consideration is paid to the weight of the stack and shape of the work. A bisque kiln can fire about one and a half times the amount of work that the glaze kiln can fire. The firing takes about 10 hours to complete the cycle and about two days to cool down. Once it has been emptied the work is placed in the glaze room ready for you to decorate! Step Six – Glazing Decorating your work with colour can be a lot of fun – and time consuming! There are three main options for surface treatment at this stage: Oxide Washes Underglazes Glazes Washes and underglazes do not “glaze” the work – It will still need a layer of glaze to fully seal the clay (washes don’t need glaze on surfaces not designed for food or liquid as they can gloss up a little on their own). Underglazes are stable colourants that turn out pretty much how they look in the jar. They can be mixed with each other to form other colours and can be used like water colours to paint onto your work. Mostly they should have a clear glaze on top to seal them. Oxides are a different species – the pink oxide (cobalt) wash turns out bright blue for instance. They don’t always need a glaze on top, and some glazes can change the colour of the wash! The glazes need no other “glaze” on top! Be careful of unknown glaze interactions – you can put any combination of glaze in a bowl or on a plate, but only a single glaze on the outside of any vertical surface! Glazes are a chemical reaction under heat. We don’t know the exact chemicals in the Mayco glazes we use. I can guess by the way they interact with each other, however, on the whole, you need to test every idea you have, and not run the test on a vertical surface! Simply put, glaze is a layer of glass like substance that bonds with the clay underneath. Clay is made of silica, alumina and water. Glaze is made of mostly silica. Silica has a melting point of 1700°C and we fire to 1240°C. The silica requires a “flux” to help it melt at the lower temperature. Fluxes can be all sorts of chemicals – a common one is calcium – calcium has a melting point of 2500°C, however, together they both melt at a much lower temperature! Colourants are metal oxides like cobalt (blue), chrome (green through black), copper (green, blue, even red!), manganese (black, purple and pink) iron (red brown), etc. Different chemicals in the glaze can have dramatic effects. for example, barium carbonate (which we don’t use) turns manganese bright pink! Other elements can turn manganese dioxide brown, blue, purple and reddish brown. Manganese dioxide is a flux in and of itself as well. So, glazes that get their black and purple colours, often interact with other glazes and RUN! Our mirror black is a good example – it mixes really well with many glazes because it fluxes them – causes them to melt faster. It will also bring out many beautiful colours in the glazes because it’s black colouring most definitely comes from manganese dioxide! Glaze chemistry is a whole subject on it’s own! We use commercial Mayco glazes on purpose – for their huge range of colour possibilities, stability, cool interactions, artistic freedom with the ability to easily brush the glazes on and ease of use. We currently have almost 50 glazes on hand! A major project is to test the interactions of all glazes with each other. That is 2,500 test tiles!!!! I’m going to make the wall behind the wheels the feature wall of pretty colours! Step Seven – Glaze (Gloss or sometimes called “Glost”) Firing Most of the time this is the final stage of making your creation (but not always!) The glaze kiln goes to 1240°C. This is called cone 6, or midrange. It is the low end of stoneware temperatures. Stoneware clays and glazes are typically fired at cone 8 – 10, that is 1260 – 1290°C. The energy requirement to go from 1240°C to 1280°C is almost a 30% more! Our clay is formulated to vitrify (mature, turn “glass-like”) at 1240°, as are our glazes. A glaze kiln take around 12 hours to reach temperature and two to three days to cool down. Sometimes a third firing process is required – this is for decoration that is added to work after the glaze firing. For example – adding precious metals and lustres. this firing temperature is usually around 600 – 800°C depending upon the techniques being used. There are many students interested in gold and silver trims – we will be doing this third type of firing soon! After firing your work will be in the student finished work shelves. Remember to pay for it before you head out the door! There is a small extra charge for using porcelain clay (it’s more than twice the price of regular clay), and for any third firing process! Once your work has been fired it can not turn back into clay for millennia – so don’t fire it if you don’t like it! Put it in the bucket for recycling. https://firebirdstudios.com.au/the-process-of-making-pottery/ The bowl is an example of kitchenware used in the 19th century and still in use today.Bowl white ceramic. Crack on side. Badly stained.Backstamp very faint and unable to be read.flagstaff hill, warrnambool, shipwrecked-coast, flagstaff-hill, flagstaff-hill-maritime-museum, maritime-museum, shipwreck-coast, flagstaff-hill-maritime-village, mixing bowl, food preparation, kitchen equipment, ceramic -
 Flagstaff Hill Maritime Museum and Village
Domestic object - Bowl
The Process of Making Pottery Decorating, Firing, Glazing, Making, Technical There is a rhythm and flow to clay. It can’t be done all at once! Even the making process! It can take weeks to get everything done, especially if you can only work on your pottery once a week! Even though we have three hour classes, it’s often just not enough time! Here is an overview of some of the processes so you have a bit more grasp on some of the technical stuff! Step One – Design There are SO many ideas out there for making stuff in clay! From delicate porcelain jewellery, through to heavy sculptural work and everything in between. Deciding your direction is sometimes not that easy – when you first start, try everything, you will naturally gravitate to the style that you enjoy! The options and variations are endless and can get a wee bit overwhelming too! Check in with me before you start to ensure your ideas will work, what order you might do things, how you could achieve the look you are seeking and any other technical data required! Step Two – Making Clay is thixotropic. This means that as you work with it, the clay first gets sloppier and wetter, before is begins to dry in the atmosphere. For most things, you simply can’t do all parts of the project at once. An example of work order might look like: Get last weeks work out from the shelves Prepare clay for today’s work – roll your clay, prepare balls for throwing, make the first stage of a pinch pot) Clean up last week’s work and put it on the shelf for bisque firing Check that you have any glazing to do – and do enough of it that you will have time to finish your main project Do the next step of your next project – there might be a further step that can’t be complete immediately, in that case, wrap your work well and put onto the shelves. Letting your work rest for a while can really help keep your work clean and professional looking. Many things require bagging under plastic to keep it ready for work the next week – put your name on the outside of the bag so you can find your work easily. We have stickers and markers. Consider how you want to decorate your work – coloured slip can be applied at a fairly wet stage (remembering that it will make your work even wetter!). Trying to apply slip to dry clay won’t work! If you want to do sgraffito – you will need to keep the work leather hard (a state of dryness where you can still work the clay with a little effort and a little water and care). Step Three – Drying Most of the time your work can go into the rack uncovered to let it dry out for the following week. If you want to continue forming or shaping you will need to double bag your work – put your work on a suitable sized bat and put the bat in a bag so the base of the bag is under the bat, then put another bag over the top of the work and tuck the top of the bag under the bat. If you want to trim (or turn) your thrown work the following week, it should also be double bagged. If your work is large, delicate, or of uneven thicknesses, you should lightly cover your work for drying. When considering the drying process, bare in mind the weather, humidity and wind! The hotter and dryer, the faster things dry and work can dry unevenly in the shelves – this can lead to cracking – another time to lightly cover your work for drying. Step Four – Trimming and Cleaning Up Your work is dry! It is called greenware now and it is at it’s most fragile! Handle everything with two hands. I often refer to soft hands – keep everything gentle and with your fingers spread as much as possible. Try to not pick up things like plates too much, and always with both hands! Before your work can be bisque fired it should be “cleaned up”. You work won’t go into the kiln if it has sharp edges – when glazed, sharp edges turn into razor blades! Use a piece of fly wire to rub the work all over – this will scratch a little so be light handed. Use a knife or metal kidney to scrape any areas that require a bit more dynamic treatment than the fly wire offers! Finally, a very light wipe over with a slightly damp sponge can help soften and soothe all of your edges and dags! Trimming thrown work: If you are planning to trim (or turn) your thrown work (and you should be), make sure you bag it well – your work should be leather hard to almost dry for easiest trimming. Use this step to finish the work completely – use a metal kidney to polish the surface, or a slightly damp sponge to give a freshly thrown look. Wipe the sponge around the rim after trimming, and check the inside of the pot for dags! Trimming slip cast work: Usually I will trim the rims of your work on the wheel the following day to make that stage easier, however you will still need to check your work for lumps and bumps. Last but not least – check that your name is still clearly on the bottom of your work. Step Five – Bisque Firing When the work is completely dry it can go into the bisque kiln. The bisque kiln is fired to 1000°C. This process burns off the water in the clay as well as some of the chemically bound water. The structure of the clay is not altered that much at this temperature. Inside the bisque kiln, the work is stacked a little, small bowl inside a larger bowl and onto a heavy plate. Smaller items like decorations or drink coasters might get stacked several high. Consideration is paid to the weight of the stack and shape of the work. A bisque kiln can fire about one and a half times the amount of work that the glaze kiln can fire. The firing takes about 10 hours to complete the cycle and about two days to cool down. Once it has been emptied the work is placed in the glaze room ready for you to decorate! Step Six – Glazing Decorating your work with colour can be a lot of fun – and time consuming! There are three main options for surface treatment at this stage: Oxide Washes Underglazes Glazes Washes and underglazes do not “glaze” the work – It will still need a layer of glaze to fully seal the clay (washes don’t need glaze on surfaces not designed for food or liquid as they can gloss up a little on their own). Underglazes are stable colourants that turn out pretty much how they look in the jar. They can be mixed with each other to form other colours and can be used like water colours to paint onto your work. Mostly they should have a clear glaze on top to seal them. Oxides are a different species – the pink oxide (cobalt) wash turns out bright blue for instance. They don’t always need a glaze on top, and some glazes can change the colour of the wash! The glazes need no other “glaze” on top! Be careful of unknown glaze interactions – you can put any combination of glaze in a bowl or on a plate, but only a single glaze on the outside of any vertical surface! Glazes are a chemical reaction under heat. We don’t know the exact chemicals in the Mayco glazes we use. I can guess by the way they interact with each other, however, on the whole, you need to test every idea you have, and not run the test on a vertical surface! Simply put, glaze is a layer of glass like substance that bonds with the clay underneath. Clay is made of silica, alumina and water. Glaze is made of mostly silica. Silica has a melting point of 1700°C and we fire to 1240°C. The silica requires a “flux” to help it melt at the lower temperature. Fluxes can be all sorts of chemicals – a common one is calcium – calcium has a melting point of 2500°C, however, together they both melt at a much lower temperature! Colourants are metal oxides like cobalt (blue), chrome (green through black), copper (green, blue, even red!), manganese (black, purple and pink) iron (red brown), etc. Different chemicals in the glaze can have dramatic effects. for example, barium carbonate (which we don’t use) turns manganese bright pink! Other elements can turn manganese dioxide brown, blue, purple and reddish brown. Manganese dioxide is a flux in and of itself as well. So, glazes that get their black and purple colours, often interact with other glazes and RUN! Our mirror black is a good example – it mixes really well with many glazes because it fluxes them – causes them to melt faster. It will also bring out many beautiful colours in the glazes because it’s black colouring most definitely comes from manganese dioxide! Glaze chemistry is a whole subject on it’s own! We use commercial Mayco glazes on purpose – for their huge range of colour possibilities, stability, cool interactions, artistic freedom with the ability to easily brush the glazes on and ease of use. We currently have almost 50 glazes on hand! A major project is to test the interactions of all glazes with each other. That is 2,500 test tiles!!!! I’m going to make the wall behind the wheels the feature wall of pretty colours! Step Seven – Glaze (Gloss or sometimes called “Glost”) Firing Most of the time this is the final stage of making your creation (but not always!) The glaze kiln goes to 1240°C. This is called cone 6, or midrange. It is the low end of stoneware temperatures. Stoneware clays and glazes are typically fired at cone 8 – 10, that is 1260 – 1290°C. The energy requirement to go from 1240°C to 1280°C is almost a 30% more! Our clay is formulated to vitrify (mature, turn “glass-like”) at 1240°, as are our glazes. A glaze kiln take around 12 hours to reach temperature and two to three days to cool down. Sometimes a third firing process is required – this is for decoration that is added to work after the glaze firing. For example – adding precious metals and lustres. this firing temperature is usually around 600 – 800°C depending upon the techniques being used. There are many students interested in gold and silver trims – we will be doing this third type of firing soon! After firing your work will be in the student finished work shelves. Remember to pay for it before you head out the door! There is a small extra charge for using porcelain clay (it’s more than twice the price of regular clay), and for any third firing process! Once your work has been fired it can not turn back into clay for millennia – so don’t fire it if you don’t like it! Put it in the bucket for recycling. https://firebirdstudios.com.au/the-process-of-making-pottery/ This bowl is an example of kitchenware used in the 19th century and still in use today.Bowl white ceramic plain that has two sets of edging around lip. Inside bowl has plaster designed to look like cooking mixture.flagstaff hill, warrnambool, shipwrecked-coast, flagstaff-hill, flagstaff-hill-maritime-museum, maritime-museum, shipwreck-coast, flagstaff-hill-maritime-village, kitchen equipment, ceramic -
 Flagstaff Hill Maritime Museum and Village
Domestic object - Bowl, J & G Meakin, Late 19th or early 20th Century
The Process of Making Pottery Decorating, Firing, Glazing, Making, Technical There is a rhythm and flow to clay. It can’t be done all at once! Even the making process! It can take weeks to get everything done, especially if you can only work on your pottery once a week! Even though we have three hour classes, it’s often just not enough time! Here is an overview of some of the processes so you have a bit more grasp on some of the technical stuff! Step One – Design There are SO many ideas out there for making stuff in clay! From delicate porcelain jewellery, through to heavy sculptural work and everything in between. Deciding your direction is sometimes not that easy – when you first start, try everything, you will naturally gravitate to the style that you enjoy! The options and variations are endless and can get a wee bit overwhelming too! Check in with me before you start to ensure your ideas will work, what order you might do things, how you could achieve the look you are seeking and any other technical data required! Step Two – Making Clay is thixotropic. This means that as you work with it, the clay first gets sloppier and wetter, before is begins to dry in the atmosphere. For most things, you simply can’t do all parts of the project at once. An example of work order might look like: Get last weeks work out from the shelves Prepare clay for today’s work – roll your clay, prepare balls for throwing, make the first stage of a pinch pot) Clean up last week’s work and put it on the shelf for bisque firing Check that you have any glazing to do – and do enough of it that you will have time to finish your main project Do the next step of your next project – there might be a further step that can’t be complete immediately, in that case, wrap your work well and put onto the shelves. Letting your work rest for a while can really help keep your work clean and professional looking. Many things require bagging under plastic to keep it ready for work the next week – put your name on the outside of the bag so you can find your work easily. We have stickers and markers. Consider how you want to decorate your work – coloured slip can be applied at a fairly wet stage (remembering that it will make your work even wetter!). Trying to apply slip to dry clay won’t work! If you want to do sgraffito – you will need to keep the work leather hard (a state of dryness where you can still work the clay with a little effort and a little water and care). Step Three – Drying Most of the time your work can go into the rack uncovered to let it dry out for the following week. If you want to continue forming or shaping you will need to double bag your work – put your work on a suitable sized bat and put the bat in a bag so the base of the bag is under the bat, then put another bag over the top of the work and tuck the top of the bag under the bat. If you want to trim (or turn) your thrown work the following week, it should also be double bagged. If your work is large, delicate, or of uneven thicknesses, you should lightly cover your work for drying. When considering the drying process, bare in mind the weather, humidity and wind! The hotter and dryer, the faster things dry and work can dry unevenly in the shelves – this can lead to cracking – another time to lightly cover your work for drying. Step Four – Trimming and Cleaning Up Your work is dry! It is called greenware now and it is at it’s most fragile! Handle everything with two hands. I often refer to soft hands – keep everything gentle and with your fingers spread as much as possible. Try to not pick up things like plates too much, and always with both hands! Before your work can be bisque fired it should be “cleaned up”. You work won’t go into the kiln if it has sharp edges – when glazed, sharp edges turn into razor blades! Use a piece of fly wire to rub the work all over – this will scratch a little so be light handed. Use a knife or metal kidney to scrape any areas that require a bit more dynamic treatment than the fly wire offers! Finally, a very light wipe over with a slightly damp sponge can help soften and soothe all of your edges and dags! Trimming thrown work: If you are planning to trim (or turn) your thrown work (and you should be), make sure you bag it well – your work should be leather hard to almost dry for easiest trimming. Use this step to finish the work completely – use a metal kidney to polish the surface, or a slightly damp sponge to give a freshly thrown look. Wipe the sponge around the rim after trimming, and check the inside of the pot for dags! Trimming slip cast work: Usually I will trim the rims of your work on the wheel the following day to make that stage easier, however you will still need to check your work for lumps and bumps. Last but not least – check that your name is still clearly on the bottom of your work. Step Five – Bisque Firing When the work is completely dry it can go into the bisque kiln. The bisque kiln is fired to 1000°C. This process burns off the water in the clay as well as some of the chemically bound water. The structure of the clay is not altered that much at this temperature. Inside the bisque kiln, the work is stacked a little, small bowl inside a larger bowl and onto a heavy plate. Smaller items like decorations or drink coasters might get stacked several high. Consideration is paid to the weight of the stack and shape of the work. A bisque kiln can fire about one and a half times the amount of work that the glaze kiln can fire. The firing takes about 10 hours to complete the cycle and about two days to cool down. Once it has been emptied the work is placed in the glaze room ready for you to decorate! Step Six – Glazing Decorating your work with colour can be a lot of fun – and time consuming! There are three main options for surface treatment at this stage: Oxide Washes Underglazes Glazes Washes and underglazes do not “glaze” the work – It will still need a layer of glaze to fully seal the clay (washes don’t need glaze on surfaces not designed for food or liquid as they can gloss up a little on their own). Underglazes are stable colourants that turn out pretty much how they look in the jar. They can be mixed with each other to form other colours and can be used like water colours to paint onto your work. Mostly they should have a clear glaze on top to seal them. Oxides are a different species – the pink oxide (cobalt) wash turns out bright blue for instance. They don’t always need a glaze on top, and some glazes can change the colour of the wash! The glazes need no other “glaze” on top! Be careful of unknown glaze interactions – you can put any combination of glaze in a bowl or on a plate, but only a single glaze on the outside of any vertical surface! Glazes are a chemical reaction under heat. We don’t know the exact chemicals in the Mayco glazes we use. I can guess by the way they interact with each other, however, on the whole, you need to test every idea you have, and not run the test on a vertical surface! Simply put, glaze is a layer of glass like substance that bonds with the clay underneath. Clay is made of silica, alumina and water. Glaze is made of mostly silica. Silica has a melting point of 1700°C and we fire to 1240°C. The silica requires a “flux” to help it melt at the lower temperature. Fluxes can be all sorts of chemicals – a common one is calcium – calcium has a melting point of 2500°C, however, together they both melt at a much lower temperature! Colourants are metal oxides like cobalt (blue), chrome (green through black), copper (green, blue, even red!), manganese (black, purple and pink) iron (red brown), etc. Different chemicals in the glaze can have dramatic effects. for example, barium carbonate (which we don’t use) turns manganese bright pink! Other elements can turn manganese dioxide brown, blue, purple and reddish brown. Manganese dioxide is a flux in and of itself as well. So, glazes that get their black and purple colours, often interact with other glazes and RUN! Our mirror black is a good example – it mixes really well with many glazes because it fluxes them – causes them to melt faster. It will also bring out many beautiful colours in the glazes because it’s black colouring most definitely comes from manganese dioxide! Glaze chemistry is a whole subject on it’s own! We use commercial Mayco glazes on purpose – for their huge range of colour possibilities, stability, cool interactions, artistic freedom with the ability to easily brush the glazes on and ease of use. We currently have almost 50 glazes on hand! A major project is to test the interactions of all glazes with each other. That is 2,500 test tiles!!!! I’m going to make the wall behind the wheels the feature wall of pretty colours! Step Seven – Glaze (Gloss or sometimes called “Glost”) Firing Most of the time this is the final stage of making your creation (but not always!) The glaze kiln goes to 1240°C. This is called cone 6, or midrange. It is the low end of stoneware temperatures. Stoneware clays and glazes are typically fired at cone 8 – 10, that is 1260 – 1290°C. The energy requirement to go from 1240°C to 1280°C is almost a 30% more! Our clay is formulated to vitrify (mature, turn “glass-like”) at 1240°, as are our glazes. A glaze kiln take around 12 hours to reach temperature and two to three days to cool down. Sometimes a third firing process is required – this is for decoration that is added to work after the glaze firing. For example – adding precious metals and lustres. this firing temperature is usually around 600 – 800°C depending upon the techniques being used. There are many students interested in gold and silver trims – we will be doing this third type of firing soon! After firing your work will be in the student finished work shelves. Remember to pay for it before you head out the door! There is a small extra charge for using porcelain clay (it’s more than twice the price of regular clay), and for any third firing process! Once your work has been fired it can not turn back into clay for millennia – so don’t fire it if you don’t like it! Put it in the bucket for recycling. https://firebirdstudios.com.au/the-process-of-making-pottery/This bowl was made by renowned pottery company J & G Meakin of England. The firm was established in the mid-1800's. The bowl is an example of kitchenware used in the 19th century and still in use today.Bowl; white ceramic, round and tapering inwards towards base. Made by J and G Meakin England.On base, 'Ironstone China Reg SOL 391413' with symbolflagstaff hill, flagstaff hill maritime museum and village, warrnambool, maritime museum, maritime village, great ocean road, shipwreck coast, mixing bowl, food preparation, j & g meakin, pottery, stoke-on-trent, kitchen equipment, ceramic -
 Flagstaff Hill Maritime Museum and Village
Domestic object - Plate
The Process of Making Pottery Decorating, Firing, Glazing, Making, Technical There is a rhythm and flow to clay. It can’t be done all at once! Even the making process! It can take weeks to get everything done, especially if you can only work on your pottery once a week! Even though we have three hour classes, it’s often just not enough time! Here is an overview of some of the processes so you have a bit more grasp on some of the technical stuff! Step One – Design There are SO many ideas out there for making stuff in clay! From delicate porcelain jewellery, through to heavy sculptural work and everything in between. Deciding your direction is sometimes not that easy – when you first start, try everything, you will naturally gravitate to the style that you enjoy! The options and variations are endless and can get a wee bit overwhelming too! Check in with me before you start to ensure your ideas will work, what order you might do things, how you could achieve the look you are seeking and any other technical data required! Step Two – Making Clay is thixotropic. This means that as you work with it, the clay first gets sloppier and wetter, before is begins to dry in the atmosphere. For most things, you simply can’t do all parts of the project at once. An example of work order might look like: Get last weeks work out from the shelves Prepare clay for today’s work – roll your clay, prepare balls for throwing, make the first stage of a pinch pot) Clean up last week’s work and put it on the shelf for bisque firing Check that you have any glazing to do – and do enough of it that you will have time to finish your main project Do the next step of your next project – there might be a further step that can’t be complete immediately, in that case, wrap your work well and put onto the shelves. Letting your work rest for a while can really help keep your work clean and professional looking. Many things require bagging under plastic to keep it ready for work the next week – put your name on the outside of the bag so you can find your work easily. We have stickers and markers. Consider how you want to decorate your work – coloured slip can be applied at a fairly wet stage (remembering that it will make your work even wetter!). Trying to apply slip to dry clay won’t work! If you want to do sgraffito – you will need to keep the work leather hard (a state of dryness where you can still work the clay with a little effort and a little water and care). Step Three – Drying Most of the time your work can go into the rack uncovered to let it dry out for the following week. If you want to continue forming or shaping you will need to double bag your work – put your work on a suitable sized bat and put the bat in a bag so the base of the bag is under the bat, then put another bag over the top of the work and tuck the top of the bag under the bat. If you want to trim (or turn) your thrown work the following week, it should also be double bagged. If your work is large, delicate, or of uneven thicknesses, you should lightly cover your work for drying. When considering the drying process, bare in mind the weather, humidity and wind! The hotter and dryer, the faster things dry and work can dry unevenly in the shelves – this can lead to cracking – another time to lightly cover your work for drying. Step Four – Trimming and Cleaning Up Your work is dry! It is called greenware now and it is at it’s most fragile! Handle everything with two hands. I often refer to soft hands – keep everything gentle and with your fingers spread as much as possible. Try to not pick up things like plates too much, and always with both hands! Before your work can be bisque fired it should be “cleaned up”. You work won’t go into the kiln if it has sharp edges – when glazed, sharp edges turn into razor blades! Use a piece of fly wire to rub the work all over – this will scratch a little so be light handed. Use a knife or metal kidney to scrape any areas that require a bit more dynamic treatment than the fly wire offers! Finally, a very light wipe over with a slightly damp sponge can help soften and soothe all of your edges and dags! Trimming thrown work: If you are planning to trim (or turn) your thrown work (and you should be), make sure you bag it well – your work should be leather hard to almost dry for easiest trimming. Use this step to finish the work completely – use a metal kidney to polish the surface, or a slightly damp sponge to give a freshly thrown look. Wipe the sponge around the rim after trimming, and check the inside of the pot for dags! Trimming slip cast work: Usually I will trim the rims of your work on the wheel the following day to make that stage easier, however you will still need to check your work for lumps and bumps. Last but not least – check that your name is still clearly on the bottom of your work. Step Five – Bisque Firing When the work is completely dry it can go into the bisque kiln. The bisque kiln is fired to 1000°C. This process burns off the water in the clay as well as some of the chemically bound water. The structure of the clay is not altered that much at this temperature. Inside the bisque kiln, the work is stacked a little, small bowl inside a larger bowl and onto a heavy plate. Smaller items like decorations or drink coasters might get stacked several high. Consideration is paid to the weight of the stack and shape of the work. A bisque kiln can fire about one and a half times the amount of work that the glaze kiln can fire. The firing takes about 10 hours to complete the cycle and about two days to cool down. Once it has been emptied the work is placed in the glaze room ready for you to decorate! Step Six – Glazing Decorating your work with colour can be a lot of fun – and time consuming! There are three main options for surface treatment at this stage: Oxide Washes Underglazes Glazes Washes and underglazes do not “glaze” the work – It will still need a layer of glaze to fully seal the clay (washes don’t need glaze on surfaces not designed for food or liquid as they can gloss up a little on their own). Underglazes are stable colourants that turn out pretty much how they look in the jar. They can be mixed with each other to form other colours and can be used like water colours to paint onto your work. Mostly they should have a clear glaze on top to seal them. Oxides are a different species – the pink oxide (cobalt) wash turns out bright blue for instance. They don’t always need a glaze on top, and some glazes can change the colour of the wash! The glazes need no other “glaze” on top! Be careful of unknown glaze interactions – you can put any combination of glaze in a bowl or on a plate, but only a single glaze on the outside of any vertical surface! Glazes are a chemical reaction under heat. We don’t know the exact chemicals in the Mayco glazes we use. I can guess by the way they interact with each other, however, on the whole, you need to test every idea you have, and not run the test on a vertical surface! Simply put, glaze is a layer of glass like substance that bonds with the clay underneath. Clay is made of silica, alumina and water. Glaze is made of mostly silica. Silica has a melting point of 1700°C and we fire to 1240°C. The silica requires a “flux” to help it melt at the lower temperature. Fluxes can be all sorts of chemicals – a common one is calcium – calcium has a melting point of 2500°C, however, together they both melt at a much lower temperature! Colourants are metal oxides like cobalt (blue), chrome (green through black), copper (green, blue, even red!), manganese (black, purple and pink) iron (red brown), etc. Different chemicals in the glaze can have dramatic effects. for example, barium carbonate (which we don’t use) turns manganese bright pink! Other elements can turn manganese dioxide brown, blue, purple and reddish brown. Manganese dioxide is a flux in and of itself as well. So, glazes that get their black and purple colours, often interact with other glazes and RUN! Our mirror black is a good example – it mixes really well with many glazes because it fluxes them – causes them to melt faster. It will also bring out many beautiful colours in the glazes because it’s black colouring most definitely comes from manganese dioxide! Glaze chemistry is a whole subject on it’s own! We use commercial Mayco glazes on purpose – for their huge range of colour possibilities, stability, cool interactions, artistic freedom with the ability to easily brush the glazes on and ease of use. We currently have almost 50 glazes on hand! A major project is to test the interactions of all glazes with each other. That is 2,500 test tiles!!!! I’m going to make the wall behind the wheels the feature wall of pretty colours! Step Seven – Glaze (Gloss or sometimes called “Glost”) Firing Most of the time this is the final stage of making your creation (but not always!) The glaze kiln goes to 1240°C. This is called cone 6, or midrange. It is the low end of stoneware temperatures. Stoneware clays and glazes are typically fired at cone 8 – 10, that is 1260 – 1290°C. The energy requirement to go from 1240°C to 1280°C is almost a 30% more! Our clay is formulated to vitrify (mature, turn “glass-like”) at 1240°, as are our glazes. A glaze kiln take around 12 hours to reach temperature and two to three days to cool down. Sometimes a third firing process is required – this is for decoration that is added to work after the glaze firing. For example – adding precious metals and lustres. this firing temperature is usually around 600 – 800°C depending upon the techniques being used. There are many students interested in gold and silver trims – we will be doing this third type of firing soon! After firing your work will be in the student finished work shelves. Remember to pay for it before you head out the door! There is a small extra charge for using porcelain clay (it’s more than twice the price of regular clay), and for any third firing process! Once your work has been fired it can not turn back into clay for millennia – so don’t fire it if you don’t like it! Put it in the bucket for recycling. https://firebirdstudios.com.au/the-process-of-making-pottery/Ceramics have evolved over thousands of years.White earthenware dinner plate. Crazing evident all over.Backstamped ‘Made in England S LTD’flagstaff hill, warrnambool, shipwrecked-coast, flagstaff-hill, flagstaff-hill-maritime-museum, maritime-museum, shipwreck-coast, flagstaff-hill-maritime-village, ceramics, tableware -
 Flagstaff Hill Maritime Museum and Village
Domestic object - Plate, Johnson Bros
The Process of Making Pottery Decorating, Firing, Glazing, Making, Technical There is a rhythm and flow to clay. It can’t be done all at once! Even the making process! It can take weeks to get everything done, especially if you can only work on your pottery once a week! Even though we have three hour classes, it’s often just not enough time! Here is an overview of some of the processes so you have a bit more grasp on some of the technical stuff! Step One – Design There are SO many ideas out there for making stuff in clay! From delicate porcelain jewellery, through to heavy sculptural work and everything in between. Deciding your direction is sometimes not that easy – when you first start, try everything, you will naturally gravitate to the style that you enjoy! The options and variations are endless and can get a wee bit overwhelming too! Check in with me before you start to ensure your ideas will work, what order you might do things, how you could achieve the look you are seeking and any other technical data required! Step Two – Making Clay is thixotropic. This means that as you work with it, the clay first gets sloppier and wetter, before is begins to dry in the atmosphere. For most things, you simply can’t do all parts of the project at once. An example of work order might look like: Get last weeks work out from the shelves Prepare clay for today’s work – roll your clay, prepare balls for throwing, make the first stage of a pinch pot) Clean up last week’s work and put it on the shelf for bisque firing Check that you have any glazing to do – and do enough of it that you will have time to finish your main project Do the next step of your next project – there might be a further step that can’t be complete immediately, in that case, wrap your work well and put onto the shelves. Letting your work rest for a while can really help keep your work clean and professional looking. Many things require bagging under plastic to keep it ready for work the next week – put your name on the outside of the bag so you can find your work easily. We have stickers and markers. Consider how you want to decorate your work – coloured slip can be applied at a fairly wet stage (remembering that it will make your work even wetter!). Trying to apply slip to dry clay won’t work! If you want to do sgraffito – you will need to keep the work leather hard (a state of dryness where you can still work the clay with a little effort and a little water and care). Step Three – Drying Most of the time your work can go into the rack uncovered to let it dry out for the following week. If you want to continue forming or shaping you will need to double bag your work – put your work on a suitable sized bat and put the bat in a bag so the base of the bag is under the bat, then put another bag over the top of the work and tuck the top of the bag under the bat. If you want to trim (or turn) your thrown work the following week, it should also be double bagged. If your work is large, delicate, or of uneven thicknesses, you should lightly cover your work for drying. When considering the drying process, bare in mind the weather, humidity and wind! The hotter and dryer, the faster things dry and work can dry unevenly in the shelves – this can lead to cracking – another time to lightly cover your work for drying. Step Four – Trimming and Cleaning Up Your work is dry! It is called greenware now and it is at it’s most fragile! Handle everything with two hands. I often refer to soft hands – keep everything gentle and with your fingers spread as much as possible. Try to not pick up things like plates too much, and always with both hands! Before your work can be bisque fired it should be “cleaned up”. You work won’t go into the kiln if it has sharp edges – when glazed, sharp edges turn into razor blades! Use a piece of fly wire to rub the work all over – this will scratch a little so be light handed. Use a knife or metal kidney to scrape any areas that require a bit more dynamic treatment than the fly wire offers! Finally, a very light wipe over with a slightly damp sponge can help soften and soothe all of your edges and dags! Trimming thrown work: If you are planning to trim (or turn) your thrown work (and you should be), make sure you bag it well – your work should be leather hard to almost dry for easiest trimming. Use this step to finish the work completely – use a metal kidney to polish the surface, or a slightly damp sponge to give a freshly thrown look. Wipe the sponge around the rim after trimming, and check the inside of the pot for dags! Trimming slip cast work: Usually I will trim the rims of your work on the wheel the following day to make that stage easier, however you will still need to check your work for lumps and bumps. Last but not least – check that your name is still clearly on the bottom of your work. Step Five – Bisque Firing When the work is completely dry it can go into the bisque kiln. The bisque kiln is fired to 1000°C. This process burns off the water in the clay as well as some of the chemically bound water. The structure of the clay is not altered that much at this temperature. Inside the bisque kiln, the work is stacked a little, small bowl inside a larger bowl and onto a heavy plate. Smaller items like decorations or drink coasters might get stacked several high. Consideration is paid to the weight of the stack and shape of the work. A bisque kiln can fire about one and a half times the amount of work that the glaze kiln can fire. The firing takes about 10 hours to complete the cycle and about two days to cool down. Once it has been emptied the work is placed in the glaze room ready for you to decorate! Step Six – Glazing Decorating your work with colour can be a lot of fun – and time consuming! There are three main options for surface treatment at this stage: Oxide Washes Underglazes Glazes Washes and underglazes do not “glaze” the work – It will still need a layer of glaze to fully seal the clay (washes don’t need glaze on surfaces not designed for food or liquid as they can gloss up a little on their own). Underglazes are stable colourants that turn out pretty much how they look in the jar. They can be mixed with each other to form other colours and can be used like water colours to paint onto your work. Mostly they should have a clear glaze on top to seal them. Oxides are a different species – the pink oxide (cobalt) wash turns out bright blue for instance. They don’t always need a glaze on top, and some glazes can change the colour of the wash! The glazes need no other “glaze” on top! Be careful of unknown glaze interactions – you can put any combination of glaze in a bowl or on a plate, but only a single glaze on the outside of any vertical surface! Glazes are a chemical reaction under heat. We don’t know the exact chemicals in the Mayco glazes we use. I can guess by the way they interact with each other, however, on the whole, you need to test every idea you have, and not run the test on a vertical surface! Simply put, glaze is a layer of glass like substance that bonds with the clay underneath. Clay is made of silica, alumina and water. Glaze is made of mostly silica. Silica has a melting point of 1700°C and we fire to 1240°C. The silica requires a “flux” to help it melt at the lower temperature. Fluxes can be all sorts of chemicals – a common one is calcium – calcium has a melting point of 2500°C, however, together they both melt at a much lower temperature! Colourants are metal oxides like cobalt (blue), chrome (green through black), copper (green, blue, even red!), manganese (black, purple and pink) iron (red brown), etc. Different chemicals in the glaze can have dramatic effects. for example, barium carbonate (which we don’t use) turns manganese bright pink! Other elements can turn manganese dioxide brown, blue, purple and reddish brown. Manganese dioxide is a flux in and of itself as well. So, glazes that get their black and purple colours, often interact with other glazes and RUN! Our mirror black is a good example – it mixes really well with many glazes because it fluxes them – causes them to melt faster. It will also bring out many beautiful colours in the glazes because it’s black colouring most definitely comes from manganese dioxide! Glaze chemistry is a whole subject on it’s own! We use commercial Mayco glazes on purpose – for their huge range of colour possibilities, stability, cool interactions, artistic freedom with the ability to easily brush the glazes on and ease of use. We currently have almost 50 glazes on hand! A major project is to test the interactions of all glazes with each other. That is 2,500 test tiles!!!! I’m going to make the wall behind the wheels the feature wall of pretty colours! Step Seven – Glaze (Gloss or sometimes called “Glost”) Firing Most of the time this is the final stage of making your creation (but not always!) The glaze kiln goes to 1240°C. This is called cone 6, or midrange. It is the low end of stoneware temperatures. Stoneware clays and glazes are typically fired at cone 8 – 10, that is 1260 – 1290°C. The energy requirement to go from 1240°C to 1280°C is almost a 30% more! Our clay is formulated to vitrify (mature, turn “glass-like”) at 1240°, as are our glazes. A glaze kiln take around 12 hours to reach temperature and two to three days to cool down. Sometimes a third firing process is required – this is for decoration that is added to work after the glaze firing. For example – adding precious metals and lustres. this firing temperature is usually around 600 – 800°C depending upon the techniques being used. There are many students interested in gold and silver trims – we will be doing this third type of firing soon! After firing your work will be in the student finished work shelves. Remember to pay for it before you head out the door! There is a small extra charge for using porcelain clay (it’s more than twice the price of regular clay), and for any third firing process! Once your work has been fired it can not turn back into clay for millennia – so don’t fire it if you don’t like it! Put it in the bucket for recycling. https://firebirdstudios.com.au/the-process-of-making-pottery/Ceramics have evolved over thousands of years.A white earthenware side plate with a gadroon edge. Has water marks and chips on front.‘Johnson Bros England Reg No 15587’flagstaff hill, warrnambool, shipwrecked-coast, flagstaff-hill, flagstaff-hill-maritime-museum, maritime-museum, shipwreck-coast, flagstaff-hill-maritime-village, johnson bros, ceramics, tableware -
 Flagstaff Hill Maritime Museum and Village
Domestic object - Plate, Alfred Meakin
The Process of Making Pottery Decorating, Firing, Glazing, Making, Technical There is a rhythm and flow to clay. It can’t be done all at once! Even the making process! It can take weeks to get everything done, especially if you can only work on your pottery once a week! Even though we have three hour classes, it’s often just not enough time! Here is an overview of some of the processes so you have a bit more grasp on some of the technical stuff! Step One – Design There are SO many ideas out there for making stuff in clay! From delicate porcelain jewellery, through to heavy sculptural work and everything in between. Deciding your direction is sometimes not that easy – when you first start, try everything, you will naturally gravitate to the style that you enjoy! The options and variations are endless and can get a wee bit overwhelming too! Check in with me before you start to ensure your ideas will work, what order you might do things, how you could achieve the look you are seeking and any other technical data required! Step Two – Making Clay is thixotropic. This means that as you work with it, the clay first gets sloppier and wetter, before is begins to dry in the atmosphere. For most things, you simply can’t do all parts of the project at once. An example of work order might look like: Get last weeks work out from the shelves Prepare clay for today’s work – roll your clay, prepare balls for throwing, make the first stage of a pinch pot) Clean up last week’s work and put it on the shelf for bisque firing Check that you have any glazing to do – and do enough of it that you will have time to finish your main project Do the next step of your next project – there might be a further step that can’t be complete immediately, in that case, wrap your work well and put onto the shelves. Letting your work rest for a while can really help keep your work clean and professional looking. Many things require bagging under plastic to keep it ready for work the next week – put your name on the outside of the bag so you can find your work easily. We have stickers and markers. Consider how you want to decorate your work – coloured slip can be applied at a fairly wet stage (remembering that it will make your work even wetter!). Trying to apply slip to dry clay won’t work! If you want to do sgraffito – you will need to keep the work leather hard (a state of dryness where you can still work the clay with a little effort and a little water and care). Step Three – Drying Most of the time your work can go into the rack uncovered to let it dry out for the following week. If you want to continue forming or shaping you will need to double bag your work – put your work on a suitable sized bat and put the bat in a bag so the base of the bag is under the bat, then put another bag over the top of the work and tuck the top of the bag under the bat. If you want to trim (or turn) your thrown work the following week, it should also be double bagged. If your work is large, delicate, or of uneven thicknesses, you should lightly cover your work for drying. When considering the drying process, bare in mind the weather, humidity and wind! The hotter and dryer, the faster things dry and work can dry unevenly in the shelves – this can lead to cracking – another time to lightly cover your work for drying. Step Four – Trimming and Cleaning Up Your work is dry! It is called greenware now and it is at it’s most fragile! Handle everything with two hands. I often refer to soft hands – keep everything gentle and with your fingers spread as much as possible. Try to not pick up things like plates too much, and always with both hands! Before your work can be bisque fired it should be “cleaned up”. You work won’t go into the kiln if it has sharp edges – when glazed, sharp edges turn into razor blades! Use a piece of fly wire to rub the work all over – this will scratch a little so be light handed. Use a knife or metal kidney to scrape any areas that require a bit more dynamic treatment than the fly wire offers! Finally, a very light wipe over with a slightly damp sponge can help soften and soothe all of your edges and dags! Trimming thrown work: If you are planning to trim (or turn) your thrown work (and you should be), make sure you bag it well – your work should be leather hard to almost dry for easiest trimming. Use this step to finish the work completely – use a metal kidney to polish the surface, or a slightly damp sponge to give a freshly thrown look. Wipe the sponge around the rim after trimming, and check the inside of the pot for dags! Trimming slip cast work: Usually I will trim the rims of your work on the wheel the following day to make that stage easier, however you will still need to check your work for lumps and bumps. Last but not least – check that your name is still clearly on the bottom of your work. Step Five – Bisque Firing When the work is completely dry it can go into the bisque kiln. The bisque kiln is fired to 1000°C. This process burns off the water in the clay as well as some of the chemically bound water. The structure of the clay is not altered that much at this temperature. Inside the bisque kiln, the work is stacked a little, small bowl inside a larger bowl and onto a heavy plate. Smaller items like decorations or drink coasters might get stacked several high. Consideration is paid to the weight of the stack and shape of the work. A bisque kiln can fire about one and a half times the amount of work that the glaze kiln can fire. The firing takes about 10 hours to complete the cycle and about two days to cool down. Once it has been emptied the work is placed in the glaze room ready for you to decorate! Step Six – Glazing Decorating your work with colour can be a lot of fun – and time consuming! There are three main options for surface treatment at this stage: Oxide Washes Underglazes Glazes Washes and underglazes do not “glaze” the work – It will still need a layer of glaze to fully seal the clay (washes don’t need glaze on surfaces not designed for food or liquid as they can gloss up a little on their own). Underglazes are stable colourants that turn out pretty much how they look in the jar. They can be mixed with each other to form other colours and can be used like water colours to paint onto your work. Mostly they should have a clear glaze on top to seal them. Oxides are a different species – the pink oxide (cobalt) wash turns out bright blue for instance. They don’t always need a glaze on top, and some glazes can change the colour of the wash! The glazes need no other “glaze” on top! Be careful of unknown glaze interactions – you can put any combination of glaze in a bowl or on a plate, but only a single glaze on the outside of any vertical surface! Glazes are a chemical reaction under heat. We don’t know the exact chemicals in the Mayco glazes we use. I can guess by the way they interact with each other, however, on the whole, you need to test every idea you have, and not run the test on a vertical surface! Simply put, glaze is a layer of glass like substance that bonds with the clay underneath. Clay is made of silica, alumina and water. Glaze is made of mostly silica. Silica has a melting point of 1700°C and we fire to 1240°C. The silica requires a “flux” to help it melt at the lower temperature. Fluxes can be all sorts of chemicals – a common one is calcium – calcium has a melting point of 2500°C, however, together they both melt at a much lower temperature! Colourants are metal oxides like cobalt (blue), chrome (green through black), copper (green, blue, even red!), manganese (black, purple and pink) iron (red brown), etc. Different chemicals in the glaze can have dramatic effects. for example, barium carbonate (which we don’t use) turns manganese bright pink! Other elements can turn manganese dioxide brown, blue, purple and reddish brown. Manganese dioxide is a flux in and of itself as well. So, glazes that get their black and purple colours, often interact with other glazes and RUN! Our mirror black is a good example – it mixes really well with many glazes because it fluxes them – causes them to melt faster. It will also bring out many beautiful colours in the glazes because it’s black colouring most definitely comes from manganese dioxide! Glaze chemistry is a whole subject on it’s own! We use commercial Mayco glazes on purpose – for their huge range of colour possibilities, stability, cool interactions, artistic freedom with the ability to easily brush the glazes on and ease of use. We currently have almost 50 glazes on hand! A major project is to test the interactions of all glazes with each other. That is 2,500 test tiles!!!! I’m going to make the wall behind the wheels the feature wall of pretty colours! Step Seven – Glaze (Gloss or sometimes called “Glost”) Firing Most of the time this is the final stage of making your creation (but not always!) The glaze kiln goes to 1240°C. This is called cone 6, or midrange. It is the low end of stoneware temperatures. Stoneware clays and glazes are typically fired at cone 8 – 10, that is 1260 – 1290°C. The energy requirement to go from 1240°C to 1280°C is almost a 30% more! Our clay is formulated to vitrify (mature, turn “glass-like”) at 1240°, as are our glazes. A glaze kiln take around 12 hours to reach temperature and two to three days to cool down. Sometimes a third firing process is required – this is for decoration that is added to work after the glaze firing. For example – adding precious metals and lustres. this firing temperature is usually around 600 – 800°C depending upon the techniques being used. There are many students interested in gold and silver trims – we will be doing this third type of firing soon! After firing your work will be in the student finished work shelves. Remember to pay for it before you head out the door! There is a small extra charge for using porcelain clay (it’s more than twice the price of regular clay), and for any third firing process! Once your work has been fired it can not turn back into clay for millennia – so don’t fire it if you don’t like it! Put it in the bucket for recycling. https://firebirdstudios.com.au/the-process-of-making-pottery/Ceramics have evolved over thousands of years.Earthenware dessert plate, cream colour. Made by Alfred Meakin, England. Backstamped ‘Alfred Meakin England’. flagstaff hill, warrnambool, shipwrecked-coast, flagstaff-hill, flagstaff-hill-maritime-museum, maritime-museum, shipwreck-coast, flagstaff-hill-maritime-village, alfred meakin, ceramics, earthenware, kitchenware -
 Flagstaff Hill Maritime Museum and Village
Domestic object - Jug
The Process of Making Pottery Decorating, Firing, Glazing, Making, Technical There is a rhythm and flow to clay. It can’t be done all at once! Even the making process! It can take weeks to get everything done, especially if you can only work on your pottery once a week! Even though we have three hour classes, it’s often just not enough time! Here is an overview of some of the processes so you have a bit more grasp on some of the technical stuff! Step One – Design There are SO many ideas out there for making stuff in clay! From delicate porcelain jewellery, through to heavy sculptural work and everything in between. Deciding your direction is sometimes not that easy – when you first start, try everything, you will naturally gravitate to the style that you enjoy! The options and variations are endless and can get a wee bit overwhelming too! Check in with me before you start to ensure your ideas will work, what order you might do things, how you could achieve the look you are seeking and any other technical data required! Step Two – Making Clay is thixotropic. This means that as you work with it, the clay first gets sloppier and wetter, before is begins to dry in the atmosphere. For most things, you simply can’t do all parts of the project at once. An example of work order might look like: Get last weeks work out from the shelves Prepare clay for today’s work – roll your clay, prepare balls for throwing, make the first stage of a pinch pot) Clean up last week’s work and put it on the shelf for bisque firing Check that you have any glazing to do – and do enough of it that you will have time to finish your main project Do the next step of your next project – there might be a further step that can’t be complete immediately, in that case, wrap your work well and put onto the shelves. Letting your work rest for a while can really help keep your work clean and professional looking. Many things require bagging under plastic to keep it ready for work the next week – put your name on the outside of the bag so you can find your work easily. We have stickers and markers. Consider how you want to decorate your work – coloured slip can be applied at a fairly wet stage (remembering that it will make your work even wetter!). Trying to apply slip to dry clay won’t work! If you want to do sgraffito – you will need to keep the work leather hard (a state of dryness where you can still work the clay with a little effort and a little water and care). Step Three – Drying Most of the time your work can go into the rack uncovered to let it dry out for the following week. If you want to continue forming or shaping you will need to double bag your work – put your work on a suitable sized bat and put the bat in a bag so the base of the bag is under the bat, then put another bag over the top of the work and tuck the top of the bag under the bat. If you want to trim (or turn) your thrown work the following week, it should also be double bagged. If your work is large, delicate, or of uneven thicknesses, you should lightly cover your work for drying. When considering the drying process, bare in mind the weather, humidity and wind! The hotter and dryer, the faster things dry and work can dry unevenly in the shelves – this can lead to cracking – another time to lightly cover your work for drying. Step Four – Trimming and Cleaning Up Your work is dry! It is called greenware now and it is at it’s most fragile! Handle everything with two hands. I often refer to soft hands – keep everything gentle and with your fingers spread as much as possible. Try to not pick up things like plates too much, and always with both hands! Before your work can be bisque fired it should be “cleaned up”. You work won’t go into the kiln if it has sharp edges – when glazed, sharp edges turn into razor blades! Use a piece of fly wire to rub the work all over – this will scratch a little so be light handed. Use a knife or metal kidney to scrape any areas that require a bit more dynamic treatment than the fly wire offers! Finally, a very light wipe over with a slightly damp sponge can help soften and soothe all of your edges and dags! Trimming thrown work: If you are planning to trim (or turn) your thrown work (and you should be), make sure you bag it well – your work should be leather hard to almost dry for easiest trimming. Use this step to finish the work completely – use a metal kidney to polish the surface, or a slightly damp sponge to give a freshly thrown look. Wipe the sponge around the rim after trimming, and check the inside of the pot for dags! Trimming slip cast work: Usually I will trim the rims of your work on the wheel the following day to make that stage easier, however you will still need to check your work for lumps and bumps. Last but not least – check that your name is still clearly on the bottom of your work. Step Five – Bisque Firing When the work is completely dry it can go into the bisque kiln. The bisque kiln is fired to 1000°C. This process burns off the water in the clay as well as some of the chemically bound water. The structure of the clay is not altered that much at this temperature. Inside the bisque kiln, the work is stacked a little, small bowl inside a larger bowl and onto a heavy plate. Smaller items like decorations or drink coasters might get stacked several high. Consideration is paid to the weight of the stack and shape of the work. A bisque kiln can fire about one and a half times the amount of work that the glaze kiln can fire. The firing takes about 10 hours to complete the cycle and about two days to cool down. Once it has been emptied the work is placed in the glaze room ready for you to decorate! Step Six – Glazing Decorating your work with colour can be a lot of fun – and time consuming! There are three main options for surface treatment at this stage: Oxide Washes Underglazes Glazes Washes and underglazes do not “glaze” the work – It will still need a layer of glaze to fully seal the clay (washes don’t need glaze on surfaces not designed for food or liquid as they can gloss up a little on their own). Underglazes are stable colourants that turn out pretty much how they look in the jar. They can be mixed with each other to form other colours and can be used like water colours to paint onto your work. Mostly they should have a clear glaze on top to seal them. Oxides are a different species – the pink oxide (cobalt) wash turns out bright blue for instance. They don’t always need a glaze on top, and some glazes can change the colour of the wash! The glazes need no other “glaze” on top! Be careful of unknown glaze interactions – you can put any combination of glaze in a bowl or on a plate, but only a single glaze on the outside of any vertical surface! Glazes are a chemical reaction under heat. We don’t know the exact chemicals in the Mayco glazes we use. I can guess by the way they interact with each other, however, on the whole, you need to test every idea you have, and not run the test on a vertical surface! Simply put, glaze is a layer of glass like substance that bonds with the clay underneath. Clay is made of silica, alumina and water. Glaze is made of mostly silica. Silica has a melting point of 1700°C and we fire to 1240°C. The silica requires a “flux” to help it melt at the lower temperature. Fluxes can be all sorts of chemicals – a common one is calcium – calcium has a melting point of 2500°C, however, together they both melt at a much lower temperature! Colourants are metal oxides like cobalt (blue), chrome (green through black), copper (green, blue, even red!), manganese (black, purple and pink) iron (red brown), etc. Different chemicals in the glaze can have dramatic effects. for example, barium carbonate (which we don’t use) turns manganese bright pink! Other elements can turn manganese dioxide brown, blue, purple and reddish brown. Manganese dioxide is a flux in and of itself as well. So, glazes that get their black and purple colours, often interact with other glazes and RUN! Our mirror black is a good example – it mixes really well with many glazes because it fluxes them – causes them to melt faster. It will also bring out many beautiful colours in the glazes because it’s black colouring most definitely comes from manganese dioxide! Glaze chemistry is a whole subject on it’s own! We use commercial Mayco glazes on purpose – for their huge range of colour possibilities, stability, cool interactions, artistic freedom with the ability to easily brush the glazes on and ease of use. We currently have almost 50 glazes on hand! A major project is to test the interactions of all glazes with each other. That is 2,500 test tiles!!!! I’m going to make the wall behind the wheels the feature wall of pretty colours! Step Seven – Glaze (Gloss or sometimes called “Glost”) Firing Most of the time this is the final stage of making your creation (but not always!) The glaze kiln goes to 1240°C. This is called cone 6, or midrange. It is the low end of stoneware temperatures. Stoneware clays and glazes are typically fired at cone 8 – 10, that is 1260 – 1290°C. The energy requirement to go from 1240°C to 1280°C is almost a 30% more! Our clay is formulated to vitrify (mature, turn “glass-like”) at 1240°, as are our glazes. A glaze kiln take around 12 hours to reach temperature and two to three days to cool down. Sometimes a third firing process is required – this is for decoration that is added to work after the glaze firing. For example – adding precious metals and lustres. this firing temperature is usually around 600 – 800°C depending upon the techniques being used. There are many students interested in gold and silver trims – we will be doing this third type of firing soon! After firing your work will be in the student finished work shelves. Remember to pay for it before you head out the door! There is a small extra charge for using porcelain clay (it’s more than twice the price of regular clay), and for any third firing process! Once your work has been fired it can not turn back into clay for millennia – so don’t fire it if you don’t like it! Put it in the bucket for recycling. https://firebirdstudios.com.au/the-process-of-making-pottery/The form of the jug has been in use for many centuries.Stoneware jug. Two tone brown glaze with pierced lip behind spout. Spout chipped.None.flagstaff hill, warrnambool, shipwrecked-coast, flagstaff-hill, flagstaff-hill-maritime-museum, maritime-museum, shipwreck-coast, flagstaff-hill-maritime-village, jug, ceramic jug -
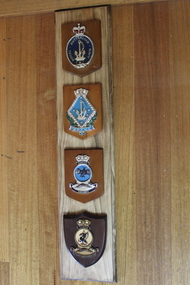 Lara RSL Sub Branch
Plaques for Australian Navy 4 off, Australian Navy plaques - 1. Royal Australian Navy, 2. W.R.A.N.S.,3.HMAS Vampire, 4.HMAS Perth
Registered plaques representing R.A.N. , W.R.A.N.S. , H.M.A.S. Vampire, and H.M.A.S. Perth.Rare collection of Royal Australian Navy plaquesPine-board backing with 4 plaques mounted 1. Royal Australian Navy, 2. W.R.A.N.S.,3.HMAS Vampire, 4.HMAS Perth, The plaques are mounted on a wooden shields. 1. Royal Australian Navy plaque consists of an oval shape topped by a regal crown and bottom an anchor and chain, The center of the plaque is Black in color embossed in a ring of "Royal Australian Navy" the center of the plaque is a symbol of an anchor and chain. 2. W.R.A.N.S. Triangle shape with a Crown made-up from a sailing ship and the bottom a bow of blue ribbon. The lower half of the triangle is a wreath of leaves. the center of the triangle is painted light blue and has small stars one in each corner. In the center there is a ships anchor and chain. The bottom of the plaque is the initials "W.R.N.S." 3.HMAS Vampire A circular plaque a crown on the top a sailing ship in a crown format. Over a name of Vampire in gold on a black back ground the middle is a circle painted blue with a black Bat in the center. The bottom of the plaque is emblazoned with a boomerang, stone axe and aboriginal waddy followed by a banner "Audamus" meaning "we dare, we venture, we risk" 4.HMAS Perth, A circular plaque a crown on the top a sailing ship in a crown format. Over a name of Perth in gold on a black back ground. The middle is a circle painted gold with a black Griffen in the center. The bottom of the plaque is emblazoned with a boomerang, stone axe and aboriginal waddy followed by a banner "Fight and Flourish". motto.plaques, r.a.n., w.r.a.n., h.m.a.s. vampire -
Glen Eira Historical Society
Ephemera - Caulfield Cricket Club
This file contains two items. A menu and programme for Caulfield Cricket Club. Includes handwritten list of names of office-bearers and printed list of sponsors. Thirty-four newspaper clippings on Caulfield Cricket Club. “Haviland, Pritchard give Caulfield Boost”, cutting from Caulfield Port Phillip Leader, 21/12/2010 on recent match. “Daron Cruickshank Shows His Class” cutting from Caulfield Port Phillip Leader 11/01/2011 on Daron Cruickshank from Trinidad-Tobago who whit 111 not out in recent match for Caulfield against Ormond. “Century Lifts Monds, Another Ton For Hansen” cutting from Caulfield Port Phillip Leader on 01/02/2011 on recent centuries by Michael Hansen of Ormond in matches. “Fields Take Minor Premiership” cutting from Caulfield Port Phillip Leader 08/03/2011 on forthcoming match of Elsternwick against Coburg. “Richo’s Century Puts Caulfield in Driver’s Seat” cutting from Caulfield Port Phillip Leader 15/03/2011 on Shaun Richardson’s 160 for Caulfield against Brunswick in a recent match. “Caulfield Up for Challenge” by Brad Beitzel cutting from Caulfield Port Phillip Leader 22/03/2011 on forthcoming match against Coburg. “Fielders Work For It. Sliver of Hope Going Into Day Two” by Paul Amy, cutting from Caulfield Port Phillip Leader 29/03/2011 on recent match of Caulfield against Malvern. Photograph, cutting from Caulfield Port Phillip Leader 05/04/2011 of batsman Matt Lawrence who had announced his retirement, pictured with unnamed wicket-keeper. “‘Grub’ will be missed” cutting from Caulfield Port Phillip Leader 12/04/2011. Obituary of Tony Sheehan who represented Caulfield in 170 matches. “Caulfield Goes in to Bat Early” cutting from Caulfield Port Phillip Leader 03/05/2011 on recent recruits Adam Warren and Rob Bartlett for forthcoming season. “South Caulfield on Top” cutting from Caulfield Port Phillip Leader 01/11/2011 on prospects of South Caulfield Club and recent matches. “Monds Break Duck” cutting from Caulfield Port Phillip Leader 31/01/2012 on recent win by Ormond Club. “Help To Put Cancer Fund in the Pink” article from the Caulfield Port Phillip Leader dated 07/02/2012 concerning the Caulfield South Cricket Club’s participation in Pink Stumps Day in order to raise funds for cancer research. “Premier Cricket” by Brad Beitzel, cutting from Caulfield Port Phillip Leader 14/02/2012 on recent watches of local clubs. “Damiano’s Three Tons A record” by Brad Beitzel, cutting from Caulfield Port Phillip Leader 28/02/2012 on batting record of Ricky Damiano. “Caulfield Digs In. Baldry Leads Lower Order Fight Against Malvern” by Paul Amy, cutting from Caulfield Port Phillip Leader 13/03/2012 on undefeated season of Caulfield club and future match. “Fields Bound For Glory. Rugged Day for Elsty” by Brad Beitzel cutting from Caulfield Port Phillip Leader 20/03/2012 on success of Caulfield Club. “Fielders Perfect Finish. Golden Summer Capped by Premiership” by Brad Beitzel cutting from Caulfield port Phillip Leader 27/03/2012 on undefeated season of Caulfield Club. “Caulfield Leaders Pay Hospital Visit to Club Stalwart. That Was For ‘Morro’” by Paul Amy cutting from Caulfield Port Phillip Leader 02/03/2012 on visit to ill Brian Morrison. “Caulfield Hearts Heavy After Death of Club Legend ‘Morro’” by Paul Amy cutting from Caulfield Port Phillip Leader 10/04/2012 on death of Brian Morrison. “Big Send Off For Legend ‘Morro’” cutting from Caulfield Port Phillip Leader 17/04/2012 on funeral of Brian Morrison. “Cricket Season to Commence” clipping from unnamed journal or magazine, hand dated 10/12 on new cricket season. “Christiansen Cracks Ton in Elsternwick Victory”, cutting from Glen Eira Port Phillip Leader 30/10/2012 on century by Cam Christiansen in match against Malvern. “Harwood Hits Hard to Set test For Caulfield” by Paul Amy cutting from Glen Eira Port Phillip Leader 13/11/2012 on performance of Shane Harwood in match against Melton. “ ‘Richo’ To The Rescue” by Paul Amy cutting from Glen Eira Port Phillip Leader 11/12/2012 on performance of Shaun Richardson in match against Williamstown. “Victorian Turf Cricket Association South Poised for Outright Win Against Bernies” cutting from Glen Eira Port Phillip Leader 29/01/2013 on match between South Caulfield and St. Bernards. “Tough Chase Awaits Caulfield” cutting from Glen Eira Port Phillip Leader 22/01/2013 on prospects of Caulfield Club. “Stateswide Twenty 20 Cup. South Caulfield Gets The Chance To Play At the MCG” photocopy of article in Glen Eira Port Phillip Leader 12/02/2013 that the team is to play in the MCG in finish of Twenty 20 Competition. “Nurse to the rescue for Wiaks” by Paul Amy cutting from Glen Eira Port Phillip Leader 19/02/2013 on century by Harry Nurse in match against Yarraville. “VTCA South Caulfield Crowned Twenty 20 Champion” cutting from Glen Eira Port Phillip Leader 12/03/2013 on win by South Caulfield in state wide Twenty 20 Cup. “Sub-District Cricket Finals. Caulfield Up Agianst Melton and Weather” cutting from Glen Eira Port Phillip Leader 19/03/2013 on semi-final match between Caulfield and Elsternwick. “Cricket Championship Team” photograph cutting from Glen Eira Port Phillip Leader 09/04/2013 of Championship Caulfield Club with thirteen players named in caption. “Cricket High Hopes for Scholarship Winner” cutting from Glen Eira Port Phillip Leader 16/04/2013 on cricket scholarship for Adam Cosgrove, aged twelve.caulfield cricket club, ormond cricket club, elsternwick cricket club, south caulfield cricket club, north caulfield glenhuntly cricket club, malvern cricket club, sheehan tony, damiano ricky, oakleigh cricket club, morrison brian, little harold, christiansen cam, harwood shane, richardson shaun, murrumbeena cricket club, carnegie cricket club, mcg, melbourne cricket grounds, nurse harry, reilly geoff, shipley colin, jacobs bill, lahiff tommy, haviland james, pritchard heath, cruickshank daron, hansen michael, lawrence matt, warren adam, baldry leigh, vtca, twenty 20 club, cosgrove adam, cricket, cricket clubs, cricketers, sporting clubs, sports -
 Melbourne Tram Museum
Magazine, Yarra Trams, "The Wire", 5/2011 to 1/2015
0 - No 9 - 1/4/2011 - Rhinos on skateboards, Did you know, Spencer St works, .1 - No. 11 of 3/5/2011 with the revised Yarra trams logo, traffic priority, work over Easter in Spencer St at Bourke and Collins St, Good Friday appeal, safety, passenger feedback and future works. .2 - No. 13 - 31/5/2011 - new uniform, cleaning, CEPR, trackwork - Fitzroy St, Northcote, Rhino, Carlton Control. .3 - No. 14 - 15/6/2011 - Haymarket Roundabout, accessibility, maintenance, CSE. 3a - No. 16 - 19/7/2011 - Managers on the move, Trevor Jones, Yarra's vision, Richard Ch'ng and Rhino update. .4 - No. 17 - 2/8/2011 - High St Westgarth trackwork, Swanston St, IMF CEO visit .5 - No. 18 - 16/8/2011 - Performance benchmarks met, Preston Workshops, repairs to 3018, tram signal priority. .6 - No . 19 - 30/8/2011 - New E class trams, routes "a" or "d", TramTracker in shelters, police, fare evasion .7 - No. 20 - 15/9/2011 - Football trams, Superstops, Bridge Road, Rhinos. .8 - No. 21 - 27/9/2011 - CEO's journey to work, accessibility, increased patronage, E class. .8a - No. 22 - 11/10/2011 - Minister Mulder visit, E class, Customer experience, Elizabeth Kerdelhue Corporate Affairs Director, flood indicator in Wellington Parade, Keolis - Orleans and PTV coming your way. .9 - No. 23 - 25/10/2011 - forthcoming royal visit, opening for Footscray Road extension, Rhinos, Stockholm .10 - No. 24 - 8/11/2011- Royal visit, photos, Z3 158, route 86 works in High St. (see htd5043i21 for a image from an unknown newspaper of the actual event - features Z3 158.) .11 - No. 25 - 22/11/2011 - new staff guide, Gold Coast tram line, Macarthur St, overhead, fund raising, route numbering update. .12 - No. 26 - 6/12/2011 - Swanston St Superstops, Newmarket bridge strikes, rhinos. .13 - No. 27 - 20/12/2011 - Christmas carnival, Lenny Bates, portable crossover, uniforms. .14 - No. 28 - 17/1/2012 - Passing of Len Bates, Myki, Gardiner railway station. 14a - No. 29 - 31/1/2012 - Southbank depot, patronage, myki, think like a passenger, fatigue management, .15 - No. 30 - 15/2/2012 - visit of Keolis, SNCF people, list of Executive leadership team with photos, Swanston St works, Myki introduction. .16 - No. 31 - 29/2/2012 - patronage up, tram postage stamps, Myki, rhinos. .17 - No. 32 - 14/3/2012 - St Kilda Rd trackwork, fund raising, Southbank Depot extensions, Myki, driving conditions, grand prix. .18 - No. 33 - 30/3/2012 - introduction of the PTV, end of MetLink and Transport Ticketing Authority, changes in management structure, trackwork, Gold Coast tramway and Keolis. .19 - No. 34 - Dr Jake - Royal children's Hospital super stop, route 96 - Premium line. .20 - No. 35, 2/5/2012 - Revision of Rules, trackwork in St Kilda Road and Elizabeth St, Myki, safety - Zero Harm. .21 - No. 69 - 25/9/2013 - Passengers paying their way, E class update, Mal Ashworth retires, progress report, feedback, new chime on trams. .22 - No. 70 - 9/10/2013 - Art comes alive, tram 925, driver simulator at Preston Workshops, E class project, 90th Glen Huntly. .23 - No. 83 - 23/4/2014 - Screen time for trams, new PIDs on B class, assistance animals, Operations Centre, Preston Workshops, Electrical log sheets to SLV. .24 - No. 89 - 23/7/2014 - punctuality, refresh of network map (fold-out map), women drivers. .25 - No. 97 - 19/11/2014 - Revitalising route 96, Keolis news, free tram zone, guide dogs. .26 - No. 99 - 17/12/2014 - Accessibility week, new uniform top for CSE's, free tram zone, world trade centre stop upgrade, heat stress, Art tram 158. .27 - No. 100 - 14/1/2015 - Route 96 complete, New Years eve free travel, fare compliance, patronage down, .28 - No. 12 - 16/5/2011 - Gold coast tramway, performance dashboard, tramworks and the rhino .29 - No. 16 - 19/7/2011 - Depot managers, tevor jones, record patronage, vision, rhino .30 - No. 17 - 2/8/2011 - High St Westgarth works, Duncan Smith, David Clarke Training, Swanston St works, and Preston Workshops . .32 - No. 39 - 28/6.2012 - maintenance, Emmanual Sorin, transformation, fare evasion, and Combino in Potsdam. .33 - No. 105 - 25/3/2015 - Grand Prix, Elgin and Lygon upgrade, Camberwell Junction, PTV hub, overhead. .34 - No. 78 - 12/2/2014 - January heatwave, Australian Open, Mark Wild of PTV, and Curt Skinner - voice in Channel 10 series Get Ace .35 - No. 81 - 26/3/2014 - drug and alcohol testing, zero harm, Victoria Bridge works, Keolis, relations with Toronto, Collins St safety and incident on a route 57 tram. .36 - No. 109 - 20/5/2015 - Goodbye Z class, Hello E class, Kew Depot centenary, drug & alcohol reminder, passenger satisfaction, Anzac day, B class life extension. .37 - No. 110 - 3/6/2015 - 3rd W class tram back grom Bendigo, employer of the year, CSE's go digital, Camberwell depot, Queensbridge tram and bus stop and Tram Hub preview. .38 - No. 115 - Feb. 2016 - 12 page centre stapled - New Year's eve services, spike the rhino is back, Burke Road level crossing removed, more E class, safe network in 2106, tennis, customers happy, New Preston depot, Farewell to Clement, Z class 40 years on network.Demonstrates Yarra trams staff newsletters.Set of 33 Yarra Trams internal newsletter "The Wire", All A4, printed in full colour. All four pages unless noted otherwise, full colour, performance snapshot on front cover.trams, tramways, yarra trams, traffic control, trackwork, spencer st, fund raising, operations, rhinos, carlton control, high st, haymarket, preston workshops, e class, route numbers, bridge road, wellington parade, ptv, royal visit, footscray road, new tramway, gold coast, macarthur st, swanston st, superstops, newmarket, gardiner, burke road, level crossings, railway squares, myki, metlink, tickets, route 96, rules, st kilda road, elizabeth st, tram 158, tram 925, glen huntly depot, simulator, b class, opeations centre, art trams, patronage, kew depot, new preston, queensbridge, w class, bendigo -
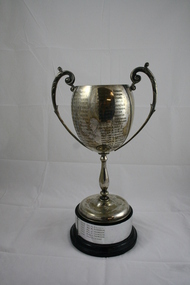 Emerald Museum & Nobelius Heritage Park
Golf Trophy
Emerald Country Club Associates Ladies Championship Trophy from 1937 to 1996Local golf club trophy donated by ex committee member Rosalie LeakeSilver Golf Trophy Cup (Ladies) on wooden base.. engraved with winners from 1937 to 1996 Emerald Country Club Associates E.M..KENNON CUP 1937 Mrs G.L. Elkins 1938 Mrs T.W. Gunnersen 1939 Mrs Norman 1940 Mrs A. Baker 1946 Mrs L.A. Fenton 1947 Mrs A.L. Newold 1948 Mrs C. Bedgood 1949 Mrs A. Baker 1950 Miss P. Massey 1951 Mrs W.H. Symon 1952 Mrs W.H. Symon 1953 Mrs A.L. Newbold 1954 Mrs W.H. Symon 1955 Miss M. Jamison 1956 Mrs W.H. Symon 1957 Miss J. Mellor 1958 Mrs L. Bulmer 1959 Mrs W.H. Symon 1960 Miss J. Mellor 1961 Mrs E. Hoy 1962 Mrs L. Bulmer 1963 Miss D. Smith 1964 Mrs N. Tuxen 1965 Mrs M. Hanger 1966 Mrs A. Howard 1967 Mrs R. Morgan 1968 Mrs P. Young 1969 Mrs J. Little 1970 Mrs J. Fountain 1971 Miss P. Jackson 1972 Mrs J. Little 1973 Mrs J. Houghton 1974 Mrs J. Meldrum 1975 Mrs. B. Barraclough 1976 Mrs J. Meldrum 1977 Mrs F. Gooch 1978 Mrs S. Hunter 1979 Ms F. Fenton 1980 Mrs J. Martin 1981 Mrs C. Grand-Court 1982 Mrs J. Pugh 1983 Mrs M. Ruigrok 1984 Mrs P. Summers 1985 Miss A. Scurry 1986 Mrs P. White 1987 Mrs M. Ruigrok 1988 Mrs P. White 1989 J. Ross 1990 Miss B. Bates 1991 Ms A. Felgate 1992 Ms M. Purbrick 1993 Ms J. Thomson 1994 Ms J Tomson 1995 Ms J Thomson 1996 Mrs R. Leake emerald country club, wm kennon cup, golf trophy 1937 to 1996