Showing 841 items matching "large plate"
-
 Flagstaff Hill Maritime Museum and Village
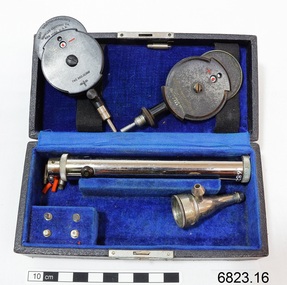
Instrument - Ophthalmoscope Kit, 1910-1920
... plate is now mounted on the doorway to the Port Medical Office at Flagstaff Hill Maritime Village, Warrnambool. Dr Edward Ryan and Dr Tom Ryan had an extensive collection of historical medical equipment and materials spanning 1884-1926 and when Dr Angus took up practice in their old premises he obtained this collection, a large part of which is now on display at the Port Medical Office at Flagstaff Hill Maritime Village in Warrnambool. ...plate is now mounted on the doorway to the Port Medical Office at Flagstaff Hill Maritime Village, Warrnambool. Dr Edward Ryan and Dr Tom Ryan had an extensive collection of historical medical equipment and materials spanning 1884-1926 and when Dr Angus took up practice in their old premises he obtained this collection, a large part of which is now on display at the Port Medical Office at Flagstaff Hill Maritime Village in Warrnambool. ...This Ophthalmoscope Kit would have been used to examine and test eyes and ears. It was most likely used by Dr T. Ryan of Nhill during the early 20th century and passed on to Dr Roy Angus, who was his assistant at one stage. It was donated to Flagstaff Hill Maritime Village by the family of Doctor William Roy Angus, Surgeon and Oculist. It is part of the “W.R. Angus Collection” that includes historical medical equipment, surgical instruments and material once belonging to Dr Edward Ryan and Dr Thomas Francis Ryan, (both of Nhill, Victoria) as well as Dr Angus’ own belongings. The Collection’s history spans the medical practices of the two Doctors Ryan, from 1885-1926 plus that of Dr Angus, up until 1969. ABOUT THE “W.R.ANGUS COLLECTION” Doctor William Roy Angus M.B., B.S., Adel., 1923, F.R.C.S. Edin.,1928 (also known as Dr Roy Angus) was born in Murrumbeena, Victoria in 1901 and lived until 1970. He qualified as a doctor in 1923 at University of Adelaide, was Resident Medical Officer at the Royal Adelaide Hospital in 1924 and for a period was house surgeon to Sir (then Mr.) Henry Simpson Newland. Dr Angus was briefly an Assistant to Dr Riddell of Kapunda, then commenced private practice at Curramulka, Yorke Peninsula, SA, where he was physician, surgeon and chemist. In 1926, he was appointed as new Medical Assistant to Dr Thomas Francis Ryan (T.F. Ryan, or Tom), in Nhill, Victoria, where his experiences included radiology and pharmacy. In 1927 he was Acting House Surgeon in Dr Tom Ryan’s absence. Dr Angus had become engaged to Gladys Forsyth and they decided he would take time to further his studies overseas in the UK in 1927. He studied at London University College Hospital and at Edinburgh Royal Infirmary and in 1928, was awarded FRCS (Fellow from the Royal College of Surgeons), Edinburgh. He worked his passage back to Australia as a Ship’s Surgeon on the on the Australian Commonwealth Line’s T.S.S. Largs Bay. Dr Angus married Gladys in 1929, in Ballarat. (They went on to have one son (Graham 1932, born in SA) and two daughters (Helen (died 12/07/1996) and Berenice (Berry), both born at Mira, Nhill ) Dr Angus was a ‘flying doctor’ for the A.I.M. (Australian Inland Ministry) Aerial Medical Service in 1928 . The organisation began in South Australia through the Presbyterian Church in that year, with its first station being in the remote town of Oodnadatta, where Dr Angus was stationed. He was locum tenens there on North-South Railway at 21 Mile Camp. He took up this ‘flying doctor’ position in response to a call from Dr John Flynn; the organisation was later known as the Flying Doctor Service, then the Royal Flying Doctor Service. A lot of his work during this time involved dental surgery also. Between 1928-1932 he was surgeon at the Curramulka Hospital, Yorke Peninsula, South Australia. In 1933 Dr Angus returned to Nhill where he’d previously worked as Medical Assistant and purchased a share of the Nelson Street practice and Mira hospital from Dr Les Middleton one of the Middleton Brothers, the current owners of what was once Dr Tom Ryan’s practice. Dr L Middleton was House Surgeon to the Nhill Hospital 1926-1933, when he resigned. [Dr Tom Ryan’s practice had originally belonged to his older brother Dr Edward Ryan, who came to Nhill in 1885. Dr Edward saw patients at his rooms, firstly in Victoria Street and in 1886 in Nelson Street, until 1901. The Nelson Street practice also had a 2 bed ward, called Mira Private Hospital ). Dr Edward Ryan was House Surgeon at the Nhill Hospital 1884-1902 . He also had occasions where he successfully performed veterinary surgery for the local farmers too. Dr Tom Ryan then purchased the practice from his brother in 1901. Both Dr Edward and Dr Tom Ryan work as surgeons included eye surgery. Dr Tom Ryan performed many of his operations in the Mira private hospital on his premises. He too was House Surgeon at the Nhill Hospital 1902-1926. Dr Tom Ryan had one of the only two pieces of radiology equipment in Victoria during his practicing years – The Royal Melbourne Hospital had the other one. Over the years Dr Tom Ryan gradually set up what was effectively a training school for country general-practitioner-surgeons. Each patient was carefully examined, including using the X-ray machine, and any surgery was discussed and planned with Dr Ryan’s assistants several days in advance. Dr Angus gained experience in using the X-ray machine there during his time as assistant to Dr Ryan. Dr Tom Ryan moved from Nhill in 1926. He became a Fellow of the Royal Australasian College of Surgeons in 1927, soon after its formation, a rare accolade for a doctor outside any of the major cities. He remained a bachelor and died suddenly on 7th Dec 1955, aged 91, at his home in Ararat. Scholarships and prizes are still awarded to medical students in the honour of Dr T.F. Ryan and his father, Dr Michael Ryan, and brother, John Patrick Ryan. ] When Dr Angus bought into the Nelson Street premises in Nhill he was also appointed as the Nhill Hospital’s Honorary House Surgeon 1933-1938. His practitioner’s plate from his Nhill surgery states “HOURS Daily, except Tuesdays, Fridays and Saturday afternoons, 9-10am, 2-4pm, 7-8pm. Sundays by appointment”. This plate is now mounted on the doorway to the Port Medical Office at Flagstaff Hill Maritime Village, Warrnambool. Dr Edward Ryan and Dr Tom Ryan had an extensive collection of historical medical equipment and materials spanning 1884-1926 and when Dr Angus took up practice in their old premises he obtained this collection, a large part of which is now on display at the Port Medical Office at Flagstaff Hill Maritime Village in Warrnambool. During his time in Nhill Dr Angus was involved in the merging of the Mira Hospital and Nhill Public Hospital into one public hospital and the property titles passed on to Nhill Hospital in 1939. In 1939 Dr Angus and his family moved to Warrnambool where he purchased “Birchwood,” the 1852 home and medical practice of Dr John Hunter Henderson, at 214 Koroit Street. (This property was sold in1965 to the State Government and is now the site of the Warrnambool Police Station. ). The Angus family was able to afford gardeners, cooks and maids; their home was a popular place for visiting dignitaries to stay whilst visiting Warrnambool. Dr Angus had his own silk worm farm at home in a Mulberry tree. His young daughter used his centrifuge for spinning the silk. Dr Angus was appointed on a part-time basis as Port Medical Officer (Health Officer) in Warrnambool and held this position until the 1940’s when the government no longer required the service of a Port Medical Officer in Warrnambool; he was thus Warrnambool’s last serving Port Medical Officer. (The duties of a Port Medical Officer were outlined by the Colonial Secretary on 21st June, 1839 under the terms of the Quarantine Act. Masters of immigrant ships arriving in port reported incidents of diseases, illness and death and the Port Medical Officer made a decision on whether the ship required Quarantine and for how long, in this way preventing contagious illness from spreading from new immigrants to the residents already in the colony.) Dr Angus was a member of the Australian Medical Association, for 35 years and surgeon at the Warrnambool Base Hospital 1939-1942, He served as a Surgeon Captain during WWII1942-45, in Ballarat, Victoria, and in Bonegilla, N.S.W., completing his service just before the end of the war due to suffering from a heart attack. During his convalescence he carved an intricate and ‘most artistic’ chess set from the material that dentures were made from. He then studied ophthalmology at the Royal Melbourne Eye and Ear Hospital and created cosmetically superior artificial eyes by pioneering using the intrascleral cartilage. Angus received accolades from the Ophthalmological Society of Australasia for this work. He returned to Warrnambool to commence practice as an ophthalmologist, pioneering in artificial eye improvements. He was Honorary Consultant Ophthalmologist to Warrnambool Base Hospital for 31 years. He made monthly visits to Portland as a visiting surgeon, to perform eye surgery. He represented the Victorian South-West subdivision of the Australian Medical Association as its secretary between 1949 and 1956 and as chairman from 1956 to 1958. In 1968 Dr Angus was elected member of Spain’s Barraquer Institute of Barcelona after his research work in Intrasclearal cartilage grafting, becoming one of the few Australian ophthalmologists to receive this honour, and in the following year presented his final paper on Living Intrasclearal Cartilage Implants at the Inaugural Meeting of the Australian College of Ophthalmologists in Melbourne In his personal life Dr Angus was a Presbyterian and treated Sunday as a Sabbath, a day of rest. He would visit 3 or 4 country patients on a Sunday, taking his children along ‘for the ride’ and to visit with him. Sunday evenings he would play the pianola and sing Scottish songs to his family. One of Dr Angus’ patients was Margaret MacKenzie, author of a book on local shipwrecks that she’d seen as an eye witness from the late 1880’s in Peterborough, Victoria. In the early 1950’s Dr Angus, painted a picture of a shipwreck for the cover jacket of Margaret’s book, Shipwrecks and More Shipwrecks. She was blind in later life and her daughter wrote the actual book for her. Dr Angus and his wife Gladys were very involved in Warrnambool’s society with a strong interest in civic affairs. Their interests included organisations such as Red Cross, Rostrum, Warrnambool and District Historical Society (founding members), Wine and Food Society, Steering Committee for Tertiary Education in Warrnambool, Local National Trust, Good Neighbour Council, Housing Commission Advisory Board, United Services Institute, Legion of Ex-Servicemen, Olympic Pool Committee, Food for Britain Organisation, Warrnambool Hospital, Anti-Cancer Council, Boys’ Club, Charitable Council, National Fitness Council and Air Raid Precautions Group. He was also a member of the Steam Preservation Society and derived much pleasure from a steam traction engine on his farm. He had an interest in people and the community He and his wife Gladys were both involved in the creation of Flagstaff Hill, including the layout of the gardens. After his death (28th March 1970) his family requested his practitioner’s plate, medical instruments and some personal belongings be displayed in the Port Medical Office surgery at Flagstaff Hill Maritime Village, and be called the “W. R. Angus Collection”. The W.R. Angus Collection is significant for still being located at the site it is connected with, Doctor Angus being the last Port Medical Officer in Warrnambool. The collection of medical instruments and other equipment is culturally significant, being an historical example of medicine from late 19th to mid-20th century. Dr Angus assisted Dr Tom Ryan, a pioneer in the use of X-rays and in ocular surgery. Ophthalmoscope Kit; combination Otoscope and May Ophthalmoscope, part of the W.R. Angus Collection. Electric ophthalmoscope and Otoscope in hinged, leather covered, hinged wood box with slide catch, lined with blue fabric. Kit contains an Ophthalmoscope head, an Otoscope head, an aural speculum, a stainless steel handle (3 pieces) powered by 2x AA batteries, orange rubber peg, 8 globes. The Ophthalmoscope head is inscribed "SURGICAL MANUFACTURING CO. (AUST.) (PTY LTD) / MADE IN GREAT BRITAIN, J.S & S." on reverse "PAT 338 766" and on the top "MAY ™ OPTHALMOSCOPE IMPROVED". Otoscope is inscribed "WAPPLER ELECTRIC CO. / NEW YOURK U.S.A.", "PAT. DEC 12 1916"flagstaff hill, warrnambool, shipwrecked coast, flagstaff hill maritime museum, maritime museum, shipwreck coast, flagstaff hill maritime village, great ocean road, dr w r angus, dr ryan, surgical instrument, t.s.s. largs bay, warrnambool base hospital, nhill base hospital, mira hospital, flying doctor, medical treatment, medical history, medical education, medical text book, ophthalmoscope kit, otoscope, eye examination, ear examination -
 Flagstaff Hill Maritime Museum and Village
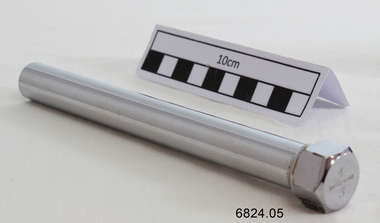
Instrument - Surgical Kit, early 1900's
... plate is now mounted on the doorway to the Port Medical Office at Flagstaff Hill Maritime Village, Warrnambool. Dr Edward Ryan and Dr Tom Ryan had an extensive collection of historical medical equipment and materials spanning 1884-1926 and when Dr Angus took up practice in their old premises he obtained this collection, a large part of which is now on display at the Port Medical Office at Flagstaff Hill Maritime Village in Warrnambool. ...plate is now mounted on the doorway to the Port Medical Office at Flagstaff Hill Maritime Village, Warrnambool. Dr Edward Ryan and Dr Tom Ryan had an extensive collection of historical medical equipment and materials spanning 1884-1926 and when Dr Angus took up practice in their old premises he obtained this collection, a large part of which is now on display at the Port Medical Office at Flagstaff Hill Maritime Village in Warrnambool. ...This scalpel kit contains two handles and a keeper-bar within a protective stainless steel cylinder with a screw on cap. This kit was donated to Flagstaff Hill Maritime Museum by the family of Doctor William Roy Angus, Surgeon and Oculist. It is part of the “W.R. Angus Collection” that includes historical medical equipment, surgical instruments and material once belonging to Dr Edward Ryan and Dr Thomas Francis Ryan, (both of Nhill, Victoria) as well as Dr Angus’ own belongings. The Collection’s history spans the medical practices of the two Doctors Ryan, from 1885-1926 plus that of Dr Angus, up until 1969. ABOUT THE “W.R.ANGUS COLLECTION” Doctor William Roy Angus M.B., B.S., Adel., 1923, F.R.C.S. Edin.,1928 (also known as Dr Roy Angus) was born in Murrumbeena, Victoria in 1901 and lived until 1970. He qualified as a doctor in 1923 at University of Adelaide, was Resident Medical Officer at the Royal Adelaide Hospital in 1924 and for a period was house surgeon to Sir (then Mr.) Henry Simpson Newland. Dr Angus was briefly an Assistant to Dr Riddell of Kapunda, then commenced private practice at Curramulka, Yorke Peninsula, SA, where he was physician, surgeon and chemist. In 1926, he was appointed as new Medical Assistant to Dr Thomas Francis Ryan (T.F. Ryan, or Tom), in Nhill, Victoria, where his experiences included radiology and pharmacy. In 1927 he was Acting House Surgeon in Dr Tom Ryan’s absence. Dr Angus had become engaged to Gladys Forsyth and they decided he would take time to further his studies overseas in the UK in 1927. He studied at London University College Hospital and at Edinburgh Royal Infirmary and in 1928, was awarded FRCS (Fellow from the Royal College of Surgeons), Edinburgh. He worked his passage back to Australia as a Ship’s Surgeon on the on the Australian Commonwealth Line’s T.S.S. Largs Bay. Dr Angus married Gladys in 1929, in Ballarat. (They went on to have one son (Graham 1932, born in SA) and two daughters (Helen (died 12/07/1996) and Berenice (Berry), both born at Mira, Nhill ) Dr Angus was a ‘flying doctor’ for the A.I.M. (Australian Inland Ministry) Aerial Medical Service in 1928 . The organisation began in South Australia through the Presbyterian Church in that year, with its first station being in the remote town of Oodnadatta, where Dr Angus was stationed. He was locum tenens there on North-South Railway at 21 Mile Camp. He took up this ‘flying doctor’ position in response to a call from Dr John Flynn; the organisation was later known as the Flying Doctor Service, then the Royal Flying Doctor Service. A lot of his work during this time involved dental surgery also. Between 1928-1932 he was surgeon at the Curramulka Hospital, Yorke Peninsula, South Australia. In 1933 Dr Angus returned to Nhill where he’d previously worked as Medical Assistant and purchased a share of the Nelson Street practice and Mira hospital from Dr Les Middleton one of the Middleton Brothers, the current owners of what was once Dr Tom Ryan’s practice. Dr L Middleton was House Surgeon to the Nhill Hospital 1926-1933, when he resigned. [Dr Tom Ryan’s practice had originally belonged to his older brother Dr Edward Ryan, who came to Nhill in 1885. Dr Edward saw patients at his rooms, firstly in Victoria Street and in 1886 in Nelson Street, until 1901. The Nelson Street practice also had a 2 bed ward, called Mira Private Hospital ). Dr Edward Ryan was House Surgeon at the Nhill Hospital 1884-1902 . He also had occasions where he successfully performed veterinary surgery for the local farmers too. Dr Tom Ryan then purchased the practice from his brother in 1901. Both Dr Edward and Dr Tom Ryan work as surgeons included eye surgery. Dr Tom Ryan performed many of his operations in the Mira private hospital on his premises. He too was House Surgeon at the Nhill Hospital 1902-1926. Dr Tom Ryan had one of the only two pieces of radiology equipment in Victoria during his practicing years – The Royal Melbourne Hospital had the other one. Over the years Dr Tom Ryan gradually set up what was effectively a training school for country general-practitioner-surgeons. Each patient was carefully examined, including using the X-ray machine, and any surgery was discussed and planned with Dr Ryan’s assistants several days in advance. Dr Angus gained experience in using the X-ray machine there during his time as assistant to Dr Ryan. Dr Tom Ryan moved from Nhill in 1926. He became a Fellow of the Royal Australasian College of Surgeons in 1927, soon after its formation, a rare accolade for a doctor outside any of the major cities. He remained a bachelor and died suddenly on 7th Dec 1955, aged 91, at his home in Ararat. Scholarships and prizes are still awarded to medical students in the honour of Dr T.F. Ryan and his father, Dr Michael Ryan, and brother, John Patrick Ryan. ] When Dr Angus bought into the Nelson Street premises in Nhill he was also appointed as the Nhill Hospital’s Honorary House Surgeon 1933-1938. His practitioner’s plate from his Nhill surgery states “HOURS Daily, except Tuesdays, Fridays and Saturday afternoons, 9-10am, 2-4pm, 7-8pm. Sundays by appointment”. This plate is now mounted on the doorway to the Port Medical Office at Flagstaff Hill Maritime Village, Warrnambool. Dr Edward Ryan and Dr Tom Ryan had an extensive collection of historical medical equipment and materials spanning 1884-1926 and when Dr Angus took up practice in their old premises he obtained this collection, a large part of which is now on display at the Port Medical Office at Flagstaff Hill Maritime Village in Warrnambool. During his time in Nhill Dr Angus was involved in the merging of the Mira Hospital and Nhill Public Hospital into one public hospital and the property titles passed on to Nhill Hospital in 1939. In 1939 Dr Angus and his family moved to Warrnambool where he purchased “Birchwood,” the 1852 home and medical practice of Dr John Hunter Henderson, at 214 Koroit Street. (This property was sold in1965 to the State Government and is now the site of the Warrnambool Police Station. ). The Angus family was able to afford gardeners, cooks and maids; their home was a popular place for visiting dignitaries to stay whilst visiting Warrnambool. Dr Angus had his own silk worm farm at home in a Mulberry tree. His young daughter used his centrifuge for spinning the silk. Dr Angus was appointed on a part-time basis as Port Medical Officer (Health Officer) in Warrnambool and held this position until the 1940’s when the government no longer required the service of a Port Medical Officer in Warrnambool; he was thus Warrnambool’s last serving Port Medical Officer. (The duties of a Port Medical Officer were outlined by the Colonial Secretary on 21st June, 1839 under the terms of the Quarantine Act. Masters of immigrant ships arriving in port reported incidents of diseases, illness and death and the Port Medical Officer made a decision on whether the ship required Quarantine and for how long, in this way preventing contagious illness from spreading from new immigrants to the residents already in the colony.) Dr Angus was a member of the Australian Medical Association, for 35 years and surgeon at the Warrnambool Base Hospital 1939-1942, He served as a Surgeon Captain during WWII1942-45, in Ballarat, Victoria, and in Bonegilla, N.S.W., completing his service just before the end of the war due to suffering from a heart attack. During his convalescence he carved an intricate and ‘most artistic’ chess set from the material that dentures were made from. He then studied ophthalmology at the Royal Melbourne Eye and Ear Hospital and created cosmetically superior artificial eyes by pioneering using the intrascleral cartilage. Angus received accolades from the Ophthalmological Society of Australasia for this work. He returned to Warrnambool to commence practice as an ophthalmologist, pioneering in artificial eye improvements. He was Honorary Consultant Ophthalmologist to Warrnambool Base Hospital for 31 years. He made monthly visits to Portland as a visiting surgeon, to perform eye surgery. He represented the Victorian South-West subdivision of the Australian Medical Association as its secretary between 1949 and 1956 and as chairman from 1956 to 1958. In 1968 Dr Angus was elected member of Spain’s Barraquer Institute of Barcelona after his research work in Intrasclearal cartilage grafting, becoming one of the few Australian ophthalmologists to receive this honour, and in the following year presented his final paper on Living Intrasclearal Cartilage Implants at the Inaugural Meeting of the Australian College of Ophthalmologists in Melbourne In his personal life Dr Angus was a Presbyterian and treated Sunday as a Sabbath, a day of rest. He would visit 3 or 4 country patients on a Sunday, taking his children along ‘for the ride’ and to visit with him. Sunday evenings he would play the pianola and sing Scottish songs to his family. One of Dr Angus’ patients was Margaret MacKenzie, author of a book on local shipwrecks that she’d seen as an eye witness from the late 1880’s in Peterborough, Victoria. In the early 1950’s Dr Angus, painted a picture of a shipwreck for the cover jacket of Margaret’s book, Shipwrecks and More Shipwrecks. She was blind in later life and her daughter wrote the actual book for her. Dr Angus and his wife Gladys were very involved in Warrnambool’s society with a strong interest in civic affairs. Their interests included organisations such as Red Cross, Rostrum, Warrnambool and District Historical Society (founding members), Wine and Food Society, Steering Committee for Tertiary Education in Warrnambool, Local National Trust, Good Neighbour Council, Housing Commission Advisory Board, United Services Institute, Legion of Ex-Servicemen, Olympic Pool Committee, Food for Britain Organisation, Warrnambool Hospital, Anti-Cancer Council, Boys’ Club, Charitable Council, National Fitness Council and Air Raid Precautions Group. He was also a member of the Steam Preservation Society and derived much pleasure from a steam traction engine on his farm. He had an interest in people and the community He and his wife Gladys were both involved in the creation of Flagstaff Hill, including the layout of the gardens. After his death (28th March 1970) his family requested his practitioner’s plate, medical instruments and some personal belongings be displayed in the Port Medical Office surgery at Flagstaff Hill Maritime Village, and be called the “W. R. Angus Collection”. The W.R. Angus Collection is significant for still being located at the site it is connected with, Doctor Angus being the last Port Medical Officer in Warrnambool. The collection of medical instruments and other equipment is culturally significant, being an historical example of medicine from late 19th to mid-20th century. Dr Angus assisted Dr Tom Ryan, a pioneer in the use of X-rays and in ocular surgery. Scalpel kit containing two (2) scalpel handles; part of the W.R. Angus Collection. Container is a stainless steel barrel with screw on cap. Inside are 2 scalpel handles stored one on each side of a fitted steel bar. All components have an inscription. The cylinder and one scalpel are made in England, the other scalpel is made in USA.Inscriptions; base of cylinder;"25" lid of cylinder: "4 / BRITISH MADE / 3", one scalpel; "BARD-PARKER", "BP" a trade mark, "4", “SURGICAL MFG. COY. LTD" and "MADE IN U.S.A.". The other scalpel has 'MADE IN ENGLAND", "PARAGON" and "3". The metal bar has "3" on one side and "4" on the otherwarrnambool, flagstaff hill maritime museum, shipwreck coast, great ocean road, dr w r angus, dr ryan, surgical instrument, t.s.s. largs bay, warrnambool base hospital, nhill base hospital, mira hospital, flying doctor, medical treatment, scalpel kit, bard-parker, paragon -
 Flagstaff Hill Maritime Museum and Village
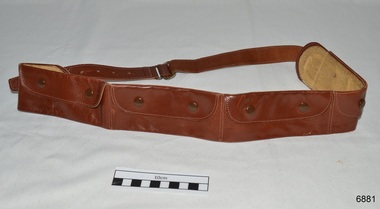
Money Belt, c. 1942
... plate from his Nhill surgery is now mounted on the doorway to the Port Medical Office at Flagstaff Hill Maritime Village, Warrnambool. When Dr Angus took up practice in the Dr Edward and Dr Tom Ryan’s old premises he obtained their extensive collection of historical medical equipment and materials spanning 1884-1926. A large...plate from his Nhill surgery is now mounted on the doorway to the Port Medical Office at Flagstaff Hill Maritime Village, Warrnambool. When Dr Angus took up practice in the Dr Edward and Dr Tom Ryan’s old premises he obtained their extensive collection of historical medical equipment and materials spanning 1884-1926. A large ...This money belt was issued to Dr W.R. Angus when he served in the Army 1942-1945 as a medical officer at Ballarat, Victoria, and Bonegilla, N.S.W.. (Surgeon Captain A.A.M.C., 108 A.G.H., and 106 A.G.H., Captain A.A.M.C. retired list.) The belt was donated to Flagstaff Hill Maritime Village by the family of Doctor William Roy Angus, Surgeon and Oculist. It is part of the “W.R. Angus Collection” that includes historical medical equipment, surgical instruments and material once belonging to Dr Edward Ryan and Dr Thomas Francis Ryan, (both of Nhill, Victoria) as well as Dr Angus’ own belongings. The Collection’s history spans the medical practices of the two Doctors Ryan, from 1885-1926 plus that of Dr Angus, up until 1969. ABOUT THE “W.R.ANGUS COLLECTION” Doctor William Roy Angus M.B., B.S., Adel., 1923, F.R.C.S. Edin.,1928 (also known as Dr Roy Angus) was born in Murrumbeena, Victoria in 1901 and lived until 1970. He qualified as a doctor in 1923 at University of Adelaide, was Resident Medical Officer at the Royal Adelaide Hospital in 1924 and for a period was house surgeon to Sir (then Mr.) Henry Simpson Newland. Dr Angus was briefly an Assistant to Dr Riddell of Kapunda, then commenced private practice at Curramulka, Yorke Peninsula, SA, where he was physician, surgeon and chemist. In 1926, he was appointed as new Medical Assistant to Dr Thomas Francis Ryan (T.F. Ryan, or Tom), in Nhill, Victoria, where his experiences included radiology and pharmacy. In 1927 he was Acting House Surgeon in Dr Tom Ryan’s absence. Dr Angus had become engaged to Gladys Forsyth and they decided he further his studies overseas in the UK in 1927. He studied at London University College Hospital and at Edinburgh Royal Infirmary and in 1928, was awarded FRCS (Fellow from the Royal College of Surgeons), Edinburgh. He worked his passage back to Australia as a Ship’s Surgeon on the on the Australian Commonwealth Line’s T.S.S. Largs Bay. Dr Angus married Gladys in 1929, in Ballarat. (They went on to have one son (Graham 1932, born in SA) and two daughters (Helen (died 12/07/1996) and Berenice (Berry), both born at Mira, Nhill ) According to Berry, her mother Gladys made a lot of their clothes. She was very talented and did some lovely embroidery including lingerie for her trousseau and beautifully handmade baby clothes. Dr Angus was a ‘flying doctor’ for the A.I.M. (Australian Inland Ministry) Aerial Medical Service in 1928 . Its first station was in the remote town of Oodnadatta, where Dr Angus was stationed. He was locum tenens there on North-South Railway at 21 Mile Camp. He took up this ‘flying doctor’ position in response to a call from Dr John Flynn; the organisation was later known as the Flying Doctor Service, then the Royal Flying Doctor Service. A lot of his work during this time involved dental surgery also. Between 1928-1932 he was surgeon at the Curramulka Hospital, Yorke Peninsula, South Australia. In 1933 Dr Angus returned to Nhill and purchased a share of the Nelson Street practice and Mira hospital (a 2 bed ward at the Nelson Street Practice) from Dr Les Middleton one of the Middleton Brothers, the current owners of what previously once Dr Tom Ryan’s practice. Dr Tom and his brother had worked as surgeons included eye surgery. Dr Tom Ryan performed many of his operations in the Mira private hospital on his premises. He had been House Surgeon at the Nhill Hospital 1902-1926. Dr Tom Ryan had one of the only two pieces of radiology equipment in Victoria during his practicing years – The Royal Melbourne Hospital had the other one. Over the years Dr Tom Ryan had gradually set up what was effectively a training school for country general-practitioner-surgeons. Each patient was carefully examined, including using the X-ray machine, and any surgery was discussed and planned with Dr Ryan’s assistants several days in advance. Dr Angus gained experience in using the X-ray machine there during his time as assistant to Dr Ryan. When Dr Angus bought into the Nelson Street premises in Nhill he was also appointed as the Nhill Hospital’s Honorary House Surgeon 1933-1938. His practitioner’s plate from his Nhill surgery is now mounted on the doorway to the Port Medical Office at Flagstaff Hill Maritime Village, Warrnambool. When Dr Angus took up practice in the Dr Edward and Dr Tom Ryan’s old premises he obtained their extensive collection of historical medical equipment and materials spanning 1884-1926. A large part of this collection is now on display at the Port Medical Office at Flagstaff Hill Maritime Village in Warrnambool. In 1939 Dr Angus and his family moved to Warrnambool where he purchased “Birchwood,” the 1852 home and medical practice of Dr John Hunter Henderson, at 214 Koroit Street. (This property was sold in1965 to the State Government and is now the site of the Warrnambool Police Station. and an ALDI sore is on the land that was once their tennis court). The Angus family was able to afford gardeners, cooks and maids; their home was a popular place for visiting dignitaries to stay whilst visiting Warrnambool. Dr Angus had his own silk worm farm at home in a Mulberry tree. His young daughter used his centrifuge for spinning the silk. Dr Angus was appointed on a part-time basis as Port Medical Officer (Health Officer) in Warrnambool and held this position until the 1940’s when the government no longer required the service of a Port Medical Officer in Warrnambool; he was thus Warrnambool’s last serving Port Medical Officer. (Masters of immigrant ships arriving in port reported incidents of diseases, illness and death and the Port Medical Officer made a decision on whether the ship required Quarantine and for how long, in this way preventing contagious illness from spreading from new immigrants to the residents already in the colony.) Dr Angus was a member of the Australian Medical Association, for 35 years and surgeon at the Warrnambool Base Hospital 1939-1942, He served as a Surgeon Captain during WWII1942-45, in Ballarat, Victoria, and in Bonegilla, N.S.W., completing his service just before the end of the war due to suffering from a heart attack. During his convalescence he carved an intricate and ‘most artistic’ chess set from the material that dentures were made from. He then studied ophthalmology at the Royal Melbourne Eye and Ear Hospital and created cosmetically superior artificial eyes by pioneering using the intrascleral cartilage. Angus received accolades from the Ophthalmological Society of Australasia for this work. He returned to Warrnambool to commence practice as an ophthalmologist, pioneering in artificial eye improvements. He was Honorary Consultant Ophthalmologist to Warrnambool Base Hospital for 31 years. He made monthly visits to Portland as a visiting surgeon, to perform eye surgery. He represented the Victorian South-West subdivision of the Australian Medical Association as its secretary between 1949 and 1956 and as chairman from 1956 to 1958. In 1968 Dr Angus was elected member of Spain’s Barraquer Institute of Barcelona after his research work in Intrasclearal cartilage grafting, becoming one of the few Australian ophthalmologists to receive this honour, and in the following year presented his final paper on Living Intrasclearal Cartilage Implants at the Inaugural Meeting of the Australian College of Ophthalmologists in Melbourne In his personal life Dr Angus was a Presbyterian and treated Sunday as a Sabbath, a day of rest. He would visit 3 or 4 country patients on a Sunday, taking his children along ‘for the ride’ and to visit with him. Sunday evenings he would play the pianola and sing Scottish songs to his family. One of Dr Angus’ patients was Margaret MacKenzie, author of a book on local shipwrecks that she’d seen as an eye witness from the late 1880’s in Peterborough, Victoria. In the early 1950’s Dr Angus, painted a picture of a shipwreck for the cover jacket of Margaret’s book, Shipwrecks and More Shipwrecks. She was blind in later life and her daughter wrote the actual book for her. Dr Angus and his wife Gladys were very involved in Warrnambool’s society with a strong interest in civic affairs. He had an interest in people and the community They were both involved in the creation of Flagstaff Hill, including the layout of the gardens. After his death (28th March 1970) his family requested his practitioner’s plate, medical instruments and some personal belongings be displayed in the Port Medical Office surgery at Flagstaff Hill Maritime Village, and be called the “W. R. Angus Collection”. The W.R. Angus Collection is significant for still being located at the site it is connected with, Doctor Angus being the last Port Medical Officer in Warrnambool. The collection of medical instruments and other equipment is culturally significant, being an historical example of medicine from late 19th to mid-20th century. Dr Angus assisted Dr Tom Ryan, a pioneer in the use of X-rays and in ocular surgery. The collection of Army objects is an example of items issued to Doctors and Surgeons in the Medical Services of the Australian Army in World War 2. Brown leather money belt, genuine calf, lined, 4 pouches with stud closure flaps included. Issued to W.R. Angus in WWII and part of the W.R. Angus Collection. Gold embossed label. Hand written inscription with name and serial number. Gold embossed “GENUINE CALF” under silver coloured buckle. Hand written inside of belt “W.R. ANGUS / 61-3 9803 5228”flagstaff hill, warrnambool, shipwrecked coast, flagstaff hill maritime museum, maritime museum, shipwreck coast, flagstaff hill maritime village, great ocean road, dr w r angus, dr ryan, military money belt, surgeon captain, royal australian army, military service australian army, wwii uniform, world war 2 -
 Flagstaff Hill Maritime Museum and Village
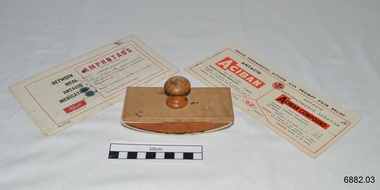
Functional object - Blotting Paper Holder, Circa 1910
... plate from his Nhill surgery is now mounted on the doorway to the Port Medical Office at Flagstaff Hill Maritime Village, Warrnambool. When Dr Angus took up practice in the Dr Edward and Dr Tom Ryan’s old premises he obtained their extensive collection of historical medical equipment and materials spanning 1884-1926. A large...plate from his Nhill surgery is now mounted on the doorway to the Port Medical Office at Flagstaff Hill Maritime Village, Warrnambool. When Dr Angus took up practice in the Dr Edward and Dr Tom Ryan’s old premises he obtained their extensive collection of historical medical equipment and materials spanning 1884-1926. A large ...Blotting paper is made from different materials of varying thickness, softness, etc. depending on the application. It is often made of cotton and manufactured on special paper machines. Blotting paper is reputed to be first referred to in the English language in the 15th century but there is a tradition in Norfolk, England that it was invented by accident at Lyng Mill on the River Wensum. It is reported that a Berkshire (England) paper mill worker in East Hagbourne failed to add sizing to a batch of paper that was being produced. The batch was discarded. Subsequently, someone tried to write on a piece of this discarded "scrap" paper and found that it rapidly absorbed any ink applied, making it unusable for writing. Its marked absorbency having been noted, however, led to its subsequently being produced and used as blotting paper, replacing sand, which was the material that had been used for absorbing superficial wet ink. In a time when most paper was produced from "rags", red/pink rags, from which it was difficult to remove all colour and had generally been discarded, were now directed to the production of blotters, hence the historically characteristic pink colour of blotters. https://en.wikipedia.org/wiki/Blotting_paper This blotting paper holder and blotting sheets were donated to Flagstaff Hill Maritime Village by the family of Doctor William Roy Angus, Surgeon and Oculist. It is part of the “W.R. Angus Collection” that includes historical medical equipment, surgical instruments and material once belonging to Dr Edward Ryan and Dr Thomas Francis Ryan, (both of Nhill, Victoria) as well as Dr Angus’ own belongings. The Collection’s history spans the medical practices of the two Doctors Ryan, from 1885-1926 plus that of Dr Angus, up until 1969. ABOUT THE “W.R.ANGUS COLLECTION” Doctor William Roy Angus M.B., B.S., Adel., 1923, F.R.C.S. Edin.,1928 (also known as Dr Roy Angus) was born in Murrumbeena, Victoria in 1901 and lived until 1970. He qualified as a doctor in 1923 at University of Adelaide, was Resident Medical Officer at the Royal Adelaide Hospital in 1924 and for a period was house surgeon to Sir (then Mr.) Henry Simpson Newland. Dr Angus was briefly an Assistant to Dr Riddell of Kapunda, then commenced private practice at Curramulka, Yorke Peninsula, SA, where he was physician, surgeon and chemist. In 1926, he was appointed as new Medical Assistant to Dr Thomas Francis Ryan (T.F. Ryan, or Tom), in Nhill, Victoria, where his experiences included radiology and pharmacy. In 1927 he was Acting House Surgeon in Dr Tom Ryan’s absence. Dr Angus had become engaged to Gladys Forsyth and they decided he further his studies overseas in the UK in 1927. He studied at London University College Hospital and at Edinburgh Royal Infirmary and in 1928, was awarded FRCS (Fellow from the Royal College of Surgeons), Edinburgh. He worked his passage back to Australia as a Ship’s Surgeon on the on the Australian Commonwealth Line’s T.S.S. Largs Bay. Dr Angus married Gladys in 1929, in Ballarat. (They went on to have one son (Graham 1932, born in SA) and two daughters (Helen (died 12/07/1996) and Berenice (Berry), both born at Mira, Nhill ) According to Berry, her mother Gladys made a lot of their clothes. She was very talented and did some lovely embroidery including lingerie for her trousseau and beautifully handmade baby clothes. Dr Angus was a ‘flying doctor’ for the A.I.M. (Australian Inland Ministry) Aerial Medical Service in 1928 . Its first station was in the remote town of Oodnadatta, where Dr Angus was stationed. He was locum tenens there on North-South Railway at 21 Mile Camp. He took up this ‘flying doctor’ position in response to a call from Dr John Flynn; the organisation was later known as the Flying Doctor Service, then the Royal Flying Doctor Service. A lot of his work during this time involved dental surgery also. Between 1928-1932 he was surgeon at the Curramulka Hospital, Yorke Peninsula, South Australia. In 1933 Dr Angus returned to Nhill and purchased a share of the Nelson Street practice and Mira hospital (a 2 bed ward at the Nelson Street Practice) from Dr Les Middleton one of the Middleton Brothers, the current owners of what previously once Dr Tom Ryan’s practice. Dr Tom and his brother had worked as surgeons included eye surgery. Dr Tom Ryan performed many of his operations in the Mira private hospital on his premises. He had been House Surgeon at the Nhill Hospital 1902-1926. Dr Tom Ryan had one of the only two pieces of radiology equipment in Victoria during his practicing years – The Royal Melbourne Hospital had the other one. Over the years Dr Tom Ryan had gradually set up what was effectively a training school for country general-practitioner-surgeons. Each patient was carefully examined, including using the X-ray machine, and any surgery was discussed and planned with Dr Ryan’s assistants several days in advance. Dr Angus gained experience in using the X-ray machine there during his time as assistant to Dr Ryan. When Dr Angus bought into the Nelson Street premises in Nhill he was also appointed as the Nhill Hospital’s Honorary House Surgeon 1933-1938. His practitioner’s plate from his Nhill surgery is now mounted on the doorway to the Port Medical Office at Flagstaff Hill Maritime Village, Warrnambool. When Dr Angus took up practice in the Dr Edward and Dr Tom Ryan’s old premises he obtained their extensive collection of historical medical equipment and materials spanning 1884-1926. A large part of this collection is now on display at the Port Medical Office at Flagstaff Hill Maritime Village in Warrnambool. In 1939 Dr Angus and his family moved to Warrnambool where he purchased “Birchwood,” the 1852 home and medical practice of Dr John Hunter Henderson, at 214 Koroit Street. (This property was sold in1965 to the State Government and is now the site of the Warrnambool Police Station. and an ALDI sore is on the land that was once their tennis court). The Angus family was able to afford gardeners, cooks and maids; their home was a popular place for visiting dignitaries to stay whilst visiting Warrnambool. Dr Angus had his own silk worm farm at home in a Mulberry tree. His young daughter used his centrifuge for spinning the silk. Dr Angus was appointed on a part-time basis as Port Medical Officer (Health Officer) in Warrnambool and held this position until the 1940’s when the government no longer required the service of a Port Medical Officer in Warrnambool; he was thus Warrnambool’s last serving Port Medical Officer. (Masters of immigrant ships arriving in port reported incidents of diseases, illness and death and the Port Medical Officer made a decision on whether the ship required Quarantine and for how long, in this way preventing contagious illness from spreading from new immigrants to the residents already in the colony.) Dr Angus was a member of the Australian Medical Association, for 35 years and surgeon at the Warrnambool Base Hospital 1939-1942, He served as a Surgeon Captain during WWII 1942-45, in Ballarat, Victoria, and in Bonegilla, N.S.W., completing his service just before the end of the war due to suffering from a heart attack. During his convalescence he carved an intricate and ‘most artistic’ chess set from the material that dentures were made from. He then studied ophthalmology at the Royal Melbourne Eye and Ear Hospital and created cosmetically superior artificial eyes by pioneering using the intrascleral cartilage. Angus received accolades from the Ophthalmological Society of Australasia for this work. He returned to Warrnambool to commence practice as an ophthalmologist, pioneering in artificial eye improvements. He was Honorary Consultant Ophthalmologist to Warrnambool Base Hospital for 31 years. He made monthly visits to Portland as a visiting surgeon, to perform eye surgery. He represented the Victorian South-West subdivision of the Australian Medical Association as its secretary between 1949 and 1956 and as chairman from 1956 to 1958. In 1968 Dr Angus was elected member of Spain’s Barraquer Institute of Barcelona after his research work in Intrasclearal cartilage grafting, becoming one of the few Australian ophthalmologists to receive this honour, and in the following year presented his final paper on Living Intrasclearal Cartilage Implants at the Inaugural Meeting of the Australian College of Ophthalmologists in Melbourne In his personal life Dr Angus was a Presbyterian and treated Sunday as a Sabbath, a day of rest. He would visit 3 or 4 country patients on a Sunday, taking his children along ‘for the ride’ and to visit with him. Sunday evenings he would play the pianola and sing Scottish songs to his family. One of Dr Angus’ patients was Margaret MacKenzie, author of a book on local shipwrecks that she’d seen as an eye witness from the late 1880’s in Peterborough, Victoria. In the early 1950’s Dr Angus, painted a picture of a shipwreck for the cover jacket of Margaret’s book, Shipwrecks and More Shipwrecks. She was blind in later life and her daughter wrote the actual book for her. Dr Angus and his wife Gladys were very involved in Warrnambool’s society with a strong interest in civic affairs. He had an interest in people and the community They were both involved in the creation of Flagstaff Hill, including the layout of the gardens. After his death (28th March 1970) his family requested his practitioner’s plate, medical instruments and some personal belongings be displayed in the Port Medical Office surgery at Flagstaff Hill Maritime Village, and be called the “W. R. Angus Collection”. The W.R. Angus Collection is significant for still being located at the site it is connected with, Doctor Angus being the last Port Medical Officer in Warrnambool. The collection of medical instruments and other equipment is culturally significant, being an historical example of medicine and administration from late 19th to mid-20th century. Dr Angus assisted Dr Tom Ryan, a pioneer in the use of X-rays and in ocular surgery. Blotting paper holder, part of the W.R. Angus Collection. Wooden rocking blotting paper holder, arc-shaped with handle and blotting paper inserted in slots (paper is used). Two books of blotting paper sheets, (1) advertising printed on cover. “ACIBAN ANTACID”, “G.P. PTY LTD / Sydney Australia” (2) Folder of blotting paper, with advertising “AMPHOTABS” and “WYETH”“ACIBAN ANTACID”, “G.P. PTY LTD / Sydney Australia” “AMPHOTABS” and “WYETH” flagstaff hill, warrnambool, shipwrecked coast, flagstaff hill maritime museum, maritime museum, shipwreck coast, flagstaff hill maritime village, great ocean road, dr w r angus, dr ryan, surgical instrument, t.s.s. largs bay, warrnambool base hospital, nhill base hospital, mira hospital, flying doctor, blotting paper holder, office stationery circa 1910, rocking blotting paper holder -
 Flagstaff Hill Maritime Museum and Village
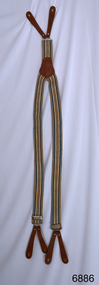
Trouser Braces, c. 1942
... plate from his Nhill surgery is now mounted on the doorway to the Port Medical Office at Flagstaff Hill Maritime Village, Warrnambool. When Dr Angus took up practice in the Dr Edward and Dr Tom Ryan’s old premises he obtained their extensive collection of historical medical equipment and materials spanning 1884-1926. A large...plate from his Nhill surgery is now mounted on the doorway to the Port Medical Office at Flagstaff Hill Maritime Village, Warrnambool. When Dr Angus took up practice in the Dr Edward and Dr Tom Ryan’s old premises he obtained their extensive collection of historical medical equipment and materials spanning 1884-1926. A large ...These adjustable elastic trouser braces with brown leather joiner and button hole straps were manufacturered for the Australian Department of Defence (shown by the symbol in the leather of a Borad Arrow with a "D" on each side). The braces are part of the W.R. Angus Collection and are labelled in pencil "ANGUS". They were worn by Dr Angus during his WW2 service for the Australian Department of Defence as Surgeon Capt. Angus 1942-1945. The braces were donated to Flagstaff Hill Maritime Village by the family of Doctor William Roy Angus, Surgeon and Oculist. It is part of the “W.R. Angus Collection” includes historical medical equipment, surgical instruments and material once belonging to Dr Edward Ryan and Dr Thomas Francis Ryan, (both of Nhill, Victoria) as well as Dr Angus’ own belongings. The Collection’s history spans the medical practices of the two Doctors Ryan, from 1885-1926 plus that of Dr Angus, up until 1969. ABOUT THE “W.R.ANGUS COLLECTION” Doctor William Roy Angus M.B., B.S., Adel., 1923, F.R.C.S. Edin.,1928 (also known as Dr Roy Angus) was born in Murrumbeena, Victoria in 1901 and lived until 1970. He qualified as a doctor in 1923 at University of Adelaide, was Resident Medical Officer at the Royal Adelaide Hospital in 1924 and for a period was house surgeon to Sir (then Mr.) Henry Simpson Newland. Dr Angus was briefly an Assistant to Dr Riddell of Kapunda, then commenced private practice at Curramulka, Yorke Peninsula, SA, where he was physician, surgeon and chemist. In 1926, he was appointed as new Medical Assistant to Dr Thomas Francis Ryan (T.F. Ryan, or Tom), in Nhill, Victoria, where his experiences included radiology and pharmacy. In 1927 he was Acting House Surgeon in Dr Tom Ryan’s absence. Dr Angus had become engaged to Gladys Forsyth and they decided he further his studies overseas in the UK in 1927. He studied at London University College Hospital and at Edinburgh Royal Infirmary and in 1928, was awarded FRCS (Fellow from the Royal College of Surgeons), Edinburgh. He worked his passage back to Australia as a Ship’s Surgeon on the on the Australian Commonwealth Line’s T.S.S. Largs Bay. Dr Angus married Gladys in 1929, in Ballarat. (They went on to have one son (Graham 1932, born in SA) and two daughters (Helen (died 12/07/1996) and Berenice (Berry), both born at Mira, Nhill) According to Berry, her mother Gladys made a lot of their clothes. She was very talented and did some lovely embroidery including lingerie for her trousseau and beautifully handmade baby clothes. Dr Angus was a ‘flying doctor’ for the A.I.M. (Australian Inland Ministry) Aerial Medical Service in 1928 . Its first station was in the remote town of Oodnadatta, where Dr Angus was stationed. He was locum tenens there on North-South Railway at 21 Mile Camp. He took up this ‘flying doctor’ position in response to a call from Dr John Flynn; the organisation was later known as the Flying Doctor Service, then the Royal Flying Doctor Service. A lot of his work during this time involved dental surgery also. Between 1928-1932 he was surgeon at the Curramulka Hospital, Yorke Peninsula, South Australia. In 1933 Dr Angus returned to Nhill and purchased a share of the Nelson Street practice and Mira hospital (a 2 bed ward at the Nelson Street Practice) from Dr Les Middleton one of the Middleton Brothers, the current owners of what previously once Dr Tom Ryan’s practice. Dr Tom and his brother had worked as surgeons included eye surgery. Dr Tom Ryan performed many of his operations in the Mira private hospital on his premises. He had been House Surgeon at the Nhill Hospital 1902-1926. Dr Tom Ryan had one of the only two pieces of radiology equipment in Victoria during his practicing years – The Royal Melbourne Hospital had the other one. Over the years Dr Tom Ryan had gradually set up what was effectively a training school for country general-practitioner-surgeons. Each patient was carefully examined, including using the X-ray machine, and any surgery was discussed and planned with Dr Ryan’s assistants several days in advance. Dr Angus gained experience in using the X-ray machine there during his time as assistant to Dr Ryan. When Dr Angus bought into the Nelson Street premises in Nhill he was also appointed as the Nhill Hospital’s Honorary House Surgeon 1933-1938. His practitioner’s plate from his Nhill surgery is now mounted on the doorway to the Port Medical Office at Flagstaff Hill Maritime Village, Warrnambool. When Dr Angus took up practice in the Dr Edward and Dr Tom Ryan’s old premises he obtained their extensive collection of historical medical equipment and materials spanning 1884-1926. A large part of this collection is now on display at the Port Medical Office at Flagstaff Hill Maritime Village in Warrnambool. In 1939 Dr Angus and his family moved to Warrnambool where he purchased “Birchwood,” the 1852 home and medical practice of Dr John Hunter Henderson, at 214 Koroit Street. (This property was sold in1965 to the State Government and is now the site of the Warrnambool Police Station. and an ALDI sore is on the land that was once their tennis court). The Angus family was able to afford gardeners, cooks and maids; their home was a popular place for visiting dignitaries to stay whilst visiting Warrnambool. Dr Angus had his own silk worm farm at home in a Mulberry tree. His young daughter used his centrifuge for spinning the silk. Dr Angus was appointed on a part-time basis as Port Medical Officer (Health Officer) in Warrnambool and held this position until the 1940’s when the government no longer required the service of a Port Medical Officer in Warrnambool; he was thus Warrnambool’s last serving Port Medical Officer. (Masters of immigrant ships arriving in port reported incidents of diseases, illness and death and the Port Medical Officer made a decision on whether the ship required Quarantine and for how long, in this way preventing contagious illness from spreading from new immigrants to the residents already in the colony.) Dr Angus was a member of the Australian Medical Association, for 35 years and surgeon at the Warrnambool Base Hospital 1939-1942, He served as a Surgeon Captain during WWII1942-45, in Ballarat, Victoria, and in Bonegilla, N.S.W., completing his service just before the end of the war due to suffering from a heart attack. During his convalescence he carved an intricate and ‘most artistic’ chess set from the material that dentures were made from. He then studied ophthalmology at the Royal Melbourne Eye and Ear Hospital and created cosmetically superior artificial eyes by pioneering using the intrascleral cartilage. Angus received accolades from the Ophthalmological Society of Australasia for this work. He returned to Warrnambool to commence practice as an ophthalmologist, pioneering in artificial eye improvements. He was Honorary Consultant Ophthalmologist to Warrnambool Base Hospital for 31 years. He made monthly visits to Portland as a visiting surgeon, to perform eye surgery. He represented the Victorian South-West subdivision of the Australian Medical Association as its secretary between 1949 and 1956 and as chairman from 1956 to 1958. In 1968 Dr Angus was elected member of Spain’s Barraquer Institute of Barcelona after his research work in Intrasclearal cartilage grafting, becoming one of the few Australian ophthalmologists to receive this honour, and in the following year presented his final paper on Living Intrasclearal Cartilage Implants at the Inaugural Meeting of the Australian College of Ophthalmologists in Melbourne In his personal life Dr Angus was a Presbyterian and treated Sunday as a Sabbath, a day of rest. He would visit 3 or 4 country patients on a Sunday, taking his children along ‘for the ride’ and to visit with him. Sunday evenings he would play the pianola and sing Scottish songs to his family. One of Dr Angus’ patients was Margaret MacKenzie, author of a book on local shipwrecks that she’d seen as an eye witness from the late 1880’s in Peterborough, Victoria. In the early 1950’s Dr Angus, painted a picture of a shipwreck for the cover jacket of Margaret’s book, Shipwrecks and More Shipwrecks. She was blind in later life and her daughter wrote the actual book for her. Dr Angus and his wife Gladys were very involved in Warrnambool’s society with a strong interest in civic affairs. He had an interest in people and the community They were both involved in the creation of Flagstaff Hill, including the layout of the gardens. After his death (28th March 1970) his family requested his practitioner’s plate, medical instruments and some personal belongings be displayed in the Port Medical Office surgery at Flagstaff Hill Maritime Village, and be called the “W. R. Angus Collection"The W.R. Angus Collection is significant for still being located at the site it is connected with, Doctor Angus being the last Port Medical Officer in Warrnambool. The collection of medical instruments and other equipment is culturally significant, being an historical example of medicine from late 19th to mid-20th century. Dr Angus assisted Dr Tom Ryan, a pioneer in the use of X-rays and in ocular surgery. Elastic trouser braces with brown leather joiner and button hole straps. Elastic is white with blue and brown stripss, length adjusts with two silver coloured metal clamps with the words Poice and Firemen on them. Pressed into leather joiner are the symbols for the Australian Department of Defence (Borad Arrow with a D on each side). The braces are part of the W.R. Angus Collection and are labelled in pencil "ANGUS". They were worn by Dr Angus during his WW2 service as Surgeon Capt. Angus 1942-1945. Impressed into leather "D [[broad arrow] D / 36", impreseed into metal clamps "POLICE AND FIREMEN" , written in pencil "ANGUS". flagstaff hill, warrnambool, shipwrecked coast, flagstaff hill maritime museum, maritime museum, shipwreck coast, flagstaff hill maritime village, great ocean road, dr w r angus, dr ryan, surgical instrument, t.s.s. largs bay, warrnambool base hospital, nhill base hospital, mira hospital, flying doctor, department of defence australia, australian army, army uniform, braces for trousers, trouser braces, department of defence braces, braces for police and firemen, trouser bracers, elastic braces, braces, bracers -
 Flagstaff Hill Maritime Museum and Village
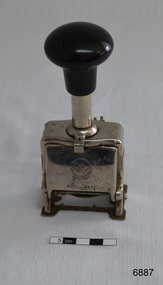
Functional object - Date Stamp, Mid 20th century
... plate from his Nhill surgery is now mounted on the doorway to the Port Medical Office at Flagstaff Hill Maritime Village, Warrnambool. When Dr Angus took up practice in the Dr Edward and Dr Tom Ryan’s old premises he obtained their extensive collection of historical medical equipment and materials spanning 1884-1926. A large...plate from his Nhill surgery is now mounted on the doorway to the Port Medical Office at Flagstaff Hill Maritime Village, Warrnambool. When Dr Angus took up practice in the Dr Edward and Dr Tom Ryan’s old premises he obtained their extensive collection of historical medical equipment and materials spanning 1884-1926. A large ...This hand held, mechanical date stamp, made in mid-20th century by English Numbering Machines Ltd (ENM) in Enfield, England and is part of the stationary items once used by Dr. W.R. Angus in his medical service. ENM was a well know manufacturer of mechanical counters and hand numbering machines, both printing and non-printing, for the stationery industry, offices, sales control and the legal profession. The company was amongst the exhibitors at the Birmingham section of the British Industries Fair, (stand number D 539). This Fair operated annually from the 1920 – 1960 and was attended by royalty and dignitaries as well as the general public. At its peak there were over 1000 exhibitors. This date stamp was donated to Flagstaff Hill Maritime Village by the family of Doctor William Roy Angus, Surgeon and Oculist. It is part of the “W.R. Angus Collection” includes historical medical equipment, surgical instruments and material once belonging to Dr Edward Ryan and Dr Thomas Francis Ryan, (both of Nhill, Victoria) as well as Dr Angus’ own belongings. The Collection’s history spans the medical practices of the two Doctors Ryan, from 1885-1926 plus that of Dr Angus, up until 1969. ABOUT THE “W.R.ANGUS COLLECTION” Doctor William Roy Angus M.B., B.S., Adel., 1923, F.R.C.S. Edin.,1928 (also known as Dr Roy Angus) was born in Murrumbeena, Victoria in 1901 and lived until 1970. He qualified as a doctor in 1923 at University of Adelaide, was Resident Medical Officer at the Royal Adelaide Hospital in 1924 and for a period was house surgeon to Sir (then Mr.) Henry Simpson Newland. Dr Angus was briefly an Assistant to Dr Riddell of Kapunda, then commenced private practice at Curramulka, Yorke Peninsula, SA, where he was physician, surgeon and chemist. In 1926, he was appointed as new Medical Assistant to Dr Thomas Francis Ryan (T.F. Ryan, or Tom), in Nhill, Victoria, where his experiences included radiology and pharmacy. In 1927 he was Acting House Surgeon in Dr Tom Ryan’s absence. Dr Angus had become engaged to Gladys Forsyth and they decided he further his studies overseas in the UK in 1927. He studied at London University College Hospital and at Edinburgh Royal Infirmary and in 1928, was awarded FRCS (Fellow from the Royal College of Surgeons), Edinburgh. He worked his passage back to Australia as a Ship’s Surgeon on the on the Australian Commonwealth Line’s T.S.S. Largs Bay. Dr Angus married Gladys in 1929, in Ballarat. (They went on to have one son (Graham 1932, born in SA) and two daughters (Helen (died 12/07/1996) and Berenice (Berry), both born at Mira, Nhill ) According to Berry, her mother Gladys made a lot of their clothes. She was very talented and did some lovely embroidery including lingerie for her trousseau and beautifully handmade baby clothes. Dr Angus was a ‘flying doctor’ for the A.I.M. (Australian Inland Ministry) Aerial Medical Service in 1928 . Its first station was in the remote town of Oodnadatta, where Dr Angus was stationed. He was locum tenens there on North-South Railway at 21 Mile Camp. He took up this ‘flying doctor’ position in response to a call from Dr John Flynn; the organisation was later known as the Flying Doctor Service, then the Royal Flying Doctor Service. A lot of his work during this time involved dental surgery also. Between 1928-1932 he was surgeon at the Curramulka Hospital, Yorke Peninsula, South Australia. In 1933 Dr Angus returned to Nhill and purchased a share of the Nelson Street practice and Mira hospital (a 2 bed ward at the Nelson Street Practice) from Dr Les Middleton one of the Middleton Brothers, the current owners of what previously once Dr Tom Ryan’s practice. Dr Tom and his brother had worked as surgeons included eye surgery. Dr Tom Ryan performed many of his operations in the Mira private hospital on his premises. He had been House Surgeon at the Nhill Hospital 1902-1926. Dr Tom Ryan had one of the only two pieces of radiology equipment in Victoria during his practicing years – The Royal Melbourne Hospital had the other one. Over the years Dr Tom Ryan had gradually set up what was effectively a training school for country general-practitioner-surgeons. Each patient was carefully examined, including using the X-ray machine, and any surgery was discussed and planned with Dr Ryan’s assistants several days in advance. Dr Angus gained experience in using the X-ray machine there during his time as assistant to Dr Ryan. When Dr Angus bought into the Nelson Street premises in Nhill he was also appointed as the Nhill Hospital’s Honorary House Surgeon 1933-1938. His practitioner’s plate from his Nhill surgery is now mounted on the doorway to the Port Medical Office at Flagstaff Hill Maritime Village, Warrnambool. When Dr Angus took up practice in the Dr Edward and Dr Tom Ryan’s old premises he obtained their extensive collection of historical medical equipment and materials spanning 1884-1926. A large part of this collection is now on display at the Port Medical Office at Flagstaff Hill Maritime Village in Warrnambool. In 1939 Dr Angus and his family moved to Warrnambool where he purchased “Birchwood,” the 1852 home and medical practice of Dr John Hunter Henderson, at 214 Koroit Street. (This property was sold in1965 to the State Government and is now the site of the Warrnambool Police Station. and an ALDI sore is on the land that was once their tennis court). The Angus family was able to afford gardeners, cooks and maids; their home was a popular place for visiting dignitaries to stay whilst visiting Warrnambool. Dr Angus had his own silk worm farm at home in a Mulberry tree. His young daughter used his centrifuge for spinning the silk. Dr Angus was appointed on a part-time basis as Port Medical Officer (Health Officer) in Warrnambool and held this position until the 1940’s when the government no longer required the service of a Port Medical Officer in Warrnambool; he was thus Warrnambool’s last serving Port Medical Officer. (Masters of immigrant ships arriving in port reported incidents of diseases, illness and death and the Port Medical Officer made a decision on whether the ship required Quarantine and for how long, in this way preventing contagious illness from spreading from new immigrants to the residents already in the colony.) Dr Angus was a member of the Australian Medical Association, for 35 years and surgeon at the Warrnambool Base Hospital 1939-1942, He served with the Australian Department of Defence as a Surgeon Captain during WWII 1942-45, in Ballarat, Victoria, and in Bonegilla, N.S.W., completing his service just before the end of the war due to suffering from a heart attack. During his convalescence he carved an intricate and ‘most artistic’ chess set from the material that dentures were made from. He then studied ophthalmology at the Royal Melbourne Eye and Ear Hospital and created cosmetically superior artificial eyes by pioneering using the intrascleral cartilage. Angus received accolades from the Ophthalmological Society of Australasia for this work. He returned to Warrnambool to commence practice as an ophthalmologist, pioneering in artificial eye improvements. He was Honorary Consultant Ophthalmologist to Warrnambool Base Hospital for 31 years. He made monthly visits to Portland as a visiting surgeon, to perform eye surgery. He represented the Victorian South-West subdivision of the Australian Medical Association as its secretary between 1949 and 1956 and as chairman from 1956 to 1958. In 1968 Dr Angus was elected member of Spain’s Barraquer Institute of Barcelona after his research work in Intrasclearal cartilage grafting, becoming one of the few Australian ophthalmologists to receive this honour, and in the following year presented his final paper on Living Intrasclearal Cartilage Implants at the Inaugural Meeting of the Australian College of Ophthalmologists in Melbourne In his personal life Dr Angus was a Presbyterian and treated Sunday as a Sabbath, a day of rest. He would visit 3 or 4 country patients on a Sunday, taking his children along ‘for the ride’ and to visit with him. Sunday evenings he would play the pianola and sing Scottish songs to his family. One of Dr Angus’ patients was Margaret MacKenzie, author of a book on local shipwrecks that she’d seen as an eye witness from the late 1880’s in Peterborough, Victoria. In the early 1950’s Dr Angus, painted a picture of a shipwreck for the cover jacket of Margaret’s book, Shipwrecks and More Shipwrecks. She was blind in later life and her daughter wrote the actual book for her. Dr Angus and his wife Gladys were very involved in Warrnambool’s society with a strong interest in civic affairs. He had an interest in people and the community They were both involved in the creation of Flagstaff Hill, including the layout of the gardens. After his death (28th March 1970) his family requested his practitioner’s plate, medical instruments and some personal belongings be displayed in the Port Medical Office surgery at Flagstaff Hill Maritime Village, and be called the “W. R. Angus Collection”. The W.R. Angus Collection is significant for still being located at the site it is connected with, Doctor Angus being the last Port Medical Officer in Warrnambool. The collection of medical instruments and other equipment is culturally significant, being an historical example of medicine from late 19th to mid-20th century. Dr Angus assisted Dr Tom Ryan, a pioneer in the use of X-rays and in ocular surgery. Metal date stamp with Bakelite handle, made in Britain by English Numbering Machines. Model No. 4531; part of the W.R. Angus Collection. Stamped on metal: “ENM / British made / Model 4531” flagstaff hill, warrnambool, shipwrecked coast, flagstaff hill maritime museum, maritime museum, shipwreck coast, flagstaff hill maritime village, great ocean road, dr w r angus, dr ryan, surgical instrument, t.s.s. largs bay, warrnambool base hospital, nhill base hospital, mira hospital, flying doctor, date stamp, office stationery, mechanical date stamp, enm date stamp, english numbering machines, enm model 4531 -
 Flagstaff Hill Maritime Museum and Village
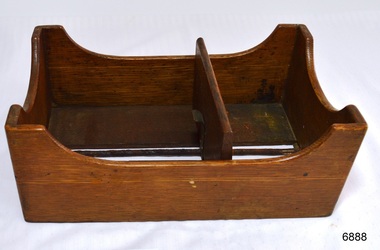
File Box, early to mid 20th century
... plate from his Nhill surgery is now mounted on the doorway to the Port Medical Office at Flagstaff Hill Maritime Village, Warrnambool. When Dr Angus took up practice in the Dr Edward and Dr Tom Ryan’s old premises he obtained their extensive collection of historical medical equipment and materials spanning 1884-1926. A large...plate from his Nhill surgery is now mounted on the doorway to the Port Medical Office at Flagstaff Hill Maritime Village, Warrnambool. When Dr Angus took up practice in the Dr Edward and Dr Tom Ryan’s old premises he obtained their extensive collection of historical medical equipment and materials spanning 1884-1926. A large ...This file box was used by Dr Angus in his medical office. It was donated to Flagstaff Hill Maritime Village by the family of Doctor William Roy Angus, Surgeon and Oculist. It is part of the “W.R. Angus Collection” includes historical medical equipment, surgical instruments and material once belonging to Dr Edward Ryan and Dr Thomas Francis Ryan, (both of Nhill, Victoria) as well as Dr Angus’ own belongings. The Collection’s history spans the medical practices of the two Doctors Ryan, from 1885-1926 plus that of Dr Angus, up until 1969. ABOUT THE “W.R.ANGUS COLLECTION” Doctor William Roy Angus M.B., B.S., Adel., 1923, F.R.C.S. Edin.,1928 (also known as Dr Roy Angus) was born in Murrumbeena, Victoria in 1901 and lived until 1970. He qualified as a doctor in 1923 at University of Adelaide, was Resident Medical Officer at the Royal Adelaide Hospital in 1924 and for a period was house surgeon to Sir (then Mr.) Henry Simpson Newland. Dr Angus was briefly an Assistant to Dr Riddell of Kapunda, then commenced private practice at Curramulka, Yorke Peninsula, SA, where he was physician, surgeon and chemist. In 1926, he was appointed as new Medical Assistant to Dr Thomas Francis Ryan (T.F. Ryan, or Tom), in Nhill, Victoria, where his experiences included radiology and pharmacy. In 1927 he was Acting House Surgeon in Dr Tom Ryan’s absence. Dr Angus had become engaged to Gladys Forsyth and they decided he further his studies overseas in the UK in 1927. He studied at London University College Hospital and at Edinburgh Royal Infirmary and in 1928, was awarded FRCS (Fellow from the Royal College of Surgeons), Edinburgh. He worked his passage back to Australia as a Ship’s Surgeon on the on the Australian Commonwealth Line’s T.S.S. Largs Bay. Dr Angus married Gladys in 1929, in Ballarat. (They went on to have one son (Graham 1932, born in SA) and two daughters (Helen (died 12/07/1996) and Berenice (Berry), both born at Mira, Nhill ) According to Berry, her mother Gladys made a lot of their clothes. She was very talented and did some lovely embroidery including lingerie for her trousseau and beautifully handmade baby clothes. Dr Angus was a ‘flying doctor’ for the A.I.M. (Australian Inland Ministry) Aerial Medical Service in 1928 . Its first station was in the remote town of Oodnadatta, where Dr Angus was stationed. He was locum tenens there on North-South Railway at 21 Mile Camp. He took up this ‘flying doctor’ position in response to a call from Dr John Flynn; the organisation was later known as the Flying Doctor Service, then the Royal Flying Doctor Service. A lot of his work during this time involved dental surgery also. Between 1928-1932 he was surgeon at the Curramulka Hospital, Yorke Peninsula, South Australia. In 1933 Dr Angus returned to Nhill and purchased a share of the Nelson Street practice and Mira hospital (a 2 bed ward at the Nelson Street Practice) from Dr Les Middleton one of the Middleton Brothers, the current owners of what previously once Dr Tom Ryan’s practice. Dr Tom and his brother had worked as surgeons included eye surgery. Dr Tom Ryan performed many of his operations in the Mira private hospital on his premises. He had been House Surgeon at the Nhill Hospital 1902-1926. Dr Tom Ryan had one of the only two pieces of radiology equipment in Victoria during his practicing years – The Royal Melbourne Hospital had the other one. Over the years Dr Tom Ryan had gradually set up what was effectively a training school for country general-practitioner-surgeons. Each patient was carefully examined, including using the X-ray machine, and any surgery was discussed and planned with Dr Ryan’s assistants several days in advance. Dr Angus gained experience in using the X-ray machine there during his time as assistant to Dr Ryan. When Dr Angus bought into the Nelson Street premises in Nhill he was also appointed as the Nhill Hospital’s Honorary House Surgeon 1933-1938. His practitioner’s plate from his Nhill surgery is now mounted on the doorway to the Port Medical Office at Flagstaff Hill Maritime Village, Warrnambool. When Dr Angus took up practice in the Dr Edward and Dr Tom Ryan’s old premises he obtained their extensive collection of historical medical equipment and materials spanning 1884-1926. A large part of this collection is now on display at the Port Medical Office at Flagstaff Hill Maritime Village in Warrnambool. In 1939 Dr Angus and his family moved to Warrnambool where he purchased “Birchwood,” the 1852 home and medical practice of Dr John Hunter Henderson, at 214 Koroit Street. (This property was sold in1965 to the State Government and is now the site of the Warrnambool Police Station. and an ALDI sore is on the land that was once their tennis court). The Angus family was able to afford gardeners, cooks and maids; their home was a popular place for visiting dignitaries to stay whilst visiting Warrnambool. Dr Angus had his own silk worm farm at home in a Mulberry tree. His young daughter used his centrifuge for spinning the silk. Dr Angus was appointed on a part-time basis as Port Medical Officer (Health Officer) in Warrnambool and held this position until the 1940’s when the government no longer required the service of a Port Medical Officer in Warrnambool; he was thus Warrnambool’s last serving Port Medical Officer. (Masters of immigrant ships arriving in port reported incidents of diseases, illness and death and the Port Medical Officer made a decision on whether the ship required Quarantine and for how long, in this way preventing contagious illness from spreading from new immigrants to the residents already in the colony.) Dr Angus was a member of the Australian Medical Association, for 35 years and surgeon at the Warrnambool Base Hospital 1939-1942, He served with the Australian Department of Defence as a Surgeon Captain during WWII 1942-45, in Ballarat, Victoria, and in Bonegilla, N.S.W., completing his service just before the end of the war due to suffering from a heart attack. During his convalescence he carved an intricate and ‘most artistic’ chess set from the material that dentures were made from. He then studied ophthalmology at the Royal Melbourne Eye and Ear Hospital and created cosmetically superior artificial eyes by pioneering using the intrascleral cartilage. Angus received accolades from the Ophthalmological Society of Australasia for this work. He returned to Warrnambool to commence practice as an ophthalmologist, pioneering in artificial eye improvements. He was Honorary Consultant Ophthalmologist to Warrnambool Base Hospital for 31 years. He made monthly visits to Portland as a visiting surgeon, to perform eye surgery. He represented the Victorian South-West subdivision of the Australian Medical Association as its secretary between 1949 and 1956 and as chairman from 1956 to 1958. In 1968 Dr Angus was elected member of Spain’s Barraquer Institute of Barcelona after his research work in Intrasclearal cartilage grafting, becoming one of the few Australian ophthalmologists to receive this honour, and in the following year presented his final paper on Living Intrasclearal Cartilage Implants at the Inaugural Meeting of the Australian College of Ophthalmologists in Melbourne In his personal life Dr Angus was a Presbyterian and treated Sunday as a Sabbath, a day of rest. He would visit 3 or 4 country patients on a Sunday, taking his children along ‘for the ride’ and to visit with him. Sunday evenings he would play the pianola and sing Scottish songs to his family. One of Dr Angus’ patients was Margaret MacKenzie, author of a book on local shipwrecks that she’d seen as an eye witness from the late 1880’s in Peterborough, Victoria. In the early 1950’s Dr Angus, painted a picture of a shipwreck for the cover jacket of Margaret’s book, Shipwrecks and More Shipwrecks. She was blind in later life and her daughter wrote the actual book for her. Dr Angus and his wife Gladys were very involved in Warrnambool’s society with a strong interest in civic affairs. He had an interest in people and the community They were both involved in the creation of Flagstaff Hill, including the layout of the gardens. After his death (28th March 1970) his family requested his practitioner’s plate, medical instruments and some personal belongings be displayed in the Port Medical Office surgery at Flagstaff Hill Maritime Village, and be called the “W. R. Angus Collection”. The W.R. Angus Collection is significant for still being located at the site it is connected with, Doctor Angus being the last Port Medical Officer in Warrnambool. The collection of medical instruments and other equipment is culturally significant, being an historical example of medicine from late 19th to mid-20th century. Dr Angus assisted Dr Tom Ryan, a pioneer in the use of X-rays and in ocular surgery. Wooden file box, part of the W.R. Angus Collection. Wood is varnished, with inserted sliding divider ( 9 x 15 cm) on metal rail. Sides of box have curved shape. flagstaff hill, warrnambool, shipwrecked coast, flagstaff hill maritime museum, maritime museum, shipwreck coast, flagstaff hill maritime village, great ocean road, dr w r angus, dr ryan, surgical instrument, t.s.s. largs bay, warrnambool base hospital, nhill base hospital, mira hospital, flying doctor, file box, office stationery, filing system -
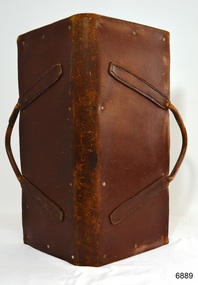 Flagstaff Hill Maritime Museum and Village
File System, 20th century
... plate from his Nhill surgery is now mounted on the doorway to the Port Medical Office at Flagstaff Hill Maritime Village, Warrnambool. When Dr Angus took up practice in the Dr Edward and Dr Tom Ryan’s old premises he obtained their extensive collection of historical medical equipment and materials spanning 1884-1926. A large...plate from his Nhill surgery is now mounted on the doorway to the Port Medical Office at Flagstaff Hill Maritime Village, Warrnambool. When Dr Angus took up practice in the Dr Edward and Dr Tom Ryan’s old premises he obtained their extensive collection of historical medical equipment and materials spanning 1884-1926. A large ...This portable filing system was used by Dr Angus in his medical surgery. It was donated to Flagstaff Hill Maritime Village by the family of Doctor William Roy Angus, Surgeon and Oculist. It is part of the “W.R. Angus Collection” includes historical medical equipment, surgical instruments and material once belonging to Dr Edward Ryan and Dr Thomas Francis Ryan, (both of Nhill, Victoria) as well as Dr Angus’ own belongings. The Collection’s history spans the medical practices of the two Doctors Ryan, from 1885-1926 plus that of Dr Angus, up until 1969. ABOUT THE “W.R.ANGUS COLLECTION” Doctor William Roy Angus M.B., B.S., Adel., 1923, F.R.C.S. Edin.,1928 (also known as Dr Roy Angus) was born in Murrumbeena, Victoria in 1901 and lived until 1970. He qualified as a doctor in 1923 at University of Adelaide, was Resident Medical Officer at the Royal Adelaide Hospital in 1924 and for a period was house surgeon to Sir (then Mr.) Henry Simpson Newland. Dr Angus was briefly an Assistant to Dr Riddell of Kapunda, then commenced private practice at Curramulka, Yorke Peninsula, SA, where he was physician, surgeon and chemist. In 1926, he was appointed as new Medical Assistant to Dr Thomas Francis Ryan (T.F. Ryan, or Tom), in Nhill, Victoria, where his experiences included radiology and pharmacy. In 1927 he was Acting House Surgeon in Dr Tom Ryan’s absence. Dr Angus had become engaged to Gladys Forsyth and they decided he further his studies overseas in the UK in 1927. He studied at London University College Hospital and at Edinburgh Royal Infirmary and in 1928, was awarded FRCS (Fellow from the Royal College of Surgeons), Edinburgh. He worked his passage back to Australia as a Ship’s Surgeon on the on the Australian Commonwealth Line’s T.S.S. Largs Bay. Dr Angus married Gladys in 1929, in Ballarat. (They went on to have one son (Graham 1932, born in SA) and two daughters (Helen (died 12/07/1996) and Berenice (Berry), both born at Mira, Nhill ) According to Berry, her mother Gladys made a lot of their clothes. She was very talented and did some lovely embroidery including lingerie for her trousseau and beautifully handmade baby clothes. Dr Angus was a ‘flying doctor’ for the A.I.M. (Australian Inland Ministry) Aerial Medical Service in 1928 . Its first station was in the remote town of Oodnadatta, where Dr Angus was stationed. He was locum tenens there on North-South Railway at 21 Mile Camp. He took up this ‘flying doctor’ position in response to a call from Dr John Flynn; the organisation was later known as the Flying Doctor Service, then the Royal Flying Doctor Service. A lot of his work during this time involved dental surgery also. Between 1928-1932 he was surgeon at the Curramulka Hospital, Yorke Peninsula, South Australia. In 1933 Dr Angus returned to Nhill and purchased a share of the Nelson Street practice and Mira hospital (a 2 bed ward at the Nelson Street Practice) from Dr Les Middleton one of the Middleton Brothers, the current owners of what previously once Dr Tom Ryan’s practice. Dr Tom and his brother had worked as surgeons included eye surgery. Dr Tom Ryan performed many of his operations in the Mira private hospital on his premises. He had been House Surgeon at the Nhill Hospital 1902-1926. Dr Tom Ryan had one of the only two pieces of radiology equipment in Victoria during his practicing years – The Royal Melbourne Hospital had the other one. Over the years Dr Tom Ryan had gradually set up what was effectively a training school for country general-practitioner-surgeons. Each patient was carefully examined, including using the X-ray machine, and any surgery was discussed and planned with Dr Ryan’s assistants several days in advance. Dr Angus gained experience in using the X-ray machine there during his time as assistant to Dr Ryan. When Dr Angus bought into the Nelson Street premises in Nhill he was also appointed as the Nhill Hospital’s Honorary House Surgeon 1933-1938. His practitioner’s plate from his Nhill surgery is now mounted on the doorway to the Port Medical Office at Flagstaff Hill Maritime Village, Warrnambool. When Dr Angus took up practice in the Dr Edward and Dr Tom Ryan’s old premises he obtained their extensive collection of historical medical equipment and materials spanning 1884-1926. A large part of this collection is now on display at the Port Medical Office at Flagstaff Hill Maritime Village in Warrnambool. In 1939 Dr Angus and his family moved to Warrnambool where he purchased “Birchwood,” the 1852 home and medical practice of Dr John Hunter Henderson, at 214 Koroit Street. (This property was sold in1965 to the State Government and is now the site of the Warrnambool Police Station. and an ALDI sore is on the land that was once their tennis court). The Angus family was able to afford gardeners, cooks and maids; their home was a popular place for visiting dignitaries to stay whilst visiting Warrnambool. Dr Angus had his own silk worm farm at home in a Mulberry tree. His young daughter used his centrifuge for spinning the silk. Dr Angus was appointed on a part-time basis as Port Medical Officer (Health Officer) in Warrnambool and held this position until the 1940’s when the government no longer required the service of a Port Medical Officer in Warrnambool; he was thus Warrnambool’s last serving Port Medical Officer. (Masters of immigrant ships arriving in port reported incidents of diseases, illness and death and the Port Medical Officer made a decision on whether the ship required Quarantine and for how long, in this way preventing contagious illness from spreading from new immigrants to the residents already in the colony.) Dr Angus was a member of the Australian Medical Association, for 35 years and surgeon at the Warrnambool Base Hospital 1939-1942, He served with the Australian Department of Defence as a Surgeon Captain during WWII 1942-45, in Ballarat, Victoria, and in Bonegilla, N.S.W., completing his service just before the end of the war due to suffering from a heart attack. During his convalescence he carved an intricate and ‘most artistic’ chess set from the material that dentures were made from. He then studied ophthalmology at the Royal Melbourne Eye and Ear Hospital and created cosmetically superior artificial eyes by pioneering using the intrascleral cartilage. Angus received accolades from the Ophthalmological Society of Australasia for this work. He returned to Warrnambool to commence practice as an ophthalmologist, pioneering in artificial eye improvements. He was Honorary Consultant Ophthalmologist to Warrnambool Base Hospital for 31 years. He made monthly visits to Portland as a visiting surgeon, to perform eye surgery. He represented the Victorian South-West subdivision of the Australian Medical Association as its secretary between 1949 and 1956 and as chairman from 1956 to 1958. In 1968 Dr Angus was elected member of Spain’s Barraquer Institute of Barcelona after his research work in Intrasclearal cartilage grafting, becoming one of the few Australian ophthalmologists to receive this honour, and in the following year presented his final paper on Living Intrasclearal Cartilage Implants at the Inaugural Meeting of the Australian College of Ophthalmologists in Melbourne In his personal life Dr Angus was a Presbyterian and treated Sunday as a Sabbath, a day of rest. He would visit 3 or 4 country patients on a Sunday, taking his children along ‘for the ride’ and to visit with him. Sunday evenings he would play the pianola and sing Scottish songs to his family. One of Dr Angus’ patients was Margaret MacKenzie, author of a book on local shipwrecks that she’d seen as an eye witness from the late 1880’s in Peterborough, Victoria. In the early 1950’s Dr Angus, painted a picture of a shipwreck for the cover jacket of Margaret’s book, Shipwrecks and More Shipwrecks. She was blind in later life and her daughter wrote the actual book for her. Dr Angus and his wife Gladys were very involved in Warrnambool’s society with a strong interest in civic affairs. He had an interest in people and the community They were both involved in the creation of Flagstaff Hill, including the layout of the gardens. After his death (28th March 1970) his family requested his practitioner’s plate, medical instruments and some personal belongings be displayed in the Port Medical Office surgery at Flagstaff Hill Maritime Village, and be called the “W. R. Angus Collection”. The W.R. Angus Collection is significant for still being located at the site it is connected with, Doctor Angus being the last Port Medical Officer in Warrnambool. The collection of medical instruments and other equipment is culturally significant, being an historical example of medicine from late 19th to mid-20th century. Dr Angus assisted Dr Tom Ryan, a pioneer in the use of X-rays and in ocular surgery. Portable leather covered filing system with handles. opens like a book; part of the W.R. Angus Collection. File system is lined with metal sides inside, rivetted onto leather. Flip-up card holders are inserted into metal on both sides; cards have reinforced lower edge and slots for inserting index card. Embossed in gold lettering each side “ Manufactured by by Brownbuilt in Clifton Hill, Melbourne, Australia. Card size 8 x 5 (inches).Tracydex / Visible Record” and “BROWNBUILT / E.T. BROWN Limited Clifton Hill Melb, - - - Equipment”flagstaff hill, warrnambool, shipwrecked coast, flagstaff hill maritime museum, maritime museum, shipwreck coast, flagstaff hill maritime village, great ocean road, dr w r angus, dr ryan, surgical instrument, t.s.s. largs bay, warrnambool base hospital, nhill base hospital, mira hospital, flying doctor, filing system, portable filing system, office equipment -
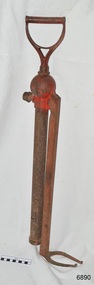 Flagstaff Hill Maritime Museum and Village
Fire Pump, 20th century
... plate from his Nhill surgery is now mounted on the doorway to the Port Medical Office at Flagstaff Hill Maritime Village, Warrnambool. When Dr Angus took up practice in the Dr Edward and Dr Tom Ryan’s old premises he obtained their extensive collection of historical medical equipment and materials spanning 1884-1926. A large...plate from his Nhill surgery is now mounted on the doorway to the Port Medical Office at Flagstaff Hill Maritime Village, Warrnambool. When Dr Angus took up practice in the Dr Edward and Dr Tom Ryan’s old premises he obtained their extensive collection of historical medical equipment and materials spanning 1884-1926. A large ...This water pump was owned by Dr. W.R. Angus AND was donated to Flagstaff Hill Maritime Village by the family of Doctor William Roy Angus, Surgeon and Oculist. It is part of the “W.R. Angus Collection” includes historical medical equipment, surgical instruments and material once belonging to Dr Edward Ryan and Dr Thomas Francis Ryan, (both of Nhill, Victoria) as well as Dr Angus’ own belongings. The Collection’s history spans the medical practices of the two Doctors Ryan, from 1885-1926 plus that of Dr Angus, up until 1969. ABOUT THE “W.R.ANGUS COLLECTION” Doctor William Roy Angus M.B., B.S., Adel., 1923, F.R.C.S. Edin.,1928 (also known as Dr Roy Angus) was born in Murrumbeena, Victoria in 1901 and lived until 1970. He qualified as a doctor in 1923 at University of Adelaide, was Resident Medical Officer at the Royal Adelaide Hospital in 1924 and for a period was house surgeon to Sir (then Mr.) Henry Simpson Newland. Dr Angus was briefly an Assistant to Dr Riddell of Kapunda, then commenced private practice at Curramulka, Yorke Peninsula, SA, where he was physician, surgeon and chemist. In 1926, he was appointed as new Medical Assistant to Dr Thomas Francis Ryan (T.F. Ryan, or Tom), in Nhill, Victoria, where his experiences included radiology and pharmacy. In 1927 he was Acting House Surgeon in Dr Tom Ryan’s absence. Dr Angus had become engaged to Gladys Forsyth and they decided he further his studies overseas in the UK in 1927. He studied at London University College Hospital and at Edinburgh Royal Infirmary and in 1928, was awarded FRCS (Fellow from the Royal College of Surgeons), Edinburgh. He worked his passage back to Australia as a Ship’s Surgeon on the on the Australian Commonwealth Line’s T.S.S. Largs Bay. Dr Angus married Gladys in 1929, in Ballarat. (They went on to have one son (Graham 1932, born in SA) and two daughters (Helen (died 12/07/1996) and Berenice (Berry), both born at Mira, Nhill ) According to Berry, her mother Gladys made a lot of their clothes. She was very talented and did some lovely embroidery including lingerie for her trousseau and beautifully handmade baby clothes. Dr Angus was a ‘flying doctor’ for the A.I.M. (Australian Inland Ministry) Aerial Medical Service in 1928 . Its first station was in the remote town of Oodnadatta, where Dr Angus was stationed. He was locum tenens there on North-South Railway at 21 Mile Camp. He took up this ‘flying doctor’ position in response to a call from Dr John Flynn; the organisation was later known as the Flying Doctor Service, then the Royal Flying Doctor Service. A lot of his work during this time involved dental surgery also. Between 1928-1932 he was surgeon at the Curramulka Hospital, Yorke Peninsula, South Australia. In 1933 Dr Angus returned to Nhill and purchased a share of the Nelson Street practice and Mira hospital (a 2 bed ward at the Nelson Street Practice) from Dr Les Middleton one of the Middleton Brothers, the current owners of what previously once Dr Tom Ryan’s practice. Dr Tom and his brother had worked as surgeons included eye surgery. Dr Tom Ryan performed many of his operations in the Mira private hospital on his premises. He had been House Surgeon at the Nhill Hospital 1902-1926. Dr Tom Ryan had one of the only two pieces of radiology equipment in Victoria during his practicing years – The Royal Melbourne Hospital had the other one. Over the years Dr Tom Ryan had gradually set up what was effectively a training school for country general-practitioner-surgeons. Each patient was carefully examined, including using the X-ray machine, and any surgery was discussed and planned with Dr Ryan’s assistants several days in advance. Dr Angus gained experience in using the X-ray machine there during his time as assistant to Dr Ryan. When Dr Angus bought into the Nelson Street premises in Nhill he was also appointed as the Nhill Hospital’s Honorary House Surgeon 1933-1938. His practitioner’s plate from his Nhill surgery is now mounted on the doorway to the Port Medical Office at Flagstaff Hill Maritime Village, Warrnambool. When Dr Angus took up practice in the Dr Edward and Dr Tom Ryan’s old premises he obtained their extensive collection of historical medical equipment and materials spanning 1884-1926. A large part of this collection is now on display at the Port Medical Office at Flagstaff Hill Maritime Village in Warrnambool. In 1939 Dr Angus and his family moved to Warrnambool where he purchased “Birchwood,” the 1852 home and medical practice of Dr John Hunter Henderson, at 214 Koroit Street. (This property was sold in1965 to the State Government and is now the site of the Warrnambool Police Station. and an ALDI sore is on the land that was once their tennis court). The Angus family was able to afford gardeners, cooks and maids; their home was a popular place for visiting dignitaries to stay whilst visiting Warrnambool. Dr Angus had his own silk worm farm at home in a Mulberry tree. His young daughter used his centrifuge for spinning the silk. Dr Angus was appointed on a part-time basis as Port Medical Officer (Health Officer) in Warrnambool and held this position until the 1940’s when the government no longer required the service of a Port Medical Officer in Warrnambool; he was thus Warrnambool’s last serving Port Medical Officer. (Masters of immigrant ships arriving in port reported incidents of diseases, illness and death and the Port Medical Officer made a decision on whether the ship required Quarantine and for how long, in this way preventing contagious illness from spreading from new immigrants to the residents already in the colony.) Dr Angus was a member of the Australian Medical Association, for 35 years and surgeon at the Warrnambool Base Hospital 1939-1942, He served with the Australian Department of Defence as a Surgeon Captain during WWII 1942-45, in Ballarat, Victoria, and in Bonegilla, N.S.W., completing his service just before the end of the war due to suffering from a heart attack. During his convalescence he carved an intricate and ‘most artistic’ chess set from the material that dentures were made from. He then studied ophthalmology at the Royal Melbourne Eye and Ear Hospital and created cosmetically superior artificial eyes by pioneering using the intrascleral cartilage. Angus received accolades from the Ophthalmological Society of Australasia for this work. He returned to Warrnambool to commence practice as an ophthalmologist, pioneering in artificial eye improvements. He was Honorary Consultant Ophthalmologist to Warrnambool Base Hospital for 31 years. He made monthly visits to Portland as a visiting surgeon, to perform eye surgery. He represented the Victorian South-West subdivision of the Australian Medical Association as its secretary between 1949 and 1956 and as chairman from 1956 to 1958. In 1968 Dr Angus was elected member of Spain’s Barraquer Institute of Barcelona after his research work in Intrasclearal cartilage grafting, becoming one of the few Australian ophthalmologists to receive this honour, and in the following year presented his final paper on Living Intrasclearal Cartilage Implants at the Inaugural Meeting of the Australian College of Ophthalmologists in Melbourne In his personal life Dr Angus was a Presbyterian and treated Sunday as a Sabbath, a day of rest. He would visit 3 or 4 country patients on a Sunday, taking his children along ‘for the ride’ and to visit with him. Sunday evenings he would play the pianola and sing Scottish songs to his family. One of Dr Angus’ patients was Margaret MacKenzie, author of a book on local shipwrecks that she’d seen as an eye witness from the late 1880’s in Peterborough, Victoria. In the early 1950’s Dr Angus, painted a picture of a shipwreck for the cover jacket of Margaret’s book, Shipwrecks and More Shipwrecks. She was blind in later life and her daughter wrote the actual book for her. Dr Angus and his wife Gladys were very involved in Warrnambool’s society with a strong interest in civic affairs. He had an interest in people and the community They were both involved in the creation of Flagstaff Hill, including the layout of the gardens. After his death (28th March 1970) his family requested his practitioner’s plate, medical instruments and some personal belongings be displayed in the Port Medical Office surgery at Flagstaff Hill Maritime Village, and be called the “W. R. Angus Collection”. The W.R. Angus Collection is significant for still being located at the site it is connected with, Doctor Angus being the last Port Medical Officer in Warrnambool. The collection of medical instruments and other equipment is culturally significant, being an historical example of medicine from late 19th to mid-20th century. Dr Angus assisted Dr Tom Ryan, a pioneer in the use of X-rays and in ocular surgery. Fire pump, part of the W.R. Angus Collection. Red metal water pump. "D" shaped pump handle slides within pump cylinder, stand has 'U" shaped footrest. Pump has threaded fitting for pipe at top and wire filter at bottom. Made by Stokes, Melbourne. Remnants of red paint left on pump. Card label is attached. Moulded into metal "STOKES" and “MELB”. Label attached with string to handle (no text visible).flagstaff hill, warrnambool, shipwrecked coast, flagstaff hill maritime museum, maritime museum, shipwreck coast, flagstaff hill maritime village, great ocean road, dr w r angus, dr ryan, surgical instrument, t.s.s. largs bay, warrnambool base hospital, nhill base hospital, mira hospital, flying doctor, water pump, fire pump, fire extinguisher, safety equipment -
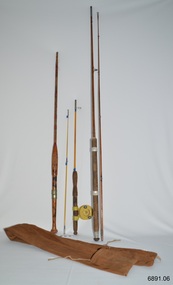 Flagstaff Hill Maritime Museum and Village
Functional object - Fishing Rods, 20th century
... plate from his Nhill surgery is now mounted on the doorway to the Port Medical Office at Flagstaff Hill Maritime Village, Warrnambool. When Dr Angus took up practice in the Dr Edward and Dr Tom Ryan’s old premises he obtained their extensive collection of historical medical equipment and materials spanning 1884-1926. A large...plate from his Nhill surgery is now mounted on the doorway to the Port Medical Office at Flagstaff Hill Maritime Village, Warrnambool. When Dr Angus took up practice in the Dr Edward and Dr Tom Ryan’s old premises he obtained their extensive collection of historical medical equipment and materials spanning 1884-1926. A large ...This fishing rod kit was donated to Flagstaff Hill Maritime Village by the family of Doctor William Roy Angus, Surgeon and Oculist. It is part of the “W.R. Angus Collection” that includes historical medical equipment, surgical instruments and material once belonging to Dr Edward Ryan and Dr Thomas Francis Ryan, (both of Nhill, Victoria) as well as Dr Angus’ own belongings. The Collection’s history spans the medical practices of the two Doctors Ryan, from 1885-1926 plus that of Dr Angus, up until 1969. ABOUT THE “W.R.ANGUS COLLECTION” Doctor William Roy Angus M.B., B.S., Adel., 1923, F.R.C.S. Edin.,1928 (also known as Dr Roy Angus) was born in Murrumbeena, Victoria in 1901 and lived until 1970. He qualified as a doctor in 1923 at University of Adelaide, was Resident Medical Officer at the Royal Adelaide Hospital in 1924 and for a period was house surgeon to Sir (then Mr.) Henry Simpson Newland. Dr Angus was briefly an Assistant to Dr Riddell of Kapunda, then commenced private practice at Curramulka, Yorke Peninsula, SA, where he was physician, surgeon and chemist. In 1926, he was appointed as new Medical Assistant to Dr Thomas Francis Ryan (T.F. Ryan, or Tom), in Nhill, Victoria, where his experiences included radiology and pharmacy. In 1927 he was Acting House Surgeon in Dr Tom Ryan’s absence. Dr Angus had become engaged to Gladys Forsyth and they decided he further his studies overseas in the UK in 1927. He studied at London University College Hospital and at Edinburgh Royal Infirmary and in 1928, was awarded FRCS (Fellow from the Royal College of Surgeons), Edinburgh. He worked his passage back to Australia as a Ship’s Surgeon on the Australian Commonwealth Line’s T.S.S. Largs Bay. Dr Angus married Gladys in 1929, in Ballarat. (They went on to have one son (Graham 1932, born in SA) and two daughters (Helen (died 12/07/1996) and Berenice (Berry), both born at Mira, Nhill ) According to Berry, her mother Gladys made a lot of their clothes. She was very talented and did some lovely embroidery including lingerie for her trousseau and beautifully handmade baby clothes. Dr Angus was a ‘flying doctor’ for the A.I.M. (Australian Inland Ministry) Aerial Medical Service in 1928 . Its first station was in the remote town of Oodnadatta, where Dr Angus was stationed. He was locum tenens there on North-South Railway at 21 Mile Camp. He took up this ‘flying doctor’ position in response to a call from Dr John Flynn; the organisation was later known as the Flying Doctor Service, then the Royal Flying Doctor Service. A lot of his work during this time involved dental surgery also. Between 1928-1932 he was surgeon at the Curramulka Hospital, Yorke Peninsula, South Australia. In 1933 Dr Angus returned to Nhill and purchased a share of the Nelson Street practice and Mira hospital (a 2 bed ward at the Nelson Street Practice) from Dr Les Middleton one of the Middleton Brothers, the current owners of what previously once Dr Tom Ryan’s practice. Dr Tom and his brother had worked as surgeons included eye surgery. Dr Tom Ryan performed many of his operations in the Mira private hospital on his premises. He had been House Surgeon at the Nhill Hospital 1902-1926. Dr Tom Ryan had one of the only two pieces of radiology equipment in Victoria during his practicing years – The Royal Melbourne Hospital had the other one. Over the years Dr Tom Ryan had gradually set up what was effectively a training school for country general-practitioner-surgeons. Each patient was carefully examined, including using the X-ray machine, and any surgery was discussed and planned with Dr Ryan’s assistants several days in advance. Dr Angus gained experience in using the X-ray machine there during his time as assistant to Dr Ryan. When Dr Angus bought into the Nelson Street premises in Nhill he was also appointed as the Nhill Hospital’s Honorary House Surgeon 1933-1938. His practitioner’s plate from his Nhill surgery is now mounted on the doorway to the Port Medical Office at Flagstaff Hill Maritime Village, Warrnambool. When Dr Angus took up practice in the Dr Edward and Dr Tom Ryan’s old premises he obtained their extensive collection of historical medical equipment and materials spanning 1884-1926. A large part of this collection is now on display at the Port Medical Office at Flagstaff Hill Maritime Village in Warrnambool. In 1939 Dr Angus and his family moved to Warrnambool where he purchased “Birchwood,” the 1852 home and medical practice of Dr John Hunter Henderson, at 214 Koroit Street. (This property was sold in1965 to the State Government and is now the site of the Warrnambool Police Station. and an ALDI store is on the land that was once their tennis court). The Angus family was able to afford gardeners, cooks and maids; their home was a popular place for visiting dignitaries to stay whilst visiting Warrnambool. Dr Angus had his own silk worm farm at home in a Mulberry tree. His young daughter used his centrifuge for spinning the silk. Dr Angus was appointed on a part-time basis as Port Medical Officer (Health Officer) in Warrnambool and held this position until the 1940’s when the government no longer required the service of a Port Medical Officer in Warrnambool; he was thus Warrnambool’s last serving Port Medical Officer. (Masters of immigrant ships arriving in port reported incidents of diseases, illness and death and the Port Medical Officer made a decision on whether the ship required Quarantine and for how long, in this way preventing contagious illness from spreading from new immigrants to the residents already in the colony.) Dr Angus was a member of the Australian Medical Association, for 35 years and surgeon at the Warrnambool Base Hospital 1939-1942, He served with the Australian Department of Defence as a Surgeon Captain during WWII 1942-45, in Ballarat, Victoria, and in Bonegilla, N.S.W., completing his service just before the end of the war due to suffering from a heart attack. During his convalescence he carved an intricate and ‘most artistic’ chess set from the material that dentures were made from. He then studied ophthalmology at the Royal Melbourne Eye and Ear Hospital and created cosmetically superior artificial eyes by pioneering using the intrascleral cartilage. Angus received accolades from the Ophthalmological Society of Australasia for this work. He returned to Warrnambool to commence practice as an ophthalmologist, pioneering in artificial eye improvements. He was Honorary Consultant Ophthalmologist to Warrnambool Base Hospital for 31 years. He made monthly visits to Portland as a visiting surgeon, to perform eye surgery. He represented the Victorian South-West subdivision of the Australian Medical Association as its secretary between 1949 and 1956 and as chairman from 1956 to 1958. In 1968 Dr Angus was elected member of Spain’s Barraquer Institute of Barcelona after his research work in Intrasclearal cartilage grafting, becoming one of the few Australian ophthalmologists to receive this honour, and in the following year presented his final paper on Living Intrasclearal Cartilage Implants at the Inaugural Meeting of the Australian College of Ophthalmologists in Melbourne In his personal life Dr Angus was a Presbyterian and treated Sunday as a Sabbath, a day of rest. He would visit 3 or 4 country patients on a Sunday, taking his children along ‘for the ride’ and to visit with him. Sunday evenings he would play the pianola and sing Scottish songs to his family. One of Dr Angus’ patients was Margaret MacKenzie, author of a book on local shipwrecks that she’d seen as an eye witness from the late 1880’s in Peterborough, Victoria. In the early 1950’s Dr Angus, painted a picture of a shipwreck for the cover jacket of Margaret’s book, Shipwrecks and More Shipwrecks. She was blind in later life and her daughter wrote the actual book for her. Dr Angus and his wife Gladys were very involved in Warrnambool’s society with a strong interest in civic affairs. He had an interest in people and the community They were both involved in the creation of Flagstaff Hill, including the layout of the gardens. After his death (28th March 1970) his family requested his practitioner’s plate, medical instruments and some personal belongings be displayed in the Port Medical Office surgery at Flagstaff Hill Maritime Village, and be called the “W. R. Angus Collection”. The W.R. Angus Collection is significant for still being located at the site it is connected with, Doctor Angus being the last Port Medical Officer in Warrnambool. The collection of medical instruments and other equipment is culturally significant, being an historical example of medicine from late 19th to mid-20th century. Dr Angus assisted Dr Tom Ryan, a pioneer in the use of X-rays and in ocular surgery. Fishing rod kit with three rod handles and two ends, stored in brown fabric bag (2 compartments and tape fastening). Part of the W.R. Angus Collection. (1) Cork rod handle with wooden rod, plus wooden rod end. (2) wooden rod handle with 'crocodile skin' pattern carved into handle. (3) wooden handle with yellow plastic rod and reel, and yellow plastic rod end. Reel is Junior Capstan 14, Made in Australia. Reel is imprinted “JUNIOR / CAPSTAN / 14 / MADE IN AUSTRALIA”. flagstaff hill, warrnambool, shipwrecked coast, flagstaff hill maritime museum, maritime museum, shipwreck coast, flagstaff hill maritime village, great ocean road, dr w r angus, dr ryan, surgical instrument, t.s.s. largs bay, warrnambool base hospital, nhill base hospital, mira hospital, flying doctor, fishing rod kit, fishing equipment, recreational fishing, fishing rod and reel -
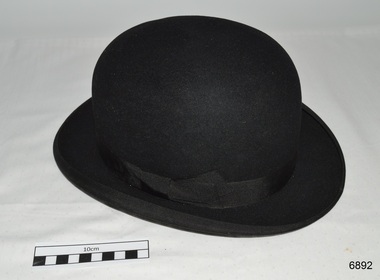 Flagstaff Hill Maritime Museum and Village
Hat, early to mid 20th century
... plate from his Nhill surgery is now mounted on the doorway to the Port Medical Office at Flagstaff Hill Maritime Village, Warrnambool. When Dr Angus took up practice in the Dr Edward and Dr Tom Ryan’s old premises he obtained their extensive collection of historical medical equipment and materials spanning 1884-1926. A large...plate from his Nhill surgery is now mounted on the doorway to the Port Medical Office at Flagstaff Hill Maritime Village, Warrnambool. When Dr Angus took up practice in the Dr Edward and Dr Tom Ryan’s old premises he obtained their extensive collection of historical medical equipment and materials spanning 1884-1926. A large ...This felt bowler hat was partof Dr Angus' wardrobe. It was donated to Flagstaff Hill Maritime Village by the family of Doctor William Roy Angus, Surgeon and Oculist. It is part of the “W.R. Angus Collection” includes historical medical equipment, surgical instruments and material once belonging to Dr Edward Ryan and Dr Thomas Francis Ryan, (both of Nhill, Victoria) as well as Dr Angus’ own belongings. The Collection’s history spans the medical practices of the two Doctors Ryan, from 1885-1926 plus that of Dr Angus, up until 1969. ABOUT THE “W.R.ANGUS COLLECTION” Doctor William Roy Angus M.B., B.S., Adel., 1923, F.R.C.S. Edin.,1928 (also known as Dr Roy Angus) was born in Murrumbeena, Victoria in 1901 and lived until 1970. He qualified as a doctor in 1923 at University of Adelaide, was Resident Medical Officer at the Royal Adelaide Hospital in 1924 and for a period was house surgeon to Sir (then Mr.) Henry Simpson Newland. Dr Angus was briefly an Assistant to Dr Riddell of Kapunda, then commenced private practice at Curramulka, Yorke Peninsula, SA, where he was physician, surgeon and chemist. In 1926, he was appointed as new Medical Assistant to Dr Thomas Francis Ryan (T.F. Ryan, or Tom), in Nhill, Victoria, where his experiences included radiology and pharmacy. In 1927 he was Acting House Surgeon in Dr Tom Ryan’s absence. Dr Angus had become engaged to Gladys Forsyth and they decided he further his studies overseas in the UK in 1927. He studied at London University College Hospital and at Edinburgh Royal Infirmary and in 1928, was awarded FRCS (Fellow from the Royal College of Surgeons), Edinburgh. He worked his passage back to Australia as a Ship’s Surgeon on the on the Australian Commonwealth Line’s T.S.S. Largs Bay. Dr Angus married Gladys in 1929, in Ballarat. (They went on to have one son (Graham 1932, born in SA) and two daughters (Helen (died 12/07/1996) and Berenice (Berry), both born at Mira, Nhill ) According to Berry, her mother Gladys made a lot of their clothes. She was very talented and did some lovely embroidery including lingerie for her trousseau and beautifully handmade baby clothes. Dr Angus was a ‘flying doctor’ for the A.I.M. (Australian Inland Ministry) Aerial Medical Service in 1928 . Its first station was in the remote town of Oodnadatta, where Dr Angus was stationed. He was locum tenens there on North-South Railway at 21 Mile Camp. He took up this ‘flying doctor’ position in response to a call from Dr John Flynn; the organisation was later known as the Flying Doctor Service, then the Royal Flying Doctor Service. A lot of his work during this time involved dental surgery also. Between 1928-1932 he was surgeon at the Curramulka Hospital, Yorke Peninsula, South Australia. In 1933 Dr Angus returned to Nhill and purchased a share of the Nelson Street practice and Mira hospital (a 2 bed ward at the Nelson Street Practice) from Dr Les Middleton one of the Middleton Brothers, the current owners of what previously once Dr Tom Ryan’s practice. Dr Tom and his brother had worked as surgeons included eye surgery. Dr Tom Ryan performed many of his operations in the Mira private hospital on his premises. He had been House Surgeon at the Nhill Hospital 1902-1926. Dr Tom Ryan had one of the only two pieces of radiology equipment in Victoria during his practicing years – The Royal Melbourne Hospital had the other one. Over the years Dr Tom Ryan had gradually set up what was effectively a training school for country general-practitioner-surgeons. Each patient was carefully examined, including using the X-ray machine, and any surgery was discussed and planned with Dr Ryan’s assistants several days in advance. Dr Angus gained experience in using the X-ray machine there during his time as assistant to Dr Ryan. When Dr Angus bought into the Nelson Street premises in Nhill he was also appointed as the Nhill Hospital’s Honorary House Surgeon 1933-1938. His practitioner’s plate from his Nhill surgery is now mounted on the doorway to the Port Medical Office at Flagstaff Hill Maritime Village, Warrnambool. When Dr Angus took up practice in the Dr Edward and Dr Tom Ryan’s old premises he obtained their extensive collection of historical medical equipment and materials spanning 1884-1926. A large part of this collection is now on display at the Port Medical Office at Flagstaff Hill Maritime Village in Warrnambool. In 1939 Dr Angus and his family moved to Warrnambool where he purchased “Birchwood,” the 1852 home and medical practice of Dr John Hunter Henderson, at 214 Koroit Street. (This property was sold in1965 to the State Government and is now the site of the Warrnambool Police Station. and an ALDI sore is on the land that was once their tennis court). The Angus family was able to afford gardeners, cooks and maids; their home was a popular place for visiting dignitaries to stay whilst visiting Warrnambool. Dr Angus had his own silk worm farm at home in a Mulberry tree. His young daughter used his centrifuge for spinning the silk. Dr Angus was appointed on a part-time basis as Port Medical Officer (Health Officer) in Warrnambool and held this position until the 1940’s when the government no longer required the service of a Port Medical Officer in Warrnambool; he was thus Warrnambool’s last serving Port Medical Officer. (Masters of immigrant ships arriving in port reported incidents of diseases, illness and death and the Port Medical Officer made a decision on whether the ship required Quarantine and for how long, in this way preventing contagious illness from spreading from new immigrants to the residents already in the colony.) Dr Angus was a member of the Australian Medical Association, for 35 years and surgeon at the Warrnambool Base Hospital 1939-1942, He served with the Australian Department of Defence as a Surgeon Captain during WWII 1942-45, in Ballarat, Victoria, and in Bonegilla, N.S.W., completing his service just before the end of the war due to suffering from a heart attack. During his convalescence he carved an intricate and ‘most artistic’ chess set from the material that dentures were made from. He then studied ophthalmology at the Royal Melbourne Eye and Ear Hospital and created cosmetically superior artificial eyes by pioneering using the intrascleral cartilage. Angus received accolades from the Ophthalmological Society of Australasia for this work. He returned to Warrnambool to commence practice as an ophthalmologist, pioneering in artificial eye improvements. He was Honorary Consultant Ophthalmologist to Warrnambool Base Hospital for 31 years. He made monthly visits to Portland as a visiting surgeon, to perform eye surgery. He represented the Victorian South-West subdivision of the Australian Medical Association as its secretary between 1949 and 1956 and as chairman from 1956 to 1958. In 1968 Dr Angus was elected member of Spain’s Barraquer Institute of Barcelona after his research work in Intrasclearal cartilage grafting, becoming one of the few Australian ophthalmologists to receive this honour, and in the following year presented his final paper on Living Intrasclearal Cartilage Implants at the Inaugural Meeting of the Australian College of Ophthalmologists in Melbourne In his personal life Dr Angus was a Presbyterian and treated Sunday as a Sabbath, a day of rest. He would visit 3 or 4 country patients on a Sunday, taking his children along ‘for the ride’ and to visit with him. Sunday evenings he would play the pianola and sing Scottish songs to his family. One of Dr Angus’ patients was Margaret MacKenzie, author of a book on local shipwrecks that she’d seen as an eye witness from the late 1880’s in Peterborough, Victoria. In the early 1950’s Dr Angus, painted a picture of a shipwreck for the cover jacket of Margaret’s book, Shipwrecks and More Shipwrecks. She was blind in later life and her daughter wrote the actual book for her. Dr Angus and his wife Gladys were very involved in Warrnambool’s society with a strong interest in civic affairs. He had an interest in people and the community They were both involved in the creation of Flagstaff Hill, including the layout of the gardens. After his death (28th March 1970) his family requested his practitioner’s plate, medical instruments and some personal belongings be displayed in the Port Medical Office surgery at Flagstaff Hill Maritime Village, and be called the “W. R. Angus Collection”. The W.R. Angus Collection is significant for still being located at the site it is connected with, Doctor Angus being the last Port Medical Officer in Warrnambool. The collection of medical instruments and other equipment is culturally significant, being an historical example of medicine from late 19th to mid-20th century. Dr Angus assisted Dr Tom Ryan, a pioneer in the use of X-rays and in ocular surgery. Black bowler hat, part of the W.R. Angus Collection. English made gentleman's bowler hat, black pure fur felt, black ribbon hatband, brown leather sweatband, coffee coloured silk lining. Dr Angus' initiials W.R.A. punched into leather sweatband. Sold by Henry Buck Pty Ltd, Gentlemen's Outfitters, Melbourne. Gold embossed labels on sweatband and lining. Lining also has Australia’s Coat of Arms. Sweatband has punched letters “W R A” and gold embossed ‘PURE FUR FELT / Made in England” and "[logo] the sign of excellence. Stamped on linng, gold embossed “HENRY BUCK PTY LTD / Gentlemen’s Outfitters / 76 Swanston St Melbourne” and logo of Australia’s Coat of Arms. flagstaff hill, warrnambool, shipwrecked coast, flagstaff hill maritime museum, maritime museum, shipwreck coast, flagstaff hill maritime village, great ocean road, dr w r angus, dr ryan, surgical instrument, t.s.s. largs bay, warrnambool base hospital, nhill base hospital, mira hospital, flying doctor, felt bowler het, gentleman's hat, dr w.r. angus wardrobe, formal wear hat, henry buck pty ltd melbourne -
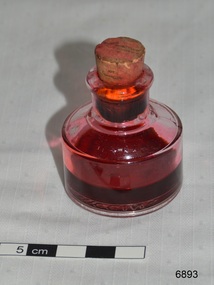 Flagstaff Hill Maritime Museum and Village
Container - Ink Bottle, Early to mid 20th century
... plate from his Nhill surgery is now mounted on the doorway to the Port Medical Office at Flagstaff Hill Maritime Village, Warrnambool. When Dr Angus took up practice in the Dr Edward and Dr Tom Ryan’s old premises he obtained their extensive collection of historical medical equipment and materials spanning 1884-1926. A large...plate from his Nhill surgery is now mounted on the doorway to the Port Medical Office at Flagstaff Hill Maritime Village, Warrnambool. When Dr Angus took up practice in the Dr Edward and Dr Tom Ryan’s old premises he obtained their extensive collection of historical medical equipment and materials spanning 1884-1926. A large ...This ink bottle was donated to Flagstaff Hill Maritime Village by the family of Doctor William Roy Angus, Surgeon and Oculist. It is part of the “W.R. Angus Collection” includes historical medical equipment, surgical instruments and material once belonging to Dr Edward Ryan and Dr Thomas Francis Ryan, (both of Nhill, Victoria) as well as Dr Angus’ own belongings. The Collection’s history spans the medical practices of the two Doctors Ryan, from 1885-1926 plus that of Dr Angus, up until 1969. ABOUT THE “W.R.ANGUS COLLECTION” Doctor William Roy Angus M.B., B.S., Adel., 1923, F.R.C.S. Edin.,1928 (also known as Dr Roy Angus) was born in Murrumbeena, Victoria in 1901 and lived until 1970. He qualified as a doctor in 1923 at University of Adelaide, was Resident Medical Officer at the Royal Adelaide Hospital in 1924 and for a period was house surgeon to Sir (then Mr.) Henry Simpson Newland. Dr Angus was briefly an Assistant to Dr Riddell of Kapunda, then commenced private practice at Curramulka, Yorke Peninsula, SA, where he was physician, surgeon and chemist. In 1926, he was appointed as new Medical Assistant to Dr Thomas Francis Ryan (T.F. Ryan, or Tom), in Nhill, Victoria, where his experiences included radiology and pharmacy. In 1927 he was Acting House Surgeon in Dr Tom Ryan’s absence. Dr Angus had become engaged to Gladys Forsyth and they decided he further his studies overseas in the UK in 1927. He studied at London University College Hospital and at Edinburgh Royal Infirmary and in 1928, was awarded FRCS (Fellow from the Royal College of Surgeons), Edinburgh. He worked his passage back to Australia as a Ship’s Surgeon on the on the Australian Commonwealth Line’s T.S.S. Largs Bay. Dr Angus married Gladys in 1929, in Ballarat. (They went on to have one son (Graham 1932, born in SA) and two daughters (Helen (died 12/07/1996) and Berenice (Berry), both born at Mira, Nhill ) According to Berry, her mother Gladys made a lot of their clothes. She was very talented and did some lovely embroidery including lingerie for her trousseau and beautifully handmade baby clothes. Dr Angus was a ‘flying doctor’ for the A.I.M. (Australian Inland Ministry) Aerial Medical Service in 1928 . Its first station was in the remote town of Oodnadatta, where Dr Angus was stationed. He was locum tenens there on North-South Railway at 21 Mile Camp. He took up this ‘flying doctor’ position in response to a call from Dr John Flynn; the organisation was later known as the Flying Doctor Service, then the Royal Flying Doctor Service. A lot of his work during this time involved dental surgery also. Between 1928-1932 he was surgeon at the Curramulka Hospital, Yorke Peninsula, South Australia. In 1933 Dr Angus returned to Nhill and purchased a share of the Nelson Street practice and Mira hospital (a 2 bed ward at the Nelson Street Practice) from Dr Les Middleton one of the Middleton Brothers, the current owners of what previously once Dr Tom Ryan’s practice. Dr Tom and his brother had worked as surgeons included eye surgery. Dr Tom Ryan performed many of his operations in the Mira private hospital on his premises. He had been House Surgeon at the Nhill Hospital 1902-1926. Dr Tom Ryan had one of the only two pieces of radiology equipment in Victoria during his practicing years – The Royal Melbourne Hospital had the other one. Over the years Dr Tom Ryan had gradually set up what was effectively a training school for country general-practitioner-surgeons. Each patient was carefully examined, including using the X-ray machine, and any surgery was discussed and planned with Dr Ryan’s assistants several days in advance. Dr Angus gained experience in using the X-ray machine there during his time as assistant to Dr Ryan. When Dr Angus bought into the Nelson Street premises in Nhill he was also appointed as the Nhill Hospital’s Honorary House Surgeon 1933-1938. His practitioner’s plate from his Nhill surgery is now mounted on the doorway to the Port Medical Office at Flagstaff Hill Maritime Village, Warrnambool. When Dr Angus took up practice in the Dr Edward and Dr Tom Ryan’s old premises he obtained their extensive collection of historical medical equipment and materials spanning 1884-1926. A large part of this collection is now on display at the Port Medical Office at Flagstaff Hill Maritime Village in Warrnambool. In 1939 Dr Angus and his family moved to Warrnambool where he purchased “Birchwood,” the 1852 home and medical practice of Dr John Hunter Henderson, at 214 Koroit Street. (This property was sold in1965 to the State Government and is now the site of the Warrnambool Police Station. and an ALDI sore is on the land that was once their tennis court). The Angus family was able to afford gardeners, cooks and maids; their home was a popular place for visiting dignitaries to stay whilst visiting Warrnambool. Dr Angus had his own silk worm farm at home in a Mulberry tree. His young daughter used his centrifuge for spinning the silk. Dr Angus was appointed on a part-time basis as Port Medical Officer (Health Officer) in Warrnambool and held this position until the 1940’s when the government no longer required the service of a Port Medical Officer in Warrnambool; he was thus Warrnambool’s last serving Port Medical Officer. (Masters of immigrant ships arriving in port reported incidents of diseases, illness and death and the Port Medical Officer made a decision on whether the ship required Quarantine and for how long, in this way preventing contagious illness from spreading from new immigrants to the residents already in the colony.) Dr Angus was a member of the Australian Medical Association, for 35 years and surgeon at the Warrnambool Base Hospital 1939-1942, He served with the Australian Department of Defence as a Surgeon Captain during WWII 1942-45, in Ballarat, Victoria, and in Bonegilla, N.S.W., completing his service just before the end of the war due to suffering from a heart attack. During his convalescence he carved an intricate and ‘most artistic’ chess set from the material that dentures were made from. He then studied ophthalmology at the Royal Melbourne Eye and Ear Hospital and created cosmetically superior artificial eyes by pioneering using the intrascleral cartilage. Angus received accolades from the Ophthalmological Society of Australasia for this work. He returned to Warrnambool to commence practice as an ophthalmologist, pioneering in artificial eye improvements. He was Honorary Consultant Ophthalmologist to Warrnambool Base Hospital for 31 years. He made monthly visits to Portland as a visiting surgeon, to perform eye surgery. He represented the Victorian South-West subdivision of the Australian Medical Association as its secretary between 1949 and 1956 and as chairman from 1956 to 1958. In 1968 Dr Angus was elected member of Spain’s Barraquer Institute of Barcelona after his research work in Intrasclearal cartilage grafting, becoming one of the few Australian ophthalmologists to receive this honour, and in the following year presented his final paper on Living Intrasclearal Cartilage Implants at the Inaugural Meeting of the Australian College of Ophthalmologists in Melbourne In his personal life Dr Angus was a Presbyterian and treated Sunday as a Sabbath, a day of rest. He would visit 3 or 4 country patients on a Sunday, taking his children along ‘for the ride’ and to visit with him. Sunday evenings he would play the pianola and sing Scottish songs to his family. One of Dr Angus’ patients was Margaret MacKenzie, author of a book on local shipwrecks that she’d seen as an eye witness from the late 1880’s in Peterborough, Victoria. In the early 1950’s Dr Angus, painted a picture of a shipwreck for the cover jacket of Margaret’s book, Shipwrecks and More Shipwrecks. She was blind in later life and her daughter wrote the actual book for her. Dr Angus and his wife Gladys were very involved in Warrnambool’s society with a strong interest in civic affairs. He had an interest in people and the community They were both involved in the creation of Flagstaff Hill, including the layout of the gardens. After his death (28th March 1970) his family requested his practitioner’s plate, medical instruments and some personal belongings be displayed in the Port Medical Office surgery at Flagstaff Hill Maritime Village, and be called the “W. R. Angus Collection”. The company was founded by Charles Michael Higgins (born Ireland) in New York in partnership with his brother-in-law John Gianella Snr. in 1885. It began as just Charles M Higgins in 1880. It produced a range of popular inks including India, indelible, and laundry ink, later expanding into adhesive manufacture; originally based in Brooklyn the company expanded with offices in New York, Chicago and London (106 Charing Cross Road) selling products world wide; Charles Higgins died 1929 and was succeeded by his son Tracy. It became an incorporated company in 1930. The W.R. Angus Collection is significant for still being located at the site it is connected with, Doctor Angus being the last Port Medical Officer in Warrnambool. The collection of medical instruments and other equipment is culturally significant, being an historical example of medicine from late 19th to mid-20th century. Dr Angus assisted Dr Tom Ryan, a pioneer in the use of X-rays and in ocular surgery. Clear glass ink bottle with cork stopper, containing small quantity of red ink.Part of the W.R. Angus Collection. Made by Higgins of Brooklyn, New York. Impressed into base "HIGGINS BROOKLYN N.Y. INKS" flagstaff hill, warrnambool, shipwrecked coast, flagstaff hill maritime museum, maritime museum, shipwreck coast, flagstaff hill maritime village, great ocean road, dr w r angus, dr ryan, surgical instrument, t.s.s. largs bay, warrnambool base hospital, nhill base hospital, mira hospital, flying doctor, ink bottle, ink bottle containing red ink, higgins & co brooklyn n.y., stationery, writing equipment, pen and ink -
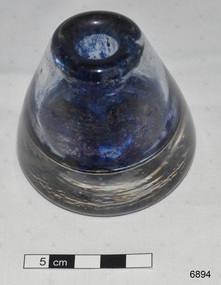 Flagstaff Hill Maritime Museum and Village
Container - Ink well, early to mid 20th century
... plate from his Nhill surgery is now mounted on the doorway to the Port Medical Office at Flagstaff Hill Maritime Village, Warrnambool. When Dr Angus took up practice in the Dr Edward and Dr Tom Ryan’s old premises he obtained their extensive collection of historical medical equipment and materials spanning 1884-1926. A large...plate from his Nhill surgery is now mounted on the doorway to the Port Medical Office at Flagstaff Hill Maritime Village, Warrnambool. When Dr Angus took up practice in the Dr Edward and Dr Tom Ryan’s old premises he obtained their extensive collection of historical medical equipment and materials spanning 1884-1926. A large ...One of the daughters of Dr Angus and his wife Gladys told Flagstaff Hill Maritime Village that this glass ink well was used by her father in his office in the days when ink powder [usually supplied in paper packets] was mixed with warm water to make ink. The ink well was donated to Flagstaff Hill Maritime Village by the family of Doctor William Roy Angus, Surgeon and Oculist. It is part of the “W.R. Angus Collection” includes historical medical equipment, surgical instruments and material once belonging to Dr Edward Ryan and Dr Thomas Francis Ryan, (both of Nhill, Victoria) as well as Dr Angus’ own belongings. The Collection’s history spans the medical practices of the two Doctors Ryan, from 1885-1926 plus that of Dr Angus, up until 1969. ABOUT THE “W.R.ANGUS COLLECTION” Doctor William Roy Angus M.B., B.S., Adel., 1923, F.R.C.S. Edin.,1928 (also known as Dr Roy Angus) was born in Murrumbeena, Victoria in 1901 and lived until 1970. He qualified as a doctor in 1923 at University of Adelaide, was Resident Medical Officer at the Royal Adelaide Hospital in 1924 and for a period was house surgeon to Sir (then Mr.) Henry Simpson Newland. Dr Angus was briefly an Assistant to Dr Riddell of Kapunda, then commenced private practice at Curramulka, Yorke Peninsula, SA, where he was physician, surgeon and chemist. In 1926, he was appointed as new Medical Assistant to Dr Thomas Francis Ryan (T.F. Ryan, or Tom), in Nhill, Victoria, where his experiences included radiology and pharmacy. In 1927 he was Acting House Surgeon in Dr Tom Ryan’s absence. Dr Angus had become engaged to Gladys Forsyth and they decided he further his studies overseas in the UK in 1927. He studied at London University College Hospital and at Edinburgh Royal Infirmary and in 1928, was awarded FRCS (Fellow from the Royal College of Surgeons), Edinburgh. He worked his passage back to Australia as a Ship’s Surgeon on the on the Australian Commonwealth Line’s T.S.S. Largs Bay. Dr Angus married Gladys in 1929, in Ballarat. (They went on to have one son (Graham 1932, born in SA) and two daughters (Helen (died 12/07/1996) and Berenice (Berry), both born at Mira, Nhill ) According to Berry, her mother Gladys made a lot of their clothes. She was very talented and did some lovely embroidery including lingerie for her trousseau and beautifully handmade baby clothes. Dr Angus was a ‘flying doctor’ for the A.I.M. (Australian Inland Ministry) Aerial Medical Service in 1928 . Its first station was in the remote town of Oodnadatta, where Dr Angus was stationed. He was locum tenens there on North-South Railway at 21 Mile Camp. He took up this ‘flying doctor’ position in response to a call from Dr John Flynn; the organisation was later known as the Flying Doctor Service, then the Royal Flying Doctor Service. A lot of his work during this time involved dental surgery also. Between 1928-1932 he was surgeon at the Curramulka Hospital, Yorke Peninsula, South Australia. In 1933 Dr Angus returned to Nhill and purchased a share of the Nelson Street practice and Mira hospital (a 2 bed ward at the Nelson Street Practice) from Dr Les Middleton one of the Middleton Brothers, the current owners of what previously once Dr Tom Ryan’s practice. Dr Tom and his brother had worked as surgeons included eye surgery. Dr Tom Ryan performed many of his operations in the Mira private hospital on his premises. He had been House Surgeon at the Nhill Hospital 1902-1926. Dr Tom Ryan had one of the only two pieces of radiology equipment in Victoria during his practicing years – The Royal Melbourne Hospital had the other one. Over the years Dr Tom Ryan had gradually set up what was effectively a training school for country general-practitioner-surgeons. Each patient was carefully examined, including using the X-ray machine, and any surgery was discussed and planned with Dr Ryan’s assistants several days in advance. Dr Angus gained experience in using the X-ray machine there during his time as assistant to Dr Ryan. When Dr Angus bought into the Nelson Street premises in Nhill he was also appointed as the Nhill Hospital’s Honorary House Surgeon 1933-1938. His practitioner’s plate from his Nhill surgery is now mounted on the doorway to the Port Medical Office at Flagstaff Hill Maritime Village, Warrnambool. When Dr Angus took up practice in the Dr Edward and Dr Tom Ryan’s old premises he obtained their extensive collection of historical medical equipment and materials spanning 1884-1926. A large part of this collection is now on display at the Port Medical Office at Flagstaff Hill Maritime Village in Warrnambool. In 1939 Dr Angus and his family moved to Warrnambool where he purchased “Birchwood,” the 1852 home and medical practice of Dr John Hunter Henderson, at 214 Koroit Street. (This property was sold in1965 to the State Government and is now the site of the Warrnambool Police Station. and an ALDI sore is on the land that was once their tennis court). The Angus family was able to afford gardeners, cooks and maids; their home was a popular place for visiting dignitaries to stay whilst visiting Warrnambool. Dr Angus had his own silk worm farm at home in a Mulberry tree. His young daughter used his centrifuge for spinning the silk. Dr Angus was appointed on a part-time basis as Port Medical Officer (Health Officer) in Warrnambool and held this position until the 1940’s when the government no longer required the service of a Port Medical Officer in Warrnambool; he was thus Warrnambool’s last serving Port Medical Officer. (Masters of immigrant ships arriving in port reported incidents of diseases, illness and death and the Port Medical Officer made a decision on whether the ship required Quarantine and for how long, in this way preventing contagious illness from spreading from new immigrants to the residents already in the colony.) Dr Angus was a member of the Australian Medical Association, for 35 years and surgeon at the Warrnambool Base Hospital 1939-1942, He served with the Australian Department of Defence as a Surgeon Captain during WWII 1942-45, in Ballarat, Victoria, and in Bonegilla, N.S.W., completing his service just before the end of the war due to suffering from a heart attack. During his convalescence he carved an intricate and ‘most artistic’ chess set from the material that dentures were made from. He then studied ophthalmology at the Royal Melbourne Eye and Ear Hospital and created cosmetically superior artificial eyes by pioneering using the intrascleral cartilage. Angus received accolades from the Ophthalmological Society of Australasia for this work. He returned to Warrnambool to commence practice as an ophthalmologist, pioneering in artificial eye improvements. He was Honorary Consultant Ophthalmologist to Warrnambool Base Hospital for 31 years. He made monthly visits to Portland as a visiting surgeon, to perform eye surgery. He represented the Victorian South-West subdivision of the Australian Medical Association as its secretary between 1949 and 1956 and as chairman from 1956 to 1958. In 1968 Dr Angus was elected member of Spain’s Barraquer Institute of Barcelona after his research work in Intrasclearal cartilage grafting, becoming one of the few Australian ophthalmologists to receive this honour, and in the following year presented his final paper on Living Intrasclearal Cartilage Implants at the Inaugural Meeting of the Australian College of Ophthalmologists in Melbourne In his personal life Dr Angus was a Presbyterian and treated Sunday as a Sabbath, a day of rest. He would visit 3 or 4 country patients on a Sunday, taking his children along ‘for the ride’ and to visit with him. Sunday evenings he would play the pianola and sing Scottish songs to his family. One of Dr Angus’ patients was Margaret MacKenzie, author of a book on local shipwrecks that she’d seen as an eye witness from the late 1880’s in Peterborough, Victoria. In the early 1950’s Dr Angus, painted a picture of a shipwreck for the cover jacket of Margaret’s book, Shipwrecks and More Shipwrecks. She was blind in later life and her daughter wrote the actual book for her. Dr Angus and his wife Gladys were very involved in Warrnambool’s society with a strong interest in civic affairs. He had an interest in people and the community They were both involved in the creation of Flagstaff Hill, including the layout of the gardens. After his death (28th March 1970) his family requested his practitioner’s plate, medical instruments and some personal belongings be displayed in the Port Medical Office surgery at Flagstaff Hill Maritime Village, and be called the “W. R. Angus Collection”. The W.R. Angus Collection is significant for still being located at the site it is connected with, Doctor Angus being the last Port Medical Officer in Warrnambool. The collection of medical instruments and other equipment is culturally significant, being an historical example of medicine from late 19th to mid-20th century. Dr Angus assisted Dr Tom Ryan, a pioneer in the use of X-rays and in ocular surgery. Ink well, thick clear glass, bell shaped, wide and heavy base. Remnants of blue ink inside. Part of the W.R. Angus Collection.flagstaff hill, warrnambool, shipwrecked coast, flagstaff hill maritime museum, maritime museum, shipwreck coast, flagstaff hill maritime village, great ocean road, dr w r angus, dr ryan, surgical instrument, t.s.s. largs bay, warrnambool base hospital, nhill base hospital, mira hospital, flying doctor, ink bottle, pen and ink writing, nib pen writing supplies, ink powder writing, ink mixing -
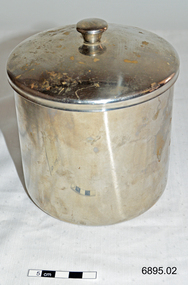 Flagstaff Hill Maritime Museum and Village
Surgical Container, mid 29th century
... plate from his Nhill surgery is now mounted on the doorway to the Port Medical Office at Flagstaff Hill Maritime Village, Warrnambool. When Dr Angus took up practice in the Dr Edward and Dr Tom Ryan’s old premises he obtained their extensive collection of historical medical equipment and materials spanning 1884-1926. A large...plate from his Nhill surgery is now mounted on the doorway to the Port Medical Office at Flagstaff Hill Maritime Village, Warrnambool. When Dr Angus took up practice in the Dr Edward and Dr Tom Ryan’s old premises he obtained their extensive collection of historical medical equipment and materials spanning 1884-1926. A large ...This stainless steel surgical contain with lid was amongst the medical and surgical equipment used by Dr. W.R. Angus in his medical practice. The steel for the containter was made by Paramount and the container maunfactured by K.G. Luke of Fitzroy North in Melbourne, Australia. (Sir) Kenneth Luke was born in Port Melbourne and had a very successful business that grew from small beginnings in 1921 in the metal and silverware business “making an ever-increasing range of products: silverware, stainless steel surgical equipment, plated goods and glass-washing machines.” K. G. Luke (Australasia) Ltd was registered as a public company in 1953. During World War 2 Kenneth Luke became an honorary advisor to the Australian Department of Supply and Shipping. He was also an administrator for Football in Victoria. This container was donated to Flagstaff Hill Maritime Village by the family of Doctor William Roy Angus, Surgeon and Oculist. It is part of the “W.R. Angus Collection” includes historical medical equipment, surgical instruments and material once belonging to Dr Edward Ryan and Dr Thomas Francis Ryan, (both of Nhill, Victoria) as well as Dr Angus’ own belongings. The Collection’s history spans the medical practices of the two Doctors Ryan, from 1885-1926 plus that of Dr Angus, up until 1969. ABOUT THE “W.R.ANGUS COLLECTION” Doctor William Roy Angus M.B., B.S., Adel., 1923, F.R.C.S. Edin.,1928 (also known as Dr Roy Angus) was born in Murrumbeena, Victoria in 1901 and lived until 1970. He qualified as a doctor in 1923 at University of Adelaide, was Resident Medical Officer at the Royal Adelaide Hospital in 1924 and for a period was house surgeon to Sir (then Mr.) Henry Simpson Newland. Dr Angus was briefly an Assistant to Dr Riddell of Kapunda, then commenced private practice at Curramulka, Yorke Peninsula, SA, where he was physician, surgeon and chemist. In 1926, he was appointed as new Medical Assistant to Dr Thomas Francis Ryan (T.F. Ryan, or Tom), in Nhill, Victoria, where his experiences included radiology and pharmacy. In 1927 he was Acting House Surgeon in Dr Tom Ryan’s absence. Dr Angus had become engaged to Gladys Forsyth and they decided he further his studies overseas in the UK in 1927. He studied at London University College Hospital and at Edinburgh Royal Infirmary and in 1928, was awarded FRCS (Fellow from the Royal College of Surgeons), Edinburgh. He worked his passage back to Australia as a Ship’s Surgeon on the on the Australian Commonwealth Line’s T.S.S. Largs Bay. Dr Angus married Gladys in 1929, in Ballarat. (They went on to have one son (Graham 1932, born in SA) and two daughters (Helen (died 12/07/1996) and Berenice (Berry), both born at Mira, Nhill ) According to Berry, her mother Gladys made a lot of their clothes. She was very talented and did some lovely embroidery including lingerie for her trousseau and beautifully handmade baby clothes. Dr Angus was a ‘flying doctor’ for the A.I.M. (Australian Inland Ministry) Aerial Medical Service in 1928 . Its first station was in the remote town of Oodnadatta, where Dr Angus was stationed. He was locum tenens there on North-South Railway at 21 Mile Camp. He took up this ‘flying doctor’ position in response to a call from Dr John Flynn; the organisation was later known as the Flying Doctor Service, then the Royal Flying Doctor Service. A lot of his work during this time involved dental surgery also. Between 1928-1932 he was surgeon at the Curramulka Hospital, Yorke Peninsula, South Australia. In 1933 Dr Angus returned to Nhill and purchased a share of the Nelson Street practice and Mira hospital (a 2 bed ward at the Nelson Street Practice) from Dr Les Middleton one of the Middleton Brothers, the current owners of what previously once Dr Tom Ryan’s practice. Dr Tom and his brother had worked as surgeons included eye surgery. Dr Tom Ryan performed many of his operations in the Mira private hospital on his premises. He had been House Surgeon at the Nhill Hospital 1902-1926. Dr Tom Ryan had one of the only two pieces of radiology equipment in Victoria during his practicing years – The Royal Melbourne Hospital had the other one. Over the years Dr Tom Ryan had gradually set up what was effectively a training school for country general-practitioner-surgeons. Each patient was carefully examined, including using the X-ray machine, and any surgery was discussed and planned with Dr Ryan’s assistants several days in advance. Dr Angus gained experience in using the X-ray machine there during his time as assistant to Dr Ryan. When Dr Angus bought into the Nelson Street premises in Nhill he was also appointed as the Nhill Hospital’s Honorary House Surgeon 1933-1938. His practitioner’s plate from his Nhill surgery is now mounted on the doorway to the Port Medical Office at Flagstaff Hill Maritime Village, Warrnambool. When Dr Angus took up practice in the Dr Edward and Dr Tom Ryan’s old premises he obtained their extensive collection of historical medical equipment and materials spanning 1884-1926. A large part of this collection is now on display at the Port Medical Office at Flagstaff Hill Maritime Village in Warrnambool. In 1939 Dr Angus and his family moved to Warrnambool where he purchased “Birchwood,” the 1852 home and medical practice of Dr John Hunter Henderson, at 214 Koroit Street. (This property was sold in1965 to the State Government and is now the site of the Warrnambool Police Station. and an ALDI sore is on the land that was once their tennis court). The Angus family was able to afford gardeners, cooks and maids; their home was a popular place for visiting dignitaries to stay whilst visiting Warrnambool. Dr Angus had his own silk worm farm at home in a Mulberry tree. His young daughter used his centrifuge for spinning the silk. Dr Angus was appointed on a part-time basis as Port Medical Officer (Health Officer) in Warrnambool and held this position until the 1940’s when the government no longer required the service of a Port Medical Officer in Warrnambool; he was thus Warrnambool’s last serving Port Medical Officer. (Masters of immigrant ships arriving in port reported incidents of diseases, illness and death and the Port Medical Officer made a decision on whether the ship required Quarantine and for how long, in this way preventing contagious illness from spreading from new immigrants to the residents already in the colony.) Dr Angus was a member of the Australian Medical Association, for 35 years and surgeon at the Warrnambool Base Hospital 1939-1942, He served with the Australian Department of Defence as a Surgeon Captain during WWII 1942-45, in Ballarat, Victoria, and in Bonegilla, N.S.W., completing his service just before the end of the war due to suffering from a heart attack. During his convalescence he carved an intricate and ‘most artistic’ chess set from the material that dentures were made from. He then studied ophthalmology at the Royal Melbourne Eye and Ear Hospital and created cosmetically superior artificial eyes by pioneering using the intrascleral cartilage. Angus received accolades from the Ophthalmological Society of Australasia for this work. He returned to Warrnambool to commence practice as an ophthalmologist, pioneering in artificial eye improvements. He was Honorary Consultant Ophthalmologist to Warrnambool Base Hospital for 31 years. He made monthly visits to Portland as a visiting surgeon, to perform eye surgery. He represented the Victorian South-West subdivision of the Australian Medical Association as its secretary between 1949 and 1956 and as chairman from 1956 to 1958. In 1968 Dr Angus was elected member of Spain’s Barraquer Institute of Barcelona after his research work in Intrasclearal cartilage grafting, becoming one of the few Australian ophthalmologists to receive this honour, and in the following year presented his final paper on Living Intrasclearal Cartilage Implants at the Inaugural Meeting of the Australian College of Ophthalmologists in Melbourne In his personal life Dr Angus was a Presbyterian and treated Sunday as a Sabbath, a day of rest. He would visit 3 or 4 country patients on a Sunday, taking his children along ‘for the ride’ and to visit with him. Sunday evenings he would play the pianola and sing Scottish songs to his family. One of Dr Angus’ patients was Margaret MacKenzie, author of a book on local shipwrecks that she’d seen as an eye witness from the late 1880’s in Peterborough, Victoria. In the early 1950’s Dr Angus, painted a picture of a shipwreck for the cover jacket of Margaret’s book, Shipwrecks and More Shipwrecks. She was blind in later life and her daughter wrote the actual book for her. Dr Angus and his wife Gladys were very involved in Warrnambool’s society with a strong interest in civic affairs. He had an interest in people and the community They were both involved in the creation of Flagstaff Hill, including the layout of the gardens. After his death (28th March 1970) his family requested his practitioner’s plate, medical instruments and some personal belongings be displayed in the Port Medical Office surgery at Flagstaff Hill Maritime Village, and be called the “W. R. Angus Collection”. The stainless steel container is significant for its association with business man Sir Kenneth Luke and his manufacturing factory K.G. Luke Pty Ltd. and early and successful Melbourne business. The container is also significant for because of its association with the W.R. Angus Collection. This collection is significant for still being located at the site it is connected with, Doctor Angus being the last Port Medical Officer in Warrnambool. The collection of medical instruments and other equipment is culturally significant, being an historical example of medicine from late 19th to mid-20th century. Dr Angus assisted Dr Tom Ryan, a pioneer in the use of X-rays and in ocular surgery. Stainless steel, round surgical container with lid, part of the W.R. Angus Collection. Stamped into base “STAINLESS / STEEL / BY / PARAMOUNT / K G LUKE / MELB / 58”flagstaff hill, warrnambool, shipwrecked coast, flagstaff hill maritime museum, maritime museum, shipwreck coast, flagstaff hill maritime village, great ocean road, dr w r angus, dr ryan, surgical instrument, t.s.s. largs bay, warrnambool base hospital, nhill base hospital, mira hospital, flying doctor, surgical container, medical equipment, surgical equipment, k.g. luke pty. ltd. melbourne, paramount stainlett steel australia -
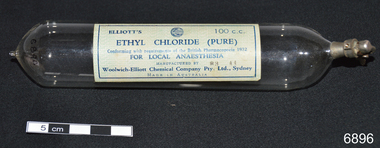 Flagstaff Hill Maritime Museum and Village
Container - Medication Ampoule, Woolwich-Elliot Chemical Company Pty Ltd, Sydney, 1930s
... plate from his Nhill surgery is now mounted on the doorway to the Port Medical Office at Flagstaff Hill Maritime Village, Warrnambool. When Dr Angus took up practice in the Dr Edward and Dr Tom Ryan’s old premises he obtained their extensive collection of historical medical equipment and materials spanning 1884-1926. A large...plate from his Nhill surgery is now mounted on the doorway to the Port Medical Office at Flagstaff Hill Maritime Village, Warrnambool. When Dr Angus took up practice in the Dr Edward and Dr Tom Ryan’s old premises he obtained their extensive collection of historical medical equipment and materials spanning 1884-1926. A large ...This anesthetic ampoule, once containing pure Ethyl Chloride, was used from the 1930s to sedate patients before an operation. It was made and distributed by Sydney company Woolwich-Elliott Chemical Company Pty Ltd. The company had a recycling program, as indicated by the lable offering "6d [6 pence] will be allowed on return to us in good order and condition". This ampoule was donated to Flagstaff Hill Maritime Village by the family of Doctor William Roy Angus, Surgeon and Oculist. It is part of the “W.R. Angus Collection” includes historical medical equipment, surgical instruments and material once belonging to Dr Edward Ryan and Dr Thomas Francis Ryan, (both of Nhill, Victoria) as well as Dr Angus’s own belongings. The Collection’s history spans the medical practices of the two Doctors Ryan, from 1885-1926 plus that of Dr Angus, up until 1969. ABOUT THE “W.R.ANGUS COLLECTION” Doctor William Roy Angus M.B., B.S., Adel., 1923, F.R.C.S. Edin.,1928 (also known as Dr Roy Angus) was born in Murrumbeena, Victoria in 1901 and lived until 1970. He qualified as a doctor in 1923 at University of Adelaide, was Resident Medical Officer at the Royal Adelaide Hospital in 1924 and for a period was house surgeon to Sir (then Mr.) Henry Simpson Newland. Dr Angus was briefly an Assistant to Dr Riddell of Kapunda, then commenced private practice at Curramulka, Yorke Peninsula, SA, where he was physician, surgeon and chemist. In 1926, he was appointed as new Medical Assistant to Dr Thomas Francis Ryan (T.F. Ryan, or Tom), in Nhill, Victoria, where his experiences included radiology and pharmacy. In 1927 he was Acting House Surgeon in Dr Tom Ryan’s absence. Dr Angus had become engaged to Gladys Forsyth and they decided he further his studies overseas in the UK in 1927. He studied at London University College Hospital and at Edinburgh Royal Infirmary and in 1928, was awarded FRCS (Fellow from the Royal College of Surgeons), Edinburgh. He worked his passage back to Australia as a Ship’s Surgeon on the on the Australian Commonwealth Line’s T.S.S. Largs Bay. Dr Angus married Gladys in 1929, in Ballarat. (They went on to have one son (Graham 1932, born in SA) and two daughters (Helen (died 12/07/1996) and Berenice (Berry), both born at Mira, Nhill ) According to Berry, her mother Gladys made a lot of their clothes. She was very talented and did some lovely embroidery including lingerie for her trousseau and beautifully handmade baby clothes. Dr Angus was a ‘flying doctor’ for the A.I.M. (Australian Inland Ministry) Aerial Medical Service in 1928 . Its first station was in the remote town of Oodnadatta, where Dr Angus was stationed. He was locum tenens there on North-South Railway at 21 Mile Camp. He took up this ‘flying doctor’ position in response to a call from Dr John Flynn; the organisation was later known as the Flying Doctor Service, then the Royal Flying Doctor Service. A lot of his work during this time involved dental surgery also. Between 1928-1932 he was surgeon at the Curramulka Hospital, Yorke Peninsula, South Australia. In 1933 Dr Angus returned to Nhill and purchased a share of the Nelson Street practice and Mira hospital (a 2 bed ward at the Nelson Street Practice) from Dr Les Middleton one of the Middleton Brothers, the current owners of what previously once Dr Tom Ryan’s practice. Dr Tom and his brother had worked as surgeons included eye surgery. Dr Tom Ryan performed many of his operations in the Mira private hospital on his premises. He had been House Surgeon at the Nhill Hospital 1902-1926. Dr Tom Ryan had one of the only two pieces of radiology equipment in Victoria during his practicing years – The Royal Melbourne Hospital had the other one. Over the years Dr Tom Ryan had gradually set up what was effectively a training school for country general-practitioner-surgeons. Each patient was carefully examined, including using the X-ray machine, and any surgery was discussed and planned with Dr Ryan’s assistants several days in advance. Dr Angus gained experience in using the X-ray machine there during his time as assistant to Dr Ryan. When Dr Angus bought into the Nelson Street premises in Nhill he was also appointed as the Nhill Hospital’s Honorary House Surgeon 1933-1938. His practitioner’s plate from his Nhill surgery is now mounted on the doorway to the Port Medical Office at Flagstaff Hill Maritime Village, Warrnambool. When Dr Angus took up practice in the Dr Edward and Dr Tom Ryan’s old premises he obtained their extensive collection of historical medical equipment and materials spanning 1884-1926. A large part of this collection is now on display at the Port Medical Office at Flagstaff Hill Maritime Village in Warrnambool. In 1939 Dr Angus and his family moved to Warrnambool where he purchased “Birchwood,” the 1852 home and medical practice of Dr John Hunter Henderson, at 214 Koroit Street. (This property was sold in1965 to the State Government and is now the site of the Warrnambool Police Station. and an ALDI sore is on the land that was once their tennis court). The Angus family was able to afford gardeners, cooks and maids; their home was a popular place for visiting dignitaries to stay whilst visiting Warrnambool. Dr Angus had his own silk worm farm at home in a Mulberry tree. His young daughter used his centrifuge for spinning the silk. Dr Angus was appointed on a part-time basis as Port Medical Officer (Health Officer) in Warrnambool and held this position until the 1940’s when the government no longer required the service of a Port Medical Officer in Warrnambool; he was thus Warrnambool’s last serving Port Medical Officer. (Masters of immigrant ships arriving in port reported incidents of diseases, illness and death and the Port Medical Officer made a decision on whether the ship required Quarantine and for how long, in this way preventing contagious illness from spreading from new immigrants to the residents already in the colony.) Dr Angus was a member of the Australian Medical Association, for 35 years and surgeon at the Warrnambool Base Hospital 1939-1942, He served with the Australian Department of Defence as a Surgeon Captain during WWII 1942-45, in Ballarat, Victoria, and in Bonegilla, N.S.W., completing his service just before the end of the war due to suffering from a heart attack. During his convalescence he carved an intricate and ‘most artistic’ chess set from the material that dentures were made from. He then studied ophthalmology at the Royal Melbourne Eye and Ear Hospital and created cosmetically superior artificial eyes by pioneering using the intrascleral cartilage. Angus received accolades from the Ophthalmological Society of Australasia for this work. He returned to Warrnambool to commence practice as an ophthalmologist, pioneering in artificial eye improvements. He was Honorary Consultant Ophthalmologist to Warrnambool Base Hospital for 31 years. He made monthly visits to Portland as a visiting surgeon, to perform eye surgery. He represented the Victorian South-West subdivision of the Australian Medical Association as its secretary between 1949 and 1956 and as chairman from 1956 to 1958. In 1968 Dr Angus was elected member of Spain’s Barraquer Institute of Barcelona after his research work in Intrasclearal cartilage grafting, becoming one of the few Australian ophthalmologists to receive this honour, and in the following year presented his final paper on Living Intrasclearal Cartilage Implants at the Inaugural Meeting of the Australian College of Ophthalmologists in Melbourne In his personal life Dr Angus was a Presbyterian and treated Sunday as a Sabbath, a day of rest. He would visit 3 or 4 country patients on a Sunday, taking his children along ‘for the ride’ and to visit with him. Sunday evenings he would play the pianola and sing Scottish songs to his family. One of Dr Angus’ patients was Margaret MacKenzie, author of a book on local shipwrecks that she’d seen as an eye witness from the late 1880’s in Peterborough, Victoria. In the early 1950’s Dr Angus, painted a picture of a shipwreck for the cover jacket of Margaret’s book, Shipwrecks and More Shipwrecks. She was blind in later life and her daughter wrote the actual book for her. Dr Angus and his wife Gladys were very involved in Warrnambool’s society with a strong interest in civic affairs. He had an interest in people and the community They were both involved in the creation of Flagstaff Hill, including the layout of the gardens. After his death (28th March 1970) his family requested his practitioner’s plate, medical instruments and some personal belongings be displayed in the Port Medical Office surgery at Flagstaff Hill Maritime Village, and be called the “W. R. Angus Collection”. The anesthetic ampoule, once containing pure Ethyl Chloride, is an example of the medication used in surgery in the early to mid 1900's. The W.R. Angus Collection is significant for still being located at the site it is connected with, Doctor Angus being the last Port Medical Officer in Warrnambool. The collection of medical instruments and other equipment is culturally significant, being an historical example of medicine from late 19th to mid-20th century. Dr Angus assisted Dr Tom Ryan, a pioneer in the use of X-rays and in ocular surgery. Medication ampoule once containing Ethyl Chloride, a pure local anesthetic. Glass cylinder with metal closure, once used in the 1930s, VERY FRAGILE. Part of the W.R. Angus Collection. Contained 100cc; made in Australia by Woolwich-Elliott Chemical Company Pty Ltd, of Sydney. Printed text on label includes "ELLIOTT'S ETHYL CHLORIDE (PURE) 100cc / FOR LOCAL ANAESTHESIA / Manufactured by Woolwich-Elliott Chemical Company Pty Ltd, Sydney / Made in Australia" and "Conforming with requirements of the British Pharmacopeia 1932". Another label is printed "6d will be allowed on return to us in good order and condition"flagstaff hill, warrnambool, shipwrecked coast, flagstaff hill maritime museum, maritime museum, shipwreck coast, flagstaff hill maritime village, great ocean road, dr w r angus, dr ryan, surgical instrument, t.s.s. largs bay, warrnambool base hospital, nhill base hospital, mira hospital, flying doctor, surgical preparation, surgical medication, medicaiton ampoule, anesthetic ampoule, pure ethyl chloride, woolwich-elliott chemical company pty ltd, -
 Flagstaff Hill Maritime Museum and Village
Functional object - Paper Fastener, 1919-1923
... plate from his Nhill surgery is now mounted on the doorway to the Port Medical Office at Flagstaff Hill Maritime Village, Warrnambool. When Dr Angus took up practice in the Dr Edward and Dr Tom Ryan’s old premises he obtained their extensive collection of historical medical equipment and materials spanning 1884-1926. A large...plate from his Nhill surgery is now mounted on the doorway to the Port Medical Office at Flagstaff Hill Maritime Village, Warrnambool. When Dr Angus took up practice in the Dr Edward and Dr Tom Ryan’s old premises he obtained their extensive collection of historical medical equipment and materials spanning 1884-1926. A large ...The Ideal Clipless Paper Fastener is what is known as a stapleless stapler. It uses the Bump fastening method which was patented in the U.S. in 1911. The Ideal measures 4.75″ H x 3.125″ W x 1.875″ L and weighs 6.5 ounces. It was manufactured and sold in Japan but also exported to England. The case is made of stained wood with the fastening mechanism made of polished steel. From unsubstantiated sources I understand the wood is Japanese Boxwood, but I cannot verify that at this time. The markings on the front and reverse are done in black paint. The two patents listed on the reverse side of the fastener are Japanese patents. They were granted in March and September 1918 respectively. The patents were granted to two different men. The letters CK on the reverse of the fastener seem to be the initials of the two patent holders. If the design of a C superimposed over the K is a trademark as indicated, it would imply that the two patent holders went into business together to manufacture the Ideal Fastener. I’ve been unable to determine fully the names of the patent holders, but the K seems to refer to a Mr. Kuroda who was the author of the later patent. The Ideal fastener was sold alongside the Clipless Stand Machine (available 1911-1923) and Bump Fasteners in Japan. The latest patent number on the Ideal is from September 1918. Furthermore, there was also an all-steel model of the Ideal Clipless Paper Fastener being sold in 1922. While the available evidence is both sparse and largely circumstantial, I believe the Ideal Clipless Paper Fastener would have been sold from 1919 until about 1923. Furthermore, with the availability of an all-steel model in 1922, it is likely that this newer model would have been introduced as the replacement for the wooden-cased version giving me further reason to believe that this would not have been sold after 1923. The fastener was donated to Flagstaff Hill Maritime Village by the family of Doctor William Roy Angus, Surgeon and Oculist. It is part of the “W.R. Angus Collection” includes historical medical equipment, surgical instruments and material once belonging to Dr Edward Ryan and Dr Thomas Francis Ryan, (both of Nhill, Victoria) as well as Dr Angus’ own belongings. The Collection’s history spans the medical practices of the two Doctors Ryan, from 1885-1926 plus that of Dr Angus, up until 1969. Dr. Angus was in England in the 1920’s and could very well have purchased the Ideal Clipless Paper Fastener during his study time there. It was donated to Flagstaff Hill Maritime Village by the family of Doctor William Roy Angus, Surgeon and Oculist. It is part of the “W.R. Angus Collection” and includes historical medical equipment, surgical instruments and material once belonging to Dr Edward Ryan and Dr Thomas Francis Ryan, (both of Nhill, Victoria) as well as Dr Angus’ own belongings. The Collection’s history spans the medical practices of the two Doctors Ryan, from 1885-1926 plus that of Dr Angus, up until 1969. ABOUT THE “W.R.ANGUS COLLECTION” Doctor William Roy Angus M.B., B.S., Adel., 1923, F.R.C.S. Edin.,1928 (also known as Dr Roy Angus) was born in Murrumbeena, Victoria in 1901 and lived until 1970. He qualified as a doctor in 1923 at University of Adelaide, was Resident Medical Officer at the Royal Adelaide Hospital in 1924 and for a period was house surgeon to Sir (then Mr.) Henry Simpson Newland. Dr Angus was briefly an Assistant to Dr Riddell of Kapunda, then commenced private practice at Curramulka, Yorke Peninsula, SA, where he was physician, surgeon and chemist. In 1926, he was appointed as new Medical Assistant to Dr Thomas Francis Ryan (T.F. Ryan, or Tom), in Nhill, Victoria, where his experiences included radiology and pharmacy. In 1927 he was Acting House Surgeon in Dr Tom Ryan’s absence. Dr Angus had become engaged to Gladys Forsyth and they decided he further his studies overseas in the UK in 1927. He studied at London University College Hospital and at Edinburgh Royal Infirmary and in 1928, was awarded FRCS (Fellow from the Royal College of Surgeons), Edinburgh. He worked his passage back to Australia as a Ship’s Surgeon on the on the Australian Commonwealth Line’s T.S.S. Largs Bay. Dr Angus married Gladys in 1929, in Ballarat. (They went on to have one son (Graham 1932, born in SA) and two daughters (Helen (died 12/07/1996) and Berenice (Berry), both born at Mira, Nhill ) According to Berry, her mother Gladys made a lot of their clothes. She was very talented and did some lovely embroidery including lingerie for her trousseau and beautifully handmade baby clothes. Dr Angus was a ‘flying doctor’ for the A.I.M. (Australian Inland Ministry) Aerial Medical Service in 1928 . Its first station was in the remote town of Oodnadatta, where Dr Angus was stationed. He was locum tenens there on North-South Railway at 21 Mile Camp. He took up this ‘flying doctor’ position in response to a call from Dr John Flynn; the organisation was later known as the Flying Doctor Service, then the Royal Flying Doctor Service. A lot of his work during this time involved dental surgery also. Between 1928-1932 he was surgeon at the Curramulka Hospital, Yorke Peninsula, South Australia. In 1933 Dr Angus returned to Nhill and purchased a share of the Nelson Street practice and Mira hospital (a 2 bed ward at the Nelson Street Practice) from Dr Les Middleton one of the Middleton Brothers, the current owners of what previously once Dr Tom Ryan’s practice. Dr Tom and his brother had worked as surgeons included eye surgery. Dr Tom Ryan performed many of his operations in the Mira private hospital on his premises. He had been House Surgeon at the Nhill Hospital 1902-1926. Dr Tom Ryan had one of the only two pieces of radiology equipment in Victoria during his practicing years – The Royal Melbourne Hospital had the other one. Over the years Dr Tom Ryan had gradually set up what was effectively a training school for country general-practitioner-surgeons. Each patient was carefully examined, including using the X-ray machine, and any surgery was discussed and planned with Dr Ryan’s assistants several days in advance. Dr Angus gained experience in using the X-ray machine there during his time as assistant to Dr Ryan. When Dr Angus bought into the Nelson Street premises in Nhill he was also appointed as the Nhill Hospital’s Honorary House Surgeon 1933-1938. His practitioner’s plate from his Nhill surgery is now mounted on the doorway to the Port Medical Office at Flagstaff Hill Maritime Village, Warrnambool. When Dr Angus took up practice in the Dr Edward and Dr Tom Ryan’s old premises he obtained their extensive collection of historical medical equipment and materials spanning 1884-1926. A large part of this collection is now on display at the Port Medical Office at Flagstaff Hill Maritime Village in Warrnambool. In 1939 Dr Angus and his family moved to Warrnambool where he purchased “Birchwood,” the 1852 home and medical practice of Dr John Hunter Henderson, at 214 Koroit Street. (This property was sold in1965 to the State Government and is now the site of the Warrnambool Police Station. and an ALDI sore is on the land that was once their tennis court). The Angus family was able to afford gardeners, cooks and maids; their home was a popular place for visiting dignitaries to stay whilst visiting Warrnambool. Dr Angus had his own silk worm farm at home in a Mulberry tree. His young daughter used his centrifuge for spinning the silk. Dr Angus was appointed on a part-time basis as Port Medical Officer (Health Officer) in Warrnambool and held this position until the 1940’s when the government no longer required the service of a Port Medical Officer in Warrnambool; he was thus Warrnambool’s last serving Port Medical Officer. (Masters of immigrant ships arriving in port reported incidents of diseases, illness and death and the Port Medical Officer made a decision on whether the ship required Quarantine and for how long, in this way preventing contagious illness from spreading from new immigrants to the residents already in the colony.) Dr Angus was a member of the Australian Medical Association, for 35 years and surgeon at the Warrnambool Base Hospital 1939-1942, He served with the Australian Department of Defence as a Surgeon Captain during WWII 1942-45, in Ballarat, Victoria, and in Bonegilla, N.S.W., completing his service just before the end of the war due to suffering from a heart attack. During his convalescence he carved an intricate and ‘most artistic’ chess set from the material that dentures were made from. He then studied ophthalmology at the Royal Melbourne Eye and Ear Hospital and created cosmetically superior artificial eyes by pioneering using the intrascleral cartilage. Angus received accolades from the Ophthalmological Society of Australasia for this work. He returned to Warrnambool to commence practice as an ophthalmologist, pioneering in artificial eye improvements. He was Honorary Consultant Ophthalmologist to Warrnambool Base Hospital for 31 years. He made monthly visits to Portland as a visiting surgeon, to perform eye surgery. He represented the Victorian South-West subdivision of the Australian Medical Association as its secretary between 1949 and 1956 and as chairman from 1956 to 1958. In 1968 Dr Angus was elected member of Spain’s Barraquer Institute of Barcelona after his research work in Intrasclearal cartilage grafting, becoming one of the few Australian ophthalmologists to receive this honour, and in the following year presented his final paper on Living Intrasclearal Cartilage Implants at the Inaugural Meeting of the Australian College of Ophthalmologists in Melbourne In his personal life Dr Angus was a Presbyterian and treated Sunday as a Sabbath, a day of rest. He would visit 3 or 4 country patients on a Sunday, taking his children along ‘for the ride’ and to visit with him. Sunday evenings he would play the pianola and sing Scottish songs to his family. One of Dr Angus’ patients was Margaret MacKenzie, author of a book on local shipwrecks that she’d seen as an eye witness from the late 1880’s in Peterborough, Victoria. In the early 1950’s Dr Angus, painted a picture of a shipwreck for the cover jacket of Margaret’s book, Shipwrecks and More Shipwrecks. She was blind in later life and her daughter wrote the actual book for her. Dr Angus and his wife Gladys were very involved in Warrnambool’s society with a strong interest in civic affairs. He had an interest in people and the community They were both involved in the creation of Flagstaff Hill, including the layout of the gardens. After his death (28th March 1970) his family requested his practitioner’s plate, medical instruments and some personal belongings be displayed in the Port Medical Office surgery at Flagstaff Hill Maritime Village, and be called the “W. R. Angus Collection”. [References; Ideal Clipless Paper Fastener, Antique Outings http://antiqueoutings.com/ideal-clipless-paper-fastener/ ; Australian College of Ophthalmologists, Vol 11, 1970.; Medical Directory of Australia listing, alphabetical says 1929, Royal College of Surgeons Edinburgh says 1928; Documents re Dr Angus from daughter Berry McDade, received at Flagstaff Hill Maritime; Portland Examiner, June 13, 1969; The Advertiser (Adelaide) 14th Nov, 1910 - Blind restored to sight – Dr Edward Ryan, Melbourne; The Hamilton Spectator, Wed 15th April 1914 – Ararat man with eye affliction attended to by Drs E & T Ryan; The Nhill Hospital, first 100 years, 1885-1985, by Jan Doust; The Horsham Times, Tuesday 6th January 1885 – Dr Edward Ryan appointed to Nhill Hospital; People who passed this way – Warrnambool and District Historical Society; Warrnambool Base Hospital Report 1969-1970 The Standard, 22/6/1990; The Argus, 1970; Letter to Mrs G Angus from John Lindsay, Flagstaff Hill, 8/5/1973; ] This Ideal Clipless Paper Fastener is significant as a rare example of a clipless paper fastener used as office stationery of the 1920’s. This Ideal Clipless Paper Fastener is significant for its association with the W.R. Angus Collection, which is significant for still being located at the site it is connected with, Doctor Angus being the last Port Medical Officer in Warrnambool. The collection of medical instruments and other equipment is culturally significant, being an historical example of medicine from late 19th to mid-20th century. Dr Angus assisted Dr Tom Ryan, a pioneer in the use of X-rays and in ocular surgery. Paper fastener, clipless or stapleless. Part of the W.R. Angus Collection. Branded Ideal Clipless Paper Fastener, made in Japan. Push down action on wooden handle, metal cutting mechanism cuts and folds the cut flap to join two pieces of paper. Stained wood base, sides and handle, floral fabric under base. Inscriptions on sides and base are in black paint print. Early to mid 1900’sPrinted on sides “IDEAL CLIPLESS PAPER FASTENER” and “TRADE MARK (K with a C through it) PATENT NO. 45105 46743” and stamped into base "MADE IN JAPAN"flagstaff hill, warrnambool, shipwrecked coast, flagstaff hill maritime museum, maritime museum, shipwreck coast, flagstaff hill maritime village, great ocean road, dr w r angus, dr ryan, surgical instrument, t.s.s. largs bay, warrnambool base hospital, nhill base hospital, mira hospital, flying doctor, ideal stapleless stapler, ideal clipless paper fastener, ideal paper fastener made in japan, paper fastener, office stationery, patent 45105 46743, ideal clipless paper fastener ck, logo ck c over k -
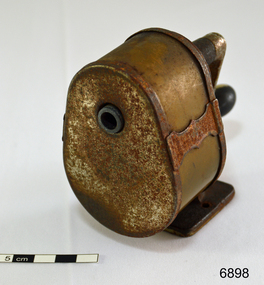 Flagstaff Hill Maritime Museum and Village
Functional object - Desk Pencil Sharpener, Mid 1900's
... plate from his Nhill surgery is now mounted on the doorway to the Port Medical Office at Flagstaff Hill Maritime Village, Warrnambool. When Dr Angus took up practice in the Dr Edward and Dr Tom Ryan’s old premises he obtained their extensive collection of historical medical equipment and materials spanning 1884-1926. A large...plate from his Nhill surgery is now mounted on the doorway to the Port Medical Office at Flagstaff Hill Maritime Village, Warrnambool. When Dr Angus took up practice in the Dr Edward and Dr Tom Ryan’s old premises he obtained their extensive collection of historical medical equipment and materials spanning 1884-1926. A large ...Cylindrical (planetary) sharpeners: These mechanisms are also called planetary sharpeners, in reference to their use of planetary gears. A larger, stationary planetary sharpener can be mounted on a desk or wall and powered by a hand crank. Typically, the pencil is inserted into the sharpener with one hand, and the crank is turned with the other. This rotates a set of helical cylindrical cutters in the mechanism, set at an acute angle to each other. The multiple cutting edges quickly sharpen the pencil, with a more precise finish than a single-blade device. Some cylindrical sharpeners have only one helical cutter cylinder, but most have two cylinders or more. https://en.wikipedia.org/wiki/Pencil_sharpener This mechanical pencil sharpener once belonged to Dr. Angus. It was one of his personal belongings and would have been used in his office. The mechanical pencil sharpener has provision for attaching it to a flat surface such as a desk. The user would insert the pencil into the hole in the front of the sharpener, wind the handle around several times until the pencil is the desired sharpness then remove the pencil. The plastic compartment is clear so that the user can see when it needs emptying, slide down the metal braces on the side of it, remove and empty the compartment and fit it back onto the stand. The sharpener was donated to Flagstaff Hill Maritime Village by the family of Doctor William Roy Angus, Surgeon and Oculist. It is part of the “W.R. Angus Collection” includes historical medical equipment, surgical instruments and material once belonging to Dr Edward Ryan and Dr Thomas Francis Ryan, (both of Nhill, Victoria) as well as Dr Angus’ own belongings. The Collection’s history spans the medical practices of the two Doctors Ryan, from 1885-1926 plus that of Dr Angus, up until 1969. ABOUT THE “W.R.ANGUS COLLECTION” Doctor William Roy Angus M.B., B.S., Adel., 1923, F.R.C.S. Edin.,1928 (also known as Dr Roy Angus) was born in Murrumbeena, Victoria in 1901 and lived until 1970. He qualified as a doctor in 1923 at University of Adelaide, was Resident Medical Officer at the Royal Adelaide Hospital in 1924 and for a period was house surgeon to Sir (then Mr.) Henry Simpson Newland. Dr Angus was briefly an Assistant to Dr Riddell of Kapunda, then commenced private practice at Curramulka, Yorke Peninsula, SA, where he was physician, surgeon and chemist. In 1926, he was appointed as new Medical Assistant to Dr Thomas Francis Ryan (T.F. Ryan, or Tom), in Nhill, Victoria, where his experiences included radiology and pharmacy. In 1927 he was Acting House Surgeon in Dr Tom Ryan’s absence. Dr Angus had become engaged to Gladys Forsyth and they decided he further his studies overseas in the UK in 1927. He studied at London University College Hospital and at Edinburgh Royal Infirmary and in 1928, was awarded FRCS (Fellow from the Royal College of Surgeons), Edinburgh. He worked his passage back to Australia as a Ship’s Surgeon on the on the Australian Commonwealth Line’s T.S.S. Largs Bay. Dr Angus married Gladys in 1929, in Ballarat. (They went on to have one son (Graham 1932, born in SA) and two daughters (Helen (died 12/07/1996) and Berenice (Berry), both born at Mira, Nhill ) According to Berry, her mother Gladys made a lot of their clothes. She was very talented and did some lovely embroidery including lingerie for her trousseau and beautifully handmade baby clothes. Dr Angus was a ‘flying doctor’ for the A.I.M. (Australian Inland Ministry) Aerial Medical Service in 1928 . Its first station was in the remote town of Oodnadatta, where Dr Angus was stationed. He was locum tenens there on North-South Railway at 21 Mile Camp. He took up this ‘flying doctor’ position in response to a call from Dr John Flynn; the organisation was later known as the Flying Doctor Service, then the Royal Flying Doctor Service. A lot of his work during this time involved dental surgery also. Between 1928-1932 he was surgeon at the Curramulka Hospital, Yorke Peninsula, South Australia. In 1933 Dr Angus returned to Nhill and purchased a share of the Nelson Street practice and Mira hospital (a 2 bed ward at the Nelson Street Practice) from Dr Les Middleton one of the Middleton Brothers, the current owners of what previously once Dr Tom Ryan’s practice. Dr Tom and his brother had worked as surgeons included eye surgery. Dr Tom Ryan performed many of his operations in the Mira private hospital on his premises. He had been House Surgeon at the Nhill Hospital 1902-1926. Dr Tom Ryan had one of the only two pieces of radiology equipment in Victoria during his practicing years – The Royal Melbourne Hospital had the other one. Over the years Dr Tom Ryan had gradually set up what was effectively a training school for country general-practitioner-surgeons. Each patient was carefully examined, including using the X-ray machine, and any surgery was discussed and planned with Dr Ryan’s assistants several days in advance. Dr Angus gained experience in using the X-ray machine there during his time as assistant to Dr Ryan. When Dr Angus bought into the Nelson Street premises in Nhill he was also appointed as the Nhill Hospital’s Honorary House Surgeon 1933-1938. His practitioner’s plate from his Nhill surgery is now mounted on the doorway to the Port Medical Office at Flagstaff Hill Maritime Village, Warrnambool. When Dr Angus took up practice in the Dr Edward and Dr Tom Ryan’s old premises he obtained their extensive collection of historical medical equipment and materials spanning 1884-1926. A large part of this collection is now on display at the Port Medical Office at Flagstaff Hill Maritime Village in Warrnambool. In 1939 Dr Angus and his family moved to Warrnambool where he purchased “Birchwood,” the 1852 home and medical practice of Dr John Hunter Henderson, at 214 Koroit Street. (This property was sold in1965 to the State Government and is now the site of the Warrnambool Police Station. and an ALDI sore is on the land that was once their tennis court). The Angus family was able to afford gardeners, cooks and maids; their home was a popular place for visiting dignitaries to stay whilst visiting Warrnambool. Dr Angus had his own silk worm farm at home in a Mulberry tree. His young daughter used his centrifuge for spinning the silk. Dr Angus was appointed on a part-time basis as Port Medical Officer (Health Officer) in Warrnambool and held this position until the 1940’s when the government no longer required the service of a Port Medical Officer in Warrnambool; he was thus Warrnambool’s last serving Port Medical Officer. (Masters of immigrant ships arriving in port reported incidents of diseases, illness and death and the Port Medical Officer made a decision on whether the ship required Quarantine and for how long, in this way preventing contagious illness from spreading from new immigrants to the residents already in the colony.) Dr Angus was a member of the Australian Medical Association, for 35 years and surgeon at the Warrnambool Base Hospital 1939-1942, He served with the Australian Department of Defence as a Surgeon Captain during WWII 1942-45, in Ballarat, Victoria, and in Bonegilla, N.S.W., completing his service just before the end of the war due to suffering from a heart attack. During his convalescence he carved an intricate and ‘most artistic’ chess set from the material that dentures were made from. He then studied ophthalmology at the Royal Melbourne Eye and Ear Hospital and created cosmetically superior artificial eyes by pioneering using the intrascleral cartilage. Angus received accolades from the Ophthalmological Society of Australasia for this work. He returned to Warrnambool to commence practice as an ophthalmologist, pioneering in artificial eye improvements. He was Honorary Consultant Ophthalmologist to Warrnambool Base Hospital for 31 years. He made monthly visits to Portland as a visiting surgeon, to perform eye surgery. He represented the Victorian South-West subdivision of the Australian Medical Association as its secretary between 1949 and 1956 and as chairman from 1956 to 1958. In 1968 Dr Angus was elected member of Spain’s Barraquer Institute of Barcelona after his research work in Intrasclearal cartilage grafting, becoming one of the few Australian ophthalmologists to receive this honour, and in the following year presented his final paper on Living Intrasclearal Cartilage Implants at the Inaugural Meeting of the Australian College of Ophthalmologists in Melbourne In his personal life Dr Angus was a Presbyterian and treated Sunday as a Sabbath, a day of rest. He would visit 3 or 4 country patients on a Sunday, taking his children along ‘for the ride’ and to visit with him. Sunday evenings he would play the pianola and sing Scottish songs to his family. One of Dr Angus’ patients was Margaret MacKenzie, author of a book on local shipwrecks that she’d seen as an eye witness from the late 1880’s in Peterborough, Victoria. In the early 1950’s Dr Angus, painted a picture of a shipwreck for the cover jacket of Margaret’s book, Shipwrecks and More Shipwrecks. She was blind in later life and her daughter wrote the actual book for her. Dr Angus and his wife Gladys were very involved in Warrnambool’s society with a strong interest in civic affairs. He had an interest in people and the community They were both involved in the creation of Flagstaff Hill, including the layout of the gardens. After his death (28th March 1970) his family requested his practitioner’s plate, medical instruments and some personal belongings be displayed in the Port Medical Office surgery at Flagstaff Hill Maritime Village, and be called the “W. R. Angus Collection”. The W.R. Angus Collection is significant for still being located at the site it is connected with, Doctor Angus being the last Port Medical Officer in Warrnambool. The collection of medical instruments and other equipment is culturally significant, being an historical example of medicine from late 19th to mid-20th century. Dr Angus assisted Dr Tom Ryan, a pioneer in the use of X-rays and in ocular surgery. Pencil sharpener, mechanical, part of the W.R. Angus Collection. Metal stand and frame, plastic compartment to hold the shavings. Rotating plastic handle. Metal front on compartment has a re-inforced hole for inserting pencil. Plastic oompartment has sliding metal bracket on each side to allow its removal. Base has two holes for mounting on flat surface. Mid 1900's. flagstaff hill, warrnambool, shipwrecked coast, flagstaff hill maritime museum, maritime museum, shipwreck coast, flagstaff hill maritime village, great ocean road, dr w r angus, dr ryan, surgical instrument, t.s.s. largs bay, warrnambool base hospital, nhill base hospital, mira hospital, flying doctor, pencil sharpener, mechanical pencil sharpener, office equipment, office stationery -
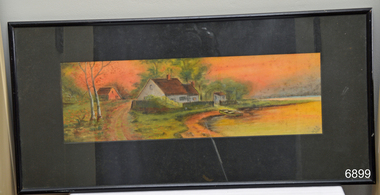 Flagstaff Hill Maritime Museum and Village
Drawing - Pastel Picture, W.R. Angus (Dr. William Roy Angus), 1932
... plate from his Nhill surgery is now mounted on the doorway to the Port Medical Office at Flagstaff Hill Maritime Village, Warrnambool. When Dr Angus took up practice in the Dr Edward and Dr Tom Ryan’s old premises he obtained their extensive collection of historical medical equipment and materials spanning 1884-1926. A large...plate from his Nhill surgery is now mounted on the doorway to the Port Medical Office at Flagstaff Hill Maritime Village, Warrnambool. When Dr Angus took up practice in the Dr Edward and Dr Tom Ryan’s old premises he obtained their extensive collection of historical medical equipment and materials spanning 1884-1926. A large ...This drawing was created by Dr Angus in 1932, most likely using pastels from a tin of pastels also in Flagstaff Hill's W.R. Angus Collection. The drawing was donated to Flagstaff Hill Maritime Village by the family of Doctor William Roy Angus, Surgeon and Oculist. It is part of the “W.R. Angus Collection” that includes historical medical equipment, surgical instruments and material once belonging to Dr Edward Ryan and Dr Thomas Francis Ryan, (both of Nhill, Victoria) as well as Dr Angus’ own belongings. The Collection’s history spans the medical practices of the two Doctors Ryan, from 1885-1926 plus that of Dr Angus, up until 1969. ABOUT THE “W.R.ANGUS COLLECTION” Doctor William Roy Angus M.B., B.S., Adel., 1923, F.R.C.S. Edin.,1928 (also known as Dr Roy Angus) was born in Murrumbeena, Victoria in 1901 and lived until 1970. He qualified as a doctor in 1923 at University of Adelaide, was Resident Medical Officer at the Royal Adelaide Hospital in 1924 and for a period was house surgeon to Sir (then Mr.) Henry Simpson Newland. Dr Angus was briefly an Assistant to Dr Riddell of Kapunda, then commenced private practice at Curramulka, Yorke Peninsula, SA, where he was physician, surgeon and chemist. In 1926, he was appointed as new Medical Assistant to Dr Thomas Francis Ryan (T.F. Ryan, or Tom), in Nhill, Victoria, where his experiences included radiology and pharmacy. In 1927 he was Acting House Surgeon in Dr Tom Ryan’s absence. Dr Angus had become engaged to Gladys Forsyth and they decided he further his studies overseas in the UK in 1927. He studied at London University College Hospital and at Edinburgh Royal Infirmary and in 1928, was awarded FRCS (Fellow from the Royal College of Surgeons), Edinburgh. He worked his passage back to Australia as a Ship’s Surgeon on the on the Australian Commonwealth Line’s T.S.S. Largs Bay. Dr Angus married Gladys in 1929, in Ballarat. (They went on to have one son (Graham 1932, born in SA) and two daughters (Helen (died 12/07/1996) and Berenice (Berry), both born at Mira, Nhill ) According to Berry, her mother Gladys made a lot of their clothes. She was very talented and did some lovely embroidery including lingerie for her trousseau and beautifully handmade baby clothes. Dr Angus was a ‘flying doctor’ for the A.I.M. (Australian Inland Ministry) Aerial Medical Service in 1928 . Its first station was in the remote town of Oodnadatta, where Dr Angus was stationed. He was locum tenens there on North-South Railway at 21 Mile Camp. He took up this ‘flying doctor’ position in response to a call from Dr John Flynn; the organisation was later known as the Flying Doctor Service, then the Royal Flying Doctor Service. A lot of his work during this time involved dental surgery also. Between 1928-1932 he was surgeon at the Curramulka Hospital, Yorke Peninsula, South Australia. In 1933 Dr Angus returned to Nhill and purchased a share of the Nelson Street practice and Mira hospital (a 2 bed ward at the Nelson Street Practice) from Dr Les Middleton one of the Middleton Brothers, the current owners of what previously once Dr Tom Ryan’s practice. Dr Tom and his brother had worked as surgeons included eye surgery. Dr Tom Ryan performed many of his operations in the Mira private hospital on his premises. He had been House Surgeon at the Nhill Hospital 1902-1926. Dr Tom Ryan had one of the only two pieces of radiology equipment in Victoria during his practicing years – The Royal Melbourne Hospital had the other one. Over the years Dr Tom Ryan had gradually set up what was effectively a training school for country general-practitioner-surgeons. Each patient was carefully examined, including using the X-ray machine, and any surgery was discussed and planned with Dr Ryan’s assistants several days in advance. Dr Angus gained experience in using the X-ray machine there during his time as assistant to Dr Ryan. When Dr Angus bought into the Nelson Street premises in Nhill he was also appointed as the Nhill Hospital’s Honorary House Surgeon 1933-1938. His practitioner’s plate from his Nhill surgery is now mounted on the doorway to the Port Medical Office at Flagstaff Hill Maritime Village, Warrnambool. When Dr Angus took up practice in the Dr Edward and Dr Tom Ryan’s old premises he obtained their extensive collection of historical medical equipment and materials spanning 1884-1926. A large part of this collection is now on display at the Port Medical Office at Flagstaff Hill Maritime Village in Warrnambool. In 1939 Dr Angus and his family moved to Warrnambool where he purchased “Birchwood,” the 1852 home and medical practice of Dr John Hunter Henderson, at 214 Koroit Street. (This property was sold in1965 to the State Government and is now the site of the Warrnambool Police Station. and an ALDI sore is on the land that was once their tennis court). The Angus family was able to afford gardeners, cooks and maids; their home was a popular place for visiting dignitaries to stay whilst visiting Warrnambool. Dr Angus had his own silk worm farm at home in a Mulberry tree. His young daughter used his centrifuge for spinning the silk. Dr Angus was appointed on a part-time basis as Port Medical Officer (Health Officer) in Warrnambool and held this position until the 1940’s when the government no longer required the service of a Port Medical Officer in Warrnambool; he was thus Warrnambool’s last serving Port Medical Officer. (Masters of immigrant ships arriving in port reported incidents of diseases, illness and death and the Port Medical Officer made a decision on whether the ship required Quarantine and for how long, in this way preventing contagious illness from spreading from new immigrants to the residents already in the colony.) Dr Angus was a member of the Australian Medical Association, for 35 years and surgeon at the Warrnambool Base Hospital 1939-1942, He served as a Surgeon Captain during WWII1942-45, in Ballarat, Victoria, and in Bonegilla, N.S.W., completing his service just before the end of the war due to suffering from a heart attack. During his convalescence he carved an intricate and ‘most artistic’ chess set from the material that dentures were made from. He then studied ophthalmology at the Royal Melbourne Eye and Ear Hospital and created cosmetically superior artificial eyes by pioneering using the intrascleral cartilage. Angus received accolades from the Ophthalmological Society of Australasia for this work. He returned to Warrnambool to commence practice as an ophthalmologist, pioneering in artificial eye improvements. He was Honorary Consultant Ophthalmologist to Warrnambool Base Hospital for 31 years. He made monthly visits to Portland as a visiting surgeon, to perform eye surgery. He represented the Victorian South-West subdivision of the Australian Medical Association as its secretary between 1949 and 1956 and as chairman from 1956 to 1958. In 1968 Dr Angus was elected member of Spain’s Barraquer Institute of Barcelona after his research work in Intrasclearal cartilage grafting, becoming one of the few Australian ophthalmologists to receive this honour, and in the following year presented his final paper on Living Intrasclearal Cartilage Implants at the Inaugural Meeting of the Australian College of Ophthalmologists in Melbourne In his personal life Dr Angus was a Presbyterian and treated Sunday as a Sabbath, a day of rest. He would visit 3 or 4 country patients on a Sunday, taking his children along ‘for the ride’ and to visit with him. Sunday evenings he would play the pianola and sing Scottish songs to his family. One of Dr Angus’ patients was Margaret MacKenzie, author of a book on local shipwrecks that she’d seen as an eye witness from the late 1880’s in Peterborough, Victoria. In the early 1950’s Dr Angus, painted a picture of a shipwreck for the cover jacket of Margaret’s book, Shipwrecks and More Shipwrecks. She was blind in later life and her daughter wrote the actual book for her. Dr Angus and his wife Gladys were very involved in Warrnambool’s society with a strong interest in civic affairs. He had an interest in people and the community They were both involved in the creation of Flagstaff Hill, including the layout of the gardens. After his death (28th March 1970) his family requested his practitioner’s plate, medical instruments and some personal belongings be displayed in the Port Medical Office surgery at Flagstaff Hill Maritime Village, and be called the “W. R. Angus Collection”. The W.R. Angus Collection is significant for still being located at the site it is connected with, Doctor Angus being the last Port Medical Officer in Warrnambool. The collection of medical instruments and other equipment is culturally significant, being an historical example of medicine from late 19th to mid-20th century. Dr Angus assisted Dr Tom Ryan, a pioneer in the use of X-rays and in ocular surgery. Artwork; coloured pastel drawing in black frame, glass covered, with wide dark mat, part of the W.R. Angus Collection. Sunset scene, cottages by water, row boat in water. Signature “W.R.A. / 1932” . Picture has been framed by M.H. Bayly & Speirs of Adelaide. Signature in bottom right corner “W.R.A. / 1932”. Label on back “M.H. BAYLY & SPEIRS / 48 GRENFELL ST ADELAIDE / ART DEALERS / AND / PICTURE FRAMERS / PHONE 3258” flagstaff hill, warrnambool, shipwrecked coast, flagstaff hill maritime museum, maritime museum, shipwreck coast, flagstaff hill maritime village, great ocean road, dr w r angus, dr ryan, surgical instrument, t.s.s. largs bay, warrnambool base hospital, nhill base hospital, mira hospital, flying doctor, pastel drawing by w.r. angus 1932, artwork w.r. angus 1932, hobby william roy angus, pastel picture william roy angus -
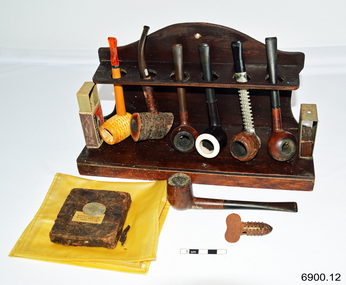 Flagstaff Hill Maritime Museum and Village
Leisure object - Pipe Stand, c. 1930's
... plate from his Nhill surgery is now mounted on the doorway to the Port Medical Office at Flagstaff Hill Maritime Village, Warrnambool. When Dr Angus took up practice in the Dr Edward and Dr Tom Ryan’s old premises he obtained their extensive collection of historical medical equipment and materials spanning 1884-1926. A large...plate from his Nhill surgery is now mounted on the doorway to the Port Medical Office at Flagstaff Hill Maritime Village, Warrnambool. When Dr Angus took up practice in the Dr Edward and Dr Tom Ryan’s old premises he obtained their extensive collection of historical medical equipment and materials spanning 1884-1926. A large ...This pipe stand or rack, together with pipes, tobacco and match box holder, was donated to Flagstaff Hill Maritime Village by the family of Doctor William Roy Angus, Surgeon and Oculist. It is part of the “W.R. Angus Collection” includes historical medical equipment, surgical instruments and material once belonging to Dr Edward Ryan and Dr Thomas Francis Ryan, (both of Nhill, Victoria) as well as Dr Angus’ own belongings. The Collection’s history spans the medical practices of the two Doctors Ryan, from 1885-1926 plus that of Dr Angus, up until 1969. ABOUT THE “W.R.ANGUS COLLECTION” Doctor William Roy Angus M.B., B.S., Adel., 1923, F.R.C.S. Edin.,1928 (also known as Dr Roy Angus) was born in Murrumbeena, Victoria in 1901 and lived until 1970. He qualified as a doctor in 1923 at University of Adelaide, was Resident Medical Officer at the Royal Adelaide Hospital in 1924 and for a period was house surgeon to Sir (then Mr.) Henry Simpson Newland. Dr Angus was briefly an Assistant to Dr Riddell of Kapunda, then commenced private practice at Curramulka, Yorke Peninsula, SA, where he was physician, surgeon and chemist. In 1926, he was appointed as new Medical Assistant to Dr Thomas Francis Ryan (T.F. Ryan, or Tom), in Nhill, Victoria, where his experiences included radiology and pharmacy. In 1927 he was Acting House Surgeon in Dr Tom Ryan’s absence. Dr Angus had become engaged to Gladys Forsyth and they decided he further his studies overseas in the UK in 1927. He studied at London University College Hospital and at Edinburgh Royal Infirmary and in 1928, was awarded FRCS (Fellow from the Royal College of Surgeons), Edinburgh. He worked his passage back to Australia as a Ship’s Surgeon on the on the Australian Commonwealth Line’s T.S.S. Largs Bay. Dr Angus married Gladys in 1929, in Ballarat. (They went on to have one son (Graham 1932, born in SA) and two daughters (Helen (died 12/07/1996) and Berenice (Berry), both born at Mira, Nhill ) According to Berry, her mother Gladys made a lot of their clothes. She was very talented and did some lovely embroidery including lingerie for her trousseau and beautifully handmade baby clothes. Dr Angus was a ‘flying doctor’ for the A.I.M. (Australian Inland Ministry) Aerial Medical Service in 1928 . Its first station was in the remote town of Oodnadatta, where Dr Angus was stationed. He was locum tenens there on North-South Railway at 21 Mile Camp. He took up this ‘flying doctor’ position in response to a call from Dr John Flynn; the organisation was later known as the Flying Doctor Service, then the Royal Flying Doctor Service. A lot of his work during this time involved dental surgery also. Between 1928-1932 he was surgeon at the Curramulka Hospital, Yorke Peninsula, South Australia. In 1933 Dr Angus returned to Nhill and purchased a share of the Nelson Street practice and Mira hospital (a 2 bed ward at the Nelson Street Practice) from Dr Les Middleton one of the Middleton Brothers, the current owners of what previously once Dr Tom Ryan’s practice. Dr Tom and his brother had worked as surgeons included eye surgery. Dr Tom Ryan performed many of his operations in the Mira private hospital on his premises. He had been House Surgeon at the Nhill Hospital 1902-1926. Dr Tom Ryan had one of the only two pieces of radiology equipment in Victoria during his practicing years – The Royal Melbourne Hospital had the other one. Over the years Dr Tom Ryan had gradually set up what was effectively a training school for country general-practitioner-surgeons. Each patient was carefully examined, including using the X-ray machine, and any surgery was discussed and planned with Dr Ryan’s assistants several days in advance. Dr Angus gained experience in using the X-ray machine there during his time as assistant to Dr Ryan. When Dr Angus bought into the Nelson Street premises in Nhill he was also appointed as the Nhill Hospital’s Honorary House Surgeon 1933-1938. His practitioner’s plate from his Nhill surgery is now mounted on the doorway to the Port Medical Office at Flagstaff Hill Maritime Village, Warrnambool. When Dr Angus took up practice in the Dr Edward and Dr Tom Ryan’s old premises he obtained their extensive collection of historical medical equipment and materials spanning 1884-1926. A large part of this collection is now on display at the Port Medical Office at Flagstaff Hill Maritime Village in Warrnambool. In 1939 Dr Angus and his family moved to Warrnambool where he purchased “Birchwood,” the 1852 home and medical practice of Dr John Hunter Henderson, at 214 Koroit Street. (This property was sold in1965 to the State Government and is now the site of the Warrnambool Police Station. and an ALDI sore is on the land that was once their tennis court). The Angus family was able to afford gardeners, cooks and maids; their home was a popular place for visiting dignitaries to stay whilst visiting Warrnambool. Dr Angus had his own silk worm farm at home in a Mulberry tree. His young daughter used his centrifuge for spinning the silk. Dr Angus was appointed on a part-time basis as Port Medical Officer (Health Officer) in Warrnambool and held this position until the 1940’s when the government no longer required the service of a Port Medical Officer in Warrnambool; he was thus Warrnambool’s last serving Port Medical Officer. (Masters of immigrant ships arriving in port reported incidents of diseases, illness and death and the Port Medical Officer made a decision on whether the ship required Quarantine and for how long, in this way preventing contagious illness from spreading from new immigrants to the residents already in the colony.) Dr Angus was a member of the Australian Medical Association, for 35 years and surgeon at the Warrnambool Base Hospital 1939-1942, He served as a Surgeon Captain during WWII1942-45, in Ballarat, Victoria, and in Bonegilla, N.S.W., completing his service just before the end of the war due to suffering from a heart attack. During his convalescence he carved an intricate and ‘most artistic’ chess set from the material that dentures were made from. He then studied ophthalmology at the Royal Melbourne Eye and Ear Hospital and created cosmetically superior artificial eyes by pioneering using the intrascleral cartilage. Angus received accolades from the Ophthalmological Society of Australasia for this work. He returned to Warrnambool to commence practice as an ophthalmologist, pioneering in artificial eye improvements. He was Honorary Consultant Ophthalmologist to Warrnambool Base Hospital for 31 years. He made monthly visits to Portland as a visiting surgeon, to perform eye surgery. He represented the Victorian South-West subdivision of the Australian Medical Association as its secretary between 1949 and 1956 and as chairman from 1956 to 1958. In 1968 Dr Angus was elected member of Spain’s Barraquer Institute of Barcelona after his research work in Intrasclearal cartilage grafting, becoming one of the few Australian ophthalmologists to receive this honour, and in the following year presented his final paper on Living Intrasclearal Cartilage Implants at the Inaugural Meeting of the Australian College of Ophthalmologists in Melbourne In his personal life Dr Angus was a Presbyterian and treated Sunday as a Sabbath, a day of rest. He would visit 3 or 4 country patients on a Sunday, taking his children along ‘for the ride’ and to visit with him. Sunday evenings he would play the pianola and sing Scottish songs to his family. One of Dr Angus’ patients was Margaret MacKenzie, author of a book on local shipwrecks that she’d seen as an eye witness from the late 1880’s in Peterborough, Victoria. In the early 1950’s Dr Angus, painted a picture of a shipwreck for the cover jacket of Margaret’s book, Shipwrecks and More Shipwrecks. She was blind in later life and her daughter wrote the actual book for her. Dr Angus and his wife Gladys were very involved in Warrnambool’s society with a strong interest in civic affairs. He had an interest in people and the community They were both involved in the creation of Flagstaff Hill, including the layout of the gardens. After his death (28th March 1970) his family requested his practitioner’s plate, medical instruments and some personal belongings be displayed in the Port Medical Office surgery at Flagstaff Hill Maritime Village, and be called the “W. R. Angus Collection”. The W.R. Angus Collection is significant for still being located at the site it is connected with, Doctor Angus being the last Port Medical Officer in Warrnambool. The collection of medical instruments and other equipment is culturally significant, being an historical example of medicine from late 19th to mid-20th century. Dr Angus assisted Dr Tom Ryan, a pioneer in the use of X-rays and in ocular surgery. Timber smoker's pipe stand set, including 7 pipes and a pouch of cut tobacco, Part of the W.R. Angus Collection. Stand holds 6 pipes upright in the rack, with metal matchbox holder on end. Stand has hanging hole in top back. Smoker's pipes: (1) corn cob pipe, orange mouthpiece (2) 'bushman's pipe', bowl carved from branch, etched in stem "ROPE" (3,4) 2x wooden bowl, Bakelite mouthpiece (5) Dark Bakelite with white rim on bowl, stamped "PHOENIX REG APP / MADE IN LONDON" (6) Bakelite mouthpiece, metal stem, wooden bowl "TUNFLOW PAT. PAT PE ND" (7) Bakelite mouthpiece and stem, wooden bowl (bowl is split). Plus metal pipe reamer/cleaner and plug of tobacco in paque tobacco pouch. Note inside pouch - “from Old Mr Bant, Panmure. He always cut a pipe full for Dr. A. when he visited him.” Pouch is stamped "O P L" (each letter in a diamond symbol). Tobacco has metal disc stamped "HAVELOCK TOBACCO" and label "The British-Ambassador Tobacco Co. Ppty. Ltd, Sydney, Australia" , "2 [above] 4 in circle" Etched into bushman's pipe "ROPE" Bakelite pipe is stamped "PHOENIX REG APP / MADE IN LONDON" Another Bakelite pipe is stamped "TUNFLOW PAT. PAT PE ND" Pouch is stamped "O P L" Tobacco has metal disc stamped "HAVELOCK TOBACCO" and label "The British-Ambassador Tobacco Co. Ppty. Ltd, Sydney, Australia" , "2 [above] 4 in circle" flagstaff hill, warrnambool, shipwrecked coast, flagstaff hill maritime museum, maritime museum, shipwreck coast, flagstaff hill maritime village, great ocean road, dr w r angu, pipe stand, pipe rack, pipe collection, smokers' pipes, smoker's accessories, matchbox holder, pipe reamer, pipe cleaner, bushman's smoker's pipe brand rope, bakelite smoker's pipe phoenix reg app, made in london, smoker's pipe tunflow pat. pat pe nd, tobacco pouch havelock tobacco, tobacco the british-ambassador tobacco co. ppty. ltd, sydney, australia -
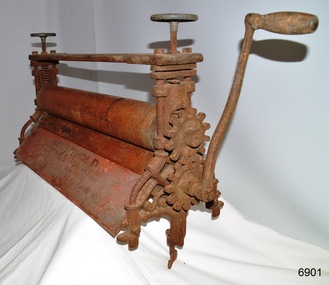 Flagstaff Hill Maritime Museum and Village
Mangle, late 19th century
... plate from his Nhill surgery is now mounted on the doorway to the Port Medical Office at Flagstaff Hill Maritime Village, Warrnambool. When Dr Angus took up practice in the Dr Edward and Dr Tom Ryan’s old premises he obtained their extensive collection of historical medical equipment and materials spanning 1884-1926. A large...plate from his Nhill surgery is now mounted on the doorway to the Port Medical Office at Flagstaff Hill Maritime Village, Warrnambool. When Dr Angus took up practice in the Dr Edward and Dr Tom Ryan’s old premises he obtained their extensive collection of historical medical equipment and materials spanning 1884-1926. A large ...This mangle, sometimes referred to as a wringer, was donated to Flagstaff Hill Maritime Village by the family of Doctor William Roy Angus, Surgeon and Oculist. It is part of the “W.R. Angus Collection” includes historical medical equipment, surgical instruments and material once belonging to Dr Edward Ryan and Dr Thomas Francis Ryan, (both of Nhill, Victoria) as well as Dr Angus’ own belongings. The Collection’s history spans the medical practices of the two Doctors Ryan, from 1885-1926 plus that of Dr Angus, up until 1969. The mangle was used in laundries to squeeze water from washed items and hasten the drying process. This particular wringer is larger that the usual household design and was possibly amongst the original furnishings of "Birchwood", the 1852 home of Dr Henderson when Dr. Angus purchased his home and medical practice in Koroit St, Warrnambool. The wooden rollers date the mangle to one of the earlier models manufactured. ABOUT THE “W.R.ANGUS COLLECTION” Doctor William Roy Angus M.B., B.S., Adel., 1923, F.R.C.S. Edin.,1928 (also known as Dr Roy Angus) was born in Murrumbeena, Victoria in 1901 and lived until 1970. He qualified as a doctor in 1923 at University of Adelaide, was Resident Medical Officer at the Royal Adelaide Hospital in 1924 and for a period was house surgeon to Sir (then Mr.) Henry Simpson Newland. Dr Angus was briefly an Assistant to Dr Riddell of Kapunda, then commenced private practice at Curramulka, Yorke Peninsula, SA, where he was physician, surgeon and chemist. In 1926, he was appointed as new Medical Assistant to Dr Thomas Francis Ryan (T.F. Ryan, or Tom), in Nhill, Victoria, where his experiences included radiology and pharmacy. In 1927 he was Acting House Surgeon in Dr Tom Ryan’s absence. Dr Angus had become engaged to Gladys Forsyth and they decided he further his studies overseas in the UK in 1927. He studied at London University College Hospital and at Edinburgh Royal Infirmary and in 1928, was awarded FRCS (Fellow from the Royal College of Surgeons), Edinburgh. He worked his passage back to Australia as a Ship’s Surgeon on the on the Australian Commonwealth Line’s T.S.S. Largs Bay. Dr Angus married Gladys in 1929, in Ballarat. (They went on to have one son (Graham 1932, born in SA) and two daughters (Helen (died 12/07/1996) and Berenice (Berry), both born at Mira, Nhill ) According to Berry, her mother Gladys made a lot of their clothes. She was very talented and did some lovely embroidery including lingerie for her trousseau and beautifully handmade baby clothes. Dr Angus was a ‘flying doctor’ for the A.I.M. (Australian Inland Ministry) Aerial Medical Service in 1928 . Its first station was in the remote town of Oodnadatta, where Dr Angus was stationed. He was locum tenens there on North-South Railway at 21 Mile Camp. He took up this ‘flying doctor’ position in response to a call from Dr John Flynn; the organisation was later known as the Flying Doctor Service, then the Royal Flying Doctor Service. A lot of his work during this time involved dental surgery also. Between 1928-1932 he was surgeon at the Curramulka Hospital, Yorke Peninsula, South Australia. In 1933 Dr Angus returned to Nhill and purchased a share of the Nelson Street practice and Mira hospital (a 2 bed ward at the Nelson Street Practice) from Dr Les Middleton one of the Middleton Brothers, the current owners of what previously once Dr Tom Ryan’s practice. Dr Tom and his brother had worked as surgeons included eye surgery. Dr Tom Ryan performed many of his operations in the Mira private hospital on his premises. He had been House Surgeon at the Nhill Hospital 1902-1926. Dr Tom Ryan had one of the only two pieces of radiology equipment in Victoria during his practicing years – The Royal Melbourne Hospital had the other one. Over the years Dr Tom Ryan had gradually set up what was effectively a training school for country general-practitioner-surgeons. Each patient was carefully examined, including using the X-ray machine, and any surgery was discussed and planned with Dr Ryan’s assistants several days in advance. Dr Angus gained experience in using the X-ray machine there during his time as assistant to Dr Ryan. When Dr Angus bought into the Nelson Street premises in Nhill he was also appointed as the Nhill Hospital’s Honorary House Surgeon 1933-1938. His practitioner’s plate from his Nhill surgery is now mounted on the doorway to the Port Medical Office at Flagstaff Hill Maritime Village, Warrnambool. When Dr Angus took up practice in the Dr Edward and Dr Tom Ryan’s old premises he obtained their extensive collection of historical medical equipment and materials spanning 1884-1926. A large part of this collection is now on display at the Port Medical Office at Flagstaff Hill Maritime Village in Warrnambool. In 1939 Dr Angus and his family moved to Warrnambool where he purchased “Birchwood,” the 1852 home and medical practice of Dr John Hunter Henderson, at 214 Koroit Street. (This property was sold in1965 to the State Government and is now the site of the Warrnambool Police Station. and an ALDI sore is on the land that was once their tennis court). The Angus family was able to afford gardeners, cooks and maids; their home was a popular place for visiting dignitaries to stay whilst visiting Warrnambool. Dr Angus had his own silk worm farm at home in a Mulberry tree. His young daughter used his centrifuge for spinning the silk. Dr Angus was appointed on a part-time basis as Port Medical Officer (Health Officer) in Warrnambool and held this position until the 1940’s when the government no longer required the service of a Port Medical Officer in Warrnambool; he was thus Warrnambool’s last serving Port Medical Officer. (Masters of immigrant ships arriving in port reported incidents of diseases, illness and death and the Port Medical Officer made a decision on whether the ship required Quarantine and for how long, in this way preventing contagious illness from spreading from new immigrants to the residents already in the colony.) Dr Angus was a member of the Australian Medical Association, for 35 years and surgeon at the Warrnambool Base Hospital 1939-1942, He served as a Surgeon Captain during WWII1942-45, in Ballarat, Victoria, and in Bonegilla, N.S.W., completing his service just before the end of the war due to suffering from a heart attack. During his convalescence he carved an intricate and ‘most artistic’ chess set from the material that dentures were made from. He then studied ophthalmology at the Royal Melbourne Eye and Ear Hospital and created cosmetically superior artificial eyes by pioneering using the intrascleral cartilage. Angus received accolades from the Ophthalmological Society of Australasia for this work. He returned to Warrnambool to commence practice as an ophthalmologist, pioneering in artificial eye improvements. He was Honorary Consultant Ophthalmologist to Warrnambool Base Hospital for 31 years. He made monthly visits to Portland as a visiting surgeon, to perform eye surgery. He represented the Victorian South-West subdivision of the Australian Medical Association as its secretary between 1949 and 1956 and as chairman from 1956 to 1958. In 1968 Dr Angus was elected member of Spain’s Barraquer Institute of Barcelona after his research work in Intrasclearal cartilage grafting, becoming one of the few Australian ophthalmologists to receive this honour, and in the following year presented his final paper on Living Intrasclearal Cartilage Implants at the Inaugural Meeting of the Australian College of Ophthalmologists in Melbourne In his personal life Dr Angus was a Presbyterian and treated Sunday as a Sabbath, a day of rest. He would visit 3 or 4 country patients on a Sunday, taking his children along ‘for the ride’ and to visit with him. Sunday evenings he would play the pianola and sing Scottish songs to his family. One of Dr Angus’ patients was Margaret MacKenzie, author of a book on local shipwrecks that she’d seen as an eye witness from the late 1880’s in Peterborough, Victoria. In the early 1950’s Dr Angus, painted a picture of a shipwreck for the cover jacket of Margaret’s book, Shipwrecks and More Shipwrecks. She was blind in later life and her daughter wrote the actual book for her. Dr Angus and his wife Gladys were very involved in Warrnambool’s society with a strong interest in civic affairs. He had an interest in people and the community They were both involved in the creation of Flagstaff Hill, including the layout of the gardens. After his death (28th March 1970) his family requested his practitioner’s plate, medical instruments and some personal belongings be displayed in the Port Medical Office surgery at Flagstaff Hill Maritime Village, and be called the “W. R. Angus Collection”. The W.R. Angus Collection is significant for still being located at the site it is connected with, Doctor Angus being the last Port Medical Officer in Warrnambool. The collection of medical instruments and other equipment is culturally significant, being an historical example of medicine from late 19th to mid-20th century. Dr Angus assisted Dr Tom Ryan, a pioneer in the use of X-rays and in ocular surgery. Large mangle (or wringer) with wooden handle, hardwood wooden rollers and metal stand, part of the W.R. Angus Collection. Household clothes mangle with steel ball bearings, made by the American Wringer Co. New York, U.S.A. Brand and details are printed on side. Printed on side; "HOUSEHOLD / CLOTHES MANGLE / STEEL BALL BEARINGS / THE AMERICAN WRINGER Co, NEW YORK, USA” and on top "NO. HARDWOOD ROLLERS 124"flagstaff hill, warrnambool, shipwrecked coast, flagstaff hill maritime museum, maritime museum, shipwreck coast, flagstaff hill maritime village, great ocean road, dr w r angus, dr ryan, surgical instrument, t.s.s. largs bay, warrnambool base hospital, nhill base hospital, mira hospital, flying doctor, clothes mangle, clothes wringer, laundry equipment, the american wringer company, mangle with wooden rollers, mangle with settl bearings -
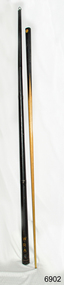 Flagstaff Hill Maritime Museum and Village
Billiard Cue, 1879 – 1919
... plate from his Nhill surgery is now mounted on the doorway to the Port Medical Office at Flagstaff Hill Maritime Village, Warrnambool. When Dr Angus took up practice in the Dr Edward and Dr Tom Ryan’s old premises he obtained their extensive collection of historical medical equipment and materials spanning 1884-1926. A large...plate from his Nhill surgery is now mounted on the doorway to the Port Medical Office at Flagstaff Hill Maritime Village, Warrnambool. When Dr Angus took up practice in the Dr Edward and Dr Tom Ryan’s old premises he obtained their extensive collection of historical medical equipment and materials spanning 1884-1926. A large ...This billiard cue donated to Flagstaff Hill Maritime Village by the family of Doctor William Roy Angus, Surgeon and Oculist. It would have been purchased in 1919 at the latest, which coincides with the time that Dr Angus was a medical student at Adelaide University. It is now part of the “W.R. Angus Collection” includes historical medical equipment, surgical instruments and material once belonging to Dr Edward Ryan and Dr Thomas Francis Ryan, (both of Nhill, Victoria) as well as Dr Angus’ own belongings. The Collection’s history spans the medical practices of the two Doctors Ryan, from 1885-1926 plus that of Dr Angus, up until 1969. ABOUT THE “W.R.ANGUS COLLECTION” Doctor William Roy Angus M.B., B.S., Adel., 1923, F.R.C.S. Edin.,1928 (also known as Dr Roy Angus) was born in Murrumbeena, Victoria in 1901 and lived until 1970. He qualified as a doctor in 1923 at University of Adelaide, was Resident Medical Officer at the Royal Adelaide Hospital in 1924 and for a period was house surgeon to Sir (then Mr.) Henry Simpson Newland. Dr Angus was briefly an Assistant to Dr Riddell of Kapunda, then commenced private practice at Curramulka, Yorke Peninsula, SA, where he was physician, surgeon and chemist. In 1926, he was appointed as new Medical Assistant to Dr Thomas Francis Ryan (T.F. Ryan, or Tom), in Nhill, Victoria, where his experiences included radiology and pharmacy. In 1927 he was Acting House Surgeon in Dr Tom Ryan’s absence. Dr Angus had become engaged to Gladys Forsyth and they decided he further his studies overseas in the UK in 1927. He studied at London University College Hospital and at Edinburgh Royal Infirmary and in 1928, was awarded FRCS (Fellow from the Royal College of Surgeons), Edinburgh. He worked his passage back to Australia as a Ship’s Surgeon on the on the Australian Commonwealth Line’s T.S.S. Largs Bay. Dr Angus married Gladys in 1929, in Ballarat. (They went on to have one son (Graham 1932, born in SA) and two daughters (Helen (died 12/07/1996) and Berenice (Berry), both born at Mira, Nhill ) According to Berry, her mother Gladys made a lot of their clothes. She was very talented and did some lovely embroidery including lingerie for her trousseau and beautifully handmade baby clothes. Dr Angus was a ‘flying doctor’ for the A.I.M. (Australian Inland Ministry) Aerial Medical Service in 1928 . Its first station was in the remote town of Oodnadatta, where Dr Angus was stationed. He was locum tenens there on North-South Railway at 21 Mile Camp. He took up this ‘flying doctor’ position in response to a call from Dr John Flynn; the organisation was later known as the Flying Doctor Service, then the Royal Flying Doctor Service. A lot of his work during this time involved dental surgery also. Between 1928-1932 he was surgeon at the Curramulka Hospital, Yorke Peninsula, South Australia. In 1933 Dr Angus returned to Nhill and purchased a share of the Nelson Street practice and Mira hospital (a 2 bed ward at the Nelson Street Practice) from Dr Les Middleton one of the Middleton Brothers, the current owners of what previously once Dr Tom Ryan’s practice. Dr Tom and his brother had worked as surgeons included eye surgery. Dr Tom Ryan performed many of his operations in the Mira private hospital on his premises. He had been House Surgeon at the Nhill Hospital 1902-1926. Dr Tom Ryan had one of the only two pieces of radiology equipment in Victoria during his practicing years – The Royal Melbourne Hospital had the other one. Over the years Dr Tom Ryan had gradually set up what was effectively a training school for country general-practitioner-surgeons. Each patient was carefully examined, including using the X-ray machine, and any surgery was discussed and planned with Dr Ryan’s assistants several days in advance. Dr Angus gained experience in using the X-ray machine there during his time as assistant to Dr Ryan. When Dr Angus bought into the Nelson Street premises in Nhill he was also appointed as the Nhill Hospital’s Honorary House Surgeon 1933-1938. His practitioner’s plate from his Nhill surgery is now mounted on the doorway to the Port Medical Office at Flagstaff Hill Maritime Village, Warrnambool. When Dr Angus took up practice in the Dr Edward and Dr Tom Ryan’s old premises he obtained their extensive collection of historical medical equipment and materials spanning 1884-1926. A large part of this collection is now on display at the Port Medical Office at Flagstaff Hill Maritime Village in Warrnambool. In 1939 Dr Angus and his family moved to Warrnambool where he purchased “Birchwood,” the 1852 home and medical practice of Dr John Hunter Henderson, at 214 Koroit Street. (This property was sold in1965 to the State Government and is now the site of the Warrnambool Police Station. and an ALDI sore is on the land that was once their tennis court). The Angus family was able to afford gardeners, cooks and maids; their home was a popular place for visiting dignitaries to stay whilst visiting Warrnambool. Dr Angus had his own silk worm farm at home in a Mulberry tree. His young daughter used his centrifuge for spinning the silk. Dr Angus was appointed on a part-time basis as Port Medical Officer (Health Officer) in Warrnambool and held this position until the 1940’s when the government no longer required the service of a Port Medical Officer in Warrnambool; he was thus Warrnambool’s last serving Port Medical Officer. (Masters of immigrant ships arriving in port reported incidents of diseases, illness and death and the Port Medical Officer made a decision on whether the ship required Quarantine and for how long, in this way preventing contagious illness from spreading from new immigrants to the residents already in the colony.) Dr Angus was a member of the Australian Medical Association, for 35 years and surgeon at the Warrnambool Base Hospital 1939-1942, He served as a Surgeon Captain during WWII1942-45, in Ballarat, Victoria, and in Bonegilla, N.S.W., completing his service just before the end of the war due to suffering from a heart attack. During his convalescence he carved an intricate and ‘most artistic’ chess set from the material that dentures were made from. He then studied ophthalmology at the Royal Melbourne Eye and Ear Hospital and created cosmetically superior artificial eyes by pioneering using the intrascleral cartilage. Angus received accolades from the Ophthalmological Society of Australasia for this work. He returned to Warrnambool to commence practice as an ophthalmologist, pioneering in artificial eye improvements. He was Honorary Consultant Ophthalmologist to Warrnambool Base Hospital for 31 years. He made monthly visits to Portland as a visiting surgeon, to perform eye surgery. He represented the Victorian South-West subdivision of the Australian Medical Association as its secretary between 1949 and 1956 and as chairman from 1956 to 1958. In 1968 Dr Angus was elected member of Spain’s Barraquer Institute of Barcelona after his research work in Intrasclearal cartilage grafting, becoming one of the few Australian ophthalmologists to receive this honour, and in the following year presented his final paper on Living Intrasclearal Cartilage Implants at the Inaugural Meeting of the Australian College of Ophthalmologists in Melbourne In his personal life Dr Angus was a Presbyterian and treated Sunday as a Sabbath, a day of rest. He would visit 3 or 4 country patients on a Sunday, taking his children along ‘for the ride’ and to visit with him. Sunday evenings he would play the Pianola and sing Scottish songs to his family. One of Dr Angus’ patients was Margaret MacKenzie, author of a book on local shipwrecks that she’d seen as an eye witness from the late 1880’s in Peterborough, Victoria. In the early 1950’s Dr Angus, painted a picture of a shipwreck for the cover jacket of Margaret’s book, Shipwrecks and More Shipwrecks. She was blind in later life and her daughter wrote the actual book for her. Dr Angus and his wife Gladys were very involved in Warrnambool’s society with a strong interest in civic affairs. He had an interest in people and the community They were both involved in the creation of Flagstaff Hill, including the layout of the gardens. After his death (28th March 1970) his family requested his practitioner’s plate, medical instruments and some personal belongings be displayed in the Port Medical Office surgery at Flagstaff Hill Maritime Village, and be called the “W. R. Angus Collection”. (References include: The Cue Coolector and his website www.thecuecollector.com, history of Alcock www.alcock.com.au, Alcocks & Billiards in Australia, by Alcocks, 12 page booklet, William Cook on www.thecuecollector.com, conversations with Berry McDade, daughter of Dr. W.R. Angus)The W.R. Angus Collection is significant for still being located at the site it is connected with, Doctor Angus being the last Port Medical Officer in Warrnambool. The collection of medical instruments and other equipment is culturally significant, being an historical example of medicine from late 19th to mid-20th century. Dr Angus assisted Dr Tom Ryan, a pioneer in the use of X-rays and in ocular surgery. Billiard cue in tapered case, part of W.R. Angus Collection. Metal case, painted black, hinged lid, green felt lining; contains light coloured timber billiard cue with black pattern on handle. Case has gold embossed initials of Dr Angus - W.R.A. Cue butt has round badge inlay of white, grained material with maker's details, Alcock & Co. Pty Ltd. of Melbourne with a Registered model W. Cook [William Cook] and a date 25/4/79 [1879].Case has gold embossed "W.R.A." Butt of cue has inlay with silver text "ALCOCK & CO. / Propty Ld / REGd / W. Cook / 25/4/79 / MELBOURNE - - - " flagstaff hill, warrnambool, shipwrecked coast, flagstaff hill maritime museum, maritime museum, shipwreck coast, flagstaff hill maritime village, great ocean road, dr w r angus, dr ryan, surgical instrument, t.s.s. largs bay, warrnambool base hospital, nhill base hospital, mira hospital, flying doctor, billiard cue, billiard equipment, alcock & co pty ltd, w cook billiard cue 25/4/19, recreation w.r. angus -
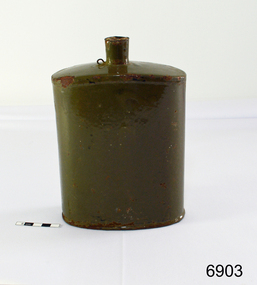 Flagstaff Hill Maritime Museum and Village
Water Canteen, mid 20th century
... plate from his Nhill surgery is now mounted on the doorway to the Port Medical Office at Flagstaff Hill Maritime Village, Warrnambool. When Dr Angus took up practice in the Dr Edward and Dr Tom Ryan’s old premises he obtained their extensive collection of historical medical equipment and materials spanning 1884-1926. A large...plate from his Nhill surgery is now mounted on the doorway to the Port Medical Office at Flagstaff Hill Maritime Village, Warrnambool. When Dr Angus took up practice in the Dr Edward and Dr Tom Ryan’s old premises he obtained their extensive collection of historical medical equipment and materials spanning 1884-1926. A large ...This water canteen was donated to Flagstaff Hill Maritime Village by the family of Doctor William Roy Angus, Surgeon and Oculist. It is part of the “W.R. Angus Collection” includes historical medical equipment, surgical instruments and material once belonging to Dr Edward Ryan and Dr Thomas Francis Ryan, (both of Nhill, Victoria) as well as Dr Angus’ own belongings. The Collection’s history spans the medical practices of the two Doctors Ryan, from 1885-1926 plus that of Dr Angus, up until 1969. ABOUT THE “W.R.ANGUS COLLECTION” Doctor William Roy Angus M.B., B.S., Adel., 1923, F.R.C.S. Edin.,1928 (also known as Dr Roy Angus) was born in Murrumbeena, Victoria in 1901 and lived until 1970. He qualified as a doctor in 1923 at University of Adelaide, was Resident Medical Officer at the Royal Adelaide Hospital in 1924 and for a period was house surgeon to Sir (then Mr.) Henry Simpson Newland. Dr Angus was briefly an Assistant to Dr Riddell of Kapunda, then commenced private practice at Curramulka, Yorke Peninsula, SA, where he was physician, surgeon and chemist. In 1926, he was appointed as new Medical Assistant to Dr Thomas Francis Ryan (T.F. Ryan, or Tom), in Nhill, Victoria, where his experiences included radiology and pharmacy. In 1927 he was Acting House Surgeon in Dr Tom Ryan’s absence. Dr Angus had become engaged to Gladys Forsyth and they decided he further his studies overseas in the UK in 1927. He studied at London University College Hospital and at Edinburgh Royal Infirmary and in 1928, was awarded FRCS (Fellow from the Royal College of Surgeons), Edinburgh. He worked his passage back to Australia as a Ship’s Surgeon on the on the Australian Commonwealth Line’s T.S.S. Largs Bay. Dr Angus married Gladys in 1929, in Ballarat. (They went on to have one son (Graham 1932, born in SA) and two daughters (Helen (died 12/07/1996) and Berenice (Berry), both born at Mira, Nhill ) According to Berry, her mother Gladys made a lot of their clothes. She was very talented and did some lovely embroidery including lingerie for her trousseau and beautifully handmade baby clothes. Dr Angus was a ‘flying doctor’ for the A.I.M. (Australian Inland Ministry) Aerial Medical Service in 1928 . Its first station was in the remote town of Oodnadatta, where Dr Angus was stationed. He was locum tenens there on North-South Railway at 21 Mile Camp. He took up this ‘flying doctor’ position in response to a call from Dr John Flynn; the organisation was later known as the Flying Doctor Service, then the Royal Flying Doctor Service. A lot of his work during this time involved dental surgery also. Between 1928-1932 he was surgeon at the Curramulka Hospital, Yorke Peninsula, South Australia. In 1933 Dr Angus returned to Nhill and purchased a share of the Nelson Street practice and Mira hospital (a 2 bed ward at the Nelson Street Practice) from Dr Les Middleton one of the Middleton Brothers, the current owners of what previously once Dr Tom Ryan’s practice. Dr Tom and his brother had worked as surgeons included eye surgery. Dr Tom Ryan performed many of his operations in the Mira private hospital on his premises. He had been House Surgeon at the Nhill Hospital 1902-1926. Dr Tom Ryan had one of the only two pieces of radiology equipment in Victoria during his practicing years – The Royal Melbourne Hospital had the other one. Over the years Dr Tom Ryan had gradually set up what was effectively a training school for country general-practitioner-surgeons. Each patient was carefully examined, including using the X-ray machine, and any surgery was discussed and planned with Dr Ryan’s assistants several days in advance. Dr Angus gained experience in using the X-ray machine there during his time as assistant to Dr Ryan. When Dr Angus bought into the Nelson Street premises in Nhill he was also appointed as the Nhill Hospital’s Honorary House Surgeon 1933-1938. His practitioner’s plate from his Nhill surgery is now mounted on the doorway to the Port Medical Office at Flagstaff Hill Maritime Village, Warrnambool. When Dr Angus took up practice in the Dr Edward and Dr Tom Ryan’s old premises he obtained their extensive collection of historical medical equipment and materials spanning 1884-1926. A large part of this collection is now on display at the Port Medical Office at Flagstaff Hill Maritime Village in Warrnambool. In 1939 Dr Angus and his family moved to Warrnambool where he purchased “Birchwood,” the 1852 home and medical practice of Dr John Hunter Henderson, at 214 Koroit Street. (This property was sold in1965 to the State Government and is now the site of the Warrnambool Police Station. and an ALDI sore is on the land that was once their tennis court). The Angus family was able to afford gardeners, cooks and maids; their home was a popular place for visiting dignitaries to stay whilst visiting Warrnambool. Dr Angus had his own silk worm farm at home in a Mulberry tree. His young daughter used his centrifuge for spinning the silk. Dr Angus was appointed on a part-time basis as Port Medical Officer (Health Officer) in Warrnambool and held this position until the 1940’s when the government no longer required the service of a Port Medical Officer in Warrnambool; he was thus Warrnambool’s last serving Port Medical Officer. (Masters of immigrant ships arriving in port reported incidents of diseases, illness and death and the Port Medical Officer made a decision on whether the ship required Quarantine and for how long, in this way preventing contagious illness from spreading from new immigrants to the residents already in the colony.) Dr Angus was a member of the Australian Medical Association, for 35 years and surgeon at the Warrnambool Base Hospital 1939-1942, He served as a Surgeon Captain during WWII1942-45, in Ballarat, Victoria, and in Bonegilla, N.S.W., completing his service just before the end of the war due to suffering from a heart attack. During his convalescence he carved an intricate and ‘most artistic’ chess set from the material that dentures were made from. He then studied ophthalmology at the Royal Melbourne Eye and Ear Hospital and created cosmetically superior artificial eyes by pioneering using the intrascleral cartilage. Angus received accolades from the Ophthalmological Society of Australasia for this work. He returned to Warrnambool to commence practice as an ophthalmologist, pioneering in artificial eye improvements. He was Honorary Consultant Ophthalmologist to Warrnambool Base Hospital for 31 years. He made monthly visits to Portland as a visiting surgeon, to perform eye surgery. He represented the Victorian South-West subdivision of the Australian Medical Association as its secretary between 1949 and 1956 and as chairman from 1956 to 1958. In 1968 Dr Angus was elected member of Spain’s Barraquer Institute of Barcelona after his research work in Intrasclearal cartilage grafting, becoming one of the few Australian ophthalmologists to receive this honour, and in the following year presented his final paper on Living Intrasclearal Cartilage Implants at the Inaugural Meeting of the Australian College of Ophthalmologists in Melbourne In his personal life Dr Angus was a Presbyterian and treated Sunday as a Sabbath, a day of rest. He would visit 3 or 4 country patients on a Sunday, taking his children along ‘for the ride’ and to visit with him. Sunday evenings he would play the pianola and sing Scottish songs to his family. One of Dr Angus’ patients was Margaret MacKenzie, author of a book on local shipwrecks that she’d seen as an eye witness from the late 1880’s in Peterborough, Victoria. In the early 1950’s Dr Angus, painted a picture of a shipwreck for the cover jacket of Margaret’s book, Shipwrecks and More Shipwrecks. She was blind in later life and her daughter wrote the actual book for her. Dr Angus and his wife Gladys were very involved in Warrnambool’s society with a strong interest in civic affairs. He had an interest in people and the community They were both involved in the creation of Flagstaff Hill, including the layout of the gardens. After his death (28th March 1970) his family requested his practitioner’s plate, medical instruments and some personal belongings be displayed in the Port Medical Office surgery at Flagstaff Hill Maritime Village, and be called the “W. R. Angus Collection”. The W.R. Angus Collection is significant for still being located at the site it is connected with, Doctor Angus being the last Port Medical Officer in Warrnambool. The collection of medical instruments and other equipment is culturally significant, being an historical example of medicine from late 19th to mid-20th century. Dr Angus assisted Dr Tom Ryan, a pioneer in the use of X-rays and in ocular surgery. Water canteen, Part of the W.R.Angus Collection. Metal, painted khaki, cork stuck in opening, back is slightly concave shape. Loop next to opening for attaching lid. flagstaff hill, warrnambool, shipwrecked coast, flagstaff hill maritime museum, maritime museum, shipwreck coast, flagstaff hill maritime village, great ocean road, dr w r angus, dr ryan, surgical instrument, t.s.s. largs bay, warrnambool base hospital, nhill base hospital, mira hospital, flying doctor, water canteen, drinking bottle -
 Flagstaff Hill Maritime Museum and Village
Surgical Instrument, early 20th century
... plate from his Nhill surgery is now mounted on the doorway to the Port Medical Office at Flagstaff Hill Maritime Village, Warrnambool. When Dr Angus took up practice in the Dr Edward and Dr Tom Ryan’s old premises he obtained their extensive collection of historical medical equipment and materials spanning 1884-1926. A large...plate from his Nhill surgery is now mounted on the doorway to the Port Medical Office at Flagstaff Hill Maritime Village, Warrnambool. When Dr Angus took up practice in the Dr Edward and Dr Tom Ryan’s old premises he obtained their extensive collection of historical medical equipment and materials spanning 1884-1926. A large ...This set of four tongue clamps was donated to Flagstaff Hill Maritime Village by the family of Doctor William Roy Angus, Surgeon and Oculist. It is part of the “W.R. Angus Collection” that includes historical medical equipment, surgical instruments and material once belonging to Dr Edward Ryan and Dr Thomas Francis Ryan, (both of Nhill, Victoria) as well as Dr Angus’ own belongings. The Collection’s history spans the medical practices of the two Doctors Ryan, from 1885-1926 plus that of Dr Angus, up until 1969. ABOUT THE “W.R.ANGUS COLLECTION” Doctor William Roy Angus M.B., B.S., Adel., 1923, F.R.C.S. Edin.,1928 (also known as Dr Roy Angus) was born in Murrumbeena, Victoria in 1901 and lived until 1970. He qualified as a doctor in 1923 at University of Adelaide, was Resident Medical Officer at the Royal Adelaide Hospital in 1924 and for a period was house surgeon to Sir (then Mr.) Henry Simpson Newland. Dr Angus was briefly an Assistant to Dr Riddell of Kapunda, then commenced private practice at Curramulka, Yorke Peninsula, SA, where he was physician, surgeon and chemist. In 1926, he was appointed as new Medical Assistant to Dr Thomas Francis Ryan (T.F. Ryan, or Tom), in Nhill, Victoria, where his experiences included radiology and pharmacy. In 1927 he was Acting House Surgeon in Dr Tom Ryan’s absence. Dr Angus had become engaged to Gladys Forsyth and they decided he further his studies overseas in the UK in 1927. He studied at London University College Hospital and at Edinburgh Royal Infirmary and in 1928, was awarded FRCS (Fellow from the Royal College of Surgeons), Edinburgh. He worked his passage back to Australia as a Ship’s Surgeon on the on the Australian Commonwealth Line’s T.S.S. Largs Bay. Dr Angus married Gladys in 1929, in Ballarat. (They went on to have one son (Graham 1932, born in SA) and two daughters (Helen (died 12/07/1996) and Berenice (Berry), both born at Mira, Nhill ) According to Berry, her mother Gladys made a lot of their clothes. She was very talented and did some lovely embroidery including lingerie for her trousseau and beautifully handmade baby clothes. Dr Angus was a ‘flying doctor’ for the A.I.M. (Australian Inland Ministry) Aerial Medical Service in 1928 . Its first station was in the remote town of Oodnadatta, where Dr Angus was stationed. He was locum tenens there on North-South Railway at 21 Mile Camp. He took up this ‘flying doctor’ position in response to a call from Dr John Flynn; the organisation was later known as the Flying Doctor Service, then the Royal Flying Doctor Service. A lot of his work during this time involved dental surgery also. Between 1928-1932 he was surgeon at the Curramulka Hospital, Yorke Peninsula, South Australia. In 1933 Dr Angus returned to Nhill and purchased a share of the Nelson Street practice and Mira hospital (a 2 bed ward at the Nelson Street Practice) from Dr Les Middleton one of the Middleton Brothers, the current owners of what previously once Dr Tom Ryan’s practice. Dr Tom and his brother had worked as surgeons included eye surgery. Dr Tom Ryan performed many of his operations in the Mira private hospital on his premises. He had been House Surgeon at the Nhill Hospital 1902-1926. Dr Tom Ryan had one of the only two pieces of radiology equipment in Victoria during his practicing years – The Royal Melbourne Hospital had the other one. Over the years Dr Tom Ryan had gradually set up what was effectively a training school for country general-practitioner-surgeons. Each patient was carefully examined, including using the X-ray machine, and any surgery was discussed and planned with Dr Ryan’s assistants several days in advance. Dr Angus gained experience in using the X-ray machine there during his time as assistant to Dr Ryan. When Dr Angus bought into the Nelson Street premises in Nhill he was also appointed as the Nhill Hospital’s Honorary House Surgeon 1933-1938. His practitioner’s plate from his Nhill surgery is now mounted on the doorway to the Port Medical Office at Flagstaff Hill Maritime Village, Warrnambool. When Dr Angus took up practice in the Dr Edward and Dr Tom Ryan’s old premises he obtained their extensive collection of historical medical equipment and materials spanning 1884-1926. A large part of this collection is now on display at the Port Medical Office at Flagstaff Hill Maritime Village in Warrnambool. In 1939 Dr Angus and his family moved to Warrnambool where he purchased “Birchwood,” the 1852 home and medical practice of Dr John Hunter Henderson, at 214 Koroit Street. (This property was sold in1965 to the State Government and is now the site of the Warrnambool Police Station. and an ALDI sore is on the land that was once their tennis court). The Angus family was able to afford gardeners, cooks and maids; their home was a popular place for visiting dignitaries to stay whilst visiting Warrnambool. Dr Angus had his own silk worm farm at home in a Mulberry tree. His young daughter used his centrifuge for spinning the silk. Dr Angus was appointed on a part-time basis as Port Medical Officer (Health Officer) in Warrnambool and held this position until the 1940’s when the government no longer required the service of a Port Medical Officer in Warrnambool; he was thus Warrnambool’s last serving Port Medical Officer. (Masters of immigrant ships arriving in port reported incidents of diseases, illness and death and the Port Medical Officer made a decision on whether the ship required Quarantine and for how long, in this way preventing contagious illness from spreading from new immigrants to the residents already in the colony.) Dr Angus was a member of the Australian Medical Association, for 35 years and surgeon at the Warrnambool Base Hospital 1939-1942, He served with the Australian Department of Defence as a Surgeon Captain during WWII 1942-45, in Ballarat, Victoria, and in Bonegilla, N.S.W., completing his service just before the end of the war due to suffering from a heart attack. During his convalescence he carved an intricate and ‘most artistic’ chess set from the material that dentures were made from. He then studied ophthalmology at the Royal Melbourne Eye and Ear Hospital and created cosmetically superior artificial eyes by pioneering using the intrascleral cartilage. Angus received accolades from the Ophthalmological Society of Australasia for this work. He returned to Warrnambool to commence practice as an ophthalmologist, pioneering in artificial eye improvements. He was Honorary Consultant Ophthalmologist to Warrnambool Base Hospital for 31 years. He made monthly visits to Portland as a visiting surgeon, to perform eye surgery. He represented the Victorian South-West subdivision of the Australian Medical Association as its secretary between 1949 and 1956 and as chairman from 1956 to 1958. In 1968 Dr Angus was elected member of Spain’s Barraquer Institute of Barcelona after his research work in Intrasclearal cartilage grafting, becoming one of the few Australian ophthalmologists to receive this honour, and in the following year presented his final paper on Living Intrasclearal Cartilage Implants at the Inaugural Meeting of the Australian College of Ophthalmologists in Melbourne In his personal life Dr Angus was a Presbyterian and treated Sunday as a Sabbath, a day of rest. He would visit 3 or 4 country patients on a Sunday, taking his children along ‘for the ride’ and to visit with him. Sunday evenings he would play the pianola and sing Scottish songs to his family. One of Dr Angus’ patients was Margaret MacKenzie, author of a book on local shipwrecks that she’d seen as an eye witness from the late 1880’s in Peterborough, Victoria. In the early 1950’s Dr Angus, painted a picture of a shipwreck for the cover jacket of Margaret’s book, Shipwrecks and More Shipwrecks. She was blind in later life and her daughter wrote the actual book for her. Dr Angus and his wife Gladys were very involved in Warrnambool’s society with a strong interest in civic affairs. He had an interest in people and the community They were both involved in the creation of Flagstaff Hill, including the layout of the gardens. After his death (28th March 1970) his family requested his practitioner’s plate, medical instruments and some personal belongings be displayed in the Port Medical Office surgery at Flagstaff Hill Maritime Village, and be called the “W. R. Angus Collection”. The W.R. Angus Collection is significant for still being located at the site it is connected with, Doctor Angus being the last Port Medical Officer in Warrnambool. The collection of medical instruments and other equipment is culturally significant, being an historical example of medicine, administration, household equipment and clothing from late 19th to mid-20th century. Dr Angus assisted Dr Tom Ryan, a pioneer in the use of X-rays and in ocular surgery. Surgical instrument, set of 4 tongue clamps, part of the W.R. Angus Collection. Stainless steel clamps each have the same impressed log.(logo is indecipherable)flagstaff hill, warrnambool, shipwrecked coast, flagstaff hill maritime museum, maritime museum, shipwreck coast, flagstaff hill maritime village, great ocean road, dr w r angus, dr ryan, surgical instrument, t.s.s. largs bay, warrnambool base hospital, nhill base hospital, mira hospital, flying doctor, medical treatment, surgical instrument, tongue clamp, e.n.t. surgery, e.n.t. treatment -
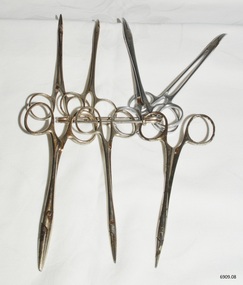 Flagstaff Hill Maritime Museum and Village
Surgical Instrument, early 20th century
... plate from his Nhill surgery is now mounted on the doorway to the Port Medical Office at Flagstaff Hill Maritime Village, Warrnambool. When Dr Angus took up practice in the Dr Edward and Dr Tom Ryan’s old premises he obtained their extensive collection of historical medical equipment and materials spanning 1884-1926. A large...plate from his Nhill surgery is now mounted on the doorway to the Port Medical Office at Flagstaff Hill Maritime Village, Warrnambool. When Dr Angus took up practice in the Dr Edward and Dr Tom Ryan’s old premises he obtained their extensive collection of historical medical equipment and materials spanning 1884-1926. A large ...This set of clamps was donated to Flagstaff Hill Maritime Village by the family of Doctor William Roy Angus, Surgeon and Oculist. It is part of the “W.R. Angus Collection” that includes historical medical equipment, surgical instruments and material once belonging to Dr Edward Ryan and Dr Thomas Francis Ryan, (both of Nhill, Victoria) as well as Dr Angus’ own belongings. The Collection’s history spans the medical practices of the two Doctors Ryan, from 1885-1926 plus that of Dr Angus, up until 1969. ABOUT THE “W.R.ANGUS COLLECTION” Doctor William Roy Angus M.B., B.S., Adel., 1923, F.R.C.S. Edin.,1928 (also known as Dr Roy Angus) was born in Murrumbeena, Victoria in 1901 and lived until 1970. He qualified as a doctor in 1923 at University of Adelaide, was Resident Medical Officer at the Royal Adelaide Hospital in 1924 and for a period was house surgeon to Sir (then Mr.) Henry Simpson Newland. Dr Angus was briefly an Assistant to Dr Riddell of Kapunda, then commenced private practice at Curramulka, Yorke Peninsula, SA, where he was physician, surgeon and chemist. In 1926, he was appointed as new Medical Assistant to Dr Thomas Francis Ryan (T.F. Ryan, or Tom), in Nhill, Victoria, where his experiences included radiology and pharmacy. In 1927 he was Acting House Surgeon in Dr Tom Ryan’s absence. Dr Angus had become engaged to Gladys Forsyth and they decided he further his studies overseas in the UK in 1927. He studied at London University College Hospital and at Edinburgh Royal Infirmary and in 1928, was awarded FRCS (Fellow from the Royal College of Surgeons), Edinburgh. He worked his passage back to Australia as a Ship’s Surgeon on the on the Australian Commonwealth Line’s T.S.S. Largs Bay. Dr Angus married Gladys in 1929, in Ballarat. (They went on to have one son (Graham 1932, born in SA) and two daughters (Helen (died 12/07/1996) and Berenice (Berry), both born at Mira, Nhill ) According to Berry, her mother Gladys made a lot of their clothes. She was very talented and did some lovely embroidery including lingerie for her trousseau and beautifully handmade baby clothes. Dr Angus was a ‘flying doctor’ for the A.I.M. (Australian Inland Ministry) Aerial Medical Service in 1928 . Its first station was in the remote town of Oodnadatta, where Dr Angus was stationed. He was locum tenens there on North-South Railway at 21 Mile Camp. He took up this ‘flying doctor’ position in response to a call from Dr John Flynn; the organisation was later known as the Flying Doctor Service, then the Royal Flying Doctor Service. A lot of his work during this time involved dental surgery also. Between 1928-1932 he was surgeon at the Curramulka Hospital, Yorke Peninsula, South Australia. In 1933 Dr Angus returned to Nhill and purchased a share of the Nelson Street practice and Mira hospital (a 2 bed ward at the Nelson Street Practice) from Dr Les Middleton one of the Middleton Brothers, the current owners of what previously once Dr Tom Ryan’s practice. Dr Tom and his brother had worked as surgeons included eye surgery. Dr Tom Ryan performed many of his operations in the Mira private hospital on his premises. He had been House Surgeon at the Nhill Hospital 1902-1926. Dr Tom Ryan had one of the only two pieces of radiology equipment in Victoria during his practicing years – The Royal Melbourne Hospital had the other one. Over the years Dr Tom Ryan had gradually set up what was effectively a training school for country general-practitioner-surgeons. Each patient was carefully examined, including using the X-ray machine, and any surgery was discussed and planned with Dr Ryan’s assistants several days in advance. Dr Angus gained experience in using the X-ray machine there during his time as assistant to Dr Ryan. When Dr Angus bought into the Nelson Street premises in Nhill he was also appointed as the Nhill Hospital’s Honorary House Surgeon 1933-1938. His practitioner’s plate from his Nhill surgery is now mounted on the doorway to the Port Medical Office at Flagstaff Hill Maritime Village, Warrnambool. When Dr Angus took up practice in the Dr Edward and Dr Tom Ryan’s old premises he obtained their extensive collection of historical medical equipment and materials spanning 1884-1926. A large part of this collection is now on display at the Port Medical Office at Flagstaff Hill Maritime Village in Warrnambool. In 1939 Dr Angus and his family moved to Warrnambool where he purchased “Birchwood,” the 1852 home and medical practice of Dr John Hunter Henderson, at 214 Koroit Street. (This property was sold in1965 to the State Government and is now the site of the Warrnambool Police Station. and an ALDI sore is on the land that was once their tennis court). The Angus family was able to afford gardeners, cooks and maids; their home was a popular place for visiting dignitaries to stay whilst visiting Warrnambool. Dr Angus had his own silk worm farm at home in a Mulberry tree. His young daughter used his centrifuge for spinning the silk. Dr Angus was appointed on a part-time basis as Port Medical Officer (Health Officer) in Warrnambool and held this position until the 1940’s when the government no longer required the service of a Port Medical Officer in Warrnambool; he was thus Warrnambool’s last serving Port Medical Officer. (Masters of immigrant ships arriving in port reported incidents of diseases, illness and death and the Port Medical Officer made a decision on whether the ship required Quarantine and for how long, in this way preventing contagious illness from spreading from new immigrants to the residents already in the colony.) Dr Angus was a member of the Australian Medical Association, for 35 years and surgeon at the Warrnambool Base Hospital 1939-1942, He served with the Australian Department of Defence as a Surgeon Captain during WWII 1942-45, in Ballarat, Victoria, and in Bonegilla, N.S.W., completing his service just before the end of the war due to suffering from a heart attack. During his convalescence he carved an intricate and ‘most artistic’ chess set from the material that dentures were made from. He then studied ophthalmology at the Royal Melbourne Eye and Ear Hospital and created cosmetically superior artificial eyes by pioneering using the intrascleral cartilage. Angus received accolades from the Ophthalmological Society of Australasia for this work. He returned to Warrnambool to commence practice as an ophthalmologist, pioneering in artificial eye improvements. He was Honorary Consultant Ophthalmologist to Warrnambool Base Hospital for 31 years. He made monthly visits to Portland as a visiting surgeon, to perform eye surgery. He represented the Victorian South-West subdivision of the Australian Medical Association as its secretary between 1949 and 1956 and as chairman from 1956 to 1958. In 1968 Dr Angus was elected member of Spain’s Barraquer Institute of Barcelona after his research work in Intrasclearal cartilage grafting, becoming one of the few Australian ophthalmologists to receive this honour, and in the following year presented his final paper on Living Intrasclearal Cartilage Implants at the Inaugural Meeting of the Australian College of Ophthalmologists in Melbourne In his personal life Dr Angus was a Presbyterian and treated Sunday as a Sabbath, a day of rest. He would visit 3 or 4 country patients on a Sunday, taking his children along ‘for the ride’ and to visit with him. Sunday evenings he would play the pianola and sing Scottish songs to his family. One of Dr Angus’ patients was Margaret MacKenzie, author of a book on local shipwrecks that she’d seen as an eye witness from the late 1880’s in Peterborough, Victoria. In the early 1950’s Dr Angus, painted a picture of a shipwreck for the cover jacket of Margaret’s book, Shipwrecks and More Shipwrecks. She was blind in later life and her daughter wrote the actual book for her. Dr Angus and his wife Gladys were very involved in Warrnambool’s society with a strong interest in civic affairs. He had an interest in people and the community They were both involved in the creation of Flagstaff Hill, including the layout of the gardens. After his death (28th March 1970) his family requested his practitioner’s plate, medical instruments and some personal belongings be displayed in the Port Medical Office surgery at Flagstaff Hill Maritime Village, and be called the “W. R. Angus Collection”. The W.R. Angus Collection is significant for still being located at the site it is connected with, Doctor Angus being the last Port Medical Officer in Warrnambool. The collection of medical instruments and other equipment is culturally significant, being an historical example of medicine, administration, household equipment and clothing from late 19th to mid-20th century. Dr Angus assisted Dr Tom Ryan, a pioneer in the use of X-rays and in ocular surgery. Surgical instrument, set of 7 clamps, part of the W.R. Angus Collection. Stainless steel clamps, points have various shapes, 4 with straight ends, 3 with curved ends, all stored on a steel pin.flagstaff hill, warrnambool, shipwrecked coast, flagstaff hill maritime museum, maritime museum, shipwreck coast, flagstaff hill maritime village, great ocean road, dr w r angus, dr ryan, surgical instrument, t.s.s. largs bay, warrnambool base hospital, nhill base hospital, mira hospital, flying doctor, medical treatment, surgical instruments, surgical clamps, operation equipment -
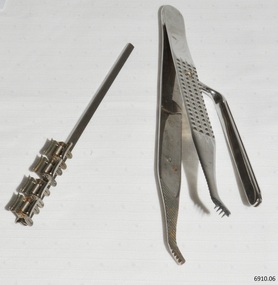 Flagstaff Hill Maritime Museum and Village
Suture Set
... plate from his Nhill surgery is now mounted on the doorway to the Port Medical Office at Flagstaff Hill Maritime Village, Warrnambool. When Dr Angus took up practice in the Dr Edward and Dr Tom Ryan’s old premises he obtained their extensive collection of historical medical equipment and materials spanning 1884-1926. A large...plate from his Nhill surgery is now mounted on the doorway to the Port Medical Office at Flagstaff Hill Maritime Village, Warrnambool. When Dr Angus took up practice in the Dr Edward and Dr Tom Ryan’s old premises he obtained their extensive collection of historical medical equipment and materials spanning 1884-1926. A large ...This suture set comprising forceps, clip rack and four clips, was used during surgery for closing wounds. It was donated to Flagstaff Hill Maritime Village by the family of Doctor William Roy Angus, Surgeon and Oculist. It is part of the “W.R. Angus Collection” that includes historical medical equipment, surgical instruments and material once belonging to Dr Edward Ryan and Dr Thomas Francis Ryan, (both of Nhill, Victoria) as well as Dr Angus’ own belongings. The Collection’s history spans the medical practices of the two Doctors Ryan, from 1885-1926 plus that of Dr Angus, up until 1969. ABOUT THE “W.R.ANGUS COLLECTION” Doctor William Roy Angus M.B., B.S., Adel., 1923, F.R.C.S. Edin.,1928 (also known as Dr Roy Angus) was born in Murrumbeena, Victoria in 1901 and lived until 1970. He qualified as a doctor in 1923 at University of Adelaide, was Resident Medical Officer at the Royal Adelaide Hospital in 1924 and for a period was house surgeon to Sir (then Mr.) Henry Simpson Newland. Dr Angus was briefly an Assistant to Dr Riddell of Kapunda, then commenced private practice at Curramulka, Yorke Peninsula, SA, where he was physician, surgeon and chemist. In 1926, he was appointed as new Medical Assistant to Dr Thomas Francis Ryan (T.F. Ryan, or Tom), in Nhill, Victoria, where his experiences included radiology and pharmacy. In 1927 he was Acting House Surgeon in Dr Tom Ryan’s absence. Dr Angus had become engaged to Gladys Forsyth and they decided he further his studies overseas in the UK in 1927. He studied at London University College Hospital and at Edinburgh Royal Infirmary and in 1928, was awarded FRCS (Fellow from the Royal College of Surgeons), Edinburgh. He worked his passage back to Australia as a Ship’s Surgeon on the on the Australian Commonwealth Line’s T.S.S. Largs Bay. Dr Angus married Gladys in 1929, in Ballarat. (They went on to have one son (Graham 1932, born in SA) and two daughters (Helen (died 12/07/1996) and Berenice (Berry), both born at Mira, Nhill ) According to Berry, her mother Gladys made a lot of their clothes. She was very talented and did some lovely embroidery including lingerie for her trousseau and beautifully handmade baby clothes. Dr Angus was a ‘flying doctor’ for the A.I.M. (Australian Inland Ministry) Aerial Medical Service in 1928 . Its first station was in the remote town of Oodnadatta, where Dr Angus was stationed. He was locum tenens there on North-South Railway at 21 Mile Camp. He took up this ‘flying doctor’ position in response to a call from Dr John Flynn; the organisation was later known as the Flying Doctor Service, then the Royal Flying Doctor Service. A lot of his work during this time involved dental surgery also. Between 1928-1932 he was surgeon at the Curramulka Hospital, Yorke Peninsula, South Australia. In 1933 Dr Angus returned to Nhill and purchased a share of the Nelson Street practice and Mira hospital (a 2 bed ward at the Nelson Street Practice) from Dr Les Middleton one of the Middleton Brothers, the current owners of what previously once Dr Tom Ryan’s practice. Dr Tom and his brother had worked as surgeons included eye surgery. Dr Tom Ryan performed many of his operations in the Mira private hospital on his premises. He had been House Surgeon at the Nhill Hospital 1902-1926. Dr Tom Ryan had one of the only two pieces of radiology equipment in Victoria during his practicing years – The Royal Melbourne Hospital had the other one. Over the years Dr Tom Ryan had gradually set up what was effectively a training school for country general-practitioner-surgeons. Each patient was carefully examined, including using the X-ray machine, and any surgery was discussed and planned with Dr Ryan’s assistants several days in advance. Dr Angus gained experience in using the X-ray machine there during his time as assistant to Dr Ryan. When Dr Angus bought into the Nelson Street premises in Nhill he was also appointed as the Nhill Hospital’s Honorary House Surgeon 1933-1938. His practitioner’s plate from his Nhill surgery is now mounted on the doorway to the Port Medical Office at Flagstaff Hill Maritime Village, Warrnambool. When Dr Angus took up practice in the Dr Edward and Dr Tom Ryan’s old premises he obtained their extensive collection of historical medical equipment and materials spanning 1884-1926. A large part of this collection is now on display at the Port Medical Office at Flagstaff Hill Maritime Village in Warrnambool. In 1939 Dr Angus and his family moved to Warrnambool where he purchased “Birchwood,” the 1852 home and medical practice of Dr John Hunter Henderson, at 214 Koroit Street. (This property was sold in1965 to the State Government and is now the site of the Warrnambool Police Station. and an ALDI sore is on the land that was once their tennis court). The Angus family was able to afford gardeners, cooks and maids; their home was a popular place for visiting dignitaries to stay whilst visiting Warrnambool. Dr Angus had his own silk worm farm at home in a Mulberry tree. His young daughter used his centrifuge for spinning the silk. Dr Angus was appointed on a part-time basis as Port Medical Officer (Health Officer) in Warrnambool and held this position until the 1940’s when the government no longer required the service of a Port Medical Officer in Warrnambool; he was thus Warrnambool’s last serving Port Medical Officer. (Masters of immigrant ships arriving in port reported incidents of diseases, illness and death and the Port Medical Officer made a decision on whether the ship required Quarantine and for how long, in this way preventing contagious illness from spreading from new immigrants to the residents already in the colony.) Dr Angus was a member of the Australian Medical Association, for 35 years and surgeon at the Warrnambool Base Hospital 1939-1942, He served with the Australian Department of Defence as a Surgeon Captain during WWII 1942-45, in Ballarat, Victoria, and in Bonegilla, N.S.W., completing his service just before the end of the war due to suffering from a heart attack. During his convalescence he carved an intricate and ‘most artistic’ chess set from the material that dentures were made from. He then studied ophthalmology at the Royal Melbourne Eye and Ear Hospital and created cosmetically superior artificial eyes by pioneering using the intrascleral cartilage. Angus received accolades from the Ophthalmological Society of Australasia for this work. He returned to Warrnambool to commence practice as an ophthalmologist, pioneering in artificial eye improvements. He was Honorary Consultant Ophthalmologist to Warrnambool Base Hospital for 31 years. He made monthly visits to Portland as a visiting surgeon, to perform eye surgery. He represented the Victorian South-West subdivision of the Australian Medical Association as its secretary between 1949 and 1956 and as chairman from 1956 to 1958. In 1968 Dr Angus was elected member of Spain’s Barraquer Institute of Barcelona after his research work in Intrasclearal cartilage grafting, becoming one of the few Australian ophthalmologists to receive this honour, and in the following year presented his final paper on Living Intrasclearal Cartilage Implants at the Inaugural Meeting of the Australian College of Ophthalmologists in Melbourne In his personal life Dr Angus was a Presbyterian and treated Sunday as a Sabbath, a day of rest. He would visit 3 or 4 country patients on a Sunday, taking his children along ‘for the ride’ and to visit with him. Sunday evenings he would play the pianola and sing Scottish songs to his family. One of Dr Angus’ patients was Margaret MacKenzie, author of a book on local shipwrecks that she’d seen as an eye witness from the late 1880’s in Peterborough, Victoria. In the early 1950’s Dr Angus, painted a picture of a shipwreck for the cover jacket of Margaret’s book, Shipwrecks and More Shipwrecks. She was blind in later life and her daughter wrote the actual book for her. Dr Angus and his wife Gladys were very involved in Warrnambool’s society with a strong interest in civic affairs. He had an interest in people and the community They were both involved in the creation of Flagstaff Hill, including the layout of the gardens. After his death (28th March 1970) his family requested his practitioner’s plate, medical instruments and some personal belongings be displayed in the Port Medical Office surgery at Flagstaff Hill Maritime Village, and be called the “W. R. Angus Collection”. Surgical suture set comprising (1) steel suture forceps (2) clip rack (3) 4x spring clips. Part of the W.R. Angus Collection. Patented. Made in London. Logo and text pressed into the steel.Pressed into forceps "LONDON MADE" and a logo "[shield'\]", pressed into side of each clip "PATENT" and "STAINLESS"flagstaff hill, warrnambool, shipwrecked coast, flagstaff hill maritime museum, maritime museum, shipwreck coast, flagstaff hill maritime village, great ocean road, dr w r angus, dr ryan, surgical instrument, t.s.s. largs bay, warrnambool base hospital, nhill base hospital, mira hospital, flying doctor, medical treatment, suture set, suture forceps, suture clips, surgical equipment, wound closure, wound treatment -
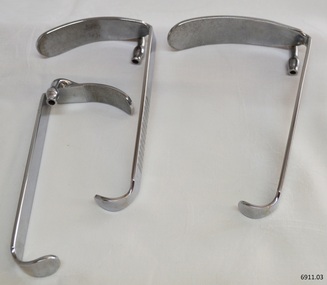 Flagstaff Hill Maritime Museum and Village
Surgical Instrument, early 20th century
... plate from his Nhill surgery is now mounted on the doorway to the Port Medical Office at Flagstaff Hill Maritime Village, Warrnambool. When Dr Angus took up practice in the Dr Edward and Dr Tom Ryan’s old premises he obtained their extensive collection of historical medical equipment and materials spanning 1884-1926. A large...plate from his Nhill surgery is now mounted on the doorway to the Port Medical Office at Flagstaff Hill Maritime Village, Warrnambool. When Dr Angus took up practice in the Dr Edward and Dr Tom Ryan’s old premises he obtained their extensive collection of historical medical equipment and materials spanning 1884-1926. A large ...This Boyle-Davis design set of gags, or tongue depressors, was used during E.N.T. oral medical and surgical procedures to keep the tongue out of the way and to allow the oral administration of anaestetic gas. The set was donated to Flagstaff Hill Maritime Village by the family of Doctor William Roy Angus, Surgeon and Oculist. It is part of the “W.R. Angus Collection” that includes historical medical equipment, surgical instruments and material once belonging to Dr Edward Ryan and Dr Thomas Francis Ryan, (both of Nhill, Victoria) as well as Dr Angus’ own belongings. The Collection’s history spans the medical practices of the two Doctors Ryan, from 1885-1926 plus that of Dr Angus, up until 1969. ABOUT THE “W.R.ANGUS COLLECTION” Doctor William Roy Angus M.B., B.S., Adel., 1923, F.R.C.S. Edin.,1928 (also known as Dr Roy Angus) was born in Murrumbeena, Victoria in 1901 and lived until 1970. He qualified as a doctor in 1923 at University of Adelaide, was Resident Medical Officer at the Royal Adelaide Hospital in 1924 and for a period was house surgeon to Sir (then Mr.) Henry Simpson Newland. Dr Angus was briefly an Assistant to Dr Riddell of Kapunda, then commenced private practice at Curramulka, Yorke Peninsula, SA, where he was physician, surgeon and chemist. In 1926, he was appointed as new Medical Assistant to Dr Thomas Francis Ryan (T.F. Ryan, or Tom), in Nhill, Victoria, where his experiences included radiology and pharmacy. In 1927 he was Acting House Surgeon in Dr Tom Ryan’s absence. Dr Angus had become engaged to Gladys Forsyth and they decided he further his studies overseas in the UK in 1927. He studied at London University College Hospital and at Edinburgh Royal Infirmary and in 1928, was awarded FRCS (Fellow from the Royal College of Surgeons), Edinburgh. He worked his passage back to Australia as a Ship’s Surgeon on the on the Australian Commonwealth Line’s T.S.S. Largs Bay. Dr Angus married Gladys in 1929, in Ballarat. (They went on to have one son (Graham 1932, born in SA) and two daughters (Helen (died 12/07/1996) and Berenice (Berry), both born at Mira, Nhill ) According to Berry, her mother Gladys made a lot of their clothes. She was very talented and did some lovely embroidery including lingerie for her trousseau and beautifully handmade baby clothes. Dr Angus was a ‘flying doctor’ for the A.I.M. (Australian Inland Ministry) Aerial Medical Service in 1928 . Its first station was in the remote town of Oodnadatta, where Dr Angus was stationed. He was locum tenens there on North-South Railway at 21 Mile Camp. He took up this ‘flying doctor’ position in response to a call from Dr John Flynn; the organisation was later known as the Flying Doctor Service, then the Royal Flying Doctor Service. A lot of his work during this time involved dental surgery also. Between 1928-1932 he was surgeon at the Curramulka Hospital, Yorke Peninsula, South Australia. In 1933 Dr Angus returned to Nhill and purchased a share of the Nelson Street practice and Mira hospital (a 2 bed ward at the Nelson Street Practice) from Dr Les Middleton one of the Middleton Brothers, the current owners of what previously once Dr Tom Ryan’s practice. Dr Tom and his brother had worked as surgeons included eye surgery. Dr Tom Ryan performed many of his operations in the Mira private hospital on his premises. He had been House Surgeon at the Nhill Hospital 1902-1926. Dr Tom Ryan had one of the only two pieces of radiology equipment in Victoria during his practicing years – The Royal Melbourne Hospital had the other one. Over the years Dr Tom Ryan had gradually set up what was effectively a training school for country general-practitioner-surgeons. Each patient was carefully examined, including using the X-ray machine, and any surgery was discussed and planned with Dr Ryan’s assistants several days in advance. Dr Angus gained experience in using the X-ray machine there during his time as assistant to Dr Ryan. When Dr Angus bought into the Nelson Street premises in Nhill he was also appointed as the Nhill Hospital’s Honorary House Surgeon 1933-1938. His practitioner’s plate from his Nhill surgery is now mounted on the doorway to the Port Medical Office at Flagstaff Hill Maritime Village, Warrnambool. When Dr Angus took up practice in the Dr Edward and Dr Tom Ryan’s old premises he obtained their extensive collection of historical medical equipment and materials spanning 1884-1926. A large part of this collection is now on display at the Port Medical Office at Flagstaff Hill Maritime Village in Warrnambool. In 1939 Dr Angus and his family moved to Warrnambool where he purchased “Birchwood,” the 1852 home and medical practice of Dr John Hunter Henderson, at 214 Koroit Street. (This property was sold in1965 to the State Government and is now the site of the Warrnambool Police Station. and an ALDI sore is on the land that was once their tennis court). The Angus family was able to afford gardeners, cooks and maids; their home was a popular place for visiting dignitaries to stay whilst visiting Warrnambool. Dr Angus had his own silk worm farm at home in a Mulberry tree. His young daughter used his centrifuge for spinning the silk. Dr Angus was appointed on a part-time basis as Port Medical Officer (Health Officer) in Warrnambool and held this position until the 1940’s when the government no longer required the service of a Port Medical Officer in Warrnambool; he was thus Warrnambool’s last serving Port Medical Officer. (Masters of immigrant ships arriving in port reported incidents of diseases, illness and death and the Port Medical Officer made a decision on whether the ship required Quarantine and for how long, in this way preventing contagious illness from spreading from new immigrants to the residents already in the colony.) Dr Angus was a member of the Australian Medical Association, for 35 years and surgeon at the Warrnambool Base Hospital 1939-1942, He served with the Australian Department of Defence as a Surgeon Captain during WWII 1942-45, in Ballarat, Victoria, and in Bonegilla, N.S.W., completing his service just before the end of the war due to suffering from a heart attack. During his convalescence he carved an intricate and ‘most artistic’ chess set from the material that dentures were made from. He then studied ophthalmology at the Royal Melbourne Eye and Ear Hospital and created cosmetically superior artificial eyes by pioneering using the intrascleral cartilage. Angus received accolades from the Ophthalmological Society of Australasia for this work. He returned to Warrnambool to commence practice as an ophthalmologist, pioneering in artificial eye improvements. He was Honorary Consultant Ophthalmologist to Warrnambool Base Hospital for 31 years. He made monthly visits to Portland as a visiting surgeon, to perform eye surgery. He represented the Victorian South-West subdivision of the Australian Medical Association as its secretary between 1949 and 1956 and as chairman from 1956 to 1958. In 1968 Dr Angus was elected member of Spain’s Barraquer Institute of Barcelona after his research work in Intrasclearal cartilage grafting, becoming one of the few Australian ophthalmologists to receive this honour, and in the following year presented his final paper on Living Intrasclearal Cartilage Implants at the Inaugural Meeting of the Australian College of Ophthalmologists in Melbourne In his personal life Dr Angus was a Presbyterian and treated Sunday as a Sabbath, a day of rest. He would visit 3 or 4 country patients on a Sunday, taking his children along ‘for the ride’ and to visit with him. Sunday evenings he would play the pianola and sing Scottish songs to his family. One of Dr Angus’ patients was Margaret MacKenzie, author of a book on local shipwrecks that she’d seen as an eye witness from the late 1880’s in Peterborough, Victoria. In the early 1950’s Dr Angus, painted a picture of a shipwreck for the cover jacket of Margaret’s book, Shipwrecks and More Shipwrecks. She was blind in later life and her daughter wrote the actual book for her. Dr Angus and his wife Gladys were very involved in Warrnambool’s society with a strong interest in civic affairs. He had an interest in people and the community They were both involved in the creation of Flagstaff Hill, including the layout of the gardens. After his death (28th March 1970) his family requested his practitioner’s plate, medical instruments and some personal belongings be displayed in the Port Medical Office surgery at Flagstaff Hill Maritime Village, and be called the “W. R. Angus Collection”. The W.R. Angus Collection is significant for still being located at the site it is connected with, Doctor Angus being the last Port Medical Officer in Warrnambool. The collection of medical instruments and other equipment is culturally significant, being an historical example of medicine, administration, household equipment and clothing from late 19th to mid-20th century. Dr Angus assisted Dr Tom Ryan, a pioneer in the use of X-rays and in ocular surgery. Surgical instrument, Boyle-Davis gag, tongue depressor, (3 units) part of the W.R. Angus Collection. Stainless steel tongue depressor, both ends curve inwards, under one end is an enclosed channel that opens up at the end, made for adding a light source. Made by Mayer of London.Inpressed "MAYER & CO. LONDON"flagstaff hill, warrnambool, shipwrecked coast, flagstaff hill maritime museum, maritime museum, shipwreck coast, flagstaff hill maritime village, great ocean road, dr w r angus, dr ryan, surgical instrument, t.s.s. largs bay, warrnambool base hospital, nhill base hospital, mira hospital, flying doctor, medical treatment, boyle-davis gag, tongue depressor, e.n.t. surgery, oral surgery -
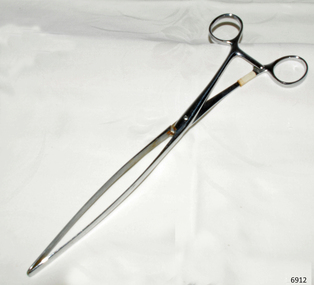 Flagstaff Hill Maritime Museum and Village
Surgical Instrument, early 20th century
... plate from his Nhill surgery is now mounted on the doorway to the Port Medical Office at Flagstaff Hill Maritime Village, Warrnambool. When Dr Angus took up practice in the Dr Edward and Dr Tom Ryan’s old premises he obtained their extensive collection of historical medical equipment and materials spanning 1884-1926. A large...plate from his Nhill surgery is now mounted on the doorway to the Port Medical Office at Flagstaff Hill Maritime Village, Warrnambool. When Dr Angus took up practice in the Dr Edward and Dr Tom Ryan’s old premises he obtained their extensive collection of historical medical equipment and materials spanning 1884-1926. A large ...This Doyen forceps was once used to hold larger organs during surgery and has now been donated to Flagstaff Hill Maritime Village by the family of Doctor William Roy Angus, Surgeon and Oculist. It is part of the “W.R. Angus Collection” that includes historical medical equipment, surgical instruments and material once belonging to Dr Edward Ryan and Dr Thomas Francis Ryan, (both of Nhill, Victoria) as well as Dr Angus’ own belongings. The Collection’s history spans the medical practices of the two Doctors Ryan, from 1885-1926 plus that of Dr Angus, up until 1969. ABOUT THE “W.R.ANGUS COLLECTION” Doctor William Roy Angus M.B., B.S., Adel., 1923, F.R.C.S. Edin.,1928 (also known as Dr Roy Angus) was born in Murrumbeena, Victoria in 1901 and lived until 1970. He qualified as a doctor in 1923 at University of Adelaide, was Resident Medical Officer at the Royal Adelaide Hospital in 1924 and for a period was house surgeon to Sir (then Mr.) Henry Simpson Newland. Dr Angus was briefly an Assistant to Dr Riddell of Kapunda, then commenced private practice at Curramulka, Yorke Peninsula, SA, where he was physician, surgeon and chemist. In 1926, he was appointed as new Medical Assistant to Dr Thomas Francis Ryan (T.F. Ryan, or Tom), in Nhill, Victoria, where his experiences included radiology and pharmacy. In 1927 he was Acting House Surgeon in Dr Tom Ryan’s absence. Dr Angus had become engaged to Gladys Forsyth and they decided he further his studies overseas in the UK in 1927. He studied at London University College Hospital and at Edinburgh Royal Infirmary and in 1928, was awarded FRCS (Fellow from the Royal College of Surgeons), Edinburgh. He worked his passage back to Australia as a Ship’s Surgeon on the on the Australian Commonwealth Line’s T.S.S. Largs Bay. Dr Angus married Gladys in 1929, in Ballarat. (They went on to have one son (Graham 1932, born in SA) and two daughters (Helen (died 12/07/1996) and Berenice (Berry), both born at Mira, Nhill ) According to Berry, her mother Gladys made a lot of their clothes. She was very talented and did some lovely embroidery including lingerie for her trousseau and beautifully handmade baby clothes. Dr Angus was a ‘flying doctor’ for the A.I.M. (Australian Inland Ministry) Aerial Medical Service in 1928 . Its first station was in the remote town of Oodnadatta, where Dr Angus was stationed. He was locum tenens there on North-South Railway at 21 Mile Camp. He took up this ‘flying doctor’ position in response to a call from Dr John Flynn; the organisation was later known as the Flying Doctor Service, then the Royal Flying Doctor Service. A lot of his work during this time involved dental surgery also. Between 1928-1932 he was surgeon at the Curramulka Hospital, Yorke Peninsula, South Australia. In 1933 Dr Angus returned to Nhill and purchased a share of the Nelson Street practice and Mira hospital (a 2 bed ward at the Nelson Street Practice) from Dr Les Middleton one of the Middleton Brothers, the current owners of what previously once Dr Tom Ryan’s practice. Dr Tom and his brother had worked as surgeons included eye surgery. Dr Tom Ryan performed many of his operations in the Mira private hospital on his premises. He had been House Surgeon at the Nhill Hospital 1902-1926. Dr Tom Ryan had one of the only two pieces of radiology equipment in Victoria during his practicing years – The Royal Melbourne Hospital had the other one. Over the years Dr Tom Ryan had gradually set up what was effectively a training school for country general-practitioner-surgeons. Each patient was carefully examined, including using the X-ray machine, and any surgery was discussed and planned with Dr Ryan’s assistants several days in advance. Dr Angus gained experience in using the X-ray machine there during his time as assistant to Dr Ryan. When Dr Angus bought into the Nelson Street premises in Nhill he was also appointed as the Nhill Hospital’s Honorary House Surgeon 1933-1938. His practitioner’s plate from his Nhill surgery is now mounted on the doorway to the Port Medical Office at Flagstaff Hill Maritime Village, Warrnambool. When Dr Angus took up practice in the Dr Edward and Dr Tom Ryan’s old premises he obtained their extensive collection of historical medical equipment and materials spanning 1884-1926. A large part of this collection is now on display at the Port Medical Office at Flagstaff Hill Maritime Village in Warrnambool. In 1939 Dr Angus and his family moved to Warrnambool where he purchased “Birchwood,” the 1852 home and medical practice of Dr John Hunter Henderson, at 214 Koroit Street. (This property was sold in1965 to the State Government and is now the site of the Warrnambool Police Station. and an ALDI sore is on the land that was once their tennis court). The Angus family was able to afford gardeners, cooks and maids; their home was a popular place for visiting dignitaries to stay whilst visiting Warrnambool. Dr Angus had his own silk worm farm at home in a Mulberry tree. His young daughter used his centrifuge for spinning the silk. Dr Angus was appointed on a part-time basis as Port Medical Officer (Health Officer) in Warrnambool and held this position until the 1940’s when the government no longer required the service of a Port Medical Officer in Warrnambool; he was thus Warrnambool’s last serving Port Medical Officer. (Masters of immigrant ships arriving in port reported incidents of diseases, illness and death and the Port Medical Officer made a decision on whether the ship required Quarantine and for how long, in this way preventing contagious illness from spreading from new immigrants to the residents already in the colony.) Dr Angus was a member of the Australian Medical Association, for 35 years and surgeon at the Warrnambool Base Hospital 1939-1942, He served with the Australian Department of Defence as a Surgeon Captain during WWII 1942-45, in Ballarat, Victoria, and in Bonegilla, N.S.W., completing his service just before the end of the war due to suffering from a heart attack. During his convalescence he carved an intricate and ‘most artistic’ chess set from the material that dentures were made from. He then studied ophthalmology at the Royal Melbourne Eye and Ear Hospital and created cosmetically superior artificial eyes by pioneering using the intrascleral cartilage. Angus received accolades from the Ophthalmological Society of Australasia for this work. He returned to Warrnambool to commence practice as an ophthalmologist, pioneering in artificial eye improvements. He was Honorary Consultant Ophthalmologist to Warrnambool Base Hospital for 31 years. He made monthly visits to Portland as a visiting surgeon, to perform eye surgery. He represented the Victorian South-West subdivision of the Australian Medical Association as its secretary between 1949 and 1956 and as chairman from 1956 to 1958. In 1968 Dr Angus was elected member of Spain’s Barraquer Institute of Barcelona after his research work in Intrasclearal cartilage grafting, becoming one of the few Australian ophthalmologists to receive this honour, and in the following year presented his final paper on Living Intrasclearal Cartilage Implants at the Inaugural Meeting of the Australian College of Ophthalmologists in Melbourne In his personal life Dr Angus was a Presbyterian and treated Sunday as a Sabbath, a day of rest. He would visit 3 or 4 country patients on a Sunday, taking his children along ‘for the ride’ and to visit with him. Sunday evenings he would play the pianola and sing Scottish songs to his family. One of Dr Angus’ patients was Margaret MacKenzie, author of a book on local shipwrecks that she’d seen as an eye witness from the late 1880’s in Peterborough, Victoria. In the early 1950’s Dr Angus, painted a picture of a shipwreck for the cover jacket of Margaret’s book, Shipwrecks and More Shipwrecks. She was blind in later life and her daughter wrote the actual book for her. Dr Angus and his wife Gladys were very involved in Warrnambool’s society with a strong interest in civic affairs. He had an interest in people and the community They were both involved in the creation of Flagstaff Hill, including the layout of the gardens. After his death (28th March 1970) his family requested his practitioner’s plate, medical instruments and some personal belongings be displayed in the Port Medical Office surgery at Flagstaff Hill Maritime Village, and be called the “W. R. Angus Collection”. The W.R. Angus Collection is significant for still being located at the site it is connected with, Doctor Angus being the last Port Medical Officer in Warrnambool. The collection of medical instruments and other equipment is culturally significant, being an historical example of medicine, administration, household equipment and clothing from late 19th to mid-20th century. Dr Angus assisted Dr Tom Ryan, a pioneer in the use of X-rays and in ocular surgery. Surgical instrument, Doyen forceps, part of the W.R. Angus Collection. Stainless steel forceps, curved. Paper label attached. Forceps were used to grasp larger organs.Paper label attached, no inscription.flagstaff hill, warrnambool, shipwrecked coast, flagstaff hill maritime museum, maritime museum, shipwreck coast, flagstaff hill maritime village, great ocean road, dr w r angus, dr ryan, surgical instrument, t.s.s. largs bay, warrnambool base hospital, nhill base hospital, mira hospital, flying doctor, medical treatment, doyen forceps -
 Flagstaff Hill Maritime Museum and Village
Surgical Instrument, early 20th century
... plate from his Nhill surgery is now mounted on the doorway to the Port Medical Office at Flagstaff Hill Maritime Village, Warrnambool. When Dr Angus took up practice in the Dr Edward and Dr Tom Ryan’s old premises he obtained their extensive collection of historical medical equipment and materials spanning 1884-1926. A large...plate from his Nhill surgery is now mounted on the doorway to the Port Medical Office at Flagstaff Hill Maritime Village, Warrnambool. When Dr Angus took up practice in the Dr Edward and Dr Tom Ryan’s old premises he obtained their extensive collection of historical medical equipment and materials spanning 1884-1926. A large ...This histerectomony forceps were used during abdominal operations. It was donated to Flagstaff Hill Maritime Village by the family of Doctor William Roy Angus, Surgeon and Oculist. It is part of the “W.R. Angus Collection” that includes historical medical equipment, surgical instruments and material once belonging to Dr Edward Ryan and Dr Thomas Francis Ryan, (both of Nhill, Victoria) as well as Dr Angus’ own belongings. The Collection’s history spans the medical practices of the two Doctors Ryan, from 1885-1926 plus that of Dr Angus, up until 1969. ABOUT THE “W.R.ANGUS COLLECTION” Doctor William Roy Angus M.B., B.S., Adel., 1923, F.R.C.S. Edin.,1928 (also known as Dr Roy Angus) was born in Murrumbeena, Victoria in 1901 and lived until 1970. He qualified as a doctor in 1923 at University of Adelaide, was Resident Medical Officer at the Royal Adelaide Hospital in 1924 and for a period was house surgeon to Sir (then Mr.) Henry Simpson Newland. Dr Angus was briefly an Assistant to Dr Riddell of Kapunda, then commenced private practice at Curramulka, Yorke Peninsula, SA, where he was physician, surgeon and chemist. In 1926, he was appointed as new Medical Assistant to Dr Thomas Francis Ryan (T.F. Ryan, or Tom), in Nhill, Victoria, where his experiences included radiology and pharmacy. In 1927 he was Acting House Surgeon in Dr Tom Ryan’s absence. Dr Angus had become engaged to Gladys Forsyth and they decided he further his studies overseas in the UK in 1927. He studied at London University College Hospital and at Edinburgh Royal Infirmary and in 1928, was awarded FRCS (Fellow from the Royal College of Surgeons), Edinburgh. He worked his passage back to Australia as a Ship’s Surgeon on the on the Australian Commonwealth Line’s T.S.S. Largs Bay. Dr Angus married Gladys in 1929, in Ballarat. (They went on to have one son (Graham 1932, born in SA) and two daughters (Helen (died 12/07/1996) and Berenice (Berry), both born at Mira, Nhill ) According to Berry, her mother Gladys made a lot of their clothes. She was very talented and did some lovely embroidery including lingerie for her trousseau and beautifully handmade baby clothes. Dr Angus was a ‘flying doctor’ for the A.I.M. (Australian Inland Ministry) Aerial Medical Service in 1928 . Its first station was in the remote town of Oodnadatta, where Dr Angus was stationed. He was locum tenens there on North-South Railway at 21 Mile Camp. He took up this ‘flying doctor’ position in response to a call from Dr John Flynn; the organisation was later known as the Flying Doctor Service, then the Royal Flying Doctor Service. A lot of his work during this time involved dental surgery also. Between 1928-1932 he was surgeon at the Curramulka Hospital, Yorke Peninsula, South Australia. In 1933 Dr Angus returned to Nhill and purchased a share of the Nelson Street practice and Mira hospital (a 2 bed ward at the Nelson Street Practice) from Dr Les Middleton one of the Middleton Brothers, the current owners of what previously once Dr Tom Ryan’s practice. Dr Tom and his brother had worked as surgeons included eye surgery. Dr Tom Ryan performed many of his operations in the Mira private hospital on his premises. He had been House Surgeon at the Nhill Hospital 1902-1926. Dr Tom Ryan had one of the only two pieces of radiology equipment in Victoria during his practicing years – The Royal Melbourne Hospital had the other one. Over the years Dr Tom Ryan had gradually set up what was effectively a training school for country general-practitioner-surgeons. Each patient was carefully examined, including using the X-ray machine, and any surgery was discussed and planned with Dr Ryan’s assistants several days in advance. Dr Angus gained experience in using the X-ray machine there during his time as assistant to Dr Ryan. When Dr Angus bought into the Nelson Street premises in Nhill he was also appointed as the Nhill Hospital’s Honorary House Surgeon 1933-1938. His practitioner’s plate from his Nhill surgery is now mounted on the doorway to the Port Medical Office at Flagstaff Hill Maritime Village, Warrnambool. When Dr Angus took up practice in the Dr Edward and Dr Tom Ryan’s old premises he obtained their extensive collection of historical medical equipment and materials spanning 1884-1926. A large part of this collection is now on display at the Port Medical Office at Flagstaff Hill Maritime Village in Warrnambool. In 1939 Dr Angus and his family moved to Warrnambool where he purchased “Birchwood,” the 1852 home and medical practice of Dr John Hunter Henderson, at 214 Koroit Street. (This property was sold in1965 to the State Government and is now the site of the Warrnambool Police Station. and an ALDI sore is on the land that was once their tennis court). The Angus family was able to afford gardeners, cooks and maids; their home was a popular place for visiting dignitaries to stay whilst visiting Warrnambool. Dr Angus had his own silk worm farm at home in a Mulberry tree. His young daughter used his centrifuge for spinning the silk. Dr Angus was appointed on a part-time basis as Port Medical Officer (Health Officer) in Warrnambool and held this position until the 1940’s when the government no longer required the service of a Port Medical Officer in Warrnambool; he was thus Warrnambool’s last serving Port Medical Officer. (Masters of immigrant ships arriving in port reported incidents of diseases, illness and death and the Port Medical Officer made a decision on whether the ship required Quarantine and for how long, in this way preventing contagious illness from spreading from new immigrants to the residents already in the colony.) Dr Angus was a member of the Australian Medical Association, for 35 years and surgeon at the Warrnambool Base Hospital 1939-1942, He served with the Australian Department of Defence as a Surgeon Captain during WWII 1942-45, in Ballarat, Victoria, and in Bonegilla, N.S.W., completing his service just before the end of the war due to suffering from a heart attack. During his convalescence he carved an intricate and ‘most artistic’ chess set from the material that dentures were made from. He then studied ophthalmology at the Royal Melbourne Eye and Ear Hospital and created cosmetically superior artificial eyes by pioneering using the intrascleral cartilage. Angus received accolades from the Ophthalmological Society of Australasia for this work. He returned to Warrnambool to commence practice as an ophthalmologist, pioneering in artificial eye improvements. He was Honorary Consultant Ophthalmologist to Warrnambool Base Hospital for 31 years. He made monthly visits to Portland as a visiting surgeon, to perform eye surgery. He represented the Victorian South-West subdivision of the Australian Medical Association as its secretary between 1949 and 1956 and as chairman from 1956 to 1958. In 1968 Dr Angus was elected member of Spain’s Barraquer Institute of Barcelona after his research work in Intrasclearal cartilage grafting, becoming one of the few Australian ophthalmologists to receive this honour, and in the following year presented his final paper on Living Intrasclearal Cartilage Implants at the Inaugural Meeting of the Australian College of Ophthalmologists in Melbourne In his personal life Dr Angus was a Presbyterian and treated Sunday as a Sabbath, a day of rest. He would visit 3 or 4 country patients on a Sunday, taking his children along ‘for the ride’ and to visit with him. Sunday evenings he would play the pianola and sing Scottish songs to his family. One of Dr Angus’ patients was Margaret MacKenzie, author of a book on local shipwrecks that she’d seen as an eye witness from the late 1880’s in Peterborough, Victoria. In the early 1950’s Dr Angus, painted a picture of a shipwreck for the cover jacket of Margaret’s book, Shipwrecks and More Shipwrecks. She was blind in later life and her daughter wrote the actual book for her. Dr Angus and his wife Gladys were very involved in Warrnambool’s society with a strong interest in civic affairs. He had an interest in people and the community They were both involved in the creation of Flagstaff Hill, including the layout of the gardens. After his death (28th March 1970) his family requested his practitioner’s plate, medical instruments and some personal belongings be displayed in the Port Medical Office surgery at Flagstaff Hill Maritime Village, and be called the “W. R. Angus Collection”. The W.R. Angus Collection is significant for still being located at the site it is connected with, Doctor Angus being the last Port Medical Officer in Warrnambool. The collection of medical instruments and other equipment is culturally significant, being an historical example of medicine, administration, household equipment and clothing from late 19th to mid-20th century. Dr Angus assisted Dr Tom Ryan, a pioneer in the use of X-rays and in ocular surgery. Surgical instrument, hysterectomony forceps, part of the W.R. Angus Collection. Stainless steel forceps, 8 inch (20cm). Paper tag attached. Made by Down Bros. of London.Impressed "DOWN BROS. LONDON"flagstaff hill, warrnambool, shipwrecked coast, flagstaff hill maritime museum, maritime museum, shipwreck coast, flagstaff hill maritime village, great ocean road, dr w r angus, dr ryan, surgical instrument, t.s.s. largs bay, warrnambool base hospital, nhill base hospital, mira hospital, flying doctor, medical treatment, hysterectomony forceps, abdominal forceps, surgical instrument -
 Flagstaff Hill Maritime Museum and Village
Equipment - Surgical Instrument, early 20th century
... plate from his Nhill surgery is now mounted on the doorway to the Port Medical Office at Flagstaff Hill Maritime Village, Warrnambool. When Dr Angus took up practice in the Dr Edward and Dr Tom Ryan’s old premises he obtained their extensive collection of historical medical equipment and materials spanning 1884-1926. A large...plate from his Nhill surgery is now mounted on the doorway to the Port Medical Office at Flagstaff Hill Maritime Village, Warrnambool. When Dr Angus took up practice in the Dr Edward and Dr Tom Ryan’s old premises he obtained their extensive collection of historical medical equipment and materials spanning 1884-1926. A large ...This stomach clamp was donated to Flagstaff Hill Maritime Village by the family of Doctor William Roy Angus, Surgeon and Oculist. It is part of the “W.R. Angus Collection” that includes historical medical equipment, surgical instruments and material once belonging to Dr Edward Ryan and Dr Thomas Francis Ryan, (both of Nhill, Victoria) as well as Dr Angus’ own belongings. The Collection’s history spans the medical practices of the two Doctors Ryan, from 1885-1926 plus that of Dr Angus, up until 1969. ABOUT THE “W.R.ANGUS COLLECTION” Doctor William Roy Angus M.B., B.S., Adel., 1923, F.R.C.S. Edin.,1928 (also known as Dr Roy Angus) was born in Murrumbeena, Victoria in 1901 and lived until 1970. He qualified as a doctor in 1923 at University of Adelaide, was Resident Medical Officer at the Royal Adelaide Hospital in 1924 and for a period was house surgeon to Sir (then Mr.) Henry Simpson Newland. Dr Angus was briefly an Assistant to Dr Riddell of Kapunda, then commenced private practice at Curramulka, Yorke Peninsula, SA, where he was physician, surgeon and chemist. In 1926, he was appointed as new Medical Assistant to Dr Thomas Francis Ryan (T.F. Ryan, or Tom), in Nhill, Victoria, where his experiences included radiology and pharmacy. In 1927 he was Acting House Surgeon in Dr Tom Ryan’s absence. Dr Angus had become engaged to Gladys Forsyth and they decided he further his studies overseas in the UK in 1927. He studied at London University College Hospital and at Edinburgh Royal Infirmary and in 1928, was awarded FRCS (Fellow from the Royal College of Surgeons), Edinburgh. He worked his passage back to Australia as a Ship’s Surgeon on the on the Australian Commonwealth Line’s T.S.S. Largs Bay. Dr Angus married Gladys in 1929, in Ballarat. (They went on to have one son (Graham 1932, born in SA) and two daughters (Helen (died 12/07/1996) and Berenice (Berry), both born at Mira, Nhill ) According to Berry, her mother Gladys made a lot of their clothes. She was very talented and did some lovely embroidery including lingerie for her trousseau and beautifully handmade baby clothes. Dr Angus was a ‘flying doctor’ for the A.I.M. (Australian Inland Ministry) Aerial Medical Service in 1928 . Its first station was in the remote town of Oodnadatta, where Dr Angus was stationed. He was locum tenens there on North-South Railway at 21 Mile Camp. He took up this ‘flying doctor’ position in response to a call from Dr John Flynn; the organisation was later known as the Flying Doctor Service, then the Royal Flying Doctor Service. A lot of his work during this time involved dental surgery also. Between 1928-1932 he was surgeon at the Curramulka Hospital, Yorke Peninsula, South Australia. In 1933 Dr Angus returned to Nhill and purchased a share of the Nelson Street practice and Mira hospital (a 2 bed ward at the Nelson Street Practice) from Dr Les Middleton one of the Middleton Brothers, the current owners of what previously once Dr Tom Ryan’s practice. Dr Tom and his brother had worked as surgeons included eye surgery. Dr Tom Ryan performed many of his operations in the Mira private hospital on his premises. He had been House Surgeon at the Nhill Hospital 1902-1926. Dr Tom Ryan had one of the only two pieces of radiology equipment in Victoria during his practicing years – The Royal Melbourne Hospital had the other one. Over the years Dr Tom Ryan had gradually set up what was effectively a training school for country general-practitioner-surgeons. Each patient was carefully examined, including using the X-ray machine, and any surgery was discussed and planned with Dr Ryan’s assistants several days in advance. Dr Angus gained experience in using the X-ray machine there during his time as assistant to Dr Ryan. When Dr Angus bought into the Nelson Street premises in Nhill he was also appointed as the Nhill Hospital’s Honorary House Surgeon 1933-1938. His practitioner’s plate from his Nhill surgery is now mounted on the doorway to the Port Medical Office at Flagstaff Hill Maritime Village, Warrnambool. When Dr Angus took up practice in the Dr Edward and Dr Tom Ryan’s old premises he obtained their extensive collection of historical medical equipment and materials spanning 1884-1926. A large part of this collection is now on display at the Port Medical Office at Flagstaff Hill Maritime Village in Warrnambool. In 1939 Dr Angus and his family moved to Warrnambool where he purchased “Birchwood,” the 1852 home and medical practice of Dr John Hunter Henderson, at 214 Koroit Street. (This property was sold in1965 to the State Government and is now the site of the Warrnambool Police Station. and an ALDI sore is on the land that was once their tennis court). The Angus family was able to afford gardeners, cooks and maids; their home was a popular place for visiting dignitaries to stay whilst visiting Warrnambool. Dr Angus had his own silk worm farm at home in a Mulberry tree. His young daughter used his centrifuge for spinning the silk. Dr Angus was appointed on a part-time basis as Port Medical Officer (Health Officer) in Warrnambool and held this position until the 1940’s when the government no longer required the service of a Port Medical Officer in Warrnambool; he was thus Warrnambool’s last serving Port Medical Officer. (Masters of immigrant ships arriving in port reported incidents of diseases, illness and death and the Port Medical Officer made a decision on whether the ship required Quarantine and for how long, in this way preventing contagious illness from spreading from new immigrants to the residents already in the colony.) Dr Angus was a member of the Australian Medical Association, for 35 years and surgeon at the Warrnambool Base Hospital 1939-1942, He served with the Australian Department of Defence as a Surgeon Captain during WWII 1942-45, in Ballarat, Victoria, and in Bonegilla, N.S.W., completing his service just before the end of the war due to suffering from a heart attack. During his convalescence he carved an intricate and ‘most artistic’ chess set from the material that dentures were made from. He then studied ophthalmology at the Royal Melbourne Eye and Ear Hospital and created cosmetically superior artificial eyes by pioneering using the intrascleral cartilage. Angus received accolades from the Ophthalmological Society of Australasia for this work. He returned to Warrnambool to commence practice as an ophthalmologist, pioneering in artificial eye improvements. He was Honorary Consultant Ophthalmologist to Warrnambool Base Hospital for 31 years. He made monthly visits to Portland as a visiting surgeon, to perform eye surgery. He represented the Victorian South-West subdivision of the Australian Medical Association as its secretary between 1949 and 1956 and as chairman from 1956 to 1958. In 1968 Dr Angus was elected member of Spain’s Barraquer Institute of Barcelona after his research work in Intrasclearal cartilage grafting, becoming one of the few Australian ophthalmologists to receive this honour, and in the following year presented his final paper on Living Intrasclearal Cartilage Implants at the Inaugural Meeting of the Australian College of Ophthalmologists in Melbourne In his personal life Dr Angus was a Presbyterian and treated Sunday as a Sabbath, a day of rest. He would visit 3 or 4 country patients on a Sunday, taking his children along ‘for the ride’ and to visit with him. Sunday evenings he would play the pianola and sing Scottish songs to his family. One of Dr Angus’ patients was Margaret MacKenzie, author of a book on local shipwrecks that she’d seen as an eye witness from the late 1880’s in Peterborough, Victoria. In the early 1950’s Dr Angus, painted a picture of a shipwreck for the cover jacket of Margaret’s book, Shipwrecks and More Shipwrecks. She was blind in later life and her daughter wrote the actual book for her. Dr Angus and his wife Gladys were very involved in Warrnambool’s society with a strong interest in civic affairs. He had an interest in people and the community They were both involved in the creation of Flagstaff Hill, including the layout of the gardens. After his death (28th March 1970) his family requested his practitioner’s plate, medical instruments and some personal belongings be displayed in the Port Medical Office surgery at Flagstaff Hill Maritime Village, and be called the “W. R. Angus Collection”. The W.R. Angus Collection is significant for still being located at the site it is connected with, Doctor Angus being the last Port Medical Officer in Warrnambool. The collection of medical instruments and other equipment is culturally significant, being an historical example of medicine, administration, household equipment and clothing from late 19th to mid-20th century. Dr Angus assisted Dr Tom Ryan, a pioneer in the use of X-rays and in ocular surgery. Surgical instrument, stomach clamp with screw clamp and pointed teeth along jaws, part of the W.R. Angus Collection. Stainless steel forceps. Made by Holborn, London. Maker's mark is impressed into metal.Impressed "HOLBORN LONDON" and "2"flagstaff hill, warrnambool, shipwrecked coast, flagstaff hill maritime museum, maritime museum, shipwreck coast, flagstaff hill maritime village, great ocean road, dr w r angus, dr ryan, surgical instrument, t.s.s. largs bay, warrnambool base hospital, nhill base hospital, mira hospital, flying doctor, medical treatment, holborn london, stomach clamp, surgical instrument -
 Flagstaff Hill Maritime Museum and Village
Surgical Instrument, Charriere, 1860's-1880's
... plate from his Nhill surgery is now mounted on the doorway to the Port Medical Office at Flagstaff Hill Maritime Village, Warrnambool. When Dr Angus took up practice in the Dr Edward and Dr Tom Ryan’s old premises he obtained their extensive collection of historical medical equipment and materials spanning 1884-1926. A large...plate from his Nhill surgery is now mounted on the doorway to the Port Medical Office at Flagstaff Hill Maritime Village, Warrnambool. When Dr Angus took up practice in the Dr Edward and Dr Tom Ryan’s old premises he obtained their extensive collection of historical medical equipment and materials spanning 1884-1926. A large ...This lithotrite was donated to Flagstaff Hill Maritime Village by the family of Doctor William Roy Angus, Surgeon and Oculist. It is part of the “W.R. Angus Collection” that includes historical medical equipment, surgical instruments and material once belonging to Dr Edward Ryan and Dr Thomas Francis Ryan, (both of Nhill, Victoria) as well as Dr Angus’ own belongings. The Collection’s history spans the medical practices of the two Doctors Ryan, from 1885-1926 plus that of Dr Angus, up until 1969. Surgeons used a lithotrite to crush and remove bladder stones a common ailment in earlier days. It was inserted into the bladder via the urethra. The knobs on the instrument would be manipulated to open up jaws at the other end of it. The lithotrite probably dates from around 1860-1880. The manufacturer's mark CHARRIERE is named after Mr Joseph-Frederic Charriere (1903-1876), a famous Swiss born inventor and maker of surgical instruments. In 1830 he founded a company in France to manufacture surgical instruments. He fame includes inventing and developing hypodermic needles and catheters, and creating the French Catheter Scale, a universal system for sizing catheters and urological instruments, often referred to now as the "French" unit of measurement. ABOUT THE “W.R.ANGUS COLLECTION” Doctor William Roy Angus M.B., B.S., Adel., 1923, F.R.C.S. Edin.,1928 (also known as Dr Roy Angus) was born in Murrumbeena, Victoria in 1901 and lived until 1970. He qualified as a doctor in 1923 at University of Adelaide, was Resident Medical Officer at the Royal Adelaide Hospital in 1924 and for a period was house surgeon to Sir (then Mr.) Henry Simpson Newland. Dr Angus was briefly an Assistant to Dr Riddell of Kapunda, then commenced private practice at Curramulka, Yorke Peninsula, SA, where he was physician, surgeon and chemist. In 1926, he was appointed as new Medical Assistant to Dr Thomas Francis Ryan (T.F. Ryan, or Tom), in Nhill, Victoria, where his experiences included radiology and pharmacy. In 1927 he was Acting House Surgeon in Dr Tom Ryan’s absence. Dr Angus had become engaged to Gladys Forsyth and they decided he further his studies overseas in the UK in 1927. He studied at London University College Hospital and at Edinburgh Royal Infirmary and in 1928, was awarded FRCS (Fellow from the Royal College of Surgeons), Edinburgh. He worked his passage back to Australia as a Ship’s Surgeon on the on the Australian Commonwealth Line’s T.S.S. Largs Bay. Dr Angus married Gladys in 1929, in Ballarat. (They went on to have one son (Graham 1932, born in SA) and two daughters (Helen (died 12/07/1996) and Berenice (Berry), both born at Mira, Nhill ) According to Berry, her mother Gladys made a lot of their clothes. She was very talented and did some lovely embroidery including lingerie for her trousseau and beautifully handmade baby clothes. Dr Angus was a ‘flying doctor’ for the A.I.M. (Australian Inland Ministry) Aerial Medical Service in 1928 . Its first station was in the remote town of Oodnadatta, where Dr Angus was stationed. He was locum tenens there on North-South Railway at 21 Mile Camp. He took up this ‘flying doctor’ position in response to a call from Dr John Flynn; the organisation was later known as the Flying Doctor Service, then the Royal Flying Doctor Service. A lot of his work during this time involved dental surgery also. Between 1928-1932 he was surgeon at the Curramulka Hospital, Yorke Peninsula, South Australia. In 1933 Dr Angus returned to Nhill and purchased a share of the Nelson Street practice and Mira hospital (a 2 bed ward at the Nelson Street Practice) from Dr Les Middleton one of the Middleton Brothers, the current owners of what previously once Dr Tom Ryan’s practice. Dr Tom and his brother had worked as surgeons included eye surgery. Dr Tom Ryan performed many of his operations in the Mira private hospital on his premises. He had been House Surgeon at the Nhill Hospital 1902-1926. Dr Tom Ryan had one of the only two pieces of radiology equipment in Victoria during his practicing years – The Royal Melbourne Hospital had the other one. Over the years Dr Tom Ryan had gradually set up what was effectively a training school for country general-practitioner-surgeons. Each patient was carefully examined, including using the X-ray machine, and any surgery was discussed and planned with Dr Ryan’s assistants several days in advance. Dr Angus gained experience in using the X-ray machine there during his time as assistant to Dr Ryan. When Dr Angus bought into the Nelson Street premises in Nhill he was also appointed as the Nhill Hospital’s Honorary House Surgeon 1933-1938. His practitioner’s plate from his Nhill surgery is now mounted on the doorway to the Port Medical Office at Flagstaff Hill Maritime Village, Warrnambool. When Dr Angus took up practice in the Dr Edward and Dr Tom Ryan’s old premises he obtained their extensive collection of historical medical equipment and materials spanning 1884-1926. A large part of this collection is now on display at the Port Medical Office at Flagstaff Hill Maritime Village in Warrnambool. In 1939 Dr Angus and his family moved to Warrnambool where he purchased “Birchwood,” the 1852 home and medical practice of Dr John Hunter Henderson, at 214 Koroit Street. (This property was sold in1965 to the State Government and is now the site of the Warrnambool Police Station. and an ALDI sore is on the land that was once their tennis court). The Angus family was able to afford gardeners, cooks and maids; their home was a popular place for visiting dignitaries to stay whilst visiting Warrnambool. Dr Angus had his own silk worm farm at home in a Mulberry tree. His young daughter used his centrifuge for spinning the silk. Dr Angus was appointed on a part-time basis as Port Medical Officer (Health Officer) in Warrnambool and held this position until the 1940’s when the government no longer required the service of a Port Medical Officer in Warrnambool; he was thus Warrnambool’s last serving Port Medical Officer. (Masters of immigrant ships arriving in port reported incidents of diseases, illness and death and the Port Medical Officer made a decision on whether the ship required Quarantine and for how long, in this way preventing contagious illness from spreading from new immigrants to the residents already in the colony.) Dr Angus was a member of the Australian Medical Association, for 35 years and surgeon at the Warrnambool Base Hospital 1939-1942, He served with the Australian Department of Defence as a Surgeon Captain during WWII 1942-45, in Ballarat, Victoria, and in Bonegilla, N.S.W., completing his service just before the end of the war due to suffering from a heart attack. During his convalescence he carved an intricate and ‘most artistic’ chess set from the material that dentures were made from. He then studied ophthalmology at the Royal Melbourne Eye and Ear Hospital and created cosmetically superior artificial eyes by pioneering using the intrascleral cartilage. Angus received accolades from the Ophthalmological Society of Australasia for this work. He returned to Warrnambool to commence practice as an ophthalmologist, pioneering in artificial eye improvements. He was Honorary Consultant Ophthalmologist to Warrnambool Base Hospital for 31 years. He made monthly visits to Portland as a visiting surgeon, to perform eye surgery. He represented the Victorian South-West subdivision of the Australian Medical Association as its secretary between 1949 and 1956 and as chairman from 1956 to 1958. In 1968 Dr Angus was elected member of Spain’s Barraquer Institute of Barcelona after his research work in Intrasclearal cartilage grafting, becoming one of the few Australian ophthalmologists to receive this honour, and in the following year presented his final paper on Living Intrasclearal Cartilage Implants at the Inaugural Meeting of the Australian College of Ophthalmologists in Melbourne In his personal life Dr Angus was a Presbyterian and treated Sunday as a Sabbath, a day of rest. He would visit 3 or 4 country patients on a Sunday, taking his children along ‘for the ride’ and to visit with him. Sunday evenings he would play the pianola and sing Scottish songs to his family. One of Dr Angus’ patients was Margaret MacKenzie, author of a book on local shipwrecks that she’d seen as an eye witness from the late 1880’s in Peterborough, Victoria. In the early 1950’s Dr Angus, painted a picture of a shipwreck for the cover jacket of Margaret’s book, Shipwrecks and More Shipwrecks. She was blind in later life and her daughter wrote the actual book for her. Dr Angus and his wife Gladys were very involved in Warrnambool’s society with a strong interest in civic affairs. He had an interest in people and the community They were both involved in the creation of Flagstaff Hill, including the layout of the gardens. After his death (28th March 1970) his family requested his practitioner’s plate, medical instruments and some personal belongings be displayed in the Port Medical Office surgery at Flagstaff Hill Maritime Village, and be called the “W. R. Angus Collection”. The W.R. Angus Collection is significant for still being located at the site it is connected with, Doctor Angus being the last Port Medical Officer in Warrnambool. The collection of medical instruments and other equipment is culturally significant, being an historical example of medicine, administration, household equipment and clothing from late 19th to mid-20th century. Dr Angus assisted Dr Tom Ryan, a pioneer in the use of X-rays and in ocular surgery. Surgical instrument, lithotrite, for bladder stone surgery; part of the W.R. Angus Collection. Stainless steel length, curved forcep end with holes on underside, knobs and round screws on top, top end has wheel with groove. Scale stamped on side "30 24 20 15 10 5" Manufactured by Charriere, Paris, circa 1860-1880.Impressed with "CHARRIERE 1 A. PARIS" and scale impressed on side"30 24 20 15 10 5"flagstaff hill, warrnambool, shipwrecked coast, flagstaff hill maritime museum, maritime museum, shipwreck coast, flagstaff hill maritime village, great ocean road, dr w r angus, dr ryan, surgical instrument, t.s.s. largs bay, warrnambool base hospital, nhill base hospital, mira hospital, flying doctor, medical treatment, urethral examination, urethral surgery, urethral forceps, charrifaf 1 a. paris