Showing 12783 items
matching phillips
-
 Federation University Historical Collection
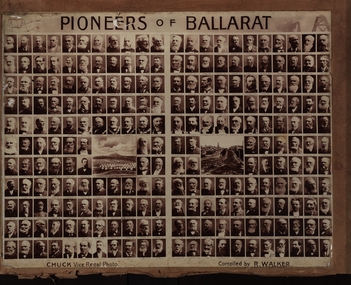
Photograph, Pioneers of Ballarat
The Pioneers of Ballarat may have been created to the Ballarat Old Colonists' Association and the reunions held by the early Ballarat pioneers. The dates given after the pioneers time is their date of arrival into the colony.Photograph showing numerous portraits of men who were considered Pioneers of Ballarat as complied by R. Walker and produced by Chuck Vice Regal Photo. The men depicted are: J. Smith; W. Gay; W. Downie; G. Goddard; B. Varcoe; A.F. Seidal; Loius Balhausen; J. McKenzie; William irwin; M. Box; Thomas Bath; James Oddie; William Tulloch; J.W. Graham; J. Ward; W. Curnow; R.J. Binder; F.J.L. Turner; W. Eyres; C.A. Welch; B. Welch; G. Welch; J. Lake; H. Smith; J. King; R.T. Wreford; Ernest Balhausen; J. Ward; T. Trengrove; J. Truswell; J. Taylor; W. Seeley; J.P. Murray; Hon. David Ham; Andrew Anderson; E. McCartney; J.H. Smith; Joseph Edward Cowley; A. Jones; W.H. Furness; F.N. Martin; James Anderson; G. Becher; James Meek; T. Hawkins; P. Drummond; C. Barker; J. Malcolm; R. Brown; G. Tupper; A. Rose; W. Pinkerton; A. Clinton; A. Sheppard, F.C. Downes; J.A. Blight; J. Blight; T. Blight; J. Richardson; C.W. Toy; W.C. Elder; E. Towl; S. Walker; W.P. Martin; J.T Langley; J.A. Abramowitch; R, Allan; S.W. Woodward; G. Hunt; J. Bishop; F.L. Graham; R. Graham; W. A.G. Fraser; J. Davies; J. Paterson; B.G. Tucker; E. McElroy; W.H. Burton, T.C. Coates; J. Williams; J.P. Roberts; J. Ritchie; T.W. White; J. F. Harvey; Natale D'Angri; D. McCallum; W. Chisholm; P. Kohl; J. Moncrief; J.P. Marshall; R.U. Nicholls; G.L. Holthouse; C. Gray; W. Gale; James Long; Theo Williams; J.R. Ellsworth; W. Scott; Henry Josephs; D. Cooke; William Little; T.H. Thompson; E. Morey; J.G. McDonald; C.C. Shoppee; G. Douglas; W. H. Ellis; W. Hicks; J. Cameron; W. B. Koppers; F. Marendez; G. Herrmann; J. Kelly; E. Jermyn; P. Murray; P. Gay; D. McNaught; T.D. Wanliss; G. Lord; H. Glenny; J. Trethowan; J. Blandford; J. Goujon; W. Coad; A. Colliver; J. Nunn; J. Munro; W.C. Burbidge; J. Jarvie; C. Ferguson; C. Morris; J. Russell; J. Phillips; J. Coghlan; R. Clark; Thomas Stoddart; M. Wasley; B. Retallack; John Reid; M.C. Carey; P. Maloney; E. Newman; J. Lamb; J,. Pryor; J. Gibson; James Mitchell; J. Rowe; James Vallins; A. Roxburgh; A. Cant; O. Thomas; J.Y. McDonald; W.M. Acheson; A. Jack; R. Gibbings; E.W. Chamberlain; J.H. Ellsworth; J. Falconer; G.G. Lorimer; James M. Bickett; T. Sayle; Andrew McIntyre; W. Hambley; K. Coutts; T. Muir; R. Scott; G. Leach; E. Richards; R. Hearn; J. Hughan; D. Miliani; E. Parr; J. T. Irving; W.G. Williams; J. Marks; J. Darby; T. Ray; D. McKenzie; James Robson; J. Robson; J. Moore; J. Murphy; Robert M. Serjeant; C. Ford; E.E. Campbell; P. Folland; P.J. Rickard; A. McVitty; B. Angwin; J.T. Sleep; M.P. Whiteside; W. Curtis; H. Crisp; E. Major; R. Pearce; J. Waller; G. Waller; G. Abrams; J. McIntyre; J. Johnston; W. Johnston; W. Taylor; J. Knoth; J. Davey; G. Smith; N. Kent; E.O. Witherden; J.B. Cathcart; W.H. Harrow; G. Evans; L. Ure; W.T. Glen; T. Dickinson; D. Hughes; J. Strickland; J. Hillman; E. Jackson; R.J. Walker; D. Gunn; R.J. Gullan; T. McManamy; A. Gray; James trembath; W. Porter; J. Showman; C. Walker; J. Bowman; W.B. McDonald; P. Jago; J. Stout pioneers, ballarat, chuck, chuck vice regal photo, r. walker, ballarat pioneers, pioneers of ballarat, j. smith, w. gay, w. downie, g. goddard, b. varcoe, a.f. seidal, loius balhausen, j. mckenzie, william irwin, m. box, thomas bath, james oddie, william tulloch, j.w. graham, j. ward, w. curnow, r.j. binder, f.j.l. turner, w. eyres, c.a. welch, b. welch, g. welch, j. lake, h. smith, j. king, r.t. wreford, ernest balhausen, t. trengrove, j. truswell, j. taylor, w. seeley, j.p. murray, hon. david ham, andrew anderson, e. mccartney, j.h. smith, joseph edward cowley, a. jones, w.h. furness, f.n. martin, james anderson, g. becher, james meek, t. hawkins, p. drummond, c. barker, j. malcolm, r. brown, g. tupper, a. rose, w. pinkerton, a. clinton, a. sheppard, f.c. downes, j.a. blight, j. blight, t. blight, j. richardson, c.w. toy, w.c. elder, e. towl, s. walker, w.p. martin, j.t langley, j.a. abramowitch, r, allan, s.w. woodward, g. hunt, j. bishop, f.l. graham, r. graham, w. a.g. fraser, j. davies, j. paterson, b.g. tucker, e. mcelroy, w.h. burton, t.c. coates, j. williams, j.p. roberts, j. ritchie, t.w. white, j. f. harvey, natale d'angri, d. mccallum, w. chisholm, p. kohl, j. moncrief, j.p. marshall, r.u. nicholls, g.l. holthouse, c. gray, w. gale, james long, theo williams, j.r. ellsworth, w. scott, henry josephs, d. cooke, william little, t.h. thompson, e. morey, j.g. mcdonald, c.c. shoppee, g. douglas, w. h. ellis, w. hicks, j. cameron, w. b. koppers, f. marendez, g. herrmann, j. kelly, e. jermyn, p. murray, p. gay, d. mcnaught, t.d. wanliss, g. lord, h. glenny, j. trethowan, j. blandford, j. goujon, w. coad, a. colliver, j. nunn, j. munro, w.c. burbidge, j. jarvie, c. ferguson, c. morris, j. russell, j. phillips, j. coghlan, r. clark, thomas stoddart, m. wasley, b. retallack, john reid, m.c. carey, p. maloney, e. newman, j. lamb, j, . pryor, j. gibson, james mitchell, j. rowe, james vallins, a. roxburgh, a. cant, o. thomas, j.y. mcdonald, w.m. acheson, a. jack, r. gibbings, e.w. chamberlain, j.h. ellsworth, j. falconer, g.g. lorimer, james m. bickett, t. sayle, andrew mcintyre, w. hambley, k. coutts, t. muir, r. scott, g. leach, e. richards, r. hearn, j. hughan, d. miliani, e. parr, j. t. irving, w.g. williams, j. marks, j. darby, t. ray, d. mckenzie, james robson, j. robson, j. moore, j. murphy, robert m. serjeant, c. ford, e.e. campbell, p. folland, p.j. rickard, a. mcvitty, b. angwin, j.t. sleep, m.p. whiteside, w. curtis, h. crisp, e. major, r. pearce, j. waller, g. waller, g. abrams, j. mcintyre, j. johnston, w. johnston, w. taylor, j. knoth, j. davey, g. smith, n. kent, e.o. witherden, j.b. cathcart, w.h. harrow, g. evans, l. ure, w.t. glen, t. dickinson, d. hughes, j. strickland, j. hillman, e. jackson, r.j. walker, d. gunn, r.j. gullan, t. mcmanamy, a. gray, james trembath, w. porter, j. showman, c. walker, j. bowman, w.b. mcdonald, p. jago, j. stout, john smith -
 Old Colonists' Association of Ballarat Inc.
Photograph - Photograph - Colour, Marble Honour Boards listing benefactors to the Ballarat Old Colonists' Associations
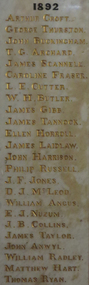
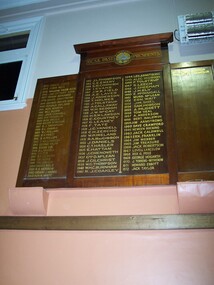
The Old Colonists' Hall opened in 1887.Marble Honour Boards listing benefactors to the Ballarat Old Colonists' Associations. The name was added to the boards the year of the donors death. 1892 Arthur Croft George Thurston John Buckingham T.G. Archard James Scannele Caroline Fraser L.E. Cutter W.H. Butler James Gibb James Tannock Ellen Horroll James Laidlaw John Harrison Philip Russell J.F Jones D.J. McLeod William Angus E.J. Nuzum J.B. Collins James Taylor John Anwyl William Radley Matthew Hart Thomas Ryan 1897 William Taylor Joseph Langfon W.C. Phillips Henry Dobson Peter Brose Edwin Parr John Magor Natale D'Angri Lawson Ure James Malcolm Robert Sim W.J. Clarke F.N. Martin William Kelly Edward Hrose Francis Edwards William Kay James Simpson J.R. Hopkins W. Booth 1898 John Peart J.J. Cahir Joseph Betts Thomas Rowlands George Brown Rudolph Stephens James Houston John McPhee Alban Atwood David Fitzpatrick L.H. Kopke Henry Morrison William Bones Henry Morris 1899 Alexander Miller David McNaught C.W. Langtree John Twentyman Nathaniel Trench Adam Bennett James Gay C.B. Retallack James Richardson Thomas Hawkins John Taylor D.F. Stalker William Laplau John Jarvie J.E. Morris James Harrison J.S. Paterson Henry Leggo W.J. Seeley Charles Stewart James Vigar J.J. Cahir Joseph Betts Thomas Rowlands George Brown Rudolph Stephens James Houston John McPhee Alban Atwood David Fitzpatrick L.H. Kopke Henry Morrison William Bones Henry Morris 1900 Peter Le Page W.H. Barnard George Perry George Eason James Ivey 1903 James Miller Matthew Morgan William Norman G.G. Graham John Griffiths Richard Ince John Wallace John Blight J.W. Mills C.E. Jones John Noble Wilson David Mitchell William Walner David Munroe John English David McDonald William Saunders William Dougall A.T. Morrison Thomas Wilson M.C. Donnelly James Fry John Haworth Edward Newman E.F. McElroy J.H. Reed Helen Trounson E.A. Miller Alexander Ross Alexander Taylor H.A. Comber 1909 John Blyth Charles Tunbridge Henry Gore Walter Owen Charles Rowsell Edward Elliott Charles Robinson T.J. Wills R.S. Hager Henry Fields T. Paterson William Woodridge A. Morrah Adam Scott J.C. Shepherd J. Holland J. Cochran G. Lovitt J. Haig G. Sharp J. Dulfer R. Davidson E. Lillingston T. Raw 1911 W.H. Uren John Paterson H.J. Summerscales James Oddie W.H. Malyon T.E. Gill Agnes D. McIntosh John Wright Andrew Byrne Thomas Greenwood H.W. Morrow James Lambert E.E. Eberhard John Reid T.W. Purdue H.J. Symons John Lynch 1915 William Bell D.B. Wheeler Richard Baker M.L.C. W.B. Bradshaw Betsy F. Graham A.J. Hare C.V. Day J.P. Smart Lieutenant Colonel A.H. White Dr R.C. Lindsay Andrew Cant T.C. Coates E. Goodwin Thomas Lyle 1916 James Long John King Junior G.A. Brown C.E. House G.T. Jones Hon. R.T. Vale J.G. Tucker H. Baber J. Lammin D. Lillingstone George Becher Laurence Clark William Brazenor A. Clinton William Little W.B. Bannerman J.H Peady James Lamb 1917 J.C. Charles Joseph Fields John McPhail John Lombard Thomas Lyle H.L. Pobjoy E.E. Llewellyn E.C. Dermer John M. Bickett Hon. J.Y. McDonald Capt. J.W. Pearce. M.C. Joseph Pounder 1918 Lieutenant E.S. Holgate Grace Valkins J.C. Brough Thomas Mitchell George Buchanan J.H. Ward T. Davey A.B. Berry Corporal L.J. Malin G.H. Abrams James Tyler 1919 T.C. Anderson Agnes Murray G. Donaghy F. Opie Thomas Bodycomb Harry D. Davies John Clarke R.L. Medwell G.N. Robinson Isaiah Pearce A.R. Tunbridge H.C. Handford F.G. Fraser F. Carver J.S. Douglas Hon. Alfred Deakin T.J. McConnellarthur croft, george thurston, john buckingham, t.g. archard, james scannele, caroline fraser, l.e. cutter, w.h. butler, james gibb, james tannock, ellen horroll, james laidlaw, john harrison, philip russell, j.f jones, d.j. mcleod, william angus, e.j. nuzum, j.b. collins, james taylor, john anwyl, william radley, matthew hart, thomas ryan, william taylor, joseph langfon, w.c. phillips, henry dobson, peter brose, edwin parr, john magor, natale d'angri, lawson ure, james malcolm, robert sim, w.j. clarke, f.n. martin, william kelly, edward hrose, francis edwards, william kay, james simpson, j.r. hopkins, w. booth, john peart, j.j. cahir, joseph betts, thomas rowlands, george brown, rudolph stephens, james houston, john mcphee, alban atwood, david fitzpatrick, l.h. kopke, henry morrison, william bones, henry morris, alexander miller, david mcnaught, c.w. langtree, john twentyman, nathaniel trench, adam bennett, james gay, c.b. retallack, james richardson, thomas hawkins, john taylor, d.f. stalker, william laplau, john jarvie, j.e. morris, james harrison, j.s. paterson, henry leggo, w.j. seeley, charles stewart, james vigar, j.j. cahir, joseph betts, thomas rowlands, george brown, rudolph stephens, james houston, john mcphee, alban atwood, david fitzpatrick, l.h. kopke, henry morrison, william bones, henry morris, 1900, peter le page, w.h. barnard, george perry, george eason, james ivey, james miller, matthew morgan, william norman, g.g. graham, john griffiths, richard ince, john wallace, john blight, j.w. mills, c.e. jones, john noble wilson, david mitchell, william walner, david munroe, john english, david mcdonald, william saunders, william dougall, a.t. morrison, thomas wilson, m.c. donnelly, james fry, john haworth, edward newman, e.f. mcelroy, j.h. reed, helen trounson, e.a. miller, alexander ross, alexander taylor, h.a. comber, john blyth, charles tunbridge, henry gore, walter owen, charles rowsell, edward elliott, charles robinson, t.j. wills, r.s. hager, henry fields, t. paterson, william woodridge, a. morrah, adam scott, j.c. shepherd, j. holland, j. cochran, g. lovitt, j. haig, g. sharp, j. dulfer, r. davidson, e. lillingston, t. raw, w.h. uren, john paterson, h.j. summerscales, james oddie, w.h. malyon, t.e. gill, agnes d. mcintosh, john wright, andrew byrne, thomas greenwood, h.w. morrow, james lambert, e.e. eberhard, john reid, t.w. purdue, h.j. symons, john lynch, william bell, d.b. wheeler, richard baker m.l.c., w.b. bradshaw, betsy f. graham, a.j. hare, c.v. day, j.p. smart, lieutenant colonel a.h. white, dr r.c. lindsay, andrew cant, t.c. coates, e. goodwin, thomas lyle, james long, john king junior, g.a. brown, c.e. house, g.t. jones, hon. r.t. vale, j.g. tucker, h. baber, j. lammin, d. lillingstone, george becher, laurence clark, william brazenor, a. clinton, william little, w.b. bannerman, j.h peady, james lamb, 1917, j.c. charles, joseph fields, john mcphail, john lombard, thomas lyle, h.l. pobjoy, e.e. llewellyn, e.c. dermer, john m. bickett, hon. j.y. mcdonald, capt. j.w. pearce. m.c., joseph pounder, lieutenant e.s. holgate, grace valkins, j.c. brough, thomas mitchell, george buchanan, j.h. ward, t. davey, a.b. berry, corporal l.j. malin, g.h. abrams, james tyler, t.c. anderson, agnes murray, g. donaghy, f. opie, thomas bodycomb, harry d. davies, john clarke, r.l. medwell, g.n. robinson, isaiah pearce, a.r. tunbridge, h.c. handford, f.g. fraser, f. carver, j.s. douglas, hon. alfred deakin, t.j. mcconnell -
 Bendigo Historical Society Inc.
Document - BENDIGO ART GALLERY, BENDIGO ART SOCIETY, 10 October, 1926
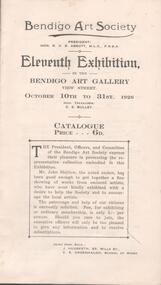
Bendigo Art Gallery, Bendigo Art Society. President: Hon. R H S Abbot, M.L.C., F.R.S.A. Eleventh Exhibition, in the Bendigo Art Gallery, View Street. October 10th to 31st, 1926. Hon. Treas.: C E Bulley. Catalogue Price 6d. The President, Officers, and Committee of the Bendigo Art Society express their pleasure in presenting the representative collection embodied in this Exhibition. Mr John Shirlow, the noted etcher has been good enough to get together a fine showing of works from eminent artists, who have kindly exhibited with a disire to help the Society and to encourage the local artists. The patronage and help of our citizens is earnestly solicited. Fee, for exhibiting or ordinary membership, only 5/- per annum. Should you care to join, the executive officers will only be too pleased to give any information and to receive subscriptions. Joint Hon. Secs.: J Hudspeth, V E Greenhalgh. Fine Art Section. Arists names: Elma Roach, Ida F Knox, H J Honeybone, Edith H Moore, M A Hope, Lady Barrett, G E Parker, D Hinchcliffe, Aileen R Dent, J Hudspeth, J Florence MacGregor, Madge Freeman, C E Bulley, Merle Bulley, Ethel f Crook, L M Sheridan, C G Dunlop, Ena Smith, William H oliver, E Phillips Fox, Ethel Carrick, H Septimus Power, David Davies, Norman Davies, Norman W Penrose, Margaret McCloud, Josephine Van Damme, M E Coverdale, Marion Jones,R W Bugg, L Rowe, Lucy C Newell, Claire Colgan, Charles G Stewart, Alice Newell, V E Greenhalgh, Violet Hambly. Display of Hand-Painted China: H W Tilley, M Jacobs, W McKie, A E Collier, Hilda Veale, Elma Curnow, Jean Cahill, Frank Vaughan. Collection of Australian Art: W D Knox, Esther Paterson, Dora L Wilson, A M E Bale, E F Hooton, John Rowell, Horah Gurdon, Louis McCubbin. Section A (Outdoor Study, any subject, any medium.) Members only: C G Duinlop, J Florence MacGregor, Merle Bulley, William H Oliver, Norman W Penrose. Section B Student's Section. Drawing or Design. Pupils of Schools: Stanley R Millott, Joyce Ranson, Ronald William Forbes, Dorothy Clemens, Lilian J White, Ruby A I Welch, Nancy R Hudspeth, J Honey Church, J G Graham, Ivo Steel. Section C Student's Section. Applied Art. Pupols of Art Schools: Florrie Spencer, Joyce Ranson, Ronald W Forbes, Dorothy Clemens, Lilian J White, Ruby A I Welch, Nancy R Hudspeth, Jean Honeychurch, Annie I Paterson, Isabel Blake, Beatrice Lee, Garnet Capper, Gwen Osborne, Dorothy Olds, Marjorie Crossman, Doris Shaw, Phyllis Paul, Amy Bolton. Section D Plant Form From Nature (Pulils of Schools in Bedigo Inspectorate), North Bendigo: Alan Styles, Ronald Wright, Agnes R Styles, Jean Woodman. Creek View S.S. Beryl Butcher, Grace Gerguson, Ruth Cheatley, Elmore S.S.: George Read, Hazel Farnsworth, Lorna Washington, Keith Gow, Jean Oliver, Robbie Dick. Wanalta S.S. Mary Brown, Dorothy Nelson, Isobel Roberts, Kenneth McKenzie, Frank Brown. Barnedown S.S.: Elsie Read, George Cahill, Maud Nicholas, Leonard Robbins, Benjamin Robbins. Gravel Hill S.S.: Gladys Bamford, Jean Wright, Jean Hosking, Nancy Honeychurch, Norman McLean, Norman Guy, Agnes Stilwell. Violet St S.S.: Alma Worth, G McConville, Harry Elliot. Various Schools: Wm. Hyslop, Ruby Robertson, Hilda Parkinson, Maud O'Connor, Archie L Walker, Hedley Leggo, Jan O Hoy, Edith Cheatley, John Tatchell, Jean Barell, Keith Ashcroft, John Mueller, J Howe, Eric Cohen, Alice Glover, Ivy Morphett, Allen V Horne, Yin On, R W Moon. 2 Copies of catalogue. Black print, 12 pages made up of 3 sheets of paper with 2 staples in centre.Boltons Print, Bendigoevent, exhibition, bendigo art society, bendigo art gallery, bendigo art society. president: hon. r h s abbot, m.l.c., f.r.s.a. eleventh exhibition, in the bendigo art gallery, view street. october 10th to 31st, 1926. hon. treas.: c e bulley. catalogue price 6d. the president, officers, and committee of the bendigo art society express their pleasure in presenting the representative collection embodied in this exhibition. mr john shirlow, the noted etcher has been good enough to ger together a fine showing of works from eminent artists, who have kindly exhibited with a disire to help the society and to encourage the local artists. the patronage and help of our citizens is earnestly solicited. fee, for exhibiting or ordinary membership, only 5/- per annum. should you care to join, the executive officers will only be too pleased to give any information and to receive subscriptions. joint hon. secs.: j hudspeth, v e greenhalgh. fine art section. arists names: elma roach, ida f knox, h j honeybone, edith h moore, m a hope, lady barrett, g e parker, d hinchcliffe, aileen r dent, j hudspeth, j florence macgregor, madge freeman, c e bulley, merle bulley, ethel f crook, l m sheridan, c g dunlop, ena smith, william h oliver, e phillips fox, ethel carrick, h septimus power, david davies, norman davies, norman w penrose, margaret mccloud, josephine van damme, m e coverdale, marion jones, r w bugg, l rowe, lucy c newell, claire colgan, charles g stewart, alice newell, v e greenhalgh, violet hambly. display of hand-painted china: h w tilley, m jacobs, w mckie, a e collier, hilda veale, elma curnow, jean cahill, frank vaughan. collection of australian art: w d knox, esther paterson, dora l wilson, a m e bale, e f hooton, john rowell, horah gurdon, louis mccubbin. section a (outdoor study, any subject, any medium.) members only: c g duinlop, j florence macgregor, merle bulley, william h oliver, norman w penrose. section b student's section. drawing or design. pupils of schools: stanley r millott, joyce ranson, ronald william forbes, dorothy clemens, lilian j white, ruby a i welch, nancy r hudspeth, j honey church, j g graham, ivo steel. section c student's section. applied art. pupols of art schools: florrie spencer, joyce ranson, ronald w forbes, dorothy clemens, lilian j white, ruby a i welch, nancy r hudspeth, jean honeychurch, annie i paterson, isabel blake, beatrice lee, garnet capper, gwen osborne, dorothy olds, marjorie crossman, doris shaw, phyllis paul, amy bolton. section d plant form from nature (pulils of schools in bedigo inspectorate), north bendigo: alan styles, ronald wright, agnes r styles, jean woodman. creek view s.s. beryl butcher, grace gerguson, ruth cheatley, elmore s.s.: george read, hazel farnsworth, lorna washington, keith gow, jean oliver, robbie dick. wanalta s.s. mary brown, dorothy nelson, isobel roberts, kenneth mckenzie, frank brown. barnedown s.s.: elsie read, george cahill, maud nicholas, leonard robbins, benjamin robbins. gravel hill s.s.: gladys bamford, jean wright, jean hosking, nancy honeychurch, norman mclean, norman guy, agnes stilwell. violet st s.s.: alma worth, g mcconville, harry elliot. various schools: wm. hyslop, ruby robertson, hilda parkinson, maud o'connor, archie l walker, hedley leggo, jan o hoy, edith cheatley, john tatchell, jean barell, keith ashcroft, john mueller, j howe, eric cohen, alice glover, ivy morphett, allen v horne, yin on, r w moon. 2 copies of catalogue. black print, 12 pages made up of 3 sheets of paper with 2 staples in centre. -
 Flagstaff Hill Maritime Museum and Village
Ceramic - Tile, circa 1878
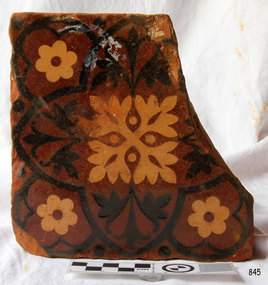
This Minton floor tile is from the wreck of the LOCH ARD along with other examples of this manufacture recovered from the wreck site and form part of the collection at Flagstaff Hill. The iron-hulled clipper ship from the Loch Line was heading for Port Phillip from London when it ran into the cliffs of Mutton Bird Island near Port Campbell and was wrecked on June 1st, 1878. The LOCH ARD was laden with high-value cargo including luxury goods intended for display at the Melbourne International Exhibition in 1880. One notable survivor from the ship’s freight manifest was the well-packed Minton porcelain peacock, a two-metre-high ceramic masterpiece of vivid glazed colours. The almost total loss of life and property from the LOCH ARD registered as a shocking tragedy for the Colony of Victoria, at a time when social confidence and economic optimism were otherwise high. The wealth generated from Gold and Wool was increasingly being spent on grandiose private residences and imposing public buildings. The demand for quality furnishings and fittings was therefore strong. Among the products consigned to burgeoning colonial markets by the Milton Pottery at Stoke upon Trent, were their new range of colourfully patterned but very durable floor tiles – ideal for the high-traffic spaces in the large civic buildings then being constructed in Australia and America. These new floor tiles were “encaustic”, meaning that their designs and colours were encased “within” the depth of the tile. Rather than their decorative patterns being glazed onto the surface of the tile, their inlaid designs were created during the manufacturing process, as “coloured slips” (or liquid clay) were poured into a deep pre-moulded casting. When fired, the resulting tile was colour-fast and design-fast. A brief history of the Loch Ard (1873-1878): - The sailing ship Loch Ard was one of the famous Loch Line ships that sailed from England to Australia. Barclay, Curdle and Co. built the three-masted iron vessel in Glasgow in 1873. It had sailed three trips to Australia and one trip to Calcutta before its fateful voyage. Loch Ard left England on March 2, 1878, under the command of recently married, 29-year-old Captain Gibbs. It was bound for Melbourne with a crew of 37, plus 17 passengers. The general cargo reflected the affluence of Melbourne at the time. Onboard were straw hats, umbrellas, perfumes, clay pipes, pianos, clocks, confectionery, linen and candles, and a heavier load of railway irons, cement, lead and copper. Other cargo included items intended for display in the Melbourne International Exhibition of 1880. The Loch Ard had been sailing for three months and was close to its destination on June 1, 1878. Captain Gibbs had expected to see land at about 3 am but the Loch Ard ran into a fog that greatly reduced visibility and there was no sign of land or the Cape Otway lighthouse. The fog lifted at 4 am and the sheer cliffs of Victoria's west coast were much closer to them than Captain Gibbs expected. He tried to manage the vessel but failed and the ship struck a reef at the base of Mutton Bird Island, near Port Campbell. The top deck loosened from the hull, and the masts and rigging crashed down, knocking passengers and crew overboard. The lifeboat was launched by Tom Pearce but crashed into the side of Loch Ard and capsized. He clung onto its overturned hull and sheltered under it. He drifted out to sea and the tide brought him back to what is now called Loch Ard Gorge. He swam to shore and found a cave for shelter. A passenger, Eva Carmichael, had raced onto the deck to find out what was happening and was confronted by towering cliffs above the ship. She was soon swept off the ship by a huge wave. Eva saw Tom Pearce on a small rocky beach and yelled to attract his attention. He swam out and dragged her to the shelter of the cave. He revived her with a bottle of brandy from a case that had washed up on the beach. Tom scaled a cliff in search of help and followed some horse hoof prints. He came from two men from Glenample Station, three and a half miles away. He told the men of the tragedy and then returned to the gorge while the two men rode back to the station to get help. They reached Loch Ard Gorge and took the two shipwreck survivors to Glenample Station to recover. Eva stayed at the station for six weeks before returning to Ireland by steamship. In Melbourne, Tom Pearce received a hero's welcome and was presented with a medal and some money. Of the 54 crew members and passengers on board, only two survived: the apprentice, Tom Pearce and the young woman passenger, Eva Carmichael, who lost her family in the tragedy. One of the most unlikely pieces of cargo to have survived the shipwreck was a Minton porcelain peacock - one of only nine in the world. The peacock was destined for the Melbourne International Exhibition in 1880. It had been well packed, which gave it adequate protection during the violent storm. Today, the Minton peacock can be seen at the Flagstaff Hill Maritime Museum in Warrnambool. From Australia's most dramatic shipwreck, it has now become Australia's most valuable shipwreck artefact and is one of very few 'objects' on the Victorian State Heritage Register. The Minton floor tile is significant for its hard-wearing yet attractive design. The shipwreck of the LOCH ARD is of State significance. Victorian Heritage Register S417. Flagstaff Hill’s collection of artefacts from LOCH ARD is significant for being one of the largest collections of artefacts from this shipwreck in Victoria. It is significant for its association with the shipwreck, which is on the Victorian Heritage Register (VHR S417). The collection is significant because of the relationship between the objects, as together they have a high potential to interpret the story of the LOCH ARD. The LOCH ARD collection is archaeologically significant as the remains of a large international passenger and cargo ship. The LOCH ARD collection is historically significant for representing aspects of Victoria’s shipping history and its potential to interpret sub-theme 1.5 of Victoria’s Framework of Historical Themes (living with natural processes). The collection is also historically significant for its association with the LOCH ARD, which was one of the worst and best-known shipwrecks in Victoria’s history. A square Minton floor tile with a black and apricot pattern against a chocolate brown background. There is a large chip missing. This decorative floor tile was recovered from the shipwreck of the LOCH ARD. On the back, or base, of the tile is inscribed the number “46” and the letters “Minton & Co Patent Stoke upon Trent”.flagstaff hill, warrnambool, shipwrecked coast, flagstaff hill maritime museum, maritime museum, shipwreck coast, flagstaff hill maritime village, great ocean road, loch line, loch ard, captain gibbs, eva carmichael, tom pearce, glenample station, mutton bird island, loch ard gorge, encaustic tile, melbourne international exhibition, floor tile, minton floor tile -
 Federation University Historical Collection
Document, Zelda Martin, Central Victorian Goldmining towns - Boom Towns or Ghost Towns?, c1996
Zelda Martin was a PhD candidate at the University of Melbourne.[.1] 4th item in light blue display book titled Research Approach/Overview of Chapters/Confirmation of Canditure/Chapters1,2,3&4 of proposed thesis. *Twenty-seven page article on Victorian goldfields towns titled: Central Victorian Goldmining Towns - Boom Towns or Ghost Towns. The article was written during the author's PhD study. It outlines the context methodology, and resources and the chapters of the proposed thesis: (1) Central Victorian Goldmining Towns - The Context (2) Contemporary Views of the Factors Necessary for Town Growth (3) Outward Manifestations of Town Growth (4) The Trappings of Government (5-9) The Main Towns and Their Hinterland. [.2] 5th item in Light Blue display book as above item. *Chapter 1 of proposed thesis titled 'Pick, Shovel and Tin Dish Mining.' Covers in Section A: Central Victoria - Pre 1851: Aborigines in Central Victoria, Squatters, and Government. Section B: The years 1851-1854: The Early Gold Rushes, Government Reaction, Township Surveys, Legislation, Town Development, Local Government and Early Settlement. [.3] 6th item in Light Blue display book as above item. *2A of proposed thesis titled 'Contemporary Views of the Factors Necessary for Town Growth'. Similar information to Chapter 1 plus extra re towns and maps. Sections: Introduction, Context of Place - Geographical Towns Listed, The Context of Time - Pre1851 Aborigines, Governance of Port Phillip, The Squatters, The Villages of Central Victorian Highlands, Conclusion, Condensed Version of Chapter2B. [.4] 7th item in Light Blue display book as above item. *Chapter2B of proposed thesis. Sections: Area of Research, Schools, Banks, Newspapers, Progress Association, Town Development - Sandhurst (Bendigo), Ballarat, Castlemaine,, Maryborough, Ararat and Stawell. [.5] 8th item in Light Blue display book as above item. *Chapter 3 of proposed thesis titled 'Outward Manifestations of Town Growth'. Sections: Introduction, Contemporary Writing, Educationalists, The Bankers, The Townsfolk, Current Theory, General Theories of Urban Development, and Conclusion. [.6] 9th item in Light Blue display book as above item. *Chapter 4 of proposed thesis titled 'Trappings of Government' Sections: Introduction, Early Government Attitudes to Mining and Town Development, Law and Order, Township Surveys, Legislation, Local Government, Transport and Communication, The People and Lobbyists. [.7] 10th item in Light Blue display book as above item. *'The Rise and Fall of Central Victorian Goldmining Towns'. Includes a map showing main Goldfields, a table showing towns and villages at two points in time - 1857 and 1871; a Bibliography of Primary and Secondary Sources. [.8] Resource No1. Black display book titled Local Towns 1 : Alma: *Brief history *Directory *Maps Amphitheatre / Mountain Hut: *Brief History Post Office Directory Ararat: *Brief History *Post Office Directory 1869 - Alphabetical Listing by Occupation *Ararat - Prominent Citizens of 1858 *Langi-Morgala Museum Avoca: *Brief History *Excerpts from 'Avoca The Early Years', Margery and Betty Beavis; pg1 - Beginnings; pg11 - The Midas Touch; pg25 - Local Gold Escorts; pg27 - A Town is Born; pg51- The Administration of Justice; pg53 - The Ways of the Law; pg61 - News of the Day; pg65 - A Time to Play; pg72 - Land Ownership *Post Office Directory (Bailliere's) 1869 *Tourism Map and Information of area *Historic Avoca - A 5.5km Tour *Avoca & the Pyrenees Region - information pamphlet Ballarat: *Early History of Ballarat - Ballarat Historical Society, Publication No.1: origin of the name; Ballaarat - the Beginning; Fabulous Yields from the Ballaarat Goldfield; *Streetscape Lydiard Street. *Hand drawn map showing Leigh River, Old Portland Bay Road, plaque on road to Colac; etc. *Newspaper article re 'The Theatre Royal' ( which stood in the vicinity of the current Owen Williams store) - 'The News'15/04/1998 *Article - 'Ballarat's Mechanics' Institute Lives On' Ballarat Courier, 14/09/1985 *Article - Standing the Test of Time' The News 17/11/1993 re The Mechanics Institute & picture of the Reading Room *'Ballarat a Study of a City, Phyllis Reichl, pub. Nelson, 1968; no.3 place, time and people field studies series *Investigator Vol.33 No.2, 1998 Geelong Historical Society. Article on pg75 describes Ballarat in 1861 *Folded poster - 'Ballarat 100' a history of telegraph communication, pub. Telecom. Beaufort (Fiery Creek): *Brief history *Post Office Directory [.9] Resource No.2 Black Folder Titled Towns cont.No2 Bendigo (Sandhurst): *'Family & Local History at the Bendigo Library - 1851-2001 150 years of gold'. *Bendigo Government Camp in 1853 illustration; key to sketch and names of Government officers stationed there *Excerpts from 'Bendigo and Vicinity' Adolph Haman *The Bendigo Goldfield Registry - pgs 1-7 Introduction *Excerpt: 'Breaking the Grip' *Excerpt: The Most Go-Ahead Place *Excerpts from 'History of Bendigo' - anti license agitation; laying out of town; proposed railway; gold calls and dividends; the Sandhurst Municipality; journalism *Bibliography Blackwood: *Excerpts from 'Aspects of Early Blackwood - The Goldfield, the Landmarks, the Pioneers' Alan J Buckingham and Margaret F Hitchcock, JG Publishing,1980 Buninyong: *A Brief History *Investigator Vol1 No.2 Feb 1966 Geelong Historical Society. Pg3 - Article re gold escort route - Mt Alexander to Adelaide - (see a simple monument on the Western Highway a few miles out of Horsham. Pg 15 - Ballarat Excursion - re the finding of gold. *Three articles published by Buninyong and District Historical Society Inc: (Magpie Exploration; Finding Gold In The Green Hills; Magpie Exploration; Burnt Bridge to Cargarie to Mt Mercer) *Copies of newspaper articles/items *Buninyong Street Directory Carisbrook: *In the Beginning There Was Carisbrook *The History of the Carisbrook Racecourse Carngham / Snake Valley: *Brief History *Directory Castlemaine: *Directory 1865-1866 - Alphabetical and Street *Poster - Castlemaine A Contemporary Guide "The Great Centre" 1866 - A Contemporary Guide to the Fascinating Past *Pamphlet - Castlemaine District Community Hospital *Map - Castlemaine, Maldon & Surrounding Districts *Map and Information - The Dry Diggings Track - a 55kl walk among historic goldfields relics ( Castlemaine Fryerstown Vaughan Mt Franklin Hepburn Daylesford) *Postcard - Former Court House *Directory 1867 - Alphabetical, Trade [.10] Resource No.3 Grey folder Titled Towns 3 Creswick to Maryborough Creswick: *Brief History *Booklet - "Creswick Cemetery Walk" *Booklet - The Buried Rivers of Gold Heritage Trail Creswick *Creswick Historical Museum Information Sheet *Chronological History of Creswick *Alphabetical Directory of the Borough of Creswick *Creswick's Creek Directory 1856 *Historic Creswick Walking Tour *A Brief Account of the Schools of Creswick - Past and Present *100 Years of Railway Travel in Creswick *The Berry Deep Leads *The Spence Home at Jackass Gully in the Creswick State Forest ( William Guthrie Spence - Pioneer) *The New Australian Mine and the 1882 Disaster *Creswick District News, Issue 7, July August 1999 *The Creswick Miners Walk - Information and Map *Maps Chewton: *Brief History *Directory Clunes: *Brief History *Clunes Street Directory Daylesford: *Brief History *Notable Bushfires in Daylesford District Over More Than a Century - "Black Thursday" 1851; 1862; 1899; the Disastrous Hepburn Fire of 1906; 1939; 1944; 1969. *Post Office Directory -Daylesford and Hepburn Dunolly / Inkerman: *Brief History *Directory *Pamphlet - Goldfields Historical Museum *Pamphlet - Historic Dunolly - Victoria's Best Kept Secret *Map of Gold Workings at Dunolly Area - showing where the main gold rushes occurred *Brief History - Inglewood *Directory - Inglewood - Name Occupation, Dwelling Kingower: *Brief History *Directory - Name / Ocupation / Dwelling Linton / Happy Valley / Piggoreet: *Brief History *Directory - Lintons McIvor: *"A History of the Shire and the Township of Heathcote" by J.O. Randell Majorca: *Brief History *Official Post Office Directory 1869 - Name / Occupation/ Address Maldon (Tarrangower): *Brief History Part 1 *Brief History Part 2 *Post Office Directory *List - Alphabetical Order by Names plus Business and Trade (Tarrangower Times Oct/1858) *List - Alphabetical Order by Trade plus Name and Business *Directory - Name / Occupation / Dwelling Maryborough: *Worsley Cottage - built by Arthur Worsley, a contractor in stonework in 1894 [.11] Resource No. 4 Blue Display Book titled Towns 4 Moliagul to Stawell Moliagul: *Brief History *Moligul Legislative Assembly (Voting?) List - Names and Occupations *Moliagul Victorian Post Office Directory 1868 - Name / Ocupation / Address / Comments *"The Welcome Stranger" gold nugget *The Sunday School *The Welcome Stranger Discovery Walk - information and map Moonambel (Mountain Creek) Redbank *Brief History *List of names extracted from advertisments of the Pioneer and Mountain Creek Advertiser 16/02/1861. *Bailliere's Directory 1869 - Alphabetical List of Name / Occupation / Place St Arnaud: *Brief History Sebastapol: *Brief History *Directory 1869 - Alphabetical by Name; plus occupation and address. Browns and Scarsdale: *Brief History *Browns Street Directory - Name and Occupation Smythesdale: *Brief Description *Smythesdale Street Directory -Name and Occupation Stawell (Pleasant Creek) *Brief History *Victorian Official Post Office Directory - Name /Occupation / Dwelling *Chronology - 1841-1920 *Production of gold statistics - 1879 - 1900 *Big Hill *Extracts from "The Golden Years of Stawell". Chapt 1 - Stawell's Coming Out. Capt. 2 - The Gold Rush. Caapt.3 - Cradle of Democracy. Chapt.4 - The Reefs Becomes Stawell. Chapt. 5 - Rushing In. Chapt.6 - The Pioneers. Chapt 7 - The Decade of Optimism. [.12] Resource No. 5: Blue Display Book titled 'Towns Steiglitz to the The Golden Triangle. Steiglitz: Brief History Victorian Post Office Directory 1869 *Map of Steiglitz *List of maps relevant to Steiglitz history *Information 6 tables of data from "Reports of Mining Surveyors Talbot (Back Creek) Brief History Taradale: Post office Directory 1869 - Name/Occupation/Street. Also list in alphabetical order by Occupation Taradale *Chronological Reference to Taradale Mines *Water - The Coliban System of Waterworks *Joseph Brady *The Syphon Tarnagulla (Sandy Creek) *Brief History *Tarnagulla Businessmen Cameos to give depth to advertisments in 'The Tarnagulla Courier' various issues 1864-1871 *Directory - Name/Occupation /Address *List - Name/Business/Trade Wedderburn (Koorong) *Brief History *List - Name/Occupation The Golden Triangle: *The Early Rushes - Wedderburn / Moliagul / Sandy Creek - Tarnagulla / Jones Creek - Waanyarra / Kingower / Dunolly - Goldsborough / Inglweood *Census of 1857 - Population / Occupations *1858-1871 - A Time of Consolidation- Wedderburn / Moliagul / Sandy Creek- Tarnagulla / Arnold *Census 1871 - Population *Information gleaned from the census data - Demographics / Population / Occupations / marital / Birthplace / Religion / Literacy/ Occupation and Housing Cameos *Graphs - Birthplace of settlers /Male-Female Ratio / Married males / Children under 15 as Percentage of Population / Religion *Census 1857 - Statistical data *Maps *Bibliography [.13] Resource No. 6 - Black Display Book Information and Research in Central Victoria including: *Banking - Research from ANZ Bank Archives *Institutions - also includes articles listed from the Ballarat Times Newspaper *Australian mining History Association - A.M.H.A. Bibliography *Australia's Mining History * Bibliography - Land Surveys Victoria - *1853 Administration (Statistics and Other) includes: schools / ministers of religion / police / military / local administration / licences for sale of spirits / distances between various Victorian gold fields. * Victoria Government Gazette (Copy) - N0. 116, 12/12/1854 includes: Gold Felds Commission of Enquiry & No. 85, 15/09/1854 - Addresses presented to the Lieutenant Governor (Sir Charles Hotham) during his tour through the Gold Fields of Victoria,1854. Addresses on behalf of : the people of Bendigo; Members of the Church of England, Bendigo; Members of the Wesleyan Church on the Bendigo Gold Fields; Bendigo Gold District General Hospital; the Bendigo Prospecting Association; Committee of the Bendigo Local Exhibition; Bendigo District Medical Association; Coloured Americans Resident at Bendigo; German Inhabitants of Bendigo; Landowners, Inhabitants, and Miners of Castlemaine; Inhabitants of Forest Creek; Inhabitants of Heathcote and Gold Miners of McIvor; Residents and landholders of the District of Bacchus Marsh; Inhabitants of Kilmore and Vicinity. *Gold Fields Correspondence 1853: letter from Lieutenant Colonel Valiant, (Officer commanding the Troops in Victoria) to the Lieutenant Governor re threatened disturbance at Sandhurst (Bendigo) regarding the Gold License Fee. * Extracts from a book "Victoria" re Gold Fields Commission of Enquiry involving mainly Ballarat and Castlemaine and a chapter titled 'A Tour to the Victorian Gold-Fields' *Lists of central Victorian newspapers - listed by date published 1851to 1874; by first date available to State Library. *A list of cities and towns showing County, population in 1861 &1871, and municipal status. [.14] Resource no.7. Black display book. *Reference: Papers presented to Parliament Victoria - 1859-1860 4 volumes - relevant sections copied. Contains information on Branches of Government. General / Finance / Gold / Gazette / Commission and Warrant / Statistic. *Gold Fields Act. In accordance with the Act the gold fields are divided into six districts - Ballaarat, Castlemaine , Sandhurst, Avoca, Ararat, and Beechworth.. Official staff in each gold district consists of a Resident Warden, Wardens, Wardens' Clerks, Bailiffs, Chinese Protectors, Chinese Interpreters, and Mining Surveyors. *Gold Receiver *Gaols *Police magistrates and Clerks of Petty Sessions, etc. *Field Branch *Immigration and Emigration Overland - Chinese - 1859 *Population on the Goldfields *The Geological Survey - The Government Geologist is assisited by staff from four branches - the office Branch; the Publishing Branch; the Field Branch and the Museum Branch. *Commission to Enquire Into Sludge dated 10/02/1859 (Some sections copied) - Report to the Honorable Chief Commissioner of Public Works, Melbourne re the mode of carrying the sludge from the puddling mills in Sandhurst without interfering with the drainage of the town and the roads in the neighbourhood. [.15] Resource No.8: Camel display book titled Resource No. 8. Aborigines *Lists of book titles - +"Readings in Victorian prehistory" +"The Aborigines of Port Phillip" +Aboriginal languages and clans" +"A History of the Port Phillip District" +"Langi Ghiran 1: Aboriginal Rock...." +"Koorie History: sources for aboriginal studies in the State Library of Victoria", ed. Tom Griffiths, Melb. Friends of the State Library, 1989 +"The Public Lands of Australia Felix"; settlement and land appraisal in Victoria1834-91 with special reference to the Western Plains", J.M.Powell, Melb. Oxford University Press 1970 +*Bibliography of the Victorian Aborigines' from the earliest manuscripts to 31st December 1970, Massoa, Aldo, Melb. Hawthorn Press, 1971 +"Aborigines in Colonial Victoria, 1836-1886", M.F. Christie, Sydney University Press, 1979 +"Urban and Industrial Australia: readings in Human Geography" ed J.M. Powell, Melb. Sorrett Pub. 1974 *Extracts: -Processes of Pioneer Settlement - The Squatting Occupation of Victoria, 1834-60. J.M. Powell -Areal Variations in the Class Structure of the Central-Place Hierarchy. P. Scott - Volume1 and Volume 2: Notes Relating to the Habits of the Natives of Other Parts of Australia and Tasmania. Compiled from various sources for the Government of Victoria by R Brough Smyth. John Curry, O'Neil, Melb. 1st pub. Melb. 1876. p31-45 - Numbers and Distribution of the Aborigines in Victoria -Victorian Aborigines 1835-1901 - A Resource Guide to the Holdings of the Public Record Office, Victoria; published by the Government Information Centre 1984. *History of the Aboriginal Artefacts Displayed in the Daylesford Museum. F. G. Powell (4 page pamphlet) *Letter to Zelda Martin from Peter Lovett, Cultural Officer, Ballarat & District Aboriginal Co- Operative, 05/02/1997 *Map: Ian Clarke Victorian Tribunal Boundary Map - Clans of Central Victoria. *Victorian Rock Art and Mythology - Article about Mount Langhi Ghiran and myths of the Tjapwarong people. *Two Aboriginal myths relating to the Grampians - 'The Monster Emu' / 'The Aquisition of Fire', by the Aborigines in the Grampians Areas *Article titled (chapter 8) Ballarat - information re camping sites in the region. Lake Wendouree / Lake Burrumbeet (includes a myth) / Mt Bunninyong / Lal Lal / Pitfield / Mount Elephant / Mount Egerton / Meredith / Lake Goldsmith / Lake Learmonth / Ercildoune *Notes on the Aborigines of the Wider Ballarat Region plus European names=Aboriginal names. John Morris 26/07/1995 *Role of Aborigines in Town Development in Central Victoria. Mentions Native Police Force est. in Port Phillip 1842 and Central Board for Aborigines est. 1860 *The Grave of King Billy. (Frank Wilson) Pamphlet. *Camping Places in Central and Northern Victoria. Article re Lake Burrumbeet site. *Programme for the Unveiling of Memorial Cairn for Edward Stone Parker 1802-1865. Note portrait not accurate. Accurate portrait is available in the book "A Successful Failure A Trilogy The Aborigines and Early Settlers", Edgar Morrison, Graffiti Publications, 2002. * Large envelope addressed to Mr G Netherway containing newspaper cuttings regarding the life of Edward Stone Parker, the unveiling of the Memorial Cairn as mentioned above, articles titled 'Episodes from Our Early Days' (Edgar Morrison, Yandoit)- The Black's School, A School At Last and The Final years. Also a typed page titled 'Historical Background to E.S.Parker's Career. Includes an interesting tale titled 'When the cat lay doggo' re laying power leads for the unveiling ceremony at the memorial site. [.16] green display folder titled 'Research Aids' *List of references to Commissioners' & W'ardens' Reports (formerly held at La Trobe Library Archives, now at Public Records Office [PRO]). Indicates town referred to / date of report / name of camp if different to town. * Archive information re Anglican Records *Movement around the Goldfields - Miners and Storekeepers - usefulness of newspapers in providing information - areas covered - Castlemaine, Maldon, Ararat, Stawell, Tarnagulla, Dunolly. *Port Phillip /Victoria Directories 1839/1867 - Chronological list of Directories included in this series. *"Notes on the History of Local Government in Victoria" A.W. Greig Melb. University Press 1925 - Photo-copied extract p5-p40. (Source - Deakin University Library) - Introduction by W.Harrison Moore. Section 1 - Development in New South Wales Before Separation. Section 2 - Development in Victoria After Its Separation from New South Wales. Hand written notations: 'roads, markets, and local government 1855 on' ;'opportunity of squatters in parliament' and 'opportunities of matters in parliament p33' * Notes on the Establishment of Surveyor General's Department 1851and Commissioner of Crown Lands and Survey. * Newspaper articles from The Argus, 1849, re the discovery of gold in the Pyrenees region. * Excerpt - a report on schools - A.B.Orlebar, Inspector; re the need for permanent school buildings rather than tents. *Excerpt from - 'Approaches to Urban History', Sean Glynn: The Case for Caution * Except from - 'The Urban Sprinkle', Weston Bate: Country Towns and Australian Regional History *Reference- 'The History of Land Tenure in the Colony of Victoria', John Quick. References the Haines Land Bill, land tenure and Land Leagues. [.17] Light blue envelope folder titled 'Birtchnell's Ballarat, etc. Directory 1862 *Contains various directories for Smythesdale, Buninyong, Clunes, Brown's and Creswick. [.18] Red envelope folder no.2 titled Victorian Gazetteer *Selected pages from 1869 Victorian Gazetteer on A4 paper (with a handwritten note questioning if some pages are from 1868 Victorian Gazetteer as appears to be different sizes - A3 pages.) Information includes locations and descriptions of towns, hotels, banks, communications and populations. (Does not include names, residences and occupations) [.19] Red Envelope folder titled Bailliere's Official Post Office Directory 1868 (or1869 or a mixture of both?) *Preface *Contains a selection of pages of towns highlighted in yellow in the the index *Work on this directory was commenced in 1867. *Information includes: Municipalities - mayors and councilors; lists of towns naming male inhabitants and their occupations. [.20]Yellow manila folder titled Post Grad Seminar Presentation 1996 *Gives some background to Zelda Martin's proposed thesis and why she chose the topic Gold Mining Towns Boom or Bust [.21] A3 display book - No. 1A * A list of 'Relevant Newspapers collected: The Tarrangower Times and Maldon Advertiser (first published 1858) Includes dates 1858-1867. The Mount Alexander Mail. Includes dates 1854-1866 The Tarnagulla Courier. Includes dates from1864-1871 Dunolly and Burnt Creek Express. Includes dates from 1862-1871 * Selection of newspaper pages from The Mount Alexander Mail 1854 to 1856, mostly showing advertisements for businesses and services provided to that community. [.22] A3 display book - No. 1B * Selection of newspaper pages from The Mount Alexander Mail 1857 to 1866, mostly showing advertisements for businesses and services provided to that community. [.23] A3 display book -No. 2 * Selection of newspaper pages from The Tarnagulla Courier 1864 to 1871, mostly showing advertisements for businesses and services provided to that community. [.24] A3 display book - No. 3 *Selection of newspaper pages from The Tarrangower Times (and Maldon and Newstead) Advertiser 1858 to1867, mostly showing advertisements for businesses and services provided to that community. [.25] A3 display book - No.4 * Selection of newspaper pages from The Dunolly and Burnt Creek Express; and The Dunolly and Betbetshire Express 1862 to 1871, mostly showing advertisements for businesses and services provided for that community. [.26] A3 display book - No.5 Includes: * Bryce Ross's Diggings Directory. Includes instructions for using this directory. This directory was used by "all persons having connexion or desiring to communicate with 'working parties, private friends, or Stores at the Diggings." As a directory for each area wwas completed it was published in each month's issue of Bonwick's "Digger's Magazine." Years c1852/1853. This Directory commences first at the head of Forest Creek. Includes a directory for Bendigo and Ballarat. Of interest at the end of the Bendigo and Ballarat directory is a list of the number of storekeepers, butchers, doctors, smiths, eating houses, lemonade sellers and chapels. * The Castlemaine Directory and Book of General Information Comprehending Glass's Model Calendar for the Two Years 1862 and1863. "zelda martin, victorian goldfield towns, bendigo, castlemaine, ballarat, maldon, stawell, ararat, maryborough, creswick, avoca, heathcote, banks, bank of australasia, union bank of australia, government camp, sandhurst, water supply, tarnagulla, talbot, back creek, mountain creek, police court, carisbrook, dunolly, thompson's foundry, charles clacy, anthony trollope, robert cecil, mount alexander, urbanisation, national schools, education, govenrment, industry, railway, transport, settlement, land settlement in central victoria, steiglitz, joseph brady, the new australian mine, berry deep leads, william guthrie spence, creswick state forest, arthur worsley, worsley cottage, the welcome stranger, moliagul, moonambel, redbank, st arnaud, sebastapol, brown's, scarsdale, clunes, chewton, daylesford, bushfires, inkerman, inglewood, kingower, lintons, happy valley, piggoreet, mcivor, majorca, tarrangower, taradale, the coliban system, the syphon, sandy creek, wedderburn, koorong, arnold, jones creek, waanyarra, the golden triangle, census 1857, blackwood, buninyong, durham lead, magpie, carngham, snake valley, alma, amherst, daisy hill, amphitheatre, mountain hut, beaufort, fiery creek, counties, population, gold fields commission of enquiry1854, william westgarth, gold license fee, lieutenant colonel valiant, administration of the victorian gold fields, commission to enquire into sludge 1859, e.s. parker, edward stone parker, edgar morrison, mount franklin protectorate, dja dja wurrung, memorial cairn, franklinford, mt franklin memorial cairn, jajowurrong, dja dja wurung, tjaowarong, wothowurong, assistant protectors, daylesford museum, buluk, rock art - grampians, aboriginal mythology - grampians, aborigines, first nations people, mount franklin, aboriginal artifacts, lake burrumbeet, native police force, central board of aborigines, yandoit, commissioners' reports, wardens' reports, port phillip/victoria directories 1839-1867, local government - victoria 1853/1854, surveyor general's department - 1850's, victorian schools 1850's, a.b.orlebar, haines land bill, william charles haines, wilson gray, land tenure, land leagues, victorian gazetteer, the tarrangower times and maldon advertiser - 1858-1867, the mount alexander mail 1854-1866, the tarnagulla courier 1864, dunolly and burnt creek express 1862-1871, bryce rose's diggings directory, the castlemaine directory 1862-1863 -
Federation University Historical Collection
Document, Dianne Campbell, Ballarat Lawyers 1853-1895 Research Folders, c2000-2021
Folders of research notes on Ballarat Lawyers, including newspaper clippings, website information, etc. .1) Ballarat Lawyers - A (Australian Law Firm histories, Jamaican in Australia, History of the Court System, University of Melbourne Law Students c1870s, Melanie Senior, Cinque Oakley Senior Lawyers, 19th Century Castlemaine Police Courts, New Victorian County Court, Scots and the Law in Scotland, Solicitor online encyclopedia, Alfred Akehurst, Artur Akehurst, J.T. Ansdell, Butler Cole Aspinall, Alfred James Bailey, Henry Stephen Bailey, Matthew Baird, Hugh Sutherland Barrett, William Field Barrett, Redmond Barry, George Elliott Barton, George Frederick Bartrop, John Bell, Thomas Bellas, George Booker) .2) Ballarat Lawyers B (Hugh Sunderland Barrett, Peter Beckford, William Beckford, John T.F. Bowker, William Box, George Boyd, William Boykett, B. Browne, Richard Archer Burton, Alfred Butler) .3) Ballarat Lawyers C-E (Thomas B.S. Carwithen, J.B. Cathcart, John Alfred Chalk, David Clarke, John Collins, Matthew Combe, Thomas Spemcer Cope, Richard. Crouch, Charles Curwan-Walker, Frank H. Cole, John Rowland Davies, Charles J. Dawson, Christopher John Dease, J.E. Dixon, Robert Willian Dobson, Roy Dobson, Edward Doward, Charles R. Doward, Edgar R. Doward,) .4) Ballarat Lawyers F-G (Charles B. Finlayson, Peter T. Finn, John Findlay, John Fitzgerald, John Olsen Foss, Alexander Fraser, J.A. Doane, Andrew Garran, George Garrard, David Gaunson, William Gaunt, MAry Gaunt, F.T. Gell) .5) Ballarat Lawyers H-J: (Frederick Ham, Jeremy Harper, John H. Harris, solicitors, Amelia Harris, J. Henry Harris, Peter Blake, Henry Plomer, Arthur Plomer, Ballarat Chamber of Commerce, Freemasons, White Flat Drainage and Mining Company, Henry R. Nicholls, Francis Ham, Richard T. Harvey, Edward Heady, Peter Heinz, T.t. Hollway. Thomas tuke hollway, William Higgins, James V.M. Hitchins, frederick Hitchins, James Hitchins, Edward Hockley, Robert W. Holmes, Catherine Kain, JOhn Ireland, Richard D. Ireland, Peter Jacobs) .6) T.C. Williams, John Kidahl, Arthur W. King, Pendrell family, M.A. Lazarus, Edward Lewis, W.H. McCormick, Soho Foundry, Henry S, Ochiltree, James V. McCormick, McDonnell, Townsend MacDermott, Morgan McDOnnell, Percy McDonnell, Cyprian McDonnell, John McFarland, Samuel W, McGowan, Bill McGregor, David Madden, Charles Holthouse, J. Madden, Samuel Mann, Samuel F. Mann, Tobias Furneaux, Samuel Mann, Agar Wynne, thomas Mann, Henry MacDermott, Archibald Midnie, Arthur Nevett, Arthur H. Nevett, Alfred Mitchell, William Mitchell, H.W. Morrow, William Mitchell, Norman P. Must, George F. Oakley.) .7) Ballarat Lawyer Q-R (Henry S. Ochiltree, W.B. Ochiltree, Edward G. Ochiltree, J.J.P. O'Dee, Bernard O'Dowd, John Ogier, Cornish Lawyers in Central Victoria Q-R, John Bateman Paynter, J.B. Pearson, Mondle Emmanuel Phillips, Robert King Piers, Robert King Piers, Pinkerton, Frank Pinkerton, Martha Pinkerton, Charles Purcell, R.H. Ramsay, Henry Randall, James Randall, Thomas Randall, John Warrington Rogers, John M. S. Rodd, George Rutler) .8) Lawyers in Central Victoria S-W (Charles Salter, H. Holmes, George Staveley, Charles Salter, George T. Boyd, Edward Sandford, Henry G. Shaw, Thomas W. Snape, Thomas S. Standish, Charles Snape, Frederick C. Standish, Edith Snape, James Snape, Thomas Snape, Philip Snape, George Staveley, John G. Stoker, William Stone, Henry Sturt, Matthew W. Taylor, Bread and Cheese Club, R.D. Thompson, Roger D. Thompson, R.H. Ramsay, R.G. Turner, F.H. Tuthill, W.M.K. Vale, William Vale, May Vale, William L. Vardy, Gordon Vardy, William S. Vardy, Charles Von Ende) .9) Lawyers in Central Victoria W-Z (Henry Walker, Andrew Wallace, John Wellesley, Brereton Watson, C.G.M. Watson, James Watson, George Armytage, Thomas Watson, Patricius Welsh, John Westmore, Theodore Whipham, Arthur Whipham, Thomas H. Whipham, Frances Whipham, Thomas Bellas, James L. Willoughby, John Noble Williams, James Wisewould, Horace Wright, H.M. Wright, William Wright, Henry J. Wrixon, Agar Wynne, Samuel Young) . ballarat lawyers, ballarat, dianne campbell goldfields lawyers collection -
 Bendigo Historical Society Inc.
Document - LA TROBE UNIVERSITY BENDIGO COLLECTION: BENDIGO TEACHERS' COLLEGE GRADUATION CEREMONY 1962
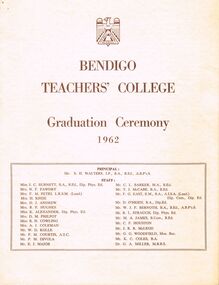
Two copies of the Bendigo Teachers' College Graduation Ceremony 1962 program. On the front page is a list of the staff working at the college - Mr. S. H. Walters (Principal), Miss J. C. Burnett, Mrs. N. F. Fawdry, Mrs. F. M. Petri, Mrs. H. Knox, Mrs. D. J. Andrew, Mrs. B. F. Hughes, Miss K. Alexander, Mrs. D. M. Philpot, Miss B. H. Cowling, Mrs. A. J. Coleman, Mr. W. D. Kolle, Mr. F. M. Courtis, Mr. P. M. Divola, Mr. E. J. Major, Mr. C. L. Barker, Mr. T. J. McCabe, Mr. F. G. East, Mr. D. O'Brien, Mr. W. J. F. Bernoth, Mr. R. L. Strauch, Mr. M. A. James, Mr. C. F. Houston, M. J. R. R. McLeod, Mr. G. G. Woodfield, Mr. K. C. Coles and Dr. G. A. Miller. On the inside cover is the "Significance of the Ceremony" and the "Order of the Ceremony". Mr. F. M. Courtis welcomed the visitors and the Principal read the College Charge. The 'Graduation Book' was presented to Mr. W. F. R. Budge by Miss J. C. Burnett. Mr. C. L. Barker presented the T.P.T.C. graduating students to the Principal and Mrs. N. F. Fawdry presented the T.I.T.C. graduating students to the Principal. Congratulations were offered by the Mayor of Bendigo Cr. R. A. Rae, J.P., the President of Strathfieldsaye Shire Cr. K. Houlahan, J. P. and Mr. E. P. Seymour, Head Teacher, Violet Street State School. The Occasional Address was given by Mr. L. J. Pryor Superintendent of Teacher Education. The following page contains a list of the "Students of 1960 - 1962 Trained Infant Teacher's Certificate". They are Glenys Faye Barrett, Marlene Isabella Bemrose, Beth Adora Bodinnar, Margaret Isobel Brown, Doris Lillian Chambers, Marie Ann Crawford, Margaret Carol Donne, Kaye Beverley Exell, Jannette Joyce Hughes, Margaret Christina Jenkins, Kathryn Margaret Lackmann, Susan Anne Lewer, Barbara June Lord, Jennifer Beris Matheson, Joy Lynette Messer, Geraldine Mary, Moylan, Patricia Joan O'Bree, Helen Jeanette Rodda, Lesley Scott, Heather Dawn Shenfield, Nola May Steele, Jennifer Margaret Weston and Alicia Yvonne Young. It also contains a paragraph describing "The Perfect Teacher". The back cover of the booklet has a list of "Students of 1961 - 1962 Trained Primary Teacher's Certificate". John Walter Angel, Elisabeth Ann Arkinstall, Mary Christina Backway, Helen Elizabeth Barclay, Bruce Maxwell Bouch, Pamela Mary Braden, Howard Francis Briggs, Clare Antoinette Brown, Alan John Bruce, Peter John Burns, Valerie Jean Caldwell, Marie Lynette Chambers, Margaret Jeannette Christie, Alison Ruth Clement, Marie Elaine Collins, Gladys Helena Cooke, Lindsay Charles Coster, David John Cowan, Peter John Cronin, Berenice Margaret Cronk, Edeline May Crouch, Theodore Robert Dare, Lynette Joan Davis, Ian David Dawson, Mary DeAraugo, Kenneth Ross Erbs, Francis Elaine Mary Fallon, Margaret Fawcett, Janet Frances Filbey, Francesco Gargiulo, Ian John Glenister, Barbara Faye Gotch, Lynette Ellen Graham, Colin Athol Hayes, Marlene Grace Hazen, Desmond Brian Hearn, Brentford Graeme Heath, Carmel Jean Heslop, Pamela Joy Higgie, Lynette Rosemary Cecelia Hoare, Erica Fay Holloway, Marie Jean Jardine, Kenneth Neil Johnson, Laurel Robyn Jones, Glenys Lorraine Judd, Diane Elizabeth Kear, Ann Elizabeth Keenan, Monica Cecelia Kelly, Margaret Elizabeth Landini, Patricia Joy Langdon, Dorothy Margaret Leitch, Donald Alan Leslie, Mary Carmel McCormack, Helen Mary McCutcheon, Birgitt Marx, Claire Agnes Mullins, Lucille Anne Newcombe, Glenice Vivienne Orr, Judith Joyce Ozanne, Wilma Beverley Pape, Virginia Elizabeth Parke, Robin Parker, Dorothy Joan Peterson, Robin Joan Phillips, Cherril Margaret Probyn, Norma Lesley Rantall, Nola Read, Margaret Elaine Ridley, Thomas Charles Rilen, Marie Therese Sharkey, Judith Margaret Spackman, Desmond Thomas Stephens, Nancy Rae Telfer, Bernard James Trevaskis, Marjorie Ellen Warden, Laurice Helen Warwick, Judith Maree Weir, Maxwell John White, Norman Leslie Williams, Pamela Williams and Lloyd Reginald Wishart. Within this document is a loose page showing the seating arrangements for the graduation. Staff seating arrangements are as follows - Walters, Barker, Seymour, Fawdry, McCabe, Woodfield, Alexander, Hughes, Divola, Major, Strauch, Pryor, Budge, Burnett, East, Houston, Petri, Andrew, Coles, McLeod, James, O'Brien.bendigo, education, bendigo teachers' college graduatio, la trobe university bendigo collection, collection, bendigo teachers' college, bendigo, education, teaching, teachers, students, staff, bendigo teachers' college students, bendigo teachers' college staff, history, graduation, graduation ceremony, book, tertiary education, graduands, graduates -
 Bendigo Historical Society Inc.
Document - Arthur T. Pattinson, 1962
10570 South African (Boer) War Memorial Bendigo. The monument commemorates those who died in service or were killed in action while serving in the South African (Boer) War. It is a bronze statue of a soldier on a granite base. Leader (Melbourne), 19 November 1904. “There was a large assemblage on the afternoon of 11th November, when the ceremony of unveiling the soldiers' memorial statue was performed by Brigadier-General Gordon in the presence of a muster of branches of the defence forces. The statue, which is in bronze, is mounted on a massive granite base, on the foot of which is the following inscription: — "Bendigo's tribute to the memory of the Australian soldiers who, in the South African war of 1899 - 1902 gave their lives for Queen and Empire. The statue was modelled by Mr. J. Walker, a young Bendigonian, who has been studying for two or three years under Mr. A. T. Woodward art instructor at the local school of mines.“ Ola Cohn recalled in her autobiography meeting John Walker as a sculpture student at the Bendigo School of Mines and that he had later received the commission for the Boer War Memorial although she neglects to mention its location. John Walker was born in Bendigo and first studied sculpture at the Bendigo School of Art. Walker, then went to England to study at the Royal College of Art London, and in Paris at the Académie Colarossi and Julian Academy. John Walker worked as a sculptor in both Bendigo and West Brunswick before turning to chicken farming in the Bendigo suburb of White Hills. The photo of A. T. Pattinson was taken by George Leake Massingham, a professional photographer, who had seven children, one of whom died at birth. After arriving in Australia from England, he established himself as a travelling photographer, an occupation he continued after his marriage. He travelled throughout country Queensland, Victoria and New South Wales, setting up studios along the way. The family ended up moving with him, travelling to Sydney, Narrandera, Bendigo, Newtown, Geelong and Deniliquin. Correspondence re Boer War Memorial Bendigo Boer War Memorial Bendigo. Letters and photo from and to Mrs Wilson, eldest daughter of Mr Arthur T. Pattinson who was a model for the Boer War sculpture. 10570a A black and white photo of Trooper Arthur T. Pattinson restored by BHS Volunteers. 10570b The original photo as sent by Mrs Wilson to Harold Curnow (Bendigo Historical Society) in 1962. The photo is mounted on heavy brown cardboard and has an old catalogue number of "P680" inscribed on it. The cardboard is torn and held together with sticky tape. On the front in italics is printed G.L. Massingham, Bendigo. 10570c Notes on the rear of the photo from Mrs Wilson state that "the photo is of Arthur T. Pattinson (Rusty), an Australian Light Horse trooper who served in the Boer War. The Boer War Memorial in Pall Mall Bendigo represents a trooper on guard. The sculptor was Jack Walker who used Pattinson as a model, and it is regarded as an excellent likeness." 10570d A letter from Harold Curnow back to Mrs Wilson on Jan 4th, 1963, acknowledging receipt of the photo and a letter received, noting the significance of the historical information. 10570e Handwritten letter 29/11/1962 from Mrs Wilson to Mr Curnow introducing herself as Mr. Pattinson's eldest daughter and answering the letter he wrote to her father. She mentions the bad health of her parents. Arthur modelled for the statue at least two to three times per week in a studio on the top floor of a building in Bull St. He was the original model to the best of her knowledge. Another model possibly Mr P. Handmear may have sat as a model for renovations (*). The rifle was a light horse rifle issued to Pattinson as he was still serving in 1904. Arthur and Handmear were boys together and very close. * Note - the plaster model was repaired prior to casting in metal. 10570f An obituary notice: 18/11/64 "On Nov. 17 at Frankston, Emma, wife of the late A. T. Pattinson (Rusty), late of Bendigo. 10570g Letter Nov. 20th, 1962, from Harold Curnow to Mr Arthur T. Pattinson, Kent St., Mornington, Vic. "Dear Mr Pattinson, Last week your brother, Brit., whom I have known for many years, supplied the Bendigo Advertiser with some interesting information regarding your role as the model for the late Jack Walker when he was making the statue for the Boer War Memorial here. Yesterday however, another claimant to the distinction of being the model was advanced in the Bendigo Advertiser by Mr Richard Marshall, of Moran Street, Bendigo who said that the soldier's model was Phillip Handmear. I understand that your brother has sent the newspaper cuttings on to you. When he called to see me yesterday, he suggested that I write to you for further particulars. Can you recall the discussion you had with Jack Walker when he approached you about acting as the model and do you remember how many times you posed for him, and whether the work was done in the house, in the yard, or in one of the outbuildings at Moran Street? In short, any details at all. At this point in time we are considering an interesting facet in Bendigo's history, so any seemingly unimportant incidents could really be useful if we knew about them. Have you any old newspaper cuttings mentioning your name in connection with the memorial? Do you remember any remarks that passed between you and Jack Walker during the long sessions you must have put in on this work? This could be very important. And do you recall where the rifle came from? Did you or Jack Walker borrow it from the military authorities? Back in 1934 Jack Walker recalled having had to pull the plaster model down and remake it when he discovered it was slightly off-balance and was slowly toppling forward. He told me he had to get his model to pose again. Do you know anything about this? Could it have been that he got Mr. Handmear in for the final stage of the work? That, of course, would apply only if you were not available. Incidentally, I never heard of Mr Handmear until I saw his name in yesterday's "Advertiser". In any case I intended contacting your brother or you to enquire whether any member of your family has an old photograph of you in your Boer War uniform, that is, one taken about the time of or just after the Boer War. I am sure that members of the Bendigo Branch of the Royal Historical Society would be most interested to see it. I hope you will have the time and inclination to consider the many points I have raised in this letter because the subject has aroused a lot of interest in Bendigo. Hoping you are well and quite as active as you wish, I remain, with all good wishes, Yours sincerely, Harold Curnow". john walker, jack walker, boer war memorial bendigo, arthur pattinson, soldiers' memorial bendigo -
 Old Castlemaine Schoolboys Association Inc.
Honour Board, Past Presidents
1912 – J. L. Thompson 1913 – G. E. Emery 1914 – S.M. Cornish 1915 – 1916 – I. Evans 1917 – J. W. B. Field 1918 – A. E. Laver 1919 – J. Anderson 1920 – T. Holmes 1921 – J. Tolstrup 1922 – A. Callaway 1923 – W. H. Seddon 1924 – J. W. McCay 1925 – H.S.W. Lawson 1926 – C. Courtney 1927 – G. Leaney 1928 – F. Tate 1929 – J.G. Yandell 1930 – C.H. Zercho 1931 – W.P. Ireland 1932 – R.A. MacGibbon 1933 – J. Daniels 1934 – A.T. Hasler 1935 – E. Hattam 1936 – J. Chenoweth 1937 – George D. McLean 1938 – J. Gilchrist 1939 – W.G. Thompson 1940 – W.H.C. Burnham 1941 – R. J. Coakley 1942 – 1943 – 1944 – Les Armstrong 1945 – Alec McGibbon 1946 – F. Tolstrup 1947 – S. Leech 1948 – J. Sheehan 1949 – J.H. Ely 1950 – E. McDougall 1951 – Murd McLean 1952 – Ern. Wait 1953 – Jim Shiel 1954 – Sam Hobson 1955 – A Mussett 1956 – Tom Veal 1957 – A. Anderson 1958 – Bert Baldwin 1959 – Jim Armstrong 1960 – Dave Crawford 1961 – Newlyn Hocking 1962 – Jack Caldwell 1963 – Ern. Franklin 1964 – Jim Webber 1965 – Jim Treasure 1966 – Jack Robertson 1967 – Lovell Langslow 1968 – Rex G. Peile 1969 – George Hogarth 1970 – J. Torrens-Witherow 1971 – Howard Ebbott 1972 – Jack Taylor 1973 – Samuel Leech 1974 – Edwin Rees 1975 – William Webb B.E.M. 1976 – Jim Ottery Q.P.M. 1977 – Frank Edwards 1978 – Geoff. Armstrong 1979 – George Archer M.B.E 1980 – Donald Ireland 1981 – Ken Martin 1982 – Bill Blume 1983 – Jack Connell 1984 – Ian Franklin 1985 – Bob Welch 1986 – Kelvin McMeekin 1987 – Edwin J Thompson 1988 – Don. L. Gamble 1989 – V.J. Pollard 1990 – B.N. Priest 1991 – R.A. Phillips 1992 – T. Williamson 1993 – George Ralph 1994 – Edgar Cue 1995 – A. L. Hassell 1996 – J.K. Cue 1997 – Richard P. Desmond 1998 – Cec. Kuhle 1999 – Trevor Cue 2000 – David A. Bailie 2001 – R.A. Morrow 2002 – Gregory J. Hughes 2003 – Ron. N. White 2004 – Terry Robinson 2005 – Peter J. Thompson 2006 – M. J. Murphy 2007 – Alan Paull 2008 – D. W. Burgess 2009 – K. F. McShanag 2010 – Steven Norris 2011 – Len Weston 2012 – Jim Chaplin 2013 – Dennis Green 2014 – Neville Cooper 2015 – Peter Cole 2016 – William Sikora -
 Flagstaff Hill Maritime Museum and Village
Photograph
HISTORY OF THE LOCH ARD The LOCH ARD belonged to the famous Loch Line which sailed many ships from England to Australia. Built in Glasgow by Barclay, Curdle and Co. in 1873, the LOCH ARD was a three-masted square rigged iron sailing ship. The ship measured 262ft 7" (79.87m) in length, 38ft (11.58m) in width, 23ft (7m) in depth and had a gross tonnage of 1693 tons. The LOCH ARD's main mast measured a massive 150ft (45.7m) in height. LOCH ARD made three trips to Australia and one trip to Calcutta before its final voyage. LOCH ARD left England on March 2, 1878, under the command of Captain Gibbs, a newly married, 29 year old. She was bound for Melbourne with a crew of 37, plus 17 passengers and a load of cargo. The general cargo reflected the affluence of Melbourne at the time. On board were straw hats, umbrella, perfumes, clay pipes, pianos, clocks, confectionary, linen and candles, as well as a heavier load of railway irons, cement, lead and copper. There were items included that intended for display in the Melbourne International Exhibition in 1880. The voyage to Port Phillip was long but uneventful. At 3am on June 1, 1878, Captain Gibbs was expecting to see land and the passengers were becoming excited as they prepared to view their new homeland in the early morning. But LOCH ARD was running into a fog which greatly reduced visibility. Captain Gibbs was becoming anxious as there was no sign of land or the Cape Otway lighthouse. At 4am the fog lifted. A man aloft announced that he could see breakers. The sheer cliffs of Victoria's west coast came into view, and Captain Gibbs realised that the ship was much closer to them than expected. He ordered as much sail to be set as time would permit and then attempted to steer the vessel out to sea. On coming head on into the wind, the ship lost momentum, the sails fell limp and LOCH ARD's bow swung back. Gibbs then ordered the anchors to be released in an attempt to hold its position. The anchors sank some 50 fathoms - but did not hold. By this time LOCH ARD was among the breakers and the tall cliffs of Mutton Bird Island rose behind the ship. Just half a mile from the coast, the ship's bow was suddenly pulled around by the anchor. The captain tried to tack out to sea, but the ship struck a reef at the base of Mutton Bird Island, near Port Campbell. Waves broke over the ship and the top deck was loosened from the hull. The masts and rigging came crashing down knocking passengers and crew overboard. When a lifeboat was finally launched, it crashed into the side of LOCH ARD and capsized. Tom Pearce, who had launched the boat, managed to cling to its overturned hull and shelter beneath it. He drifted out to sea and then on the flood tide came into what is now known as LOCH ARD Gorge. He swam to shore, bruised and dazed, and found a cave in which to shelter. Some of the crew stayed below deck to shelter from the falling rigging but drowned when the ship slipped off the reef into deeper water. Eva Carmichael had raced onto deck to find out what was happening only to be confronted by towering cliffs looming above the stricken ship. In all the chaos, Captain Gibbs grabbed Eva and said, "If you are saved Eva, let my dear wife know that I died like a sailor". That was the last Eva Carmichael saw of the captain. She was swept off the ship by a huge wave. Eva saw Tom Pearce on a small rocky beach and yelled to attract his attention. He dived in and swam to the exhausted woman and dragged her to shore. He took her to the cave and broke open case of brandy which had washed up on the beach. He opened a bottle to revive the unconscious woman. A few hours later Tom scaled a cliff in search of help. He followed hoof prints and came by chance upon two men from nearby Glenample Station three and a half miles away. In a state of exhaustion, he told the men of the tragedy. Tom returned to the gorge while the two men rode back to the station to get help. By the time they reached LOCH ARD Gorge, it was cold and dark. The two shipwreck survivors were taken to Glenample Station to recover. Eva stayed at the station for six weeks before returning to Ireland, this time by steamship. In Melbourne, Tom Pearce received a hero's welcome. He was presented with the first gold medal of the Royal Humane Society of Victoria and a £1000 cheque from the Victorian Government. Concerts were performed to honour the young man's bravery and to raise money for those who lost family in the LOCH ARD disaster. Of the 54 crew members and passengers on board, only two survived: the apprentice, Tom Pearce and the young woman passenger, Eva Carmichael, who lost all of her family in the tragedy. Ten days after the LOCH ARD tragedy, salvage rights to the wreck were sold at auction for £2,120. Cargo valued at £3,000 was salvaged and placed on the beach, but most washed back into the sea when another storm developed. The wreck of LOCH ARD still lies at the base of Mutton Bird Island. Much of the cargo has now been salvaged and some was washed up into what is now known as LOCH ARD Gorge. Cargo and artefacts have also been illegally salvaged over many years before protective legislation was introduced. One of the most unlikely pieces of cargo to have survived the shipwreck was a Minton porcelain peacock - one of only nine in the world. The peacock was destined for the Melbourne International Exhibition in 1880. It had been well packed, which gave it adequate protection during the violent storm. Today, the Minton peacock can be seen at the Flagstaff Hill Maritime Museum in Warrnambool. From Australia's most dramatic shipwreck it has now become Australia's most valuable shipwreck artefact and is one of very few 'objects' on the Victorian State Heritage Register. Flagstaff Hill’s collection of artefacts from LOCH ARD is significant for being one of the largest collections of artefacts from this shipwreck in Victoria. It is significant for its association with the shipwreck, which is on the Victorian Heritage Register (VHR S417). The collection is significant because of the relationship between the objects, as together they have a high potential to interpret the story of the LOCH ARD. The LOCH ARD collection is archaeologically significant as the remains of a large international passenger and cargo ship. The LOCH ARD collection is historically significant for representing aspects of Victoria’s shipping history and its potential to interpret sub-theme 1.5 of Victoria’s Framework of Historical Themes (living with natural processes). The collection is also historically significant for its association with the LOCH ARD, which was one of the worst and best known shipwrecks in Victoria’s history. Photograph of Loch Ard Gorge. Photograph taken some distance from the Gorge. Three men in the Gorge and outlines of steps can be seen. Right hand side of the photograph is written "Loch Ard Gorge"flagstaff hill, warrnambool, shipwrecked coast, flagstaff hill maritime museum, maritime museum, shipwreck coast, flagstaff hill maritime village, great ocean road, loch line, loch ard, captain gibbs, eva carmichael, tom pearce, glenample station, mutton bird island, loch ard gorge, photograph of loch ard gorge, photograph -
 Flagstaff Hill Maritime Museum and Village
Painting
HISTORY OF THE LOCH ARD The LOCH ARD belonged to the famous Loch Line which sailed many ships from England to Australia. Built in Glasgow by Barclay, Curdle and Co. in 1873, the LOCH ARD was a three-masted square rigged iron sailing ship. The ship measured 262ft 7" (79.87m) in length, 38ft (11.58m) in width, 23ft (7m) in depth and had a gross tonnage of 1693 tons. The LOCH ARD's main mast measured a massive 150ft (45.7m) in height. LOCH ARD made three trips to Australia and one trip to Calcutta before its final voyage. LOCH ARD left England on March 2, 1878, under the command of Captain Gibbs, a newly married, 29 year old. She was bound for Melbourne with a crew of 37, plus 17 passengers and a load of cargo. The general cargo reflected the affluence of Melbourne at the time. On board were straw hats, umbrella, perfumes, clay pipes, pianos, clocks, confectionary, linen and candles, as well as a heavier load of railway irons, cement, lead and copper. There were items included that intended for display in the Melbourne International Exhibition in 1880. The voyage to Port Phillip was long but uneventful. At 3am on June 1, 1878, Captain Gibbs was expecting to see land and the passengers were becoming excited as they prepared to view their new homeland in the early morning. But LOCH ARD was running into a fog which greatly reduced visibility. Captain Gibbs was becoming anxious as there was no sign of land or the Cape Otway lighthouse. At 4am the fog lifted. A man aloft announced that he could see breakers. The sheer cliffs of Victoria's west coast came into view, and Captain Gibbs realised that the ship was much closer to them than expected. He ordered as much sail to be set as time would permit and then attempted to steer the vessel out to sea. On coming head on into the wind, the ship lost momentum, the sails fell limp and LOCH ARD's bow swung back. Gibbs then ordered the anchors to be released in an attempt to hold its position. The anchors sank some 50 fathoms - but did not hold. By this time LOCH ARD was among the breakers and the tall cliffs of Mutton Bird Island rose behind the ship. Just half a mile from the coast, the ship's bow was suddenly pulled around by the anchor. The captain tried to tack out to sea, but the ship struck a reef at the base of Mutton Bird Island, near Port Campbell. Waves broke over the ship and the top deck was loosened from the hull. The masts and rigging came crashing down knocking passengers and crew overboard. When a lifeboat was finally launched, it crashed into the side of LOCH ARD and capsized. Tom Pearce, who had launched the boat, managed to cling to its overturned hull and shelter beneath it. He drifted out to sea and then on the flood tide came into what is now known as LOCH ARD Gorge. He swam to shore, bruised and dazed, and found a cave in which to shelter. Some of the crew stayed below deck to shelter from the falling rigging but drowned when the ship slipped off the reef into deeper water. Eva Carmichael had raced onto deck to find out what was happening only to be confronted by towering cliffs looming above the stricken ship. In all the chaos, Captain Gibbs grabbed Eva and said, "If you are saved Eva, let my dear wife know that I died like a sailor". That was the last Eva Carmichael saw of the captain. She was swept off the ship by a huge wave. Eva saw Tom Pearce on a small rocky beach and yelled to attract his attention. He dived in and swam to the exhausted woman and dragged her to shore. He took her to the cave and broke open case of brandy which had washed up on the beach. He opened a bottle to revive the unconscious woman. A few hours later Tom scaled a cliff in search of help. He followed hoof prints and came by chance upon two men from nearby Glenample Station three and a half miles away. In a state of exhaustion, he told the men of the tragedy. Tom returned to the gorge while the two men rode back to the station to get help. By the time they reached LOCH ARD Gorge, it was cold and dark. The two shipwreck survivors were taken to Glenample Station to recover. Eva stayed at the station for six weeks before returning to Ireland, this time by steamship. In Melbourne, Tom Pearce received a hero's welcome. He was presented with the first gold medal of the Royal Humane Society of Victoria and a £1000 cheque from the Victorian Government. Concerts were performed to honour the young man's bravery and to raise money for those who lost family in the LOCH ARD disaster. Of the 54 crew members and passengers on board, only two survived: the apprentice, Tom Pearce and the young woman passenger, Eva Carmichael, who lost all of her family in the tragedy. Ten days after the LOCH ARD tragedy, salvage rights to the wreck were sold at auction for £2,120. Cargo valued at £3,000 was salvaged and placed on the beach, but most washed back into the sea when another storm developed. The wreck of LOCH ARD still lies at the base of Mutton Bird Island. Much of the cargo has now been salvaged and some was washed up into what is now known as LOCH ARD Gorge. Cargo and artefacts have also been illegally salvaged over many years before protective legislation was introduced. One of the most unlikely pieces of cargo to have survived the shipwreck was a Minton porcelain peacock - one of only nine in the world. The peacock was destined for the Melbourne International Exhibition in 1880. It had been well packed, which gave it adequate protection during the violent storm. Today, the Minton peacock can be seen at the Flagstaff Hill Maritime Museum in Warrnambool. From Australia's most dramatic shipwreck it has now become Australia's most valuable shipwreck artefact and is one of very few 'objects' on the Victorian State Heritage Register. Flagstaff Hill’s collection of artefacts from LOCH ARD is significant for being one of the largest collections of artefacts from this shipwreck in Victoria. It is significant for its association with the shipwreck, which is on the Victorian Heritage Register (VHR S417). The collection is significant because of the relationship between the objects, as together they have a high potential to interpret the story of the LOCH ARD. The LOCH ARD collection is archaeologically significant as the remains of a large international passenger and cargo ship. The LOCH ARD collection is historically significant for representing aspects of Victoria’s shipping history and its potential to interpret sub-theme 1.5 of Victoria’s Framework of Historical Themes (living with natural processes). The collection is also historically significant for its association with the LOCH ARD, which was one of the worst and best known shipwrecks in Victoria’s history. Painting of The Loch Ard oil on board depicting wreck. It shows stormy sea and coastline in background. Ship appears to be capsized.flagstaff hill, warrnambool, shipwrecked coast, flagstaff hill maritime museum, maritime museum, shipwreck coast, flagstaff hill maritime village, great ocean road, loch line, loch ard, captain gibbs, eva carmichael, tom pearce, glenample station, mutton bird island, loch ard gorge, painting -
 Flagstaff Hill Maritime Museum and Village
Photograph
HISTORY OF THE LOCH ARD The LOCH ARD belonged to the famous Loch Line which sailed many ships from England to Australia. Built in Glasgow by Barclay, Curdle and Co. in 1873, the LOCH ARD was a three-masted square rigged iron sailing ship. The ship measured 262ft 7" (79.87m) in length, 38ft (11.58m) in width, 23ft (7m) in depth and had a gross tonnage of 1693 tons. The LOCH ARD's main mast measured a massive 150ft (45.7m) in height. LOCH ARD made three trips to Australia and one trip to Calcutta before its final voyage. LOCH ARD left England on March 2, 1878, under the command of Captain Gibbs, a newly married, 29 year old. She was bound for Melbourne with a crew of 37, plus 17 passengers and a load of cargo. The general cargo reflected the affluence of Melbourne at the time. On board were straw hats, umbrella, perfumes, clay pipes, pianos, clocks, confectionary, linen and candles, as well as a heavier load of railway irons, cement, lead and copper. There were items included that intended for display in the Melbourne International Exhibition in 1880. The voyage to Port Phillip was long but uneventful. At 3am on June 1, 1878, Captain Gibbs was expecting to see land and the passengers were becoming excited as they prepared to view their new homeland in the early morning. But LOCH ARD was running into a fog which greatly reduced visibility. Captain Gibbs was becoming anxious as there was no sign of land or the Cape Otway lighthouse. At 4am the fog lifted. A man aloft announced that he could see breakers. The sheer cliffs of Victoria's west coast came into view, and Captain Gibbs realised that the ship was much closer to them than expected. He ordered as much sail to be set as time would permit and then attempted to steer the vessel out to sea. On coming head on into the wind, the ship lost momentum, the sails fell limp and LOCH ARD's bow swung back. Gibbs then ordered the anchors to be released in an attempt to hold its position. The anchors sank some 50 fathoms - but did not hold. By this time LOCH ARD was among the breakers and the tall cliffs of Mutton Bird Island rose behind the ship. Just half a mile from the coast, the ship's bow was suddenly pulled around by the anchor. The captain tried to tack out to sea, but the ship struck a reef at the base of Mutton Bird Island, near Port Campbell. Waves broke over the ship and the top deck was loosened from the hull. The masts and rigging came crashing down knocking passengers and crew overboard. When a lifeboat was finally launched, it crashed into the side of LOCH ARD and capsized. Tom Pearce, who had launched the boat, managed to cling to its overturned hull and shelter beneath it. He drifted out to sea and then on the flood tide came into what is now known as LOCH ARD Gorge. He swam to shore, bruised and dazed, and found a cave in which to shelter. Some of the crew stayed below deck to shelter from the falling rigging but drowned when the ship slipped off the reef into deeper water. Eva Carmichael had raced onto deck to find out what was happening only to be confronted by towering cliffs looming above the stricken ship. In all the chaos, Captain Gibbs grabbed Eva and said, "If you are saved Eva, let my dear wife know that I died like a sailor". That was the last Eva Carmichael saw of the captain. She was swept off the ship by a huge wave. Eva saw Tom Pearce on a small rocky beach and yelled to attract his attention. He dived in and swam to the exhausted woman and dragged her to shore. He took her to the cave and broke open case of brandy which had washed up on the beach. He opened a bottle to revive the unconscious woman. A few hours later Tom scaled a cliff in search of help. He followed hoof prints and came by chance upon two men from nearby Glenample Station three and a half miles away. In a state of exhaustion, he told the men of the tragedy. Tom returned to the gorge while the two men rode back to the station to get help. By the time they reached LOCH ARD Gorge, it was cold and dark. The two shipwreck survivors were taken to Glenample Station to recover. Eva stayed at the station for six weeks before returning to Ireland, this time by steamship. In Melbourne, Tom Pearce received a hero's welcome. He was presented with the first gold medal of the Royal Humane Society of Victoria and a £1000 cheque from the Victorian Government. Concerts were performed to honour the young man's bravery and to raise money for those who lost family in the LOCH ARD disaster. Of the 54 crew members and passengers on board, only two survived: the apprentice, Tom Pearce and the young woman passenger, Eva Carmichael, who lost all of her family in the tragedy. Ten days after the LOCH ARD tragedy, salvage rights to the wreck were sold at auction for £2,120. Cargo valued at £3,000 was salvaged and placed on the beach, but most washed back into the sea when another storm developed. The wreck of LOCH ARD still lies at the base of Mutton Bird Island. Much of the cargo has now been salvaged and some was washed up into what is now known as LOCH ARD Gorge. Cargo and artefacts have also been illegally salvaged over many years before protective legislation was introduced. One of the most unlikely pieces of cargo to have survived the shipwreck was a Minton porcelain peacock - one of only nine in the world. The peacock was destined for the Melbourne International Exhibition in 1880. It had been well packed, which gave it adequate protection during the violent storm. Today, the Minton peacock can be seen at the Flagstaff Hill Maritime Museum in Warrnambool. From Australia's most dramatic shipwreck it has now become Australia's most valuable shipwreck artefact and is one of very few 'objects' on the Victorian State Heritage Register. Flagstaff Hill’s collection of artefacts from LOCH ARD is significant for being one of the largest collections of artefacts from this shipwreck in Victoria. It is significant for its association with the shipwreck, which is on the Victorian Heritage Register (VHR S417). The collection is significant because of the relationship between the objects, as together they have a high potential to interpret the story of the LOCH ARD. The LOCH ARD collection is archaeologically significant as the remains of a large international passenger and cargo ship. The LOCH ARD collection is historically significant for representing aspects of Victoria’s shipping history and its potential to interpret sub-theme 1.5 of Victoria’s Framework of Historical Themes (living with natural processes). The collection is also historically significant for its association with the LOCH ARD, which was one of the worst and best known shipwrecks in Victoria’s history. Photograph of Loch Ard Gorge c1900flagstaff hill, warrnambool, shipwrecked coast, flagstaff hill maritime museum, maritime museum, shipwreck coast, flagstaff hill maritime village, great ocean road, loch line, loch ard, captain gibbs, eva carmichael, tom pearce, glenample station, mutton bird island, loch ard gorge, photograph of loch ard gorge, photograph -
 Flagstaff Hill Maritime Museum and Village
Calendar
HISTORY OF THE LOCH ARD The LOCH ARD belonged to the famous Loch Line which sailed many ships from England to Australia. Built in Glasgow by Barclay, Curdle and Co. in 1873, the LOCH ARD was a three-masted square rigged iron sailing ship. The ship measured 262ft 7" (79.87m) in length, 38ft (11.58m) in width, 23ft (7m) in depth and had a gross tonnage of 1693 tons. The LOCH ARD's main mast measured a massive 150ft (45.7m) in height. LOCH ARD made three trips to Australia and one trip to Calcutta before its final voyage. LOCH ARD left England on March 2, 1878, under the command of Captain Gibbs, a newly married, 29 year old. She was bound for Melbourne with a crew of 37, plus 17 passengers and a load of cargo. The general cargo reflected the affluence of Melbourne at the time. On board were straw hats, umbrella, perfumes, clay pipes, pianos, clocks, confectionary, linen and candles, as well as a heavier load of railway irons, cement, lead and copper. There were items included that intended for display in the Melbourne International Exhibition in 1880. The voyage to Port Phillip was long but uneventful. At 3am on June 1, 1878, Captain Gibbs was expecting to see land and the passengers were becoming excited as they prepared to view their new homeland in the early morning. But LOCH ARD was running into a fog which greatly reduced visibility. Captain Gibbs was becoming anxious as there was no sign of land or the Cape Otway lighthouse. At 4am the fog lifted. A man aloft announced that he could see breakers. The sheer cliffs of Victoria's west coast came into view, and Captain Gibbs realised that the ship was much closer to them than expected. He ordered as much sail to be set as time would permit and then attempted to steer the vessel out to sea. On coming head on into the wind, the ship lost momentum, the sails fell limp and LOCH ARD's bow swung back. Gibbs then ordered the anchors to be released in an attempt to hold its position. The anchors sank some 50 fathoms - but did not hold. By this time LOCH ARD was among the breakers and the tall cliffs of Mutton Bird Island rose behind the ship. Just half a mile from the coast, the ship's bow was suddenly pulled around by the anchor. The captain tried to tack out to sea, but the ship struck a reef at the base of Mutton Bird Island, near Port Campbell. Waves broke over the ship and the top deck was loosened from the hull. The masts and rigging came crashing down knocking passengers and crew overboard. When a lifeboat was finally launched, it crashed into the side of LOCH ARD and capsized. Tom Pearce, who had launched the boat, managed to cling to its overturned hull and shelter beneath it. He drifted out to sea and then on the flood tide came into what is now known as LOCH ARD Gorge. He swam to shore, bruised and dazed, and found a cave in which to shelter. Some of the crew stayed below deck to shelter from the falling rigging but drowned when the ship slipped off the reef into deeper water. Eva Carmichael had raced onto deck to find out what was happening only to be confronted by towering cliffs looming above the stricken ship. In all the chaos, Captain Gibbs grabbed Eva and said, "If you are saved Eva, let my dear wife know that I died like a sailor". That was the last Eva Carmichael saw of the captain. She was swept off the ship by a huge wave. Eva saw Tom Pearce on a small rocky beach and yelled to attract his attention. He dived in and swam to the exhausted woman and dragged her to shore. He took her to the cave and broke open case of brandy which had washed up on the beach. He opened a bottle to revive the unconscious woman. A few hours later Tom scaled a cliff in search of help. He followed hoof prints and came by chance upon two men from nearby Glenample Station three and a half miles away. In a state of exhaustion, he told the men of the tragedy. Tom returned to the gorge while the two men rode back to the station to get help. By the time they reached LOCH ARD Gorge, it was cold and dark. The two shipwreck survivors were taken to Glenample Station to recover. Eva stayed at the station for six weeks before returning to Ireland, this time by steamship. In Melbourne, Tom Pearce received a hero's welcome. He was presented with the first gold medal of the Royal Humane Society of Victoria and a £1000 cheque from the Victorian Government. Concerts were performed to honour the young man's bravery and to raise money for those who lost family in the LOCH ARD disaster. Of the 54 crew members and passengers on board, only two survived: the apprentice, Tom Pearce and the young woman passenger, Eva Carmichael, who lost all of her family in the tragedy. Ten days after the LOCH ARD tragedy, salvage rights to the wreck were sold at auction for £2,120. Cargo valued at £3,000 was salvaged and placed on the beach, but most washed back into the sea when another storm developed. The wreck of LOCH ARD still lies at the base of Mutton Bird Island. Much of the cargo has now been salvaged and some was washed up into what is now known as LOCH ARD Gorge. Cargo and artefacts have also been illegally salvaged over many years before protective legislation was introduced. One of the most unlikely pieces of cargo to have survived the shipwreck was a Minton porcelain peacock - one of only nine in the world. The peacock was destined for the Melbourne International Exhibition in 1880. It had been well packed, which gave it adequate protection during the violent storm. Today, the Minton peacock can be seen at the Flagstaff Hill Maritime Museum in Warrnambool. From Australia's most dramatic shipwreck it has now become Australia's most valuable shipwreck artefact and is one of very few 'objects' on the Victorian State Heritage Register. Flagstaff Hill’s collection of artefacts from LOCH ARD is significant for being one of the largest collections of artefacts from this shipwreck in Victoria. It is significant for its association with the shipwreck, which is on the Victorian Heritage Register (VHR S417). The collection is significant because of the relationship between the objects, as together they have a high potential to interpret the story of the LOCH ARD. The LOCH ARD collection is archaeologically significant as the remains of a large international passenger and cargo ship. The LOCH ARD collection is historically significant for representing aspects of Victoria’s shipping history and its potential to interpret sub-theme 1.5 of Victoria’s Framework of Historical Themes (living with natural processes). The collection is also historically significant for its association with the LOCH ARD, which was one of the worst and best known shipwrecks in Victoria’s history. Calendar printed by Terang Express for December 1923 with picture of Loch Ard Gorge and survivors of wreck and also story of the episode. Has some large tears in it.flagstaff hill, warrnambool, shipwrecked coast, flagstaff hill maritime museum, maritime museum, shipwreck coast, flagstaff hill maritime village, great ocean road, loch line, loch ard, captain gibbs, eva carmichael, tom pearce, glenample station, mutton bird island, loch ard gorge, calendar, terang express -
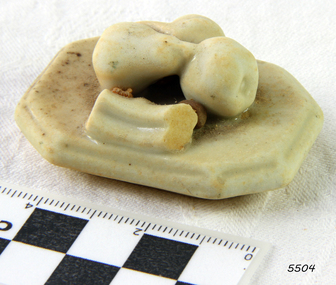 Flagstaff Hill Maritime Museum and Village
Lid
Ref: LA 2 29 274 HISTORY OF THE LOCH ARD The LOCH ARD belonged to the famous Loch Line which sailed many ships from England to Australia. Built in Glasgow by Barclay, Curdle and Co. in 1873, the LOCH ARD was a three-masted square rigged iron sailing ship. The ship measured 262ft 7" (79.87m) in length, 38ft (11.58m) in width, 23ft (7m) in depth and had a gross tonnage of 1693 tons. The LOCH ARD's main mast measured a massive 150ft (45.7m) in height. LOCH ARD made three trips to Australia and one trip to Calcutta before its final voyage. LOCH ARD left England on March 2, 1878, under the command of Captain Gibbs, a newly married, 29 year old. She was bound for Melbourne with a crew of 37, plus 17 passengers and a load of cargo. The general cargo reflected the affluence of Melbourne at the time. On board were straw hats, umbrella, perfumes, clay pipes, pianos, clocks, confectionary, linen and candles, as well as a heavier load of railway irons, cement, lead and copper. There were items included that intended for display in the Melbourne International Exhibition in 1880. The voyage to Port Phillip was long but uneventful. At 3am on June 1, 1878, Captain Gibbs was expecting to see land and the passengers were becoming excited as they prepared to view their new homeland in the early morning. But LOCH ARD was running into a fog which greatly reduced visibility. Captain Gibbs was becoming anxious as there was no sign of land or the Cape Otway lighthouse. At 4am the fog lifted. A man aloft announced that he could see breakers. The sheer cliffs of Victoria's west coast came into view, and Captain Gibbs realised that the ship was much closer to them than expected. He ordered as much sail to be set as time would permit and then attempted to steer the vessel out to sea. On coming head on into the wind, the ship lost momentum, the sails fell limp and LOCH ARD's bow swung back. Gibbs then ordered the anchors to be released in an attempt to hold its position. The anchors sank some 50 fathoms - but did not hold. By this time LOCH ARD was among the breakers and the tall cliffs of Mutton Bird Island rose behind the ship. Just half a mile from the coast, the ship's bow was suddenly pulled around by the anchor. The captain tried to tack out to sea, but the ship struck a reef at the base of Mutton Bird Island, near Port Campbell. Waves broke over the ship and the top deck was loosened from the hull. The masts and rigging came crashing down knocking passengers and crew overboard. When a lifeboat was finally launched, it crashed into the side of LOCH ARD and capsized. Tom Pearce, who had launched the boat, managed to cling to its overturned hull and shelter beneath it. He drifted out to sea and then on the flood tide came into what is now known as LOCH ARD Gorge. He swam to shore, bruised and dazed, and found a cave in which to shelter. Some of the crew stayed below deck to shelter from the falling rigging but drowned when the ship slipped off the reef into deeper water. Eva Carmichael had raced onto deck to find out what was happening only to be confronted by towering cliffs looming above the stricken ship. In all the chaos, Captain Gibbs grabbed Eva and said, "If you are saved Eva, let my dear wife know that I died like a sailor". That was the last Eva Carmichael saw of the captain. She was swept off the ship by a huge wave. Eva saw Tom Pearce on a small rocky beach and yelled to attract his attention. He dived in and swam to the exhausted woman and dragged her to shore. He took her to the cave and broke open case of brandy which had washed up on the beach. He opened a bottle to revive the unconscious woman. A few hours later Tom scaled a cliff in search of help. He followed hoof prints and came by chance upon two men from nearby Glenample Station three and a half miles away. In a state of exhaustion, he told the men of the tragedy. Tom returned to the gorge while the two men rode back to the station to get help. By the time they reached LOCH ARD Gorge, it was cold and dark. The two shipwreck survivors were taken to Glenample Station to recover. Eva stayed at the station for six weeks before returning to Ireland, this time by steamship. In Melbourne, Tom Pearce received a hero's welcome. He was presented with the first gold medal of the Royal Humane Society of Victoria and a £1000 cheque from the Victorian Government. Concerts were performed to honour the young man's bravery and to raise money for those who lost family in the LOCH ARD disaster. Of the 54 crew members and passengers on board, only two survived: the apprentice, Tom Pearce and the young woman passenger, Eva Carmichael, who lost all of her family in the tragedy. Ten days after the LOCH ARD tragedy, salvage rights to the wreck were sold at auction for £2,120. Cargo valued at £3,000 was salvaged and placed on the beach, but most washed back into the sea when another storm developed. The wreck of LOCH ARD still lies at the base of Mutton Bird Island. Much of the cargo has now been salvaged and some was washed up into what is now known as LOCH ARD Gorge. Cargo and artefacts have also been illegally salvaged over many years before protective legislation was introduced. One of the most unlikely pieces of cargo to have survived the shipwreck was a Minton porcelain peacock - one of only nine in the world. The peacock was destined for the Melbourne International Exhibition in 1880. It had been well packed, which gave it adequate protection during the violent storm. Today, the Minton peacock can be seen at the Flagstaff Hill Maritime Museum in Warrnambool. From Australia's most dramatic shipwreck it has now become Australia's most valuable shipwreck artefact and is one of very few 'objects' on the Victorian State Heritage Register. Flagstaff Hill’s collection of artefacts from LOCH ARD is significant for being one of the largest collections of artefacts from this shipwreck in Victoria. It is significant for its association with the shipwreck, which is on the Victorian Heritage Register (VHR S417). The collection is significant because of the relationship between the objects, as together they have a high potential to interpret the story of the LOCH ARD. The LOCH ARD collection is archaeologically significant as the remains of a large international passenger and cargo ship. The LOCH ARD collection is historically significant for representing aspects of Victoria’s shipping history and its potential to interpret sub-theme 1.5 of Victoria’s Framework of Historical Themes (living with natural processes). The collection is also historically significant for its association with the LOCH ARD, which was one of the worst and best known shipwrecks in Victoria’s history. Lid from child's tea set. Porcelain. Lid has small chip and some slight iron stains. Recovered from the wreck of the Loch Ard. Artefact reg No LA/16.flagstaff hill, warrnambool, shipwrecked-coast, flagstaff-hill, flagstaff-hill-maritime-museum, maritime-museum, shipwreck-coast, flagstaff-hill-maritime-village -
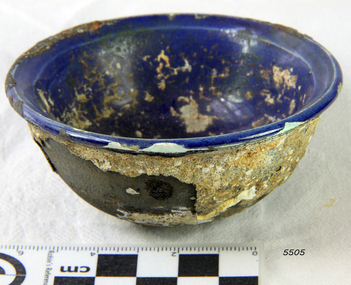 Flagstaff Hill Maritime Museum and Village
Deflector
HISTORY OF THE LOCH ARD The LOCH ARD belonged to the famous Loch Line which sailed many ships from England to Australia. Built in Glasgow by Barclay, Curdle and Co. in 1873, the LOCH ARD was a three-masted square rigged iron sailing ship. The ship measured 262ft 7" (79.87m) in length, 38ft (11.58m) in width, 23ft (7m) in depth and had a gross tonnage of 1693 tons. The LOCH ARD's main mast measured a massive 150ft (45.7m) in height. LOCH ARD made three trips to Australia and one trip to Calcutta before its final voyage. LOCH ARD left England on March 2, 1878, under the command of Captain Gibbs, a newly married, 29 year old. She was bound for Melbourne with a crew of 37, plus 17 passengers and a load of cargo. The general cargo reflected the affluence of Melbourne at the time. On board were straw hats, umbrella, perfumes, clay pipes, pianos, clocks, confectionary, linen and candles, as well as a heavier load of railway irons, cement, lead and copper. There were items included that intended for display in the Melbourne International Exhibition in 1880. The voyage to Port Phillip was long but uneventful. At 3am on June 1, 1878, Captain Gibbs was expecting to see land and the passengers were becoming excited as they prepared to view their new homeland in the early morning. But LOCH ARD was running into a fog which greatly reduced visibility. Captain Gibbs was becoming anxious as there was no sign of land or the Cape Otway lighthouse. At 4am the fog lifted. A man aloft announced that he could see breakers. The sheer cliffs of Victoria's west coast came into view, and Captain Gibbs realised that the ship was much closer to them than expected. He ordered as much sail to be set as time would permit and then attempted to steer the vessel out to sea. On coming head on into the wind, the ship lost momentum, the sails fell limp and LOCH ARD's bow swung back. Gibbs then ordered the anchors to be released in an attempt to hold its position. The anchors sank some 50 fathoms - but did not hold. By this time LOCH ARD was among the breakers and the tall cliffs of Mutton Bird Island rose behind the ship. Just half a mile from the coast, the ship's bow was suddenly pulled around by the anchor. The captain tried to tack out to sea, but the ship struck a reef at the base of Mutton Bird Island, near Port Campbell. Waves broke over the ship and the top deck was loosened from the hull. The masts and rigging came crashing down knocking passengers and crew overboard. When a lifeboat was finally launched, it crashed into the side of LOCH ARD and capsized. Tom Pearce, who had launched the boat, managed to cling to its overturned hull and shelter beneath it. He drifted out to sea and then on the flood tide came into what is now known as LOCH ARD Gorge. He swam to shore, bruised and dazed, and found a cave in which to shelter. Some of the crew stayed below deck to shelter from the falling rigging but drowned when the ship slipped off the reef into deeper water. Eva Carmichael had raced onto deck to find out what was happening only to be confronted by towering cliffs looming above the stricken ship. In all the chaos, Captain Gibbs grabbed Eva and said, "If you are saved Eva, let my dear wife know that I died like a sailor". That was the last Eva Carmichael saw of the captain. She was swept off the ship by a huge wave. Eva saw Tom Pearce on a small rocky beach and yelled to attract his attention. He dived in and swam to the exhausted woman and dragged her to shore. He took her to the cave and broke open case of brandy which had washed up on the beach. He opened a bottle to revive the unconscious woman. A few hours later Tom scaled a cliff in search of help. He followed hoof prints and came by chance upon two men from nearby Glenample Station three and a half miles away. In a state of exhaustion, he told the men of the tragedy. Tom returned to the gorge while the two men rode back to the station to get help. By the time they reached LOCH ARD Gorge, it was cold and dark. The two shipwreck survivors were taken to Glenample Station to recover. Eva stayed at the station for six weeks before returning to Ireland, this time by steamship. In Melbourne, Tom Pearce received a hero's welcome. He was presented with the first gold medal of the Royal Humane Society of Victoria and a £1000 cheque from the Victorian Government. Concerts were performed to honour the young man's bravery and to raise money for those who lost family in the LOCH ARD disaster. Of the 54 crew members and passengers on board, only two survived: the apprentice, Tom Pearce and the young woman passenger, Eva Carmichael, who lost all of her family in the tragedy. Ten days after the LOCH ARD tragedy, salvage rights to the wreck were sold at auction for £2,120. Cargo valued at £3,000 was salvaged and placed on the beach, but most washed back into the sea when another storm developed. The wreck of LOCH ARD still lies at the base of Mutton Bird Island. Much of the cargo has now been salvaged and some was washed up into what is now known as LOCH ARD Gorge. Cargo and artefacts have also been illegally salvaged over many years before protective legislation was introduced. One of the most unlikely pieces of cargo to have survived the shipwreck was a Minton porcelain peacock - one of only nine in the world. The peacock was destined for the Melbourne International Exhibition in 1880. It had been well packed, which gave it adequate protection during the violent storm. Today, the Minton peacock can be seen at the Flagstaff Hill Maritime Museum in Warrnambool. From Australia's most dramatic shipwreck it has now become Australia's most valuable shipwreck artefact and is one of very few 'objects' on the Victorian State Heritage Register. Flagstaff Hill’s collection of artefacts from LOCH ARD is significant for being one of the largest collections of artefacts from this shipwreck in Victoria. It is significant for its association with the shipwreck, which is on the Victorian Heritage Register (VHR S417). The collection is significant because of the relationship between the objects, as together they have a high potential to interpret the story of the LOCH ARD. The LOCH ARD collection is archaeologically significant as the remains of a large international passenger and cargo ship. The LOCH ARD collection is historically significant for representing aspects of Victoria’s shipping history and its potential to interpret sub-theme 1.5 of Victoria’s Framework of Historical Themes (living with natural processes). The collection is also historically significant for its association with the LOCH ARD, which was one of the worst and best known shipwrecks in Victoria’s history. Small Porcelain Heat Deflector from a kero lamp,deflector is blue inside. Outside has some encrustation. Artefact reg no LA/15. Recovered from the wreck of the Loch Ard.flagstaff hill, warrnambool, shipwrecked coast, flagstaff hill maritime museum, maritime museum, shipwreck coast, flagstaff hill maritime village, great ocean road, loch line, loch ard, captain gibbs, eva carmichael, tom pearce, glenample station, mutton bird island, loch ard gorge, porcelain heat deflector, heat deflector -
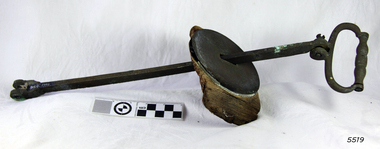 Flagstaff Hill Maritime Museum and Village
Pump
HISTORY OF THE LOCH ARD The LOCH ARD belonged to the famous Loch Line which sailed many ships from England to Australia. Built in Glasgow by Barclay, Curdle and Co. in 1873, the LOCH ARD was a three-masted square rigged iron sailing ship. The ship measured 262ft 7" (79.87m) in length, 38ft (11.58m) in width, 23ft (7m) in depth and had a gross tonnage of 1693 tons. The LOCH ARD's main mast measured a massive 150ft (45.7m) in height. LOCH ARD made three trips to Australia and one trip to Calcutta before its final voyage. LOCH ARD left England on March 2, 1878, under the command of Captain Gibbs, a newly married, 29 year old. She was bound for Melbourne with a crew of 37, plus 17 passengers and a load of cargo. The general cargo reflected the affluence of Melbourne at the time. On board were straw hats, umbrella, perfumes, clay pipes, pianos, clocks, confectionary, linen and candles, as well as a heavier load of railway irons, cement, lead and copper. There were items included that intended for display in the Melbourne International Exhibition in 1880. The voyage to Port Phillip was long but uneventful. At 3am on June 1, 1878, Captain Gibbs was expecting to see land and the passengers were becoming excited as they prepared to view their new homeland in the early morning. But LOCH ARD was running into a fog which greatly reduced visibility. Captain Gibbs was becoming anxious as there was no sign of land or the Cape Otway lighthouse. At 4am the fog lifted. A man aloft announced that he could see breakers. The sheer cliffs of Victoria's west coast came into view, and Captain Gibbs realised that the ship was much closer to them than expected. He ordered as much sail to be set as time would permit and then attempted to steer the vessel out to sea. On coming head on into the wind, the ship lost momentum, the sails fell limp and LOCH ARD's bow swung back. Gibbs then ordered the anchors to be released in an attempt to hold its position. The anchors sank some 50 fathoms - but did not hold. By this time LOCH ARD was among the breakers and the tall cliffs of Mutton Bird Island rose behind the ship. Just half a mile from the coast, the ship's bow was suddenly pulled around by the anchor. The captain tried to tack out to sea, but the ship struck a reef at the base of Mutton Bird Island, near Port Campbell. Waves broke over the ship and the top deck was loosened from the hull. The masts and rigging came crashing down knocking passengers and crew overboard. When a lifeboat was finally launched, it crashed into the side of LOCH ARD and capsized. Tom Pearce, who had launched the boat, managed to cling to its overturned hull and shelter beneath it. He drifted out to sea and then on the flood tide came into what is now known as LOCH ARD Gorge. He swam to shore, bruised and dazed, and found a cave in which to shelter. Some of the crew stayed below deck to shelter from the falling rigging but drowned when the ship slipped off the reef into deeper water. Eva Carmichael had raced onto deck to find out what was happening only to be confronted by towering cliffs looming above the stricken ship. In all the chaos, Captain Gibbs grabbed Eva and said, "If you are saved Eva, let my dear wife know that I died like a sailor". That was the last Eva Carmichael saw of the captain. She was swept off the ship by a huge wave. Eva saw Tom Pearce on a small rocky beach and yelled to attract his attention. He dived in and swam to the exhausted woman and dragged her to shore. He took her to the cave and broke open case of brandy which had washed up on the beach. He opened a bottle to revive the unconscious woman. A few hours later Tom scaled a cliff in search of help. He followed hoof prints and came by chance upon two men from nearby Glenample Station three and a half miles away. In a state of exhaustion, he told the men of the tragedy. Tom returned to the gorge while the two men rode back to the station to get help. By the time they reached LOCH ARD Gorge, it was cold and dark. The two shipwreck survivors were taken to Glenample Station to recover. Eva stayed at the station for six weeks before returning to Ireland, this time by steamship. In Melbourne, Tom Pearce received a hero's welcome. He was presented with the first gold medal of the Royal Humane Society of Victoria and a £1000 cheque from the Victorian Government. Concerts were performed to honour the young man's bravery and to raise money for those who lost family in the LOCH ARD disaster. Of the 54 crew members and passengers on board, only two survived: the apprentice, Tom Pearce and the young woman passenger, Eva Carmichael, who lost all of her family in the tragedy. Ten days after the LOCH ARD tragedy, salvage rights to the wreck were sold at auction for £2,120. Cargo valued at £3,000 was salvaged and placed on the beach, but most washed back into the sea when another storm developed. The wreck of LOCH ARD still lies at the base of Mutton Bird Island. Much of the cargo has now been salvaged and some was washed up into what is now known as LOCH ARD Gorge. Cargo and artefacts have also been illegally salvaged over many years before protective legislation was introduced. One of the most unlikely pieces of cargo to have survived the shipwreck was a Minton porcelain peacock - one of only nine in the world. The peacock was destined for the Melbourne International Exhibition in 1880. It had been well packed, which gave it adequate protection during the violent storm. Today, the Minton peacock can be seen at the Flagstaff Hill Maritime Museum in Warrnambool. From Australia's most dramatic shipwreck it has now become Australia's most valuable shipwreck artefact and is one of very few 'objects' on the Victorian State Heritage Register. Flagstaff Hill’s collection of artefacts from LOCH ARD is significant for being one of the largest collections of artefacts from this shipwreck in Victoria. It is significant for its association with the shipwreck, which is on the Victorian Heritage Register (VHR S417). The collection is significant because of the relationship between the objects, as together they have a high potential to interpret the story of the LOCH ARD. The LOCH ARD collection is archaeologically significant as the remains of a large international passenger and cargo ship. The LOCH ARD collection is historically significant for representing aspects of Victoria’s shipping history and its potential to interpret sub-theme 1.5 of Victoria’s Framework of Historical Themes (living with natural processes). The collection is also historically significant for its association with the LOCH ARD, which was one of the worst and best known shipwrecks in Victoria’s history. Part of a pump system. Has been attached to a piece of wood. Possibly a cistern plunger. From the Loch Ard.flagstaff hill, warrnambool, shipwrecked coast, flagstaff hill maritime museum, maritime museum, shipwreck coast, flagstaff hill maritime village, great ocean road, loch line, loch ard, captain gibbs, eva carmichael, tom pearce, glenample station, mutton bird island, loch ard gorge, pump system, pump -
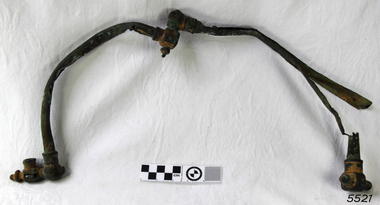 Flagstaff Hill Maritime Museum and Village
Functional object - Gas Fitting
This gas fitting was recovered from the wreck of the Loch Ard circa 1970, at the time of the discovery of the wreck. HISTORY OF THE LOCH ARD: - The LOCH ARD belonged to the famous Loch Line which sailed many ships from England to Australia. Built in Glasgow by Barclay, Curdle and Co. in 1873, the LOCH ARD was a three-masted square rigged iron sailing ship. The ship measured 262ft 7" (79.87m) in length, 38ft (11.58m) in width, 23ft (7m) in depth and had a gross tonnage of 1693 tons. The LOCH ARD's main mast measured a massive 150ft (45.7m) in height. LOCH ARD made three trips to Australia and one trip to Calcutta before its final voyage. LOCH ARD left England on March 2, 1878, under the command of Captain Gibbs, a newly married, 29 year old. She was bound for Melbourne with a crew of 37, plus 17 passengers and a load of cargo. The general cargo reflected the affluence of Melbourne at the time. On board were straw hats, umbrella, perfumes, clay pipes, pianos, clocks, confectionary, linen and candles, as well as a heavier load of railway irons, cement, lead and copper. There were items included that intended for display in the Melbourne International Exhibition in 1880. The voyage to Port Phillip was long but uneventful. At 3am on June 1, 1878, Captain Gibbs was expecting to see land and the passengers were becoming excited as they prepared to view their new homeland in the early morning. But LOCH ARD was running into a fog which greatly reduced visibility. Captain Gibbs was becoming anxious as there was no sign of land or the Cape Otway lighthouse. At 4am the fog lifted. A man aloft announced that he could see breakers. The sheer cliffs of Victoria's west coast came into view, and Captain Gibbs realised that the ship was much closer to them than expected. He ordered as much sail to be set as time would permit and then attempted to steer the vessel out to sea. On coming head on into the wind, the ship lost momentum, the sails fell limp and LOCH ARD's bow swung back. Gibbs then ordered the anchors to be released in an attempt to hold its position. The anchors sank some 50 fathoms - but did not hold. By this time LOCH ARD was among the breakers and the tall cliffs of Mutton Bird Island rose behind the ship. Just half a mile from the coast, the ship's bow was suddenly pulled around by the anchor. The captain tried to tack out to sea, but the ship struck a reef at the base of Mutton Bird Island, near Port Campbell. Waves broke over the ship and the top deck was loosened from the hull. The masts and rigging came crashing down knocking passengers and crew overboard. When a lifeboat was finally launched, it crashed into the side of LOCH ARD and capsized. Tom Pearce, who had launched the boat, managed to cling to its overturned hull and shelter beneath it. He drifted out to sea and then on the flood tide came into what is now known as LOCH ARD Gorge. He swam to shore, bruised and dazed, and found a cave in which to shelter. Some of the crew stayed below deck to shelter from the falling rigging but drowned when the ship slipped off the reef into deeper water. Eva Carmichael had raced onto deck to find out what was happening only to be confronted by towering cliffs looming above the stricken ship. In all the chaos, Captain Gibbs grabbed Eva and said, "If you are saved Eva, let my dear wife know that I died like a sailor". That was the last Eva Carmichael saw of the captain. She was swept off the ship by a huge wave. Eva saw Tom Pearce on a small rocky beach and yelled to attract his attention. He dived in and swam to the exhausted woman and dragged her to shore. He took her to the cave and broke open case of brandy which had washed up on the beach. He opened a bottle to revive the unconscious woman. A few hours later Tom scaled a cliff in search of help. He followed hoof prints and came by chance upon two men from nearby Glenample Station three and a half miles away. In a state of exhaustion, he told the men of the tragedy. Tom returned to the gorge while the two men rode back to the station to get help. By the time they reached LOCH ARD Gorge, it was cold and dark. The two shipwreck survivors were taken to Glenample Station to recover. Eva stayed at the station for six weeks before returning to Ireland, this time by steamship. In Melbourne, Tom Pearce received a hero's welcome. He was presented with the first gold medal of the Royal Humane Society of Victoria and a £1000 cheque from the Victorian Government. Concerts were performed to honour the young man's bravery and to raise money for those who lost family in the LOCH ARD disaster. Of the 54 crew members and passengers on board, only two survived: the apprentice, Tom Pearce and the young woman passenger, Eva Carmichael, who lost all of her family in the tragedy. Ten days after the LOCH ARD tragedy, salvage rights to the wreck were sold at auction for £2,120. Cargo valued at £3,000 was salvaged and placed on the beach, but most washed back into the sea when another storm developed. The wreck of LOCH ARD still lies at the base of Mutton Bird Island. Much of the cargo has now been salvaged and some was washed up into what is now known as LOCH ARD Gorge. Cargo and artefacts have also been illegally salvaged over many years before protective legislation was introduced. One of the most unlikely pieces of cargo to have survived the shipwreck was a Minton porcelain peacock - one of only nine in the world. The peacock was destined for the Melbourne International Exhibition in 1880. It had been well packed, which gave it adequate protection during the violent storm. Today, the Minton peacock can be seen at the Flagstaff Hill Maritime Museum in Warrnambool. From Australia's most dramatic shipwreck it has now become Australia's most valuable shipwreck artefact and is one of very few 'objects' on the Victorian State Heritage Register. Flagstaff Hill’s collection of artefacts from LOCH ARD is significant for being one of the largest collections of artefacts from this shipwreck in Victoria. It is significant for its association with the shipwreck, which is on the Victorian Heritage Register (VHR S417). The collection is significant because of the relationship between the objects, as together they have a high potential to interpret the story of the LOCH ARD. The LOCH ARD collection is archaeologically significant as the remains of a large international passenger and cargo ship. The LOCH ARD collection is historically significant for representing aspects of Victoria’s shipping history and its potential to interpret sub-theme 1.5 of Victoria’s Framework of Historical Themes (living with natural processes). The collection is also historically significant for its association with the LOCH ARD, which was one of the worst and best known shipwrecks in Victoria’s history. Copper gas pipe and fitting. Tow C-shaped pipes with fittings at each end. One end of each pipe is joined to the other pipe, making a U-shape. It was recovered from the 1878 wreck of the ship Loch Ard in the 1970s. flagstaff hill, warrnambool, shipwrecked coast, flagstaff hill maritime museum, maritime museum, shipwreck coast, flagstaff hill maritime village, great ocean road, loch line, loch ard, captain gibbs, eva carmichael, tom pearce, glenample station, mutton bird island, loch ard gorge, copper gas pipe and fitting, copper gas pipe -
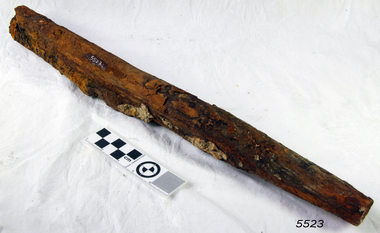 Flagstaff Hill Maritime Museum and Village
Handle
Ref: LA 6 67 311 HISTORY OF THE LOCH ARD The LOCH ARD belonged to the famous Loch Line which sailed many ships from England to Australia. Built in Glasgow by Barclay, Curdle and Co. in 1873, the LOCH ARD was a three-masted square rigged iron sailing ship. The ship measured 262ft 7" (79.87m) in length, 38ft (11.58m) in width, 23ft (7m) in depth and had a gross tonnage of 1693 tons. The LOCH ARD's main mast measured a massive 150ft (45.7m) in height. LOCH ARD made three trips to Australia and one trip to Calcutta before its final voyage. LOCH ARD left England on March 2, 1878, under the command of Captain Gibbs, a newly married, 29 year old. She was bound for Melbourne with a crew of 37, plus 17 passengers and a load of cargo. The general cargo reflected the affluence of Melbourne at the time. On board were straw hats, umbrella, perfumes, clay pipes, pianos, clocks, confectionary, linen and candles, as well as a heavier load of railway irons, cement, lead and copper. There were items included that intended for display in the Melbourne International Exhibition in 1880. The voyage to Port Phillip was long but uneventful. At 3am on June 1, 1878, Captain Gibbs was expecting to see land and the passengers were becoming excited as they prepared to view their new homeland in the early morning. But LOCH ARD was running into a fog which greatly reduced visibility. Captain Gibbs was becoming anxious as there was no sign of land or the Cape Otway lighthouse. At 4am the fog lifted. A man aloft announced that he could see breakers. The sheer cliffs of Victoria's west coast came into view, and Captain Gibbs realised that the ship was much closer to them than expected. He ordered as much sail to be set as time would permit and then attempted to steer the vessel out to sea. On coming head on into the wind, the ship lost momentum, the sails fell limp and LOCH ARD's bow swung back. Gibbs then ordered the anchors to be released in an attempt to hold its position. The anchors sank some 50 fathoms - but did not hold. By this time LOCH ARD was among the breakers and the tall cliffs of Mutton Bird Island rose behind the ship. Just half a mile from the coast, the ship's bow was suddenly pulled around by the anchor. The captain tried to tack out to sea, but the ship struck a reef at the base of Mutton Bird Island, near Port Campbell. Waves broke over the ship and the top deck was loosened from the hull. The masts and rigging came crashing down knocking passengers and crew overboard. When a lifeboat was finally launched, it crashed into the side of LOCH ARD and capsized. Tom Pearce, who had launched the boat, managed to cling to its overturned hull and shelter beneath it. He drifted out to sea and then on the flood tide came into what is now known as LOCH ARD Gorge. He swam to shore, bruised and dazed, and found a cave in which to shelter. Some of the crew stayed below deck to shelter from the falling rigging but drowned when the ship slipped off the reef into deeper water. Eva Carmichael had raced onto deck to find out what was happening only to be confronted by towering cliffs looming above the stricken ship. In all the chaos, Captain Gibbs grabbed Eva and said, "If you are saved Eva, let my dear wife know that I died like a sailor". That was the last Eva Carmichael saw of the captain. She was swept off the ship by a huge wave. Eva saw Tom Pearce on a small rocky beach and yelled to attract his attention. He dived in and swam to the exhausted woman and dragged her to shore. He took her to the cave and broke open case of brandy which had washed up on the beach. He opened a bottle to revive the unconscious woman. A few hours later Tom scaled a cliff in search of help. He followed hoof prints and came by chance upon two men from nearby Glenample Station three and a half miles away. In a state of exhaustion, he told the men of the tragedy. Tom returned to the gorge while the two men rode back to the station to get help. By the time they reached LOCH ARD Gorge, it was cold and dark. The two shipwreck survivors were taken to Glenample Station to recover. Eva stayed at the station for six weeks before returning to Ireland, this time by steamship. In Melbourne, Tom Pearce received a hero's welcome. He was presented with the first gold medal of the Royal Humane Society of Victoria and a £1000 cheque from the Victorian Government. Concerts were performed to honour the young man's bravery and to raise money for those who lost family in the LOCH ARD disaster. Of the 54 crew members and passengers on board, only two survived: the apprentice, Tom Pearce and the young woman passenger, Eva Carmichael, who lost all of her family in the tragedy. Ten days after the LOCH ARD tragedy, salvage rights to the wreck were sold at auction for £2,120. Cargo valued at £3,000 was salvaged and placed on the beach, but most washed back into the sea when another storm developed. The wreck of LOCH ARD still lies at the base of Mutton Bird Island. Much of the cargo has now been salvaged and some was washed up into what is now known as LOCH ARD Gorge. Cargo and artefacts have also been illegally salvaged over many years before protective legislation was introduced. One of the most unlikely pieces of cargo to have survived the shipwreck was a Minton porcelain peacock - one of only nine in the world. The peacock was destined for the Melbourne International Exhibition in 1880. It had been well packed, which gave it adequate protection during the violent storm. Today, the Minton peacock can be seen at the Flagstaff Hill Maritime Museum in Warrnambool. From Australia's most dramatic shipwreck it has now become Australia's most valuable shipwreck artefact and is one of very few 'objects' on the Victorian State Heritage Register. Flagstaff Hill’s collection of artefacts from LOCH ARD is significant for being one of the largest collections of artefacts from this shipwreck in Victoria. It is significant for its association with the shipwreck, which is on the Victorian Heritage Register (VHR S417). The collection is significant because of the relationship between the objects, as together they have a high potential to interpret the story of the LOCH ARD. The LOCH ARD collection is archaeologically significant as the remains of a large international passenger and cargo ship. The LOCH ARD collection is historically significant for representing aspects of Victoria’s shipping history and its potential to interpret sub-theme 1.5 of Victoria’s Framework of Historical Themes (living with natural processes). The collection is also historically significant for its association with Shovel handle. Has pieces of iron and concretion visible. Artefact Reg No LA/42. Recovered from the wreck of the Loch Ard.flagstaff hill, warrnambool, shipwrecked coast, flagstaff hill maritime museum, maritime museum, shipwreck coast, flagstaff hill maritime village, great ocean road, loch line, loch ard, captain gibbs, eva carmichael, tom pearce, glenample station, mutton bird island, loch ard gorge, shovel handle -
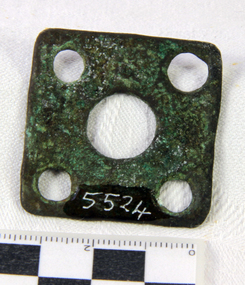 Flagstaff Hill Maritime Museum and Village
Flange
Ref LA 3 32 256 HISTORY OF THE LOCH ARD The LOCH ARD belonged to the famous Loch Line which sailed many ships from England to Australia. Built in Glasgow by Barclay, Curdle and Co. in 1873, the LOCH ARD was a three-masted square rigged iron sailing ship. The ship measured 262ft 7" (79.87m) in length, 38ft (11.58m) in width, 23ft (7m) in depth and had a gross tonnage of 1693 tons. The LOCH ARD's main mast measured a massive 150ft (45.7m) in height. LOCH ARD made three trips to Australia and one trip to Calcutta before its final voyage. LOCH ARD left England on March 2, 1878, under the command of Captain Gibbs, a newly married, 29 year old. She was bound for Melbourne with a crew of 37, plus 17 passengers and a load of cargo. The general cargo reflected the affluence of Melbourne at the time. On board were straw hats, umbrella, perfumes, clay pipes, pianos, clocks, confectionary, linen and candles, as well as a heavier load of railway irons, cement, lead and copper. There were items included that intended for display in the Melbourne International Exhibition in 1880. The voyage to Port Phillip was long but uneventful. At 3am on June 1, 1878, Captain Gibbs was expecting to see land and the passengers were becoming excited as they prepared to view their new homeland in the early morning. But LOCH ARD was running into a fog which greatly reduced visibility. Captain Gibbs was becoming anxious as there was no sign of land or the Cape Otway lighthouse. At 4am the fog lifted. A man aloft announced that he could see breakers. The sheer cliffs of Victoria's west coast came into view, and Captain Gibbs realised that the ship was much closer to them than expected. He ordered as much sail to be set as time would permit and then attempted to steer the vessel out to sea. On coming head on into the wind, the ship lost momentum, the sails fell limp and LOCH ARD's bow swung back. Gibbs then ordered the anchors to be released in an attempt to hold its position. The anchors sank some 50 fathoms - but did not hold. By this time LOCH ARD was among the breakers and the tall cliffs of Mutton Bird Island rose behind the ship. Just half a mile from the coast, the ship's bow was suddenly pulled around by the anchor. The captain tried to tack out to sea, but the ship struck a reef at the base of Mutton Bird Island, near Port Campbell. Waves broke over the ship and the top deck was loosened from the hull. The masts and rigging came crashing down knocking passengers and crew overboard. When a lifeboat was finally launched, it crashed into the side of LOCH ARD and capsized. Tom Pearce, who had launched the boat, managed to cling to its overturned hull and shelter beneath it. He drifted out to sea and then on the flood tide came into what is now known as LOCH ARD Gorge. He swam to shore, bruised and dazed, and found a cave in which to shelter. Some of the crew stayed below deck to shelter from the falling rigging but drowned when the ship slipped off the reef into deeper water. Eva Carmichael had raced onto deck to find out what was happening only to be confronted by towering cliffs looming above the stricken ship. In all the chaos, Captain Gibbs grabbed Eva and said, "If you are saved Eva, let my dear wife know that I died like a sailor". That was the last Eva Carmichael saw of the captain. She was swept off the ship by a huge wave. Eva saw Tom Pearce on a small rocky beach and yelled to attract his attention. He dived in and swam to the exhausted woman and dragged her to shore. He took her to the cave and broke open case of brandy which had washed up on the beach. He opened a bottle to revive the unconscious woman. A few hours later Tom scaled a cliff in search of help. He followed hoof prints and came by chance upon two men from nearby Glenample Station three and a half miles away. In a state of exhaustion, he told the men of the tragedy. Tom returned to the gorge while the two men rode back to the station to get help. By the time they reached LOCH ARD Gorge, it was cold and dark. The two shipwreck survivors were taken to Glenample Station to recover. Eva stayed at the station for six weeks before returning to Ireland, this time by steamship. In Melbourne, Tom Pearce received a hero's welcome. He was presented with the first gold medal of the Royal Humane Society of Victoria and a £1000 cheque from the Victorian Government. Concerts were performed to honour the young man's bravery and to raise money for those who lost family in the LOCH ARD disaster. Of the 54 crew members and passengers on board, only two survived: the apprentice, Tom Pearce and the young woman passenger, Eva Carmichael, who lost all of her family in the tragedy. Ten days after the LOCH ARD tragedy, salvage rights to the wreck were sold at auction for £2,120. Cargo valued at £3,000 was salvaged and placed on the beach, but most washed back into the sea when another storm developed. The wreck of LOCH ARD still lies at the base of Mutton Bird Island. Much of the cargo has now been salvaged and some was washed up into what is now known as LOCH ARD Gorge. Cargo and artefacts have also been illegally salvaged over many years before protective legislation was introduced. One of the most unlikely pieces of cargo to have survived the shipwreck was a Minton porcelain peacock - one of only nine in the world. The peacock was destined for the Melbourne International Exhibition in 1880. It had been well packed, which gave it adequate protection during the violent storm. Today, the Minton peacock can be seen at the Flagstaff Hill Maritime Museum in Warrnambool. From Australia's most dramatic shipwreck it has now become Australia's most valuable shipwreck artefact and is one of very few 'objects' on the Victorian State Heritage Register. Flagstaff Hill’s collection of artefacts from LOCH ARD is significant for being one of the largest collections of artefacts from this shipwreck in Victoria. It is significant for its association with the shipwreck, which is on the Victorian Heritage Register (VHR S417). The collection is significant because of the relationship between the objects, as together they have a high potential to interpret the story of the LOCH ARD. The LOCH ARD collection is archaeologically significant as the remains of a large international passenger and cargo ship. The LOCH ARD collection is historically significant for representing aspects of Victoria’s shipping history and its potential to interpret sub-theme 1.5 of Victoria’s Framework of Historical Themes (living with natural processes). The collection is also historically significant for its association with the LOCH ARD, which was one of the worst and best known shipwrecks in Victoria’s history. Small square brass Flange with four corner holes and one larger centre hole. Artefact Reg No LA/25. Recovered from the wreck of the Loch Ard.flagstaff hill, warrnambool, shipwrecked coast, flagstaff hill maritime museum, maritime museum, shipwreck coast, flagstaff hill maritime village, great ocean road, loch line, loch ard, captain gibbs, eva carmichael, tom pearce, glenample station, mutton bird island, loch ard gorge, flange -
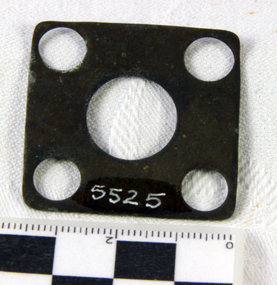 Flagstaff Hill Maritime Museum and Village
Flange
Ref LA 3 32 257 HISTORY OF THE LOCH ARD The LOCH ARD belonged to the famous Loch Line which sailed many ships from England to Australia. Built in Glasgow by Barclay, Curdle and Co. in 1873, the LOCH ARD was a three-masted square rigged iron sailing ship. The ship measured 262ft 7" (79.87m) in length, 38ft (11.58m) in width, 23ft (7m) in depth and had a gross tonnage of 1693 tons. The LOCH ARD's main mast measured a massive 150ft (45.7m) in height. LOCH ARD made three trips to Australia and one trip to Calcutta before its final voyage. LOCH ARD left England on March 2, 1878, under the command of Captain Gibbs, a newly married, 29 year old. She was bound for Melbourne with a crew of 37, plus 17 passengers and a load of cargo. The general cargo reflected the affluence of Melbourne at the time. On board were straw hats, umbrella, perfumes, clay pipes, pianos, clocks, confectionary, linen and candles, as well as a heavier load of railway irons, cement, lead and copper. There were items included that intended for display in the Melbourne International Exhibition in 1880. The voyage to Port Phillip was long but uneventful. At 3am on June 1, 1878, Captain Gibbs was expecting to see land and the passengers were becoming excited as they prepared to view their new homeland in the early morning. But LOCH ARD was running into a fog which greatly reduced visibility. Captain Gibbs was becoming anxious as there was no sign of land or the Cape Otway lighthouse. At 4am the fog lifted. A man aloft announced that he could see breakers. The sheer cliffs of Victoria's west coast came into view, and Captain Gibbs realised that the ship was much closer to them than expected. He ordered as much sail to be set as time would permit and then attempted to steer the vessel out to sea. On coming head on into the wind, the ship lost momentum, the sails fell limp and LOCH ARD's bow swung back. Gibbs then ordered the anchors to be released in an attempt to hold its position. The anchors sank some 50 fathoms - but did not hold. By this time LOCH ARD was among the breakers and the tall cliffs of Mutton Bird Island rose behind the ship. Just half a mile from the coast, the ship's bow was suddenly pulled around by the anchor. The captain tried to tack out to sea, but the ship struck a reef at the base of Mutton Bird Island, near Port Campbell. Waves broke over the ship and the top deck was loosened from the hull. The masts and rigging came crashing down knocking passengers and crew overboard. When a lifeboat was finally launched, it crashed into the side of LOCH ARD and capsized. Tom Pearce, who had launched the boat, managed to cling to its overturned hull and shelter beneath it. He drifted out to sea and then on the flood tide came into what is now known as LOCH ARD Gorge. He swam to shore, bruised and dazed, and found a cave in which to shelter. Some of the crew stayed below deck to shelter from the falling rigging but drowned when the ship slipped off the reef into deeper water. Eva Carmichael had raced onto deck to find out what was happening only to be confronted by towering cliffs looming above the stricken ship. In all the chaos, Captain Gibbs grabbed Eva and said, "If you are saved Eva, let my dear wife know that I died like a sailor". That was the last Eva Carmichael saw of the captain. She was swept off the ship by a huge wave. Eva saw Tom Pearce on a small rocky beach and yelled to attract his attention. He dived in and swam to the exhausted woman and dragged her to shore. He took her to the cave and broke open case of brandy which had washed up on the beach. He opened a bottle to revive the unconscious woman. A few hours later Tom scaled a cliff in search of help. He followed hoof prints and came by chance upon two men from nearby Glenample Station three and a half miles away. In a state of exhaustion, he told the men of the tragedy. Tom returned to the gorge while the two men rode back to the station to get help. By the time they reached LOCH ARD Gorge, it was cold and dark. The two shipwreck survivors were taken to Glenample Station to recover. Eva stayed at the station for six weeks before returning to Ireland, this time by steamship. In Melbourne, Tom Pearce received a hero's welcome. He was presented with the first gold medal of the Royal Humane Society of Victoria and a £1000 cheque from the Victorian Government. Concerts were performed to honour the young man's bravery and to raise money for those who lost family in the LOCH ARD disaster. Of the 54 crew members and passengers on board, only two survived: the apprentice, Tom Pearce and the young woman passenger, Eva Carmichael, who lost all of her family in the tragedy. Ten days after the LOCH ARD tragedy, salvage rights to the wreck were sold at auction for £2,120. Cargo valued at £3,000 was salvaged and placed on the beach, but most washed back into the sea when another storm developed. The wreck of LOCH ARD still lies at the base of Mutton Bird Island. Much of the cargo has now been salvaged and some was washed up into what is now known as LOCH ARD Gorge. Cargo and artefacts have also been illegally salvaged over many years before protective legislation was introduced. One of the most unlikely pieces of cargo to have survived the shipwreck was a Minton porcelain peacock - one of only nine in the world. The peacock was destined for the Melbourne International Exhibition in 1880. It had been well packed, which gave it adequate protection during the violent storm. Today, the Minton peacock can be seen at the Flagstaff Hill Maritime Museum in Warrnambool. From Australia's most dramatic shipwreck it has now become Australia's most valuable shipwreck artefact and is one of very few 'objects' on the Victorian State Heritage Register. Flagstaff Hill’s collection of artefacts from LOCH ARD is significant for being one of the largest collections of artefacts from this shipwreck in Victoria. It is significant for its association with the shipwreck, which is on the Victorian Heritage Register (VHR S417). The collection is significant because of the relationship between the objects, as together they have a high potential to interpret the story of the LOCH ARD. The LOCH ARD collection is archaeologically significant as the remains of a large international passenger and cargo ship. The LOCH ARD collection is historically significant for representing aspects of Victoria’s shipping history and its potential to interpret sub-theme 1.5 of Victoria’s Framework of Historical Themes (living with natural processes). The collection is also historically significant for its association with the LOCH ARD, which was one of the worst and best known shipwrecks in Victoria’s history. Small square brass Flange with four corner holes and one larger centre hole. Artefact Reg No LA/26. Recovered from the wreck of the Loch Ard.flagstaff hill, warrnambool, shipwrecked coast, flagstaff hill maritime museum, maritime museum, shipwreck coast, flagstaff hill maritime village, great ocean road, loch line, loch ard, captain gibbs, eva carmichael, tom pearce, glenample station, mutton bird island, loch ard gorge, flange -
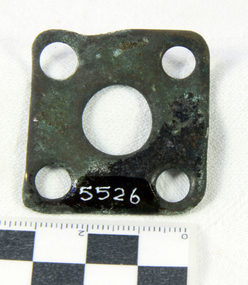 Flagstaff Hill Maritime Museum and Village
Flange
Ref LA 3 32 258 HISTORY OF THE LOCH ARD The LOCH ARD belonged to the famous Loch Line which sailed many ships from England to Australia. Built in Glasgow by Barclay, Curdle and Co. in 1873, the LOCH ARD was a three-masted square rigged iron sailing ship. The ship measured 262ft 7" (79.87m) in length, 38ft (11.58m) in width, 23ft (7m) in depth and had a gross tonnage of 1693 tons. The LOCH ARD's main mast measured a massive 150ft (45.7m) in height. LOCH ARD made three trips to Australia and one trip to Calcutta before its final voyage. LOCH ARD left England on March 2, 1878, under the command of Captain Gibbs, a newly married, 29 year old. She was bound for Melbourne with a crew of 37, plus 17 passengers and a load of cargo. The general cargo reflected the affluence of Melbourne at the time. On board were straw hats, umbrella, perfumes, clay pipes, pianos, clocks, confectionary, linen and candles, as well as a heavier load of railway irons, cement, lead and copper. There were items included that intended for display in the Melbourne International Exhibition in 1880. The voyage to Port Phillip was long but uneventful. At 3am on June 1, 1878, Captain Gibbs was expecting to see land and the passengers were becoming excited as they prepared to view their new homeland in the early morning. But LOCH ARD was running into a fog which greatly reduced visibility. Captain Gibbs was becoming anxious as there was no sign of land or the Cape Otway lighthouse. At 4am the fog lifted. A man aloft announced that he could see breakers. The sheer cliffs of Victoria's west coast came into view, and Captain Gibbs realised that the ship was much closer to them than expected. He ordered as much sail to be set as time would permit and then attempted to steer the vessel out to sea. On coming head on into the wind, the ship lost momentum, the sails fell limp and LOCH ARD's bow swung back. Gibbs then ordered the anchors to be released in an attempt to hold its position. The anchors sank some 50 fathoms - but did not hold. By this time LOCH ARD was among the breakers and the tall cliffs of Mutton Bird Island rose behind the ship. Just half a mile from the coast, the ship's bow was suddenly pulled around by the anchor. The captain tried to tack out to sea, but the ship struck a reef at the base of Mutton Bird Island, near Port Campbell. Waves broke over the ship and the top deck was loosened from the hull. The masts and rigging came crashing down knocking passengers and crew overboard. When a lifeboat was finally launched, it crashed into the side of LOCH ARD and capsized. Tom Pearce, who had launched the boat, managed to cling to its overturned hull and shelter beneath it. He drifted out to sea and then on the flood tide came into what is now known as LOCH ARD Gorge. He swam to shore, bruised and dazed, and found a cave in which to shelter. Some of the crew stayed below deck to shelter from the falling rigging but drowned when the ship slipped off the reef into deeper water. Eva Carmichael had raced onto deck to find out what was happening only to be confronted by towering cliffs looming above the stricken ship. In all the chaos, Captain Gibbs grabbed Eva and said, "If you are saved Eva, let my dear wife know that I died like a sailor". That was the last Eva Carmichael saw of the captain. She was swept off the ship by a huge wave. Eva saw Tom Pearce on a small rocky beach and yelled to attract his attention. He dived in and swam to the exhausted woman and dragged her to shore. He took her to the cave and broke open case of brandy which had washed up on the beach. He opened a bottle to revive the unconscious woman. A few hours later Tom scaled a cliff in search of help. He followed hoof prints and came by chance upon two men from nearby Glenample Station three and a half miles away. In a state of exhaustion, he told the men of the tragedy. Tom returned to the gorge while the two men rode back to the station to get help. By the time they reached LOCH ARD Gorge, it was cold and dark. The two shipwreck survivors were taken to Glenample Station to recover. Eva stayed at the station for six weeks before returning to Ireland, this time by steamship. In Melbourne, Tom Pearce received a hero's welcome. He was presented with the first gold medal of the Royal Humane Society of Victoria and a £1000 cheque from the Victorian Government. Concerts were performed to honour the young man's bravery and to raise money for those who lost family in the LOCH ARD disaster. Of the 54 crew members and passengers on board, only two survived: the apprentice, Tom Pearce and the young woman passenger, Eva Carmichael, who lost all of her family in the tragedy. Ten days after the LOCH ARD tragedy, salvage rights to the wreck were sold at auction for £2,120. Cargo valued at £3,000 was salvaged and placed on the beach, but most washed back into the sea when another storm developed. The wreck of LOCH ARD still lies at the base of Mutton Bird Island. Much of the cargo has now been salvaged and some was washed up into what is now known as LOCH ARD Gorge. Cargo and artefacts have also been illegally salvaged over many years before protective legislation was introduced. One of the most unlikely pieces of cargo to have survived the shipwreck was a Minton porcelain peacock - one of only nine in the world. The peacock was destined for the Melbourne International Exhibition in 1880. It had been well packed, which gave it adequate protection during the violent storm. Today, the Minton peacock can be seen at the Flagstaff Hill Maritime Museum in Warrnambool. From Australia's most dramatic shipwreck it has now become Australia's most valuable shipwreck artefact and is one of very few 'objects' on the Victorian State Heritage Register. Flagstaff Hill’s collection of artefacts from LOCH ARD is significant for being one of the largest collections of artefacts from this shipwreck in Victoria. It is significant for its association with the shipwreck, which is on the Victorian Heritage Register (VHR S417). The collection is significant because of the relationship between the objects, as together they have a high potential to interpret the story of the LOCH ARD. The LOCH ARD collection is archaeologically significant as the remains of a large international passenger and cargo ship. The LOCH ARD collection is historically significant for representing aspects of Victoria’s shipping history and its potential to interpret sub-theme 1.5 of Victoria’s Framework of Historical Themes (living with natural processes). The collection is also historically significant for its association with the LOCH ARD, which was one of the worst and best known shipwrecks in Victoria’s history. Small square brass Flange with four corner holes and one larger centre hole. Has slight bend one side. Artefact Reg No LA/27. Recovered from the wreck of the Loch Ard.flagstaff hill, warrnambool, shipwrecked coast, flagstaff hill maritime museum, maritime museum, shipwreck coast, flagstaff hill maritime village, great ocean road, loch line, loch ard, captain gibbs, eva carmichael, tom pearce, glenample station, mutton bird island, loch ard gorge, flange, brass flange -
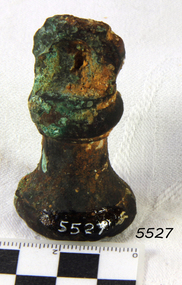 Flagstaff Hill Maritime Museum and Village
Functional object - Weight, 1878
History of the Loch Ard: The Loch Ard got its name from ”Loch Ard” a loch which lies to the west of Aberfoyle, and the east of Loch Lomond. It means "high lake" in Scottish Gaelic. The vessel belonged to the famous Loch Line which sailed many vessels from England to Australia. The Loch Ard was built in Glasgow by Barclay, Curdle and Co. in 1873, the vessel was a three-masted square-rigged iron sailing ship that measured 79.87 meters in length, 11.58 m in width, and 7 m in depth with a gross tonnage of 1693 tons with a mainmast that measured a massive 45.7 m in height. Loch Ard made three trips to Australia and one trip to Calcutta before its fateful voyage. Loch Ard left England on March 2, 1878, under the command of 29-year-old Captain Gibbs, who was newly married. The ship was bound for Melbourne with a crew of 37, plus 17 passengers. The general cargo reflected the affluence of Melbourne at the time. Onboard were straw hats, umbrella, perfumes, clay pipes, pianos, clocks, confectionery, linen and candles, as well as a heavier load of railway irons, cement, lead and copper. There were other items included that were intended for display in the Melbourne International Exhibition of 1880. The voyage to Port Phillip was long but uneventful. Then at 3 am on June 1, 1878, Captain Gibbs was expecting to see land. But the Loch Ard was running into a fog which greatly reduced visibility. Captain Gibbs was becoming anxious as there was no sign of land or the Cape Otway lighthouse. At 4 am the fog lifted and a lookout aloft announced that he could see breakers. The sheer cliffs of Victoria's west coast came into view, and Captain Gibbs realised that the ship was much closer to them than expected. He ordered as much sail to be set as time would permit and then attempted to steer the vessel out to sea. On coming head-on into the wind, the ship lost momentum, the sails fell limp and Loch Ard's bow swung back towards land. Gibbs then ordered the anchors to be released in an attempt to hold its position. The anchors sank some 50 fathoms - but did not hold. By this time the ship was among the breakers and the tall cliffs of Mutton Bird Island rose behind. Just half a mile from the coast, the ship's bow was suddenly pulled around by the anchor. The captain tried to tack out to sea, but the ship struck a reef at the base of Mutton Bird Island, near Port Campbell. Waves subsequently broke over the ship and the top deck became loosened from the hull. The masts and rigging came crashing down knocking passengers and crew overboard. When a lifeboat was finally launched, it crashed into the side of Loch Ard and capsized. Tom Pearce, who had launched the boat, managed to cling to its overturned hull and shelter beneath it. He drifted out to sea and then on the flood tide came into what is now known as Loch Ard Gorge. He swam to shore, bruised and dazed, and found a cave in which to shelter. Some of the crew stayed below deck to shelter from the falling rigging but drowned when the ship slipped off the reef into deeper water. Eva Carmichael a passenger had raced onto the deck to find out what was happening only to be confronted by towering cliffs looming above the stricken ship. In all the chaos, Captain Gibbs grabbed Eva and said, "If you are saved Eva, let my dear wife know that I died like a sailor". That was the last Eva Carmichael saw of the captain. She was swept off the ship by a huge wave. Eva saw Tom Pearce on a small rocky beach and yelled to attract his attention. He dived in and swam to the exhausted woman and dragged her to shore. He took her to the cave and broke the open case of brandy which had washed up on the beach. He opened a bottle to revive the unconscious woman. A few hours later Tom scaled a cliff in search of help. He followed hoof prints and came by chance upon two men from nearby Glenample Station three and a half miles away. In a complete state of exhaustion, he told the men of the tragedy. Tom then returned to the gorge while the two men rode back to the station to get help. By the time they reached Loch Ard Gorge, it was cold and dark. The two shipwreck survivors were taken to Glenample Station to recover. Eva stayed at the station for six weeks before returning to Ireland by steamship. In Melbourne, Tom Pearce received a hero's welcome. He was presented with the first gold medal of the Royal Humane Society of Victoria and a £1000 cheque from the Victorian Government. Concerts were performed to honour the young man's bravery and to raise money for those who lost family in the disaster. Of the 54 crew members and passengers on board, only two survived: the apprentice, Tom Pearce and the young woman passenger, Eva Carmichael, who lost her family in the tragedy. Ten days after the Loch Ard tragedy, salvage rights to the wreck were sold at auction for £2,120. Cargo valued at £3,000 was salvaged and placed on the beach, but most washed back into the sea when another storm developed. The wreck of Loch Ard still lies at the base of Mutton Bird Island. Much of the cargo has now been salvaged and some items were washed up into Loch Ard Gorge. Cargo and artefacts have also been illegally salvaged over many years before protective legislation was introduced in March 1982. One of the most unlikely pieces of cargo to have survived the shipwreck was a Minton majolica peacock- one of only nine in the world. The peacock was destined for the Melbourne 1880 International Exhibition in. It had been well packed, which gave it adequate protection during the violent storm. Today the Minton peacock can be seen at the Flagstaff Hill Maritime Museum in Warrnambool. From Australia's most dramatic shipwreck it has now become Australia's most valuable shipwreck artifact and is one of very few 'objects' on the Victorian State Heritage Register.The shipwreck of the Loch Ard is of significance for Victoria and is registered on the Victorian Heritage Register ( S 417). Flagstaff Hill has a varied collection of artefacts from Loch Ard and its collection is significant for being one of the largest accumulation of artefacts from this notable Victorian shipwreck. The collections object is to also give us a snapshot into history so we can interpret the story of this tragic event. The collection is also archaeologically significant as it represents aspects of Victoria's shipping history that allows us to interpret Victoria's social and historical themes of the time. The collections historically significance is that it is associated unfortunately with the worst and best-known shipwreck in Victoria's history. Small copper alloy weight shaped like a domed bell. Recovered from the wreck of the Loch Ardflagstaff hill, warrnambool, shipwrecked coast, flagstaff hill maritime museum, maritime museum, shipwreck coast, flagstaff hill maritime village, great ocean road, loch line, loch ard, captain gibbs, eva carmichael, tom pearce, glenample station, mutton bird island, loch ard gorge, copper alloy weight, weight, weights and measures, scale weight -
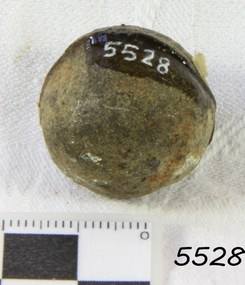 Flagstaff Hill Maritime Museum and Village
Rubber Ball
Ref: LA (417) 4 49 276 HISTORY OF THE LOCH ARD The LOCH ARD belonged to the famous Loch Line which sailed many ships from England to Australia. Built in Glasgow by Barclay, Curdle and Co. in 1873, the LOCH ARD was a three-masted square rigged iron sailing ship. The ship measured 262ft 7" (79.87m) in length, 38ft (11.58m) in width, 23ft (7m) in depth and had a gross tonnage of 1693 tons. The LOCH ARD's main mast measured a massive 150ft (45.7m) in height. LOCH ARD made three trips to Australia and one trip to Calcutta before its final voyage. LOCH ARD left England on March 2, 1878, under the command of Captain Gibbs, a newly married, 29 year old. She was bound for Melbourne with a crew of 37, plus 17 passengers and a load of cargo. The general cargo reflected the affluence of Melbourne at the time. On board were straw hats, umbrella, perfumes, clay pipes, pianos, clocks, confectionary, linen and candles, as well as a heavier load of railway irons, cement, lead and copper. There were items included that intended for display in the Melbourne International Exhibition in 1880. The voyage to Port Phillip was long but uneventful. At 3am on June 1, 1878, Captain Gibbs was expecting to see land and the passengers were becoming excited as they prepared to view their new homeland in the early morning. But LOCH ARD was running into a fog which greatly reduced visibility. Captain Gibbs was becoming anxious as there was no sign of land or the Cape Otway lighthouse. At 4am the fog lifted. A man aloft announced that he could see breakers. The sheer cliffs of Victoria's west coast came into view, and Captain Gibbs realised that the ship was much closer to them than expected. He ordered as much sail to be set as time would permit and then attempted to steer the vessel out to sea. On coming head on into the wind, the ship lost momentum, the sails fell limp and LOCH ARD's bow swung back. Gibbs then ordered the anchors to be released in an attempt to hold its position. The anchors sank some 50 fathoms - but did not hold. By this time LOCH ARD was among the breakers and the tall cliffs of Mutton Bird Island rose behind the ship. Just half a mile from the coast, the ship's bow was suddenly pulled around by the anchor. The captain tried to tack out to sea, but the ship struck a reef at the base of Mutton Bird Island, near Port Campbell. Waves broke over the ship and the top deck was loosened from the hull. The masts and rigging came crashing down knocking passengers and crew overboard. When a lifeboat was finally launched, it crashed into the side of LOCH ARD and capsized. Tom Pearce, who had launched the boat, managed to cling to its overturned hull and shelter beneath it. He drifted out to sea and then on the flood tide came into what is now known as LOCH ARD Gorge. He swam to shore, bruised and dazed, and found a cave in which to shelter. Some of the crew stayed below deck to shelter from the falling rigging but drowned when the ship slipped off the reef into deeper water. Eva Carmichael had raced onto deck to find out what was happening only to be confronted by towering cliffs looming above the stricken ship. In all the chaos, Captain Gibbs grabbed Eva and said, "If you are saved Eva, let my dear wife know that I died like a sailor". That was the last Eva Carmichael saw of the captain. She was swept off the ship by a huge wave. Eva saw Tom Pearce on a small rocky beach and yelled to attract his attention. He dived in and swam to the exhausted woman and dragged her to shore. He took her to the cave and broke open case of brandy which had washed up on the beach. He opened a bottle to revive the unconscious woman. A few hours later Tom scaled a cliff in search of help. He followed hoof prints and came by chance upon two men from nearby Glenample Station three and a half miles away. In a state of exhaustion, he told the men of the tragedy. Tom returned to the gorge while the two men rode back to the station to get help. By the time they reached LOCH ARD Gorge, it was cold and dark. The two shipwreck survivors were taken to Glenample Station to recover. Eva stayed at the station for six weeks before returning to Ireland, this time by steamship. In Melbourne, Tom Pearce received a hero's welcome. He was presented with the first gold medal of the Royal Humane Society of Victoria and a £1000 cheque from the Victorian Government. Concerts were performed to honour the young man's bravery and to raise money for those who lost family in the LOCH ARD disaster. Of the 54 crew members and passengers on board, only two survived: the apprentice, Tom Pearce and the young woman passenger, Eva Carmichael, who lost all of her family in the tragedy. Ten days after the LOCH ARD tragedy, salvage rights to the wreck were sold at auction for £2,120. Cargo valued at £3,000 was salvaged and placed on the beach, but most washed back into the sea when another storm developed. The wreck of LOCH ARD still lies at the base of Mutton Bird Island. Much of the cargo has now been salvaged and some was washed up into what is now known as LOCH ARD Gorge. Cargo and artefacts have also been illegally salvaged over many years before protective legislation was introduced. One of the most unlikely pieces of cargo to have survived the shipwreck was a Minton porcelain peacock - one of only nine in the world. The peacock was destined for the Melbourne International Exhibition in 1880. It had been well packed, which gave it adequate protection during the violent storm. Today, the Minton peacock can be seen at the Flagstaff Hill Maritime Museum in Warrnambool. From Australia's most dramatic shipwreck it has now become Australia's most valuable shipwreck artefact and is one of very few 'objects' on the Victorian State Heritage Register. Flagstaff Hill’s collection of artefacts from LOCH ARD is significant for being one of the largest collections of artefacts from this shipwreck in Victoria. It is significant for its association with the shipwreck, which is on the Victorian Heritage Register (VHR S417). The collection is significant because of the relationship between the objects, as together they have a high potential to interpret the story of the LOCH ARD. The LOCH ARD collection is archaeologically significant as the remains of a large international passenger and cargo ship. The LOCH ARD collection is historically significant for representing aspects of Victoria’s shipping history and its potential to interpret sub-theme 1.5 of Victoria’s Framework of Historical Themes (living with natural processes). The collection is also historically significant for its association with the LOCH ARD, which was one of the worst and best known shipwrecks in Victoria’s history. Small hard, perished rubber ball with a seam visible. Recovered from the wreck of the Loch Ard. Artefact reg No LA/31.flagstaff hill, warrnambool, shipwrecked coast, flagstaff hill maritime museum, maritime museum, shipwreck coast, flagstaff hill maritime village, great ocean road, loch line, loch ard, captain gibbs, eva carmichael, tom pearce, glenample station, mutton bird island, loch ard gorge, rubber ball, ball -
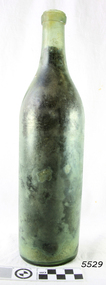 Flagstaff Hill Maritime Museum and Village
Bottle
Ref: LA 4 44 283 HISTORY OF THE LOCH ARD The LOCH ARD belonged to the famous Loch Line which sailed many ships from England to Australia. Built in Glasgow by Barclay, Curdle and Co. in 1873, the LOCH ARD was a three-masted square rigged iron sailing ship. The ship measured 262ft 7" (79.87m) in length, 38ft (11.58m) in width, 23ft (7m) in depth and had a gross tonnage of 1693 tons. The LOCH ARD's main mast measured a massive 150ft (45.7m) in height. LOCH ARD made three trips to Australia and one trip to Calcutta before its final voyage. LOCH ARD left England on March 2, 1878, under the command of Captain Gibbs, a newly married, 29 year old. She was bound for Melbourne with a crew of 37, plus 17 passengers and a load of cargo. The general cargo reflected the affluence of Melbourne at the time. On board were straw hats, umbrella, perfumes, clay pipes, pianos, clocks, confectionary, linen and candles, as well as a heavier load of railway irons, cement, lead and copper. There were items included that intended for display in the Melbourne International Exhibition in 1880. The voyage to Port Phillip was long but uneventful. At 3am on June 1, 1878, Captain Gibbs was expecting to see land and the passengers were becoming excited as they prepared to view their new homeland in the early morning. But LOCH ARD was running into a fog which greatly reduced visibility. Captain Gibbs was becoming anxious as there was no sign of land or the Cape Otway lighthouse. At 4am the fog lifted. A man aloft announced that he could see breakers. The sheer cliffs of Victoria's west coast came into view, and Captain Gibbs realised that the ship was much closer to them than expected. He ordered as much sail to be set as time would permit and then attempted to steer the vessel out to sea. On coming head on into the wind, the ship lost momentum, the sails fell limp and LOCH ARD's bow swung back. Gibbs then ordered the anchors to be released in an attempt to hold its position. The anchors sank some 50 fathoms - but did not hold. By this time LOCH ARD was among the breakers and the tall cliffs of Mutton Bird Island rose behind the ship. Just half a mile from the coast, the ship's bow was suddenly pulled around by the anchor. The captain tried to tack out to sea, but the ship struck a reef at the base of Mutton Bird Island, near Port Campbell. Waves broke over the ship and the top deck was loosened from the hull. The masts and rigging came crashing down knocking passengers and crew overboard. When a lifeboat was finally launched, it crashed into the side of LOCH ARD and capsized. Tom Pearce, who had launched the boat, managed to cling to its overturned hull and shelter beneath it. He drifted out to sea and then on the flood tide came into what is now known as LOCH ARD Gorge. He swam to shore, bruised and dazed, and found a cave in which to shelter. Some of the crew stayed below deck to shelter from the falling rigging but drowned when the ship slipped off the reef into deeper water. Eva Carmichael had raced onto deck to find out what was happening only to be confronted by towering cliffs looming above the stricken ship. In all the chaos, Captain Gibbs grabbed Eva and said, "If you are saved Eva, let my dear wife know that I died like a sailor". That was the last Eva Carmichael saw of the captain. She was swept off the ship by a huge wave. Eva saw Tom Pearce on a small rocky beach and yelled to attract his attention. He dived in and swam to the exhausted woman and dragged her to shore. He took her to the cave and broke open case of brandy which had washed up on the beach. He opened a bottle to revive the unconscious woman. A few hours later Tom scaled a cliff in search of help. He followed hoof prints and came by chance upon two men from nearby Glenample Station three and a half miles away. In a state of exhaustion, he told the men of the tragedy. Tom returned to the gorge while the two men rode back to the station to get help. By the time they reached LOCH ARD Gorge, it was cold and dark. The two shipwreck survivors were taken to Glenample Station to recover. Eva stayed at the station for six weeks before returning to Ireland, this time by steamship. In Melbourne, Tom Pearce received a hero's welcome. He was presented with the first gold medal of the Royal Humane Society of Victoria and a £1000 cheque from the Victorian Government. Concerts were performed to honour the young man's bravery and to raise money for those who lost family in the LOCH ARD disaster. Of the 54 crew members and passengers on board, only two survived: the apprentice, Tom Pearce and the young woman passenger, Eva Carmichael, who lost all of her family in the tragedy. Ten days after the LOCH ARD tragedy, salvage rights to the wreck were sold at auction for £2,120. Cargo valued at £3,000 was salvaged and placed on the beach, but most washed back into the sea when another storm developed. The wreck of LOCH ARD still lies at the base of Mutton Bird Island. Much of the cargo has now been salvaged and some was washed up into what is now known as LOCH ARD Gorge. Cargo and artefacts have also been illegally salvaged over many years before protective legislation was introduced. One of the most unlikely pieces of cargo to have survived the shipwreck was a Minton porcelain peacock - one of only nine in the world. The peacock was destined for the Melbourne International Exhibition in 1880. It had been well packed, which gave it adequate protection during the violent storm. Today, the Minton peacock can be seen at the Flagstaff Hill Maritime Museum in Warrnambool. From Australia's most dramatic shipwreck it has now become Australia's most valuable shipwreck artefact and is one of very few 'objects' on the Victorian State Heritage Register. Flagstaff Hill’s collection of artefacts from LOCH ARD is significant for being one of the largest collections of artefacts from this shipwreck in Victoria. It is significant for its association with the shipwreck, which is on the Victorian Heritage Register (VHR S417). The collection is significant because of the relationship between the objects, as together they have a high potential to interpret the story of the LOCH ARD. The LOCH ARD collection is archaeologically significant as the remains of a large international passenger and cargo ship. The LOCH ARD collection is historically significant for representing aspects of Victoria’s shipping history and its potential to interpret sub-theme 1.5 of Victoria’s Framework of Historical Themes (living with natural processes). The collection is also historically significant for its association with the LOCH ARD, which was one of the worst and best known shipwrecks in Victoria’s history. Glass bottle, light green, bottle is intact with slight chip on lip. Bottle has cork and some sand inside. Recovered from the wreck of the Loch Ard. Artefact Reg No LA/43.flagstaff hill, warrnambool, shipwrecked coast, flagstaff hill maritime museum, maritime museum, shipwreck coast, flagstaff hill maritime village, great ocean road, loch line, loch ard, captain gibbs, eva carmichael, tom pearce, glenample station, mutton bird island, loch ard gorge, bottle -
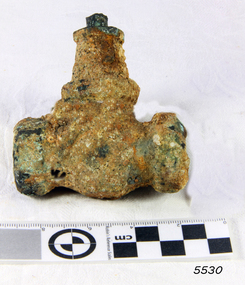 Flagstaff Hill Maritime Museum and Village
Tap
Ref: LA 3 32 273 HISTORY OF THE LOCH ARD The LOCH ARD belonged to the famous Loch Line which sailed many ships from England to Australia. Built in Glasgow by Barclay, Curdle and Co. in 1873, the LOCH ARD was a three-masted square rigged iron sailing ship. The ship measured 262ft 7" (79.87m) in length, 38ft (11.58m) in width, 23ft (7m) in depth and had a gross tonnage of 1693 tons. The LOCH ARD's main mast measured a massive 150ft (45.7m) in height. LOCH ARD made three trips to Australia and one trip to Calcutta before its final voyage. LOCH ARD left England on March 2, 1878, under the command of Captain Gibbs, a newly married, 29 year old. She was bound for Melbourne with a crew of 37, plus 17 passengers and a load of cargo. The general cargo reflected the affluence of Melbourne at the time. On board were straw hats, umbrella, perfumes, clay pipes, pianos, clocks, confectionary, linen and candles, as well as a heavier load of railway irons, cement, lead and copper. There were items included that intended for display in the Melbourne International Exhibition in 1880. The voyage to Port Phillip was long but uneventful. At 3am on June 1, 1878, Captain Gibbs was expecting to see land and the passengers were becoming excited as they prepared to view their new homeland in the early morning. But LOCH ARD was running into a fog which greatly reduced visibility. Captain Gibbs was becoming anxious as there was no sign of land or the Cape Otway lighthouse. At 4am the fog lifted. A man aloft announced that he could see breakers. The sheer cliffs of Victoria's west coast came into view, and Captain Gibbs realised that the ship was much closer to them than expected. He ordered as much sail to be set as time would permit and then attempted to steer the vessel out to sea. On coming head on into the wind, the ship lost momentum, the sails fell limp and LOCH ARD's bow swung back. Gibbs then ordered the anchors to be released in an attempt to hold its position. The anchors sank some 50 fathoms - but did not hold. By this time LOCH ARD was among the breakers and the tall cliffs of Mutton Bird Island rose behind the ship. Just half a mile from the coast, the ship's bow was suddenly pulled around by the anchor. The captain tried to tack out to sea, but the ship struck a reef at the base of Mutton Bird Island, near Port Campbell. Waves broke over the ship and the top deck was loosened from the hull. The masts and rigging came crashing down knocking passengers and crew overboard. When a lifeboat was finally launched, it crashed into the side of LOCH ARD and capsized. Tom Pearce, who had launched the boat, managed to cling to its overturned hull and shelter beneath it. He drifted out to sea and then on the flood tide came into what is now known as LOCH ARD Gorge. He swam to shore, bruised and dazed, and found a cave in which to shelter. Some of the crew stayed below deck to shelter from the falling rigging but drowned when the ship slipped off the reef into deeper water. Eva Carmichael had raced onto deck to find out what was happening only to be confronted by towering cliffs looming above the stricken ship. In all the chaos, Captain Gibbs grabbed Eva and said, "If you are saved Eva, let my dear wife know that I died like a sailor". That was the last Eva Carmichael saw of the captain. She was swept off the ship by a huge wave. Eva saw Tom Pearce on a small rocky beach and yelled to attract his attention. He dived in and swam to the exhausted woman and dragged her to shore. He took her to the cave and broke open case of brandy which had washed up on the beach. He opened a bottle to revive the unconscious woman. A few hours later Tom scaled a cliff in search of help. He followed hoof prints and came by chance upon two men from nearby Glenample Station three and a half miles away. In a state of exhaustion, he told the men of the tragedy. Tom returned to the gorge while the two men rode back to the station to get help. By the time they reached LOCH ARD Gorge, it was cold and dark. The two shipwreck survivors were taken to Glenample Station to recover. Eva stayed at the station for six weeks before returning to Ireland, this time by steamship. In Melbourne, Tom Pearce received a hero's welcome. He was presented with the first gold medal of the Royal Humane Society of Victoria and a £1000 cheque from the Victorian Government. Concerts were performed to honour the young man's bravery and to raise money for those who lost family in the LOCH ARD disaster. Of the 54 crew members and passengers on board, only two survived: the apprentice, Tom Pearce and the young woman passenger, Eva Carmichael, who lost all of her family in the tragedy. Ten days after the LOCH ARD tragedy, salvage rights to the wreck were sold at auction for £2,120. Cargo valued at £3,000 was salvaged and placed on the beach, but most washed back into the sea when another storm developed. The wreck of LOCH ARD still lies at the base of Mutton Bird Island. Much of the cargo has now been salvaged and some was washed up into what is now known as LOCH ARD Gorge. Cargo and artefacts have also been illegally salvaged over many years before protective legislation was introduced. One of the most unlikely pieces of cargo to have survived the shipwreck was a Minton porcelain peacock - one of only nine in the world. The peacock was destined for the Melbourne International Exhibition in 1880. It had been well packed, which gave it adequate protection during the violent storm. Today, the Minton peacock can be seen at the Flagstaff Hill Maritime Museum in Warrnambool. From Australia's most dramatic shipwreck it has now become Australia's most valuable shipwreck artefact and is one of very few 'objects' on the Victorian State Heritage Register. Flagstaff Hill’s collection of artefacts from LOCH ARD is significant for being one of the largest collections of artefacts from this shipwreck in Victoria. It is significant for its association with the shipwreck, which is on the Victorian Heritage Register (VHR S417). The collection is significant because of the relationship between the objects, as together they have a high potential to interpret the story of the LOCH ARD. The LOCH ARD collection is archaeologically significant as the remains of a large international passenger and cargo ship. The LOCH ARD collection is historically significant for representing aspects of Victoria’s shipping history and its potential to interpret sub-theme 1.5 of Victoria’s Framework of Historical Themes (living with natural processes). The collection is also historically significant for its association with the LOCH ARD, which was one of the worst and best known shipwrecks in Victoria’s history. Brass tap. Bronze disease active and heavily concreted. Recovered from the wreck of the Loch Ard. Artefact Reg No LA/12. flagstaff hill, warrnambool, shipwrecked coast, flagstaff hill maritime museum, maritime museum, shipwreck coast, flagstaff hill maritime village, great ocean road, loch line, loch ard, captain gibbs, eva carmichael, tom pearce, glenample station, mutton bird island, loch ard gorge, tap -
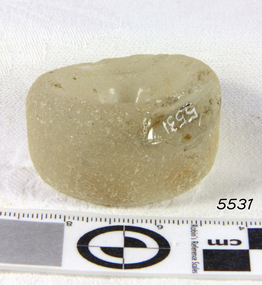 Flagstaff Hill Maritime Museum and Village
Plug
Ref: LA 4 44 262 HISTORY OF THE LOCH ARD The LOCH ARD belonged to the famous Loch Line which sailed many ships from England to Australia. Built in Glasgow by Barclay, Curdle and Co. in 1873, the LOCH ARD was a three-masted square rigged iron sailing ship. The ship measured 262ft 7" (79.87m) in length, 38ft (11.58m) in width, 23ft (7m) in depth and had a gross tonnage of 1693 tons. The LOCH ARD's main mast measured a massive 150ft (45.7m) in height. LOCH ARD made three trips to Australia and one trip to Calcutta before its final voyage. LOCH ARD left England on March 2, 1878, under the command of Captain Gibbs, a newly married, 29 year old. She was bound for Melbourne with a crew of 37, plus 17 passengers and a load of cargo. The general cargo reflected the affluence of Melbourne at the time. On board were straw hats, umbrella, perfumes, clay pipes, pianos, clocks, confectionary, linen and candles, as well as a heavier load of railway irons, cement, lead and copper. There were items included that intended for display in the Melbourne International Exhibition in 1880. The voyage to Port Phillip was long but uneventful. At 3am on June 1, 1878, Captain Gibbs was expecting to see land and the passengers were becoming excited as they prepared to view their new homeland in the early morning. But LOCH ARD was running into a fog which greatly reduced visibility. Captain Gibbs was becoming anxious as there was no sign of land or the Cape Otway lighthouse. At 4am the fog lifted. A man aloft announced that he could see breakers. The sheer cliffs of Victoria's west coast came into view, and Captain Gibbs realised that the ship was much closer to them than expected. He ordered as much sail to be set as time would permit and then attempted to steer the vessel out to sea. On coming head on into the wind, the ship lost momentum, the sails fell limp and LOCH ARD's bow swung back. Gibbs then ordered the anchors to be released in an attempt to hold its position. The anchors sank some 50 fathoms - but did not hold. By this time LOCH ARD was among the breakers and the tall cliffs of Mutton Bird Island rose behind the ship. Just half a mile from the coast, the ship's bow was suddenly pulled around by the anchor. The captain tried to tack out to sea, but the ship struck a reef at the base of Mutton Bird Island, near Port Campbell. Waves broke over the ship and the top deck was loosened from the hull. The masts and rigging came crashing down knocking passengers and crew overboard. When a lifeboat was finally launched, it crashed into the side of LOCH ARD and capsized. Tom Pearce, who had launched the boat, managed to cling to its overturned hull and shelter beneath it. He drifted out to sea and then on the flood tide came into what is now known as LOCH ARD Gorge. He swam to shore, bruised and dazed, and found a cave in which to shelter. Some of the crew stayed below deck to shelter from the falling rigging but drowned when the ship slipped off the reef into deeper water. Eva Carmichael had raced onto deck to find out what was happening only to be confronted by towering cliffs looming above the stricken ship. In all the chaos, Captain Gibbs grabbed Eva and said, "If you are saved Eva, let my dear wife know that I died like a sailor". That was the last Eva Carmichael saw of the captain. She was swept off the ship by a huge wave. Eva saw Tom Pearce on a small rocky beach and yelled to attract his attention. He dived in and swam to the exhausted woman and dragged her to shore. He took her to the cave and broke open case of brandy which had washed up on the beach. He opened a bottle to revive the unconscious woman. A few hours later Tom scaled a cliff in search of help. He followed hoof prints and came by chance upon two men from nearby Glenample Station three and a half miles away. In a state of exhaustion, he told the men of the tragedy. Tom returned to the gorge while the two men rode back to the station to get help. By the time they reached LOCH ARD Gorge, it was cold and dark. The two shipwreck survivors were taken to Glenample Station to recover. Eva stayed at the station for six weeks before returning to Ireland, this time by steamship. In Melbourne, Tom Pearce received a hero's welcome. He was presented with the first gold medal of the Royal Humane Society of Victoria and a £1000 cheque from the Victorian Government. Concerts were performed to honour the young man's bravery and to raise money for those who lost family in the LOCH ARD disaster. Of the 54 crew members and passengers on board, only two survived: the apprentice, Tom Pearce and the young woman passenger, Eva Carmichael, who lost all of her family in the tragedy. Ten days after the LOCH ARD tragedy, salvage rights to the wreck were sold at auction for £2,120. Cargo valued at £3,000 was salvaged and placed on the beach, but most washed back into the sea when another storm developed. The wreck of LOCH ARD still lies at the base of Mutton Bird Island. Much of the cargo has now been salvaged and some was washed up into what is now known as LOCH ARD Gorge. Cargo and artefacts have also been illegally salvaged over many years before protective legislation was introduced. One of the most unlikely pieces of cargo to have survived the shipwreck was a Minton porcelain peacock - one of only nine in the world. The peacock was destined for the Melbourne International Exhibition in 1880. It had been well packed, which gave it adequate protection during the violent storm. Today, the Minton peacock can be seen at the Flagstaff Hill Maritime Museum in Warrnambool. From Australia's most dramatic shipwreck it has now become Australia's most valuable shipwreck artefact and is one of very few 'objects' on the Victorian State Heritage Register. Flagstaff Hill’s collection of artefacts from LOCH ARD is significant for being one of the largest collections of artefacts from this shipwreck in Victoria. It is significant for its association with the shipwreck, which is on the Victorian Heritage Register (VHR S417). The collection is significant because of the relationship between the objects, as together they have a high potential to interpret the story of the LOCH ARD. The LOCH ARD collection is archaeologically significant as the remains of a large international passenger and cargo ship. The LOCH ARD collection is historically significant for representing aspects of Victoria’s shipping history and its potential to interpret sub-theme 1.5 of Victoria’s Framework of Historical Themes (living with natural processes). The collection is also historically significant for its association with the LOCH ARD, which was one of the worst and best known shipwrecks in Victoria’s history. Glass plug with cone recess in plug. Glass is abraded and chipped. Plug is 1½" wide and 1" high. Recovered from the wreck of the Loch Ard. Artefact Reg No LA/22.flagstaff hill, warrnambool, shipwrecked coast, flagstaff hill maritime museum, maritime museum, shipwreck coast, flagstaff hill maritime village, great ocean road, loch line, loch ard, captain gibbs, eva carmichael, tom pearce, glenample station, mutton bird island, loch ard gorge, glass plug, plug -
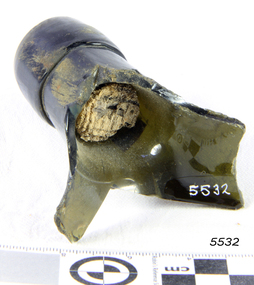 Flagstaff Hill Maritime Museum and Village
Bottle
Ref: LA/81 HISTORY OF THE LOCH ARD The LOCH ARD belonged to the famous Loch Line which sailed many ships from England to Australia. Built in Glasgow by Barclay, Curdle and Co. in 1873, the LOCH ARD was a three-masted square rigged iron sailing ship. The ship measured 262ft 7" (79.87m) in length, 38ft (11.58m) in width, 23ft (7m) in depth and had a gross tonnage of 1693 tons. The LOCH ARD's main mast measured a massive 150ft (45.7m) in height. LOCH ARD made three trips to Australia and one trip to Calcutta before its final voyage. LOCH ARD left England on March 2, 1878, under the command of Captain Gibbs, a newly married, 29 year old. She was bound for Melbourne with a crew of 37, plus 17 passengers and a load of cargo. The general cargo reflected the affluence of Melbourne at the time. On board were straw hats, umbrella, perfumes, clay pipes, pianos, clocks, confectionary, linen and candles, as well as a heavier load of railway irons, cement, lead and copper. There were items included that intended for display in the Melbourne International Exhibition in 1880. The voyage to Port Phillip was long but uneventful. At 3am on June 1, 1878, Captain Gibbs was expecting to see land and the passengers were becoming excited as they prepared to view their new homeland in the early morning. But LOCH ARD was running into a fog which greatly reduced visibility. Captain Gibbs was becoming anxious as there was no sign of land or the Cape Otway lighthouse. At 4am the fog lifted. A man aloft announced that he could see breakers. The sheer cliffs of Victoria's west coast came into view, and Captain Gibbs realised that the ship was much closer to them than expected. He ordered as much sail to be set as time would permit and then attempted to steer the vessel out to sea. On coming head on into the wind, the ship lost momentum, the sails fell limp and LOCH ARD's bow swung back. Gibbs then ordered the anchors to be released in an attempt to hold its position. The anchors sank some 50 fathoms - but did not hold. By this time LOCH ARD was among the breakers and the tall cliffs of Mutton Bird Island rose behind the ship. Just half a mile from the coast, the ship's bow was suddenly pulled around by the anchor. The captain tried to tack out to sea, but the ship struck a reef at the base of Mutton Bird Island, near Port Campbell. Waves broke over the ship and the top deck was loosened from the hull. The masts and rigging came crashing down knocking passengers and crew overboard. When a lifeboat was finally launched, it crashed into the side of LOCH ARD and capsized. Tom Pearce, who had launched the boat, managed to cling to its overturned hull and shelter beneath it. He drifted out to sea and then on the flood tide came into what is now known as LOCH ARD Gorge. He swam to shore, bruised and dazed, and found a cave in which to shelter. Some of the crew stayed below deck to shelter from the falling rigging but drowned when the ship slipped off the reef into deeper water. Eva Carmichael had raced onto deck to find out what was happening only to be confronted by towering cliffs looming above the stricken ship. In all the chaos, Captain Gibbs grabbed Eva and said, "If you are saved Eva, let my dear wife know that I died like a sailor". That was the last Eva Carmichael saw of the captain. She was swept off the ship by a huge wave. Eva saw Tom Pearce on a small rocky beach and yelled to attract his attention. He dived in and swam to the exhausted woman and dragged her to shore. He took her to the cave and broke open case of brandy which had washed up on the beach. He opened a bottle to revive the unconscious woman. A few hours later Tom scaled a cliff in search of help. He followed hoof prints and came by chance upon two men from nearby Glenample Station three and a half miles away. In a state of exhaustion, he told the men of the tragedy. Tom returned to the gorge while the two men rode back to the station to get help. By the time they reached LOCH ARD Gorge, it was cold and dark. The two shipwreck survivors were taken to Glenample Station to recover. Eva stayed at the station for six weeks before returning to Ireland, this time by steamship. In Melbourne, Tom Pearce received a hero's welcome. He was presented with the first gold medal of the Royal Humane Society of Victoria and a £1000 cheque from the Victorian Government. Concerts were performed to honour the young man's bravery and to raise money for those who lost family in the LOCH ARD disaster. Of the 54 crew members and passengers on board, only two survived: the apprentice, Tom Pearce and the young woman passenger, Eva Carmichael, who lost all of her family in the tragedy. Ten days after the LOCH ARD tragedy, salvage rights to the wreck were sold at auction for £2,120. Cargo valued at £3,000 was salvaged and placed on the beach, but most washed back into the sea when another storm developed. The wreck of LOCH ARD still lies at the base of Mutton Bird Island. Much of the cargo has now been salvaged and some was washed up into what is now known as LOCH ARD Gorge. Cargo and artefacts have also been illegally salvaged over many years before protective legislation was introduced. One of the most unlikely pieces of cargo to have survived the shipwreck was a Minton porcelain peacock - one of only nine in the world. The peacock was destined for the Melbourne International Exhibition in 1880. It had been well packed, which gave it adequate protection during the violent storm. Today, the Minton peacock can be seen at the Flagstaff Hill Maritime Museum in Warrnambool. From Australia's most dramatic shipwreck it has now become Australia's most valuable shipwreck artefact and is one of very few 'objects' on the Victorian State Heritage Register. Flagstaff Hill’s collection of artefacts from LOCH ARD is significant for being one of the largest collections of artefacts from this shipwreck in Victoria. It is significant for its association with the shipwreck, which is on the Victorian Heritage Register (VHR S417). The collection is significant because of the relationship between the objects, as together they have a high potential to interpret the story of the LOCH ARD. The LOCH ARD collection is archaeologically significant as the remains of a large international passenger and cargo ship. The LOCH ARD collection is historically significant for representing aspects of Victoria’s shipping history and its potential to interpret sub-theme 1.5 of Victoria’s Framework of Historical Themes (living with natural processes). The collection is also historically significant for its association with the LOCH ARD, which was one of the worst and best known shipwrecks in Victoria’s history. Neck only from a green bottle. Cork is still visible in neck. Recovered from the wreck of the Loch Ard. Artefact Reg No LA/81.flagstaff hill, warrnambool, shipwrecked coast, flagstaff hill maritime museum, maritime museum, shipwreck coast, flagstaff hill maritime village, great ocean road, loch line, loch ard, captain gibbs, eva carmichael, tom pearce, glenample station, mutton bird island, loch ard gorge, bottle -
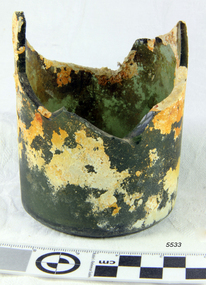 Flagstaff Hill Maritime Museum and Village
Bottle
Ref: LA 4 44 270 HISTORY OF THE LOCH ARD The LOCH ARD belonged to the famous Loch Line which sailed many ships from England to Australia. Built in Glasgow by Barclay, Curdle and Co. in 1873, the LOCH ARD was a three-masted square rigged iron sailing ship. The ship measured 262ft 7" (79.87m) in length, 38ft (11.58m) in width, 23ft (7m) in depth and had a gross tonnage of 1693 tons. The LOCH ARD's main mast measured a massive 150ft (45.7m) in height. LOCH ARD made three trips to Australia and one trip to Calcutta before its final voyage. LOCH ARD left England on March 2, 1878, under the command of Captain Gibbs, a newly married, 29 year old. She was bound for Melbourne with a crew of 37, plus 17 passengers and a load of cargo. The general cargo reflected the affluence of Melbourne at the time. On board were straw hats, umbrella, perfumes, clay pipes, pianos, clocks, confectionary, linen and candles, as well as a heavier load of railway irons, cement, lead and copper. There were items included that intended for display in the Melbourne International Exhibition in 1880. The voyage to Port Phillip was long but uneventful. At 3am on June 1, 1878, Captain Gibbs was expecting to see land and the passengers were becoming excited as they prepared to view their new homeland in the early morning. But LOCH ARD was running into a fog which greatly reduced visibility. Captain Gibbs was becoming anxious as there was no sign of land or the Cape Otway lighthouse. At 4am the fog lifted. A man aloft announced that he could see breakers. The sheer cliffs of Victoria's west coast came into view, and Captain Gibbs realised that the ship was much closer to them than expected. He ordered as much sail to be set as time would permit and then attempted to steer the vessel out to sea. On coming head on into the wind, the ship lost momentum, the sails fell limp and LOCH ARD's bow swung back. Gibbs then ordered the anchors to be released in an attempt to hold its position. The anchors sank some 50 fathoms - but did not hold. By this time LOCH ARD was among the breakers and the tall cliffs of Mutton Bird Island rose behind the ship. Just half a mile from the coast, the ship's bow was suddenly pulled around by the anchor. The captain tried to tack out to sea, but the ship struck a reef at the base of Mutton Bird Island, near Port Campbell. Waves broke over the ship and the top deck was loosened from the hull. The masts and rigging came crashing down knocking passengers and crew overboard. When a lifeboat was finally launched, it crashed into the side of LOCH ARD and capsized. Tom Pearce, who had launched the boat, managed to cling to its overturned hull and shelter beneath it. He drifted out to sea and then on the flood tide came into what is now known as LOCH ARD Gorge. He swam to shore, bruised and dazed, and found a cave in which to shelter. Some of the crew stayed below deck to shelter from the falling rigging but drowned when the ship slipped off the reef into deeper water. Eva Carmichael had raced onto deck to find out what was happening only to be confronted by towering cliffs looming above the stricken ship. In all the chaos, Captain Gibbs grabbed Eva and said, "If you are saved Eva, let my dear wife know that I died like a sailor". That was the last Eva Carmichael saw of the captain. She was swept off the ship by a huge wave. Eva saw Tom Pearce on a small rocky beach and yelled to attract his attention. He dived in and swam to the exhausted woman and dragged her to shore. He took her to the cave and broke open case of brandy which had washed up on the beach. He opened a bottle to revive the unconscious woman. A few hours later Tom scaled a cliff in search of help. He followed hoof prints and came by chance upon two men from nearby Glenample Station three and a half miles away. In a state of exhaustion, he told the men of the tragedy. Tom returned to the gorge while the two men rode back to the station to get help. By the time they reached LOCH ARD Gorge, it was cold and dark. The two shipwreck survivors were taken to Glenample Station to recover. Eva stayed at the station for six weeks before returning to Ireland, this time by steamship. In Melbourne, Tom Pearce received a hero's welcome. He was presented with the first gold medal of the Royal Humane Society of Victoria and a £1000 cheque from the Victorian Government. Concerts were performed to honour the young man's bravery and to raise money for those who lost family in the LOCH ARD disaster. Of the 54 crew members and passengers on board, only two survived: the apprentice, Tom Pearce and the young woman passenger, Eva Carmichael, who lost all of her family in the tragedy. Ten days after the LOCH ARD tragedy, salvage rights to the wreck were sold at auction for £2,120. Cargo valued at £3,000 was salvaged and placed on the beach, but most washed back into the sea when another storm developed. The wreck of LOCH ARD still lies at the base of Mutton Bird Island. Much of the cargo has now been salvaged and some was washed up into what is now known as LOCH ARD Gorge. Cargo and artefacts have also been illegally salvaged over many years before protective legislation was introduced. One of the most unlikely pieces of cargo to have survived the shipwreck was a Minton porcelain peacock - one of only nine in the world. The peacock was destined for the Melbourne International Exhibition in 1880. It had been well packed, which gave it adequate protection during the violent storm. Today, the Minton peacock can be seen at the Flagstaff Hill Maritime Museum in Warrnambool. From Australia's most dramatic shipwreck it has now become Australia's most valuable shipwreck artefact and is one of very few 'objects' on the Victorian State Heritage Register Flagstaff Hill’s collection of artefacts from LOCH ARD is significant for being one of the largest collections of artefacts from this shipwreck in Victoria. It is significant for its association with the shipwreck, which is on the Victorian Heritage Register (VHR S417). The collection is significant because of the relationship between the objects, as together they have a high potential to interpret the story of the LOCH ARD. The LOCH ARD collection is archaeologically significant as the remains of a large international passenger and cargo ship. The LOCH ARD collection is historically significant for representing aspects of Victoria’s shipping history and its potential to interpret sub-theme 1.5 of Victoria’s Framework of Historical Themes (living with natural processes). The collection is also historically significant for its association with the LOCH ARD, which was one of the worst and best known shipwrecks in Victoria’s history. Base part of a green bottle. Calcareous encrustation visible on glass. Recovered from the wreck of the Loch Ard. Artefact Reg No LA/20. Has the number 737 on bottomflagstaff hill, warrnambool, shipwrecked coast, flagstaff hill maritime museum, maritime museum, shipwreck coast, flagstaff hill maritime village, great ocean road, loch line, loch ard, captain gibbs, eva carmichael, tom pearce, glenample station, mutton bird island, loch ard gorge, bottle -
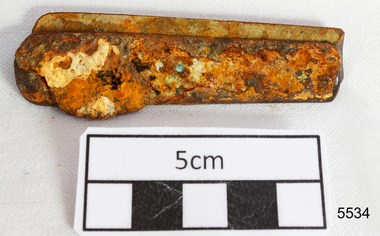 Flagstaff Hill Maritime Museum and Village
Pocket Knife
Ref: LA/07 HISTORY OF THE LOCH ARD The LOCH ARD belonged to the famous Loch Line which sailed many ships from England to Australia. Built in Glasgow by Barclay, Curdle and Co. in 1873, the LOCH ARD was a three-masted square rigged iron sailing ship. The ship measured 262ft 7" (79.87m) in length, 38ft (11.58m) in width, 23ft (7m) in depth and had a gross tonnage of 1693 tons. The LOCH ARD's main mast measured a massive 150ft (45.7m) in height. LOCH ARD made three trips to Australia and one trip to Calcutta before its final voyage. LOCH ARD left England on March 2, 1878, under the command of Captain Gibbs, a newly married, 29 year old. She was bound for Melbourne with a crew of 37, plus 17 passengers and a load of cargo. The general cargo reflected the affluence of Melbourne at the time. On board were straw hats, umbrella, perfumes, clay pipes, pianos, clocks, confectionary, linen and candles, as well as a heavier load of railway irons, cement, lead and copper. There were items included that intended for display in the Melbourne International Exhibition in 1880. The voyage to Port Phillip was long but uneventful. At 3am on June 1, 1878, Captain Gibbs was expecting to see land and the passengers were becoming excited as they prepared to view their new homeland in the early morning. But LOCH ARD was running into a fog which greatly reduced visibility. Captain Gibbs was becoming anxious as there was no sign of land or the Cape Otway lighthouse. At 4am the fog lifted. A man aloft announced that he could see breakers. The sheer cliffs of Victoria's west coast came into view, and Captain Gibbs realised that the ship was much closer to them than expected. He ordered as much sail to be set as time would permit and then attempted to steer the vessel out to sea. On coming head on into the wind, the ship lost momentum, the sails fell limp and LOCH ARD's bow swung back. Gibbs then ordered the anchors to be released in an attempt to hold its position. The anchors sank some 50 fathoms - but did not hold. By this time LOCH ARD was among the breakers and the tall cliffs of Mutton Bird Island rose behind the ship. Just half a mile from the coast, the ship's bow was suddenly pulled around by the anchor. The captain tried to tack out to sea, but the ship struck a reef at the base of Mutton Bird Island, near Port Campbell. Waves broke over the ship and the top deck was loosened from the hull. The masts and rigging came crashing down knocking passengers and crew overboard. When a lifeboat was finally launched, it crashed into the side of LOCH ARD and capsized. Tom Pearce, who had launched the boat, managed to cling to its overturned hull and shelter beneath it. He drifted out to sea and then on the flood tide came into what is now known as LOCH ARD Gorge. He swam to shore, bruised and dazed, and found a cave in which to shelter. Some of the crew stayed below deck to shelter from the falling rigging but drowned when the ship slipped off the reef into deeper water. Eva Carmichael had raced onto deck to find out what was happening only to be confronted by towering cliffs looming above the stricken ship. In all the chaos, Captain Gibbs grabbed Eva and said, "If you are saved Eva, let my dear wife know that I died like a sailor". That was the last Eva Carmichael saw of the captain. She was swept off the ship by a huge wave. Eva saw Tom Pearce on a small rocky beach and yelled to attract his attention. He dived in and swam to the exhausted woman and dragged her to shore. He took her to the cave and broke open case of brandy which had washed up on the beach. He opened a bottle to revive the unconscious woman. A few hours later Tom scaled a cliff in search of help. He followed hoof prints and came by chance upon two men from nearby Glenample Station three and a half miles away. In a state of exhaustion, he told the men of the tragedy. Tom returned to the gorge while the two men rode back to the station to get help. By the time they reached LOCH ARD Gorge, it was cold and dark. The two shipwreck survivors were taken to Glenample Station to recover. Eva stayed at the station for six weeks before returning to Ireland, this time by steamship. In Melbourne, Tom Pearce received a hero's welcome. He was presented with the first gold medal of the Royal Humane Society of Victoria and a £1000 cheque from the Victorian Government. Concerts were performed to honour the young man's bravery and to raise money for those who lost family in the LOCH ARD disaster. Of the 54 crew members and passengers on board, only two survived: the apprentice, Tom Pearce and the young woman passenger, Eva Carmichael, who lost all of her family in the tragedy. Ten days after the LOCH ARD tragedy, salvage rights to the wreck were sold at auction for £2,120. Cargo valued at £3,000 was salvaged and placed on the beach, but most washed back into the sea when another storm developed. The wreck of LOCH ARD still lies at the base of Mutton Bird Island. Much of the cargo has now been salvaged and some was washed up into what is now known as LOCH ARD Gorge. Cargo and artefacts have also been illegally salvaged over many years before protective legislation was introduced. One of the most unlikely pieces of cargo to have survived the shipwreck was a Minton porcelain peacock - one of only nine in the world. The peacock was destined for the Melbourne International Exhibition in 1880. It had been well packed, which gave it adequate protection during the violent storm. Today, the Minton peacock can be seen at the Flagstaff Hill Maritime Museum in Warrnambool. From Australia's most dramatic shipwreck it has now become Australia's most valuable shipwreck artefact and is one of very few 'objects' on the Victorian State Heritage Register. Flagstaff Hill’s collection of artefacts from LOCH ARD is significant for being one of the largest collections of artefacts from this shipwreck in Victoria. It is significant for its association with the shipwreck, which is on the Victorian Heritage Register (VHR S417). The collection is significant because of the relationship between the objects, as together they have a high potential to interpret the story of the LOCH ARD. The LOCH ARD collection is archaeologically significant as the remains of a large international passenger and cargo ship. The LOCH ARD collection is historically significant for representing aspects of Victoria’s shipping history and its potential to interpret sub-theme 1.5 of Victoria’s Framework of Historical Themes (living with natural processes). The collection is also historically significant for its association with the LOCH ARD, which was one of the worst and best known shipwrecks in Victoria’s history. Handle of a pocket knife, wood and metal. Badly encrusted Length 3". Recovered from the wreck of the Loch Ard. Artefact Reg No LA/07. Handle is in 2 piecesflagstaff hill, warrnambool, shipwrecked coast, flagstaff hill maritime museum, maritime museum, shipwreck coast, flagstaff hill maritime village, great ocean road, loch line, loch ard, captain gibbs, eva carmichael, tom pearce, glenample station, mutton bird island, loch ard gorge, pocket knife -
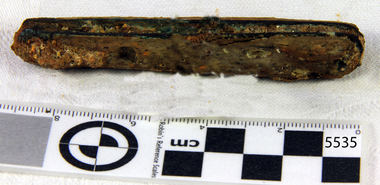 Flagstaff Hill Maritime Museum and Village
Pocket Knife
Ref: LA/08 HISTORY OF THE LOCH ARD The LOCH ARD belonged to the famous Loch Line which sailed many ships from England to Australia. Built in Glasgow by Barclay, Curdle and Co. in 1873, the LOCH ARD was a three-masted square rigged iron sailing ship. The ship measured 262ft 7" (79.87m) in length, 38ft (11.58m) in width, 23ft (7m) in depth and had a gross tonnage of 1693 tons. The LOCH ARD's main mast measured a massive 150ft (45.7m) in height. LOCH ARD made three trips to Australia and one trip to Calcutta before its final voyage. LOCH ARD left England on March 2, 1878, under the command of Captain Gibbs, a newly married, 29 year old. She was bound for Melbourne with a crew of 37, plus 17 passengers and a load of cargo. The general cargo reflected the affluence of Melbourne at the time. On board were straw hats, umbrella, perfumes, clay pipes, pianos, clocks, confectionary, linen and candles, as well as a heavier load of railway irons, cement, lead and copper. There were items included that intended for display in the Melbourne International Exhibition in 1880. The voyage to Port Phillip was long but uneventful. At 3am on June 1, 1878, Captain Gibbs was expecting to see land and the passengers were becoming excited as they prepared to view their new homeland in the early morning. But LOCH ARD was running into a fog which greatly reduced visibility. Captain Gibbs was becoming anxious as there was no sign of land or the Cape Otway lighthouse. At 4am the fog lifted. A man aloft announced that he could see breakers. The sheer cliffs of Victoria's west coast came into view, and Captain Gibbs realised that the ship was much closer to them than expected. He ordered as much sail to be set as time would permit and then attempted to steer the vessel out to sea. On coming head on into the wind, the ship lost momentum, the sails fell limp and LOCH ARD's bow swung back. Gibbs then ordered the anchors to be released in an attempt to hold its position. The anchors sank some 50 fathoms - but did not hold. By this time LOCH ARD was among the breakers and the tall cliffs of Mutton Bird Island rose behind the ship. Just half a mile from the coast, the ship's bow was suddenly pulled around by the anchor. The captain tried to tack out to sea, but the ship struck a reef at the base of Mutton Bird Island, near Port Campbell. Waves broke over the ship and the top deck was loosened from the hull. The masts and rigging came crashing down knocking passengers and crew overboard. When a lifeboat was finally launched, it crashed into the side of LOCH ARD and capsized. Tom Pearce, who had launched the boat, managed to cling to its overturned hull and shelter beneath it. He drifted out to sea and then on the flood tide came into what is now known as LOCH ARD Gorge. He swam to shore, bruised and dazed, and found a cave in which to shelter. Some of the crew stayed below deck to shelter from the falling rigging but drowned when the ship slipped off the reef into deeper water. Eva Carmichael had raced onto deck to find out what was happening only to be confronted by towering cliffs looming above the stricken ship. In all the chaos, Captain Gibbs grabbed Eva and said, "If you are saved Eva, let my dear wife know that I died like a sailor". That was the last Eva Carmichael saw of the captain. She was swept off the ship by a huge wave. Eva saw Tom Pearce on a small rocky beach and yelled to attract his attention. He dived in and swam to the exhausted woman and dragged her to shore. He took her to the cave and broke open case of brandy which had washed up on the beach. He opened a bottle to revive the unconscious woman. A few hours later Tom scaled a cliff in search of help. He followed hoof prints and came by chance upon two men from nearby Glenample Station three and a half miles away. In a state of exhaustion, he told the men of the tragedy. Tom returned to the gorge while the two men rode back to the station to get help. By the time they reached LOCH ARD Gorge, it was cold and dark. The two shipwreck survivors were taken to Glenample Station to recover. Eva stayed at the station for six weeks before returning to Ireland, this time by steamship. In Melbourne, Tom Pearce received a hero's welcome. He was presented with the first gold medal of the Royal Humane Society of Victoria and a £1000 cheque from the Victorian Government. Concerts were performed to honour the young man's bravery and to raise money for those who lost family in the LOCH ARD disaster. Of the 54 crew members and passengers on board, only two survived: the apprentice, Tom Pearce and the young woman passenger, Eva Carmichael, who lost all of her family in the tragedy. Ten days after the LOCH ARD tragedy, salvage rights to the wreck were sold at auction for £2,120. Cargo valued at £3,000 was salvaged and placed on the beach, but most washed back into the sea when another storm developed. The wreck of LOCH ARD still lies at the base of Mutton Bird Island. Much of the cargo has now been salvaged and some was washed up into what is now known as LOCH ARD Gorge. Cargo and artefacts have also been illegally salvaged over many years before protective legislation was introduced. One of the most unlikely pieces of cargo to have survived the shipwreck was a Minton porcelain peacock - one of only nine in the world. The peacock was destined for the Melbourne International Exhibition in 1880. It had been well packed, which gave it adequate protection during the violent storm. Today, the Minton peacock can be seen at the Flagstaff Hill Maritime Museum in Warrnambool. From Australia's most dramatic shipwreck it has now become Australia's most valuable shipwreck artefact and is one of very few 'objects' on the Victorian State Heritage Register. Flagstaff Hill’s collection of artefacts from LOCH ARD is significant for being one of the largest collections of artefacts from this shipwreck in Victoria. It is significant for its association with the shipwreck, which is on the Victorian Heritage Register (VHR S417). The collection is significant because of the relationship between the objects, as together they have a high potential to interpret the story of the LOCH ARD. The LOCH ARD collection is archaeologically significant as the remains of a large international passenger and cargo ship. The LOCH ARD collection is historically significant for representing aspects of Victoria’s shipping history and its potential to interpret sub-theme 1.5 of Victoria’s Framework of Historical Themes (living with natural processes). The collection is also historically significant for its association with the LOCH ARD, which was one of the worst and best known shipwrecks in Victoria’s history. Wooden handled pocket knife with blade intact. Heavily encrusted. Recovered from the wreck of the Loch Ard. Artefact Reg No LA/07.flagstaff hill, warrnambool, shipwrecked coast, flagstaff hill maritime museum, maritime museum, shipwreck coast, flagstaff hill maritime village, great ocean road, loch line, loch ard, captain gibbs, eva carmichael, tom pearce, glenample station, mutton bird island, loch ard gorge, pocket knife