Showing 739 items matching "bombs"
-
 Wodonga & District Historical Society Inc
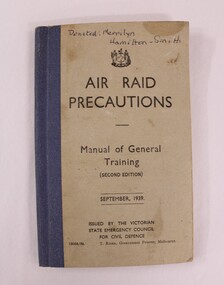
Booklet - Hamilton-Smith Collection Air Raid Precautions Booklet, T. Rider - Government Printer, September 1939
... ...bomb...Other measures adopted by State Governments during this period included the installation of air raid sirens and bomb shelters, and the training of volunteers in firefighting and first aid. ...Other measures adopted by State Governments during this period included the installation of air raid sirens and bomb shelters, and the training of volunteers in firefighting and first aid. ...The Hamilton-Smith collection was donated by the children of Grace Mary Hamilton-Smith nee Ellwood (1911-2004) and John Hamilton-Smith (1909-1984) who settled in Wodonga in the 1940s. The Ellwood family had lived in north-east Victoria since the late 1800s. Grace’s mother, Rosina Ellwood nee Smale, was the first teacher at Baranduda in 1888, and a foundation member of the C.W.A. Rosina and her husband Mark retired to Wodonga in 1934. Grace and John married at St. David’s Church, Albury in 1941. John was a grazier, and actively involved in Agricultural Societies. The collection contains significant items which reflect the local history of Wodonga, including handmade needlework, books, photographs, a wedding dress, maps, and material relating to the world wars. This Air Raid Precautions booklet was one of thousands distributed to households across Australia during WW2. They provided instructions on what to do during an air raid and were based on emergency response protocols established in Britain. Other measures adopted by State Governments during this period included the installation of air raid sirens and bomb shelters, and the training of volunteers in firefighting and first aid. This item has well documented provenance and a known owner. It forms part of a significant and representative historical collection which reflects the local history of Wodonga. It contributes to our understanding of life in Australia during WW2. A small booklet containing illustrations and text instructing people what to do during an air raid. Front cover in pen: "Donated: Merrilyn/Hamilton-Smith"ww2, world war two, world war, war, 1940s, air raid, defence, bomb -
 Bendigo Military Museum
Badge - BADGES, BOMBING of DARWIN, 1990-1992
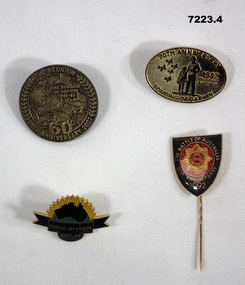
... At bottom border is the phrase - "Bombing of Darwin". In the centre are a flight of aircraft, tall and short humans and the phrase "1942 Front Line Australia". 3. ...Around the outside of the star is the phrase " The Battle of Australia 50th Anniversary 1992". Badge BADGES, BOMBING of DARWIN ...Refer to the service of "BASIL DARBY" SX9423, 2/14 Bn.1. A round bronze colour badge, at top border - words "The Reunion", at bottom border - words - "60th Anniversary 2002". In the centre of the badge are two human head profiles, two spitfires, a ship and possibly a tank with big numerals '60' at bottom. 2. Oval brass coloured badge. On top border is the phrase '70th Anniversary' . At bottom border is the phrase - "Bombing of Darwin". In the centre are a flight of aircraft, tall and short humans and the phrase "1942 Front Line Australia". 3. This is a multi shaped badge. It has a stylised Rising Sun, superimposed on that is a dark red shape of Australia. Under that is a black enamel banner with the phrase "Darwin Defenders 1942-1945". 4. This is a shield shaped badge with a long mounting pin behind it. The shield is a green enamel. In the centre is an 8 pointed gold star. Set on a red background. In that centre is phrase "1992 50th Anniversary" in gold colour. Around the outside of the star is the phrase " The Battle of Australia 50th Anniversary 1992".1. On rear is stamped 1484.badges, bombing of darwin, anniversaries -
 Melbourne Tram Museum
Newspaper, The Age, “'Time bomb': Caught out with an expired myki”, "The tap-on taps into some new tech", "'Myki miracle' eludes Apple users", 24/01/2019 12:00:00 AM
... “'Time bomb': Caught out with an expired myki”, "The tap-on taps into some new tech", "'Myki miracle' eludes Apple users"...Newspaper clippings titled: 1. “'Time bomb': Caught out with an expired myki” - the Age 24/1/2019 Timna Jacks Transport reporter Mike Smith is contesting fine for using expired myki on tram on Route 57 in May 2018. ...Until an iPhone can mimic a myki card, iPhone users can't use the system. “'Time bomb': Caught out with an expired myki”, "The tap-on taps into some new tech", "'Myki miracle' eludes Apple users" Newspaper The Age ...Newspaper clippings titled: 1. “'Time bomb': Caught out with an expired myki” - the Age 24/1/2019 Timna Jacks Transport reporter Mike Smith is contesting fine for using expired myki on tram on Route 57 in May 2018. Mr Smith is taking PTV to court to contest the fine. 2. "The tap-on taps into some new tech" - the Age 7/2/2019 Tom Cowie Trialling new smartphone technology on trams and trains. Photo shows Nick Neos using Android phone to tap on myki validator on a tram. 3. "'Myki miracle' eludes Apple users" Android smartphone users will be able to pay for public transport fares from 7am on Thursday 28 March 2019 but Apple iPhone users will have to wait. Apple locks down the NFC chip so that it can only be used by Apple apps. Until an iPhone can mimic a myki card, iPhone users can't use the system.trams, tramways, route 57, newmarket, myki -
 Flagstaff Hill Maritime Museum and Village
Instrument - Clock, 1900's
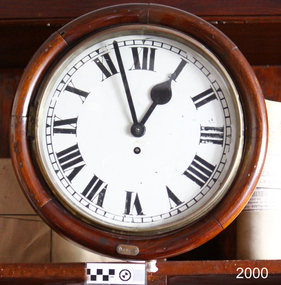
... The firm had been tasked by the Ministry of Munitions to solve the problem of pilots dropping bombs by hand and as a result, they effectively created the first bomb rack. ...The firm had been tasked by the Ministry of Munitions to solve the problem of pilots dropping bombs by hand and as a result, they effectively created the first bomb rack. ...In August 1884, Alfred Hirst who had started his trade as a watch repairer and was described as a watchmaker extraordinaire established Hirst Brothers and Company, on Union Street in Oldham Manchester. He took his two stepbrothers into the business and the company was set up to produce timepieces and jewellery as well as importing “Limit company” Swiss watches and precision machine tools for the watch and clock trade. By 1902 Hirst Brothers. had become a limited company and was still growing, adding other businesses in Manchester in 1904 and at Birmingham in 1907. The quality of the clocks and watches was such that Alfred Hirst realised his greatest ambition in 1912 with a range of watches which carried the "Limit" trademark. These watch movements had originally been made in Switzerland and shipped to Hirst Bros. to be put into British made “Dennison” cases. This trade brought even more growth with additional sales offices opening in London and Glasgow. At the outbreak of the First World War in 1914 found them manufacturing aircraft parts including revolution counters and optical instruments. The firm had been tasked by the Ministry of Munitions to solve the problem of pilots dropping bombs by hand and as a result, they effectively created the first bomb rack. After the war, the company once again began to prosper and with the demand for their products increasing they looked to build a new purpose-built factory to manufacture their products. In 1917 they purchased a seven-acre field site at Tame Side Dobcross, the designing of the new factory was passed onto local architect AJ Howcroft. His brief for the design of the clockworks would have been prompted by Alfred Hirst who having visited modern factories in the United States was inspired by the latest factory designs providing as much daylight as possible during working hours. The factory was eventually completed in 1920, by the mid-1920s there were cheap clock imports from Germany and production turned to radio sets and other components as well as counter and gas meters for the "Parkinson and Cowan" company who was later to take over the business. In 1926 came the cotton crash and the District Bank who had loans with the company foreclosed on the Hirst loan. The company did survive and throughout the second World, War II were involved in munitions work at the factory as well as making instruments for various aircraft. In the 1950’s they were producing meters and high grade measuring equipment but by the 1970's the business had closed and the factory was demolished in the mid-1980 "s The item is a good example of the later use of an early mechanism “Fusee” that was originally invented around 1525 in Prague. This type of clock mechanism was replaced as watchmakers looked for mechanisms that could reduce the size of clocks and watches, it appears England was the only country to continue making clocks with a Fusee device until around 1900,s of which our clock is an example. The use of a Fusee movement eventually became obsolete in 1970,s. The item is significant for the collection as it is a clock with a movement that has long since been made obsolete. Fusee type gallery wall clock made by Tame Side with an 8-day mechanical fusee movement. The white enamel dial is a little crazed and some of the Roman Numeral numbers are fading due to over-cleaning. The movement has a hexagonal iron pendulum bob hooking onto a pendulum rod with a spring-wound anchor escapement.Only mark is stamped on the movement believed to be a production number "13490" and made in Tame Side. (If the clock had been made after 1912 it would have had a trade mark "Limit")flagstaff hill, warrnambool, shipwrecked-coast, flagstaff-hill, flagstaff-hill-maritime-museum, maritime-museum, shipwreck-coast, flagstaff-hill-maritime-village, clock, wall clock, fusee, gallery clock, alfred hirst, tame side -
 Bendigo Military Museum
Photograph - ARTHUR GEORGE HOLLEY PHOTOGRAPHIC ALBUM, 10 Photographs HMAS Hobart 1942 Coral Sea and Solomons
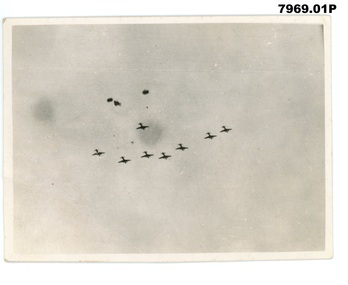
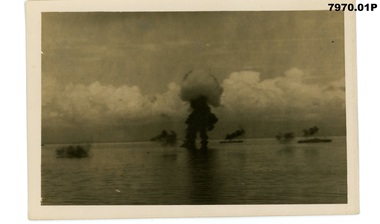
... Each description is preceded by an approximate date e.g.1940 06 is June 1940. 1. 1942 05 Coral Sea Japanese aircraft under AA fire.jpg 2. 1942 05 Coral Sea Japanese bombers aircraft under AA fire.jpg 3. 1942 08 HMAS Australia near miss caption three down in that bunch we missed a few.jpg 4. 1942 08 Solomon Islands Hobart white ensign battle flag flying at main mast.jpg 5. 1942 08 Solomons caption a few seconds later another one down this one goes to transports.jpg 6. 1942 08 Solomons caption peaceful and placid waters fury above.jpg 7. 1942 08 Solomons USS Astoria shoots down first high level bomber.jpg 8. 1942 08 Transport on fire off Guadalcanal 9. 1942 08 Solomons American destroyers open up on shore targets.jpg 10. 1942 08 Solomons caption Hobart alters course bombs fall in wake.jpg...HMAS Hobart Arthur George Holley RAN Pacific Theatre Battle of the Coral Sea Solomons Campaign Each description is preceded by an approximate date e.g.1940 06 is June 1940. 1. 1942 05 Coral Sea Japanese aircraft under AA fire.jpg 2. 1942 05 Coral Sea Japanese bombers aircraft under AA fire.jpg 3. 1942 08 HMAS Australia near miss caption three down in that bunch we missed a few.jpg 4. 1942 08 Solomon Islands Hobart white ensign battle flag flying at main mast.jpg 5. 1942 08 Solomons caption a few seconds later another one down this one goes to transports.jpg 6. 1942 08 Solomons caption peaceful and placid waters fury above.jpg 7. 1942 08 Solomons USS Astoria shoots down first high level bomber.jpg 8. 1942 08 Transport on fire off Guadalcanal 9. 1942 08 Solomons American destroyers open up on shore targets.jpg 10. 1942 08 Solomons caption Hobart alters course bombs fall in wake.jpg 10 Photographs HMAS Hobart 1942 Coral Sea and Solomons Photograph ARTHUR GEORGE HOLLEY PHOTOGRAPHIC ALBUM ...Items in the collection relating to ARTHUR GEORGE HOLLEY no 13556 RAN Refer cat no 2134 for his service record. The photographs are from his personal album, and are mainly official photographs widely available among the services. The photographs are from Australian , British and American sources. This set coincides with the Hobart's service around the time of the Battle of the Coral Sea, and her involvement in the Solomons and Guadalcanal landings. Whilst not taken personally, these photographs do capture some of the events Holley and his Hobart crewmates would have experienced and witnessed.Each description is preceded by an approximate date e.g.1940 06 is June 1940. 1. 1942 05 Coral Sea Japanese aircraft under AA fire.jpg 2. 1942 05 Coral Sea Japanese bombers aircraft under AA fire.jpg 3. 1942 08 HMAS Australia near miss caption three down in that bunch we missed a few.jpg 4. 1942 08 Solomon Islands Hobart white ensign battle flag flying at main mast.jpg 5. 1942 08 Solomons caption a few seconds later another one down this one goes to transports.jpg 6. 1942 08 Solomons caption peaceful and placid waters fury above.jpg 7. 1942 08 Solomons USS Astoria shoots down first high level bomber.jpg 8. 1942 08 Transport on fire off Guadalcanal 9. 1942 08 Solomons American destroyers open up on shore targets.jpg 10. 1942 08 Solomons caption Hobart alters course bombs fall in wake.jpghmas hobart, arthur george holley ran, pacific theatre, battle of the coral sea, solomons campaign -
 Bendigo Military Museum
Photograph - ARTHUR GEORGE HOLLEY PHOTOGRAPHIC ALBUM, 10 Photographs HMAS Hobart 1942 Solomons
... Each description is preceded by an approximate date e.g.1940 06 is June 1940. 1. 1942 08 Solomons caption torpedo bombers two more on fire.jpg 2. 1942 08 Solomons high level bombers no hits Japs flew one thousand miles for this 054.jpg 3. 1942 08 Solomons caption there is no doubt this one being a Jap note marking.jpg 4. 1942 08 Solomons Dawn entering Guadalcanal Hobart Hoists battle ensign.jpg 5. 1942 08 Solomons fires started by bombing and shell fire.jpg 6. 1942 08 Solomons Fires started by gunfire and dive bombers .jpg 7. 1942 08 Solomons Guadalcanal HMS Exeter evading Japanese bombers February 1942.jpg 8. 1942 08 Solomons US Mugford hit by bomb.jpg 9. 1942 08 Solomons USS Mugford attacked by dive bombers caption shot down one bomber.jpg 10. 1942 08 Solomons USS Mugford attacked by dive bombers.jpg ...HMAS Hobart Arthur George Holley RAN Pacific Theatre Solomons Campaign Guadalcanal Each description is preceded by an approximate date e.g.1940 06 is June 1940. 1. 1942 08 Solomons caption torpedo bombers two more on fire.jpg 2. 1942 08 Solomons high level bombers no hits Japs flew one thousand miles for this 054.jpg 3. 1942 08 Solomons caption there is no doubt this one being a Jap note marking.jpg 4. 1942 08 Solomons Dawn entering Guadalcanal Hobart Hoists battle ensign.jpg 5. 1942 08 Solomons fires started by bombing and shell fire.jpg 6. 1942 08 Solomons Fires started by gunfire and dive bombers .jpg 7. 1942 08 Solomons Guadalcanal HMS Exeter evading Japanese bombers February 1942.jpg 8. 1942 08 Solomons US Mugford hit by bomb.jpg 9. 1942 08 Solomons USS Mugford attacked by dive bombers caption shot down one bomber.jpg 10. 1942 08 Solomons USS Mugford attacked by dive bombers.jpg 10 Photographs HMAS Hobart 1942 Solomons Photograph ARTHUR GEORGE HOLLEY PHOTOGRAPHIC ALBUM ...Items in the collection relating to ARTHUR GEORGE HOLLEY no 13556 RAN Refer cat no 2134 for his service record. The photographs are from his personal album, and are mainly official photographs widely available among the services. The photographs are from Australian , British and American sources. This set coincides with the Hobart's service around the time of the Battle of the Coral Sea, and her involvement in the Solomons and Guadalcanal landings. Whilst not taken personally, these photographs do capture some of the events Holley and his Hobart crewmates would have experienced and witnessed.Each description is preceded by an approximate date e.g.1940 06 is June 1940. 1. 1942 08 Solomons caption torpedo bombers two more on fire.jpg 2. 1942 08 Solomons high level bombers no hits Japs flew one thousand miles for this 054.jpg 3. 1942 08 Solomons caption there is no doubt this one being a Jap note marking.jpg 4. 1942 08 Solomons Dawn entering Guadalcanal Hobart Hoists battle ensign.jpg 5. 1942 08 Solomons fires started by bombing and shell fire.jpg 6. 1942 08 Solomons Fires started by gunfire and dive bombers .jpg 7. 1942 08 Solomons Guadalcanal HMS Exeter evading Japanese bombers February 1942.jpg 8. 1942 08 Solomons US Mugford hit by bomb.jpg 9. 1942 08 Solomons USS Mugford attacked by dive bombers caption shot down one bomber.jpg 10. 1942 08 Solomons USS Mugford attacked by dive bombers.jpg hmas hobart, arthur george holley ran, pacific theatre, solomons campaign, guadalcanal -
 Eltham District Historical Society Inc
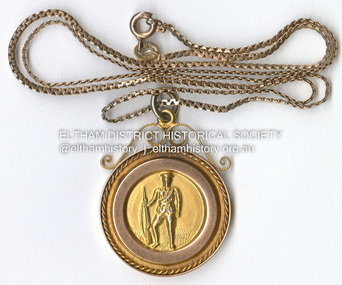
Photograph - Medal, Awarded to Spr. W. H. Orford by Shire of Eltham Welcome Home Committee, 1919
... He was a Tunneler and was part of an operation of a group of British miners (known as "Claykickers" or “Manchester Moles”) recruited during World War I to tunnel underneath no man's land and set bombs below the German front at the Battle of Messines in June 1917. 10,000 German soldiers were killed instantly after the detonation of explosives beneath their lines. ...He was a Tunneler and was part of an operation of a group of British miners (known as "Claykickers" or “Manchester Moles”) recruited during World War I to tunnel underneath no man's land and set bombs below the German front at the Battle of Messines in June 1917. 10,000 German soldiers were killed instantly after the detonation of explosives beneath their lines. ...Medal presented for their service to their country and local district to returning local servicemen from the Great War (First World War) by the Shire of Eltham Welcome Home Committee. This medal was presented to W.H. Orford. Spr. W.H. Orford From Eltham We Honour You Great War 1914 - 1919 Whilst the war ended in 1918, many servicemen did not return home till 1919. ORFORD William Henry - Munitions Worker Number 542 William Henry Orford enlisted 1 Feb 1916 and embarked for France 25 May 1916. He was a Tunneler and was part of an operation of a group of British miners (known as "Claykickers" or “Manchester Moles”) recruited during World War I to tunnel underneath no man's land and set bombs below the German front at the Battle of Messines in June 1917. 10,000 German soldiers were killed instantly after the detonation of explosives beneath their lines. The story was depicted in the film "The War Below". Doug Orford, William's nephew recalls William saying they could hear the Germans as they tunnelled below them within metres. A month later He was wounded in action with a gun shot wound to the scalp and face in July 1917. He disembarked back in Melbourne on September 5, 1919.ww1, 1919, aif, battle of messine, great war, medal, shire of eltham, tunneler, welcome home committee, william henry orford -
 Eltham District Historical Society Inc
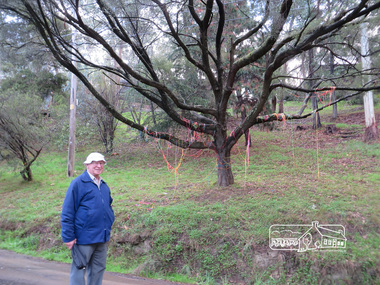
Photograph, Liz Pidgeon, Heritage Excursion; The 1901 Eltham Railway Walk, 3 May 2014, 3 May 2014
... EDHS Member Doug Orford stands by a yarn bombing installation. ewsletter No. 216, May 2014 May Excursion – The 1901 Eltham Railway Walk The railway from Heidelberg to Eltham was opened in 1902. ...Eltham District Historical Society Inc 728 Main Rd Eltham melbourne EDHS Member Doug Orford stands by a yarn bombing installation. ewsletter No. 216, May 2014 May Excursion – The 1901 Eltham Railway Walk The railway from Heidelberg to Eltham was opened in 1902. ...EDHS Member Doug Orford stands by a yarn bombing installation. ewsletter No. 216, May 2014 May Excursion – The 1901 Eltham Railway Walk The railway from Heidelberg to Eltham was opened in 1902. Over the previous year railway construction cut a curving swathe through Josiah Holloway’s 1851 Little Eltham subdivision. The survey plans for the railway show the owners and occupiers of land within Little Eltham affected by the railway alignment and for some distance each side. The plans show houses and other buildings but development at that time was rather sparse. Copies of these plans from the State Library of Victoria collection have been provided to the Society by Alan Sheehan. For our walk on 3rd May we intend to follow the railway from the Eltham Station to Ryans Road, which was the boundary of the adjoining Montmorency Farm. The return will be by way of nearby streets. Along the way we will discuss the details shown on the railway plans as well as more recent railway documents and photographs. At the conclusion and if time permits we can inspect the historical display at the Eltham Station. The walk is about 3 km in length and will take about 2.5 hours. It will start at 2 pm at the Eltham Railway Station car park (east/Main Road side) (Melway Ref. 21 J5).Born Digitalheritage excursion, activities, eltham district historical society, eltham railway station, eltham library, trestle bridge, yarn bombing, doug orford -
 Ballarat Tramway Museum
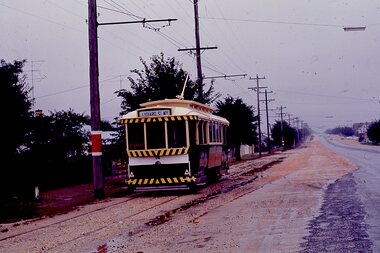
Photograph - SECV Ballarat - operations - set of 11, George Stevens, 31/1/1971
... Set of 11 Digital images, from slides taken by George Stevens on 31/1/1971 1 Tram 14 Inbound in Albert St nearing Skipton St 2 Trams 14, 30 Crossing 30 at Bell St 3 Tram 21 Drummond St Nth to Gardens 4 Tram 26 Running into the depot from Wendouree Parade 5 Tram 28 to Gardens via Sturt St west at Pleasant St 6 Tram 14 Northbound to Lydiard St Nth crossing level crossing with Reids Coffee Palace and the Provincinal Hotel in the background 7 Tram 21 Leaving the King St Loop in Victoria St 8 Tram 13 Climbing the Barkly St hill, has a Twin Lakes advert. 9 Tram 28 At Sturt and Lydiard on its way to Victoria St, has the ANZ bank in the background. Tram has a Bliss Bombs ( "To Read pack: Tilt Tram") roof advert and a SEC roof advert. 10 Tram 14 Turning from Lydiard into Sturt St - side on view. ...Ballarat Tramway Museum South Gardens Reserve Wendouree Parade Ballarat Ballarat goldfields Set of 11 Digital images, from slides taken by George Stevens on 31/1/1971 1 Tram 14 Inbound in Albert St nearing Skipton St 2 Trams 14, 30 Crossing 30 at Bell St 3 Tram 21 Drummond St Nth to Gardens 4 Tram 26 Running into the depot from Wendouree Parade 5 Tram 28 to Gardens via Sturt St west at Pleasant St 6 Tram 14 Northbound to Lydiard St Nth crossing level crossing with Reids Coffee Palace and the Provincinal Hotel in the background 7 Tram 21 Leaving the King St Loop in Victoria St 8 Tram 13 Climbing the Barkly St hill, has a Twin Lakes advert. 9 Tram 28 At Sturt and Lydiard on its way to Victoria St, has the ANZ bank in the background. Tram has a Bliss Bombs ( "To Read pack: Tilt Tram") roof advert and a SEC roof advert. 10 Tram 14 Turning from Lydiard into Sturt St - side on view. ...Set of 11 Digital images, from slides taken by George Stevens on 31/1/1971 1 Tram 14 Inbound in Albert St nearing Skipton St 2 Trams 14, 30 Crossing 30 at Bell St 3 Tram 21 Drummond St Nth to Gardens 4 Tram 26 Running into the depot from Wendouree Parade 5 Tram 28 to Gardens via Sturt St west at Pleasant St 6 Tram 14 Northbound to Lydiard St Nth crossing level crossing with Reids Coffee Palace and the Provincinal Hotel in the background 7 Tram 21 Leaving the King St Loop in Victoria St 8 Tram 13 Climbing the Barkly St hill, has a Twin Lakes advert. 9 Tram 28 At Sturt and Lydiard on its way to Victoria St, has the ANZ bank in the background. Tram has a Bliss Bombs ( "To Read pack: Tilt Tram") roof advert and a SEC roof advert. 10 Tram 14 Turning from Lydiard into Sturt St - side on view. In the background is the SEC Offices and Eyres Brothers store. 11 Tram 30 Northbound in Lydiard St Nth at level crossing with railway station and signal gantry in the background. Yields information about the tramcars used on 31/1/1971 and the various locations around the system.Set of 11 digital images scanned from slides.tram 26, drummond st nth, lydiard st, tram 30, barkly st, sturt st, victoria st, tram 21, tram 14, tram 28, bell st loop, albert st, wendouree parade, king st loop, level crossing -
 Returned Nurses RSL Sub-branch
Newspaper - Newspaper clipping, New Idea, A true anzac angel, 27/4/96
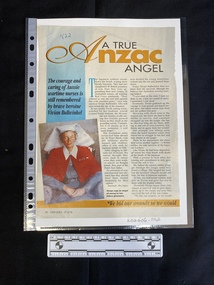
... The Australian Army nurses, with 200 civilians, were aboard the SS Vyner Brook when the Japanese bombed and sank the ship. After ten hours, twenty four nurses survived to make it ashore on Banka Island. ...The Australian Army nurses, with 200 civilians, were aboard the SS Vyner Brook when the Japanese bombed and sank the ship. After ten hours, twenty four nurses survived to make it ashore on Banka Island. ...The article details the war time recollections of Vivian Bullwinkel, sole survivor of the Japanese massacre of Australian nurses in 1942. The Australian Army nurses, with 200 civilians, were aboard the SS Vyner Brook when the Japanese bombed and sank the ship. After ten hours, twenty four nurses survived to make it ashore on Banka Island. The Japanese took them prisoner and then proceeded to shoot them all, after first bayoneting forty Bristish prisoners. Vivian was shot in the side and pretended she was dead. Vivian credits her initial survival to the duty she felt to a fellow survivor of the massacre, a British man. They then had to make the decision that giving themselves up to the Japanese was their best chance of survival. After threes years as a POW Vivian had lost alot of weight and seen many die, but she had continued to care for those that were her patients. More than 50 years later Vivian is to return to Banka Island as and honoured guest of Indonesia, to chose the site of of a memorial to her dead comrades. Vivian avoids talking in detail about her POW experiences but she does have strong views on selling Australian land to Japanese investors. The Japanese government had recently apologised for the atrocities they committed, but Vivian believes the apology was not specific enough. The first page of a magazine article including two columns of text and a colour reproduction of a painting of a woman in nurse's uniform, page one of two'N22' [blue ink, top right]ww2, wwii, red cross, frank statham, dutch east indies, anzac day -
 Returned Nurses RSL Sub-branch
Magazine - Magazine clipping in two parts, New Idea, A true anzac angel, 27/4/96
... The Australian Army nurses, with 200 civilians, were aboard the SS Vyner Brook when the Japanese bombed and sank the ship. After ten hours, twenty four nurses survived to make it ashore on Banka Island. ...The Australian Army nurses, with 200 civilians, were aboard the SS Vyner Brook when the Japanese bombed and sank the ship. After ten hours, twenty four nurses survived to make it ashore on Banka Island. ...The article details the war time recollections of Vivian Bullwinkel, sole survivor of the Japanese massacre of Australian nurses in 1942. The Australian Army nurses, with 200 civilians, were aboard the SS Vyner Brook when the Japanese bombed and sank the ship. After ten hours, twenty four nurses survived to make it ashore on Banka Island. The Japanese took them prisoner and then proceeded to shoot them all, after first bayoneting forty Bristish prisoners. Vivian was shot in the side and pretended she was dead. Vivian credits her initial survival to the duty she felt to a fellow survivor of the massacre, a British man. They then had to make the decision that giving themselves up to the Japanese was their best chance of survival. After threes years as a POW Vivian had lost alot of weight and seen many die, but she had continued to care for those that were her patients. More than 50 years later Vivian is to return to Banka Island as and honoured guest of Indonesia, to chose the site of of a memorial to her dead comrades. Vivian avoids talking in detail about her POW experiences but she does have strong views on selling Australian land to Japanese investors. The Japanese government had recently apologised for the atrocities they committed, but Vivian believes the apology was not specific enough. First page of a magazine clipping consisting of a large title with two columns of text next to a colour reproduction of a painting of a nurse Second page of a magazine clipping consisting of three columns of text under a large colour photo of an older man and woman leaning into each other'N22' [blue ink, top left, first page]ww2, wwii, red cross, frank statham, dutch east indies, anzac day -
Moorabbin Air Museum
Equipment (item) - Graviscope for Lincoln (Australian) RAAF Ident No G6C/3972, Graviscope for Lincoln
... This would vary depending on crew, bomb load, fuel and stores carried. It was used in the British designed but Australian manufactured, Government Aircraft Factory (GAF) Lincoln heavy bomber, which was operated by the Royal Australian Air Force (RAAF) in the years following the Second World War. ...This would vary depending on crew, bomb load, fuel and stores carried. It was used in the British designed but Australian manufactured, Government Aircraft Factory (GAF) Lincoln heavy bomber, which was operated by the Royal Australian Air Force (RAAF) in the years following the Second World War. ...Description White plastic doubled sided Graviscope stored in protective leather carry case. Case is fitted with pair of press studs, pocket in front for holding instructions and is stamped "Graviscope / for / Lincoln / (Australian) / Manufactured by / Melb > W & G < Aust / R.A.A.F / Ident. No G6C/3972". Plastic graviscope consists of a 277mm white disc, printed on both sides, overlaid on one side by a 224mm disc and the other side by a 175mm disc. All discs located by central screw, to which is attached a 160mm long x 25mm wide clear celluloid strip. History / Summary The graviscope is a computing device, which in aircraft was used for measuring the centre of gravity in an aircraft. This would vary depending on crew, bomb load, fuel and stores carried. It was used in the British designed but Australian manufactured, Government Aircraft Factory (GAF) Lincoln heavy bomber, which was operated by the Royal Australian Air Force (RAAF) in the years following the Second World War. This aircraft was originally a derivative of the famous Avro Lancaster bomber. The Lincoln was used by both the RAAF and the Royal Air Force in operations against Malayan Communist terrorists during the Malayan Emergency, 1948-1960. This graviscope is of the type designed for and used by RAAF and RAF aircrew who operated this aircraft.Many by W and G Australia -
 Bendigo Military Museum
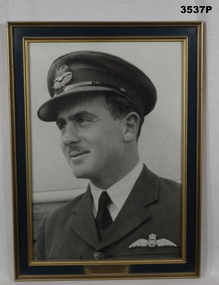
Photograph - PHOTOGRAPH RAAF, FRAMED, C. WW2
... Newton was taken to Lae for interrogation and then returned to Salamaua and was executed by decapitation and his body thrown in bomb crater on 29.3.1943. His body was later recovered in late 1943 when Australian troops captured Salamaua. ...Newton was taken to Lae for interrogation and then returned to Salamaua and was executed by decapitation and his body thrown in bomb crater on 29.3.1943. His body was later recovered in late 1943 when Australian troops captured Salamaua. ...William Ellis NEWTON VC enlisted in the RAAF no 250748 on 5.2.1940 age 20 years 8 months. Serving with No 22Sqd RAAF flying Boston Bombers he arrived in New Guinea in May 1942. Along the way he was promoted to Pilot Officer, Flying Officer and then Flight Lieutenant. On the 18.3 1943 during a low level attack on Japanese positions around Salamaua he hit his target but his plane was hit several times by flack and burst into flames but he landed it in the sea. Sgt B.G Eastwood No 13055 a crew member went down with the aircraft. Newton and Flt Sgt J Lyon No 401706 swam to shore but were captured by the Japanese. Newton was taken to Lae for interrogation and then returned to Salamaua and was executed by decapitation and his body thrown in bomb crater on 29.3.1943. His body was later recovered in late 1943 when Australian troops captured Salamaua. Lyons was executed at Lae by bayoneting in the back. The award to Newton of the Victoria Cross was for low level attacks in the Salamaua area which inflicted heavy losses on Japanese installations one of which his plane was hit by flak heavily and he successfully flew it back some 180 miles and landed. The award also included the attack for which he was executed. Newtons and war crimes records are some 800 plus pages with photos, statements etc. Refer also Cat No 3456.Black & white photo, head & shoulders portrait of F/LT W. E. NEWTON V.C. He is wearing a peaked cap, collar & tie with RAAF wings badge on L side of jacket. In a green / gold wooden frame with glass front. Fawn paper backing. Gold plaque in middle beneath photo.Engraved on plaque: “F/LT W. E. NEWTON V.C. 22 Squadron RAAF”photograph, raaf, vc, newton -
 Red Cliffs Military Museum
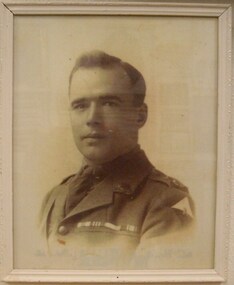
Framed Photograph, Lieutenant W.T. West, MM, MC, (estimated)
... Citation: During the attack on Montebrehain, east of Peronne on 5th Ocober, 1918, Lt West acted in a skilful and courageous manner when his platoon was held up by an enemy strong post, he rushed forward alone under heavy machine gun fire, threw a bomb at the post and captured the gun and crew of three. ...Citation: During the attack on Montebrehain, east of Peronne on 5th Ocober, 1918, Lt West acted in a skilful and courageous manner when his platoon was held up by an enemy strong post, he rushed forward alone under heavy machine gun fire, threw a bomb at the post and captured the gun and crew of three. ...1789 Corporal Walter Thomas West was recommended for Military Medal 13th May 1917. Citation: For conspicous gallantry in action at the Hindenburg Line on 3rd May 1917. When he attacked with few bob=mbers an enemy post using MG fire against the right brigade. Having taken up the post he moved down the first trench and with 6 men engaged an enemy party who were resisting the 2nd attack of the tight brigade. Recommended by GOC 6th Australian Infantry Brigade. Lieutenant Walter Thomas West was recommended for MC 21st Ocrober 1918. Citation: During the attack on Montebrehain, east of Peronne on 5th Ocober, 1918, Lt West acted in a skilful and courageous manner when his platoon was held up by an enemy strong post, he rushed forward alone under heavy machine gun fire, threw a bomb at the post and captured the gun and crew of three. Later his flank was being held up by a strong post manned by the German guns in cemetary. Lt. West crawled round to the right and rushed the post. One ran he killed 3 of the nemy and took 3 prisoners. The men in the other post ran off with their gun and so escaped. Throughout the day he led his platoon with skil and when the company commander was killed assumed charge and supervised the consolidation of the line with great activity and courage. A framed black and white photgraph of Lieutenant West in dress uniform, showing Unit Insignia (colour Flash) service ribbons.Photo clearly shows unit insignia, ranks pips, service and valour ribbons.of, 1919, australia, 1917, ww1, commonwealth, gazette, london, walter, thomas, west, mm, mc, page, 2, collection, july, w t west, gazettte, 9, location, 6839, 8th, nov, 2937, position, 104, april, 4337, 12, 23, 1163, 45 -
 Australian Commando Association - Victoria
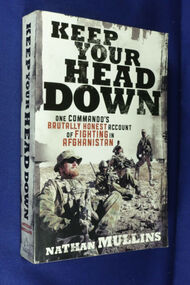
Book, Keep Your Head Down by Nathan Mullins
... They lived with the daily threat of roadside bombs, ambush and firefights, where survival meant learning to read the signs to determine friend from foe. ...They lived with the daily threat of roadside bombs, ambush and firefights, where survival meant learning to read the signs to determine friend from foe. ...Nathan Mullins deployed to Afghanistan as a Special Forces Commando. Spearheading Australia's Special Operations troops, he and other Australians like him sought the Taliban in the valleys and hills of Uruzgan through Afghanistan's harsh winter while at the same time attempting to bring a human face to the villagers caught in the middle of the fighting. They lived with the daily threat of roadside bombs, ambush and firefights, where survival meant learning to read the signs to determine friend from foe. And they did what they could to relieve the awful effects of war on the men, women and children of the civilian population caught in the crossfire. But these were not your regular soldiers. Sure, they had trained for years for the role but these were citizen soldiers, reservists who had put aside their usual jobs as salesmen, farmers, scientists, lawyers and students to fight Australia's 'war on terror'. Keep Your Head Down is a brutally honest, first-hand account that takes you into the centre of the action and asks some tough questions. What is Australia doing in Afghanistan? What would winning that war look like? What makes a man leave his family to go to war when he doesn't have to? Can there be such a thing as a just war? Nathan Mullins isn't a typical Special Forces soldier. In his day job he is the International Program Manager for Australian Aid International, a humanitarian organisation that responds to disasters and emergencies around the globe.soft cover bookaustralian special forces, australian commando, afghanistan -
 Federation University Historical Collection
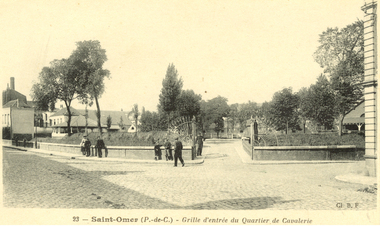
Postcards - black and white, Saint-Omex, France, c1916
... He had lost an artificial leg when bailing out, and the RAF dropped him another one during a bombing raid.(http://en.wikipedia.org/wiki/Saint-Omer, accessed 14/07/2014)...He had lost an artificial leg when bailing out, and the RAF dropped him another one during a bombing raid.(http://en.wikipedia.org/wiki/Saint-Omer, accessed 14/07/2014) Chatham-Holmes Family Collection Saint Omer france WW1 postcard Four postcards of Saint Omer in France Saint-Omex, France Postcards - black and white ...During the First World War on 8 October 1914, the British Royal Flying Corps (RFC) arrived in Saint-Omer and a headquarters was established at the aerodrome next to the local race course. For the following four years, Saint-Omer was a focal point for all RFC operations in the field. Although most squadrons only used Saint-Omer as a transit camp before moving on to other locations, the base grew in importance as it increased its logistic support to the RFC. Many Royal Air Force squadrons can trace their roots to formation at Saint-Omer during this period. Among which are No. IX Squadron RAF which was formed at Saint-Omer, 14 December 1914 and No. 16 Squadron RAF which was formed on 10 February 1915. (http://en.wikipedia.org/wiki/Saint-Omer, accessed 14/07/2014) During World War II, the Luftwaffe used the airfield. When the RAF's legless Battle of Britain ace, Douglas Bader, parachuted from his Spitfire during an aerial battle over France, he was initially treated at a Luftwaffe hospital at Saint Omer. He had lost an artificial leg when bailing out, and the RAF dropped him another one during a bombing raid.(http://en.wikipedia.org/wiki/Saint-Omer, accessed 14/07/2014)Four postcards of Saint Omer in Francechatham-holmes family collection, saint omer, france, ww1, postcard -
 Melbourne Legacy
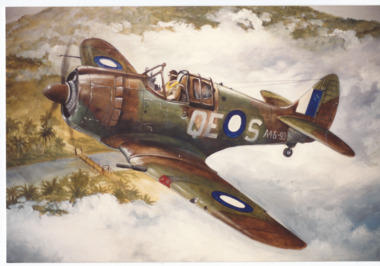
Photograph - Photo, Launch of Legacy Week - 3rd September 1990 - Aviation art exhibition, 1990
... Each painting had been extensively researched to capture a specific moment in the World War 2 combat career of various pilots, flight officers or bomb-aimers. His aim was to honour the fine efforts of these great individuals. ...Each painting had been extensively researched to capture a specific moment in the World War 2 combat career of various pilots, flight officers or bomb-aimers. His aim was to honour the fine efforts of these great individuals. ...Launch of Legacy Week in 1990 included an exhibition of Aviation Art at Legacy House. Paintings were by Frank Harding of Renmark, South Australia. A newspaper article published on 23 August 1990, mentions that Frank Harding had painted over 50 paintings of aircraft flown by Australians and published a book of the images. It was called 'They flew for the King'. Each painting had been extensively researched to capture a specific moment in the World War 2 combat career of various pilots, flight officers or bomb-aimers. His aim was to honour the fine efforts of these great individuals. Unfortunately the artist died a few weeks after the exhibition and launch of his book. Guests included Bud Tingwell, who flew for the RAAF in World War 2 and other RAAF personnel. It appears to have included a heritage display from the Royal Australian Air Force Museum at the same time. The article is at 01522 also see media release at 01521, more photos of the paintings and guests are in 01524. In 1990 the slogan was "Lest YOU forget" with an image of the statue of Simpson and his donkey rather than a personality. The main time of year for fundraising is September when Legacy holds 'Badge Week'. Often there is a celebrity who gives his or her time as 'Personality of the Year'. Was in a scrapbook of photos spanning 1987 to 1991.An example of an art exhibition being held at Legacy House to promote Legacy during Legacy week in 1990.Colour photo x 6 of an art exhibition for Legacy Week in 1990.legacy week, paintings, planes, warplanes, promotion -
 Melbourne Legacy
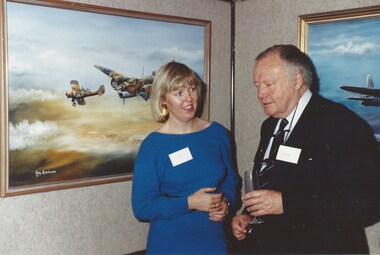
Photograph - Photo, Launch of Legacy Week - 3rd September 1990 - Aviation art exhibition, 1990
... Each painting had been extensively researched to capture a specific moment in the World War 2 combat career of various pilots, flight officers or bomb-aimers. His aim was to honour the fine efforts of these great individuals. ...Each painting had been extensively researched to capture a specific moment in the World War 2 combat career of various pilots, flight officers or bomb-aimers. His aim was to honour the fine efforts of these great individuals. ...Launch of Legacy Week in 1990 included an exhibition of Aviation Art at Legacy House. Paintings were by Frank Harding of Renmark, South Australia. A newspaper article published on 23 August 1990, mentions that Frank Harding had painted over 50 paintings of aircraft flown by Australians and published a book of the images. It was called 'They flew for the King'. Each painting had been extensively researched to capture a specific moment in the World War 2 combat career of various pilots, flight officers or bomb-aimers. His aim was to honour the fine efforts of these great individuals. Guests included Bud Tingwell, who flew for the RAAF in World War 2 and other RAAF personnel. It appears to have included a heritage display from the Royal Australian Air Force Museum at the same time. Unfortunately the artist died a few weeks after the exhibition and launch of his book. The article is at 01522 also see media release at 01521, more photos of the paintings and guests are in 01523. In 1990 the slogan was "Lest YOU forget" with an image of the statue of Simpson and his donkey rather than a personality. The main time of year for fundraising is September when Legacy holds 'Badge Week'. Often there is a celebrity who gives his or her time as 'Personality of the Year'. Was in a scrapbook of photos spanning 1987 to 1991.An example of an art exhibition being held at Legacy House to promote Legacy during Legacy week in 1990.Colour photo x 9 of an art exhibition for Legacy Week in 1990.legacy week, painting, promotion, planes, warplanes -
 Bendigo Military Museum
Newspaper - NEWSPAPER ARTICLE 2002, original 2002
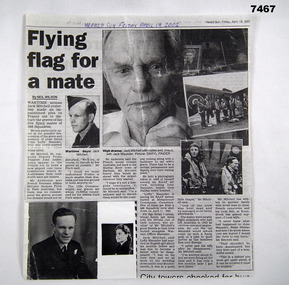
... John Neville Keys No 426112, Bomb Aimer, enlisted 23.5.1942 age 19 years 6 months. ...John Neville Keys No 426112, Bomb Aimer, enlisted 23.5.1942 age 19 years 6 months. ...Item in the collection of Gilbert John Mitchell (Jack) Pre WW2 Jack had service for a brief time in the 38th BN Bendigo No 447203. He enlisted in the RAAF on 31.1.1942 No 410686 age 20 years. Embarked for England on 6.1.1943 for further Training. Posted to 166 Sqd RAF Wellington Bombers then posted Operational to No 466 Sqd RAAF flying Halifax Heavy Bombers. On 18.7.1944 he and his crew in MZ313 were on a mission to attack Railway Sidings at Vaires. This was new Aircraft on 11.6.1944. They were hit by Anti Aircraft shells exploding in the fuselage. The Bomb Aimer Flt/Lt Finley advised the crew to leave by parachute as it was possible the craft could disintegrate. The Pilot Officer R.J. Evans decided to try and get the aircraft back to England, once there they abandoned the craft which was seen to disintegrate in mid air. Both were awarded the DFC. Jack was taken POW and sent to Stalag Luft 1 near Barth on the Baltic Sea for Allied Airmen. The Crew were; Roger John Evans No 410202, enlisted 5.12.1941 age 31 years. Peter Hamiliton Finley No 412294, enlisted 22.6.1941 age 22 years. L.C. Abbott, British/Allied. G.J. Mitchell, POW. Keith Mossman Tranent POW, No 426402, enlisted 20.6.1942 age 19 years 2 months. J.P.T. Finn RAF (Paddy) T.W. Wild British/Allied. On 30.4.1945 The Germans vacated the Camp Jack was in and 2 days later the Russians released them and he was placed in a British Hospital weighing 6 stone. He arrived home in Sept 1945. He stayed in the RAAF No 033130 and served in No 35 Sqd flying VIPs. He was in the Berlin Airlift 1948 - 1949, he also went on exchange with the RAF and flew in No's 24 & 511 Sqd's one a transport the other VIP transport. He was discharged from the RAAF with the rank of Flt/Lt on 6.7.1956 in No 11 Sqd. "Maunder and Sheean". In the article Jacks says that Lofty Maunder always had a joke etc when near the target to settle everyone down. The crew of Halifax LV875 were shot down by a Night Fighter near the target "Terngier" north of Paris 0n 11.4.1944. There was 157 Halifax's on the raid with 10 being lost. The Crew were; John Henry Maunder No 412562, Navigator, enlisted 19.7.1941 age 19 years 10 months. Brian Leo Sheean, No 409855, Wireless Operator, enlisted 1.10.1941 age 18 years. Research shows there were at least 3 more of the Crew KIA. Cecil John Bond No 420433, Pilot, enlisted 8.11.1941 age 19 years 11 months. John Neville Keys No 426112, Bomb Aimer, enlisted 23.5.1942 age 19 years 6 months. Clifford Young Warren No 427047, Rear Gunner, enlisted 26.4.1942 age 19 years 3 months. J.A. White, Flight Engineer, British/Allied. D.K. Messenger, Mid Upper Gunner, British/Allied. Newspaper article Herald Sun 19.4.2002, copy. Article re Jack Mitchell. The article has 6 photo insets 3 of Jack, 2 show Airmen beside an aircraft. The one with 2 Aircrew is "Lofty" Maunder and Jack. The article is mostly about "Maunder and Brian Sheean" mates of Jack. The inset photo of a women in uniform is believed to be "Maunders" English wife who he had married previously. Maunder and Sheean were KIA. "FLY THE FLAG FOR A MATE"newspaper, article, 466 sqd -
 City of Moorabbin Historical Society (Operating the Box Cottage Museum)
Manufactured objects, Cigarette lighter metal, 20thC
... In 1939-1940 the company moved its administration to the Beney Lighter premises in Beckenham after the Head Office at Trinity Square along with many company records were destroyed in a 'doodlebug' flying bomb attack. Beney Ltd. continued producing lighters at least through the late 1954. ...In 1939-1940 the company moved its administration to the Beney Lighter premises in Beckenham after the Head Office at Trinity Square along with many company records were destroyed in a 'doodlebug' flying bomb attack. Beney Ltd. continued producing lighters at least through the late 1954. tobacco cigarettes cigarette lighters fuels moorabbin cheltenham bentleigh early settlers beney pty ltd beckenham england base: BENEY / COMPANION / PATENT 568897 / BRITISH MADE A green metal cigarette lighter that used fuel and a striking action arm to produce a flame . ...A cigarette lighter is a portable device used to generate a flame. It consists of a metal or plastic container filled with a flammable fluid or pressurized liquid gas, a means of ignition, and some provision for extinguishing the flame. A spark is created by striking metal against a flint, or by pressing a button that compresses a piezoelectric crystal (piezo ignition), generating an electric arc. In naphtha lighters, the liquid is sufficiently volatile, and flammable vapour is present as soon as the top of the lighter is opened. Butane lighters combine the striking action with the opening of the valve to release gas. The spark ignites the flammable gas causing a flame to come out of the lighter which continues until the top is closed (naphtha type), The Beney Company was founded by Robert Ernest Beney of London, England. R. E. Beney invented and marketed the first Beney mechanical lighter in 1919. Beney also designed and manufactured numerous luxury lighters and striker boxes for Alfred Dunhill of London as well as Hermes of Paris. In 1938, Beckenham based Beney Lighters was acquired, adding utility lighters and precision tools to the company's (Winn & Coates) ever growing list of products. The biggest selling line manufactured by Beney was the Economic Gas Lighter which hung on the side of housewife's gas cookers and was also used for lighting Bunsen burners in laboratories. In 1939-1940 the company moved its administration to the Beney Lighter premises in Beckenham after the Head Office at Trinity Square along with many company records were destroyed in a 'doodlebug' flying bomb attack. Beney Ltd. continued producing lighters at least through the late 1954. A green metal cigarette lighter that used fuel and a striking action arm to produce a flame .base: BENEY / COMPANION / PATENT 568897 / BRITISH MADEtobacco, cigarettes, cigarette lighters, fuels, moorabbin, cheltenham, bentleigh, early settlers, beney pty ltd, beckenham england -
 City of Melbourne Libraries
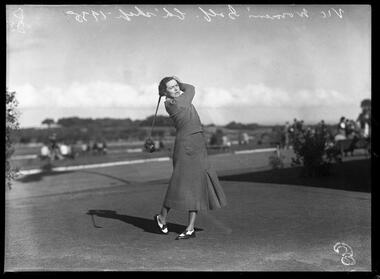
Photograph, Bull, Hugh Jones, 1897-1993, Miss Betty Sale
... Back in England, as a corporal, she worked during bombings in Plymouth, writing to her brother: “Bombs were dropping all around us, fires are raging, debris everywhere and huge holes around us. ...Back in England, as a corporal, she worked during bombings in Plymouth, writing to her brother: “Bombs were dropping all around us, fires are raging, debris everywhere and huge holes around us. ...Betty Sale (1905-1976) won the Tasmanian State Championship in 1934, 1935 and 1936. She also worked as a car saleswoman in Hobart. In 1939, London reported: “Betty Sale, pretty Tasmanian brunette, will soon leave England for Finland, where she will drive an ambulance behind the Mannerheim Line. With twenty-three English society girls, she volunteered for the job because she wanted to do something for the brave Finns.” Betty volunteered for First Aid Nursing Yeomanry Service (F.A.N.Y.), conveying refugees and casualties to hospitals by ambulance in Finland’s harsh weather. Back in England, as a corporal, she worked during bombings in Plymouth, writing to her brother: “Bombs were dropping all around us, fires are raging, debris everywhere and huge holes around us. When we had got all the live ones, we went and collected dead bodies.” Betty was awarded an MBE and the Winter War Medal for Civilians from Finland Government 1939-40. MCK142 Published The Age 29 August 1935 Featured in "Newsworthy: Melbourne in photographs 1933-1936" exhibition at East Melbourne Library, October to December 2023. Exhibition caption by project volunteer, Fiona Collyer. Photographer notations on slide: "Vic. Women's Golf Ch'ship 1935 B98" Published: The Age 29 August 1935 p. 11 Published title: SIX STATE CHAMPIONS IN NATIONAL GOLF CHAMPIONSHIP. Published caption: Six State champions for the first time in the history of women’s golf are competing in the matches for the Australian title. — 1. Miss B. Sale (Tas.). 2. Miss J. Hood-Hammond (N.S.W.). 3. Miss J. Gardiner (Qld,) 4. Miss K. Rymill (S.A.). 5. Mrs. O. J. Negus (W.A.). 6. Mrs. S. Morpeth (Vic.) RESEARCHER'S NOTE: The Age listed Golfer 1 as Miss B. Sale and Golfer 4 as Miss K. Rymill. We verified that these should in fact be the other way around: 1 is Miss K. Rymill, 4 is Miss B. Sale. Description: Action shot of woman driving golf ball Research by project volunteer, Fiona Collyer: MISS BETTY SALE Mrs Margaret Elizabeth Scott Rigg (1905-1976) MBE Betty Sale grew up in Hobart and attended St Michael’s Collegiate School. She was a champion Tasmania golfer and won the State Championship in 1934, 1935, 1936. Betty competed in the Australian Women’s Golf Championship at Royal Melbourne against the British Women’s Team in 1935. Betty worked as a car saleswoman at Robert Nettleford Pty Ltd at 113 Macquarie Street, Hobart. They were the agent for Austin, Buick, Chevrolet and Vauxhall. In April 1939, Betty sailed on the RMS Orford to London where she worked in sales for Henley’s, an exclusive motor sales firm. In November 1939 she volunteered for the Woman’s Transport Arm of the First Aid Nursing Yeomanry Service (F.A.N.Y.) and was part of the team delivering 10 ambulances to Finland, which had been invaded by the Soviet Union. Betty worked conveying refugees and military casualties to military hospitals, often over tracks with only sleigh marks to guide them. Despite contracting measles she continued to work tirelessly, often for 22-hour shifts. She was awarded the Finland Winter War medal 1939-1940 for civilians by Field-Marshall Mannerheim (later President of Finland). Betty was quoted in the Australian Women’s Weekly 17/1/1940: “I joined the ambulance corp for Finland because I was filled with admiration for the courage and determination of the Finns. I don’t think that there has ever been anything so dramatic in history as the manner in which Finland, a land of 4,000,000 people has resisted the aggression of the teeming millions of Russians.” After six months working in Finland, the FANYs found themselves held up unable to get aid from Britain to escape and they felt a burden on the Finns. Eventually money was sent privately from a neutral country and the 17 FANYs determined to get away. They set off from Helsinki with only the civilian clothes they were wearing and travelled by train and bus to a northern port where they boarded a cargo vessel. For a fortnight they did not change their clothes and slept under tarpaulins in the hatchway. The only choice of food was porridge or pea soup. After two weeks aboard the cargo vessel, a palatial liner approached the ship and in mid-ocean the FANYs were transhipped by rope ladders. The women enjoyed three course meals and other luxuries for three days before arriving back in England. Betty, now a corporal, worked for two years transporting civilian and military casualties during bombings in Plymouth. In a letter to her brother, Mr J Sale of Gerogery NSW, Betty wrote, “We have had a very lively time here as we have been blitzed for two nights. There is literally nothing of Plymouth left. We were out all the first night with the ambulance collecting casualties and have never seen such injuries. Bombs were dropping all around us, fires were raging, debris everywhere, and huge holes in the roads. When we had got all the live ones, we went and collected dead bodies. The people are marvellous.” “Next night, we had a worse blitz. We were not out so long but it was not a pleasant party. I didn’t know I was so brave but could not stand it too long. Mr Menzies was here for the second night’s blitz. We have adopted a homeless and hurt dog – a raid victim – and the poor fellow is completely exhausted.” In 1942, Betty worked in Algeria in charge of 100 specialists and technicians - the first servicewomen to arrive in North Africa. In 1945, she was awarded an MBE in recognition and on behalf of the work this unit was involved in. In 1945, Betty was promoted to Captain and posted to Australia to establish a Signal Station. In 1946, she married Lt-Col H. Henry O. Rigg of the Royal Artillery in Tasmania. The couple had first met in Algeria in 1943. The Australian press closely followed Betty’s wartime activities praising her courage, capability, driving and mechanical knowledge and of course Australian women’s hardiness. After the war, Betty lived in Sheffield, England with her husband, working as an office manager. She continued to play golf until her death aged 71 in 1976.Photographer notations on slide: "Vic. Women's Golf Ch'ship 1935 B98".golf, women golfers, royal melbourne golf club -
 Sunshine and District Historical Society Incorporated
Memorabilia - Sunshine Technical School Memorabilia - Story Book S.T.S. Story Book 1986 Class 9AD
... The Stabbing by Tracey Mills|Ghost Town by Marion Walker|PEPE The Pigeon Who Ruled Sunshine by Anthony Micallef|The Phone Call by Kaelene Knott|Calder Park Finals Drag Racing March 1986 by Michelle Chatzidimitriou|My Dog Corky by Nicolle Meyers|The Day We Went Motor Bike Riding by Shane Hynds|The Mystery by Donna Tatlow|Annual Camp by David Shilling|Forces Vengeance by Jeff Ward|Sunshine Tech Bombed by Claudia Rundel|Mystery 2 by Donna Tatlow|Amazon Jungle by Barry Howard|An Experience Of My Own by Rodger Greaves|Best Friends by Vicki Psomiadis|The Book And Me by Amanda Alldis|Deadley Mistake by Corey Havarc|The Gate Of Imagination by Rachel Masuglia|The Picnic by Dion Beasley|The Magic Seeds by Tracey McDonagh|The Drowing by Mark Herrick|The Day I Wagged School by Michael Sammut|The Magic Seeds by Tracey McDonagh|The Ghost That Never Spooked by Chris MacDonald|Amusement Park By Tracey McDonagh|Lost Treasure by Allen Carrick|Ghost Train by Nikkie Potter...Was part of the Sunshine Technical School Collection Sunshine Technical School Technical School The Stabbing by Tracey Mills|Ghost Town by Marion Walker|PEPE The Pigeon Who Ruled Sunshine by Anthony Micallef|The Phone Call by Kaelene Knott|Calder Park Finals Drag Racing March 1986 by Michelle Chatzidimitriou|My Dog Corky by Nicolle Meyers|The Day We Went Motor Bike Riding by Shane Hynds|The Mystery by Donna Tatlow|Annual Camp by David Shilling|Forces Vengeance by Jeff Ward|Sunshine Tech Bombed by Claudia Rundel|Mystery 2 by Donna Tatlow|Amazon Jungle by Barry Howard|An Experience Of My Own by Rodger Greaves|Best Friends by Vicki Psomiadis|The Book And Me by Amanda Alldis|Deadley Mistake by Corey Havarc|The Gate Of Imagination by Rachel Masuglia|The Picnic by Dion Beasley|The Magic Seeds by Tracey McDonagh|The Drowing by Mark Herrick|The Day I Wagged School by Michael Sammut|The Magic Seeds by Tracey McDonagh|The Ghost That Never Spooked by Chris MacDonald|Amusement Park By Tracey McDonagh|Lost Treasure by Allen Carrick|Ghost Train by Nikkie Potter A stapled document containg various student's short stories Memorabilia Sunshine Technical School Memorabilia - Story Book S.T.S. ...Was part of the Sunshine Technical School CollectionThe Stabbing by Tracey Mills|Ghost Town by Marion Walker|PEPE The Pigeon Who Ruled Sunshine by Anthony Micallef|The Phone Call by Kaelene Knott|Calder Park Finals Drag Racing March 1986 by Michelle Chatzidimitriou|My Dog Corky by Nicolle Meyers|The Day We Went Motor Bike Riding by Shane Hynds|The Mystery by Donna Tatlow|Annual Camp by David Shilling|Forces Vengeance by Jeff Ward|Sunshine Tech Bombed by Claudia Rundel|Mystery 2 by Donna Tatlow|Amazon Jungle by Barry Howard|An Experience Of My Own by Rodger Greaves|Best Friends by Vicki Psomiadis|The Book And Me by Amanda Alldis|Deadley Mistake by Corey Havarc|The Gate Of Imagination by Rachel Masuglia|The Picnic by Dion Beasley|The Magic Seeds by Tracey McDonagh|The Drowing by Mark Herrick|The Day I Wagged School by Michael Sammut|The Magic Seeds by Tracey McDonagh|The Ghost That Never Spooked by Chris MacDonald|Amusement Park By Tracey McDonagh|Lost Treasure by Allen Carrick|Ghost Train by Nikkie Pottersunshine technical school, technical school -
 Bendigo Military Museum
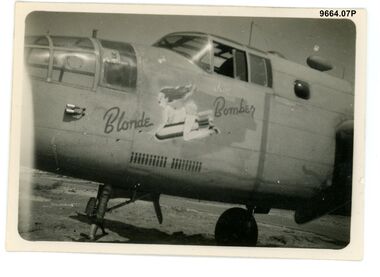
Photograph - 3 SQUADRON RAAF PHOTOGRAPHIC COLLECTION, Allied aircraft from other squadrons
... The full set numbering and description is as follows: 9664.01P Avro Anson Africa.jpg 9664.02P B 17 Italy 2.jpg 9664.03P B17 Italy.jpg 9664.04P B17 Lil Joan 346 Bombr Squadron 99th bomb group Italy.jpg 9664.05P B17.jpg 9664.06P B24 Foggia Italy.jpg 9664.07P B24 Liberator Italy.jpg 9664.08P B24 Transport.jpg 9664.09P B25 Mitchell 1943.jpg 9664.10P B25 Mitchell Italy.jpg 9664.11P Beaufighter with nose radar.jpg 9664.12P Beaufighter.jpg 9664.13P Beaufort.jpg 9664.14P Bristol Blenheim.jpg 9664.15P Bristol Bombay 1st Ambulance Air Unit Africa.jpg 9664.16P Crashed Havoc.jpg 9664.17P Crashed Liberator Italy.jpg 9664.18P Crashed Spitfire.jpg 9664.19P DeHavilland DH86 .jpg 9664.20P Formation of Baltimores at Mtapin Malapis.jpg 9664.21P Havoc.jpg 9664.22P Hawker Fury Africa.jpg 9664.23P Lightening.jpg 9664.24P Lockheed Hudson.jpg 9664.25P Mosquito.jpg 9664.26P P38 Lightning Italy.jpg 9664.27P P47D Thunderbolt.jpg 9664.28P P47G Thunderbolt .jpg 9664.29P Shanghai Lil insignia on Mitchell Loggia Italy 1943.jpg 9664.30P Vultee Vengeance .jpg 9664.31P Walrus.jpg 9664.32P Wellington.jpg 9664.33P Wimpy.jpg 9664.34P Harrow.jpg...The full set numbering and description is as follows: 9664.01P Avro Anson Africa.jpg 9664.02P B 17 Italy 2.jpg 9664.03P B17 Italy.jpg 9664.04P B17 Lil Joan 346 Bombr Squadron 99th bomb group Italy.jpg 9664.05P B17.jpg 9664.06P B24 Foggia Italy.jpg 9664.07P B24 Liberator Italy.jpg 9664.08P B24 Transport.jpg 9664.09P B25 Mitchell 1943.jpg 9664.10P B25 Mitchell Italy.jpg 9664.11P Beaufighter with nose radar.jpg 9664.12P Beaufighter.jpg 9664.13P Beaufort.jpg 9664.14P Bristol Blenheim.jpg 9664.15P Bristol Bombay 1st Ambulance Air Unit Africa.jpg 9664.16P Crashed Havoc.jpg 9664.17P Crashed Liberator Italy.jpg 9664.18P Crashed Spitfire.jpg 9664.19P DeHavilland DH86 .jpg 9664.20P Formation of Baltimores at Mtapin Malapis.jpg 9664.21P Havoc.jpg 9664.22P Hawker Fury Africa.jpg 9664.23P Lightening.jpg 9664.24P Lockheed Hudson.jpg 9664.25P Mosquito.jpg 9664.26P P38 Lightning Italy.jpg 9664.27P P47D Thunderbolt.jpg 9664.28P P47G Thunderbolt .jpg 9664.29P Shanghai Lil insignia on Mitchell Loggia Italy 1943.jpg 9664.30P Vultee Vengeance .jpg 9664.31P Walrus.jpg 9664.32P Wellington.jpg 9664.33P Wimpy.jpg 9664.34P Harrow.jpg Allied aircraft from other squadrons Photograph 3 SQUADRON RAAF PHOTOGRAPHIC COLLECTION ...The seven photographs shown above are part of an anonymous donation, by a relative, of the photographic collection of a former member of No. 3 Squadron RAAF 1939-1945. They cover the African, Sicily and Italian campaigns. The entire collection comprises 175 photographs. The collection has been divided into sets depicting various aspects of 3 Squadron operations. The above images are representative of this particular set of 34 photographs, featuring allied aircraft from British and American squadrons that that shared airfields with 3 Squadron in Africa and Italy. Of note are the photographs from Foggia in Italy, home to dozens of bomber and fighter squadrons. The museum has digitized the complete set.Set of 34 black and white photographs featuring Allied aircraft from other squadrons, Australian, British and American. The full set numbering and description is as follows: 9664.01P Avro Anson Africa.jpg 9664.02P B 17 Italy 2.jpg 9664.03P B17 Italy.jpg 9664.04P B17 Lil Joan 346 Bombr Squadron 99th bomb group Italy.jpg 9664.05P B17.jpg 9664.06P B24 Foggia Italy.jpg 9664.07P B24 Liberator Italy.jpg 9664.08P B24 Transport.jpg 9664.09P B25 Mitchell 1943.jpg 9664.10P B25 Mitchell Italy.jpg 9664.11P Beaufighter with nose radar.jpg 9664.12P Beaufighter.jpg 9664.13P Beaufort.jpg 9664.14P Bristol Blenheim.jpg 9664.15P Bristol Bombay 1st Ambulance Air Unit Africa.jpg 9664.16P Crashed Havoc.jpg 9664.17P Crashed Liberator Italy.jpg 9664.18P Crashed Spitfire.jpg 9664.19P DeHavilland DH86 .jpg 9664.20P Formation of Baltimores at Mtapin Malapis.jpg 9664.21P Havoc.jpg 9664.22P Hawker Fury Africa.jpg 9664.23P Lightening.jpg 9664.24P Lockheed Hudson.jpg 9664.25P Mosquito.jpg 9664.26P P38 Lightning Italy.jpg 9664.27P P47D Thunderbolt.jpg 9664.28P P47G Thunderbolt .jpg 9664.29P Shanghai Lil insignia on Mitchell Loggia Italy 1943.jpg 9664.30P Vultee Vengeance .jpg 9664.31P Walrus.jpg 9664.32P Wellington.jpg 9664.33P Wimpy.jpg 9664.34P Harrow.jpgno. 3 squadron raaf 1939-1945, african campaign ww2, italian campaign ww2, raf squadrons, usaaf squadrons -
 Victorian Interpretive Projects Inc.
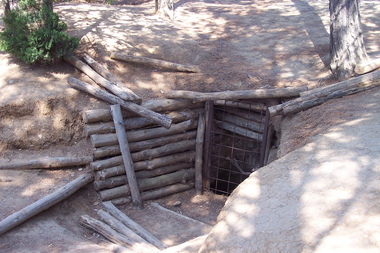
Photograph - Colour, Gaida Stevens, World War One Tunnel Entrance, Lone Pine, Gallipoli, 2015, 2015
... The troops paused on reaching the Turkish trenches, finding that many were covered by timber roofs. Some fired, bombed and bayoneted from above, some found their way inside and others ran on past to the open communications and support trenches behind. ...The troops paused on reaching the Turkish trenches, finding that many were covered by timber roofs. Some fired, bombed and bayoneted from above, some found their way inside and others ran on past to the open communications and support trenches behind. ...Lone Pine was an action that featured one of the most famous assaults of the Gallipoli campaign. The attack was planned as a diversion for the Australian and New Zealand units that were to breakout from the Anzac perimeter by capturing the heights of Chunuk Bair and Hill 971. At 5.30 pm on 6 August 1915, the Australian artillery barrage lifted and from concealed trenches in no man’s land the 1st Australian Brigade charged towards the Turkish trenches. The troops paused on reaching the Turkish trenches, finding that many were covered by timber roofs. Some fired, bombed and bayoneted from above, some found their way inside and others ran on past to the open communications and support trenches behind. Others advanced as far as "the Cup" which was where Turkish support units were located and from where the Turks counter-attacked. By nightfall, most of the enemy front line was in Australian hands and outposts had been established in former Turkish communication trenches. The Australian Engineers dug a safe passage across no man’s land so that reinforcements could enter the captured positions without being exposed to Turkish fire. Having captured the Turkish trenches, the Australians now tried to hold what they had taken while the Turks desperately and determinedly tried to throw the Australians out. From nightfall on 6 August until the night of 9 August a fierce battle ensued underground in the complex maze of Turkish tunnels. The Australians succeeded in drawing the whole of the immediate Turkish reserve. Six Australian battalions suffered nearly 2,300 killed and wounded at Lone Pine. Seven Australians were awarded the Victoria Cross, the highest number ever awarded to an Australian division for one action.(http://www.awmlondon.gov.au/battles/lone-pine)Entrance to a tunnel at Lone Pine, Gallipoli. gallipoli, world war one, tunnel, mmm -
 Flagstaff Hill Maritime Museum and Village
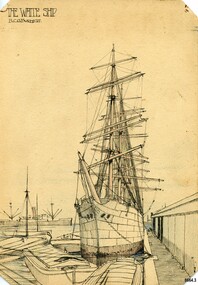
Artwork, other - Pen and Wash Painting, Beni Carr Glyn Burnett, The White Ship, circa 1933
... He went on to design a series of houses for senior public servants and military personnel which became very popular as they were specifically designed for the tropics - incorporating louvres, high ceilings and good ventilation. When Darwin was bombed in February 1942, he was evacuated to Alice Springs where he continued to work as an architect. ...He went on to design a series of houses for senior public servants and military personnel which became very popular as they were specifically designed for the tropics - incorporating louvres, high ceilings and good ventilation. When Darwin was bombed in February 1942, he was evacuated to Alice Springs where he continued to work as an architect. ...Beni Carr Glyn Burnett (also known as B. C. G. Burnett or Beni Burnett) was born in 1889 to missionary parents in Mongolia. When he was 15 years old he began training as an architect with a firm in Shanghai. He worked in Singapore, Japan and China before moving to Australia around 1933. In 1937 he was appointed as the Commonwealth principal architect in the Northern Territory. He went on to design a series of houses for senior public servants and military personnel which became very popular as they were specifically designed for the tropics - incorporating louvres, high ceilings and good ventilation. When Darwin was bombed in February 1942, he was evacuated to Alice Springs where he continued to work as an architect. He also became a Magistrate and Coroner in Alice Springs. In later life he was well known for sketching clientele in public bars. He died in 1955. Beni Burnett was living in Sydney in 1933 when he produced these three artworks. There were several photography firms operating in Sydney at this time who specialised in photographing ships and the shipping trade (e.g. Samuel J. Hood and William James Hall) and whose photographs were used by artists to produce ship portraits. Both of these photographers took photographs of the two ships in B. C. G. Burnett's watercolours This ship depicted by B. C. G. Burnett in his pen and wash sketch labelled "The White Ship" exactly matches a photograph pasted into his personal scrapbook which is in the "Library and Archives N. T.". The name of the ship is unknown and B. C. G. Burnett may have taken some artistic licence with the colouring as in the original photograph, the ship had a dark hull.This artwork (one of a set of three small artworks) is significant as an example of shipping (particularly the use of sailing ships) that were still being used as late as the 1930's in Australia. It is also important as its creator (B. C. G. Burnett) went on to become a well-known public figure in the Northern Territory in the late 1930's due to his innovative approach to designing homes for the tropical climate.An ink sketch of an unknown sailing ship moored to a dock. There are several small boats tied up near the sailing ship and a large steel freighter can be seen in the background. There is a faint wash of colour on parts of the sketch - the bottom of the ship, the masts and booms and the water at the end of the pier. The title (The White Ship) and the artist's name (B. C. G. Burnett) are written in ink in the top left corner. The back of the sketch is black card with faint pencil marks (overwritten in red ink) that appear to read "1842 A". A page from an album belonging to Beni Burnett displays five black and white photos including three photographs of ships. The photograph on the bottom right is an exact match for the pen and wash drawing. front - "THE WHITE SHIP / B. C. G. BURNETT" back - difficult to read "1842 A"flagstaff hill maritime museum and village, warrnambool, great ocean road, sailing ships, ships, barque, magdalene vinnen, winterhude, beni carr glyn burnett, b. c. g. burnett, beni burnett, painting, watercolour painting, sketch, ink sketch, sydney harbour, architect, darwin, burnett house, photography, samuel j. hood, william james hall -
 Returned Nurses RSL Sub-branch
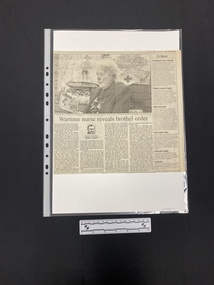
Newspaper - Newspaper clipping, The Age, Wartime nurse reveals brothel order, Saturday 12 August 1995
... Of the 65 nurses who fled from Singapore on the Vyner Brooke in February 1942, 54 made it to Banka Island after the ship was bombed, with 21 being massacred on a beach. ...Of the 65 nurses who fled from Singapore on the Vyner Brooke in February 1942, 54 made it to Banka Island after the ship was bombed, with 21 being massacred on a beach. ...Main story Mrs Wilma Young (nee Oram) is speaking for the first time publicly about certain happenings during World War Two, when she and other Australian Nurses were held as POWs in Sumatra. Of the 65 nurses who fled from Singapore on the Vyner Brooke in February 1942, 54 made it to Banka Island after the ship was bombed, with 21 being massacred on a beach. Over the next three years the remaining nurses were imprisonesd by the Japanese in a series of camps in Sumatra and on Banka Island, before being liberated. The group of surviving nurses had not spoken of certain events publicly before, but at 78 Mrs Wilma Young has decided to. The Japanese tried to force the nurses into participating in a makeshift brothel, or 'club' as the Japanese called it. The instructions were for four nurses to go to the 'club', but instead 28 went. They made themselves as horrible as they could, and made use of their time there by stealing sugar, toilet paper and anything else they could. Eventually four women were pressured into staying behind, but they were able to hold out against the Japanese. Eventually the Japanese gave up on this idea. The Japanese' treatment of the the nurses, as well as the other women and children in the camp was brutal. Punishments could include being made to stand out in the punishing sun for hours without a hat, or being slapped on each side of the face, hard enough to be knocked over. The daily food rations consisted of a cup of rice, sometimes supplemented palm oil, rotten vegetables or similar. Daily work for the nurses included caring for the sick prisoners, rarely with medicinal aid. In brief stories do not appear relevantA large newspaper clipping consisting of a large black and white photo with a story of four columns of text underneath, with a column of brief stories to the right. The black and photo features an older woman looking at a photo of a young woman in uniform. The story is written by John Lahey.wwii, ww2, 13th australian general hospital, major gideon jacobs, royal marines, indonesians, dutch -
 Wodonga & District Historical Society Inc
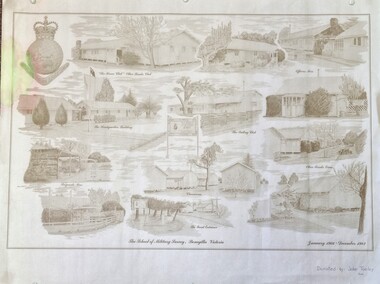
Work on paper - Sketch - The School of Military Survey, Bonegilla
... It provided training for small arms instructors, signallers, transport workers, bomb disposal and gas warfare personnel. ...It provided training for small arms instructors, signallers, transport workers, bomb disposal and gas warfare personnel. ...Bonegilla operated as an army base from September 1940 and by 1943 was expanded to 848 buildings, including a general hospital. It provided training for small arms instructors, signallers, transport workers, bomb disposal and gas warfare personnel. In a response to the need to house the growing number of displaced persons coming to Australia, the Bonegilla Reception and Training Centre began operating in 1947. For some time it was a shared facility but the Army withdrew temporarily from Bonegilla in 1949, whilst still retaining ownership of the site. From 1949-65 Bonegilla Reception and Training Centre operated without a military presence. However, in the late 1960s and Australia’s commitments to the Vietnam War and pressed by the need to find accommodation to train men, especially National Servicemen, the Army negotiated with the Department of Immigration to take over several blocks at Bonegilla in 1965. Thirty-five huts were acquired by the Royal Australian Army Ordnance Corps as a Recruit Training Centre in which National Servicemen and recruits could attend 10-week ordnance courses. Shortly afterwards additional huts were acquired by the School of Military Survey, which established field-survey practical training areas and special astronomical observation sites as it began conducting courses in surveying. Instructors and trainees co-located at Bonegilla with migrant reception centre. In 1971 the Reception Centre closed and the site reverted to the Army. Progressively after 1971 the Army undertook a major site redevelopment with the construction of Latchford Barracks as the Army Apprentice School. Later Latchford Barracks was redeveloped into part of the Army Logistic Training Centre. Block 19 of the Mirant Reception Centre later became the Bonegilla Migrant Experience Heritage Park.This item depicts a heritage listed historical site located in the Wodonga district.A large poster size representation of the variety of buildings at Bonegilla, Victoria when it served as the location for the Royal Australian School of Military Survey. The insignia of the Royal Australian Survey Corps is featured in the top left hand corner.Top left corner: Insignia of the Royal Australian Survey Corps At bottom of sketches: "The School of Military Survey, Bonegilla Victoria / January 1966 - December 1982migrant reception centre bonegilla, army at bonegilla, australian military -
 Federation University Historical Collection
Book - Scrap Book, Ballarat School of Mines Scrap Book, 1954-1957, 1954-1957
... Reiter 1956 - Pittong Mine 1956 - Atom Bombs and rain 1956 - Ballarat Gaol and the Ballarat School of MInes 1956 - William Paterson and A.W. ...Reiter 1956 - Pittong Mine 1956 - Atom Bombs and rain 1956 - Ballarat Gaol and the Ballarat School of MInes 1956 - William Paterson and A.W. ...The Ballarat School of Mines was the first school of mines in AustraliaA scrapbook of news clippings relating to the Ballarat School of MInes, including: 1954 - Barry Singleton 1954 - Neville Bunning 1954 - Victor Greenhalgh and his sculpture of King George V 1954 - Road Deviation in Hickman Street near White Flat 1954 - John Skuka naturalisation 1954 - Fire Danger in Vale Park 1954 - retirement of William J. Paterson from the staff of the Ballarat Junior Technical School 1954 - First pottery exhibition, featuring local clays. 1954 - New Technical school start in Ballarat North 1955 - Removal of caretaker's Cottage 1955 - Air Training Corps Cadets 1955 - Fluoridation 1955 - I.G. Witcher 1955 - Graham Willey, football 1955 - Image of L. Wilson, head teacher of the Ballarat North Technical School 1955 - Ballarat Girls' Technical School takes shape at White Flat. 1955 - Ballarat Junior Technical School Pine Plantation at Nerrina 1955 - Lake water test by W.G. Cornell 1955 - John Rowell 1956 - Geoffrey Mainwarring painting Lieutenant F.A. Reiter 1956 - Pittong Mine 1956 - Atom Bombs and rain 1956 - Ballarat Gaol and the Ballarat School of MInes 1956 - William Paterson and A.W. Steane of the Ballarat Junior Technical School 1957 - Ballarat "Junior Tech" Has a Bright History 1957 - Brelaz Scholarship for School of Mines (scrap book, ballarat school of mines, ballarat gaol, nerrina, caretaker's cottage, geoffrey mainwarring, gymnasium, noel flood, neville bunning, art lending library -
Federation University Historical Collection
Booklet, Ballarat School of Mines Students' Magazine, 1942, 1942
... . - By Patricia Allen Mr Wilkinson - Possibly By - William Rowe Kirk - By Patricia Allen Cactus - By Patricia Allen Spud - By Joy Martin Gus - By Kenneth Palmer Wilson - By Kenneth Palmer Cut out that sill dive bombing biddy! - By William Rowe Ben - By Kenneth Palmer George - By Patricia Allen Jim - By Patricia Allen Jackie - By Patricia Allen The Yarrawee Creek Ballarat - By William Rowe Man - By Kenneth Palmer Marion - By Patricia Allen Ruth - By Patricia Allen Screecm - By Patricia Allen Jack - By Kenneth Palmer Lino Cut - By Joyce Thompson Alphonso - By Kenneth Palmer Ken - By Kenneth Palmer Slushpuhp - By Joy Martin Round and Round - By Kenneth Palmer and Graham Lawry John D. - By Patricia Allen Ruth - By Patricia Allen Marie - By Patricia Allen Joan - By Patricia Allen Curly - By Patricia Allen Girl - By Kenneth Palmer Fireworks - By Kenneth Palmer Geek - By Kenneth Palmer Marj - By Kenneth Palmer June - By Patricia Allen Joan - By Kenneth Palmer Betty - By Patricia Allen Lois - By Patricia Allen Val - By Margaret Dark Fatty - By Kenneth Palmer John - By Margaret Dark Harold - By Patricia Allen Dick & Tig - By Kenneth Palmer Evans - By Kenneth Palmer Max - By Patricia Allen & Marian Peirce Pro - By Kenneth Palmer .... - By Patricia Allen Mr Wilkinson - Possibly By - William Rowe Kirk - By Patricia Allen Cactus - By Patricia Allen Spud - By Joy Martin Gus - By Kenneth Palmer Wilson - By Kenneth Palmer Cut out that sill dive bombing biddy! - By William Rowe Ben - By Kenneth Palmer George - By Patricia Allen Jim - By Patricia Allen Jackie - By Patricia Allen The Yarrawee Creek Ballarat - By William Rowe Man - By Kenneth Palmer Marion - By Patricia Allen Ruth - By Patricia Allen Screecm - By Patricia Allen Jack - By Kenneth Palmer Lino Cut - By Joyce Thompson Alphonso - By Kenneth Palmer Ken - By Kenneth Palmer Slushpuhp - By Joy Martin Round and Round - By Kenneth Palmer and Graham Lawry John D. - By Patricia Allen Ruth - By Patricia Allen Marie - By Patricia Allen Joan - By Patricia Allen Curly - By Patricia Allen Girl - By Kenneth Palmer Fireworks - By Kenneth Palmer Geek - By Kenneth Palmer Marj - By Kenneth Palmer June - By Patricia Allen Joan - By Kenneth Palmer Betty - By Patricia Allen Lois - By Patricia Allen Val - By Margaret Dark Fatty - By Kenneth Palmer John - By Margaret Dark Harold - By Patricia Allen Dick & Tig - By Kenneth Palmer Evans - By Kenneth Palmer Max - By Patricia Allen & Marian Peirce Pro - By Kenneth Palmer Ballarat School of Mines Students' Magazine, 1942 Booklet Booklet J.A. ...List of Full Course Students' 1942, Editorial, News, Obituary Ralph Taylor, Editor's Notes, Personal, The Literary Society, Fumes from the Lab, Arts & Crafts Gossip, Sport, Commercial Notes, The Junior Techs Black, green and gold soft covered magazine of 62 pages including advertisements. Artwork Mr J. - By Patricia Allen Mr Wilkinson - Possibly By - William Rowe Kirk - By Patricia Allen Cactus - By Patricia Allen Spud - By Joy Martin Gus - By Kenneth Palmer Wilson - By Kenneth Palmer Cut out that sill dive bombing biddy! - By William Rowe Ben - By Kenneth Palmer George - By Patricia Allen Jim - By Patricia Allen Jackie - By Patricia Allen The Yarrawee Creek Ballarat - By William Rowe Man - By Kenneth Palmer Marion - By Patricia Allen Ruth - By Patricia Allen Screecm - By Patricia Allen Jack - By Kenneth Palmer Lino Cut - By Joyce Thompson Alphonso - By Kenneth Palmer Ken - By Kenneth Palmer Slushpuhp - By Joy Martin Round and Round - By Kenneth Palmer and Graham Lawry John D. - By Patricia Allen Ruth - By Patricia Allen Marie - By Patricia Allen Joan - By Patricia Allen Curly - By Patricia Allen Girl - By Kenneth Palmer Fireworks - By Kenneth Palmer Geek - By Kenneth Palmer Marj - By Kenneth Palmer June - By Patricia Allen Joan - By Kenneth Palmer Betty - By Patricia Allen Lois - By Patricia Allen Val - By Margaret Dark Fatty - By Kenneth Palmer John - By Margaret Dark Harold - By Patricia Allen Dick & Tig - By Kenneth Palmer Evans - By Kenneth Palmer Max - By Patricia Allen & Marian Peirce Pro - By Kenneth Palmer ballarat school of mines, magazine, n. wilcock, patricia martin, m.w. lawrence, winsome hender, eveleigh wells, m. pescott, j. w. mcclure, marian peirce, k. r. wylie, francis duffy, d.h. eltringham, patricia allen, john h. calaby, margaret dark, graham lawry, joy martin, kevin mclachlan, p.c. kempe, mr mein, kenneth palmer, fay renfrey, dr pound, ralph (bill) taylor, f. barrow, m. martin, mr cornell, a.g. hale, i.d. mclachlan, w. r. whiteside, denise kidd, patricia goldsmith, t. evans, enid chambers, noreen webster, joan banes, miss king, mrs ilvena, patricia lane, c. w. rowe, joyce thompson, m. linklater, n. murray, g. lehmann, a.m. scott, a. w. wilson, e.j. poppins, w.j. lawry, p.d. fisher, r. mckenzie, m.a. richards, j.r. elliott, a. stanley white, r.g. mccahon, j. sandlant, beryl grinter, joan bryan, p. lawry, norma parkes, m. plover, k. b. stephens, j. m. hucker, p. george, n. f. reeve, c. f. moyihan, p. b. humphrey, e. h. adams, b. j. linklater, r. j. doull, j. waddingham, a. c. wilson, d. d. jones, f. w. wren, e. j. skilbeck, b. r. holloway, w. g. young, s. g. wallis, g. bergin, d. w. hart, h. packham, max coward, william rowe, ralph taylor obituary, bill taylor, f. barrow obituary, honey, ballarat school of mines combined sports association, yarrowee creek, gordon hale, a.w. steane, f.g. procter, gladstone procter -
 Ballarat Tramway Museum
Photograph - Digital image set of 6, 27/06/1971 12:00:00 AM
... Tram has a "Bliss Bombs" roof advertisement on the side, "Make Bliss, Not Love". .4 - slide FQ22 - Trams 26 and 41, crossing at Grey St Sebastopol Loop. ...Tram has a "Bliss Bombs" roof advertisement on the side, "Make Bliss, Not Love". .4 - slide FQ22 - Trams 26 and 41, crossing at Grey St Sebastopol Loop. ...Yields information about the SEC Ballarat trams in the months before the closure of the SEC Tramway system. Yields information about the streetscape.Set of six Digital images, scanned from slides by Graeme Cleak, scanning by Peter Winspur 9/2011. .1 - Slide FQ16 - No. 41, outbound at the south end of Drummond St south about to turn into Skipton St, with the destination of Bell St. .2 - slide FQ18 - No. 41, outbound to Sebastopol terminus, Albert St, just before the terminus itself. .3 - slide FQ21 - No. 41, inbound Albert St Sebastopol with the Sebastopol Town Hall in the background. Tram has a "Bliss Bombs" roof advertisement on the side, "Make Bliss, Not Love". .4 - slide FQ22 - Trams 26 and 41, crossing at Grey St Sebastopol Loop. No. 41 has destination of Grey St. .5 - slide FQ27 - Trams 27 and 37, crossing at the Hamilton Ave loop, No. 41 inbound - with destination of Victoria St at the Hamilton Ave loop with the "Stonehenge" fence house in the background. Sturt St West. .6 - slide FS29 - No. 37 at Grenville St, Sturt St intersection with Bridge St in the background. Tram has the destination of View Point and is entering the loop itself. The destination was no longer in use at the time of the photograph and would indicate that the destination has been arranged. In the background is the Woolworths Big W store and the Dickins Food Store. All photos taken on 27/6/1971. trams, tramways, drummond st sth, sebastopol, grey st, albert st, sturt st west, grenville st, tram 41, tram 26, tram 27, tram 37