Showing 825 items matching "green glass."
-
 Flagstaff Hill Maritime Museum and Village
Ticket
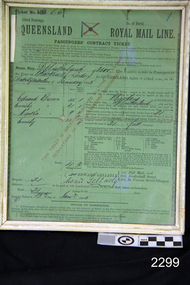
Ticket passengers contract from London to Brisbane. The ticket is green and has been placed under glass in a white frame.flagstaff hill, warrnambool, shipwrecked-coast, flagstaff-hill, flagstaff-hill-maritime-museum, maritime-museum, shipwreck-coast, flagstaff-hill-maritime-village, ticket passengers contract, ticket, london to brisbane., passengers ticket -
 Flagstaff Hill Maritime Museum and Village
Flask
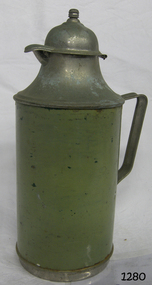
Flask glass inner, pouring lip, hinged cover, handle and painted green on the exterior. Chrome coated base and top. flagstaff hill, warrnambool, shipwrecked-coast, flagstaff-hill, flagstaff-hill-maritime-museum, maritime-museum, shipwreck-coast, flagstaff-hill-maritime-village -
 Flagstaff Hill Maritime Museum and Village
Cap Liner, Between 1870 and 1908
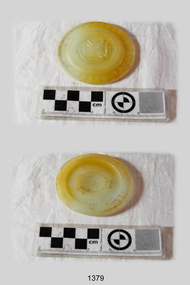
This Zinc Cap Porcelain Liner was recovered from the (1908) shipwreck site of the FALLS OF HALLADALE. The purpose of cap liners was to assist with the safe preserving and storage of perishable foodstuffs in an age when refrigeration was generally unavailable. These round, coarse-glass inserts formed part of the screw lids used with the Ball Mason style of canning fruit jars. The liner was placed inside the zinc cap to stop the contents of the jar reacting with the zinc. It prevented the metallic tainting of food as well as the corrosion of the metallic lid. On March 30, 1869, Lewis R Boyd was issued with patent # 88439 for an “Improved Mode of Preventing Corrosion in Metallic Caps”. From the 1870s to the 1950s, large quantities of these liners were produced by a number of glass manufacturing companies. They are consequently difficult to date or identify. “It is assumed that most of the earlier versions of these liners have the name ‘BOYD’S’ or ‘BOYD’ embossed on them. Later versions may or may not have the name included in the lettering”. (http://www.glassbottlemarks.com). Only a few were made of porcelain, the great majority being made first of transparent and later of translucent or opaque glass. The different emblems of triangles, circles, and crosses embossed on the front face of the liners are assumed to signify mould or model types rather than the company that produced them. This particular artefact is one of 14 cap liners that were retrieved from the shipwreck site and are now part of the Flagstaff Hill Maritime Village collection. The Maltese Cross and “BOYD’S GENUINE PORCELAIN LINED” lettering are unique to this piece. However, it is evident from the markings and materials of the other cap liners, that they originally formed sets or series. Six are larger (8 mm depth x 85mm diameter), of greenish hue with ground glass texture, and support the raised emblem of a compass needle. Two are medium-sized (75mm diameter) with two raised dots in a central circle and the lettering “Patd. APR 25.82”. This particular cap liner is likely to have also been one of a mass-produced line being imported from America. The iron-hulled sailing ship FALLS OF HALLADALE was a bulk carrier of general cargo en route from New York to Melbourne and Sydney. In her hold, along with 56,763 tiles of unusual beautiful green American slates (roofing tiles), 5,673 coils of barbed wire, 600 stoves, 500 sewing machines, 6500 gallons of oil, 14400 gallons of benzene, and many other manufactured items, were 117 cases of crockery and glassware. The FALLS OF HALLADALE came aground on a reef off the Peterborough headland at 3 am on the morning of the 15th of November, 1908. The captain and 29 crew members all survived, but her valuable cargo was largely lost, despite two salvage attempts in1908-09 and 1910. The iron-hulled, four-masted barque, the Falls of Halladale, was a bulk carrier of general cargo. She left New York in August 1908 on her way to Melbourne and Sydney. In her hold, along with 56,763 tiles of unusual beautiful green American slates (roofing tiles), 5,673 coils of barbed wire, 600 stoves, 500 sewing machines, 6500 gallons of oil, 14400 gallons of benzene, and many other manufactured items, were 117 cases of crockery and glassware. Three months later and close to her destination, a navigational error caused the Falls of Halladale to be wrecked on a reef off the Peterborough headland at 3 am on the morning of the 15th of November, 1908. The captain and 29 crew members all survived, but her valuable cargo was largely lost, despite two salvage attempts in 1908-09 and 1910. ABOUT THE ‘FALLS OF HALLADALE’ (1886 - 1908) Built: in1886 by Russell & Co., Greenock shipyards, River Clyde, Scotland, UK. The company was founded in 1870 (or 1873) as a partnership between Joseph Russell (1834-1917), Anderson Rodger and William Todd Lithgow. During the period 1882-92 Russell & Co., they standardised designs, which sped up their building process so much that they were able to build 271 ships over that time. In 1886 they introduced a 3000 ton class of sailing vessel with auxiliary engines and brace halyard winches. In 1890 they broke the world output record. Owner: Falls Line, Wright, Breakenridge & Co, 111 Union Street, Glasgow, Scotland. Configuration: Four masted sailing ship; iron-hulled barque; iron masts, wire rigging, fore & aft lifting bridges. Size: Length 83.87m x Breadth 12.6m x Depth 7.23m, Gross tonnage 2085 ton Wrecked: the night of 14th November 1908, Curdies Inlet, Peterborough south west Victoria Crew: 29 The Falls of Halladale was a four-masted sailing ship built-in 1886 in Glasgow, Scotland, for the long-distance cargo trade and was mostly used for Pacific grain trade. She was owned by Wright, Breakenridge & Co of Glasgow and was one of several Falls Line ships, all of which were named after waterfalls in Scotland. The lines flag was of red, blue and white vertical stripes. The Falls of Halladale had a sturdy construction built to carry maximum cargo and able to maintain full sail in heavy gales, one of the last of the ‘windjammers’ that sailed the Trade Route. She and her sister ship, the Falls of Garry, were the first ships in the world to include fore and aft lifting bridges. Previous to this, heavily loaded vessels could have heavy seas break along the full length of the deck, causing serious injury or even death to those on deck. The new, raised catwalk-type decking allowed the crew to move above the deck stormy conditions. This idea is still used today on the most modern tankers and cargo vessels and has proved to be an important step forward in the safety of men at sea. On 4th August 1908, with new sails, 29 crew, and 2800 tons of cargo, the Falls of Halladale left New York, bound for Melbourne and Sydney via the Cape of Good Hope. The cargo on board was valued at £35,000 and included 56,763 tiles of American slate roofing tiles (roof slates), 5,673 coils of barbed wire, 600 stoves, 500 sewing machines, 6,500 gallons of oil, 14,400 gallons of benzene, plumbing iron, 117 cases of crockery and glassware and many other manufactured items. The Falls of Halladale had been at sail for 102 days when, at 3 am on the night of 14th November 1908, under full sail in calm seas with a six knots breeze behind and misleading fog along the coast, the great vessel rose upon an ocean swell and settled on top of a submerged reef near Peterborough on south-west Victoria’s coast. The ship was jammed on the rocks and began filling with water. The crew launched the two lifeboats and all 29 crew landed safely on the beach over 4 miles away at the Bay of Islands. The postmistress at Peterborough, who kept a watch for vessels in distress, saw the stranding and sent out an alert to the local people. A rescue party went to the aid of the sailors and the Port Campbell rocket crew was dispatched, but the crew had all managed to reach shore safely by the time help arrived. The ship stayed in full sail on the rocky shelf for nearly two months, attracting hundreds of sightseers who watched her slowly disintegrate until the pounding seas and dynamiting by salvagers finally broke her back, and her remains disappeared back into deeper water. The valuable cargo was largely lost, despite two salvage attempts in 1908-09 and 1910. Further salvage operations were made from 1974-1986, during which time 22,000 slate tiles were recovered with the help of 14 oil drums to float them, plus personal artefacts, ship fittings, reams of paper and other items. The Court of Marine Inquiry in Melbourne ruled that the foundering of the ship was entirely due to Captain David Wood Thomson’s navigational error, not too technical failure of the Clyde-built ship. The shipwreck is a popular site for divers, about 300m offshore and in 3 – 15m of water. Some of the original cargo can be seen at the site, including pieces of roof slate and coils of barbed wire. The Falls of Halladale shipwreck is listed on the Victorian Heritage Register (No. S255). She was one of the last ships to sail the Trade Routes. She is one of the first vessels to have fore and aft lifting bridges. She is an example of the remains of an International Cargo Ship and also represents aspects of Victoria’s shipping industry. The wreck is protected as a Historic Shipwreck under the Commonwealth Historic Shipwrecks Act (1976). A circular translucent glass disc in good condition with raised upper case lettering around 8mm rim – “BOYD’S GENUINE PORCELAIN LINED” - and a raised central emblem of a Maltese Cross. On the reverse face in the centre of the disc, there is a raised numeral “3”. falls of halladale, wright, breakenridge & co of glasgow, unusual beautiful green american slates (roofing tiles), warrnambool, shipwrecked-coast, flagstaff-hill, flagstaff-hill-maritime-museum, maritime-museum, shipwreck-coast, flagstaff-hill-maritime-village, shipwrecked-artefact, zinc cap porcelain liner, boyd’s genuine porcelain lined, glass lid, opaque disc, food preserving, fruit bottling, cap liner, shipwrecked coast, flagstaff hill maritime museum, shipwreck artefact, 1908 shipwreck -
 Flagstaff Hill Maritime Museum and Village
Craft - Ship Model
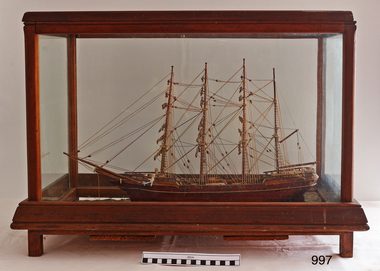
Ship model, 4 masted ship-set on green surface. Ship is brown varnish, rope trip along sides. Glass case with timber frame, on legs. No name on ship. flagstaff hill, warrnambool, shipwrecked-coast, flagstaff-hill, flagstaff-hill-maritime-museum, maritime-museum, shipwreck-coast, flagstaff-hill-maritime-village -
 Flagstaff Hill Maritime Museum and Village
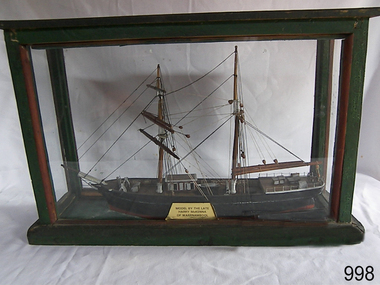
Craft - Ship Model, Mary Campbell, circa 1940
This ship model is of the sailing brigantine MARY CAMPBELL, which once belonged to Captain James Arthur Robilliard. The model was made by Harry McKenna, a well-known ship model maker and Warrnambool resident. CAPTAIN ROBILLIARD James Arthur Robilliard, sea captain and tent maker, was born in 19th April 1843 in St. Helier, Jersey, Channel Islands. He trained there in his father’s sail loft as a sail maker. He later became a skipper. His first job as a sailor was achieved in Liverpool, England. In 1875 James Robilliard migrated to Australia as mate on the “E.M. Young”. Captain Robilliard and his family were amongst the early settlers along the Curdies River in the Heytesbury district. In 1877 he became a Captain. On 14th November 1879 Captain Robilliard married Helen Beckett. James and Helen had ten children; James Arthur (Jnr), Henry William, Nellie Jessie, Alfred Albert, Rubena Nellie, De Jersy Norman, Clifford Beckett, Olive Ida, Frances Ridley Havergal and Nellie Elvie, all born in Victoria. THE MARY CAMPBELL The ship “Mary Campbell” was built by Alexander Newton Jnr. She was carvel planked, of iron bark and blue gum timber. The family shipyard was at Pelican, on the Manning River, NSW, and “Mary Campbell” was first launched by her builder in 1869 as “The Son”. Three months later she was renamed “Mary Campbell’ by her purchaser J. Campbell in Sydney. She was used to carry equipment for the Sydney Sugar Refinery’s Mill in Southgate, NSW. She then traded for the next 20 years between Australian ports and rivers along the east coast as well as regular ports in New Zealand. She was “recognised as one of the best carrying little vessels in the timber trade” (Sydney Morning Herald). She had several owners over this time, the last one being Captain James A. Robilliard. On 29th April 1889 “Mary Campbell”, in the charge of her owner, Captain James A Robilliard, was on her way from Clarence River, NSW to Melbourne, Victoria with a cargo of railway girders for the Melbourne Harbour Trust. Captain Robilliard encountered a storm off Port Macquarie. He sailed the vessel south to 25 miles (about 40km) east of Cape Hawke, near Tuncurry and Forster. At 7pm, he discovered that the cargo had shifted during the stormy seas and the heavy girders had damaged the hull, causing a leak. The pumps were inadequate to stem the fast flowing leak and over a meter of water filled the hull during the next 2 hours. Some of the crew began throwing the cargo overboard to lighten the vessel, hoping to keep it afloat until daylight. When the water reached over 2 meters in the hull they realised their efforts were in vain. At 1:30am on 30th April 1889 the crew left the vessel. They stood by in the lifeboat until 3am. The ship was sinking fast, so they left for the shore, looking for a safe place to beach their boat. While still miles off Cape Hawke all 7 crew members, including the Captain, were rescued by the Government Tug “Rhea” and taken to Port Macquarie hospital then returned to Sydney in the “Wellington”. Captain Robilliard managed to rescue his ship’s compass but no cargo was saved from the vessel. It had been under-insured, only covered for half its value, due to lack of funds. Many years later, in 1976, an anchor was caught up in the net of a trawler south of Forster and thought to be from the “Mary Campbell”. It was donated and installed in the Great Lakes Museum, Tuncurry, NSW. (The same museum also has a half-model of the hull of “Mary Campbell”.) The name of the last ship Captain Robilliard sailed is currently unknown, however he sailed that ship from the port of Marlborough, Queensland, carting steel railway girders for the Geelong-to-Camperdown line. On one trip it hit a storm, the cargo shifted and the ship was wrecked along the NSW coast. After this, Captain Robilliard exchanged sea life for farming in Peterborough. In about 1897, verging on retirement, Capt. Robiilliard superintended the Melbourne Sailors’ Home in Spencer Street, Melbourne, before being asked to leave this position in 1902 for trying to shut down the local hotel! At this time the Melbourne Sailors’ Home was about to change its location. On 6th May 1917 Captain James Arthur Robilliard J.P. died at Blackwood Park, in the Cobden district of Brucknell, which is now considered the first official Robilliard family homestead in Australia. He was buried in the Melbourne General Cemetery, Victoria. His wife Helen passed away in 1947. The Becket and Robilliard family names continue to be well known in the Western District Flagstaff Hill Maritime Village also has a ship’s compass in the collection that was also owned by Capt. J. Robilliard and was used on the ship Mary Campbell.This ship model of the MARY CAMPBELL is of local significance for its association with well known Warrnambool resident and ship model maker. The model is also significant for its association with the brigantine MARY CAMPBELL, a trading vessel that brought railway girders to the Melbourne Harbour Trust.Ship model "Mary Campbell", a two-masted vessel with black hull, brown masts and black rigging. In glass case with timber frame painted green. Painted on the bow in white “MARY CAMPBELL” Gold label with black print attached to display case “MODEL BY THE LATE HARRY McKENNA OF WARRNAMBOOL”flagstaff hill, warrnambool, shipwrecked coast, flagstaff hill maritime museum, maritime museum, shipwreck coast, flagstaff hill maritime village, great ocean road, marine artwork, model making, captain james arthur robilliard, j.a. robilliard, vessel mary campbell, ship mary campbell, melbourne sailors home, vessels, harry mckenna -
 Flagstaff Hill Maritime Museum and Village
Functional object - Binnacle and Magnetic Compass
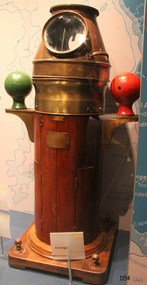
In 1947, the scientific instrument manufacturing firms of Henry Hughes & Son Ltd, London, England, and Kelvin Bottomley & Baird Ltd, Glasgow, Scotland, came together to form Kelvin & Hughes Ltd. Hughes Company History: Henry Hughes & Sons were founded in 1838 in London as a maker of chronographic and scientific instruments. The firm was incorporated as “Henry Hughes & Sons Ltd” in 1903. In 1923, the company produced its first recording echo sounder and in 1935 a controlling interest in the company was acquired by S Smith & Son Ltd resulting in the development and production of marine and aircraft instruments. Following the London office's destruction in the Blitz of 1941, a collaboration was entered into with Kelvin, Bottomley & Baird Ltd resulting in the establishing “Marine Instruments Ltd”. Following the formal amalgamation of Kelvin, Bottomley & Baird Ltd and Henry Hughes & Sons Ltd in 1947 to form Kelvin & Hughes Ltd. Marine Instruments Ltd then acted as regional agents in the UK for Kelvin & Hughes Ltd who were essentially now a part of Smith's Industries Ltd founded in 1944 and the successors of S. Smith & Son Ltd. Kelvin & Hughes Ltd went on to develop various marine radar and echo sounders supplying the Ministry of Transport, and later the Ministry of Defence. The firm was liquidated in 1966 but the name was continued as Kelvin Hughes, a division of the Smiths Group. In 2002, Kelvin Hughes continues to produce and develop marine instruments for commercial and military use. (See Note section this document for further information on the company's origins) This model binnacle and compass is a good example of the commercial diversity of navigational instruments made by Kelvin & Hughes after world war 2. It was made in numbers for use by shipping after the second world war and is not particularly rare or significant for its type. Also, it was made no earlier than 1947 as the firms of Kelvin, Bottomley & Baird Ltd and Henry Hughes & Sons Ltd who took over from Smith & Sons were not amalgamated until 1947. It can there for be assumed that this item was made during the company's transitional period to Kelvin & Hughes from Smith Industries Ltd.Mid 20th century ship's binnacle with Kelvin Hughes/ F. Fuselli Genova 8 inch diameter (glass) compass on gimballed ring. Round, teak wood pedestal with mounted brass compensating sphere brackets and painted iron balls one green the other red. Heavy brass helmet style compass cover with hinged front door and removable top for compass viewing and natural lighting. A single handle is located on the side and single burner on the opposite side. Retains an old finish and some wear to the pedestal base. Binnacle marked Serial No 163 "Veritas" Made by Kelvin Hughes Compass marked "Kelvin Hughes & Made in Great Britain Serial No 760 C J"flagstaff hill, warrnambool, shipwrecked-coast, flagstaff-hill, flagstaff-hill-maritime-museum, maritime-museum, shipwreck-coast, flagstaff-hill-maritime-village -
 Flagstaff Hill Maritime Museum and Village
Functional object - Lamp, Kosmos Brenner, First half of the 20th century
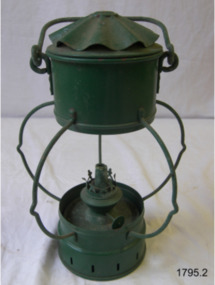
... to a reservoir made of copper. No glass and painted green.... beneath attached to a reservoir made of copper. No glass ...The Kosmos burner is probably the most popular burner used in European lamps. A patent for the design was first lodged in the UK in 1865 by Wild & Wessel from Berlin. In 1875 they began using the trade mark 'Kosmos' on winder knobs. The mark was taken over in 1899 by Brokelman, Jager & Co. who changed it to 'Kosmos Brenner', (literally 'Kosmos burner'), they continued to manufacture right up to the 1970's when the factory closed and most tooling was destroyed. A very popular burner in Germany and still manufactured today in France it has been used in all sizes of lamps from small hand lamps up to large table and hanging lamps.The subject item at this time cannot be associated with an historical event, person or place, provenance is unknown, item is believed to have been produced in the first half of the 20th century. Many different lamp manufactures used Kosmos Burners in their lamps up until the 1970s, therefore exact provenance and age is difficult to determine.Lamp, copper, handle on top and one beneath attached to a reservoir made of copper. No glass and painted green.Marked "Kosmos Brenner" to winder flagstaff hill, warrnambool, flagstaff-hill-maritime-museum, maritime-museum, shipwreck-coast, flagstaff-hill-maritime-village, lamp, kosmos burner, kerosene lamp, lighting -
 Flagstaff Hill Maritime Museum and Village
Domestic object - Plate
The Process of Making Pottery Decorating, Firing, Glazing, Making, Technical There is a rhythm and flow to clay. It can’t be done all at once! Even the making process! It can take weeks to get everything done, especially if you can only work on your pottery once a week! Even though we have three hour classes, it’s often just not enough time! Here is an overview of some of the processes so you have a bit more grasp on some of the technical stuff! Step One – Design There are SO many ideas out there for making stuff in clay! From delicate porcelain jewellery, through to heavy sculptural work and everything in between. Deciding your direction is sometimes not that easy – when you first start, try everything, you will naturally gravitate to the style that you enjoy! The options and variations are endless and can get a wee bit overwhelming too! Check in with me before you start to ensure your ideas will work, what order you might do things, how you could achieve the look you are seeking and any other technical data required! Step Two – Making Clay is thixotropic. This means that as you work with it, the clay first gets sloppier and wetter, before is begins to dry in the atmosphere. For most things, you simply can’t do all parts of the project at once. An example of work order might look like: Get last weeks work out from the shelves Prepare clay for today’s work – roll your clay, prepare balls for throwing, make the first stage of a pinch pot) Clean up last week’s work and put it on the shelf for bisque firing Check that you have any glazing to do – and do enough of it that you will have time to finish your main project Do the next step of your next project – there might be a further step that can’t be complete immediately, in that case, wrap your work well and put onto the shelves. Letting your work rest for a while can really help keep your work clean and professional looking. Many things require bagging under plastic to keep it ready for work the next week – put your name on the outside of the bag so you can find your work easily. We have stickers and markers. Consider how you want to decorate your work – coloured slip can be applied at a fairly wet stage (remembering that it will make your work even wetter!). Trying to apply slip to dry clay won’t work! If you want to do sgraffito – you will need to keep the work leather hard (a state of dryness where you can still work the clay with a little effort and a little water and care). Step Three – Drying Most of the time your work can go into the rack uncovered to let it dry out for the following week. If you want to continue forming or shaping you will need to double bag your work – put your work on a suitable sized bat and put the bat in a bag so the base of the bag is under the bat, then put another bag over the top of the work and tuck the top of the bag under the bat. If you want to trim (or turn) your thrown work the following week, it should also be double bagged. If your work is large, delicate, or of uneven thicknesses, you should lightly cover your work for drying. When considering the drying process, bare in mind the weather, humidity and wind! The hotter and dryer, the faster things dry and work can dry unevenly in the shelves – this can lead to cracking – another time to lightly cover your work for drying. Step Four – Trimming and Cleaning Up Your work is dry! It is called greenware now and it is at it’s most fragile! Handle everything with two hands. I often refer to soft hands – keep everything gentle and with your fingers spread as much as possible. Try to not pick up things like plates too much, and always with both hands! Before your work can be bisque fired it should be “cleaned up”. You work won’t go into the kiln if it has sharp edges – when glazed, sharp edges turn into razor blades! Use a piece of fly wire to rub the work all over – this will scratch a little so be light handed. Use a knife or metal kidney to scrape any areas that require a bit more dynamic treatment than the fly wire offers! Finally, a very light wipe over with a slightly damp sponge can help soften and soothe all of your edges and dags! Trimming thrown work: If you are planning to trim (or turn) your thrown work (and you should be), make sure you bag it well – your work should be leather hard to almost dry for easiest trimming. Use this step to finish the work completely – use a metal kidney to polish the surface, or a slightly damp sponge to give a freshly thrown look. Wipe the sponge around the rim after trimming, and check the inside of the pot for dags! Trimming slip cast work: Usually I will trim the rims of your work on the wheel the following day to make that stage easier, however you will still need to check your work for lumps and bumps. Last but not least – check that your name is still clearly on the bottom of your work. Step Five – Bisque Firing When the work is completely dry it can go into the bisque kiln. The bisque kiln is fired to 1000°C. This process burns off the water in the clay as well as some of the chemically bound water. The structure of the clay is not altered that much at this temperature. Inside the bisque kiln, the work is stacked a little, small bowl inside a larger bowl and onto a heavy plate. Smaller items like decorations or drink coasters might get stacked several high. Consideration is paid to the weight of the stack and shape of the work. A bisque kiln can fire about one and a half times the amount of work that the glaze kiln can fire. The firing takes about 10 hours to complete the cycle and about two days to cool down. Once it has been emptied the work is placed in the glaze room ready for you to decorate! Step Six – Glazing Decorating your work with colour can be a lot of fun – and time consuming! There are three main options for surface treatment at this stage: Oxide Washes Underglazes Glazes Washes and underglazes do not “glaze” the work – It will still need a layer of glaze to fully seal the clay (washes don’t need glaze on surfaces not designed for food or liquid as they can gloss up a little on their own). Underglazes are stable colourants that turn out pretty much how they look in the jar. They can be mixed with each other to form other colours and can be used like water colours to paint onto your work. Mostly they should have a clear glaze on top to seal them. Oxides are a different species – the pink oxide (cobalt) wash turns out bright blue for instance. They don’t always need a glaze on top, and some glazes can change the colour of the wash! The glazes need no other “glaze” on top! Be careful of unknown glaze interactions – you can put any combination of glaze in a bowl or on a plate, but only a single glaze on the outside of any vertical surface! Glazes are a chemical reaction under heat. We don’t know the exact chemicals in the Mayco glazes we use. I can guess by the way they interact with each other, however, on the whole, you need to test every idea you have, and not run the test on a vertical surface! Simply put, glaze is a layer of glass like substance that bonds with the clay underneath. Clay is made of silica, alumina and water. Glaze is made of mostly silica. Silica has a melting point of 1700°C and we fire to 1240°C. The silica requires a “flux” to help it melt at the lower temperature. Fluxes can be all sorts of chemicals – a common one is calcium – calcium has a melting point of 2500°C, however, together they both melt at a much lower temperature! Colourants are metal oxides like cobalt (blue), chrome (green through black), copper (green, blue, even red!), manganese (black, purple and pink) iron (red brown), etc. Different chemicals in the glaze can have dramatic effects. for example, barium carbonate (which we don’t use) turns manganese bright pink! Other elements can turn manganese dioxide brown, blue, purple and reddish brown. Manganese dioxide is a flux in and of itself as well. So, glazes that get their black and purple colours, often interact with other glazes and RUN! Our mirror black is a good example – it mixes really well with many glazes because it fluxes them – causes them to melt faster. It will also bring out many beautiful colours in the glazes because it’s black colouring most definitely comes from manganese dioxide! Glaze chemistry is a whole subject on it’s own! We use commercial Mayco glazes on purpose – for their huge range of colour possibilities, stability, cool interactions, artistic freedom with the ability to easily brush the glazes on and ease of use. We currently have almost 50 glazes on hand! A major project is to test the interactions of all glazes with each other. That is 2,500 test tiles!!!! I’m going to make the wall behind the wheels the feature wall of pretty colours! Step Seven – Glaze (Gloss or sometimes called “Glost”) Firing Most of the time this is the final stage of making your creation (but not always!) The glaze kiln goes to 1240°C. This is called cone 6, or midrange. It is the low end of stoneware temperatures. Stoneware clays and glazes are typically fired at cone 8 – 10, that is 1260 – 1290°C. The energy requirement to go from 1240°C to 1280°C is almost a 30% more! Our clay is formulated to vitrify (mature, turn “glass-like”) at 1240°, as are our glazes. A glaze kiln take around 12 hours to reach temperature and two to three days to cool down. Sometimes a third firing process is required – this is for decoration that is added to work after the glaze firing. For example – adding precious metals and lustres. this firing temperature is usually around 600 – 800°C depending upon the techniques being used. There are many students interested in gold and silver trims – we will be doing this third type of firing soon! After firing your work will be in the student finished work shelves. Remember to pay for it before you head out the door! There is a small extra charge for using porcelain clay (it’s more than twice the price of regular clay), and for any third firing process! Once your work has been fired it can not turn back into clay for millennia – so don’t fire it if you don’t like it! Put it in the bucket for recycling. https://firebirdstudios.com.au/the-process-of-making-pottery/Ceramics have evolved over thousands of years.White earthenware dinner plate. Crazing evident all over.Backstamped ‘Made in England S LTD’flagstaff hill, warrnambool, shipwrecked-coast, flagstaff-hill, flagstaff-hill-maritime-museum, maritime-museum, shipwreck-coast, flagstaff-hill-maritime-village, ceramics, tableware -
 Flagstaff Hill Maritime Museum and Village
Domestic object - Plate, Johnson Bros
The Process of Making Pottery Decorating, Firing, Glazing, Making, Technical There is a rhythm and flow to clay. It can’t be done all at once! Even the making process! It can take weeks to get everything done, especially if you can only work on your pottery once a week! Even though we have three hour classes, it’s often just not enough time! Here is an overview of some of the processes so you have a bit more grasp on some of the technical stuff! Step One – Design There are SO many ideas out there for making stuff in clay! From delicate porcelain jewellery, through to heavy sculptural work and everything in between. Deciding your direction is sometimes not that easy – when you first start, try everything, you will naturally gravitate to the style that you enjoy! The options and variations are endless and can get a wee bit overwhelming too! Check in with me before you start to ensure your ideas will work, what order you might do things, how you could achieve the look you are seeking and any other technical data required! Step Two – Making Clay is thixotropic. This means that as you work with it, the clay first gets sloppier and wetter, before is begins to dry in the atmosphere. For most things, you simply can’t do all parts of the project at once. An example of work order might look like: Get last weeks work out from the shelves Prepare clay for today’s work – roll your clay, prepare balls for throwing, make the first stage of a pinch pot) Clean up last week’s work and put it on the shelf for bisque firing Check that you have any glazing to do – and do enough of it that you will have time to finish your main project Do the next step of your next project – there might be a further step that can’t be complete immediately, in that case, wrap your work well and put onto the shelves. Letting your work rest for a while can really help keep your work clean and professional looking. Many things require bagging under plastic to keep it ready for work the next week – put your name on the outside of the bag so you can find your work easily. We have stickers and markers. Consider how you want to decorate your work – coloured slip can be applied at a fairly wet stage (remembering that it will make your work even wetter!). Trying to apply slip to dry clay won’t work! If you want to do sgraffito – you will need to keep the work leather hard (a state of dryness where you can still work the clay with a little effort and a little water and care). Step Three – Drying Most of the time your work can go into the rack uncovered to let it dry out for the following week. If you want to continue forming or shaping you will need to double bag your work – put your work on a suitable sized bat and put the bat in a bag so the base of the bag is under the bat, then put another bag over the top of the work and tuck the top of the bag under the bat. If you want to trim (or turn) your thrown work the following week, it should also be double bagged. If your work is large, delicate, or of uneven thicknesses, you should lightly cover your work for drying. When considering the drying process, bare in mind the weather, humidity and wind! The hotter and dryer, the faster things dry and work can dry unevenly in the shelves – this can lead to cracking – another time to lightly cover your work for drying. Step Four – Trimming and Cleaning Up Your work is dry! It is called greenware now and it is at it’s most fragile! Handle everything with two hands. I often refer to soft hands – keep everything gentle and with your fingers spread as much as possible. Try to not pick up things like plates too much, and always with both hands! Before your work can be bisque fired it should be “cleaned up”. You work won’t go into the kiln if it has sharp edges – when glazed, sharp edges turn into razor blades! Use a piece of fly wire to rub the work all over – this will scratch a little so be light handed. Use a knife or metal kidney to scrape any areas that require a bit more dynamic treatment than the fly wire offers! Finally, a very light wipe over with a slightly damp sponge can help soften and soothe all of your edges and dags! Trimming thrown work: If you are planning to trim (or turn) your thrown work (and you should be), make sure you bag it well – your work should be leather hard to almost dry for easiest trimming. Use this step to finish the work completely – use a metal kidney to polish the surface, or a slightly damp sponge to give a freshly thrown look. Wipe the sponge around the rim after trimming, and check the inside of the pot for dags! Trimming slip cast work: Usually I will trim the rims of your work on the wheel the following day to make that stage easier, however you will still need to check your work for lumps and bumps. Last but not least – check that your name is still clearly on the bottom of your work. Step Five – Bisque Firing When the work is completely dry it can go into the bisque kiln. The bisque kiln is fired to 1000°C. This process burns off the water in the clay as well as some of the chemically bound water. The structure of the clay is not altered that much at this temperature. Inside the bisque kiln, the work is stacked a little, small bowl inside a larger bowl and onto a heavy plate. Smaller items like decorations or drink coasters might get stacked several high. Consideration is paid to the weight of the stack and shape of the work. A bisque kiln can fire about one and a half times the amount of work that the glaze kiln can fire. The firing takes about 10 hours to complete the cycle and about two days to cool down. Once it has been emptied the work is placed in the glaze room ready for you to decorate! Step Six – Glazing Decorating your work with colour can be a lot of fun – and time consuming! There are three main options for surface treatment at this stage: Oxide Washes Underglazes Glazes Washes and underglazes do not “glaze” the work – It will still need a layer of glaze to fully seal the clay (washes don’t need glaze on surfaces not designed for food or liquid as they can gloss up a little on their own). Underglazes are stable colourants that turn out pretty much how they look in the jar. They can be mixed with each other to form other colours and can be used like water colours to paint onto your work. Mostly they should have a clear glaze on top to seal them. Oxides are a different species – the pink oxide (cobalt) wash turns out bright blue for instance. They don’t always need a glaze on top, and some glazes can change the colour of the wash! The glazes need no other “glaze” on top! Be careful of unknown glaze interactions – you can put any combination of glaze in a bowl or on a plate, but only a single glaze on the outside of any vertical surface! Glazes are a chemical reaction under heat. We don’t know the exact chemicals in the Mayco glazes we use. I can guess by the way they interact with each other, however, on the whole, you need to test every idea you have, and not run the test on a vertical surface! Simply put, glaze is a layer of glass like substance that bonds with the clay underneath. Clay is made of silica, alumina and water. Glaze is made of mostly silica. Silica has a melting point of 1700°C and we fire to 1240°C. The silica requires a “flux” to help it melt at the lower temperature. Fluxes can be all sorts of chemicals – a common one is calcium – calcium has a melting point of 2500°C, however, together they both melt at a much lower temperature! Colourants are metal oxides like cobalt (blue), chrome (green through black), copper (green, blue, even red!), manganese (black, purple and pink) iron (red brown), etc. Different chemicals in the glaze can have dramatic effects. for example, barium carbonate (which we don’t use) turns manganese bright pink! Other elements can turn manganese dioxide brown, blue, purple and reddish brown. Manganese dioxide is a flux in and of itself as well. So, glazes that get their black and purple colours, often interact with other glazes and RUN! Our mirror black is a good example – it mixes really well with many glazes because it fluxes them – causes them to melt faster. It will also bring out many beautiful colours in the glazes because it’s black colouring most definitely comes from manganese dioxide! Glaze chemistry is a whole subject on it’s own! We use commercial Mayco glazes on purpose – for their huge range of colour possibilities, stability, cool interactions, artistic freedom with the ability to easily brush the glazes on and ease of use. We currently have almost 50 glazes on hand! A major project is to test the interactions of all glazes with each other. That is 2,500 test tiles!!!! I’m going to make the wall behind the wheels the feature wall of pretty colours! Step Seven – Glaze (Gloss or sometimes called “Glost”) Firing Most of the time this is the final stage of making your creation (but not always!) The glaze kiln goes to 1240°C. This is called cone 6, or midrange. It is the low end of stoneware temperatures. Stoneware clays and glazes are typically fired at cone 8 – 10, that is 1260 – 1290°C. The energy requirement to go from 1240°C to 1280°C is almost a 30% more! Our clay is formulated to vitrify (mature, turn “glass-like”) at 1240°, as are our glazes. A glaze kiln take around 12 hours to reach temperature and two to three days to cool down. Sometimes a third firing process is required – this is for decoration that is added to work after the glaze firing. For example – adding precious metals and lustres. this firing temperature is usually around 600 – 800°C depending upon the techniques being used. There are many students interested in gold and silver trims – we will be doing this third type of firing soon! After firing your work will be in the student finished work shelves. Remember to pay for it before you head out the door! There is a small extra charge for using porcelain clay (it’s more than twice the price of regular clay), and for any third firing process! Once your work has been fired it can not turn back into clay for millennia – so don’t fire it if you don’t like it! Put it in the bucket for recycling. https://firebirdstudios.com.au/the-process-of-making-pottery/Ceramics have evolved over thousands of years.A white earthenware side plate with a gadroon edge. Has water marks and chips on front.‘Johnson Bros England Reg No 15587’flagstaff hill, warrnambool, shipwrecked-coast, flagstaff-hill, flagstaff-hill-maritime-museum, maritime-museum, shipwreck-coast, flagstaff-hill-maritime-village, johnson bros, ceramics, tableware -
 Flagstaff Hill Maritime Museum and Village
Domestic object - Plate, Alfred Meakin
The Process of Making Pottery Decorating, Firing, Glazing, Making, Technical There is a rhythm and flow to clay. It can’t be done all at once! Even the making process! It can take weeks to get everything done, especially if you can only work on your pottery once a week! Even though we have three hour classes, it’s often just not enough time! Here is an overview of some of the processes so you have a bit more grasp on some of the technical stuff! Step One – Design There are SO many ideas out there for making stuff in clay! From delicate porcelain jewellery, through to heavy sculptural work and everything in between. Deciding your direction is sometimes not that easy – when you first start, try everything, you will naturally gravitate to the style that you enjoy! The options and variations are endless and can get a wee bit overwhelming too! Check in with me before you start to ensure your ideas will work, what order you might do things, how you could achieve the look you are seeking and any other technical data required! Step Two – Making Clay is thixotropic. This means that as you work with it, the clay first gets sloppier and wetter, before is begins to dry in the atmosphere. For most things, you simply can’t do all parts of the project at once. An example of work order might look like: Get last weeks work out from the shelves Prepare clay for today’s work – roll your clay, prepare balls for throwing, make the first stage of a pinch pot) Clean up last week’s work and put it on the shelf for bisque firing Check that you have any glazing to do – and do enough of it that you will have time to finish your main project Do the next step of your next project – there might be a further step that can’t be complete immediately, in that case, wrap your work well and put onto the shelves. Letting your work rest for a while can really help keep your work clean and professional looking. Many things require bagging under plastic to keep it ready for work the next week – put your name on the outside of the bag so you can find your work easily. We have stickers and markers. Consider how you want to decorate your work – coloured slip can be applied at a fairly wet stage (remembering that it will make your work even wetter!). Trying to apply slip to dry clay won’t work! If you want to do sgraffito – you will need to keep the work leather hard (a state of dryness where you can still work the clay with a little effort and a little water and care). Step Three – Drying Most of the time your work can go into the rack uncovered to let it dry out for the following week. If you want to continue forming or shaping you will need to double bag your work – put your work on a suitable sized bat and put the bat in a bag so the base of the bag is under the bat, then put another bag over the top of the work and tuck the top of the bag under the bat. If you want to trim (or turn) your thrown work the following week, it should also be double bagged. If your work is large, delicate, or of uneven thicknesses, you should lightly cover your work for drying. When considering the drying process, bare in mind the weather, humidity and wind! The hotter and dryer, the faster things dry and work can dry unevenly in the shelves – this can lead to cracking – another time to lightly cover your work for drying. Step Four – Trimming and Cleaning Up Your work is dry! It is called greenware now and it is at it’s most fragile! Handle everything with two hands. I often refer to soft hands – keep everything gentle and with your fingers spread as much as possible. Try to not pick up things like plates too much, and always with both hands! Before your work can be bisque fired it should be “cleaned up”. You work won’t go into the kiln if it has sharp edges – when glazed, sharp edges turn into razor blades! Use a piece of fly wire to rub the work all over – this will scratch a little so be light handed. Use a knife or metal kidney to scrape any areas that require a bit more dynamic treatment than the fly wire offers! Finally, a very light wipe over with a slightly damp sponge can help soften and soothe all of your edges and dags! Trimming thrown work: If you are planning to trim (or turn) your thrown work (and you should be), make sure you bag it well – your work should be leather hard to almost dry for easiest trimming. Use this step to finish the work completely – use a metal kidney to polish the surface, or a slightly damp sponge to give a freshly thrown look. Wipe the sponge around the rim after trimming, and check the inside of the pot for dags! Trimming slip cast work: Usually I will trim the rims of your work on the wheel the following day to make that stage easier, however you will still need to check your work for lumps and bumps. Last but not least – check that your name is still clearly on the bottom of your work. Step Five – Bisque Firing When the work is completely dry it can go into the bisque kiln. The bisque kiln is fired to 1000°C. This process burns off the water in the clay as well as some of the chemically bound water. The structure of the clay is not altered that much at this temperature. Inside the bisque kiln, the work is stacked a little, small bowl inside a larger bowl and onto a heavy plate. Smaller items like decorations or drink coasters might get stacked several high. Consideration is paid to the weight of the stack and shape of the work. A bisque kiln can fire about one and a half times the amount of work that the glaze kiln can fire. The firing takes about 10 hours to complete the cycle and about two days to cool down. Once it has been emptied the work is placed in the glaze room ready for you to decorate! Step Six – Glazing Decorating your work with colour can be a lot of fun – and time consuming! There are three main options for surface treatment at this stage: Oxide Washes Underglazes Glazes Washes and underglazes do not “glaze” the work – It will still need a layer of glaze to fully seal the clay (washes don’t need glaze on surfaces not designed for food or liquid as they can gloss up a little on their own). Underglazes are stable colourants that turn out pretty much how they look in the jar. They can be mixed with each other to form other colours and can be used like water colours to paint onto your work. Mostly they should have a clear glaze on top to seal them. Oxides are a different species – the pink oxide (cobalt) wash turns out bright blue for instance. They don’t always need a glaze on top, and some glazes can change the colour of the wash! The glazes need no other “glaze” on top! Be careful of unknown glaze interactions – you can put any combination of glaze in a bowl or on a plate, but only a single glaze on the outside of any vertical surface! Glazes are a chemical reaction under heat. We don’t know the exact chemicals in the Mayco glazes we use. I can guess by the way they interact with each other, however, on the whole, you need to test every idea you have, and not run the test on a vertical surface! Simply put, glaze is a layer of glass like substance that bonds with the clay underneath. Clay is made of silica, alumina and water. Glaze is made of mostly silica. Silica has a melting point of 1700°C and we fire to 1240°C. The silica requires a “flux” to help it melt at the lower temperature. Fluxes can be all sorts of chemicals – a common one is calcium – calcium has a melting point of 2500°C, however, together they both melt at a much lower temperature! Colourants are metal oxides like cobalt (blue), chrome (green through black), copper (green, blue, even red!), manganese (black, purple and pink) iron (red brown), etc. Different chemicals in the glaze can have dramatic effects. for example, barium carbonate (which we don’t use) turns manganese bright pink! Other elements can turn manganese dioxide brown, blue, purple and reddish brown. Manganese dioxide is a flux in and of itself as well. So, glazes that get their black and purple colours, often interact with other glazes and RUN! Our mirror black is a good example – it mixes really well with many glazes because it fluxes them – causes them to melt faster. It will also bring out many beautiful colours in the glazes because it’s black colouring most definitely comes from manganese dioxide! Glaze chemistry is a whole subject on it’s own! We use commercial Mayco glazes on purpose – for their huge range of colour possibilities, stability, cool interactions, artistic freedom with the ability to easily brush the glazes on and ease of use. We currently have almost 50 glazes on hand! A major project is to test the interactions of all glazes with each other. That is 2,500 test tiles!!!! I’m going to make the wall behind the wheels the feature wall of pretty colours! Step Seven – Glaze (Gloss or sometimes called “Glost”) Firing Most of the time this is the final stage of making your creation (but not always!) The glaze kiln goes to 1240°C. This is called cone 6, or midrange. It is the low end of stoneware temperatures. Stoneware clays and glazes are typically fired at cone 8 – 10, that is 1260 – 1290°C. The energy requirement to go from 1240°C to 1280°C is almost a 30% more! Our clay is formulated to vitrify (mature, turn “glass-like”) at 1240°, as are our glazes. A glaze kiln take around 12 hours to reach temperature and two to three days to cool down. Sometimes a third firing process is required – this is for decoration that is added to work after the glaze firing. For example – adding precious metals and lustres. this firing temperature is usually around 600 – 800°C depending upon the techniques being used. There are many students interested in gold and silver trims – we will be doing this third type of firing soon! After firing your work will be in the student finished work shelves. Remember to pay for it before you head out the door! There is a small extra charge for using porcelain clay (it’s more than twice the price of regular clay), and for any third firing process! Once your work has been fired it can not turn back into clay for millennia – so don’t fire it if you don’t like it! Put it in the bucket for recycling. https://firebirdstudios.com.au/the-process-of-making-pottery/Ceramics have evolved over thousands of years.Earthenware dessert plate, cream colour. Made by Alfred Meakin, England. Backstamped ‘Alfred Meakin England’. flagstaff hill, warrnambool, shipwrecked-coast, flagstaff-hill, flagstaff-hill-maritime-museum, maritime-museum, shipwreck-coast, flagstaff-hill-maritime-village, alfred meakin, ceramics, earthenware, kitchenware -
 Flagstaff Hill Maritime Museum and Village
Domestic object - Jug
The Process of Making Pottery Decorating, Firing, Glazing, Making, Technical There is a rhythm and flow to clay. It can’t be done all at once! Even the making process! It can take weeks to get everything done, especially if you can only work on your pottery once a week! Even though we have three hour classes, it’s often just not enough time! Here is an overview of some of the processes so you have a bit more grasp on some of the technical stuff! Step One – Design There are SO many ideas out there for making stuff in clay! From delicate porcelain jewellery, through to heavy sculptural work and everything in between. Deciding your direction is sometimes not that easy – when you first start, try everything, you will naturally gravitate to the style that you enjoy! The options and variations are endless and can get a wee bit overwhelming too! Check in with me before you start to ensure your ideas will work, what order you might do things, how you could achieve the look you are seeking and any other technical data required! Step Two – Making Clay is thixotropic. This means that as you work with it, the clay first gets sloppier and wetter, before is begins to dry in the atmosphere. For most things, you simply can’t do all parts of the project at once. An example of work order might look like: Get last weeks work out from the shelves Prepare clay for today’s work – roll your clay, prepare balls for throwing, make the first stage of a pinch pot) Clean up last week’s work and put it on the shelf for bisque firing Check that you have any glazing to do – and do enough of it that you will have time to finish your main project Do the next step of your next project – there might be a further step that can’t be complete immediately, in that case, wrap your work well and put onto the shelves. Letting your work rest for a while can really help keep your work clean and professional looking. Many things require bagging under plastic to keep it ready for work the next week – put your name on the outside of the bag so you can find your work easily. We have stickers and markers. Consider how you want to decorate your work – coloured slip can be applied at a fairly wet stage (remembering that it will make your work even wetter!). Trying to apply slip to dry clay won’t work! If you want to do sgraffito – you will need to keep the work leather hard (a state of dryness where you can still work the clay with a little effort and a little water and care). Step Three – Drying Most of the time your work can go into the rack uncovered to let it dry out for the following week. If you want to continue forming or shaping you will need to double bag your work – put your work on a suitable sized bat and put the bat in a bag so the base of the bag is under the bat, then put another bag over the top of the work and tuck the top of the bag under the bat. If you want to trim (or turn) your thrown work the following week, it should also be double bagged. If your work is large, delicate, or of uneven thicknesses, you should lightly cover your work for drying. When considering the drying process, bare in mind the weather, humidity and wind! The hotter and dryer, the faster things dry and work can dry unevenly in the shelves – this can lead to cracking – another time to lightly cover your work for drying. Step Four – Trimming and Cleaning Up Your work is dry! It is called greenware now and it is at it’s most fragile! Handle everything with two hands. I often refer to soft hands – keep everything gentle and with your fingers spread as much as possible. Try to not pick up things like plates too much, and always with both hands! Before your work can be bisque fired it should be “cleaned up”. You work won’t go into the kiln if it has sharp edges – when glazed, sharp edges turn into razor blades! Use a piece of fly wire to rub the work all over – this will scratch a little so be light handed. Use a knife or metal kidney to scrape any areas that require a bit more dynamic treatment than the fly wire offers! Finally, a very light wipe over with a slightly damp sponge can help soften and soothe all of your edges and dags! Trimming thrown work: If you are planning to trim (or turn) your thrown work (and you should be), make sure you bag it well – your work should be leather hard to almost dry for easiest trimming. Use this step to finish the work completely – use a metal kidney to polish the surface, or a slightly damp sponge to give a freshly thrown look. Wipe the sponge around the rim after trimming, and check the inside of the pot for dags! Trimming slip cast work: Usually I will trim the rims of your work on the wheel the following day to make that stage easier, however you will still need to check your work for lumps and bumps. Last but not least – check that your name is still clearly on the bottom of your work. Step Five – Bisque Firing When the work is completely dry it can go into the bisque kiln. The bisque kiln is fired to 1000°C. This process burns off the water in the clay as well as some of the chemically bound water. The structure of the clay is not altered that much at this temperature. Inside the bisque kiln, the work is stacked a little, small bowl inside a larger bowl and onto a heavy plate. Smaller items like decorations or drink coasters might get stacked several high. Consideration is paid to the weight of the stack and shape of the work. A bisque kiln can fire about one and a half times the amount of work that the glaze kiln can fire. The firing takes about 10 hours to complete the cycle and about two days to cool down. Once it has been emptied the work is placed in the glaze room ready for you to decorate! Step Six – Glazing Decorating your work with colour can be a lot of fun – and time consuming! There are three main options for surface treatment at this stage: Oxide Washes Underglazes Glazes Washes and underglazes do not “glaze” the work – It will still need a layer of glaze to fully seal the clay (washes don’t need glaze on surfaces not designed for food or liquid as they can gloss up a little on their own). Underglazes are stable colourants that turn out pretty much how they look in the jar. They can be mixed with each other to form other colours and can be used like water colours to paint onto your work. Mostly they should have a clear glaze on top to seal them. Oxides are a different species – the pink oxide (cobalt) wash turns out bright blue for instance. They don’t always need a glaze on top, and some glazes can change the colour of the wash! The glazes need no other “glaze” on top! Be careful of unknown glaze interactions – you can put any combination of glaze in a bowl or on a plate, but only a single glaze on the outside of any vertical surface! Glazes are a chemical reaction under heat. We don’t know the exact chemicals in the Mayco glazes we use. I can guess by the way they interact with each other, however, on the whole, you need to test every idea you have, and not run the test on a vertical surface! Simply put, glaze is a layer of glass like substance that bonds with the clay underneath. Clay is made of silica, alumina and water. Glaze is made of mostly silica. Silica has a melting point of 1700°C and we fire to 1240°C. The silica requires a “flux” to help it melt at the lower temperature. Fluxes can be all sorts of chemicals – a common one is calcium – calcium has a melting point of 2500°C, however, together they both melt at a much lower temperature! Colourants are metal oxides like cobalt (blue), chrome (green through black), copper (green, blue, even red!), manganese (black, purple and pink) iron (red brown), etc. Different chemicals in the glaze can have dramatic effects. for example, barium carbonate (which we don’t use) turns manganese bright pink! Other elements can turn manganese dioxide brown, blue, purple and reddish brown. Manganese dioxide is a flux in and of itself as well. So, glazes that get their black and purple colours, often interact with other glazes and RUN! Our mirror black is a good example – it mixes really well with many glazes because it fluxes them – causes them to melt faster. It will also bring out many beautiful colours in the glazes because it’s black colouring most definitely comes from manganese dioxide! Glaze chemistry is a whole subject on it’s own! We use commercial Mayco glazes on purpose – for their huge range of colour possibilities, stability, cool interactions, artistic freedom with the ability to easily brush the glazes on and ease of use. We currently have almost 50 glazes on hand! A major project is to test the interactions of all glazes with each other. That is 2,500 test tiles!!!! I’m going to make the wall behind the wheels the feature wall of pretty colours! Step Seven – Glaze (Gloss or sometimes called “Glost”) Firing Most of the time this is the final stage of making your creation (but not always!) The glaze kiln goes to 1240°C. This is called cone 6, or midrange. It is the low end of stoneware temperatures. Stoneware clays and glazes are typically fired at cone 8 – 10, that is 1260 – 1290°C. The energy requirement to go from 1240°C to 1280°C is almost a 30% more! Our clay is formulated to vitrify (mature, turn “glass-like”) at 1240°, as are our glazes. A glaze kiln take around 12 hours to reach temperature and two to three days to cool down. Sometimes a third firing process is required – this is for decoration that is added to work after the glaze firing. For example – adding precious metals and lustres. this firing temperature is usually around 600 – 800°C depending upon the techniques being used. There are many students interested in gold and silver trims – we will be doing this third type of firing soon! After firing your work will be in the student finished work shelves. Remember to pay for it before you head out the door! There is a small extra charge for using porcelain clay (it’s more than twice the price of regular clay), and for any third firing process! Once your work has been fired it can not turn back into clay for millennia – so don’t fire it if you don’t like it! Put it in the bucket for recycling. https://firebirdstudios.com.au/the-process-of-making-pottery/The form of the jug has been in use for many centuries.Stoneware jug. Two tone brown glaze with pierced lip behind spout. Spout chipped.None.flagstaff hill, warrnambool, shipwrecked-coast, flagstaff-hill, flagstaff-hill-maritime-museum, maritime-museum, shipwreck-coast, flagstaff-hill-maritime-village, jug, ceramic jug -
 Flagstaff Hill Maritime Museum and Village
Instrument - Clock, 1920s
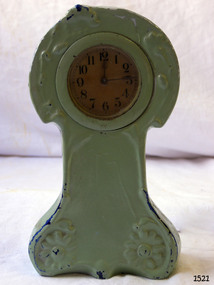
It is possible that this may have been a wedding present or gift to Roy Wines and or his family as his name is scratched on the bottom. Roy was married in 1924 in Warrnambool. Roy Arthur Wines was Born in 1897 in Mailors Flat Victoria Australia and Died in 1980 in Ballarat. Roy lived for a number of years in Warrnambool during his married life.A massed produced item that at the time was cheap to buy with no makers mark or date stamp thousands would have been produced using a mould to make the ceramic case in two half's by pouring liquid clay into the mould and then joining the half's together when cured. This item could have been produced in Holland at any number of pottery factories at this time for export in vast quantities.Ceramic clock; the mechanism is plated steel and set in a ceramic case with glass over the face. The ceramic base colour is white with royal blue ceramic colour to the front and sides only. The blue ceramic has been painted over with lime green house paint on the front and sides. An inscription of a handwritten name is on the case and a hard-to-read model or batch number is on the cast base. Handwritten "Roy Wines" Cast number "6072"flagstaff hill, flagstaff hill maritime museum and village, warrnambool, maritime museum, maritime village, great ocean road, shipwreck coast, clock, roy wines, ceramic, ceramic clock, horology, time keeper, travel clock, bedside clock, timepiece -
 Flagstaff Hill Maritime Museum and Village
Craft - Ship Model, Heather, before Dec 1983
The blue pennant with the white letters "J R E" flag of the Ellerman Wilson Line Pty. Ltd. of Hull. The letters refer to the founder of the Ellerman Group, John Reeves Ellerman. Ship model of the vessel "Heather", a three masted tall ship. Model is painted black and white with a brown deck. Sails are raised. The name "HEATHER" is painted in white on it black bow. The ship is displayed as a diorama in a glass fronted, wide edged timber frame with deep sides. The back of the frame is painted pale green. The base of the frame depicts textured sea and the back has a seascape with a cliff and other sailing vessels. Ship is flying two pennants, top one is blue with 'JRE" on it, bottom one is plain white with a red disc and a swallow-tailed end; the rectangular flag is divided by a yellow cross on white, and the top left corner is blue with a yellow anchor symbol on it. "HEATHER" on bow. "JRE" on blue pennant.flagstaff hill, warrnambool, shipwrecked-coast, flagstaff-hill, flagstaff-hill-maritime-museum, maritime-museum, shipwreck-coast, flagstaff-hill-maritime-village, ship model, sailing ship heather, tall ship diorama, diorama, sailing vessel, john reeves ellerman., jre, ellerman wilson line pty. ltd -
 Federation University Historical Collection
Report, Wendy Jacobs et al, The Pyrenees Shire Avoca Shire Study 1864-1994 Volume 3, 1995, 1995
.1) Copy of Volume 1 of the Avoca Shire Heritage Study which outlines the enviromental history of the shire including gold, water, farming. wine and fruit, towns, road and rail, and extractive industries. .2) Copy of Volume 3 The Avoca Heritage Study which was commissioned by the National Estate Committee. Voume Three contains documentation on individual sites whoch reflect themes outlined in the Environmental History (Volume One). These sites are recommended for protectins under the Local Planning Scheme or the provisions of the Historic Buildings Act. The sites are arranged by geographical location, then, alphabetically by road.wendy jacobs, karen twigg, avoca, bung bung, homebush, crowlands, landsborough, moonambel, natte yallock, navarre, barkly, ]percydale, redbank, mountain creek, nettyalloc, green hills, glendhu, djadja wurrung, djab wurrung, hugh glass, glenmona, charles williamson, woodlands, william degreaves, chinese, mining, ironbark mine, homebush deep lead mine, ampitheatre, dredging, water, mashado's well, ellen allan, hunter's hime, wine, fruit, mackereth's vineyard, orchards, viticulture, edwin mackereth, john costello, w.a. adams, chateau remy, david rodwell, schools, education, churches, road, rail, avoca road districy board, ben nevis, eucalyptus distelleries, jim farnsworth, ned gollop, reg harvey, heritage study -
 Red Cliffs Military Museum
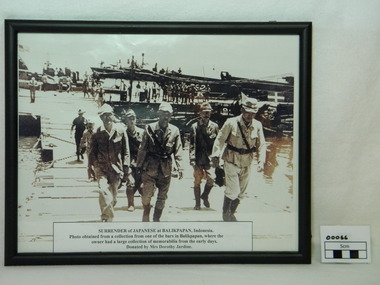
Framed Photograph, Surrender of Japanese at Balikpapan, 1945
Japanese Commanders crossing a pontoon bridge under guard by Australian soldier on the way to the official surrender of Japanese forces in Balikpapan in (Dutch East Indies) Indonesia 1945. This was a major event in the ending of World War 2. Following the japanese surrender the Local population began it push for independance. Framed photograph (copy) of Japanese Commanders surrendering at Balikpapan. Black frame and glass covered. The Japanese Command staff with a Japanese general and aid-d-camp (Captian)carring his breif case along with other staff members. In the background here are 2 American PT boats with American naval personal .Note American flag flying in the top left corner. There are several American landing craft next to a Japanese landing barge. The Japanese landing bardge has the required surrender markings which is a green square with a white cross on top right of photo. The Australian soldier following the Japanese soldiers is wearing slouch hat and gungle green uniform. Along the docks are native workers.Paper discription on lower photograph with details of item description, where photo obtained from and donated by.ww2, japanese, surrender, balikpapan, generals, americans, pt boats, japanese landing bardge, american landing craft, dutch east indies -
 City of Moorabbin Historical Society (Operating the Box Cottage Museum)
Dairy Equipment, doiley, 20thC
Early settler women were skilled craft workers and crocheted doilies and other napery for their household. This Doiley is a cover for a jug or cup, with the glass beads providing the weight to secure it, to protect the contents from flies, insects and dust while on the kitchen table.Early settler women were skilled in dressmaking, crochet, knitting as they made clothes, furnishings, drapery and tableware for their families c1900A cotton, crocheted doily with a teapot pattern and green beads at edges to keep it in place when protecting contents of a jug or cupkitchen equipment, crochetwork, napery, doilies, milk jugs, early settlers, market gardeners, cooking utensils, kitchenware, castiron cooking pots, blacksmiths, slow cooking, moorabbin shire, bentleigh, mckinnon, highett, cheltenham, -
 City of Moorabbin Historical Society (Operating the Box Cottage Museum)
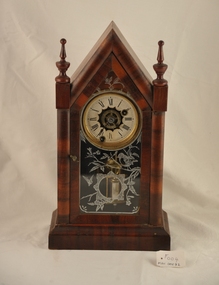
Functional object - Clocks, small 'Ansonia' c1887, c1887
Ansonia Clocks were made by a clock manufacturing business which started in Ansonia, Connecticut, in 1851 and which moved to Brooklyn, New York, in 1878. An enormously successful business, it turned out thousands of clocks in a large number of styles.This Ansonia clock was owned by the pioneer family of Miss Carol Green in Moorabbin Shire c 1887This Ansonia clock was owned by the pioneer family of Miss Carol Green in Moorabbin Shire c 1887A small ANSONIA clock. c1887 with a winding key and pendulum and a hinged front glass door This Ansonia clock was restored by Mr Frank M. Gowan.c 1960damaged label on back : AWARD PARIS..... / SMALL SHAR..... / ANSONIA CLOCK / none genuine without ' ( symbol) ' / factories at ANSONIA Conn. Brook / Salesroom .....19 Cliff Street ....../ansonia clock company, connecticut, america, phelps anson, terry theodore, andrews franklin, brighton, moorabbin, furniture, pioneers, clocks, market gardeners, early settlers, green carol, gowan frank -
 City of Moorabbin Historical Society (Operating the Box Cottage Museum)
Furniture, Wardrobe 3 piece 3 drawers c1900, c1900
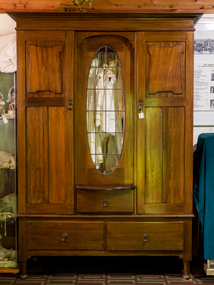
The sections of this wardrobe can be lifted apart so that it can be transported easily and when assembled provides suitable hanging and storage space for the clothes and bed covers of an early settler family This wardrobe is of a type commonly used by early settler families in Moorabbin Shire c1900Wooden Wardrobe with 3 sections- top, hanging space with a central oval glass window, a shallow central drawer and 2 doors with key locks, and drawer section with 2 deep drawers early settlers, market gardeners, poultry farmers, mechanics institutes, furniture, kitchen equipment, clothing, drapery, haberdashery, green pederson carol, city of moorabbin, county of bourke, moorabbin roads board, parish of moorabbin, shire of moorabbin, henry dendy's special survey 1841, were j.b.; bent thomas, highett william, ormond francis, maynard dennis, -
 City of Moorabbin Historical Society (Operating the Box Cottage Museum)
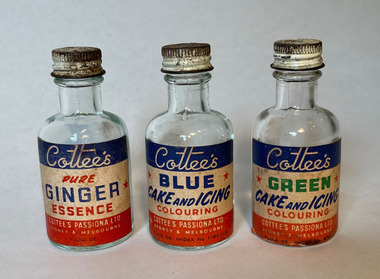
Container - "Cottees" Cake and Icing Colouring (2 bottles) and Pure Ginger Essence (1bottle), Kitchen Equipment
3 clear glass bottles with labels1. Cottee's Pure Ginger Essence, Cottees Passiona Ltd Sydney and Melbourne. 1 fluid oz. 2. Cottee's Blue Cake and Icing Colouring, Cottees Passiona Ltd Sydney and Melbourne. 1 fluid oz. 3. Cottee's Green Cake and Icing Colouring, Cottees Passiona Ltd Sydney and Melbourne. 1 fluid oz. -
 City of Moorabbin Historical Society (Operating the Box Cottage Museum)
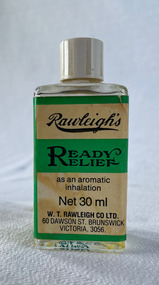
Domestic object - Rawleigh's Ready Relief, as an aromatic inhalation, 1967
Rawleigh's Ready Relief was advertised for checking and relieving head colds and catarrh. W. T. Rawleighs Co Ltd was a Canadian firm who expanded their food manufacturing business to Australia in 1928. In 1934 they purchased land in Dawson Road, Brunswick and built a five storey brick and reinforced factory. The building was still standing in 2022.Clear glass bottle with white plastic screw on lid. Paper wrap around label printed in green, black and pinkFRONT: Rawleigh's Ready Relief as an aromatic inhalation Net 30 ml W. T. Rawleigh Co Ltd. 60 Dawson St. Brunswick Victoria, 3056. LEFT SIDE: Active Constituents % w/w Alcohol 57.571, Camphor Crystals 4.789, Menthol Crystals 10.200, Menthol Liquid 5.100, Oil of Lavender 50% 18.124 Oil of Pinus Pumilous 0.786, Oil of Eucalyptus 0.180, Musc Ambrette Solution 0.20, Dist. Water 3.00. Reg. Vic 18810 E2012 RIGHT SIDE: Directions: Place drop or tow on folded handkerchief. Inhale gently, then gradually deepen inhalation. At night put a few drops at end of pillow. Not recommended for children under three years. Keep tightly closed. Store in cool place.medical, rawleighs co ltd, brunswick -
 Flagstaff Hill Maritime Museum and Village
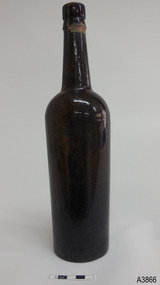
Container - Bottle, 1840s to 1910
This handmade ‘gallon’ style of bottle was generally used for storing and transporting wine and ale. Many bottles similar to this one have their bases embossed with “6 TO THE GALLON”. It is one of many artefacts recovered from unidentified shipwrecks along Victoria’s coast between the late 1960s and the early 1970s. It is now part of the John Chance Collection. The capacity of this is one-sixth of a gallon (imperial measure), which is equal to 758 ml. (American bottles were often inscribed “5 TO THE GALLON”, which is one-fifth of an American gallon, equal to 757 ml.) Contemporary home brewers can purchase new ‘6 to gallon’ bottles that hold 750 ml. and are sold in cases of 36 bottles, which is equal to 6 gallons of wine. Glass was made thousands of years ago by heating together quartz-sand (Silica), lime and potash. Potash was obtained from burnt wood, but these days potash is mined. The natural sand had imperfections such as different forms of iron, resulting in ‘black’ glass, which was really dark green or dark amber colour. The ‘black’ glass was enhanced by residual carbon in the potash. Black glass is rarely used nowadays but most beer, wine, and liquors are still sold in dark coloured glass. Glass vessels were core-formed from around 1500 BC. An inner core with the vessel’s shape was formed around a rod using a porous material such as clay or dung. Molten glass was then modelled around the core and decorated. When the glass had cooled the vessel was immersed in water and the inner core became liquid and was washed out. Much more recently, bottlers were crafted by a glassblower using molten glass and a blow pipe together with other hand tools. Another method was using simple moulds, called dip moulds, that allowed the glass to be blown into the mould to form the base, then the glassblower would continue blowing free-form to shape the shoulders and neck. The bottle was then finished by applying a lip. These moulded bottles were more uniform in shape compared to the free-form bottles originally produced. English glassblowers in the mid-1800s were making some bottles with 2-piece and 3-piece moulds, some with a push-up style base, sometimes with embossing in the base as well. Improvements allowed the moulds to also have embossed and patterned sides, and straight sided shapes such as hexagons. Bottles made in full moulds usually displayed seam seams or lines. These process took skill and time, making the bottles valuable, so they were often recycled. By the early 20th century bottles were increasingly machine made, which greatly reduced the production time and cost. This bottle is historically significant as an example of a handmade, blown inscribed glass bottle manufactured in the mid-to-late 1800s for specific use as a liquor bottle with a set measurement of one-sixth of gallon. It is also historically significant as an example of liquor bottles imported into Colonial Victoria in the mid-to-late 1800s, giving a snapshot into history and social life that occurred during the early days of Victoria’s development, and the sea trade that visited the ports in those days. The bottle is also significant as one of a group of bottles recovered by John Chance, a diver in Victoria’s coastal waters in the late 1960s to early 1970s. Items that come from several wrecks have since been donated to the Flagstaff Hill Maritime Village’s museum collection of shipwreck artefacts by his family, illustrating this item’s level of historical value. Bottle, brown glass, handmade. Tall slim Gallon style liquor bottle. Applied, double collar lip; square upper with flared lower. Neck has seams and shoulder seam from 3-piece mould. Body with horizontal ripples tapers inwards to base. Push-up base with pontil mark and embossed inscription. Tape over wire around mouth. Cork remnants inside mouth. Embossed on base "6 TO THE GALLON"flagstaff hill, warrnambool, flagstaff hill maritime museum, maritime museum, shipwreck coast, flagstaff hill maritime village, great ocean road, shipwreck artefact, john chance, glass bottle, antique bottle, gallon bottle, 6 to the gallon bottle, handmade, dip mould, mouth blown, pontil mark, blown bottle, liquor bottle, ale bottle, double collar, 19th century bottle, collectable -
 Flagstaff Hill Maritime Museum and Village
Container - Bottle, 1840s to 1910
This handmade ‘gallon’ style of bottle was generally used for storing and transporting wine and ale. Many bottles similar to this one have their bases embossed with “6 TO THE GALLON”. It is one of many artefacts recovered from unidentified shipwrecks along Victoria’s coast between the late 1960s and the early 1970s. It is now part of the John Chance Collection. The capacity of this is one-sixth of a gallon (imperial measure), which is equal to 758 ml. (American bottles were often inscribed “5 TO THE GALLON”, which is one-fifth of an American gallon, equal to 757 ml.) Contemporary home brewers can purchase new ‘6 to gallon’ bottles that hold 750 ml. and are sold in cases of 36 bottles, which is equal to 6 gallons of wine. Glass was made thousands of years ago by heating together quartz-sand (Silica), lime and potash. Potash was obtained from burnt wood, but these days potash is mined. The natural sand had imperfections such as different forms of iron, resulting in ‘black’ glass, which was really dark green or dark amber colour. The ‘black’ glass was enhanced by residual carbon in the potash. Black glass is rarely used nowadays but most beer, wine, and liquors are still sold in dark coloured glass. Glass vessels were core-formed from around 1500 BC. An inner core with the vessel’s shape was formed around a rod using a porous material such as clay or dung. Molten glass was then modelled around the core and decorated. When the glass had cooled the vessel was immersed in water and the inner core became liquid and was washed out. Much more recently, bottlers were crafted by a glassblower using molten glass and a blow pipe together with other hand tools. Another method was using simple moulds, called dip moulds, that allowed the glass to be blown into the mould to form the base, then the glassblower would continue blowing free-form to shape the shoulders and neck. The bottle was then finished by applying a lip. These moulded bottles were more uniform in shape compared to the free-form bottles originally produced. English glassblowers in the mid-1800s were making some bottles with 2-piece and 3-piece moulds, some with a push-up style base, sometimes with embossing in the base as well. Improvements allowed the moulds to also have embossed and patterned sides, and straight sided shapes such as hexagons. Bottles made in full moulds usually displayed seam seams or lines. These process took skill and time, making the bottles valuable, so they were often recycled. By the early 20th century bottles were increasingly machine made, which greatly reduced the production time and cost. This bottle is historically significant as an example of a handmade, blown inscribed glass bottle manufactured in the mid-to-late 1800s for specific use as a liquor bottle with a set measurement of one-sixth of gallon. It is also historically significant as an example of liquor bottles imported into Colonial Victoria in the mid-to-late 1800s, giving a snapshot into history and social life that occurred during the early days of Victoria’s development, and the sea trade that visited the ports in those days. The bottle is also significant as one of a group of bottles recovered by John Chance, a diver in Victoria’s coastal waters in the late 1960s to early 1970s. Items that come from several wrecks have since been donated to the Flagstaff Hill Maritime Village’s museum collection of shipwreck artefacts by his family, illustrating this item’s level of historical value. Bottle, brown glass, handmade. Tall slim Gallon style liquor bottle. Applied double collar lip; square upper with flared lower. Push-up base with pontil mark and embossed inscription. Base is uneven, glass composition has imperfections.Embossed on base "6 TO THE GALLON"flagstaff hill, warrnambool, flagstaff hill maritime museum, maritime museum, shipwreck coast, flagstaff hill maritime village, great ocean road, shipwreck artefact, john chance, glass bottle, antique bottle, gallon bottle, 6 to the gallon bottle, handmade, dip mould, mouth blown, pontil mark, blown bottle, liquor bottle, ale bottle, double collar, 19th century bottle, collectable -
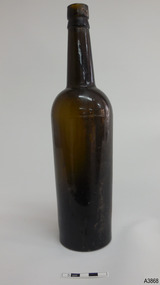 Flagstaff Hill Maritime Museum and Village
Container - Bottle, 1840s to 1910
This handmade ‘gallon’ style of bottle was generally used for storing and transporting wine and ale. Many bottles similar to this one have their bases embossed with “6 TO THE GALLON”. It is one of many artefacts recovered from unidentified shipwrecks along Victoria’s coast between the late 1960s and the early 1970s. It is now part of the John Chance Collection. The capacity of this is one-sixth of a gallon (imperial measure), which is equal to 758 ml. (American bottles were often inscribed “5 TO THE GALLON”, which is one-fifth of an American gallon, equal to 757 ml.) Contemporary home brewers can purchase new ‘6 to gallon’ bottles that hold 750 ml. and are sold in cases of 36 bottles, which is equal to 6 gallons of wine. Glass was made thousands of years ago by heating together quartz-sand (Silica), lime and potash. Potash was obtained from burnt wood, but these days potash is mined. The natural sand had imperfections such as different forms of iron, resulting in ‘black’ glass, which was really dark green or dark amber colour. The ‘black’ glass was enhanced by residual carbon in the potash. Black glass is rarely used nowadays but most beer, wine, and liquors are still sold in dark coloured glass. Glass vessels were core-formed from around 1500 BC. An inner core with the vessel’s shape was formed around a rod using a porous material such as clay or dung. Molten glass was then modelled around the core and decorated. When the glass had cooled the vessel was immersed in water and the inner core became liquid and was washed out. Much more recently, bottlers were crafted by a glassblower using molten glass and a blow pipe together with other hand tools. Another method was using simple moulds, called dip moulds, that allowed the glass to be blown into the mould to form the base, then the glassblower would continue blowing free-form to shape the shoulders and neck. The bottle was then finished by applying a lip. These moulded bottles were more uniform in shape compared to the free-form bottles originally produced. English glassblowers in the mid-1800s were making some bottles with 2-piece and 3-piece moulds, some with a push-up style base, sometimes with embossing in the base as well. Improvements allowed the moulds to also have embossed and patterned sides, and straight sided shapes such as hexagons. Bottles made in full moulds usually displayed seam seams or lines. These process took skill and time, making the bottles valuable, so they were often recycled. By the early 20th century bottles were increasingly machine made, which greatly reduced the production time and cost. This bottle is historically significant as an example of a handmade, blown inscribed glass bottle manufactured in the mid-to-late 1800s for specific use as a liquor bottle with a set measurement of one-sixth of gallon. It is also historically significant as an example of liquor bottles imported into Colonial Victoria in the mid-to-late 1800s, giving a snapshot into history and social life that occurred during the early days of Victoria’s development, and the sea trade that visited the ports in those days. The bottle is also significant as one of a group of bottles recovered by John Chance, a diver in Victoria’s coastal waters in the late 1960s to early 1970s. Items that come from several wrecks have since been donated to the Flagstaff Hill Maritime Village’s museum collection of shipwreck artefacts by his family, illustrating this item’s level of historical value. Bottle, brown glass, handmade. Tall slim Gallon style liquor bottle. Applied double collar lip; square upper and flared lower. Neck has seams and shoulder seam from 3-piece mould. Body tapers towards base. Push-up base with pontil mark and embossed inscription. Base is uneven. Mouth has remnants of the seal in it and tape remnants around its outside. Embossed on base "6 TO THE GALLON"flagstaff hill, warrnambool, flagstaff hill maritime museum, maritime museum, shipwreck coast, flagstaff hill maritime village, great ocean road, shipwreck artefact, john chance, glass bottle, antique bottle, gallon bottle, 6 to the gallon bottle, handmade, dip mould, mouth blown, pontil mark, blown bottle, liquor bottle, ale bottle, double collar, 19th century bottle, collectable -
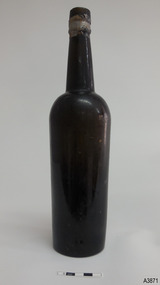 Flagstaff Hill Maritime Museum and Village
Container - Bottle, 1840s to 1910
This handmade ‘gallon’ style of bottle was generally used for storing and transporting wine and ale. Many bottles similar to this one have their bases embossed with “6 TO THE GALLON”. However, this bottle is rare, in that the base has been embossed then over-embossed with the same text, letters overlapping. It is one of many artefacts recovered from unidentified shipwrecks along Victoria’s coast between the late 1960s and the early 1970s. It is now part of the John Chance Collection. The capacity of this is one-sixth of a gallon (imperial measure), which is equal to 758 ml. (American bottles were often inscribed “5 TO THE GALLON”, which is one-fifth of an American gallon, equal to 757 ml.) Contemporary home brewers can purchase new ‘6 to gallon’ bottles that hold 750 ml. and are sold in cases of 36 bottles, which is equal to 6 gallons of wine. Glass was made thousands of years ago by heating together quartz-sand (Silica), lime and potash. Potash was obtained from burnt wood, but these days potash is mined. The natural sand had imperfections such as different forms of iron, resulting in ‘black’ glass, which was really dark green or dark amber colour. The ‘black’ glass was enhanced by residual carbon in the potash. Black glass is rarely used nowadays but most beer, wine, and liquors are still sold in dark coloured glass. Glass vessels were core-formed from around 1500 BC. An inner core with the vessel’s shape was formed around a rod using a porous material such as clay or dung. Molten glass was then modelled around the core and decorated. When the glass had cooled the vessel was immersed in water and the inner core became liquid and was washed out. Much more recently, bottlers were crafted by a glassblower using molten glass and a blow pipe together with other hand tools. Another method was using simple moulds, called dip moulds, that allowed the glass to be blown into the mould to form the base, then the glassblower would continue blowing free-form to shape the shoulders and neck. The bottle was then finished by applying a lip. These moulded bottles were more uniform in shape compared to the free-form bottles originally produced. English glassblowers in the mid-1800s were making some bottles with 2-piece and 3-piece moulds, some with a push-up style base, sometimes with embossing in the base as well. Improvements allowed the moulds to also have embossed and patterned sides, and straight sided shapes such as hexagons. Bottles made in full moulds usually displayed seam seams or lines. These process took skill and time, making the bottles valuable, so they were often recycled. By the early 20th century bottles were increasingly machine made, which greatly reduced the production time and cost. This bottle is a rare find, in that the base has been over-embossed with the same lettering, letters overlapping one another. This bottle is historically significant as an example of a handmade, blown inscribed glass bottle manufactured in the mid-to-late 1800s for specific use as a liquor bottle with a set measurement of one-sixth of gallon. It is also historically significant as an example of liquor bottles imported into Colonial Victoria in the mid-to-late 1800s, giving a snapshot into history and social life that occurred during the early days of Victoria’s development, and the sea trade that visited the ports in those days. The bottle is also significant as one of a group of bottles recovered by John Chance, a diver in Victoria’s coastal waters in the late 1960s to early 1970s. Items that come from several wrecks have since been donated to the Flagstaff Hill Maritime Village’s museum collection of shipwreck artefacts by his family, illustrating this item’s level of historical value. Bottle, over embossed, brown glass, handmade, rare. Tall slim Gallon style liquor bottle. Applied double collar lip; square upper and flared lower. Mouth has sealing tape remnants around top. Mould seam around shoulder. Body tapers inwards to push-up base. Top edge of lip has application faults. There is also a rectangular indent in the upper edge of lip. Base is embossed and over embossed, with the letters overlapping each other. Embossed on base "6 TO THE GALLON", then over-embossed with the same "6 TO THE GALLON"flagstaff hill, warrnambool, flagstaff hill maritime museum, maritime museum, shipwreck coast, flagstaff hill maritime village, great ocean road, shipwreck artefact, john chance, glass bottle, antique bottle, gallon bottle, 6 to the gallon bottle, handmade, dip mould, mouth blown, pontil mark, blown bottle, liquor bottle, ale bottle, double collar, 19th century bottle, collectable, over embossed, rare -
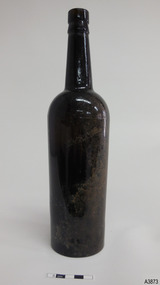 Flagstaff Hill Maritime Museum and Village
Container - Bottle, 1840s to 1910
This handmade ‘gallon’ style of bottle was generally used for storing and transporting wine and ale. Many bottles similar to this one have their bases embossed with “6 TO THE GALLON”. It is one of many artefacts recovered from an unidentified shipwrecks along Victoria’s coast between the late 1960s and the early 1970s. It is now part of the John Chance Collection. The capacity of this is one-sixth of a gallon (imperial measure), which is equal to 758 ml. (American bottles were often inscribed “5 TO THE GALLON”, which is one-fifth of an American gallon, equal to 757 ml.) Contemporary home brewers can purchase new ‘6 to gallon’ bottles that hold 750 ml. and are sold in cases of 36 bottles, which is equal to 6 gallons of wine. Glass was made thousands of years ago by heating together quartz-sand (Silica), lime and potash. Potash was obtained from burnt wood, but these days potash is mined. The natural sand had imperfections such as different forms of iron, resulting in ‘black’ glass, which was really dark green or dark amber colour. The ‘black’ glass was enhanced by residual carbon in the potash. Black glass is rarely used nowadays but most beer, wine, and liquors are still sold in dark coloured glass. Glass vessels were core-formed from around 1500 BC. An inner core with the vessel’s shape was formed around a rod using a porous material such as clay or dung. Molten glass was then modelled around the core and decorated. When the glass had cooled the vessel was immersed in water and the inner core became liquid and was washed out. Much more recently, bottlers were crafted by a glassblower using molten glass and a blow pipe together with other hand tools. Another method was using simple moulds, called dip moulds, that allowed the glass to be blown into the mould to form the base, then the glassblower would continue blowing free-form to shape the shoulders and neck. The bottle was then finished by applying a lip. These moulded bottles were more uniform in shape compared to the free-form bottles originally produced. English glassblowers in the mid-1800s were making some bottles with 2-piece and 3-piece moulds, some with a push-up style base, sometimes with embossing in the base as well. Improvements allowed the moulds to also have embossed and patterned sides, and straight sided shapes such as hexagons. Bottles made in full moulds usually displayed seam seams or lines. These process took skill and time, making the bottles valuable, so they were often recycled. By the early 20th century bottles were increasingly machine made, which greatly reduced the production time and cost. This bottle is historically significant as an example of a handmade, blown inscribed glass bottle manufactured in the mid-to-late 1800s for specific use as a liquor bottle with a set measurement of one-sixth of gallon. It is also historically significant as an example of liquor bottles imported into Colonial Victoria in the mid-to-late 1800s, giving a snapshot into history and social life that occurred during the early days of Victoria’s development, and the sea trade that visited the ports in those days. The bottle is also significant as one of a group of bottles recovered by John Chance, a diver in Victoria’s coastal waters in the late 1960s to early 1970s. Items that come from several wrecks have since been donated to the Flagstaff Hill Maritime Village’s museum collection of shipwreck artefacts by his family, illustrating this item’s level of historical value. Bottle, brown glass, Tall slim gallon style. Applied double collar lip; upper is straight, lower is flared. Lip has bumps around the top. Neck has slight taper towards shoulder, which has a shoulder seam from the mould. Body tapers inwards towards base. Push up base has a pontil mark. Base is embossed.Embossed on base "6 TO THE GALLON"flagstaff hill, warrnambool, flagstaff hill maritime museum, maritime museum, shipwreck coast, flagstaff hill maritime village, great ocean road, shipwreck artefact, john chance, glass bottle, antique bottle, gallon bottle, 6 to the gallon bottle, handmade, dip mould, mouth blown, pontil mark, blown bottle, liquor bottle, ale bottle, double collar, 19th century bottle, collectable -
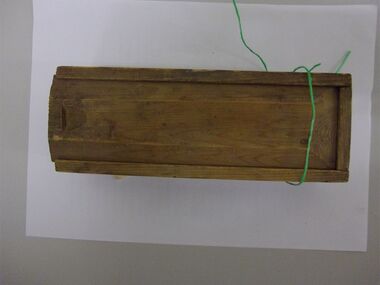 Bendigo Historical Society Inc.
Slide - MAGIC LANTERN COLLECTION: MAGIC LANTERN SLIDES
Wooden box with sliding lid - (bottom of box has a War Cry newspaper clipping dated 9.9.1893). Containing assorted glass antique Circa 1870's - 1900s (produced by Ernst Plank ?). Magic Lantern slides, 1 x red bordered slide - showing initials E.P.- Ernst Plank ? 7 inches x 2 inches -pictures include nursery rhyme / 8 x green bordered slides with ships / 7 x blue bordered slides 7 inches x 2 inches pictures include nursery rhymes / 1 x slide - pink border -6 x 1 1/2 inches (x ref 7535.2)photography, projectors - still -
 Bendigo Historical Society Inc.
Slide - MAGIC LANTERN COLLECTION: MAGIC LANTERN SLIDES
Wooden box with sliding lid - (bottom of box has an Argus newspaper clipping dated 6.7.1904) containing assorted glass antique Circa 1870's - 1900s (produced by Ernst Plank ?) Magic Lantern slides 9 x red bordered slides - some showing initials E.P.- Ernst Plank , 7 inches x 2 inches -pictures include nursery rhymes / soldiers / animals / 3 x green bordered slides with people and animals- 7 inches x 2 inches/ 4 x blue bordered slides 7 inches x 2 inches pictures include nursery rhymes / 1 x slide - pink border -6 x 1 1/2 inches (x ref 7535.3)Ernst Plank ?photography, projectors-still, ernst plank -
 Bendigo Historical Society Inc.
Photograph - PHOTO OF MABEL HOPKINSON & BILLIE THOMPSON, 1916 - 1918
Black & white photo of Billie Thompson in WW1 - AIF Uniform sitting on wooden crossed chair. Black & white photo of Mabel Hopkinson standing, dressed in long white wedding dress with long sleeves, dark hair with large white hat, necklace, holding bunch of flowers, white shoes. Glass in middle of photo with painting of little red robin bird, sitting on a tree branch of white flowers-blossom, with green leaves. Frame has green leaf branches with silver buds. Markings/Inscriptions: Picture frames & gold enamel enlargement & presentation frames a speciality. Picture Gallery. The Hall. Smith street. Collingwood. Near Stanley street. ( DU. RIEU & Co. TYP ) Deframed 2022.Made by L.H.Evans manufacturer of the celebrated lion brand.person, group, wedding portrait -
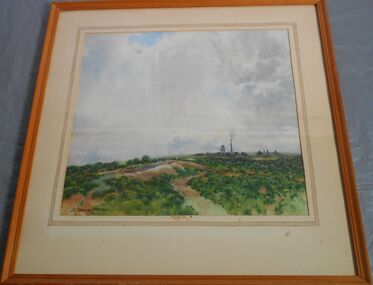 Bendigo Historical Society Inc.
Painting - Bendigo Mining Country, Norman Penrose
Born in 1903, Norman Penrose studied at the Bendigo School of Mines. A painter and a teacher, he lived in Bendigo most of his life.Watercolour painting by Norman Penrose titled "Bendigo Mining Country." It shows a barren landscape of green shrubs and reddish dirt under a cloudy sky. A single poppet head and a chimney with smoke coming out can be seen on the right hand side with two houses further away. The painting is signed on the bottom left-hand side. The painting is under glass in a light brown wooden frame. Norman Penrose Collection On the back "Norman W. Penrose" ("Bendigo Mining Country') 14 Barkly Terrace, Bendigo. phone: 36420. In red chalk No 4 within a circle. bendigo, mining, norman penrose, artist, teacher -
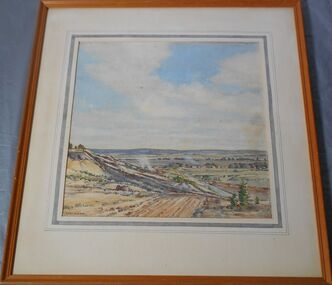 Bendigo Historical Society Inc.
Painting - A view near Ballarat, Norman Penrose
Born in 1903, Norman Penrose studied at the Bendigo School of Mines. A painter and a teacher, he lived in Bendigo most of his life.Watercolour painting by Norman Penrose titled "A view near Ballarat." It shows a barren landscape of green shrubs and reddish dirt under a cloudy sky. A few trees at bottom right-hand and a couple of houses in the background. The painting is signed on the bottom left-hand side. The painting is under glass in a light brown wooden frame. Norman Penrose Collection On the back "A view near Ballarat" phone 36420. Address: 14 Barkly Terrace, Bendigo. In red chalk within a circle No. 22. norman penrose, artist, teacher, ballarat