Showing 8456 items matching " 20"
-
 Bendigo Military Museum
Award - MEDAL SET WW1, Post 1919
Charles Hendry served 2 years in Jnr Cadets prior to enlisting on 19.8.14 No 326 in D Coy 10th Batt AIF aged 20 years 9 months. Embarked for Eygpt 20.10.14, embarked for Gallipoli 2.3.15, hospital 10.9.15 with Gastro Enteritis, returns to Gallipoli 6.11.15. Transfers to 50th Batt 26.2.16, promoted L/Cpl 20.3.16, embark for France 5.6.16, promoted Cpl 1.7.16, hospital 15.10.16 sprained ankle while on duty, promoted T/Sgt 9.3.17, KIA 2.4.17.Medals, court mounted, set of (3) re C Hendry. 1. 1914-15 Star, replica not engraved. 2. War Medal 1914-18replica not engraved. 3. Victory Medal 1914 - 1919."326 T/Sgt C Hendry 10 Bn A.I.F"medals, military, ron mills collection -
 Great Stupa of Universal Compassion
Plaque (item) - Plaque honoring Ian Green for his exemplary leadership, generosity, and commitment in promoting the belief of Jade Buddha toward universal peace around the world, 07/02/2010
The Jade Buddha for Universal Peace, the largest Buddha carved from gemstone-quality jade in the world, is the centerpiece of the Great Stupa of Universal Compassion in Bendigo, Australia. Standing 2.5 meters tall and weighing 4 tonnes, this priceless Buddhist statue toured over 120 cities across 20 countries from 2009 to 2018, inspiring peace in families, schools, and communities worldwide. After attracting an estimated 12 million visitors, it returned to the Great Stupa in May 2018, where it continues to be a potent symbol of peace.This wooden plaque with an engraved metal plate symbolizes formal recognition of Ian Green’s exemplary leadership, generosity, and commitment to spreading the message of universal peace. His efforts in guiding the Jade Buddha’s journey helped forge meaningful connections between Buddhist communities and individuals worldwide. The significance of this plaque extends beyond personal acknowledgment, representing an appreciation for Green’s impact on the success of the Jade Buddha’s global tour and the values it embodies. Preserving this plaque ensures continued recognition of his contributions and reinforces the ongoing importance of fostering peace and interfaith harmony. jade buddha, memorabilia -
 Geoffrey Kaye Museum of Anaesthetic History
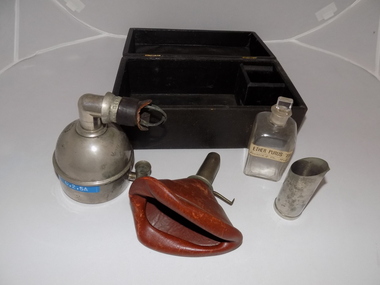
Equipment - Inhaler, Clover, Mayer & Meltzer, 1877
Dr. Joseph Clover (1825-1882), an English physician, first described his Portable Regulating Ether Inhaler on Jan. 20, 1877. Clover was an especially sought after anesthesiologist and early pioneer in the specialty. This was the best-known of many inhalers that Clover designed. The dome-shaped reservoir was turned to points on a control dial to gradually increase or decrease the percentage of the air that passed over the ether. Several inventors based new inhalers on this, while the original continued to be manufactured as late as the beginning of WWII. (Source: Wood Library Museum)Black round topped box with brass hooks at front and brass hinges at rear. There is a black fabric handle on the top. Inside the box is black padding with the manufacturer's logo printed in gold leaf. There is a square section in the base of the box for holding the square clear glass bottle for ether. There is also a dome-shaped metal inhaler with a "whistle tip" type connection to the mask. The mask is made of tan leather. There is also a metal ether measure for pouring the ether.Printed in gold leaf inside lid of box: MAYER & MELTZER [?] PORTLAND ST. / MAKERS •Engraved on side of inhaler: Mayer & Meltzer / London •Stamped on connector of inhaler: MAYER & MELTZER RN NO 212327 •Engraved on rear of inhaler: Clover's Inhaler •Printed in white on blue sticker: O.2.5A •Measurements have been stamped on the bottom of the inhaler. •Printed in black ink on mask: MADE IN ENGLAND •Stamped on metal connector inside mask: 6 •Printed in black ink on white manufacturer's label on glass bottle: ETHER PURUS '720 / H. Francis & Co., Melbourne.clover, joseph, mollison, crawford henry, george bankin, mccaul, kevin, royal women's hospital, coroner, freemason, surgeon, gynaecologist, obstetrician, mayer & meltzer, francis & co, melbourne, ether purus -
 Bendigo Military Museum
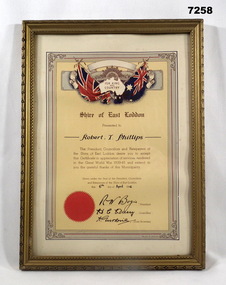
Certificate - SHIRE OF EAST LODDON, FRAMED, Arnall & Jackson, c.1940's
Certificate "FOR KING/ AND/ COUNTRY" from 'SHIRE OF EAST LODDON" "CERTIFICATE IN APPRECIATION FOR SERVICES RENDERED IN THE GREAT WORLD WAR 1939-45" "Robert T. Phillips" Robert Thomas Phillips V28869 (AMF) VX113093 (2nd AIF). Enlisted 16.12.1941 age 20 years 7 months as V28869, transferred to the AIF 14.10.1942 in 2/2nd Tank Transporter Coy ASC, listed as served in Adelaide River, Winnellie and Darwin between 25.11.1943 to 23.9.1945. Discharged 19/10/45 with the rank CPL in A.A. Pay Corps.CERTIFICATE - ORIGINAL, ON PAPER. Dark Brown print. Illustrated in colours, red, blue, yellow and beige. Top - Rising Sun Badge with British and Australian Flags, outline map of Australia and surrounded by decorative scroll work. Bottom - Red seal. Certificate framed with decorative line and scroll work. Frame - timber, gold colour paint with black paint highlights to decorate moulding. Glass front. Backing - cardboard and brown paper. Original metal hanging clips and cotton cord.Handwritten in black ink: "Robert T. Phillips" - 6th April 1946, Signed by R.W. Bogie, President. H.C....???...... Councilor, A. Gutherie Shire Secretary.framed accessories, certificate, ww2, shire of east loddon -
 Bendigo Military Museum
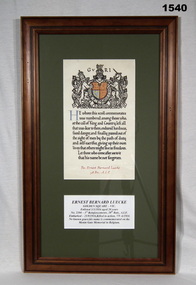
Memorabilia - MEMORIAL SCROLL WW1, FRAMED, Bethany Gallery, c.1919
ERNEST BERNARD LUECKE No 2104 enlisted in the 38th Batt AIF on 3.3.1916 age 20 years. He embarked with the 3rd reinforcements 38th Batt on 25.9.1916. He arrived in France 21.12.1916. Hospitalised with Myalgia 8.1.1917 then Influenza 7.2.1917. He returned to his unit 22.5.1917. KIA between 7 - 9 June 1917. No known grave. Inscription at bottom incorrect E B LUECKE killed in Belgium between 7 - 9 June 1917. Commemorative scroll issued to family of the dead soldier.Rectangular Memorial Scroll, olive mount, brown wooden frame, glass front. “Pte ERNEST BERNARD LUECKE Golden Square Vic No 2104 3rd Reinforcements, 38 Batt AIF Embarked 25.9.1916 KIA 7.9.1916”documents-certificates, frame accessories, luecke, kia -
 Great Stupa of Universal Compassion
Photograph (item) - A photograph of the Jade Buddha displayed at Phat Da Buddhist Temple, San Diego, California, 06/02/2011
The Jade Buddha for Universal Peace, the largest Buddha carved from gemstone-quality jade in the world, is the centrepiece of the Great Stupa of Universal Compassion in Bendigo, Australia. Standing 2.5 metres tall and weighing 4 tonnes, this priceless Buddhist statue toured over 120 cities across 20 countries from 2009 to 2018, inspiring peace in families, schools, and communities worldwide. After attracting an estimated 12 million visitors, it returned to the Great Stupa in May 2018, where it continues to be a potent symbol of peace.This framed photograph shows the Jade Buddha for Universal Peace on display at Phat Da Buddhist Temple in San Diego, California. jade buddha, memorabilia -
 Great Stupa of Universal Compassion
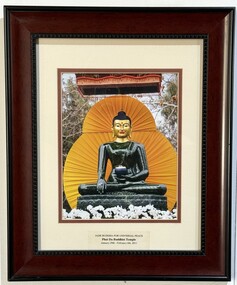
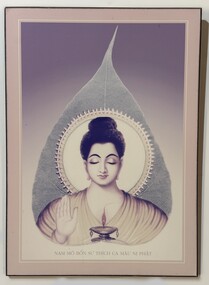
Artwork, other (item) - Mounted picture of Shakyamuni Buddha presented by Thich Minh Hieu, Abbot of Minh Quang Temple Sydney, August 2009
The Jade Buddha for Universal Peace, the largest Buddha carved from gemstone-quality jade in the world, is the centerpiece of the Great Stupa of Universal Compassion in Bendigo, Australia. Standing 2.5 meters tall and weighing 4 tonnes, this priceless Buddhist statue toured over 120 cities across 20 countries from 2009 to 2018, inspiring peace in families, schools, and communities worldwide. After attracting an estimated 12 million visitors, it returned to the Great Stupa in May 2018, where it continues to be a potent symbol of peace.This artwork was presented to the Great Stupa to commemorate the Jade Buddha viewing at the Minh Quang Temple in Sydney.jade buddha, memorabilia -
 Great Stupa of Universal Compassion
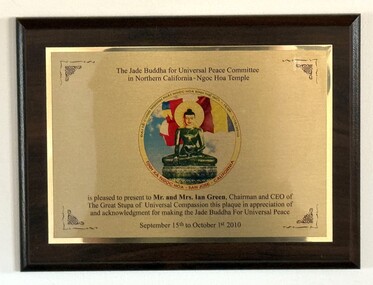
Plaque (item) - Plaque to Ian and Judy Green from Ngoc Hoa Temple, 01/10/2010
The Jade Buddha for Universal Peace, the largest Buddha carved from gemstone-quality jade in the world, is the centrepiece of the Great Stupa of Universal Compassion in Bendigo, Australia. Standing 2.5 metres tall and weighing 4 tonnes, this priceless Buddhist statue toured over 120 cities across 20 countries from 2009 to 2018, inspiring peace in families, schools, and communities worldwide. After attracting an estimated 12 million visitors, it returned to the Great Stupa in May 2018, where it continues to be a potent symbol of peace.The Jade Buddha for Universal Peace was carved from a rare boulder of translucent gemstone-quality jade (“Polar Pride”) that was discovered in Canada in the year 2000. The plaque was presented to Ian Green from Ngoc Hoa Temple in appreciation and acknowledgement for making the Jade Buddha for Universal Peace.jade buddha, memorabilia -
 Great Stupa of Universal Compassion
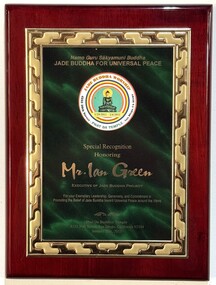
Plaque (item) - Plaque to Ian Green, 29/01/2011
The Jade Buddha for Universal Peace, the largest Buddha carved from gemstone-quality jade in the world, is the centrepiece of the Great Stupa of Universal Compassion in Bendigo, Australia. Standing 2.5 metres tall and weighing 4 tonnes, this priceless Buddhist statue toured over 120 cities across 20 countries from 2009 to 2018, inspiring peace in families, schools, and communities worldwide. After attracting an estimated 12 million visitors, it returned to the Great Stupa in May 2018, where it continues to be a potent symbol of peace.The Jade Buddha for Universal Peace was carved from a rare boulder of translucent gemstone-quality jade (“Polar Pride”) that was discovered in Canada in the year 2000. This plaque is honoring Ian Green, The Great Stupa Chairman, for exemplary leadership, generosity and commitment in promoting the belief of Jade Buddha toward Universal Peace around the world.jade buddha, memorabilia -
 Great Stupa of Universal Compassion
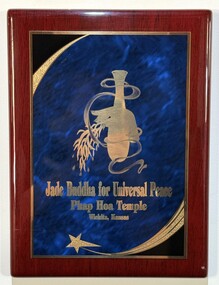
Plaque (item) - Plaque commemorating the Jade Buddha viewing at the Phap Hoa Temple, 19/04/2011
The Jade Buddha for Universal Peace, the largest Buddha carved from gemstone-quality jade in the world, is the centrepiece of the Great Stupa of Universal Compassion in Bendigo, Australia. Standing 2.5 metres tall and weighing 4 tonnes, this priceless Buddhist statue toured over 120 cities across 20 countries from 2009 to 2018, inspiring peace in families, schools, and communities worldwide. After attracting an estimated 12 million visitors, it returned to the Great Stupa in May 2018, where it continues to be a potent symbol of peace.The Jade Buddha for Universal Peace was carved from a rare boulder of translucent gemstone-quality jade (“Polar Pride”) that was discovered in Canada in the year 2000. The plaque was presented to Ian Green, chairman of The Great Stupa, commemorating the Jade Buddha viewing at the Phap Hoa Temple.jade buddha, memorabilia -
 Great Stupa of Universal Compassion
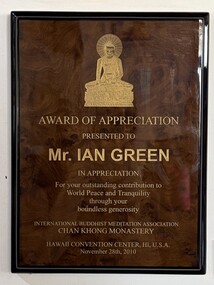
Plaque (item) - Plaque to Ian Green from International Buddhist Meditation Association Chan Khong Monastery, 28/11/2010
The Jade Buddha for Universal Peace, the largest Buddha carved from gemstone-quality jade in the world, is the centrepiece of the Great Stupa of Universal Compassion in Bendigo, Australia. Standing 2.5 metres tall and weighing 4 tonnes, this priceless Buddhist statue toured over 120 cities across 20 countries from 2009 to 2018, inspiring peace in families, schools, and communities worldwide. After attracting an estimated 12 million visitors, it returned to the Great Stupa in May 2018, where it continues to be a potent symbol of peace.The Jade Buddha for Universal Peace was carved from a rare boulder of translucent gemstone-quality jade (“Polar Pride”) that was discovered in Canada in the year 2000. This plaque was presented to Ian Green from International Buddhist Meditation Association Chan Khong Monastery in appreciation for the outstanding contribution to world peace and tranquility through boundless generosity.jade buddha, memorabilia -
 Great Stupa of Universal Compassion
Plaque (item) - Plaque from Lien-Hoa Temple, 16/05/2010
The Jade Buddha for Universal Peace, the largest Buddha carved from gemstone-quality jade in the world, is the centrepiece of the Great Stupa of Universal Compassion in Bendigo, Australia. Standing 2.5 metres tall and weighing 4 tonnes, this priceless Buddhist statue toured over 120 cities across 20 countries from 2009 to 2018, inspiring peace in families, schools, and communities worldwide. After attracting an estimated 12 million visitors, it returned to the Great Stupa in May 2018, where it continues to be a potent symbol of peace.The Jade Buddha for Universal Peace was carved from a rare boulder of translucent gemstone-quality jade (“Polar Pride”) that was discovered in Canada in the year 2000. The plaque represents a world of thanks and has imagery of the Jade Buddha, world and temple.jade buddha, memorabilia -
 Great Stupa of Universal Compassion
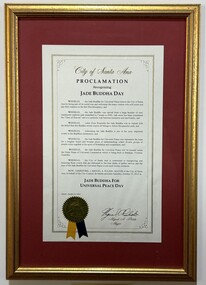
Certificate (item) - Certificate from City of Santa Ana recognizing Jade Buddha for Universal Peace Day, 23/10/2010
The Jade Buddha for Universal Peace, the largest Buddha carved from gemstone-quality jade in the world, is the centrepiece of the Great Stupa of Universal Compassion in Bendigo, Australia. Standing 2.5 metres tall and weighing 4 tonnes, this priceless Buddhist statue toured over 120 cities across 20 countries from 2009 to 2018, inspiring peace in families, schools, and communities worldwide. After attracting an estimated 12 million visitors, it returned to the Great Stupa in May 2018, where it continues to be a potent symbol of peace.The Jade Buddha for Universal Peace was carved from a rare boulder of translucent gemstone-quality jade (“Polar Pride”) that was discovered in Canada in the year 2000. The certificate from the City of Santa Ana is proclaiming Saturday, October 23, 2010, as Jade Buddha for Universal Peace Day.jade buddha, memorabilia -
 Great Stupa of Universal Compassion
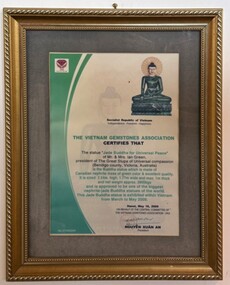
Certificate (item) - Framed certificate from Vietnamese Gemstones Association (Hoi Da Quy Viet Nam), Vietnamese Gemstones Association, 2009
The Jade Buddha for Universal Peace, the largest Buddha carved from gemstone-quality jade in the world, is the centrepiece of the Great Stupa of Universal Compassion in Bendigo, Australia. Standing 2.5 metres tall and weighing 4 tonnes, this priceless Buddhist statue toured over 120 cities across 20 countries from 2009 to 2018, inspiring peace in families, schools, and communities worldwide. After attracting an estimated 12 million visitors, it returned to the Great Stupa in May 2018, where it continues to be a potent symbol of peace. The Jade Buddha for Universal Peace was carved from a rare boulder of translucent gemstone-quality jade (“Polar Pride”) that was discovered in Canada in the year 2000. This certificate confirms its origin and quality and details its dimensions and weight in support of the claim that it is the largest Buddha carved from gemstone-quality jade in the world. jade buddha, memorabilia -
 Great Stupa of Universal Compassion
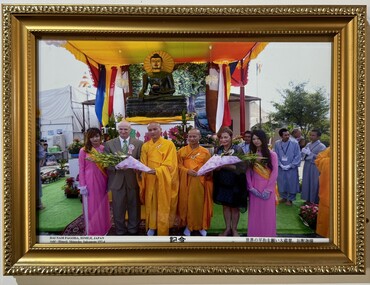
Photograph (item) - Framed photograph of Judy and Ian Green with the monks and hostesses at Dai Nam Temple, Himeji, Japan, 25/08/2013
The Jade Buddha for Universal Peace, the largest Buddha carved from gemstone-quality jade in the world, is the centrepiece of the Great Stupa of Universal Compassion in Bendigo, Australia. Standing 2.5 metres tall and weighing 4 tonnes, this priceless Buddhist statue toured over 120 cities across 20 countries from 2009 to 2018, inspiring peace in families, schools, and communities worldwide. After attracting an estimated 12 million visitors, it returned to the Great Stupa in May 2018, where it continues to be a potent symbol of peace.The image shows Ian Green, Great Stupa Chairman, with his wife and Stupa Board member Judy, being presented with flowers at Dai Nam Temple in Himeji during the Jade Buddha tour to Japan. The viewing of Jade Budda at Dai Nam Temple took place from 17 to 25 August 2013.jade buddha, memorabilia -
 Great Stupa of Universal Compassion
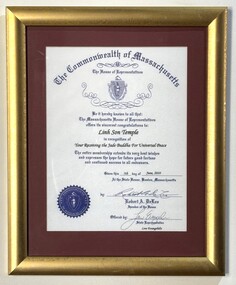
Certificate (item) - A certificate from the Commonwealth of Massachusetts congratulating the Linh Son Temple in recognition of receiving the Jade Buddha, 05/06/2010
The Jade Buddha for Universal Peace, the largest Buddha carved from gemstone-quality jade in the world, is the centrepiece of the Great Stupa of Universal Compassion in Bendigo, Australia. Standing 2.5 metres tall and weighing 4 tonnes, this priceless Buddhist statue toured over 120 cities across 20 countries from 2009 to 2018, inspiring peace in families, schools, and communities worldwide. After attracting an estimated 12 million visitors, it returned to the Great Stupa in May 2018, where it continues to be a potent symbol of peace.This is a congratulatory certificate in recognition of the Linh Son Temple receiving the Jade Buddha of Universal Peace during its USA/Canada tour from 2010 – May 2011.jade buddha, memorabilia -
 Warrnambool and District Historical Society Inc.
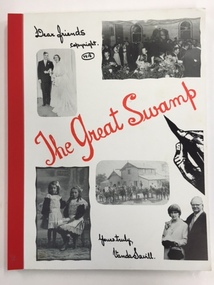
Book, The Great Swamp, 1980s
This book has been written by Vanda Savill and is about the settlers in the Wallacedale area in Western Victoria. Wallacedale is 28 kilometres south west of Hamilton and was created by the draining of the Condah Swamp. Vanda Savill (1913-2005) and her husband ran a dairy farm and the Bower Birds Nest Museum and History Centre at Heywood. Vanda Savill was passionate about keeping alive the personal histories of local people and for 20 years she wrote and published many books about the areas in which she lived. This book is of interest because it tells the stories of settlers in the Wallacedale area of Western Victoria. It also has appeal because of the warm, conversational style of the author.This is a soft cover book of 216 pages. The cover has a white background with a black and white image of a hand holding a pen and, on the front cover, five black and white photographs and, on the back cover, nine black and white photographs. The title of the book is in red cursive writing. The information in the book is printed from the original handwriting of the author (Vanda Savill). The book also has many black and white photographs. The book is bound with red tape.wallacedale, history of western victoria, vanda savill, warrnambool -
 Bendigo Military Museum
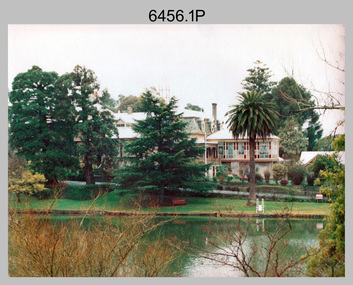
Photograph - Army Survey Regiment - Fortuna & Surrounds, Bendigo, c1985
This set of 30 photographs of the Army Survey Regiment’s Fortuna Villa and surrounding facilities was taken circa 1985. The photos feature much of Fortuna’s exterior and most of the out-buildings spread over the property’s fifteen acres of grounds. After Defence took possession of Fortuna in 1942, the Q-store and engineering workshops were added during the wartime period. Soldiers were accommodated in tents during WW2 for 20 years next to the parade ground before the construction of accommodation buildings in 1962. In 1990 most of the weatherboard buildings in the Q-store area were replaced. A climate-controlled building was also constructed to house a map library and digital data media. This photo set also includes the exterior of Air Survey Squadron’s Building 16 and two modular buildings -16A and 16B that were added in the early 1980s to accommodate map production and technical services. See item 6457.22P for photos of Fortuna Villa’s interior that were taken at the same time.This set of 30 photographs of the Army Survey Regiment’s Fortuna Villa and surrounding facilities was taken circa 1985. The colour photographs were printed on photographic paper and are part of the Army Survey Regiment’s Collection. The photographs were scanned at 300 dpi. .1) - Photo, colour, c1985. Fortuna Villa – view from the lake. .2) to .4) - Photo, colour, c1985. Fortuna Villa – front view. .5) - Photo, colour, c1985. Fortuna Villa – balcony view of transport compound and Air Survey Squadron. .6) - Photo, colour, c1985. Fortuna Villa – balcony view of Q-store and transport compound. .7) - Photo, colour, c1985. Fortuna Villa – balcony view of transport compound and Bendigo. .8) - Photo, colour, c1985. Fortuna Villa – balcony view of Q-store buildings. .9) - Photo, colour, c1985. Fortuna Villa – Pompeii Fountain and Stables. .10) - Photo, colour, c1985. Fortuna Villa – coach house. .11) - Photo, colour, c1985. Lithographic Squadron delivery docks. .12) - Photo, colour, c1985. Fortuna Villa - Original Roman Bath entry. .13) - Photo, colour, c1985. RAEME and carpentry buildings. .14) - Photo, colour, c1985. Q-store buildings. .15) - Photo, colour, c1985. Q-store buildings. .16) - Photo, colour, c1985. Transport compound. .17) - Photo, colour, c1985. Fortuna Villa’s original laundry, gardeners’ building. .18) - Photo, colour, c1985. Duty Room. .19) - Photo, colour, c1985. L to R: Side of Duty Room, RAP building. .20) - Photo, colour, c1985. Transport compound, Q-store in background. .21) - Photo, colour, c1985. Air Survey Squadron’s Building 16 viewed from carpark. .22) - Photo, colour, c1985. Technical Services, Building 16B. .23) - Photo, colour, c1985. Air Survey Squadron’s Building 16 courtyard. .24) - Photo, colour, c1985. Technical Services, Building 16B viewed from Building 16 courtyard. .25) - Photo, colour, c1985. Air Survey Squadron’s Building 16A and fernery viewed from walkway. .26) - Photo, colour, c1985. Officers Accommodation. .27) - Photo, colour, c1985. Other Ranks (OR’s) ‘New’ Barracks. .28) - Photo, colour, c1985. OR’s Kitchen and Dining Room. .29) & .30) - Photo, colour, c1985. Army Survey Regiment - Front Entry GateThere are brief descriptions on a note behind each photograph.royal australian survey corps, rasvy, army survey regiment, army svy regt, fortuna, asr -
 Wangaratta RSL Sub Branch
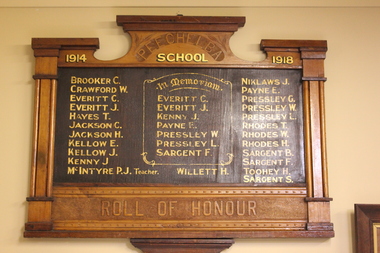
Honour Board, Peechelba School 1914-1918, C1919
Peechelba School Roll of Honour 1914-1918 - list of students who served during the First World War as follows:- Christopher George EVERITT 5582 Born Bremen/Wangaratta Enlisted 20/7/1915 Aged 20 years 7 months Died of Wounds 26/4/1918 at Villiers Brettoneux France James Samuel EVERITT 3319 Born Rutherglen Enlisted 30/7/1915 Served with the 23/57/58 Battalions Killed In Action 18/7/1916 France William John RHODES 917 Born Wangaratta Enlisted 29/6/1915 Aged 20 years 8 months Unit 29th Battalion Wounded twice GSW left knee Discharged 30/5/1918 Henry RHODES 2779 Born St James Enlisted 6/7/1916 Aged 19 years 6 months Unit 58th Battaliion Wounded GSW Head right leg and hand Discharged 10/8/1918 Thomas Lewis RHODES Reserve Born Benalla Enlisted 15/7/1915 Aged 22 years 4 months Discharged 29/4/1916 medically unfit due to meningitis and lumbago - Later drowned aged 25 years in June 1917 at Wangaratta during the disastrous floods in which six people lost their lives. Robert Ernest PAYNE 5215 Born Killawarra Enlisted 29/1/1916 Aged 20 years 9 months Unit 28th Battalion 2 Pioneer Battalion Killed in Action 15/4/1918 in France James Joseph KELLOW 6836 Born Peechelba Enlisted 16/7/1917 Aged 18 years 7 months Unit 20/22 Reinforcements Embarked 21/11/1917 Discharged 12/2/1920 George PRESSLEY 3017/a Born Wangaratta Enlisted Cairns Aged 29 years Unit 52nd Battalion Embarked 27/10/1916 from Brisbane. William Hawden PRESSLEY 3016 Born Wangaratta Enlisted Cairns Aged 32 years Unit 52nd Battalion Embarked 27/10/1916 from Brisbane Killed in Action 20/9/1917 in Belgium Leslie PRESSLEY 5446 Born Wangaratta Enlisted Cairns Aged 26 years Unit 12th Battalion Embarked 20/4/1916 from Sydney Killed in Action 25/8/1918 Villers-Brettoneux Charles Reginald Walter CRAWFORD 2211 Born Wangaratta Aged 23 years Unit 24th Ballatlion Embarked 17/1/1917 Gassed and GSW R Forearm Discharged 3/5/1919 Charles BROOKER aka BROWN 1619 Born Benalla Enlisted Wagga Aged 28 years Unit 55th Battalion Embarked 14/4/1916 - Deserted on Active Service - Declared Illegal Absentee from 8/5/1917 Still Absent on 2/1/1920 and Discharged from AIF on 1/4/1920. In 1924 sought to receive war medals and informed Not Eligible. Thomas Erlsford HAYES 1337 Born Peechelba Enlisted Wangaratta Aged 19 years Unit 37/38th Battalion Embarked 3/6/1916 Discharged 30/4/1919 Charles John JACKSON 418/2nd Lieut. Born Rutherglen Joined 23/8/1915 Aged 22 years 8 months Unit 1st Div Signals MID Returned to Australia Discharged 30/3/1920 Walter Herbert JACKSON 2645 Born Wangaratta Joined 13/7/1916 Aged 32 years Unit 2nd Pioneers Returned to Australia 5/9/1919 Discharged 28/12/1919 Edward Francis KELLOW 3825/6837A Born Gippsland Enlisted Melbourne 9/8/1915 Aged 21 years Unit 59 Battalion Returned to Australia 10/6/1916 for Hernia Operation Discharged 11/12/1916 - ReEnlisted Wangaratta 16/7/1917 Embarked 21/11/1917 22nd Battalion Wounded GSW Returned to Australia 24/8/1918 Jep Frances KENNY 3041 Born Thoona Enlisted Yarrawonga Joined 16/7/1915 Aged 18 years 5 months 57/58 Battalion Died of Wounds 17/7/1916 James NIKLAUS 3881 Born 20/11/1892 Peechelba Joined 7/8/1915 Aged 22 years 9 months Enlisted Yarrawonga Embarked 23/11/1915 1st Machine Gun Coy/8th Battalion Discharged 4/1/1918 due to Trachoma Benjamin SARGENT 56 Born Peechelba Joined 18/1/1915 Enlisted Wangaratta Aged 22 years 3 months Embarked 9/7/1915 Unit 21st Battalion Wounded 11/6/1918 -Gassed Returned to Australia 9/3/1919 Frederick SARGENT 439 Born Peechelba Joined 4/2/1915 Enlisted Yarrawonga Aged 22 years 5 months Unit 23rd Battalion Killed in Action 2/9/1915 Greece Samuel Cook SARGEANT 2874 Born Thoona Joined 9/11/1916 Enlisted Bendigo Aged 24 years 6 months Embarked 16/12/1916 Unit 38th Battalion Wounded 13/10/1917 GSW left hand. 16/12/1917 Returned to Australia due to Injury Discharged 6/8/1918 Herbert WILLETT 2413 Born Yarrawonga Joined/Enlisted 24/7/1916 Melbourne Aged 21 years 8 months Embarked 20/10/1916 Unit 8th Battalion Wounded x 3 times Returned to Australia due to Injury Discharged 21/6/1919 H. TOOHEY ? Phillip James McINTYRE - School Teacher - 3207 Born Snake Gully Joined 29/9/1916 Aged 28 years 3 months Embarked 16/12/1916 Unit 37th Battalion - WoundedA primary school was opened in Peechelba in 1880 and closed in 1903 after a new school opened in Peechelba township in 1891 which closed in 1970. This timber honour board was made as a tribute to honour and remember the Peechelba School students and their teacher who enlisted and served during the First World War. Wooden honour board with three columns of names, the centre being an "In Memoriam" listPeechelba School Roll of Honour 1914-1918wangaratta, world war 1, honour board, peechelba school -
 Bendigo Historical Society Inc.
Document - YOUNG WOMEN'S CHRISTIAN ASSOCIATION, BENDIGO - WARRIAH CLUB, 1920
Young Women's Christian Association, Bendigo - Warriah Club. For Girls over 20. Here hath dawned another blue day. Think I wilt thou let it slip useless away? General Secretary: A Louise Burton. Syllabus 1920. June 2-Readings, Members. June 9-Fancywork, Miss Sinclaire. June 16-Lofe in Honolulu, Miss Hunter. June 23-Home Cooking, Miss Leadbeater. June 30-Club 'At Home' to friends. July 7-An evening with Browning, Mrs Finster. July 14-A Cottage Farden, Mr Rumball. June 21-Demonstration of Cookery, Miss Sampson. June 28-How to take care of an invalid. Aug. 4-Personal Beauty. Aug 11-An evening in France, Sister Hunter. Aug 18-How to prepare meals, Miss Wheeler. Aug 25-A Winter Party. Sept 1-Nursing in the Home. Sept 8-How to keep youthful. Sept15-My books. Sept 22-Fancywork,. Sept 29-The teeth, and how to care for them. Oct 6-An evening with the poets. Oct 13-Open night. Oct 20-The Citizen Ideal. Oct 27-Invitation night. Nov 3-Etiquette, Members. Nov-10 China to-day. NovNov 17-How to furnish a home. Nov 24-Democracy. Dec 1-Open night. Dec 8-An evening with books. Dec 15-Christmas Party. The purpose of the Club is to unite girls in; Comradeship, Service, and Self-Development. The Club meets every Wednesday evening at 8pm, and is open to all girls over 20 years who wish to enrol. Presedent: Miss L Johns. Vice President: Miss B Marsh. Secretary: Miss R Sampson. Treasurer: Miss E Robinson.Bolton Bros. Printers. Bendigochurch, ymca warriah club, young women's christian association, bendigo - warriah club -
 Melbourne Tram Museum
Document - Specification, Melbourne & Metropolitan Tramways Board (MMTB), "specifications - MMTB various", 1922 to 1925
See image 2085i4 for tender re brake blocks detailing the type of cast iron and the Brinell hardness.Demonstrates MMTB tender documents of 1923.Manila colour file marked "Specifications" containing 25 different specifications of the MMTB 1922 to 1925. Not all dated, generally foolscap sheets either pinned or stapled. Dated Tender No. For supply of: 30/6/1925 157 Steel castings Not dated Ballast Hopper trucks 1923 Steelwork for electric and cable tramway crossings Pamphlet Monier Pipes and box culverts Pamphlet Monier – septic tanks and aerators Not dated 229 Purchase of removal of cottages 101 to 107 Bouverie St Carlton Not dated Side tipping ballast trucks 18/7/1923 226 Brake shoes - see pdf file for a full scan 18/7/1923 222 Steel tramway tyres 18/7/1923 220 Concrete Mixing Plants Not dated 219 Dressed wooden poles 9/5/1923 215 Bricks 19/4/1923 214 Reinforced Concrete fencing posts 20/3/1923 213 Tramway steel wire ropes 28/3/1923 212 Painting exterior of 673 Bourke St Melbourne Not dated 210 Alterations to offices at Rathdowne St depot Not dated 202 80lb steel rails and fishplates 5/1/1923 198 GE201 Motors 6/12/1922 197 Hydraulic pit jacks 6/12/1922 195 Supply of Low tension feeder cable Not dated 194 Supply of high tension cable 4/12/1922 188 Supply of hard drawn trolley wire 6/11/1922 186 Dressed wooden poles 20/11/1922 182 Steel Poles 20/12/1922 171 Erection and completion of new car depot Glen Huntly Roadtrams, tramways, mmtb, tenders, specification, trackwork, motors, cables, poles, ballast wagons, glenhuntly tram depot, brake blocks -
 Melbourne Tram Museum
Magazine, Metropolitan Transit Authority (MTA), "Met Lines", 1988
Magazine, published by the Metropolitan Transit Authority of Victoria "Met Lines" (Metlines) - A4, printed on white gloss paper, centre stapled with the MTA logo or symbol. Issued under the name of Kevin Shea as Chairman. Continues from Reg Item 1142 "Met Lines" - printed in an A4 version. Major tram and bus items listed. Tramway names only listed, not railway. .1 - March 1988 - The Pandas car coming! - 20 pages - lists MTA Board, under Minister Jim Kennan; Helen Davison, Jenny Acton, Tony Tuohey, Sybille Kalbitzer, Greg Rodgers, John Usher. Advertising on trams etc, by Australian Posters - contractor, includes a photo of 814 as the Summer in the City tram, Transport Information Centre, launch of St Kilda light rail, photo of test tram 533, Tom Roper, tram 2002. Photo of farewell at Essendon depot. Final W2 - last tram in regular service - 646. .2 - June 1988 - Football theme - 16 pages - Station improvements, Jolimont Decentralisation, advertising the Met (photo for 273), new computer systems, Panamonium - pandas at the Zoo and Z8 painted for the event, new MAN buses - photo of 260. .3 - September 1988 - Uniquely Melbourne theme on the cover, some of the items sold at The Met shop, - 20 - photo of Light Rail vehicle lifting equipment at the workshops with Jack Armstrong and Les Jean, opening of The Met shop, Metrol, kids take a peek at trams (Brunswick depot). .4 - December 1988 - Festival season cover - 20 pages - MAN buses to Elwood, Transport Technology conference, article on the Thornbury Tramway Flyover (the Hump) at Preston Workshops - collisions or accidents on the flyover, tramcar details - submitted by Norm Cross. For next year 1989 - see Reg Item 1184trams, tramways, the met, mta, advertising trams, light rail, st kilda, essendon depot, zoo tram, buses, preston workshops, brunswick depot, the hump, bridges, w2 class, last tram, tram 814, tram 2002, tram 533, tram 2001, tram 8, tram 273, tram 646 -
 Melbourne Tram Museum
Magazine, Metropolitan Transit Authority (MTA), "Met Lines", 1989
Magazine, published by the Metropolitan Transit Authority of Victoria "Met Lines" (Metlines) - A4, printed on white gloss paper, centre stapled with the MTA logo or symbol. Issued under the name of Kevin Shea as Chairman. Continues from Reg Item 1183 "Met Lines" - printed in an A4 version. Notes Editor as Judi Lalor and writer Sandra McLaren. Chris Astridge Major tram and bus items listed. Tramway names only listed, not railway. .1 - March 1989 - 20 pages - Track gangs, graffiti, signalling, making recruitment videos, body building at Preston Workshops. .2 - June 1989 - 16 pages - Flinders St station cover theme - 16 pages - modifications to Z class tram lights to improve visibility at stops, payroll, Wattle Park rejuvenation project, Essendon Depot Soccer team, Ian Barkla on Puffing Billy. .3 - September 1989 - 20 pages - Show grounds theme - Met Planning, Metplan, Met Plan, Jolimont Rail Yards, Mill Park Light rail extension, photo of 2004, The Met shop, 60th anniversary of Camberwell tram depot, apprentice awards, Melbourne Stamp show 1989, Wattle Park, New billiard table at Malvern, recycling of W2 trams in to mobile Tramburgers - Jim Johnstone and Greg Hart - was going to franchise 60 trams cut in half. (See also Reg Item 406 for other background - also see Jim Johnson) .4 - December 1989 - 20 pages - Christmas theme cover - "On the buses", the Met Bus workshop, details the bus maintenance, bundy clocks - where they were maintained, size of the bus fleet and major depots. Festoon lighting at Flinders St station and retirement of Howard Smith - see image i5. For next year 1990 - see Reg Item 1185.trams, tramways, the met, mta, preston workshops, tramcars, repairs, wattle park, essendon depot, metplan, camberwell depot, postage stamps, post office, malvern depot, scrapped trams, w2 class, flinders st station, bundy clock, buses, tram 2004 -
 Orbost & District Historical Society
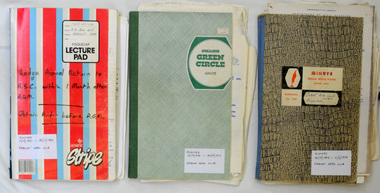
minute books, 1969-1977 ; 1991-1997
Orbost Aero Club began in 1969 with Basil Dowie as Chair, David Nixon as Secretary/Treasurer. The group went into recess from 1977-1991 closing in 1997. The mid 1960s were boom years in flying training in Australia and the number of Aero Clubs grew rapidly. The Club played a significant role in the establishment of the small airport at Marlo and in the ongoing operation and development of the airport over the years particularly for patient transfer by aerial ambulance.The Orbost Aero Club Club played a significant role in the establishment of the small airport at Marlo and in the ongoing operation and development of the airport over the years.Three minute books for the Orbost Aero Club. Inside are loose copies of correspondence, statements and accounts. They are mostly hand-written with some typed and glued in. 2406.1 has a grey mottled cover and is dated 1969-1975. 2406.2 has a green cover and is dated 1976-1977. 2406.3 has a red/white/blue striped cover and is dated 1991-1997.2406.1 - cover : ORBOST AERO CLUB 20/9/69 Minute Book 2406.2 has a price sticker 2.55 2406.3 - cover : ORBOST AERO CLUB P.O. BOX 415 ORBOST 3888 in black texta : Lodge Annual Return to A.S.C. within 1 month after A.G.M. Obtain Audit before A.G.M. orbost-aero-club -
 Flagstaff Hill Maritime Museum and Village
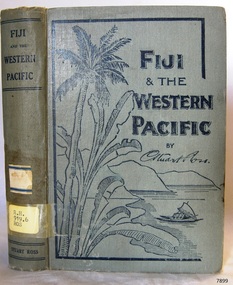
Book, Fiji and The Western Pacific
This item is from the ‘Pattison Collection’, a collection of books and records that was originally owned by the Warrnambool Mechanics’ Institute, which was founded in Warrnambool in 1853. By 1886 the Warrnambool Mechanics’ Institute (WMI) had grown to have a Library, Museum and Fine Arts Gallery, with a collection of “… choice productions of art, and valuable specimens in almost every branch and many wonderful national curiosities are now to be seen there, including historic relics of the town and district.” It later included a School of Design. Although it was very well patronised, the lack of financial support led the WMI in 1911 to ask the City Council to take it over. In 1935 Ralph Pattison was appointed as City Librarian to establish and organise the Warrnambool Library as it was then called. When the WMI building was pulled down in 1963 a new civic building was erected on the site and the new Warrnambool Library, on behalf of the City Council, took over all the holdings of the WMI. At this time some of the items were separated and identified as the ‘Pattison Collection’, named after Ralph Pattison. Eventually the components of the WMI were distributed from the Warrnambool Library to various places, including the Art Gallery, Historical Society and Flagstaff Hill. Later some were even distributed to other regional branches of Corangamite Regional Library and passed to and fro. It is difficult now to trace just where all of the items have ended up. The books at Flagstaff Hill Maritime Village generally display stamps and markings from Pattison as well as a variety of other institutions including the Mechanics’ Institute itself. RALPH ERIC PATTISON Ralph Eric Pattison was born in Rockhampton, Queensland, in 1891. He married Maude Swan from Warrnambool in 1920 and they set up home in Warrnambool. In 1935 Pattison accepted a position as City Librarian for the Warrnambool City Council. His huge challenge was to make a functional library within two rooms of the Mechanics’ Institute. He tirelessly cleaned, cleared and sorted a disarrayed collection of old books, jars of preserved specimens and other items reserved for exhibition in the city’s museum. He developed and updated the library with a wide variety of books for all tastes, including reference books for students; a difficult task to fulfil during the years following the Depression. He converted all of the lower area of the building into a library, reference room and reading room for members and the public. The books were sorted and stored using a cataloguing and card index system that he had developed himself. He also prepared the upper floor of the building and established the Art Gallery and later the Museum, a place to exhibit the many old relics that had been stored for years for this purpose. One of the treasures he found was a beautiful ancient clock, which he repaired, restored and enjoyed using in his office during the years of his service there. Ralph Pattison was described as “a meticulous gentleman whose punctuality, floorless courtesy and distinctive neat dress were hallmarks of his character, and ‘his’ clock controlled his daily routine, and his opening and closing of the library’s large heavy doors to the minute.” Pattison took leave during 1942 to 1945 to serve in the Royal Australian Navy, Volunteer Reserve as Lieutenant. A few years later he converted one of the Museum’s rooms into a Children’s Library, stocking it with suitable books for the younger generation. This was an instant success. In the 1950’s he had the honour of being appointed to the Victorian Library Board and received more inspiration from the monthly conferences in Melbourne. He was sadly retired in 1959 after over 23 years of service, due to the fact that he had gone over the working age of council officers. However he continued to take a very keen interest in the continual development of the Library until his death in 1969. The Pattison Collection, along with other items at Flagstaff Hill Maritime Village, was originally part of the Warrnambool Mechanics' Institute’s collection. The Warrnambool Mechanics’ Institute Collection is primarily significant in its totality, rather than for the individual objects it contains. Its contents are highly representative of the development of Mechanics' Institute libraries across Australia, particularly Victoria. A diversity of publications and themes has been amassed, and these provide clues to our understanding of the nature of and changes in the reading habits of Victorians from the 1850s to the middle of the 20th century. The collection also highlights the Warrnambool community’s commitment to the Mechanics’ Institute, reading, literacy and learning in the regions, and proves that access to knowledge was not impeded by distance. These items help to provide a more complete picture of our community’s ideals and aspirations. The Warrnambool Mechanics Institute book collection has historical and social significance for its strong association with the Mechanics Institute movement and the important role it played in the intellectual, cultural and social development of people throughout the latter part of the nineteenth century and the early twentieth century. The collection of books is a rare example of an early lending library and its significance is enhanced by the survival of an original collection of many volumes. The Warrnambool Mechanics' Institute’s publication collection is of both local and state significance. Fiji and The Western Pacific Author: C Stuart Ross Publisher: H Thacker Date: 1909Blue and White sticker on spine cover with hand written RH 919.6 ROS also has Label on spine cover with typed text RH 919.6 ROS Pastedown front endpaper has sticker from Warrnambool Mechanics Institute and Free Library Hand written on front loose endpaper "With the Authors Compliments 20/12/09"shipwrecked-coast, flagstaff-hill, warrnambool, flagstaff-hill-maritime-museum, maritime-museum, shipwreck-coast, flagstaff-hill-maritime-village, shipwrecked-artefact, book, warrnambool library, warrnambool mechanics’ institute, warrnambool city librarian, mechanics’ institute library, victorian library board, warrnambool books and records, warrnambool children’s library, great ocean road, fiji and the western pacific, c stuart ross -
 Warrnambool RSL Sub Branch
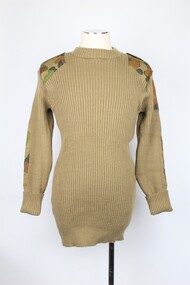
Jumper, Elegant Knitting Co, 1993
This jumper is part of a Disruptive Pattern Combat Uniform issued by the Australian Airforce to Bernard Farley during service. This uniform type was used in base and field activities and was replaced in 2014 by the General Purpose Uniform as the uniform worn during general base duties and in non-warlike environments.This woolen jumper was presumably a winter addition to the DPCU.This item has social significance, as an item of uniform worn by Warrnambool RSL community member and Secretary (2019), Bernard Farley during service with the Australian Airforce. The item is a representative example of previously standard issue Airforce uniform and is in excellent condition. As a set, the uniform has aesthetic significance in it’s design, incorporating the Disruptive Pattern style of camouflage which has its roots in the 1980s and continues to be adapted into uniform design by the Defence Force.Khaki ribbed knitted jumper with stitched Disruptive Pattern cotton elbow patches, rectangular in shape running the length of the forearm. Similar rectangular shaped patches on the left and right shoulder, bearing two epaulettes, stiched at one end and fastened with velcro and the other. The left upper arm carries a rectangular Disruptive Pattern patch with a seam down the centre, creating two long narrow pockets. Arm cuffs have external seam for approximately 100 mm from the end, indicating that the jumper may have been worn with cuffs folded over. Synthetic strip of green fabric on the interior collar behind a cream coloured label.Label on interior of collar reads: “ELEGANT KNITTING CO./PENRITH, N.S.W. 1993/(047) 32 2491/8405-66-134-9381/SIZE 115cm-125cm XL (broad arrow)/SERVICE No........./NAME.........../“ Reverse of label carries a series of care instructions including “Fasten shoulder straps before/washing/ 80% Wool 20% Nylon”camouflage, general purpose uniform, airforce, uniform, australian defence force -
 Flagstaff Hill Maritime Museum and Village
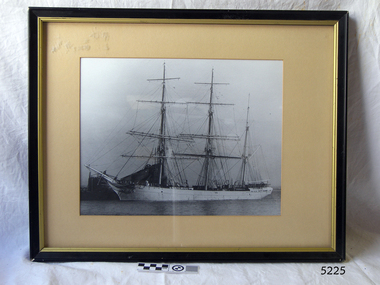
Photograph - Maritime, John Murray, 1909-1917
The image in this photograph is the 'John Murray', which was owned by the Government of Victoria from 1909 to 1917 as a training vessel. It was built and registered in Glasgow, UK in 1877 as the 'Loch Ryan'. This photograph is a copy of the original photograph, which was owned by Dr J. Douglas, brother o the donor. The iron baque 'Loch Ryan' was a three masted, 1207 ton sailing ship built by James & George Thomson in Glasgow in 1877. It was purposed as a general cargo vessel and owned by the General Shipping Company, known as the Loch Line because the ships were named after Scottish lochs. The company had a fleet of 25 colonial clipper ships that traded between the UK and Australia between 1866 and 1909, mainly from Glasgow to Melbourne, Sydney and Adelaide. Many of the sips, including the Loch Ryan, had a distinctive white stripe on their dark coloured hulls. The 'Loch Ryan' was purchased in 1909 by the Victorian Government's Défense Department and converted for the purposes of a training in Williamstown. In 1910 it was renamed John Murray, whose namesake, John (Jack) Murray (1851-1916) was born near Koroit. He was the 23rd Premier of Victoria (1909-1912), and a Warrnambool Member of Parliament for twenty years. The government commissioned the ship from 1910-1917 for reforming juvenile offenders, training them as seamen for the Navy and Merchant Navy. The training project ceased after reports of the treatment of the boys. Although 411 did their training under this scheme, the success rate of them qualifying to serve on other vessels was less than twenty percent. In 1917 the John Murray was sold to the Government of Australia to serve during WWI. The ship was loaded with a cargo of dynamite and petroleum at San Francisco then departed for Melbourne when, during its passage, it was wrecked at Malden Island reef in the mid-Pacific Ocean on May 29th, 1918.The photograph of the John Murray , formerly the 'Loch Ryan' is significant for its connection with the Loch Line of the General Shipping Company of Glasgow, the same company that owned the Loch Ard, which was wrecked and tragically lost 52 lives. The photograph is also significant for its connection with Victoria's training ship John Murray, which aimed at reforming delinquent juveniles, to be suitable as seamen for Australia's Navy or Merchant Navy. The ship was the namesake of John Murray, so the photograph is also significant for its connection with Victorian and local Government, as John Murray was the 23rd Premier of Victoria and a Warrnambool Member of Parliament for over 20 years. He was born in the local town of Koroit. The photograph is significant as an image of the many clipper ships that traded between the United Kingdom and Australia, with goods collected from other countries along the way.Photograph, black and white, behind glass, matt, framed in black with gold trim. Image is the Government of Victoria's training ship "John Murray". Label attached to back of frame with inscription. Also a square white sticker with handwritten number.Text on label includes: "The "John Murray" / A training ship for delinquent boys about 1910 / Formerly the Loch Ryan / John Murray - Premier of Victoria and Member for Warrnambool for over 20 years / Donated by Elizabeth O'Callaghan / Original photo in possession of Dr J. Douglas / (Brother of Elizabeth O'Callaghan - nee Douglas)" Sticker; handwritten "57"flagstaff hill, warrnambool, shipwrecked-coast, flagstaff-hill, flagstaff-hill-maritime-museum, maritime-museum, shipwreck-coast, flagstaff-hill-maritime-village, the john murray, loch ryan, john murray, loch line, general shipping company, government of victoria, training ship, juvenile reformation, delinquent boys, james & george thomson, iron barque, three masted ship, clipper ship, uk to australia trade, dynamite cargo, petroleum cargo, maldon island reef, 1909-1917 -
 Melbourne Legacy
Film, Legacy, 1964
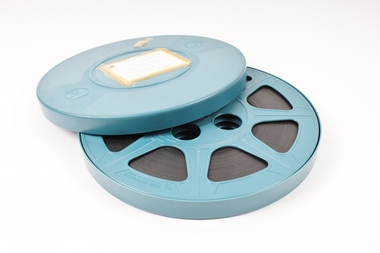
A black and white film about Legacy camps, made in the 1960s it shows the routine and activities for Junior Legatees at a typical camp weekend. There is an address by the then President Ian Anderson (1964). Commentary Geoff McComas, Photography Garry Jones. This film has been digitised to preserve its content. Melbourne Legacy gratefully acknowledges the support of the Victorian Government and Public Record Office Victoria for making this possible. See also Cat No 00006 which is a second copy of the same film and has been digitised by DamSmart 6/11/2019.Rare footage of activities run by Melbourne Legacy for boys post WWII which indicates how many children Legacy cared for both in Victoria and nationally and shows the dedication of Legatees in providing this care.Blue plastic cover with 800 feet 16mm film inside. Paper classification on cover, taped on.Cover info is as follows: CINE SERVICE PTY, LTD. / Telephone 69 7346 / 235 MORAY STREET, SOUTH MELBOURNE TITLE "LEGACY" PRODUCED FOR MELBOURNE LEGACY COLOUR / BLACK AND WHITE (tick next to box) / RUNNING TIME 20 mins. Blue handwriting reads: Please return to Melbourne (Legacy) 293 Collins St, Melbournesomers camp, junior legatees -
 Ballarat Tramway Museum
Slide - 35mm slide/s - set of 23, Noel Simons, 26/02/1972 12:00:00 AM
Set of 23 transparencies taken on 26/2/1972 on Kodak mounts. 1205.1 - Bendigo No. 25 on a special tour at Fire Station Loop, en route to Golden Square. 1205.2 - No. 21 and 25 crossing at Fire Station Loop, note photographers on the ground. No. 21 bound for North Bendigo. 1205.3 - as for 1205.3, but with trams departing loop and fire station in the background. 1205.4 - No. 25 at Golden Square Hotel with 'Rodda's Golden Square Hotel' in the background. Tram on a special tour, but showing destination of North Bendigo. 1205.5 - as for 1205.4 - but showing special. Has the end of the track in the photograph. 1205.6 - Nos. 7 and 25 (on a special tour) crossing at Myrtle St. Loop. 1205.7 - No. 7 leaving Myrtle St. loop with the mine poppet head in the background. Photo taken after tram has passed photographer. (Print made of this slide 10/2001 for use in the Gold Gold Gold exhibition of 10/2001 - See Reg. item 1979. 1205.8 - No. 25 entering depot. Tram showing 'special'. Tennis court on right has players. Photo taken after tram has passed photographer. 1205.9 - No. 24 (showing 'special') and No. 20 (showing 'Long Gully') at Bendigo Depot. 1205.10 - No. 24 on a special charter, leaving Bendigo depot. Tram has two 'Johnnie Walker' roof ads. 1205.11 - Bendigo depot with 29, 25 and a bogie car inside the depot doors. 1205.12 - As for 1205.11, but with 28 and 29. 1205.13 - No. 24 standing at front entrance of Bendigo depot with No. 20 in the background. 1205.14 - No. 24 running out into McCrae St showing special, with conductor on front step. 1205.15 - No. 24 in Caledonia St. at corner of Thunder St with the Gasworks in the background. 1205.16 - No. 5 en route for Quarry Hill at Charing cross with No. 26 (en route for Eaglehawk) about to arrive. Has former crossover at this location in the foreground. Has the Ezywalkin building in the background. 1205.17 - No. 5 and 26 at Charing Cross, with the Alexandra Fountain in the foreground and the Beehive and Ezywalkin buildings in the background. No.26 has two SEC roof ads. 1205.18 - Charing Cross looking along Pall Mall with trams 7 and 21 and 26 in the picture. 1205.19 - Charing Cross, with 21 departing for Golden Square and No. 5 heading for Quarry Hill. Has the Ezywalkin and the Beehive buildings in the background. 1205.20 - as for 1205.19, but a few moments later. Adjacent pole has a "NO ROAD" letter in reflectors vertically. 1205.21 - Charing Cross with Nos. 25, 21, 26 and 7, looking south from Pall Mall end. 1205.22 - No. 24 crossing Mitchell St. en route for Golden Square, showing 'special' with the Beehive and Ezywalkin buildings in the background. 1205.23 - Charing Cross with Nos. 24, 21 and 7 in the photo and Fountain Plaza in the background. Print of 1205.7 - stored in box D1.Information written on in blue ink and date stamped on purple ink. 1205.1 - "No. 25 at Fire Station Loop High Street, Golden Square." 1205.2 - "Nos. 25 and 21 crossing at Fire Station Loop, near Golden Square." 1205.3 - "Nos. 25 and 21 crossing at Fire Station Loop, near Golden Square." 1205.4 - "No. 25 at Golden Square terminus." 1205.5 - "No. 25 at Golden Square terminus." 1205.6 - "Nos. 7 and 25 crossing at Myrtle St. Loop." 1205.7 - "No. 7 leaving Myrtle St. Loop." 1205.8 - "No 25, entering Bendigo Depot." 1205.9 - "Nos. 20 and 24 at Bendigo Depot." 1205.10 - "No. 24 at Bendigo Depot." 1205.11 - "Nos. 25 and 29 at Bendigo Depot." 1205.12 - "Birney cars 29 and 28 at Bendigo Depot." 1205.13 - "No. 24 (with 20 beyond) at Bendigo Depot." 1205.14 - "No. 24 entering McCrae St. from Arnold St." 1204.15 - "No. 24 in Caledonia St. at cnr of Thunder St." 1204.16 - "No. 5 waits at Charing Cross as No. 26 arrives from Quarry Hill. Note remains of crossover abandoned on relocation in 1965." 1204.17 - "Nos. 5 and 26 at Charing Cross." 1204.18 - "Nos. 26, 7 and 21 at Charing Cross (No. 5 just visible behind No. 26)." 1204.19 - "No. 21 leaves Charing Cross for Golden Square as No. 5 starts off for Quarry Hill." 1204.20 - "No. 21 swings onto the single track Golden Square line as No. 5 heads into Mitchell St. towards Quarry Hill." 1204.21 - "Nos. 25, 21 and 26 watch No. 7 arrive at Charing Cross from Golden Square." 1204.22 - "No. 24 at Charing Cross crossing Mitchell St." 1204.23 - "Nos. 24, 21 and 7 at Charing Cross."tramways, trams, bendigo, golden square, myrtle st., fire station, depot, charing cross, tram 5, tram 7, tram 20, tram 21, tram 24, tram 25, tram 28, tram 29 -
 Flagstaff Hill Maritime Museum and Village
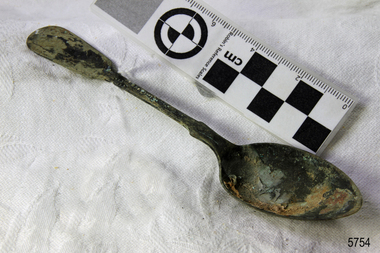
Domestic object - Spoon, c.1878
This tea spoon is from the wreck of the LOCH ARD, a Loch Line ship of 1,693 tons which sailed from Gravesend, London, on 2 March 1878 with 17 passengers and a crew of 36 under Captain George Gibbs. “The intention was to discharge cargo in Melbourne, before returning to London via the Horn with wool and wheat”. Instead, on 1 June 1878, after 90 days at sea, she struck the sandstone cliffs of Mutton Bird Island on the south west coast of Victoria, and sank with the loss of 52 lives and all her cargo. The manifest of the LOCH ARD listed an array of manufactured goods and bulk metals being exported to the Colony of Victoria, with a declared value of £53,700. (202 bills of lading show an actual invoice value of £68, 456, with insurance underwriting to £30,000 of all cargo). Included in the manifest is the item of “Tin hardware & cutlery £7,530”. This teaspoon is one of 482 similar items of electro-plated cutlery from the LOCH ARD site, comprising spoons and forks of various sizes but all sharing the same general shape or design and metallic composition. 49 of these pieces display a legible makers’ mark — the initials “W” and “P” placed within a raised diamond outline, which is in turn contained within a sunken crown shape — identifying the manufacturer as William Page & Co of Birmingham. An electroplater’s makers’ marks, unlike sterling silver hallmarks, are not consistent identifiers of quality or date and place of manufacture. A similar line of five impressions was usually made to impress the consumer with an implication of industry standards, but what each one actually signified was not regulated and so they varied according to the whim of the individual foundry. In this case, the maker’s marks are often obscured by sedimentary accretion or removed by corrosion after a century of submersion in the ocean. However sufficient detail has survived to indicate that these samples of electro-plated cutlery probably originated from the same consignment in the LOCH ARD’s cargo. The following descriptions of maker’s marks are drawn from 255 tea spoons, 125 dessert spoons, and 99 table forks. These marks are clearly visible in 66 instances, while the same sequence of general outlines, or depression shapes, is discernible in another 166 examples. 1. A recessed Crown containing a raised Diamond outline and the initials “W” and “P” (the recognised trademark of William Page & Co) 2. An impressed Ellipse containing a raised, pivoted, Triangle in its lower part and bearing a Resurrection Cross on its upper section (a possible dissenting church symbol reflecting religious affiliation); OR a rounded Square impression containing a raised, ‘lazy’, letter “B” (possibly mimicking sterling silver hallmark signifying city of manufacture i.e. Birmingham) 3. An impressed rounded Square filled with a raised Maltese Cross (the base metal composite of nickel silver was also known as ‘German silver’ after its Berlin inventors in 1823) 4. A recessed Circle containing a Crab or Scarab Beetle image; OR a recessed Circle containing a rotated ‘fleur de lys’ or ‘fasces’ design 5. A depressed Diamond shape enclosing a large raised letter “R” and a small raised letter “D” (mimicking the U.K. Patent Office stamp which abbreviated the term ‘registered’ to “RD”, but also included date and class of patent) Suggested trade names for William Page & Co’s particular blend of brass plating are ‘roman silver’ or ‘silverite’. This copper alloy polishes to a lustrous gold when new, discolouring to a murky grey with greenish hue when neglected. HISTORY OF THE LOCH ARD The LOCH ARD belonged to the famous Loch Line which sailed many ships from England to Australia. Built in Glasgow by Barclay, Curdle and Co. in 1873, the LOCH ARD was a three-masted square rigged iron sailing ship. The ship measured 262ft 7" (79.87m) in length, 38ft (11.58m) in width, 23ft (7m) in depth and had a gross tonnage of 1693 tons. The LOCH ARD's main mast measured a massive 150ft (45.7m) in height. LOCH ARD made three trips to Australia and one trip to Calcutta before its final voyage. LOCH ARD left England on March 2, 1878, under the command of Captain Gibbs, a newly married, 29 year old. She was bound for Melbourne with a crew of 37, plus 17 passengers and a load of cargo. The general cargo reflected the affluence of Melbourne at the time. On board were straw hats, umbrella, perfumes, clay pipes, pianos, clocks, confectionary, linen and candles, as well as a heavier load of railway irons, cement, lead and copper. There were items included that intended for display in the Melbourne International Exhibition in 1880. The voyage to Port Phillip was long but uneventful. At 3am on June 1, 1878, Captain Gibbs was expecting to see land and the passengers were becoming excited as they prepared to view their new homeland in the early morning. But LOCH ARD was running into a fog which greatly reduced visibility. Captain Gibbs was becoming anxious as there was no sign of land or the Cape Otway lighthouse. At 4am the fog lifted. A man aloft announced that he could see breakers. The sheer cliffs of Victoria's west coast came into view, and Captain Gibbs realised that the ship was much closer to them than expected. He ordered as much sail to be set as time would permit and then attempted to steer the vessel out to sea. On coming head on into the wind, the ship lost momentum, the sails fell limp and LOCH ARD's bow swung back. Gibbs then ordered the anchors to be released in an attempt to hold its position. The anchors sank some 50 fathoms - but did not hold. By this time LOCH ARD was among the breakers and the tall cliffs of Mutton Bird Island rose behind the ship. Just half a mile from the coast, the ship's bow was suddenly pulled around by the anchor. The captain tried to tack out to sea, but the ship struck a reef at the base of Mutton Bird Island, near Port Campbell. Waves broke over the ship and the top deck was loosened from the hull. The masts and rigging came crashing down knocking passengers and crew overboard. When a lifeboat was finally launched, it crashed into the side of LOCH ARD and capsized. Tom Pearce, who had launched the boat, managed to cling to its overturned hull and shelter beneath it. He drifted out to sea and then on the flood tide came into what is now known as LOCH ARD Gorge. He swam to shore, bruised and dazed, and found a cave in which to shelter. Some of the crew stayed below deck to shelter from the falling rigging but drowned when the ship slipped off the reef into deeper water. Eva Carmichael had raced onto deck to find out what was happening only to be confronted by towering cliffs looming above the stricken ship. In all the chaos, Captain Gibbs grabbed Eva and said, "If you are saved Eva, let my dear wife know that I died like a sailor". That was the last Eva Carmichael saw of the captain. She was swept off the ship by a huge wave. Eva saw Tom Pearce on a small rocky beach and yelled to attract his attention. He dived in and swam to the exhausted woman and dragged her to shore. He took her to the cave and broke open case of brandy which had washed up on the beach. He opened a bottle to revive the unconscious woman. A few hours later Tom scaled a cliff in search of help. He followed hoof prints and came by chance upon two men from nearby Glenample Station three and a half miles away. In a state of exhaustion, he told the men of the tragedy. Tom returned to the gorge while the two men rode back to the station to get help. By the time they reached LOCH ARD Gorge, it was cold and dark. The two shipwreck survivors were taken to Glenample Station to recover. Eva stayed at the station for six weeks before returning to Ireland, this time by steamship. In Melbourne, Tom Pearce received a hero's welcome. He was presented with the first gold medal of the Royal Humane Society of Victoria and a £1000 cheque from the Victorian Government. Concerts were performed to honour the young man's bravery and to raise money for those who lost family in the LOCH ARD disaster. Of the 54 crew members and passengers on board, only two survived: the apprentice, Tom Pearce and the young woman passenger, Eva Carmichael, who lost all of her family in the tragedy. Ten days after the LOCH ARD tragedy, salvage rights to the wreck were sold at auction for £2,120. Cargo valued at £3,000 was salvaged and placed on the beach, but most washed back into the sea when another storm developed. The wreck of LOCH ARD still lies at the base of Mutton Bird Island. Much of the cargo has now been salvaged and some was washed up into what is now known as LOCH ARD Gorge. Cargo and artefacts have also been illegally salvaged over many years before protective legislation was introduced. One of the most unlikely pieces of cargo to have survived the shipwreck was a Minton porcelain peacock - one of only seven in the world. The peacock was destined for the Melbourne International Exhibition in 1880. It had been well packed, which gave it adequate protection during the violent storm. Today, the Minton peacock can be seen at the Flagstaff Hill Maritime Museum in Warrnambool. From Australia's most dramatic shipwreck it has now become Australia's most valuable shipwreck artefact and is one of very few 'objects' on the Victorian State Heritage Register. The LOCH ARD shipwreck is of State significance – Victorian Heritage Register S 417. Flagstaff Hill’s collection of artefacts from LOCH ARD is significant for being one of the largest collections of artefacts from this shipwreck in Victoria. It is significant for its association with the shipwreck, which is on the Victorian Heritage Register (VHR S417). The collection is significant because of the relationship between the objects, as together they have a high potential to interpret the story of the LOCH ARD. The LOCH ARD collection is archaeologically significant as the remains of a large international passenger and cargo ship. The LOCH ARD collection is historically significant for representing aspects of Victoria’s shipping history and its potential to interpret sub-theme 1.5 of Victoria’s Framework of Historical Themes (living with natural processes). The collection is also historically significant for its association with the LOCH ARD, which was one of the worst and best known shipwrecks in Victoria’s history. Unrestored tea spoon from the wreck of the LOCH ARD. The spoon design has a flattened fiddle-back handle, with a thin stem or shank, flared collar, and elongated bowl. The spoons metallic composition is a thin layer of brass alloy which has partially corroded back to a nickel-silver base metal. Approximately 20% of original electroplating remains, with some verdigris, and 10% of surface area is covered by sedimentary encrustation, on bowl. Outlines of five makers marks are visible on lower rear of handle (Crown, Ellipse, Circle, Circle, Diamond) but interior details are unclear.flagstaff hill maritime museum, shipwreck coast, great ocean road, loch line, loch ard, mutton bird island, loch ard gorge, electroplated cutlery, loch ard shipwreck, nickel silver, william page & co, birmingham, brass plating, makers marks