Showing 874 items
matching treatment
-
 Federation University Historical Collection
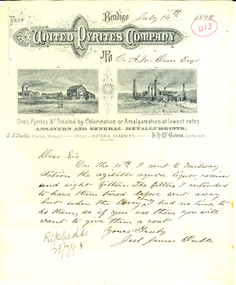
Letter - Correspondence, Letter on Bendigo United Pyrites Company Letterhead, 1898, 1898
"The United Pyrites Company's Works are situated about three quarters of a mile from Spargo Brothers, and are on the northern side of the Marong road, in Pinch-gut Gully. Two processes are followed at these works, viz., the amalgamating process and the treatment by means of chlorine gas. The latter is called the Newbery-Vautin system, and the mode pursued is that laid down by Mr. Cosmo Newbery and Mr Vautin, whose names have been given to the process. Mr. Edwards manages these works. Three reverbatory furnaces are used to roast the pyrites, which is weighed in the truck before being put into the furnaces. At this weighbridge a sample of each lot is kept, and if the yield is not equal to expectation, the works are carefully gone over to see where the fault occurs. Care is taken at the furnace to regulate the heat, otherwise the pyrites might slag instead of roasting evenly right through. An immense revolving furnace (made of boiler iron) was used at these works. It was found to be suitable for treating blanket sand, but was not a success for roasting coarse pyrites. The process of amalgamating by means of Chilian mills is the same in these works as at the Western Works, but the United Works are on a larger scale, and eleven mills are utilised. It is the chlorine gas process which is most interesting here. The gas is made from sulphuric acid, black oxide of manganese, and common salt, and the gas is introduced into huge vats, where it works its way through a filter of pieces of quartz and then through the bed of roasted pyrites lying above. The action of the gas transforms the gold into chloride of gold. This is easily dissolved in water, and in that form is drawn off into huge delf jars, where the use of sulphate of iron precipitates the gold to the bottom. A small battery—eight head of stamps in two boxes—is in use here to crush small consignments of stone sent for trial. Test crushings come from all the Australasian colonies, and even from India. The jars used are manufactured at Epsom, and some of the salt used is also of home manufacture, from the Salt Lakes on the Northern plains. Mr. Edwards took us over a new building in course of erection, and in which the chlorine gas is to be generated in the midst of the pyrites— a still further advancement in the new process. There is some very good machinery in this new building, and the tailings from the ordinary pyrites works will also be treated by this chlorine gas system, which has been found to work well at Mount Morgan, in Queensland. The purest of gold is obtained by this process, the gold passing in solution into a charcoal filter, from which it emerges in the shape of metallic gold. We saw some nice cakes of retorted gold at the works. One of 26oz. was from some New Zealand pyrites (2½ tons), and assayed over 23 carats. There were also cakes of Avoca gold, of silver, and of the tremulous amalgam." (The Argus, 4 February 1887)Two handwritten letters to the Ballarat School of Mines on Bendigo United Pyrites Company Letterhead.bendigo united pyrites company, pyrites, ballarat school of mines, j.j. deeble, joel deeble, joel james deeble, a.m. dean, fred j. martell, martell, s.h. cowan, letterhead -
 Jewish Museum of Australia
Diary of Alfred Broch, 10/7/1940 - 17/12/1940
This diary was handwritten by Alfred Broch over the course of four months in 1940. It was kept while Alfred Broch was travelling on the HMT Dunera and then during his detainment in the Hay internment camp.Bound with cotton and handwritten in pencil. Bound with cotton and handwritten in pencil.[selected passage translation from German, further translation available] : “Dunera” 10.VII – 6.IX.1940 First impression very depressing. Fears. Confusion with prisoners of war. Never mind. Corrected. Continuing further bad treatment. Boarding the ship assisted by rifle butts. Robbed as soon as we reached the deck. Impression of a death ship. Complete helplessness. No sleeping facilities. All sleep on the floor, on tables etc. Intended accommodation taken up by luggage cases. (barbed wire). Food good but only spoons. Next day: robbery from the cases. Own people steal. Purloined objects even include toothbrushes and toothpaste. Much to eat. Small convoy with one cruiser. In the same convoy a women’s transport which soon leaves us as it is bound for Canada and we are quite surprised. The English soldiers and officers have another side. While in the danger zone they only had a webbing belt and slippers. In case of torpedoes – expecting certain death. Bad air as all vents are closed. Other Inscriptions: Front page, upper right, underlined: "Alfred Broch" Front page, upper, underlined: "Notitz Buch" Front page, centre, underlined: "Hay 1941" Page 1, upper right: "Mittwoch 10. VII." Page 3, upper right: "10. VII. - 6. IX. 1940 Page 4, centre: "[...] ARANDORA STAR" Page 11, upper, underlined: "Von Liverpool Nach Hay / Mittwoch 10 VII" dunera, wwii, internment, jewish history & people -
 University of Melbourne, Burnley Campus Archives
Photograph - Black and white prints, Publicity Branch Victorian Department of Agriculture, Plants, 1957-1963
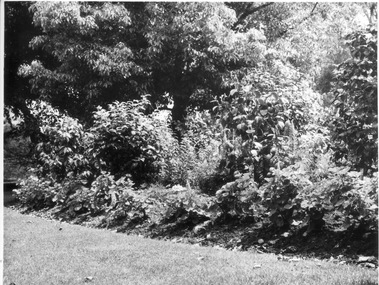
Photographs, many labelled. Flowers, trees, propagation, signs, etc. Some for Journal articles. Publicity Branch Victorian Department of Agriculture: (1) 2 copies, C.1768A "Camellias Geraniums." (2) c.1262D "Anemone japonica." ((4) c.1262K "Hibiscus Wilder's White." (5) "Peace." (7) D521A Fruit tree. (8) c.1262E "Helenium autumnale." (9) c.1262I "Gerri Hock?" (12) c.1262F "Golden Ash. " (13) Struck cuttings 05 7.6.57. (14) "Kumquat." (15) Path to Principal's Residence. (16) A479 "Thujopsis dolobrata. Make an excellent tub specimen of the spreading type." (17) A477 "Aucuba japonica variegata. A very good foliage shrub for tubs. Sept '63 Jnl." (18) Struck cutting. (19-22) Arum, different views. (23) 2 copies ? (24) "June garden notes," small tree with roots. (25, 26) Different views ? (27)Pittosporum crassifolium. (28) "For Dec article (This is the one to use) Polyanthus are attractive & easily managed pot plants. (29) 2 copies ? (30) ? (31) Tubers. (32) "Oct Jnl" "Dividing the tubers. This is necessary to ensure that one eye is left etc." (33) Divided tuber. (34) Aucuba in pot. (35) ? (36) "Thuja plicata aurea a good tub plant of pyramid form." (37) "Buxus sempervirens. he English Box makes a neat, compact, low hedge." (38) "Cupressus torulosa is useful for a high narrow hedge for screening." (39) Sign giving information about different fertilizer treatments. (40) Sign comparing yield of Jonathons & Democrats with fertilzers. (41) "Russell Lupins." (42, 43) Different views ? (44) Soil profile in hole. (45) "Cyclamen is a good subject flowering over winter period." (46) "Cyclamen." (47) "Chabbads? & Malmaisons are suitable for bedding & make good cut flowers." (48) A478 "Seedlings." (49) A487 2 copies Roses in vase. (50) C.1767.E "Angophora 5-6 years." (51) C.1769.C "Jan '60 Jul. Ginko biloba Maidenhair Tree." (52) C.1768.C "Thuja plicata aurea, Golden Willow, Pinus radiata." (53) C.1762.I Vegetables. (54) A512 ?. (55) C.1767.C 2 copies "Eucalyptus torquata." (56) C.1769C 2 copies "Eucalyptus ficifolia." (57) C.1769.C 2 copies "Callistemon lanceolata( Bottle Brush.) (59) C.1769.B 2 copies "Pepperomias." (58) C.1769.F 2 copies "Melaleuca styphelioides (Paper Bark Tree.) (60) C.1769.D 2 copies "African Violets." (61) C.1768.F 2 copies "Pelargonium." (62) C.1768.B 2 copies "Tilia europea (Linden Tree.) Department of Agriculture Biology Branch: (6) Neg No 06 24.11.59 "A struck cutting of Rhododendron var. Alice. For a rhododendron this popular & beautiful variety strikes readily." (13) 05 5.6.57 Struck cuttings. No provenance: (3) "Araucaria excelsa, ?, ?, Metrosideros tomentosa." (10) "Thuja rheingold." (11) "Border of Geraniums (zonal Pelargoniums." (14) "Kumquat." (15) Path to Principal's Residence." (18) Struck cuttings. (19-22) Different views of Arum. (23) 2 copies ? (24-26) "June garden notes." Small tree with roots. (27) "Pittosporum crassifolium." (28) "For Dec article (This is the one to use) Polyanthus are attractive & easily managed pot plants." (29) 2 copies ? (30) ? (31) Tubers. (32) "Oct Jnl Dividing the the tubers. This is necessary to ensure that one eye is left etc." (33) Divided tuber. (34) Aucuba in pot. (35) ? (36) "Thuja plicata aurea a good tub plant of pyramid form. (37) "Buxus sempervirens. The English Box makes a neat, compact, low hedge." (38) Cupressus torulosa is useful for a high narrow hedge for screening." (39) Sign in Orchard giving information about different fertilizer treatments. (40) Sign in Orchard comparing yield of Jonathans and Democrats with fertilizers used. (41) "Russell lupins. (42-43) Different views ? (44) Soil profile in hole. (45) "Cyclamen is a good subject flowering over Winter period." (46) Cyclamen. (47) "Chabbads? & Malmaisons are suitable for bedding & make good cut flowers." flowers, trees, propagation, signs, camellias, geraniums, anemone japonica, hibiscus, fruit trees, principal's residence -
 Federation University Historical Collection
Book - Certificate stub book, School of Mines Ballarat, Ballarat School of Mines Certificate Stubb Book, 1938-1964
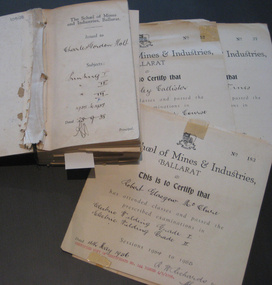
This certificate stub book contains the subject certificates of the graduates of the School of Mines and Indutsries, Ballarat, a predecessor of Federation University Australia.This item highlights the subjects studied and graduates of the School of Mines between 1938 to 1964. It also records the change of cursive over that time.This book includes stubs of subject certificates from the School of Mines and Industries, Ballarat. This also contains a number of uncollected certificates. It is a brown hardback book with black binding. Its contents covers certificates between 1938 to 1964. Names of recipients include: Charles Holt, Henry Elford, Irvin Singleton, J. H. Hughes, John Morcom, Alfred Amor, John Wastell, John Rudwick, Jared Hines, Harry Allan, L. F. J. Hillman, Arthur Davies, Letitia Stanley, Victor Wright,Raymond Ball, Mary O'Callaghan, Ethna Burke, Alec Foyster, James Duggan, Leonard Auchettl, Reeves Collins, James Patterson, Stanley Douglas Webb, Oswald Lyle, Marvis Orr, Eric Roberts, Jack Clennell, A. R. Millar, Heith Smyth, Walter Hines, Harold Leslie, Joseph Fisher, Geoffry Burns, Alick Dait, George Hill, Raymond Wines, Robert Manson, Albert O'Neill, Thomas Green, William Stargatt, William Harrison, Reginald Allen, Albert Wilson, Allan Curtis, Arthur Donald, John Wynn, Sydney Robinson, John Blackic, Percy Elsdon, Hubert Jenkins, Kingsley Callister, Douglas Hall, Norman Lawson, Winfield Tonkin, Artuhur Williams, Allan Curtis, Ernest, Billinge, John Daelon, Harold Bunting, Stanley Wilton, Robert Sugden, Heith Foster, Winsome Stevens, Herbert Stanbridge, Robert Pittard, Henry Brew, Ernest Berriman, Carlyle West-Onley, William Blackic, Lorna Dunstan, Cedric Pike, Stanley Jephson, Hugh Hendrick, Joseph Fisher, Ernest Grove, Ronald Fisher, Heith Halsall, Henry Harris, Maxwell Silvey, Stanley Trengove, Donald Trescowthick, Harold Tolliday, Russell Lucas, John Boyd, John Keys, Stanley Betteridge, Ernest Betteridge, Michael Ross, Robert Stewart, Joseph Beasley, William Beasley, Ray Deveson, George Hennessy, Charles Matthews, Maxwell Silvey, Ian Creek, Geoffrey Moorhouse, Hector Tonks, John Donald, Hugh Hendrick, Stanley Jephson, Ian McIntosh, Robert Nice, Ralph Scott, Walter Martin, Grant Coutts, Lindsay Hannah, John Tainsh, Hubert Robinson, John Donald, George Beaton, Heather Harris, Brian McCarthy, Samuel Perry, Valentine Pascoe, Philip McLean, Geoffrey Hewish, Hubert Robinson, John Borch, Frederick Gale, Ian Grundell, Albert Perry, Frank Hutchinson, Horace Shuttleworth, Kenneth Mason, David Hatt, Malcom Foster, George Jones, Graham McKinnon, Ronald Newton, John Betts, Leonard Wade, Robert McClure, David Beaumont, Leslie Powell, Samuel Perry, Donald Treweek, Edgar McArthur, Russell Fraser, Edgar McArthur Bartrop, Clive Carmichael, Leslie Fuhrmeister, Lindsay Coon, Zigurds Plavina, Victor Gingell, Rupert McKenna, Graham McKinnon, David Fairley, Johannes Meennen, Ronald Murphy, Johannes Naus, John McConville, Graham Melonie, William Cutter, Thomas Chalkley, Kenneth Morton, Stanley Shears, Robert Auld, Donald Campbell, John Cofield, Brian Whykes, William Milford, Noel Richards, Stewart Jacobs, James Robertson, Clement Rose, Eric Brown, Allan Raworth, Ernest Salter, Neville Cartledge, Peter Stacey, Robert McClure, Antonius Goossens, Rodney Cartledge, Rodney Hayes, Bevan Grigsby, James Robertson, Neil Stephens, John Riddle, Andreas Aaus, Bruce Fletcher, Keith Pedler, Allen Flavell, Robert Cartledge, Ronald Shaw, Kenneth Hibberd, William Lockland, Percival Bilney and Petrus Damen. Uncollected certificates for James Patterson, Robert Sugden, Ernest Berriman, Stanley Jephson, Henry Harris, Maxwell Silvey, Joseph Beasley, Charles Matthews, Maxwell Silvey, Ian Creek, Geoffrey Hewish, Robert McClure, Kingsley Callister, Winfield Tonkin, Raymond Wines, Oswald Wilde and Kenneth Mason are included within. The subjects covered include: Printing, mining, geology, metallurgy, mining geology, mine surveying, mechanics applied to mining, electric welding, machine shop practice, algebra, trigonometry, mechanics and heat, applied mechanics, heat treatment, graphics, oxywelding, engineering drawing, blacksmithing, shorthand theory advanced, shorthand speed, commercial English, intermediate English, plain dressmaking, dressmaking advanced, electric wiring, physics, electric technology, carpentry, machine shop, plumbing, trade science, carpentry and joinery, building construction, heat treatment, wiring, oxyacetylene welding, foremanship, turning and fitting, electric wiring, arithmetic, social studies, commercial correspondence, office routine, bookkeeping, typewriting, shorthand, electric refrigerator servicing, refrigeration, radio mechanics, trade maths, sheetmetal, wool sorting, motor mechanics, human relations in management and industrial supervision. Many of the stubbs are signed by principal Dick Richards. Each certificate is signed by the current principal of the School of Mines and Industries, Ballarat, and a number have also been signed by the students.school of mines, school of mines andindustries, certificate, richard w. richards, horace william shuttleworth, dick richards, charles holt, henry elford, irvin singleton, j. h. hughes, john morcom, alfred amor, john wastell, john rudwick, jared hines, harry allan, l. f. j. hillman, arthur davies, letitia stanley, victor wright, raymond ball, mary o'callaghan, ethna burke, alec foyster, james duggan, leonard auchettl, reeves collins, james patterson, stanley douglas webb, oswald lyle, marvis orr, eric roberts, jack clennell, a. r. millar, heith smyth, walter hines, harold leslie, joseph fisher, geoffry burns, alick dait, george hill, raymond wines, robert manson, albert o'neill, thomas green, william stargatt, william harrison, reginald allen, albert wilson, allan curtis, arthur donald, john wynn, sydney robinson, john blackic, percy elsdon, hubert jenkins, kingsley callister, douglas hall, norman lawson, winfield tonkin, artuhur williams, allan curtis, ernest billinge, john daelon, harold bunting, stanley wilton, robert sugden, winsome stevens, herbert stanbridge, robert pittard, henry bre, ernest berriman, carlyle west-onley, william blackic, lorna dunstan, cedric pike, stanley jephson, hugh hendrick, joseph fisher, ernest grove, ronald fisher, heith halsall, henry harris, maxwell silvey, stanley trengove, donald trescowthick, harold tolliday, russell lucas, john boyd, john keys, stanley betteridge, ernest betteridge, michael ross, robert stewart, joseph beasley, william beasley, ray deveson, george hennessy, charles matthews, maxwell silvey, ian creek, geoffrey moorhouse, hector tonks, john donald, hugh hendrick, stanley jephson, ian mcintosh, robert nice, ralph scott, walter martin, grant coutts, lindsay hannah, john tainsh, hubert robinson, john donald, george beaton, heather harris, brian mccarthy, samuel perry, valentine pascoe, philip mclean, geoffrey hewish, hubert robinson, john borch, frederick gale, ian grundell, albert perry, frank hutchinson, horace shuttleworth, kenneth mason, david hatt, malcom foster, george jones, graham mckinnon, ronald newton, john betts, leonard wade, robert mcclure, david beaumont, leslie powell, samuel perry, donald treweek, edgar mcarthur, russell fraser, edgar mcarthur bartrop, clive carmichael, leslie fuhrmeister, lindsay coon, zigurds plavina, zig plavina, victor gingell, rupert mckenna, graham mckinnon, david fairley, johannes meennen, ronald murphy, johannes naus, john mcconville, graham melonie, william cutter, thomas chalkley, kenneth morton, stanley shears, robert auld, donald campbell, john cofield, brian whykes, william milford, noel richards, stewart jacobs, james robertson, clement rose, eric brown, allan raworth, ernest salter, neville cartledge, peter stacey, robert mcclure, antonius goossens, rodney cartledge, rodney hayes, bevan grigsby, james robertson, neil stephens, john riddle, andreas aaus, bruce fletcher, keith pedler, allen flavell, robert cartledge, ronald shaw, kenneth hibberd, william lockland, percival bilney, petrus damen, james patterson, robert sugden, ernest berriman, stanley jephson, henry harris, maxwell silvey, joseph beasley, charles matthews, maxwell silvey, ian creek, geoffrey hewish, robert mcclure, kingsley callister, winfield tonkin, raymond wines, oswald wilde, kenneth mason, trades -
 Melbourne Legacy
Document, History (H33) By Frank Meldrum, 1976
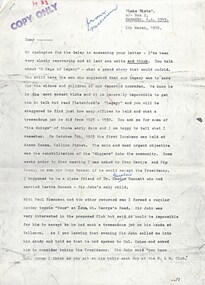
A document written in 1976 by Legatee Frank Meldrum containing his account of the start of Legacy. He was responding to a request for information about the history of Legacy that the archive committee was collating. He mentions several key members by name and what they achieved. As with other similar accounts he mentions the original objective was to see diggers placed in employment. When two years later the focus changed to the families 'thanks to Frank Doolan Legacy found its SOUL'. Many other accounts have also used the term 'soul' when referring to Frank's suggestion. It seems many Legatees had been quietly helping families of their comrades; Frank 'said he was helping a widow with two children of an old army mate. It was discovered that several of the Board were doing the same. Stan Savige had taken over the care of his widowed sister and her two boys, whose father had died at Passchendale. I had a widow with two little ones whose father was one of my best mates at Anzac. He died of flu virus after returning to Australia. I think eleven members of the Board or Committees were already giving similar service. Frank's proposal caught on immediately. Legacy had found its Soul!' 'Harold Peters started his Lit and Debating Class and I was asked by Stan to find a PT instructor', Frank Meldrum asked for the 'Billy' Williams to helped, and a cobber from Anzac, Louis Vavjanezki, to take on boxing and wrestling classes. 'All committees carried their own expenses amongst themselves - nothing was charged to JLC. Hugh Brain started the Education Committee and was given a donation, I think of $1000 (a heck of a lot in those days) by the Ballieu Bros.' He also mentions 'For the first 5-10 years practically all administrative costs were borne by the members.' 'Stan Savige was, of course a tremendous driving force in all the work for the Juniors. He put on a Christmas Camp at Balnarring on his own property and was Camp Commandant and Camp Cook.' Legatee Keith Mitchell helped Frank Meldrum in doing a dental examination of all children in the classes and then Frank did the necessary treatments in his rooms. When it was known they were treating over 400 children and their mums, Syd Birrell then got the board to co-opt two more dentists into the Club and form a Dental Clinic. Syd Birrell also started a Legal Committee to provide free legal advice. 'Committees quietly vied with each other to give better services to the Juniors and their mums. It was an atmosphere that was unbelievably happy - SERVCE WITHOUT SELF'. He mentions picnics, including one at Grimwade house - photos are at 01382 - where legatees were dressed up. The first demonstration was held in the 'Playhouse, just over Princes Bridge and was a great success.' Aaron Beattie and Mrs Gilles were mentioned. The notation H33 in red pen shows that it was part of the archive project that was trying to capture the history of Legacy. A summary of the first fifty years of Legacy written by a key founding member.White foolscap paper with black type x 6 pages of Frank Meldrum's account of Legacy's history dated 6 March 1976.Handwritten H33 in red pen and 'from Meldrum' in blue pen on first page. Stamped 'COPY ONLY' in purple ink.history, founding legatee, frank meldrum -
 Federation University Historical Collection
Books, H.E. Daw Government Printer, Ballarat School of Mines and Industries Departmental Papers, 1914-1950, 1914-1950
Used at the Ballarat School of Mines and the Ballarat Technical Art SchoolThis collection of examinations is significant because of its completeness with the full range of examinations between 1914 and 1950.Large leather bound books, with leather spine, containing all examinations held at the Ballarat School of Mines (including the Ballarat Technical Art School and Ballarat Junior Technical School). The examination papers were supplied and printed by the Education Department, Victoria. Examinations include: Agriculture, Algebra, Architecture, Arithmetic, Applied Mechanics, Assaying, Biology, Botany, Boilermaking, Building Design, Blacksmithing, Bricklaying, Carpentry and Joinery, Coachbuilding, Cabinet Making, Civil Engineering, Cabinet Making, Commercial, Chemistry, Engineering Drawing, Economics, English, Electrical technology, Electricity and Magnetism, Electric Wiring, Electric Welding, Electrical Fitting, Electrical Trades, Food Analysis, Geology, Geological Mapping, Graphics, Geometry, Heat Engines, Heat Treatment, Hydraulics, Hand Railing, Instrument Making, Millinery, Milling and Gearouting, Machine Shop Practice. Metal Founding, Mining, Metallurgy, Mineralogy, Mathematics, Motor Mechanics, Mine Surveying, Mining Mechanics, Petrology, Physics, Painting and Decorating, Pattern Making, Plastering, Plumbing and Gasfitting, Printing, Refrigeration, Spelling, Science , Shorthand, Surveying. Signwriting. Sheet Metalwork, Toolmaking, Ladies Tailoring, Trigonometry, Typewriting, Welding, Commercial Geography. Millinery, Dressmaking, Needlework, Decorative Needlework, Architecture, Building Design and Construction, Art (Composition in Form and Colour), Art (Casting Clay MOdels) Art (Drapery), Art (Drawing the Human Figure From Casts), Art (Drawing the Antique from Memory), Art (Drawing from Memory); Art (Drawing Plant Forms from Nature, Art (Drawing Plant Forms From Memory), Art (Drawing from Models and Objects), (Drawing From a Flat Example). Art (Drawing in Light and Shade from a Cast of Ornament or Lower Nature), Art (Drawing Ornament from the Cast), Art (Drawing from Models or Objects), Art (Drawing fro Dressmakers' and Milliners' Fashions), Art (Drawing With the Brush), Art (Drawing from a Flat Example); Art (Modelled Design), Art (General Design), Art (Embossed Leatherwork), Art (Practical Plane Geometry), Art (Practical Solid Geometry), Art (Geometrical Drawing), Carpentry and Joinery, Art (Human Anatomy), Art (Historic Ornament), Art (House Decoration), Art (LEttering), Signwriting, Art (Light Metalwork), Art (Modelling), Art (Modelling the Human Figure from a Life), Art (Stencilling); Art (Wood Carving) Refrigeration, Teaching, Boilermaking, Blacksmithing, Carpentry and Joinery, Coachbuilding and Carriage Drafting, Electric Wiring, Electrical Fitting, Graining and Marbling, Instrument Making , Machine Shop Practice, Metal Founding, Milling and Gear Cutting, Motor Mechanics, Painting and Decorating, Sheet Metalwork, Toolmaking, Printing, Pattern Making, Plumbing and gasfitting, examinations, ballarat school of mines, ballarat technical art school, trades, education department victoria, agriculture, algebra, architecture, arithmetic, applied mechanics, assaying, biology, botany, boilermaking, building design, blacksmithing, bricklaying, carpentry and joinery, coachbuilding, cabinet making, civil engineering, commercial, chemistry, engineering drawing, economics, english, electrical technology, electricity and magnetism, electric wiring, electric welding, electrical fitting, electrical trades, food analysis, geology, geological mapping, graphics, geometry, heat engines, heat treatment, hydraulics, hand railing, instrument making, millinery, milling and gearouting, machine shop practice, metal founding, mining, metallurgy, mineralogy, mathematics, motor mechanics, mine surveying, mining mechanics, petrology, physics, painting and decorating, pattern making, plastering, plumbing and gasfitting, printing, refrigeration, spelling, science, shorthand, surveying, signwriting, sheet metalwork, toolmaking, ladies tailoring, trigonometry, typewriting, welding., dressmaking, needlework, decorative needlework, architecture, building design and construction, art (composition in form and colour), art (casting clay models), art (drapery), art (drawing the human figure from casts), art (drawing the antique from memory), art (drawing from memory), art (drawing plant forms from nature, art (drawing plant forms from memory), art (drawing from models and objects), (drawing from a flat example), art (drawing in light and shade from a cast of ornament or lower nature), art (drawing ornament from the cast), art (drawing from models or objects), art (drawing for dressmakers' and milliners' fashions), art (drawing with the brush), art (drawing from a flat example), art (modelled design), art (general design), art (embossed leatherwork), art (practical plane geometry), art (practical solid geometry), art (geometrical drawing), art (human anatomy), art (historic ornament), art (house decoration), art (lettering), art (light metalwork), art (modelling), art (modelling the human figure from a life, art (stencilling), art (wood carving), teaching, coachbuilding and carriage drafting, graining and marbling, milling and gear cutting, commercial geography, exams, examination book -
 Victorian Aboriginal Corporation for Languages
Periodical, Australian Institute of Aboriginal and Torres Strait Islander Studies, Australian Aboriginal studies : journal of the Australian Institute of Aboriginal and Torres Strait Islander Studies, 2007
1. Musical and linguistic perspectives on Aboriginal song Allan Marett and Linda Barwick Song brings language and music together. Great singers are at once musicians and wordsmiths, who toss rhythm, melody and word against one another in complex cross-play. In this paper we outline some initial findings that are emerging from our interdisciplinary study of the musical traditions of the Cobourg region of western Arnhem Land, a coastal area situated in the far north of the Australian continent 350 kilometres northeast of Darwin. We focus on a set of songs called Jurtbirrk, sung in Iwaidja, a highly endangered language, whose core speaker base is now located in the community of Minjilang on Croker Island. We bring to bear analytical methodologies from both musicology and linguistics to illuminate this hitherto undocumented genre of love songs. 2. Iwaidja Jurtbirrk songs: Bringing language and music together Linda Barwick (University of Sydney), Bruce Birch and Nicholas Evans (University of Melbourne) Song brings language and music together. Great singers are at once musicians and wordsmiths, who toss rhythm, melody and word against one another in complex cross-play. In this paper we outline some initial findings that are emerging from our interdisciplinary study of the musical traditions of the Cobourg region of western Arnhem Land, a coastal area situated in the far north of the Australian continent 350 kilometres northeast of Darwin. We focus on a set of songs called Jurtbirrk, sung in Iwaidja, a highly endangered language, whose core speaker base is now located in the community of Minjilang on Croker Island. We bring to bear analytical methodologies from both musicology and linguistics to illuminate this hitherto undocumented genre of love songs. 3. Morrdjdjanjno ngan-marnbom story nakka, ?songs that turn me into a story teller?: The morrdjdjanjno of western Arnhem Land Murray Garde (University of Melbourne) Morrdjdjanjno is the name of a song genre from the Arnhem Land plateau in the Top End of the Northern Territory and this paper is a first description of this previously undocumented song tradition. Morrdjdjanjno are songs owned neither by individuals or clans, but are handed down as ?open domain? songs with some singers having knowledge of certain songs unknown to others. Many morrdjdjanjno were once performed as part of animal increase rituals and each song is associated with a particular animal species, especially macropods. Sung only by men, they can be accompanied by clap sticks alone or both clap sticks and didjeridu. First investigations reveal that the song texts are not in everyday speech but include, among other things, totemic referential terms for animals which are exclusive to morrdjdjanjno. Translations from song language into ordinary register speech can often be ?worked up? when the song texts are discussed in their cultural and performance context. The transmission of these songs is severely endangered at present as there are only two known singers remaining both of whom are elderly. 4. Sung and spoken: An analysis of two different versions of a Kun-barlang love song Isabel O?Keeffe (nee Bickerdike) (University of Melbourne) In examining a sung version and a spoken version of a Kun-barlang love song text recorded by Alice Moyle in 1962, I outline the context and overall structure of the song, then provide a detailed comparative analysis of the two versions. I draw some preliminary conclusions about the nature of Kun-barlang song language, particularly in relation to the rhythmic setting of words in song texts and the use of vocables as structural markers. 5. Simplifying musical practice in order to enhance local identity: Rhythmic modes in the Walakandha wangga (Wadeye, Northern Territory) Allan Marett (University of Sydney) Around 1982, senior performers of the Walakandha wangga, a repertory of song and dance from the northern Australian community of Wadeye (Port Keats), made a conscious decision to simplify their complex musical and dance practice in order to strengthen the articulation of a group identity in ceremonial performance. Recordings from the period 1972?82 attest to a rich diversity of rhythmic modes, each of which was associated with a different style of dance. By the mid-1980s, however, this complexity had been significantly reduced. I trace the origin of the original complexity, explore the reasons why this was subsequently reduced, and trace the resultant changes in musical practice. 6. ?Too long, that wangga?: Analysing wangga texts over time Lysbeth Ford (University of Sydney) For the past forty or so years, Daly region song-men have joined with musicologists and linguists to document their wangga songs. This work has revealed a corpus of more than one hundred wangga songs composed in five language varieties Within this corpus are a few wangga texts recorded with their prose versions. I compare sung and spoken texts in an attempt to show not only what makes wangga texts consistently different from prose texts, but also how the most recent wangga texts differ from those composed some forty years ago. 7. Flesh with country: Juxtaposition and minimal contrast in the construction and melodic treatment of jadmi song texts Sally Treloyn (University of Sydney) For some time researchers of Centralian-style songs have found that compositional and performance practices that guide the construction and musical treatment of song texts have a broader social function. Most recently, Barwick has identified an ?aesthetics of parataxis or juxtaposition? in the design of Warumungu song texts and musical organisation (as well as visual arts and dances), that mirrors social values (such as the skin system) and forms 'inductive space' in which relationships between distinct classes of being, places, and groups of persons are established. Here I set out how juxtaposition and minimal contrast in the construction and melodic treatment of jadmi-type junba texts from the north and north-central Kimberley region similarly create 'inductive space' within which living performers, ancestral beings, and the country to which they are attached, are drawn into dynamic, contiguous relationships. 8. The poetics of central Australian Aboriginal song Myfany Turpin (University of Sydney) An often cited feature of traditional songs from Central Australia (CA songs) is the obfuscation of meaning. This arises partly from the difficulties of translation and partly from the difficulties in identifying words in song. The latter is the subject of this paper, where I argue it is a by-product of adhering to the requirements of a highly structured art form. Drawing upon a set of songs from the Arandic language group, I describe the CA song as having three independent obligatory components (text, rhythm and melody) and specify how text is set to rhythm within a rhythmic and a phonological constraint. I show how syllable counting, for the purposes of text setting, reflects a feature of the Arandic sound system. The resultant rhythmic text is then set to melody while adhering to a pattern of text alliteration. 9. Budutthun ratja wiyinymirri: Formal flexibility in the Yol?u manikay tradition and the challenge of recording a complete repertoire Aaron Corn (University of Sydney) with Neparr? a Gumbula (University of Sydney) Among the Yol?u (people) of north-eastern Arnhem Land, manikay (song) series serve as records of sacred relationships between humans, country and ancestors. Their formal structures constitute the overarching order of all ceremonial actions, and their lyrics comprise sacred esoteric lexicons held nowhere else in the Yol?u languages. A consummate knowledge of manikay and its interpenetrability with ancestors, country, and parallel canons of sacred y�ku (names), bu?gul (dances) and miny'tji (designs) is an essential prerequisite to traditional leadership in Yol?u society. Drawing on our recordings of the Baripuy manikay series from 2004 and 2005, we explore the aesthetics and functions of formal flexibility in the manikay tradition. We examine the individuation of lyrical realisations among singers, and the role of rhythmic modes in articulating between luku (root) and bu?gul'mirri (ceremonial) components of repertoire. Our findings will contribute significantly to intercultural understandings of manikay theory and aesthetics, and the centrality of manikay to Yol?u intellectual traditions. 10. Australian Aboriginal song language: So many questions, so little to work with Michael Walsh Review of the questions related to the analysis of Aboriginal song language; requirements for morpheme glossing, component package, interpretations, prose and song text comparison, separation of Indigenous and ethnographic explanations, candour about collection methods, limitations and interpretative origins.maps, colour photographs, tablesyolgnu, wadeye, music and culture -
 The Ed Muirhead Physics Museum
Meldometer, Joly
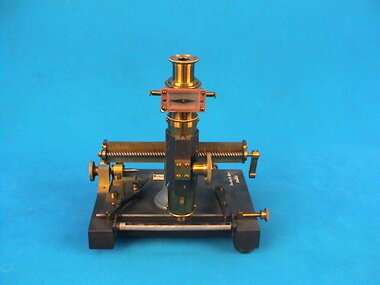
Joly Meldometer The Joly meldometer was created to determine the melting point of minerals. W.E. Wilson, an astronomer and author, stated in 1900 that the Joly meldometer consisted of a ‘a strip of platinum on which minute fragments of any mineral can be placed, while any alteration in its length can be determined by means of a micrometer screw which touches a lever connected with one end of the strip. The strip can be heated by an electric current, and is calibrated by observing the micrometer readings corresponding to the temperatures at which some substances of known melting-points melt’i . One reason why the Joly meldometer was seen as a successful addition to science was the small amount of any substance that it required for testing. Only a minute sample was needed for the instrument to work and so a tiny part could be taken from a delicate item without destroying itii . The instrument was originally manufactured by the Irish company Yeates & Son of Dublin. The Yeates family business was established in the early 1790’s and is thought to have operated until approximately 1922iii . Their business slogan was recorded as ‘Instrument makers to the University’, a slogan which proudly exhibited their relationship with Trinity College, Dublin. The company was located directly opposite Trinity College, the place where the Joly meldometer was created. Working in such close proximity must have assisted this business relationship. The inventor of this meldometer was Irishman John Joly. Joly was born in 1857 at the Church of Ireland Rectory, Hollywood House. His education led him to Trinity College Dublin where, by 1891, he had obtained a Bachelor of Engineering degree as well as a Doctorate of Science. The entirety of his working life appears to have taken place at Trinity College although he is known to have travelled in order to consult with other scientists such as the world renowned Sir Ernest Rutherford. The Joly meldometer was used for a variety of different purposes, with scientists often adapting the instrument to suit their own needs. For instance, the previously mentioned astronomer W.E. Wilson adapted the meldometer to assist him in measuring the radiation of the suniv . Joly used his device in an attempt to ascertain the age of the earth. In 1913, along with Sir Rutherford, Joly came to the conclusion that the earth was approximately 400 million years old. They did this by analysing the decay of radioactivity in minerals. According to our present knowledge of the earth this was a much more accurate date than the dates Joly had previously derived. He had first thought that the earth was 97 million years old due to the volume of sodium in the oceans. Joly’s second analysis of the topic had resulted in the age of 80 million years. This figure was based on the accumulation of sediment. Apart from designing his meldometer, Joly is also remembered for his work with colour photography. In 1894 Joly discovered a method for creating colour photographs from a single platev . He also studied the use of radiation as a treatment for cancer and persuaded the Royal Dublin Society to establish the Radium Institute to assist hospitals. In 1933 Joly passed away at the age of seventy-six. Jacqueline Eager Student Projects Placement, Cultural Collections 2005 iMollan, Charles, Irish National Inventory of Scientific Instruments, Samton Limited, 1995, p. 302. iiJoly, John, 'On the determination of the melting points of minerals, Part 1. Uses of the meldometer', Proceedings of the Royal Irish Academy, Vol. 2., 1891. iiiInstitute for Learning Technologies, "Stephan Mitchell Yeates' http://www.ilt.columbia.edu/projects/bluetelephone/html/yeates.html, accessed on 04.10.2005 ivMollan, Charles, Irish National Inventory of Historic Scientific Instruments, op cit. vMollan, Charles, The Mind and the Hand: Instruments of Science 1685-1932, Samton Limited, Dublin, 1995, p. 34.The following from #2975 in UDE UNIVERSITY COLLEGE DUBLIN ENGINEERING list in the “Irish National Inventory of Historical Scientific Instruments” by Charles Mellon (P/C in file for Cat no 272. “....meldometer as an instrument ‘for the purpose of finding the melting-points of minerals, hence its name. As used by him (Joly), it consists of a strip of platinum,on which minute fragments of any mineral can be placed, while any alteration in its length can be determined by means of a micrometer screw which touches a lever connected with one end of the strip. The strip can be heated by an electric current, and is calibrated by observing the micrometer readings corresponding to the temperatures at which some substances of known melting-points melt’.” Ref. : J. Joly, Proc. Roy. Irish Acad. 3rd series vol 2 (1891),38-64. -
 Bendigo Historical Society Inc.
Book - BENDIGO SALEYARDS COLLECTION: BENDIGO SALEYARDS RELOCATION STUDY - PLANNING REPORT AND ENVIRONMENT
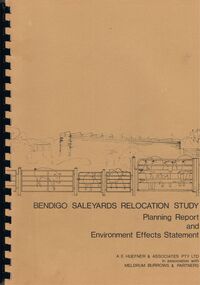
Bendigo Saleyards Relocation Study - Planning Report and Environment Effects Statement for the City of Bendigo by A E Huefner & Associates Pty Ltd in association with Meldrum Burrows & Partners. Book has a light brown cover with black plastic binder spine. Green and yellow pages separate some sections. The front cover has a sketch of a stock transport with a pig, sheep and cattle behind gates. Contents include: Introduction, Summary, Recapitulation on the Feasibility Report which includes The Need for Action, the Site and Existing Uses Adjacent to the Site, The Proposal which includes Concept, Project Description, Components, Siting of Facilities, Land Clearing, Earthworks, Darainage, Buildings and Structures, Roads and Pavements, Services, Landscaping, Soil Profile and Construction Programme. Invironmental Effects which include Visual Impact Dust, Odours, Effluent, Effluent Treatment System, Traffic, Artificial Lighting, Noise, Operational Failures and Nature Conservation Effects. Statutory Planning Considerations which includes Zoning Controls and Suggested Procedure for Initiating I.D.O. Amendment. Appendices are: A.- Copy of Tit;e, B - Soil Investigation, C - Acoustic Assessment and D - Suggested Draft Amendment to Shire of Marong I.D.O. Contains a photo of the area - View of the Site, looking South and a number of drawings. Copies of various Council Reports referring to the Saleyards Relocation Project. It has a bright yellow cover and a hard plastic type spine. Mentioned in the reports is the cost to bring the old saleyards up to standard and list of improvements. Reports are as at 16th July, 1984. Mustard coloured book with plastic spine titled Bendigo Saleyards Relocation Study Feasibility Report by Meldrum Burrows & Partners in association with A E Huefner & Associates Pty Ltd and Acil Australia Pty Ltd dated September, 1983. Items mentioned are: Introduction, Summary, Background, Role in Livestock Marketing for the Bendigo Saleyards (Acil Australia Pty. Ltd., Saleyard Relocation: Strategic Considerations, Financial Implications and Conclusion. Appendix 1: Estimation of Livestock Population in Catchment Area. Drawings in Fig 1 Existing Bendigo Saleyards and Surrounding Land Uses, Fig 2 Catchment Area for Bendigo Saleyards 1983, Fig 4.1 Estimated Sheep Populatiuon in Catchment Area 1976 - 77 to 1981 - 82, Fig 4.2 Estimated Cattle Population in Catchment area 1976 -77 to 1981 -82, Fig 3 Possible Saleyard Relocation Areas, Fig 4, Directions from which access to possible Saleyard Locations would be obtained - Estimated percentage of sheep to cattle stock, Fig 5 Possible Saleyard Locations - Northern Area, Fig 6 Possible Locations of Saleyards - Inner West, Fig 7 Possible Locations of Saleyards - Outer West. Considerations were made as to renovate the existing saleyards or to move them elsewhere. Effluent, transport and stock movement, and condition of the yards were a problem.bendigo, council, cattle markets, bendigo saleyards collection - bendigo saleyards relocation study - planning report and environment effects statement, a e huefner & associates pty ltd, meldrum burrows & partners, city of bendigo, state electricity commission, mal styles, bendigo college of advanced education, n j fieldew, pryce goodale & duncan pty ltd, p b swift, shire of marong -
 The Ed Muirhead Physics Museum
Meldometer, Joly
The Joly meldometer was created to determine the melting point of minerals. W.E. Wilson, an astronomer and author, stated in 1900 that the Joly meldometer consisted of a ‘a strip of platinum on which minute fragments of any mineral can be placed, while any alteration in its length can be determined by means of a micrometer screw which touches a lever connected with one end of the strip. The strip can be heated by an electric current, and is calibrated by observing the micrometer readings corresponding to the temperatures at which some substances of known melting-points melt’i . One reason why the Joly meldometer was seen as a successful addition to science was the small amount of any substance that it required for testing. Only a minute sample was needed for the instrument to work and so a tiny part could be taken from a delicate item without destroying itii . The instrument was originally manufactured by the Irish company Yeates & Son of Dublin. The Yeates family business was established in the early 1790’s and is thought to have operated until approximately 1922iii . Their business slogan was recorded as ‘Instrument makers to the University’, a slogan which proudly exhibited their relationship with Trinity College, Dublin. The company was located directly opposite Trinity College, the place where the Joly meldometer was created. Working in such close proximity must have assisted this business relationship. The inventor of this meldometer was Irishman John Joly. Joly was born in 1857 at the Church of Ireland Rectory, Hollywood House. His education led him to Trinity College Dublin where, by 1891, he had obtained a Bachelor of Engineering degree as well as a Doctorate of Science. The entirety of his working life appears to have taken place at Trinity College although he is known to have travelled in order to consult with other scientists such as the world renowned Sir Ernest Rutherford. The Joly meldometer was used for a variety of different purposes, with scientists often adapting the instrument to suit their own needs. For instance, the previously mentioned astronomer W.E. Wilson adapted the meldometer to assist him in measuring the radiation of the suniv . Joly used his device in an attempt to ascertain the age of the earth. In 1913, along with Sir Rutherford, Joly came to the conclusion that the earth was approximately 400 million years old. They did this by analysing the decay of radioactivity in minerals. According to our present knowledge of the earth this was a much more accurate date than the dates Joly had previously derived. He had first thought that the earth was 97 million years old due to the volume of sodium in the oceans. Joly’s second analysis of the topic had resulted in the age of 80 million years. This figure was based on the accumulation of sediment. Apart from designing his meldometer, Joly is also remembered for his work with colour photography. In 1894 Joly discovered a method for creating colour photographs from a single platev . He also studied the use of radiation as a treatment for cancer and persuaded the Royal Dublin Society to establish the Radium Institute to assist hospitals. In 1933 Joly passed away at the age of seventy-six. -
 Puffing Billy Railway
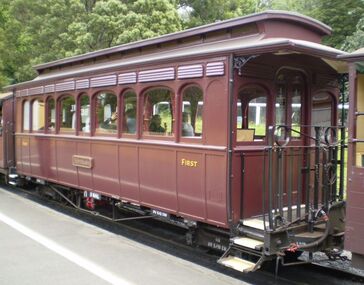
3 NAL (Teepookana), 1st. class saloon car, 1901–1902
3 NAL - Teepookana - (Mt. Lyell) O 3; 3 NBL - 1st. class saloon car (20) NAL FIRST-CLASS SALOON CAR. Four saloon end-platform cars originally built during 1901–1902 by the Lancaster Railway Carriage and Wagon Company Ltd. for the 3'6" gauge Mt. Lyell Mining & Railway Company in Tasmania and classed O. Converted for use as second-class cars on the 2'6" gauge Puffing Billy Railway during 1965–1966, these cars were reclassified NBL and numbered 1–4. The L recognises their Mt. Lyell origin, No. 1 was kept for use as the Railway's VIP car and was reconditioned to a higher standard. No. 2 was similarly upgraded in 1985 for use on special occasions. In 1989 No. 3 was similarly reconditioned with No. 4 receiving similar treatment in 1995. These cars were re-classified NAL in recognition of their new first-class nature. The Mt Lyell Railway was closed in 1963 and subsequently dismantled, but fortunately several of the locomotives and carriages passed into preservation. Purchased by Puffing Billy Preservation Society from the Mount Lyell Mining & Railway Company in the 1960s, it was converted to 2' 6" gauge. It has since given many years of service on the Puffing Billy Railway. TASMANIAN CARRIAGES & GUARDS VANS No. Builder Type Year built Ex. Location Note NAL 1 Lancaster Railway Carriage and Wagon Co Saloon 1901 Mt Lyell Railway Named Mt Lyell NAL 2 Lancaster Railway Carriage and Wagon Co Saloon 1901 Mt Lyell Railway Named Rinadeena NAL 3 Lancaster Railway Carriage and Wagon Co Saloon 1901 Mt Lyell Railway Named Teepookana NAL 4 Lancaster Railway Carriage and Wagon Co Saloon 1901 Mt Lyell Railway Named Dubbil Barril Lancaster Railway Carriage and Wagon Co The Lancaster Company was formed in 1863 and owned extensive works on the outskirts of Lancaster where it produced railway rolling stock of all descriptions, tram cars, wheels and axles, etc and had a reputation for work of a very high-class character. In 1902 Metropolitan Amalgamated Railway Carriage and Wagon Co was registered on 18 April and incorporated as a limited company to amalgamate 6 companies including Lancaster Railway Carriage and Wagon Co These works were closed in 1908 when the business was transferred to Ashbury 1st Saloon Carriage Owner Mount Lyell Mining and Railway Company, Queenstown, TAS Builder Lancaster Railway Carriage and Wagon Company Ltd, England Build date 1901 - 1902 Car length 31 ft 4 in (9.55 m) Car weight 11 t (11.18 ton) Gauge Original Narrow: 1,067 mm (3 ft 6 in) Rebuilt Narrow: 762 mm (2 ft 6 in) Configuration Bogie Capacity 1 -3: 20 Passengers 4: 28 Passengers Number in class 4 Numbers Mt. Lyell: O 2 - O 3, O 5, O 6 Puffing Billy: NBL 1 - NBL 4, NAL 1 - NAL 4, Mt. Lyell, Teepookana, Rinadeena, Dubbil Barril First run 1901 No. Name Location In Service Withdrawn Condition Livery NAL 1 Mt Lyell, NBL 1 Puffing Billy Reclassed from O 5. Recoded to NAL 1. Operational NAL 2 Teepookana, NBL 2 Puffing Billy Converted from O 2. Upgraded - 1985. Recoded to NAL 2. Operational NAL 3 Rinadeena, NBL 3 Puffing Billy Converted from O 3. Upgraded - 1989. Converted to NAL 3. Operational NAL 4 Dubbil Barril, NBL 4 Puffing Billy Converted from O 6. Upgraded - 1995. Converted to NAL 4. Operational Historic - Industrial Narrow Gauge railway - Mt. Lyell Mining & Railway Company in Tasmania - 1st Class Saloon Carriage1st. class saloon car made of Timber and steel3 NAL - Teepookanapuffing billy railway -
 Glenelg Shire Council Cultural Collection
Photograph - Photograph - Portland Social Amusement Club, n.d
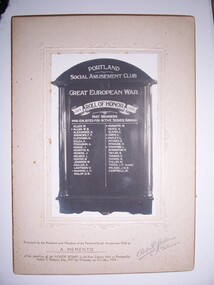
The Portland Social Amusement Club was founded in 1897. Taken from Trove. Portland Guardian Monday May 26 1913: Portland Social Amusement Club. The members of the above Club celebrated the 16th anniversary of its foundation on Tuesday evening last, when the usual banquet. and social gathering was held. During the afternoon, a numerous band of the lady members attended at the, Free Library Hall and made the necessary arrangements, so that on arrival at the scene at 8 p.m. those attending were very pleasurably surprised to find most taste fully decorated tables actually groaning with the weight of all those good things which appeal so strongly, it is said, to the average man, and perhaps we may also add, woman also. At any rate, he would indeed be hard to please, who was not fully satisfied with all that was placed before him on that eventful evening. The attendance this year overtopped that of previous years, as over 80 ladies and gentlemen took part in what must be considered as one of the most successful of the many 'successful gatherings that have taken place. This 16th anniversary was the 431st ordinary gathering that had occurred, and, as the President (Mr. F. A.Row) justly said, it would appear that the Club, which many years ago was given but six months live, had proved the falsity of the attempted prophecy. After the principal business of the gathering had been transacted, the usual Club dinner speeches were made. The President gave "The King," which after being duly honored, was followed by the principal toast of the evening, "The day we celebrate." To Mr D. McDonald the toast of the Absent and Foundation members was entrusted, and as usual, that veteran discharged his duty well. II i cferred to the fact that of the 34 foundation members who started the Club in 1897,only five were present that evening. Mr W. T. Bennett, as one of the five referred to, responded, and hoped that in the glorious future that appeared before Portland, the Club, which had been started in the days of its adversity, would flourish in a like manner. Mr Grant proposed the toast of "Our Visitors." and in the name of the Club welcomed them to this the most important gathering of the year. Mr J. R. Woods responded in his usual happy way, and acknowledged that, until he had been the Club's guest during the years of his mayoralty of the town, he had no idea that it had enrolled among its members the number of ladies and gentlemen that it had or that its functions were upon the scale that he had since found to be the case. Mr G. H. .ennett upheld the claims of the ladies, especially those belonging to the Club. He evidently spoke with much feeling, and. waxed more than usually poetical in his eulogy of the graces and skill of the gentler sex. He rather upset the equilibrium of three of the younger portion of the gentlemen present by asking them to respond, but they all managed to "upstand" and make their acknowledgments. Mr T. F. Cruse was particularly happy in proposing the toast of. "The President and Members of Committee," who, he claimed, had done so much towards the success of the Club, and were deserving of the best that the members could give. Mr T. E. C. Henry, upon the invitation of the .President, responded,-end pointed out that [whilst it might appear that the work of the committee was light, it was not so in reality, as any member who desired a seat upon the Board would soon find out after.his or her election. The singing of Auld Lang Syne brought this portion of the entertainment to a close. In the dance which followed, some opportunity to view the ladies' dresses was afforded, and it could then be easily seen that the anniversary gathering of the Club was considered by the lady members at least, if not .by others, to be important enough to demand special treatment in the matter of dress. Many elaborate and beautiful costumes graced the scene, and everyone appeared to thoroughly enjoy themselves. The function was kept going merrily until about 2 a.m.; when the break up occurred. During the gathering telegrams of con gratulation were received from Mr W. B. Shevill and also from Mr Jno. Homers, both old members, the former a foundation one. Mr O'Donnell apologised for his own and Mrs O'Donnell's absence.Photograph of Portland Social Amusement Club -
 Flagstaff Hill Maritime Museum and Village
Equipment - First Aid Case, Thomas Urquhart & Son Pty Ltd (Thos. Urquhart), 1930-1939
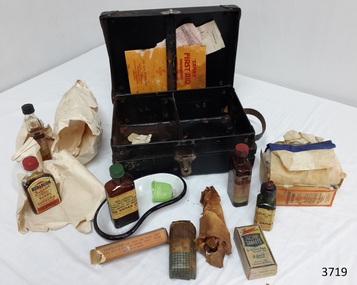
This small, portable 1930s Sanax First Aid Case has been strongly constructed, with corners reinforced with metal to take knocks and bumps, so it could be quickly transported to the site of an emergency. Having these supplies organised into a kit made them easily accessible and reduces time to take them to the site of the accident. It was possibly designed for use in factories because the booklet in the case states that the kit complies with “Part 1, Victorian Factories Regulations”. The text of the printed brand “Sanax First Aid Case” is right-way up when the case stands vertically on its hinged side. In modern times people are well aware of the importance of quick treatment when accident and injury occur. However, before the first commercial First Aid Kit was made by Johnson & Johnson in 1888, people had little knowledge about treating injuries and lacked information about suitable supplies to keep on hand for emergencies. They were often unaware of how to help in that critical time before the doctor or other assistance arrived, a particularly important time for the many people living in remote areas. A quote from Johnson’s & Johnson’s 1888 price list explains “It is a fact, which is everywhere being recognized, that many lives are lost and much suffering entailed in such accidents on account of the lack of the simple but necessary articles required to afford prompt assistance to the wounded.” One example of the value of First Aid assistance to community groups is shown in an article from the Weekly Times, 29th November 1930. It records a report from the Annuello Branch of the Younger Set (a Country Women’s Organisation), telling that on Armistice Day their president Mrs Jamieson, presented the Annuello School with the gift of a Sanax Red Cross First Aid outfit, which was accepted as being “of great practical use to the scholars.” (Annuello is a remote wheat growing area in the Mallee region of North Western Victoria, which became a soldier settlement area after World War I. There is a strain of wheat named ‘Annuello’ due to its suitability for that area. ) The Sanax Case in our Collection contains instructions, equipment and medical items suitable for use in emergency situations. The Case was one of 42 patterns available from Sanax that conformed to ‘Part 1, Victorian Factories Regulations’. It includes items made by Sanax Company and by Burroughs Wellcome & Co. (Australia) Ltd., Sydney, NSW. A quote at the back of the First Aid Emergency Instructions booklet says: “Sanax products are made in Australia by or under the supervision of qualified chemists, from the highest quality materials. They are dependable for the purposes written on labels.” BOOKLET included in First Aid Case: “SANAX” First-Aid Emergency Instructions has orange cover and white pages, joined in the centre by two staples. Booklet contains First Aid Instructions for general events listed in alphabetical order. It also contains an indexed sections headed “Poisoning, and what to do” written by S.A. Burrows, Ph.C., Vuc and N.Z. There are instructions and diagrams on how to perform Artificial Respiration. There are advertisement for Sanax products throughout the booklet that include; - Sanax Ambulance Stretcher for timber mills, mines, ships and quarries - Saw dust masks (porous rubber) for workers in dust, paint or duco sprayers Inside cover lists Sanax’s Australian made products including - tablets and powders for headaches, neuralgia, influenza, colds - snuff for Catarrh that is “quite harmless” - First Aid Cases that come in a range of 42 patterns - sunburn preventatives and treatments - healing salve for carbuncles, pock, pimples, boils, varicose ulcers etc. - snake bite outfits and kits LEAFLETS included in First Aid Case: (1) Tannafax Tannic Acid Jelly. Tannafax should be kept at hand in every home. It should be applied direct from the tube and used with neither oil nor grease. Where a large area has to be covered the clamped end may be torn or cut off to give a wider mouth to the tube. Collapsible tubes of different sizes. Made in Australia. Burroughs Wellcome & Co. (Australia) Ltd. (Incorporated in England). Sydney, NSW. Assorted Houses, London, New York, Montreal, Cape Town, Milan, Bombay, Shanghai, Buenos Aires. Copyright A. 1817, J. 9463 (2) Tabloid. The strong thing is the just - - . Tabloid marks the wor - - Burroughs Wellcome & Comp. The use of the word is to enab – the prescriber, dispenser and patient to get the right thing with one short word, instead of the firm’s long name. If another maker apply the word to his product, the act is unlawful. Tabloid is our trade mark and brand. If a vendor disregard it in dispensing or selling, the act is unlawful for the same reason. We prosecute both offenders rigorously, in the interest of prescribers, dispensers, patients and the owners of the trade mark. Please inform us of any instance of either offence. Burroughs Wellcome & Co. (Australia) Ltd. (Incorporated in England). Telephone Number - M 4184 (4 lines) All communications to G.P.O. Box No. 1185 DD. Copyright Sy. 20. & J 9894. Medicines and Equipment included in First Aid Case: - Absorbent Cotton, Sanax, for absorbing blood or drying a wound. As a swab for washing wounds; to place above a compress to keep the heat in: or as a pad to protect wounds or fractures. The Sanax Co. Manuf. Chemists, Melbourne. Regd. Office: 5 Brunswick St, Fitzroy. N.6. - ACHE tablets, Sanax, for all aches, pains, fevers etc. Dose: 2 to 3 tablets with a draught of water, every 3 hours. Children in proportion. For influenza or colds, take the bedtime dose with a hot lemon drink or toddy. Recommended for Headaches, Colds, Influenza, Fevers, Neuralgia, Rheumatism, Nerve Pains, Sleeplessness, and Seasickness. Three Sanax Ache tablets equals one Sanax Ache powder. Each tablet contains 1.75grs. each Phenacotinum and Acety acSzilcyl, and .75grs Ammon Brom. Etc.. Sanax brand specialties are prepared by highly qualified pharmaceutical chemists and may be accepted as safe and effective for the purpose indicated on the label. The Sanax Co. Melbourne - Eye lotion, Sanax, “in eye bath full strength or diluted with equal parts of water. Sanax Co. Brunswich St, Fitzroy, Melbourne. - Iodine, Sanax, POISON, with instructions for what to do if swallowed. - Kuraburn, Sanax, Applied to the burn and allowed to dry, the pain and heat instantly disappear, and blistering is prevented. If necessary, apply again in an hours. To safeguard against burning when sunbathing, apply before exposure to the sun. If already sunburnet, use Kuraburn as directions above. Safe and harmless. Sole makers, The Sanax Co. Brunswick St. - - Vic. - Sal Volatile, Sanax, - - stimulant for - - nervous aches - - or as smelling salts Dose - - - - Solution of A- - - 5%, . The Sanax Co. Brunswick St, Melbourne. - Tannafax, Burroughs Wellcome & Co. Australia Ltd. Sydney, N.S.W., 20gm. Approx., Tannic Acid Jelly, (Tannic Acid with 0.5% Phenol in a water-soluble base) for burns and scalds. A.N. 15050, p188, logo of a unicorn. Apply lightly, allow to dry, and bandage loosely. Do not apply oil or grease. - bottle wrapped in brown paper, unknown contents, paper adhered to bottle. - dish, kidney shaped, metal, white enamel with black rim - eye bath, green, plastic or Bakelite SANAX COMPANY The Sanax Company was at the address of 5 Brunswick Street, Fitzroy [Melbourne] at least as early as November 1924, as shown by its advertisement of Ache Powder in the Weekly Times, 8th November 1924. It was still at this address in September 1951, when it advertised First Aid outfits and components in the Post Master General’s section of the Commonwealth of Australia Gazette. REFERENCES: Annuello, Victoria; Wikipedia, https://en.wikipedia.org/wiki/Annuello,_Victoria Annuello Younger Set, Branch Activities and Local Reports, Country Women’s Organisations, Weekly Times, 29 November 1930, Trove http://trove.nla.gov.au/newspaper/article/224921009?searchTerm=%22sanax%22%20and%20%22melbourne%22&searchLimits=# Commonwealth of Australia Gazette, Issue 32, 24th April 1915, https://www.legislation.gov.au/file/1915GN32 [Johnson & Johnson Price List, September 1, 1888, p. 20. From our archives], Celebrating the 125th Birthday of the First Aid Kit , The Story of Johnson & Johnson, , http://www.kilmerhouse.com/2013/06/from-1888-to-2013-celebrating-the-125th-birthday-of-the-first-aid-kit/ Post Master General’s section of the Commonwealth of Australia Gazette, Issue No. 73, Thursday 27th September 1951 http://trove.nla.gov.au/newspaper/article/232185299?searchTerm=%22sanax%22%20and%20%22fitzroy%22&searchLimits= Sanax First Aid Emergency Instructions, by S.A. Burrows, publisher Sanax Ltd. Fitzroy, Victoria, 1930-1939 English, book, Illustrated edition, Trove http://trove.nla.gov.au/version/40948895 Access to emergency medical help in early settlement days of Victoria could take quite some time, especially in remote areas. From 1888 First Aid Kits and instructions became available for work sites, offices, community groups and individuals, helping to bridge the gap between the accident and the arrival of medical assistance. This portable Sanax First Aid Case is an example of portable medical equipment made in Melbourne, Australia, in the 1930’s and available to the public. It contains a range of items plus information to be used in a variety of injuries and emergencies in in factories, households, businesses and local communities, and instructions on their use. First Aid Case, portable, Sanax First Aid Case. First Aid kit in strong black cardboard carry case with metal reinforced corners, metal hinges on lid, metal catch and leather carry handle. Inside lid is a vertical strap with narrow gap behind it. Base is divided into two compartments. Manufactured by Sanax, Fitzroy, Melbourne, C. 1930-1939 Contents include "Sanax" First Aid instructions booklet, 2 leaflets, metal kidney dish enamelled in white with black trim on edge, green plastic or Bakelite eye bath, eye lotion, Tannafax tannic acid jelly, Sal Volitile, Kuraburn, Iodine, Argyrol, ACHE tablets, absorbent cotton in cardboard box, gauze bandage, and UNKNOWN wrapped bottle. Printed in gold on lid of case “SANAX” FIRST AID CASE. Most of the contents, as well as the case, show the “SANAX” brand. Some contents are inscribed Burroughs Wellcome & Co. (Australia) Ltd., flagstaff hill, warrnambool, shipwrecked coast, flagstaff hill maritime museum, maritime museum, shipwreck coast, flagstaff hill maritime village, great ocean road, first aid items, first aid kit, emergency first aid, medical emergency kit, home emergency kit, industrial emergency kit, sanax company fitzroy melbourne, burroughs wellcome & co. (australia) ltd, thos. urquhart & son pty. ltd. melbourne, sanax first aid case, sanax first-aid emergency instructions, part 1 victorian factories regulations, tabloid medical supplies -
 Glen Eira Historical Society
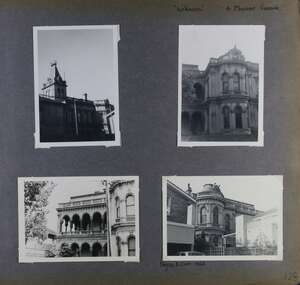
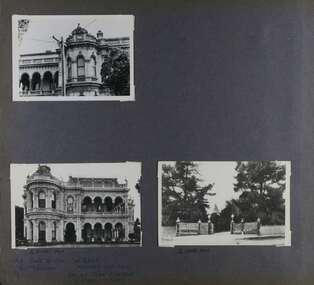
Album - Album page, Labassa, 4 Manor Grove, Circa 1972
This photograph is part of the Caulfield Historical Album 1972. This album was created in approximately 1972 as part of a project by the Caulfield Historical Society to assist in identifying buildings worthy of preservation. The album is related to a Survey the Caulfield Historical Society developed in collaboration with the National Trust of Australia (Victoria) and Caulfield City Council to identify historic buildings within the City of Caulfield that warranted the protection of a National Trust Classification. Principal photographer thought to be Trevor Hart, member of Caulfield Historical Society. Most photographs were taken between 1966-1972 with a small number of photographs being older and from unknown sources. All photographs are black and white except where stated, with 386 photographs over 198 pages. HISTORY:-- From Victorian Heritage Database citation for Labassa https://vhd.heritagecouncil.vic.gov.au/places/278 as at (26/10/2020) Labassa, Caulfield is one of Melbourne's most lavishly decorated nineteenth century mansions. It resulted from the extensive remodelling in 1890, of an earlier house, known as Sylliott Hill, which was begun in 1862-3 for lawyer, Richard A. Billing. The land at the corner of Balaclava and Orrong Roads was first acquired in 1854 by William Lyall, transferred to his partner, John Mickle, in 1859, who also acquired the adjoining allotment in Balaclava Road, and the three allotments were conveyed to Billing. His first eight-roomed house was extended significantly in 1873 into a twenty-roomed house by architects Crouch and Wilson, who were possibly also responsible for the first house. This reflected Billing's success as a barrister, and he resided at this property until his death in 1882. In 1883 prominent Melbourne businessman, Alexander William Robertson, leased the Sylliott Hill property from Billing's widow, and in 1885 he purchased the adjoining allotment in Balaclava Road. He purchased the Billing's property in 1887 and renamed the 6.31 hectare property, Ontario. In 1889-90, Robertson commissioned the German born architect, John A. B. Koch, to extensively remodel the house into a thirty-five roomed mansion. The existing house was extended and altered, largely resulting in the nineteenth century mansion as it now appears. After Robertson's death in 1896, the house was tenanted until it was eventually sold to the mining millionaire, John Boyd Watson, in 1904. He renamed the property Labassa and carried out repair and re-decoration work to the house. In the early twentieth century, many large estates were subdivided into smaller allotments as the demand for land grew and it became difficult to maintain such large estates. After Watson's death in 1911, portions of the Labassa estate were offered for sale, with Mrs Watson retaining a 1.73 hectare portion containing the house. In 1913 forty-six allotments were auctioned at Labassa Estate, with the formation of Labassa Grove and Ontario Street to the east of the property. Labassa was first recorded as containing flats in 1923 and in the late 1920s, the owner, Robert Hannon, built a red brick block of flats adjacent to the house. Subdivision continued, until the National Trust of Australia (Victoria) purchased the house in 1980 and subsequently purchased adjoining sites, one to the south-east in 1984 (house demolished in 1988) and to the west in 1988. Labassa as it now stands is substantially as it appeared when Koch completed the work in 1890. The original two storey house was transformed into a French Renaissance style mansion, with the addition of a two level L-shaped arcaded verandah and two prominent terminating bays to the south and the east. The building is of unpainted cement render with dressed bluestone plinths, balustraded parapet and steep, slate covered, flat topped mansard roofs behind. A truncated conical roof is a feature of the south bay and a helmeted head is incorporated in the parapet over the east bay. The main south and east facades incorporate many cast cement details, including sculptures, elaborate cornices, swagged Corinthian columns and caryatid consoles flanking the entrance porch, as well as pink marble panels and imitation marble, or scagliola, on curved surfaces. At the rear of the building is a two storey wing and a single storey cottage, the former being connected to the main house by a tower. This section of the house was constructed in 1873. The estate at its peak included stables (1873), conservatory (probably 1890) and a tennis pavilion (probably 1890). All of these outbuildings survive, with the stables and conservatory being converted for residential use after 1922. Internally a range of decorative treatments remain from the late nineteenth century and the early twentieth century, both from the Robertson and Watson periods of occupancy. These include wallpapers, ceiling decoration, chimney pieces, mouldings, joinery and decorative glass. From Victorian Heritage Database citation for H0135 Labassa 2/2A Manor Grove Caulfield North https://vhd.heritagecouncil.vic.gov.au/places/278 as at (26/10/2020) HOW IS IT SIGNIFICANT? Labassa, Caulfield is of architectural, aesthetic and historical significance to the State of Victoria. WHY IS IT SIGNIFICANT? Labassa, Caulfield is of architectural significance as the most prominent example of a small number of houses built in Australia in the French Renaissance style. It is of further note due to the German interpretation of the style and the use of Hellenistic sources, via Germany. It is exceptional for its lavish treatment externally, including marble, scagliola, caryatids, swagged columns, mansard roofs and ornamental cresting. Labassa is of architectural significance as the most important surviving example of German architect, John Koch's domestic work. He undertook a large variety of work in Melbourne, including a number of houses, however Labassa is the most lavish example of his work. Labassa is of aesthetic significance for its outstanding assemblage of late nineteenth and early twentieth century European style interior decoration, which remain remarkably intact. These include a trompe l'oeil ceiling, painted ceilings, embossed imitation leather and other papers, chimney pieces, ceramic tilework, oak parquetry and stained glass, including a tripartite window by Ferguson and Urie, probably dating from the 1873 period. Labassa is of historical significance as an illustrative example of the wealth acquired by a number of prominent Victorian families in the second half of the 19th century. The early development of the property, Sylliott Hill, was due to the wealth acquired by Richard Billing, barrister and fifth Victorian to be appointed Queen's Counsel in 1878. The significant development in 1890 of Ontario, is illustrative of the wealth of Alexander Robertson, a partner in Cobb and Co., a director of Goldsborough Mort & Co., and a pastoral speculator. John B. Watson, whose father had acquired great wealth from the goldfields of Bendigo and subsequently invested in city and country properties, was the third resident to impact on the house, particularly the interiors. The Labassa estate is of historical significance as an illustrative example of the development that occurred in such suburbs as Caulfield in the 1880s due to the land boom, its proximity to Melbourne and the establishment of the Melbourne to Gippsland railway in 1879. It is also illustrative of an estate which succumbed to the pressures of subdividing in the early twentieth century, as properties became difficult to maintain and demand for land close to the city grew. It was typically divided into flats in the 1920s and was used as such for about sixty years. It is of historical significance for its associations with the remnants of the earlier estate which remain extant. These include the stables, conservatory (H2005) and tennis pavilion which all remain on separate sites. Also significant are the remains of early electrical wiring and fittings. Labassa was one of the first houses in Caulfield to be electrified and some of the original wires remain. [Online Data Upgrade Project 2004]Page 128 of Photograph Album with four photographs (two portrait and two landscape) of Labassa.Handwritten: "Labassa" 4 Manor Grove [top right] / Neg 232 8 Oct 1966 [under bottom right photo] / 128 [bottom right]trevor hart, bracketed eaves, slate roof, bay windows, decorative brackets, caulfield north, labassa, richard a. billing, balaclava road, orrong road, sylliott hill, william lyall, crouch and wilson, alexander william robertson, ontario, 1880's, john a. b. koch, mansion, john boyd watson, labassa grove, french renaissance style, l-shaped arcaded verandah, bluestone plinths, balustraded parapet, flat topped mansard roofs, conical roof, elaborate cornices, corinthian columns, caryatid consoles, marble panels, imitation marble, scagliola, tower, conservatory, stables, tennis pavilion, mouldings, decorative glass, caryatids, swagged columns, ornamental cresting, trompe l'oeil ceiling, embossed imitation leather, oak parquetry, stained glass, tripartite window, triple window, ferguson and urie, 1870's, flats, 1920's, electric wiring, 1860's, verandahs, curved windows, arched windows, italianate, terraces, gargoyles, ornamentation, ornate entrance, la bassa, manor grove, st kilda east, victorian, cast iron work, john koch, richard billing, architects, electrification, john mickle, land subdivision, mrs watson, labassa estate, robert hannon, national trust of australia (victoria), sculpture -
 Glen Eira Historical Society
Album - Album page, Labassa, 4 Manor Grove, Circa 1972
This photograph is part of the Caulfield Historical Album 1972. This album was created in approximately 1972 as part of a project by the Caulfield Historical Society to assist in identifying buildings worthy of preservation. The album is related to a Survey the Caulfield Historical Society developed in collaboration with the National Trust of Australia (Victoria) and Caulfield City Council to identify historic buildings within the City of Caulfield that warranted the protection of a National Trust Classification. Principal photographer thought to be Trevor Hart, member of Caulfield Historical Society. Most photographs were taken between 1966-1972 with a small number of photographs being older and from unknown sources. All photographs are black and white except where stated, with 386 photographs over 198 pages. HISTORY:-- From Victorian Heritage Database citation for Labassa https://vhd.heritagecouncil.vic.gov.au/places/278 as at (26/10/2020) Labassa, Caulfield is one of Melbourne's most lavishly decorated nineteenth century mansions. It resulted from the extensive remodelling in 1890, of an earlier house, known as Sylliott Hill, which was begun in 1862-3 for lawyer, Richard A. Billing. The land at the corner of Balaclava and Orrong Roads was first acquired in 1854 by William Lyall, transferred to his partner, John Mickle, in 1859, who also acquired the adjoining allotment in Balaclava Road, and the three allotments were conveyed to Billing. His first eight-roomed house was extended significantly in 1873 into a twenty-roomed house by architects Crouch and Wilson, who were possibly also responsible for the first house. This reflected Billing's success as a barrister, and he resided at this property until his death in 1882. In 1883 prominent Melbourne businessman, Alexander William Robertson, leased the Sylliott Hill property from Billing's widow, and in 1885 he purchased the adjoining allotment in Balaclava Road. He purchased the Billing's property in 1887 and renamed the 6.31 hectare property, Ontario. In 1889-90, Robertson commissioned the German born architect, John A. B. Koch, to extensively remodel the house into a thirty-five roomed mansion. The existing house was extended and altered, largely resulting in the nineteenth century mansion as it now appears. After Robertson's death in 1896, the house was tenanted until it was eventually sold to the mining millionaire, John Boyd Watson, in 1904. He renamed the property Labassa and carried out repair and re-decoration work to the house. In the early twentieth century, many large estates were subdivided into smaller allotments as the demand for land grew and it became difficult to maintain such large estates. After Watson's death in 1911, portions of the Labassa estate were offered for sale, with Mrs Watson retaining a 1.73 hectare portion containing the house. In 1913 forty-six allotments were auctioned at Labassa Estate, with the formation of Labassa Grove and Ontario Street to the east of the property. Labassa was first recorded as containing flats in 1923 and in the late 1920s, the owner, Robert Hannon, built a red brick block of flats adjacent to the house. Subdivision continued, until the National Trust of Australia (Victoria) purchased the house in 1980 and subsequently purchased adjoining sites, one to the south-east in 1984 (house demolished in 1988) and to the west in 1988. Labassa as it now stands is substantially as it appeared when Koch completed the work in 1890. The original two storey house was transformed into a French Renaissance style mansion, with the addition of a two level L-shaped arcaded verandah and two prominent terminating bays to the south and the east. The building is of unpainted cement render with dressed bluestone plinths, balustraded parapet and steep, slate covered, flat topped mansard roofs behind. A truncated conical roof is a feature of the south bay and a helmeted head is incorporated in the parapet over the east bay. The main south and east facades incorporate many cast cement details, including sculptures, elaborate cornices, swagged Corinthian columns and caryatid consoles flanking the entrance porch, as well as pink marble panels and imitation marble, or scagliola, on curved surfaces. At the rear of the building is a two storey wing and a single storey cottage, the former being connected to the main house by a tower. This section of the house was constructed in 1873. The estate at its peak included stables (1873), conservatory (probably 1890) and a tennis pavilion (probably 1890). All of these outbuildings survive, with the stables and conservatory being converted for residential use after 1922. Internally a range of decorative treatments remain from the late nineteenth century and the early twentieth century, both from the Robertson and Watson periods of occupancy. These include wallpapers, ceiling decoration, chimney pieces, mouldings, joinery and decorative glass.From Victorian Heritage Database citation for H0135 Labassa 2/2A Manor Grove Caulfield North https://vhd.heritagecouncil.vic.gov.au/places/278 as at (26/10/2020) HOW IS IT SIGNIFICANT? Labassa, Caulfield is of architectural, aesthetic and historical significance to the State of Victoria. WHY IS IT SIGNIFICANT? Labassa, Caulfield is of architectural significance as the most prominent example of a small number of houses built in Australia in the French Renaissance style. It is of further note due to the German interpretation of the style and the use of Hellenistic sources, via Germany. It is exceptional for its lavish treatment externally, including marble, scagliola, caryatids, swagged columns, mansard roofs and ornamental cresting. Labassa is of architectural significance as the most important surviving example of German architect, John Koch's domestic work. He undertook a large variety of work in Melbourne, including a number of houses, however Labassa is the most lavish example of his work. Labassa is of aesthetic significance for its outstanding assemblage of late nineteenth and early twentieth century European style interior decoration, which remain remarkably intact. These include a trompe l'oeil ceiling, painted ceilings, embossed imitation leather and other papers, chimney pieces, ceramic tilework, oak parquetry and stained glass, including a tripartite window by Ferguson and Urie, probably dating from the 1873 period. Labassa is of historical significance as an illustrative example of the wealth acquired by a number of prominent Victorian families in the second half of the 19th century. The early development of the property, Sylliott Hill, was due to the wealth acquired by Richard Billing, barrister and fifth Victorian to be appointed Queen's Counsel in 1878. The significant development in 1890 of Ontario, is illustrative of the wealth of Alexander Robertson, a partner in Cobb and Co., a director of Goldsborough Mort & Co., and a pastoral speculator. John B. Watson, whose father had acquired great wealth from the goldfields of Bendigo and subsequently invested in city and country properties, was the third resident to impact on the house, particularly the interiors. The Labassa estate is of historical significance as an illustrative example of the development that occurred in such suburbs as Caulfield in the 1880s due to the land boom, its proximity to Melbourne and the establishment of the Melbourne to Gippsland railway in 1879. It is also illustrative of an estate which succumbed to the pressures of subdividing in the early twentieth century, as properties became difficult to maintain and demand for land close to the city grew. It was typically divided into flats in the 1920s and was used as such for about sixty years. It is of historical significance for its associations with the remnants of the earlier estate which remain extant. These include the stables, conservatory (H2005) and tennis pavilion which all remain on separate sites. Also significant are the remains of early electrical wiring and fittings. Labassa was one of the first houses in Caulfield to be electrified and some of the original wires remain. [Online Data Upgrade Project 2004]Page 129 of Photograph Album with three landscape photographs of Labassa. One of the photographs is of Labassa's drive and gates.Handwritten: 4 JUNE 1910 / SALE JUNE 28 1910 "LA BASSA' / "AUSTRALASIAN" FORMERLY "ONTARIO"/ RES OF JOHN B WATSON / 15 ACRES 3 ROADS [under bottom left photo] / 4 JUNE 1910 [under bottom right photo] / 129 [bottom left]trevor hart, bracketed eaves, intricate lacework, slate roof, bay windows, decorative brackets, caulfield north, labassa, richard a. billing, balaclava road, orrong road, sylliott hill, william lyall, crouch and wilson, alexander william robertson, ontario, 1880's, john a. b. koch, mansion, john boyd watson, labassa grove, french renaissance style, l-shaped arcaded verandah, bluestone plinths, balustraded parapet, flat topped mansard roofs, conical roof, elaborate cornices, corinthian columns, caryatid consoles, marble panels, imitation marble, scagliola, tower, conservatory, stables, tennis pavilion, mouldings, decorative glass, caryatids, swagged columns, ornamental cresting, trompe l'oeil ceiling, embossed imitation leather, oak parquetry, stained glass, tripartite window, triple window, ferguson and urie, 1870's, flats, 1920's, electric wiring, 1860's, verandahs, curved windows, arched windows, italianate, terraces, gargoyles, ornamentation, ornate entrance, la bassa, manor grove, st kilda east, gates, cast iron work, richard billing, architects, john koch, electrification, victorian style, drives, john mickle, land subdivision, mrs watson, labassa estate, robert hannon, national trust of australia (victoria), sculpture -
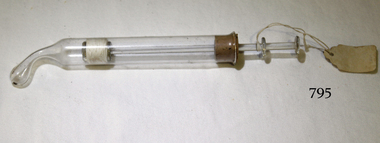 Flagstaff Hill Maritime Museum and Village
Equipment - Syringe
In 1821 the French otologist Jean Marc Itard irrigated the ear canal to remove hard wax, by using a syringe prototype designed for enemas which was made from tin and brass. This glass and cork ear syringe was manufactured by the Ambson Company in the United Kingdom, about eighty years afterwards. Its lightweight properties would have been ideal for application to the sensitive regions of the ear canal. https://www.racgp.org.au/the-racgp/history/the-racgp-museum-collection/syringes/ambson-ear-syringe Otology is a branch of medicine which studies normal and pathological anatomy and physiology of the ear (hearing and vestibular sensory systems and related structures and functions) as well as their diseases, diagnosis and treatment. Otologic surgery generally refers to surgery of the middle ear and mastoid related to chronic otitis media, such as tympanoplasty, or ear drum surgery, ossiculoplasty, or surgery of the hearing bones, and mastoidectomy. Otology also includes surgical treatment of conductive hearing loss, such as stapedectomy surgery for otosclerosis. https://en.wikipedia.org/wiki/Otology The ear syringe was donated to Flagstaff Hill Maritime Village by the family of Doctor William Roy Angus, Surgeon and Oculist. It is part of the “W.R. Angus Collection” includes historical medical equipment, surgical instruments and material once belonging to Dr Edward Ryan and Dr Thomas Francis Ryan, (both of Nhill, Victoria) as well as Dr Angus’ own belongings. The Collection’s history spans the medical practices of the two Doctors Ryan, from 1885-1926 plus that of Dr Angus, up until 1969. ABOUT THE “W.R.ANGUS COLLECTION” Doctor William Roy Angus M.B., B.S., Adel., 1923, F.R.C.S. Edin.,1928 (also known as Dr Roy Angus) was born in Murrumbeena, Victoria in 1901 and lived until 1970. He qualified as a doctor in 1923 at University of Adelaide, was Resident Medical Officer at the Royal Adelaide Hospital in 1924 and for a period was house surgeon to Sir (then Mr.) Henry Simpson Newland. Dr Angus was briefly an Assistant to Dr Riddell of Kapunda, then commenced private practice at Curramulka, Yorke Peninsula, SA, where he was physician, surgeon and chemist. In 1926, he was appointed as new Medical Assistant to Dr Thomas Francis Ryan (T.F. Ryan, or Tom), in Nhill, Victoria, where his experiences included radiology and pharmacy. In 1927 he was Acting House Surgeon in Dr Tom Ryan’s absence. Dr Angus had become engaged to Gladys Forsyth and they decided he further his studies overseas in the UK in 1927. He studied at London University College Hospital and at Edinburgh Royal Infirmary and in 1928, was awarded FRCS (Fellow from the Royal College of Surgeons), Edinburgh. He worked his passage back to Australia as a Ship’s Surgeon on the on the Australian Commonwealth Line’s T.S.S. Largs Bay. Dr Angus married Gladys in 1929, in Ballarat. (They went on to have one son (Graham 1932, born in SA) and two daughters (Helen (died 12/07/1996) and Berenice (Berry), both born at Mira, Nhill ) According to Berry, her mother Gladys made a lot of their clothes. She was very talented and did some lovely embroidery including lingerie for her trousseau and beautifully handmade baby clothes. Dr Angus was a ‘flying doctor’ for the A.I.M. (Australian Inland Ministry) Aerial Medical Service in 1928 . Its first station was in the remote town of Oodnadatta, where Dr Angus was stationed. He was locum tenens there on North-South Railway at 21 Mile Camp. He took up this ‘flying doctor’ position in response to a call from Dr John Flynn; the organisation was later known as the Flying Doctor Service, then the Royal Flying Doctor Service. A lot of his work during this time involved dental surgery also. Between 1928-1932 he was surgeon at the Curramulka Hospital, Yorke Peninsula, South Australia. In 1933 Dr Angus returned to Nhill and purchased a share of the Nelson Street practice and Mira hospital (a 2 bed ward at the Nelson Street Practice) from Dr Les Middleton one of the Middleton Brothers, the current owners of what previously once Dr Tom Ryan’s practice. Dr Tom and his brother had worked as surgeons included eye surgery. Dr Tom Ryan performed many of his operations in the Mira private hospital on his premises. He had been House Surgeon at the Nhill Hospital 1902-1926. Dr Tom Ryan had one of the only two pieces of radiology equipment in Victoria during his practicing years – The Royal Melbourne Hospital had the other one. Over the years Dr Tom Ryan had gradually set up what was effectively a training school for country general-practitioner-surgeons. Each patient was carefully examined, including using the X-ray machine, and any surgery was discussed and planned with Dr Ryan’s assistants several days in advance. Dr Angus gained experience in using the X-ray machine there during his time as assistant to Dr Ryan. When Dr Angus bought into the Nelson Street premises in Nhill he was also appointed as the Nhill Hospital’s Honorary House Surgeon 1933-1938. His practitioner’s plate from his Nhill surgery is now mounted on the doorway to the Port Medical Office at Flagstaff Hill Maritime Village, Warrnambool. When Dr Angus took up practice in the Dr Edward and Dr Tom Ryan’s old premises he obtained their extensive collection of historical medical equipment and materials spanning 1884-1926. A large part of this collection is now on display at the Port Medical Office at Flagstaff Hill Maritime Village in Warrnambool. In 1939 Dr Angus and his family moved to Warrnambool where he purchased “Birchwood,” the 1852 home and medical practice of Dr John Hunter Henderson, at 214 Koroit Street. (This property was sold in1965 to the State Government and is now the site of the Warrnambool Police Station. and an ALDI sore is on the land that was once their tennis court). The Angus family was able to afford gardeners, cooks and maids; their home was a popular place for visiting dignitaries to stay whilst visiting Warrnambool. Dr Angus had his own silk worm farm at home in a Mulberry tree. His young daughter used his centrifuge for spinning the silk. Dr Angus was appointed on a part-time basis as Port Medical Officer (Health Officer) in Warrnambool and held this position until the 1940’s when the government no longer required the service of a Port Medical Officer in Warrnambool; he was thus Warrnambool’s last serving Port Medical Officer. (Masters of immigrant ships arriving in port reported incidents of diseases, illness and death and the Port Medical Officer made a decision on whether the ship required Quarantine and for how long, in this way preventing contagious illness from spreading from new immigrants to the residents already in the colony.) Dr Angus was a member of the Australian Medical Association, for 35 years and surgeon at the Warrnambool Base Hospital 1939-1942, He served with the Australian Department of Defence as a Surgeon Captain during WWII 1942-45, in Ballarat, Victoria, and in Bonegilla, N.S.W., completing his service just before the end of the war due to suffering from a heart attack. During his convalescence he carved an intricate and ‘most artistic’ chess set from the material that dentures were made from. He then studied ophthalmology at the Royal Melbourne Eye and Ear Hospital and created cosmetically superior artificial eyes by pioneering using the intrascleral cartilage. Angus received accolades from the Ophthalmological Society of Australasia for this work. He returned to Warrnambool to commence practice as an ophthalmologist, pioneering in artificial eye improvements. He was Honorary Consultant Ophthalmologist to Warrnambool Base Hospital for 31 years. He made monthly visits to Portland as a visiting surgeon, to perform eye surgery. He represented the Victorian South-West subdivision of the Australian Medical Association as its secretary between 1949 and 1956 and as chairman from 1956 to 1958. In 1968 Dr Angus was elected member of Spain’s Barraquer Institute of Barcelona after his research work in Intrasclearal cartilage grafting, becoming one of the few Australian ophthalmologists to receive this honour, and in the following year presented his final paper on Living Intrasclearal Cartilage Implants at the Inaugural Meeting of the Australian College of Ophthalmologists in Melbourne In his personal life Dr Angus was a Presbyterian and treated Sunday as a Sabbath, a day of rest. He would visit 3 or 4 country patients on a Sunday, taking his children along ‘for the ride’ and to visit with him. Sunday evenings he would play the pianola and sing Scottish songs to his family. One of Dr Angus’ patients was Margaret MacKenzie, author of a book on local shipwrecks that she’d seen as an eye witness from the late 1880’s in Peterborough, Victoria. In the early 1950’s Dr Angus, painted a picture of a shipwreck for the cover jacket of Margaret’s book, Shipwrecks and More Shipwrecks. She was blind in later life and her daughter wrote the actual book for her. Dr Angus and his wife Gladys were very involved in Warrnambool’s society with a strong interest in civic affairs. He had an interest in people and the community They were both involved in the creation of Flagstaff Hill, including the layout of the gardens. After his death (28th March 1970) his family requested his practitioner’s plate, medical instruments and some personal belongings be displayed in the Port Medical Office surgery at Flagstaff Hill Maritime Village, and be called the “W. R. Angus Collection”.The W.R. Angus Collection is significant for still being located at the site it is connected with, Doctor Angus being the last Port Medical Officer in Warrnambool. The collection of medical instruments and other equipment is culturally significant, being an historical example of medicine from late 19th to mid-20th century. Dr Angus assisted Dr Tom Ryan, a pioneer in the use of X-rays and in ocular surgery.Glass ear syringe. Has cork stopper at top and cotton wrapped at base of plunger. Has a curved end.None.flagstaff hill, warrnambool, shipwrecked-coast, flagstaff-hill, flagstaff-hill-maritime-museum, maritime-museum, shipwreck-coast, flagstaff-hill-maritime-village, otology, ears, ear syringe, deafness, ear wax -
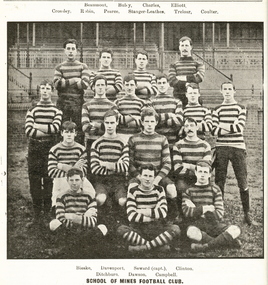 Federation University Historical Collection
Book, Ballarat School of Mines Students' Magazine, 1907-1909, 1907-9
Bound volume of the Ballarat School of Mines Students' Magazine for 1907-1909. Articles include the location and pegging of a tramway Route, the transmission of Power by Rope Driving by A.E.C. Kerr, A visit to the Briseis Mine, and New Brothers' Home, Mining Engineers in Tasmania, Obituaries for David Ham and Matthew Lyndsay, Pioneer Mining at Leichhardt, Automatic Ore Feeders and Chacedony Park by J.H. Adams. Images include the Ballarat School of Mines Football Team and the Ballarat School of Mines Sports Committee. 1907 * Hubert Krause 1908 * The location and Pegging of a Tramway Route by Yamba * The Unity of things by John Brittain * The transmission of power by Rope Driving, by A.E.C. Kerr * A visit to the Briseis Mine, and New Brothers' Home (includes photographs) * Mining Engineers in Tasmania * Limericks Sluiced at Snake Valley * David Ham Obituary * Matthew Lyndsay Obituary * Some Bunsen Memories by Professor Alfred Mica Smith * Geological Camp to Daylesford * Practical Mathematics by Hubert F. Hall * Pioneer Mining - Leickhardt * Automatic Ore Feeders * A Unique Ore Deposit (Lucknow Goldfield, NSW) * A country Ramble * The Alkaline Titration for Zinc * Chalcedony Park, Arizona, United States of America by J.H. Adams * Notetaking at Lectures * Smelter Cost-Keeping by Oliver E. Jaeger * Benefits of Physical Culture * Mineral Tasmania and its Wonderful Resources by F.F. Bradford * A holiday Trip to Queensland * The Compression of Air as Applied to Mining * Machine V Hand Drilling * The mining in the Malay States * William Thomas Grownow Obituary (includes image) * Timbering Stopes (Includes images) * Trip to Melbourne * Two Problems of Alluvial Mining by Richard Hain * The Berry Leads (includes plan of mines) * Black Pudding Supper * Observations for Meridian * NOtes on Coking Plants (includes plan) * How Old is the Earth * Conglomerations * A Pat Formula * The making of a Suitable Muffle for General Assay Work * Reduction of Gold Chloride by Charcoal * Chemical Definitions * Old Boys (R.J. Allen, W.B. Blyth, F. Brinsden, Lindsay D. Cameron, George W. Cornwell, John M. Currie, C.M. Harris, T. Wighton-Hood, W. Lakeland, W.S. Macartney, Fred A. Marriott, Karl B. Moore, G.E. Sander, Sherb. H. Sheppard, Norman S. Stuckby, John Sutherland, Lewis A. Westcott, Walter White, O.C. Witherden, Gerald Young) 1909 * The Graduates Problem * An Interesting Nevada Cyanide Plant (Bamberger De Lamar Gold Mines) * Easter Geological Camp to Ingliston * New Methods for the Volumetric Estimation of Lead * William Charles Kernott Obituary * Mount Morgan Mine by G.W. Williams * Tin Dredging at Tingha, New South Wales * Notes on the Iodide estimation of Copper * Photograph of the Ballarat School of Mines Students' Association Committee * The Importance of Mine Ventilation to the Students by F. Howells * Life in Mining Camp * Wise Words to Mining School Students * Military Search Lights * Gleaning s on resistance * Ministerial Visit to the Ballarat School of Mines by the Hon. A.A. Billson, Minister of Education , accompanied by Frank Tate, Director of Education. * Picture Making in Photography Composition * Mountains of Fire * A Walking Engine - New Military Machine - Guns into Action - Caterpillar No. 1. (Tank) * Fireless Locomotives * Elmore Concentrating Process (includes plan of Elmore Concentrator) * Mount Pani Limited * Surveying for Irrigation * Weights and Measures * Carbon Monoxide * Joseph Francis Usher obituary * The Problem of the Metalliferous Veins * Ballarat School of Mines Ambulance Class * Treatment of Gold in a battery Without the Use of Copper Plates by E.C. Hurdsfield * Meteorites * Werribee Gorge * Dredging in the Ovens Valley * Electrical Chatter - Electrocution by an Imaginary Eye-Witness * The Electric Furnace in Iron Metallurgy ballarat school of mines, ballarat school of mines football team, football, sports, tramway, mining engineers, david ham, matthew lyndsay, jack adams, berry lead, hepburn consuls, madame berry, west ristori, ristori no 1, allendale, dyke's co, charleson's mill, australian extended, mining, r.j. allen,, w.b. blyth, f. brinsden, lindsay d. cameron, george w. cornwell, john m. currie, c.m. harris, t. wighton-hood, w. lakeland, w.s. macartney, fred a. marriott, karl b. moore, g.e. sander, sherb. h. sheppard, norman s. stuckby, john sutherland, lewis a. westcott, walter white, o.c. witherden, gerald young, ballarat school of mines students' association, hubert krause, krause, vfl, afl -
 Flagstaff Hill Maritime Museum and Village
Domestic object - Bowl, Late 19th or early 20th Century
The Process of Making Pottery Decorating, Firing, Glazing, Making, Technical There is a rhythm and flow to clay. It can’t be done all at once! Even the making process! It can take weeks to get everything done, especially if you can only work on your pottery once a week! Even though we have three hour classes, it’s often just not enough time! Here is an overview of some of the processes so you have a bit more grasp on some of the technical stuff! Step One – Design There are SO many ideas out there for making stuff in clay! From delicate porcelain jewellery, through to heavy sculptural work and everything in between. Deciding your direction is sometimes not that easy – when you first start, try everything, you will naturally gravitate to the style that you enjoy! The options and variations are endless and can get a wee bit overwhelming too! Check in with me before you start to ensure your ideas will work, what order you might do things, how you could achieve the look you are seeking and any other technical data required! Step Two – Making Clay is thixotropic. This means that as you work with it, the clay first gets sloppier and wetter, before is begins to dry in the atmosphere. For most things, you simply can’t do all parts of the project at once. An example of work order might look like: Get last weeks work out from the shelves Prepare clay for today’s work – roll your clay, prepare balls for throwing, make the first stage of a pinch pot) Clean up last week’s work and put it on the shelf for bisque firing Check that you have any glazing to do – and do enough of it that you will have time to finish your main project Do the next step of your next project – there might be a further step that can’t be complete immediately, in that case, wrap your work well and put onto the shelves. Letting your work rest for a while can really help keep your work clean and professional looking. Many things require bagging under plastic to keep it ready for work the next week – put your name on the outside of the bag so you can find your work easily. We have stickers and markers. Consider how you want to decorate your work – coloured slip can be applied at a fairly wet stage (remembering that it will make your work even wetter!). Trying to apply slip to dry clay won’t work! If you want to do sgraffito – you will need to keep the work leather hard (a state of dryness where you can still work the clay with a little effort and a little water and care). Step Three – Drying Most of the time your work can go into the rack uncovered to let it dry out for the following week. If you want to continue forming or shaping you will need to double bag your work – put your work on a suitable sized bat and put the bat in a bag so the base of the bag is under the bat, then put another bag over the top of the work and tuck the top of the bag under the bat. If you want to trim (or turn) your thrown work the following week, it should also be double bagged. If your work is large, delicate, or of uneven thicknesses, you should lightly cover your work for drying. When considering the drying process, bare in mind the weather, humidity and wind! The hotter and dryer, the faster things dry and work can dry unevenly in the shelves – this can lead to cracking – another time to lightly cover your work for drying. Step Four – Trimming and Cleaning Up Your work is dry! It is called greenware now and it is at it’s most fragile! Handle everything with two hands. I often refer to soft hands – keep everything gentle and with your fingers spread as much as possible. Try to not pick up things like plates too much, and always with both hands! Before your work can be bisque fired it should be “cleaned up”. You work won’t go into the kiln if it has sharp edges – when glazed, sharp edges turn into razor blades! Use a piece of fly wire to rub the work all over – this will scratch a little so be light handed. Use a knife or metal kidney to scrape any areas that require a bit more dynamic treatment than the fly wire offers! Finally, a very light wipe over with a slightly damp sponge can help soften and soothe all of your edges and dags! Trimming thrown work: If you are planning to trim (or turn) your thrown work (and you should be), make sure you bag it well – your work should be leather hard to almost dry for easiest trimming. Use this step to finish the work completely – use a metal kidney to polish the surface, or a slightly damp sponge to give a freshly thrown look. Wipe the sponge around the rim after trimming, and check the inside of the pot for dags! Trimming slip cast work: Usually I will trim the rims of your work on the wheel the following day to make that stage easier, however you will still need to check your work for lumps and bumps. Last but not least – check that your name is still clearly on the bottom of your work. Step Five – Bisque Firing When the work is completely dry it can go into the bisque kiln. The bisque kiln is fired to 1000°C. This process burns off the water in the clay as well as some of the chemically bound water. The structure of the clay is not altered that much at this temperature. Inside the bisque kiln, the work is stacked a little, small bowl inside a larger bowl and onto a heavy plate. Smaller items like decorations or drink coasters might get stacked several high. Consideration is paid to the weight of the stack and shape of the work. A bisque kiln can fire about one and a half times the amount of work that the glaze kiln can fire. The firing takes about 10 hours to complete the cycle and about two days to cool down. Once it has been emptied the work is placed in the glaze room ready for you to decorate! Step Six – Glazing Decorating your work with colour can be a lot of fun – and time consuming! There are three main options for surface treatment at this stage: Oxide Washes Underglazes Glazes Washes and underglazes do not “glaze” the work – It will still need a layer of glaze to fully seal the clay (washes don’t need glaze on surfaces not designed for food or liquid as they can gloss up a little on their own). Underglazes are stable colourants that turn out pretty much how they look in the jar. They can be mixed with each other to form other colours and can be used like water colours to paint onto your work. Mostly they should have a clear glaze on top to seal them. Oxides are a different species – the pink oxide (cobalt) wash turns out bright blue for instance. They don’t always need a glaze on top, and some glazes can change the colour of the wash! The glazes need no other “glaze” on top! Be careful of unknown glaze interactions – you can put any combination of glaze in a bowl or on a plate, but only a single glaze on the outside of any vertical surface! Glazes are a chemical reaction under heat. We don’t know the exact chemicals in the Mayco glazes we use. I can guess by the way they interact with each other, however, on the whole, you need to test every idea you have, and not run the test on a vertical surface! Simply put, glaze is a layer of glass like substance that bonds with the clay underneath. Clay is made of silica, alumina and water. Glaze is made of mostly silica. Silica has a melting point of 1700°C and we fire to 1240°C. The silica requires a “flux” to help it melt at the lower temperature. Fluxes can be all sorts of chemicals – a common one is calcium – calcium has a melting point of 2500°C, however, together they both melt at a much lower temperature! Colourants are metal oxides like cobalt (blue), chrome (green through black), copper (green, blue, even red!), manganese (black, purple and pink) iron (red brown), etc. Different chemicals in the glaze can have dramatic effects. for example, barium carbonate (which we don’t use) turns manganese bright pink! Other elements can turn manganese dioxide brown, blue, purple and reddish brown. Manganese dioxide is a flux in and of itself as well. So, glazes that get their black and purple colours, often interact with other glazes and RUN! Our mirror black is a good example – it mixes really well with many glazes because it fluxes them – causes them to melt faster. It will also bring out many beautiful colours in the glazes because it’s black colouring most definitely comes from manganese dioxide! Glaze chemistry is a whole subject on it’s own! We use commercial Mayco glazes on purpose – for their huge range of colour possibilities, stability, cool interactions, artistic freedom with the ability to easily brush the glazes on and ease of use. We currently have almost 50 glazes on hand! A major project is to test the interactions of all glazes with each other. That is 2,500 test tiles!!!! I’m going to make the wall behind the wheels the feature wall of pretty colours! Step Seven – Glaze (Gloss or sometimes called “Glost”) Firing Most of the time this is the final stage of making your creation (but not always!) The glaze kiln goes to 1240°C. This is called cone 6, or midrange. It is the low end of stoneware temperatures. Stoneware clays and glazes are typically fired at cone 8 – 10, that is 1260 – 1290°C. The energy requirement to go from 1240°C to 1280°C is almost a 30% more! Our clay is formulated to vitrify (mature, turn “glass-like”) at 1240°, as are our glazes. A glaze kiln take around 12 hours to reach temperature and two to three days to cool down. Sometimes a third firing process is required – this is for decoration that is added to work after the glaze firing. For example – adding precious metals and lustres. this firing temperature is usually around 600 – 800°C depending upon the techniques being used. There are many students interested in gold and silver trims – we will be doing this third type of firing soon! After firing your work will be in the student finished work shelves. Remember to pay for it before you head out the door! There is a small extra charge for using porcelain clay (it’s more than twice the price of regular clay), and for any third firing process! Once your work has been fired it can not turn back into clay for millennia – so don’t fire it if you don’t like it! Put it in the bucket for recycling. https://firebirdstudios.com.au/the-process-of-making-pottery/ The bowl is an example of kitchenware used in the 19th century and still in use today.Bowl white ceramic. Crack on side. Badly stained.Backstamp very faint and unable to be read.flagstaff hill, warrnambool, shipwrecked-coast, flagstaff-hill, flagstaff-hill-maritime-museum, maritime-museum, shipwreck-coast, flagstaff-hill-maritime-village, mixing bowl, food preparation, kitchen equipment, ceramic -
 Flagstaff Hill Maritime Museum and Village
Domestic object - Bowl
The Process of Making Pottery Decorating, Firing, Glazing, Making, Technical There is a rhythm and flow to clay. It can’t be done all at once! Even the making process! It can take weeks to get everything done, especially if you can only work on your pottery once a week! Even though we have three hour classes, it’s often just not enough time! Here is an overview of some of the processes so you have a bit more grasp on some of the technical stuff! Step One – Design There are SO many ideas out there for making stuff in clay! From delicate porcelain jewellery, through to heavy sculptural work and everything in between. Deciding your direction is sometimes not that easy – when you first start, try everything, you will naturally gravitate to the style that you enjoy! The options and variations are endless and can get a wee bit overwhelming too! Check in with me before you start to ensure your ideas will work, what order you might do things, how you could achieve the look you are seeking and any other technical data required! Step Two – Making Clay is thixotropic. This means that as you work with it, the clay first gets sloppier and wetter, before is begins to dry in the atmosphere. For most things, you simply can’t do all parts of the project at once. An example of work order might look like: Get last weeks work out from the shelves Prepare clay for today’s work – roll your clay, prepare balls for throwing, make the first stage of a pinch pot) Clean up last week’s work and put it on the shelf for bisque firing Check that you have any glazing to do – and do enough of it that you will have time to finish your main project Do the next step of your next project – there might be a further step that can’t be complete immediately, in that case, wrap your work well and put onto the shelves. Letting your work rest for a while can really help keep your work clean and professional looking. Many things require bagging under plastic to keep it ready for work the next week – put your name on the outside of the bag so you can find your work easily. We have stickers and markers. Consider how you want to decorate your work – coloured slip can be applied at a fairly wet stage (remembering that it will make your work even wetter!). Trying to apply slip to dry clay won’t work! If you want to do sgraffito – you will need to keep the work leather hard (a state of dryness where you can still work the clay with a little effort and a little water and care). Step Three – Drying Most of the time your work can go into the rack uncovered to let it dry out for the following week. If you want to continue forming or shaping you will need to double bag your work – put your work on a suitable sized bat and put the bat in a bag so the base of the bag is under the bat, then put another bag over the top of the work and tuck the top of the bag under the bat. If you want to trim (or turn) your thrown work the following week, it should also be double bagged. If your work is large, delicate, or of uneven thicknesses, you should lightly cover your work for drying. When considering the drying process, bare in mind the weather, humidity and wind! The hotter and dryer, the faster things dry and work can dry unevenly in the shelves – this can lead to cracking – another time to lightly cover your work for drying. Step Four – Trimming and Cleaning Up Your work is dry! It is called greenware now and it is at it’s most fragile! Handle everything with two hands. I often refer to soft hands – keep everything gentle and with your fingers spread as much as possible. Try to not pick up things like plates too much, and always with both hands! Before your work can be bisque fired it should be “cleaned up”. You work won’t go into the kiln if it has sharp edges – when glazed, sharp edges turn into razor blades! Use a piece of fly wire to rub the work all over – this will scratch a little so be light handed. Use a knife or metal kidney to scrape any areas that require a bit more dynamic treatment than the fly wire offers! Finally, a very light wipe over with a slightly damp sponge can help soften and soothe all of your edges and dags! Trimming thrown work: If you are planning to trim (or turn) your thrown work (and you should be), make sure you bag it well – your work should be leather hard to almost dry for easiest trimming. Use this step to finish the work completely – use a metal kidney to polish the surface, or a slightly damp sponge to give a freshly thrown look. Wipe the sponge around the rim after trimming, and check the inside of the pot for dags! Trimming slip cast work: Usually I will trim the rims of your work on the wheel the following day to make that stage easier, however you will still need to check your work for lumps and bumps. Last but not least – check that your name is still clearly on the bottom of your work. Step Five – Bisque Firing When the work is completely dry it can go into the bisque kiln. The bisque kiln is fired to 1000°C. This process burns off the water in the clay as well as some of the chemically bound water. The structure of the clay is not altered that much at this temperature. Inside the bisque kiln, the work is stacked a little, small bowl inside a larger bowl and onto a heavy plate. Smaller items like decorations or drink coasters might get stacked several high. Consideration is paid to the weight of the stack and shape of the work. A bisque kiln can fire about one and a half times the amount of work that the glaze kiln can fire. The firing takes about 10 hours to complete the cycle and about two days to cool down. Once it has been emptied the work is placed in the glaze room ready for you to decorate! Step Six – Glazing Decorating your work with colour can be a lot of fun – and time consuming! There are three main options for surface treatment at this stage: Oxide Washes Underglazes Glazes Washes and underglazes do not “glaze” the work – It will still need a layer of glaze to fully seal the clay (washes don’t need glaze on surfaces not designed for food or liquid as they can gloss up a little on their own). Underglazes are stable colourants that turn out pretty much how they look in the jar. They can be mixed with each other to form other colours and can be used like water colours to paint onto your work. Mostly they should have a clear glaze on top to seal them. Oxides are a different species – the pink oxide (cobalt) wash turns out bright blue for instance. They don’t always need a glaze on top, and some glazes can change the colour of the wash! The glazes need no other “glaze” on top! Be careful of unknown glaze interactions – you can put any combination of glaze in a bowl or on a plate, but only a single glaze on the outside of any vertical surface! Glazes are a chemical reaction under heat. We don’t know the exact chemicals in the Mayco glazes we use. I can guess by the way they interact with each other, however, on the whole, you need to test every idea you have, and not run the test on a vertical surface! Simply put, glaze is a layer of glass like substance that bonds with the clay underneath. Clay is made of silica, alumina and water. Glaze is made of mostly silica. Silica has a melting point of 1700°C and we fire to 1240°C. The silica requires a “flux” to help it melt at the lower temperature. Fluxes can be all sorts of chemicals – a common one is calcium – calcium has a melting point of 2500°C, however, together they both melt at a much lower temperature! Colourants are metal oxides like cobalt (blue), chrome (green through black), copper (green, blue, even red!), manganese (black, purple and pink) iron (red brown), etc. Different chemicals in the glaze can have dramatic effects. for example, barium carbonate (which we don’t use) turns manganese bright pink! Other elements can turn manganese dioxide brown, blue, purple and reddish brown. Manganese dioxide is a flux in and of itself as well. So, glazes that get their black and purple colours, often interact with other glazes and RUN! Our mirror black is a good example – it mixes really well with many glazes because it fluxes them – causes them to melt faster. It will also bring out many beautiful colours in the glazes because it’s black colouring most definitely comes from manganese dioxide! Glaze chemistry is a whole subject on it’s own! We use commercial Mayco glazes on purpose – for their huge range of colour possibilities, stability, cool interactions, artistic freedom with the ability to easily brush the glazes on and ease of use. We currently have almost 50 glazes on hand! A major project is to test the interactions of all glazes with each other. That is 2,500 test tiles!!!! I’m going to make the wall behind the wheels the feature wall of pretty colours! Step Seven – Glaze (Gloss or sometimes called “Glost”) Firing Most of the time this is the final stage of making your creation (but not always!) The glaze kiln goes to 1240°C. This is called cone 6, or midrange. It is the low end of stoneware temperatures. Stoneware clays and glazes are typically fired at cone 8 – 10, that is 1260 – 1290°C. The energy requirement to go from 1240°C to 1280°C is almost a 30% more! Our clay is formulated to vitrify (mature, turn “glass-like”) at 1240°, as are our glazes. A glaze kiln take around 12 hours to reach temperature and two to three days to cool down. Sometimes a third firing process is required – this is for decoration that is added to work after the glaze firing. For example – adding precious metals and lustres. this firing temperature is usually around 600 – 800°C depending upon the techniques being used. There are many students interested in gold and silver trims – we will be doing this third type of firing soon! After firing your work will be in the student finished work shelves. Remember to pay for it before you head out the door! There is a small extra charge for using porcelain clay (it’s more than twice the price of regular clay), and for any third firing process! Once your work has been fired it can not turn back into clay for millennia – so don’t fire it if you don’t like it! Put it in the bucket for recycling. https://firebirdstudios.com.au/the-process-of-making-pottery/ This bowl is an example of kitchenware used in the 19th century and still in use today.Bowl white ceramic plain that has two sets of edging around lip. Inside bowl has plaster designed to look like cooking mixture.flagstaff hill, warrnambool, shipwrecked-coast, flagstaff-hill, flagstaff-hill-maritime-museum, maritime-museum, shipwreck-coast, flagstaff-hill-maritime-village, kitchen equipment, ceramic -
 Flagstaff Hill Maritime Museum and Village
Domestic object - Bowl, J & G Meakin, Late 19th or early 20th Century
The Process of Making Pottery Decorating, Firing, Glazing, Making, Technical There is a rhythm and flow to clay. It can’t be done all at once! Even the making process! It can take weeks to get everything done, especially if you can only work on your pottery once a week! Even though we have three hour classes, it’s often just not enough time! Here is an overview of some of the processes so you have a bit more grasp on some of the technical stuff! Step One – Design There are SO many ideas out there for making stuff in clay! From delicate porcelain jewellery, through to heavy sculptural work and everything in between. Deciding your direction is sometimes not that easy – when you first start, try everything, you will naturally gravitate to the style that you enjoy! The options and variations are endless and can get a wee bit overwhelming too! Check in with me before you start to ensure your ideas will work, what order you might do things, how you could achieve the look you are seeking and any other technical data required! Step Two – Making Clay is thixotropic. This means that as you work with it, the clay first gets sloppier and wetter, before is begins to dry in the atmosphere. For most things, you simply can’t do all parts of the project at once. An example of work order might look like: Get last weeks work out from the shelves Prepare clay for today’s work – roll your clay, prepare balls for throwing, make the first stage of a pinch pot) Clean up last week’s work and put it on the shelf for bisque firing Check that you have any glazing to do – and do enough of it that you will have time to finish your main project Do the next step of your next project – there might be a further step that can’t be complete immediately, in that case, wrap your work well and put onto the shelves. Letting your work rest for a while can really help keep your work clean and professional looking. Many things require bagging under plastic to keep it ready for work the next week – put your name on the outside of the bag so you can find your work easily. We have stickers and markers. Consider how you want to decorate your work – coloured slip can be applied at a fairly wet stage (remembering that it will make your work even wetter!). Trying to apply slip to dry clay won’t work! If you want to do sgraffito – you will need to keep the work leather hard (a state of dryness where you can still work the clay with a little effort and a little water and care). Step Three – Drying Most of the time your work can go into the rack uncovered to let it dry out for the following week. If you want to continue forming or shaping you will need to double bag your work – put your work on a suitable sized bat and put the bat in a bag so the base of the bag is under the bat, then put another bag over the top of the work and tuck the top of the bag under the bat. If you want to trim (or turn) your thrown work the following week, it should also be double bagged. If your work is large, delicate, or of uneven thicknesses, you should lightly cover your work for drying. When considering the drying process, bare in mind the weather, humidity and wind! The hotter and dryer, the faster things dry and work can dry unevenly in the shelves – this can lead to cracking – another time to lightly cover your work for drying. Step Four – Trimming and Cleaning Up Your work is dry! It is called greenware now and it is at it’s most fragile! Handle everything with two hands. I often refer to soft hands – keep everything gentle and with your fingers spread as much as possible. Try to not pick up things like plates too much, and always with both hands! Before your work can be bisque fired it should be “cleaned up”. You work won’t go into the kiln if it has sharp edges – when glazed, sharp edges turn into razor blades! Use a piece of fly wire to rub the work all over – this will scratch a little so be light handed. Use a knife or metal kidney to scrape any areas that require a bit more dynamic treatment than the fly wire offers! Finally, a very light wipe over with a slightly damp sponge can help soften and soothe all of your edges and dags! Trimming thrown work: If you are planning to trim (or turn) your thrown work (and you should be), make sure you bag it well – your work should be leather hard to almost dry for easiest trimming. Use this step to finish the work completely – use a metal kidney to polish the surface, or a slightly damp sponge to give a freshly thrown look. Wipe the sponge around the rim after trimming, and check the inside of the pot for dags! Trimming slip cast work: Usually I will trim the rims of your work on the wheel the following day to make that stage easier, however you will still need to check your work for lumps and bumps. Last but not least – check that your name is still clearly on the bottom of your work. Step Five – Bisque Firing When the work is completely dry it can go into the bisque kiln. The bisque kiln is fired to 1000°C. This process burns off the water in the clay as well as some of the chemically bound water. The structure of the clay is not altered that much at this temperature. Inside the bisque kiln, the work is stacked a little, small bowl inside a larger bowl and onto a heavy plate. Smaller items like decorations or drink coasters might get stacked several high. Consideration is paid to the weight of the stack and shape of the work. A bisque kiln can fire about one and a half times the amount of work that the glaze kiln can fire. The firing takes about 10 hours to complete the cycle and about two days to cool down. Once it has been emptied the work is placed in the glaze room ready for you to decorate! Step Six – Glazing Decorating your work with colour can be a lot of fun – and time consuming! There are three main options for surface treatment at this stage: Oxide Washes Underglazes Glazes Washes and underglazes do not “glaze” the work – It will still need a layer of glaze to fully seal the clay (washes don’t need glaze on surfaces not designed for food or liquid as they can gloss up a little on their own). Underglazes are stable colourants that turn out pretty much how they look in the jar. They can be mixed with each other to form other colours and can be used like water colours to paint onto your work. Mostly they should have a clear glaze on top to seal them. Oxides are a different species – the pink oxide (cobalt) wash turns out bright blue for instance. They don’t always need a glaze on top, and some glazes can change the colour of the wash! The glazes need no other “glaze” on top! Be careful of unknown glaze interactions – you can put any combination of glaze in a bowl or on a plate, but only a single glaze on the outside of any vertical surface! Glazes are a chemical reaction under heat. We don’t know the exact chemicals in the Mayco glazes we use. I can guess by the way they interact with each other, however, on the whole, you need to test every idea you have, and not run the test on a vertical surface! Simply put, glaze is a layer of glass like substance that bonds with the clay underneath. Clay is made of silica, alumina and water. Glaze is made of mostly silica. Silica has a melting point of 1700°C and we fire to 1240°C. The silica requires a “flux” to help it melt at the lower temperature. Fluxes can be all sorts of chemicals – a common one is calcium – calcium has a melting point of 2500°C, however, together they both melt at a much lower temperature! Colourants are metal oxides like cobalt (blue), chrome (green through black), copper (green, blue, even red!), manganese (black, purple and pink) iron (red brown), etc. Different chemicals in the glaze can have dramatic effects. for example, barium carbonate (which we don’t use) turns manganese bright pink! Other elements can turn manganese dioxide brown, blue, purple and reddish brown. Manganese dioxide is a flux in and of itself as well. So, glazes that get their black and purple colours, often interact with other glazes and RUN! Our mirror black is a good example – it mixes really well with many glazes because it fluxes them – causes them to melt faster. It will also bring out many beautiful colours in the glazes because it’s black colouring most definitely comes from manganese dioxide! Glaze chemistry is a whole subject on it’s own! We use commercial Mayco glazes on purpose – for their huge range of colour possibilities, stability, cool interactions, artistic freedom with the ability to easily brush the glazes on and ease of use. We currently have almost 50 glazes on hand! A major project is to test the interactions of all glazes with each other. That is 2,500 test tiles!!!! I’m going to make the wall behind the wheels the feature wall of pretty colours! Step Seven – Glaze (Gloss or sometimes called “Glost”) Firing Most of the time this is the final stage of making your creation (but not always!) The glaze kiln goes to 1240°C. This is called cone 6, or midrange. It is the low end of stoneware temperatures. Stoneware clays and glazes are typically fired at cone 8 – 10, that is 1260 – 1290°C. The energy requirement to go from 1240°C to 1280°C is almost a 30% more! Our clay is formulated to vitrify (mature, turn “glass-like”) at 1240°, as are our glazes. A glaze kiln take around 12 hours to reach temperature and two to three days to cool down. Sometimes a third firing process is required – this is for decoration that is added to work after the glaze firing. For example – adding precious metals and lustres. this firing temperature is usually around 600 – 800°C depending upon the techniques being used. There are many students interested in gold and silver trims – we will be doing this third type of firing soon! After firing your work will be in the student finished work shelves. Remember to pay for it before you head out the door! There is a small extra charge for using porcelain clay (it’s more than twice the price of regular clay), and for any third firing process! Once your work has been fired it can not turn back into clay for millennia – so don’t fire it if you don’t like it! Put it in the bucket for recycling. https://firebirdstudios.com.au/the-process-of-making-pottery/This bowl was made by renowned pottery company J & G Meakin of England. The firm was established in the mid-1800's. The bowl is an example of kitchenware used in the 19th century and still in use today.Bowl; white ceramic, round and tapering inwards towards base. Made by J and G Meakin England.On base, 'Ironstone China Reg SOL 391413' with symbolflagstaff hill, flagstaff hill maritime museum and village, warrnambool, maritime museum, maritime village, great ocean road, shipwreck coast, mixing bowl, food preparation, j & g meakin, pottery, stoke-on-trent, kitchen equipment, ceramic -
 Flagstaff Hill Maritime Museum and Village
Domestic object - Plate
The Process of Making Pottery Decorating, Firing, Glazing, Making, Technical There is a rhythm and flow to clay. It can’t be done all at once! Even the making process! It can take weeks to get everything done, especially if you can only work on your pottery once a week! Even though we have three hour classes, it’s often just not enough time! Here is an overview of some of the processes so you have a bit more grasp on some of the technical stuff! Step One – Design There are SO many ideas out there for making stuff in clay! From delicate porcelain jewellery, through to heavy sculptural work and everything in between. Deciding your direction is sometimes not that easy – when you first start, try everything, you will naturally gravitate to the style that you enjoy! The options and variations are endless and can get a wee bit overwhelming too! Check in with me before you start to ensure your ideas will work, what order you might do things, how you could achieve the look you are seeking and any other technical data required! Step Two – Making Clay is thixotropic. This means that as you work with it, the clay first gets sloppier and wetter, before is begins to dry in the atmosphere. For most things, you simply can’t do all parts of the project at once. An example of work order might look like: Get last weeks work out from the shelves Prepare clay for today’s work – roll your clay, prepare balls for throwing, make the first stage of a pinch pot) Clean up last week’s work and put it on the shelf for bisque firing Check that you have any glazing to do – and do enough of it that you will have time to finish your main project Do the next step of your next project – there might be a further step that can’t be complete immediately, in that case, wrap your work well and put onto the shelves. Letting your work rest for a while can really help keep your work clean and professional looking. Many things require bagging under plastic to keep it ready for work the next week – put your name on the outside of the bag so you can find your work easily. We have stickers and markers. Consider how you want to decorate your work – coloured slip can be applied at a fairly wet stage (remembering that it will make your work even wetter!). Trying to apply slip to dry clay won’t work! If you want to do sgraffito – you will need to keep the work leather hard (a state of dryness where you can still work the clay with a little effort and a little water and care). Step Three – Drying Most of the time your work can go into the rack uncovered to let it dry out for the following week. If you want to continue forming or shaping you will need to double bag your work – put your work on a suitable sized bat and put the bat in a bag so the base of the bag is under the bat, then put another bag over the top of the work and tuck the top of the bag under the bat. If you want to trim (or turn) your thrown work the following week, it should also be double bagged. If your work is large, delicate, or of uneven thicknesses, you should lightly cover your work for drying. When considering the drying process, bare in mind the weather, humidity and wind! The hotter and dryer, the faster things dry and work can dry unevenly in the shelves – this can lead to cracking – another time to lightly cover your work for drying. Step Four – Trimming and Cleaning Up Your work is dry! It is called greenware now and it is at it’s most fragile! Handle everything with two hands. I often refer to soft hands – keep everything gentle and with your fingers spread as much as possible. Try to not pick up things like plates too much, and always with both hands! Before your work can be bisque fired it should be “cleaned up”. You work won’t go into the kiln if it has sharp edges – when glazed, sharp edges turn into razor blades! Use a piece of fly wire to rub the work all over – this will scratch a little so be light handed. Use a knife or metal kidney to scrape any areas that require a bit more dynamic treatment than the fly wire offers! Finally, a very light wipe over with a slightly damp sponge can help soften and soothe all of your edges and dags! Trimming thrown work: If you are planning to trim (or turn) your thrown work (and you should be), make sure you bag it well – your work should be leather hard to almost dry for easiest trimming. Use this step to finish the work completely – use a metal kidney to polish the surface, or a slightly damp sponge to give a freshly thrown look. Wipe the sponge around the rim after trimming, and check the inside of the pot for dags! Trimming slip cast work: Usually I will trim the rims of your work on the wheel the following day to make that stage easier, however you will still need to check your work for lumps and bumps. Last but not least – check that your name is still clearly on the bottom of your work. Step Five – Bisque Firing When the work is completely dry it can go into the bisque kiln. The bisque kiln is fired to 1000°C. This process burns off the water in the clay as well as some of the chemically bound water. The structure of the clay is not altered that much at this temperature. Inside the bisque kiln, the work is stacked a little, small bowl inside a larger bowl and onto a heavy plate. Smaller items like decorations or drink coasters might get stacked several high. Consideration is paid to the weight of the stack and shape of the work. A bisque kiln can fire about one and a half times the amount of work that the glaze kiln can fire. The firing takes about 10 hours to complete the cycle and about two days to cool down. Once it has been emptied the work is placed in the glaze room ready for you to decorate! Step Six – Glazing Decorating your work with colour can be a lot of fun – and time consuming! There are three main options for surface treatment at this stage: Oxide Washes Underglazes Glazes Washes and underglazes do not “glaze” the work – It will still need a layer of glaze to fully seal the clay (washes don’t need glaze on surfaces not designed for food or liquid as they can gloss up a little on their own). Underglazes are stable colourants that turn out pretty much how they look in the jar. They can be mixed with each other to form other colours and can be used like water colours to paint onto your work. Mostly they should have a clear glaze on top to seal them. Oxides are a different species – the pink oxide (cobalt) wash turns out bright blue for instance. They don’t always need a glaze on top, and some glazes can change the colour of the wash! The glazes need no other “glaze” on top! Be careful of unknown glaze interactions – you can put any combination of glaze in a bowl or on a plate, but only a single glaze on the outside of any vertical surface! Glazes are a chemical reaction under heat. We don’t know the exact chemicals in the Mayco glazes we use. I can guess by the way they interact with each other, however, on the whole, you need to test every idea you have, and not run the test on a vertical surface! Simply put, glaze is a layer of glass like substance that bonds with the clay underneath. Clay is made of silica, alumina and water. Glaze is made of mostly silica. Silica has a melting point of 1700°C and we fire to 1240°C. The silica requires a “flux” to help it melt at the lower temperature. Fluxes can be all sorts of chemicals – a common one is calcium – calcium has a melting point of 2500°C, however, together they both melt at a much lower temperature! Colourants are metal oxides like cobalt (blue), chrome (green through black), copper (green, blue, even red!), manganese (black, purple and pink) iron (red brown), etc. Different chemicals in the glaze can have dramatic effects. for example, barium carbonate (which we don’t use) turns manganese bright pink! Other elements can turn manganese dioxide brown, blue, purple and reddish brown. Manganese dioxide is a flux in and of itself as well. So, glazes that get their black and purple colours, often interact with other glazes and RUN! Our mirror black is a good example – it mixes really well with many glazes because it fluxes them – causes them to melt faster. It will also bring out many beautiful colours in the glazes because it’s black colouring most definitely comes from manganese dioxide! Glaze chemistry is a whole subject on it’s own! We use commercial Mayco glazes on purpose – for their huge range of colour possibilities, stability, cool interactions, artistic freedom with the ability to easily brush the glazes on and ease of use. We currently have almost 50 glazes on hand! A major project is to test the interactions of all glazes with each other. That is 2,500 test tiles!!!! I’m going to make the wall behind the wheels the feature wall of pretty colours! Step Seven – Glaze (Gloss or sometimes called “Glost”) Firing Most of the time this is the final stage of making your creation (but not always!) The glaze kiln goes to 1240°C. This is called cone 6, or midrange. It is the low end of stoneware temperatures. Stoneware clays and glazes are typically fired at cone 8 – 10, that is 1260 – 1290°C. The energy requirement to go from 1240°C to 1280°C is almost a 30% more! Our clay is formulated to vitrify (mature, turn “glass-like”) at 1240°, as are our glazes. A glaze kiln take around 12 hours to reach temperature and two to three days to cool down. Sometimes a third firing process is required – this is for decoration that is added to work after the glaze firing. For example – adding precious metals and lustres. this firing temperature is usually around 600 – 800°C depending upon the techniques being used. There are many students interested in gold and silver trims – we will be doing this third type of firing soon! After firing your work will be in the student finished work shelves. Remember to pay for it before you head out the door! There is a small extra charge for using porcelain clay (it’s more than twice the price of regular clay), and for any third firing process! Once your work has been fired it can not turn back into clay for millennia – so don’t fire it if you don’t like it! Put it in the bucket for recycling. https://firebirdstudios.com.au/the-process-of-making-pottery/Ceramics have evolved over thousands of years.White earthenware dinner plate. Crazing evident all over.Backstamped ‘Made in England S LTD’flagstaff hill, warrnambool, shipwrecked-coast, flagstaff-hill, flagstaff-hill-maritime-museum, maritime-museum, shipwreck-coast, flagstaff-hill-maritime-village, ceramics, tableware -
 Flagstaff Hill Maritime Museum and Village
Domestic object - Plate, Johnson Bros
The Process of Making Pottery Decorating, Firing, Glazing, Making, Technical There is a rhythm and flow to clay. It can’t be done all at once! Even the making process! It can take weeks to get everything done, especially if you can only work on your pottery once a week! Even though we have three hour classes, it’s often just not enough time! Here is an overview of some of the processes so you have a bit more grasp on some of the technical stuff! Step One – Design There are SO many ideas out there for making stuff in clay! From delicate porcelain jewellery, through to heavy sculptural work and everything in between. Deciding your direction is sometimes not that easy – when you first start, try everything, you will naturally gravitate to the style that you enjoy! The options and variations are endless and can get a wee bit overwhelming too! Check in with me before you start to ensure your ideas will work, what order you might do things, how you could achieve the look you are seeking and any other technical data required! Step Two – Making Clay is thixotropic. This means that as you work with it, the clay first gets sloppier and wetter, before is begins to dry in the atmosphere. For most things, you simply can’t do all parts of the project at once. An example of work order might look like: Get last weeks work out from the shelves Prepare clay for today’s work – roll your clay, prepare balls for throwing, make the first stage of a pinch pot) Clean up last week’s work and put it on the shelf for bisque firing Check that you have any glazing to do – and do enough of it that you will have time to finish your main project Do the next step of your next project – there might be a further step that can’t be complete immediately, in that case, wrap your work well and put onto the shelves. Letting your work rest for a while can really help keep your work clean and professional looking. Many things require bagging under plastic to keep it ready for work the next week – put your name on the outside of the bag so you can find your work easily. We have stickers and markers. Consider how you want to decorate your work – coloured slip can be applied at a fairly wet stage (remembering that it will make your work even wetter!). Trying to apply slip to dry clay won’t work! If you want to do sgraffito – you will need to keep the work leather hard (a state of dryness where you can still work the clay with a little effort and a little water and care). Step Three – Drying Most of the time your work can go into the rack uncovered to let it dry out for the following week. If you want to continue forming or shaping you will need to double bag your work – put your work on a suitable sized bat and put the bat in a bag so the base of the bag is under the bat, then put another bag over the top of the work and tuck the top of the bag under the bat. If you want to trim (or turn) your thrown work the following week, it should also be double bagged. If your work is large, delicate, or of uneven thicknesses, you should lightly cover your work for drying. When considering the drying process, bare in mind the weather, humidity and wind! The hotter and dryer, the faster things dry and work can dry unevenly in the shelves – this can lead to cracking – another time to lightly cover your work for drying. Step Four – Trimming and Cleaning Up Your work is dry! It is called greenware now and it is at it’s most fragile! Handle everything with two hands. I often refer to soft hands – keep everything gentle and with your fingers spread as much as possible. Try to not pick up things like plates too much, and always with both hands! Before your work can be bisque fired it should be “cleaned up”. You work won’t go into the kiln if it has sharp edges – when glazed, sharp edges turn into razor blades! Use a piece of fly wire to rub the work all over – this will scratch a little so be light handed. Use a knife or metal kidney to scrape any areas that require a bit more dynamic treatment than the fly wire offers! Finally, a very light wipe over with a slightly damp sponge can help soften and soothe all of your edges and dags! Trimming thrown work: If you are planning to trim (or turn) your thrown work (and you should be), make sure you bag it well – your work should be leather hard to almost dry for easiest trimming. Use this step to finish the work completely – use a metal kidney to polish the surface, or a slightly damp sponge to give a freshly thrown look. Wipe the sponge around the rim after trimming, and check the inside of the pot for dags! Trimming slip cast work: Usually I will trim the rims of your work on the wheel the following day to make that stage easier, however you will still need to check your work for lumps and bumps. Last but not least – check that your name is still clearly on the bottom of your work. Step Five – Bisque Firing When the work is completely dry it can go into the bisque kiln. The bisque kiln is fired to 1000°C. This process burns off the water in the clay as well as some of the chemically bound water. The structure of the clay is not altered that much at this temperature. Inside the bisque kiln, the work is stacked a little, small bowl inside a larger bowl and onto a heavy plate. Smaller items like decorations or drink coasters might get stacked several high. Consideration is paid to the weight of the stack and shape of the work. A bisque kiln can fire about one and a half times the amount of work that the glaze kiln can fire. The firing takes about 10 hours to complete the cycle and about two days to cool down. Once it has been emptied the work is placed in the glaze room ready for you to decorate! Step Six – Glazing Decorating your work with colour can be a lot of fun – and time consuming! There are three main options for surface treatment at this stage: Oxide Washes Underglazes Glazes Washes and underglazes do not “glaze” the work – It will still need a layer of glaze to fully seal the clay (washes don’t need glaze on surfaces not designed for food or liquid as they can gloss up a little on their own). Underglazes are stable colourants that turn out pretty much how they look in the jar. They can be mixed with each other to form other colours and can be used like water colours to paint onto your work. Mostly they should have a clear glaze on top to seal them. Oxides are a different species – the pink oxide (cobalt) wash turns out bright blue for instance. They don’t always need a glaze on top, and some glazes can change the colour of the wash! The glazes need no other “glaze” on top! Be careful of unknown glaze interactions – you can put any combination of glaze in a bowl or on a plate, but only a single glaze on the outside of any vertical surface! Glazes are a chemical reaction under heat. We don’t know the exact chemicals in the Mayco glazes we use. I can guess by the way they interact with each other, however, on the whole, you need to test every idea you have, and not run the test on a vertical surface! Simply put, glaze is a layer of glass like substance that bonds with the clay underneath. Clay is made of silica, alumina and water. Glaze is made of mostly silica. Silica has a melting point of 1700°C and we fire to 1240°C. The silica requires a “flux” to help it melt at the lower temperature. Fluxes can be all sorts of chemicals – a common one is calcium – calcium has a melting point of 2500°C, however, together they both melt at a much lower temperature! Colourants are metal oxides like cobalt (blue), chrome (green through black), copper (green, blue, even red!), manganese (black, purple and pink) iron (red brown), etc. Different chemicals in the glaze can have dramatic effects. for example, barium carbonate (which we don’t use) turns manganese bright pink! Other elements can turn manganese dioxide brown, blue, purple and reddish brown. Manganese dioxide is a flux in and of itself as well. So, glazes that get their black and purple colours, often interact with other glazes and RUN! Our mirror black is a good example – it mixes really well with many glazes because it fluxes them – causes them to melt faster. It will also bring out many beautiful colours in the glazes because it’s black colouring most definitely comes from manganese dioxide! Glaze chemistry is a whole subject on it’s own! We use commercial Mayco glazes on purpose – for their huge range of colour possibilities, stability, cool interactions, artistic freedom with the ability to easily brush the glazes on and ease of use. We currently have almost 50 glazes on hand! A major project is to test the interactions of all glazes with each other. That is 2,500 test tiles!!!! I’m going to make the wall behind the wheels the feature wall of pretty colours! Step Seven – Glaze (Gloss or sometimes called “Glost”) Firing Most of the time this is the final stage of making your creation (but not always!) The glaze kiln goes to 1240°C. This is called cone 6, or midrange. It is the low end of stoneware temperatures. Stoneware clays and glazes are typically fired at cone 8 – 10, that is 1260 – 1290°C. The energy requirement to go from 1240°C to 1280°C is almost a 30% more! Our clay is formulated to vitrify (mature, turn “glass-like”) at 1240°, as are our glazes. A glaze kiln take around 12 hours to reach temperature and two to three days to cool down. Sometimes a third firing process is required – this is for decoration that is added to work after the glaze firing. For example – adding precious metals and lustres. this firing temperature is usually around 600 – 800°C depending upon the techniques being used. There are many students interested in gold and silver trims – we will be doing this third type of firing soon! After firing your work will be in the student finished work shelves. Remember to pay for it before you head out the door! There is a small extra charge for using porcelain clay (it’s more than twice the price of regular clay), and for any third firing process! Once your work has been fired it can not turn back into clay for millennia – so don’t fire it if you don’t like it! Put it in the bucket for recycling. https://firebirdstudios.com.au/the-process-of-making-pottery/Ceramics have evolved over thousands of years.A white earthenware side plate with a gadroon edge. Has water marks and chips on front.‘Johnson Bros England Reg No 15587’flagstaff hill, warrnambool, shipwrecked-coast, flagstaff-hill, flagstaff-hill-maritime-museum, maritime-museum, shipwreck-coast, flagstaff-hill-maritime-village, johnson bros, ceramics, tableware -
 Flagstaff Hill Maritime Museum and Village
Domestic object - Plate, Alfred Meakin
The Process of Making Pottery Decorating, Firing, Glazing, Making, Technical There is a rhythm and flow to clay. It can’t be done all at once! Even the making process! It can take weeks to get everything done, especially if you can only work on your pottery once a week! Even though we have three hour classes, it’s often just not enough time! Here is an overview of some of the processes so you have a bit more grasp on some of the technical stuff! Step One – Design There are SO many ideas out there for making stuff in clay! From delicate porcelain jewellery, through to heavy sculptural work and everything in between. Deciding your direction is sometimes not that easy – when you first start, try everything, you will naturally gravitate to the style that you enjoy! The options and variations are endless and can get a wee bit overwhelming too! Check in with me before you start to ensure your ideas will work, what order you might do things, how you could achieve the look you are seeking and any other technical data required! Step Two – Making Clay is thixotropic. This means that as you work with it, the clay first gets sloppier and wetter, before is begins to dry in the atmosphere. For most things, you simply can’t do all parts of the project at once. An example of work order might look like: Get last weeks work out from the shelves Prepare clay for today’s work – roll your clay, prepare balls for throwing, make the first stage of a pinch pot) Clean up last week’s work and put it on the shelf for bisque firing Check that you have any glazing to do – and do enough of it that you will have time to finish your main project Do the next step of your next project – there might be a further step that can’t be complete immediately, in that case, wrap your work well and put onto the shelves. Letting your work rest for a while can really help keep your work clean and professional looking. Many things require bagging under plastic to keep it ready for work the next week – put your name on the outside of the bag so you can find your work easily. We have stickers and markers. Consider how you want to decorate your work – coloured slip can be applied at a fairly wet stage (remembering that it will make your work even wetter!). Trying to apply slip to dry clay won’t work! If you want to do sgraffito – you will need to keep the work leather hard (a state of dryness where you can still work the clay with a little effort and a little water and care). Step Three – Drying Most of the time your work can go into the rack uncovered to let it dry out for the following week. If you want to continue forming or shaping you will need to double bag your work – put your work on a suitable sized bat and put the bat in a bag so the base of the bag is under the bat, then put another bag over the top of the work and tuck the top of the bag under the bat. If you want to trim (or turn) your thrown work the following week, it should also be double bagged. If your work is large, delicate, or of uneven thicknesses, you should lightly cover your work for drying. When considering the drying process, bare in mind the weather, humidity and wind! The hotter and dryer, the faster things dry and work can dry unevenly in the shelves – this can lead to cracking – another time to lightly cover your work for drying. Step Four – Trimming and Cleaning Up Your work is dry! It is called greenware now and it is at it’s most fragile! Handle everything with two hands. I often refer to soft hands – keep everything gentle and with your fingers spread as much as possible. Try to not pick up things like plates too much, and always with both hands! Before your work can be bisque fired it should be “cleaned up”. You work won’t go into the kiln if it has sharp edges – when glazed, sharp edges turn into razor blades! Use a piece of fly wire to rub the work all over – this will scratch a little so be light handed. Use a knife or metal kidney to scrape any areas that require a bit more dynamic treatment than the fly wire offers! Finally, a very light wipe over with a slightly damp sponge can help soften and soothe all of your edges and dags! Trimming thrown work: If you are planning to trim (or turn) your thrown work (and you should be), make sure you bag it well – your work should be leather hard to almost dry for easiest trimming. Use this step to finish the work completely – use a metal kidney to polish the surface, or a slightly damp sponge to give a freshly thrown look. Wipe the sponge around the rim after trimming, and check the inside of the pot for dags! Trimming slip cast work: Usually I will trim the rims of your work on the wheel the following day to make that stage easier, however you will still need to check your work for lumps and bumps. Last but not least – check that your name is still clearly on the bottom of your work. Step Five – Bisque Firing When the work is completely dry it can go into the bisque kiln. The bisque kiln is fired to 1000°C. This process burns off the water in the clay as well as some of the chemically bound water. The structure of the clay is not altered that much at this temperature. Inside the bisque kiln, the work is stacked a little, small bowl inside a larger bowl and onto a heavy plate. Smaller items like decorations or drink coasters might get stacked several high. Consideration is paid to the weight of the stack and shape of the work. A bisque kiln can fire about one and a half times the amount of work that the glaze kiln can fire. The firing takes about 10 hours to complete the cycle and about two days to cool down. Once it has been emptied the work is placed in the glaze room ready for you to decorate! Step Six – Glazing Decorating your work with colour can be a lot of fun – and time consuming! There are three main options for surface treatment at this stage: Oxide Washes Underglazes Glazes Washes and underglazes do not “glaze” the work – It will still need a layer of glaze to fully seal the clay (washes don’t need glaze on surfaces not designed for food or liquid as they can gloss up a little on their own). Underglazes are stable colourants that turn out pretty much how they look in the jar. They can be mixed with each other to form other colours and can be used like water colours to paint onto your work. Mostly they should have a clear glaze on top to seal them. Oxides are a different species – the pink oxide (cobalt) wash turns out bright blue for instance. They don’t always need a glaze on top, and some glazes can change the colour of the wash! The glazes need no other “glaze” on top! Be careful of unknown glaze interactions – you can put any combination of glaze in a bowl or on a plate, but only a single glaze on the outside of any vertical surface! Glazes are a chemical reaction under heat. We don’t know the exact chemicals in the Mayco glazes we use. I can guess by the way they interact with each other, however, on the whole, you need to test every idea you have, and not run the test on a vertical surface! Simply put, glaze is a layer of glass like substance that bonds with the clay underneath. Clay is made of silica, alumina and water. Glaze is made of mostly silica. Silica has a melting point of 1700°C and we fire to 1240°C. The silica requires a “flux” to help it melt at the lower temperature. Fluxes can be all sorts of chemicals – a common one is calcium – calcium has a melting point of 2500°C, however, together they both melt at a much lower temperature! Colourants are metal oxides like cobalt (blue), chrome (green through black), copper (green, blue, even red!), manganese (black, purple and pink) iron (red brown), etc. Different chemicals in the glaze can have dramatic effects. for example, barium carbonate (which we don’t use) turns manganese bright pink! Other elements can turn manganese dioxide brown, blue, purple and reddish brown. Manganese dioxide is a flux in and of itself as well. So, glazes that get their black and purple colours, often interact with other glazes and RUN! Our mirror black is a good example – it mixes really well with many glazes because it fluxes them – causes them to melt faster. It will also bring out many beautiful colours in the glazes because it’s black colouring most definitely comes from manganese dioxide! Glaze chemistry is a whole subject on it’s own! We use commercial Mayco glazes on purpose – for their huge range of colour possibilities, stability, cool interactions, artistic freedom with the ability to easily brush the glazes on and ease of use. We currently have almost 50 glazes on hand! A major project is to test the interactions of all glazes with each other. That is 2,500 test tiles!!!! I’m going to make the wall behind the wheels the feature wall of pretty colours! Step Seven – Glaze (Gloss or sometimes called “Glost”) Firing Most of the time this is the final stage of making your creation (but not always!) The glaze kiln goes to 1240°C. This is called cone 6, or midrange. It is the low end of stoneware temperatures. Stoneware clays and glazes are typically fired at cone 8 – 10, that is 1260 – 1290°C. The energy requirement to go from 1240°C to 1280°C is almost a 30% more! Our clay is formulated to vitrify (mature, turn “glass-like”) at 1240°, as are our glazes. A glaze kiln take around 12 hours to reach temperature and two to three days to cool down. Sometimes a third firing process is required – this is for decoration that is added to work after the glaze firing. For example – adding precious metals and lustres. this firing temperature is usually around 600 – 800°C depending upon the techniques being used. There are many students interested in gold and silver trims – we will be doing this third type of firing soon! After firing your work will be in the student finished work shelves. Remember to pay for it before you head out the door! There is a small extra charge for using porcelain clay (it’s more than twice the price of regular clay), and for any third firing process! Once your work has been fired it can not turn back into clay for millennia – so don’t fire it if you don’t like it! Put it in the bucket for recycling. https://firebirdstudios.com.au/the-process-of-making-pottery/Ceramics have evolved over thousands of years.Earthenware dessert plate, cream colour. Made by Alfred Meakin, England. Backstamped ‘Alfred Meakin England’. flagstaff hill, warrnambool, shipwrecked-coast, flagstaff-hill, flagstaff-hill-maritime-museum, maritime-museum, shipwreck-coast, flagstaff-hill-maritime-village, alfred meakin, ceramics, earthenware, kitchenware -
 Flagstaff Hill Maritime Museum and Village
Domestic object - Jug
The Process of Making Pottery Decorating, Firing, Glazing, Making, Technical There is a rhythm and flow to clay. It can’t be done all at once! Even the making process! It can take weeks to get everything done, especially if you can only work on your pottery once a week! Even though we have three hour classes, it’s often just not enough time! Here is an overview of some of the processes so you have a bit more grasp on some of the technical stuff! Step One – Design There are SO many ideas out there for making stuff in clay! From delicate porcelain jewellery, through to heavy sculptural work and everything in between. Deciding your direction is sometimes not that easy – when you first start, try everything, you will naturally gravitate to the style that you enjoy! The options and variations are endless and can get a wee bit overwhelming too! Check in with me before you start to ensure your ideas will work, what order you might do things, how you could achieve the look you are seeking and any other technical data required! Step Two – Making Clay is thixotropic. This means that as you work with it, the clay first gets sloppier and wetter, before is begins to dry in the atmosphere. For most things, you simply can’t do all parts of the project at once. An example of work order might look like: Get last weeks work out from the shelves Prepare clay for today’s work – roll your clay, prepare balls for throwing, make the first stage of a pinch pot) Clean up last week’s work and put it on the shelf for bisque firing Check that you have any glazing to do – and do enough of it that you will have time to finish your main project Do the next step of your next project – there might be a further step that can’t be complete immediately, in that case, wrap your work well and put onto the shelves. Letting your work rest for a while can really help keep your work clean and professional looking. Many things require bagging under plastic to keep it ready for work the next week – put your name on the outside of the bag so you can find your work easily. We have stickers and markers. Consider how you want to decorate your work – coloured slip can be applied at a fairly wet stage (remembering that it will make your work even wetter!). Trying to apply slip to dry clay won’t work! If you want to do sgraffito – you will need to keep the work leather hard (a state of dryness where you can still work the clay with a little effort and a little water and care). Step Three – Drying Most of the time your work can go into the rack uncovered to let it dry out for the following week. If you want to continue forming or shaping you will need to double bag your work – put your work on a suitable sized bat and put the bat in a bag so the base of the bag is under the bat, then put another bag over the top of the work and tuck the top of the bag under the bat. If you want to trim (or turn) your thrown work the following week, it should also be double bagged. If your work is large, delicate, or of uneven thicknesses, you should lightly cover your work for drying. When considering the drying process, bare in mind the weather, humidity and wind! The hotter and dryer, the faster things dry and work can dry unevenly in the shelves – this can lead to cracking – another time to lightly cover your work for drying. Step Four – Trimming and Cleaning Up Your work is dry! It is called greenware now and it is at it’s most fragile! Handle everything with two hands. I often refer to soft hands – keep everything gentle and with your fingers spread as much as possible. Try to not pick up things like plates too much, and always with both hands! Before your work can be bisque fired it should be “cleaned up”. You work won’t go into the kiln if it has sharp edges – when glazed, sharp edges turn into razor blades! Use a piece of fly wire to rub the work all over – this will scratch a little so be light handed. Use a knife or metal kidney to scrape any areas that require a bit more dynamic treatment than the fly wire offers! Finally, a very light wipe over with a slightly damp sponge can help soften and soothe all of your edges and dags! Trimming thrown work: If you are planning to trim (or turn) your thrown work (and you should be), make sure you bag it well – your work should be leather hard to almost dry for easiest trimming. Use this step to finish the work completely – use a metal kidney to polish the surface, or a slightly damp sponge to give a freshly thrown look. Wipe the sponge around the rim after trimming, and check the inside of the pot for dags! Trimming slip cast work: Usually I will trim the rims of your work on the wheel the following day to make that stage easier, however you will still need to check your work for lumps and bumps. Last but not least – check that your name is still clearly on the bottom of your work. Step Five – Bisque Firing When the work is completely dry it can go into the bisque kiln. The bisque kiln is fired to 1000°C. This process burns off the water in the clay as well as some of the chemically bound water. The structure of the clay is not altered that much at this temperature. Inside the bisque kiln, the work is stacked a little, small bowl inside a larger bowl and onto a heavy plate. Smaller items like decorations or drink coasters might get stacked several high. Consideration is paid to the weight of the stack and shape of the work. A bisque kiln can fire about one and a half times the amount of work that the glaze kiln can fire. The firing takes about 10 hours to complete the cycle and about two days to cool down. Once it has been emptied the work is placed in the glaze room ready for you to decorate! Step Six – Glazing Decorating your work with colour can be a lot of fun – and time consuming! There are three main options for surface treatment at this stage: Oxide Washes Underglazes Glazes Washes and underglazes do not “glaze” the work – It will still need a layer of glaze to fully seal the clay (washes don’t need glaze on surfaces not designed for food or liquid as they can gloss up a little on their own). Underglazes are stable colourants that turn out pretty much how they look in the jar. They can be mixed with each other to form other colours and can be used like water colours to paint onto your work. Mostly they should have a clear glaze on top to seal them. Oxides are a different species – the pink oxide (cobalt) wash turns out bright blue for instance. They don’t always need a glaze on top, and some glazes can change the colour of the wash! The glazes need no other “glaze” on top! Be careful of unknown glaze interactions – you can put any combination of glaze in a bowl or on a plate, but only a single glaze on the outside of any vertical surface! Glazes are a chemical reaction under heat. We don’t know the exact chemicals in the Mayco glazes we use. I can guess by the way they interact with each other, however, on the whole, you need to test every idea you have, and not run the test on a vertical surface! Simply put, glaze is a layer of glass like substance that bonds with the clay underneath. Clay is made of silica, alumina and water. Glaze is made of mostly silica. Silica has a melting point of 1700°C and we fire to 1240°C. The silica requires a “flux” to help it melt at the lower temperature. Fluxes can be all sorts of chemicals – a common one is calcium – calcium has a melting point of 2500°C, however, together they both melt at a much lower temperature! Colourants are metal oxides like cobalt (blue), chrome (green through black), copper (green, blue, even red!), manganese (black, purple and pink) iron (red brown), etc. Different chemicals in the glaze can have dramatic effects. for example, barium carbonate (which we don’t use) turns manganese bright pink! Other elements can turn manganese dioxide brown, blue, purple and reddish brown. Manganese dioxide is a flux in and of itself as well. So, glazes that get their black and purple colours, often interact with other glazes and RUN! Our mirror black is a good example – it mixes really well with many glazes because it fluxes them – causes them to melt faster. It will also bring out many beautiful colours in the glazes because it’s black colouring most definitely comes from manganese dioxide! Glaze chemistry is a whole subject on it’s own! We use commercial Mayco glazes on purpose – for their huge range of colour possibilities, stability, cool interactions, artistic freedom with the ability to easily brush the glazes on and ease of use. We currently have almost 50 glazes on hand! A major project is to test the interactions of all glazes with each other. That is 2,500 test tiles!!!! I’m going to make the wall behind the wheels the feature wall of pretty colours! Step Seven – Glaze (Gloss or sometimes called “Glost”) Firing Most of the time this is the final stage of making your creation (but not always!) The glaze kiln goes to 1240°C. This is called cone 6, or midrange. It is the low end of stoneware temperatures. Stoneware clays and glazes are typically fired at cone 8 – 10, that is 1260 – 1290°C. The energy requirement to go from 1240°C to 1280°C is almost a 30% more! Our clay is formulated to vitrify (mature, turn “glass-like”) at 1240°, as are our glazes. A glaze kiln take around 12 hours to reach temperature and two to three days to cool down. Sometimes a third firing process is required – this is for decoration that is added to work after the glaze firing. For example – adding precious metals and lustres. this firing temperature is usually around 600 – 800°C depending upon the techniques being used. There are many students interested in gold and silver trims – we will be doing this third type of firing soon! After firing your work will be in the student finished work shelves. Remember to pay for it before you head out the door! There is a small extra charge for using porcelain clay (it’s more than twice the price of regular clay), and for any third firing process! Once your work has been fired it can not turn back into clay for millennia – so don’t fire it if you don’t like it! Put it in the bucket for recycling. https://firebirdstudios.com.au/the-process-of-making-pottery/The form of the jug has been in use for many centuries.Stoneware jug. Two tone brown glaze with pierced lip behind spout. Spout chipped.None.flagstaff hill, warrnambool, shipwrecked-coast, flagstaff-hill, flagstaff-hill-maritime-museum, maritime-museum, shipwreck-coast, flagstaff-hill-maritime-village, jug, ceramic jug -
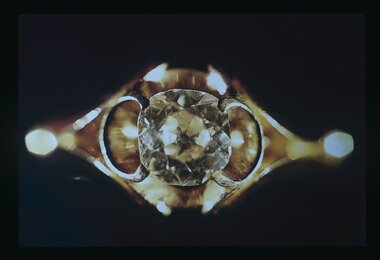 Flagstaff Hill Maritime Museum and Village
Accessory - Diamond ring, about 1855
In 1975, 120 years after the sailing ship Schomberg was wrecked, Flagstaff Hill divers (Peter Ronald, Colin Goodall and Gary Hayden) found an ornate communion set amongst the wreckage. The set comprised a jug, ciborium, lid, chalice and plate. The items, apart from the lid, were then displayed at Flagstaff Hill Maritime Village. The lid had etchings that did not match the chalice and sat in storage for several years. Then in 1978, while the marine concretion inside the lid was being examined, a surface layer came loose and revealed a glint of gold that was assumed to be a piece of brass. The layers of concretion were carefully removed and a ring-like band emerged. Further treatment exposed a 'large faceted stone in an intricate gold setting. Weeks later a detailed examination estimated the value of the ring, known as the Schomberg Diamond, to be $7000. When the Schomberg was launched in 1855, she was considered the "Noblest” ship that ever floated on the water. Schomberg's owners, the Black Ball Line had commissioned the ship for their fleet of passenger liners. She was built by Alexander Hall of Aberdeen at a cost of £43,103 and constructed with 3 skins. One planked fore and aft and two diagonally planked, fastened together with screw-threaded trunnels (wooden rails). Her First Class accommodation was simply luxurious with velvet pile carpets, large mirrors, rosewood, birds-eye maple and mahogany timbers throughout, soft furnishings of satin damask, an oak-lined library with a piano. Overall she had accommodation for 1000 passengers. At the launch, the Schomberg's 34-year-old master, Captain 'Bully' Forbes, had promised to reach Melbourne in sixty days stating, "with or without the help of God." Captain James Nicol Forbes was born in Aberdeen in 1821 and rose to fame with his record-breaking voyages on the famous Black Ball Line ships; Marco Polo and Lightning. In 1852 in the Marco Polo, he made the record passage from London to Melbourne in 68 days. Unfortunately there were 53 deaths on the voyage, but the great news was off the record passage by Captain Forbes. In 1854 he took the clipper “Lighting” to Melbourne in 76 days and back in 63 days, this record was never beaten by a sailing ship. He often drove his crew and ship to breaking point to beat his previous records. He cared little for the comfort of the passengers. On this, the Schomberg's maiden voyage, he was determined to break existing records. Schomberg departed Liverpool on her maiden voyage on 6th October 1855 flying a sign that read "Sixty Days to Melbourne". She departed with 430 passengers and 3000 tons cargo including iron rails and equipment intended to build the Melbourne to Geelong Railway and a bridge over the Yarra from Melbourne to Hawthorn. She also carried a cow for fresh milk, pens for fowls and pigs, 90,000 gallons of water for washing and drinking. She also carried 17,000 letters and 31,800 newspapers. The ship and cargo were insured for $300,000 a fortune for the time. The winds were poor as she sailed across the equator, slowing Schomberg's journey considerably. Land was first sighted on Christmas Day, at Cape Bridgewater near Portland, Captain Forbes followed the coastline towards Melbourne. Forbes was said to be playing cards when called by the third mate Henry Keen, who reported land about 3 miles off. Due in large part to the captain's regarding a card game as more important than his ship, it eventually ran aground on a sand spit near Curdie's Inlet (about 56 km west of Cape Otway) on 26th December 1855, 78 days after leaving Liverpool. The sand spit and the currents were not marked on Forbes's map. Overnight, the crew launched a lifeboat to find a safe place to land the ship’s passengers. The scouting party returned to Schomberg and advised Forbes that it was best to wait until morning because the rough seas could easily overturn the small lifeboats. The ship’s Chief Officer spotted the SS Queen at dawn and signaled the steamer. The master of the Queen approached the stranded vessel and all of Schomberg’s passengers and crew disembarked safely. The Black Ball Line's Melbourne agent sent a steamer to retrieve the passengers' baggage from the Schomberg. Other steamers helped unload her cargo until the weather changed and prevented the salvage teams from accessing the ship. Later one plunderer found a case of Wellington boots, but alas, all were for the left foot. Local merchants Manifold & Bostock bought the wreck and cargo but did not attempt to salvage the cargo still on board the ship. They eventually sold it on to a Melbourne businessman and two seafarers. In 1864 after two of the men drowned when they tried to reach Schomberg, salvage efforts were abandoned. In 1870, nearly 15 years after the wreck parts of the Schomberg had washed ashore on the south island of New Zealand. The wreck now lies in 825 meters of water and although the woodwork is mostly disintegrated the shape of the ship can still be determined due to the remaining railway irons, girders and the ship’s frame. A variety of goods and materials can be seen scattered about nearby. The actual lid in which the ring was found has not yet been completely identified and could belong to a coffee pot, sugar bowl or maybe a jug or something similar. Although all survived the wreck no-one came forward to claim the valuable diamond. The Schomberg Diamond is currently on display in the Great Circle Gallery. Flagstaff Hill Maritime Village along with the rest of the communion set. Other artefacts salvaged from the wreck include ship fittings and equipment, personal effects, a lithograph, tickets and photographs from the Schomberg. One of the Schomberg bells is in the Warrnambool Library.The Schomberg Diamond is particularly significant in that it played a crucial part in having the legislation changed to protect shipwrecks, with far tighter control over the salvaging of items from wreck sites. This ring is registered as Artefact S/105 in the Schomberg collection, the Schomberg collection as a whole is of historical and archaeological significance at a State level. Flagstaff Hill’s collection of artefacts from the Schomberg is also significant for its association with the Victorian Heritage Registered shipwreck (VHR S 612). The collection is of prime significant because of the relationship between the objects salvaged, as together they help us to interpret the story of the Schomberg. The collection as a whole is historically significant for representing aspects of Victoria's maritime history and its potential to interpret social and historical themes. A mid-Victorian gentleman's solitaire diamond dress ring with a Brazilian cut diamond (cushion cut), one and one-third carat set within an 18 carat yellow gold ring consisting of four claws within an open scroll setting and a divided scroll shank. Colour is classified as 'J', clarity SII. The setting is handmade. warrnambool, shipwrecked-coast, flagstaff-hill, flagstaff-hill-maritime-museum, maritime-museum, shipwreck-coast, flagstaff-hill-maritime-village, schomberg, shipwrecked-artefact, clipper ship, black ball line, 1855 shipwreck, aberdeen clipper ship, captain forbes, peterborough shipwreck, ss queen, ciborium, ring, schomberg-diamond, schomberg-ring, gentleman's ring, dress ring -
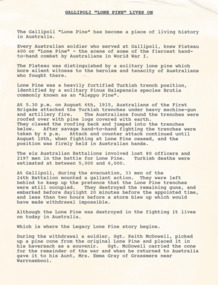 Melbourne Legacy
Document, Gallipoli's 'Lone Pine' Lives On
A detailed account of the story of Lone Pine in Gallipoli and how seedlings were grown from a pine cone brought back by Sgt. Keith McDowell. The author and date of this account is not known but was post 1989. The text says: " Gallipoli Lone Pine Lives On The Gallipoli Lone Pine has become a piece of living history in Australia. Every Australian solider who served at Gallipoli, knew Plateau 400 or ‘Lone Pine’ – the scene of some of the fiercest hand-to-hand combat by Australian in World War 1. The Plateau was distinguished by a solitary lone pine which bore silent witness to the heroism and tenacity of Australians who fought there. Lone Pine was a heavily fortified Turkish trench position, identified by a solitary Pinus Halepensis species commonly known as an ‘Aleppo Pine’. (** NB this has since been corrected and the species is not an 'Aleppo pine' but Pinus Brutia, commonly called Turkish pine) At 5.30 pm on August 6th, 1915, Australians of the First Brigade attacked the Turkish trenches under heavy machine-gun and artillery fire. The Australians found the trenches were roofed over with pine logs covered with earth. They clawed the roofing back and jumped into the trenches below. After savage hand-to-hand fighting the trenches were taken by 6 pm. Attack and counter attack continued until August 10, when fighting at Lone Pine ceased, and the position as firmly held in Australian hands. The six Australian Battalions involved lost 80 officers and 2197 men in the battle for Lone Pine. Turkish deaths were estimated at between 5,000 and 6,000. At Gallipoli during the evacuation, 33 men of the 24th Battalion mounted a gallant action. They were left behind to keep up the pretence that the Lone Pine trenches were still occupied. They destroyed the remaining guns, and embarked before daylight 20 minutes before the appointed time, and less than two hours before a storm blew up which would have made withdrawal impossible. Although the Lone Pine was destroyed in the fighting it lives on today in Australia. Which is where the Legacy Lone Pine story begins. During the withdrawal a soldier, Sgt. Keith McDowell, picked up a pine cone from the original Lone Pine and placed it in his haversack as a souvenir. Sgt. McDowell carried the cone for the remainder of the war and when he returned to Australia gave it to his Aunt, Mrs Emma Gray of Grassmere near Warrnambool. “Here Aunty, you’ve got a green thumb, see if you can grow something out of this”, the late Mrs Gray’s son, Alexander, recalled. But it wasn’t until some 12 years later that Mrs Gray planted the few seeds from the cone, five of which sprouted and grew into little trees. One of the pines eventually died but the remaining four survived. In May, 1933, one was planted in Wattle Park on the occasion of the Trooping of the Colour by the 24th Battalion. On the 11th June 1933, the second tree was planted with full military honours by S G Savige of the 24th Battalion, at the Shrine of Remembrance in Melbourne, where it now shades the well-loved statue of Simpson and his donkey. The late Lieutenant-General Sir Stanley Savige KBE, CB, DSO, MC, ED, was the founder of Melbourne Legacy. Formed in 1923, the Melbourne Legacy Club was the first such Club to be established. On the 18 June 1933 the third tree was planted at the Sisters, near Terang, just north east of Warrnambool. This is the area Mrs Gray’s family lived and the home of several Gallipoli veterans. The fourth tree was planted in the Warrnambool Gardens on 23 January 1934. In 1964 Legatee Tom Griffiths, then President of Warrnambool Legacy, put forward the idea that more seedlings should be raised in the Jubilee Year of Gallipoli from the established trees with the object of planting memorial trees throughout Australia in memory of those who fell in action at Lone Pine in 1915. The project was outlined in a paper presented to the Perth Conference in 1965 and was strongly supported. Two batches of cones were sent to Melbourne, one from the tree at ‘The Sisters’ and another from the tree at the Warrnambool Gardens, and the full cooperation of the (then) Forests Commission of Victoria, was guaranteed by the Chief Commissioner, Mr Benallack. Unfortunately, these cones had been gathered too late as the seeds had already been cast, and the few seeds that survived failed to germinate. However, Melbourne Legacy then undertook the propagation and distribution of seedlings. With the assistance of the Shrine of Remembrance Trustees, permission was granted by the Melbourne City Parks and gardens Curator to harvest a limited number of cones from the 24th Battalion tree at the Shrine and these were gathered by the Forest Commission and after the necessary preparatory treatment were planted in the Commission’s nursery at Macedon. Approximately 150 seedlings were raised from these cones by Dr Grose, Director and Silviculture. Melbourne Legacy’s Commemoration Committee was responsible for the collection, propagation, presentation and dedication of Lone Pines from the 24th Battalion tree at the Shrine of Remembrance. One the 14 September 1989 further cones were collected with the hope to raise 1000 trees from the seeds. This could not have been done without the invaluable assistance of the Department of Natural Resources and Dr Peter May at the Victorian College of Agriculture and Horticulture in Richmond, Victoria. Thus, Legacy is helping to keep the memory of the Gallipoli ‘Lone Pine’ alive – its spirit living on today. Presentations are made to schools, ex-service organisations and interested bodies by Legacy Clubs in the hope that they will be cherished as a symbol of Australian nationhood and of its just pride, devotion, courage, selflessness and sense of service to others. "The Legacy Lone Pine program helped promote the Anzac story throughout Australia.White A4 paper with black type x 3 pages recounting the story of Legacy's propagation of Lone Pine seedlings. lone pine, gallipoli -
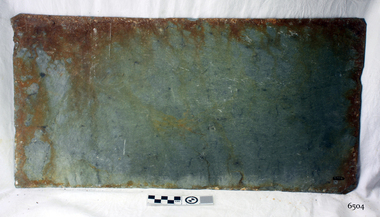 Flagstaff Hill Maritime Museum and Village
Geological specimen - Slate, c. 1886
This rectangular slate of 'beautiful, unusual, expensive, green' American roof tile was amongst tiles recovered from the wreck of the Falls of Halladale. Salvaging began in 1974 by volunteer divers, using local cray-fishing boats. An efficient system was devised that enabled the recovery of up to 4,000 of the still neatly packed slates a day. Many of 22,000 salvaged slates can be seen on roofs of eight buildings in the Flagstaff Hill Maritime Village. The sought-after slate doesn't need any special treatment before use. Some of the slates have slight red staining that comes from over 70 years in the wrecked vessel's rusting hull. The four-mast iron barque 'Falls of Halladale' left New York in August 1908 and, due to a navigational error, floundered off the rocks at Peterborough, Victoria, in the following November. None of the 29 lives on board were lost. Crowds gathered for months to watch the tall ship slowly break up. The green American slates were carried on board as ballast. As well as over 56,000 of the American slates, the large cargo on the Falls of Halladale included benzine, costly timber, rolls of printing paper, coils of barbed wire, thousands of metal bolts, hardware items, tableware, American walnut desks and medicine. Some of the cargo was later recovered. The iron-hulled, four-masted barque, the Falls of Halladale, was a bulk carrier of general cargo. She left New York in August 1908 on her way to Melbourne and Sydney. In her hold, along with 56,763 tiles of unusual beautiful green American slates (roof tiles), 5,673 coils of barbed wire, 600 stoves, 500 sewing machines, 6500 gallons of oil, 14400 gallons of benzene, and many other manufactured items, were 117 cases of crockery and glassware. Three months later and close to her destination, a navigational error caused the Falls of Halladale to be wrecked on a reef off the Peterborough headland at 3 am on the morning of the 15th of November, 1908. The captain and 29 crew members all survived, but her valuable cargo was largely lost, despite two salvage attempts in 1908-09 and 1910. ABOUT THE ‘FALLS OF HALLADALE’ (1886 - 1908) Built: in1886 by Russell & Co., Greenock shipyards, River Clyde, Scotland, UK. The company was founded in 1870 (or 1873) as a partnership between Joseph Russell (1834-1917), Anderson Rodger and William Todd Lithgow. During the period 1882-92 Russell & Co., standardised designs, which sped up their building process so much that they were able to build 271 ships over that time. In 1886 they introduced a 3000 ton class of sailing vessel with auxiliary engines and brace halyard winches. In 1890 they broke the world output record. Owner: Falls Line, Wright, Breakenridge & Co, 111 Union Street, Glasgow, Scotland. Configuration: Four masted sailing ship; iron-hulled barque; iron masts, wire rigging, fore & aft lifting bridges. Size: Length 83.87m x Breadth 12.6m x Depth 7.23m, Gross tonnage 2085 ton Wrecked: the night of 14th November 1908, Curdies Inlet, Peterborough south west Victoria Crew: 29 The Falls of Halladale was a four-masted sailing ship built-in 1886 in Glasgow, Scotland, for the long-distance cargo trade and was mostly used for Pacific grain trade. She was owned by Wright, Breakenridge & Co of Glasgow and was one of several Falls Line ships, all of which were named after waterfalls in Scotland. The lines flag was of red, blue and white vertical stripes. The Falls of Halladale had a sturdy construction built to carry maximum cargo and able to maintain full sail in heavy gales, one of the last of the ‘windjammers’ that sailed the Trade Route. She and her sister ship, the Falls of Garry, were the first ships in the world to include fore and aft lifting bridges. Previous to this, heavily loaded vessels could have heavy seas break along the full length of the deck, causing serious injury or even death to those on deck. The new, raised catwalk-type decking allowed the crew to move above the deck stormy conditions. This idea is still used today on the most modern tankers and cargo vessels and has proved to be an important step forward in the safety of men at sea. On 4th August 1908, with new sails, 29 crew, and 2800 tons of cargo, the Falls of Halladale left New York, bound for Melbourne and Sydney via the Cape of Good Hope. The cargo on board was valued at £35,000 and included 56,763 tiles of American slate roof tiles (roof slates), 5,673 coils of barbed wire, 600 stoves, 500 sewing machines, 6,500 gallons of oil, 14,400 gallons of benzene, plumbing iron, 117 cases of crockery and glassware and many other manufactured items. The Falls of Halladale had been at sail for 102 days when, at 3 am on the night of 14th November 1908, under full sail in calm seas with a six knots breeze behind and misleading fog along the coast, the great vessel rose upon an ocean swell and settled on top of a submerged reef near Peterborough on the south-west Victoria’s coast. The ship was jammed on the rocks and began filling with water. The crew launched the two lifeboats and all 29 crew landed safely on the beach over 4 miles away at the Bay of Islands. The postmistress at Peterborough, who kept a watch for vessels in distress, saw the stranding and sent out an alert to the local people. A rescue party went to the aid of the sailors and the Port Campbell rocket crew was dispatched, but the crew had all managed to reach shore safely by the time help arrived. The ship stayed in full sail on the rocky shelf for nearly two months, attracting hundreds of sightseers who watched her slowly disintegrate until the pounding seas and dynamiting by salvagers finally broke her back, and her remains disappeared back into deeper water. The valuable cargo was largely lost, despite two salvage attempts in 1908-09 and 1910. Further salvage operations were made from 1974-1986, during which time 22,000 slate tiles were recovered with the help of 14 oil drums to float them, plus personal artefacts, ship fittings, reams of paper and other items. The Court of Marine Inquiry in Melbourne ruled that the foundering of the ship was entirely due to Captain David Wood Thomson’s navigational error, not too technical failure of the Clyde-built ship. The shipwreck is a popular site for divers, about 300m offshore and in 3 – 15m of water. Some of the original cargo can be seen at the site, including pieces of roof slate and coils of barbed wire. This slate tile is significant for its connection with the wreck of the Falls of Halladale. The Falls of Halladale shipwreck is listed on the Victorian Heritage Register (No. S255). She was one of the last ships to sail the Trade Routes. She is one of the first vessels to have fore and aft lifting bridges. She is an example of the remains of an International Cargo Ship and also represents aspects of Victoria’s shipping industry. The wreck is protected as a Historic Shipwreck under the Commonwealth Historic Shipwrecks Act (1976).Unusual beautiful green American slate, rectangular shape, recovered from the wreck of the Falls of Halladale. flagstaff hill, warrnambool, shipwrecked-coast, flagstaff-hill, flagstaff-hill-maritime-museum, maritime-museum, shipwreck-coast, flagstaff-hill-maritime-village, falls of halladale, green american roofing slate tile, roof tiles, slate, slate roof tiles, falls of halladale shipwreck, shipwreck cargo, russell & co. -
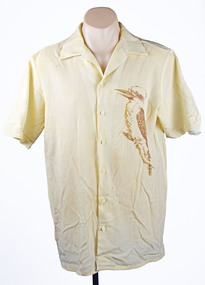 National Wool Museum
Clothing - 1984 Los Angeles Olympics Men's Opening Ceremony Shirt, c. 1984
On the 1984 Los Angeles Olympic Uniforms donator Doug wrote- During the 1980s the Australian wool industry was at its most prosperous times with record numbers of sheep producing wool receiving ever increasing values due to the success of the Reserve Price Scheme, and the overall guidance of the Australian Wool Corporation (AWC). As a humble technician, my role was a low profile newly created position of “Controller, Technical Marketing” where wool was to be marketed on its technical properties, as distinct from the “Product Marketing Group” which exploited trhe traditional high profile approach of marketing wool;s superior fashion attributes. The Woolmark was the tool central to this approach. When the forthcoming Los Angeles Olympic Games was announced, the Product Marketing Group seized upon the chance to show the world that we could make top fashion garments and display them on our elite athletes on the world stage. A concept was launched using a contemporary top designer, Adel Weiss, with the most exclusive fabrics and knits available, and all with a lot of hype. This launch failed dismally for the following reasons- - The designer did a wonderful job presenting an excellent fashion range on perfect skinny models. The AOC however wanted a uniform which had an obvious Australian appearance when fitted to elite, and frequently muscular, athletes. - The fabrics chosen did not reflect the performance required by travelling athletes, there was no recognition of the need for ‘easy care.’ - There was no recognition given to the problem of measuring, manufacturing and distribution of a range of articles when the selected athlete could be domiciled anywhere in Australia. - There was no appreciation of such historical facts as Fletcher Jones, who had been unofficial suppliers dating back to the 1954 Olympics in Melbourne, and the Fletcher Jones board member, who was also an AWC board member, and was not in favour of the change. The project passed from Product Marketing to Public Relations, a big spending off-shoot of the AWC Chairman David Asimus, and due to the day to day operations of the project was passed to me and PR took care of the financial matters. The first task was to meet with the AOC and find out exactly their requirements. This lead to the production of a design and manufacturing brief, cointaining exact time lines for each event required to ensure an appropriate uniform on every athlete chosen to represent his/her country on the date given for the Opening Ceremony in Los Angeles. Working backwards the timeline becomes- 1. Noted the exact date of the Opening Ceremony. 2. Estimated the date for distributing completed garments to each athlete. 3. Estimated the time span available for measuring each athlete and commence making each component of the ensemble to the individual measurements of each athlete. 4. Decided the date for making the final choice of uniform design concept. 5. Decided the date for distribution of the design brief to selected designers. These five steps were spread out over a two year period. The Commonwealth Games occur midway between each Olympic Games, work on the Olympic uniform commences the week after the Commonwealth Games closing ceremony and MUST be ready by the prescribed day two years hence. The project also had to remain cognisant of trade politics existing within the span of the task, as well as the temperament of designers in general. It is no overstatement to say that in the past every designer in Australia believed they could, and should, be chosen to design the Australian Uniform. The final choice of designer almost always faced criticism from the fashion press and any designer who had been overlooked. However, with the contenders receiving an exacting brief the numbers of serious contenders greatly reduced. The Los Angeles Olympic Uniforms. A further reason for the AWC bid failure to design the LA uniform was that the AOC had already chosen Prue Acton to design it. This was based on her proven performance during previous games as she had a talent for creating good taste Australiana. Her design concepts also considered the effect when they were viewed on a single athlete as well as the impact when viewed on a 400 strong team coming on to the arena. A blazer trouser/skirt uniform in bright gold was chosen for the formal uniform. It was my task to select a pure wool faille fabric from Foster Valley weaving mill and have sufficient woven and ready within the prescribed timeline. The trouser/skirt fabric selected was a 60/40 wool polyester plain weave fabric from Macquarie Worsted. This fabric had a small effect thread of linen that was most attractive when dyed to match some eucalyptus bark Prue had brought back from central Australia. For the Opening Ceremony uniform, Prue designed a series of native fauna, a kookaburra for the men’s shirt and a pleated skirt with a rural scene of kangaroos, hills and plants. This presented an insurmountable printing challenge to the local printing industry as it had an unacceptably large repeat size and the number required (50) was also commercially unacceptable. The solution was a DIY mock up at RMIT and the employment of four student designers. The fabric selected for this garment was a light weight 19 micron, pure wool with a very high twist yarn in alternating S and Z twist, warp and weft. This fabric proved to be the solution to a very difficult problem, finding a wool product which is universally acceptable when worn next to the sin by young athletes competing in the heat of a Los Angeles summer. Modifications to this fabric were developed to exploit its success when facing the same problem in future games. Garment Making- The most exacting garment in the ensemble is the tailored blazer, plus the related trouser/skirt. Unfortunately tailoring athletes that come in various shapes and sizes such as; - Weight lifters develop an enormous chest, arms and neck size. A shirt made to a neck size of 52 would produce a shirt with cuffs extending well beyond the wearer’s hands. - Basketball players are up to 7 feet tall and garments relying ona chest measurement grading would produce a shirt with cuffs extending only to elbow length. - Swimmers develop enormous shoulders and slim hips, cyclists by contrast develop thighs I liken to tree trunks and a uniform featuring tight trousers must be avoided at all cost. Suffice to say many ensembles require specialist ‘one off’ treatment for many athletes. Meanwhile there is a comfortable in between group who can accept regular sizes so you can cater for these by having back up stock with plenty of built in contingencies. Athletes may be domiciled anywhere in Australia, this creates a fundamental problem of taking their measurements. The Fletcher Jones organisation was key to answering this problem due to their presence in every capital city, as well as many provincial towns around Australia. Each athlete on being selected for the Olympic Team was simultaneously requested to visit their nearest Fletcher Jones shop. The standardised measurement data collected was shared with the other manufacturers, e.g. Pelaco Shirts, Holeproof Socks and Knitwear, Maddison Belts, and even Hush Puppy Shoes. As the time for the Games approached the AOC made arrangements for combining meeting of all. Selected available athletes at the Australian Institute of Sport, Canberra, where, among other things, they were fitted and supplied with their uniform. The method evolved as follows.Men’s cream coloured button up, collared shirt. Images of a kookaburra have been printed onto the shirt, a single kookaburra on the left breast and a pair of kookaburras on the reverse of the shirt. The kookaburras are printed in a brown tone to complement the cream colour of the fabric.On tag - FMaustralian wool corporation, 1984 los angeles olympics, olympic uniforms, men's uniforms, sport, athletes -
 Federation University Historical Collection
Magazine, Ballarat School of Mines Students' Magazine, 1898-1901, 1898-1901
Bound copies of the Ballarat School of Mines Students' Magazine, 1898-1901 Vol 1, No. 1, September 1898 * News and Notes (Ballarat School of Mines Museum, J.F. Usher, New British Pharmacopoeia, excursion to Bendigo) * History of the Ballarat School of Mines * Current Topics (Federation, Gladstone, Anglo-American Alliance) * Of Custom * Discovery of Coolgardie * Mining Notes(Clunes, Pitfield, Birthday Mine, Western Australia, Transvaal, Mt Bischoff, Rand Drill Co.) * From the Journals * The Societies - (Student Association, Ballarat Field Club and Science Society, Ballarat Photographic Club) * Original Poetry * Sports * Students' Association Committee Meetings * On the Increase of Temperature of the Earth With Increased Depth Vol 1, No. 2, October 1898 * Notes about some of the Past Students (E.M. Weston, J.A. Porter, H.R. Sleeman, G.E. Sander, B.C.T. Solley, T. Rhys, C. Burbury, D. McDougal, J. Matsen) * Excursion to Daylesford, p.3 * History of the Ballarat School of Mines (continued) * The Soudan * Greater Melbourne * Image of J. Hopkinson, electrical engineer killed ascending the Alps * What is Science * Mining Notes (Pitfield Plains, Victoria United G.M.Co., Lithgow, Avoca, great Cobar, Mt Whycheproof) * Student's Association (women's franchise) * Sports Vol 2, No. 1, March 1899 * News and Notes * History of the Ballarat School of Mines (continued) * Notes of Victorian Geology, 1. Granites, by Thomas S. Hart * Sir William Crookes * Summaries and Notes from the Mining Journals * Students' Association * Sports * The Bush Assayer * Solubility of Gold-Silver Alloys in Potassium Cyanide * Correspondence Vol 2, No. 2, April 1899 * News and Notes (Smythesdale Excursion, New Buildings, A.S. Coyte, R.J. Allan) * History of the Ballarat School of Mines (Continued) * The New Students (J. Owen, A. Clayton Morrisby, A.S. Atkin, J. Alexander Reid, Alfred G. Johnston, L. Lowe, F.H. Dalton, W.M. Robertson, A. Hacke, H.L. Giles, W. Martin, E. Walshe, H.L. Krause, R. Sawyer) * Berringa by Oh'E Jay * Summaries and Notes from the Mining Journals * Mount Magnet to Victoria - A Long Bicycle Trip * 1898 Examination returns * Sports Vol 2, No. 3, May 1899 * Technical Education and the Proposed Affiliation of the Schools of Mines with the Melbourne University. * Laying of the Foundation Stone of the New Classrooms (now Administration Building). Alexander J. Peacock * News and Notes (Past Students - A.S. Lilburn, J.W. Sutherland, J. Richardson, E. Prendergast, J. Wallace, J. Kidd, J. Lake, Mathew Thompson), Coolgardie Exhibition. * Trip to Lal Lal * Students' Association * Summaries and Notes from the Mining Journals * Professor Henry Louis on Mining Education * Corrections Used in Chaining by C.W. Adams * The Black Horse Cyanide Plant * Sports * Completed List of 1898 Examinations Vol 2, No. 4, June 1899 * News and Notes * The Education Problem by D.N. McLean * A Few Hints on Histological Technique by Emil Gutheil * Summaries and Notes from the Mining Journals * Students' Association * A Visit to the Skipton Caves (Mount Widdern, Ormand Hill, volcano, Emu Creek, Mount Kinross, Mount Elephant, Mount Vite Vite, Mount Kinross, Mount Hamiston) * Mount Magnet To Victoria (cont) * The New Engines at the Ballarat Woollen Mills - includes image of the Compound 700 H.P. Engines constructed for the Ballarat Woollen Mills by Austral Otis Company and consulting engineers Monash and Anderson. * Sports * Original Poetry * Correspondence Vol 2, No. 5, July 1899 * News and Notes (E. Byron Moore, Visit to Britannia Gold Mine, J. Bryant, Visit to Last Chance Mine) * A Few Hints on Histological Technique (cont) by Emil Gutheil * Summaries and Notes from the Mining Journals * Professor Alfred Mica Smith (includes image) * Notes on Victorian Geology Part 2 The Trappean Rocks, by Thomas Hart * Origin of Diamonds * Hydraulic Mining by A.E.C. Kerr * Volcanoes by F.G. Bonney * Analytical Chemistry Notes by Daniel Walker * Some Things Out To Do * Sports * Correspondence Vol 2, No. 6, August 1899 *Summaries and notes from the Mining Journals * Some Regulations of the Academy of Mines at Freiberg * A visit to Mt Lyell Smelters * Professor Gilbert J. Dawbarn (includes image) * Air compressor and Transmission of Power by Compressed air by A.E.C. Kerr * Chemistry Notes by Daniel Walker * Mineralogical Notes, Ballarat by Thomas S. Hart * Kalgurli Gold Mines, W.A. * OUr New Lab Vol 2., No 7, September 1899 * Summaries and Notes from the Mining Journals * Some recent Steam Plants at Bendigo by Gilbert Dawbarn * Professor Thomas Stephen Hart (includes image) * Students Association * Notes on Victorian Geology by Thomas Hart * Centrifugal Pumps * A New Chum's Experience by E.M. Weston Vol 2., No 8, October 1899 * The institute of Chemistry Examinations * A New Method of Qualitative Chemical Analysis by Emil Gutheil * Steam Engine Valves and Valve-Gears by Gilbert Dawbarn * Daniel Walker (includes image) * Notes on Victorian Geology by Thomas Hart * Cyaniding Cripple Creek Tellurides (Metallic Extraction Company) * Notes on Two Ballarat Gravel Pumping Plants, G.A. Wilberforce (Eureka Jennings Co and Yarrowee Sluicing Co) * History of the School of Mines (concluded) Vol 3., No 1, March 1900 * A Journey from Natal to Mashomaland with the British Police * A Plea for Research * New Caledonia by C.A.M. Deane * Notes of Victorian Geology - Lower Palaeoroic Rocks by Thomas Hart * Mt Bischoff Mine and Mill * Summaries and Notes from the Mining Journals * Things we Eat and Drink * Farewell to A.S. Coyte Vol 3., No 1, March 1900 * Mining Education * Model Locomotive made by the apprentices of the Phoenix Foundry, p2 * Glimpses of Rhodesian Police Camp Life * New Caledonia (continued) * Summaries from the Mining and Engineering Journals * Boot and Saddle Vol 3., No 3, May 1900 * A Students' Common Room * Geological Excursion to Hardie's Hill * Notes on Victorian Geology by Thomas Hart * The Planet Venus by John Brittain * Summaries and Notes from the Australian Mining Standard * The Assay Ton * Zeehan Smelters * Electrical Notes by Ohe Jay * Trop of the Cricket Club to Stawell * Students' Association * Solid Hydrogen Vol 3., No 4, June 1900 * The Minister of Mines on Mining Education (Minister A.R. Outtrim) * Lal Lal Geology Trip (Thomas Hart) * Rifle Club now defunct, pg 3 * A Contribution to the Mining Geology of Kalgoorlie, W.A. by Ferdinand Krause (includes cross sections) (Wood's Point, Rand, Johannesburg, South Africa, Gaffney's Creek, Walhalla, Shady Creek, Sago Hill at Cardigan, Bunbury) * Summaries and Notes from the Australian Mining Standard (Buninyong Estate Mine) * Monthly Progress Reports of the Geological Survey * Electrical Notes by John M Sutherland (Telagraphone, phonograph, telephone receiver) * Students' Theatre Party (Gordon Todd, Ohe Jaeger, C.S. Wakley) * Opening of the New Buildings - Ministerial Speeches (Outtrim, W.H. Irvine, New Mining Laboratory, Old Chemistry Building, Battery, Model Mine) * Students' Association * Relief of Mafeking * A Critic Criticised * Things We Eat and Drink by Ohe Jay - Oatmeal, Coffee and Cocoa. Vol 3., No 5, July 1900 * Research * Adelaide Varsity Students at Ballarat * The Manchester-Liverpool Mono Railway * Students Association * *A Contribution to the Mining Geology of Kalgoorlie, W.A. by Ferdinand Krause (continued) (includes cross-sections) * Motive Power, address by Charles A. Parsons * Summaries and Notes from the Australian Mining Standard * Sugar Manufacturing by Sugna * Great Creswick Hydraulic Sluicing Plant (THomas Hart, Ballarat School of Mines Mining Class visit) * Reminiscences of a Students Life in Germany * Football - Ballarat School of Mines v Geelong Grammar School (Australian Rules Football) Vol 3., No 6, August 1900 * Cheap Mine Management * Library * Bendigo School of Mines, pg 3 * Notes on Ore Dressing by T, Vincent, Manager The Zeehan (Tas) Silver-Lead Mines Ltd) * Motive Power * Notes on Broken Hill - Its Mines and Minerals by J. Williams * The Concert * Summaries and Notes from the Australian Mining Standard * The Dandy Duke's Dreadful Demise * The Road Race Vol 3., No 7, September 1900 * Michaelmas Excursion (Melbourne University, Prof Kernot, Applied Mechanics) * Injury to School Property * Return of E. Ditchburn (Boer War) * Mt William Gold-Field visit, pg 3 * The Stoping of Wide Lodes by J.V. Lake (includes cross sections) * Summaries of Notes from the Australian Mining Standard * Notes on Broken Hill Part 2- Its Mines and Minerals by W.J. Williams * Motive Power from the Waves * Electrical Notes * Some Account of Italian Mining (Sarinia, Sicily, Peidmont, Lombardia) by Candido Maglione * Students Association * Should Women Have the Vote by Frank Bessemeres * The School Theatre Parly * Past Students * Poetry * Football * Surveying Rules Vol 3., No 8, October 1900 * Ballarat School of Mines Associateship * An Engineering Laboratory * Students' Practical Work * Notes on Broken Hill Part 3 by W.J. Williams * The Lake View Consols by F.S. Earp - Battery Treatment of Sulpo-Telluride Ore * Neglected Mineral Fields - Eurowie and Warrata * A Glimpse Ahead * News and Notes * A.W. G. McPherson, Boer War * Students Association * Ballarat School of Mines Melbourne Excursion to the Government Electric Lighting Station, Austral-Otis Co, Working Mens College * Ballarat School of Mines Concert in Aid of Soldiers Statue Balance Sheet * Football * Cricket Vol 3., No 8b, November 1900 * Position of the Ballarat School of Mines with Regards to Mining Education * Age Limit * Entrance Examination * Presentation t0 Professor Alfred Mica Smith * Image of a Group of Old Ballarat School of Mines Students in Coolgardie and Kalgoorlie. * Students Association Vol 4., No 1, March 1901 * Espirit De Corps * A few Notes on the Testing of Explosives * Round About Inverell, NSW by F. and J. Mawl * On the Choice of Drawing Instruments * Summaries and Notes From the Technical Journals * Annual Examinations 1900 * New Students * Sporting Notes * The Vale of Coolgardie Mine, Bonnievale, W.A. by G. Stephen Hart * News and Notes (Kerr Grant, C.L. Nash, R. Gordon Todd, Vial) * Editorial Notices Vol 4., No 2, Second Term 1901 * The Metallurgical Treatment of Sulpho-Telluride Ores by L.W. Grayson * Some Metallurgical Difficulties of Aluminium * Diehl's Sulphide Process by A.E. C. Kerr * A Californian Gold Mine by A.E. C. Kerr * New Express Locomotives for the Victorian Government (Phoenix Foundry) * An Excursion to Geelong (Electric Light and Traction Company of Australia) * The Linkenback Table for our New Mining Laboratory (Humboldt Company of Colgne) * Death of Thomas Bath * The Late Alfred G. Johnson (Boer War) * An Introduction to Natural Science by Emil Gutheil * The First Annual School Sports Meeting * Concert in Aid of Magazine Funds * The Men That Made the Concert (C.E. Denniston, W.H. Chandler, Mr White, William Litte Jnr, Marriott, Giles McCracken) * Sports * News and Notes Vol 4., No 2, Third Term 1901 * Bagging-Up - A Sketch * Concentration of Difficult Silver-Lead Ores * Estimation of Chlorine, Bromine and Iodine by D. Runting * Summaries of Notes from teh technical Journals * Notes on the Use and Care of Platinum Ware Common Sense * The Machinery at the Tasmania Gold Mine, Beaconsfield, Tasmania * Mining at Walhalla - The Long Tunnel Mine * Past Students * Mapping our of Agricultural Areas, etc, In Dense Vine Lands, North Queensland by R.A. Suter * News and Notes * Concert Balance Sheet e.m. weston, robert brough smyth, mcdougall, bruce, charles burbury, harrie wood, graham j. hopwood, emil gutheil, daniel walker, thomas hart, thomas stephen hart, m. hacker, schnitzler, f.a., ditchfield, l.h, alfred e.c. kerr, charles harvey, campbell, joseph bryant, campbell & ferguson, gilbert j. dawburn, irving, g.b., kerr, a.e.c., john walter sutherland, william robertson, herbert l. krause, alfred mica smith, binh pham, crosbie, d. jack, ditchburn, j., james hiscock, alfred johnston, reid, j.a., kidd, john, james bonwick, james, j.p, overall, d, e.h salmon, gaynor marquand, williams, w.w., williams, william, deane, c.m., vincent, tom, phillips, g.e., hart, d.w., jarnail suingh, rowlands, e., ferdinand m. krause,, easterby, f.l, parsons, r.g., partington, j.r., vial, s.b., meadows, h, atkins, arthur, john braisted burdekin, w.h. corbould, ditchburn, john, hill, john, otto e. jager, mcpherson, g.t, nicholls, c, thom, j.m., crafter, stewart, john brittain, peter lalor, hardy - commissioner, thomas bath, alf johnston, charles campbell, nash, llewellyn, watson, m.a, gardener, eddie, adamson, s.g, alford, l.c, allen, r.j, arthur, d.w.b., burge, a., willia, cairncross, cooper, i, maurice osric copland, maurice copland, dickinson, s., doepel, dunstan, john, loveday dunstan, eeles, terri, flegeltaub, israel, fletcher, a, fyrar, peter, kerr grant, w.kerr, green, gary, betty harris, harris, c.m., hay, a.l., hearn, hill, martin, james, david, johnston, alfred g, kilner, marion, kingston, thomas, lewin, f.c.k., lilburne, arthur m, linahan, colin, macready, w.h, major birlefco, markwald, henry, mccaffrey, mcfarlane, kaye, mciver, s.k, mellins, b, morton, felicity, w. kenneth moss, ken moss, nash, c.w., nash, neville, nickolls, berkeley, osborne, percy, philp, e., playford, william, reid, e, roberts, gordon, ross, f.c., royce, phillip, sawyer, basil, stewart, r.c., todhunter, i, vaisey, a., vincent, john, vinden, sue, wakley, cecil, watt, james, westcott, lewis, charles w. whyte,, vial, s browning, ballarat school of mines students in coolgardie and kalgoorlie, coolgardie, kalgoorlie, claude maitland, a.l. hay, a.s. lilburne, latham watson, arthur kildahl, thomas copeland, f.a. moss, w.a. hearman, cardoc james, alexander fraser, e.o. watt, g.m. roberts, j.j. dunstan, h.v. moss, j.a. hill,, john dunstan, c.m. harris, william h. corbould, j.w. sutherland, ballarat photographic club, ballarat field naturalists club, ballarat field club and science society, photography, geology, excursions, last chance mine, tasmania gold mine, beaconsfield, tasmania, rand, south africa, mount lyell, ballarat school of mines student excursion to mount lyell, h.l. krause, ferdinand krause, krause, hardie's hill, hardie's hill excursion, lal lal, lal lal excursion, lal lal geology excursion, smythesdale, smythesdale excursion, soudan, south african miners, south star mines, wynne and tregurtha battery, ananconda copper mining, arizona copper mining, boiler plates, british guinea, butte copper smelter, daylesford geology camp, daylesford excursion, diehl process, electric power house ballarat, electric pumps, geelong rope factory, gympie, golden horseshoe estate, c johnstone, jack nichol, c. macgennis, alec saunders, alfred g. johnstone, graeme jolly, william purdie, john mann, maxwell l gaunt, sale school of mines, freiberg school of mines, schools of mines, railway locomotive -
Federation University Historical Collection
Book - Ledger, Ballarat Technical Art School and Ballarat School of Mines Rough Cash Book, 1896-1901, 1896-1901
The Ballarat Technical Art School was a division of the Ballarat School of MinesA hard covered ledger with marbled cover and brown tape spine. It includes students names. A selection of names can be found in the keywords.ballarat technical art school, frank young, r. hager, g.w. kelly\drawing, carpentry, smelting, treatment, assay, w. wilson yong, treatment of pyrites, g.m. vare, alfred seely, t. trengrove, w. pearce, c.v. day, john heinz, m. ditchburn, d. ditchburn, w. baragwanath, g. cornell, chemistry, w. wardle, j.j. carroll, julia carroll, h. murphy, d.m. lenehan, joh caley, h. fleahy, alfred gordon, effie dulfer, b. lloyd, p. papenhager, h.j. waller, k. malcolm, esther daniel, john watson, harry leggo, r. john allan, basil reid, e. wasley, w. richard, edgar lamb, rita webb, sophia mccartney, arnold cowdell, thomas glover, m. hamburger, r. allan, r.w. holmes, a. dobbie, a. slade, w. pepper, r. gilpin, w.a. gossman, james a. bass, w.t. bass, thomas lynch, stanley batten, murial hart, essie herbert, david o. nightingale, george p. hayes, j.a. powell, w. amor, c.f. wilson, bertram g. wheal, thomas wade, h. woodward, v. symons, robert j. allan, thomas woolcock, john w. williams, r. shand, william caldwell, charles lyons, ruby webb, a. trehowan, nicholas white, thomas commons, otto rieglhuth, james kidd, james bass, justus angwin, john munro, james ronaldson, a.b. osborne, g.j. boudry, john sprague, leslie c. langsford, john don, waller e. hearman, j.c. pickford, edwinn penn, w.g. price, thomas mann, william brokenshire, john blayney, arthur mccooey, samuel walmsley, matilda lees, e.w. campbell, ernest wiliams, william john pearce, w.l. bailleu, thomas proctor, daisy ditchburn, maurice hamburger, james dando, nelson humphrey, james pyke, james c. pickford, john coad, george richard pratt, ferguson boyce, ernest whettle, william lamb, john cawley, christina watson, ivor davies, percy la gerche, norman gaunt, william bolte, leonard p. seal, alex young, george penny, w. caircross, harold frew, robert allan, james h. holst, george green, herbert semmens, john ronaldson, william robinson, james paterson, walter douglas, louisa roberts, james swenson, austin woods, herbert hillman, william cairncross, harry blyth, john craford, william h. callister, clare gartery, daisy batten, j. attenborough, herbert o'neilk, j.f. lynch, fred holst, a. doepel, horace giles, john perry, samuel morrow, thomas hawthorn, george britnall, alan j. acton, jessie cantwell, franci a. horsfall, william stubbs, john sutherland, percy russell, richard walsh, oliver jager, garfield bolton, thomas vincent, james holst, j.a. hill, william charles hughes, a. vale, james lonie, karl moore