Showing 6970 items
matching square
-
 Eltham District Historical Society Inc
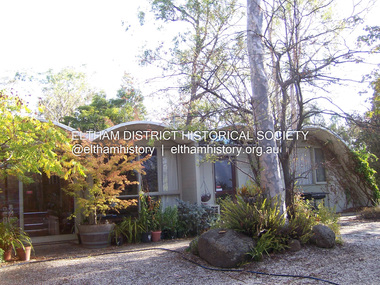
Photograph - Digital Photograph, Marguerite Marshall, Rice House, 69 Ryans Road, Eltham, 27 March 2007
Built in 1953, the Rice House was leading Melbourne architect Kevin Borland's first commssion and was one of two houses of its kind. The design of the shell-like structure was inspired by the Arch of Ctesiphon, built in the second century south of Baghdad. Cement with a waterproofing agent was applied in layers to a form of regularly spaced timber arches covered in hessian. This ctesiphon system was developed in the United Kingdom by engineer J.H. de Waller in 1947. Commissioned in 1951 by Harrie and Lorna Rice, after Harrie, then an art student, met Borland at The Age Small Homes Service. Borland suggested they buy land in Eltham because at that time it was the only council in Melbourne that would grant a permit for such an innovative house. Covered under Victorian Heritage. Published: Nillumbik Now and Then / Marguerite Marshall 2008; photographs Alan King with Marguerite Marshall.; p157 Inspired by an ancient arch in Iraq, a house stands on top of a hill in a private position, off Ryans Road, Eltham. One of only two houses of its kind, it was leading Melbourne architect Kevin Borland’s first commissioned house, which he built in 1953. The shell-like structure, partially screened by giant trees and cacti, was inspired by the Arch of Ctesiphon south of Baghdad, built in the second century.1 Cement with a waterproofing agent was applied in layers to a form of regularly spaced timber arches tightly covered by hessian. This ctesiphon system was developed in the United Kingdom by engineer J H de Waller in 1947. This house was the first of three such structures built in Victoria, of which only one other remains, although substantially altered.2 It is the Wood House and supermarket, at the corner of Cleveland Road and High Street Road, Ashwood, designed by Robin Boyd in 1952. The Rice House demonstrates Kevin Borland’s innovative and experimental work. It is an outstanding example of the post-war period of experimentation in domestic architecture in Melbourne – by Robin Boyd, Kevin Borland and others – for The Age Small Homes Service from 1947 to 1953. This was partly an expression of late-Modernism and also necessitated by the post-war shortage of building materials. In Eltham, the post-war shortage of building materials largely resulted in mud-brick houses. Examples of Borland’s public work include contributions to the Olympic Swimming Pool in Melbourne and the Preshil Junior School in Kew. After more than 50 years of living in the house, Harrie and Lorna Rice still love it. Facing north-east with large windows overlooking the garden and two courtyards, it is well lit and benefits from a through breeze. The couple commissioned the extraordinary house after Harrie, then an art student, met Borland in 1951 at The Age Small Homes Service. Harrie was so impressed by the recently graduated Borland’s enthusiasm, that he asked him to design them an interesting house for a low budget.3 The unusual design presented several hurdles for the young couple before they could construct it. Borland suggested that they buy land in Eltham, because at that time it had the only council in Melbourne that would allow such an innovative house. Another hurdle was to gain finance for this remarkable house. The State Savings Bank Manager refused finance on the grounds that it was ‘unliveable’ and a ‘disgrace’. Fortunately, through a family connection, the couple borrowed money from the National Bank. But they discovered years later, that the bank’s evaluation stated the two ‘concrete sheds’ were of no value!4 The house built in off-white concrete, consists of two sections. The main house has four arches supported by brick and concrete walls that create a series of inter-connected rooms. Inside, the ceiling follows the roofline. Originally this section was only ten square metres, because of building restrictions at the time. But in 1973 Borland added two rooms and a carport. The second structure of two arches was originally a garage and a studio for art teacher Harrie Rice. To accommodate the growing family, in the mid 1950s, Borland converted the second structure into two children’s bedrooms, a kitchenette, a bathroom and a living room. The two structures were originally linked by a covered way of suspended draped-concrete, but this collapsed in the 1980s. The design has several maintenance problems. Cracks developed where two halves of the shells were joined. Then the material sprayed over the cracks became brittle, causing leaks. Fortunately Harrie found another material he could use. The valleys between the arches collect water, requiring annual painting with a waterproof material to prevent leaking. Lorna framed the house with native and exotic plants, which provide privacy and as a bonus, the garden attracted the rare Eltham Copper Butterfly.This collection of almost 130 photos about places and people within the Shire of Nillumbik, an urban and rural municipality in Melbourne's north, contributes to an understanding of the history of the Shire. Published in 2008 immediately prior to the Black Saturday bushfires of February 7, 2009, it documents sites that were impacted, and in some cases destroyed by the fires. It includes photographs taken especially for the publication, creating a unique time capsule representing the Shire in the early 21st century. It remains the most recent comprehenesive publication devoted to the Shire's history connecting local residents to the past. nillumbik now and then (marshall-king) collection, eltham, rice house, ryans road -
 Flagstaff Hill Maritime Museum and Village
Photograph - Vessel, Sailing Ship, Original image recorded between 14 Nov 1908 and early Jan 1909
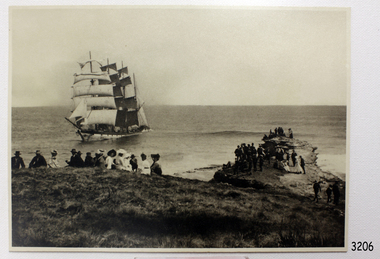
The photograph represents the original complete landscape (southerly) view of the FALLS OF HALLADALE shipwreck which occurred at 3 am on the 14th of November 1908. This image includes three groups of well-dressed Edwardian sightseers on the clifftop and a rocky headland. Subsequent reproductions of this well-known image have been cropped to a striking portrait view, emphasising the vertical line of the masts and sails of the sailing ship, and excluding the groups of sightseers on the adjoining headland. The small girl in the foreground and the loose topsail on the foremast are common to both the landscape and the cropped portrait images of this memorable scene. The photograph was taken at an early stage of the ship’s final days, somewhere between the date of her grounding in mid-November 1908 and early January 1909, when salvagers began dynamiting her masts to get to the cargo in her holds. The heavily laden FALLS OF HALLADALE was 102 days out of New York when the swell of the Southern Ocean lifted her onto the rocks near Peterborough. At the time she was sailing at six knots in a light breeze, her sails fully set and on an ENE tack. Mist over the land created an optical illusion of a distant horizon and the crew believed they were at least ten miles off the coast. When high cliffs loomed up out of the darkness it was too late in the light conditions to change tack or let go the anchors. Within minutes of running aground, her decks were awash and the holds filling with water. Captain Thomson and his 29 crew took to the boats, leaving the vessel stranded on the reef, looking awkwardly graceful in her predicament, firmly wedged between two parts of the reef and with all her square-rigged sails still set, FALLS OF HALLADALE provided a landmark visible for miles. Over the following two months, she attracted hundreds of sightseers, including contemporary photographers. A Court of Marine Inquiry at Melbourne on 30 November 1908 found Captain Thomson guilty of a gross act of misconduct ― in that he carelessly navigated the ship, neglecting to take proper soundings and failing to place the ship on the port tack before it was too late to do so. His Master’s Certificate of Competency was suspended for six months and he was ordered to pay £15/15/- toward the costs of the inquiry. It was an expensive outcome for the captain but his error provided many weeks of inexpensive entertainment for coastal residents and visitors to Peterborough. To judge from the standard of formal dress in this photograph, visiting the wreck was considered a special occasion as well as a popular one. Falls of Halladale: - The iron-hulled, four-masted barque, the Falls of Halladale, was a bulk carrier of general cargo. She left New York in August 1908 on her way to Melbourne and Sydney. In her hold, along with 56,763 tiles of unusual beautiful green American slates (roofing tiles), 5,673 coils of barbed wire, 600 stoves, 500 sewing machines, 6500 gallons of oil, 14400 gallons of benzene, and many other manufactured items, were 117 cases of crockery and glassware. Three months later and close to her destination, a navigational error caused the Falls of Halladale to be wrecked on a reef off the Peterborough headland at 3 am on the morning of the 15th of November, 1908. The captain and 29 crew members all survived, but her valuable cargo was largely lost, despite two salvage attempts in 1908-09 and 1910. ABOUT THE ‘FALLS OF HALLADALE’ (1886 - 1908) Built: in1886 by Russell & Co., Greenock shipyards, River Clyde, Scotland, UK. The company was founded in 1870 (or 1873) as a partnership between Joseph Russell (1834-1917), Anderson Rodger and William Todd Lithgow. During the period 1882-92 Russell & Co. they standardised designs, which sped up their building process so much that they were able to build 271 ships over that time. In 1886 they introduced a 3000 ton class of sailing vessel with auxiliary engines and brace halyard winches. In 1890 they broke the world output record. Owner: Falls Line, Wright, Breakenridge & Co, 111 Union Street, Glasgow, Scotland. Configuration: Four masted sailing ship; iron-hulled barque; iron masts, wire rigging, fore & aft lifting bridges. Size: Length 83.87m x Breadth 12.6m x Depth 7.23m, Gross tonnage 2085 ton Wrecked: the night of 14th November 1908, Curdies Inlet, Peterborough south west Victoria Crew: 29The shipwreck of the FALLS OF HALLADALE is of state significance: Victorian Heritage Register No. S255. The Falls of Halladale shipwreck is listed on the Victorian Heritage Register (No. S255). She was one of the last ships to sail the Trade Routes. She is one of the first vessels to have fore and aft lifting bridges. She is an example of the remains of an International Cargo Ship and also represents aspects of Victoria’s shipping industry. The wreck is protected as a Historic Shipwreck under the Commonwealth Historic Shipwrecks Act (1976).Black and white photograph on cream-coloured backing card and in good condition. Description of Image: Quadrant 01, vessel with full set of sails perched on reef with stern submerged; Quadrant 02, predominantly clear sky over flat calm sea; Quadrant 03, two groups of standing sightseers on rocky promontory with three individuals approaching from far left foreground; Quadrant 04, fifteen well dressed sightseers seated on grassed cliff top including one child and six women. There is a deliberately obscured inscription in white ink along lower border or foreground of photograph.Letters in upper case and white contrast stretching across the grassed foreground of photograph have been smudged over by development process and are largely indecipherable. However rear of backing board of identical but reduced image Reg. No. 3207 bears pencilled words “Mrs Francis” and “Wreck of ‘Falls of Halladale’ Peterborough 1908”, which accords with what remains of the initial inscription.flagstaff hill, warrnambool, shipwrecked-coast, flagstaff-hill-maritime-museum, maritime-museum, shipwreck-coast, flagstaff-hill-maritime-village, falls of halladale, shipwreck spectacle, shipwreck photograph, peterborough reef, edwardian sightseers, russell & co. -
 Ballarat Tramway Museum
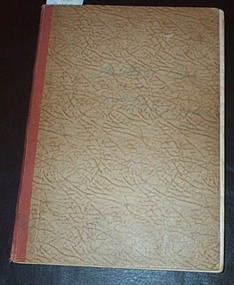
Book, H.P. James, "In Other Days", late 1930's
ESCo Employee Hours Work Record book that has been used by an ESCo/SEC inspector, H. P. James as a record / note book for his personal collection or papers or journal titled "In Other Days". Book sewn with string in 36 page sections, blank end papers, board covers with stipple paper out sides and Rexene cloth binding. Comprising plain paper end papers and 104 printed pages (52 leaves), with each sheet printed in black on feint ruled paper for recording the hours worked and other details of drivers and conductors employed by ESCo. Printed for daily use, with Day and date page headings - made out for the 1930's. Text generically printed feint ruled paper. Images: Book - i1 Inside front cover - i2 Members Certificate - i3 Photo of H.P. James and index page - i4 Has been used to gather mementos such as photos, articles, newspaper clippings, letters and other miscellaneous documents on Ballarat local history. Newspaper cuttings etc often have side notes written by Mr. James. Inside front cover has certificate recording Mr. James membership to the Ballarat Historical Society (on Australasian Historical Record Society paper) for 1937 - 1938. A side note records Mr. James elected as Vice President in 1939. Receipt signed by Edward Crimmins (See Reg. Item 2486) Has a table of contents for pages 1 to 65. Opposite is a photograph of Mr. James dressed for the Ballarat Tramways Social Club function - See Reg. Item No. 506 Primary items are: 1 - Newspaper cutting "A stroll along Bridge St. 50 years ago" - Nathan F. Speilvogel. 3 - Newspaper cutting "What I Remember of Early Ballarat" - James Sainsberry. 4 - Newspaper cutting "Magnet that Made Ballarat - New Monument Marks Gold Discovery" 7 - Newspaper cutting "Romance of a Ballarat Street Block" - Speilvogel 9 - Newspaper cutting "Sixty years of Dana St. School"- Speilvogel 11 - Newspaper cutting "The White Flat - its Transitions of Service - Historical Review" - J. Hargreaves 15 - Newspaper cutting "Memories of Russell Square - Fireman's Carnivals" - James 16 - Notes on the Alfred Hall 17 - Newspaper cutting - "Alfred Hall" - James 21 - Letter re Russell Square dated 24/2/38, J. McLeish 23 - Newspaper cutting "The First Train to Ballarat" 25 - Newspaper cutting "Story of Ballarat's Horse Trams 1887 to 1913", James - see Reg. Item 2489. 27 - Photos and Newspaper cutting of items re horse trams, and photo of ESCo No. 18 - See Reg. Items 2490, 2491 and 2492. 28 - ESCo opening ticket (See other Reg. Items 608 for examples of this) ticket No. 1595. 29 - Newspaper cutting "Story of Ballarat's Electric Trams", James, See Reg. Item 2493. 30 - Poster - SEC - Ballarat "The New System of Fares and Sections" - 3/10/1997 - See Reg. Item 2494. SEC - Tourist Ticket - See Reg. Item 2495 ESCo - 3d check ticket - See Reg. Item 2496 31 - Tickets and handwritten notes - with reference to page 51 ESCo 1d - See Reg. Item 2497 (2 No.) ESCo/SEC? - lunch hour weekly ticket - See Reg. Item 2498 ESCo/SEC? - Morning and evening weekly ticket - See Reg. Item 2499 ESCo/SEC? - 3d Adult Transfer - See Reg. Item 2500 ESCo/SEC? - 2d child Transfer - See Reg. Item 2501 ESCo - 1.1/2 child ticket - See Reg. Item 2502 ESCo - 3d Adult ticket - See Reg. Item 2503 Extract of an item titled "History of Ballarat Tramways", SEC Magazine, Feb. 1939 - See Reg. Item 2504 2d ESCo token (See other reg items 1794 and 1943 for details of this object) - sewn into page. 33 - Handwritten notes "Alfred Hall" 35 - Handwritten notes "Russell Square" 36, 37 - miscellaneous cuttings from the Courier for 1939 and 1940 39 - Newspaper cutting "South Street Band Contests" - cutting dated 27/10/1932. (See images - i5 to 41, 43, - ditto - contest results 44 - Photo of the Tramway Shelter in Sturt Street being removed - Courier dated 18/12/1923 - see Reg Item 2523. 45 - Extract of April 1938 from SEC Magazine, photos of the launch of the illuminated Ballarat Centenary tram - see Reg Item 2524. 47 - Newspaper cutting "Peeps into the Past" 48 - Listing of "Members of Returned Soldiers Band", Ballarat, dated 18/11/1919. 49 - Newspaper cutting "Ballarat, The Home of the Band Contests", dated 27/10/1932. 51 - Handwritten notes - "Tram Fares methods of collection" - See Reg. Item 2505. 53 - Newspaper cutting "100 years ago", Port Phillip Herald for 1840. 54 - Black and white photo of a gathering of people (tramway?) at the Showgrounds - See Reg. Item 2506 55 - Six black and white photos with handwritten notes ESCo 19 or 20 - See Reg. Item 2507 Group of ESCo employees by ESCo tram - See Reg. Item 2508 Photo of ESCo employee, Si Barker - See Reg. Item 2509 Photo of ESCo company bus - See Reg. Item 2510 (See also Reg Item 3813) Photo of No. 25 - Barkly St - See Reg. Item 2511 Photo of two ESCo employees - See Reg. Item 2512 56 - Loose newspaper cutting "San Francisco Struggle Buggies" - cable trams - The Age 15/3/1947 57 - Letter from Mr. Pringle of ESCo to Inspector James and Handwritten notes on ESCo management - See Reg. Item 2513 Handwritten notes on the token systems - See Reg. Item 2514 59 - Page titled "Bundy clocks and meters" but no notes 61 - Hand drawn map of Ballarat tramways with notes on tracks - horse, SEC and ESCo and loops - See Reg. Item 2515. 63 - Miscellaneous newspaper cuttings and photo of the Arch of Victory 64 - Photo of W. J.K. Dunstan ??? (has notes written on back, but difficult to read)* - Notes on rear of photo p64. "49 years in service W.J.K. Dunstan Office Manager Ballarat Branch Retired 18/3/46" 65 - Newspaper cutting "Old Victorian Schooldays, letters and reminiscences by past scholars". 67 - Newspaper cuttings - photo of Ballarat Choral Union and Urquhart St. school 69 - Newspaper cutting "Saint with a top hat" 71, 73 - Newspaper cutting "District Mining Disasters of By-Gone Days" - John Hargreaves 75 - Newspaper cutting "The Ballarat Courier" banners for 2/9/1939 - outbreak of World War Two - normal and a special edition. 77, 79 - Newspaper cutting "My Youth in Ballarat" - T.P. Long. 81 - Two photos and handwritten notes showing trams in Sturt St and the line up of horse trams - See Reg Item 2516. 83 - Newspaper cutting "Theatrical History - The Charlie Napier" - Speilvogel 85, 87 - Newspaper cutting "Story of the Eureka Stockade Monument" - Speilvogel 89 - Newspaper cutting "The Beginning of Buninyong" - Speilvogel 91 - Newspaper cutting "St. David's Day" 93, 95 - Newspaper cutting "From 1856 to 1894, Ballarat's Foremost Citizen Major (William Collard) Smith Recalled - J. Hargreaves. 97 - Newspaper cutting "All Electrical Exhibition / Ballarat's Electric Supply, its development" - 1936, See Reg. Item 2517. 98 - Loose photo of the ESCo Power station chimney and steeplejacks - See Reg. Item 2518. 98 - Loose sheet of paper about the origin of the ESCo trams - See Reg. Item 2525. 99 - Newspaper cutting - about Electricity in Ballarat and tramway services, and handwritten notes on ESCo Inspectors - See Reg. Item 2519 100, 101 - Newspaper cuttings - "Mr. Melbourne Day by Day" cartoon series and the artist's death notice dated 22/8/1939. 102 - Poster - Dana Street School Jubilee Re-union, has N. Speilvogel and H. James as joint secretaries. 103 - Newspaper cutting of various photos and a scene of a gold train at Bendigo 104 - Newspaper cuttings - Bob Menzies and Adolph Hitler and backs of Melbourne tram tickets - "School Boy Howlers". 105 - Letter in an envelope to H.P. James dated 11/10/1937, by a person about the building of the tram sheds at Wendouree - See Reg. Item 2520. Newspaper cutting of the opening of the tramway to Lydiard St. North from Gregory St. - See Reg. Item 2521 Loose item - 1/- SEC Tourist Ticket No. A2676 - See Reg. Item 2522.Many in pencil and inktrams, tramways, h.p. james, esco, horse trams, ballarat, civic history -
 Ballarat Heritage Services
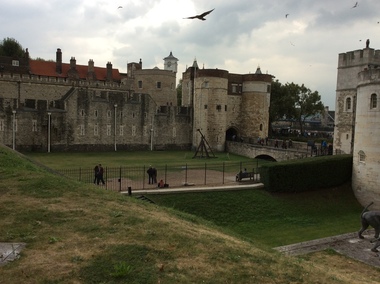
Digital photograph, Dorothy Wickham, Tower of London, 2016
The Tower of London, officially Her Majesty's Royal Palace and Fortress of the Tower of London, is a historic castle located on the north bank of the River Thames in central London. It lies within the London Borough of Tower Hamlets, separated from the eastern edge of the square mile of the City of London by the open space known as Tower Hill. It was founded towards the end of 1066 as part of the Norman Conquest of England. The White Tower, which gives the entire castle its name, was built by William the Conqueror in 1078, and was a resented symbol of oppression, inflicted upon London by the new ruling elite. The castle was used as a prison from 1100 (Ranulf Flambard) until 1952 (Kray twins),[3] although that was not its primary purpose. A grand palace early in its history, it served as a royal residence. As a whole, the Tower is a complex of several buildings set within two concentric rings of defensive walls and a moat. There were several phases of expansion, mainly under Kings Richard the Lionheart, Henry III, and Edward I in the 12th and 13th centuries. The general layout established by the late 13th century remains despite later activity on the site. The Tower of London has played a prominent role in English history. It was besieged several times, and controlling it has been important to controlling the country. The Tower has served variously as an armoury, a treasury, a menagerie, the home of the Royal Mint, a public record office, and the home of the Crown Jewels of England. From the early 14th century until the reign of Charles II, a procession would be led from the Tower to Westminster Abbey on the coronation of a monarch. In the absence of the monarch, the Constable of the Tower is in charge of the castle. This was a powerful and trusted position in the medieval period. In the late 15th century the castle was the prison of the Princes in the Tower. Under the Tudors, the Tower became used less as a royal residence, and despite attempts to refortify and repair the castle its defences lagged behind developments to deal with artillery. The peak period of the castle's use as a prison was the 16th and 17th centuries, when many figures who had fallen into disgrace, such as Elizabeth I before she became queen, Sir Walter Raleigh, and Elizabeth Throckmorton were held within its walls. This use has led to the phrase "sent to the Tower". Despite its enduring reputation as a place of torture and death, popularised by 16th-century religious propagandists and 19th-century writers, only seven people were executed within the Tower before the World Wars of the 20th century. Executions were more commonly held on the notorious Tower Hill to the north of the castle, with 112 occurring there over a 400-year period. In the latter half of the 19th century, institutions such as the Royal Mint moved out of the castle to other locations, leaving many buildings empty. Anthony Salvin and John Taylor took the opportunity to restore the Tower to what was felt to be its medieval appearance, clearing out many of the vacant post-medieval structures. In the First and Second World Wars, the Tower was again used as a prison, and witnessed the executions of 12 men for espionage. After the Second World War, damage caused during the Blitz was repaired, and the castle reopened to the public. Today the Tower of London is one of the country's most popular tourist attractions. Under the ceremonial charge of the Constable of the Tower, it is cared for by the charity Historic Royal Palaces and is protected as a World Heritage Site.(Wikipedia) A World Heritage Site is a landmark which has been officially recognized by the United Nations, specifically by UNESCO. Sites are selected on the basis of having cultural, historical, scientific or some other form of significance, and they are legally protected by international treaties. UNESCO regards these sites as being important to the collective interests of humanity. More specifically, a World Heritage Site is an already classified landmark on the earth, which by way of being unique in some respect as a geographically and historically identifiable piece is of special cultural or physical significance (such as either due to hosting an ancient ruins or some historical structure, building, city, complex, desert, forest, island, lake, monument, or mountain) and symbolizes a remarkable footprint of extreme human endeavour often coupled with some act of indisputable accomplishment of humanity which then serves as a surviving evidence of its intellectual existence on the planet. And with an ignoble intent of its practical conservation for posterity, but which otherwise could be subject to inherent risk of endangerment from human or animal trespassing, owing to unmonitored/uncontrolled/unrestricted nature of access or threat by natural or accelerated extinction owing to local administrative negligence, hence it would have been listed and demarcated by the United Nations Educational, Scientific and Cultural Organization (UNESCO) to have been identified or recognised and officially christened and internationally elevated through multilateral declaration by UNESCO as a universally protected zone. [1] The list is maintained by the international World Heritage Programme administered by the UNESCO World Heritage Committee, composed of 21 UNESCO member states which are elected by the General Assembly. (Wikipedia)The Tower of London is a UNESCO world heritage site.tower of london -
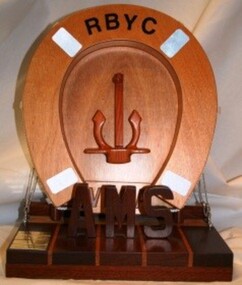 Royal Brighton Yacht Club
Life Ring, Vega Trophy (Mounted Wooden Life Ring)
Vega Trophy (Mounted Wooden Life Ring) Donor: Graham Noel During World War II when the Germans occupied the Channel Islands the local people went through very severe food rationing and were on the verge of starvation. Near the end of the war, the Swedish ship Vega was allowed by the Germans to deliver several shipments of food to the civilian population, easing the critical shortages of food on the islands. Further background detail can be found below. Graham Noel was born on the Islands and lived there during this harsh period. The trophy is awarded to the winner of the Combined Division AMS Aggregate Series. First Winner: Under Capricorn, P. Bedlington 2005/06 Vega – Further historical background Early in the Second World War Jersey was declared “unarmed” and the German military took over, taking quite a few lives in the process, through strafing the main harbour and a few other places which they needlessly considered threatening. A considerable number of locals evacuated to England before the Germans arrived, but more than 60% of the population remained and endured 5 years of very strict and difficult conditions. Not only was the population unable to contact relatives in the UK or elsewhere, but very quickly they found themselves subject to harsh curfews, strictly rationed foodstuffs, no fuel for vehicles, radios confiscated, and homes and hotels commandeered by the military. The military demanded first pick of all foodstuffs and kept meticulous records of all livestock forcing farmers even to show newborn calves and piglets to them, then claiming the new arrivals for their dinner tables. However there are many stories of farmers outwitting their masters when twin calves or suchlike arrived! Lawbreakers were quickly dealt with, mostly with lengthy prison terms in Jersey, but the more serious crimes were punished by being sent to some horrible French prisons, or even some of the notorious German concentration camps. All local Jews were dispatched to concentration camps, and even English born families were similarly shipped through France and on to Germany. Sadly, a considerable number of those deported did not make it back safely to Jersey. In June 1944 the locals were delighted to hear that the Allies had invaded Normandy and very soon they could hear the battles as the Allies worked their way along the French coast. Little did they know they would still have to wait another 11 months for freedom, having to put up with a very demanding German occupation force which was still determined to obey Hitler’s order to “Defend the Channel Islands to the death”. Now that France was in Allied Hands the local military commanders were unable to supplement their food supplies from France and even harsher demands were made on the local population to ensure that all branches of their still very substantial military force were reasonably well fed. As well as the military, Jersey farmers had to provide food for the Allied POWs and the many “forced labourers”, mainly of Russian, Polish and Italian backgrounds who had been directed to the island to build all the concrete bunkers. This included an underground hospital, all this complying with Hitler’s orders to ensure that the Channel Islands would never again be part of Britain. Many requests by the Jersey authorities for Red Cross assistance were rejected, but finally in December 1944 they agreed and on 30th December the Red Cross vessel “Vega” (Swedish Registry) arrived and delivered parcels to the civilian population. These parcels contained a variety of foodstuffs supplied mainly by Canadian authorities, desperately needed medical supplies, flour, oils and soaps, as well as tobacco from New Zealand. Vega made a further 3 or 4 trips and most certainly eased the desperate situation being faced by the locals. In fact, it resulted in the locals having slightly better food supplies than the military and many local farmers tell stories of having to protect their stock from marauding soldiers. Understandably Churchill was reluctant to send in an invading force to retake the Channel Islands, but by May 1945 it was clear that the Third Reich was finished and on May 9th the German Military surrendered, without a fight, to a large British landing force. On a slightly lighter note … in January 1945 Jersey stonemasons were seen in the main town square repairing flagstones … the Germans had never noticed that the name “Vega” had been formed in those flagstones! As a side note Vega is the name of the brightest star in the universe. Furthermore, throughout the occupation, despite German law that demanded confiscation of all radio sets, punishable by long prison terms or deportation to Germany, there were still many sets being listened to. The locals had a well refined news system for the dissemination of news of what was happening in the outside world. vega, graham noel, ams, combined division, aggregate -
 Eltham District Historical Society Inc
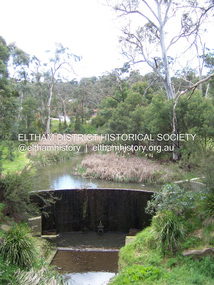
Photograph - Digital Photograph, Marguerite Marshall, Smith Dam, Karingal Drive, Eltham, 19 September 2006
The dam at the entrance to the Nerreman Gateway in Eltham was built according to an internationally acclaimed theory developed by the builder's father. In 1920, Victorian engineer B.A. Smith was awarded the American Society of Civil Engineers J. James R. Cross Gold Medal for his Technical Paper titled 'Arched Dams'. It was the first time this medal had been awarded outside the United States. The concrete arched dam across the Eltham West Drain was built in 1940 by B.A. Smith's son and engineer, D. B. (Bernie) Smith to water the 24 acre (9.75 ha) hobby farm owned by himself and new wife, Isa Smith. Upon completion of the dam a pump-house was constructed beside the creek but before the water could be pumped up the hill they had to dig a trench and lay 500m of 100mm water main to an elevated holding tank. The Smiths made the pump-house their home for several years until they constructed their home at the top of the hill overlooking Eltham and views extending to Kinglake. Following Bernie's death in 1983, Nerreman Park was subdivided between 1993 and 1995. Gordon Ford designed the landscaping and the pump-house was demolished. Covered under Heritage Overlay, Nillumbik Planning Scheme. Published: Nillumbik Now and Then / Marguerite Marshall 2008; photographs Alan King with Marguerite Marshall.; p137 The dam at the entrance to the Nerreman Gateway in Eltham, was built according to an internationally acclaimed theory developed by the builder’s father. In 1920, Victorian engineer B A Smith was awarded the American Society of Civil Engineers J. James R. Croes Gold Medal, for his Technical Paper titled Arched Dams. It was the first time this medal had been awarded outside America. An international example of the application of Smith’s work can be found in the design of the Hoover Dam on the Colorado River, Nevada, USA. Built between 1930 and 1936, it is recognised by the ASCE as one of ‘America’s Seven Modern Civil Engineering Wonders’.1 The concrete arched dam across the Eltham West Drain was built by B A Smith’s son and engineer, D B (Bernie) Smith. Bernie’s dam followed his father’s theory, having a curvature that takes maximum advantage of concrete’s great strength in compression. The water load is carried into the abutments because of this curvature, which permits a wall thickness of only 225 millimetres thick at its crest, despite the dam’s capacity of more than 4.5 megalitres. The Eltham dam was designed to water the 24 acre (9.75 ha) hobby farm belonging to newly married couple Bernie and Isa Smith. Bernie, from Armadale, and Isa, from a farm at Tyntynder near Swan Hill, were attracted to the hilly topography and the creek running through the property. It extended from Ryans Road, Eltham, to Karingal Drive, Montmorency and was adjacent to Meruka Park. The Smiths named it Nerreman Park using the Aboriginal word Nerreman meaning ‘River Bend’ as their creek had a pronounced bend.2 In 1940 the first thing Bernie did was to build a dam, and with Isa’s help, a pump-house, to secure a water supply for their cattle, pigs, chickens, orchard and vegetable gardens. It was also available for the fire-plugs, which they placed all over the property in case of bushfire. The couple built the pump-house beside the creek and installed a Tange three-plunger pump, which had originally supplied the City of Wodonga with water. But before the Smiths could pump water up the hill from the dam they had to dig a trench and lay about 550 yards (500m) of a four-inch (100mm) water main up to an elevated holding tank. The trench was dug with a single furrow plough drawn by an old draught horse. Living in rough conditions did not deter the Smiths, who made the pump-house their home, where they still lived when their first child was born in 1944. They later built their home at the top of their property overlooking Eltham, with magnificent views to Kinglake, the Dandenong Ranges and Melbourne. From 1946 it took them almost 20 years to complete the 36-square house with its 12-foot (3.6m) high ceilings. Material for the concrete roof and walls faced with sandstone, was ripped out of the ground on their property by plough pulled by tandem Clydesdale horses. Isa was a strong woman – two days before their second child was born – she set three huge sandstone boulders in place in the bottom wall of the garage. She also mixed all the cement for the house. A collapsed kitchen wall did not discourage her from rebuilding it in a week, while her husband was away working in the country. She later recalled: ‘We stood back to admire this beautiful wall we’d built and while we were looking at it, it came tumbling down’.3 Following Bernie’s death in 1983, Nerreman Park was subdivided, between 1993 and 1995. Local Gordon Ford designed the landscaping and the pump-house was pulled down. But the dam remains as a reminder of exceptional engineering4 – and of a remarkable couple.This collection of almost 130 photos about places and people within the Shire of Nillumbik, an urban and rural municipality in Melbourne's north, contributes to an understanding of the history of the Shire. Published in 2008 immediately prior to the Black Saturday bushfires of February 7, 2009, it documents sites that were impacted, and in some cases destroyed by the fires. It includes photographs taken especially for the publication, creating a unique time capsule representing the Shire in the early 21st century. It remains the most recent comprehenesive publication devoted to the Shire's history connecting local residents to the past. nillumbik now and then (marshall-king) collection, eltham, karingal drive, smiths dam, bernie smith, gordon ford, isa smith, nerreman gateway, nerreman park estate, dams -
 Bendigo Military Museum
Administrative record - COMPENDIUM WW1 - WW2, 4) A H Pettifer, Government Printer et al, 2) 14.2.1946; .3) 1.3.1919; .4) 30.11.1954 .5) 24.11.19? - WWI; .6) 31.10.1917; .7) 12.6.1917; .8) Page 1: 20.12.1915, Page 2: 10.12.1915, Page 6: 19.1915; .9) 10.9.1918; .10) 18.4.1919; .11) c.2.3.19?; .12) 18.9.1920; .14) post WWI; .15) 24.4.1920; .17) 18.4.1942; .18) 19.6.1943; .19) 18.3.1947; .20) 1944; .21) 1944; .23) 22.10.1941; .26) 13.9.1944; .27) 1.1944; .30) 7.3.1950; .31) 31.7.1944; .32) 16.4.1942; .33) 13.6.1946; .34) 6.5.1946; .36) a) & b) 3.11.1947; .37) 24.10.1951; .38) 24.9.1957; .39) 9.10.1957; .40) 19.2.1958; .41) 26.2.1958; .42) 1.3.1958; .43) & .44) 7.3.1958; .45) 25.2.1958; .46) 3.1.1948; .47) 26.2.1948; .48) 22.4.1958; .49) 24.2.1958; .50) 12.3.1958; .51) 6.1958; .52) c.Mar/Apr 1958; .53) 5.4.1958; .54) c.end WWII; .55) a.b. 13.6.1967; .56) 26.5.1967; .57) 18.2.1954
Herbert Trangmar Allan, refer 2755.4 for his extensive service history and wards. .2) Details gifting of a pair of Japanese binoculars to Col H T ALLAN by Pacific Island Regiment. .3) Certificate issued by Winston Churchill, Secretary of State for War (The War of 1914-1918), awarded to Capt H T ALLAN MC. .4) Herbert Trangman ALLAN born 5.1.1895 at Woolwich, NSW. Middle name misspelled, should be Trangmar not Trangman. .6) Congratulating H T ALLAN on receiving the Military Cross award for leading 2 companies which had lost officers during action on Passchendaele Ridge on 9.10.1917. .7) Describes life behind the lines whilst H T ALLAN's battalion has been resting for a month. Daily life consisted of training drills, sport & entertainment. Writer takes time to describe the countryside & weather. .8) Relate to H T ALLAN's military exam results & his promotion to 2nd Lieutenant in 1915. .9) To Herbert Allan's father, Mr P Allan detailing the citation for awarding of the Military Cross to Herbert ALLAN. Original citation appeared in the London Gazette,5.4.1918. .10) Form addressed to Capt H ALLAN MC, 17th Battalion stating his period of enlistment in the 1st AIF was to expire 26.5.1919. .11) Letter from Lord BIRDWOOD (General) to Herbert ALLAN in response to a letter received 19.11.19?. General BIRDWOOD expresses his opinions on difficulties the allied troops face in their fight against the Japanese. .12) Letter to Capt H T ALLAN advising of MID oak leaves sent to him. Details guidelines for attaching oak leaves to both the larger Victory Medal & the small service dress medal. .13) Form details H T ALLAN's WWII Army No, Rank, Unit & Decorations & Medals held. The form has not been signed & dated. .14) Details service record of Lt Col H T ALLAN NX12229. Includes military service from 1912 - 1944, schools & courses attended, decorations, promotions & overseas service. .16) Form issued to H T ALLAN on 15.12.1939 granting permission to leave New Guinea for Australia & return within a period of 12 months. Issued by Customs Office in Salamaua. Lists H T ALLAN's age as 44, height 5' 10" & occupation. .17) Letter from Major General MORSHEAD GOC, AIF (ME) to Major H T ALLAN, OBE, MC congratulating him on being awarded the OBE for outstanding service at Tobruch. .18) Letter from Major General MORSHEAD to Major H T ALLAN, OBE, MC replying to ALLAN's letter of 15.6.1943. MORSHEAD is congratulating ALLAN on his appointment to New Guinea Force, also acknowledges his excellent service record. .19) Letter acknowledges H T ALLAN's resignation from the Office of Production Member of the Australian New Guinea Production Control Board, effective from 28.8.1946. .20) Major General WINDEYER commanded the 20th Brigade from 1942-1946. .22) Card sent from the CO of the 3rd Australian Anti-Tank Regiment. .23) Menu for Farewell Dinner held in the Officer's Mess of the 20th Infantry Brigade, Tobruch on 22.10.1941. .24) Menu & Toast list for Farewell Dinner to Brigadier J J MURRAY DSO MC VD. Attended by H T ALLAN & held in the Officers Mess, 2/17 Australian Infantry Battalion on 22.12.1941. .25) Invitation to Col H T ALLAN by Lady Gowrie (wife of Governor General Baron Gowrie) to attend a Luncheon at Government House, Canberra, ACT. .26) Letter to Major (T/Lt Col) H T ALLAN from Major W A JENNER advising him of his secondment to 2/17 Australian Infantry Battalion & appointment to command 5 Aust Base Sub Area. .27) Application for Africa Star with Eighth Army Clasp signed by H T ALLAN & approved by Lt Colonel of 2/17 Australian Infantry Battalion. H T ALLAN held the rank of Major (substantive) at the time of qualification, 1.3.1942 - 11.1942. He held the rank of Lt Colonel at the time of application in 2.1944. .28) Detailing changes in command & promotions including that of Lt Col H T ALLAN, dated 1.4.19? .29) For Lt Col H T ALLAN detailing movements required by First Australian Army command. .30) Acknowledgement & confirmation of Col H T ALLAN's application for campaign awards for WWII. .31) Letter addressed to Lt Col H T ALLAN from Lt Gen Stanley Sauige requesting information on New Britain for a forthcoming visit. .32) Certificate was presented to H T ALLAN on 16.4.1942 when he was awarded an OBE by King George VI. .33) Document details H T ALLAN's relinguishing of Command of the HQ of Pacific Islands Regiment. ALLAN also relinguished the rank of temporary Colonel & was transferred to the Reserve of Officers with rank of substantive Lt Colonel. .35) Official letter to Colonel H T ALLAN from Joseph Francis, Minister for the Army. The letter acknowledges Col ALLAN's long & distinguished career during both peace & wartime. .36) a) & b) From H T ALLAN (assumed) to Prime Minister J B CHIFFLEY referring to the production of copra in New Guinea, the actions of the Commonwealth Bank in relation to planters & the collaboration of New Guinea natives with the Japanese. Assumed to be a copy of original. .37) Letter to H T ALLAN indicating he had been placed on the Retired List with the rank of Honorary Colonel. .38) Letter invites H T ALLAN to officially open the State Conference in Lae in late March or early April 1958. Invitation was extended due to H T ALLAN for distinguished service in PNG. .39) Letter to H T ALLAN thanking him for accepting the invitation to open the Papua & New Guinea State Conference in late March or early April 1958. .40) Letter from H T ALLAN to Lt Gen Sir Henry WELLS, Chief of the General Staff, Victoria Barracks, Melbourne. ALLAN requests permission to wear his uniform for official engagements during his upcoming visit to New Guinea. ALLAN also offers advice on how to deal with native troops including serving time with them, learning their language & studying their customs. He suggests that this would help quell & dissent & revolt. .41) Reply from Major General DALY to HT ALLAN thanking him for his offer to spend time with the CO of the Pacific Island Regiment to address concerns with that unit. This meeting would coincide with ALLAN's upcoming visit to PNG. .42) HT ALLAN's reply to Major General T J DALY's letter of 26.2.1958. ALLAN requests an opportunity to discuss PIR issues with Major General DALY prior to his visit to PNG. .43) Major General T J DALY's reply to HT ALLAN's request for a meeting to discuss ongoing issues with the Pacific Island Regiment. .44) Letter from HT ALLAN to Brigadier D M CLELAND notifying him that he will be staying in Port Moresby on his way to the RSS&AILA Congress in Lae. .45) Lieutenant Colonel MCGUINN writes to invite Colonel ALLAN to visit the PIR during his visit to New Guinea at the end of March of the beginning of April 1959. .46) Letter of appreciation to H T ALLAN thanking him for his efforts in presenting the case for the Territory of New Guinea during the post WWII transition period. .47) Letter to H T ALLAN from New Guinea Citizens Association, Lae Branch, thanking him for his service on behalf of the people of the Territory of New Guinea. The association offered to send ALLAN a suitable present in recognition of his service. .48) Major General T J DALY's reply to HT ALLAN's suggestions for handling disquiet amongst the native troops in the Pacific Island Regiment. .49) Reply from Lieutenant General WELLS to H T ALLAN granting him permission to wear his uniform on his forthcoming visit to New Guinea. WELLS also notes that he has passed other requests made by ALLAN to Major General DALY. .50) Copy of H T ALLAN's reply to Lieutenant General WELL's letter of 24.2.1958 [.49)]. .51) A written account of Colonel H T Blue ALLAN's visit to New Guinea in 3.1958. Article appeared on p.65 & 67 of the 6.1958 edition of Pacific Islands Monthly. .52) Newspaper account of Colonel H T Blue ALLAN's opening of the Rabaul Branch of the Native Ex Servicemen's Association. Colonel ALLAN spoke of the involvement of the Pacific Islands Regiment during WWII. .53) The Rabaul Times account of Colonel H T Blue ALLAN's opening of the Rabaul Branch of Native Ex Servicemen's Club. Featured on p1, concluded p3. .54) Biographical account of Colonel H T ALLAN's service in WWI & WWII. In addition an account of his success in New Guinea between the wars is included. .55) a.b. Biography of Colonel H T ALLAN written by R W Robson who was the founder of the Pacific Islands Monthly. Article was written following ALLAN's death on 23.5.1967 aged 72. This item is a pre publication copy of Robson's article which appeared in the Pacific Islands Monthly. .56) Text of a valedictory given at the funeral of Colonel Herbert Trangmar ALLAN OBE, MC, ED, NX12229 held 26.5.1967 following his death on 23.5.1967. The speech summarized his life in both wars & civilian life. 57) Invitation issued to Colonel H T & Mrs ALLAN to attend a Garden Party at Government House on 18.2.1954. At this function Colonel H T & Mrs ALLAN were to be presented to her Majesty Queen Elizabeth II.Herbert T ALLAN Collection. The contents are all of various size, the Album is the size documented. .1) Large teal green album containing 16 plastic pockets each with white card insert. Various documents & photos contained in each pocket. .2) Typed letter, black type on cream paper. .3) Certificate mounted on fawn card backed with dark brown veneer. Presented to Capt H T ALLAN MC for being mentioned in despatches on 7.11.1917. .4) New South Wales Birth Certificate extract, printed on pink paper with watermark. .5) Telegram on tissue paper to a sheet of cream paper. Pin located top L corner. Requests the attendance of Lt Herbert ALLAN, Russell Hotel, Russell Square. .6) Typed letter mounted on grey cardboard. .7) 2 page letter on foolscap paper, secured by pin top L corner. Written from France by Herbert (Bert) ALLAN & addressed to his father. .8) 11 pages secured with a clip top L corner. 1st document typed, 2nd handwritten, remainder printed. Relate to H T ALLAN's military exam results. .9) Typed letter from Department of Defence Base Records Office to P ALLAN. .10) Document, printed form to inform the recipient that their period of enlistment in the 1st AIF had expired. .11) 4 page handwritten letter on 2 sheets of paper. 1st page has a printed letterhead. .12) BR Form No 20. Typed formal letter from AIF Base Records Office to accompany Mentioned in Despatches oak leaves sent to the recipient. .13) Form AAFA36 used for recommending the awarding of an Efficiency Decoration. Form details service record & details of a serving soldier. .14) 1 large / 1 small page, numbered, detailing the service record of Lt Col H T ALLAN. Black type on cream paper. 2 pages are loose but evidence of attachment visible. .15) Bachelor of Arts Degree Certificate (testamur) granted by the University of Sydney, awarded to Herbert Trangmar ALLAN. Printed on cream parchment. .16) Proforma document issued by the Territory of New Guinea permitting leave & return to the Territory. Printed 2 sides, black type on cream paper. .17) Letter on Australian Imperial Force letterhead from Major General MORSHEAD to Major H T ALLAN. .18 Letter on HQ2 Aust Corps letterhead from Major General MORSHEAD to Major H T ALLAN. .19) Typed letter on External Territories letterhead from J R Halligan to H T ALLAN. .20) Cream Christmas card folded in 2, sent to H T ALLAN. On front in black lettering is HQ 20th Australian Infantry Brigade below black Rising Sun emblem. Inside in black lettering is With Best Wishes for Christmas and New Year. Christmas 1944. .21) Cream card folded in 2. Front illustration depicts a devil figure riding a platypus & carrying a pennant with 2/13 on it. The devil is depicted attacking a German & Japanese soldier. Below the devil is a boomerang with Greetings Xmas 1944 printed on it. Illustration is in green & black. Inside on LHS is a message from 2/13 Battalion. On RHS is a list of 2/13 battle honours from 1940-1943. On back in black print is 1944-1945 New Guinea Australia. .22) Cream Christmas card folded in 2. Front illustration in brown with word Greetings in green. RHS inside printing in green & brown letters. Artillery badge on back in brown. .23) Cream card folded in 2. Typed menu on cream paper attached inside. Front cover illustrated with 20th Infantry Brigade colour patch & a rat over a scroll with words - So What? .24) Cream card folded in 2. On front black printing accompanied by 2/17 Battalion colour patch that is black over green diamond shape. Inside a list of Toasts & Dinner Menu printed in black. Back page for autographs. .25) Cream invitation card. Black cursive script printing below gold crown on front. .26) Typed letter on cream paper. .27) Typed foolscap application form to claim the Africa Star. .28) & .29) Message form filled with typed orders. .30) Typed letter acknowledging an application for campaign medals & listing eligible awards. .31) Typed letter on bond paper. .32) Certificate on cream parchment. Black print in cursive script. Text details the awarding of an OBE to the recipient. .33) Typed text on Australian Military Forces letterhead. Cream paper. .34) Typed text. Temporary note for H T ALLAN's discharge from AMF. .35) Typed letter on Commonwealth of Australia, Minister for the Army letterhead. .36) a) & b) 2 page letter in black type on cream paper. Pages are loose, letter unsigned. .37) 1 page typed letter on Australian Military Forces letterhead. .38) & .39) 1 page typed letter on Return Sailors, Soldiers & Airmen's Imperial League of Australia, Papua & New Guinea Branch letterhead. .40) 1 page typed letter, unsigned. .41) Single sided typed letter on Australian Military Forces letterhead on cream paper. .42) 1 page typed letter, unsigned on cream paper. .43) Single sided typed letter on Australian Military Forces, Northern Command, Victoria Barracks, Brisbane letterhead on cream paper. .44) Single sided typed letter on cream paper. .45) 2 page typed letter on folded cream paper bearing the letterhead of the Pacific Islands Regiment. .46) 1 page typed letter on cream, lined paper. .47) 1 page typed letter on cream paper. .48) 1 page typed letter on Australian Military Forces, Northern Command Headquarters, Victoria Barracks, Brisbane letterhead on cream paper. .49) 1 page typed letter on Chief of General Staff, Australian Military Forces, Army Headquarters, Victoria Barracks, Melbourne letterhead on cream paper. .50) 1 page copy of an unsigned letter on cream paper. .51) Magazine article: Building a New Nation in New Guinea : Some advice from Colonel Blue ALLAN. Black & white article with a 2nd small section stapled to the main page. Large page features a black & white captioned photo of a group listening to a uniformed Officer deliver a speech. Also features advertising front & back. .52) Newspaper article: Official Opening of Native Ex Servicemen's Club. Black & white typed newspaper article featuring a captioned black & white photo of a uniformed Australian Officer & a group of New Guinea Ex Servicemen. .53) a. b. c. Newspaper article: Master Blue Came Back to the Islands: 4000 Attend Club Opening. 3 Section article cut from a newspaper. One part is the banner of the newspaper with date published. Other sections contain the text of the article. The larger section features a black & white photo of an Australian Army Officer in uniform. .54) Newspaper article, untitled. Black & white typed newspaper article with black & white caricature of an Australian Army Officer featured. .55) a. b. Magazine article: The Story of a Big Man who Loved Soldiering. 2 page black & white typed article with sub headings. .56) Text of a Speech. 2 page typed text written for a valedictory given at a funeral. Pages connected with a staple in the top L corner. .57) Printed, cream card invitation to a Garden Party for the recipient to meet Queen Elizabeth II & The Duke of Edinburgh. Text is in cursive script under the Coat of Arms of Her Majesty. .2) Signature ? Capt S C PIR. .4) Date of issue typed: 30.11.1954 Name of recipient: Herbert Trangman Allan Stamped: T Wells, Registrar General NSW .5) Handwritten: To Lt Herbert Allan, Russell Hotel, Russell Square. Typed: Buckingham Palace OHS. Your attendance is required at Buckingham Palace on Wednesday next the Twentyeighth inst (28.11.19?) at ten o'clock am service dress please telegraph acknowledgement Lord Chamberlain London. Stamped: Central District 24 NO 19. .6) Signed in pencil: W Birdwood. In pencil on back: 15 x 12. .8) p1: Handwritten signature. Copy dated 29.12.1915. p2 Handwritten in ink: P Allan Esq, Mount Hunter Hill. Military Examination. Copy dated 29.12.1915. Handwritten in pencil: Results: H T Allan. Tactics - Distinction 92% HE Barff p3 Underlined in ink: 38th Infantry Herbert Trangmar Allan to be 2nd Lieutenant (provisionally). Dated 16 June 1914. p5 Handwritten: Total 139. Lieut Allan tied with 15 others for 20 place. p7, 9, 10 & 11underlined in ink: H T Allan. p8 Underlined in ink: Allan HT. .9) & .10) Signature in black ink. .12) Handwritten signature in black ink: On back handwritten signature in black ink: Clive Wilkinson, Buddong, Robinson St, Chatswood. Also ? Rd, Cremorne Pt. .13) Handwritten in black ink: Details of HT Allan's Commission Service from 16.6.1914 - 18.2.1946. .15) Handwritten signature of the University Chancellor, Dean of Faculty of Arts & Registrar. Handwritten name of recipient. Seal of the University of Sydney imprinted bottom LHS. .16) Handwritten in black ink: Details of recipient. Stamped in red ink: New Guinea Customs. Stamped in blue ink: H M Customs, Cooktown, dated 17.12.1939. Handwritten on reverse: Signature. Stamped on reverse in red ink: New Guinea Customs, dated 15.12.1939. .17) & .18) Handwritten signature: Major General Morshead. .19) Handwritten signature in black ink: J R Halligan. .20) Handwritten inside in blue ink: Lt Col Allan. Good wishes from your many friends here. Signed by Major General Windeyer. .21) Inside LHS handwritten in blue ink: Lt Col Allan & an indecipherable signature. .22) Inside RHS handwritten: To Major (Blue) Allan OBE MC from Lt Col? .23) On front handwritten in blue ink: H T Allan?. Inside in black ink & pencil are 19 signatures. .24) On front: 3 signatures in black ink & pencil. On back: 36 signatures in black & blue ink & pencil. .25) On back handwritten in black ink: Colonel H T Allan OBE MC, with 3 ink lines below name. .26) Handwritten in blue/black ink: Signature. Handwritten in blue pencil top R corner: A32/3477. Handwritten in black ink bottom L corner: Cond (?) 15/9A. Handwritten in black ink: Signature. .27) Stamped top R corner: 2/17 Bn Received 9.2.1944. Signature in black ink: H T Allan. Signature in black ink: ? Lt Col 2/17 Aust Inf Bn 10.2.1944 Page bottom in pencil: Blue will keep 1 1/4 for you? .30) Handwritten: Details of eligible medals. Handwritten signature: J C K Miller Capt 7.3.50. Handwritten bottom L corner: Col H T Allan Bottom R corner: OBE, MC, 1914-19, Victory, ED, MID 1914-18, MID 1939-45 On back: Steak & Kidney Morris ) Clark ) Vowood ) 10/- 70215 Maughan ) Allan ) .31) Top of page: Imprinted Coat of Arms Top LHS in black ink: TOP SECRET AND PERSONAL Handwritten signature: Stanley Sauige .32) Embossed top L corner: Seal of the Most Excellent Order of the British Empire. Handwritten: Mary R. .32) Signed: Queen Mary, mother of George VI. .33) Handwritten signature. .34) Handwritten in blue ink: HERBERT TRANGMAR ALLAN 6 MAY 46 Handwritten signature. .35) Handwritten signature in blue ink: Joseph Francis, Minister for the Army. .37) Handwritten signature. .38) & .39) Handwritten signature: J W Knight. .41), .43) & .45) Handwritten signature in blue ink. .46) & .47) Handwritten signature in black ink: Henry G Eckhoff. .48) Handwritten signature in blue ink: With best wishes Yours sincerely T J Daly. .49) Handwritten signature in black ink: Yours sincerely H Wells. .57) Handwritten in black ink: Colonel & Mrs H T Allan.certificates, records, awards, administrative, compendium -
 Puffing Billy Railway
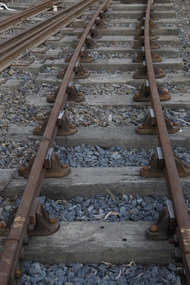
Double Headed Rail, circa 1872 - 1883
Double Headed Rail from Ravenswood Station Siding which was dismantled circa 1987 the two rails were stored for a time at Maldon before being donated to Puffing Billy Museum Bearing makers marks of Wilson & Cammell - Dronfield- Steel works Wilson & Cammell made Steel rails at their Dronfield Steel Works, in Dronfield, North East Derbyshire, England from 1872 - 1883 Double-headed rail In late 1830s Britain, railway lines had a vast range of different patterns. One of the earliest lines to use double-headed rail was the London and Birmingham Railway, which had offered a prize for the best design. This rail was supported by chairs and the head and foot of the rail had the same profile. The supposed advantage was that, when the head became worn, the rail could be turned over and re-used. In practice, this form of recycling was not very successful as the chair caused dents in the lower surface, and double-headed rail evolved into bullhead rail in which the head was more substantial than the foot. Info from Wikipedia - Rail Profile https://en.wikipedia.org/wiki/Rail_profile The first records of double headed rail being used In Victoria by Victorian Railways was in 1859, the rails, chairs, oak and trenails were imported from UK. After the 1870’s the Victorian Railways went over to using flat bottom rails, but they still needed replacement double headed rail for lines already laid and this continued up to at least 1883 Wilson & Cammell - Dronfield- Steel works Wilson & Cammell made Steel rails at their Dronfield Steel Works, in Dronfield England from 1872 - 1883 Mount Alexander & Murray River Railway The Melbourne, Mount Alexander & Murray River Railway Company received parliamentary assent in February 1853 to build Victoria's first inland railway from Melbourne to Williamstown, and Melbourne to Bendigo and Echuca. Construction commenced in January 1854 with work on a pier at Williamstown but lack of funds slowed progress, eventually prompting the company to sell out to the government. The 100-mile (162 km) section to Bendigo opened in October 1862. Its cost of £35,000 per mile made it the most expensive railway ever built in Australia. In 1864, the line was extended to Echuca, tapping into the booming Murray-Darling paddlesteamer trade. info from Museums Victoria - Victorian Railways https://museumsvictoria.com.au/railways/theme.aspx?lvl=3&IRN=450&gall=456 1863 Ravenswood Station open on the 1st Feb 1863 Victorian Railways - purchased and imported the Rail and Chairs from Raleigh, Dalgleish, White and Co. London Importation of railway plant : abstract of a return to an order of the Legislative Assembly dated 27th June 1860 for - Copies of the advertisements calling for tenders, the names of the tenderers and the accounts and correspondence with Mr Brunel relating thereto GP V 1859/60 no. C 15 http://www.parliament.vic.gov.au/papers/govpub/VPARL1859-60NoC15.pdf Report from the Select Committee upon the Importation of Railway Plant : together with proceedings of the Committee, minutes of evidence and appendix GP V 1859/60 no. D 38 (2.9 MB) http://www.parliament.vic.gov.au/papers/govpub/VPARL1859-60NoD38.pdf Ravenswood Siding When the Victorian Railways were established in 1856 they adopted one of the popular British permanent way standards - heavy 80lb (36.3kg) double-headed rail held up right in cast iron chairs attached to transverse timber sleepers by wooden pegs called trenails. The Ravenswood Railway siding was constructed in 1862 with 12 feet wrought iron double-head rail held in cast iron chairs with Ransom and May patent compressed keys. Trenails held the chairs to the sleepers and the joints were secured in joint chairs. Joints were subsequently joined using fish plates. It formed part of the Melbourne to Echuca rail line, initially known as the Melbourne, Mt Alexander and Murray River Railway. George Christian Derbyshire, the first Engineer-in-Chair of the Victorian Railways was responsible for the design and construction of the works. No new lines were built in Victoria using double-headed rail after 1870. The siding was disconnected from the main line in 1988. The Ravenswood Railway Siding demonstrates the original 1856 philosophy of the Victorian Railways to adopt British permanent way technology. The siding demonstrates significant aspects in the development of permanent way technology in England and Victoria over the period from the 1830's to the 1880's. The chairs in the Ravenswood siding are physical evidence of early railway technology rendered obsolete 120 years ago, namely joint chairs at rail joints and trenails to secure the chairs to the sleepers. The double-headed rail demonstrates an important stage in the evolution of British rail technology in the 1830s. The old fish plates, square headed bolts and square nuts demonstrate the success of fishing the rail joins. The Ravenswood siding demonstrates the earliest form of rail joint technology developed in England, and existing in Australia, the joint chair. In part of the siding the sequence of joint and intermediate chairs is consistent with the 1856 specifications, that sequence is rare with the joints secured in joint chairs. The survival of chairs in this sequence is rare and almost certainly demonstrates that they remained in continuous use at the same location from 1862 to 1988. This remnant of the Ravenswood siding has survived 126 years. The siding has proved to be the most significant of extant remnant double-headed sidings in Victoria, containing a rare combination of early permanent way technologies. Construction dates 1862, Info from Ravenswood Railway Siding Victorian Heritage Database Report http://vhd.heritagecouncil.vic.gov.au/places/4693/download-report The remaining section of this siding is significant at the State and National levels in that it demonstrates the use of chaired rail by the Victorian Railways Department for the Trunk Lines and, more particularly, the following stages in the evolution of this long obsolete method of permanent way construction: a) The use of joint chairs and intermediate chairs at regular intervals inferring that the original wrought iron rail lengths were 12 feet, as is known through documentary sources to have been the case. The survival of chairs in this sequence is unique and almost certainly demonstrates that they have remained in continuous use at the same location and in the same sequence from 1862 to 1988 . b) The use of joint chairs and intermediate chairs designed for use with trenails. c) The use of later intermediate chairs designed for use with steel pins and the use of fished joints with steel double head chaired rail, representing a second method of constructing the permanent way using chaired rail technology. info from Ravenswood Siding - Melbourne/Echuca Railway Line - Victorian Heritage Database Report http://vhd.heritagecouncil.vic.gov.au/places/70103/download-report Addition to Citation for Melbourne to EchucaRailway Line 1/10/1990 Double Head Rail The surviving lengths of double head rail with chairs on this railway compare with one surviving similar remnant on the Geelong to Ballarat railway and are representative of permanent way construction techniques applied exclusively to the two trunk railways of the 1860's. In this respect they are rare survivors and may be unique at the national level and of technical importance at the international level to the extent that they enhance contemporary understanding of early railway building technology. Surviving lengths of chaired double head rail survive at Kyneton, Ravenswood and Bendigo on this railway and include a number of different types of cast iron intermediate and joint chairs with hardwood keys and metal pins. The Ravenswood siding is of special significance for the diversity of chair types and for the sequence of chairs recalling rail lengths known to be associated with construction of the line in 1862. Construction of the Railway Tenders closed on 24 March 1858 with no less than 133 tenders being received. A contract was let to Cornish and Bruce for £3,356,937 to commence work on 1 June 1858 and complete the line by 31 July 1861. Cornish and Bruce made quick early progress with the Melbourne to Sunbury section being officially opened on 13 January 1859. The line was officially opened to Bendigo (Sandhurst) on 20 October 1862 by the Governor of Victoria, Sir Henry Barkly. A great banquet was held for 800 guests and this was followed by a grand ball. The extension of the line to Echuca was a relatively simple matter as that part of the line was across plain country without any significant engineering challenges. Tenders were called for the work in 1863 and the work was completed in 1864 by contractors Collier and Barry Apart from the line contractors, other firms directly involved were J Shire law and Co (sleepers), R Fulton, Langlands Brothers and Co, William Crossley (water supply), B Moreland, Langlands Brothers and Co (platelayers lorries), E Chambers (iron pins, traversers), Miller and McQuinstan (luggage vans and steam engines) and various contractors for building works. Info from Engineers Australia Engineering Heritage Victoria Nomination for Recognition under the Engineering Heritage Australia Heritage Recognition Program for the Goldfields Railways - Melbourne , Bendigo & Echuca Railway Page 25 - .2.9.2 Statement from National Trust of Australia (Victoria) Listing number B5323 for Mt Alexander/Murray Valley Rail Line: Page 69 - Theme 3 https://www.engineersaustralia.org.au/portal/system/files/engineering-heritage-australia/nomination-title/Melbourne_%20Bendigo_Echuca%20Railway%20Nomination.pdf The Melbourne, Mount Alexander and Murray River Railway Company was a railway company in Victoria, Australia. It was established on 8 February 1853 to build a railway from Melbourne to Echuca on the Victorian-NSW border and a branch railway to Williamstown. The company struggled to make any progress and on 23 May 1856, the colonial Government took over the Company and it became part of the newly established Department of Railways, part of the Board of Land and Works. The Department of Railways became Victorian Railways in 1859. Construction of the Bendigo line commenced in 1858, but this private consortium also met with financial difficulties when it was unable to raise sufficient funds, and was bought out by the Victorian colonial government. The design work was then taken over by Captain Andrew Clarke, R. E., Surveyor-General of Victoria, with bridge designs completed by Bryson and O'Hara The contract for the first stage of the line from Footscray to Sandhurst (now Bendigo), was let to Cornish and Bruce for £3,356,937.2s.2d ($6.714 million) with work commencing on 1 June 1858. Completion of the permanent way was to be by 31 July 1861 https://en.wikipedia.org/wiki/Melbourne,_Mount_Alexander_and_Murray_River_Railway_Company Victorian Railways - purchased and imported the Rail and Chairs from Raleigh, Dalgleish, White and Co. London Importation of railway plant : abstract of a return to an order of the Legislative Assembly dated 27th June 1860 for - Copies of the advertisements calling for tenders, the names of the tenderers and the accounts and correspondence with Mr Brunel relating thereto GP V 1859/60 no. C 15 http://www.parliament.vic.gov.au/papers/govpub/VPARL1859-60NoC15.pdf Report from the Select Committee upon the Importation of Railway Plant : together with proceedings of the Committee, minutes of evidence and appendix GP V 1859/60 no. D 38 (2.9 MB) http://www.parliament.vic.gov.au/papers/govpub/VPARL1859-60NoD38.pdf Victorian Railways : report of the Board of Land and Works November 1862 GP V 1862/63 no. 21 (2.8 MB) https://www.parliament.vic.gov.au/papers/govpub/VPARL1862-63No21.pdfHistoric - Victorian Railways - Double Headed rail Ravenswood Railway Station and Siding Victorian Heritage Database Reports Victorian Heritage Register VHR H1100 Victorian Heritage Register VHR H1786 National Trust VHR H1100 Mount Alexander and Murray River Rail way Line National Trust2 rail lengths of Double Headed Rail made of Iron makers marks : Wilson & Cammell - Dronfield - Steel and 20 joint chairs with metal rail pins Makers mark Wilson & Cammell - Dronfield - Steel (possible date 187? very hard to read ) puffing billy, double headed rail, wilson & cammell - dronfield - steel works, ravenswood station siding, melbourne to echuca rail line, initially known as the melbourne, mt alexander and murray river railway. -
 Bendigo Historical Society Inc.
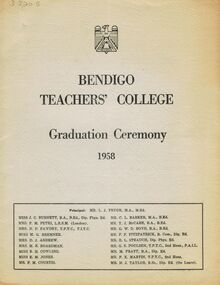
Document - LA TROBE UNIVERSITY BENDIGO COLLECTION: BENDIGO TEACHERS' COLLEGE GRADUATION CEREMONY 1958
A faded document titled "Bendigo Teachers' College Graduation Ceremony 1958". The front cover also contains a list of the staff teaching at the college. They are The Principal Mr. L. J. Pryor, Miss J. C. Burnett, Mrs. F. M. Petri, Mrs. N. F. Fawdry, Miss M. G. Bremner, Mrs. D. J. Andrew, Mrs. M. E. Boardman, Miss B. H. Cowling, Miss E. M. Jones, Mr. F. M. Courtis, Mr. C. L. Barker, Mr. T. J. McCabe, Mr. G. W. D. Boyd, Mr. P. F. Fitzpatrick, Mr. R. L. Strauch, Mr. G. S. Poulsen, Mr. M. Pratt, Mr. F. X. Martin and Mr. N. J. Taylor. On the inside cover is the "Significance of the Ceremony" and the "Order of the Ceremony". Mr. F. M. Courtis gave the Welcome to Visitors and the College Charge was given by the Principal. The 'Graduation Book' was presented to Mr. A. L. Harris by Miss J. C. Burnett. Mr. C. L. Barker called the final roll for 1958 and Congratulations were offered by The Mayor Cr. H. W. Snell J.P. and Mr. R. L. Harrowfield Head Teacher of Golden Square State School. The Occasional Address was given by Mr. J. R. Lyall Assistant Chief Inspector of Primary Schools.The following page contains a list of the "Students of 1957-58" - John Victor Anderson, Margaret Betty Baker, Patricia Ann Banko, George Edward Bazley, Elizabeth Margaret Bower, Nancy Elva Boyle, Enid Gilmour Brown, Wendy Lorraine Bulleid, Fairlie Anne Burkinshaw, Barry Henry Burns, Katherine Alice Byrnes, Bryan Clarke Campbell, Elizabeth Joyce Chapman, Alison Amelia Clark, Valerie Nancy Clough, Georgina Mary Agnes Coppock, Eric Bruce Hindle Coventry, Faye Margaret Crump, Dorothy Lilian Cunnington, Elizabeth Jean Dalrymple, Lois Anne Davies, Brian Leslie Dolan, Moira Margaret Dowd, June Frances Ellis, James Cornelius Finnegan, Graeme Reynolds Fleet, Elaine Rose Fuga, Rosemary June Garonne, James Alfred Geehman, Ronald James Goodman, Bernard Thomas Gray, Dorothy June Gregson, Joy Margaret Ham, Dorothy Rose Harice, Arthur Herbert Harris, Brian Hopper, Dorothy Anne Hosking, Nancy Elizabeth Hughes, Irene Margaret Hynes, Donald James Low, Elspeth Faye McCarthy, Richard James McGowan, Geoffrey Douglas McLean, Junella Maree McPhail, Beryl Martin, Carmel Monica Mullins, Charles Peter O'Connor, Nancy Lorraine Peck, Ian Alwyn Raeburn, Raymond Edward Reardon, Ruth Lorraine Reid, Patricia Margaux Roberts, Robert Herbert Robertson, Phillip Edward Rowe, Lesley Margaret Silke, Francis William Sleeth, Margaret Joy Sloane, Murray Francis Sweeney, Elwyn Beth Thompson, Margaret Ann Wadley, Janet Ann Wallis, Geoffrey Michael Warman, Kevin George Watson, Patricia Anne Weight, Margaret Anne West, Ronald Thomas White and Irene Mary Wolfe. The back page has the "Principal's Charge". There is also a white type written insertion containing the words of the songs and a plan of the seating and movements of the ceremony. Boltons Print, Bendigo.bendigo, education, bendigo teachers' college graduatio, la trobe university bendigo collection, collection, bendigo, bendigo teachers' college, bendigo teachers' college students, education, teaching, teachers, students, graduation, tertiary education, book, graduation ceremony, graduands, history, bendigo teachers' college staff, history -
 National Communication Museum
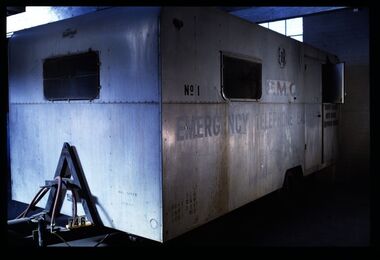
Vehicle - Mobile Telephone Exchange, c. 1965
Manufactured in the 1960s, this mobile emergency telephone exchange was fitted into a caravan. Part of the Shepparton Division State Disaster Plan, the caravan could be towed to areas affected by disasters to enable communications to recommence. The caravan remained in service until approximately 1974.Mobile infrastructure plays an important role in Australian communications, owing to the often remote and hostile environments in which Australians live and work. Exchanges such as this facilitated phone calls in the aftermath of an emergency, particularly for hospitals, police and other emergency services. Today, Mobile Exchange on Wheels (MEOWs), Cell on Wheels (CoW) and Satellite Cell on Wheels (SatCOW) - which provide temporary landline and broadband services, mobile phone coverage and service in areas without communications infrastructure respectively - are a critical part of emergency response procedures for natural disasters such as fire and flood. Though technology has progressed, the need for rapid service in remote areas remains a present concern of the communications service providers in Australia. This mobile service infrastructure is historically significant as an early example of a service which has evolved over decades, yet is still needed today. The exchange, as a representative example of a vehicle which would provide early-response in a disaster, is socially significant as a facilitator of critical communications needs in devastated communities: access to emergency services and contact with family and friends. The exchange itself, intact from its period of use, provides an insight into technology of the 1970s.Mobile emergency exchange housed in a caravan trailer on 2 wheel base, duralin body, steel tow bar, Caravan divided into 3 sections; the exchange room; the relay room and the main frame room. The exchange room contains 3 switchboards, a folding table, cupboards, benches and switch rack (.1). table (.2), steel bar for attaching the table (.3), back boards of switchboards (.4-.6), switches (.7-.16), box of switches (.17). There is a wall phone magneto, 300 type handset on wall and 2 skylights with wire screens. .11? hat pegs and shelf; there are 2 fluorescent tubes for lighting, all in exchange section. The floor is covered with 2 tone grey tiles and there are wire mesh on outside of windows and a geometric curtain inside behind switch rack. There is a flywire screen door as well as exterior door. The relay room has a sectioned door so half can open at a time. Room contains a cupboard with folding bench top beneath a curtained window. The opposite wall has a bank of batteries and transmission condensers; there is a shelf above window, one fluorescent tube and fuse boxes. Tiles on floor also. The main frame room contains many metres of coiled black covered cable, a black covered magneto wall telephone with 300 type handset; grey plastic jumper cords, a rack of termination points and wire with wasp nests attached. There is a small iron step under door, a fluorescent tube on wall and 3 hat hooks. Roll of Paper Handtowels (.18), cord and handle (.19), red exchange cords and plugs (.20-.22), plastic aluminium runners (.23,.24), headset (.25,.26), logbook (.27), battery readings (.28), box containing papers circuit drawings etc (.29-.93), paper lists off wall (.94,.95). Books, record books etc (.96-.103). Manila folder (.104) containing circuit drawings (105-.124). Wooden drawer (.125), metal drawer containing subscribers master cards, record of faults cards, particular switchboards connected, Junction line cards (.126). Box of valves (.127), box of clamps (.128). Box of 2000 type rack fuses, red 1 1/2 AMPS, black 3 AMP, blue 1/2 AMP (.129). Box of sleeves for covering wire joints (.130), plastic beakers (.131,.132), soap (.133), box of white plastic squares (.134), time switch "Venner BF/43 time switch" Made in England (.135), box of bolts, knobs etc (.136), box of switchboard number indicators (.137), fuse (.138), fuse wire (.139), football card (.140). Box of cartridge fuse 6 AMP (.141). Envelope of drawing pins, rubber bands (.142), black plastic, paper tape centres (.143-.152), metal plug (.153), 2 signs "Beware of vehicles" (.154-.155). Paper listing Naringal East automatic conversion (.156). Green Commonwealth of Australia note pad (.157). Wiring plug for tail lights (.158). Black fuse plugs (.159,.160). Box of bolts (.161). 2 sections of blue plastic coated wires (.162,.163). Gloves used for working on batteries (.164-.167). Wasp nests (.168,.169). White fuse (.170). Photographs of van in use (.171,.172)..1 on front: "ANOTHER / MOBILETRAIL / PRODUCT" "MAX SPEED / 25MPH" "TRAILER BRAKES / --- / " On sides: "EMERGENCY TELEPHONE EXCHANGE" "NO 1" "PMG" "TCQ / GROSS 250 / TARE 182 / LOAD 162" "6" "COUNTRY BRANCH / NORTH REGION / [SHEPPARTON DIVISION]" "LAW'S SIGNS" "Telecom Australia" On back: "DANGER / LONG LOAD" "MQA 3787" .133: "FIR OIL" "AUSTRALIA"mobile telephone exchanges, mobile telecommunications trailers, trailers, transport, natural disaster, black saturday, bushfires, floods, emergency communications -
 Bendigo Historical Society Inc.
Photograph - PURDY COLLECTION: NEW RED WHITE AND BLUE/NORTH BLUE 2, 3 BLUE MINES
Black and white image - very faded - of miners from the New Red White and Blue Mine, and North Deborah Mine. Men are standing in front of large mullock heaps, sitting in front and standing on slope of mullock heap behind. Very large group of men dressed in working clothes. On top of image in biro New Red, White and Blue North Blue, 2 and 3 Blue, 1923 On back of image: written in biro are names of men. New Red White and Blue Consolidated Mining Co., North Red White and Blue No. 2 north of main shaft, No. 3 Blue, south of main shaft, Quart Hill, Adams Road. Names of miners written in back in pen: (no order given) New Red, White and Blue Consolidated Mining Co., North Red, White and Blue No 2 north of main shaft, No 3 Blue South of Main Shaft, Quartz Hill, Adams Road, (Golden Square). Mine managers: W Brimacombe, Fred Woods, Bob O'Brien, John Saunders, George Kinsgley, Jim Arthur, Bill Bren, Charle Cheetham, Tom Rowe (Snr), Grimshaw Hayes. Underground managers - shift bosses Bill Crosman, Steve Rothenberger, Tom Turner, Jim Chapman, Snowy Read, Jim Poole, J Champman, Bil Leggo, Gus Vlaminck, Biven Shelton, Ted Connors. (Photo) Phil Lanyon, Jack Plant, Jim Plant, Tom Turner, Tom Rowe (Sen) Bob O'Brien, Jim Buller, Arthur Webster, C. Neeman, Jack Craven, Peter Millar, Engine Driver Fred Watson, P Hopley, Jim Purdy, Jack Bottom, George Ross, Dave Rigbye, Gill Dupey, Fred Smith, Er Smith, Dick Plowright, Charlie Rickards, H. Stevenson, Sal Smith, Bill Harris, Frank Greig, C. Reid, Bill Leggo, Jim Poole, George Moore, W. Webb, Windy Hurst Shaft repairing: Harry Shelton, Bil Beveridge, Ted Porter, Joe? Harry Pollard, W. Polglase, Dave Lyke, Bill Del, W. Boland, Jack Hosking, Polshaw, Pomp Davidson, Jim Lesley, Dan Scully, Cliff Barton, George Barton, Tom Crowther, Bill?, Jack Hosking, Ern Rushmeyer, George Hocking, W. Benbow, Joe Hocking, Jim Jose, Jack Jose, Herb Bill, Dick Arthur, Taff Hocking, Charlie Dean, pat Doyle, Peter Doyle, Bob Davey, Roger Trewarne, Wilf Watson, Bill Hatfield, Dick Lanyon, Hughie Atherton, Ashley Rigbye, John Purdy, Bill Watson, Jim Watson, Perce Johnson, Russ Champan, W. McNamara, W. Nievandt, E. Jobe, Bill Yates, Yate McBeth, Alex Eadie, Jim Eadie, Jorgensens, Leo Atherton, Ted Comners, 2 Battery: Mears, Bill Dewar, Dave Luke, Allan Arthur. Deutchman, Les Balle, Perce Balle, Bob Hunter, Ray Jackson, Cec Waterman, George Randall, Ted Porter, Yate McBeth, W. Lamont, D. Rigbye, J. Purdy Platman North Blue 14 years (7.7.1920 - 1.11.1940) Engine Drivers: Fred Watson, Jack Plant, Harry Hanson, Anthony Hall, Jack Botton, Harry Nicholas, John Teasdale.bendigo, mining, red white and blue -
 Flagstaff Hill Maritime Museum and Village
Book - Record Book, before 1918
In UK in early 1800's the word 'mechanic' was applied to a broader range of skills such as working man, tradesman or artisan. Mechanics' Institutes were formed originally for voluntary, self-funded organisations, to improve the education of working men and to instruct them on their various trades. The germ of the idea came from a class formed in 1799 by Professor George Birbeck in Glasgow, Scotland, for journeymen mechanics (apprentice trade workers), with the first Institutes being organised in London and Manchester in the 1820's. By then the original aim had broadened and the Mechanics' Institutes were established as popular agencies of adult education. The Mechanics' Institutes were run by committees that provided facilities for a meeting room, hall suitable for lectures, and a library. Funding was raised locally and often supplemented by grants from government agencies for the purchase of books and other resources. Activities were community based. In Australia, Mechanics' Institutes were set up in New South Wales and in Tasmania in the late 1820's. Mechanics' Institutes began in Victoria, with the first one in Melbourne dating from 1839, providing similar services but in time offered services tailored to their specific area. Warrnambool's Mechanics' Institute (or Institution as it was sometimes called) was one of the earliest in Victoria. On 17th October 1853 a meeting was held where it was resolved to request the Lieutenant Governor of the Colony to grant land for the erection of a Mechanics' Institutes building. A committee was formed at the meeting and Richard Osburne chaired the first meeting of this committee. The land on the North West corner of Banyan and Merri Streets was granted but there were no funds to erect the building. The Formal Rights of the Warrnambool Mechanics' Institute's encompassed its aims and these were officially adopted in1859; "This Institution has for its object the diffusion of literary, scientific, and other useful knowledge amongst its members, excluding all controversial subjects, religious or political. "These objects are sought to be obtained by means of a circulating library, a reading room, the establishment of classes, debates, and the occasional delivery of lectures on natural and experimental philosophy, mechanics, astronomy, chemistry, natural history, literature, and the useful and ornamental arts, particularly those which have a more immediate reference to the colony." The Warrnambool Mechanics' Institute opened its first reading room in November1884 in the National School building at the corner of Banyan and Timor Streets. The Institute was funded by member subscription, payable on a quarterly, half yearly or yearly basis. Samuel Hannaford, the Manager of the Warrnambool Bank of Australasia, was the first Honorary Secretary of the Mechanics' Institutes, and an early President and Vice-President. He also gave several of the early lectures in the Reading Room. Another early Secretary, Librarian and lecturer was Marmaduke Fisher, the teacher at the National School. Lecture topics included The Poets and Poetry of Ireland', 'The Birth and Development of the Earth', 'The Vertebrae - with Remarks on the pleasures resulting from the study of Natural History' and 'Architecture'. In q856 the Reading Room was moved to James Hider's shop in Timor Street, and by 1864 it was located in the bookshop of Davies and Read. In the 1860's the Mechanics' Institute struggled as membership waned but in 1866, after a series of fund raising efforts, the committee was able to purchase land in Liebig Street, on a site then called Market Square, between the weighbridge and the fire station. A Mechanics' Institute building was opened at this site in August 1871. The following year four more rooms were added to the main Reading Room and in 1873 the Artisan School of Design was incorporated into the Institute. The same year Joseph Archibald established a Museum; however it deteriorated when he was transferred to Bendigo in 1877. In 1880, with Archibald's return to Warrnambool, the Museum was re-established, and in 1885 a new building was built at the back of the Institute to accommodate the re-created School of Design, the Art Gallery and the Museum. In 1887 the Museum section was moved to the former court house in Timor Street (for some time the walls of the building formed part of the TAFE cafeteria but all is now demolished)). In 1911 the Museum was transferred back to the original building and the management of the Mechanics' Institute was handed over to the Warrnambool City Council. The Museum and Art Gallery became one and housed many fine works of art., and the Library continued to grow. The building was well patronised, with records showing that at the beginning of the 20th century there were between 500 and 800 visitors. During World War One the monthly figures were in the thousands, with 3,400 people visiting in January 1915. The Museum was a much loved Institution in Warrnambool until the contents of the Museum and Art Gallery were removed to make room for the Warrnambool City Council Engineers' Department. The contents were stored but many of the items were scattered or lost. In 1975 the original building was demolished and the site became occupied by the Civic Centre, which included the new City Library. (The library was temporarily located in the old Palais building in Koroit Street.) In the process of reorganisation the Collection was distributed amongst the community groups: - The new City Library took some of the historic books and some important documents, historic photographs and newspapers. - The Art Gallery kept the 19th Century art collection and some of the artefacts from the museum. - The Historic Society has some items - The State Museum has some items - Some items were destroyed - Flagstaff Hill Maritime Village has old newspapers, Government Gazettes, most of the Mechanics' Institute Library, ledgers and documents connected to the Mechanics' Institute Library, some framed and unframed art works and some photographs. The Warrnambool Mechanics' Institute Library book collection is deemed to be of great importance because it is one of the few collections in an almost intact state, and many of the books are now very rare and of great value. NOTE: Pages of this book have been digitally recorded and archived. The Warrnambool Mechanics Institute book collection has historical and social significance for its strong association with the Mechanics Institute movement and the important role it played in the intellectual, cultural and social development of people throughout the latter part of the nineteenth century and the early twentieth century. The collection of books is a rare example of an early lending library and its significance is enhanced by the survival of an original collection of many volumes. The Warrnambool Mechanics Institute Accessions Book, 1913-1922. Hard cover, olive green cover with brown protective cloth on corners. Page edges have coloured marble pattern. Hand written inside cover "RA 02749457 MEC,000451"flagstaff hill, warrnambool, shipwrecked coast, flagstaff hill maritime museum, maritime museum, shipwreck coast, flagstaff hill maritime village, great ocean road, warrnambool mechanics' institute, mechanics' institute records warrnambool, record book c1918 -
 Flagstaff Hill Maritime Museum and Village
Record Book, before 5th April 1903
In UK in early 1800's the word 'mechanic' was applied to a broader range of skills such as working man, tradesman or artisan. Mechanics' Institutes were formed originally for voluntary, self-funded organisations, to improve the education of working men and to instruct them on their various trades. The germ of the idea came from a class formed in 1799 by Professor George Birbeck in Glasgow, Scotland, for journeymen mechanics (apprentice trade workers), with the first Institutes being organised in London and Manchester in the 1820's. By then the original aim had broadened and the Mechanics' Institutes were established as popular agencies of adult education. The Mechanics' Institutes were run by committees that provided facilities for a meeting room, hall suitable for lectures, and a library. Funding was raised locally and often supplemented by grants from government agencies for the purchase of books and other resources. Activities were community based. In Australia, Mechanics' Institutes were set up in New South Wales and in Tasmania in the late 1820's. Mechanics' Institutes began in Victoria, with the first one in Melbourne dating from 1839, providing similar services but in time offered services tailored to their specific area. Warrnambool's Mechanics' Institute (or Institution as it was sometimes called) was one of the earliest in Victoria. On 17th October 1853 a meeting was held where it was resolved to request the Lieutenant Governor of the Colony to grant land for the erection of a Mechanics' Institutes building. A committee was formed at the meeting and Richard Osburne chaired the first meeting of this committee. The land on the North West corner of Banyan and Merri Streets was granted but there were no funds to erect the building. The Formal Rights of the Warrnambool Mechanics' Institute's encompassed its aims and these were officially adopted in1859; "This Institution has for its object the diffusion of literary, scientific, and other useful knowledge amongst its members, excluding all controversial subjects, religious or political. "These objects are sought to be obtained by means of a circulating library, a reading room, the establishment of classes, debates, and the occasional delivery of lectures on natural and experimental philosophy, mechanics, astronomy, chemistry, natural history, literature, and the useful and ornamental arts, particularly those which have a more immediate reference to the colony." The Warrnambool Mechanics' Institute opened its first reading room in November1884 in the National School building at the corner of Banyan and Timor Streets. The Institute was funded by member subscription, payable on a quarterly, half yearly or yearly basis. Samuel Hannaford, the Manager of the Warrnambool Bank of Australasia, was the first Honorary Secretary of the Mechanics' Institutes, and an early President and Vice-President. He also gave several of the early lectures in the Reading Room. Another early Secretary, Librarian and lecturer was Marmaduke Fisher, the teacher at the National School. Lecture topics included The Poets and Poetry of Ireland', 'The Birth and Development of the Earth', 'The Vertebrae - with Remarks on the pleasures resulting from the study of Natural History' and 'Architecture'. In q856 the Reading Room was moved to James Hider's shop in Timor Street, and by 1864 it was located in the bookshop of Davies and Read. In the 1860's the Mechanics' Institute struggled as membership waned but in 1866, after a series of fund raising efforts, the committee was able to purchase land in Liebig Street, on a site then called Market Square, between the weighbridge and the fire station. A Mechanics' Institute building was opened at this site in August 1871. The following year four more rooms were added to the main Reading Room and in 1873 the Artisan School of Design was incorporated into the Institute. The same year Joseph Archibald established a Museum; however it deteriorated when he was transferred to Bendigo in 1877. In 1880, with Archibald's return to Warrnambool, the Museum was re-established, and in 1885 a new building was built at the back of the Institute to accommodate the re-created School of Design, the Art Gallery and the Museum. In 1887 the Museum section was moved to the former court house in Timor Street (for some time the walls of the building formed part of the TAFE cafeteria but all is now demolished)). In 1911 the Museum was transferred back to the original building and the management of the Mechanics' Institute was handed over to the Warrnambool City Council. The Museum and Art Gallery became one and housed many fine works of art., and the Library continued to grow. The building was well patronised, with records showing that at the beginning of the 20th century there were between 500 and 800 visitors. During World War One the monthly figures were in the thousands, with 3,400 people visiting in January 1915. The Museum was a much loved Institution in Warrnambool until the contents of the Museum and Art Gallery were removed to make room for the Warrnambool City Council Engineers' Department. The contents were stored but many of the items were scattered or lost. In 1975 the original building was demolished and the site became occupied by the Civic Centre, which included the new City Library. (The library was temporarily located in the old Palais building in Koroit Street.) In the process of reorganisation the Collection was distributed amongst the community groups: - The new City Library took some of the historic books and some important documents, historic photographs and newspapers. - The Art Gallery kept the 19th Century art collection and some of the artefacts from the museum. - The Historic Society has some items - The State Museum has some items - Some items were destroyed - Flagstaff Hill Maritime Village has old newspapers, Government Gazettes, most of the Mechanics' Institute Library, ledgers and documents connected to the Mechanics' Institute Library, some framed and unframed art works and some photographs. The Warrnambool Mechanics' Institute Library book collection is deemed to be of great importance because it is one of the few collections in an almost intact state, and many of the books are now very rare and of great value. NOTE: Pages of this book have been digitally recorded and archived.The Warrnambool Mechanics Institute book collection has historical and social significance for its strong association with the Mechanics Institute movement and the important role it played in the intellectual, cultural and social development of people throughout the latter part of the nineteenth century and the early twentieth century. The collection of books is a rare example of an early lending library and its significance is enhanced by the survival of an original collection of many volumes. Record book, Warrnambool Mechanics Institute Committee, Secretaries reports, 5th April 1903 - 31st March, 1906. Soft card with red/blue/white marble pattern and red binding. Ruled lines with red left margins. flagstaff hill, warrnambool, shipwrecked coast, flagstaff hill maritime museum, maritime museum, shipwreck coast, flagstaff hill maritime village, great ocean road, warrnambool mechanics' institute, mechanics' institute records warrnambool, record book c1903 -
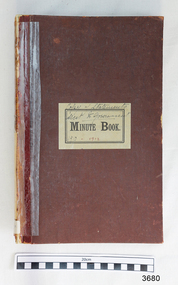 Flagstaff Hill Maritime Museum and Village
Record Book, c. 1910
In UK in early 1800's the word 'mechanic' was applied to a broader range of skills such as working man, tradesman or artisan. Mechanics' Institutes were formed originally for voluntary, self-funded organisations, to improve the education of working men and to instruct them on their various trades. The germ of the idea came from a class formed in 1799 by Professor George Birbeck in Glasgow, Scotland, for journeymen mechanics (apprentice trade workers), with the first Institutes being organised in London and Manchester in the 1820's. By then the original aim had broadened and the Mechanics' Institutes were established as popular agencies of adult education. The Mechanics' Institutes were run by committees that provided facilities for a meeting room, hall suitable for lectures, and a library. Funding was raised locally and often supplemented by grants from government agencies for the purchase of books and other resources. Activities were community based. In Australia, Mechanics' Institutes were set up in New South Wales and in Tasmania in the late 1820's. Mechanics' Institutes began in Victoria, with the first one in Melbourne dating from 1839, providing similar services but in time offered services tailored to their specific area. Warrnambool's Mechanics' Institute (or Institution as it was sometimes called) was one of the earliest in Victoria. On 17th October 1853 a meeting was held where it was resolved to request the Lieutenant Governor of the Colony to grant land for the erection of a Mechanics' Institutes building. A committee was formed at the meeting and Richard Osburne chaired the first meeting of this committee. The land on the North West corner of Banyan and Merri Streets was granted but there were no funds to erect the building. The Formal Rights of the Warrnambool Mechanics' Institute's encompassed its aims and these were officially adopted in1859; "This Institution has for its object the diffusion of literary, scientific, and other useful knowledge amongst its members, excluding all controversial subjects, religious or political. "These objects are sought to be obtained by means of a circulating library, a reading room, the establishment of classes, debates, and the occasional delivery of lectures on natural and experimental philosophy, mechanics, astronomy, chemistry, natural history, literature, and the useful and ornamental arts, particularly those which have a more immediate reference to the colony." The Warrnambool Mechanics' Institute opened its first reading room in November1884 in the National School building at the corner of Banyan and Timor Streets. The Institute was funded by member subscription, payable on a quarterly, half yearly or yearly basis. Samuel Hannaford, the Manager of the Warrnambool Bank of Australasia, was the first Honorary Secretary of the Mechanics' Institutes, and an early President and Vice-President. He also gave several of the early lectures in the Reading Room. Another early Secretary, Librarian and lecturer was Marmaduke Fisher, the teacher at the National School. Lecture topics included The Poets and Poetry of Ireland', 'The Birth and Development of the Earth', 'The Vertebrae - with Remarks on the pleasures resulting from the study of Natural History' and 'Architecture'. In q856 the Reading Room was moved to James Hider's shop in Timor Street, and by 1864 it was located in the bookshop of Davies and Read. In the 1860's the Mechanics' Institute struggled as membership waned but in 1866, after a series of fund raising efforts, the committee was able to purchase land in Liebig Street, on a site then called Market Square, between the weighbridge and the fire station. A Mechanics' Institute building was opened at this site in August 1871. The following year four more rooms were added to the main Reading Room and in 1873 the Artisan School of Design was incorporated into the Institute. The same year Joseph Archibald established a Museum; however it deteriorated when he was transferred to Bendigo in 1877. In 1880, with Archibald's return to Warrnambool, the Museum was re-established, and in 1885 a new building was built at the back of the Institute to accommodate the re-created School of Design, the Art Gallery and the Museum. In 1887 the Museum section was moved to the former court house in Timor Street (for some time the walls of the building formed part of the TAFE cafeteria but all is now demolished)). In 1911 the Museum was transferred back to the original building and the management of the Mechanics' Institute was handed over to the Warrnambool City Council. The Museum and Art Gallery became one and housed many fine works of art., and the Library continued to grow. The building was well patronised, with records showing that at the beginning of the 20th century there were between 500 and 800 visitors. During World War One the monthly figures were in the thousands, with 3,400 people visiting in January 1915. The Museum was a much loved Institution in Warrnambool until the contents of the Museum and Art Gallery were removed to make room for the Warrnambool City Council Engineers' Department. The contents were stored but many of the items were scattered or lost. In 1975 the original building was demolished and the site became occupied by the Civic Centre, which included the new City Library. (The library was temporarily located in the old Palais building in Koroit Street.) In the process of reorganisation the Collection was distributed amongst the community groups: - The new City Library took some of the historic books and some important documents, historic photographs and newspapers. - The Art Gallery kept the 19th Century art collection and some of the artefacts from the museum. - The Historic Society has some items - The State Museum has some items - Some items were destroyed - Flagstaff Hill Maritime Village has old newspapers, Government Gazettes, most of the Mechanics' Institute Library, ledgers and documents connected to the Mechanics' Institute Library, some framed and unframed art works and some photographs. The Warrnambool Mechanics' Institute Library book collection is deemed to be of great importance because it is one of the few collections in an almost intact state, and many of the books are now very rare and of great value. NOTE: Pages of this book have been digitally recorded and archived.The Warrnambool Mechanics Institute book collection has historical and social significance for its strong association with the Mechanics Institute movement and the important role it played in the intellectual, cultural and social development of people throughout the latter part of the nineteenth century and the early twentieth century. The collection of books is a rare example of an early lending library and its significance is enhanced by the survival of an original collection of many volumes. Record Book, Warrnambool Mechanics Institute, Copy of Statements sent to Government, 1910-1912. Hard cover, brown, pages have blue lines with red left margins, edges of pages have marbled pattern.flagstaff hill, warrnambool, shipwrecked coast, flagstaff hill maritime museum, maritime museum, shipwreck coast, flagstaff hill maritime village, great ocean road, warrnambool mechanics' institute, mechanics' institute records warrnambool, record book 1910 -
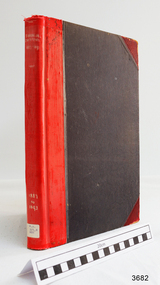 Flagstaff Hill Maritime Museum and Village
Record Book, c. 1887
In UK in early 1800's the word 'mechanic' was applied to a broader range of skills such as working man, tradesman or artisan. Mechanics' Institutes were formed originally for voluntary, self-funded organisations, to improve the education of working men and to instruct them on their various trades. The germ of the idea came from a class formed in 1799 by Professor George Birbeck in Glasgow, Scotland, for journeymen mechanics (apprentice trade workers), with the first Institutes being organised in London and Manchester in the 1820's. By then the original aim had broadened and the Mechanics' Institutes were established as popular agencies of adult education. The Mechanics' Institutes were run by committees that provided facilities for a meeting room, hall suitable for lectures, and a library. Funding was raised locally and often supplemented by grants from government agencies for the purchase of books and other resources. Activities were community based. In Australia, Mechanics' Institutes were set up in New South Wales and in Tasmania in the late 1820's. Mechanics' Institutes began in Victoria, with the first one in Melbourne dating from 1839, providing similar services but in time offered services tailored to their specific area. Warrnambool's Mechanics' Institute (or Institution as it was sometimes called) was one of the earliest in Victoria. On 17th October 1853 a meeting was held where it was resolved to request the Lieutenant Governor of the Colony to grant land for the erection of a Mechanics' Institutes building. A committee was formed at the meeting and Richard Osburne chaired the first meeting of this committee. The land on the North West corner of Banyan and Merri Streets was granted but there were no funds to erect the building. The Formal Rights of the Warrnambool Mechanics' Institute's encompassed its aims and these were officially adopted in1859; "This Institution has for its object the diffusion of literary, scientific, and other useful knowledge amongst its members, excluding all controversial subjects, religious or political. "These objects are sought to be obtained by means of a circulating library, a reading room, the establishment of classes, debates, and the occasional delivery of lectures on natural and experimental philosophy, mechanics, astronomy, chemistry, natural history, literature, and the useful and ornamental arts, particularly those which have a more immediate reference to the colony." The Warrnambool Mechanics' Institute opened its first reading room in November1884 in the National School building at the corner of Banyan and Timor Streets. The Institute was funded by member subscription, payable on a quarterly, half yearly or yearly basis. Samuel Hannaford, the Manager of the Warrnambool Bank of Australasia, was the first Honorary Secretary of the Mechanics' Institutes, and an early President and Vice-President. He also gave several of the early lectures in the Reading Room. Another early Secretary, Librarian and lecturer was Marmaduke Fisher, the teacher at the National School. Lecture topics included The Poets and Poetry of Ireland', 'The Birth and Development of the Earth', 'The Vertebrae - with Remarks on the pleasures resulting from the study of Natural History' and 'Architecture'. In q856 the Reading Room was moved to James Hider's shop in Timor Street, and by 1864 it was located in the bookshop of Davies and Read. In the 1860's the Mechanics' Institute struggled as membership waned but in 1866, after a series of fund raising efforts, the committee was able to purchase land in Liebig Street, on a site then called Market Square, between the weighbridge and the fire station. A Mechanics' Institute building was opened at this site in August 1871. The following year four more rooms were added to the main Reading Room and in 1873 the Artisan School of Design was incorporated into the Institute. The same year Joseph Archibald established a Museum; however it deteriorated when he was transferred to Bendigo in 1877. In 1880, with Archibald's return to Warrnambool, the Museum was re-established, and in 1885 a new building was built at the back of the Institute to accommodate the re-created School of Design, the Art Gallery and the Museum. In 1887 the Museum section was moved to the former court house in Timor Street (for some time the walls of the building formed part of the TAFE cafeteria but all is now demolished)). In 1911 the Museum was transferred back to the original building and the management of the Mechanics' Institute was handed over to the Warrnambool City Council. The Museum and Art Gallery became one and housed many fine works of art., and the Library continued to grow. The building was well patronised, with records showing that at the beginning of the 20th century there were between 500 and 800 visitors. During World War One the monthly figures were in the thousands, with 3,400 people visiting in January 1915. The Museum was a much loved Institution in Warrnambool until the contents of the Museum and Art Gallery were removed to make room for the Warrnambool City Council Engineers' Department. The contents were stored but many of the items were scattered or lost. In 1975 the original building was demolished and the site became occupied by the Civic Centre, which included the new City Library. (The library was temporarily located in the old Palais building in Koroit Street.) In the process of reorganisation the Collection was distributed amongst the community groups: - The new City Library took some of the historic books and some important documents, historic photographs and newspapers. - The Art Gallery kept the 19th Century art collection and some of the artefacts from the museum. - The Historic Society has some items - The State Museum has some items - Some items were destroyed - Flagstaff Hill Maritime Village has old newspapers, Government Gazettes, most of the Mechanics' Institute Library, ledgers and documents connected to the Mechanics' Institute Library, some framed and unframed art works and some photographs. The Warrnambool Mechanics' Institute Library book collection is deemed to be of great importance because it is one of the few collections in an almost intact state, and many of the books are now very rare and of great value. NOTE: Pages of this book have been digitally recorded and archived.The Warrnambool Mechanics Institute book collection has historical and social significance for its strong association with the Mechanics Institute movement and the important role it played in the intellectual, cultural and social development of people throughout the latter part of the nineteenth century and the early twentieth century. The collection of books is a rare example of an early lending library and its significance is enhanced by the survival of an original collection of many volumes. Record book, Warrnambool Mechanics Institute Financial Statements 1887-1893, Hard cover, black with red spine and red corner protection. Page edges have marbled pattern, pages have accounting columns.flagstaff hill, warrnambool, shipwrecked coast, flagstaff hill maritime museum, maritime museum, shipwreck coast, flagstaff hill maritime village, great ocean road, warrnambool mechanics' institute, mechanics' institute records warrnambool, record book c. 1887 -
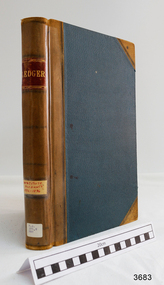 Flagstaff Hill Maritime Museum and Village
Record Book, c. 1892
In UK in early 1800's the word 'mechanic' was applied to a broader range of skills such as working man, tradesman or artisan. Mechanics' Institutes were formed originally for voluntary, self-funded organisations, to improve the education of working men and to instruct them on their various trades. The germ of the idea came from a class formed in 1799 by Professor George Birbeck in Glasgow, Scotland, for journeymen mechanics (apprentice trade workers), with the first Institutes being organised in London and Manchester in the 1820's. By then the original aim had broadened and the Mechanics' Institutes were established as popular agencies of adult education. The Mechanics' Institutes were run by committees that provided facilities for a meeting room, hall suitable for lectures, and a library. Funding was raised locally and often supplemented by grants from government agencies for the purchase of books and other resources. Activities were community based. In Australia, Mechanics' Institutes were set up in New South Wales and in Tasmania in the late 1820's. Mechanics' Institutes began in Victoria, with the first one in Melbourne dating from 1839, providing similar services but in time offered services tailored to their specific area. Warrnambool's Mechanics' Institute (or Institution as it was sometimes called) was one of the earliest in Victoria. On 17th October 1853 a meeting was held where it was resolved to request the Lieutenant Governor of the Colony to grant land for the erection of a Mechanics' Institutes building. A committee was formed at the meeting and Richard Osburne chaired the first meeting of this committee. The land on the North West corner of Banyan and Merri Streets was granted but there were no funds to erect the building. The Formal Rights of the Warrnambool Mechanics' Institute's encompassed its aims and these were officially adopted in1859; "This Institution has for its object the diffusion of literary, scientific, and other useful knowledge amongst its members, excluding all controversial subjects, religious or political. "These objects are sought to be obtained by means of a circulating library, a reading room, the establishment of classes, debates, and the occasional delivery of lectures on natural and experimental philosophy, mechanics, astronomy, chemistry, natural history, literature, and the useful and ornamental arts, particularly those which have a more immediate reference to the colony." The Warrnambool Mechanics' Institute opened its first reading room in November1884 in the National School building at the corner of Banyan and Timor Streets. The Institute was funded by member subscription, payable on a quarterly, half yearly or yearly basis. Samuel Hannaford, the Manager of the Warrnambool Bank of Australasia, was the first Honorary Secretary of the Mechanics' Institutes, and an early President and Vice-President. He also gave several of the early lectures in the Reading Room. Another early Secretary, Librarian and lecturer was Marmaduke Fisher, the teacher at the National School. Lecture topics included The Poets and Poetry of Ireland', 'The Birth and Development of the Earth', 'The Vertebrae - with Remarks on the pleasures resulting from the study of Natural History' and 'Architecture'. In q856 the Reading Room was moved to James Hider's shop in Timor Street, and by 1864 it was located in the bookshop of Davies and Read. In the 1860's the Mechanics' Institute struggled as membership waned but in 1866, after a series of fund raising efforts, the committee was able to purchase land in Liebig Street, on a site then called Market Square, between the weighbridge and the fire station. A Mechanics' Institute building was opened at this site in August 1871. The following year four more rooms were added to the main Reading Room and in 1873 the Artisan School of Design was incorporated into the Institute. The same year Joseph Archibald established a Museum; however it deteriorated when he was transferred to Bendigo in 1877. In 1880, with Archibald's return to Warrnambool, the Museum was re-established, and in 1885 a new building was built at the back of the Institute to accommodate the re-created School of Design, the Art Gallery and the Museum. In 1887 the Museum section was moved to the former court house in Timor Street (for some time the walls of the building formed part of the TAFE cafeteria but all is now demolished)). In 1911 the Museum was transferred back to the original building and the management of the Mechanics' Institute was handed over to the Warrnambool City Council. The Museum and Art Gallery became one and housed many fine works of art., and the Library continued to grow. The building was well patronised, with records showing that at the beginning of the 20th century there were between 500 and 800 visitors. During World War One the monthly figures were in the thousands, with 3,400 people visiting in January 1915. The Museum was a much loved Institution in Warrnambool until the contents of the Museum and Art Gallery were removed to make room for the Warrnambool City Council Engineers' Department. The contents were stored but many of the items were scattered or lost. In 1975 the original building was demolished and the site became occupied by the Civic Centre, which included the new City Library. (The library was temporarily located in the old Palais building in Koroit Street.) In the process of reorganisation the Collection was distributed amongst the community groups: - The new City Library took some of the historic books and some important documents, historic photographs and newspapers. - The Art Gallery kept the 19th Century art collection and some of the artefacts from the museum. - The Historic Society has some items - The State Museum has some items - Some items were destroyed - Flagstaff Hill Maritime Village has old newspapers, Government Gazettes, most of the Mechanics' Institute Library, ledgers and documents connected to the Mechanics' Institute Library, some framed and unframed art works and some photographs. The Warrnambool Mechanics' Institute Library book collection is deemed to be of great importance because it is one of the few collections in an almost intact state, and many of the books are now very rare and of great value. NOTE: Pages of this book have been digitally recorded and archived.The Warrnambool Mechanics Institute book collection has historical and social significance for its strong association with the Mechanics Institute movement and the important role it played in the intellectual, cultural and social development of people throughout the latter part of the nineteenth century and the early twentieth century. The collection of books is a rare example of an early lending library and its significance is enhanced by the survival of an original collection of many volumes. Record book, Warrnambool Mechanics Institute Accounts Ledger, 1892-1896. Hard ccover, green with brown fabric protecting corners, Front of book has alphabetical index tabs, remainder of book has numbered pages with accounting columns.flagstaff hill, warrnambool, shipwrecked coast, flagstaff hill maritime museum, maritime museum, shipwreck coast, flagstaff hill maritime village, great ocean road, warrnambool mechanics' institute, mechanics' institute records warrnambool, record book 1892 -
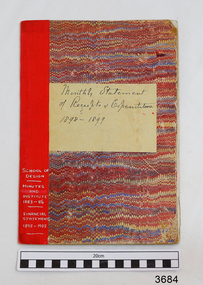 Flagstaff Hill Maritime Museum and Village
Record Book, c. 1883
In UK in early 1800's the word 'mechanic' was applied to a broader range of skills such as working man, tradesman or artisan. Mechanics' Institutes were formed originally for voluntary, self-funded organisations, to improve the education of working men and to instruct them on their various trades. The germ of the idea came from a class formed in 1799 by Professor George Birbeck in Glasgow, Scotland, for journeymen mechanics (apprentice trade workers), with the first Institutes being organised in London and Manchester in the 1820's. By then the original aim had broadened and the Mechanics' Institutes were established as popular agencies of adult education. The Mechanics' Institutes were run by committees that provided facilities for a meeting room, hall suitable for lectures, and a library. Funding was raised locally and often supplemented by grants from government agencies for the purchase of books and other resources. Activities were community based. In Australia, Mechanics' Institutes were set up in New South Wales and in Tasmania in the late 1820's. Mechanics' Institutes began in Victoria, with the first one in Melbourne dating from 1839, providing similar services but in time offered services tailored to their specific area. Warrnambool's Mechanics' Institute (or Institution as it was sometimes called) was one of the earliest in Victoria. On 17th October 1853 a meeting was held where it was resolved to request the Lieutenant Governor of the Colony to grant land for the erection of a Mechanics' Institutes building. A committee was formed at the meeting and Richard Osburne chaired the first meeting of this committee. The land on the North West corner of Banyan and Merri Streets was granted but there were no funds to erect the building. The Formal Rights of the Warrnambool Mechanics' Institute's encompassed its aims and these were officially adopted in1859; "This Institution has for its object the diffusion of literary, scientific, and other useful knowledge amongst its members, excluding all controversial subjects, religious or political. "These objects are sought to be obtained by means of a circulating library, a reading room, the establishment of classes, debates, and the occasional delivery of lectures on natural and experimental philosophy, mechanics, astronomy, chemistry, natural history, literature, and the useful and ornamental arts, particularly those which have a more immediate reference to the colony." The Warrnambool Mechanics' Institute opened its first reading room in November1884 in the National School building at the corner of Banyan and Timor Streets. The Institute was funded by member subscription, payable on a quarterly, half yearly or yearly basis. Samuel Hannaford, the Manager of the Warrnambool Bank of Australasia, was the first Honorary Secretary of the Mechanics' Institutes, and an early President and Vice-President. He also gave several of the early lectures in the Reading Room. Another early Secretary, Librarian and lecturer was Marmaduke Fisher, the teacher at the National School. Lecture topics included The Poets and Poetry of Ireland', 'The Birth and Development of the Earth', 'The Vertebrae - with Remarks on the pleasures resulting from the study of Natural History' and 'Architecture'. In q856 the Reading Room was moved to James Hider's shop in Timor Street, and by 1864 it was located in the bookshop of Davies and Read. In the 1860's the Mechanics' Institute struggled as membership waned but in 1866, after a series of fund raising efforts, the committee was able to purchase land in Liebig Street, on a site then called Market Square, between the weighbridge and the fire station. A Mechanics' Institute building was opened at this site in August 1871. The following year four more rooms were added to the main Reading Room and in 1873 the Artisan School of Design was incorporated into the Institute. The same year Joseph Archibald established a Museum; however it deteriorated when he was transferred to Bendigo in 1877. In 1880, with Archibald's return to Warrnambool, the Museum was re-established, and in 1885 a new building was built at the back of the Institute to accommodate the re-created School of Design, the Art Gallery and the Museum. In 1887 the Museum section was moved to the former court house in Timor Street (for some time the walls of the building formed part of the TAFE cafeteria but all is now demolished)). In 1911 the Museum was transferred back to the original building and the management of the Mechanics' Institute was handed over to the Warrnambool City Council. The Museum and Art Gallery became one and housed many fine works of art., and the Library continued to grow. The building was well patronised, with records showing that at the beginning of the 20th century there were between 500 and 800 visitors. During World War One the monthly figures were in the thousands, with 3,400 people visiting in January 1915. The Museum was a much loved Institution in Warrnambool until the contents of the Museum and Art Gallery were removed to make room for the Warrnambool City Council Engineers' Department. The contents were stored but many of the items were scattered or lost. In 1975 the original building was demolished and the site became occupied by the Civic Centre, which included the new City Library. (The library was temporarily located in the old Palais building in Koroit Street.) In the process of reorganisation the Collection was distributed amongst the community groups: - The new City Library took some of the historic books and some important documents, historic photographs and newspapers. - The Art Gallery kept the 19th Century art collection and some of the artefacts from the museum. - The Historic Society has some items - The State Museum has some items - Some items were destroyed - Flagstaff Hill Maritime Village has old newspapers, Government Gazettes, most of the Mechanics' Institute Library, ledgers and documents connected to the Mechanics' Institute Library, some framed and unframed art works and some photographs. The Warrnambool Mechanics' Institute Library book collection is deemed to be of great importance because it is one of the few collections in an almost intact state, and many of the books are now very rare and of great value. NOTE: Pages of this book have been digitally recorded and archived.The Warrnambool Mechanics Institute book collection has historical and social significance for its strong association with the Mechanics Institute movement and the important role it played in the intellectual, cultural and social development of people throughout the latter part of the nineteenth century and the early twentieth century. The collection of books is a rare example of an early lending library and its significance is enhanced by the survival of an original collection of many volumes. Record book; School of Design Minutes and Institute 1883-1886 / Monthly Statement of Receipts & Expenditure 1898-1905 (Double purpose book). Card cover, red/blue/white pattern, red cloth binding, pages have ruled lines. Label on one cover reads "Monthly Statement of Receipts and Expenditure 1898-1899", label on other cover reads "Comparative Statement"flagstaff hill, warrnambool, shipwrecked coast, flagstaff hill maritime museum, maritime museum, shipwreck coast, flagstaff hill maritime village, great ocean road, warrnambool mechanics' institute, mechanics' institute records warrnambool, record book 1883 -
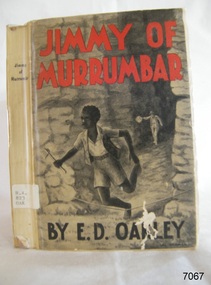 Flagstaff Hill Maritime Museum and Village
Book, Jimmy of Murrumbar, circa 1938
This novel, Jimmy of 'Murrumbar' by E.D. Oakley (Edward Daniel Oakley 1877-1962), is a children’s adventure story about an Australian indigenous boy who was educated in a mission and worked as a 'black tracker’ for the police to hunt down criminals in the bush and mountain region of the Grampian Ranges of Victoria. Oakely's parents, Thomas and Eliza, had a farm in Warrnambool called 'Oakbank'. Oakley worked at various jobs in the local district and later had his own wheat farms. When he returned to Warrnambool to build commercial premises and work in the retail industry. His influence encouraged Fletcher Jones to open a shop in Warrnambool. His novel - Jimmy of 'Murrumbar' - was written after he retired. The copy of the book in our collection does not have a publication date. The National Library of Australia lists two editions of this book, one dated 1938, the other is undetermined. It was published as part of a series called the Marcie Muir Collection of Australian children's books. No reference has been found to the author or any further works by him/her. The novel was reprinted as a reproduction in 2017 as a paperback and a leather bound edition 'Classic Reprint' by Forgotten Books. WARRNAMBOOL MECHANICS’ INSTITUTE Warrnambool's Mechanics' Institute (or Institution as it was sometimes called) was one of the earliest in Victoria. On 17th October 1853, a meeting was held where it was resolved to request the Lieutenant Governor of the Colony to grant land for the erection of a Mechanics' Institutes building. A committee was formed at the meeting and Richard Osburne chaired the first meeting of this committee. The land on the North West corner of Banyan and Merri Streets was granted but there were no funds to erect the building. The Formal Rights of the Warrnambool Mechanics' Institute's encompassed its aims and these were officially adopted in1859; "This Institution has for its object the diffusion of literary, scientific, and other useful knowledge amongst its members, excluding all controversial subjects, religious or political. These objects are sought to be obtained by means of a circulating library, a reading room, the establishment of classes, debates, and the occasional delivery of lectures on natural and experimental philosophy, mechanics, astronomy, chemistry, natural history, literature, and the useful and ornamental arts, particularly those which have a more immediate reference to the colony." The Warrnambool Mechanics' Institute opened its first reading room in November 1884 in the National School building at the corner of Banyan and Timor Streets. The Institute was funded by member subscription, payable on a quarterly, half-yearly or yearly basis. Samuel Hannaford, the Manager of the Warrnambool Bank of Australasia, was the first Honorary Secretary of the Mechanics' Institutes, and an early President and Vice-President. He also gave several of the early lectures in the Reading Room. Another early Secretary, Librarian and lecturer was Marmaduke Fisher, the teacher at the National School. Lecture topics included The Poets and Poetry of Ireland', 'The Birth and Development of the Earth', 'The Vertebrae - with Remarks on the pleasures resulting from the study of Natural History' and 'Architecture'. In 1856 the Reading Room was moved to James Hider's shop in Timor Street, and by 1864 it was located in the bookshop of Davies and Read. In the 1860's the Mechanics' Institute struggled as membership waned but in 1866, after a series of fundraising efforts, the committee was able to purchase land in Liebig Street, on a site then called Market Square, between the weighbridge and the fire station. A Mechanics' Institute building was opened at this site in August 1871. The following year four more rooms were added to the main Reading Room and in 1873 the Artisan School of Design was incorporated into the Institute. The same year Joseph Archibald established a Museum; however, it deteriorated when he was transferred to Bendigo in 1877. In 1880, with Archibald's return to Warrnambool, the Museum was re-established, and in 1885 a new building was built at the back of the Institute to accommodate the re-created School of Design, the Art Gallery and the Museum. In 1887 the Museum section was moved to the former courthouse in Timor Street (for some time the walls of the building formed part of the TAFE cafeteria but all is now demolished)). In 1911 the Museum was transferred back to the original building and the management of the Mechanics' Institute was handed over to the Warrnambool City Council. The Museum and Art Gallery became one and housed many fine works of art, and the Library continued to grow. The building was well patronised, with records showing that at the beginning of the 20th century there were between 500 and 800 visitors. During World War One the monthly figures were in the thousands, with 3,400 people visiting in January 1915. The Museum was a much loved Institution in Warrnambool until the contents of the Museum and Art Gallery were removed to make room for the Warrnambool City Council Engineers' Department. The contents were stored but many of the items were scattered or lost. When the original building was demolished the site became occupied by the Civic Centre, which included the new City Library. (The library was temporarily located in the old Palais building in Koroit Street.) In the process of reorganisation the Collection was distributed amongst the community groups: -The new City Library took some of the historical books and some important documents, historic photographs and newspapers. -The Art Gallery kept the 19th Century art collection and some of the artefacts from the museum. -The Historical Society has some items -The State Museum has some items -Some items were destroyed -Flagstaff Hill Maritime Village has old newspapers, Government Gazettes, most of the Mechanics' Institute Library, ledgers and documents connected to the Mechanics' Institute Library, some framed and unframed artworks and some photographs. The Warrnambool Mechanics' Institute Library book collection is deemed to be of great importance because it is one of the few collections in an almost intact state, and many of the books are now very rare and of great value. This novel is historically significant for its story, representing the changes to Australian Indigenous culture and life after colonisation. The book appears to be that this is the only work written by E.D. Oakley. It is locally significant for being written by an early prominent Warrnambool family member. Jimmy of Murrumbar : A Story of the Amazing Ability and Fidelity of an Australian Black Tracker Author: E D Oakley (Edward Daniel Oakley) Publisher: Osboldstone & Co, Pty Ltd, Melbourne, Australia The label on the spine with typed text R.A. 823 OAK The front loose endpaper has a sticker from Warrnambool Children’s Library shipwrecked-coast, flagstaff-hill, flagstaff-hill-maritime-museum, warrnambool, maritime-museum, shipwreck-coast, flagstaff-hill-maritime-village, shipwrecked-artefact, book, pattison collection, warrnambool library, warrnambool mechanics’ institute, ralph eric pattison, corangamite regional library service, warrnambool city librarian, mechanics’ institute library, victorian library board, warrnambool books and records, warrnambool children’s library, jimmy of murrumbar, e d oakley, edward daniel oakley, novel, young adult novel, juvenile fiction, australian black tracker, law enforcement - police trackers, tracking and trailing in australia, australian bush, grampian ranges in victoria, warrnambool history, fletcher jones, oakbank, thomas and eliza oakley, indigenous literature, indigenous australians -
 Eltham District Historical Society Inc
Photograph - Digital Photograph, Alan King, Nillumbik Shire Offices, Greensborough, 30 March 2008
Nillumbik Shire Council transferred to the former Diamond Valley Shire Offices in Greensborough after municipal restructuing. The offices became the official Nillumbik Shire Council Offices on 16 October 1995. The former Shire of Diamond Valley Civic Centre or Shire Office building was officially opened on 26th February 1972. Archtiects were A.K. Lines, McFarlane & Marshall and it was built by L.U. Simon Pty Ltd, The Diamond Valley Shire had been created in 1964 from part of the City of Heidelberg. On December 15, 1994 the Shire of Nillumbik was established. Under the Council amalgamations imposed by the Kennett government, the Shire of Eltham, Shire of Diamond Valley and City of Heidelberg ceased to exist with the establishment of Nillumbik Shire Council and the City of Banyule.The new Nillumbik shire surrended the west riding from Eltham to Banyule but in place gained parts of the former Diamond Valley Shire which itself had been created in 1964 from parts of the City of Heidelberg. Three unelected and non-local Commissioners were put in place by the government bringing democracy into question by many members of the local community. The Commissioners determined to abandon the former Shire of Eltham offices located in Main Road, Eltham and in turn occupy the former Shire of Diamond Valley offices located at the boundary of the new shire with Banyule, in Civic Drive, Greensborough. In July 1996 the Commissioners sold the former Eltham Shire Offices and had them bulldozed leading to many years of communiity protest over the process and future development applications. The site has remained vacant ever since. Published: Nillumbik Now and Then / Marguerite Marshall 2008; photographs Alan King with Marguerite Marshall.; p43 It was the need for roads that led to this district’s first council. In 1853 a committee was formed to improve the rough roads, some in Kangaroo Ground being almost impassable in winter.1 The committee fundraised by voluntary levies and grants to improve in particular, the main road between Kangaroo Ground and the Plenty River. From this committee arose the Eltham District Road Board, in 1856, which was the precursor to the Eltham Shire Council. The Board’s first chairman was Kangaroo Ground farmer, John Barr. Secretary was the former committee’s secretary, Andrew Ross, Kangaroo Ground’s first school teacher, and founder of the district newspaper, The Evelyn Observer.2 Most of the board’s income came from a toll-house north of the Lower Plenty Bridge, which funded such projects as a road from Kangaroo Ground to the Caledonia Diggings. In 1871 the Shire of Eltham was proclaimed, with its boundaries the same as those of the Road Board, and Councillor A Donaldson of Kangaroo Ground was the first president. Eltham was at the southern tip of the shire, which extended north to Kinglake and east beyond Yarra Glen. In 1878, part of Kinglake was added to the shire, while the area east of Watts River, near Healesville was removed. In 1912, then again in 1958, the shire was further reduced. Yarra Glen, Steels Creek, Tarrawarra, parts of Healesville and Christmas Hills, were transferred to the Shire of Healesville. In 1972 a smaller area, at Kinglake, was transferred to the Shire of Yea, leaving 277 square kilometres in the Eltham Shire. Perhaps no other Victorian municipality has had so many meeting places. Although from 1858 to 1904, the council convened at the office in the home of Secretary Charles Wingrove, the board, and later the council, also met at other more central locations.3 The board moved from the Fountain of Friendship Hotel to the Eltham Courthouse, to the Kangaroo Ground schoolhouse. It then met at the Kangaroo Ground Hotel, which some considered put it in danger of interruptions by people ‘the worse for liquor’.4 In 1885 the council met at the hall on Mr J Donaldson’s land at Kangaroo Ground. After Wingrove’s retirement, the council rented space at the Kangaroo Ground General Store and Post Office. Then, in 1917, the council bought the former office of The Evelyn Observer, after its printing works transferred to Hurstbridge. In 1934, fire destroyed the shire office, which was temporarily relocated to the Kangaroo Ground home of Shire Secretary, Mr P J McMahon. In 1941, the shire office moved to a new building (which included a public hall) in Eltham, at the corner of Arthur Street and Main Road, where the Eltham Village Shopping Centre was eventually built. Growth required new offices, which opened in 1965, on the former Shillinglaw property in Main Road.5 In 1994, as part of municipal restructuring under the Jeff Kennett Liberal Government, most of the Eltham Shire formed part of the new Shire of Nillumbik. It joined with the north section of the Diamond Valley Shire and parts of the Healesville and Whittlesea municipalities. The Diamond Valley Shire had been created in 1964, from part of the City of Heidelberg. Turbulence followed Nillumbik Shire’s formation. Under the Commissioners the council transferred to the former Diamond Valley Shire offices in Greensborough, and the Eltham council offices were demolished. In March 1997 the first five-member Nillumbik Council was elected. But, in October 1998, the government suspended the council and appointed an administrator . Early in 1999, shire residents voted to increase councillors to nine: comprising five ward councillors and four shire-wide councillors. Elections were held in March 1999. Then, before the March 2002 elections, nine new wards were created.6 In 2008 these were reduced to seven. Today [2008] the council governs a varied population of more than 60,000 people living in townships and on bush properties in the green wedge.This collection of almost 130 photos about places and people within the Shire of Nillumbik, an urban and rural municipality in Melbourne's north, contributes to an understanding of the history of the Shire. Published in 2008 immediately prior to the Black Saturday bushfires of February 7, 2009, it documents sites that were impacted, and in some cases destroyed by the fires. It includes photographs taken especially for the publication, creating a unique time capsule representing the Shire in the early 21st century. It remains the most recent comprehenesive publication devoted to the Shire's history connecting local residents to the past. nillumbik now and then (marshall-king) collection, greensborough, nillumbik shire council offices, civic drive -
 Bendigo Historical Society Inc.
Document - Hustlers, Sheepshead and Deborah lines of reef
Albert Richardson was a mining historian who wrote widely on the mines of the Bendigo Goldfield. The park opposite the Goldmines Hotel in Marong Road, is named in his honour. Five page document, hand written by Albert Richardson on lined foolscap and edited with cross-outs and insertions, . The mines along the Hustlers line of reef and the Sheepshead line of reef are described. Mines listed on Hustlers line of reef: Fortuna Hustlers (1888 - 1913), shaft 2,240 feet at rear of Buckell and Jeffrey's offices; Royal Hustlers Reserve No. 2 - two shafts 'City" 860 feet, now covered by R.S.L. building Pall Mall, steel poppet legs 60 ft high and 'Park Shaft" at rear of Camp Hill School, 1,775 feet, steel poppet legs 60 feet high; Hustlers Hill Group first worked by Jonathan Harris in 1853 and bounded by Valentine, Anderson and Ironbark Creek to the north and Milroy Street to the east, one of first areas worked for quartz reefing. It with Garden Gully line west and Victoria Hill Ironbark, formed by far the richest cross section of the Bendigo Goldfield. Great Extended Hustlers (1865-1921) close to intersection of Anderson Street and Hustlers Road, mullock heap against road and shored up around shaft, steel poppet legs now at Wattle Gully mine, Chewton, large winding machine, air compressor south of shaft and 36 head crushing battery. Hustlers Reef (Old Hustlers) and Hustlers Reef No. 1, two shafts, main 2,210 feet, about 220 yards east of Moran Street and against Fenton Street. , No. 1 shaft 1,140 feet and about 155 yards east of Moran Street. Lansell's Comet, Lightining Hill line, 2.100 feet, on Comet Hill approx 70 yards west of Holmes Road, near Comet Creek, steel poppet legs. United Hustlers and Redan (1876-1918), main Redan, 1,830 feet about 155 yards west of Sandhurst Roead, in line with Comet Hill State School, this hill known as Redan Hill. North, or New Hustlers, once known as Agnew Hustlers, wooden poppet legs, south side, Kneebone Street, Eaglehawk. Derby line, Johnson's No. 3, South Johnson's (east shaft of Collman and Tacchi) 439 feet on west wide of Woods Street, south of Wetherall Street. Paddy's Gully Line, south to north, some shafts - Lansell's 'Sandhurst" ('Needle") Eaglehawk Road shaft 2,425 feet, about 50 yards east of Needle Loops, a brick square sided chimney with Cleopatra Needle top. British American, 789 feet, just south of Holdsworth Road. Collman and Tacchi, main shaft 2,588 feet, 60 yards west of Eaglehawk Road, California Gully. Deborah Line of Reef, The Deborah (1932-1954) shaft 2.017 feet, west of Adams Road and south of Abel Street, Quarry Hill. North Deborah (1937 - 1954) shaft 1,151 feet, Breen Street, Quarry Hill, steel poppet legs. Central Deborah (1939-1954) shaft 1,347 feet Sheepshead line of reef, Lansell's South Red, White and Blue, shaft 2,124 feet, north east of Bellevue Road and 220 yards east of Adams Road. The New Red, White and Blue Consolidated (Big Blue) main shaft 2,416 feet. Lansell's Bendigo Battery 105 head, north of 'Big Blue" on his freehold lease, commenced crushing on 24th February 1895. After closing was erected as the Showground's Industrial Hall, July 1926. North Red, White and Blue, burnt down February 1926, new company 1934, closed 1938. Document is part of the Albert Richardson Collection of Bendigo mining history. bendigo, gold mining, deborah line of reef, sheepshead line of reef, hustlers line of reef, royal hustlers reserve mine, hustlers hill group of mines, great extended hustlers, hustlers reef no. 1, lightning hill line, old comet, collman and tacchi, lansell's comet, north deborah, central deborah, dhrrpdhrsf linr og trrg, new red, white and blue consolidated mine, big blue, lansell's bendigo battery, north red, white and blue mine, albert richardson collection -
 Flagstaff Hill Maritime Museum and Village
Photograph
HISTORY OF THE LOCH ARD The LOCH ARD belonged to the famous Loch Line which sailed many ships from England to Australia. Built in Glasgow by Barclay, Curdle and Co. in 1873, the LOCH ARD was a three-masted square rigged iron sailing ship. The ship measured 262ft 7" (79.87m) in length, 38ft (11.58m) in width, 23ft (7m) in depth and had a gross tonnage of 1693 tons. The LOCH ARD's main mast measured a massive 150ft (45.7m) in height. LOCH ARD made three trips to Australia and one trip to Calcutta before its final voyage. LOCH ARD left England on March 2, 1878, under the command of Captain Gibbs, a newly married, 29 year old. She was bound for Melbourne with a crew of 37, plus 17 passengers and a load of cargo. The general cargo reflected the affluence of Melbourne at the time. On board were straw hats, umbrella, perfumes, clay pipes, pianos, clocks, confectionary, linen and candles, as well as a heavier load of railway irons, cement, lead and copper. There were items included that intended for display in the Melbourne International Exhibition in 1880. The voyage to Port Phillip was long but uneventful. At 3am on June 1, 1878, Captain Gibbs was expecting to see land and the passengers were becoming excited as they prepared to view their new homeland in the early morning. But LOCH ARD was running into a fog which greatly reduced visibility. Captain Gibbs was becoming anxious as there was no sign of land or the Cape Otway lighthouse. At 4am the fog lifted. A man aloft announced that he could see breakers. The sheer cliffs of Victoria's west coast came into view, and Captain Gibbs realised that the ship was much closer to them than expected. He ordered as much sail to be set as time would permit and then attempted to steer the vessel out to sea. On coming head on into the wind, the ship lost momentum, the sails fell limp and LOCH ARD's bow swung back. Gibbs then ordered the anchors to be released in an attempt to hold its position. The anchors sank some 50 fathoms - but did not hold. By this time LOCH ARD was among the breakers and the tall cliffs of Mutton Bird Island rose behind the ship. Just half a mile from the coast, the ship's bow was suddenly pulled around by the anchor. The captain tried to tack out to sea, but the ship struck a reef at the base of Mutton Bird Island, near Port Campbell. Waves broke over the ship and the top deck was loosened from the hull. The masts and rigging came crashing down knocking passengers and crew overboard. When a lifeboat was finally launched, it crashed into the side of LOCH ARD and capsized. Tom Pearce, who had launched the boat, managed to cling to its overturned hull and shelter beneath it. He drifted out to sea and then on the flood tide came into what is now known as LOCH ARD Gorge. He swam to shore, bruised and dazed, and found a cave in which to shelter. Some of the crew stayed below deck to shelter from the falling rigging but drowned when the ship slipped off the reef into deeper water. Eva Carmichael had raced onto deck to find out what was happening only to be confronted by towering cliffs looming above the stricken ship. In all the chaos, Captain Gibbs grabbed Eva and said, "If you are saved Eva, let my dear wife know that I died like a sailor". That was the last Eva Carmichael saw of the captain. She was swept off the ship by a huge wave. Eva saw Tom Pearce on a small rocky beach and yelled to attract his attention. He dived in and swam to the exhausted woman and dragged her to shore. He took her to the cave and broke open case of brandy which had washed up on the beach. He opened a bottle to revive the unconscious woman. A few hours later Tom scaled a cliff in search of help. He followed hoof prints and came by chance upon two men from nearby Glenample Station three and a half miles away. In a state of exhaustion, he told the men of the tragedy. Tom returned to the gorge while the two men rode back to the station to get help. By the time they reached LOCH ARD Gorge, it was cold and dark. The two shipwreck survivors were taken to Glenample Station to recover. Eva stayed at the station for six weeks before returning to Ireland, this time by steamship. In Melbourne, Tom Pearce received a hero's welcome. He was presented with the first gold medal of the Royal Humane Society of Victoria and a £1000 cheque from the Victorian Government. Concerts were performed to honour the young man's bravery and to raise money for those who lost family in the LOCH ARD disaster. Of the 54 crew members and passengers on board, only two survived: the apprentice, Tom Pearce and the young woman passenger, Eva Carmichael, who lost all of her family in the tragedy. Ten days after the LOCH ARD tragedy, salvage rights to the wreck were sold at auction for £2,120. Cargo valued at £3,000 was salvaged and placed on the beach, but most washed back into the sea when another storm developed. The wreck of LOCH ARD still lies at the base of Mutton Bird Island. Much of the cargo has now been salvaged and some was washed up into what is now known as LOCH ARD Gorge. Cargo and artefacts have also been illegally salvaged over many years before protective legislation was introduced. One of the most unlikely pieces of cargo to have survived the shipwreck was a Minton porcelain peacock - one of only nine in the world. The peacock was destined for the Melbourne International Exhibition in 1880. It had been well packed, which gave it adequate protection during the violent storm. Today, the Minton peacock can be seen at the Flagstaff Hill Maritime Museum in Warrnambool. From Australia's most dramatic shipwreck it has now become Australia's most valuable shipwreck artefact and is one of very few 'objects' on the Victorian State Heritage Register. Flagstaff Hill’s collection of artefacts from LOCH ARD is significant for being one of the largest collections of artefacts from this shipwreck in Victoria. It is significant for its association with the shipwreck, which is on the Victorian Heritage Register (VHR S417). The collection is significant because of the relationship between the objects, as together they have a high potential to interpret the story of the LOCH ARD. The LOCH ARD collection is archaeologically significant as the remains of a large international passenger and cargo ship. The LOCH ARD collection is historically significant for representing aspects of Victoria’s shipping history and its potential to interpret sub-theme 1.5 of Victoria’s Framework of Historical Themes (living with natural processes). The collection is also historically significant for its association with the LOCH ARD, which was one of the worst and best known shipwrecks in Victoria’s history. Photograph of Loch Ard Gorge. Photograph taken some distance from the Gorge. Three men in the Gorge and outlines of steps can be seen. Right hand side of the photograph is written "Loch Ard Gorge"flagstaff hill, warrnambool, shipwrecked coast, flagstaff hill maritime museum, maritime museum, shipwreck coast, flagstaff hill maritime village, great ocean road, loch line, loch ard, captain gibbs, eva carmichael, tom pearce, glenample station, mutton bird island, loch ard gorge, photograph of loch ard gorge, photograph -
 Flagstaff Hill Maritime Museum and Village
Painting
HISTORY OF THE LOCH ARD The LOCH ARD belonged to the famous Loch Line which sailed many ships from England to Australia. Built in Glasgow by Barclay, Curdle and Co. in 1873, the LOCH ARD was a three-masted square rigged iron sailing ship. The ship measured 262ft 7" (79.87m) in length, 38ft (11.58m) in width, 23ft (7m) in depth and had a gross tonnage of 1693 tons. The LOCH ARD's main mast measured a massive 150ft (45.7m) in height. LOCH ARD made three trips to Australia and one trip to Calcutta before its final voyage. LOCH ARD left England on March 2, 1878, under the command of Captain Gibbs, a newly married, 29 year old. She was bound for Melbourne with a crew of 37, plus 17 passengers and a load of cargo. The general cargo reflected the affluence of Melbourne at the time. On board were straw hats, umbrella, perfumes, clay pipes, pianos, clocks, confectionary, linen and candles, as well as a heavier load of railway irons, cement, lead and copper. There were items included that intended for display in the Melbourne International Exhibition in 1880. The voyage to Port Phillip was long but uneventful. At 3am on June 1, 1878, Captain Gibbs was expecting to see land and the passengers were becoming excited as they prepared to view their new homeland in the early morning. But LOCH ARD was running into a fog which greatly reduced visibility. Captain Gibbs was becoming anxious as there was no sign of land or the Cape Otway lighthouse. At 4am the fog lifted. A man aloft announced that he could see breakers. The sheer cliffs of Victoria's west coast came into view, and Captain Gibbs realised that the ship was much closer to them than expected. He ordered as much sail to be set as time would permit and then attempted to steer the vessel out to sea. On coming head on into the wind, the ship lost momentum, the sails fell limp and LOCH ARD's bow swung back. Gibbs then ordered the anchors to be released in an attempt to hold its position. The anchors sank some 50 fathoms - but did not hold. By this time LOCH ARD was among the breakers and the tall cliffs of Mutton Bird Island rose behind the ship. Just half a mile from the coast, the ship's bow was suddenly pulled around by the anchor. The captain tried to tack out to sea, but the ship struck a reef at the base of Mutton Bird Island, near Port Campbell. Waves broke over the ship and the top deck was loosened from the hull. The masts and rigging came crashing down knocking passengers and crew overboard. When a lifeboat was finally launched, it crashed into the side of LOCH ARD and capsized. Tom Pearce, who had launched the boat, managed to cling to its overturned hull and shelter beneath it. He drifted out to sea and then on the flood tide came into what is now known as LOCH ARD Gorge. He swam to shore, bruised and dazed, and found a cave in which to shelter. Some of the crew stayed below deck to shelter from the falling rigging but drowned when the ship slipped off the reef into deeper water. Eva Carmichael had raced onto deck to find out what was happening only to be confronted by towering cliffs looming above the stricken ship. In all the chaos, Captain Gibbs grabbed Eva and said, "If you are saved Eva, let my dear wife know that I died like a sailor". That was the last Eva Carmichael saw of the captain. She was swept off the ship by a huge wave. Eva saw Tom Pearce on a small rocky beach and yelled to attract his attention. He dived in and swam to the exhausted woman and dragged her to shore. He took her to the cave and broke open case of brandy which had washed up on the beach. He opened a bottle to revive the unconscious woman. A few hours later Tom scaled a cliff in search of help. He followed hoof prints and came by chance upon two men from nearby Glenample Station three and a half miles away. In a state of exhaustion, he told the men of the tragedy. Tom returned to the gorge while the two men rode back to the station to get help. By the time they reached LOCH ARD Gorge, it was cold and dark. The two shipwreck survivors were taken to Glenample Station to recover. Eva stayed at the station for six weeks before returning to Ireland, this time by steamship. In Melbourne, Tom Pearce received a hero's welcome. He was presented with the first gold medal of the Royal Humane Society of Victoria and a £1000 cheque from the Victorian Government. Concerts were performed to honour the young man's bravery and to raise money for those who lost family in the LOCH ARD disaster. Of the 54 crew members and passengers on board, only two survived: the apprentice, Tom Pearce and the young woman passenger, Eva Carmichael, who lost all of her family in the tragedy. Ten days after the LOCH ARD tragedy, salvage rights to the wreck were sold at auction for £2,120. Cargo valued at £3,000 was salvaged and placed on the beach, but most washed back into the sea when another storm developed. The wreck of LOCH ARD still lies at the base of Mutton Bird Island. Much of the cargo has now been salvaged and some was washed up into what is now known as LOCH ARD Gorge. Cargo and artefacts have also been illegally salvaged over many years before protective legislation was introduced. One of the most unlikely pieces of cargo to have survived the shipwreck was a Minton porcelain peacock - one of only nine in the world. The peacock was destined for the Melbourne International Exhibition in 1880. It had been well packed, which gave it adequate protection during the violent storm. Today, the Minton peacock can be seen at the Flagstaff Hill Maritime Museum in Warrnambool. From Australia's most dramatic shipwreck it has now become Australia's most valuable shipwreck artefact and is one of very few 'objects' on the Victorian State Heritage Register. Flagstaff Hill’s collection of artefacts from LOCH ARD is significant for being one of the largest collections of artefacts from this shipwreck in Victoria. It is significant for its association with the shipwreck, which is on the Victorian Heritage Register (VHR S417). The collection is significant because of the relationship between the objects, as together they have a high potential to interpret the story of the LOCH ARD. The LOCH ARD collection is archaeologically significant as the remains of a large international passenger and cargo ship. The LOCH ARD collection is historically significant for representing aspects of Victoria’s shipping history and its potential to interpret sub-theme 1.5 of Victoria’s Framework of Historical Themes (living with natural processes). The collection is also historically significant for its association with the LOCH ARD, which was one of the worst and best known shipwrecks in Victoria’s history. Painting of The Loch Ard oil on board depicting wreck. It shows stormy sea and coastline in background. Ship appears to be capsized.flagstaff hill, warrnambool, shipwrecked coast, flagstaff hill maritime museum, maritime museum, shipwreck coast, flagstaff hill maritime village, great ocean road, loch line, loch ard, captain gibbs, eva carmichael, tom pearce, glenample station, mutton bird island, loch ard gorge, painting -
 Flagstaff Hill Maritime Museum and Village
Photograph
HISTORY OF THE LOCH ARD The LOCH ARD belonged to the famous Loch Line which sailed many ships from England to Australia. Built in Glasgow by Barclay, Curdle and Co. in 1873, the LOCH ARD was a three-masted square rigged iron sailing ship. The ship measured 262ft 7" (79.87m) in length, 38ft (11.58m) in width, 23ft (7m) in depth and had a gross tonnage of 1693 tons. The LOCH ARD's main mast measured a massive 150ft (45.7m) in height. LOCH ARD made three trips to Australia and one trip to Calcutta before its final voyage. LOCH ARD left England on March 2, 1878, under the command of Captain Gibbs, a newly married, 29 year old. She was bound for Melbourne with a crew of 37, plus 17 passengers and a load of cargo. The general cargo reflected the affluence of Melbourne at the time. On board were straw hats, umbrella, perfumes, clay pipes, pianos, clocks, confectionary, linen and candles, as well as a heavier load of railway irons, cement, lead and copper. There were items included that intended for display in the Melbourne International Exhibition in 1880. The voyage to Port Phillip was long but uneventful. At 3am on June 1, 1878, Captain Gibbs was expecting to see land and the passengers were becoming excited as they prepared to view their new homeland in the early morning. But LOCH ARD was running into a fog which greatly reduced visibility. Captain Gibbs was becoming anxious as there was no sign of land or the Cape Otway lighthouse. At 4am the fog lifted. A man aloft announced that he could see breakers. The sheer cliffs of Victoria's west coast came into view, and Captain Gibbs realised that the ship was much closer to them than expected. He ordered as much sail to be set as time would permit and then attempted to steer the vessel out to sea. On coming head on into the wind, the ship lost momentum, the sails fell limp and LOCH ARD's bow swung back. Gibbs then ordered the anchors to be released in an attempt to hold its position. The anchors sank some 50 fathoms - but did not hold. By this time LOCH ARD was among the breakers and the tall cliffs of Mutton Bird Island rose behind the ship. Just half a mile from the coast, the ship's bow was suddenly pulled around by the anchor. The captain tried to tack out to sea, but the ship struck a reef at the base of Mutton Bird Island, near Port Campbell. Waves broke over the ship and the top deck was loosened from the hull. The masts and rigging came crashing down knocking passengers and crew overboard. When a lifeboat was finally launched, it crashed into the side of LOCH ARD and capsized. Tom Pearce, who had launched the boat, managed to cling to its overturned hull and shelter beneath it. He drifted out to sea and then on the flood tide came into what is now known as LOCH ARD Gorge. He swam to shore, bruised and dazed, and found a cave in which to shelter. Some of the crew stayed below deck to shelter from the falling rigging but drowned when the ship slipped off the reef into deeper water. Eva Carmichael had raced onto deck to find out what was happening only to be confronted by towering cliffs looming above the stricken ship. In all the chaos, Captain Gibbs grabbed Eva and said, "If you are saved Eva, let my dear wife know that I died like a sailor". That was the last Eva Carmichael saw of the captain. She was swept off the ship by a huge wave. Eva saw Tom Pearce on a small rocky beach and yelled to attract his attention. He dived in and swam to the exhausted woman and dragged her to shore. He took her to the cave and broke open case of brandy which had washed up on the beach. He opened a bottle to revive the unconscious woman. A few hours later Tom scaled a cliff in search of help. He followed hoof prints and came by chance upon two men from nearby Glenample Station three and a half miles away. In a state of exhaustion, he told the men of the tragedy. Tom returned to the gorge while the two men rode back to the station to get help. By the time they reached LOCH ARD Gorge, it was cold and dark. The two shipwreck survivors were taken to Glenample Station to recover. Eva stayed at the station for six weeks before returning to Ireland, this time by steamship. In Melbourne, Tom Pearce received a hero's welcome. He was presented with the first gold medal of the Royal Humane Society of Victoria and a £1000 cheque from the Victorian Government. Concerts were performed to honour the young man's bravery and to raise money for those who lost family in the LOCH ARD disaster. Of the 54 crew members and passengers on board, only two survived: the apprentice, Tom Pearce and the young woman passenger, Eva Carmichael, who lost all of her family in the tragedy. Ten days after the LOCH ARD tragedy, salvage rights to the wreck were sold at auction for £2,120. Cargo valued at £3,000 was salvaged and placed on the beach, but most washed back into the sea when another storm developed. The wreck of LOCH ARD still lies at the base of Mutton Bird Island. Much of the cargo has now been salvaged and some was washed up into what is now known as LOCH ARD Gorge. Cargo and artefacts have also been illegally salvaged over many years before protective legislation was introduced. One of the most unlikely pieces of cargo to have survived the shipwreck was a Minton porcelain peacock - one of only nine in the world. The peacock was destined for the Melbourne International Exhibition in 1880. It had been well packed, which gave it adequate protection during the violent storm. Today, the Minton peacock can be seen at the Flagstaff Hill Maritime Museum in Warrnambool. From Australia's most dramatic shipwreck it has now become Australia's most valuable shipwreck artefact and is one of very few 'objects' on the Victorian State Heritage Register. Flagstaff Hill’s collection of artefacts from LOCH ARD is significant for being one of the largest collections of artefacts from this shipwreck in Victoria. It is significant for its association with the shipwreck, which is on the Victorian Heritage Register (VHR S417). The collection is significant because of the relationship between the objects, as together they have a high potential to interpret the story of the LOCH ARD. The LOCH ARD collection is archaeologically significant as the remains of a large international passenger and cargo ship. The LOCH ARD collection is historically significant for representing aspects of Victoria’s shipping history and its potential to interpret sub-theme 1.5 of Victoria’s Framework of Historical Themes (living with natural processes). The collection is also historically significant for its association with the LOCH ARD, which was one of the worst and best known shipwrecks in Victoria’s history. Photograph of Loch Ard Gorge c1900flagstaff hill, warrnambool, shipwrecked coast, flagstaff hill maritime museum, maritime museum, shipwreck coast, flagstaff hill maritime village, great ocean road, loch line, loch ard, captain gibbs, eva carmichael, tom pearce, glenample station, mutton bird island, loch ard gorge, photograph of loch ard gorge, photograph -
 Flagstaff Hill Maritime Museum and Village
Calendar
HISTORY OF THE LOCH ARD The LOCH ARD belonged to the famous Loch Line which sailed many ships from England to Australia. Built in Glasgow by Barclay, Curdle and Co. in 1873, the LOCH ARD was a three-masted square rigged iron sailing ship. The ship measured 262ft 7" (79.87m) in length, 38ft (11.58m) in width, 23ft (7m) in depth and had a gross tonnage of 1693 tons. The LOCH ARD's main mast measured a massive 150ft (45.7m) in height. LOCH ARD made three trips to Australia and one trip to Calcutta before its final voyage. LOCH ARD left England on March 2, 1878, under the command of Captain Gibbs, a newly married, 29 year old. She was bound for Melbourne with a crew of 37, plus 17 passengers and a load of cargo. The general cargo reflected the affluence of Melbourne at the time. On board were straw hats, umbrella, perfumes, clay pipes, pianos, clocks, confectionary, linen and candles, as well as a heavier load of railway irons, cement, lead and copper. There were items included that intended for display in the Melbourne International Exhibition in 1880. The voyage to Port Phillip was long but uneventful. At 3am on June 1, 1878, Captain Gibbs was expecting to see land and the passengers were becoming excited as they prepared to view their new homeland in the early morning. But LOCH ARD was running into a fog which greatly reduced visibility. Captain Gibbs was becoming anxious as there was no sign of land or the Cape Otway lighthouse. At 4am the fog lifted. A man aloft announced that he could see breakers. The sheer cliffs of Victoria's west coast came into view, and Captain Gibbs realised that the ship was much closer to them than expected. He ordered as much sail to be set as time would permit and then attempted to steer the vessel out to sea. On coming head on into the wind, the ship lost momentum, the sails fell limp and LOCH ARD's bow swung back. Gibbs then ordered the anchors to be released in an attempt to hold its position. The anchors sank some 50 fathoms - but did not hold. By this time LOCH ARD was among the breakers and the tall cliffs of Mutton Bird Island rose behind the ship. Just half a mile from the coast, the ship's bow was suddenly pulled around by the anchor. The captain tried to tack out to sea, but the ship struck a reef at the base of Mutton Bird Island, near Port Campbell. Waves broke over the ship and the top deck was loosened from the hull. The masts and rigging came crashing down knocking passengers and crew overboard. When a lifeboat was finally launched, it crashed into the side of LOCH ARD and capsized. Tom Pearce, who had launched the boat, managed to cling to its overturned hull and shelter beneath it. He drifted out to sea and then on the flood tide came into what is now known as LOCH ARD Gorge. He swam to shore, bruised and dazed, and found a cave in which to shelter. Some of the crew stayed below deck to shelter from the falling rigging but drowned when the ship slipped off the reef into deeper water. Eva Carmichael had raced onto deck to find out what was happening only to be confronted by towering cliffs looming above the stricken ship. In all the chaos, Captain Gibbs grabbed Eva and said, "If you are saved Eva, let my dear wife know that I died like a sailor". That was the last Eva Carmichael saw of the captain. She was swept off the ship by a huge wave. Eva saw Tom Pearce on a small rocky beach and yelled to attract his attention. He dived in and swam to the exhausted woman and dragged her to shore. He took her to the cave and broke open case of brandy which had washed up on the beach. He opened a bottle to revive the unconscious woman. A few hours later Tom scaled a cliff in search of help. He followed hoof prints and came by chance upon two men from nearby Glenample Station three and a half miles away. In a state of exhaustion, he told the men of the tragedy. Tom returned to the gorge while the two men rode back to the station to get help. By the time they reached LOCH ARD Gorge, it was cold and dark. The two shipwreck survivors were taken to Glenample Station to recover. Eva stayed at the station for six weeks before returning to Ireland, this time by steamship. In Melbourne, Tom Pearce received a hero's welcome. He was presented with the first gold medal of the Royal Humane Society of Victoria and a £1000 cheque from the Victorian Government. Concerts were performed to honour the young man's bravery and to raise money for those who lost family in the LOCH ARD disaster. Of the 54 crew members and passengers on board, only two survived: the apprentice, Tom Pearce and the young woman passenger, Eva Carmichael, who lost all of her family in the tragedy. Ten days after the LOCH ARD tragedy, salvage rights to the wreck were sold at auction for £2,120. Cargo valued at £3,000 was salvaged and placed on the beach, but most washed back into the sea when another storm developed. The wreck of LOCH ARD still lies at the base of Mutton Bird Island. Much of the cargo has now been salvaged and some was washed up into what is now known as LOCH ARD Gorge. Cargo and artefacts have also been illegally salvaged over many years before protective legislation was introduced. One of the most unlikely pieces of cargo to have survived the shipwreck was a Minton porcelain peacock - one of only nine in the world. The peacock was destined for the Melbourne International Exhibition in 1880. It had been well packed, which gave it adequate protection during the violent storm. Today, the Minton peacock can be seen at the Flagstaff Hill Maritime Museum in Warrnambool. From Australia's most dramatic shipwreck it has now become Australia's most valuable shipwreck artefact and is one of very few 'objects' on the Victorian State Heritage Register. Flagstaff Hill’s collection of artefacts from LOCH ARD is significant for being one of the largest collections of artefacts from this shipwreck in Victoria. It is significant for its association with the shipwreck, which is on the Victorian Heritage Register (VHR S417). The collection is significant because of the relationship between the objects, as together they have a high potential to interpret the story of the LOCH ARD. The LOCH ARD collection is archaeologically significant as the remains of a large international passenger and cargo ship. The LOCH ARD collection is historically significant for representing aspects of Victoria’s shipping history and its potential to interpret sub-theme 1.5 of Victoria’s Framework of Historical Themes (living with natural processes). The collection is also historically significant for its association with the LOCH ARD, which was one of the worst and best known shipwrecks in Victoria’s history. Calendar printed by Terang Express for December 1923 with picture of Loch Ard Gorge and survivors of wreck and also story of the episode. Has some large tears in it.flagstaff hill, warrnambool, shipwrecked coast, flagstaff hill maritime museum, maritime museum, shipwreck coast, flagstaff hill maritime village, great ocean road, loch line, loch ard, captain gibbs, eva carmichael, tom pearce, glenample station, mutton bird island, loch ard gorge, calendar, terang express -
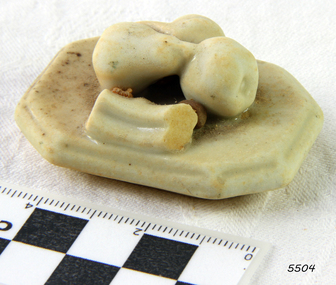 Flagstaff Hill Maritime Museum and Village
Lid
Ref: LA 2 29 274 HISTORY OF THE LOCH ARD The LOCH ARD belonged to the famous Loch Line which sailed many ships from England to Australia. Built in Glasgow by Barclay, Curdle and Co. in 1873, the LOCH ARD was a three-masted square rigged iron sailing ship. The ship measured 262ft 7" (79.87m) in length, 38ft (11.58m) in width, 23ft (7m) in depth and had a gross tonnage of 1693 tons. The LOCH ARD's main mast measured a massive 150ft (45.7m) in height. LOCH ARD made three trips to Australia and one trip to Calcutta before its final voyage. LOCH ARD left England on March 2, 1878, under the command of Captain Gibbs, a newly married, 29 year old. She was bound for Melbourne with a crew of 37, plus 17 passengers and a load of cargo. The general cargo reflected the affluence of Melbourne at the time. On board were straw hats, umbrella, perfumes, clay pipes, pianos, clocks, confectionary, linen and candles, as well as a heavier load of railway irons, cement, lead and copper. There were items included that intended for display in the Melbourne International Exhibition in 1880. The voyage to Port Phillip was long but uneventful. At 3am on June 1, 1878, Captain Gibbs was expecting to see land and the passengers were becoming excited as they prepared to view their new homeland in the early morning. But LOCH ARD was running into a fog which greatly reduced visibility. Captain Gibbs was becoming anxious as there was no sign of land or the Cape Otway lighthouse. At 4am the fog lifted. A man aloft announced that he could see breakers. The sheer cliffs of Victoria's west coast came into view, and Captain Gibbs realised that the ship was much closer to them than expected. He ordered as much sail to be set as time would permit and then attempted to steer the vessel out to sea. On coming head on into the wind, the ship lost momentum, the sails fell limp and LOCH ARD's bow swung back. Gibbs then ordered the anchors to be released in an attempt to hold its position. The anchors sank some 50 fathoms - but did not hold. By this time LOCH ARD was among the breakers and the tall cliffs of Mutton Bird Island rose behind the ship. Just half a mile from the coast, the ship's bow was suddenly pulled around by the anchor. The captain tried to tack out to sea, but the ship struck a reef at the base of Mutton Bird Island, near Port Campbell. Waves broke over the ship and the top deck was loosened from the hull. The masts and rigging came crashing down knocking passengers and crew overboard. When a lifeboat was finally launched, it crashed into the side of LOCH ARD and capsized. Tom Pearce, who had launched the boat, managed to cling to its overturned hull and shelter beneath it. He drifted out to sea and then on the flood tide came into what is now known as LOCH ARD Gorge. He swam to shore, bruised and dazed, and found a cave in which to shelter. Some of the crew stayed below deck to shelter from the falling rigging but drowned when the ship slipped off the reef into deeper water. Eva Carmichael had raced onto deck to find out what was happening only to be confronted by towering cliffs looming above the stricken ship. In all the chaos, Captain Gibbs grabbed Eva and said, "If you are saved Eva, let my dear wife know that I died like a sailor". That was the last Eva Carmichael saw of the captain. She was swept off the ship by a huge wave. Eva saw Tom Pearce on a small rocky beach and yelled to attract his attention. He dived in and swam to the exhausted woman and dragged her to shore. He took her to the cave and broke open case of brandy which had washed up on the beach. He opened a bottle to revive the unconscious woman. A few hours later Tom scaled a cliff in search of help. He followed hoof prints and came by chance upon two men from nearby Glenample Station three and a half miles away. In a state of exhaustion, he told the men of the tragedy. Tom returned to the gorge while the two men rode back to the station to get help. By the time they reached LOCH ARD Gorge, it was cold and dark. The two shipwreck survivors were taken to Glenample Station to recover. Eva stayed at the station for six weeks before returning to Ireland, this time by steamship. In Melbourne, Tom Pearce received a hero's welcome. He was presented with the first gold medal of the Royal Humane Society of Victoria and a £1000 cheque from the Victorian Government. Concerts were performed to honour the young man's bravery and to raise money for those who lost family in the LOCH ARD disaster. Of the 54 crew members and passengers on board, only two survived: the apprentice, Tom Pearce and the young woman passenger, Eva Carmichael, who lost all of her family in the tragedy. Ten days after the LOCH ARD tragedy, salvage rights to the wreck were sold at auction for £2,120. Cargo valued at £3,000 was salvaged and placed on the beach, but most washed back into the sea when another storm developed. The wreck of LOCH ARD still lies at the base of Mutton Bird Island. Much of the cargo has now been salvaged and some was washed up into what is now known as LOCH ARD Gorge. Cargo and artefacts have also been illegally salvaged over many years before protective legislation was introduced. One of the most unlikely pieces of cargo to have survived the shipwreck was a Minton porcelain peacock - one of only nine in the world. The peacock was destined for the Melbourne International Exhibition in 1880. It had been well packed, which gave it adequate protection during the violent storm. Today, the Minton peacock can be seen at the Flagstaff Hill Maritime Museum in Warrnambool. From Australia's most dramatic shipwreck it has now become Australia's most valuable shipwreck artefact and is one of very few 'objects' on the Victorian State Heritage Register. Flagstaff Hill’s collection of artefacts from LOCH ARD is significant for being one of the largest collections of artefacts from this shipwreck in Victoria. It is significant for its association with the shipwreck, which is on the Victorian Heritage Register (VHR S417). The collection is significant because of the relationship between the objects, as together they have a high potential to interpret the story of the LOCH ARD. The LOCH ARD collection is archaeologically significant as the remains of a large international passenger and cargo ship. The LOCH ARD collection is historically significant for representing aspects of Victoria’s shipping history and its potential to interpret sub-theme 1.5 of Victoria’s Framework of Historical Themes (living with natural processes). The collection is also historically significant for its association with the LOCH ARD, which was one of the worst and best known shipwrecks in Victoria’s history. Lid from child's tea set. Porcelain. Lid has small chip and some slight iron stains. Recovered from the wreck of the Loch Ard. Artefact reg No LA/16.flagstaff hill, warrnambool, shipwrecked-coast, flagstaff-hill, flagstaff-hill-maritime-museum, maritime-museum, shipwreck-coast, flagstaff-hill-maritime-village -
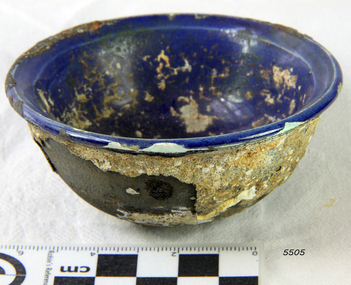 Flagstaff Hill Maritime Museum and Village
Deflector
HISTORY OF THE LOCH ARD The LOCH ARD belonged to the famous Loch Line which sailed many ships from England to Australia. Built in Glasgow by Barclay, Curdle and Co. in 1873, the LOCH ARD was a three-masted square rigged iron sailing ship. The ship measured 262ft 7" (79.87m) in length, 38ft (11.58m) in width, 23ft (7m) in depth and had a gross tonnage of 1693 tons. The LOCH ARD's main mast measured a massive 150ft (45.7m) in height. LOCH ARD made three trips to Australia and one trip to Calcutta before its final voyage. LOCH ARD left England on March 2, 1878, under the command of Captain Gibbs, a newly married, 29 year old. She was bound for Melbourne with a crew of 37, plus 17 passengers and a load of cargo. The general cargo reflected the affluence of Melbourne at the time. On board were straw hats, umbrella, perfumes, clay pipes, pianos, clocks, confectionary, linen and candles, as well as a heavier load of railway irons, cement, lead and copper. There were items included that intended for display in the Melbourne International Exhibition in 1880. The voyage to Port Phillip was long but uneventful. At 3am on June 1, 1878, Captain Gibbs was expecting to see land and the passengers were becoming excited as they prepared to view their new homeland in the early morning. But LOCH ARD was running into a fog which greatly reduced visibility. Captain Gibbs was becoming anxious as there was no sign of land or the Cape Otway lighthouse. At 4am the fog lifted. A man aloft announced that he could see breakers. The sheer cliffs of Victoria's west coast came into view, and Captain Gibbs realised that the ship was much closer to them than expected. He ordered as much sail to be set as time would permit and then attempted to steer the vessel out to sea. On coming head on into the wind, the ship lost momentum, the sails fell limp and LOCH ARD's bow swung back. Gibbs then ordered the anchors to be released in an attempt to hold its position. The anchors sank some 50 fathoms - but did not hold. By this time LOCH ARD was among the breakers and the tall cliffs of Mutton Bird Island rose behind the ship. Just half a mile from the coast, the ship's bow was suddenly pulled around by the anchor. The captain tried to tack out to sea, but the ship struck a reef at the base of Mutton Bird Island, near Port Campbell. Waves broke over the ship and the top deck was loosened from the hull. The masts and rigging came crashing down knocking passengers and crew overboard. When a lifeboat was finally launched, it crashed into the side of LOCH ARD and capsized. Tom Pearce, who had launched the boat, managed to cling to its overturned hull and shelter beneath it. He drifted out to sea and then on the flood tide came into what is now known as LOCH ARD Gorge. He swam to shore, bruised and dazed, and found a cave in which to shelter. Some of the crew stayed below deck to shelter from the falling rigging but drowned when the ship slipped off the reef into deeper water. Eva Carmichael had raced onto deck to find out what was happening only to be confronted by towering cliffs looming above the stricken ship. In all the chaos, Captain Gibbs grabbed Eva and said, "If you are saved Eva, let my dear wife know that I died like a sailor". That was the last Eva Carmichael saw of the captain. She was swept off the ship by a huge wave. Eva saw Tom Pearce on a small rocky beach and yelled to attract his attention. He dived in and swam to the exhausted woman and dragged her to shore. He took her to the cave and broke open case of brandy which had washed up on the beach. He opened a bottle to revive the unconscious woman. A few hours later Tom scaled a cliff in search of help. He followed hoof prints and came by chance upon two men from nearby Glenample Station three and a half miles away. In a state of exhaustion, he told the men of the tragedy. Tom returned to the gorge while the two men rode back to the station to get help. By the time they reached LOCH ARD Gorge, it was cold and dark. The two shipwreck survivors were taken to Glenample Station to recover. Eva stayed at the station for six weeks before returning to Ireland, this time by steamship. In Melbourne, Tom Pearce received a hero's welcome. He was presented with the first gold medal of the Royal Humane Society of Victoria and a £1000 cheque from the Victorian Government. Concerts were performed to honour the young man's bravery and to raise money for those who lost family in the LOCH ARD disaster. Of the 54 crew members and passengers on board, only two survived: the apprentice, Tom Pearce and the young woman passenger, Eva Carmichael, who lost all of her family in the tragedy. Ten days after the LOCH ARD tragedy, salvage rights to the wreck were sold at auction for £2,120. Cargo valued at £3,000 was salvaged and placed on the beach, but most washed back into the sea when another storm developed. The wreck of LOCH ARD still lies at the base of Mutton Bird Island. Much of the cargo has now been salvaged and some was washed up into what is now known as LOCH ARD Gorge. Cargo and artefacts have also been illegally salvaged over many years before protective legislation was introduced. One of the most unlikely pieces of cargo to have survived the shipwreck was a Minton porcelain peacock - one of only nine in the world. The peacock was destined for the Melbourne International Exhibition in 1880. It had been well packed, which gave it adequate protection during the violent storm. Today, the Minton peacock can be seen at the Flagstaff Hill Maritime Museum in Warrnambool. From Australia's most dramatic shipwreck it has now become Australia's most valuable shipwreck artefact and is one of very few 'objects' on the Victorian State Heritage Register. Flagstaff Hill’s collection of artefacts from LOCH ARD is significant for being one of the largest collections of artefacts from this shipwreck in Victoria. It is significant for its association with the shipwreck, which is on the Victorian Heritage Register (VHR S417). The collection is significant because of the relationship between the objects, as together they have a high potential to interpret the story of the LOCH ARD. The LOCH ARD collection is archaeologically significant as the remains of a large international passenger and cargo ship. The LOCH ARD collection is historically significant for representing aspects of Victoria’s shipping history and its potential to interpret sub-theme 1.5 of Victoria’s Framework of Historical Themes (living with natural processes). The collection is also historically significant for its association with the LOCH ARD, which was one of the worst and best known shipwrecks in Victoria’s history. Small Porcelain Heat Deflector from a kero lamp,deflector is blue inside. Outside has some encrustation. Artefact reg no LA/15. Recovered from the wreck of the Loch Ard.flagstaff hill, warrnambool, shipwrecked coast, flagstaff hill maritime museum, maritime museum, shipwreck coast, flagstaff hill maritime village, great ocean road, loch line, loch ard, captain gibbs, eva carmichael, tom pearce, glenample station, mutton bird island, loch ard gorge, porcelain heat deflector, heat deflector -
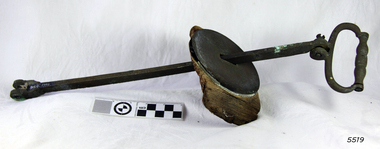 Flagstaff Hill Maritime Museum and Village
Pump
HISTORY OF THE LOCH ARD The LOCH ARD belonged to the famous Loch Line which sailed many ships from England to Australia. Built in Glasgow by Barclay, Curdle and Co. in 1873, the LOCH ARD was a three-masted square rigged iron sailing ship. The ship measured 262ft 7" (79.87m) in length, 38ft (11.58m) in width, 23ft (7m) in depth and had a gross tonnage of 1693 tons. The LOCH ARD's main mast measured a massive 150ft (45.7m) in height. LOCH ARD made three trips to Australia and one trip to Calcutta before its final voyage. LOCH ARD left England on March 2, 1878, under the command of Captain Gibbs, a newly married, 29 year old. She was bound for Melbourne with a crew of 37, plus 17 passengers and a load of cargo. The general cargo reflected the affluence of Melbourne at the time. On board were straw hats, umbrella, perfumes, clay pipes, pianos, clocks, confectionary, linen and candles, as well as a heavier load of railway irons, cement, lead and copper. There were items included that intended for display in the Melbourne International Exhibition in 1880. The voyage to Port Phillip was long but uneventful. At 3am on June 1, 1878, Captain Gibbs was expecting to see land and the passengers were becoming excited as they prepared to view their new homeland in the early morning. But LOCH ARD was running into a fog which greatly reduced visibility. Captain Gibbs was becoming anxious as there was no sign of land or the Cape Otway lighthouse. At 4am the fog lifted. A man aloft announced that he could see breakers. The sheer cliffs of Victoria's west coast came into view, and Captain Gibbs realised that the ship was much closer to them than expected. He ordered as much sail to be set as time would permit and then attempted to steer the vessel out to sea. On coming head on into the wind, the ship lost momentum, the sails fell limp and LOCH ARD's bow swung back. Gibbs then ordered the anchors to be released in an attempt to hold its position. The anchors sank some 50 fathoms - but did not hold. By this time LOCH ARD was among the breakers and the tall cliffs of Mutton Bird Island rose behind the ship. Just half a mile from the coast, the ship's bow was suddenly pulled around by the anchor. The captain tried to tack out to sea, but the ship struck a reef at the base of Mutton Bird Island, near Port Campbell. Waves broke over the ship and the top deck was loosened from the hull. The masts and rigging came crashing down knocking passengers and crew overboard. When a lifeboat was finally launched, it crashed into the side of LOCH ARD and capsized. Tom Pearce, who had launched the boat, managed to cling to its overturned hull and shelter beneath it. He drifted out to sea and then on the flood tide came into what is now known as LOCH ARD Gorge. He swam to shore, bruised and dazed, and found a cave in which to shelter. Some of the crew stayed below deck to shelter from the falling rigging but drowned when the ship slipped off the reef into deeper water. Eva Carmichael had raced onto deck to find out what was happening only to be confronted by towering cliffs looming above the stricken ship. In all the chaos, Captain Gibbs grabbed Eva and said, "If you are saved Eva, let my dear wife know that I died like a sailor". That was the last Eva Carmichael saw of the captain. She was swept off the ship by a huge wave. Eva saw Tom Pearce on a small rocky beach and yelled to attract his attention. He dived in and swam to the exhausted woman and dragged her to shore. He took her to the cave and broke open case of brandy which had washed up on the beach. He opened a bottle to revive the unconscious woman. A few hours later Tom scaled a cliff in search of help. He followed hoof prints and came by chance upon two men from nearby Glenample Station three and a half miles away. In a state of exhaustion, he told the men of the tragedy. Tom returned to the gorge while the two men rode back to the station to get help. By the time they reached LOCH ARD Gorge, it was cold and dark. The two shipwreck survivors were taken to Glenample Station to recover. Eva stayed at the station for six weeks before returning to Ireland, this time by steamship. In Melbourne, Tom Pearce received a hero's welcome. He was presented with the first gold medal of the Royal Humane Society of Victoria and a £1000 cheque from the Victorian Government. Concerts were performed to honour the young man's bravery and to raise money for those who lost family in the LOCH ARD disaster. Of the 54 crew members and passengers on board, only two survived: the apprentice, Tom Pearce and the young woman passenger, Eva Carmichael, who lost all of her family in the tragedy. Ten days after the LOCH ARD tragedy, salvage rights to the wreck were sold at auction for £2,120. Cargo valued at £3,000 was salvaged and placed on the beach, but most washed back into the sea when another storm developed. The wreck of LOCH ARD still lies at the base of Mutton Bird Island. Much of the cargo has now been salvaged and some was washed up into what is now known as LOCH ARD Gorge. Cargo and artefacts have also been illegally salvaged over many years before protective legislation was introduced. One of the most unlikely pieces of cargo to have survived the shipwreck was a Minton porcelain peacock - one of only nine in the world. The peacock was destined for the Melbourne International Exhibition in 1880. It had been well packed, which gave it adequate protection during the violent storm. Today, the Minton peacock can be seen at the Flagstaff Hill Maritime Museum in Warrnambool. From Australia's most dramatic shipwreck it has now become Australia's most valuable shipwreck artefact and is one of very few 'objects' on the Victorian State Heritage Register. Flagstaff Hill’s collection of artefacts from LOCH ARD is significant for being one of the largest collections of artefacts from this shipwreck in Victoria. It is significant for its association with the shipwreck, which is on the Victorian Heritage Register (VHR S417). The collection is significant because of the relationship between the objects, as together they have a high potential to interpret the story of the LOCH ARD. The LOCH ARD collection is archaeologically significant as the remains of a large international passenger and cargo ship. The LOCH ARD collection is historically significant for representing aspects of Victoria’s shipping history and its potential to interpret sub-theme 1.5 of Victoria’s Framework of Historical Themes (living with natural processes). The collection is also historically significant for its association with the LOCH ARD, which was one of the worst and best known shipwrecks in Victoria’s history. Part of a pump system. Has been attached to a piece of wood. Possibly a cistern plunger. From the Loch Ard.flagstaff hill, warrnambool, shipwrecked coast, flagstaff hill maritime museum, maritime museum, shipwreck coast, flagstaff hill maritime village, great ocean road, loch line, loch ard, captain gibbs, eva carmichael, tom pearce, glenample station, mutton bird island, loch ard gorge, pump system, pump -
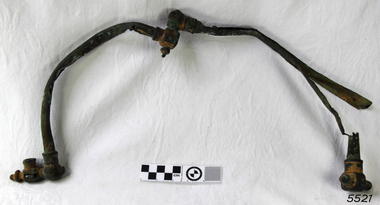 Flagstaff Hill Maritime Museum and Village
Functional object - Gas Fitting
This gas fitting was recovered from the wreck of the Loch Ard circa 1970, at the time of the discovery of the wreck. HISTORY OF THE LOCH ARD: - The LOCH ARD belonged to the famous Loch Line which sailed many ships from England to Australia. Built in Glasgow by Barclay, Curdle and Co. in 1873, the LOCH ARD was a three-masted square rigged iron sailing ship. The ship measured 262ft 7" (79.87m) in length, 38ft (11.58m) in width, 23ft (7m) in depth and had a gross tonnage of 1693 tons. The LOCH ARD's main mast measured a massive 150ft (45.7m) in height. LOCH ARD made three trips to Australia and one trip to Calcutta before its final voyage. LOCH ARD left England on March 2, 1878, under the command of Captain Gibbs, a newly married, 29 year old. She was bound for Melbourne with a crew of 37, plus 17 passengers and a load of cargo. The general cargo reflected the affluence of Melbourne at the time. On board were straw hats, umbrella, perfumes, clay pipes, pianos, clocks, confectionary, linen and candles, as well as a heavier load of railway irons, cement, lead and copper. There were items included that intended for display in the Melbourne International Exhibition in 1880. The voyage to Port Phillip was long but uneventful. At 3am on June 1, 1878, Captain Gibbs was expecting to see land and the passengers were becoming excited as they prepared to view their new homeland in the early morning. But LOCH ARD was running into a fog which greatly reduced visibility. Captain Gibbs was becoming anxious as there was no sign of land or the Cape Otway lighthouse. At 4am the fog lifted. A man aloft announced that he could see breakers. The sheer cliffs of Victoria's west coast came into view, and Captain Gibbs realised that the ship was much closer to them than expected. He ordered as much sail to be set as time would permit and then attempted to steer the vessel out to sea. On coming head on into the wind, the ship lost momentum, the sails fell limp and LOCH ARD's bow swung back. Gibbs then ordered the anchors to be released in an attempt to hold its position. The anchors sank some 50 fathoms - but did not hold. By this time LOCH ARD was among the breakers and the tall cliffs of Mutton Bird Island rose behind the ship. Just half a mile from the coast, the ship's bow was suddenly pulled around by the anchor. The captain tried to tack out to sea, but the ship struck a reef at the base of Mutton Bird Island, near Port Campbell. Waves broke over the ship and the top deck was loosened from the hull. The masts and rigging came crashing down knocking passengers and crew overboard. When a lifeboat was finally launched, it crashed into the side of LOCH ARD and capsized. Tom Pearce, who had launched the boat, managed to cling to its overturned hull and shelter beneath it. He drifted out to sea and then on the flood tide came into what is now known as LOCH ARD Gorge. He swam to shore, bruised and dazed, and found a cave in which to shelter. Some of the crew stayed below deck to shelter from the falling rigging but drowned when the ship slipped off the reef into deeper water. Eva Carmichael had raced onto deck to find out what was happening only to be confronted by towering cliffs looming above the stricken ship. In all the chaos, Captain Gibbs grabbed Eva and said, "If you are saved Eva, let my dear wife know that I died like a sailor". That was the last Eva Carmichael saw of the captain. She was swept off the ship by a huge wave. Eva saw Tom Pearce on a small rocky beach and yelled to attract his attention. He dived in and swam to the exhausted woman and dragged her to shore. He took her to the cave and broke open case of brandy which had washed up on the beach. He opened a bottle to revive the unconscious woman. A few hours later Tom scaled a cliff in search of help. He followed hoof prints and came by chance upon two men from nearby Glenample Station three and a half miles away. In a state of exhaustion, he told the men of the tragedy. Tom returned to the gorge while the two men rode back to the station to get help. By the time they reached LOCH ARD Gorge, it was cold and dark. The two shipwreck survivors were taken to Glenample Station to recover. Eva stayed at the station for six weeks before returning to Ireland, this time by steamship. In Melbourne, Tom Pearce received a hero's welcome. He was presented with the first gold medal of the Royal Humane Society of Victoria and a £1000 cheque from the Victorian Government. Concerts were performed to honour the young man's bravery and to raise money for those who lost family in the LOCH ARD disaster. Of the 54 crew members and passengers on board, only two survived: the apprentice, Tom Pearce and the young woman passenger, Eva Carmichael, who lost all of her family in the tragedy. Ten days after the LOCH ARD tragedy, salvage rights to the wreck were sold at auction for £2,120. Cargo valued at £3,000 was salvaged and placed on the beach, but most washed back into the sea when another storm developed. The wreck of LOCH ARD still lies at the base of Mutton Bird Island. Much of the cargo has now been salvaged and some was washed up into what is now known as LOCH ARD Gorge. Cargo and artefacts have also been illegally salvaged over many years before protective legislation was introduced. One of the most unlikely pieces of cargo to have survived the shipwreck was a Minton porcelain peacock - one of only nine in the world. The peacock was destined for the Melbourne International Exhibition in 1880. It had been well packed, which gave it adequate protection during the violent storm. Today, the Minton peacock can be seen at the Flagstaff Hill Maritime Museum in Warrnambool. From Australia's most dramatic shipwreck it has now become Australia's most valuable shipwreck artefact and is one of very few 'objects' on the Victorian State Heritage Register. Flagstaff Hill’s collection of artefacts from LOCH ARD is significant for being one of the largest collections of artefacts from this shipwreck in Victoria. It is significant for its association with the shipwreck, which is on the Victorian Heritage Register (VHR S417). The collection is significant because of the relationship between the objects, as together they have a high potential to interpret the story of the LOCH ARD. The LOCH ARD collection is archaeologically significant as the remains of a large international passenger and cargo ship. The LOCH ARD collection is historically significant for representing aspects of Victoria’s shipping history and its potential to interpret sub-theme 1.5 of Victoria’s Framework of Historical Themes (living with natural processes). The collection is also historically significant for its association with the LOCH ARD, which was one of the worst and best known shipwrecks in Victoria’s history. Copper gas pipe and fitting. Tow C-shaped pipes with fittings at each end. One end of each pipe is joined to the other pipe, making a U-shape. It was recovered from the 1878 wreck of the ship Loch Ard in the 1970s. flagstaff hill, warrnambool, shipwrecked coast, flagstaff hill maritime museum, maritime museum, shipwreck coast, flagstaff hill maritime village, great ocean road, loch line, loch ard, captain gibbs, eva carmichael, tom pearce, glenample station, mutton bird island, loch ard gorge, copper gas pipe and fitting, copper gas pipe -
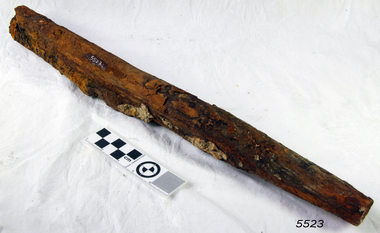 Flagstaff Hill Maritime Museum and Village
Handle
Ref: LA 6 67 311 HISTORY OF THE LOCH ARD The LOCH ARD belonged to the famous Loch Line which sailed many ships from England to Australia. Built in Glasgow by Barclay, Curdle and Co. in 1873, the LOCH ARD was a three-masted square rigged iron sailing ship. The ship measured 262ft 7" (79.87m) in length, 38ft (11.58m) in width, 23ft (7m) in depth and had a gross tonnage of 1693 tons. The LOCH ARD's main mast measured a massive 150ft (45.7m) in height. LOCH ARD made three trips to Australia and one trip to Calcutta before its final voyage. LOCH ARD left England on March 2, 1878, under the command of Captain Gibbs, a newly married, 29 year old. She was bound for Melbourne with a crew of 37, plus 17 passengers and a load of cargo. The general cargo reflected the affluence of Melbourne at the time. On board were straw hats, umbrella, perfumes, clay pipes, pianos, clocks, confectionary, linen and candles, as well as a heavier load of railway irons, cement, lead and copper. There were items included that intended for display in the Melbourne International Exhibition in 1880. The voyage to Port Phillip was long but uneventful. At 3am on June 1, 1878, Captain Gibbs was expecting to see land and the passengers were becoming excited as they prepared to view their new homeland in the early morning. But LOCH ARD was running into a fog which greatly reduced visibility. Captain Gibbs was becoming anxious as there was no sign of land or the Cape Otway lighthouse. At 4am the fog lifted. A man aloft announced that he could see breakers. The sheer cliffs of Victoria's west coast came into view, and Captain Gibbs realised that the ship was much closer to them than expected. He ordered as much sail to be set as time would permit and then attempted to steer the vessel out to sea. On coming head on into the wind, the ship lost momentum, the sails fell limp and LOCH ARD's bow swung back. Gibbs then ordered the anchors to be released in an attempt to hold its position. The anchors sank some 50 fathoms - but did not hold. By this time LOCH ARD was among the breakers and the tall cliffs of Mutton Bird Island rose behind the ship. Just half a mile from the coast, the ship's bow was suddenly pulled around by the anchor. The captain tried to tack out to sea, but the ship struck a reef at the base of Mutton Bird Island, near Port Campbell. Waves broke over the ship and the top deck was loosened from the hull. The masts and rigging came crashing down knocking passengers and crew overboard. When a lifeboat was finally launched, it crashed into the side of LOCH ARD and capsized. Tom Pearce, who had launched the boat, managed to cling to its overturned hull and shelter beneath it. He drifted out to sea and then on the flood tide came into what is now known as LOCH ARD Gorge. He swam to shore, bruised and dazed, and found a cave in which to shelter. Some of the crew stayed below deck to shelter from the falling rigging but drowned when the ship slipped off the reef into deeper water. Eva Carmichael had raced onto deck to find out what was happening only to be confronted by towering cliffs looming above the stricken ship. In all the chaos, Captain Gibbs grabbed Eva and said, "If you are saved Eva, let my dear wife know that I died like a sailor". That was the last Eva Carmichael saw of the captain. She was swept off the ship by a huge wave. Eva saw Tom Pearce on a small rocky beach and yelled to attract his attention. He dived in and swam to the exhausted woman and dragged her to shore. He took her to the cave and broke open case of brandy which had washed up on the beach. He opened a bottle to revive the unconscious woman. A few hours later Tom scaled a cliff in search of help. He followed hoof prints and came by chance upon two men from nearby Glenample Station three and a half miles away. In a state of exhaustion, he told the men of the tragedy. Tom returned to the gorge while the two men rode back to the station to get help. By the time they reached LOCH ARD Gorge, it was cold and dark. The two shipwreck survivors were taken to Glenample Station to recover. Eva stayed at the station for six weeks before returning to Ireland, this time by steamship. In Melbourne, Tom Pearce received a hero's welcome. He was presented with the first gold medal of the Royal Humane Society of Victoria and a £1000 cheque from the Victorian Government. Concerts were performed to honour the young man's bravery and to raise money for those who lost family in the LOCH ARD disaster. Of the 54 crew members and passengers on board, only two survived: the apprentice, Tom Pearce and the young woman passenger, Eva Carmichael, who lost all of her family in the tragedy. Ten days after the LOCH ARD tragedy, salvage rights to the wreck were sold at auction for £2,120. Cargo valued at £3,000 was salvaged and placed on the beach, but most washed back into the sea when another storm developed. The wreck of LOCH ARD still lies at the base of Mutton Bird Island. Much of the cargo has now been salvaged and some was washed up into what is now known as LOCH ARD Gorge. Cargo and artefacts have also been illegally salvaged over many years before protective legislation was introduced. One of the most unlikely pieces of cargo to have survived the shipwreck was a Minton porcelain peacock - one of only nine in the world. The peacock was destined for the Melbourne International Exhibition in 1880. It had been well packed, which gave it adequate protection during the violent storm. Today, the Minton peacock can be seen at the Flagstaff Hill Maritime Museum in Warrnambool. From Australia's most dramatic shipwreck it has now become Australia's most valuable shipwreck artefact and is one of very few 'objects' on the Victorian State Heritage Register. Flagstaff Hill’s collection of artefacts from LOCH ARD is significant for being one of the largest collections of artefacts from this shipwreck in Victoria. It is significant for its association with the shipwreck, which is on the Victorian Heritage Register (VHR S417). The collection is significant because of the relationship between the objects, as together they have a high potential to interpret the story of the LOCH ARD. The LOCH ARD collection is archaeologically significant as the remains of a large international passenger and cargo ship. The LOCH ARD collection is historically significant for representing aspects of Victoria’s shipping history and its potential to interpret sub-theme 1.5 of Victoria’s Framework of Historical Themes (living with natural processes). The collection is also historically significant for its association with Shovel handle. Has pieces of iron and concretion visible. Artefact Reg No LA/42. Recovered from the wreck of the Loch Ard.flagstaff hill, warrnambool, shipwrecked coast, flagstaff hill maritime museum, maritime museum, shipwreck coast, flagstaff hill maritime village, great ocean road, loch line, loch ard, captain gibbs, eva carmichael, tom pearce, glenample station, mutton bird island, loch ard gorge, shovel handle -
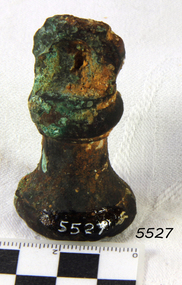 Flagstaff Hill Maritime Museum and Village
Functional object - Weight, 1878
History of the Loch Ard: The Loch Ard got its name from ”Loch Ard” a loch which lies to the west of Aberfoyle, and the east of Loch Lomond. It means "high lake" in Scottish Gaelic. The vessel belonged to the famous Loch Line which sailed many vessels from England to Australia. The Loch Ard was built in Glasgow by Barclay, Curdle and Co. in 1873, the vessel was a three-masted square-rigged iron sailing ship that measured 79.87 meters in length, 11.58 m in width, and 7 m in depth with a gross tonnage of 1693 tons with a mainmast that measured a massive 45.7 m in height. Loch Ard made three trips to Australia and one trip to Calcutta before its fateful voyage. Loch Ard left England on March 2, 1878, under the command of 29-year-old Captain Gibbs, who was newly married. The ship was bound for Melbourne with a crew of 37, plus 17 passengers. The general cargo reflected the affluence of Melbourne at the time. Onboard were straw hats, umbrella, perfumes, clay pipes, pianos, clocks, confectionery, linen and candles, as well as a heavier load of railway irons, cement, lead and copper. There were other items included that were intended for display in the Melbourne International Exhibition of 1880. The voyage to Port Phillip was long but uneventful. Then at 3 am on June 1, 1878, Captain Gibbs was expecting to see land. But the Loch Ard was running into a fog which greatly reduced visibility. Captain Gibbs was becoming anxious as there was no sign of land or the Cape Otway lighthouse. At 4 am the fog lifted and a lookout aloft announced that he could see breakers. The sheer cliffs of Victoria's west coast came into view, and Captain Gibbs realised that the ship was much closer to them than expected. He ordered as much sail to be set as time would permit and then attempted to steer the vessel out to sea. On coming head-on into the wind, the ship lost momentum, the sails fell limp and Loch Ard's bow swung back towards land. Gibbs then ordered the anchors to be released in an attempt to hold its position. The anchors sank some 50 fathoms - but did not hold. By this time the ship was among the breakers and the tall cliffs of Mutton Bird Island rose behind. Just half a mile from the coast, the ship's bow was suddenly pulled around by the anchor. The captain tried to tack out to sea, but the ship struck a reef at the base of Mutton Bird Island, near Port Campbell. Waves subsequently broke over the ship and the top deck became loosened from the hull. The masts and rigging came crashing down knocking passengers and crew overboard. When a lifeboat was finally launched, it crashed into the side of Loch Ard and capsized. Tom Pearce, who had launched the boat, managed to cling to its overturned hull and shelter beneath it. He drifted out to sea and then on the flood tide came into what is now known as Loch Ard Gorge. He swam to shore, bruised and dazed, and found a cave in which to shelter. Some of the crew stayed below deck to shelter from the falling rigging but drowned when the ship slipped off the reef into deeper water. Eva Carmichael a passenger had raced onto the deck to find out what was happening only to be confronted by towering cliffs looming above the stricken ship. In all the chaos, Captain Gibbs grabbed Eva and said, "If you are saved Eva, let my dear wife know that I died like a sailor". That was the last Eva Carmichael saw of the captain. She was swept off the ship by a huge wave. Eva saw Tom Pearce on a small rocky beach and yelled to attract his attention. He dived in and swam to the exhausted woman and dragged her to shore. He took her to the cave and broke the open case of brandy which had washed up on the beach. He opened a bottle to revive the unconscious woman. A few hours later Tom scaled a cliff in search of help. He followed hoof prints and came by chance upon two men from nearby Glenample Station three and a half miles away. In a complete state of exhaustion, he told the men of the tragedy. Tom then returned to the gorge while the two men rode back to the station to get help. By the time they reached Loch Ard Gorge, it was cold and dark. The two shipwreck survivors were taken to Glenample Station to recover. Eva stayed at the station for six weeks before returning to Ireland by steamship. In Melbourne, Tom Pearce received a hero's welcome. He was presented with the first gold medal of the Royal Humane Society of Victoria and a £1000 cheque from the Victorian Government. Concerts were performed to honour the young man's bravery and to raise money for those who lost family in the disaster. Of the 54 crew members and passengers on board, only two survived: the apprentice, Tom Pearce and the young woman passenger, Eva Carmichael, who lost her family in the tragedy. Ten days after the Loch Ard tragedy, salvage rights to the wreck were sold at auction for £2,120. Cargo valued at £3,000 was salvaged and placed on the beach, but most washed back into the sea when another storm developed. The wreck of Loch Ard still lies at the base of Mutton Bird Island. Much of the cargo has now been salvaged and some items were washed up into Loch Ard Gorge. Cargo and artefacts have also been illegally salvaged over many years before protective legislation was introduced in March 1982. One of the most unlikely pieces of cargo to have survived the shipwreck was a Minton majolica peacock- one of only nine in the world. The peacock was destined for the Melbourne 1880 International Exhibition in. It had been well packed, which gave it adequate protection during the violent storm. Today the Minton peacock can be seen at the Flagstaff Hill Maritime Museum in Warrnambool. From Australia's most dramatic shipwreck it has now become Australia's most valuable shipwreck artifact and is one of very few 'objects' on the Victorian State Heritage Register.The shipwreck of the Loch Ard is of significance for Victoria and is registered on the Victorian Heritage Register ( S 417). Flagstaff Hill has a varied collection of artefacts from Loch Ard and its collection is significant for being one of the largest accumulation of artefacts from this notable Victorian shipwreck. The collections object is to also give us a snapshot into history so we can interpret the story of this tragic event. The collection is also archaeologically significant as it represents aspects of Victoria's shipping history that allows us to interpret Victoria's social and historical themes of the time. The collections historically significance is that it is associated unfortunately with the worst and best-known shipwreck in Victoria's history. Small copper alloy weight shaped like a domed bell. Recovered from the wreck of the Loch Ardflagstaff hill, warrnambool, shipwrecked coast, flagstaff hill maritime museum, maritime museum, shipwreck coast, flagstaff hill maritime village, great ocean road, loch line, loch ard, captain gibbs, eva carmichael, tom pearce, glenample station, mutton bird island, loch ard gorge, copper alloy weight, weight, weights and measures, scale weight