Showing 645 items matching "australian troops"
-
 Wangaratta RSL Sub Branch
Memorabilia - Cane Woven Basket Tray, The Invasion of the Philippines, c1945
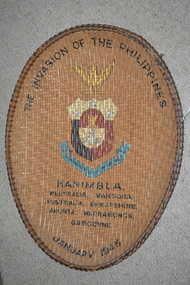
In early January 1945, Australian warships took part in their next big naval action of the campaign when American forces were landed at Lingayen Gulf for the invasion of Luzon Island. Their objective was the capital, Manila. The frigates Gascoyne and Warrego carried out survey tasks and escort duties, coming under artillery fire and also attacks from aircraft. The Kanimbla, Manoora and Westralia again transported American troops for the landings and once again the escorts included the cruisers Shropshire and Australia – the latter had undergone repair – and the destroyers Arunta and Warramunga. Whist not confirmed, this large cane woven oval tray with The Philippines Coat of Arms in the centre above list of Royal Australian Navy ships that were involved in the liberation of the Philippines, is believed to have belonged to Robert Hamilton Hutchieson PM 4802 who served on HMAS Westralia as a landing craft coxswain in the Southwest Pacific Campaign 1942 to 1945. Large oval shaped cane woven basket tray The Invasion of the Philippines Image of Coat of Arms Commonwealth of the Philippines Kanimbla, Westralia, Manoura, Australia, Shropshire, Arunta, Warramunga, Gascoyne January 1945ww2, invasion of the philippines, 1945, hmas westralia, hmas kanimbla -
 Bendigo Military Museum
Photograph - Army Survey Regiment Freedom of Entry Parade, Queen Elizabeth Oval, Bendigo, 1980
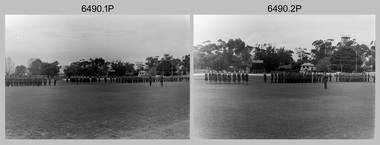
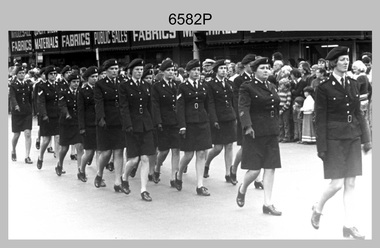
The Freedom of Entry to the City was an honour conferred by the Bendigo City Council to the Army Survey Regiment in 1970. 1980 was the third time the unit exercised its freedom of marching into the city with swords drawn, bayonets fixed and drums beating. The honour is usually bestowed upon local regiments, in recognition of their dedicated service, and it is common for military units to periodically exercise their freedom by arranging a parade through the city. Led by the Regiment’s CO – LTCOL Bob Skitch, the unit marched down View St in the CBD, along Pall Mall and up Gaol Rd to the Queen Elizabeth II Oval. The ceremonial parade followed with a march past the guests of honour, Mayor of Bendigo Councillor Paul Tomkinson and military dignitaries. The parade concluded after formal inspections of the troops. The Regiment also exercised its Freedom of Entry with anniversary parades in 1977, 1980, 1985, 1990 and 1995. Some photos in this set were also printed on photo paper and catalogued under item 6021.25P. Photos of the march are catalogued under item 6491.21P. Photos of the Freedom of Entry parade rehearsal are catalogued under item 6479.38P.These black and white photographs of the Army Survey Regiment were taken on the occasion of the Freedom of Entry parade to the City of Bendigo in 1980. The photographs are on 35mm negative film and scanned at 96 dpi. They are part of the Army Survey Regiment’s Collection. .1) to .7) - Photo, black & white, 1980. Squadrons formed up at beginning of parade. .8) & .9) - Photo, black & white, 1980. 3rd Military District Band marches to their parade position. .10) to .11) - Photo, black & white, 1980. Squadrons formed up parade with 3rd Military District Band playing music. .12) to .14) - Photo, black & white, 1980. Officers formed up before taking posts. L to R: MAJ Peter Eddy, LT Brendon Jaego-Banks, CAPT Peter Searle - UK Exchange, unidentified, ADJT CAPT John Harrison, MAJ Sam Schwartz US Exchange, unidentified, MAJ Robin Blackburn, remainder unidentified. .15) - Photo, black & white, 1980. Officers march to their posts. L to R: MAJ Peter Eddy, LT Brendon Jaego-Banks, CAPT Peter Searle - UK Exchange, unidentified, ADJT CAPT John Harrison, MAJ Sam Schwartz US Exchange, unidentified, MAJ Robin Blackburn, remainder unidentified. .16 - Photo, black & white, 1980. Officers march to their posts. .17 - Photo, black & white, 1980. Army Svy Regt awaits the arrival of the Mayor – Councillor Paul Tomkinson. .18 - Photo, black & white, 1980. CO LTCOL Bob Skitch escorts the Mayor – Councillor Paul Tomkinson and unidentified guest to the dais. .19) to .25) – Army Svy Regt salutes the Mayor – Councillor Paul Tomkinson. .26) - Photo, black & white, 1980. CO LTCOL Bob Skitch escorts the Mayor – Councillor Paul Tomkinson to Headquarters Squadron to inspect its personnel. .27) - Photo, black & white, 1980. Headquarters Squadron inspection. L to R: OC MAJ Paddy Strunks, RSM WO1 Aub Harvey, Mayor – Councillor Paul Tomkinson, SPR Chris ‘Charlie’ Brown, unidentified, SGT John Grove (orderly room), unidentified, SPR Jeff Ruiz, WO2 Max Neil, unidentified, SGT Alan Brown, SGT Tim Allanson. .28) - Photo, black & white, 1980. Headquarters Squadron inspection. L to R: OC MAJ Paddy Strunks, Mayor – Councillor Paul Tomkinson, unidentified, SGT Rick Warren, unidentified, CPL Andy Wilson, WO2 Ted Burgess. .29) - Photo, black & white, 1980. Headquarters Squadron inspection. L to R: OC MAJ Paddy Strunks, RSM WO1 Aub Harvey, unidentified civilian, Mayor – Councillor Paul Tomkinson, unidentified, SGT Rick Warren, unidentified, CPL Andy Wilson, WO2 Ted Burgess. .30) - Photo, black & white, 1980. Cartographic Squadron’s OC CAPT Bob Roche salutes the Mayor – Councillor Paul Tomkinson. L to R: unidentified civilian, CO LTCOL Bob Skitch. In background L to R: SSGT Bob Scaddan, unidentified, CPL John Tempest, CAPT Simon Lemon, SSGT Colin Cuskelly, CPL Trevor Bottomley, SPR Bob Sheppard, WO2 Bob ‘Stretch’ Hayden, unidentified, CPL Ian McKenzie, FLTLT Ron Aitken, SPR Ian Fitzgerald, SPR Greg Else. .31) - Photo, black & white, 1980. Cartographic Squadron’s OC CAPT Bob Roche salutes the Mayor – Councillor Paul Tomkinson. L to R: unidentified civilian, CO LTCOL Bob Skitch. In background L to R: CPL Terry Danger, SPR Rod Skidmore, SSGT Bob Scaddan, unidentified, CPL John Tempest, CAPT Simon Lemon, SSGT Colin Cuskelly, CPL Trevor Bottomley, SPR Bob Sheppard, WO2 Bob ‘Stretch’ Hayden, unidentified, CPL Ian McKenzie, FLTLT Ron Aitken, SPR Ian Fitzgerald, SPR Greg Else. .32) - Photo, black & white, 1980. Cartographic Squadron inspection. L to R: OC CAPT Bob Roche, Mayor – Councillor Paul Tomkinson. In background L to R: SGT Stu Thaxter, unidentified, SSGT John Barrie, CPL Roger Pearson, SGT Doug Carswell, SPR Peter Main, WO2 Bob ‘Stretch’ Hayden. .33) - Photo, black & white, 1980. Cartographic Squadron inspection. L to R: CO LTCOL Bob Skitch, OC CAPT Bob Roche, unidentified civilian, SGT Doug Carswell, Mayor – Councillor Paul Tomkinson, WO2 Bob ‘Stretch’ Hayden. .34) - Photo, black & white, 1980. Female Contigent inspection L to R: unidentified, SPR Gae (Amato) Robinson, SPR Scheryl Delforce, unidentified officer, unidentified civilian, Mayor – Councillor Paul Tomkinson, CPL Marrianne (Van De Zee) De Groot, SPR Cathy Regan, SPR Ginny (Turner) Rowe, SPR Ilen Isaac, SPR Penny Knott, SPR Santina (Argetto) Straube, SPR Gina (Coore) Neilson, WO2 Pat Lumsden. .35) - Photo, black & white, 1980. Female Contigent inspection L to R: SPR Scheryl Delforce, unidentified officer, CO LTCOL Bob Skitch, unidentified civilian, Mayor – Councillor Paul Tomkinson, SPR Ginny Turner, SPR Ilen Isaac, SPR Penny Knott, SPR Santina (Argetto) Straube, SPR Gina (Coore) Neilson, WO2 Pat Lumsden. .36) - Photo, black & white, 1980. Female Contigent inspection L to R: SPR Scheryl Delforce, unidentified officer, CO LTCOL Bob Skitch, unidentified civilian, Mayor – Councillor Paul Tomkinson, SPR Cathy Regan, SPR Ginny Turner, SPR Ilen Isaac, SPR Penny Knott, SPR Santina (Argetto) Straube, SPR Gina (Coore) Neilson, WO2 Pat Lumsden. .37) - Photo, black & white, 1980. Female Contigent inspection L to R: SPR Scheryl Delforce, unidentified officer, CO LTCOL Bob Skitch, CPL Marrianne (Van De Zee) De Groot, unidentified civilian, Mayor – Councillor Paul Tomkinson, SPR Ilen Isaac, SPR Penny Knott, SPR Santina (Argetto) Straube, SPR Gina (Coore) Neilson, WO2 Pat Lumsden. .38) - Photo, black & white, 1980. Air Survey Squadron’s OC MAJ Peter Eddy salutes the Mayor – Councillor Paul Tomkinson. L to R: unidentified civilian, CO LTCOL Bob Skitch. In background L to R: WO1 Jim ‘Triple J’ Jefferies, SPR Allan Choat, SPR Geoff Havelberg, CPL Alan Hawkins, CPL Dave Cook, LT Brendon Jaego-Banks, SGT Jim Beard, SSGT Russell ‘Rusty’ Williams, SGT Cam Chapman, SSGT Alan Derby, SSGT Greg Buckingham. .39) - Photo, black & white, 1980. Air Survey Squadron inspection. L to R: back of CAPT Kym Weston, OC MAJ Peter Eddy, Mayor – Councillor Paul Tomkinson, unidentified civilian. .40) - Photo, black & white, 1980. Air Survey Squadron inspection. L to R: CAPT Peter Searle - UK Exchange, unidentified officer, unidentified civilian, Mayor – Councillor Paul Tomkinson, unidentified, SSGT Alan Derby, LCPL Paul Hopes, SPR Peter Jones, SPR John Lane, WO2 Brian Meade, CPL Mick Hogan, CPL Greg Byers, SGT Cliff Webb. .41) - Photo, black & white, 1980. Air Survey Squadron inspection. Centre rank L to R: SGT Bruce ‘Stretch’ Gordon, WO2 Chris Parkinson. Rear rank L to R: SPR Allan Choat, unidentified, SPR Jamie McRae, SSGT Russell ‘Rusty’ Williams, SSGT Greg Buckingham, CPL Greg Byers, CPL Roger Rees, SPR Gary Ames, SGT Greg Gilbert, SSGT Peter Warwick, WO2 Mick Dempster. .42) - Photo, black & white, 1980. Air Survey Squadron inspection. Rear rank: SSGT Russell ‘Rusty’ Williams. Centre rank L to R: SPR Geoff Havelberg, CPL Peter Treble, SGT Jim Beard, SPR Peter Hardy, SPR Steve Hilton, SPR John Lane, CPL Mick Hogan, Mayor – Councillor Paul Tomkinson, OC MAJ Peter Eddy. .43) - Photo, black & white, 1980. Air Survey Squadron inspection. Centre rank L to R: SGT Bruce ‘Stretch’ Gordon, WO2 Chris Parkinson. Mayor – Councillor Paul Tomkinson, OC MAJ Peter Eddy. Rear rank L to R: SPR Allan Choat, unidentified, SPR Jamie McRae, SSGT Russell ‘Rusty’ Williams, SSGT Greg Buckingham, CPL Greg Byers, CPL Roger Rees, SPR Gary Ames, SGT Greg Gilbert, SSGT Peter Warwick, WO2 Mick Dempster. .44) - Photo, black & white, 1980. Lithographic Squadron’s OC MAJ Robin Blackburn salutes the Mayor – Councillor Paul Tomkinson. L to R: unidentified civilian, CO LTCOL Bob Skitch. In background L to R: WO1 Manfred Panknin, SSGT Peter Coombes, CPL Frank Lenane, SPR Per Andersen, CPL John ‘Flash’ Anderson, unidentified, MAJ Sam Schwartz US Exchange, CPL Warren ‘Waldo’ Shirley, SPR Warren ‘Wah’ Hall, unidentified, SPR Neville Carr, SPR Paul Davis, SPR Paul Baker, CPL Mick ‘Buddha’ Ellis, SPR Martin Van De Maele, CPL Bill Jones, SPR Greg Rowe. .45) - Photo, black & white, 1980. Lithographic Squadron inspection. L to R: RSM WO1 Aub Harvey, SPR Warren ‘Wah’ Hall, CO LTCOL Bob Skitch, SPR Paul Davis, unidentified civilian, unidentified, OC MAJ Robin Blackburn, CPL Lance Strudwick, Mayor – Councillor Paul Tomkinson, SPR Neville Carr, SPR Roy Hicks, SSGT Trevor Osborne, SPR Paul Baker, CAPT Stan Vote, CPL Bill Jones, SGT Greg Francis-Wright, SGT Ralph Chant, CPL Garry Drummond, WO2 Noel ‘Nesty’ Coulthard. .46) - Photo, black & white, 1980. Lithographic Squadron inspection. Front rank L to R: SGT Greig Kidman, SPR Garry Hudson, SPR Gary Tremain, CPL Steve Egan, SPR Greg Rowe, CPL Mick ‘Buddha’ Ellis, remainder unidentified. Centre rank: SSGT Kevin Macquire. Inspection party L to R: CO LTCOL Bob Skitch, OC MAJ Robin Blackburn, unidentified civilian, Mayor – Councillor Paul Tomkinson. Rear rank L to R: unidentified (x5), CPL Warren ‘Waldo’ Shirley, SPR Neville Carr, SPR Paul Baker, CPL Bill Jones, CPL Garry Drummond, SGT Graeme Jeffers, WO2 Tom Pattison. .47) - Photo, black & white, 1980. Lithographic Squadron inspection. Front rank L to R: SSGT Trevor Osborne, SGT Greig Kidman, SPR Garry Hudson, SPR Gary Tremain, CPL Steve Egan, SPR Greg Rowe, CPL Mick ‘Buddha’ Ellis, remainder unidentified. Centre rank: SSGT Kevin Macquire, SGT Ralph Chant. Inspection party L to R: OC MAJ Robin Blackburn, RSM WO1 Aub Harvey, unidentified civilian, Mayor – Councillor Paul Tomkinson. Rear rank L to R: SPR Paul Baker, CPL Bill Jones, CPL Garry Drummond, SGT Graeme Jeffers, WO2 Tom Pattison. 48) - Photo, black & white, 1980. Lithographic Squadron inspection. Inspection party L to R: OC MAJ Robin Blackburn, Mayor – Councillor Paul Tomkinson, CO LTCOL Bob Skitch, unidentified civilian. Rear rank L to R: WO2 Tom Pattison, SGT Graeme Jeffers, CPL Garry Drummond, CPL Bill Jones, CPL SPR Neville Carr, Warren ‘Waldo’ Shirley, unidentified. Rear supernumery: WO1 John McCulloch. 49) - Photo, black & white, 1980. Lithographic Squadron inspection. Inspection party L to R: OC MAJ Robin Blackburn, CO LTCOL Bob Skitch, Mayor – Councillor Paul Tomkinson, unidentified civilian, RSM WO1 Aub Harvey. Rear rank L to R: WO2 Tom Pattison, SGT Graeme Jeffers, remainer unidentified. 50) - Photo, black & white, 1980. 3rd Military District Band inspection. L to R: unidentified band master, CO LTCOL Bob Skitch, Mayor – Councillor Paul Tomkinson. 51) - Photo, black & white, 1980. CO LTCOL Bob Skitch delivers his speech. 52) & .53) - Photo, black & white, 1980. Army Svy Regt squadrons stand at ease during CO LTCOL Bob Skitch’s speech.There are no personnel identified. royal australian survey corps, rasvy, army survey regiment, army svy regt, fortuna, asr -
 Bendigo Military Museum
Photograph - Army Survey Regiment Freedom of Entry March, Bendigo CBD, 1980
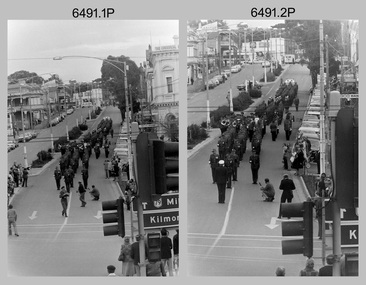
The Freedom of Entry to the City was an honour conferred by the Bendigo City Council to the Army Survey Regiment in 1970. 1980 was the third time the unit exercised its freedom of marching into the city with swords drawn, bayonets fixed and drums beating. The honour is usually bestowed upon local regiments, in recognition of their dedicated service, and it is common for military units to periodically exercise their freedom by arranging a parade through the city. Led by the Regiment’s CO – LTCOL Bob Skitch, the unit marched down View St in the CBD, along Pall Mall and up Gaol Rd to the Queen Elizabeth II Oval. The ceremonial parade followed with a march past the guests of honour, Mayor of Bendigo Councillor Paul Tomkinson and military dignitaries. The parade concluded after formal inspections of the troops. The Regiment also exercised its Freedom of Entry with anniversary parades in 1977, 1980, 1985, 1990 and 1995. Some photos in this set were also printed on photo paper and catalogued under item 6021.25P. Photos of the parade are catalogued under item 6490.53P. Photos of the Freedom of Entry parade rehearsal are catalogued under item 6479.38P.This set of 21 black and white photographs of the Army Survey Regiment were taken on the occasion of the Freedom of Entry to the City of Bendigo March in 1980. The majority of photographs are on 35mm negative film and scanned at 96 dpi. Photos 6491.3P and 6491.18P were printed on photographic paper and scanned at 300 dpi. They are part of the Army Survey Regiment’s Collection. .1) - Photo, black & white, 1980. L to R: MAJ Don Swiney MBE, LTCOL Bob Skitch, WO1 Aub Harvey, ADJT CAPT John Harrison, photographer in foreground – SGT Garran Hill .2) to .5) - Photo, black & white, 1980. L to R: MAJ Don Swiney MBE, LTCOL Bob Skitch, WO1 Aub Harvey, ADJT CAPT John Harrison. .6) - Photo, black & white, 1980. Headquarters Squadron marches left wheels into Pall Mall followed by 3rd MD Band. L to R: WO2 Ted Burgess, WO1 Dave Thomson, WO2 George Graham, CPL Andy Wilson, unidentified (x2), SPR Jeff Ruiz, unidentified, SGT Rick Warren, remainder unidentified. .7) - Photo, black & white, 1980. Headquarters Squadron marches down Pall Mall followed by 3rd MD Band. Right file L to R: WO1 Alex Cairney, WO2 Ted Burgess, CPL Andy Wilson, unidentified, SGT Rick Warren, remainder unidentified. Centre file L to R: unidentified (x2), SGT Bruce Hammond, CPL Phil McGuire. .8) - Photo, black & white, 1980. 3rd MD Band marches down Pall Mall. .9) - Photo, black & white, 1980. Dignitaries on dais next to Soldiers Institute Memorial Hall. L to R: Colonel Commandant COL J.L. Stedman (Retd), Commander 3MD BRIG Geoffrey Cohen AM, unidentified aide de camp, Brigadier Lawrence Fitzgerald OBE (Retd), Mayor – Councillor Paul Tomkinson, CAPT Don Maskew. .10) - Photo, black & white, 1980. Lithographic Squadron marches down Pall Mall towards the dais. L to R: CPL Josh Degroot, CPL Rhys De Laine, unidentified, SPR Per Andersen – right marker, MAJ Sam Schwartz US Exchange, CAPT Stan Vote, OC MAJ Robin Blackburn. .11) - Photo, black & white, 1980. Headquarters Squadron salutes on the march past the dais. L to R: CPL Cliff Webb, unidentified officer, SGT Bob Croxton, unidentified, SGT Syd Davis, CAPT Bob Cooper. .12) - Photo, black & white, 1980. 3rd MD Band marches down Pall Mall towards the dais. .13) - Photo, black & white, 1980. 3rd MD Band marches past the dais. L to R: Colonel Commandant COL J.L. Stedman (Retd), Commander 3MD BRIG Geoffrey Cohen AM, unidentified aide de camp, Brigadier Lawrence Fitzgerald OBE (Retd), Mayor – Councillor Paul Tomkinson, CAPT Don Maskew, unidentified officer. .14) - Photo, black & white, 1980. 3rd MD Band salutes on the march past the dais. L to R: unidentified aide de camp, Colonel Commandant COL J.L. Stedman (Retd), Commander 3MD BRIG Geoffrey Cohen AM, CAPT Don Maskew, Brigadier Lawrence Fitzgerald OBE (Retd), Mayor – Councillor Paul Tomkinson, unidentified officer. .15) - Photo, black & white, 1980. 3rd MD Band salutes on the march past the dais. L to R: Colonel Commandant COL J.L. Stedman (Retd), Commander 3MD BRIG Geoffrey Cohen AM, Mayor – Councillor Paul Tomkinson, CAPT Don Maskew. .16) - Photo, black & white, 1980. Squadrons march past the dais. .17) - Photo, black & white, 1980. Female Contingent salutes on the march past the dais. L to R: Colonel Commandant COL J.L. Stedman (Retd), Commander 3MD BRIG Geoffrey Cohen AM, CAPT Don Maskew, Brigadier Lawrence Fitzgerald OBE (Retd), Mayor – Councillor Paul Tomkinson. .18) - Photo, black & white, 1980. Female Contingent salutes on the march past the dais. L to R: SPR Scheryl Delforce, SPR Ilen Isaac, SPR Ginny (Turner) Rowe, SPR Cathy Regan, CPL Marrianne (Van De Zee) De Groot, SPR Gae (Robinson) Amato, SPR Megan (McBurney) Reynolds, SPR Sue (Fryer) Bottomley, SPR Le-anne (Smallshaw) Shirley, SPR Janet (Chopping) Justin, SPR Zoe (Lisiewich) Ames, unidentified saluting officer, L to R: Colonel Commandant COL J.L. Stedman (Retd), Commander 3MD BRIG Geoffrey Cohen AM. .19) - Photo, black & white, 1980. Cartographic Squadron led by CAPT Bob Roche salutes on the march past the dais. L to R: Colonel Commandant COL J.L. Stedman (Retd), Commander 3MD BRIG Geoffrey Cohen AM, CAPT Don Maskew, Brigadier Lawrence Fitzgerald OBE (Retd), Mayor – Councillor Paul Tomkinson. .20) & .21) - Photo, black & white, 1980. Air Survey Squadron salutes on the march past the dais. L to R: Colonel Commandant COL J.L. Stedman (Retd), Commander 3MD BRIG Geoffrey Cohen AM, CAPT Don Maskew, Brigadier Lawrence Fitzgerald OBE (Retd), Mayor – Councillor Paul Tomkinson.There are no personnel identified. royal australian survey corps, rasvy, army survey regiment, army svy regt, fortuna, asr -
 National Vietnam Veterans Museum (NVVM)
Memorabilia - Tunnel Rat Flag explanation
This item is part of a collection donated by Helmut Grzegozewski (Ziggy) who served in the Royal Australian Infantry Corps, 3rd Battalion, The Royal Australian Regiment from December 1967 to November 1968. A laminated copy of The tunnel Rats Vietnam. The banner represents all four of the Vietnam Field Troop from 1965 - 1971. Surrounding the insignia of the Tunnel Rats are the names of the various troops and units. Under the Insignia is a description of the banner. Our banner, with its distinctive rat armed with a pistol and torch portrayed in the traditional 1 Field Squadron colours of red and blue. Each of the four Field Troops which served in Vietnam are on the banner, along with the dates which represent the span of service of those Troops.tunnel rats, tunnel rats 1965-1971, 3 troop, 1 field squadron rae, 1 troop, 3 field troop, 3 fd trp (rae), 2 troop, grzegozewski, helmut, ziggy, 39121, royal australian infantry corps, 3rd battalion, the royal australian regiment -
 Bendigo Military Museum
Book - BATTALION HISTORY, WW2 - ARMY, David Hay, "NOTHING OVER US", 1984
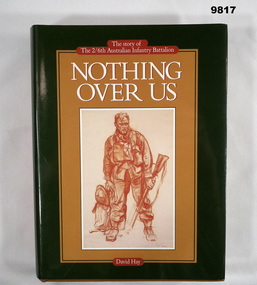
From the title page - "NOTHING OVER US/ The story of/ The 2/6th Australian Infantry Battalion" Part of the "William (Bill) THOMASON" Collection. Refer Cat. No. 4136P for more items.Hardcover book with dust cover. Cover - cardboard, mid brown colour buckram, gold colour print on spine. Dust cover - paper, white and dark green colour print on front and spine on dark green, mid brown and cream colour background. Front illustration - brown colour crayon drawing of an Australian soldier. Flaps - white colour printed information. 604 pages, cut, plain white colour paper. Illustrated black and white and colour photographs, maps and drawings. End papers - front and back - sepia toned photograph of troops on Parade, background streetscape of trees and tram. publications, books, history 2/6th infantry battalion, william (bill) thomason collection -
 Bendigo Military Museum
Souvenir - ANZAC DAY MARCH 1919, C.1919
... details of the days events which include 5,000 troops from the 5... details of the days events which include 5,000 troops from the 5 ...Item in the collection relating to C.J.C. McQuie MM, refer Cat No 9680P for his service details. The March as per cover was held on 25th April 1919 in London. The program gives full details of the days events which include 5,000 troops from the 5 Australian Diviisions, Light Horse Division, Artilley, 18 PDR Battery all led by the General Officers of the Divisions on Horse back. The route taken over 12 streets, at Mansion House the Lord Mayor will take the Salute, the Prince of Wales to take a Salute at Australia House, secretary for War Winston Churchill and members of the Army Council, Australian Airmen will fly over in 14 Aircraft. After a luncheon in the Egyptian Hall for 350 of the men plus distinguished guests, evening will be a reception at Australia House for 1,500 guests held by the Riight Honorable Andrew and Mrs Fisher.Program, paper folded, front cover in all blue print, inside is all black print, rear page is clear.program, anzac, 1919, mcquie -
 Flagstaff Hill Maritime Museum and Village
Photograph - Vessel, Steam Ship, H.M.A.S. Warrnambool J202, Between 1941-1947
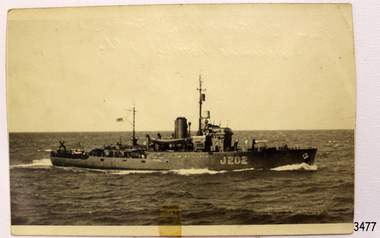
This photograph is connected to the first HMAS Warrnambool (J202), which was one of 60 Bathurst class corvette vessels built during World War II by Mort's Dock & Engineering Co Ltd of Sydney under the commission of the Royal Australian Navy (RAN). It was the namesake of the City of Warrnambool in Victoria. The armed minesweeper was 57 metres long and could had a complement of 85 personnel. Its armament included 1 × 4 inch Mk XIX gun, 1 × 40 mm Bofors AA gun (installed later), 3 × 20 mm Oerlikon guns (1 later removed), machine guns and depth charge chutes and throwers. It was launched in Sydney in May, 1941. The HMAS Warrnambool began service with patrols off Bass Strait in 1941. In December the ship docked in Warrnambool Harbour and the crew marched in a parade along Timor Street. The ship’s crew received a donation of 110 books from the Warrnambool Patriotic Fund, and a plaque of the City of Warrnambool’s Coat of Arms presented by the Mayor, Cr. John R Astbury. In September 1942 a Dutch East Indies family, Samuel and Annie Jacob and seven of their eight children, was rescued by the HMAS Warrnambool and evacuated to Darwin. The family settled in Melbourne, then in 1944 Samuel tragically died. After the war ended the family was threatened with deportation under Australia’s Immigration Restriction Act 1901 (known also as the White Australia policy). Annie married her landlord, John O’Keefe but was still issued a deportation order in 1949. The family appealed to the High Court and the case became famous for being the first successful legal challenge to the Act. The HMAS Warrnambool was in Darwin during the time it was bombed, attacked by the Japanese while rescuing 73 crew from a merchant vessel that had also been attacked. The ship was involved in several other rescues and carried troops to New Guinea. Other events included escort and patrol duties on Australia's east coast, then at Fremantle and back to Darwin. When the Japanese surrendered on September 11, 1945, at the end of World War II, the ship was at Timor. It performed mine clearance work around the Solomon Islands and New Guinea after the war. On 13th September 1947 the ship was sent to lead a flotilla at the Great Barrier Reef, off the Queensland coast. The mission was to clear the defensive British mines that were laid during1941-43 to protect Australia’s boarders. The HMAS Warrnambool hit a mine near Cockburn Reef, exploded and sank shortly afterwards. One of the 70 or so men on board was killed at the time and thirty-two men were badly injured; three of these also lost their lives. The four deceased were Victorian seamen. The wounded men were transferred by boats to the nearby HMAS Swan II, where the Swan’s and the Warrnambool’s doctors cared for them. The HMAS Swan II took the survivors to Cairns, and from there the men were flown by RAAF to either Brisbane or Sydney hospitals. The HMAS Warrnambool was the only RAN ship to be sunk by a mine, and the four who lost their livers were the last naval casualties from World War II. The ship’s wartime service was recognised by three honours. In May 1948 a number of items were recovered by Navy divers from the wreck of HMAS Warrnambool. The items included the ship’s bell (inscribed HMAS Warrnambool 1941) and the round plaque with the Seal of the Warrnambool City Council. In 1949 the plaque was returned to the Council, and the bell was donated to the Australian War Memorial. Further objects were recovered by the new owners of the wreck, Southern Cross Diving and Salvage, in 1972-75. A memorial plaque, honouring the memories of all those who served on the HMAS Warrnambool until is sunk on September 13 1947, was erected in Warrnambool on September 13, 1995. NOTE: (1)- The second HMAS Warrnambool (FCPB204), also the namesake of the City of Warrnambool, was built in 1980 in Cairns, one of fifteen Fremantle Class Patrol Boats ordered by the RAN. It was just over 41 metres long with a compliment of 22 personnel. It patrolled Australia’s northern waters for illegal fishing vessels. This vessel was decommissioned in 2005. (2)- There was also a steam and sail ship named the S.S. Warrnambool, built in 1892 in London and broken up in 1926.This photograph is significant for its association with Royal Australian Navy and its vessel, HMAS Warrnambool (j202). The HMAS Warrnambool played a nationally significant role in overturning Australia’s Immigration Restriction Act 1901 (colloquially known as the White Australia policy). The ship rescued, and brought to Australia, Samuel and Annie Jacob and their family after they evacuated Dutch East India. The family was threatened with deportation and made the first successful appeal to High Court regarding that Act. The HMAS Warrnambool has - Local significance for being the namesake of the City of Warrnambool - Local significance, having docked in Warrnambool Harbour - Local significance, the crew having paraded in Timor Street, Warrnambool - State significance for its first patrol being in Bass Strait. - National significance, being present in Timor at the Japanese surrender - National significance as part of Australia’s defence force history, being one of only four Bathurst class corvettes lost while in Australian service, the only Bathurst class corvette lost after World War II, the only RAN vessel to be sunk by a mine, and associated with the last four Navy deaths of WWIIBlack and white photograph of vessel H.M.A.S. Warrnambool J202 on an open sea. The identifying number is painted on the hull. The ship is flying a white ensign. A lifeboat is suspended near the centre of the ship. Figures can be seen on deck. Hand written inscription on the reverse side. On ship's hull "J202" On reverse of photo "From P.O. FRED MATTHEWS. 23378. R.A.N." "MARIBYRNONG MAIDSTON RSL" "H.M.A.S. WARRNAMBOOL"flagstaff hill, warrnambool, shipwrecked-coast, flagstaff-hill, flagstaff-hill-maritime-museum, maritime-museum, shipwreck-coast, flagstaff-hill-maritime-village, photograph, h.m.a.s. warrnambool, maritime village, maritime museum, shipwreck coast, mort's dock & engineering co ltd, hmas warrnambool, hmas warrnambool i, hmas warrnambool j202, hmas swan ii, j202, world war ii, bathurst class corvette, royal australian navy, ran, sydney built ship, bass strait patrol, sea mine patrol, mine sweeper, mine clearance, navy divers, great barrier reef, cockburn reef, southern cross diving and salvage, warrnambool city council, cr j r astbury, mayor j r astbury, warrnambool patriotic fund, seal, coat of arms, ship’s bell, hmas warrnambool 1941, shipwreck by sea mine 1947, sea rescue, life saving, lifesaving, sinking ship, sunk ship, immigration restrictions act 1901, white australia policy, samuel and annie jacob, john o'keere, minesweeper -
 National Vietnam Veterans Museum (NVVM)
Photograph, Gibbons, Denis, Digby Richards
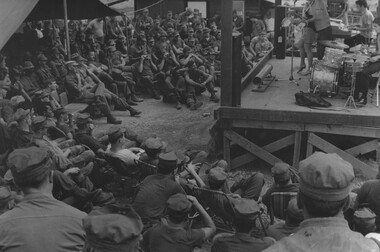
Denis Gibbons (1937 – 2011) Trained with the Australian Army, before travelling to Vietnam in January 1966, Denis stayed with the 1st Australian Task Force in Nui Dat working as a photographer. For almost five years Gibbons toured with nine Australian infantry battalions, posting compelling war images from within many combat zones before being flown out in late November 1970 after sustaining injuries. The images held within the National Vietnam Veterans Museum make up the Gibbons Collection. A black and white photograph of Digby Richards and his show entertain US troops at a Fire Support Base North East of Danang in Northern South Vietnam. While Australian Concert Parties entertained, where practicable, US troops, American USO did not reciprocate.photograhp, entertainment, digby richards, us troops, danang, gibbons collection catalogue, digger, fire support base, australian concert parties, denis gibbons -
 Wangaratta RSL Sub Branch
Photograph - Framed Photograph, c1918
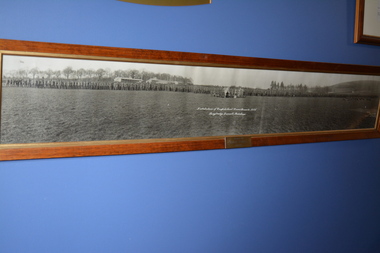
... was built in 1914 to accommodate infantry units. Australian troops ...This black and white image taken of Australian soldiers at the Headquarters of the AIF Overseas Training Brigade based at Longbridge Deverell in Wiltshire England prior to distribution of Comfort Funds Xmas Boxes in 1918. One of the soldiers in the image is Private Llewellyn EVANS 5335 of the 24th Battalion. EVANS was born on the 9/8/1879 at Moyhu in Victoria. He was a farmer and enlisted on the 8/2/1916 at the age of 36 years. He embarked on the 1/8/1916 and was wounded twice, first in 1917 receiving a gunshot wound to the right leg and again in 1918 receiving a gunshot wound to the right arm and leg. He returned to Australia and was discharged on 30/4/1919.Sand Hill (Longbridge Deverill)- Sand Hill camp was built in 1914 to accommodate infantry units. Australian troops arrived at Longbridge Deverill in October 1917, when their Overseas Training Brigade was moved from Perham Down and established there to train soldiers who had recovered from illness and wounds for a return to active service. Brown timber frame containing photograph of large group of soldiers and band members in an open field.Distribution of "Comfort Fund" Xmas Boxes to A.I.F. Longbridge Deverall, March 1918 comfort fund, ww1, llewellyn evans, 24th battalion, longbridge deverill -
 Wangaratta RSL Sub Branch
Equipment - Rifle Bucket
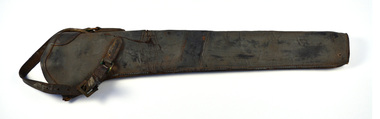
Rifle buckets were used by British and Commonwealth mounted troops from the First World War to around 1941. In the Australian Light Horse units their use did not become common until the end of the First World War. Prior to this rifles were carried slung across the rider's back.Long cylinder shape made from dark brown leather with leather strap and brass buckle at the top of the bucket which attaches it to the saddle .The bucket is missing a leather slide steadying fitting, half way down the bucket which attaches to the surcingle of the saddle.rifle bucket, light horse -
 Wodonga & District Historical Society Inc
Photograph - Members of the Bethanga Light Horse Troop
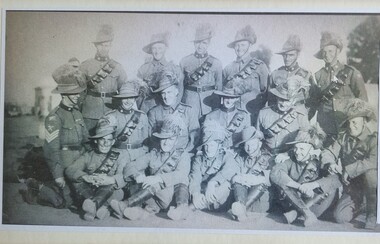
The 8th Light Horse was initially raised from companies of the colonial Victorian Mounted Rifles located in North-east Victoria following Federation. In 1912 a major reorganisation of the Australian military forces resulted in the regiment being renumbered 16th Light Horse. The Regiment was disbanded in 1919 but soon after was re-raised as the 8th (Indi) Light Horse in the Citizen Military Forces, with the territorial title Indi Light Horse. The Indi Light Horse consisted of 3 squadrons. A squadron consisted of troops in Corryong, Walwa, Tallangatta, Eskdale and Wodonga. After an extensive recruiting campaign in January 1939 a new troop was raised in Bethanga, Victoria. In December 1941, the regiment converted from horse to mechanised, initially as 8th Reconnaissance Battalion then in July 1942 it became 8th Cavalry Regiment and served in Northern Territory. As Japanese threat to the mainland declined the regiment was disbanded.This photo represents a group of Bethanga men who committed to service during World War 2A framed Black and white photograph of Bethanga members of the Australian Light Horse in uniformBack row (left to right), Troopers Keith Cadman, Arthur "Friday" Dower, Bert Sommer, Norm Martin, Andy Mitchell, Tom Pearce; Middle row (left to right). Troop Leader Sergeant Edward "Ted"Davies, Troopers Jack Mortlock, Albert "Ab" Bohun, Aub Cadman, Les Freyer Front row (left to right), Troopers Henry Trenchard, A."Ed" Hertzog, Doug Dower, Nelson "Manny" Green, Eric Wheller, J. Parker.indi light horse, bethanga light horse troop, bethanga history -
 Wodonga & District Historical Society Inc
Article - Wodonga and District - Soldiers of the King
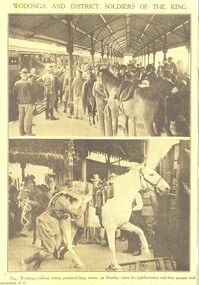
The 8th Light Horse was initially raised from companies of the colonial Victorian Mounted Rifles located in North-east Victoria following Federation. In 1912 a major reorganisation of the Australian military forces resulted in the regiment being renumbered 16th Light Horse. The Regiment was disbanded in 1919 but soon after was re-raised as the 8th (Indi) Light Horse in the Citizen Military Forces, with the territorial title Indi Light Horse. The Indi Light Horse consisted of 3 squadrons. A squadron consisted of troops in Corryong, Walwa, Tallangatta, Eskdale and Wodonga. After an extensive recruiting campaign in January 1939 a new troop was raised in Bethanga, Victoria. In December 1941, the regiment converted from horse to mechanised, initially as 8th Reconnaissance Battalion then in July 1942 it became 8th Cavalry Regiment and served in Northern Territory. As Japanese threat to the mainland declined the regiment was disbanded.This article is significant because it depicts horses being loaded at the Wodonga Railway Station to despatch to the training camp at Broadmeadows. Two black and white images from the Border Morning Mail Friday March 10, 1939. One image shows horses being loaded on to trains in Wodonga to be sent to the base at Broadmeadows, Victoria. The second image depicts two leaders of the 8th Light Horse Regiment.Caption with Photo 1 WODONGA AND DISTRICT SOLDIERS OF THE KING Top: Wodonga railway station presented busy scenes on Monday when the lighthorsemen and their mounts took possession of it. Bottom- Although the men were jubilant at boarding the train for Broadmeadows the horses did not like the idea. This horse was no exception. Photo 2 TWO LIGHTHORSE LEADERS Lieutenant L. W. Welesmith, Tallangatta (left), discussing the entraining of horses for Broadmeadows at Wodonga, with Lieutenant J. A. Mc-Geoch (Wodonga), before the departure of the 8th Light Horse troop.australian light horse, peter frawley, light horse wodonga -
 Wangaratta RSL Sub Branch
Photograph - Framed Photograph
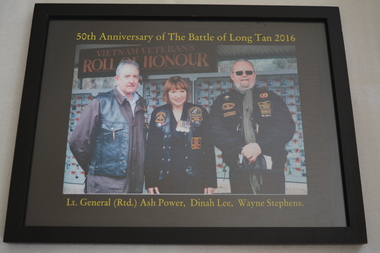
Photograph of Dinah Lee, Wayne Stephens and Ash Power taken at the Vietnam Veteran's Motorcycle Clubrooms at the unveiling of a commemorative wall to honour the 521 personnel who died during the Vietnam War on the 50th Anniversary of the Battle of Long Tan in August 2016. Dinah LEE - Lee entertained troops in Vietnam in the late 1960s on Australian Broadcasting Commission-sponsored tours and was awarded the Vietnam Logistic and Support Medal. Wayne STEPHENS - Vietnam Veteran and Victorian President of the Vietnam Veteran's Motorcycle Club. Ash POWER - Lt. Gen (Rtd) President of Wangaratta RSL Sub BranchBlack frame and mount containing colour photograph of two males either side of a female - all wearing jackets with colour badges/patches.50th Anniversary of the Battle of Long Tan 2016 Lt Gen (Rtd) Ash Power, Dinah Lee, Mark Stephensvietnam war, dinah lee, vietnam veterans motor cycle club -
 National Vietnam Veterans Museum (NVVM)
Letter, La Thu Xuan - A Spring Letter, 1968 (estimated)
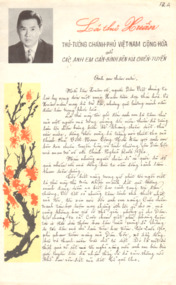
A letter from the Vietnamese Prime Minister is a general call for NVA/VC CADRE and Soldiers on the Other Side of Battle Lines. The manuscript letter - including the reverse, are a general appeal to NVA/VC troops to rally - signed by Prime Minister Nguyen Van Loc (a lawyer). The test appeals for a Xuan Doan Tu - a family reunion at Tet (New Year) Mau Than 1968. (Loc served as Prime Minister from 31 October 1967 to 17 May 1968 - following the Fall of Vietnam, he attempted to flee - and achieved such in his 14th attempt in May 1983) With Photograph of Prime Minister and Floral Picture.Recovered from an abandoned bunker systemvietnamese prime minister, letter, propaganda, psycological warfare, nva/vc, prime minister nguyen van loc, tet mau than, fall of vietnam, terry michael collie, 2790361, 7th battalion, 1st battalion, the royal australian regiment -
 Broadmeadows Historical Society & Museum
Photograph - Soldier Portrait, The Ainar Studio, c. 1910's
... ground for Australian troops, and such images document not only ...This portrait, taken at Ainar Studios during the First World War, captures a soldier stationed at Broadmeadows Camp, Victoria—one of Australia’s primary military training facilities during the early 20th century. Broadmeadows Camp played a pivotal role in preparing thousands of recruits for overseas service, particularly during WWI. Studios like Ainar and Kitchener, often operating near or within the camp, provided soldiers with the opportunity to send formal portraits home to loved ones—a cherished tradition that blended personal memory with national service. These images now serve as poignant historical records of Australia’s wartime experience and the individuals who served.This portrait of a soldier from Broadmeadows Camp, captured by Ainar Studios during the First World War, holds enduring historical and cultural value. It represents a deeply personal yet widely shared wartime ritual—soldiers commissioning studio portraits before deployment, often to send home as keepsakes. Broadmeadows Camp was a major training ground for Australian troops, and such images document not only individual service but also the broader national experience of mobilisation and sacrifice. The photograph is significant for its ability to humanise the war effort, offering a visual connection to the identities, emotions, and stories of those who served. As both a personal memento and a historical artifact, it contributes to our understanding of Australia’s military and social history during the early 20th century.Black and white portrait pasted onto cardboard. Portrait of a soldier from Broadmeadows Camp.Below Photo Front: The Kitchener Studio/Broadmeadows Camp/Under Vice-Regal Patronage/The Ainair Studio/571 Burwood Road/Auburn, Victoria Back: Soldier posing for Portrait/from Broadmeadows/Army Camp/Taken/Ainair Studiobroadmeadows |army camp, the ainair studio, auburn -
 Monbulk RSL Sub Branch
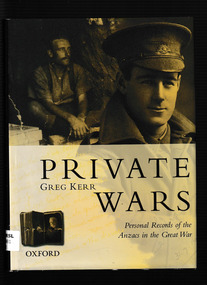
Book, Greg Kerr, Private wars : personal records of the Anzacs in the Great War, 2000
... of Australian troops from Gallipoli in 1915 to the final penetration ...Private Wars: Personal Records of the Anzacs in the Great War offers a new perspective on Australia's engagement in the twentieth century's bloodiest war. It retraces the journey of Australian troops from Gallipoli in 1915 to the final penetration of the Hindenburg Line in 1918. Although the author summarises the general strategic course of the war and the success or otherwise of each campaign, his primary concern is with the personal factor - the human burden of combat and its aftermathIll, index, p.306.non-fictionPrivate Wars: Personal Records of the Anzacs in the Great War offers a new perspective on Australia's engagement in the twentieth century's bloodiest war. It retraces the journey of Australian troops from Gallipoli in 1915 to the final penetration of the Hindenburg Line in 1918. Although the author summarises the general strategic course of the war and the success or otherwise of each campaign, his primary concern is with the personal factor - the human burden of combat and its aftermathaustralian army - anzac corps, soldiers - australia - biographies -
 Ithacan Historical Society
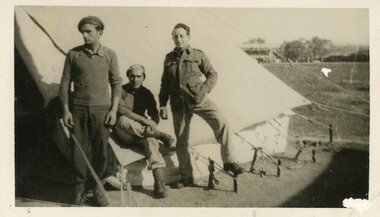
Photograph, WW2 Australian Defence Forces - Allied Aliens, c 1943
The men photographed are from L-R: Gerry Dellaportas (Dellas), Bill Antypas and Stathi Raftopoulos who served in the Civilian Military Forces as 'Allied Aliens'. The photograph was taken at an army base in Albury in 1944. Albury was one of the regional towns where troops were stationed before being sent to other areas of battle or defence. Young Greek and Australian-Greek men joined the Australian Defence Forces during World War 2 and served in various capacities. Ithacans who were unnaturalised were recruited into the Civilian Military Forces as 'Allied Aliens' and served the war effort on the home front. Naturalised Ithacans saw active service.A black and whit photograph of three men in army uniform standing next to a tent erected in an open paddock.army, wwii -
 Monbulk RSL Sub Branch
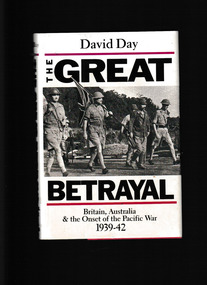
Book, Angus and Robertson, The great betrayal : Britain, Australia and the onset of the Pacific War, 1939-42, 1988
... the repatriation of Australian troops needed for defence. Thus Britain ...The ignominious fall of Singapore to the Japanese in February 1942 marked the climax of the greatese crisis in Anglo-Australian relations - Britain's inexcusable betrayal of Australia in time of war. Until World War II, Australia had always rushed to the Imperial colours, confident that just as Australian blood was shed for the Mother Country, so too would British Blood be in the defence of Australia. But in 1939 Australia lay wide open to attack, her defences practically non-existent, and she was reluctant to commit her meagre forces overseas. Her objections were overcome, however, by an unequivocal British promise to protect her from a Japanese attack, so she sent troops and ships to the northern hemisphere, leaving Singapore naval base as the cornerstone of her own defence policy. Britain's promise to defend Australia was made with little concern for the possibility of its ever being implemented and, certainly, in 1939 a direct threat to Australia looked unlikely. During 1940 and 1941, however, the threat from Japan increased, while Britain's ability to counter it weakened. Yet the British government resisted calls to strengthen the Far Eastern Defence, continually reassuring Australia that the Japanese threat would not materialize and that, even if it did, Britain could still contain it. Then the inconceivable happened: in December 1941 the Japanese decimated the US fleet at Pearl Harbour and in early 1942 took Singapore, leaving Australia suddenly in immediate peril. But the oft-repeated promise to defend the Dominion came to nought. And, at the most crucial time in Australia's history, Churchill tried to prevent substantial American forces from being sent to the pacific, and even attempted to delay the repatriation of Australian troops needed for defence. Thus Britain deliberately left Australia at the mercy of Japan, using her to divert and delay the Japanese thrust westwards towards India and the Middle East...[inside front and back cover]. This compelling and controversial book reveals how in 1942 Churchill, in an attempt to delay an attack on India, left Australia at the mercy of the Japanese by trying to prevent American forces being sent to the Pacific. Drawing on a wealth of sources, including many previously unavailable to historians, David Day exposes a saga of empty promises and asks serious questions about the past and future relationship between Britain and Australia. Collapse summaryIndex, p.388.non-fictionThe ignominious fall of Singapore to the Japanese in February 1942 marked the climax of the greatese crisis in Anglo-Australian relations - Britain's inexcusable betrayal of Australia in time of war. Until World War II, Australia had always rushed to the Imperial colours, confident that just as Australian blood was shed for the Mother Country, so too would British Blood be in the defence of Australia. But in 1939 Australia lay wide open to attack, her defences practically non-existent, and she was reluctant to commit her meagre forces overseas. Her objections were overcome, however, by an unequivocal British promise to protect her from a Japanese attack, so she sent troops and ships to the northern hemisphere, leaving Singapore naval base as the cornerstone of her own defence policy. Britain's promise to defend Australia was made with little concern for the possibility of its ever being implemented and, certainly, in 1939 a direct threat to Australia looked unlikely. During 1940 and 1941, however, the threat from Japan increased, while Britain's ability to counter it weakened. Yet the British government resisted calls to strengthen the Far Eastern Defence, continually reassuring Australia that the Japanese threat would not materialize and that, even if it did, Britain could still contain it. Then the inconceivable happened: in December 1941 the Japanese decimated the US fleet at Pearl Harbour and in early 1942 took Singapore, leaving Australia suddenly in immediate peril. But the oft-repeated promise to defend the Dominion came to nought. And, at the most crucial time in Australia's history, Churchill tried to prevent substantial American forces from being sent to the pacific, and even attempted to delay the repatriation of Australian troops needed for defence. Thus Britain deliberately left Australia at the mercy of Japan, using her to divert and delay the Japanese thrust westwards towards India and the Middle East...[inside front and back cover]. This compelling and controversial book reveals how in 1942 Churchill, in an attempt to delay an attack on India, left Australia at the mercy of the Japanese by trying to prevent American forces being sent to the Pacific. Drawing on a wealth of sources, including many previously unavailable to historians, David Day exposes a saga of empty promises and asks serious questions about the past and future relationship between Britain and Australia. Collapse summary worls war 1939-1945 - diplomatic history, australia - foreign relations - britain -
 Monbulk RSL Sub Branch
Book, Penguin Random House Australia Pty Ltd, Victory at Villers-Bretonneux : why a French town will never forget the Anzacs, 2016
It's early 1918, and after four brutal years, the fate of the Great War hangs in the balance. On the morning of 21 March 1918, the Kaiserschlacht (the Kaiser's battle) is launched. The biggest set-piece battle the world has ever seen. Across a 45-mile front, no fewer than two million German soldiers hurl themselves at the Allied lines, with the specific intention of driving all the way through to the town of Villers-Bretonneux, where their artillery can rain down shells on the key train hub of Amiens, thus throttling the Allied supply lines. For nigh on two weeks, the plan works brilliantly.The Germans are able to advance without check, as the exhausted British troops flee before them, together with tens of thousands of French refugees. In desperation, the British commander, General Douglas Haig, calls upon the Australian soldiers to stop the German onslaught and save Villers-Bretonneux. If the Australians can hold the line, the very gate to Amiens, then the Germans will not win the war. Arriving at Villers-Bretonneux just in time, the Australians launch a vicious counter-attack that hurls the enemy back the first time. And then, on Anzac Day 1918, when the town falls after all to the British defenders, it is again the Australians who are called on to save the day, the town, and the entire battle - even the warIndex, ill, bib, maps, p.764.It's early 1918, and after four brutal years, the fate of the Great War hangs in the balance. On the morning of 21 March 1918, the Kaiserschlacht (the Kaiser's battle) is launched. The biggest set-piece battle the world has ever seen. Across a 45-mile front, no fewer than two million German soldiers hurl themselves at the Allied lines, with the specific intention of driving all the way through to the town of Villers-Bretonneux, where their artillery can rain down shells on the key train hub of Amiens, thus throttling the Allied supply lines. For nigh on two weeks, the plan works brilliantly.The Germans are able to advance without check, as the exhausted British troops flee before them, together with tens of thousands of French refugees. In desperation, the British commander, General Douglas Haig, calls upon the Australian soldiers to stop the German onslaught and save Villers-Bretonneux. If the Australians can hold the line, the very gate to Amiens, then the Germans will not win the war. Arriving at Villers-Bretonneux just in time, the Australians launch a vicious counter-attack that hurls the enemy back the first time. And then, on Anzac Day 1918, when the town falls after all to the British defenders, it is again the Australians who are called on to save the day, the town, and the entire battle - even the war -
 National Vietnam Veterans Museum (NVVM)
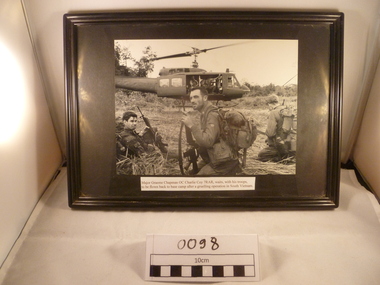
Photograph - Major Graeme Chapmen OC Charlie Coy 7RAR
A black and white picture in black frame of Major Chapman and his two soldiers waiting in front of a helicopter to be flown back to base camp. Major Graeme Chapmen OC Charlie Coy 7RAR, waits, with his troops to be flownback to base camp after a grueling operation in South VietnamA black and white picture in black frame of Major Chapman and his two soldiers waiting in front of a helicopter to be flown back to base camp.Major Graeme Chapmen OC Charlie Coy 7RAR, waits, with his troops to be flownback to base camp after a grueling operation in South Vietnam7 rar, 7th battalion, photograph, charlie company, officer commanding, helicopter, maj graeme chapman, 335108, royal australian infantry corps, the royal australian regiment -
 National Vietnam Veterans Museum (NVVM)
Model - HMAS Sydney, 1990 (Approximate)
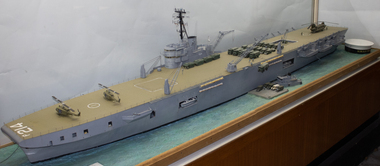
HMAS Sydney (III) played a significant role in the Vietnam War, primarily as a transport ship carrying troops, equipment, and supplies from Sydney to Vung Tau. The ship made 25 trips to South Vietnam between 1965 and 1972, earning the nickname "the Vung Tau Ferry"A ship model with ratio of 1:75 of HMAS Sydney. The ship has lime green deck which has two helicopter standing at the front with text P214, 1 helicopter at the back and 3 boats hanging on a side.Ship Model, c1990s HMAS Sydney A 1:75 scale model of HMAS Sydney, a Majestic class light aircraft carrier operated by the Royal Australian Navy (RAN) from 1947-1958, when she was placed in reserve. The need for a sealift capability saw the ship modified for service as a fast toop transport, and re-commiessioned in 1962. In 1965, she sailed on her first voyage to Vung Tau, transporting soldires and equipment to Vietnam. Sydney made 25 voyages to Vietnam between 1965 and 1972, earning the ship nickname "Vung tau Ferry"model, hmas sydney, ran, aircraft carrier, vung tau ferry -
 Geoffrey Kaye Museum of Anaesthetic History
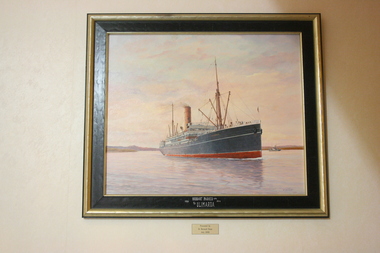
Painting, Ib Odfeldt, S.S. Ulimaroa
Dr Bernie Dunn spotted a model of the merchant ship 'Ulimaroa' at Pollywoodside Museum after which he commissioned Ib Odfeldt, a Danish prize winning marine artist, to depict the vessel at sea.The painting was later gifted to ANZCA in 2006. John Traill, co-owner of Huddart Parker Ltd, named the ship in 1907 after his family home 'Ulimaroa' the building which was later purchased by the newly established ANZCA. The S S Ulimaroa was one of the popular ships in the Huddart Parker fleet that was in regular service between Australia and New Zealand from 1908 to 1934. This service was interrupted by WWI when it was commissioned by the NZ Government to carry troops. During the depression it was de-commissioned where it lay in Sydney Harbor until 1934 when it sailed under its own steam to Japan to be converted into scrap metal. Oil on board painting of the merchant ship S S Ulimaroa on the Derwent River, Hobart, with landscape in distance and small steam boat on of main ship. Set in a plain gold and black wooden frame.[on frame in white ink] HUDDART PARKER LTD. / 1908 1934 / S/S ULIMAROA [on reverse in black ink] THIS PAINTING WAS COMMISSIONED / BY DR BERNARD L. DUNN & WIFE JEAN. / FOR THE ANZ COLLEGE OF ANESTHETIST 2006 ("ULIMAROA" ST KILDA RD MELBOURNE ) / TITLE: ULIMAROA ON THE DERWENT RIVER, (TASMANIA) / ARTIST IB ODFELDT / MEDIUM: OIL ON BOARD 2006 / THE SMALL STEAMER IN THE BACKGROUND S/S WARRENTINA / 808 CYGNET COAST RD / PETCHEY'S BAY 7109 TAS. / RED STAMP dunn, bernard, ulimaroa, odfeldt, ib, parker, huddart, traill, john -
 National Vietnam Veterans Museum (NVVM)
Document - Travel Order Document
Standard instructions for the movement of troops to HQAFV South Vietnam via QANTAS. The instructions explain how to travel, the cost to them/bearer and the destination.A foolscap page of typed instructions for fourteen soldiers to fly via QANTAS flight QF 755. The travel order is dated 1967 (23/8). Australian Military Forces/Hq 10 Movement Control Group/Sydney - Manila Int. Airport/Saigonsoldier, vietnam, qantas -
 National Vietnam Veterans Museum (NVVM)
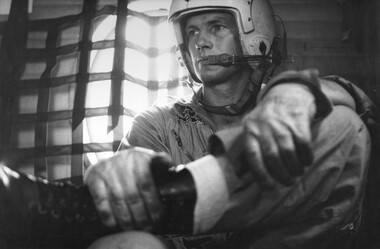
Photograph, Gibbons, Denis, Crew Chief
Denis Gibbons (1937 – 2011) Trained with the Australian Army, before travelling to Vietnam in January 1966, Denis stayed with the 1st Australian Task Force in Nui Dat working as a photographer. For almost five years Gibbons toured with nine Australian infantry battalions, posting compelling war images from within many combat zones before being flown out in late November 1970 after sustaining injuries. The images held within the National Vietnam Veterans Museum make up the Gibbons Collection.A black and white photograph of the Crew Chief, Cpl Allan Hudson, of an RAAF No 35 Squadron Caribou at his post in the front of the plane contemplates the job at hand, of this 005 mission, of the "Mekong Milk Run". The daily tasks included transport of cargo, troops and civilians.photograph, caribou, raaf, 35 squadron, cpl allan hudson, mekong milk run, gibbons collection catalogue, crew chief, royal australian air force, denis gibbons -
 Bendigo Military Museum
Photograph - Army Survey Regiment Freedom of Entry March, Bendigo CBD, 1977
The Freedom of Entry to the City was an honour conferred by the Bendigo City Council to the Army Survey Regiment in 1970. 1977 was the second time the unit exercised its freedom of marching into the city with swords drawn, bayonets fixed and drums beating. The honour is usually bestowed upon local regiments, in recognition of their dedicated service, and it is common for military units to periodically exercise their freedom by arranging a parade through the city. Led by the Regiment’s CO – LTCOL Bob Skitch, the unit marched down View St in the CBD, along Pall Mall and up Gaol Rd to the Queen Elizabeth II Oval. The ceremonial parade followed with a march past the guests of honour, the Mayor of Bendigo and military dignitaries. The parade concluded after formal inspections of the troops. The Regiment also exercised its Freedom of Entry with anniversary parades in 1980, 1985, 1990 and 1995.This photograph of the Army Survey Regiment was taken on the occasion of the Freedom of Entry to the City of Bendigo March in 1977. The photo was printed on photographic paper and scanned at 200 dpi. It is part of the Army Survey Regiment’s Collection. .1 - Photo, black & white, 1977. Female Contingent salutes on the march past the dais. Right file L to R: PTE Chris Meharg, CPL Di Chalmers, LCPL Lynn Johnson, PTE Debbie Brown, PTE Le-anne (Smallshaw) Shirley, PTE Janet (Chopping) Justin, PTE Deirdre Moorrees, CPL Sue (Lang) Spath, WO1 Marj Knight, LT Dianne (Norling) Harris CSC. Centre and left file L to R: SSGT Pat Lumsden - obscured, PTE Karen (Carmichael) Gloster, PTE Kerry (Brown) Collins- obscured, PTE Terry Martin, PTE Laurel (Ryant) Staley – obscured, PTE Tracey (Beckwith) Phillips, PTE Marrianne (Van De Zee) De Groot- obscured. Personnel are named on a digital copy of this photo.royal australian survey corps, rasvy, army survey regiment, army svy regt, fortuna -
 National Vietnam Veterans Museum (NVVM)
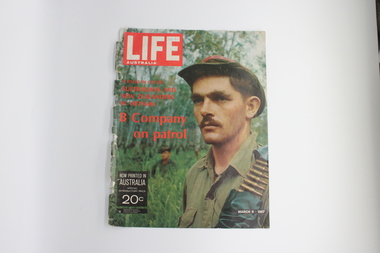
Magazine - B company magazine article
... Australian and New Zealand troops... at the time. Life Australia magazine B Company on patrol Australian ...This item contains reports of the war in Vietnam written at the time. It helps us to understand the views of society at the time."Life Australia" magazine with cover showing Australian soldier in foreground in jungle setting with more soldiers in the background.12 pages in color/ Australians and New Zealanders in Vietnam/ B Company on patrol/ now printed in Australia/ special introductory price 20c/ March 6 1967.life australia magazine, b company, on patrol, australian and new zealand troops, vietnam, richard swanson photographer -
 Monbulk RSL Sub Branch
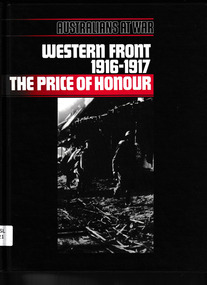
Book, John Laffin, Western front 1916-191: The price of honour, 1987
... -1918 - Campaigns - France Australian troops fighting in France ...Australian troops fighting in France between 1916 and 1917Index, bib, ill, maps, p.163.non-fictionAustralian troops fighting in France between 1916 and 1917world war 1914-1918 - australian involvement, world war 1914-1918 - campaigns - france -
 Monbulk RSL Sub Branch
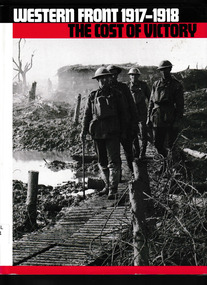
Book, John Laffin, Western front 1917-1918: The cost of victory, 1988
... -1918 - Campaigns - France Australian troops fighting in France ...Australian troops fighting in France between 1917 and 1918Index, bib, ill, maps, p.163.non-fictionAustralian troops fighting in France between 1917 and 1918world war 1914-1918 - australian involvement, world war 1914-1918 - campaigns - france -
 Monbulk RSL Sub Branch
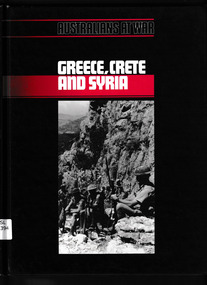
Book, John Laffin, Greece, Crete, Syria, 1989
... - Crete and Syria Australian troops fighting in Greece, Crete ...Australian troops fighting in Greece, Crete and Syria during World War IIIndex, bib, ill, maps, p.163.non-fictionAustralian troops fighting in Greece, Crete and Syria during World War IIworld war 1939-1945 - australian involvement, , world war 1939-1945 - campaigns - greece, world war 1939-1945 - campaigns - crete and syria -
 Monbulk RSL Sub Branch
Book, Time Life Books, War against Japan 1941-1942, 1988
... -1945 - Campaigns - Pacific area Australian troops fighting ...Australian troops fighting against Japan in 1941 and 1942Index, bib, ill, maps, p.163.non-fictionAustralian troops fighting against Japan in 1941 and 1942world war 1939-1945 - australian involvement, world war 1939-1945 - campaigns - pacific area