Showing 771 items
matching (commander)
-
 National Vietnam Veterans Museum (NVVM)
Photograph, Gibbons, Denis, Great Hung Vuong Day Road Race
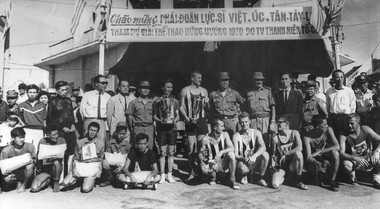
Denis Gibbons (1937 – 2011) Trained with the Australian Army, before travelling to Vietnam in January 1966, Denis stayed with the 1st Australian Task Force in Nui Dat working as a photographer. For almost five years Gibbons toured with nine Australian infantry battalions, posting compelling war images from within many combat zones before being flown out in late November 1970 after sustaining injuries. The images held within the National Vietnam Veterans Museum make up the Gibbons Collection. A black and white photograph of a Group photo of the placed runners in the 5000 metre footrace from the market place at Long Dien. The race was run on the Vietnamese National DayTHE GREAT HUNG VUONG DAY ROAD RACE - 15th APRIL 1970: Hung Vuong Day, 15th April 1970, the Vietnamese National Day commemorating the events of the birth of the Vietnamese Race, is on of the most important festivals of the Vietnamese Memorabilia. The placed contestant athletics in the 5000 metre foot race from the market place at Long Dien, south east of Nui Dat, the 1st Australian Task force Base, along national Route 23 to the town square at Baria (Phuoc Le), the Phuoc Tuy Province Capital. The multi coloured shirts of the various contestants, from the numerous military and civilian units in the province and the Australian Task Force looked out of place in the war zone. It took 17 minutes, 5 seconds for the outright winner to get to the finish, a strapping young SAS soldier, Trooper John Thurgar, from Scone, N.S.W. of the 1st Special Air Service Squadron, one of the Australian contestants. The first prize, silver cup, was presented to Trooper Thrugar by Colonel Tu, The Province Chief, Colonel Peter Falkland, the 1st Australian Task Force Deputy Commander presented the first Vietnamese contestant across the finish line with a silver cup. In all there were trophies for the first siz places by the Vietnamese and the "visitors", SAS took the first three Australian/New Zealand places whilst the last three came from other 1st Australian Task Force Units, the first prize for each of the individual winners was a large silver cup, for the next five runners up, by the Australians there was a smaller silver cup, for the Vietnamese first place there was a silver cup the same size as for the Australian, outright, winner, while the next five Vietnamese runners up received a parcel of clothing and towels.photograph, 1st sas sqn, baria, phuoc tuy province, vietnamese national day, gibbons collection catalogue, great hung vuong day road race, trooper john thurgar, national route 23, nui dat, long dien village, col tu, col peter falkland, 1st special air squandron, the province chief, 1st australian task force, 3390, royal regiment of australian artillery, denis gibbons -
 Seaworks Maritime Museum
Document
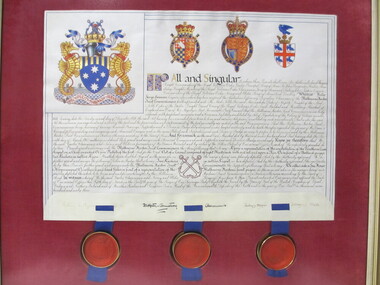
Large paper document including colour illustrations of Melbourne Harbor Trust shield and other shields. Includes three wax seals attached to document with blue ribbon."To All and Singular to whom these presents shall come, Sire Anthony Richard Wagner/ Knight Commander of the Royal Victorian Order Garter Principal King of Arms. Sir John Lunamace Heaton Arm/ Strong Knight, Member of the Royal Victorian Order. Clarenceux King of Arms an Aubrey John Toppin Esquire/ Commander of the Royal Victorian Order. Norroy and Ulster King of Arms Send Greeting! Whereas Victor/ George Swanson. Esquire upon whom has been conferred the Australian Efficiency Decoration Chairman of the Melbourne Harbor/ Trust Commissioners hath represented unto The Most Noble Bernard Marmaduke, Duke of Norfolk, Knight of the Most/ Noble Order of the Garter Knight Grand Cress of the Royal Victorian Order, Earl Marshal and Hereditary Marshal of/ England and one of Her Majesty's Most Honourable Privy Council that the Melbourne Harbor Trust Commissioners is a body/ corporate with perpetual succession and a Common Seal duly constituted by Act of Legislature of the Colony of Victoria number/ DLII bearing date Twenty second day of December 1876 the said Act having been amended from time to time and various Acts passed consolidating such amendments that under the said/ Act the exclusive management and control of the port and the preservation and improvement of the port generally as vested in the said Commissioners. That the Melbourne Harbour Trust/ Commissioners being desirous of having Armorial Bearings, Supporters and a Device or Badge duly assigned under lawful authority and he hath therefore requested the favour of His Grace's/ Warrant for Ouigranting and assigning such Armorial Ensigns and in the same Patent such Supporters and such Device or Badge as may be proper to be borne and used by the Melbourne/ Harbor Trust Commissioners on Seals otherwise accoding to the Laws of Arms. And forasmuch as the said Earl Marshal did by warrant under his hand and Seal bearing date the Sev-/ enth day of March 1962 authorize and direct Us to grant and assign such Armorial Ensigns and such Supporters and such Device or Badge Accordingly. Know ye therefore that we/ the said Garter Clarenceux and Norroy and Ulster in pursuance of His Grace's warrant and by virtue of the Letters of Patent of Our several offices to each of us respectively granted do/ by these Presents grant and assign unto the Melbourne Harbor Trust Commissioners the Arms following that is to say: Azure a representation of the constellation of the Southern Cross/ Argent on a Chief enarched on five Pallets of the first. And for the Crest Out of a Coronet composed of eight Masts each with sail set and upon Rim Or in front of a Bollard proper/ two Anchors in saltire Azure Mantled figure doubled Argent as the same are in the margin here of more plainly depicted. And by the Authority aforesaid We do/ further grant and assign the following Device or Badge that is to say: Two Anchors in saltire Argent as here depicted And by the Authority aforesaid the said Garter/ do by these Presents further grant and assign unto the Melbourne Harbor Trust Commissioners the Supporters following that is to say : On either side a Sea Horse/ (Hippocampus) or collared and lined Gules in front of a representation of the Melbourne Harbour front proper as the same are also in the margins here of more/ arms plainly depicted the whole to be borne and used forever hereafter by the Melbourne Harbour Trust Commissioners on seals otherwise according to the laws of/ Arms. In witness whereof we the said Garter Clarenceux and a Norroy and Ulster Kings of Arms have to these presents subscribed Our names and affixed the seals/ Of our Several offices this fith day of March in the Twelfth Year of the reign of our Soveriegn Lady Elizabeth the Second by the Grace of God of the United Kingdom of Great/ Britain and Northern Ireland and of Her other Realms and Territories Queen head of the Commonwealth Defender of the Faith and in the years of Our Lord One Thousand nine/ hundred and sixty three" "Prosperity Through Service" -
 Eltham District Historical Society Inc
Photograph - Digital Photograph, Marguerite Marshall, 'Worlingworth', 10-26 Banoon Road, Eltham, 30 January 2006
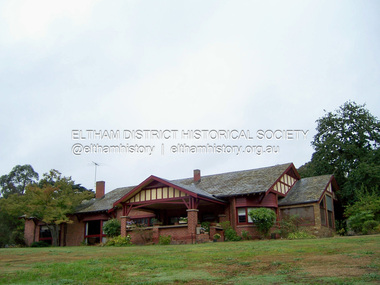
'Worlingworth', Eltham, home of noted anthropologist the late Professor Donald Thomson and his wife Dorita Thomson. Covered under Heritage Overlay, Nillumbik Planning Scheme. Published: Nillumbik Now and Then / Marguerite Marshall 2008; photographs Alan King with Marguerite Marshall.; p127 Dubbed as ‘Australia’s Lawrence of Arabia’ anthropologist Donald Thomson lived much of his life in Eltham, at Banoon Road. On his retirement as Professor of Anthropology in 1968, The University of Melbourne professorial board compared Thomson to Lawrence of Arabia because of his work for Aborigines and his controversial personality. Although Thomson is now recognised for his huge contribution, during his lifetime he suffered opposition and his life has been described as ‘tragic’.1 Thomson failed to gain the recognition as a scientist that he felt he deserved and he failed to alter government policy towards Aboriginal people. But towards the end of his life in 1970, anthropologists were moving towards the type of research he had done and the movement to grant land rights to Aborigines was strengthening. Thomson is best known for his anthropological fieldwork in Cape York, Arnhem Land and Central Australia, but he is also known for his scholarly contributions to ornithology and ecology. Thomson documented every aspect of the daily and ritual life of the Aboriginal world of Cape York and Arnhem Land in the 1930s and 1940s. The huge collection in Museum Victoria includes 11,000 photographs, 7500 items of material culture, 1000 botanical and zoological specimens and 4500 pages of field-notes.2 The film Ten Canoes used Thomson’s photographs as a source. Thomson bought the Eltham property known as Worlingworth in 1934. The single-storey 60-square house standing by the Yarra River was built in 1922-23. It is one of the last in Eltham to survive with its farm setting intact. It is also one of the few substantial residences built in the Eltham Shire from the late 19th century to the early 20th century, which signalled a major change in the area towards the residential municipality it is today.3 The original section, built in the mid 1860s, of rose pink hand-made bricks and stone quarried on the property, was incorporated in the new red-brick house built in 1922. An immense oak tree by the house grew from an acorn brought by Patrick Armstrong who first bought the land in March 14, 1862. Armstrong named Worlingworth after his forbears’ village in Suffolk, England. Worlingworth saw grand days when Commander Alan A Barlee (R.N.) bought it in 1922 after winning the Calcutta Sweep. The property then included a nine-hole golf course, a tennis court, a bowling green, a boathouse and a boat-ramp.4 For most of his career Thomson, who was born in 1901, was attached to The University of Melbourne. In 1935 he represented the Commonwealth Government at Caledon Bay in east Arnhem Land to investigate and mediate for four Aborigines accused of killing five Japanese and three Europeans. In 1938 Thomson was awarded a PhD in Anthropology at Cambridge University, and during his career, he received several medals from British Societies, who perhaps appreciated his work better than their Australian counterparts. From World War Two, Thomson suffered a string of hardships, beginning with severe wounding in Dutch New Guinea (for his military service in New Guinea he was awarded an OBE) and he was invalided from service in 1944. That year he was diagnosed with diabetes. A fire in 1946 destroyed what Thomson regarded as perhaps the best record he had made of Aboriginal life – the 20,000 feet, (6096m) of film he had shot in Arnhem Land. In 1954 he and wife, Gladys, divorced. The next year he married his technical assistant, Dorita McColl. Several times during his career Thomson had major disagreements. For instance Professor P Elkin constantly opposed his work. He also opposed Thomson when he campaigned vigorously in 1947 against the establishment of a rocket range at Woomera, South Australia, because of the threat it posed Aborigines. Thomson resigned in frustration from the Victorian Aborigines Welfare Board in 1967, after serving for ten years, because he found that his advice was disregarded. His ashes were scattered over Caledon Bay from the air.This collection of almost 130 photos about places and people within the Shire of Nillumbik, an urban and rural municipality in Melbourne's north, contributes to an understanding of the history of the Shire. Published in 2008 immediately prior to the Black Saturday bushfires of February 7, 2009, it documents sites that were impacted, and in some cases destroyed by the fires. It includes photographs taken especially for the publication, creating a unique time capsule representing the Shire in the early 21st century. It remains the most recent comprehenesive publication devoted to the Shire's history connecting local residents to the past. nillumbik now and then (marshall-king) collection, banoon road, donald thomson, dorita thomson, eltham, worlingworth -
 8th/13th Victorian Mounted Rifles Regimental Collection
Born digital image, September 1993
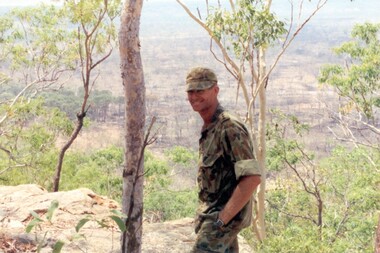
The Dibb Report into mainland defence of Australia,1986, among other things identified the requirement for protection of key assets in Northern Australia and the possibility of involving Army Reserve (Ares) units in this thus releasing regular forces for offensive operations. Dibb also pointed out that this defined role would result in a huge lift in Ares morale. In June 1988, the 3rd Division (3Div) conducted a Tactical Exercise without Troops (TEWT), Exercise ‘Distant Trumpet’ in the Katherine- Darwin area to study problems associated with defence against low level incursions against Tindal RAAF Base. Exercise ‘Northern Explorer’ followed in October of that year when units of the 3Div including A Squadron 8/13 Victorian Mounted Rifles sent patrol groups to get a first taste of environment and conditions. Post-Exercise reports had to include recommendations re: health, equipment and adaptation of Standing Operating Procedures (SOPs) in preparation for the new role deploying to Northern Australia. The first deployment by 8/13 Vistorian Mounted Rifles was in 1988. Deployments continued i following years. In September 1993, 3 Troop (Wangaratta) VMR Squadron 4/19 PWLH commanded by Captain Kelvin Robertson deployed to NT. The training began with airfield defence at Tindal followed by a 1000km recon into Arnhem Land in four Landrovers. The troop reported on the conditions of the roads, airfields, bridges (mainly causeways) resources such as fuel supplies in the towns and infrastructure. Each troop taking different route. 3 Troop had the Northern route through Kakadu National park across the East Alligator River to Oenpelli then to Maningrida and Ramangining and south to the Central Arnhem Road and back to Tindal Air force Base. Kelvin Robertson enlisted on 6 April 1981 at Cobram where Lieutenant Dan Wyborn was the troop leader at 2 Troop A Squadron 8th/13th Victorian Mounted Rifles (2TP A SQN 8/13 VMR). He completed the Initial Employment Training Course (IET) and then an M113A1 driver’s course in March 1982. Course Senior Instructor (SI) was Captain (CAPT) John McLean and wing instructor Warrant Officer Class 2 (WO2) Mick Baxter (ex-Driving & Servicing Wing instructor at the School of Armour). He served with 2TP at Cobram as a trooper Driver/Signaller until June 1982 when he was selected for officer training. He served two years as an Officer Cadet in Course 21 at Officer Cadet Training Unit (OCTU) graduating in June 1984. He returned to 8/13 VMR and completed the 1/85 Army Reserve (ARES) Regimental Officers Basic Course (ROBC Reconnaissance), then was posted immediately as 1 TP LDR for the Hay Booligal Annual Field Exercise (AFX). In 1985 he took command of 2TP at Cobram until Nov 1987 when he transferred to C Squadron First Armoured Regiment (CSQN 1AR). This began six months full time duty in which Lieutenant (LT) Robertson completed the regular army 1/88 (ROBC Tank), and then served as CSQN's first and only ARES Leopard Tank TP LDR until the next ARES LT was trained up as 2TP LDR. He later served as the CSQN Liaison Officer (LO) on the First Brigade (1 Bde) exercise ‘Predators Advance’ and as a staff officer on a Second Division (2Div) exercise. In Jan 1991 he studied at the Reserve Command and Staff College (RCSC). Upon completion of Grade 3 he was promoted to CAPT and transferred back to a reconnaissance troop, 3TP VMR SQN 4th/19th Prince of Wales’s Light Horse (4/19PWLH) at Wangaratta. CAPT Robertson transferred to the Inactive List in 1994, but in 2011 returned to the Active List serving as Operations Captain (OPS CAPT) at Regimental Headquarters (RHQ) 12th/16th Hunter River Lancers (12/16 HRL)and later Second-In-Command (2IC) Tamworth-based Operations Support Squadron (OPSPT SQN), and at 9 day exercises at Singleton range and an exercise at Townville High Range in Protective Mobility Vehicle (PMV) Bushmasters. In 2013 after completing the ARES Grade 3 Staff Officers course in Brisbane he returned home to Jerilderie and served as 2IC A SQN 4/19 PWLH based at Latchford Barracks Bonegilla. He was awarded the Defence Long Service Medal (DLSM) in 2014. Highlights of his career included being Parade Commander for the 75th anniversary Beersheba parade in Canberra on 31 October 1992. The guard, drawn from the VMR SQN 4/19 PWLH represented the 4th Light Horse Regiment, a participant of the Charge. Then twenty years later, 2012, he was invited to speak at the Quirindi Anzac Day ceremony. On this occasion he was serving with 12/16 HRL, so in two ceremonies, 20 years apart, he had represented both the 4th LHR and the 12th LHR, the two lead Regiments that charged Beersheba. CAPT Robertson was placed on the Inactive List again in 2015. Illustrates Reserve training in NT.Colour image of soldier with landscape in background being Captain Kelvin Robertson 3 Troop Leader (Wangaratta) VMR Squadron 4th/19th Prince of Wales’s Light Horse Regiment looking out over the Arafura swamp near the Maningrida to Ramingining road in Arnhem Land during exercise in the Northern Territory, September 1993.tindal, robertson -
 Royal Brighton Yacht Club
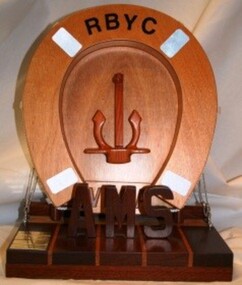
Life Ring, Vega Trophy (Mounted Wooden Life Ring)
Vega Trophy (Mounted Wooden Life Ring) Donor: Graham Noel During World War II when the Germans occupied the Channel Islands the local people went through very severe food rationing and were on the verge of starvation. Near the end of the war, the Swedish ship Vega was allowed by the Germans to deliver several shipments of food to the civilian population, easing the critical shortages of food on the islands. Further background detail can be found below. Graham Noel was born on the Islands and lived there during this harsh period. The trophy is awarded to the winner of the Combined Division AMS Aggregate Series. First Winner: Under Capricorn, P. Bedlington 2005/06 Vega – Further historical background Early in the Second World War Jersey was declared “unarmed” and the German military took over, taking quite a few lives in the process, through strafing the main harbour and a few other places which they needlessly considered threatening. A considerable number of locals evacuated to England before the Germans arrived, but more than 60% of the population remained and endured 5 years of very strict and difficult conditions. Not only was the population unable to contact relatives in the UK or elsewhere, but very quickly they found themselves subject to harsh curfews, strictly rationed foodstuffs, no fuel for vehicles, radios confiscated, and homes and hotels commandeered by the military. The military demanded first pick of all foodstuffs and kept meticulous records of all livestock forcing farmers even to show newborn calves and piglets to them, then claiming the new arrivals for their dinner tables. However there are many stories of farmers outwitting their masters when twin calves or suchlike arrived! Lawbreakers were quickly dealt with, mostly with lengthy prison terms in Jersey, but the more serious crimes were punished by being sent to some horrible French prisons, or even some of the notorious German concentration camps. All local Jews were dispatched to concentration camps, and even English born families were similarly shipped through France and on to Germany. Sadly, a considerable number of those deported did not make it back safely to Jersey. In June 1944 the locals were delighted to hear that the Allies had invaded Normandy and very soon they could hear the battles as the Allies worked their way along the French coast. Little did they know they would still have to wait another 11 months for freedom, having to put up with a very demanding German occupation force which was still determined to obey Hitler’s order to “Defend the Channel Islands to the death”. Now that France was in Allied Hands the local military commanders were unable to supplement their food supplies from France and even harsher demands were made on the local population to ensure that all branches of their still very substantial military force were reasonably well fed. As well as the military, Jersey farmers had to provide food for the Allied POWs and the many “forced labourers”, mainly of Russian, Polish and Italian backgrounds who had been directed to the island to build all the concrete bunkers. This included an underground hospital, all this complying with Hitler’s orders to ensure that the Channel Islands would never again be part of Britain. Many requests by the Jersey authorities for Red Cross assistance were rejected, but finally in December 1944 they agreed and on 30th December the Red Cross vessel “Vega” (Swedish Registry) arrived and delivered parcels to the civilian population. These parcels contained a variety of foodstuffs supplied mainly by Canadian authorities, desperately needed medical supplies, flour, oils and soaps, as well as tobacco from New Zealand. Vega made a further 3 or 4 trips and most certainly eased the desperate situation being faced by the locals. In fact, it resulted in the locals having slightly better food supplies than the military and many local farmers tell stories of having to protect their stock from marauding soldiers. Understandably Churchill was reluctant to send in an invading force to retake the Channel Islands, but by May 1945 it was clear that the Third Reich was finished and on May 9th the German Military surrendered, without a fight, to a large British landing force. On a slightly lighter note … in January 1945 Jersey stonemasons were seen in the main town square repairing flagstones … the Germans had never noticed that the name “Vega” had been formed in those flagstones! As a side note Vega is the name of the brightest star in the universe. Furthermore, throughout the occupation, despite German law that demanded confiscation of all radio sets, punishable by long prison terms or deportation to Germany, there were still many sets being listened to. The locals had a well refined news system for the dissemination of news of what was happening in the outside world. vega, graham noel, ams, combined division, aggregate -
 Moorabbin Air Museum
Document (item) - Roland Jahne Collection - See Description for details
-
 Flagstaff Hill Maritime Museum and Village
Photograph, Between 1890 - 19-12-1937
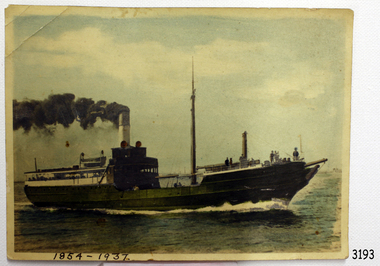
This photographic postcard of the SS Edina was taken after the 1890’s due to the style and configuration of the vessel. There is a black and white photograph of the same image also in our Collection (RN 3192). It is most likely that both of the photographs were donated by the same person because the people mentioned in the inscription on the black and white photograph’s reverse side connect with two of the people mentioned in the letter on the reverse of the coloured photograph. * RN 3192; Black & White photograph - inscription: "Donated by Mrs. Nancy Mason, Bay View. Owned by Mac Fordham, Chief Engineer, 'Edina', then given to Mrs. Mason's father-in-law Arnold Mason (both Engineers W.W. I)" The “Arnie” to whom the letter was addressed is likely to be Arnold Mason, Engineer. The author of the letter, “Mac”, is likely to be Mac Fordham, Chief Engineer of SS Edina. The transcribed letter tells of two men who know each other well and have an interest in the Edina. “Mac” mentions that he may be “too old” to be at sea again; this would also support the idea that the older writer would give his photographs to the perhaps younger “Arnie”. * RN 3193 (this photograph) - Transcription of pen and ink script handwriting = = = = = = = = = = = = 19-12-37 No. 1 Flat, “Goodwood Lodge” 196 Lennox Street, Richmond [Victoria] Dear Arnie , Been meaning to write for long time but you know, it’s just the usual routine of the seamen within Bay trades. Had a good trip back from Sydney. Took our time, spent almost a week coming back, rather monotonous in parts in the hill country, too many darn curves, still was a good trip. How are you all keeping? Suppose you’ve moved back to Drummoyne [erettris?], expect you can let the house in Manly easily enough. Noticed they had a strike at Cockatoo [Cockatoo Island NSW]. don’t suppose they pulled the boys out. How is Jack doing? Has [Willie?] commenced training yet, or no! too young, isn’t she? Been a lot of “paper” talk about the “Edina” finishing but nothing official that I’m aware of, but it’s always on the cards I suppose, then I suppose it will be to sea again if I’m not too old. Easy Winter only 3 trips per week, running every day from today until further notice. Trust [Mary?] Is well & all’s well with you too. Best wishes from us both for Xmas & New Year. Cheerio Mac = = = = = = = = = = = = ABOUT THE S S EDINA The three masted iron screw steamer SS Edina was built in Glasgow, Scotland, in 1854 by Barclay and Curle. She was adorned with the figurehead of ‘fair maid of Judea’. The many years of service made SS Edina famous world-wide as the longest serving screw steamer. (The term screw steamer comes from being driven by a single propeller, sometimes called a screw, driven by a steam engine.) SS Edina’s interesting history includes English Chanel runs, serving in the Crimean Ware carrying ammunition, horses and stores to the Black Sea, and further service in the American Civil War and later, serving in the western district of Victoria as well as in Queensland and carried gold, currency and gold prospectors Australia to New Zealand. SS Edina had the privilege of being an escort vessel to H.R.H. the Duke of Edinburgh during his visit to Australia in 1867. In March 1863 SS Edina arrived in Port Phillip Bay, Melbourne and was bought by Stephen Henty, of Portland fame, to work the cargo and passenger run from Melbourne – Warrnambool – Port Fairy - Portland. After a short time of working the run from Australia to New Zealand, with passengers and cargo that included gold and currency, she returned to her Melbourne - Warrnambool – Port Fairy run, with cargo including bales of wool produced in the western district of Victoria. The Warrnambool Steam Packet Company purchased SS Edina in 1867; she was now commanded by Captain John Thompson and Chief Engineer John Davies. She survived several mishaps at sea, had a complete service and overhaul and several changes of commanders. In 1870 SS Edina was in Lady Bay, Warrnambool, when a gale sprung up and caused a collision with the iron screw steamer SS Dandenong. SS Edina’s figurehead was broken into pieces and it was not ever replaced. SS Edina was re-fitted in 1870 then was used as a coastal trader in Queensland for a period. She was then brought to Melbourne to carry cargo and passengers between Melbourne and Geelong and performed this service 1880-1938. During this time (1917) she was again refitted with a new mast, funnel, bridge and promenade deck, altering her appearance. In 1938, after more collisions, SS Edina was taken out of service. However she was later renamed Dinah and used as a ‘lighter’ (a vessel without engine or superstructure) to be towed and carry wool and general cargo between Melbourne and Geelong. In 1957, after 104 years, the SS Edina was broken up at Footscray, Melbourne. Remains of SS Edina’s hull can be found in the Maribyrnong River, Port Phillip Bay. [Reference: A Brief Review of Steam Navigation in Victoria; C Dickson Gregory; Centenary Maritime Exhibition catalogue, 1934; published by Shiplovers' Society of Victoria Dandenong, Passengers in History, http://passengersinhistory.sa.gov.au/node/924034 Edina, Victorian Heritage Database VHR S199 http://vhd.heritage.vic.gov.au/shipwrecks/heritage/199 SS Edina, Coastal Trader and Passenger Ship 1853-1938, Museum Victoria Collections, https://collections.museumvictoria.com.au/articles/6227 SS ‘Edina’ – the Longest Serving Screw Steamer in the World, POI Australia, https://poi-australia.com.au/ss-edina-the-longest-serving-steamer-in-the-world/ ]This photographic postcard with the letter on the revers tell about the SS Edina and are significant for its association with the screw steamer SS Edina. The SS Edina is heritage listed on the Victorian Heritage Database VHR S199. She had endeared herself to the people of Port Phillip Bay as a passenger ferry, part of their history and culture. She played a significant role in the Crimean War, the American Civil War and the gold rush in New Zealand. She also served western Victoria for many years in her cargo and passenger runs. The SS Edina is famous for being the longest serving screw steamer in the world. After spending her first nine years overseas she arrived in Melbourne and her work included running the essential service of transporting cargo and passengers between Melbourne and the western Victoria ports of Warrnambool, Port Fairy and Portland. The SS Edina was purchased in the late 1860’s by local Warrnambool business, the Warrnambool Steam Packet Co. and continued trading from there as part of the local business community. The SS Edina’s original ‘fair maid of Judea’ figurehead was broken to pieces in a collision with another vessel (the SS Dandenong) in a gale off Warrnambool, Victoria, in 1870.Coloured (hand coloured) photographic postcard of SS Edina. Letter on reverse, hand written in pen and ink, from Mac to Arnie, dated 19-12-37 [1937]. The photograph shows the SS Edina moving under steam power, many people on both the bow and stern and a few people in the centre of the vessel. There are buildings on the shore in the background. The ship's configuration is dated post 1890.Hand written in pen on base of front “1854-1957” Hand written on back in blue pen and crossed out “REC 409” Hand written on back in pen ‘EDINA,’ “3173,” “086.2” Hand written letter dated 19-12-37, from Mac to Arnie. Script writing in pen and ink letter on reverse of photograph – see “Context” section for transcription. warrnambool, shipwrecked coast, flagstaff hill, flagstaff hill maritime museum, maritime museum, shipwreck coast, flagstaff hill maritime village, shipwrecked artefact, barclay & curle, figurehead 'fair maid of judea', centenary maritime exhibition 1934, a brief review of steam navigation in victoria, pleasure steamer edina, trade and travel late 19th and early 20th century, trade melbourne to geelong, screw steamer edina, coastal trader edina, lighter dinah, cargo carrying for cremean war, cargo carrying for american civil war, passenger and trade in western district of victoria, export gold and currency and gold diggers to new zealand, export vessel to h r h the duke of edinburgh, melbourne - warrnambool - port fairy - portland cargo run, warrnambool steam packet company, stephen henty, captain john thompson, chief engineer john davies, lady bay warrnambool, lighter edina, shipping victoria, port phillip bay steamers, steamship great britain, edina, vhr s199 victorian heritage database, photographic postcard of ss edina 1854-1957, letter by mac fordham chief engineer ss edina, letter to arnold mason, engineer -
 Flagstaff Hill Maritime Museum and Village
Craft - Scrimshaw, Late 20th century
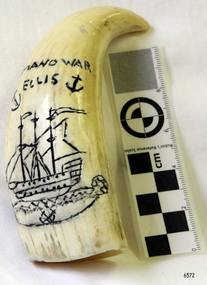
The ship “Ellis” started life as the Clementina, launched in America in 1781. The vessel was first listed in Lloyd's Register in 1784 and under this name began serving as a slave ship sailing out of Liverpool. A Lloyd’s database records of slave-trading voyages by vessels from Liverpool makes it clear that Clementina was a slave trader. The next year Captain J. Elworthy sailed her to West Central Africa and St Helena. He transported his slaves to South Carolina. Then in 1785 Elworthy gathered slaves in the Bight of Biafra and the Gulf of Guinea Islands for delivery to Jamaica. In 1786 Bent & Co. purchased the Clementina and renamed her Ellis, presumably after the then owner Ellis Bent. She remained in the slave trade and In 1788 Captain John Ford sailed the now renamed Ellis to the Bight of Biafra and the Gulf of Guinea to gather slaves. He delivered this batch of slaves to the island of Grenada. The next year, 1789 the Ellis was almost completely rebuilt, and from the change in subsequent reports of her cargo loading or (burthen), she was enlarged. In 1791, Captain Joseph Matthews became master and sailed the Ellis to the Gold Coast then delivering his consignment of slaves to the island of St Vincent. During this voyage, some misfortune may have befallen Matthews because records show the Ellis command was transferred to Thomas Given. In 1792, Given sailed to the Bight of Biafra and the Islands in the Gulf of Guinea, again collecting slaves for delivery to Jamaica. There is a parallel record, also for 1793, that the Ellis under the command of Thomas Heart, undertook the same journey and with the same itinerary and cargo. In 1793, Bent & Co. decided to use the Ellis as a privateer with John Levingston as the master. After receiving a letter of "marque” on the 3rd of June 1793, that allowed any armed vessel to commit acts on the high seas which would otherwise have constituted piracy. Thus the Ellis began to operate as a combat ship under the endorsement of the British navy. The Ellis was three times captured first by the French frigate Gracieuse, under the command of Captain Chevillard on 22 July 1793. The French took her into service and renamed her as ”Elise”. Later that summer the Spanish captured her and in November ownership returned to the French who then renamed her the “Esperance”. On the 8th of June 1794, Esperance arrived in Jacmel, Saint-Domingue (present-day Haiti), from France with the official proclamation of the abolition of slavery. Leger-Felicite Sonthonax was one of the Civil Commissioners of Saint-Domingue and he had already unilaterally proclaimed the island for the French colony the year before amid a slave rebellion and attacks from British and Spanish forces. Ironically, Esperance also brought the news to the Civil Commissioners that the National Convention of France had impeached them on 16th July 1793 and ordered them to return promptly to France. On 8 January 1795, HMS Argonaut, under the command of Captain Alexander John Ball, captured Esperance while she was on the North America station. At this time the Esperance was armed with 22 guns (4 and 6-pounders) and had a crew of 130 men. She was under the command of Lieutenant de vaisseau De St. Laurent and had been out at sea for 56 days from Rochfort, bound for the American Chesapeake Bay area. The French ambassador to the United States registered a complaint with the President of the United States that Argonaut, by stating that by entering Lynnhaven bay, either before she captured Esperance or shortly thereafter, had violated a treaty between France and the United States. The French also accused the British of having brought the Esperance into Lynnhaven for refitting for a cruise. The British Consul replied that the capture had taken place some 10 leagues offshore as the bad weather had forced Argonaut and her prize to shelter within the Chesapeake area for some days, but that they had left as soon as practicable. Furthermore, Argonaut had paroled her French prisoners on arrival at Lynnhaven, and if she had entered American territorial waters solely to parole her French prisoners no one would have thought that objectionable. Royal Navy Service: Because the Esperance was captured in good order and sailed well, Rear Admiral George Murray, the British commander in chief of the North American station, put a British crew aboard and sent the Esperance out on patrol with HMS Lynx, under the command of John Poo Beresford, on 31st January. On 1st March the two vessels captured the Cocarde Nationale (or National Cockade), a privateer from Charleston, South Carolina, of 14 guns, six swivel cannons and a crew of 80 men. Esperance and the lynx went on to recaptured the ship Norfolk, of Belfast, and the brig George, of Workington. On 20 July, Esperance, in company with frigates Thetis and Hussar, intercepted the American vessel Cincinnatus, of Wilmington, sailing from Ireland to Wilmington. They pressed many men on board into service, narrowly missing the Irish revolutionary Wolfe Tone, who was on his way to Philadelphia. Esperance was formally commissioned in 1795 into the Royal Navy in August under the Command of Jonas Rose. On 4 May 1796 Esperance was sailing in company with HMS Spencer and Bonetta when they sighted a suspicious vessel. Spencer set off in chase while shortly thereafter Esperance saw two vessels, a schooner and a sloop, and she and Bonetta set off after them. Spencer sailed south by south-east and the other two British vessels sailed south-west by west, with the result that they lost sight of each other. Spencer captured the French gun-brig Volcan, while Bonetta and Esperance captured the French schooner Poisson Volant. The Esperance eventually arrived at Portsmouth on the 3rd of November 1797, the crew was paid off and on 31st May 1798 the Admiralty listed the Esperance for sale and she was sold in June 1798 for £600.The subject scrimshaw is a modern reproduction crudely done of a historic vessel and the scene is believed to be engraved onto a synthetic substance. Scrimshaw art crudely carved into non-natural material in the shape of a tooth. The line artwork is an image of a three-masted sailing ship with a poop deck, and anchors, are coloured black. Inscription is engraved into tooth.Engraved "Man o War Ellis" warrnambool, flagstaff-hill, flagstaff-hill-maritime-museum, maritime-museum, shipwreck-coast, flagstaff-hill-maritime-village, scrimshaw, ellis, esperance, clementina, elise, hms ship, man of war, leter of marque, privateer, slave ship, slavery, ellis bent, american war of inderpendance, marine art, marine artifact, whale tooth, ivory tooth, resin, plastic, craft, engraving, carving -
 Bendigo Historical Society Inc.
Document - LANSELL RELATED DOCUMENTS
Document.Copy of Williamstown Historical Society Newsletter No 17 (1977).On the second and third page of this Newsletter is an article entitled ''The guns of the 'Nelson''', written by Doug Mills, Castlemaine. The Warship NELSON underwent alterations in 1860, including cut down to two decks and lengthened, her armaments reduced to 72 guns. Two 7inch 68 pounder guns were added to her armament. In February 7 1867 she was officially given to the Colony of Victoria by the Imperial Government. At the time her Commander was Captain Charles B. Payne. The Warship reached Melbourne in 4th February 1868. Relics of the NELSON were auctioned at Williamstown Victoria Naval Depot, and her two anchors are preserved for public display at Williamstown. An active demand for a share of the guns from various towns in the State. Ballarat received four (4) guns, Bendigo and Castlemaine two (2) each, while one has been given to each of the following towns: - Ararat, Tarnagulla, Hamilton, Bacchus Marsh, Echuca and Geelong. Collection of Lansell related documents: a. Copy of photograph - Lansell's Big 180 Victoria Hill - early 1870s - New Chum Hill in background. B. Lansell Estate mines - compiled from the annual report of the Hon Minister of Mines for Victoria, 1906. A listing of the George Lansell Mining Company interests at the time of his death. These were, New Moon Co, N.L., Clarence, New Prince Of Wales Co. N.L., Virginia G. M. Co., Catherine Reef United Co N.L., Great Northern Co N.L., Williams United, McDuff Amalgamated Co, South Mungo Co, South Prince Of Wales Consolidated, Constellation Co. Golden Pyke Co, Johnson's Reef Extended Company, Golden Age Co., Princess Dagmar Co, New St Mungo Co, Johnson's Reef Co, North Johnson's Co, Collman and Tacchi Co, Confidence Extended Co, G. Lansell Sandhurst Mines, Pearl Co., Windmill Hill Co., United Hustlers and Redan, Koch's Pioneer Co., Hercules and Energetic Co., Lansell's Comet, Cornish United Co., Ironbark Co., Hustler's Reef Co., and No. 1 Lansell's 83, Carlisle Co., Great Extended Hustler's Co., Victoria Consolidated Co., Great Central Victoria Co., Victoria Quartz Co., Victory and Pandora , Lansell's Big 180, Tambour Major, New Chum and Victoria Co., Garden Gully United Co., G. Lansell, Lansell's 222, Lazarus Co., Sea Amalgamated Co., Hustler's Royal Reserve Co., Horwood and Burrowe's Co., New Chum Consolidated Co., G Lansell's Sheepshead, Gariboldi Co., Londonderry Co., Shamrock Co., Great Britain Co., Fortuna Hustler's Co., Eureka Extended Co., G. Lansell's G.V.L., New Red White and Blue Consolidated, Great Southern Co., Lansell's Concord Mines, True Blue Co., G. G. Consolidated Co., Extended Red White and Blue Co., Great Columbian, Sedgwick and New Birthday. Also, a listing: ''Among the biggest yields to ate (sic) (date?) in ozs or Pounds were''; New Moon.Co. N.L. 180,087 ounces, Clarence £303,932, Catherine Reef United N.L. £762,815, Great Northern Co Ltd £394,525, Johnson's Reef Co 277,320ounces, Windmill Hill Co. 113,842ounces, Hustler's Reef Co. And No.1 1,144,923ounces, Carlisle Co 307,835ounces, Great Extended Hustlers Co £1,038,125, Garden Gully United Co. £1,653,900, Great Southern 97,752ounces, New Chum Consolidated 89,526ounces. This part (b) has handwritten inscription ''compiled by J Sarvaas MCE(??) Certified Mining Surveyor; 22/8/06''; c. Copy of Deed dated Dec 1886 between George Lansell, Wooten Lansell and the Bank of New South Wales relating to a wall and windows and openings etc etc. (3 pages of legalese!!!!!). Also, a (related?) page copy of a Grant -by purchase to the Bank of New South Wales with a date of August 1855 on it ''Enrolled in the Office of the Registrar of the Supreme Court of the Colony of Victoria - signed by Acting Registrar.document, gold, mines -
 Ballarat Tramway Museum
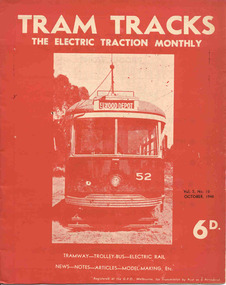
Magazine, Jack Richardson, "Tram Tracks - The Electric Traction Monthly", July to Dec 1948
Three issues of "Tram Tracks - The Electric Traction Monthly" of the Australian Electric Traction Association. Each issue has a standard cover, of the magazine name etc, and featuring a front end photo of Victorian Railways tram No. 52 with the destination of Elwood but are in different colours, all have been saddled stapled with a single staple. The Volume and date details have been over printed. Back covers inside covers have the same advertisements. The three issues contain advertisements for the Wee Folks productions, Wattle Park, G&R model railway parts, Richard Noble model electric motors, Hobbyco, Fleet scale model railway equipment, Masseys Sports, Lloyd's Hobbycraft, John Martin Ltd, Johnson's Variety Store, the ARLHS, Barnes Tennis Centre, The Model Dockyard, the American Subscription Agency, Robilt Models, Meadmore Model Engineering and Austral Bronze Pty Ltd, Hearns Hobbies, Christie Scale Model Railway Products and Traction Publications. 2466.1 - Vol. 3 No. 10 - 20 pages, Oct. 1948, with cover printed in red ink. Has articles on anti-tram propaganda, Alphington - Heidelberg duplication and Sydney's early electric trams - C and D class. Also has news items on Brisbane, Newcastle, Sydney, Melbourne, Sandringham - Black Rock, Hobart, Launceston, Perth, Sydney and Melbourne electric trains, Launceston Trolley Buses, AETA notes, and a caricature of the Editor, Jack Richardson. 2466.2 - Vol. 3 No. 11 - 24 pages, Nov. 1948, with cover printed in blue ink. Has articles on construction of tram track in Melbourne (Victoria Parade), Bourke St., tram-bus controversy, (Reg Ansett, Noel Gipps and USNR Commander Quinby), Sydney's early electric trams - C and D class continued. Also news items on Last tram to Mayfield, Sydney, Latrobe St. Melbourne, Adelaide, opening to Alamein, Melbourne show traffic, VR Trams and AETA notes. 2466.3 - Vol. 3 No. 12 - 16 pages, Dec. 1948, with cover printed in green ink. Has articles on Sydney's electric railways, Brisbane Tramways and an AETA Melbourne tour. News items cover Sydney, Newcastle, Melbourne, Geelong, Bendigo, Kalgoorlie, Melbourne and Sydney trains and AETA news. 2466.4 - Vol 3 - No. 7 - 20 pages - July 1948 with cover printed in red ink. Has articles on cost of building trams for Brisbane, Sydney and Melbourne, abandonment of VR trams, Newcastle, Sydney, centre page photo of Y1 611, Sydney Electric train system including map and AETA news. 2466.5 - Vol 3 - No. 9 - 20 pages - Sep 1948 with cover printed in blue ink. Has articles on Mr. T. G. Patterson, Acting Director of Commonwealth Road Transport and Chairman of Federal Road Safety Council (very anti tram), news from Brisbane, Launceston, Sydney, Newcastle, Burwood, cost of trams, impressions of transport in Europe and North America, Melbourne and Sydney electric trains, tramways of Newcastle and model notes and AETA news. 2466.6 - Vol. 3, No. 1 - Jan 1948 - 16 pages with photo of Brisbane 407, political news, direct Melbourne to Footscray line proposal, new trams, bogie trams in Ballarat, article on Melbourne cable trams, electric trains, AETA outing in Melbourne and various adverts for model railways. 2466.7 - Vol 3 No. 2 - Feb. 1948 - 16 pages - political news, Ballarat news, traffic in Sturt St and new bogie cars, Christchurch closure, cartoon by Mercier on Sydney Honesty box, Brisbane suburban electrification, general tramway and electric railway news and various adverts for model railways. 2466.8 - Vol. 3 No. 3 - March 1948, with photo of VR 52 on front cover, 16 pages, political news, closures, Reg Ansett offer to buy the Melbourne bus system, Newcastle News, SEC Transfer of cars between the three systems, tramways in the Maribyrnong area, map of Melbourne trams, cartoon by Mercier, Brisbane train electrification and general news. 2466.9 - Vol. 3 No. 6 - June 1948 - 12 pages - MMTB political news, new trams for Sydney, tramways of Newcastle, Invercargill, Sydney Suburban trains, and AETA General news. .6 to .9 added 24-3-18 - from consolidation of Melbourne Tram Museum and BTM collections - ex AETA. trams, tramways, electric traction, aeta, models, australian tramways, melbourne, sydney, brisbane, newcastle, costs, ballarat, footscray -
 Federation University Historical Collection
Plan, Sulieman Pasha Co Plan Transverse Section
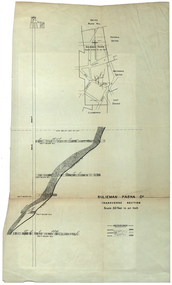
The Sulieman Pasha is possibly named after the most important Sultan of the Ottoman Empire, Suleiman One, or Suleiman the Magnificent, when the Ottoman Empire was at its peak. Or potentially a number of Ottoman governors, statesmen and military commanders with the same name after, however the spelling is slightly different to the mine name. No Turkish connection was found relating to the formation of the company, and remains unconfirmed. The mine operated from two shafts; No. 1 near the corner of Humffray and Mair streets, and also near where the Welcome Nugget (2217 ounces) was found years earlier; and the controversial No. 2 shaft several blocks south bordering the northern side of the main highway through Ballarat. The company produced 62 666 ounces of gold, the twelfth highest quartz reef gold production for any mine on the Ballarat goldfield. Some crushing figure examples are January-June 1881: 3674 tonnes 1085 ounces; January-June 1885: 2949 tonnes 1281 ounces; July-December 1885: 4459 tonnes 1119 ounces; January-June 1887: 1869 tonnes 730 ounces; July-December 1892: 1450 tonnes 771 ounces; July-December 1896: 4365 tonnes 1372 ounces. Like many mines in the area, gold grades were low. John Watson was noted as mine manager in the 1880s, and John Williams 1890s. The company was re-organised twice increasing the number of shares from 4000 to 24 000, and increasing the capital available. The Sulieman Pasha Company was formed in 1878. David Fitzpatrick was given the honour of turning the first sod of both the No.1 and later No. 2 shafts. The first dividend was given to shareholders in July 1881. The company obtained a prospecting vote (government grant) to start, and was very proud to be the first Victorian gold mining company to pay the funds back to the government. The event was marked by a lavish banquet laid out for ministers and government officials by the company. Leases were purchased to the south in 1885 to the Llanberris Mine boundary, after poor results began accumulating from the small No. 1 shaft. To take advantage of this new land the company planned to sink a second shaft. Initially this was to take place on government land, but the uproar from nearby residents caused the company to purchase land along the Main Road (now Western Highway), and the old Yarrowee Hotel which had occupied the site since the alluvial digger days of the 1850's was demolished. The area had since those days become heavily occupied with a number of shops, houses, a post office, church and two schools in the immediate area. The thought of an underground mine next door drew considerable opposition. The company (before the days of public relations departments) wrote 'most people would have thought that progress as vital as mining would be supported by tradesmen whose business rely on the mining industry. It seems when it comes to mining they are bereft of their senses, and considering the low ebb of mining in Ballarat East, the action of our opponents are unaccountable. (Sarcastically) There are certain engineering difficulties in moving the quartz reefs to a new location, but if we could to appease our opponents we would'. The company also wanted to take over 4 acres of the St Paul's school oval for machinery, but accused the St Paul's Church of wanting extortionate amounts of money upfront, and on a yearly basis for the privilege. It stated the church could not be opposed to mining when several years earlier it had formed its own company to mine the land, only for shareholders to lose their money. In 1886, the company approached the Minister for Mines, and attended heated public meetings on the matter. The local residents, shop owners, and church submitted a 60 person petition to the local council and government authorities. They stated the shaft contravened the mining statutes, which stating no mining could take place within 150 yards of a public building or church. A speech by a resident stated 'mining always comes with glorious pictures of the great benefits which would accrue all parties concerned if their request is granted, but if property is destroyed or depreciated in value, no-one then comes forward and compensates them'. The No. 2 shaft was approved including taking over part of the school oval. In 1888, workers at the company's No. 2 shaft went on strike to try and bring their wages in line with other mines in the district (the No. 1 shaft was operated by tributers). William Madden (26) was killed from a fall of earth underground the same year, while a year later his father John Madden (70) was similarly killed in the Madame Berry Mine elsewhere in the district. In 1897 as the amount of gold being found fell away, it came to light part of the deal to purchase the Yarrowee Hotel site was a 5% royalty on gold found. Shareholders could not understand why they were paying a royalty to the former owners of the property. The mine closed in 1898 due to a lack of gold. In 1902 a boy (age unknown) called Charles Lee was killed from a fractured skull while working to dismantle the Sulieman Pasha plant. The fuss over the No. 2 shaft had a sequel. On the company winding up, the land was purchased by J.S. Trethowan who built a house next to the shaft. In 1907, the shaft caved-in creating a sinkhole immediately at the back of the house. A Mr Chamberlain heard a deep rumbling sound at 5am, and looked out the window to see his fowl house and thirteen chickens disappear down an expanding hole. He then went back to bed, and called the police later in the day. The shaft was 1050 feet deep, and the hole at the surface that developed was 20 feet by 17 feet across, and 20 feet depth. In 1930 it is reported a syndicate had been formed to clean out the old shaft, and re-open the mine. It is assumed this was the No. 1 shaft but no more was found. (https://www.mindat.org/loc-304239.html, accessed 07/08/2019) A transverse section plan of the Sulieman Pasha Mine.sulieman pasha company, plan, mining, united black hill mine, victoria united mine, victoria street, britannia united mine, last chance mine, llanberris mine, ottoman empire, john watson, john williams, david fitzpatrick -
 Flagstaff Hill Maritime Museum and Village
Photograph - Vessels, Sailing Ships, Vessels in the bay, 1890's
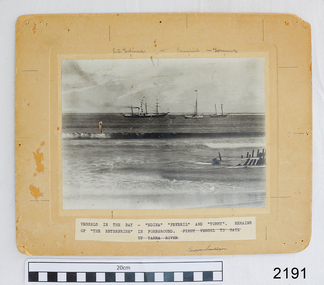
The photograph, taken in the 1890s, shows sailing ships and a wreck in Lady Bay, Warrnambool. Lady Bay was once a very busy port of trade in Warrnambool and was also called the Port of Warrnambool or Warrnambool Harbour. ENTERPRISE (1847-1850) NOTE: The “Enterprise” wrecked in 1850 in Warrnambool should not be confused with John Pascoe Faulkner’s ‘Enterprise’, which was wrecked in NSW in 1847. The 58-ton schooner Enterprise was built by David Hay in Waiheke, New Zealand in 1847 and registered by owners John Watson and Edward Byam in Melbourne, Australia. She was a single-deck sailing ship with two masts, used for carrying cargo such as local agricultural produce and general commodities between Melbourne and other colonial ports. On September 14th, 1850 the Enterprise had sailed from Melbourne under the control of the ship’s Master, James Gardiner Caught, and was moored in at the Tramway Jetty in Lady Bay, laden with wheat and potatoes. The vessel rode out a south-easterly gale but eventually dragged anchor and was beached, bow first and then broadside. Buckwall, a local indigenous man, braved the heavy surf and reached the stricken vessel with a rescue line, saving all five crew on board. There were no passengers on board. The Enterprise wreck was in an area called Tramway Jetty in Lady Bay. Since then the area has become the location of Lady Bay Hotel and now, in 2019, it is in the grounds of the Deep Blue Apartments. In fact, with the constantly changing coastline through built-up sand, the wreck site is now apparently under the No 2 Caravan Park on Pertobe Road, perhaps 150 metres from the high tide. Its location was found by Ian McKiggan (leader of the various searches in the 1980s for the legendary Mahogany Ship). The Warrnambool Wreck Enterprise is listed on the Victorian Heritage Database VHR S238. DIFFERENTIATING the New Zealand Schooner “Enterprise” from John Fawkner’s “Enterprize“ Dr Murray Johns, Melbourne, says in his article The Mahogany Ship Story, “…the Enterprise, wrecked in Lady Bay, Warrnambool in 1850 ... was soon covered by sand but was exposed again after several storms in 1887. “Samples of timber were then cut from the wreck, which would then have been buried for 37 years. In November 1887 the Warrnambool Standard reported that “the timber looks sound and hard, a penknife scarcely making any impression.” “For many years there was confusion about the identity of that ship in Lady Bay. Most people believed it was the wreck of John Pascoe Fawkner’s Enterprize, which had sailed from Tasmania to Victoria bringing the pioneer settlers to Melbourne in 1835. “In fact, as I documented in 1985, the Warrnambool wreck was of an entirely different ship, also called Enterprize [Enterprise], but built in New Zealand in 1847. Fawkner’s ship had already been sold to Captain Sullivan in 1845 and was wrecked on the Richmond Pier in northern New South Wales early in 1847. “In 1985 a piece of timber from the local Enterprise, which had been kept at the Warrnambool Museum since 1892, was identified histologically as a New Zealand timber, not Tasmanian timber such as blue gum, from which Fawkner’s Enterprize would have been built in 1830. This confirmed the identity of the Warrnambool Enterprize.”[Dr. M.W. Johns later wrote an article called “The Schooner Enterprise: A Final Word on a Historic Wreck.”] ABOUT THE S S EDINA The three-masted iron screw steamer SS Edina was built in Glasgow, Scotland, in 1854 by Barclay and Curle. She was adorned with the figurehead of the ‘fair maid of Judea’. The many years of service made SS Edina famous worldwide as the longest-serving screw steamer. (The term screw steamer comes from being driven by a single propeller, sometimes called a screw, driven by a steam engine.) SS Edina’s interesting history includes English Chanel runs, serving in the Crimean Ware carrying ammunition, horses and stores to the Black Sea, and further service in the American Civil War and later, serving in the western district of Victoria as well as in Queensland and carried gold, currency and gold prospectors Australia to New Zealand. SS Edina had the privilege of being an escort vessel to H.R.H. the Duke of Edinburgh during his visit to Australia in 1867. In March 1863 SS Edina arrived in Port Phillip Bay, Melbourne and was bought by Stephen Henty, of Portland fame, to work the cargo and passenger run from Melbourne – Warrnambool – Port Fairy - Portland. After a short time of working the run from Australia to New Zealand, with passengers and cargo that included gold and currency, she returned to her Melbourne - Warrnambool – Port Fairy run, with cargo including bales of wool produced in the western district of Victoria. The Warrnambool Steam Packet Company purchased SS Edina in 1867; she was now commanded by Captain John Thompson and Chief Engineer John Davies. She survived several mishaps at sea, had a complete service and overhaul and several changes of commanders. In 1870 SS Edina was in Lady Bay, Warrnambool, when a gale sprung up and caused a collision with the iron screw steamer SS Dandenong. SS Edina’s figurehead was broken into pieces and it was not ever replaced. SS Edina was re-fitted in 1870 and was then used as a coastal trader in Queensland for a period. She was then brought to Melbourne to carry cargo and passengers between Melbourne and Geelong and performed this service from 1880-1938. During this time (1917) she was again refitted with a new mast, funnel, bridge and promenade deck, altering her appearance. In 1938, after more collisions, SS Edina was taken out of service. However, she was later renamed Dinah and used as a ‘lighter’ (a vessel without an engine or superstructure) to be towed and carry wool and general cargo between Melbourne and Geelong. In 1957, after 104 years, the SS Edina was broken up at Footscray, Melbourne. Remains of SS Edina’s hull can be found in the Maribyrnong River, Port Phillip Bay. This photograph is significant for its association with the screw steamer SS Edina, heritage listed on the Victorian Heritage Database VHR S199. She had endeared herself to the people of Port Phillip Bay as a passenger ferry, part of their history and culture. She played a significant role in the Crimean War, the American Civil War and the gold rush in New Zealand. She also served western Victoria for many years in her cargo and passenger runs. The SS Edina is famous for being the longest-serving screw steamer in the world. After spending her first nine years overseas she arrived in Melbourne and her work included running the essential service of transporting cargo and passengers between Melbourne and the western Victoria ports of Warrnambool, Port Fairy and Portland. The SS Edina was purchased in the late 1860s by the local Warrnambool business, the Warrnambool Steam Packet Co. and continued trading from there as part of the local business community. Her original ‘fair maid of Judea’ figurehead was broken to pieces in a collision with another vessel (the SS Dandenong) in a gale off Warrnambool, Victoria, in 1870. The photograph is significant for its association wreck of the Victorian Heritage Listed schooner Enterprise, VHR S238, being a New Zealand-built but Australian-owned coastal trader. The wreck was also significant for its association with the local indigenous hero, Buckawall, who saved the lives of the five crew on board. Photograph "Vessels in the Bay". Black and white photograph of several vessels in Lady Bay, Warrnambool, including some small vessels and "S.S. Edina", the "Peveril" and "Tommy", plus the remains of the wrecked vessel "Enterprise" in the foreground. Photograph is mounted on beige card with label describing the vessels, plus pencilled vessel names. There are several pin holes in each corner of the photograph. Typed label under the photograph “VESSELS IN THE BAY – “EDINA” “PEREVIL” AND “TOMMY”. / REMAINS OF “THE ENTERPRISE” IN FOREGROUND. (Also crossed out on the label “FIRST VESSEL TO SAIL UP YARRA RIVER). In pencil script above the vessels on the photograph “S.S. Edina”, “Peveril” “Tommy”. On the reverse is a printed sticker with “F-Ph 59/2 74”, red felt-tip pen “88”, green pen script repeating the text that is under the photograph on the front.flagstaff hill, warrnambool, shipwrecked-coast, flagstaff-hill, flagstaff-hill-maritime-museum, maritime-museum, shipwreck-coast, flagstaff-hill-maritime-village, enterprize, port of warrnambool, warrnambool harbour, peveril, tommy, ss edina, lighter dinah, warrnambool steam packet company, lady bay, pleasure steamer, edina, trade, travel, screw ship, coastal trader, cargo, victoria, buckawall, indigenous rescue, indigenous hero -
 Lara RSL Sub Branch
Photograph, Set 4 photographs. and others for Torquay Light Horse camp, 1940
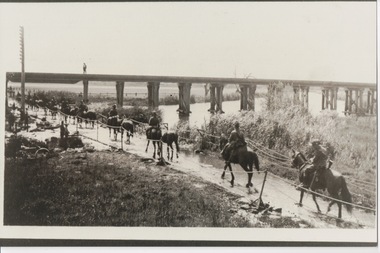
These images capture for all time Light Horsemen travelling through Geelong on their way to camp at Torquay for the last Group meeting in Australia . information following - details obtained from .........https://torquayhistory.com/light-horse-brigade/ On Australia Day, 1997, Sir John Young unveiled this plaque on Point Danger, Torquay. Torquay history, Light Horse Training Camp, WW2 Plaque at Pt. Danger Note----- (See images to view plaque) The plaque identifies a significant event in Torquay’s history and the sentiments of ‘change’ for the Light Horse Brigade – from horses to machines. In 1940 the four Light Horse Regiments (4th, 8th, 13th and 20th), some 5000 Light Horse and 2000 horses camped and trained at Torquay. Three other regiments, formerly mounted on horses, were also at Torquay ‘mounted’ on privately owned trucks and cars. Division troops included Artillery, Engineers, Signals, Field Ambulance and other branches of the Army necessary to enable a Division to function. It wasn’t just the sheer numbers of men coming to this little town that made the event significant, it was also the fact that the men of the Light Horse were dramatic, almost glamorous figures and it is easy to see their exploits as some splendid adventure. Horses have played a special role in the story of Australia. They were the only means of transport across this huge country, so it was necessary for everyone to have the ability to ride a horse. When war broke out in 1899 between Britain and the Boers of South Africa (“Boer” was Dutch for “farmer”) Australia sent troops to fight. At first Britain was wary of using untried, unprofessional colonial cavalrymen but soon saw that the slouch-hatted Australian “bushmen” were a match for the fast-moving and unconventional mounted commandos of the Boers. The Australians proved themselves to be expert rough-riding horsemen and good shots. Bush life had hardened them to go for long periods with little food and water. They also showed remarkable ability to find their way in a strange country and use its features for cover, in both attack and defence. By 1914, when Australia joined the war against Germany, there were 23 Light Horse regiments of militia volunteers. Many men from these units joined the Light Horse regiments of the Australian Imperial Force (AIF). Men were given remounts (if not using their own horses) – army horses bought by Commonwealth purchasing officers from graziers and breeders. These were called “walers” because they were a New South Wales stockhorse type – strong, great-hearted animals with the strains of the thoroughbred and semi-draught to give them speed, strength and stamina. On 1st November, 1914, Australia’s First Infantry Division and the first four Light Horse regiments sailed for England in a fleet of transport ships. The first of the Light Horse arrived at Gallipoli in May without their horses. Back with their horses after Gallipoli, they were formidable combatants across the Sinai and Palestine. Some British commanders observed that the light horseman moved with a “lazy, slouching gait, like that of a sleepy tiger” but described how the promise of battle “changes that careless gait, into a live athletic swing that takes him over the ground much quicker than other troops”. They had Light Horse, Torquay, training campdeveloped a reputation as formidable infantrymen. The Turks called them “the White Ghurkas” – a reference to their deadly skill with the bayonet. The Arabs called them “The Kings of the Feathers”. The plume had originally been a battle honour of the Queensland Mounted Infantry for their work in the shearer’s strike of 1891. During WW1 it was adopted by almost all the Light Horse Regiments. It was the proud badge of the light horseman. The most famous of their battles was the attack on Beersheba- the charge of the 4th Light Horse Brigade. Mounted infantrymen and their superb walers had carried out one of the most successful cavalry charges in history – against what seemed impossible odds. They surprised the Turks by charging cavalry-style, when they would normally have ridden close to an objective then dismounted to fight. The fall of Beersheba swung the battle tide against the Turks in Palestine; and changed the history of the Middle East. While 19 men from the Surf Coast Shire served with the 4th Light Horse over the course of WW1, only four were involved in the charge of Beersheba- John GAYLARD, Philip QUINN.(Winchelsea); Wallace FINDLAY (Anglesea); Harry TRIGG (Bambra). After the war, Light Horse units played a key role in the Australian Government’s compulsory military training programme. The Citizen Military Forces (C.M.F.) thrived on the glamour of the wartime Light Horse tradition, ignoring the possibility that motor vehicles would soon replace the horses. When training was no longer compulsory, the C.M.F. regiments declined and horses became more of a luxury during the 1930s depression years of poverty and unemployment. Some regiments were motorised. Then, in 1939, Australia joined Britain in another world war. Training was increased for the militia at both home bases and regional training camps. The camp at Torquay in 1940, commanded by Major General Rankin, was at Divisional strength. By the end of the camp some felt that the Division was ready for active service. Gradually, over the next four years, the Australian Light Horse units were mounted on wheels and tracks and the horses were retired. Six men enlisted at the Torquay camp and another 57 men and women enlisted at Torquay for service in WW2. Those who served in the Militia provided valuable Officers and NCOs and men for the armed services during the war. Each infantry division of the 2nd AIF had a Light Horse regiment attached to it. But the day of the Australian mounted soldier hadn’t quite passed. During World War II, Australia’s 6th Cavalry Regiment formed a mounted unit they called “The Kelly Gang” which did valuable scouting work. In New Guinea, a mounted Light Horse Troop did patrol duty and helped carry supplies. Some fully equipped walers were flown into Borneo for reconnaissance in rugged mountain country. But by the end of the war, in 1945, the horse had disappeared from the Australian Army. References: Australian Light Horse Association www.lighthorse.org.au National Australia Archives Australian War Memorial Surf Coast Shire WW1 memorials www.togethertheyserved.com The Light horse- a Cavalry under Canvas Light Horse, Training Camp, Torquay, WW2 Late in 1939 it was decided to set up a Lighthorse training camp in Torquay to train both men and horses for the battles of the Second World War. Horses, men and equipment came on special trains from all over Victoria and NSW, and as you would expect horseman came from areas such as Omeo and Sale, the Wimmera and the Western District. They arrived at the Geelong racecourse for watering in the Barwon River and then were ridden across the ford at the breakwater and began their 11 mile trek to Torquay. Light Horse, Training Camp, Torquay, WW2 Tent city By the end of January 1940 the camp at Torquay accommodated some 5000 men and 2500 horses of the Second Cavalry Division. The rows of horses, tents and huts near Blackgate Road were quite a sight. While the cavalrymen engaged in exercises on the land and on the beaches, many of the troops took over the Torquay School for special training of men and officers. Mr Bob Pettit local farmer and Councillor for the Barrabool Shire, wrote about the Light horse in the Surf Coast Community News in 1985 saying “They used to travel about the district riding four abreast in one long convoy. To my annoyance they went through my property and shut all the gates behind them. I had certain gates open to let stock in to the water holes and it would take me three -quarters of an hour to follow the horsemen up and put all the gates right again” he continued “the men from the Light Horse were here when the fire went through in March 1940. He recalled an incident when early one morning, as some one blew the bugle, a soldier putting a white sheet on the line frightened the horses. They panicked and ran off in all directions. Six went over the cliff near Bird Rock, five were never found, and the rest were gathered up after nearly a fortnight in the bush around Addiscott and Anglesea" Light Horse, Training Camp, Torquay, WW2, Geelong Parade Geelong parade The training camp culminated in a parade through the streets of Geelong on March 12th 1940. The salute was given at the Town Hall and the troops continued on a route to the You Yang’s for a training exercise. Note-----(see media section for photograph) The Camp was abandoned in mid 1940 as it was deemed unsuitable for training during winter and the cost of a permanent camp could not be justified if it could not be used all year. Historic.......Rare,,,Interpretive.Sepia photographs.set of four ....post card size ....Horses &LighthorsemenNo 1, Lighthorsemen Regiment Geelong 1940......No 2 Light Horse at Breakwater Geelong 1938 to 1940....No 3 Light Horse at Breakwater Geelong 1938 to 1940.....No 4 Light Horse crossing Breakwater camped at Geelong Showgrounds. These markings are on reverse of photographs.light horsemengeelong 1940., world war 2 -
 City of Ballarat
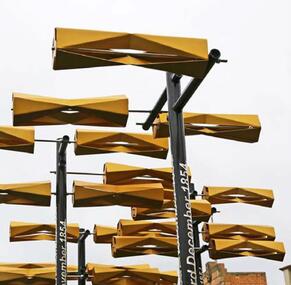
Artwork, other - Public Artwork, Aaron Robinson et al, Flow by Holly Grace and Aaron Robinson, 2014
Water is key to a thriving community and it is through the representation of water Flow enlivens the space at Bakery Hill. Historically ‘water races’ ran through the valleys of the Greater Ballarat area unearthing the minerals that forged prosperity and wealth. This water still flows today unearthing new possibilities for the community. Possibilities focusing on sustainability, ecology, health and prosperity. Flowing over the site a series of kinetic turbines flutter in the wind creating a contemporary water race. The interactive elements offer visual stimulation enticing people to connect with the artwork and in turn the surrounding spaces. Bakery Hill has great historical significance. It’s connection to the Eureka Stockade and the series of events that were to unfold during the 1850’s was to become the turning point in Australian political history. The placement of each turbine is to mirror a point of history in the timeline of events that occurred during the Eureka Stockade. The Water Race is a symbol of possibilities, the ones created by history and those of modern society. It is a visual timeline that can be read by traversing the site. The connecting turbines that flow and turn in sync are a representation of time passing and the interconnectedness of history with the community that surrounds it. The gateway to Bridge Mall is framed through the placement of each turbine allowing the sense of prosperity and wealth to flow through to the surrounding community. This gateway also references the significance of Bakery Hill reinvigorating the historical site by reconnecting it back to its town centre. The artwork is of aesthetic and historical significance to the people of BallaratTwelve steel turbines set on poles with dates attached and a large bronze 'timeline' plaqueFLOW/ Plotting the motion of Wind, Water, History and Time/ by Holly Grace and Aaron Robinson/ This site has great historical significance. It’s connection to the Eureka Stockade and the series of events that unfolded in the 1850’s was to become the turning point in Australian history. The placement of each turbine within this artwork mirrors a point of history in the events that led up to the Eureka Stockade. It is a visual timeline that can be read by traversing the site. The connecting turbines that flow and turn in sync are a representation of time passing. They are a symbol of the community’s connection to their history. 1851 June James Esmond makes the first discovery of gold in Victoria at Clunes./ 1st July The Port Phillip District separates from New South Wales and becomes the Colony of Victoria. It is still subject to British rule./ August Gold is discovered at Buninyong and at Golden Point, Ballarat. Lt-Governor La Trobe introduces the Gold Licence system in an attempt to reduce the colony’s debt./ 20th September First gold licences issued in Ballarat. / 1852 August/ Eureka Lead discovered on the Ballarat goldfields. December Charles La Trobe resigns as Lt-Governor but he is not relieved until 1854/ July – December/ Unrest builds on the various goldfields with protest meetings held in Bendigo and Castlemaine. Bendigo’s Red Ribbon Movement is active on the goldfields and the Bendigo Petition is presented to Lt-Governor./ December/ Charles Hotham is appointed Lt-Governor/ 1854 March/ A bill to extend the Elective Franchise is passed by the Legislative Council and sent to London for the assent of the British Parliament. 22nd June/ Lt-Governor Sir Charles Hotham arrives in Victoria. The colony faces mounting debt and Hotham orders weekly licence hunts in an attempt to increase income./ August/ Hotham is acclaimed during his visit to the Ballarat goldfield./ 13th September? Hotham orders twice-weekly licence hunts to further increase revenue./ September – October/ Miners are experiencing problems – no shafts bottomed on the Eureka Lead for five weeks./ 7th October/ James Scobie is murdered outside the Eureka Hotel. Many diggers believe that publican James Bentley is responsible./ 9th October/ At Scobie’s inquest, Bentley is acquitted, despite strong evidence of his guilt./ 10th October/ Father Smythe’s servant is beaten up by authorities and falsely arrested for not holding a licence./ 15th October/ Mass meeting of miners on Bakery Hill. Catholic miners meet after Mass. // 17th October/ A meeting of up to 10,000 Diggers is held near the Eureka Hotel to protest against Bentley’s acquittal. The meeting results in the burning of the hotel. Three diggers, Westerby, Fletcher and McIntyre, are arrested. Hotham dispatches 400 soldiers to Ballarat. 22nd October/ Another large meeting is held to address grievances. The Catholics send their leaders, Hayes, Kennedy and Manning to meet Rede. The Government Camp is under siege 11th November/ A public meeting on Bakery Hill results in the formal establishment of the Ballarat Reform League and adoption of the League’s proposals./ 21st November/ The enquiry into the Bentley affair is published. It recommends the dismissal of the judge and the establishment of a Royal Commission. 23rd November/ Westerby, Fletcher and McIntyre are convicted of burning the hotel. The Ballarat Reform League demands their release. 27th November/ A deputation from The Ballarat Reform League, including Humffray, Black and Kennedy, meet with Hotham to demand the release of the three prisoners. Hotham does not believe the diggers have the right to “demand anything”, Rede requests reinforcements in Ballarat. 28th November/ Miners attack the troop reinforcements and wagons passing near the Eureka diggings. A drummer boy is seriously wounded. 29th November/ A “Monster Meeting” attended by more than 10,000 diggers is held on Bakery Hill. The Southern Cross flag is flown for the first time. Peter Lalor addresses the miners and a number of diggers burn their licences. 30th November/ A licence hunt occurs in the morning at the order of Commissioner Rede. Another meeting of radical miners is held on Bakery Hill. Peter Lalor becomes leader of the diggers and calls for volunteers. Many diggers wear an oath to defend their rights and liberties under the Southern Cross flag. A number of diggers move to the Eureka Lead and start to erect a stockade. 3rd December In the early hours of Sunday morning 296 soldiers and police led by Captain Thomas proceed from the Government Camp to the Eureka Lead and attack the Stockade. 22 diggers and 7 military are officially listed as being killed. Many others are wounded. Approximately 120 diggers are arrested and marched to the Government Camp. 4th December/ Funeral of some of the fallen diggers and soldiers. Martial Law is proclaimed in Ballarat. Henry Seekamp, editor of the Ballarat Times is charged with seditious libel. 6th December/ Major General Sir Robert Nickle, commander-in-chief of the military forces in the Australian colonies, arrives in Ballarat. 9th December/ General Nickle repeals martial law. 14th December/ The Gold Fields Commission sits for the first time. 18th December/ The first Ballarat sitting of the Gold Fields Commission is held at Bath’s Hotel. 1855 23rd January/ Henry Seekamp is found guilt of sedition and sentenced to three months in prison. 22nd February/ The Eureka trials starts in Melbourne. February to March/ 13 prisoners are tried and acquitted amid great public rejoicing. 27th March Report of the Royal Commission recommends miners’ rights and significant reforms. 10th November/ Peter Lalor and John Basson Humffray are nominated for seats in the legislative Council. 31st December Sir Charles Hotham dies before his resignation takes effect. flow, aaron robinson, holly grace, public art, eureka stockade, bakery hill -
Mission to Seafarers Victoria
Article, A Woman's Melbourne Letter
A detailed description of the Mission and its activities written by a woman: Western Mail (Perth, WA : 1885 - 1954), Friday 13 December 1918, page 34 A WOMAN'S MELBOURNE LETTER. Melbourne, Dec. 4. There is an idea abroad, which as regards Melbourne, at any rate, is quite erroneous, that our sailors are not as well looked after as our soldiers, and that the noble men of the Mercantile Marine are much neglected ! For once, perhaps, my readers will pardon a letter dealing with only one subject, but the steady, unostentatious work done by the Ladies' Harbour Light Guild, in connection with the mission to seamen in Melbourne could not be adequately explained if dismissed in the usual short paragraph. Some of the most prominent names in Melbourne are associated with this guild and with the Mission Chaplain, and Mrs. Gurney Goldsmith, the members have made the Seamen's Institute a real home for those sailors of the Mercantile Marine, who touch our port. What we as a community owe to those men by their heroism in recent hostilities is certainly more understood by this band of enthusiastic workers than by the community generally. By using their unflagging energies, and influence on the sailor's behalf they endeavour to discharge a debt to which in some way or other we could and should all contribute. Even the most casual person can, if he thinks at all, sum up a few of the things our sailors - other than those belonging to our glorious navy - have done for us. On the spur of the moment we remember that those of the Mercantile Marine, are the men who manned our transports, who carried our wheat and wool, to oversea markets; who kept us in touch with our loved ones abroad; who kept the fires going in the furnaces of the great leviathans, bringing our wounded soldiers home again; who never flinched when self-sacrifice was demanded; who cared, with that tenderness, innate in all sailors, for the women and children, when the passenger ships were struck a dastardly blow by the wicked enemy; who, mocking death, gave up life with a heroism all the more heroic because it was always taken as a matter of course! Is it any wonder, then, that the members of the Ladies' Harbour Light Guild make it their business to provide a bright, homelike, spot in Melbourne, where the sailors are always certain of a cherry welcome ashore? The members of the guild are admirably drafted! The 360 non-workers each pay £1 1s. per annum. The workers, of whom there are between 700 and 800, donate 2s. 6d. and school members - it is confidently hoped that gradually all the schools will take an active interest in the mission - 1s. a year. The knights of the guild - as the men members are designated - are responsible for any sum they wish to name, from 5s. a year upwards. Everything is paid for out of these revenues, with the exception of a small grant from the Home Mission Fund - and such is the organisation, and management, that the entire concern is quite free from debt. The Seamen's Church and Institute, where the "Harbour Lights" gleam so brightly, is situated right in the midst of all the bustle and turmoil of the wharves, at the end of Flinders-street. The building, comprising chapel, and institute under the one red tiled roof, is grey stuccoed, with a small tower, from which flaunts the flag of 'The Flying Angel" - the badge of the guild. A visit to the institute makes one fully appreciate the boon the place must be to the voyage worn, weary, sailor. The atmosphere is eminently social in its best sense. While the architecture imparts an elegance, and quiet dignity which soothes by the very subtlety of its charm. With its comfortable furniture, its wealth of flowers, and the happy, wholesome, feminine influence which prevails everywhere, the quality which stands for the magic word "home" abounds. The Chaplain in the course of conversation said: -"We try to make this really a free club for sailors." But the habitues would probably tell you it was far more than that to them. The Institute is excellently appointed, and every little corner seems to have its particular history. It was built after the model of one of the old mission churches in California, and retains something of the old world attraction, while yet it combines all the advantages of modern, practical, conveniences. On entering the door the first thing, one notices is a huge compass, inlaid upon the floor, evidently to indicate one's proper bearings for it points due north - to the chapel! Only one other seamen's mission in the world boasts such a compass. As the sailor swings through the entrance he finds the office on his right, and there is, here, always a smiling face to welcome the shy, or timid, new comer. Quite a real post office is staffed by members of the guild, and all the letters received are listed alphabetically. Therefore, the expectant sailor has just to run his eye down the list, and he can immediately see whether there is a letter for him or not. If he is fortunate, he comes up to the member in charge, who unlocks the box, and produces the longed for missive. The boys are always encouraged to answer letters - and to write them. Often a few words about their mother, and their own home, will provoke a sleeping memory into activity. The writing room is well stocked with paper, envelopes, pens, and ink. The tables are so divided to ensure the utmost privacy, and through a calculated chain of circumstances, many an anxious mother receives a letter from her sailor lad, who, perhaps, might not have written but for these kindly inducements. The central hall - where social evenings are held every other night besides two special concerts a week - is inviting in the extreme. A handsome piano affords opportunity for those musically inclined. The tables are strewn with papers. The walls are bright with pictures, and here, and there, is a carved model, of a ship. One, of especial interest, is a model of "The Roon" carved, and presented by a French sailor. This German vessel will always be remembered in Australia. For it was across her bows that the first hostile shot was ever fired in Australian waters. In the corner is the canteen. It was fitted up entirely from the proceeds of a quotation calendar compiled by one of the members. The sailors may at any time, get a teapot of tea, or a tray of eatables, at a nominal cost. Before the canteen was in existence they had to go out for refreshments! - and sometimes they did not come back! Groups of sailors sit chatting at the tables. Half a dozen Swedes laugh and talk among themselves, for the simple reason they know no other language than their own. Several British sailors cluster about a dark-eyed Welsh lad - a perfect Celtic type - who, although only about twenty years of age, has been the victim of the Hun five times. Mines and torpedoes sank the ships he was in, either in the Channel or off the English coast, four times; and it is to his fifth experience, when the Inverness was wrecked, that everyone is eagerly listening. "We were in the boats eight days," he was saying, "I was pretty well mangled when they picked me up. The sufferings we endured were awful. At last we managed to reach Rapa, a Hawaiian island. The natives thought we were Germans, and came at us with spears. When they found we were British, they were awfully good to us. They even cried when we left, and the day before the rescue boat arrived they begged us to go into the hills and hide." At another table a Canadian lad - once a sailor - then a soldier, who trained at the Broadmeadows camp - was telling his experiences : - "The voyage which will always stick in my memory," he said, "was to a place which must be nameless. We left the United States not knowing whether we were bound, or what we were going to do. After some weeks we sighted a group of wonderfully beautiful islands, and we headed for the most remote and most lovely of them all. Then, and only then, we learned our mission from the skipper. We were taking their year's supply to a leprosy station! Oh no! I don't blame the skipper for not telling us ! Someone has to do these things, you know. A naval guard saw they didn't come near - and we all got sixty dollars extra. When the job was over we were quarantined on another island for two months, and one little chap - the baby of the crew, not eighteen - developed leprosy, and died before we left. Yes! I'll never forget that voyage, mates! Sometimes, I seem to see Leper's Island yet, with its lavish tropical vegetation and the gorgeous sunsets which stained all the water with blood. Then, too" - here the voice deepened - "there was an English girl - a leper - there. We heard she used to be an actress, and she contracted the disease somehow or other. She was always alone, and always watching us. In the distance we could see her come to the water's edge, and from there she would watch. Just watch . .. . watch . . .watch. ..." "Here come a couple of North Sea chaps," broke in an elderly man after pause. "One of them wounded, too, poor lad." It is not strange that all the sailors flock to the Institute. It is so comfortable, and essentially inviting, besides being full of human interest. The men's quarters comprise reading, writing and dressing rooms - hot and cold baths are always available - billiard room, and a special baggage room, where any sailor may leave his kit for as long as he likes. The payment of 3d. covers its complete insurance. Upstairs are the officers' quarters. These also have their own billiard room, writing and reading rooms, bath and dressing rooms. Just close are the apprentices' quarters - "The Half Deck," as popular parlance has it! The lads also have a billiard room of their own, and indulge in an easy armchair - amongst others - which was a donation from the Milverton School branch of the Guild. It is hoped by the committee to some day utilise the huge empty rooms, which run the length of the whole building. Their ultimate intention is to fit them up as cubicles, or "cabins," as they are to be called. They trust these "cabins" will be donated, either in memory, or in honour, of someone dear to the donor. Another forward movement soon to be put in hand, now that materials are available, is the establishment of "Norla Gymnasium." In a sailors' club such facility for exercise is absolutely essential. The men both need, and miss, exertion. As one boy, who had been backsliding, once said pathetically : -"If only there was something to do to get me into a good sweat, I would be all right." Soon such an one will be helped to swing from the trapese of the Norla Gymnasium into the right track! Sunday is always a fete day at the Institute, for 40 or 50 sailors generally come into tea. The up-to-date kitchen, which is fitted with every labour-saving appliance - all paid for out of working members' half crowns - is then a hive of animation, and methodical order. A formidable row of teapots await filling. Mrs. Goldsmith -, the chaplain's wife - rightly thinks it is far more homely to pour out the tea from a pot, than to serve it straight from the urns. So tea is poured out by a member, who sits at the head of a table gay with flowers, and chats to the guests. These latter are of all nationalities. But the French, the Spanish, Scandinavian, Norwegian - or any other sailor is equally welcome with the British. Two enthusiasts belonging to the Guild actually learnt Norwegian, so that men of this nation would have someone to talk to, and so be less lonely when they reached this, to them, foreign port ! The members of the Guild have their own private suite where they arrange the flow-err and do other necessary odds and ends undisturbed. No one appreciates flowers like a sailor, and the earliest and most beautiful may always be seen adorning the tables and rooms. Teas are served and lectures are held in the "Celia Little Hall," one of the most beautiful portions of the institute. It was erected by the chaplain in memory of his aunt from whom the hall takes its name. The Gothic windows open upon the cloisters, where, in the hot weather, the sailors enjoy their meals out of doors. The cloisters, indeed, form an exquisite spot. They are between a series of sweeping arches which lead to the chapel, and are sheltered by the open balcony of the chaplain's quarters. Grace of contour marks the architecture on every turn. Just around the corner is the chaplain's garden - a patch of green and colour, transformed from a desert waste, by a well-known woman horticulturist. The book room is a department especially valued by the sailors. There are two secretaries, one for home and the other for foreign literature. Books in French, English, Spanish, Scandinavian, Norwegian, and German may be found on the shelves. Each week about 36 convenient parcels of reading stuff are made up. These contain illustrated papers, books in various languages, and magazines. These parcels are eagerly accepted by the sailor with a long monotonous voyage before him. But complete as is every corner of the institute, no part is so well equipped as the memorial chapel erected by the Ladies' Harbour Light Guild, in memory of the officers and men, who have lost their lives during the war. St Peter's - for it is called after the sailor's patron saint - with its hallowed gentle dignity is a veritable sanctuary of peace, perhaps all the more so because it sprang out of war. The fittings are entirely of Australian wood. The pews, given in memory of some loved one by one of the members, are of Tasmanian hardwood. The reredos and altar chairs of carved blackwood. The rich carpet was provided by the members' magical half-crowns. Already this chapel holds memorials of peculiar historical interest. The altar lectern was given in memory of Commander Elwell, who, it will be remembered, was killed at Rabaul, in the early part of the war. The font commemorates two heroes - Nigel Hockley and Fred Hyde, who lost their lives at the hands of the Germans, although they survived the actual torpedoing of their ships, the Galgorn Castle off the coast of Ireland. The mother of one of them wrote out that her son had died as an Englishman should - fighting for the right. This noble sentiment is suitably paraphrased upon the inscription engraved upon the font. Practically every-hing enshrined in the chapel has its own sentimental value. The alms salver of beaten copper, studded with agate, is fragrant with the memory of a saintly woman.The eye of the sailor is caught and held by the pulpit, which is fashioned like a ship's hull and only a twist of rope guides the chaplain up the steps. For the last 13 years the Rev. A. Gurney Goldsmith, M.A., has acted as chaplain to the Seamen's Mission in Melbourne. Before that he and his wife worked in China. Mr Goldsmith visits all the boats and gets in touch personally with the sailor, over whom he has great influence. He is not only their chaplain and friend, but, amongst a wide range of other things, their banker besides. An exchange system exists between the various Missions, and the sailor who has "banked" his money with the chaplain, upon going away, receives a cheque which is cashed - minus exchange - by the chaplain of the next port. Mr. Goldsmith will tell you he has a soft spot in his heart for on old sailor he calls "Paddy." This ancient mariner has been wrecked ten times. It was a long time before the chaplain prevailed upon "Paddy" to partake of the spiritual and secular advantages afforded by the institute. He would not come, he said, until he could do so "with a good heart." Finally he frankly admitted that he had no "friends like those of 'the Flying Angel,' " and that he eventually proved his own "good heart" will be shown in this story. One day he came in to the chaplain and said bluffly, "Well, sir, I've been payin' off some old scores up Carlton way, an' I tells yer, plain, sir, not one of 'em would have seen a penny of their money but for the Mission." The Ladies' Harbour Light Guild has over thirty working suburban branches, and the excellent results achieved at the Institute now will no doubt be considerably augmented in the future. The practical actions of the members do more than anything else to convey the subtle meaning of the name of the Guild. To the visiting sailors the word "ladies" signifies the bread givers; "harbour" safety ; "lights" welcome; "guild" the welding of fraternity, and they one and all tell you the ideals thus embodied are unselfishly carried out by all the ladies who have banded together to care for the sailors' welfare.The article describes the Mission and the use of several spaces a year after its opening and gives details about the daily activities.Digital copy of an article published in the Western Mail on the 13th of December 1918. 717 flinders street, seamen's mission, norla dome, lhlg, reverend alfred gurney goldsmith, celia little room, garden, frederica godfrey -
 Bendigo Military Museum
Photograph - Army Survey Regiment – Commanding Officer Handover Parade, Fortuna, Bendigo, 1980
This photograph was taken at a Commanding Officer Handover Parade at the Army Survey Regiment, Bendigo in 1980. LTCOL Bob Skitch was the CO from 1976 to 1980 and handed over LTCOL Frank Thorogood SB St J. LTCOL Thorogood’s appointment was from 1980 to 1981.This is a set of 45 photographs taken at a Commanding Officer Handover Parade at the Army Survey Regiment, Bendigo in 1980. The photographs are on 35mm negative film and were scanned at 96 dpi. Photograph .34P is an enlargement printed on photographic paper and scanned at 300 dpi. They are part of the Army Survey Regiment’s Collection. .1) - Photo, black & white, 1980. Led by HQ Squadron, Army Survey Regiment marches onto the parade ground. .2) - Photo, black & white, 1980. Army Survey Regiment marches onto the parade ground. Drummers L to R: SSGT George Austen, CPL Di Chalmer, CPL Tony Lawler. .3) - Photo, black & white, 1980. Air Survey Squadron formed up. SSM WO1 Bob Mason at front. L to R: unidentified (x9), SPR Kristin (Isaac) Skidmore, unidentified, SPR Scheryl Delforce, unidentified (x2), SSGT Russell ‘Rusty’ Williams, SSGT Peter Warwick, SSGT Greg Buckenham, SGT Cliff Webb, SSGT Alan Derby, SSGT John Bennett, SSGT Bruce Gordon. .4) - Photo, black & white, 1980. Officers formed up before taking posts. L to R: CAPT Peter Searle - UK Exchange, unidentified, LT Ozzy Slade, CAPT Peter ‘Blue’ Blaskett, unidentified (x4), CAPT Bob Williams, MAJ David Bowen - US Exchange officer, unidentified (x3), RSM WO1 Aub Harvey. .5) - Photo, black & white, 1980. Officers salute before taking posts. L to R: CAPT Peter Searle - UK Exchange, unidentified, LT Ozzy Slade, CAPT Peter ‘Blue’ Blaskett, unidentified (x4), CAPT Bob Williams, MAJ David Bowen - US Exchange officer, unidentified (x3). .6) - Photo, black & white, 1980. Officers march to their posts. L to R: CAPT Bob Cooper, CAPT Mick Byrne, MAJ Robin Blackburn, unidentified. .7) & .8) - Photo, black & white, 1980. L to R: 2IC MAJ Don Swiney MBE hands over parade to CO LTCOL Bob Skitch. Cartographic Squadron - Centre rank L to R: CPL Paul Richards, SPR Megan (McBurney) Reynolds, SPR Jan (Crighton) Minchin, SPR Ilen Isaac, CPL Lynn Johnson, remainder unidentified. Front rank L to R: CPL Dennis Learmonth, CPL Roger Pearson, SPR Rod Skidmore, SPR John Martin, SGT Bob Bright, CPL Trevor Bottomley, SPR Gerry Gates, remainder unidentified, OC CAPT Bob Williams, Officer in far right: CAPT Bob Cooper. .9) - Photo, black & white, 1980. L to R: CO LTCOL Bob Skitch salutes reviewing officer - Commander 3MD BRIG Geoffrey Cohen AM. Cartographic Squadron in background L to R: CPL Trevor Bottomley, SPR Gerry Gates, SPR Peter Main, CPL John ‘Stormy’ Tempest, unidentified, OC CAPT Bob Williams, SSGT Gary Warnest. .10) - Photo, black & white, 1980. HQ Squadron inspection - L to R: unidentified (x5), CAPT Paddy Strunks, SPR Chris Ebeling, CO LTCOL Bob Skitch, BRIG Geoffrey Cohen AM, unidentified (x7), in foreground MAJ David Bowen - US Exchange officer, unidentified, CPL Phil McGuire, WO2 Ted Burgess. .11) - Photo, black & white, 1980. HQ Squadron in foreground L to R: MAJ David Bowen - US Exchange officer, unidentified, CPL Phil McGuire, WO2 Ted Burgess. Lithographic Squadron inspection L to R: CPL Paul Davis, CPL Le-Anne (Smallshaw) Shirely, CO LTCOL Bob Skitch, unidentified, OC MAJ Robin Blackburn, BRIG Geoffrey Cohen AM, SPR Jim Ash, unidentified, unidentified UK Exchange SNCO, SSGT Greg Francis-Wright, WO1 Doug Malligan, drummers SSGT George Austen, CPL Di Chalmer, CPL Tony Lawler, unidentified (x2). .12) - Photo, black & white, 1980. Air Survey Squadron inspection - L to R: LT Ozzy Slade, CAPT Peter ‘Blue’ Blaskett, unidentified officer, front rank L to R: SGT Cliff Webb, CO LTCOL Bob Skitch, CAPT Peter Searle - UK Exchange, unidentified, centre rank L to R: unidentified, SSGT Greg Buckingham, SSGT John Bennett, rear rank L to R: unidentified (x4), SPR Sharon (Jones) Treble, CPL Marrianne (Van De Zee) De Groot, SPR Ginny (Turner) Rowe, SSGT Kevin Kennedy, unidentified, SSGT Alan Derby. .13) - Photo, black & white, 1980. Air Survey Squadron inspection - Centre rank: SSGT John Bennett, CO LTCOL Bob Skitch, CAPT Peter Searle - UK Exchange, BRIG Geoffrey Cohen AM, rear rank L to R: SPR Ginny (Turner) Rowe, SSGT Kevin Kennedy, unidentified, SSGT Alan Derby, SSGT Bruce Gordon, supernumerary rank L to R: SSM WO1 Bob Mason, WO1 Bob Hayden, WO2 Peter Colwell, WO1 Chris Parkinson. Unidentified. .14) - Photo, black & white, 1980. Air Survey Squadron inspection - Centre rank: SSGT John Bennett, CO LTCOL Bob Skitch, CAPT Peter Searle - UK Exchange, BRIG Geoffrey Cohen AM, rear rank L to R: SPR Ginny (Turner) Rowe, SSGT Kevin Kennedy, unidentified, SSGT Alan Derby, SSGT Bruce Gordon, supernumerary rank L to R: SSM WO1 Bob Mason, WO1 Bob Hayden, WO2 Peter Colwell. .15) - Photo, black & white, 1980. Cartographic Squadron inspection – L to R: OC CAPT Bob Williams, CO LTCOL Bob Skitch, BRIG Geoffrey Cohen AM. Front rank L to R: CPL John ‘Stormy’ Tempest, unidentified (x2), SSGT Allan Adsett, SSGT Gary Warnest. Centre rank L to R: SPR Ilen Isaac, CPL Sue (Fryer) Bottomley, SPR Gina (Coore) Neilson, SPR Carla Dell, CPL Lynn Johnson, SPR Cathy Regan, unidentified, SSGT John ‘JB’ Barrie, SSGT Bob Scaddan. Rear rank L to R: CPL Terry Danger, CPL Brad Peppler. .16) & .17) - Photo, black & white, 1980. Cartographic Squadron inspection – L to R: OC CAPT Bob Williams, CO LTCOL Bob Skitch, BRIG Geoffrey Cohen AM. Front rank L to R: CPL Dennis Learmonth, CPL Roger Pearson, SPR Rod Skidmore, SPR John Martin, SGT Bob Bright, CPL Trevor Bottomley, SPR Gerry Gates, CPL John ‘Stormy’ Tempest, unidentified (x2), SSGT Allan Adsett, SSGT Gary Warnest. CO LTCOL Bob Skitch, CAPT Bob Cooper, BRIG Geoffrey Cohen AM. Centre rank L to R: SPR Ilen Isaac, CPL Sue (Fryer) Bottomley, SPR Gina (Coore) Neilson, SPR Carla Dell, SPR Cathy Regan, SSGT John ‘JB’ Barrie, SSGT Bob Scaddan. Rear rank L to R: CPL Terry Danger, CPL Brad Peppler, SGT Stu Thaxter, SGT Colin Cuskelly, SGT Bill Friswell. Far right: CAPT Peter Searle - UK Exchange, WO1 Jim ‘JJJ’ Jefferies. .18) - Photo, black & white, 1980. Cartographic Squadron inspection – Front rank: SSGT Gary Warnest. L to R: CO LTCOL Bob Skitch, CAPT Bob Cooper, BRIG Geoffrey Cohen AM. Centre rank L to R: SPR Ilen Isaac, CPL Sue (Fryer) Bottomley, SPR Gina (Coore) Neilson, SPR Carla Dell, SPR Cathy Regan, SSGT John ‘JB’ Barrie, SSGT Bob Scaddan. Rear rank L to R: CPL Terry Danger, CPL Brad Peppler, SGT Stu Thaxter, SGT Colin Cuskelly, SGT Bill Friswell. SSM WO1 Gordon Lowery. Far right: WO1 Jim ‘JJJ’ Jefferies, CAPT Peter Searle - UK Exchange, CAPT Peter ‘Blue’ Blaskett, LT Ozzy Slade. .19) - Photo, black & white, 1980. Medal presentation - L to R: CO LTCOL Bob Skitch, CAPT Bob Cooper. Cartographic Squadron – Front rank L to R: CPL Dennis Learmonth, CPL Roger Pearson, SPR Rod Skidmore, SGT Bob Bright, CPL Trevor Bottomley, SPR Gerry Gates, SPR Peter Main, CPL John ‘Stormy’ Tempest. Centre rank L to R: CPL Paul Richards, SPR Jan (Crighton) Minchin, SPR Ilen Isaac, SPR Carla Dell, CPL Lynn Johnson, SPR Cathy Regan. .20) - Photo, black & white, 1980. Medal presentation - L to R: CAPT Bob Cooper, BRIG Geoffrey Cohen AM. Cartographic Squadron – Front rank L to R: CPL Dennis Learmonth, CPL Roger Pearson, SPR Rod Skidmore, SPR John Martin, SGT Bob Bright, SPR Peter Main, CPL John ‘Stormy’ Tempest, SSGT Allan Adsett, SSGT Gary Warnest. Centre rank L to R: CPL Paul Richards, SPR Jan (Crighton) Minchin, SPR Ilen Isaac, CPL Sue (Fryer) Bottomley, SPR Gina (Coore) Neilson. .21) - Photo, black & white, 1980. Medal presentation - L to R: CAPT Bob Cooper, BRIG Geoffrey Cohen AM. Cartographic Squadron – Front rank L to R: CPL Dennis Learmonth, CPL Roger Pearson, SPR Rod Skidmore, SPR John Martin, SGT Bob Bright, SPR Peter Main, CPL John ‘Stormy’ Tempest, SSGT Gary Warnest. Centre rank L to R: CPL Paul Richards, SPR Jan (Crighton) Minchin, SPR Ilen Isaac, CPL Sue (Fryer) Bottomley. .22) - Photo, black & white, 1980. Medal presentation - L to R: CO LTCOL Bob Skitch, CAPT Bob Cooper, BRIG Geoffrey Cohen AM. Cartographic Squadron – Front rank L to R: CPL Dennis Learmonth, CPL Roger Pearson, SPR Rod Skidmore, SPR John Martin, SGT Bob Bright CPL Trevor Bottomley, SPR Gerry Gates, SPR Peter Main, CPL John ‘Stormy’ Tempest, CAPT Bob Williams, SSGT Allan Adsett. Centre rank L to R: CPL Paul Richards, SPR Jan (Crighton) Minchin, SPR Gina (Coore) Neilson, SPR Carla Dell, CPL Lynn Johnson, SPR Cathy Regan, unidentified, SSGT Bob Scaddan. Rear rank: CPL Stu Symonds. .23) - Photo, black & white, 1980. Presentation - L to R: CO LTCOL Bob Skitch, BRIG Geoffrey Cohen AM, ADJT CAPT John Harrison. Cartographic Squadron – Front rank L to R: CPL Dennis Learmonth, CPL Roger Pearson, SPR Rod Skidmore, SPR John Martin, SGT Bob Bright CPL Trevor Bottomley, SPR Gerry Gates, unidentified, CAPT Bob Williams, SSGT Allan Adsett, CAPT Bob Cooper. Centre rank L to R: SPR Jan (Crighton) Minchin, CPL Sue (Fryer) Bottomley, SPR Carla Dell, CPL Lynn Johnson, SPR Cathy Regan, unidentified, SSGT Bob Scaddan. .24) - Photo, black & white, 1980. Presentation - L to R: CO LTCOL Bob Skitch, BRIG Geoffrey Cohen AM, ADJT CAPT John Harrison. Cartographic Squadron – Front rank L to R: SPR Rod Skidmore, SPR John Martin, SGT Bob Bright CPL Trevor Bottomley, SPR Gerry Gates, unidentified, CAPT Bob Williams, CAPT Bob Cooper. Centre rank L to R: SPR Jan (Crighton) Minchin, CPL Sue (Fryer) Bottomley, SPR Carla Dell, CPL Lynn Johnson, SPR Cathy Regan, unidentified, SSGT Bob Scaddan. .25) - Photo, black & white, 1980. Presentation - L to R: CO LTCOL Bob Skitch, BRIG Geoffrey Cohen AM, ADJT CAPT John Harrison. Cartographic Squadron – Front rank L to R: CPL Roger Pearson, SPR Rod Skidmore, SPR John Martin, SGT Bob Bright CPL Trevor Bottomley, unidentified, CAPT Bob Williams, SSGT Allan Adsett, SSGT Gary Warnest. CAPT Bob Cooper, Centre rank L to R: CPL Sue (Fryer) Bottomley, SPR Gina (Coore) Neilson, SPR Carla Dell, CPL Lynn Johnson. .26) to .28) - Photo, black & white, 1980. Presentation - L to R: MAJ Robin Blackburn, BRIG Geoffrey Cohen AM, ADJT CAPT John Harrison. .29) to .31) - Photo, black & white, 1980. Presentation - L to R: SPR Penny Knott, CO LTCOL Bob Skitch. .32) - Photo, black & white, 1980. CO Handover - L to R: LTCOL Bob Skitch, LTCOL Frank Thorogood SB St J. Cartographic Squadron – Front rank L to R: CPL Dennis Learmonth, CPL Roger Pearson, SPR Rod Skidmore, SPR John Martin SPR Gerry Gates, SPR Peter Main, CPL John ‘Stormy’ Tempest, unidentified, CAPT Bob Williams, SSGT Allan Adsett, SSGT Gary Warnest. Centre rank L to R: SPR Ilan Isaac, CPL Sue (Fryer) Bottomley, SPR Gina (Coore) Neilson, SSGT Bob Scaddan at end. .33) & .34) - Photo, black & white, 1980. CO Handover - L to R: LTCOL Bob Skitch, LTCOL Frank Thorogood SB St J. Cartographic Squadron – Front rank L to R: CPL Dennis Learmonth, CPL Roger Pearson, SPR Rod Skidmore, SPR John Martin, SGT Bob Bright, SPR Gerry Gates, SPR Peter Main, CPL John ‘Stormy’ Tempest, unidentified, CAPT Bob Williams, SSGT Allan Adsett. Centre rank L to R: SPR Ilen Isaac, CPL Sue (Fryer) Bottomley, SPR Gina (Coore) Neilson, SSGT Bob Scaddan at end. .35) - Photo, black & white, 1980. CO Handover – March past L to R: BRIG Geoffrey Cohen AM, ADJT CAPT John Harrison. LTCOL Frank Thorogood SB St J, CO LTCOL Bob Skitch. L to R: RSM WO1 Aub Harvey, 2IC MAJ Don Swiney MBE. .36) - Photo, black & white, 1980. CO Handover March past L to R: BRIG Geoffrey Cohen AM, ADJT CAPT John Harrison. LTCOL Frank Thorogood SB St J, CO LTCOL Bob Skitch. HQ Squadron march past L to R: unidentified officer, MAJ MAJ David Bowen - US Exchange officer, CAPT Paddy Strunks. .37) - Photo, black & white, 1980. CO Handover March past L to R: BRIG Geoffrey Cohen AM, ADJT CAPT John Harrison. LTCOL Frank Thorogood SB St J, CO LTCOL Bob Skitch. HQ Squadron march past L to R: unidentified, SGT Rick Warren, remainder unidentified. .38) - Photo, black & white, 1980. CO Handover March past L to R: BRIG Geoffrey Cohen AM, ADJT CAPT John Harrison. LTCOL Frank Thorogood SB St J, CO LTCOL Bob Skitch. Cartographic Squadron march past L to R: CLP Paul Richards, CPL Dennis Learmonth, CAPT Bob Williams, CAPT Bob Cooper. .39) - Photo, black & white, 1980. CO Handover March past L to R: BRIG Geoffrey Cohen AM, ADJT CAPT John Harrison. LTCOL Frank Thorogood SB St J, CO LTCOL Bob Skitch. Cartographic Squadron march past L to R: SPR Greg Else, SPR Jan (Crighton) Minchin, SPR Rod Skidmore, unidentified, SPR Megan (McBurney) Reynolds, CPL Roger Pearson, CPL Stu Symonds, CPL Paul Richards. .40) - Photo, black & white, 1980. CO Handover March past L to R: BRIG Geoffrey Cohen AM, ADJT CAPT John Harrison. LTCOL Frank Thorogood SB St J, CO LTCOL Bob Skitch. Cartographic Squadron march past L to R: CPL Terry Danger, CPL Lynn Johnson, SPR Peter Main, unidentified, SPR Carla Dell, SPR Gerry Gates, SPR Bob Sheppard, SPR Gina (Coore) Neilson, CPL Trevor Bottomley, SPR Ian Fitzgerald, CPL Sue (Fryer) Bottomley, unidentified. .41) - Photo, black & white, 1980. CO Handover March past L to R: BRIG Geoffrey Cohen AM, ADJT CAPT John Harrison. LTCOL Frank Thorogood SB St J, CO LTCOL Bob Skitch. Lithographic Squadron march past L to R: CAPT Mick Byrne, MAJ Robin Blackburn. .42) - Photo, black & white, 1980. CO Handover March past L to R: BRIG Geoffrey Cohen AM, ADJT CAPT John Harrison. LTCOL Frank Thorogood SB St J, CO LTCOL Bob Skitch. Lithographic Squadron march past L to R: CPL Gary Kerr, SPR Brian Paul, SPR Brian Fauth, CPL Roy Hicks, SPR Per Andersen, CAPT Mick Byrne. .43) & .44) - Photo, black & white, 1980. CO Handover March past L to R: BRIG Geoffrey Cohen AM, ADJT CAPT John Harrison. LTCOL Frank Thorogood SB St J, CO LTCOL Bob Skitch. Lithographic Squadron march past. .45) - Photo, black & white, 1980. CO Handover March past L to R: BRIG Geoffrey Cohen AM, ADJT CAPT John Harrison. LTCOL Frank Thorogood SB St J, CO LTCOL Bob Skitch. Officer march past L to R: unidentified, CAPT Peter Searle - UK Exchange.No personnel are identified. Photo .34P is annotated on back ‘1981 LTCOL Bob Skitch handed over to LTCOL Thorogood.’ *Date is incorrect.royal australian survey corps, rasvy, army survey regiment, army svy regt, fortuna, asr -
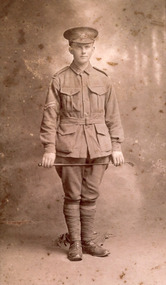 The Beechworth Burke Museum
Photograph, 1916-17
Portrait of William Edward Peach in First World War military uniform, holding a crop in front of his thighs with military kit on the ground behind him. A Beechworth postal employee who enlisted in 1915, this photograph is probably taken in 1917, as he is a corporal in the photo and was promoted to this rank in May 1917. This photograph is of historic significance as it depicts William Edward Peach, a Beechworth postal assistant who enlisted in the Australian Imperial Force (AIF) on his nineteenth birthday, 5 August 1915, which required his parents' permission. He was decorated with the military medal for his courage in battle 4/5 October 1917 at the Battle of Broodseinde Ridge near Ypres, the most successful allied attack of the Third Battle of Ypres (31 July to 10 November 1917), also known as the Battle of Paschendale, which saw the greatest loss of human life during World War One, with almost half a million lives were lost on all sides. According to the recommendation for his military medal, Peach 'displayed conspicuous courage and initiative', taking charge after his platoon commander became a casualty, handling the men 'under heavy fire with great skill'. He also assisted the Company Commander in reorganising their military objectives. The photograph is of social as well as historic significance for the Beechworth community, because it provides a direct link between local, national and international histories in relation to Australia' s participation in one of WWI's best-known battles. The record has strong research potential given the ongoing public and scholarly interest in war, history, and especially the ANZAC legend, which is commemorated annually on 25 April, known as ANZAC Day. Peach is also one of the diarists of WWI, including of this significant period of Australian military history, from 1916 to 18, which can be accessed via the Australian War Memorial. Sepia rectangular photograph printed on gloss Kodak photographic paper mounted on board. Reverse: BMM 8779 item catalogue number pencilled in right-hand bottom corner.military medal, defending australia and victoria, military service, hmat a64 demosthenes, wipers, anzac, burke museum, beechworth, ypres, australian military services, beechworth post office, first world war, wartime, our boys, belgium, flanders fields, ww1, british war medal, victory medal, broodseinde, third battle of ypres -
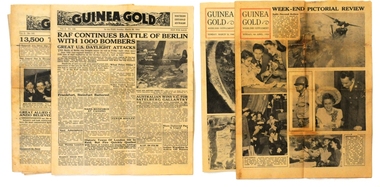 Orbost & District Historical Society
newspapers, Guinea Gold, 1943-1944
In WWII New Guinea, GUINEA GOLD presented news to all troops "in the field". It avoided editorial comment. It published for 1320 continuous days, without missing a single edition. The front and back pages concentrated on current world news, including major sporting events. Page 2 was generally devoted to extracts from Australian and US newspapers. Some news was obtained by taking shorthand notes of short-wave radio bulletins from Australia, the U.S. and the B.B.C. At its peak, distribution was 37,000 to US forces and 27,000 to Australian forces, daily. The daily version had four pages and the WEEK-END SUPPLEMENT edition contained 8 pages (with extra pictures & cartoons).Guinea Gold" daily brought to the news-hungry men of the Australian and American forces serving in the steaming jungle, topics of interest to allay their boredom and boost their morale. It was able to do so because US General Douglas MacArthur, Supreme Commander of Allied Forces in the South-West Pacific, gave it permission to publish his communiqués 20 hours before the release time for the rest of the world's media. The newspaper contains Australian, American & world news (military, political, sports & tabloid).Seven editions of "Guinea Gold" from 1943 and 1944. 2103.1 is edition 7/6/1943. 2103.2 is edition 8/6/1943. 2103.3 is edition 12/6/1943. 2103.4 is edition 27/2/1944. 2103.5 is edition 26/3/1944 and is the Weekend Supplement. 2103.6 is edition 26/3/1944 and 2103.7 is dated 9/4/1944 and is the Weekend Supplement.guinea-gold newspaper ww11 pacific-campaign new-guinea -
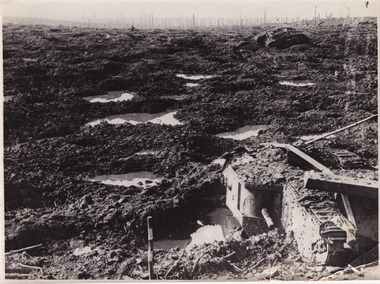 The Beechworth Burke Museum
Photograph, c. 1917
This photograph depicts the third battle of Ypres (Battle of Passchendaele). Depicted is a trench battlefield that has been turned to mud. Two army tank vehicles have been buried in the mud of the trenches. A single soldier stands in the background surveying the battlefield.After mid-1917, and following mutinies in the over-strained French Army, the British Forces had to assume an even greater role in the war on the Western Front. For Field Marshal Sir Douglas Haig, the British commander-in-chief, this provided an opportunity to launch an offensive that he had long wanted. Attacking from Ypres in Belgium, he planned to drive the Germans from the surrounding dominant ridges and even hoped to reach the Belgian coast. Following on the success at Messines in June, he unleashed his great attack on 31 July 1917. Fighting went on, often in appalling weather and despite crippling losses, until November. Finally, with the army stuck in muddy fields churned up by the artillery fire, the bloody offensive came to an untidy close. Many would afterwards call this offensive, actually a series of battles, after the name of the village that had become the last objective – 'Passchendaele'. In the Battle off Passchendaele, the 1st, 2nd and 3rd Australian Divisions captured Broodseinde Ridge on 4 October 1917. It was a vital victory. But, then it began to rain. Five days later the 2nd Australian Division suffered heavily in a further attack in the mud. Finally, on 12 October, another attack, involving the 3rd Division assisted by the 4th, was made against the village of Passchendaele atop the main ridge. In the face of heavy fire, the men fought in the mire while struggling to keep up with their artillery barrages. Ground was taken but it could not be held. In wretched conditions, with casualties mounting at an appalling rate, the Australians had to fall back. The troops were finally exhausted and could do no more; by 15 November they handed over to the Canadians.Black and white rectangular reproduced photograph printed on mate photographic paperReverse: 6523/ (A copyright and reproduction notice from the Australian War Museum, printed upside-down in blue ink)/military album, burke museum, beechworth, military vehicle, trenches, trench warfare, wwi, world war one, world war 1, ypres, belgium -
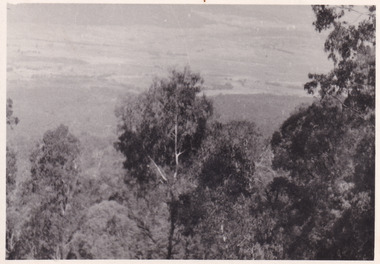 The Beechworth Burke Museum
Photograph, 1944
Taken in 1944, the photograph depicts the surrounding farmland from Mt. Stanley in Victoria. A secret experimental micro-wave radio station was established and tested at this site by the Army Signal Detachment Unit during World War II. It was part of an experimental Ultra High Frequency (UHF) link between Melbourne and Sydney. At the time, it was highly classified. It intended to enquire into the hitherto unexplored transmission of micro-waves; that is, a radio signal which could only be transmitted by line of sight, and thus required hill-top to hill-top location.The photograph is historically significant as it pertains to World War II; the largest global conflict in history. This significance is enhanced by Australia's prominent involvement in campaigns across the Pacific, particularly on land in New Guinea and across the Huon Peninsula. It was also the first time that the Australian mainland came under direct attack by the Axis, with Japanese forces targeting north-west Australia and Sydney Harbour. These battles became Australia's largest and most complex offensives during the war. The record is also historically significant as it relates to the Royal Australian Corps of Signals, or "RA Sigs". This significance is strengthened by Australia's unique distinction of having the first established signal unit under the British Empire. This unit provides electronic warfare. They enable commanders to implement highly dynamic battle control against opposing forces by using a number of methods including radio, fibre optic, micro-wave, information systems and satellite links. The record has strong research potential. This is due to the ongoing scholarly and public interest in war, military history, the ANZAC legend, and the ongoing existence of the RA Sigs. The historic context of this record can provide insight into Australia's history, military, technological innovation and advancements, as well as national economic, defence and foreign policies after 1945. Black and white rectangular photograph printed on matte photographic paper.Reverse: BMM5095.1 /military album, army album, wwii, world war ii, army signal detachment unit, mt. stanley, beechworth, victoria, 1940s, australian army, melbourne, sydney, royal australian corps of signals -
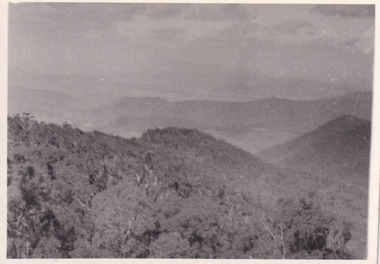 The Beechworth Burke Museum
Photograph, 1944
Taken in 1944, the photograph depicts the view of surrounding hills from Mt. Stanley. A secret experimental micro-wave radio station was established and tested at this site by the Army Signal Detachment Unit during World War II. It was part of an experimental Ultra High Frequency (UHF) link between Melbourne and Sydney. At the time, it was highly classified. It intended to enquire into the hitherto unexplored transmission of micro-waves; that is, a radio signal which could only be transmitted by line of sight, and thus required hill-top to hill-top location.The photograph is historically significant as it pertains to World War II; the largest global conflict in history. This significance is enhanced by Australia's prominent involvement in campaigns across the Pacific, particularly on land in New Guinea and across the Huon Peninsula. It was also the first time that the Australian mainland came under direct attack by the Axis, with Japanese forces targeting north-west Australia and Sydney Harbour. These battles became Australia's largest and most complex offensives during the war. The record is also historically significant as it relates to the Royal Australian Corps of Signals, or "RA Sigs". This significance is strengthened by Australia's unique distinction of having the first established signal unit under the British Empire. This unit provides electronic warfare. They enable commanders to implement highly dynamic battle control against opposing forces by using a number of methods including radio, fibre optic, micro-wave, information systems and satellite links. The record has strong research potential. This is due to the ongoing scholarly and public interest in war, military history, the ANZAC legend, and the ongoing existence of the RA Sigs. The historic context of this record can provide insight into Australia's history, military, technological innovation and advancements, as well as national economic, defence and foreign policies after 1945.Black and white rectangular photograph printed on matte photographic paper.Reverse: BMM5095.2 / 32 /military album, army album, wwii, world war ii, army signal detachment unit, royal australian signal army corps, war, beechworth, victoria, mt. stanley -
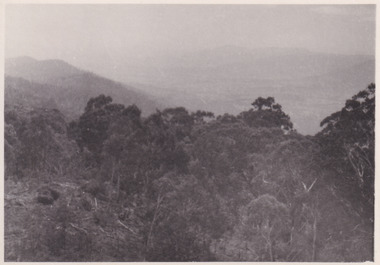 The Beechworth Burke Museum
Photograph, 1944
Taken in 1944, the photograph depicts the view from Mt. Stanley. A secret experimental micro-wave radio station was established and tested at this site by the Army Signal Detachment Unit during World War II. It was part of an experimental Ultra High Frequency (UHF) link between Melbourne and Sydney. At the time, it was highly classified. It intended to enquire into the hitherto unexplored transmission of micro-waves; that is, a radio signal which could only be transmitted by line of sight, and thus required hill-top to hill-top location.The photograph is historically significant as it pertains to World War II; the largest global conflict in history. This significance is enhanced by Australia's prominent involvement in campaigns across the Pacific, particularly on land in New Guinea and across the Huon Peninsula. It was also the first time that the Australian mainland came under direct attack by the Axis, with Japanese forces targeting north-west Australia and Sydney Harbour. These battles became Australia's largest and most complex offensives during the war. The record is also historically significant as it relates to the Royal Australian Corps of Signals, or "RA Sigs". This significance is strengthened by Australia's unique distinction of having the first established signal unit under the British Empire. This unit provides electronic warfare. They enable commanders to implement highly dynamic battle control against opposing forces by using a number of methods including radio, fibre optic, micro-wave, information systems and satellite links. The record has strong research potential. This is due to the ongoing scholarly and public interest in war, military history, the ANZAC legend, and the ongoing existence of the RA Sigs. The historic context of this record can provide insight into Australia's history, military, technological innovation and advancements, as well as national economic, defence and foreign policies after 1945.Black and white rectangular photograph printed on matte photographic paper.Reverse: BMM5095.3 / 32 /military album, army album, beechworth, victoria, mt. stanley, australian army, wwii, world war ii, royal australian signal corps, army signal detachment unit -
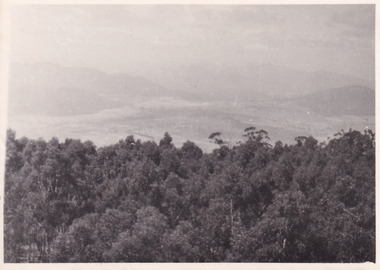 The Beechworth Burke Museum
Photograph, 1944
Taken in 1944, the photograph depicts the view from Mt. Stanley. A secret experimental micro-wave radio station was established and tested at this site by the Army Signal Detachment Unit during World War II. It was part of an experimental Ultra High Frequency (UHF) link between Melbourne and Sydney. At the time, it was highly classified. It intended to enquire into the hitherto unexplored transmission of micro-waves; that is, a radio signal which could only be transmitted by line of sight, and thus required hill-top to hill-top location.The photograph is historically significant as it pertains to World War II; the largest global conflict in history. This significance is enhanced by Australia's prominent involvement in campaigns across the Pacific, particularly on land in New Guinea and across the Huon Peninsula. It was also the first time that the Australian mainland came under direct attack by the Axis, with Japanese forces targeting north-west Australia and Sydney Harbour. These battles became Australia's largest and most complex offensives during the war. The record is also historically significant as it relates to the Royal Australian Corps of Signals, or "RA Sigs". This significance is strengthened by Australia's unique distinction of having the first established signal unit under the British Empire. This unit provides electronic warfare. They enable commanders to implement highly dynamic battle control against opposing forces by using a number of methods including radio, fibre optic, micro-wave, information systems and satellite links. The record has strong research potential. This is due to the ongoing scholarly and public interest in war, military history, the ANZAC legend, and the continuing existence of the RA Sigs. The historic context of this record can provide insight into Australia's history, military, technological innovation and advancements, as well as national economic, defence and foreign policies after 1945.Black and white rectangular photograph printed on matte photographic paper.Reverse: BMM5095.4 / 32 /military album, army album, wwii, world war ii, mt stanley, beechworth, victoria, melbourne, sydney, royal australian corps of signals, army signal detachment unit, military, war -
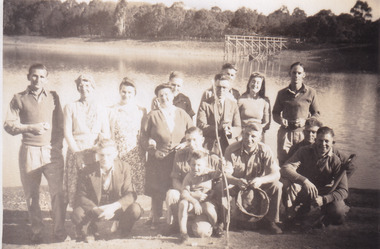 The Beechworth Burke Museum
Photograph, 1944
Taken in 1944, depicted are members of the Army Signal Detachment Unit with local residents at at Lake Kerferd. David Pittard (back row, right) is standing beside Dorrie Elliot. The other people are unidentified. A secret experimental micro-wave radio station was established and tested at this site by the Army Signal Detachment Unit during World War II. It was part of an experimental Ultra High Frequency (UHF) link between Melbourne and Sydney. At the time, it was highly classified. It intended to enquire into the hitherto unexplored transmission of micro-waves; that is, a radio signal which could only be transmitted by line of sight, and thus required hill-top to hill-top location.The photograph is historically significant as it pertains to World War II; the largest global conflict in history. This significance is enhanced by Australia's prominent involvement in campaigns across the Pacific, particularly on land in New Guinea and across the Huon Peninsula. It was also the first time that the Australian mainland came under direct attack by the Axis, with Japanese forces targeting north-west Australia and Sydney Harbour. These battles became Australia's largest and most complex offensives during the war. The record is also historically significant as it relates to the Royal Australian Corps of Signals, or "RA Sigs". This significance is strengthened by Australia's unique distinction of having the first established signal unit under the British Empire. This unit provides electronic warfare. They enable commanders to implement highly dynamic battle control against opposing forces by using a number of methods including radio, fibre optic, micro-wave, information systems and satellite links. The record has strong research potential. This is due to the ongoing scholarly and public interest in war, military history, the ANZAC legend, and the continuing existence of the RA Sigs. The historic context of this record can provide insight into Australia's history, military, technological innovation and advancements, as well as national economic, defence and foreign policies after 1945.Sepia rectangular photograph printed on matte photographic paper.Reverse: BMM5095.5 / Relaxing with some of / the Stanley locals / David Pittard (back row Rt.) / next to Dorrie Elliot / I can't recall the others / Lake Sambell, I think / Kerferd /military album, army album, lake kerford, army signal detachment unit, royal australian corps of signals, military, war, wwii, world war ii, beechworth, victoria, sydney, melbourne -
 The Beechworth Burke Museum
Photograph, 1944
Taken in 1944, depicted are two unidentified soldiers presumed to be part of the Army Signal Detachment Unit. They are cooking a meal outdoors around Mt. Stanley. A secret experimental micro-wave radio station was established and tested near this site by the Army Signal Detachment Unit during World War II. It was part of an experimental Ultra High Frequency (UHF) link between Melbourne and Sydney. At the time, it was highly classified. It intended to enquire into the hitherto unexplored transmission of micro-waves; that is, a radio signal which could only be transmitted by line of sight, and thus required hill-top to hill-top location.The photograph is historically significant as it pertains to World War II; the largest global conflict in history. This significance is enhanced by Australia's prominent involvement in campaigns across the Pacific, particularly on land in New Guinea and across the Huon Peninsula. It was also the first time that the Australian mainland came under direct attack by the Axis, with Japanese forces targeting north-west Australia and Sydney Harbour. These battles became Australia's largest and most complex offensives during the war. The record is also historically significant as it relates to the Royal Australian Corps of Signals, or "RA Sigs". This significance is strengthened by Australia's unique distinction of having the first established signal unit under the British Empire. This unit provides electronic warfare. They enable commanders to implement highly dynamic battle control against opposing forces by using a number of methods including radio, fibre optic, micro-wave, information systems and satellite links.Black and white rectangular photograph printed on matte photographic paper.Reverse: BMM5095.6 / Our Cookhouse / 32 /military album, army album, military, war, wwii, world war ii, army signal detachment unit, royal australian corps of signals, mt stanley, beechworth, victoria, melbourne, sydney -
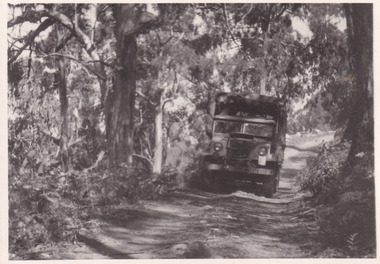 The Beechworth Burke Museum
Photograph, 1944
Taken in 1944, the photograph depicts an Australian Army truck driving along an unsealed road from Stanley to the top of Mt. Stanley. A secret experimental micro-wave radio station was established and tested at Mt. Stanley by the Army Signal Detachment Unit during World War II. It was part of an experimental Ultra High Frequency (UHF) link between Melbourne and Sydney. At the time, it was highly classified. It intended to enquire into the hitherto unexplored transmission of micro-waves; that is, a radio signal which could only be transmitted by line of sight, and thus required hill-top to hill-top location.The photograph is historically significant as it pertains to World War II; the largest global conflict in history. This significance is enhanced by Australia's prominent involvement in campaigns across the Pacific, particularly on land in New Guinea and across the Huon Peninsula. It was also the first time that the Australian mainland came under direct attack by the Axis, with Japanese forces targeting north-west Australia and Sydney Harbour. These battles became Australia's largest and most complex offensives during the war. The record is also historically significant as it relates to the Royal Australian Corps of Signals, or "RA Sigs". This significance is strengthened by Australia's unique distinction of having the first established signal unit under the British Empire. This unit provides electronic warfare. They enable commanders to implement highly dynamic battle control against opposing forces by using a number of methods including radio, fibre optic, micro-wave, information systems and satellite links. The record has strong research potential. This is due to the ongoing scholarly and public interest in war, military history, the ANZAC legend, and the continuing existence of the RA Sigs. The historic context of this record can provide insight into Australia's history, military, technological innovation and advancements, as well as national economic, defence and foreign policies after 1945.Black and white rectangular photograph printed on matte photographic paper.Reverse: BMM5095.7 / The track up (?) from / Stanley to the top / 32 /military album, army album, military, war, wwii, world war ii, army signal detachment unit, royal australian corps of signals, beechworth, victoria, stanley, mt stanley, melbourne, sydney -
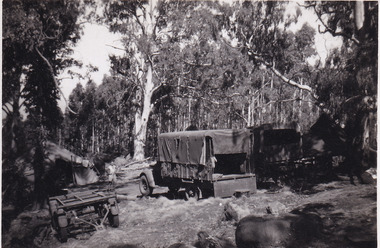 The Beechworth Burke Museum
Photograph, 1944
Taken in 1944, the photograph depicts two trucks and a trailer park at an undisclosed location inside the Stanley forest. An unidentified young man is standing in the background. There are also two tents installed on either side of the vehicles. A secret experimental micro-wave radio station was established and tested in Stanley, Victoria by the Army Signal Detachment Unit during World War II. It was part of an experimental Ultra High Frequency (UHF) link between Melbourne and Sydney. At the time, it was highly classified. It intended to enquire into the hitherto unexplored transmission of micro-waves; that is, a radio signal which could only be transmitted by line of sight, and thus required hill-top to hill-top location.The photograph is historically significant as it pertains to World War II; the largest global conflict in history. This significance is enhanced by Australia's prominent involvement in campaigns across the Pacific, particularly on land in New Guinea and across the Huon Peninsula. It was also the first time that the Australian mainland came under direct attack by the Axis, with Japanese forces targeting north-west Australia and Sydney Harbour. These battles became Australia's largest and most complex offensives during the war. The record is also historically significant as it relates to the Royal Australian Corps of Signals, or "RA Sigs". This significance is strengthened by Australia's unique distinction of having the first established signal unit under the British Empire. This unit provides electronic warfare. They enable commanders to implement highly dynamic battle control against opposing forces by using a number of methods including radio, fibre optic, micro-wave, information systems and satellite links. The record has strong research potential. This is due to the ongoing scholarly and public interest in war, military history, the ANZAC legend, and the continuing existence of the RA Sigs. The historic context of this record can provide insight into Australia's history, military, technological innovation and advancements, as well as national economic, defence and foreign policies after 1945.Black and white rectangular photograph printed on matte photographic paper.Reverse: BMM5095.8 /military album, army album, wwii, world war ii, army signal detachment unit, royal australian corps of signals, ra sigs, stanley, army truck, victoria, beechworth, melbourne, sydney -
 The Beechworth Burke Museum
Photograph, 1944
Taken in 1944, the photograph depicts an Australian Army vehicle with a trailer driving through bushland in Victoria. A secret experimental micro-wave radio station was established and tested in Stanley, Victoria by the Army Signal Detachment Unit during World War II. It was part of an experimental Ultra High Frequency (UHF) link between Melbourne and Sydney. At the time, it was highly classified. It intended to enquire into the hitherto unexplored transmission of micro-waves; that is, a radio signal which could only be transmitted by line of sight, and thus required hill-top to hill-top location.The photograph is historically significant as it pertains to World War II; the largest global conflict in history. This significance is enhanced by Australia's prominent involvement in campaigns across the Pacific, particularly on land in New Guinea and across the Huon Peninsula. It was also the first time that the Australian mainland came under direct attack by the Axis, with Japanese forces targeting north-west Australia and Sydney Harbour. These battles became Australia's largest and most complex offensives during the war. The record is also historically significant as it relates to the Royal Australian Corps of Signals, or "RA Sigs". This significance is strengthened by Australia's unique distinction of having the first established signal unit under the British Empire. This unit provides electronic warfare. They enable commanders to implement highly dynamic battle control against opposing forces by using a number of methods including radio, fibre optic, micro-wave, information systems and satellite links.Black and white rectangular photograph printed on matte photographic paper.Reverse: BMM5095.9 / Our outfit (fully mobile) / on the move / 32 /military album, army album, wwii, world war ii, army signal detachment unit, royal australian corps of signals, ra sigs, australian army, army truck, beechworth, stanley, victoria, melbourne, sydney -
 The Beechworth Burke Museum
Photograph, 1944
Taken in 1944, the photograph depicts a van with two large, round satellite dishes installed on the roof stationed near Mt. Stanley, Victoria. There is a transmission tower in the background. Four unidentified young men are in the foreground on the right hand side. A secret experimental micro-wave radio station was established and tested at this site by the Army Signal Detachment Unit during World War II. It was part of an experimental Ultra High Frequency (UHF) link between Melbourne and Sydney. At the time, it was highly classified. It intended to enquire into the hitherto unexplored transmission of micro-waves; that is, a radio signal which could only be transmitted by line of sight, and thus required hill-top to hill-top location.The photograph is historically significant as it pertains to World War II; the largest global conflict in history. This significance is enhanced by Australia's prominent involvement in campaigns across the Pacific, particularly on land in New Guinea and across the Huon Peninsula. It was also the first time that the Australian mainland came under direct attack by the Axis, with Japanese forces targeting north-west Australia and Sydney Harbour. These battles became Australia's largest and most complex offensives during the war. The record is also historically significant as it relates to the Royal Australian Corps of Signals, or "RA Sigs". This significance is strengthened by Australia's unique distinction of having the first established signal unit under the British Empire. This unit provides electronic warfare. They enable commanders to implement highly dynamic battle control against opposing forces by using a number of methods including radio, fibre optic, micro-wave, information systems and satellite links. The record has strong research potential. This is due to the ongoing scholarly and public interest in war, military history, the ANZAC legend, and the continuing existence of the RA Sigs. The historic context of this record can provide insight into Australia's history, military, technological innovation and advancements, as well as national economic, defence and foreign policies after 1945.Black and white rectangular photograph printed on matte photographic paper.Reverse: BMM5095.10 / Our station set-up / in operation beside / the old Fire Watchers / Tower / 32 / It was man-handled / the last 50m. to the top /military album, army album, wwii, world war ii, army signal detachment unit, royal australia corps of signals, military, war, australian army, mt. stanley, victoria, beechworth -
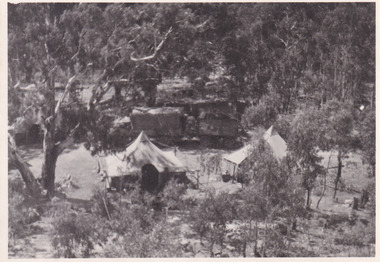 The Beechworth Burke Museum
Photograph, 1944
Taken in 1944, depicted is an aerial view of an Australian military camp set up at Mt. Stanley in Victoria. There are two large tents along with a vehicle and trailer surrounded by bushland. A secret experimental micro-wave radio station was established and tested at this site by the Army Signal Detachment Unit during World War II. It was part of an experimental Ultra High Frequency (UHF) link between Melbourne and Sydney. At the time, it was highly classified. It intended to enquire into the hitherto unexplored transmission of micro-waves; that is, a radio signal which could only be transmitted by line of sight, and thus required hill-top to hill-top location.The photograph is historically significant as it pertains to World War II; the largest global conflict in history. This significance is enhanced by Australia's prominent involvement in campaigns across the Pacific, particularly on land in New Guinea and across the Huon Peninsula. It was also the first time that the Australian mainland came under direct attack by the Axis, with Japanese forces targeting north-west Australia and Sydney Harbour. These battles became Australia's largest and most complex offensives during the war. The record is also historically significant as it relates to the Royal Australian Corps of Signals, or "RA Sigs". This significance is strengthened by Australia's unique distinction of having the first established signal unit under the British Empire. This unit provides electronic warfare. They enable commanders to implement highly dynamic battle control against opposing forces by using a number of methods including radio, fibre optic, micro-wave, information systems and satellite links. The record has strong research potential. This is due to the ongoing scholarly and public interest in war, military history, the ANZAC legend, and the continuing existence of the RA Sigs. The historic context of this record can provide insight into Australia's history, military, technological innovation and advancements, as well as national economic, defence and foreign policies after 1945.Black and white rectangular photograph printed on matte photographic paper.Reverse: BMM5095.11 / Our camp / From the top. / (?) (?) /military album, army album, australian royal corps of signals, army signal detachment unit, mt. stanley, victoria, beechworth, wwii, world war ii, melbourne, sydney