Showing 19839 items
matching george-g-morrison
-
 Greensborough Historical Society
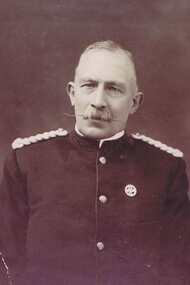
Photograph - Digital image, George Westcott, 1870c
George (Sarge) Westcott (born 1859) was the son of Charity Pink Medhurst and second husband George Charles Westcott. After Charity's death father George raised his son George and her son David Medhurst (born 1855). Sarge Westcott was awarded a police valour medal after saving a colleague in the line of duty.Connection to the Medhurst family of Greensborough.Digital copy of black and white studio photograph.Caption on back of photograph:"Sarge Westcott. Superintendent of police with Valour Badge for bravery."george westcott, david medhurst, charity jane pink -
 Orbost & District Historical Society
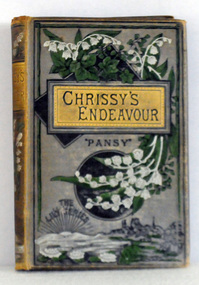
Book, Chrissy's Endeavour, C1899
This book was given to Ivy Scouller in 1899 as a Sunday School prize. Ivy Scouller married Harry Herbert George Watson (son of Mr. and Mrs. Watson of Warragul) James Cameron (1846-1922) was a prominent Orbost citizen - a justice of the peace, shire councillor, guardian of St James Anglican Church, Sunday school superintendent and president of the local agricultural society. James married 19-year-old Sarah Scouller, of Birregurra on 30 April 1879 at Colac, .This book, one of a series, was a popular example of children's literature with a religious theme in the late 19th and early 20th centuries.A hard cover book, titles "Chrissy's Endeavour". The cover is grey. The title is in black print on a gold background with a dotted border. The cover is decorated with green leaves and silver flowers. Below the title is "Pansy" and at the bottom left is "The Lily Series".Handwritten in ink " Ivy Scouller Mr Cameron's Prize for Repeating XX111 Psalm St James Sunday School Orbost 31st Dec 1899"cameron-james scouller-ivy pansy-books -
 Lakes Entrance Historical Society
Book, George Adams (Tattersall) - his romantic career), 1959
A brief biography of George Adams and the story of the Tattersall Lottery which he founded. The political climate which led to the introduction of State Lotteries to finance public hospitals is examined, and other beneficiaries are included.Born 1839 to 1904bibliography, social history -
 University of Melbourne, Burnley Campus Archives
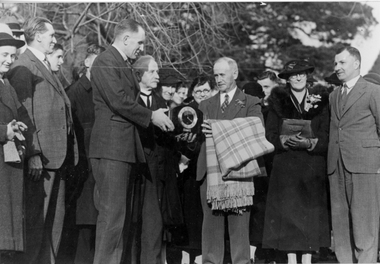
Photograph - Black and white print, A.P. Winzenried, George Russ's Retirement, 1936
A possible photograph for A.P. Winzenried book, "Green grows Our Garden."Black and white photograph. Copy of a photograph. Appears to be the celebration of George Russ's retirement in 1936 where he is being presented with a clock. A crowd of people around him. A.W. Jessep far right. On reverse: from AP Winzenried Book 3celebration, george russ, retirement, 1936, a.w. jessep, a.p. winzenried, green grows our garden, presentation -
 Warrnambool and District Historical Society Inc.
Book, Sand, Sweat & Camels, 1995 (first published by Rigby Ltd in 1976)
This book contains the story of the Australian Companies of the Imperial Camel Corps in the First World War. The authors are George and Edmee Langley. George Langley (1891-1972) was the principal of Warrnambool High School from 1924 to 1940. He and his wife Edmee were prominent in community affairs in Warrnambool during that time. George Langley served with distinction in both World Wars and rose to the rank of Brigadier in 1944. He intended writing the history of the Australian Camel Corps but died before he could complete the work. Edmee Langley, herself a talented journalist and writer, used her husband’s collection of letters, diaries and writings to publish Sand, Sweat and Camels.This book is of interest as it was written by George and Edmee Langley who were important Warrnambool residents in the 1920s and 30s. Extracts from Edmee’s memoirs of her time in Warrnambool are held by the Warrnambool and District Historical Society. This is a soft cover book of 188 pages. It has a brown cover with white and yellow lettering and, on the front cover, a colour image of several men riding camels. The back cover has blurbs on the two pieces of writing in the book. The book contains many black and white photographs. The book also contains another piece of writing – ‘Australian Aviator, Sir Norman Brearley.’george and edmee langley, world war one, history of warrnambool, warrnambool high school -
 Melbourne Tram Museum
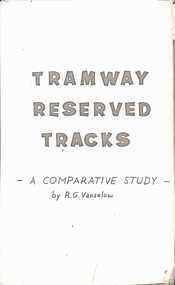
Document - Report, Bob Vanselow, "Tramway Reserved Tracks - A comparative study by R. G. Vanselow", c1969
Report or Thesis - 49 foolscap sheets photocopied onto heat sensitive paper titled "Tramway Reserved Tracks - A comparative study by R. G. Vanselow" prepared most likely for his Hons at the University of Melbourne c1969. Has a table of contents. Gives background, Literature survey, description of theoretical analysis, experimental arrangements and methods, results, discussion, conclusions and references. Pages 46 to 62, 64 to 66 missing. Document scanned into three parts. Bob passed away 18/2/2019. He spent some 10 years with the MMTB Civil Engineering.trams, tramways, trackwork, reserved track, reports, mmtb, melbourne university -
 Puffing Billy Railway
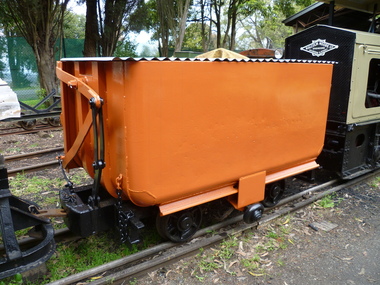
Side Tipping Wagon - W. G. Allen & Sons (Tipton) Ltd
Built by W. G. Allen & Sons (Tipton) Ltd., Tipton, Staffordshire, England. This vehicle was used on the construction of dams, etc., and the Jindivick tunnel at Tarago in Gippsland for the state Rivers & Water Supply Commission of Victoria. The small wheel located on the side ran up a suitably located ramp automatically tipping the hopper and emptying the contents. Historic - Industrial Narrow Gauge Railway - side tipping wagon used by the State Rivers & Water Supply Commission of Victoria - Jindivick tunnel at Tarago, Victoria, AustraliaSide Tipping Wagon made of Iron, steel and wrought ironpuffing billy railway, pbr, side tipping wagon - w. g. allen & sons (tipton) ltd, puffing billy, side tipping wagon, w. g. allen & sons (tipton) ltd, jindivick tunnel, state rivers & water supply commission of victoria -
Port Melbourne Historical & Preservation Society
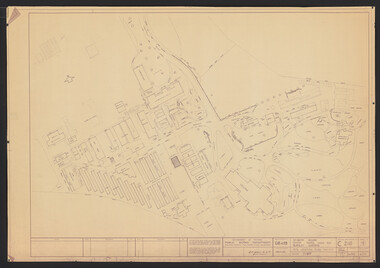
Map, G S Williams, City Engineer, City of Port Melbourne, Dec 1963
Map of City of Port Melbourne (brick areas marked in colour), 1963.G. S. Williams (City Engineer)town planning, g s williams, troedel and cooper -
Tatura Irrigation & Wartime Camps Museum
Photograph - original, G. Haire photographer, 1946
Original photograph of grades V1 and V11 Tatura state School No. 1441. Copy L0253Black and white photograph of Tatura State School Group No. 1441. Original photographon back: Photographers name "G. Haire" -
Stawell Historical Society Inc
Map, G C Birch Mining Surveyor, Magdala Cum Moonlight Co. Plan of Stawell Goldfield, c1900
Shows Sloanes & Scotchmans Coy AreaShowing underground drives. c1900G C Birch Mining Surveyor mining, gold, map -
 Phillip Island and District Historical Society Inc.
Sketch
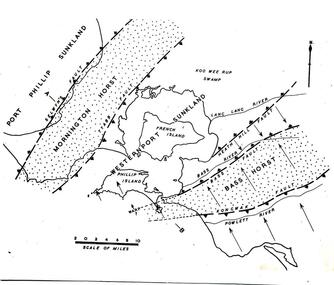
One of a collection of over 400 sketches & photographs in an album commenced in 1960 and presented to the Phillip Island & Westernport Historical Society by the Shire of Phillip IslandSketch Map of Westernport region and environs showing physiographical faults and warps. Drawn by Dr G Bakerlocal history, illustrations, pen & ink, westernport region, black & white sketch, physiography, dr g baker, e s hill d.sc, john jenner, bryant west -
 Flagstaff Hill Maritime Museum and Village
Domestic object - Bowl, J & G Meakin, Late 19th or early 20th Century
The Process of Making Pottery Decorating, Firing, Glazing, Making, Technical There is a rhythm and flow to clay. It can’t be done all at once! Even the making process! It can take weeks to get everything done, especially if you can only work on your pottery once a week! Even though we have three hour classes, it’s often just not enough time! Here is an overview of some of the processes so you have a bit more grasp on some of the technical stuff! Step One – Design There are SO many ideas out there for making stuff in clay! From delicate porcelain jewellery, through to heavy sculptural work and everything in between. Deciding your direction is sometimes not that easy – when you first start, try everything, you will naturally gravitate to the style that you enjoy! The options and variations are endless and can get a wee bit overwhelming too! Check in with me before you start to ensure your ideas will work, what order you might do things, how you could achieve the look you are seeking and any other technical data required! Step Two – Making Clay is thixotropic. This means that as you work with it, the clay first gets sloppier and wetter, before is begins to dry in the atmosphere. For most things, you simply can’t do all parts of the project at once. An example of work order might look like: Get last weeks work out from the shelves Prepare clay for today’s work – roll your clay, prepare balls for throwing, make the first stage of a pinch pot) Clean up last week’s work and put it on the shelf for bisque firing Check that you have any glazing to do – and do enough of it that you will have time to finish your main project Do the next step of your next project – there might be a further step that can’t be complete immediately, in that case, wrap your work well and put onto the shelves. Letting your work rest for a while can really help keep your work clean and professional looking. Many things require bagging under plastic to keep it ready for work the next week – put your name on the outside of the bag so you can find your work easily. We have stickers and markers. Consider how you want to decorate your work – coloured slip can be applied at a fairly wet stage (remembering that it will make your work even wetter!). Trying to apply slip to dry clay won’t work! If you want to do sgraffito – you will need to keep the work leather hard (a state of dryness where you can still work the clay with a little effort and a little water and care). Step Three – Drying Most of the time your work can go into the rack uncovered to let it dry out for the following week. If you want to continue forming or shaping you will need to double bag your work – put your work on a suitable sized bat and put the bat in a bag so the base of the bag is under the bat, then put another bag over the top of the work and tuck the top of the bag under the bat. If you want to trim (or turn) your thrown work the following week, it should also be double bagged. If your work is large, delicate, or of uneven thicknesses, you should lightly cover your work for drying. When considering the drying process, bare in mind the weather, humidity and wind! The hotter and dryer, the faster things dry and work can dry unevenly in the shelves – this can lead to cracking – another time to lightly cover your work for drying. Step Four – Trimming and Cleaning Up Your work is dry! It is called greenware now and it is at it’s most fragile! Handle everything with two hands. I often refer to soft hands – keep everything gentle and with your fingers spread as much as possible. Try to not pick up things like plates too much, and always with both hands! Before your work can be bisque fired it should be “cleaned up”. You work won’t go into the kiln if it has sharp edges – when glazed, sharp edges turn into razor blades! Use a piece of fly wire to rub the work all over – this will scratch a little so be light handed. Use a knife or metal kidney to scrape any areas that require a bit more dynamic treatment than the fly wire offers! Finally, a very light wipe over with a slightly damp sponge can help soften and soothe all of your edges and dags! Trimming thrown work: If you are planning to trim (or turn) your thrown work (and you should be), make sure you bag it well – your work should be leather hard to almost dry for easiest trimming. Use this step to finish the work completely – use a metal kidney to polish the surface, or a slightly damp sponge to give a freshly thrown look. Wipe the sponge around the rim after trimming, and check the inside of the pot for dags! Trimming slip cast work: Usually I will trim the rims of your work on the wheel the following day to make that stage easier, however you will still need to check your work for lumps and bumps. Last but not least – check that your name is still clearly on the bottom of your work. Step Five – Bisque Firing When the work is completely dry it can go into the bisque kiln. The bisque kiln is fired to 1000°C. This process burns off the water in the clay as well as some of the chemically bound water. The structure of the clay is not altered that much at this temperature. Inside the bisque kiln, the work is stacked a little, small bowl inside a larger bowl and onto a heavy plate. Smaller items like decorations or drink coasters might get stacked several high. Consideration is paid to the weight of the stack and shape of the work. A bisque kiln can fire about one and a half times the amount of work that the glaze kiln can fire. The firing takes about 10 hours to complete the cycle and about two days to cool down. Once it has been emptied the work is placed in the glaze room ready for you to decorate! Step Six – Glazing Decorating your work with colour can be a lot of fun – and time consuming! There are three main options for surface treatment at this stage: Oxide Washes Underglazes Glazes Washes and underglazes do not “glaze” the work – It will still need a layer of glaze to fully seal the clay (washes don’t need glaze on surfaces not designed for food or liquid as they can gloss up a little on their own). Underglazes are stable colourants that turn out pretty much how they look in the jar. They can be mixed with each other to form other colours and can be used like water colours to paint onto your work. Mostly they should have a clear glaze on top to seal them. Oxides are a different species – the pink oxide (cobalt) wash turns out bright blue for instance. They don’t always need a glaze on top, and some glazes can change the colour of the wash! The glazes need no other “glaze” on top! Be careful of unknown glaze interactions – you can put any combination of glaze in a bowl or on a plate, but only a single glaze on the outside of any vertical surface! Glazes are a chemical reaction under heat. We don’t know the exact chemicals in the Mayco glazes we use. I can guess by the way they interact with each other, however, on the whole, you need to test every idea you have, and not run the test on a vertical surface! Simply put, glaze is a layer of glass like substance that bonds with the clay underneath. Clay is made of silica, alumina and water. Glaze is made of mostly silica. Silica has a melting point of 1700°C and we fire to 1240°C. The silica requires a “flux” to help it melt at the lower temperature. Fluxes can be all sorts of chemicals – a common one is calcium – calcium has a melting point of 2500°C, however, together they both melt at a much lower temperature! Colourants are metal oxides like cobalt (blue), chrome (green through black), copper (green, blue, even red!), manganese (black, purple and pink) iron (red brown), etc. Different chemicals in the glaze can have dramatic effects. for example, barium carbonate (which we don’t use) turns manganese bright pink! Other elements can turn manganese dioxide brown, blue, purple and reddish brown. Manganese dioxide is a flux in and of itself as well. So, glazes that get their black and purple colours, often interact with other glazes and RUN! Our mirror black is a good example – it mixes really well with many glazes because it fluxes them – causes them to melt faster. It will also bring out many beautiful colours in the glazes because it’s black colouring most definitely comes from manganese dioxide! Glaze chemistry is a whole subject on it’s own! We use commercial Mayco glazes on purpose – for their huge range of colour possibilities, stability, cool interactions, artistic freedom with the ability to easily brush the glazes on and ease of use. We currently have almost 50 glazes on hand! A major project is to test the interactions of all glazes with each other. That is 2,500 test tiles!!!! I’m going to make the wall behind the wheels the feature wall of pretty colours! Step Seven – Glaze (Gloss or sometimes called “Glost”) Firing Most of the time this is the final stage of making your creation (but not always!) The glaze kiln goes to 1240°C. This is called cone 6, or midrange. It is the low end of stoneware temperatures. Stoneware clays and glazes are typically fired at cone 8 – 10, that is 1260 – 1290°C. The energy requirement to go from 1240°C to 1280°C is almost a 30% more! Our clay is formulated to vitrify (mature, turn “glass-like”) at 1240°, as are our glazes. A glaze kiln take around 12 hours to reach temperature and two to three days to cool down. Sometimes a third firing process is required – this is for decoration that is added to work after the glaze firing. For example – adding precious metals and lustres. this firing temperature is usually around 600 – 800°C depending upon the techniques being used. There are many students interested in gold and silver trims – we will be doing this third type of firing soon! After firing your work will be in the student finished work shelves. Remember to pay for it before you head out the door! There is a small extra charge for using porcelain clay (it’s more than twice the price of regular clay), and for any third firing process! Once your work has been fired it can not turn back into clay for millennia – so don’t fire it if you don’t like it! Put it in the bucket for recycling. https://firebirdstudios.com.au/the-process-of-making-pottery/This bowl was made by renowned pottery company J & G Meakin of England. The firm was established in the mid-1800's. The bowl is an example of kitchenware used in the 19th century and still in use today.Bowl; white ceramic, round and tapering inwards towards base. Made by J and G Meakin England.On base, 'Ironstone China Reg SOL 391413' with symbolflagstaff hill, flagstaff hill maritime museum and village, warrnambool, maritime museum, maritime village, great ocean road, shipwreck coast, mixing bowl, food preparation, j & g meakin, pottery, stoke-on-trent, kitchen equipment, ceramic -
 Flagstaff Hill Maritime Museum and Village
Bowl, J & G Meakin
Large white ironstone china bowl. Made by J & G Meakin. Hanley England. 15' in diameter.flagstaff hill, warrnambool, shipwrecked-coast, flagstaff-hill, flagstaff-hill-maritime-museum, maritime-museum, shipwreck-coast, flagstaff-hill-maritime-village, china bowl, bowl -
 University of Melbourne, Burnley Campus Archives
Plan, M. Drake et al, Site Location Plan of Incubator Building and Random Sample Laying Test for Burnley Gardens, 1967
Plan by Public Works Dept., Melbourne. M. Drake (draughtsman), R. G. Wilson, Chief Architect.m. drake, g.r. wilson -
 Ringwood and District Historical Society
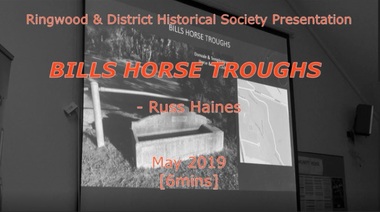
Mixed media - Video, RDHS Meeting Presentation - "G & A Bills Horse Troughs" - Russ Haines
Digitised video (339MB). Duration: 6 minutes. Recorded May, 2019 (Video is available for viewing at Ringwood & District Historical Society Archives by appointment)In this talk, Ringwood and District Historical Society President Russ Haines takes us through a brief history of George and Annis Bills horse troughs, manufactured in Australia and installed to provide relief for working horses in the first half of the 20th century. Around 700 troughs were originally distributed throughout Australia and overseas, some still existing locally today. -
 Kiewa Valley Historical Society
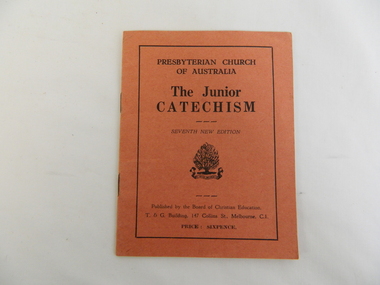
Book - Religious Education, The Junior Catechism
Catechism was taught at Sunday School by most Christian religions during the 1950s. Students attended Sunday School classes at the Kergunyah Presbyterian Church. Sunday school was held in a little 16 foot square wooden building which came from Rocky Valley after it was no longer needed there. Ewen Wallace's father initiated and organised the move. C2011 the building was knocked down because of white ants. The Presbyterian Church will be 125 years old in 2015.Historical: Religious Education: This book was used by students who attended the Sunday School classes at Kergunyah Presbyterian Church. Religion: Presbyterian Church at Kergunyah, in the Kiewa Valley, celebrates its 125th anniversary in 2015 after being handed over to the Uniting Church in the 1970s.Small, thin, orange booklet with black print on cover - for title. Also in black a tree with 'ribbon' underneath inside which are 2 Latin words. 16 pages inside thin cardboard cover. On back cover "B.C.E. Publications" Listed with price.Title and "Presbyterian Church of Australia Price: Sixpence. Seventh New Edition"religion, kergunyah, ewen wallace, catechism, presbyterian church, religious education, sunday school -
Glenelg Shire Council Cultural Collection
Mixed media - Oral History Interview - Borthwick's, George Wallace Interview - Borthwick's, c. 2014
DVD - unedited. Interview with George Wallace. Unedited interviews with former Borthwicks workers. These interviews appear in the DVD on Borthwicks, launched 5 DEC 2014. Interviews conducted by Gary Kerr and filmed by Noel Waugh.thomas borthwick and sons, oral history interview, employee -
Whitehorse Historical Society Inc.
Pamphlet, George Cox cares for Mitcham
George Cox, state member for Mitcham and foundation member and past president of Blackburn and District Tree Preservation SocietyGeorge Cox, state member for Mitcham and foundation member and past president of Blackburn and District Tree Preservation Society has put out a pamphlet recommending a selection of Australian plants known to thrive in this area.George Cox, state member for Mitcham and foundation member and past president of Blackburn and District Tree Preservation Societynative plants, cox, george, blackburn and district tree preservation society -
 Greensborough Historical Society
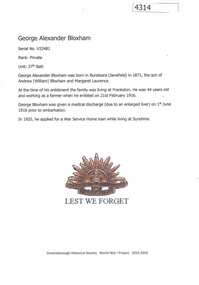
Article, Greensborough Historical Society et al, George Alexander Bloxham, 1914-1918
A short article about George Alexander Bloxham and his service in World War 1. George Alexander Bloxham was born in Bundoora.1 Page, text and colour images.world war 1 project, george alexander bloxham -
City of Moorabbin Historical Society (Operating the Box Cottage Museum)
Booklet - Cheltenham Church of Christ - Our Heritage - The History of the Cheltenham Church of Christ, by K. G. Hilbig and G. L. Daff, 1970
Cheltenham Church of Christ was opened in 1878 and is still in use today. Built on Chesterville Road, Cheltenham.Cheltenham Church of Christ was opened in 1878 and was integral to the spiritual well being and social life of the early settlers.Booklet 10 pages with typed textearly settlers, parish of moorabbin, city of moorabbin, county of bourke, shire of moorabbin, market gardeners, cheltenham, nepean highway, church of christ cheltenham, religion, chesterville road -
Moorabbin Air Museum
Manual (item) - Vickers Warwick C. Mk. 3 Aircraft Manual, Warwick C. Mk. III Aircraft Two Double Wasp Engines (S1-A4-G or 2SB-G)
-
 Inverloch Historical Society
000045 - Photograph - Luna Park - circa1932 - G N Howsam - L G Howsam
-
Moorabbin Air Museum
Booklet (Item) - Warwick C. Mk III Aircraft ,Two Double Wasp Engines (S1-A4-G Or 2SB-G)
A.P. 2068B Volume 1 -
Moorabbin Air Museum
Manual (Item) - Bell Model 47 Helicopter Maintenance and Overhaul Manual, Models 47 D-1, G, & G-2
-
 Greensborough Historical Society
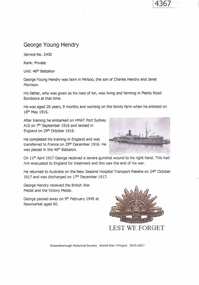
Article, Greensborough Historical Society et al, George Young Hendry, 1914-1918
A short article about George Young Hendry and his service in World War 1. At the time of his enlistment, George was living at BundooraOne page, text and colour images.world war 1 project, george young hendry -
 Anglesea and District Historical Society
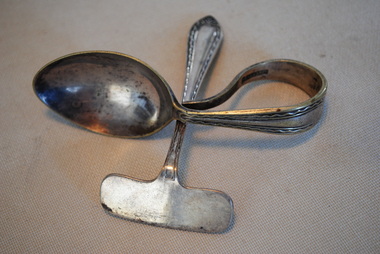
Toddler's Spoon and Pusher Cutlery, G & E Rodd
Silver spoon with easy-to-grasp handle with a loop. Silver pusher with a flat piece at right angles to the handle - to be held in left hand. It is used to push food onto the spoon. Rodd were established by George Rodd in 1919. Early name of company was G & E Rodd. Their markings had trade name Apex. When it became a public company in 1945 the marking was changed to Rodd. The business continued until 1985 - merged with Grosvenor and later Mytton.Spoon: APEX EPNS A1 Pusher: RODD EPNS A1.toddler's cutlery -
 Greensborough Historical Society
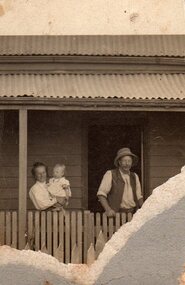
Photograph - Digital image, George Stock and family 1909, 1909_
George Stock and family 1909 (left to right) Jane Finn and son George, George William Stock. House in Main Street near bridge over river. Photographs from the collection of Peter Blackbourn, a descendant of the Chapman Stock family. Annotations to photos by Peter Blackbourn.Digital copy of black and white photograph.peter blackbourn, george willam stock, jane stock (nee finn), george stock -
 Ballarat Tramway Museum
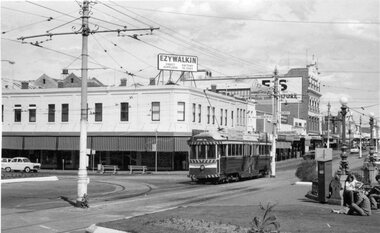
Photograph - Black & White Photograph/s - set of 2, George Bishop, Dec. 1971
Set of two Black and white photographs of Bendigo No. 3 leaving Charing Cross for Quarry Hill 12/1971. Photos by George Bishop. Both have the Ezywalkin sign and building in the background and people sitting on the ground by the fountain.On the back of two of the photos in ink or pencil "No. 3, Charing Cross December/ G. Bishop photo" On the rear of .2 is a label "No. 3 at Charing Cross Bendigo, December 1971"tramways, trams, bendigo, charing cross, tram 3 -
 Linton and District Historical Society Inc
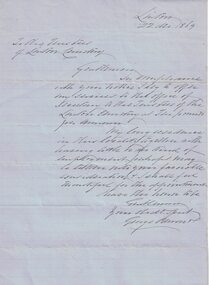
Letter, George Bennett to Linton Cemetery Trustees, 1869
Letter handwritten on pale blue, foolscap-size, lined paper. The writer, George Bennett, of Linton, is offering his services as Secretary to the trustees of the Linton Cemetery. The letter is dated "Linton / 22 (month indecipherable) 1869".linton cemetery trustees, george bennett, correspondence, letters, job applications -
 Uniting Church Archives - Synod of Victoria
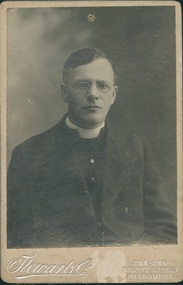
Photograph, Stewart & Co, C. 1908
G. S. Brett (unknown - 1934) was ordained in 1894, having attended college at Oberlin, Ohio (USA) and was a congregational minister in Brighton, 1900 - 1911.Matte black and white, head and shoulders studio portrait of Rev. G. S. Brett on buff card.Handwritten on back: "Rev G. S.Brett Brighton Cong."g s brett, congregational minister, congregational church brighton victoria