Showing 1015 items matching "cycle"
-
 Melton City Libraries
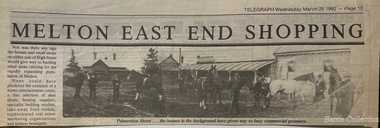
Newspaper, Melton East end shopping, 1992
TOM COLLINS–from the reel to reel tape recording at Melton 1969 In the years between 1890 and to about 1913 Melton was a quiet little hamlet alongside the Toolern Creek, once called the Pennyroyal Creek, 24 miles from Melbourne on the Ballarat Road. There was a fair amount of woodland left around it, mostly grey and yellow box with sheoak, and golden wattle, which in spring time made a rather attractive setting. Most of the premises were in the main or High Street, with its line of elm and pepper trees on each side. Unitt, McKenzie and Henry streets each contained only a few dwellings. Hotels were four in number, Minns’s, Mrs Hay licencee, now Mac’s, Golden Fleece – Sheblers. The Royal or Ryan’s as it was then called, later Graham had the licence, and the Raglan - Kilpatricks had the licence and afterwards Tom Manning. This was situated about where Mr K. Young had his residence. There was a store attached to the hotel until about 1900. Both the Royal and the Raglan were delicensed, later on the Royal being converted to a green grocery and a boarding house, the Raglan was demolished. The Royal green grocery and boarding house was kept by E Carew and after he retired, E Radford. The Post and Telegraph Office was on the opposite side of the street to the Raglan Hotel about two doors west of the Shire Hall and was kept by Mrs Ferris and Lady Farmer until her retirement, when it was carried on by Miss Lottie Ross. A store was attached to the Post Office and was sometimes used as a store and at one time housed the National Bank. There were two full time banks at Melton, the other being the Commercial which built premises about 1904 and on the corner of High and Smith Streets, which it still occupies. Mr G Egan was the manager of the Commercial and Mr Stradling and later Mr Lee of the National. However as business was not thought good enough they reverted to a part time branch operated from Bacchus Marsh. Grocer shops were Chalmers, with a news agency and drapery now Arnolds, Jongebloeds had the bakery. Mr Fox also a produce merchant, was where Melton Real Estate is now, it was later occupied by Buchanans, Atleys, and Mrs Ross. Not long after the War Mrs Ross built the Post Office, since demolished where Miss Lottie Ross was the Post Mistress and later built the store which she conducted. It was later turned into a factory and in now the barbers shop. McNichols was just west of the Minns Hotel. He travelled as far a Ballan weekly, buying calves and dairy produce for sale in Melbourne. Afterwards he sold the business and bought Minns Hotel and changing the name to Macs. Blacksmiths were three in number. Blackwoods – later James Byrnes next door to Jongebloeds. Alex Cameron who learnt his trade with Blackwoods had his shop about the rear of where Ken Youngs Garage is now he later moved to the north west corner of High and Alexander Street. He was also the Registrar of Birth and Deaths and Electoral Registrar. After his retirement he was weighbridge keeper at Melton South. Two of his sons were engaged in the carpentry trade, but both died at an early age. Whittingtons shop was a few doors east of the Mechanics Hall and it was later occupied by Gordon Macdonald who did business there until about eight years ago. The butchers of the period were George Graham, that is where Mandy Lees hairdressing establishment is now. Euan MacDonald had premises later occupied by Whittingtons blacksmith shop. Later shifting next door. He left here about 1901, he slaughtererd animals at a slaughter house right where Chas Jones now resides, it had previously been a slaughter house and butcher shop of that site. George Spring also operated as a butcher for two or three years about the 1900 or so. Ted Simpsons shop was where John Kontek now has his Estate Agency, he used it as an branch shop from Bacchus Marsh bringing meat from there by a two horse lorry. Jimmy Butler the manager was well known and loved, his son was later a steeplechase jockey. The Court House and Police Station would be built sometime before 1900. The Constables at the time were McGuire, later Wade, Riely and McKenzie after that Robert Wilson and Seinfort were here, they were a bit later on. The Mechanics Hall was first opened by Ryan of the Royal Hotel who sold it to the Hall Committee. It was on Unitt Street and it was moved by McLellans the house shifters from Unitt Street to its present site. Bluestone premises formerly occupied by the bootmaker Carew, were later demolished and replaced by the brick frontage to the Hall. Keith Orensini [?] the local bricklayer built brick portion to the Hall. In the cottage adjoining the Hall a Frenchman named Baudin, had a boot repairing business.This cottage was the later residence of J Hill, a local carpenter and builder from whom I learnt my trade. Granny Watts was the well known local nurse and operated the Mid-Wifery Hospital in Yuille Street on the Sherwin Street corner. Mrs Nissen was on the opposite side of Yuille Street a short distance nearer the township. She conducted the laundry. Carew had a greengrocers shop next door to the Post Office in the High Street for some time before transferring to the Royal Hotel site. He also bought [?] calves for killing. W Cecil was a tank maker and also had a produce round, he lived on Pyke and Sherwin Street. Later Gus Shebler, builder and carpenter engaged in tank making being well known for good workmanship. Shebler was very energetic in forming the Gun Club which met for a good number of years where the golf course now has its headquarters. Of the four churches only three are in use, Christ Church, Scots and St Dominics. The Methodist closed down but later transferred to Melton South. Monthly stock sales were held at the yards in Unitt Street at Minns Hotel by McPhail Auctioneers, later held by McCarthur and McLeod. After the Council built the pound and sale yards they transferred sales to these premises, but lack of patronage caused them to be abandoned. A familiar sight in the district was blind Bob Nixon, who lived in a tumbled down cottage in Centenary Road near W Coburns, being led by his dog down the road to Melton, that is Palmerston street, to the Post Office, butcher and baker for his supplies and then back home. He was able to do his own cooking and other chores. Sundays he would come down Raleighs Road to the back of the church and tie his dog to a tree. Someone, mostly one of the boys would guide him into the church and out again after the service, when the dog would lead him home again. State School 430, a two roomed bluestone building it was the only school in the district, none at Melton South. The nearest would be Rockbank and Toolern Vale. Scholars had a fair distance to walk in most cases. The teachers were Mr T Lang Headmaster. I put a query here, Miss Winters, I’m not certain of the name, Mrs Skinner and Miss Silke as Assistant Teachers. Miss Augusta Cecil and Miss Maud Lang were Junior teachers. One boy who attended the school about the turn of the century was Hector Fraser who resided with his parents in Keilor Road, where Jim Gillespie now lives. He was an excellent gun shot and at the age of about 17 years his father took him to France or Monaco where he won the Gran Prix for pigeon shooting and became the champion boy shot of the world. However he died there from pneumonia. He shot under the name of “Parvo”. The Melbourne Hunt Club used to meet in Keilor Road north side just east of the Toolern Creek on what was originally Pykes Run. This was also the place where the races were held and the Sports Meetings. Dave Murphy, employed at Clarke’s Rockbank Station usually provided the fox which he liberated for the Club. Greyhound coursing was usually held on Moylans property Mt Kororoit, or Mt Misery as it was known then. Later it was held at Melton Park, Mr Matt Carberry was the judge and Percy Cook the slipper. Early in the 1900’s the Recreation Park was created and the Caledonian and the ANA sports meetings were held there, they were annual events. L Paterson from Melton South was a successful competitor in all the cycling events as a young man. He later in life became the Deputy Chief Officer of the Metropolitan Fire Brigade. The present Chief Officer of the Fire Brigade is John Paterson, nephew of his, and spent his early life in Exford where his father was manager of the Exford Estate. Notes Tom Collins was born c 1895. He lived on the south side of the Ballarat Road near the intersection of Keilor Road.Historical image of Palmerston Street in Meltonlocal architecture, landscapes of significance -
 Eltham District Historical Society Inc
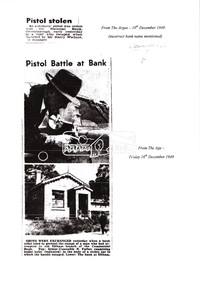
Folder, Commercial Bank of Australia Eltham Branch Hold-Up, 15 December 1949
Thursday, December 15, 1949, the quiet little bank was embroiled in an infamous wild shoot-out between a daring thief and two bank officers. Today, the building still carries the scars ; a bullet hole remains visible in a cedar bench testifying to the events that played out that day. 3.30 a.m., Friday, December 9. The manager of the Commercial Bank branch at Greensborough, Mr Harry Wallace and his wife are asleep in their bedroom of the little house behind the branch. Harry is awakened by a noise and sees an intruder in a corner of the bedroom. He calls out but the intruder who has switched off the power in anticipation flees through a side door and scarpers down Main Street. Harry summons the police but a search by First Constable Thomas of the Greensborough Police assisted by a wireless patrol car is unsuccessful. A report is filed noting the theft of a .25 calibre pistol from the wardrobe. Thursday, December 15th. It is 1pm and the Commercial Bank has just opened. The branch is only open Mondays and Thursdays from 1-3pm. The morning started off a little cool with some scattered showers but it has fined up and the temperature is now around 61 degrees (16 C). A new grey Singer sports car with soft-top pulls up on the opposite side of the road and a young man, neatly dressed in a dark blue suit, wearing a grey hat and carrying a brief case exits the vehicle. He looks around then crosses the road and walks up the steps and through the door into the bank. There are three people inside; Mr. Jack Burgoyne whose grocery store is situated just 50 yards up the road, Mr. Lindsay A. Spears, the Eltham Agency Receiving Officer and by chance, Mr Harry Wallace, manager of the Greensborough branch. Jack Burgoyne takes note of the young stranger; thinking to himself he appears nervous. The man approaches the counter and introduces himself as John Henderson of Greensborough and explains that he wishes to open a new account. He places his hat and £3 on the counter. Mr Spears attends to the paperwork. He asks the young man to sign two forms, which he does but then he withdraws from the counter and starts walking towards the door. Suddenly he spins around pulling an automatic pistol from his right-hand pocket. He exclaims forcefully; “The game’s on! I’ll take the lot!” Spears appears to comply by pretending to open a drawer. The man shouts loudly, “Keep your hand away from that drawer.” Spears instead reaches for a pistol in his pocket and challenges the man, “Here it is. Come and get it!” At the same time, Harry Wallace pulls a pistol from his pocket as well. The bandit fires a shot but misses, the bullet striking the counter. Both Spears and Wallace open fire and Jack Burgoyne ducks for cover. As the bandit turns and runs for the door leaving his £3 behind, he fires another shot, which strikes the ceiling. Spears fires back, and thinks he may have hit him in the foot. The bandit flees the bank and heads for the grey Singer car, registration NO-106, parked opposite. Wallace and Spears pursue him to the door and open fire again, striking the car three times around the driver’s door. Spears lets off eight shots and Wallace, seven before his gun jams. The getaway car initially heads slowly down Main Road towards Bridge Street. About 100 yards down the road, Dave Adams, a PMG employee, who has heard the shots, throws a steel manhole step at the driver. It hits the roof of the car nine inches above the driver’s head and tears the hood. Another witness claims to have seen the door blow open and the driver raise his hand. The car gathers speed and swings left into Bridge Street racing along at about 60 miles an hour careering recklessly past council employee, Mr. Percy Williams, who is driving a dray along Smarts Road [believed to be Bridge Street]. At the end of the road the Singer fails to get round the sharp turn and crashes into an embankment skidding to a stop outside the home of Mr John Clifford. One side of the car is wrecked. Mr Clifford, an aircraft engineer hears the fast travelling car bump heavily into the road bank at about 1.25 p.m. Hearing the whine of an engine he goes outside to find the grey Singer parked at the side of the road. Jack George also lives at the corner and hears the car crash. “The bandit opened the car door, ran 50 yards, and suddenly turned back,” exclaims Jack. “He took something from the car. It might have been a gun.” In his haste, the bandit drops his grey felt hat, size 6 7/8, on the road and dashes up Sherbourne Road for about 200 yards then disappears into the scrub carrying a brief case and a bundle in which a sailor’s cap can be seen. About 3 p.m., Mr H.D. Pettie of Mountain View Road, Montmorency is looking through his field glasses and notices a young man walking through thick scrub on private property some distance from his house. The man is wearing a sailor’s cap and disappears along the railway track toward Montmorency. As the day progresses, ten police cars, one motor cycle, and about 40 police led by Det. Sgt. McMennemin of Malvern CIB are searching for him. They believe he is hiding in thick scrub along the bank of the creek about half-a-mile outside Eltham township. Wireless patrol cars, four mobile traffic cars and the CIB area cars from Malvern and Kew are taking part. Police check the thief’s car and discover it was stolen from Helen Baxter, of Doncaster Road, North Balwyn from outside Victoria Barracks. Harry Wallace informs the police that he believes he recognised the bandit as the man who took his pistol from his bedroom the previous Friday morning. As night falls, armed police are posted at strategic points in the Eltham-Greensborough district. Police in cars are watching the roads. Others are searching the bush and checking passengers on trains. Little do they realise the young man has already slipped out of the net. SEQUEL YOUTH OF 19 CHARGED WITH ATTEMPTED ARMED ROBBERY OF BANK AT ELTHAM Weekly Times, Wednesday 15 February 1950, page 6 Detectives who raided a house in Bell St., Coburg, Melbourne, charged a 19-year-old youth, of South Yarra, with attempted armed robbery at the Commercial Bank’s Eltham (Vic.) receiving depot on Dec. 15. Police say they recovered a loaded automatic pistol, diamond and signet rings worth more than £200, a complete set of house-breaking instruments, a sailor’s uniform, and chloroform gauze in the raid. The youth was charged that while armed with an offensive weapon, he attempted to rob Lindsay George Spears of a sum of money. He was further charged on six counts of breaking, entering and stealing. Police allege that the person who tried to hold up Mr Spears in the Commercial Bank receiving depot at Eltham on December 15. escaped in a stolen car, after Mr Spears and Mr Henry Wallace, manager of the bank’s Greensborough branch, had fired at him. After the car crashed, he escaped into thick scrub and is alleged to have changed into a sailor’s uniform. On December 9 an automatic pistol was stolen from Mr Wallace’s bedroom at the Greensborough bank. The chloroform pad recovered is alleged to have been stolen from the Dental Supply Company, Plenty Road, Preston. The rings are alleged to have been taken in a £513 burglary from the shop of James Paton. Sydney Road, Coburg. Det. Sgt. H. McMennemin conducted the investigations with Senior Dets. R. Newton and M Downie, Detectives l. Dent, R. Rayner, P. Pedersen and M. Handley and First Constable A. Thomas. The youth will appear at Eltham Court on February 22. Manager’s Gun Used in Holdup at Bank The Age, Thursday 23 February 1950, page 4 It was stated in Eltham court yesterday that a youth who robbed a bank manager of his pistol, later used it in an attempt to hold-up the bank. Kay Arthur Morgan, 19, draftsman, of Castle-street, South Yarra, was committed for trial on charges of breaking and entering, and stealing a pistol and attempted robbery while armed with an offensive weapon. He pleaded guilty. The manager of Eltham branch of the Commercial Bank of Australia Ltd., Henry Clifton Cabot Wallace, said he disturbed someone in the bedroom, in which he and his wife were sleeping, at 3 a.m. on December. 9, 1949. Later he found that his automatic- pistol was missing. On December 15 a youth, who said his name was John Henderson, entered the bank and opened a new account. As the youth was leaving the bank he turned round with a pistol in his hand and said: — “I want the lot.” Spear indicated a drawer under the counter; and said.— “Here it is. Come and get it.” The youth said:— “Keep your hand away from that drawer.” Witness said Spear then drew his pistol from his hip pocket. The youth fired at them, and Spear returned the fire. “I pulled my pistol and fired, too” said witness. The youth fired again, ran out to a car and drove off. Witness and Spear fired several shots at the car. The youth was the accused Morgan, sitting in court, witness said. Evidence was given that one bullet was found in the celling and the other in the bank. Morgan was allowed £100 bail on each charge. Morgan ended up serving three years for the failed armed robbery and became a notorious criminal. He had twin sons, Peter and Doug and even though only ten years old, Morgan would get his sons to act as lookouts whilst he committed burglaries. The lads became building contractors but when the industry suffered a downturn in 1977 and they were short on cash, they returned to the family business. Over the following 23 months they undertook 24 raids on country and outer-suburban TABs and banks. Whilst robbing one country bank for the third time, just like their father, it all went wrong ending up with a police officer shot. They were nick-named the “After-dark” bandits and are considered to be Australia’s last bushrangers. They were convicted and served 17 years in prison.5 x A4 photocopied pagesbank hold-up, cba bank, det sgt mcmennemin, eltham, h.d. pettie, harry wallace, jack burgoyne, kay arthur morgan, lindsay a. spears, main road -
 Flagstaff Hill Maritime Museum and Village
Domestic object - Bowl, Late 19th or early 20th Century
The Process of Making Pottery Decorating, Firing, Glazing, Making, Technical There is a rhythm and flow to clay. It can’t be done all at once! Even the making process! It can take weeks to get everything done, especially if you can only work on your pottery once a week! Even though we have three hour classes, it’s often just not enough time! Here is an overview of some of the processes so you have a bit more grasp on some of the technical stuff! Step One – Design There are SO many ideas out there for making stuff in clay! From delicate porcelain jewellery, through to heavy sculptural work and everything in between. Deciding your direction is sometimes not that easy – when you first start, try everything, you will naturally gravitate to the style that you enjoy! The options and variations are endless and can get a wee bit overwhelming too! Check in with me before you start to ensure your ideas will work, what order you might do things, how you could achieve the look you are seeking and any other technical data required! Step Two – Making Clay is thixotropic. This means that as you work with it, the clay first gets sloppier and wetter, before is begins to dry in the atmosphere. For most things, you simply can’t do all parts of the project at once. An example of work order might look like: Get last weeks work out from the shelves Prepare clay for today’s work – roll your clay, prepare balls for throwing, make the first stage of a pinch pot) Clean up last week’s work and put it on the shelf for bisque firing Check that you have any glazing to do – and do enough of it that you will have time to finish your main project Do the next step of your next project – there might be a further step that can’t be complete immediately, in that case, wrap your work well and put onto the shelves. Letting your work rest for a while can really help keep your work clean and professional looking. Many things require bagging under plastic to keep it ready for work the next week – put your name on the outside of the bag so you can find your work easily. We have stickers and markers. Consider how you want to decorate your work – coloured slip can be applied at a fairly wet stage (remembering that it will make your work even wetter!). Trying to apply slip to dry clay won’t work! If you want to do sgraffito – you will need to keep the work leather hard (a state of dryness where you can still work the clay with a little effort and a little water and care). Step Three – Drying Most of the time your work can go into the rack uncovered to let it dry out for the following week. If you want to continue forming or shaping you will need to double bag your work – put your work on a suitable sized bat and put the bat in a bag so the base of the bag is under the bat, then put another bag over the top of the work and tuck the top of the bag under the bat. If you want to trim (or turn) your thrown work the following week, it should also be double bagged. If your work is large, delicate, or of uneven thicknesses, you should lightly cover your work for drying. When considering the drying process, bare in mind the weather, humidity and wind! The hotter and dryer, the faster things dry and work can dry unevenly in the shelves – this can lead to cracking – another time to lightly cover your work for drying. Step Four – Trimming and Cleaning Up Your work is dry! It is called greenware now and it is at it’s most fragile! Handle everything with two hands. I often refer to soft hands – keep everything gentle and with your fingers spread as much as possible. Try to not pick up things like plates too much, and always with both hands! Before your work can be bisque fired it should be “cleaned up”. You work won’t go into the kiln if it has sharp edges – when glazed, sharp edges turn into razor blades! Use a piece of fly wire to rub the work all over – this will scratch a little so be light handed. Use a knife or metal kidney to scrape any areas that require a bit more dynamic treatment than the fly wire offers! Finally, a very light wipe over with a slightly damp sponge can help soften and soothe all of your edges and dags! Trimming thrown work: If you are planning to trim (or turn) your thrown work (and you should be), make sure you bag it well – your work should be leather hard to almost dry for easiest trimming. Use this step to finish the work completely – use a metal kidney to polish the surface, or a slightly damp sponge to give a freshly thrown look. Wipe the sponge around the rim after trimming, and check the inside of the pot for dags! Trimming slip cast work: Usually I will trim the rims of your work on the wheel the following day to make that stage easier, however you will still need to check your work for lumps and bumps. Last but not least – check that your name is still clearly on the bottom of your work. Step Five – Bisque Firing When the work is completely dry it can go into the bisque kiln. The bisque kiln is fired to 1000°C. This process burns off the water in the clay as well as some of the chemically bound water. The structure of the clay is not altered that much at this temperature. Inside the bisque kiln, the work is stacked a little, small bowl inside a larger bowl and onto a heavy plate. Smaller items like decorations or drink coasters might get stacked several high. Consideration is paid to the weight of the stack and shape of the work. A bisque kiln can fire about one and a half times the amount of work that the glaze kiln can fire. The firing takes about 10 hours to complete the cycle and about two days to cool down. Once it has been emptied the work is placed in the glaze room ready for you to decorate! Step Six – Glazing Decorating your work with colour can be a lot of fun – and time consuming! There are three main options for surface treatment at this stage: Oxide Washes Underglazes Glazes Washes and underglazes do not “glaze” the work – It will still need a layer of glaze to fully seal the clay (washes don’t need glaze on surfaces not designed for food or liquid as they can gloss up a little on their own). Underglazes are stable colourants that turn out pretty much how they look in the jar. They can be mixed with each other to form other colours and can be used like water colours to paint onto your work. Mostly they should have a clear glaze on top to seal them. Oxides are a different species – the pink oxide (cobalt) wash turns out bright blue for instance. They don’t always need a glaze on top, and some glazes can change the colour of the wash! The glazes need no other “glaze” on top! Be careful of unknown glaze interactions – you can put any combination of glaze in a bowl or on a plate, but only a single glaze on the outside of any vertical surface! Glazes are a chemical reaction under heat. We don’t know the exact chemicals in the Mayco glazes we use. I can guess by the way they interact with each other, however, on the whole, you need to test every idea you have, and not run the test on a vertical surface! Simply put, glaze is a layer of glass like substance that bonds with the clay underneath. Clay is made of silica, alumina and water. Glaze is made of mostly silica. Silica has a melting point of 1700°C and we fire to 1240°C. The silica requires a “flux” to help it melt at the lower temperature. Fluxes can be all sorts of chemicals – a common one is calcium – calcium has a melting point of 2500°C, however, together they both melt at a much lower temperature! Colourants are metal oxides like cobalt (blue), chrome (green through black), copper (green, blue, even red!), manganese (black, purple and pink) iron (red brown), etc. Different chemicals in the glaze can have dramatic effects. for example, barium carbonate (which we don’t use) turns manganese bright pink! Other elements can turn manganese dioxide brown, blue, purple and reddish brown. Manganese dioxide is a flux in and of itself as well. So, glazes that get their black and purple colours, often interact with other glazes and RUN! Our mirror black is a good example – it mixes really well with many glazes because it fluxes them – causes them to melt faster. It will also bring out many beautiful colours in the glazes because it’s black colouring most definitely comes from manganese dioxide! Glaze chemistry is a whole subject on it’s own! We use commercial Mayco glazes on purpose – for their huge range of colour possibilities, stability, cool interactions, artistic freedom with the ability to easily brush the glazes on and ease of use. We currently have almost 50 glazes on hand! A major project is to test the interactions of all glazes with each other. That is 2,500 test tiles!!!! I’m going to make the wall behind the wheels the feature wall of pretty colours! Step Seven – Glaze (Gloss or sometimes called “Glost”) Firing Most of the time this is the final stage of making your creation (but not always!) The glaze kiln goes to 1240°C. This is called cone 6, or midrange. It is the low end of stoneware temperatures. Stoneware clays and glazes are typically fired at cone 8 – 10, that is 1260 – 1290°C. The energy requirement to go from 1240°C to 1280°C is almost a 30% more! Our clay is formulated to vitrify (mature, turn “glass-like”) at 1240°, as are our glazes. A glaze kiln take around 12 hours to reach temperature and two to three days to cool down. Sometimes a third firing process is required – this is for decoration that is added to work after the glaze firing. For example – adding precious metals and lustres. this firing temperature is usually around 600 – 800°C depending upon the techniques being used. There are many students interested in gold and silver trims – we will be doing this third type of firing soon! After firing your work will be in the student finished work shelves. Remember to pay for it before you head out the door! There is a small extra charge for using porcelain clay (it’s more than twice the price of regular clay), and for any third firing process! Once your work has been fired it can not turn back into clay for millennia – so don’t fire it if you don’t like it! Put it in the bucket for recycling. https://firebirdstudios.com.au/the-process-of-making-pottery/ The bowl is an example of kitchenware used in the 19th century and still in use today.Bowl white ceramic. Crack on side. Badly stained.Backstamp very faint and unable to be read.flagstaff hill, warrnambool, shipwrecked-coast, flagstaff-hill, flagstaff-hill-maritime-museum, maritime-museum, shipwreck-coast, flagstaff-hill-maritime-village, mixing bowl, food preparation, kitchen equipment, ceramic -
 Flagstaff Hill Maritime Museum and Village
Domestic object - Bowl
The Process of Making Pottery Decorating, Firing, Glazing, Making, Technical There is a rhythm and flow to clay. It can’t be done all at once! Even the making process! It can take weeks to get everything done, especially if you can only work on your pottery once a week! Even though we have three hour classes, it’s often just not enough time! Here is an overview of some of the processes so you have a bit more grasp on some of the technical stuff! Step One – Design There are SO many ideas out there for making stuff in clay! From delicate porcelain jewellery, through to heavy sculptural work and everything in between. Deciding your direction is sometimes not that easy – when you first start, try everything, you will naturally gravitate to the style that you enjoy! The options and variations are endless and can get a wee bit overwhelming too! Check in with me before you start to ensure your ideas will work, what order you might do things, how you could achieve the look you are seeking and any other technical data required! Step Two – Making Clay is thixotropic. This means that as you work with it, the clay first gets sloppier and wetter, before is begins to dry in the atmosphere. For most things, you simply can’t do all parts of the project at once. An example of work order might look like: Get last weeks work out from the shelves Prepare clay for today’s work – roll your clay, prepare balls for throwing, make the first stage of a pinch pot) Clean up last week’s work and put it on the shelf for bisque firing Check that you have any glazing to do – and do enough of it that you will have time to finish your main project Do the next step of your next project – there might be a further step that can’t be complete immediately, in that case, wrap your work well and put onto the shelves. Letting your work rest for a while can really help keep your work clean and professional looking. Many things require bagging under plastic to keep it ready for work the next week – put your name on the outside of the bag so you can find your work easily. We have stickers and markers. Consider how you want to decorate your work – coloured slip can be applied at a fairly wet stage (remembering that it will make your work even wetter!). Trying to apply slip to dry clay won’t work! If you want to do sgraffito – you will need to keep the work leather hard (a state of dryness where you can still work the clay with a little effort and a little water and care). Step Three – Drying Most of the time your work can go into the rack uncovered to let it dry out for the following week. If you want to continue forming or shaping you will need to double bag your work – put your work on a suitable sized bat and put the bat in a bag so the base of the bag is under the bat, then put another bag over the top of the work and tuck the top of the bag under the bat. If you want to trim (or turn) your thrown work the following week, it should also be double bagged. If your work is large, delicate, or of uneven thicknesses, you should lightly cover your work for drying. When considering the drying process, bare in mind the weather, humidity and wind! The hotter and dryer, the faster things dry and work can dry unevenly in the shelves – this can lead to cracking – another time to lightly cover your work for drying. Step Four – Trimming and Cleaning Up Your work is dry! It is called greenware now and it is at it’s most fragile! Handle everything with two hands. I often refer to soft hands – keep everything gentle and with your fingers spread as much as possible. Try to not pick up things like plates too much, and always with both hands! Before your work can be bisque fired it should be “cleaned up”. You work won’t go into the kiln if it has sharp edges – when glazed, sharp edges turn into razor blades! Use a piece of fly wire to rub the work all over – this will scratch a little so be light handed. Use a knife or metal kidney to scrape any areas that require a bit more dynamic treatment than the fly wire offers! Finally, a very light wipe over with a slightly damp sponge can help soften and soothe all of your edges and dags! Trimming thrown work: If you are planning to trim (or turn) your thrown work (and you should be), make sure you bag it well – your work should be leather hard to almost dry for easiest trimming. Use this step to finish the work completely – use a metal kidney to polish the surface, or a slightly damp sponge to give a freshly thrown look. Wipe the sponge around the rim after trimming, and check the inside of the pot for dags! Trimming slip cast work: Usually I will trim the rims of your work on the wheel the following day to make that stage easier, however you will still need to check your work for lumps and bumps. Last but not least – check that your name is still clearly on the bottom of your work. Step Five – Bisque Firing When the work is completely dry it can go into the bisque kiln. The bisque kiln is fired to 1000°C. This process burns off the water in the clay as well as some of the chemically bound water. The structure of the clay is not altered that much at this temperature. Inside the bisque kiln, the work is stacked a little, small bowl inside a larger bowl and onto a heavy plate. Smaller items like decorations or drink coasters might get stacked several high. Consideration is paid to the weight of the stack and shape of the work. A bisque kiln can fire about one and a half times the amount of work that the glaze kiln can fire. The firing takes about 10 hours to complete the cycle and about two days to cool down. Once it has been emptied the work is placed in the glaze room ready for you to decorate! Step Six – Glazing Decorating your work with colour can be a lot of fun – and time consuming! There are three main options for surface treatment at this stage: Oxide Washes Underglazes Glazes Washes and underglazes do not “glaze” the work – It will still need a layer of glaze to fully seal the clay (washes don’t need glaze on surfaces not designed for food or liquid as they can gloss up a little on their own). Underglazes are stable colourants that turn out pretty much how they look in the jar. They can be mixed with each other to form other colours and can be used like water colours to paint onto your work. Mostly they should have a clear glaze on top to seal them. Oxides are a different species – the pink oxide (cobalt) wash turns out bright blue for instance. They don’t always need a glaze on top, and some glazes can change the colour of the wash! The glazes need no other “glaze” on top! Be careful of unknown glaze interactions – you can put any combination of glaze in a bowl or on a plate, but only a single glaze on the outside of any vertical surface! Glazes are a chemical reaction under heat. We don’t know the exact chemicals in the Mayco glazes we use. I can guess by the way they interact with each other, however, on the whole, you need to test every idea you have, and not run the test on a vertical surface! Simply put, glaze is a layer of glass like substance that bonds with the clay underneath. Clay is made of silica, alumina and water. Glaze is made of mostly silica. Silica has a melting point of 1700°C and we fire to 1240°C. The silica requires a “flux” to help it melt at the lower temperature. Fluxes can be all sorts of chemicals – a common one is calcium – calcium has a melting point of 2500°C, however, together they both melt at a much lower temperature! Colourants are metal oxides like cobalt (blue), chrome (green through black), copper (green, blue, even red!), manganese (black, purple and pink) iron (red brown), etc. Different chemicals in the glaze can have dramatic effects. for example, barium carbonate (which we don’t use) turns manganese bright pink! Other elements can turn manganese dioxide brown, blue, purple and reddish brown. Manganese dioxide is a flux in and of itself as well. So, glazes that get their black and purple colours, often interact with other glazes and RUN! Our mirror black is a good example – it mixes really well with many glazes because it fluxes them – causes them to melt faster. It will also bring out many beautiful colours in the glazes because it’s black colouring most definitely comes from manganese dioxide! Glaze chemistry is a whole subject on it’s own! We use commercial Mayco glazes on purpose – for their huge range of colour possibilities, stability, cool interactions, artistic freedom with the ability to easily brush the glazes on and ease of use. We currently have almost 50 glazes on hand! A major project is to test the interactions of all glazes with each other. That is 2,500 test tiles!!!! I’m going to make the wall behind the wheels the feature wall of pretty colours! Step Seven – Glaze (Gloss or sometimes called “Glost”) Firing Most of the time this is the final stage of making your creation (but not always!) The glaze kiln goes to 1240°C. This is called cone 6, or midrange. It is the low end of stoneware temperatures. Stoneware clays and glazes are typically fired at cone 8 – 10, that is 1260 – 1290°C. The energy requirement to go from 1240°C to 1280°C is almost a 30% more! Our clay is formulated to vitrify (mature, turn “glass-like”) at 1240°, as are our glazes. A glaze kiln take around 12 hours to reach temperature and two to three days to cool down. Sometimes a third firing process is required – this is for decoration that is added to work after the glaze firing. For example – adding precious metals and lustres. this firing temperature is usually around 600 – 800°C depending upon the techniques being used. There are many students interested in gold and silver trims – we will be doing this third type of firing soon! After firing your work will be in the student finished work shelves. Remember to pay for it before you head out the door! There is a small extra charge for using porcelain clay (it’s more than twice the price of regular clay), and for any third firing process! Once your work has been fired it can not turn back into clay for millennia – so don’t fire it if you don’t like it! Put it in the bucket for recycling. https://firebirdstudios.com.au/the-process-of-making-pottery/ This bowl is an example of kitchenware used in the 19th century and still in use today.Bowl white ceramic plain that has two sets of edging around lip. Inside bowl has plaster designed to look like cooking mixture.flagstaff hill, warrnambool, shipwrecked-coast, flagstaff-hill, flagstaff-hill-maritime-museum, maritime-museum, shipwreck-coast, flagstaff-hill-maritime-village, kitchen equipment, ceramic -
 Flagstaff Hill Maritime Museum and Village
Domestic object - Bowl, J & G Meakin, Late 19th or early 20th Century
The Process of Making Pottery Decorating, Firing, Glazing, Making, Technical There is a rhythm and flow to clay. It can’t be done all at once! Even the making process! It can take weeks to get everything done, especially if you can only work on your pottery once a week! Even though we have three hour classes, it’s often just not enough time! Here is an overview of some of the processes so you have a bit more grasp on some of the technical stuff! Step One – Design There are SO many ideas out there for making stuff in clay! From delicate porcelain jewellery, through to heavy sculptural work and everything in between. Deciding your direction is sometimes not that easy – when you first start, try everything, you will naturally gravitate to the style that you enjoy! The options and variations are endless and can get a wee bit overwhelming too! Check in with me before you start to ensure your ideas will work, what order you might do things, how you could achieve the look you are seeking and any other technical data required! Step Two – Making Clay is thixotropic. This means that as you work with it, the clay first gets sloppier and wetter, before is begins to dry in the atmosphere. For most things, you simply can’t do all parts of the project at once. An example of work order might look like: Get last weeks work out from the shelves Prepare clay for today’s work – roll your clay, prepare balls for throwing, make the first stage of a pinch pot) Clean up last week’s work and put it on the shelf for bisque firing Check that you have any glazing to do – and do enough of it that you will have time to finish your main project Do the next step of your next project – there might be a further step that can’t be complete immediately, in that case, wrap your work well and put onto the shelves. Letting your work rest for a while can really help keep your work clean and professional looking. Many things require bagging under plastic to keep it ready for work the next week – put your name on the outside of the bag so you can find your work easily. We have stickers and markers. Consider how you want to decorate your work – coloured slip can be applied at a fairly wet stage (remembering that it will make your work even wetter!). Trying to apply slip to dry clay won’t work! If you want to do sgraffito – you will need to keep the work leather hard (a state of dryness where you can still work the clay with a little effort and a little water and care). Step Three – Drying Most of the time your work can go into the rack uncovered to let it dry out for the following week. If you want to continue forming or shaping you will need to double bag your work – put your work on a suitable sized bat and put the bat in a bag so the base of the bag is under the bat, then put another bag over the top of the work and tuck the top of the bag under the bat. If you want to trim (or turn) your thrown work the following week, it should also be double bagged. If your work is large, delicate, or of uneven thicknesses, you should lightly cover your work for drying. When considering the drying process, bare in mind the weather, humidity and wind! The hotter and dryer, the faster things dry and work can dry unevenly in the shelves – this can lead to cracking – another time to lightly cover your work for drying. Step Four – Trimming and Cleaning Up Your work is dry! It is called greenware now and it is at it’s most fragile! Handle everything with two hands. I often refer to soft hands – keep everything gentle and with your fingers spread as much as possible. Try to not pick up things like plates too much, and always with both hands! Before your work can be bisque fired it should be “cleaned up”. You work won’t go into the kiln if it has sharp edges – when glazed, sharp edges turn into razor blades! Use a piece of fly wire to rub the work all over – this will scratch a little so be light handed. Use a knife or metal kidney to scrape any areas that require a bit more dynamic treatment than the fly wire offers! Finally, a very light wipe over with a slightly damp sponge can help soften and soothe all of your edges and dags! Trimming thrown work: If you are planning to trim (or turn) your thrown work (and you should be), make sure you bag it well – your work should be leather hard to almost dry for easiest trimming. Use this step to finish the work completely – use a metal kidney to polish the surface, or a slightly damp sponge to give a freshly thrown look. Wipe the sponge around the rim after trimming, and check the inside of the pot for dags! Trimming slip cast work: Usually I will trim the rims of your work on the wheel the following day to make that stage easier, however you will still need to check your work for lumps and bumps. Last but not least – check that your name is still clearly on the bottom of your work. Step Five – Bisque Firing When the work is completely dry it can go into the bisque kiln. The bisque kiln is fired to 1000°C. This process burns off the water in the clay as well as some of the chemically bound water. The structure of the clay is not altered that much at this temperature. Inside the bisque kiln, the work is stacked a little, small bowl inside a larger bowl and onto a heavy plate. Smaller items like decorations or drink coasters might get stacked several high. Consideration is paid to the weight of the stack and shape of the work. A bisque kiln can fire about one and a half times the amount of work that the glaze kiln can fire. The firing takes about 10 hours to complete the cycle and about two days to cool down. Once it has been emptied the work is placed in the glaze room ready for you to decorate! Step Six – Glazing Decorating your work with colour can be a lot of fun – and time consuming! There are three main options for surface treatment at this stage: Oxide Washes Underglazes Glazes Washes and underglazes do not “glaze” the work – It will still need a layer of glaze to fully seal the clay (washes don’t need glaze on surfaces not designed for food or liquid as they can gloss up a little on their own). Underglazes are stable colourants that turn out pretty much how they look in the jar. They can be mixed with each other to form other colours and can be used like water colours to paint onto your work. Mostly they should have a clear glaze on top to seal them. Oxides are a different species – the pink oxide (cobalt) wash turns out bright blue for instance. They don’t always need a glaze on top, and some glazes can change the colour of the wash! The glazes need no other “glaze” on top! Be careful of unknown glaze interactions – you can put any combination of glaze in a bowl or on a plate, but only a single glaze on the outside of any vertical surface! Glazes are a chemical reaction under heat. We don’t know the exact chemicals in the Mayco glazes we use. I can guess by the way they interact with each other, however, on the whole, you need to test every idea you have, and not run the test on a vertical surface! Simply put, glaze is a layer of glass like substance that bonds with the clay underneath. Clay is made of silica, alumina and water. Glaze is made of mostly silica. Silica has a melting point of 1700°C and we fire to 1240°C. The silica requires a “flux” to help it melt at the lower temperature. Fluxes can be all sorts of chemicals – a common one is calcium – calcium has a melting point of 2500°C, however, together they both melt at a much lower temperature! Colourants are metal oxides like cobalt (blue), chrome (green through black), copper (green, blue, even red!), manganese (black, purple and pink) iron (red brown), etc. Different chemicals in the glaze can have dramatic effects. for example, barium carbonate (which we don’t use) turns manganese bright pink! Other elements can turn manganese dioxide brown, blue, purple and reddish brown. Manganese dioxide is a flux in and of itself as well. So, glazes that get their black and purple colours, often interact with other glazes and RUN! Our mirror black is a good example – it mixes really well with many glazes because it fluxes them – causes them to melt faster. It will also bring out many beautiful colours in the glazes because it’s black colouring most definitely comes from manganese dioxide! Glaze chemistry is a whole subject on it’s own! We use commercial Mayco glazes on purpose – for their huge range of colour possibilities, stability, cool interactions, artistic freedom with the ability to easily brush the glazes on and ease of use. We currently have almost 50 glazes on hand! A major project is to test the interactions of all glazes with each other. That is 2,500 test tiles!!!! I’m going to make the wall behind the wheels the feature wall of pretty colours! Step Seven – Glaze (Gloss or sometimes called “Glost”) Firing Most of the time this is the final stage of making your creation (but not always!) The glaze kiln goes to 1240°C. This is called cone 6, or midrange. It is the low end of stoneware temperatures. Stoneware clays and glazes are typically fired at cone 8 – 10, that is 1260 – 1290°C. The energy requirement to go from 1240°C to 1280°C is almost a 30% more! Our clay is formulated to vitrify (mature, turn “glass-like”) at 1240°, as are our glazes. A glaze kiln take around 12 hours to reach temperature and two to three days to cool down. Sometimes a third firing process is required – this is for decoration that is added to work after the glaze firing. For example – adding precious metals and lustres. this firing temperature is usually around 600 – 800°C depending upon the techniques being used. There are many students interested in gold and silver trims – we will be doing this third type of firing soon! After firing your work will be in the student finished work shelves. Remember to pay for it before you head out the door! There is a small extra charge for using porcelain clay (it’s more than twice the price of regular clay), and for any third firing process! Once your work has been fired it can not turn back into clay for millennia – so don’t fire it if you don’t like it! Put it in the bucket for recycling. https://firebirdstudios.com.au/the-process-of-making-pottery/This bowl was made by renowned pottery company J & G Meakin of England. The firm was established in the mid-1800's. The bowl is an example of kitchenware used in the 19th century and still in use today.Bowl; white ceramic, round and tapering inwards towards base. Made by J and G Meakin England.On base, 'Ironstone China Reg SOL 391413' with symbolflagstaff hill, flagstaff hill maritime museum and village, warrnambool, maritime museum, maritime village, great ocean road, shipwreck coast, mixing bowl, food preparation, j & g meakin, pottery, stoke-on-trent, kitchen equipment, ceramic -
 Flagstaff Hill Maritime Museum and Village
Domestic object - Plate
The Process of Making Pottery Decorating, Firing, Glazing, Making, Technical There is a rhythm and flow to clay. It can’t be done all at once! Even the making process! It can take weeks to get everything done, especially if you can only work on your pottery once a week! Even though we have three hour classes, it’s often just not enough time! Here is an overview of some of the processes so you have a bit more grasp on some of the technical stuff! Step One – Design There are SO many ideas out there for making stuff in clay! From delicate porcelain jewellery, through to heavy sculptural work and everything in between. Deciding your direction is sometimes not that easy – when you first start, try everything, you will naturally gravitate to the style that you enjoy! The options and variations are endless and can get a wee bit overwhelming too! Check in with me before you start to ensure your ideas will work, what order you might do things, how you could achieve the look you are seeking and any other technical data required! Step Two – Making Clay is thixotropic. This means that as you work with it, the clay first gets sloppier and wetter, before is begins to dry in the atmosphere. For most things, you simply can’t do all parts of the project at once. An example of work order might look like: Get last weeks work out from the shelves Prepare clay for today’s work – roll your clay, prepare balls for throwing, make the first stage of a pinch pot) Clean up last week’s work and put it on the shelf for bisque firing Check that you have any glazing to do – and do enough of it that you will have time to finish your main project Do the next step of your next project – there might be a further step that can’t be complete immediately, in that case, wrap your work well and put onto the shelves. Letting your work rest for a while can really help keep your work clean and professional looking. Many things require bagging under plastic to keep it ready for work the next week – put your name on the outside of the bag so you can find your work easily. We have stickers and markers. Consider how you want to decorate your work – coloured slip can be applied at a fairly wet stage (remembering that it will make your work even wetter!). Trying to apply slip to dry clay won’t work! If you want to do sgraffito – you will need to keep the work leather hard (a state of dryness where you can still work the clay with a little effort and a little water and care). Step Three – Drying Most of the time your work can go into the rack uncovered to let it dry out for the following week. If you want to continue forming or shaping you will need to double bag your work – put your work on a suitable sized bat and put the bat in a bag so the base of the bag is under the bat, then put another bag over the top of the work and tuck the top of the bag under the bat. If you want to trim (or turn) your thrown work the following week, it should also be double bagged. If your work is large, delicate, or of uneven thicknesses, you should lightly cover your work for drying. When considering the drying process, bare in mind the weather, humidity and wind! The hotter and dryer, the faster things dry and work can dry unevenly in the shelves – this can lead to cracking – another time to lightly cover your work for drying. Step Four – Trimming and Cleaning Up Your work is dry! It is called greenware now and it is at it’s most fragile! Handle everything with two hands. I often refer to soft hands – keep everything gentle and with your fingers spread as much as possible. Try to not pick up things like plates too much, and always with both hands! Before your work can be bisque fired it should be “cleaned up”. You work won’t go into the kiln if it has sharp edges – when glazed, sharp edges turn into razor blades! Use a piece of fly wire to rub the work all over – this will scratch a little so be light handed. Use a knife or metal kidney to scrape any areas that require a bit more dynamic treatment than the fly wire offers! Finally, a very light wipe over with a slightly damp sponge can help soften and soothe all of your edges and dags! Trimming thrown work: If you are planning to trim (or turn) your thrown work (and you should be), make sure you bag it well – your work should be leather hard to almost dry for easiest trimming. Use this step to finish the work completely – use a metal kidney to polish the surface, or a slightly damp sponge to give a freshly thrown look. Wipe the sponge around the rim after trimming, and check the inside of the pot for dags! Trimming slip cast work: Usually I will trim the rims of your work on the wheel the following day to make that stage easier, however you will still need to check your work for lumps and bumps. Last but not least – check that your name is still clearly on the bottom of your work. Step Five – Bisque Firing When the work is completely dry it can go into the bisque kiln. The bisque kiln is fired to 1000°C. This process burns off the water in the clay as well as some of the chemically bound water. The structure of the clay is not altered that much at this temperature. Inside the bisque kiln, the work is stacked a little, small bowl inside a larger bowl and onto a heavy plate. Smaller items like decorations or drink coasters might get stacked several high. Consideration is paid to the weight of the stack and shape of the work. A bisque kiln can fire about one and a half times the amount of work that the glaze kiln can fire. The firing takes about 10 hours to complete the cycle and about two days to cool down. Once it has been emptied the work is placed in the glaze room ready for you to decorate! Step Six – Glazing Decorating your work with colour can be a lot of fun – and time consuming! There are three main options for surface treatment at this stage: Oxide Washes Underglazes Glazes Washes and underglazes do not “glaze” the work – It will still need a layer of glaze to fully seal the clay (washes don’t need glaze on surfaces not designed for food or liquid as they can gloss up a little on their own). Underglazes are stable colourants that turn out pretty much how they look in the jar. They can be mixed with each other to form other colours and can be used like water colours to paint onto your work. Mostly they should have a clear glaze on top to seal them. Oxides are a different species – the pink oxide (cobalt) wash turns out bright blue for instance. They don’t always need a glaze on top, and some glazes can change the colour of the wash! The glazes need no other “glaze” on top! Be careful of unknown glaze interactions – you can put any combination of glaze in a bowl or on a plate, but only a single glaze on the outside of any vertical surface! Glazes are a chemical reaction under heat. We don’t know the exact chemicals in the Mayco glazes we use. I can guess by the way they interact with each other, however, on the whole, you need to test every idea you have, and not run the test on a vertical surface! Simply put, glaze is a layer of glass like substance that bonds with the clay underneath. Clay is made of silica, alumina and water. Glaze is made of mostly silica. Silica has a melting point of 1700°C and we fire to 1240°C. The silica requires a “flux” to help it melt at the lower temperature. Fluxes can be all sorts of chemicals – a common one is calcium – calcium has a melting point of 2500°C, however, together they both melt at a much lower temperature! Colourants are metal oxides like cobalt (blue), chrome (green through black), copper (green, blue, even red!), manganese (black, purple and pink) iron (red brown), etc. Different chemicals in the glaze can have dramatic effects. for example, barium carbonate (which we don’t use) turns manganese bright pink! Other elements can turn manganese dioxide brown, blue, purple and reddish brown. Manganese dioxide is a flux in and of itself as well. So, glazes that get their black and purple colours, often interact with other glazes and RUN! Our mirror black is a good example – it mixes really well with many glazes because it fluxes them – causes them to melt faster. It will also bring out many beautiful colours in the glazes because it’s black colouring most definitely comes from manganese dioxide! Glaze chemistry is a whole subject on it’s own! We use commercial Mayco glazes on purpose – for their huge range of colour possibilities, stability, cool interactions, artistic freedom with the ability to easily brush the glazes on and ease of use. We currently have almost 50 glazes on hand! A major project is to test the interactions of all glazes with each other. That is 2,500 test tiles!!!! I’m going to make the wall behind the wheels the feature wall of pretty colours! Step Seven – Glaze (Gloss or sometimes called “Glost”) Firing Most of the time this is the final stage of making your creation (but not always!) The glaze kiln goes to 1240°C. This is called cone 6, or midrange. It is the low end of stoneware temperatures. Stoneware clays and glazes are typically fired at cone 8 – 10, that is 1260 – 1290°C. The energy requirement to go from 1240°C to 1280°C is almost a 30% more! Our clay is formulated to vitrify (mature, turn “glass-like”) at 1240°, as are our glazes. A glaze kiln take around 12 hours to reach temperature and two to three days to cool down. Sometimes a third firing process is required – this is for decoration that is added to work after the glaze firing. For example – adding precious metals and lustres. this firing temperature is usually around 600 – 800°C depending upon the techniques being used. There are many students interested in gold and silver trims – we will be doing this third type of firing soon! After firing your work will be in the student finished work shelves. Remember to pay for it before you head out the door! There is a small extra charge for using porcelain clay (it’s more than twice the price of regular clay), and for any third firing process! Once your work has been fired it can not turn back into clay for millennia – so don’t fire it if you don’t like it! Put it in the bucket for recycling. https://firebirdstudios.com.au/the-process-of-making-pottery/Ceramics have evolved over thousands of years.White earthenware dinner plate. Crazing evident all over.Backstamped ‘Made in England S LTD’flagstaff hill, warrnambool, shipwrecked-coast, flagstaff-hill, flagstaff-hill-maritime-museum, maritime-museum, shipwreck-coast, flagstaff-hill-maritime-village, ceramics, tableware -
 Flagstaff Hill Maritime Museum and Village
Domestic object - Plate, Johnson Bros
The Process of Making Pottery Decorating, Firing, Glazing, Making, Technical There is a rhythm and flow to clay. It can’t be done all at once! Even the making process! It can take weeks to get everything done, especially if you can only work on your pottery once a week! Even though we have three hour classes, it’s often just not enough time! Here is an overview of some of the processes so you have a bit more grasp on some of the technical stuff! Step One – Design There are SO many ideas out there for making stuff in clay! From delicate porcelain jewellery, through to heavy sculptural work and everything in between. Deciding your direction is sometimes not that easy – when you first start, try everything, you will naturally gravitate to the style that you enjoy! The options and variations are endless and can get a wee bit overwhelming too! Check in with me before you start to ensure your ideas will work, what order you might do things, how you could achieve the look you are seeking and any other technical data required! Step Two – Making Clay is thixotropic. This means that as you work with it, the clay first gets sloppier and wetter, before is begins to dry in the atmosphere. For most things, you simply can’t do all parts of the project at once. An example of work order might look like: Get last weeks work out from the shelves Prepare clay for today’s work – roll your clay, prepare balls for throwing, make the first stage of a pinch pot) Clean up last week’s work and put it on the shelf for bisque firing Check that you have any glazing to do – and do enough of it that you will have time to finish your main project Do the next step of your next project – there might be a further step that can’t be complete immediately, in that case, wrap your work well and put onto the shelves. Letting your work rest for a while can really help keep your work clean and professional looking. Many things require bagging under plastic to keep it ready for work the next week – put your name on the outside of the bag so you can find your work easily. We have stickers and markers. Consider how you want to decorate your work – coloured slip can be applied at a fairly wet stage (remembering that it will make your work even wetter!). Trying to apply slip to dry clay won’t work! If you want to do sgraffito – you will need to keep the work leather hard (a state of dryness where you can still work the clay with a little effort and a little water and care). Step Three – Drying Most of the time your work can go into the rack uncovered to let it dry out for the following week. If you want to continue forming or shaping you will need to double bag your work – put your work on a suitable sized bat and put the bat in a bag so the base of the bag is under the bat, then put another bag over the top of the work and tuck the top of the bag under the bat. If you want to trim (or turn) your thrown work the following week, it should also be double bagged. If your work is large, delicate, or of uneven thicknesses, you should lightly cover your work for drying. When considering the drying process, bare in mind the weather, humidity and wind! The hotter and dryer, the faster things dry and work can dry unevenly in the shelves – this can lead to cracking – another time to lightly cover your work for drying. Step Four – Trimming and Cleaning Up Your work is dry! It is called greenware now and it is at it’s most fragile! Handle everything with two hands. I often refer to soft hands – keep everything gentle and with your fingers spread as much as possible. Try to not pick up things like plates too much, and always with both hands! Before your work can be bisque fired it should be “cleaned up”. You work won’t go into the kiln if it has sharp edges – when glazed, sharp edges turn into razor blades! Use a piece of fly wire to rub the work all over – this will scratch a little so be light handed. Use a knife or metal kidney to scrape any areas that require a bit more dynamic treatment than the fly wire offers! Finally, a very light wipe over with a slightly damp sponge can help soften and soothe all of your edges and dags! Trimming thrown work: If you are planning to trim (or turn) your thrown work (and you should be), make sure you bag it well – your work should be leather hard to almost dry for easiest trimming. Use this step to finish the work completely – use a metal kidney to polish the surface, or a slightly damp sponge to give a freshly thrown look. Wipe the sponge around the rim after trimming, and check the inside of the pot for dags! Trimming slip cast work: Usually I will trim the rims of your work on the wheel the following day to make that stage easier, however you will still need to check your work for lumps and bumps. Last but not least – check that your name is still clearly on the bottom of your work. Step Five – Bisque Firing When the work is completely dry it can go into the bisque kiln. The bisque kiln is fired to 1000°C. This process burns off the water in the clay as well as some of the chemically bound water. The structure of the clay is not altered that much at this temperature. Inside the bisque kiln, the work is stacked a little, small bowl inside a larger bowl and onto a heavy plate. Smaller items like decorations or drink coasters might get stacked several high. Consideration is paid to the weight of the stack and shape of the work. A bisque kiln can fire about one and a half times the amount of work that the glaze kiln can fire. The firing takes about 10 hours to complete the cycle and about two days to cool down. Once it has been emptied the work is placed in the glaze room ready for you to decorate! Step Six – Glazing Decorating your work with colour can be a lot of fun – and time consuming! There are three main options for surface treatment at this stage: Oxide Washes Underglazes Glazes Washes and underglazes do not “glaze” the work – It will still need a layer of glaze to fully seal the clay (washes don’t need glaze on surfaces not designed for food or liquid as they can gloss up a little on their own). Underglazes are stable colourants that turn out pretty much how they look in the jar. They can be mixed with each other to form other colours and can be used like water colours to paint onto your work. Mostly they should have a clear glaze on top to seal them. Oxides are a different species – the pink oxide (cobalt) wash turns out bright blue for instance. They don’t always need a glaze on top, and some glazes can change the colour of the wash! The glazes need no other “glaze” on top! Be careful of unknown glaze interactions – you can put any combination of glaze in a bowl or on a plate, but only a single glaze on the outside of any vertical surface! Glazes are a chemical reaction under heat. We don’t know the exact chemicals in the Mayco glazes we use. I can guess by the way they interact with each other, however, on the whole, you need to test every idea you have, and not run the test on a vertical surface! Simply put, glaze is a layer of glass like substance that bonds with the clay underneath. Clay is made of silica, alumina and water. Glaze is made of mostly silica. Silica has a melting point of 1700°C and we fire to 1240°C. The silica requires a “flux” to help it melt at the lower temperature. Fluxes can be all sorts of chemicals – a common one is calcium – calcium has a melting point of 2500°C, however, together they both melt at a much lower temperature! Colourants are metal oxides like cobalt (blue), chrome (green through black), copper (green, blue, even red!), manganese (black, purple and pink) iron (red brown), etc. Different chemicals in the glaze can have dramatic effects. for example, barium carbonate (which we don’t use) turns manganese bright pink! Other elements can turn manganese dioxide brown, blue, purple and reddish brown. Manganese dioxide is a flux in and of itself as well. So, glazes that get their black and purple colours, often interact with other glazes and RUN! Our mirror black is a good example – it mixes really well with many glazes because it fluxes them – causes them to melt faster. It will also bring out many beautiful colours in the glazes because it’s black colouring most definitely comes from manganese dioxide! Glaze chemistry is a whole subject on it’s own! We use commercial Mayco glazes on purpose – for their huge range of colour possibilities, stability, cool interactions, artistic freedom with the ability to easily brush the glazes on and ease of use. We currently have almost 50 glazes on hand! A major project is to test the interactions of all glazes with each other. That is 2,500 test tiles!!!! I’m going to make the wall behind the wheels the feature wall of pretty colours! Step Seven – Glaze (Gloss or sometimes called “Glost”) Firing Most of the time this is the final stage of making your creation (but not always!) The glaze kiln goes to 1240°C. This is called cone 6, or midrange. It is the low end of stoneware temperatures. Stoneware clays and glazes are typically fired at cone 8 – 10, that is 1260 – 1290°C. The energy requirement to go from 1240°C to 1280°C is almost a 30% more! Our clay is formulated to vitrify (mature, turn “glass-like”) at 1240°, as are our glazes. A glaze kiln take around 12 hours to reach temperature and two to three days to cool down. Sometimes a third firing process is required – this is for decoration that is added to work after the glaze firing. For example – adding precious metals and lustres. this firing temperature is usually around 600 – 800°C depending upon the techniques being used. There are many students interested in gold and silver trims – we will be doing this third type of firing soon! After firing your work will be in the student finished work shelves. Remember to pay for it before you head out the door! There is a small extra charge for using porcelain clay (it’s more than twice the price of regular clay), and for any third firing process! Once your work has been fired it can not turn back into clay for millennia – so don’t fire it if you don’t like it! Put it in the bucket for recycling. https://firebirdstudios.com.au/the-process-of-making-pottery/Ceramics have evolved over thousands of years.A white earthenware side plate with a gadroon edge. Has water marks and chips on front.‘Johnson Bros England Reg No 15587’flagstaff hill, warrnambool, shipwrecked-coast, flagstaff-hill, flagstaff-hill-maritime-museum, maritime-museum, shipwreck-coast, flagstaff-hill-maritime-village, johnson bros, ceramics, tableware -
 Flagstaff Hill Maritime Museum and Village
Domestic object - Plate, Alfred Meakin
The Process of Making Pottery Decorating, Firing, Glazing, Making, Technical There is a rhythm and flow to clay. It can’t be done all at once! Even the making process! It can take weeks to get everything done, especially if you can only work on your pottery once a week! Even though we have three hour classes, it’s often just not enough time! Here is an overview of some of the processes so you have a bit more grasp on some of the technical stuff! Step One – Design There are SO many ideas out there for making stuff in clay! From delicate porcelain jewellery, through to heavy sculptural work and everything in between. Deciding your direction is sometimes not that easy – when you first start, try everything, you will naturally gravitate to the style that you enjoy! The options and variations are endless and can get a wee bit overwhelming too! Check in with me before you start to ensure your ideas will work, what order you might do things, how you could achieve the look you are seeking and any other technical data required! Step Two – Making Clay is thixotropic. This means that as you work with it, the clay first gets sloppier and wetter, before is begins to dry in the atmosphere. For most things, you simply can’t do all parts of the project at once. An example of work order might look like: Get last weeks work out from the shelves Prepare clay for today’s work – roll your clay, prepare balls for throwing, make the first stage of a pinch pot) Clean up last week’s work and put it on the shelf for bisque firing Check that you have any glazing to do – and do enough of it that you will have time to finish your main project Do the next step of your next project – there might be a further step that can’t be complete immediately, in that case, wrap your work well and put onto the shelves. Letting your work rest for a while can really help keep your work clean and professional looking. Many things require bagging under plastic to keep it ready for work the next week – put your name on the outside of the bag so you can find your work easily. We have stickers and markers. Consider how you want to decorate your work – coloured slip can be applied at a fairly wet stage (remembering that it will make your work even wetter!). Trying to apply slip to dry clay won’t work! If you want to do sgraffito – you will need to keep the work leather hard (a state of dryness where you can still work the clay with a little effort and a little water and care). Step Three – Drying Most of the time your work can go into the rack uncovered to let it dry out for the following week. If you want to continue forming or shaping you will need to double bag your work – put your work on a suitable sized bat and put the bat in a bag so the base of the bag is under the bat, then put another bag over the top of the work and tuck the top of the bag under the bat. If you want to trim (or turn) your thrown work the following week, it should also be double bagged. If your work is large, delicate, or of uneven thicknesses, you should lightly cover your work for drying. When considering the drying process, bare in mind the weather, humidity and wind! The hotter and dryer, the faster things dry and work can dry unevenly in the shelves – this can lead to cracking – another time to lightly cover your work for drying. Step Four – Trimming and Cleaning Up Your work is dry! It is called greenware now and it is at it’s most fragile! Handle everything with two hands. I often refer to soft hands – keep everything gentle and with your fingers spread as much as possible. Try to not pick up things like plates too much, and always with both hands! Before your work can be bisque fired it should be “cleaned up”. You work won’t go into the kiln if it has sharp edges – when glazed, sharp edges turn into razor blades! Use a piece of fly wire to rub the work all over – this will scratch a little so be light handed. Use a knife or metal kidney to scrape any areas that require a bit more dynamic treatment than the fly wire offers! Finally, a very light wipe over with a slightly damp sponge can help soften and soothe all of your edges and dags! Trimming thrown work: If you are planning to trim (or turn) your thrown work (and you should be), make sure you bag it well – your work should be leather hard to almost dry for easiest trimming. Use this step to finish the work completely – use a metal kidney to polish the surface, or a slightly damp sponge to give a freshly thrown look. Wipe the sponge around the rim after trimming, and check the inside of the pot for dags! Trimming slip cast work: Usually I will trim the rims of your work on the wheel the following day to make that stage easier, however you will still need to check your work for lumps and bumps. Last but not least – check that your name is still clearly on the bottom of your work. Step Five – Bisque Firing When the work is completely dry it can go into the bisque kiln. The bisque kiln is fired to 1000°C. This process burns off the water in the clay as well as some of the chemically bound water. The structure of the clay is not altered that much at this temperature. Inside the bisque kiln, the work is stacked a little, small bowl inside a larger bowl and onto a heavy plate. Smaller items like decorations or drink coasters might get stacked several high. Consideration is paid to the weight of the stack and shape of the work. A bisque kiln can fire about one and a half times the amount of work that the glaze kiln can fire. The firing takes about 10 hours to complete the cycle and about two days to cool down. Once it has been emptied the work is placed in the glaze room ready for you to decorate! Step Six – Glazing Decorating your work with colour can be a lot of fun – and time consuming! There are three main options for surface treatment at this stage: Oxide Washes Underglazes Glazes Washes and underglazes do not “glaze” the work – It will still need a layer of glaze to fully seal the clay (washes don’t need glaze on surfaces not designed for food or liquid as they can gloss up a little on their own). Underglazes are stable colourants that turn out pretty much how they look in the jar. They can be mixed with each other to form other colours and can be used like water colours to paint onto your work. Mostly they should have a clear glaze on top to seal them. Oxides are a different species – the pink oxide (cobalt) wash turns out bright blue for instance. They don’t always need a glaze on top, and some glazes can change the colour of the wash! The glazes need no other “glaze” on top! Be careful of unknown glaze interactions – you can put any combination of glaze in a bowl or on a plate, but only a single glaze on the outside of any vertical surface! Glazes are a chemical reaction under heat. We don’t know the exact chemicals in the Mayco glazes we use. I can guess by the way they interact with each other, however, on the whole, you need to test every idea you have, and not run the test on a vertical surface! Simply put, glaze is a layer of glass like substance that bonds with the clay underneath. Clay is made of silica, alumina and water. Glaze is made of mostly silica. Silica has a melting point of 1700°C and we fire to 1240°C. The silica requires a “flux” to help it melt at the lower temperature. Fluxes can be all sorts of chemicals – a common one is calcium – calcium has a melting point of 2500°C, however, together they both melt at a much lower temperature! Colourants are metal oxides like cobalt (blue), chrome (green through black), copper (green, blue, even red!), manganese (black, purple and pink) iron (red brown), etc. Different chemicals in the glaze can have dramatic effects. for example, barium carbonate (which we don’t use) turns manganese bright pink! Other elements can turn manganese dioxide brown, blue, purple and reddish brown. Manganese dioxide is a flux in and of itself as well. So, glazes that get their black and purple colours, often interact with other glazes and RUN! Our mirror black is a good example – it mixes really well with many glazes because it fluxes them – causes them to melt faster. It will also bring out many beautiful colours in the glazes because it’s black colouring most definitely comes from manganese dioxide! Glaze chemistry is a whole subject on it’s own! We use commercial Mayco glazes on purpose – for their huge range of colour possibilities, stability, cool interactions, artistic freedom with the ability to easily brush the glazes on and ease of use. We currently have almost 50 glazes on hand! A major project is to test the interactions of all glazes with each other. That is 2,500 test tiles!!!! I’m going to make the wall behind the wheels the feature wall of pretty colours! Step Seven – Glaze (Gloss or sometimes called “Glost”) Firing Most of the time this is the final stage of making your creation (but not always!) The glaze kiln goes to 1240°C. This is called cone 6, or midrange. It is the low end of stoneware temperatures. Stoneware clays and glazes are typically fired at cone 8 – 10, that is 1260 – 1290°C. The energy requirement to go from 1240°C to 1280°C is almost a 30% more! Our clay is formulated to vitrify (mature, turn “glass-like”) at 1240°, as are our glazes. A glaze kiln take around 12 hours to reach temperature and two to three days to cool down. Sometimes a third firing process is required – this is for decoration that is added to work after the glaze firing. For example – adding precious metals and lustres. this firing temperature is usually around 600 – 800°C depending upon the techniques being used. There are many students interested in gold and silver trims – we will be doing this third type of firing soon! After firing your work will be in the student finished work shelves. Remember to pay for it before you head out the door! There is a small extra charge for using porcelain clay (it’s more than twice the price of regular clay), and for any third firing process! Once your work has been fired it can not turn back into clay for millennia – so don’t fire it if you don’t like it! Put it in the bucket for recycling. https://firebirdstudios.com.au/the-process-of-making-pottery/Ceramics have evolved over thousands of years.Earthenware dessert plate, cream colour. Made by Alfred Meakin, England. Backstamped ‘Alfred Meakin England’. flagstaff hill, warrnambool, shipwrecked-coast, flagstaff-hill, flagstaff-hill-maritime-museum, maritime-museum, shipwreck-coast, flagstaff-hill-maritime-village, alfred meakin, ceramics, earthenware, kitchenware -
 Flagstaff Hill Maritime Museum and Village
Domestic object - Jug
The Process of Making Pottery Decorating, Firing, Glazing, Making, Technical There is a rhythm and flow to clay. It can’t be done all at once! Even the making process! It can take weeks to get everything done, especially if you can only work on your pottery once a week! Even though we have three hour classes, it’s often just not enough time! Here is an overview of some of the processes so you have a bit more grasp on some of the technical stuff! Step One – Design There are SO many ideas out there for making stuff in clay! From delicate porcelain jewellery, through to heavy sculptural work and everything in between. Deciding your direction is sometimes not that easy – when you first start, try everything, you will naturally gravitate to the style that you enjoy! The options and variations are endless and can get a wee bit overwhelming too! Check in with me before you start to ensure your ideas will work, what order you might do things, how you could achieve the look you are seeking and any other technical data required! Step Two – Making Clay is thixotropic. This means that as you work with it, the clay first gets sloppier and wetter, before is begins to dry in the atmosphere. For most things, you simply can’t do all parts of the project at once. An example of work order might look like: Get last weeks work out from the shelves Prepare clay for today’s work – roll your clay, prepare balls for throwing, make the first stage of a pinch pot) Clean up last week’s work and put it on the shelf for bisque firing Check that you have any glazing to do – and do enough of it that you will have time to finish your main project Do the next step of your next project – there might be a further step that can’t be complete immediately, in that case, wrap your work well and put onto the shelves. Letting your work rest for a while can really help keep your work clean and professional looking. Many things require bagging under plastic to keep it ready for work the next week – put your name on the outside of the bag so you can find your work easily. We have stickers and markers. Consider how you want to decorate your work – coloured slip can be applied at a fairly wet stage (remembering that it will make your work even wetter!). Trying to apply slip to dry clay won’t work! If you want to do sgraffito – you will need to keep the work leather hard (a state of dryness where you can still work the clay with a little effort and a little water and care). Step Three – Drying Most of the time your work can go into the rack uncovered to let it dry out for the following week. If you want to continue forming or shaping you will need to double bag your work – put your work on a suitable sized bat and put the bat in a bag so the base of the bag is under the bat, then put another bag over the top of the work and tuck the top of the bag under the bat. If you want to trim (or turn) your thrown work the following week, it should also be double bagged. If your work is large, delicate, or of uneven thicknesses, you should lightly cover your work for drying. When considering the drying process, bare in mind the weather, humidity and wind! The hotter and dryer, the faster things dry and work can dry unevenly in the shelves – this can lead to cracking – another time to lightly cover your work for drying. Step Four – Trimming and Cleaning Up Your work is dry! It is called greenware now and it is at it’s most fragile! Handle everything with two hands. I often refer to soft hands – keep everything gentle and with your fingers spread as much as possible. Try to not pick up things like plates too much, and always with both hands! Before your work can be bisque fired it should be “cleaned up”. You work won’t go into the kiln if it has sharp edges – when glazed, sharp edges turn into razor blades! Use a piece of fly wire to rub the work all over – this will scratch a little so be light handed. Use a knife or metal kidney to scrape any areas that require a bit more dynamic treatment than the fly wire offers! Finally, a very light wipe over with a slightly damp sponge can help soften and soothe all of your edges and dags! Trimming thrown work: If you are planning to trim (or turn) your thrown work (and you should be), make sure you bag it well – your work should be leather hard to almost dry for easiest trimming. Use this step to finish the work completely – use a metal kidney to polish the surface, or a slightly damp sponge to give a freshly thrown look. Wipe the sponge around the rim after trimming, and check the inside of the pot for dags! Trimming slip cast work: Usually I will trim the rims of your work on the wheel the following day to make that stage easier, however you will still need to check your work for lumps and bumps. Last but not least – check that your name is still clearly on the bottom of your work. Step Five – Bisque Firing When the work is completely dry it can go into the bisque kiln. The bisque kiln is fired to 1000°C. This process burns off the water in the clay as well as some of the chemically bound water. The structure of the clay is not altered that much at this temperature. Inside the bisque kiln, the work is stacked a little, small bowl inside a larger bowl and onto a heavy plate. Smaller items like decorations or drink coasters might get stacked several high. Consideration is paid to the weight of the stack and shape of the work. A bisque kiln can fire about one and a half times the amount of work that the glaze kiln can fire. The firing takes about 10 hours to complete the cycle and about two days to cool down. Once it has been emptied the work is placed in the glaze room ready for you to decorate! Step Six – Glazing Decorating your work with colour can be a lot of fun – and time consuming! There are three main options for surface treatment at this stage: Oxide Washes Underglazes Glazes Washes and underglazes do not “glaze” the work – It will still need a layer of glaze to fully seal the clay (washes don’t need glaze on surfaces not designed for food or liquid as they can gloss up a little on their own). Underglazes are stable colourants that turn out pretty much how they look in the jar. They can be mixed with each other to form other colours and can be used like water colours to paint onto your work. Mostly they should have a clear glaze on top to seal them. Oxides are a different species – the pink oxide (cobalt) wash turns out bright blue for instance. They don’t always need a glaze on top, and some glazes can change the colour of the wash! The glazes need no other “glaze” on top! Be careful of unknown glaze interactions – you can put any combination of glaze in a bowl or on a plate, but only a single glaze on the outside of any vertical surface! Glazes are a chemical reaction under heat. We don’t know the exact chemicals in the Mayco glazes we use. I can guess by the way they interact with each other, however, on the whole, you need to test every idea you have, and not run the test on a vertical surface! Simply put, glaze is a layer of glass like substance that bonds with the clay underneath. Clay is made of silica, alumina and water. Glaze is made of mostly silica. Silica has a melting point of 1700°C and we fire to 1240°C. The silica requires a “flux” to help it melt at the lower temperature. Fluxes can be all sorts of chemicals – a common one is calcium – calcium has a melting point of 2500°C, however, together they both melt at a much lower temperature! Colourants are metal oxides like cobalt (blue), chrome (green through black), copper (green, blue, even red!), manganese (black, purple and pink) iron (red brown), etc. Different chemicals in the glaze can have dramatic effects. for example, barium carbonate (which we don’t use) turns manganese bright pink! Other elements can turn manganese dioxide brown, blue, purple and reddish brown. Manganese dioxide is a flux in and of itself as well. So, glazes that get their black and purple colours, often interact with other glazes and RUN! Our mirror black is a good example – it mixes really well with many glazes because it fluxes them – causes them to melt faster. It will also bring out many beautiful colours in the glazes because it’s black colouring most definitely comes from manganese dioxide! Glaze chemistry is a whole subject on it’s own! We use commercial Mayco glazes on purpose – for their huge range of colour possibilities, stability, cool interactions, artistic freedom with the ability to easily brush the glazes on and ease of use. We currently have almost 50 glazes on hand! A major project is to test the interactions of all glazes with each other. That is 2,500 test tiles!!!! I’m going to make the wall behind the wheels the feature wall of pretty colours! Step Seven – Glaze (Gloss or sometimes called “Glost”) Firing Most of the time this is the final stage of making your creation (but not always!) The glaze kiln goes to 1240°C. This is called cone 6, or midrange. It is the low end of stoneware temperatures. Stoneware clays and glazes are typically fired at cone 8 – 10, that is 1260 – 1290°C. The energy requirement to go from 1240°C to 1280°C is almost a 30% more! Our clay is formulated to vitrify (mature, turn “glass-like”) at 1240°, as are our glazes. A glaze kiln take around 12 hours to reach temperature and two to three days to cool down. Sometimes a third firing process is required – this is for decoration that is added to work after the glaze firing. For example – adding precious metals and lustres. this firing temperature is usually around 600 – 800°C depending upon the techniques being used. There are many students interested in gold and silver trims – we will be doing this third type of firing soon! After firing your work will be in the student finished work shelves. Remember to pay for it before you head out the door! There is a small extra charge for using porcelain clay (it’s more than twice the price of regular clay), and for any third firing process! Once your work has been fired it can not turn back into clay for millennia – so don’t fire it if you don’t like it! Put it in the bucket for recycling. https://firebirdstudios.com.au/the-process-of-making-pottery/The form of the jug has been in use for many centuries.Stoneware jug. Two tone brown glaze with pierced lip behind spout. Spout chipped.None.flagstaff hill, warrnambool, shipwrecked-coast, flagstaff-hill, flagstaff-hill-maritime-museum, maritime-museum, shipwreck-coast, flagstaff-hill-maritime-village, jug, ceramic jug -
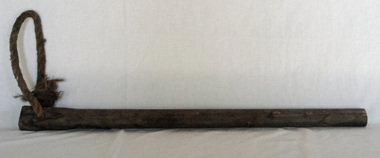 Orbost & District Historical Society
animl prodder, first half 20th century
A cattle prod, also called a stock prod, is a handheld device commonly used to make cattle or other livestock move by striking or poking them. This is a home-made prod.This is an example of the resourcefulness of rural families in economising and re-cycling.A wooden stick - probably a handle from a tool - with rope threaded through the top. It was probably a home-made animal prodder.livestock prod -
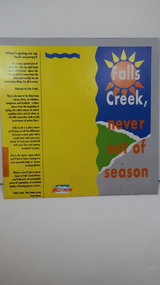 Kiewa Valley Historical Society
Brochure - Falls Creek Tourism, Falls Creek Never Out of Season
Falls Creek is a Ski Resort in the north east of Victoria. This brochure has been produced to encourage tourists to visit throughout the year.Tourism to the Kiewa Valley is an important industry for the area. Falls Creek is a ski resort with accommodation during winter for skiers, snow boarders and other snow sports. It involves entertainment, restaurants and associated workers. This brochure is produced to promote the resort throughout the year to increase the occupancy of these lodges. The tourist industry has increased steadily with fishing, cycling and bush walking increasing numbers in the area.Glossy square brochure folded in in half and half again. Front page is yellow on the left with black print on the far left. The right side has the title with blue, green and grey background with yellow, orange and white as part of the title. The back is a man standing in front of a sunset with print in a column towards the right side. Inside includes a map with advertisements for accommodation surrounding it.falls creek ski resort; alpine region in victoria; mountain lodges; -
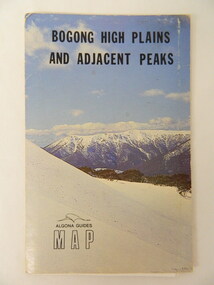 Kiewa Valley Historical Society
Map - Bogong High Plains & Adjacent Peaks x2, 1976
This map was produced as a result of the 'pressure from walkers' who are interested in climbing the accessible peaks on the Bogong High Plains. Places, huts and rivers are named and indexed. Contours are not given. Heights of mountains are in metres.The Bogong High Plains is a popular walking area and a National Park. This map identifies the mountains and peaks in the area at the time of publication. Some of the huts have since been destroyed by fire and Mt Niggerhead has since been renamed to Jaithmathang.Blue and white cardboard folded in half containing a folded black and white map of Bogong High Plains and Adjacent Peaks with index.bogong high plains. mountains. bushwalkers. walking. map. national park. recreation. cycling. tourism -
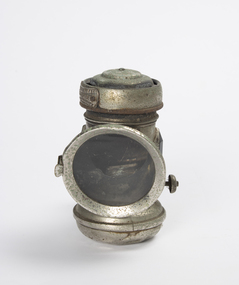 Warrnambool and District Historical Society Inc.
Functional object - Portable cycle carbide lamp, Powell & Hanmer, Birmingham, c 1920
This is a removable bicycle lantern probably dating from the first half of the 20th Century. It is a carbide lamp which was a popular form of lighting, particularly in rural areas. This item has no known local provenance but is retained as it is a good example of an early bicycle lamp.This is a brass and steel bicycle lamp. It has a circular glass front, a mechanism for attaching the lamp to the bicycle, a lighting adjustable wick and two glass panels on the side, one green and one red. There is a label with the manufacturer's name on the side. POWELL & HANMER "KINGFISHER" MAKERS, BIRMINGHAMvintage lighting, powell and hanmer -
 Eltham District Historical Society Inc
Document - Folder, Maxwell, Keith
Keith Maxwell lived in East Brunswick before his family moved to Eltham in 1938. Contents Newspaper article: "Facing good and bad times with enthusiasm," Diamond Valley News, 21 October 1986, outlines Keith Maxwell's activities.Newspaper clippings, A4 photocopies, etckeith maxwell, edna maxwell, progress hall eltham north, department of aircraft, cycling, frank penhalurack, fitzroy cycling club, victorian horticultural society, montmorency garden club -
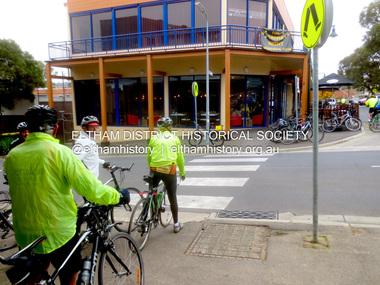 Eltham District Historical Society Inc
Photograph - Digital Photograph, Jim Connor, Commercial Place and Pryor Street, Eltham, 12 June 2015
jim connor collection, commercial place, cycling, eltham shopping centre, jock & eddie, pryor street -
Glen Eira Historical Society
Document - Reeves, Walter
2 items, which may be related, about old Elsternwick: 1/A roneod copy of Recollections of Walter Reeves: gives notes on local identities, their business’, Caulfield State School, places of interest and events that took place in the area; undated and apparently summarised by an un-named other person from Mr Reeves' recollections. 2/A hand written list taken from Rate Books 1864 of areas in dispute, including nine names of residents, between Caulfield and St Kilda, date and author unknown. No direct connection to Walter Reeves apparent but they are taped together.automobile, hebenstreit mr, shoobra road, butcher, glenhuntly road, henderson h mr, davis charles, hardware store, beddoe frank, horne street, shops, renown theatre, phoebe theatre, theatres, lepage phoebe, lepage jack, taylor ‘squizzie’, echuca terrace, edward street, hawthorn road, revees walter, dunn bros, cycle shop, cox bros, supermarkets, apps (undertakers), elsternwick men’s club, elsternwick trades club, johnston t., hayter george (painter and decorator), sargood frederick, cabmen, cabs, ‘ripponlea’, wilson dick, blacksmiths, orrong road, moran and cato, repco, downshire road, bullock (grocer), grocers, taylor’s liquor and wine saloon, bottleshops, biddle misses, schools, bliss mr, station master, elsternwick, bensonino mr, newsagents, caulfield, gas supply, point nepean road, rowney dick, trams, riddell’s paddock, football golf links, riddell john carre, rowan road, sports grounds, melville’s supermarket -
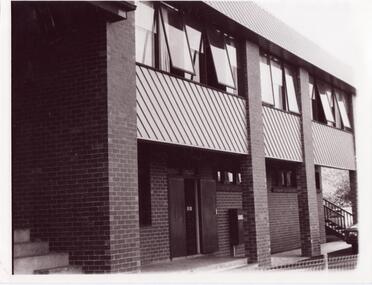 Glen Eira Historical Society
Article - E. E. Gunn Reserve
This file contains three items about this Park, formerly known as Ormond Park: An original photograph of E. E. Gunn Reserve Hall. An article from the Caulfield Contact relating to the history of E.E. Gunn Park and the achievements of the committee of management of the Park, dated January/February 1992. An article from The Leader summarising the football competition results, some of which may have been held at E.E. Gunn Park, dated 26 July 2011.e. e. gunn reserve, e.e. gunn park, ee gunn park, ormond park, caulfield south ward, foch street, malane street, ormond, ormond amateur football club, ormond/glen huntly baseball club, ormond cricket club, ormond tennis club, ormond football club, ormond park trust, caulfield, caulfield council, kilvington girls baptist grammar school, e.e. gunn committee of management, barret james, singleton clive, robertson john, gunn ernest edwin, dorothy avenue, newham grove, collegians, de la salle, st. bedes, the tigers, ajax, rupertswood, blieden gary, old camberwell, rombotis john, toolongs steve, glen eira, paterson tom, boyd glenn, demashki mark, the saints, the monds, eltham, elsternwick, albert park, the falcons, the wicks, convery james, hunter justin, power house, prahran/assumption, parks, reserves, playgrounds, sportsgrounds, football, australian rules football, sporting clubs, sports people, clubs, associations, football clubs, sports, recreations, leisure, cultural events, cultural activities, cricket club, baseball club, ovals, playing fields, club houses, scout halls, halls, tennis clubs, athletics, cycling -
 Eltham District Historical Society Inc
Book, Cadel Evans: the art of cycling, 2016
The autobiography of "Australia's greatest cyclist" Cadel Evans. He is one of only two non-Europeans to have won the Tour de France (bike race), which he won in 2011. Cadel Evans spent much of his youth growing up in the rural area of the Shire of NillumbikHardbackracing cyclist, olympian, athlete, cadel evans, autobiography -
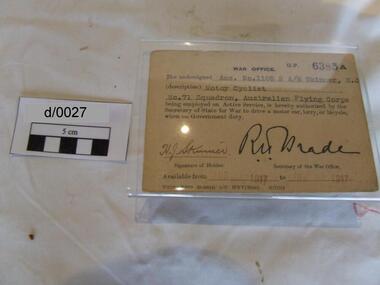 Waverley RSL Sub Branch
Army Motor Cycle Lisence
issued to A Beale a dispatch rider during WWIIPaper lisence in plastic mountA.Bealemilitary, dispatch riderclisence -
Federation University Historical Collection
Photograph - Bicycle, Henry Sutton, Large Sepia photograph of cyclists by Henry Sutton
Henry Sutton was born at Ballarat on 03 September 1856. He taught Electricity and Magnetism at the Ballarat School of Mines between 1883 and 1887. Sutton was an incredible inventor. He died on 28 July 1912 at Brighton, Victoria.Large Sepia photograph of cyclists by Henry Sutton. The cyclists are all near Penny Farthing Bicycles in front of some pine treeshenry sutton, sepia photograph, cyclists, penny-farthing, cycling, bicycle -
Federation University Historical Collection
Book - Book - Scrapbook, Ballarat Institute of Advanced Education: Scrapbook of newspaper cutting, Book 2; February 1970 to September 1970
Newspaper cuttings relating to Ballarat Institute of Advanced Education. These are from various newspapers and include The Age, Ballarat Courier, The Australian, The Herald. The cuttings cover the period from 25 February 1970 to 9 September 1970. Book with grey cover, front. Spiral boundballarat institute of advanced education, biae, employment advertisements, senate team visit biae, minister of education visit, lindsay thompson, 3ba comes under fire, orientation ball in wendouree hall, jean mckenzie at smb art and design course, g mainwarring, festival radio cover to be curtailed, scheme helping ballarat widows, students win scholarships, robert gray, robert norman, cheque from students, smb launch $400000 appeal, $11m from government for smb, political opponents inspect bts, closure of gaols, overnight hike, state colleges get $25m varsity image, political advertisement, smb could attract new industries, punch card technique, four-letter word thrills audience, school news, "quadrangle", alp opens election campaign, alp candidates address teachers, new home for smb, degree courses now being considered, electromagnet, first stage of mt helen, acceleration of scientific progress, stephen donald motor mechanic apprentice, degree course for institute, conditions in school 'almost unbelievable', silk screen printing, smb apprentices presentation, john davidson wins builders award scholarship, election statements clarified, jack barker, address by myra roper, some names to remember, centenary appeal for smb, biae request for street light agreed to, members of the biae motor cycle club, gas scholarships of $100, philip walker and noel shillito, a g cutts, no ballarat case for fourth uni, dr r shrieke and mr b shearer lecturers at biae, $5000 to smb appeal, experts aid students re careers -
Federation University Historical Collection
Book - Book - Scrapbook, Ballarat Institute of Advanced Education: Scrapbook of newspaper cutting, Book 3, July 1970 to December 1970
Newspaper cuttings relating to Ballarat Institute of Advanced Education. These are from various newspapers and include The Age, Ballarat Courier, The Australian, The Herald. The cuttings cover the period from 7 July 1970 to 12 December 1970. Book with yellow cover, front. Spiral bound.ballarat institute of advanced education, biae, employment advertisements, early school records found, council records from 1870 - 1893, john lynch wins stock exchange award, b r hames to deliver lecture at smb, death of a w steane, biae motor cycle club visit factory, mount helen campus of the future, visit from mt isa officer, centenary celebrations, peter hensley outstanding academic record 1969, rosslynne guymer, hill climb, repco gives $5000 to smb fund, ray woolard artist, mineral discoveries in australia, centenary prediction, centenary medallion, betty archdale to deliver fourth lecture, looking back on school history, e j tippett, threshold of the second century, e j barker, stanley white awarded csiro doctoral scholarship, tertiary colleges should be community centre, post-diploma course in malting and brewing, young geologists from broken hill, technical conference for ballarat, banks' gift, exhibition by students, rare rocks for biae, teachers' college at mt helen?, technical principals' association, miss n findley of emily mcpherson college, visiting heads admire facilities at biae, advisory council sets guidelines, smb plaque unveiled, $25000 to centenary appeal, national service exemption granted, technical schools disrupted by teachers' strike, bid for fourth university, librarian course advocated, smb appeal at $221000, centenary of technical education in australia, mt helen campus opening, centenary of great achievement, governments give $100000 to institute, student from last century, mrs o ratray, biae asked to train librarians, buninyong seek talks, problems of "background" in education, exhibition by jon crawley - potter, mr thompson's comment, art sake at school, 90 engineers at biae, ray woollard -
Federation University Historical Collection
Book - Book - Scrapbook, Ballarat College of Advanced Education: Scrapbook of newspaper cutting, Book 1; August 1975 to January 1976
Newspaper cuttings relating to Ballarat College of Advanced Education. These are from various newspapers and include The Age, Ballarat Courier, The Australian, The Herald. The cuttings cover the period from 20 August 1975 to 19 January 1976. Book with Blue cover, front. Spiral bound.ballarat institute of advanced education, biae, employment advertisements, application for enrolment, outline of courses, apprenticeship ball, u.s. fellowship for former smb student, gregory mcrae, mount clear school facilities, when travelodge comes shops to go, introduction to metallurgy, practical benefits of legacy, john reitze, discrimination claim, peter den brinker, student representatives, library on wheels, teacher union doubts on new school at mt clear, plans in store for mine, plans outlined for new school, college standards rising, no pollution no noise, electric cycle, biae chemists in pollution hunt, council to aid school growth, buninyong council, school to open in february, move for cycle track to biae campus, graham beanland appointed depty principal, drastic cuts in tertiary courses, tempory school goes up, portable buildings, school of coastal engineering, 177 receive diploma of teaching, $2500 scholarship to noel janetski, fraser island environmental inquiry, engineering school takes to the air, ballarat students for democracy, steve bracks, praise for technical school tradition, iran appointment for geologist -
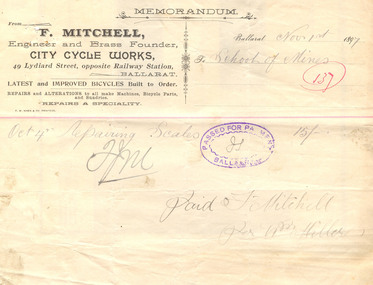 Federation University Historical Collection
Document, Invoices to the Ballarat School of Mines, 1897
Innvoices to the Ballarat School of Minesm.b. john, m.b. john brass founder, f. mitchell, f. mitchell brassfounder and engineer, city cycle works -
 Federation University Historical Collection
Photograph, Federation University Banner during the 2021 Australian Cycling Road Nationals, 03/02/2021
A large banner along Chancellor drive, Mount Helen Campusfederation university australia, cycling road national competition, banner -
 Federation University Historical Collection
Photograph, Clare Gervasoni, Federation University Banner during the 2021 Australian Road Cycling Championships, 03/02/2021
A large banner along Chancellor drive, Mount Helen Campusfederation university australia, cycling road national competition, banner, australian road cyclng championships, bicycle -
 Federation University Historical Collection
Album - Album - Sample Stickers, ZILLES COLLECTION: Album, Sample Stickers produced by Jeff Zilles
Zilles Printers was begun by Lewis Zilles in the early 1930s. It was in McKenzie Street Ballarat. His son Jeffrey also became a printer - letterpress, offset and screen printer. The business became Zilles Printers/Graphics and was in Armstrong Street and later Bell Street Ballarat. A form of sticker began in 1839 when Sir Rowland Hill invented adhesive paper. The first self-adhesive label was invented in 1935 by Stanton Avery - Avery Labels. In the 1940s "bumper strips"were created. Now referred to as bumper stickers. The stickers shown are for car dealerships, motor bike, tractor and agricultural equipment and entertainment. They are for places in Ballarat, Bendigo, Geelong and Wonthaggi, indicating that Zilles were well known for the quality of their products. These stickers were possibly produced in the 1960s, 1970s and early 1980s. The Swinger was a local dance that ran at the Ballarat Civic Hall between 1972-1975. Dress was neat casual and men were required to wear a tie. The average age of attendees was 18-25.Dark green vinyl cover, three bolts holding it together. Thirteen pages - black cover paperSticker on each pagezilles printers, stickers, bumper stickers, self-adhesive label, santo avery, sir rowland hill, car dealers, motor cycles, farm equipment, ballarat, bendigo, geelong, wonthaggi, ballarat motors, rambler, triumph, toyota, brown murphy geelong, leyland australia, berko datsun geelong, mental ballarat, sound conditioned bendigo, col hawkins, frank faulkner car sales, patron products ballarat, mil haven tractor cab ballarat, john basin ballarat, swinger, b & g myers pty ltd ballarat, arthur shultz, don mullin motors wonthaggi -
Federation University Historical Collection
Album, Newspaper Clippings Scrap Book on Henry Sutton
Henry Sutton is a talented world-wide accepted inventor with inventions relating to the telephone, photography, wireless, cars, motorcycles, and bicycles as well as many more inventions. Henry was also one of four brothers that ran the Sutton's Music Store after the death of their Father Richard Sutton. Henry Sutton taught Applied Electricity at the Ballarat School of Mines in 1883 to 1886. Several folders of newspaper articles relating to Henry Sutton. henry sutton, mining companies, hugo brunn, main road, ballarat east, sutton music seller, plank road, richard sutton, flutina, halophone, inventions, instruments, all saints mining company, phillipson jeweller, ballaarat mechanics' institute, w.g. shepperd, cooper's reading room, plate glass, concertina, r.h. sutton music warehouse, organ harmonium, ballarat temperance hall, fire, accordian, musical instruments, st paul's anglican church, bakery hill, military side-drums, ballarat volunteer rangers fife band, shops, street broadcasting, complete music store, concord piano, gramaphone, alfred sutton, walter sutton, fred sutton, e. gordon.jones, astor radio, centenary dinner, jeffrey sutton, music stool, orguinette, harp, chilver wilson benefit, collard and collard, w.h. figgis, hydraulic lift, sturt street, mary sutton, advertisements, sutton's cycle agency, a. leslie sutton, -
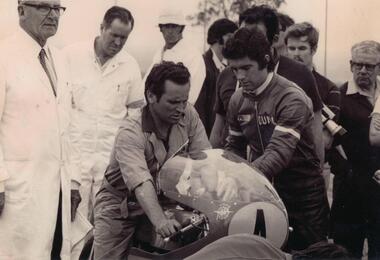 Phillip Island and District Historical Society Inc.
Photograph, c 1960's
One of a collection of photographs purchased from Photo First, Thompson Avenue, Cowes, when it closed in June, 2014.Large Sepia photograph of a motorcycle rider, possibly Agostini Agostart, standing and crowd of onlookers and team workers.Historic motorsport, Agostini Agostart.motor cycle racing, agostini agostart, photo first -
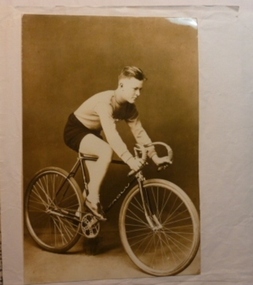 Greensborough Historical Society
Folder, Laurie Roy, 23/02/1933
Newspaper articles and photographs relating to cyclist Laurie Roy who tragically died at age 19 in 1933.Laurie Roy was an amateur cyclist with great potential who died as a result of a cycling accident in 1933. Laurie Roy lived in Greensborough and is buried at the Greensborough Cemetery.20-page plastic binder, spiral bound, clear cover. Contains documents relating to the Roy family.laurie roy, cyclists, greensborough cemetery