Showing 1440 items
matching black photo album
-
 Mt Dandenong & District Historical Society Inc.
Photograph
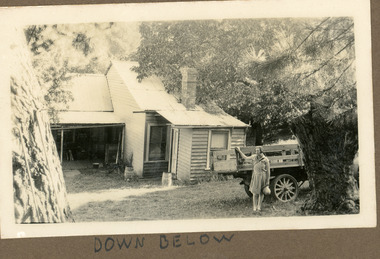
Photograph is from the album of Ivy Child. The back view of the homestead is either the Kalorama homestead of Ivy's parents, Ted and Ethel Child or her grandfather, Matthew Francis Child. Ivy May Child (1910 – 1989) was the daughter of Arthur Edward (Ted) Child (1878 – 1964) and Ethel May Madden (1888 – 1970). Ted Child was the son of Matthew Francis Child (1839 – 1933) and Martha Jeeves (1857 – 1926). He was the grandson of one of the early pioneers Francis Child. Ivy grew up on the family property on Childs Road and took many photographs. Most of these are glued into her photo album. The album covered the years from c1927 – 1932. Ivy married Henry William Burgess (1906 – 1968) in 1944. The photographs remain in their original state in the album with individual copies made. Black and white close up photograph of the rear of a wooden building. A girl holding a sun hat is standing with her arm on the tray of an old truck.Handwritten below the photograph in album: DOWN BELOWivy child, kalorama, homestead, farm, matthew francis child, child, ted child -
 Mt Dandenong & District Historical Society Inc.
Photograph
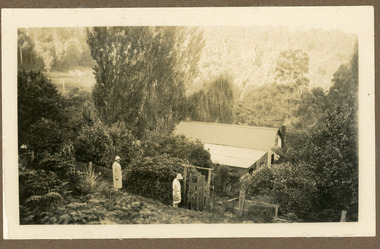
The photograph is from the album of Ivy Child. The homestead depicted belongs to Ivy's parents Ted and Ethel Child. It was part of the Child Family land at Kalorama. Ivy May Child (1910 – 1989) was the daughter of Arthur Edward (Ted) Child (1878 – 1964) and Ethel May Madden (1888 – 1970). Ted Child was the son of Matthew Francis Child (1839 – 1933) and Martha Jeeves (1857 – 1926). He was the grandson of one of the early pioneers Francis Child. Ivy grew up on the family property on Childs Road and took many photographs. Most of these are glued into her photo album. The album covered the years from c1927 – 1932. Ivy married Henry William Burgess (1906 – 1968) in 1944. The photographs remain in their original state in the album with individual copies made. Black and white photograph showing two women wearing sun hats and dresses walking down a pathway to the gate of a homestead.ivy child, ted child, ethel child, homestead, kalorama, child -
 Mt Dandenong & District Historical Society Inc.
Photograph
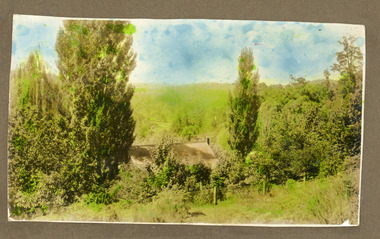
The photograph is from the album of Ivy Child. The original black and white photograph is also in the album. The homestead shown belonged to Ivy's parents Ted and Ethel Child. Ivy May Child (1910 – 1989) was the daughter of Arthur Edward (Ted) Child (1878 – 1964) and Ethel May Madden (1888 – 1970). Ted Child was the son of Matthew Francis Child (1839 – 1933) and Martha Jeeves (1857 – 1926). He was the grandson of one of the early pioneers Francis Child. Ivy grew up on the family property on Childs Road and took many photographs. Most of these are glued into her photo album. The album covered the years from c1927 – 1932. Ivy married Henry William Burgess (1906 – 1968) in 1944. The photographs remain in their original state in the album with individual copies made. A black and white photograph that has been coloured. It shows a scene of a homestead with a post and wire fence at the front and tress beside it. Hills can be seen in the distance.homestead, ivy child, ted child, ethel child, kalorama -
 Mt Dandenong & District Historical Society Inc.
Photograph
The photograph is from the album of Ivy Child. The woman standing on the veranda is her mother Ethel Child (nee Madden). The homestead is on Childs Road and belonged to Ted and Ethel Child. Ivy May Child (1910 – 1989) was the daughter of Arthur Edward (Ted) Child (1878 – 1964) and Ethel May Madden (1888 – 1970). Ted Child was the son of Matthew Francis Child (1839 – 1933) and Martha Jeeves (1857 – 1926). He was the grandson of one of the early pioneers Francis Child. Ivy grew up on the family property on Childs Road and took many photographs. Most of these are glued into her photo album. The album covered the years from c1927 – 1932. Ivy married Henry William Burgess (1906 – 1968) in 1944. The photographs remain in their original state in the album with individual copies made. Black and white photograph showing a woman wearing an apron standing on the veranda of a wooden homestead. Ferns are in the foreground and around the building.ethel child, ted child, homestead, childs road -
 Mt Dandenong & District Historical Society Inc.
Photograph
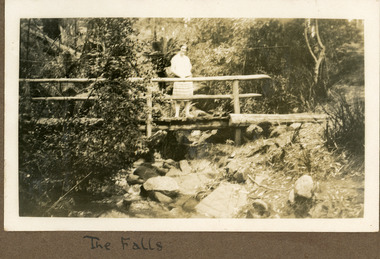
The photograph is from the album of Ivy Child. The young woman standing on the bridge is Ivy Child probably aged 17 years. The location is the Olinda Falls. Ivy May Child (1910 – 1989) was the daughter of Arthur Edward (Ted) Child (1878 – 1964) and Ethel May Madden (1888 – 1970). Ted Child was the son of Matthew Francis Child (1839 – 1933) and Martha Jeeves (1857 – 1926). He was the grandson of one of the early pioneers Francis Child. Ivy grew up on the family property on Childs Road and took many photographs. Most of these are glued into her photo album. The album covered the years from c1927 – 1932. Ivy married Henry William Burgess (1906 – 1968) in 1944. The photographs remain in their original state in the album with individual copies made. Black and white photograph showing a young woman standing on a wooden bridge with a handrail above a creek. Rocks are in the foreground in the creek and bush surrounds the scene.Handwritten below the photograph in the album: The Fallsivy child, olinda falls, bridge -
 Mt Dandenong & District Historical Society Inc.
Photograph
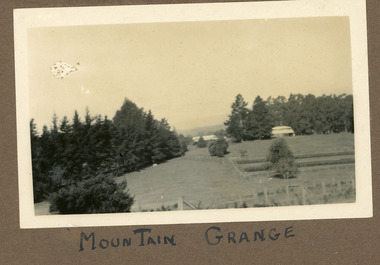
The photograph is from the album of Ivy Child. It shows a rare scene of the Mountain Grange Homestead. Mountain Grange was built by Thomas Hand on his 306 acres. By 1881 he had completed the homestead and a large barn. Thomas Hand died suddenly in 1888 and his family took over the property. His son William Hand lived in the homestead until 1931 until it was demolished due to white ants. The great barn was demolished in 1930. A new home was built and Will stayed until 1939 when the property was sold to the Shire of Lillydale. It is now the site of the Kalorama Oval. This photograph is c1927 Ivy May Child (1910 – 1989) was the daughter of Arthur Edward (Ted) Child (1878 – 1964) and Ethel May Madden (1888 – 1970). Ted Child was the son of Matthew Francis Child (1839 – 1933) and Martha Jeeves (1857 – 1926). He was the grandson of one of the early pioneers Francis Child. Ivy grew up on the family property on Childs Road and took many photographs. Most of these are glued into her photo album. The album covered the years from c1927 – 1932. Ivy married Henry William Burgess (1906 – 1968) in 1944. The photographs remain in their original state in the album with individual copies made. Black and white photograph showing a cleared area. There is a wire and posr fence in the foreground, a tall row of pine trees across the centre with two buildings visible. One in front of the trees RHS and he other in a gap in the centre. A crop has been planted in two long rows centre right of the photograph.Handwritten below the photograph in the album: MOUNTAIN GRANGEivy child, mountain grange, thomas hand, william hand, will hand, barn, great barn, homestead, shire of lillydale, kalorama oval -
 Tennis Australia
Photographic print, Circa 1935
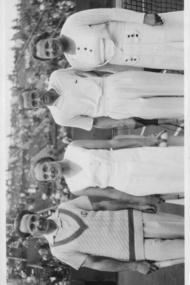
Black and white photographic print of four tennis players at the net on a tennis court. Handwritten on back of print: 'Jean Borotra, Dorothy Round, Pat Hughes, Betty Nuthall'. Part of collection of photos taken/owned by Australian player D.P. Turnbull - found in collection in a vinyl album marked 'Photos by D P Turnbull'.. Materials: Paper, Photographic emulsiontennis -
 Tennis Australia
Photographic print, Circa 1935
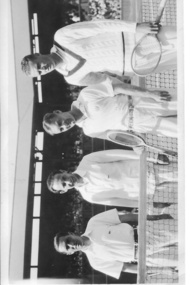
Black and white photographic print of four tennis players at the net on a tennis court. Handwritten on back of print: 'Brugnon, Borotra, Lott, Stoefen'. Part of collection of photos taken/owned by Australian player D.P. Turnbull - found in collection in a vinyl album marked 'Photos by D P Turnbull'.. Materials: Paper, Photographic emulsiontennis -
 Tennis Australia
Photographic print, 1934
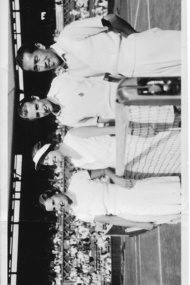
Black and white photographic print of four tennis players at the net on a tennis court. Wimbledon Mixed Doubles Final 1934. Handwritten on back of print: 'Dorothy Round, Eileen Whittingstall, Bunny Austin, Miki''. Actually it is Dorothy Shepherd-Barron, not Whittingstall, and Miki is Ryuki Miki, Japanese player. Miki and Round were victorious. Part of collection of photos taken/owned by Australian player D.P. Turnbull - found in collection in a vinyl album marked 'Photos by D P Turnbull'.. Materials: Paper, Photographic emulsiontennis -
 Tennis Australia
Photographic print, Circa 1938
Black and white photographic postcard of four female players seated and resting on side of lawn tennis court. Players are L to R: Dorothy Stevenson, Nell Hopman, Nancye Wynne (Bolton) and Thelma Coyne (Long). Place a date unknown, but likely Melbourne/Kooyong 1937 or 1938. Part of collection of photos taken/owned by Australian player D.P. Turnbull - found in collection in a vinyl album marked 'Photos by D P Turnbull'. Materials: Paper, Photographic emulsiontennis -
 Tennis Australia
Photographic print, 1939
Black and white photographic postcard of four players shaking hands at the net. Handwriting on back states 'Final of Aust Double 1939 in Victoria' and Long, Turnbull, Quist, Bromwich'. Stamped 'Copyright Herald Feature Melbourne'. Part of collection of photos taken/owned by Australian player D.P. Turnbull - found in collection in a vinyl album marked 'Photos by D P Turnbull'. Materials: Paper, Photographic emulsiontennis -
 Tennis Australia
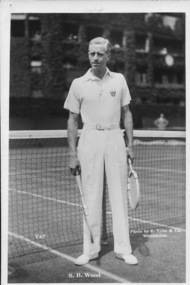
Photographic print, Circa 1934
Black and white photographic postcard of S.B. Wood, standing at net with racquet. Captions on image state his name and also 'Photo by E.Trim & Co., Wimbledon'. Part of collection of photos taken/owned by Australian player D.P. Turnbull - found in collection in a vinyl album marked 'Photos by D P Turnbull'. Materials: Paper, Photographic emulsiontennis -
 Tennis Australia
Photographic print, 1933-1934
Black and white photographic postcard of four tennis players standing on a lawn tennis court. Left two figures are Adrian Quist and Don Turnbull. Right hand figures names unknown but likely Japanese Davis Cup team members. Probably Davis Cup match in 1933 or 1934. Part of collection of photos taken/owned by Australian player D.P. Turnbull - found in collection in a vinyl album marked 'Photos by D P Turnbull'. Materials: Paper, Photographic emulsiontennis -
 Tennis Australia
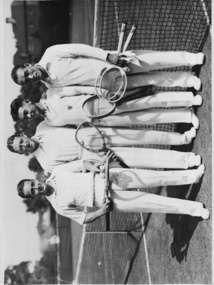
Photographic print, 1932
Black and white photographic print of six men in suits standing in a row, one with a bunch of tennis racquets at his feet. Three are Japanese players, probably Ryosuke Nunoi, Takeichi Harada and Jiro Sato(h). Australians are Jack Crawford and the other two possibly Ray Dunlop and/or Harry Hopman. Probably 1932 Japanese visit to AUstralia to play test. Part of collection of photos taken/owned by Australian player D.P. Turnbull - found in collection in a vinyl album marked 'Photos by D P Turnbull'. Materials: Paper, Photographic emulsiontennis -
 Tennis Australia
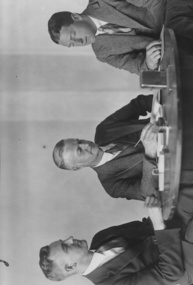
Photographic print, Circa 1934
Black and white photographic print of three men in suits seated at a table. Handwriting on back states: 'R L Shepherd, R Y Thomas, D P Turnbull, SA Selection Committee'. Part of collection of photos taken/owned by Australian player D.P. Turnbull - found in collection in a vinyl album marked 'Photos by D P Turnbull'. Materials: Paper, Photographic emulsiontennis -
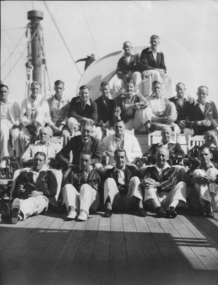 Tennis Australia
Photographic print, Circa 1934
Black and white photographic print of large number of people posed ona ship deck. Probably Australian tennis team travelling to Europe. Front from left are Don Turnbull, Viv McGrath, Adrian Quist, and behind McGrath is Jack Crawford. Other people unidentified. Part of a collection of photos taken/owned by Australian player D.P. Turnbull - found in collection in a vinyl album marked 'Photos by D P Turnbull'. Materials: Paper, Photographic emulsiontennis -
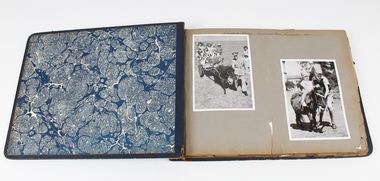
 Department of Health and Human Services
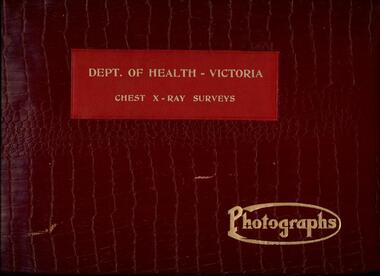
Photograph, Photo of photograph album cover entitled "Dept. of Health Victoria - Chest X-Ray Surveys - Photographs", 1962
Part of an estray collection of material from the former Tuberculosis Branch.Leather bound photograph album containing 41 black and white photographsMain Entrance Melbourne Town Hall -
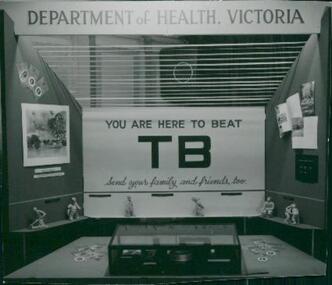 Department of Health and Human Services
Photograph, A photo of a poster headline "You are here to beat TB", and "Send your family, and friends, too" taken of a promotional display at the Department of Health chest x-ray clinic, Tuberculosis Branch. The photo is from a photograph album circa 1962, c 1962
Department of Health chest clinic operated free tuberculosis screening during the 1950' and 60's. Black and white photograph -
 Department of Health and Human Services
Photograph, Mobile chest x-ray clinic van on site on Melbourne street, showing individuals queuing to undertake screening for tuberculosis. Photo is from a photograph album circa 1962
Black and white photograph -
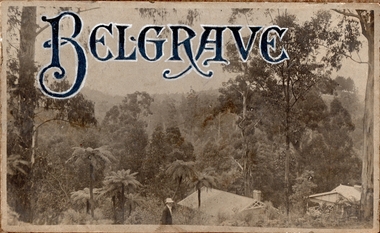 Southern Sherbrooke Historical Society Inc.
Photograph, Belgrave
Photo which was originally stuck to Jacobson photo album. Photo shows a man in a dark jacket, pale shirt and pale hat, standing or walking along a road above two houses in a steep valley, probably the valley below Monbulk Road. Man is visible from waist up. One house is probably the house which features in other photos. The name 'Belgrave' has been hand-drawn on the top of the photo in an elegant script. The word is in black with a white outline."Belgrave' hand-drawn on the photo. -
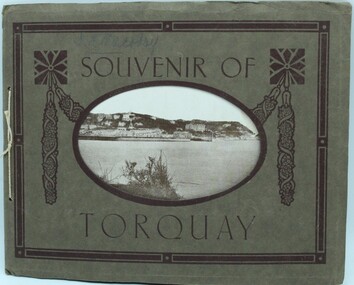 Ringwood RSL Sub-Branch
Booklet, Souvenir of Torquay
... Paper covered photo album containing black and white photos.... melbourne Paper covered photo album containing black and white ...Paper covered photo album containing black and white photos. -
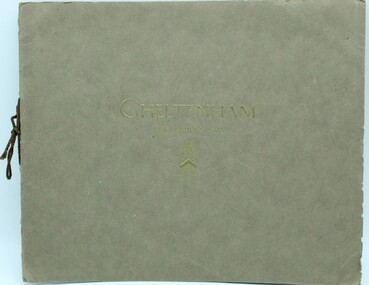 Ringwood RSL Sub-Branch
Booklet, Cheltenham. The Gardia Spa
... Photo album containing black and white photos... melbourne Photo album containing black and white photos Cheltenham ...Photo album containing black and white photos -
 Ringwood RSL Sub-Branch
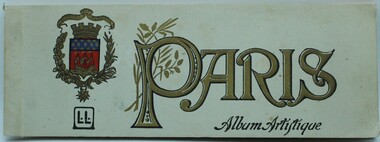
Photographs, Paris Album Artiflique
Black and white photos of Paris c WW1 -
 Ringwood RSL Sub-Branch
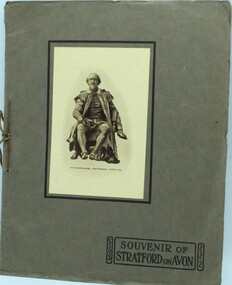
Photo Album, Souvenir of Stratford on Avon
Black and white prints of Stratford on Avon -
 Ringwood RSL Sub-Branch
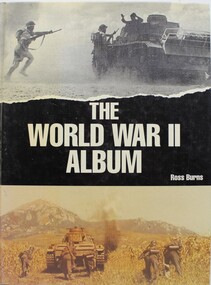
Book, The World War 2 Album, 1991
304 Pages of text with black and white photos complete with index.First published 1991 by Saturn Book Ltd London UK -
 Melbourne Legacy
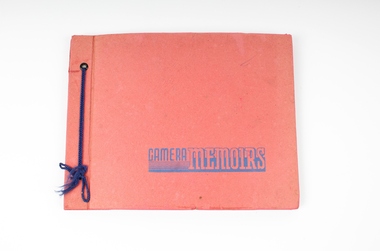
Album - Photo album, Holmbush, 194X
Photos include Legacy residences that housed junior legatees. Also outings by some of the junior Legatees, for example to the zoo and a campsite or picnic. One of the junior legatees in a nurses uniform and dressed for her wedding. Names are not known. Further perusal is requried as some pencil marks are indistinct.A compilation of photos of some junior legatees in the Legacy residences.Red photo album x 33 pages, with a collection of black and white, and sepia toned photographs. There is a blue string looped through two holes at the left side of the book that binds the pages together. A clipping from a newspaper article rests between pages eight and nine."CAMERA MEMOIRS"residences, junior legatee outing -
 Melbourne Legacy
Album, Photos from the 1940s, 1940s
Provenence is unknown but contains potentially rare photos. A comprehensive record of the types of events provided for Junior Legatees in the 1940s. Events such as the Government House Christmas parties and Annual Demonstrations. Also a record of the classes offered to girls and boys. There are photos of Anzac Commemoration Ceremony for school students that has been held annually by Legacy in April. It helps educate and promote the observance of Anzac Day to students. Some of the photos are Junior Legatees that joined the armed forces in the second World War. Pages 7 and 8 show the visit of the Duke and Duchess of Gloucester to Legacy. They were in Australia to start his term as Governor General of Australia - until 1947. An important photographic record of the work of Legacy in the 1940s.Large photo album with blue leather look back and front cover. Decorative front and back end pages. Screws in left hand side to keep paper pages bound together. 20 pages with black and white photos attached to the majority of both sides of the pages.Handwritten at top of pages. Page 1 'Christmas Party, Government House Grounds, 1945' Page 2 'Christmas Party, Government House Grounds, 1945' Page 3 'Christmas Party, Government House Grounds, 1945' Page 4 'Senior Girls 6/2/1945' Page 5 'Senior Girls 6/2/1945' Page 6 'JL (?) Cecil Waters 6/2/1945' Page 7 'Duke and Duchess of Gloucester at the Club Rooms, 27/11/1945' and 'At the Club Rooms' Page 8 'At the Grosvenor Theatre' Page 9 '20/2/45 Speaker Wlliamstown' Page 10 '6/2/45 Mr Justice(?) Monty Phillips' Pages 11 - 16 no inscription Page 17 'Annual Demonstration, 1946' (photo missing) Page 18 'Annual Demonstration, 1946' Page 19 'Annual Demonstration, 1946' Page 20 Sepia photo Savige Page 21 'Junior Legatee N Shiels' Page 22 'Legatee E.T. Scott' Page 23 'Legatee H.E. Cohe (?)' Page 24 ‘Christmas Party, Government House Grounds 1948’ (Photo missing bottom right) Page 25 ‘Christmas Party, Government House Grounds 1944’ (Page cut in half) Page 26 ‘Christmas Party, Government House Grounds 1944’ (Page cut in half) events, government house party, anzac commemoration for students, junior legatee outing, annual demonstration, royal visit -
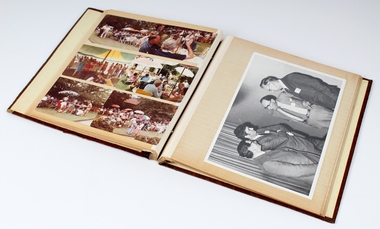 Melbourne Legacy
Album - Photo album, A record of comradeship activities, 1970s-1980s
This album of Comradeship activities was compiled by Legatee Fred Holdsworth. It contains photographs, newspaper cuttings and ephemera relating to various “Comradeship” activities (social gatherings) held throughout the 1970s and early 1980s. Items included various events legatees participated in. First few pages had photos from a gathering at Cruden Farm on 15 May 1977. Cruden Farm was owned by Elisabeth Murdoch, the mother-in-law of Legatee Geoff Handbury. It appears there was a kite flying contest. Names are not listed. Three photos were from Queensland where Legatee Wal Escott had retired at Mundoona apartments, Noosa Heads, one photo shows him with Lorna Grimwade on 6/10/1979. There is a black and white photo of Max Armstrong, Rex Hall, Harry Burton, Warren Hardy riding horses in the Anzac Day march. The year is not known but an accompanying newspaper article mentions that they had been riding every year for 13 years on horses loaned by the police mounted branch. The newspaper clipping shows another photo of the four. A photo of seven legatees including David Carter were at the Numurkah Annual meeting in 1978. There are 8 photos of a gathering of Legatees and their wives at Stanhope in 1979. A photo of a Christmas party at Chaucers in 1979 was missing from the page, it has shown Choirmaster Reg Thomson and Choristers; Rob Allison, Bruce Hall, Les Patch, Bill Seager, David Syme and Ron Austin; with the M.C. being Fred Holdsworth. There was a trip to a trout farm in Alexandra Yea area in February 1978. At a comradeship evening there a photos showed the Comradeship committee of Harold Berg, John Cooper and Fred Holdsworth. Also photos from Anzac Night in 1980 and 1981. Plus other gathering at people's homes. A black and white photo of men in formal black tie, is from a night at the Windsor Hotel to farewell Sit Thomas White to become Australia's High Commissioner in London. Left to right are Sir Archie Michaelis, Sir John Latham, Sir Thomas White, Lt Col Donovan Joynt and Sir Stanley Savige. At the 1981 comradeship Christmas party, the held a 'this is your life' tribute to President Ken Green.The Comradeship photo album was put together by the Comradeship committee and records events that Legatees did and places they lived or visited. Some appear to be trips to visit other Legatees living overseas and social occasions held in different places. It shows the bond that Legatees have with each other.Brown vinyl photo album. The front cover is embellished with a double gold border. The album contains thirty pages bearing both colour and black and white photographs as well as newspaper clippings from various “Comradeship” events during the 1970s and 1980s.Inside cover - “A record of Comradeship activities / Fred Holdsworth” ? First page - “AT CRUDEN PARK / 15 May 1977” Third page - “CHAMP THE KITE MAN” Fourth page - “THE SHRINE 1977” / “THE CHAMP” / “REX” Fifth page - “Lorna Grimwade/ + Wal Escott/ at Noosa Heads, Q. / 6/10/79” Sixth page - “Max Armstrong, Rex Hall, Harry Burton, Warren Hardy” Seventh page - “Numurkah Annual 1978” / “ANZAC Night 1973” Eighth page - “STANHOPE 1979” Ninth page - “THE CHRISTMAS CHORISTERS at CHAUCERS CANTERBURY 1979.” / “FEARLESS FREDS FAMOUS FOLLIES. CHOIRMASTER. Reg Thomson. CHORISTERS. Rob Allison. Bruce Hall. Les Patch. Bill Seager. David Syme. Ron Austin. / M.C. Fred Holdsworth.” Tenth page - “ALEXANDRA YEA / ~ / FEBRUARY 1978” Eleventh page - “COMRADESHIP HIERARCHY 1979 / HAROLD BERG / DEP CHAIRMAN / JOHN COOPER / CHAIRMAN / FRED HOLDSWORTH / TREASURER” Twelfth page - “ANZAC NIGHT / ~ / 1980” Eighteenth page - “ANZAC NIGHT - 1981” Nineteenth page - “ANZAC NIGHT -1981” Twenty Second - “THIS IS YOUR LIFE / 1981 comradeship/ christmas party” comradeship, events, legatee event -
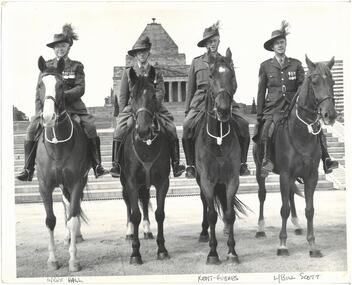 Melbourne Legacy
Photograph, Light Horse Men, 1967?
Four soldiers mounted on horses in the forecourt of the Shrine of Remembrance. Three of the four that are named are Legatee Rex Hall, Billy Kent-Hughes and Legatee Bill Scott. The other rider's name and date unknown. An article in The Herald on 19 April 1975 mentions that Rex Hall, Jim Holland and Bill Scott would wear their Light Horse uniforms and lead the Anzac Day parade to the Shrine mounted on police horses (see 01023). Though the date on the back of the photo is 1967. It is believed these legatees rode in at least 13 Anzac Day marches. Wilfred Kent-Hughes, known as Billy, served in both World Wars, was a prisoner of the Japanese, an Olympic athlete (hurdles, Antwerp 1920) and a State and Federal politician and was awarded a Knighthood. His niece, Jane, is a Legatee in the South Gippsland Group. From another article found Colonel Rex Hall was a member of the 5th Light Horse Brigade in World War 1. The image of the newspaper article and black and white photo is from an album stored separately at 00209 - at that march the men were: Max Armstrong, Legatee Rex Hall, Legatee Harry Burton and Warren Hardy.A record of a Legatees riding horses to the Shrine in Light Horse uniform.Black and white photo of 4 soldiers on horseback at the Shrine.Front of photo has " L/Rex Hall ; Kent-Hughes ; L/Bill Scott" in black pen. The back is stamped Copyright Herald and Weekly Times in blue ink. Handwritten "Property of Melbourne Legacy / Melbourne Shrine of Remembrance / L/tee J. R. Hall / 1967" in black ink.anzac day, horses, light horse, rex hall, bill scott, billy kent-hughes -
 Moorabbin Air Museum
Document (Item) - Photo Album of Kevin Kerle, Kevin Kerle, Photographs
Contains 58 black and white images of civil aircraft from the second half of the 20th century. The inside of the front cover mistakenly attributes it to Kevin Keppel.