Showing 1636 items matching " australia square "
-
 Flagstaff Hill Maritime Museum and Village
Tool - Auger, Robert Sorby, First half of the 20th Century
A scotch eye auger is perfect for quickly making holes in dry or wet wood for making chairs, stools, and any number of woodworking projects. The scotch eye serves as a peg gauge and whatever peg you make to go into the hole should fit into the augers eye. Robert Sorby & Sons: The forbearer's of Robert Sorby had been cutlers in the Sheffield region of England, dating from the mid 17th century. Robert Sorby and Sons were registered in Sheffield in 1828 as a manufacturer of edge tools, saws, scythes and hay knives. In addition to manufacturing tools, they also diversified into the manufacture of crucible steel for tool manufacture. From circa 1860-1967, the Sorby factory in Sheffield was known as the “Kangaroo Works”. The Kangaroo Brand of tools was made by Robert Sorby & Sons. During the 19th century, they had a large trade in Australasia. By the early 20th century, they were manufacturing carving tools, planes and plane irons, circular saws, wood saws, butchers saws and cleavers, garden tools, pruning knives, coopers’ knives, bricklayers tools and joiners tools. In 1923 Robert Sorby & Sons was bought by Sheffield company Hattersley and Davidson. They are today one of the few remaining British tool manufacturers.The company has a long tradition of making edged tools for various uses and exporting them to Australia, however the subject item was probably made from the early 20th century up until 1967 when the company stopped exporting to Australia.Scotch Eye Auger, Double Twist with Lead Screw, square shaft, socket set at right angleRob Sorbey Sheffield stamped on shaft with Kangaroo trade markflagstaff hill, warrnambool, flagstaff-hill, flagstaff-hill-maritime-museum, maritime-museum, shipwreck-coast, flagstaff-hill-maritime-village, ring auger, carpenders tools, hole drilling, rob sorby & sons -
 Flagstaff Hill Maritime Museum and Village
Equipment - Printing Press, Harrild and Sons, 1866
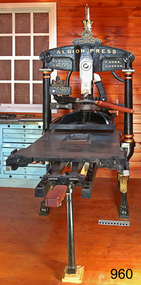
This Albion printing press was manufactured by Harrild & Sons of London and exported in 1868 from London to the colonial Western Victoria town of Coleraine, population of 700 at that time. It was installed in the Colerain Albion printing office. It was used to print the first edition of the Coleraine Albion newspaper in 1868 and continued until publication ceased in 1974. The Albion Press is still being used today by a volunteer printer in the “Examiners Office” in the village at Flagstaff Hill. Amongst the items produced are printed paper bags for the Tea Rooms and posters for visitors. ALBION PRINTING PRESS The Albion press was invented and manufactured in London by Richard Whittaker Cope around 1820 and was still being produced in the 1930s. The Albion was manufactured under licence by several companies from the 1850s onwards, one of which was Harrild & Sons of Fleet Works, London. Harrild & Sons describes its business as “printing materials manufacturer”. The business was established in 1807 by Robert Harrild and named R. Harrild & Co. In 1813 he showed that rollers could be used to ink a printing plate instead of inking balls, the method in use at the time. He then established a company to make the rollers. Eventually his company would make other printing materials and equipment. Robert’s sons joined him in the 1830s, when the company was renamed Harrild & Sons, and they continued to run the company after his death in 1853 and up until the mid-1900s. COLERAINE ALBION PRINTING OFFICE The Coleraine Albion Printing Office was established by W.L. Ambler. The first issue of the Coleraine Albion was dated 4th January 1868. Arrangements had been made to receive news from Melbourne, nearby provinces, other colonies and England. The second issue on 18 January 1868 printed articles from many agencies, including the Melbourne Age and the Warrnambool Examiner. The Albion office was sold to William Hatherleigh, formerly of Portland, in October 1868. Thereafter the Albion office had many owners. The last was L. A. & E. Oliver, who took over in January 1972 and was the last to be stated as printers and publishers of the Coleraine Albion. The office was wound up in 1974. The Albion Press and other equipment was distributed to Star printing in Terang. Star Printing donated the Albion press to Flagstaff Hill Maritime Village around 1980 and Stan Philp, owner of Philprint in Warrnambool, transported it to Warrnambool, brought it up to good working order and organised the supply of appropriate printer’s type. The Albion hand operated printing press is significant for producing the first newspaper in Coleraine, Western Victoria and continuing production for over 100 years. The Albion is technologically significant as a working example of a hand operated printer from the mid-19th century. The use of the printer is demonstrated by volunteers at Flagstaff Hill, printing items such as lolly and treat bays for use in the Village. The Albion is socially significant for its role in the isolated provincial colony, providing communication with the outside world, both in Australia and overseas. Newspaper printers were often amongst the first businesses of a small town. Printing press; hand operated Albion Press, Patent 2105. The machine has an upright iron frame at the back that supports the upper press that has a wooden handled metal bar is attached. The frame and legs support a thick metal flatbed. A metal leg supports the front of the press bed. The iron work is painted black with gold highlights. The decorative legs are finished with the golden feet of an animal. The frame above the metal bed includes a crown shaped finial symbol above the maker’s emblem. The maker’s details and the name of the printer are embossed on the upright frame. A plaque with the patent number is below a Lion and Unicorn emblem.Embossed maker’s emblem [A red cross - above a double ring – square inside ring – three banners below ring]. - Inside the double rings “PRINTING MATERIALS MANUFACTURE” - Inside the square, intertwined text “H & S” [representing Harrild & Sons] - Inside the three banners ““FLEET” “WORKS.” “LONDON.E.C.” Embossed across the shoulders “ALBION PRESS / HARRILD & SONS, / MAKERS LONDON.” Emblem above plaque [Lion and Unicorn] Embossed on the plaque “PATENT / 2105” Stamped into upright machine part above the printing bed “2105 / 1866” flagstaff hill, warrnambool, shipwrecked coast, flagstaff hill maritime museum, maritime museum, shipwreck coast, flagstaff hill maritime village, albion press, printing press, 1866 printing press, printing equipment, communications, coleraine albion printing office, coleraine newspaper, albion newspaper, south west victoria newspapers, harrild and sons london, richard whittaker cope, star printing terang, philprint, coleraine albion, hand operated press -
 Flagstaff Hill Maritime Museum and Village
Plaque - Insignia, Bank of Australasia, 16-10-1980
This plaque displays the Bank of Australia's Coat of Arms and is significant because is ts the symbol printed on the Bank Notes of the Bank of Australasia. The bank of Australasia was incorporated by Royal Charter of England in March 1834. It had its Australian beginning on 14th December 1835, opening in Sydney. The Acting Superintendent of the bank at that time was David Charters McArthur. He was Superintendent from 1867-to 1876. The Melbourne branch opened on 28th August 1838 in a two-roomed brick cottage on the north side of Little Collins Street, where two huge mastiff dogs were used at night to guard the bank. The government also provided an armed military sentinel. Due to the bank's rapid growth, a new building for the Melbourne branch was opened in 1840 at 75 Collins Street West. By 1879 the bank had been upgraded to a magnificent two-storey building on the corners of Collins and Queens Streets, with the entry on Collins Street. In 1951 the Bank of Australasia amalgamated with the Union Bank to form the Australia and New Zealand Bank, now known as the ANZ. Then in 1970, the ANZ merged with both the ES&A and the London Bank of Australia to form the ANZ Banking Group Limited. The ANZ Banking Group Ltd kindly donated a variety of historic items from the Bank of Australasia. BANK of AUSTRALASIA, WARRNAMBOOL – In 1854 Warrnambool had two banks, the Union Bank and the Bank of Australasia. Later, completely different bank businesses opened; in 1867 the National Bank of Australasia, then in 1875 the Colonial Bank of Australasia. The original Warrnambool branch of the Bank of Australasia was established in July 1854, and operated from a leased cottage on Merri Street, close to Liebig Street. The bank next bought a stone building previously erected by drapers Cramond & Dickson on the corner of Timor and Gibson Streets. Samuel Hannaford was a teller and then Manager at the Warrnambool branch from 1855 to 1856 and the Warrnambool Council chose that bank for its dealings during 1856-57. In 1859 Roberts & Co. was awarded the contract to build the new Bank of Australasia branch for the sum of £3,000; the firm built the Warrnambool Post Office in 1856 and purchased land in Timor Street in 1858. The land was on a sand hill on the northeast corner of Timor and Kepler Streets and had been bought in 1855 from investor James Cust. The new building opened on May 21, 1860. The bank continued to operate there until 1951 when it merged with the Union Bank to form the ANZ Bank, which continued operating from its Liebig Street building. Warrnambool City Council purchased the former Bank of Australasia building in 1971 and renovated it, then on 3rd December 1973 it was officially opened as the Art Gallery by Cr. Harold Stephenson and Gallery Director John Welsh. The Gallery transferred to the purpose-built building in Liebig Street in 1986 and the old bank building is now the Gallery club. Staff at the Bank of Australasia in Warrnambool included the following men but others were also involved: Samuel Hannaford, Teller then Manager from 1855-1856; Hawkins, Manager in 1856, W H Palmer, Manager from January 1857 until November 1869 when the Teller Basil Spence was promoted to Manager; H B Chomley, Manager from April 1873 and still there in 1886; A Butt, Manager in 1895-1904; J R McCleary Accountant and Acting Manager for 12 months, until 1900; A Kirk, Manager 1904; J Moore, staff until his transfer to Bendigo in December 1908; J S Bath was Manager until 1915; C C Cox, Manager until April 1923; Richard C Stanley, Manager 1923 to April 1928. The plaque with the insignia has significance through its association with the Bank of Australasia. The early Australian bank was established in 1834 by Royal Charter and opened in Sydney, Australia, in Sydney in 1835. The bank had many Australian offices in November 1877, particularly on the east and south coasts. Victoria had 45 per cent of all Offices. The plaque is locally significant for its association with the Warrnambool Bank of Australasia, which was established in 1854. It was Warrnambool Council’s first bank. The bank continued to operate until the organisation's merger in 1951 when it became the ANZ Bank Group today. The Bank was an integral part of the growth of local commerce and the community.Insignia of the Bank of Australasia. Cast metal coat of arms within a gold, shield-shaped border, painted gold and red, with blue, black and white details. Decals in each corner; upper left and lower right have a white sheep suspended by a blue ribbon, upper right and lower left have a 3-masted, square-rigged sailing ship with a black hull and red flags flying on each mast, sailing on waves with storm clouds in the sky. Between the emblems are gold stars.Decals; ships, sheep, starsflagstaff hill, warrnambool, shipwrecked coast, flagstaff hill maritime museum, maritime museum, shipwreck coast, flagstaff hill maritime village, great ocean road, bank of australasia, boa, union bank, australia & new zealand bank, anz bank, david charters mcarthur, d c mcarthur, currency, banknote, commerce, banking, heraldic shield, insignia, samuel hannaford -
 Flagstaff Hill Maritime Museum and Village
Domestic object - Dinner plate, William Adams, before 1863-1875
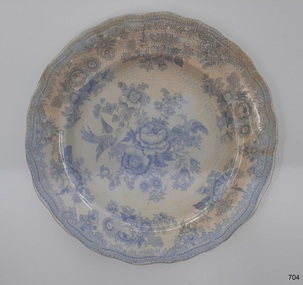
The Asiatic Pheasant pattern is a transfer design and was the most popular design of the 18th & 19th centuries and is still being produced today. The design was produced as high quality, decorative dinnerware by the potters in the Staffordshire area of England, from the late 1830’s, but no-one is sure exactly who the original designer was. This particular example was made by William Adams of Tunstall, Stoke-on-Trent, Staffordshire at the Greengates Potteries probably after or around 1863 and is believed to have been part of a passengers goods. The Adams family have a long line of making pottery since 1584 until 1966 when they were acquired by the Wedgewood group of companies. But this items pattern is attributed to the Adams potteries. History of the Loch Ard: The Loch Ard got its name from ”Loch Ard” a loch which lies to the west of Aberfoyle, and the east of Loch Lomond. It means "high lake" in Scottish Gaelic. The vessel belonged to the famous Loch Line which sailed many vessels from England to Australia. The Loch Ard was built in Glasgow by Barclay, Curle & Co. in 1873, the vessel was a three-masted square-rigged iron sailing ship that measured 79.87 meters in length, 11.58 m in width, and 7 m in depth with a gross tonnage of 1693 tons with a mainmast that measured a massive 45.7 m in height. Loch Ard made three trips to Australia and one trip to Calcutta before its fateful voyage. Loch Ard left England on March 2, 1878, under the command of 29-year-old Captain Gibbs, who was newly married. The ship was bound for Melbourne with a crew of 37, plus 17 passengers. The general cargo reflected the affluence of Melbourne at the time. Onboard were straw hats, umbrella, perfumes, clay pipes, pianos, clocks, confectionery, linen and candles, as well as a heavier load of railway irons, cement, lead and copper. There were other items included that were intended for display in the Melbourne International Exhibition of 1880. The voyage to Port Phillip was long but uneventful. Then at 3 am on June 1, 1878, Captain Gibbs was expecting to see land. But the Loch Ard was running into a fog which greatly reduced visibility. Captain Gibbs was becoming anxious as there was no sign of land or the Cape Otway lighthouse. At 4 am the fog lifted and a lookout aloft announced that he could see breakers. The sheer cliffs of Victoria's west coast came into view, and Captain Gibbs realised that the ship was much closer to them than expected. He ordered as much sail to be set as time would permit and then attempted to steer the vessel out to sea. On coming head-on into the wind, the ship lost momentum, the sails fell limp and Loch Ard's bow swung back towards land. Gibbs then ordered the anchors to be released in an attempt to hold its position. The anchors sank some 50 fathoms - but did not hold. By this time the ship was among the breakers and the tall cliffs of Mutton Bird Island rose behind. Just half a mile from the coast, the ship's bow was suddenly pulled around by the anchor. The captain tried to tack out to sea, but the ship struck a reef at the base of Mutton Bird Island, near Port Campbell. Waves subsequently broke over the ship and the top deck became loosened from the hull. The masts and rigging came crashing down knocking passengers and crew overboard. When a lifeboat was finally launched, it crashed into the side of Loch Ard and capsized. Tom Pearce, who had launched the boat, managed to cling to its overturned hull and shelter beneath it. He drifted out to sea and then on the flood tide came into what is now known as Lochard Gorge. He swam to shore, bruised and dazed, and found a cave in which to shelter. Some of the crew stayed below deck to shelter from the falling rigging but drowned when the ship slipped off the reef into deeper water. Eva Carmichael a passenger had raced onto the deck to find out what was happening only to be confronted by towering cliffs looming above the stricken ship. In all the chaos, Captain Gibbs grabbed Eva and said, "If you are saved Eva, let my dear wife know that I died like a sailor". That was the last Eva Carmichael saw of the captain. She was swept off the ship by a huge wave. Eva saw Tom Pearce on a small rocky beach and yelled to attract his attention. He dived in and swam to the exhausted woman and dragged her to shore. He took her to the cave and broke the open case of brandy which had washed up on the beach. He opened a bottle to revive the unconscious woman. A few hours later Tom scaled a cliff in search of help. He followed hoof prints and came by chance upon two men from nearby Glenample Station three and a half miles away. In a complete state of exhaustion, he told the men of the tragedy. Tom then returned to the gorge while the two men rode back to the station to get help. By the time they reached Loch Ard Gorge, it was cold and dark. The two shipwreck survivors were taken to Glenample Station to recover. Eva stayed at the station for six weeks before returning to Ireland by steamship. In Melbourne, Tom Pearce received a hero's welcome. He was presented with the first gold medal of the Royal Humane Society of Victoria and a £1000 cheque from the Victorian Government. Concerts were performed to honour the young man's bravery and to raise money for those who lost family in the disaster. Of the 54 crew members and passengers on board, only two survived: the apprentice, Tom Pearce and the young woman passenger, Eva Carmichael, who lost her family in the tragedy. Ten days after the Lochard tragedy, salvage rights to the wreck were sold at auction for £2,120. Cargo valued at £3,000 was salvaged and placed on the beach, but most washed back into the sea when another storm developed. The wreck of Lochard still lies at the base of Mutton Bird Island. Much of the cargo has now been salvaged and some items were washed up into Lochard Gorge. Cargo and artefacts have also been illegally salvaged over many years before protective legislation was introduced in March 1982. One of the most unlikely pieces of cargo to have survived the shipwreck was a Minton majolica peacock- one of only nine in the world. The peacock was destined for the Melbourne 1880 International Exhibition in. It had been well packed, which gave it adequate protection during the violent storm. Today the Minton peacock can be seen at the Flagstaff Hill Maritime Museum in Warrnambool. From Australia's most dramatic shipwreck it has now become Australia's most valuable shipwreck artifact and is one of very few 'objects' on the Victorian State Heritage Register. The shipwreck of the Loch Ard is of significance for Victoria and is registered on the Victorian Heritage Register ( S 417). Flagstaff Hill has a varied collection of artefacts from Loch Ard and its collection is significant for being one of the largest accumulation of artefacts from this notable Victorian shipwreck of which the subject items are a small part. The collections objects give us a snapshot of how we can interpret the story of this tragic event. The collection is also archaeologically significant as it represents aspects of Victoria's shipping history that allows us to interpret Victoria's social and historical themes of the time. Through is associated with the worst and best-known shipwreck in Victoria's history. Plate recovered from the wreck of the Loch Ard. Earthenware dinner plate with blue and white transfer design (Asiatic Pheasant) with a clear over-glaze. The outer rim is scalloped. Stickers with inscriptions "Rec 373 A" "L 102" "From Loch Ard Wreck (1878) - - -" Design logo [Floral wreath with ribbon and text "Asiatic Pheasant" and text below "- - - -"}flagstaff hill, warrnambool, flagstaff hill maritime museum, shipwreck coast, flagstaff hill maritime village, great ocean road, loch line, loch ard, captain gibbs, eva carmichael, tom pearce, glenample station, mutton bird island, loch ard gorge, asiatic pheasant, china dinner plate, earthenware plate, w adams potteries -
 Flagstaff Hill Maritime Museum and Village
Leisure object - Toy Gun, ca 1878
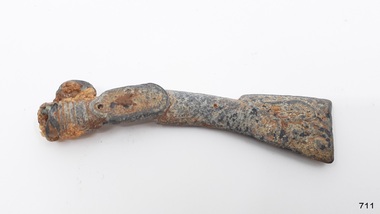
The lead toy gun was recovered from the wreck of the Loch Ard and could have been amongst the personal belongings of a passenger. History of the Loch Ard: The Loch Ard got its name from ”Loch Ard” a loch that lies to the west of Aberfoyle, and the east of Loch Lomond. It means "high lake" in Scottish Gaelic. The vessel belonged to the famous Loch Line which sailed many vessels from England to Australia. The Loch Ard was built in Glasgow by Barclay, Curle & Co. in 1873, the vessel was a three-masted square-rigged iron sailing ship that measured 79.87 meters in length, 11.58 m in width, and 7 m in depth with a gross tonnage of 1693 tons with a mainmast that measured a massive 45.7 m in height. Loch Ard made three trips to Australia and one trip to Calcutta before its fateful voyage. Loch Ard left England on March 2, 1878, under the command of 29-year-old Captain Gibbs, who was newly married. The ship was bound for Melbourne with a crew of 37, plus 17 passengers. The general cargo reflected the affluence of Melbourne at the time. Onboard were straw hats, umbrellas, perfumes, clay pipes, pianos, clocks, confectionery, linen and candles, as well as a heavier load of railway irons, cement, lead and copper. There were other items included that were intended for display in the Melbourne International Exhibition of 1880. The voyage to Port Phillip was long but uneventful. Then at 3 am on June 1, 1878, Captain Gibbs was expecting to see land. But the Loch Ard was running into a fog which greatly reduced visibility. Captain Gibbs was becoming anxious as there was no sign of land or the Cape Otway lighthouse. At 4 am the fog lifted and a lookout aloft announced that he could see breakers. The sheer cliffs of Victoria's west coast came into view, and Captain Gibbs realised that the ship was much closer to them than expected. He ordered as much sail to be set as time would permit and then attempted to steer the vessel out to sea. On coming head-on into the wind, the ship lost momentum, the sails fell limp and Loch Ard's bow swung back towards land. Gibbs then ordered the anchors to be released in an attempt to hold their position. The anchors sank some 50 fathoms - but did not hold. By this time the ship was among the breakers and the tall cliffs of Mutton Bird Island rose behind. Just half a mile from the coast, the ship's bow was suddenly pulled around by the anchor. The captain tried to tack out to sea, but the ship struck a reef at the base of Mutton Bird Island, near Port Campbell. Waves subsequently broke over the ship and the top deck became loosened from the hull. The masts and rigging came crashing down knocking passengers and crew overboard. When a lifeboat was finally launched, it crashed into the side of Loch Ard and capsized. Tom Pearce, who had launched the boat, managed to cling to its overturned hull and shelter beneath it. He drifted out to sea and then on the flood tide came into what is now known as Lochard Gorge. He swam to shore, bruised and dazed, and found a cave in which to shelter. Some of the crew stayed below deck to shelter from the falling rigging but drowned when the ship slipped off the reef into deeper water. Eva Carmichael a passenger had raced onto the deck to find out what was happening only to be confronted by towering cliffs looming above the stricken ship. In all the chaos, Captain Gibbs grabbed Eva and said, "If you are saved Eva, let my dear wife know that I died like a sailor". That was the last Eva Carmichael saw of the captain. She was swept off the ship by a huge wave. Eva saw Tom Pearce on a small rocky beach and yelled to attract his attention. He dived in and swam to the exhausted woman and dragged her to shore. He took her to the cave and broke the open case of brandy which had washed up on the beach. He opened a bottle to revive the unconscious woman. A few hours later Tom scaled a cliff in search of help. He followed hoof prints and came by chance upon two men from nearby Glenample Station three and a half miles away. In a complete state of exhaustion, he told the men of the tragedy. Tom then returned to the gorge while the two men rode back to the station to get help. By the time they reached Loch Ard Gorge, it was cold and dark. The two shipwreck survivors were taken to Glenample Station to recover. Eva stayed at the station for six weeks before returning to Ireland by steamship. In Melbourne, Tom Pearce received a hero's welcome. He was presented with the first gold medal of the Royal Humane Society of Victoria and a £1000 cheque from the Victorian Government. Concerts were performed to honour the young man's bravery and to raise money for those who lost family in the disaster. Of the 54 crew members and passengers on board, only two survived: the apprentice, Tom Pearce and the young woman passenger, Eva Carmichael, who lost her family in the tragedy. Ten days after the Lochard tragedy, salvage rights to the wreck were sold at auction for £2,120. Cargo valued at £3,000 was salvaged and placed on the beach, but most washed back into the sea when another storm developed. The wreck of Lochard still lies at the base of Mutton Bird Island. Much of the cargo has now been salvaged and some items were washed up into Lochard Gorge. Cargo and artefacts have also been illegally salvaged over many years before protective legislation was introduced in March 1982. One of the most unlikely pieces of cargo to have survived the shipwreck was a Minton majolica peacock- one of only nine in the world. The peacock was destined for the Melbourne 1880 International Exhibition. It had been well packed, which gave it adequate protection during the violent storm. Today the Minton peacock can be seen at the Flagstaff Hill Maritime Museum in Warrnambool. From Australia's most dramatic shipwreck, it has now become Australia's most valuable shipwreck artifact and is one of very few 'objects' on the Victorian State Heritage Register. The shipwreck of the Loch Ard is of significance for Victoria and is registered on the Victorian Heritage Register ( S 417). Flagstaff Hill has a varied collection of artefacts from Loch Ard and its collection is significant for being one of the largest accumulation of artefacts from this notable Victorian shipwreck of which the subject items are a small part. The collections objects give us a snapshot of how we can interpret the story of this tragic event. The collection is also archaeologically significant as it represents aspects of Victoria's shipping history that allows us to interpret Victoria's social and historical themes of the time. Through is associated with the worst and best-known shipwreck in Victoria's history.Toy gun, lead, barrel missing. Details have been moulded into the metal. The surface has heavy encrustation. flagstaff hill, warrnambool, flagstaff hill maritime museum, shipwreck coast, flagstaff hill maritime village, great ocean road, loch line, loch ard, captain gibbs, eva carmichael, tom pearce, glenample station, mutton bird island, loch ard gorge, toy gun, metal toy -
 Flagstaff Hill Maritime Museum and Village
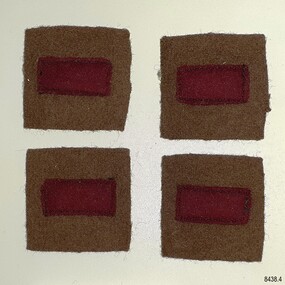
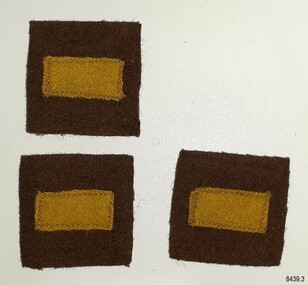
Badge - Australian Military cloth patch, Army Medical Corps, 108 Australian General Hospital, 1939-1945
... squares. Insignia of the Australian Defence Forces, Army Medical... squares. Insignia of the Australian Defence Forces, Army Medical ...The four cloth patches belonged to Dr William Roy Angus and are now part of Flagstaff Hill’s comprehensive W.R. Angus Collection, donated by the family of Dr W R Angus (1901-1970), surgeon and oculist. The badges date to the Second World War era, when Dr Angus was a Surgeon Captain for the Australian Defence Forces in the Army Medical Corps, 108 Australian General Hospital and 106 Australian General Hospital, stationed in Ballarat, Victoria, and in Bonegilla, N.S.W. He completed his service just before the end of the war due to suffering from a heart attack. In World War I the troops of the Australian Military Forces staked coloured flags of various shapes and colours in the ground where they camped to identify their units. These flag codes were quickly recognised. The system worked so well that miniature flags were called colour patches. They became part of the uniform, to be worn on both sleeves just below the shoulder. The system was slightly modified for use in the Second World War. The W.R. Angus Collection: - The W.R. Angus Collection includes historical medical equipment, surgical instruments and material belonging to Dr Edward Ryan and Dr Thomas Francis Ryan, (both of Nhill, Victoria) and Dr Angus’ own belongings. The Collection’s history spans the medical practices of the two Doctors Ryan, from 1885-1926 plus that of Dr Angus, up until 1969. It includes historical medical and surgical equipment and instruments from the doctors Edward and Thomas Ryan of Nhill, Victoria. Dr Angus married Gladys in 1927 at Ballarat, the nearest big city to Nhill where he began as a Medical Assistant. He was also Acting House surgeon at the Nhill hospital where their two daughters were born. During World War II He served as a Military Doctor in the Australian Defence Forces. Dr Angus and his family moved to Warrnambool in 1939, where Dr Angus operated his own medical practice. He later added the part-time Port Medical Officer responsibility and was the last person appointed to that position. Both Dr Angus and his wife were very involved in the local community, including the planning stages of the new Flagstaff Hill and the layout of the gardens there. Dr Angus passed away in March 1970.Dr W R Angus (1901-1970), surgeon and oculist, collected a range of military objects including those he personally used during his time as Surgeon Captain in the Australian Defence Forces in World War II. The objects allow insight into military life in the early-to-mid 20th century. The W.R. Angus Collection is significant for still being located at the site it is connected with, Doctor Angus being the last Port Medical Officer in Warrnambool. The Collection includes historical medical objects that date back to the late 1800s.Badges; set of four cloth patches, red rectangles on brown squares. Insignia of the Australian Defence Forces, Army Medical Corps, 108 Australian General Hospital, WWII era. Dr W R Angus owned the cloth patches that are now part of the W. R. Angus Collection.flagstaff hill, warrnambool, maritime village, maritime museum, shipwreck coast, great ocean road, flagstaff hill maritime museum and village, dr w r angus, w.r. angus collection, australian army, surgeon captain, ballarat, bonegilla, badge, insignia, badge collection, world war 2, second world war, australian defence forces, army medical corps, 108 australian general hospital, great war, military uniform, 106 australian general hospital, 1939-1945 -
 Flagstaff Hill Maritime Museum and Village
Badge - Australian Military cloth patch, Army Medical Corps, 106 Australian General Hospital, 1939-1945
... on brown squares. Insignia of the Australian Defence Forces, Army... rectangles on brown squares. Insignia of the Australian Defence ...The three cloth patches belonged to Dr William Roy Angus and are now part of Flagstaff Hill’s comprehensive W.R. Angus Collection, donated by the family of Dr W R Angus (1901-1970), surgeon and oculist. The badges date to the Second World War era, when Dr Angus was a Surgeon Captain for the Australian Defence Forces in the Army Medical Corps, 108 Australian General Hospital and 106 Australian General Hospital, stationed in Ballarat, Victoria, and in Bonegilla, N.S.W. He completed his service just before the end of the war due to suffering from a heart attack. In World War I the troops of the Australian Military Forces staked coloured flags of various shapes and colours in the ground where they camped to identify their units. These flag codes were quickly recognised. The system worked so well that miniature flags were called colour patches. They became part of the uniform, to be worn on both sleeves just below the shoulder. The system was slightly modified for use in the Second World War. The W.R. Angus Collection: - The W.R. Angus Collection includes historical medical equipment, surgical instruments and material belonging to Dr Edward Ryan and Dr Thomas Francis Ryan, (both of Nhill, Victoria) and Dr Angus’ own belongings. The Collection’s history spans the medical practices of the two Doctors Ryan, from 1885-1926 plus that of Dr Angus, up until 1969. It includes historical medical and surgical equipment and instruments from the doctors Edward and Thomas Ryan of Nhill, Victoria. Dr Angus married Gladys in 1927 at Ballarat, the nearest big city to Nhill where he began as a Medical Assistant. He was also Acting House surgeon at the Nhill hospital where their two daughters were born. During World War II He served as a Military Doctor in the Australian Defence Forces. Dr Angus and his family moved to Warrnambool in 1939, where Dr Angus operated his own medical practice. He later added the part-time Port Medical Officer responsibility and was the last person appointed to that position. Both Dr Angus and his wife were very involved in the local community, including the planning stages of the new Flagstaff Hill and the layout of the gardens there. Dr Angus passed away in March 1970.Dr W R Angus (1901-1970), surgeon and oculist, collected a range of military objects including those he personally used during his time as Surgeon Captain in the Australian Defence Forces in World War II. The objects allow insight into military life in the early-to-mid 20th century. The W.R. Angus Collection is significant for still being located at the site it is connected with, Doctor Angus being the last Port Medical Officer in Warrnambool. The Collection includes historical medical objects that date back to the late 1800s.Badges; set of three cloth patches, yellow rectangles on brown squares. Insignia of the Australian Defence Forces, Army Medical Corps, 106 Australian General Hospital, WII era. Dr W R Angus owned the cloth patches that are now part of the W. R. Angus Collection.flagstaff hill, warrnambool, maritime village, maritime museum, shipwreck coast, great ocean road, flagstaff hill maritime museum and village, dr w r angus, w.r. angus collection, australian army, surgeon captain, ballarat, bonegilla, badge, insignia, world war 1, 1914-1918, badge collection, world war 2, second world war, australian defence forces, army medical corps, 108 australian general hospital, great war, military uniform, 106 australian general hospital -
 Flagstaff Hill Maritime Museum and Village
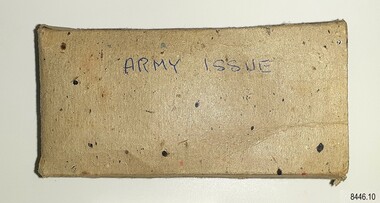
Equipment - Personal Care kit, 1939-1945
This Personal Care kit was issued by the Australian Army to those in military service during WWII, including Dr.W.R. Angus. The kit was part of a soldier's equipment to guard against possible sexually transmitted infections. It is now part of Flagstaff Hill’s comprehensive W.R. Angus Collection, donated by the family of Dr W R Angus (1901-1970), surgeon and oculist. Dr W R Angus was a Surgeon Captain for the Australian Defence Forces, Army Medical Corps, stationed in Ballarat, Victoria, and in Bonegilla, N.S.W. He completed his service just before the end of the war due to suffering from a heart attack. The W.R. Angus Collection: - The W.R. Angus Collection includes historical medical equipment, surgical instruments and material belonging to Dr Edward Ryan and Dr Thomas Francis Ryan, (both of Nhill, Victoria) and Dr Angus’ own belongings. The Collection’s history spans the medical practices of the two Doctors Ryan, from 1885-1926 plus that of Dr Angus, up until 1969. It includes historical medical and surgical equipment and instruments from the doctors Edward and Thomas Ryan of Nhill, Victoria. Dr Angus married Gladys in 1927 at Ballarat, the nearest big city to Nhill where he began as a Medical Assistant. He was also Acting House surgeon at the Nhill hospital where their two daughters were born. During World War II He served as a Military Doctor in the Australian Defence Forces. Dr Angus and his family moved to Warrnambool in 1939, where Dr Angus operated his own medical practice. He later added the part-time Port Medical Officer responsibility and was the last person appointed to that position. Both Dr Angus and his wife were very involved in the local community, including the planning stages of the new Flagstaff Hill and the layout of the gardens there. Dr Angus passed away in March 1970.This item is significant in Australia's Military History. It aids in understanding life in the military and the changes to normal life and morality. Dr W R Angus (1901-1970), surgeon and oculist, collected a range of military objects including those he personally used during his time as Surgeon Captain in the Australian Defence Forces in World War II. The W.R. Angus Collection is significant for still being located at the site it is connected with, Doctor Angus being the last Port Medical Officer in Warrnambool. The Collection includes historical medical objects that date back to the late 1800s.Australian Army personal care kit, WWII era. A rectangular brown box containing a small blue cardboard box with a leaflet and two small tubes of ointment inside it, four square waxed paper prophylactic packets and a brown cardboard cylinder with enclosed ends containing a waxy substance. The overall box has a handwritten inscription. The kit belonged to Dr W R Angus and are now part of the W. R. Angus Collection.On the large box, handwritten “ARMY ISSUE” On waxed paper wrapper; “CHECKER NEW LATEX PROPHYLACTIC” On the small box “THE BLUE LIGHT OUTFIT” “DIRECTIONS INSIDE” flagstaff hill, warrnambool, maritime village, maritime museum, shipwreck coast, great ocean road, flagstaff hill maritime museum and village, dr w r angus, w.r. angus collection, australian army, world war 2, second world war, australian defence forces, ww 2, ww ii, military equipment, army issue, personal care, personal hygene, prevention of std, prevention of sti, prevention of vd -
 Flagstaff Hill Maritime Museum and Village
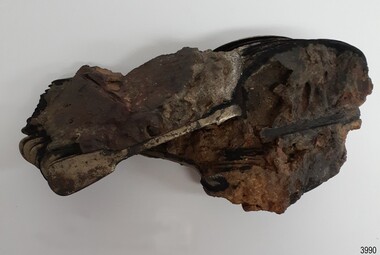
Domestic object - Spoons, Prior to 1878
These desert spoons are from the wreck of the Loch Ard, that sailed from Gravesend, London. The manifest listed an array of manufactured goods being exported to the Colony of Victoria. Included in the cargo manifest was a large number of hardware and cutlery items. These spoons are representative of similar items of silver electro-plated cutlery salvaged from the Loch Ard wreck site, comprising nickel silver electroplated spoons and forks of various sizes but all sharing the same general shape and design. History of the Loch Ard: - The Loch Ard got its name from ”Loch Ard” a loch that lies to the west of Aberfoyle, and the east of Loch Lomond. It means "high lake" in Scottish Gaelic. The vessel belonged to the famous Loch Line which sailed many vessels from England to Australia. The Loch Ard was built in Glasgow by Barclay, Curdle and Co. in 1873, the vessel was a three-masted square-rigged iron sailing ship that measured 79.87 meters in length, 11.58 m in width, and 7 m in depth with a gross tonnage of 1693 tons with a mainmast that measured a massive 45.7 m in height. Loch Ard made three trips to Australia and one trip to Calcutta before its fateful voyage. Loch Ard left England on March 2, 1878, under the command of 29-year-old Captain Gibbs, who was newly married. The ship was bound for Melbourne with a crew of 37, plus 17 passengers. The general cargo reflected the affluence of Melbourne at the time. Onboard were straw hats, umbrellas, perfumes, clay pipes, pianos, clocks, confectionery, linen and candles, as well as a heavier load of railway irons, cement, lead and copper. There were other items included that were intended for display in the Melbourne International Exhibition of 1880. The voyage to Port Phillip was long but uneventful. Then at 3 am on June 1, 1878, Captain Gibbs was expecting to see land. But the Loch Ard was running into a fog which greatly reduced visibility. Captain Gibbs was becoming anxious as there was no sign of land or the Cape Otway lighthouse. At 4 am the fog lifted and a lookout aloft announced that he could see breakers. The sheer cliffs of Victoria's west coast came into view, and Captain Gibbs realised that the ship was much closer to them than expected. He ordered as much sail to be set as time would permit and then attempted to steer the vessel out to sea. On coming head-on into the wind, the ship lost momentum, the sails fell limp and Loch Ard's bow swung back towards land. Gibbs then ordered the anchors to be released in an attempt to hold their position. The anchors sank some 50 fathoms - but did not hold. By this time the ship was among the breakers and the tall cliffs of Mutton Bird Island rose behind. Just half a mile from the coast, the ship's bow was suddenly pulled around by the anchor. The captain tried to tack out to sea, but the ship struck a reef at the base of Mutton Bird Island, near Port Campbell. Waves subsequently broke over the ship and the top deck became loosened from the hull. The masts and rigging came crashing down knocking passengers and crew overboard. When a lifeboat was finally launched, it crashed into the side of Loch Ard and capsized. Tom Pearce, who had launched the boat, managed to cling to its overturned hull and shelter beneath it. He drifted out to sea and then on the flood tide came into what is now known as Loch Ard Gorge. He swam to shore, bruised and dazed, and found a cave in which to shelter. Some of the crew stayed below deck to shelter from the falling rigging but drowned when the ship slipped off the reef into deeper water. Eva Carmichael a passenger had raced onto the deck to find out what was happening only to be confronted by towering cliffs looming above the stricken ship. In all the chaos, Captain Gibbs grabbed Eva and said, "If you are saved Eva, let my dear wife know that I died like a sailor". That was the last Eva Carmichael saw of the captain. She was swept off the ship by a huge wave. Eva saw Tom Pearce on a small rocky beach and yelled to attract his attention. He dived in and swam to the exhausted woman and dragged her to shore. He took her to the cave and broke the open case of brandy which had washed up on the beach. He opened a bottle to revive the unconscious woman. A few hours later Tom scaled a cliff in search of help. He followed hoof prints and came by chance upon two men from nearby Glenample Station three and a half miles away. In a complete state of exhaustion, he told the men of the tragedy. Tom then returned to the gorge while the two men rode back to the station to get help. By the time they reached Loch Ard Gorge, it was cold and dark. The two shipwreck survivors were taken to Glenample Station to recover. Eva stayed at the station for six weeks before returning to Ireland by steamship. In Melbourne, Tom Pearce received a hero's welcome. He was presented with the first gold medal of the Royal Humane Society of Victoria and a £1000 cheque from the Victorian Government. Concerts were performed to honour the young man's bravery and to raise money for those who lost family in the disaster. Of the 54 crew members and passengers on board, only two survived: the apprentice, Tom Pearce and the young woman passenger, Eva Carmichael, who lost her family in the tragedy. Ten days after the Loch Ard tragedy, salvage rights to the wreck were sold at auction for £2,120. Cargo valued at £3,000 was salvaged and placed on the beach, but most washed back into the sea when another storm developed. The wreck of Loch Ard still lies at the base of Mutton Bird Island. Much of the cargo has now been salvaged and some items were washed up into Loch Ard Gorge. Cargo and artefacts have also been illegally salvaged over many years before protective legislation was introduced in March 1982. One of the most unlikely pieces of cargo to have survived the shipwreck was a Minton majolica peacock- one of only nine in the world. The peacock was destined for the Melbourne 1880 International Exhibition. It had been well packed, which gave it adequate protection during the violent storm. Today the Minton peacock can be seen at the Flagstaff Hill Maritime Museum in Warrnambool. From Australia's most dramatic shipwreck, it has now become Australia's most valuable shipwreck artifact and is one of very few 'objects' on the Victorian State Heritage Register.The shipwreck of the Loch Ard is of significance for Victoria and is registered on the Victorian Heritage Register ( S 417). Flagstaff Hill has a varied collection of artefacts from Loch Ard and its collection is significant for being one of the largest accumulation of artefacts from this notable Victorian shipwreck. The collections object is to also give us a snapshot into history so we can interpret the story of this tragic event. The collection is also archaeologically significant as it represents aspects of Victoria's shipping history that allows us to interpret Victoria's social and historical themes of the time. The collections historically significance is that it is associated unfortunately with the worst and best-known shipwreck in Victoria's history. Large conglomerated group of nickel silver plated spoons with fiddle-back design handle, narrow stem with flared collar and elongated bowl; twenty parts of spoons are visible. The spoons were recovered from the wreck of the Loch Ard.flagstaff hill, warrnambool, shipwrecked coast, flagstaff hill maritime museum, maritime museum, shipwreck coast, flagstaff hill maritime village, great ocean road, loch line, loch ard, captain gibbs, eva carmichael, tom pearce, glenample station, mutton bird island, loch ard gorge, dessert spoon, petrified timber, conglomerated cutlery, silverware, dining utensil, spoons, conglomeration of spoons -
 Flagstaff Hill Maritime Museum and Village
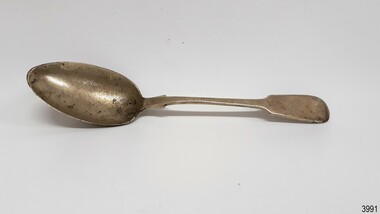
Domestic object - Spoon, Prior to 1878
This tablespoon was recovered from the wreck of the Loch Ard that sailed from Gravesend, London. The manifest listed an array of manufactured goods being exported to the Colony of Victoria. Included in the cargo manifest was a large number of hardware and cutlery items. These spoons are representative of similar items of silver electro-plated cutlery salvaged from the Loch Ard wreck site, comprising nickel silver electroplated spoons and forks of various sizes but all sharing the same general shape and design. History of the Loch Ard: - The Loch Ard got its name from ”Loch Ard” a loch that lies to the west of Aberfoyle, and the east of Loch Lomond. It means "high lake" in Scottish Gaelic. The vessel belonged to the famous Loch Line which sailed many vessels from England to Australia. The Loch Ard was built in Glasgow by Barclay, Curdle and Co. in 1873, the vessel was a three-masted square-rigged iron sailing ship that measured 79.87 meters in length, 11.58 m in width, and 7 m in depth with a gross tonnage of 1693 tons with a mainmast that measured a massive 45.7 m in height. Loch Ard made three trips to Australia and one trip to Calcutta before its fateful voyage. Loch Ard left England on March 2, 1878, under the command of 29-year-old Captain Gibbs, who was newly married. The ship was bound for Melbourne with a crew of 37, plus 17 passengers. The general cargo reflected the affluence of Melbourne at the time. Onboard were straw hats, umbrellas, perfumes, clay pipes, pianos, clocks, confectionery, linen and candles, as well as a heavier load of railway irons, cement, lead and copper. There were other items included that were intended for display in the Melbourne International Exhibition of 1880. The voyage to Port Phillip was long but uneventful. Then at 3 am on June 1, 1878, Captain Gibbs was expecting to see land. But the Loch Ard was running into a fog which greatly reduced visibility. Captain Gibbs was becoming anxious as there was no sign of land or the Cape Otway lighthouse. At 4 am the fog lifted and a lookout aloft announced that he could see breakers. The sheer cliffs of Victoria's west coast came into view, and Captain Gibbs realised that the ship was much closer to them than expected. He ordered as much sail to be set as time would permit and then attempted to steer the vessel out to sea. On coming head-on into the wind, the ship lost momentum, the sails fell limp and Loch Ard's bow swung back towards land. Gibbs then ordered the anchors to be released in an attempt to hold their position. The anchors sank some 50 fathoms - but did not hold. By this time the ship was among the breakers and the tall cliffs of Mutton Bird Island rose behind. Just half a mile from the coast, the ship's bow was suddenly pulled around by the anchor. The captain tried to tack out to sea, but the ship struck a reef at the base of Mutton Bird Island, near Port Campbell. Waves subsequently broke over the ship and the top deck became loosened from the hull. The masts and rigging came crashing down knocking passengers and crew overboard. When a lifeboat was finally launched, it crashed into the side of Loch Ard and capsized. Tom Pearce, who had launched the boat, managed to cling to its overturned hull and shelter beneath it. He drifted out to sea and then on the flood tide came into what is now known as Loch Ard Gorge. He swam to shore, bruised and dazed, and found a cave in which to shelter. Some of the crew stayed below deck to shelter from the falling rigging but drowned when the ship slipped off the reef into deeper water. Eva Carmichael a passenger had raced onto the deck to find out what was happening only to be confronted by towering cliffs looming above the stricken ship. In all the chaos, Captain Gibbs grabbed Eva and said, "If you are saved Eva, let my dear wife know that I died like a sailor". That was the last Eva Carmichael saw of the captain. She was swept off the ship by a huge wave. Eva saw Tom Pearce on a small rocky beach and yelled to attract his attention. He dived in and swam to the exhausted woman and dragged her to shore. He took her to the cave and broke the open case of brandy which had washed up on the beach. He opened a bottle to revive the unconscious woman. A few hours later Tom scaled a cliff in search of help. He followed hoof prints and came by chance upon two men from nearby Glenample Station three and a half miles away. In a complete state of exhaustion, he told the men of the tragedy. Tom then returned to the gorge while the two men rode back to the station to get help. By the time they reached Loch Ard Gorge, it was cold and dark. The two shipwreck survivors were taken to Glenample Station to recover. Eva stayed at the station for six weeks before returning to Ireland by steamship. In Melbourne, Tom Pearce received a hero's welcome. He was presented with the first gold medal of the Royal Humane Society of Victoria and a £1000 cheque from the Victorian Government. Concerts were performed to honour the young man's bravery and to raise money for those who lost family in the disaster. Of the 54 crew members and passengers on board, only two survived: the apprentice, Tom Pearce and the young woman passenger, Eva Carmichael, who lost her family in the tragedy. Ten days after the Loch Ard tragedy, salvage rights to the wreck were sold at auction for £2,120. Cargo valued at £3,000 was salvaged and placed on the beach, but most washed back into the sea when another storm developed. The wreck of Loch Ard still lies at the base of Mutton Bird Island. Much of the cargo has now been salvaged and some items were washed up into Loch Ard Gorge. Cargo and artefacts have also been illegally salvaged over many years before protective legislation was introduced in March 1982. One of the most unlikely pieces of cargo to have survived the shipwreck was a Minton majolica peacock- one of only nine in the world. The peacock was destined for the Melbourne 1880 International Exhibition. It had been well packed, which gave it adequate protection during the violent storm. Today the Minton peacock can be seen at the Flagstaff Hill Maritime Museum in Warrnambool. From Australia's most dramatic shipwreck, it has now become Australia's most valuable shipwreck artifact and is one of very few 'objects' on the Victorian State Heritage Register.The shipwreck of the Loch Ard is of significance for Victoria and is registered on the Victorian Heritage Register ( S 417). Flagstaff Hill has a varied collection of artefacts from Loch Ard and its collection is significant for being one of the largest accumulation of artefacts from this notable Victorian shipwreck. The collections object is to also give us a snapshot into history so we can interpret the story of this tragic event. The collection is also archaeologically significant as it represents aspects of Victoria's shipping history that allows us to interpret Victoria's social and historical themes of the time. The collections historically significance is that it is associated unfortunately with the worst and best-known shipwreck in Victoria's history. Spoon, tablespoon; nickel silver plated spoon with fiddle-back design handle, narrow stem with flared collar and elongated bowl. Marker's marks are impressed on the back of the handle. It was recovered from the wreck of the Loch Ard.Crown with diamond with W P inside Oval with anchor or key Square with cut corners with fancy cross inside Circle with lion Diamond with "P"flagstaff hill, warrnambool, shipwrecked coast, flagstaff hill maritime museum, maritime museum, shipwreck coast, flagstaff hill maritime village, great ocean road, loch line, loch ard, captain gibbs, eva carmichael, tom pearce, glenample station, mutton bird island, loch ard gorge, dessert spoon, petrified timber, conglomerated cutlery, silverware, dining utensil, spoons, conglomeration of spoons, spoon, tablespoon, cutlery -
 Flagstaff Hill Maritime Museum and Village
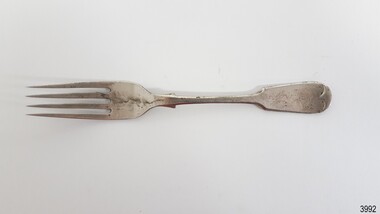
Domestic object - Fork, Prior to 1878
This fork was recovered from the wreck of the Loch Ard that sailed from Gravesend, London. The manifest listed an array of manufactured goods being exported to the Colony of Victoria. Included in the cargo manifest was a large number of hardware and cutlery items. These spoons are representative of similar items of silver electro-plated cutlery salvaged from the Loch Ard wreck site, comprising nickel silver electroplated spoons and forks of various sizes but all sharing the same general shape and design. History of the Loch Ard: - The Loch Ard got its name from ”Loch Ard” a loch that lies to the west of Aberfoyle, and the east of Loch Lomond. It means "high lake" in Scottish Gaelic. The vessel belonged to the famous Loch Line which sailed many vessels from England to Australia. The Loch Ard was built in Glasgow by Barclay, Curdle and Co. in 1873, the vessel was a three-masted square-rigged iron sailing ship that measured 79.87 meters in length, 11.58 m in width, and 7 m in depth with a gross tonnage of 1693 tons with a mainmast that measured a massive 45.7 m in height. Loch Ard made three trips to Australia and one trip to Calcutta before its fateful voyage. Loch Ard left England on March 2, 1878, under the command of 29-year-old Captain Gibbs, who was newly married. The ship was bound for Melbourne with a crew of 37, plus 17 passengers. The general cargo reflected the affluence of Melbourne at the time. Onboard were straw hats, umbrellas, perfumes, clay pipes, pianos, clocks, confectionery, linen and candles, as well as a heavier load of railway irons, cement, lead and copper. There were other items included that were intended for display in the Melbourne International Exhibition of 1880. The voyage to Port Phillip was long but uneventful. Then at 3 am on June 1, 1878, Captain Gibbs was expecting to see land. But the Loch Ard was running into a fog which greatly reduced visibility. Captain Gibbs was becoming anxious as there was no sign of land or the Cape Otway lighthouse. At 4 am the fog lifted and a lookout aloft announced that he could see breakers. The sheer cliffs of Victoria's west coast came into view, and Captain Gibbs realised that the ship was much closer to them than expected. He ordered as much sail to be set as time would permit and then attempted to steer the vessel out to sea. On coming head-on into the wind, the ship lost momentum, the sails fell limp and Loch Ard's bow swung back towards land. Gibbs then ordered the anchors to be released in an attempt to hold their position. The anchors sank some 50 fathoms - but did not hold. By this time the ship was among the breakers and the tall cliffs of Mutton Bird Island rose behind. Just half a mile from the coast, the ship's bow was suddenly pulled around by the anchor. The captain tried to tack out to sea, but the ship struck a reef at the base of Mutton Bird Island, near Port Campbell. Waves subsequently broke over the ship and the top deck became loosened from the hull. The masts and rigging came crashing down knocking passengers and crew overboard. When a lifeboat was finally launched, it crashed into the side of Loch Ard and capsized. Tom Pearce, who had launched the boat, managed to cling to its overturned hull and shelter beneath it. He drifted out to sea and then on the flood tide came into what is now known as Loch Ard Gorge. He swam to shore, bruised and dazed, and found a cave in which to shelter. Some of the crew stayed below deck to shelter from the falling rigging but drowned when the ship slipped off the reef into deeper water. Eva Carmichael a passenger had raced onto the deck to find out what was happening only to be confronted by towering cliffs looming above the stricken ship. In all the chaos, Captain Gibbs grabbed Eva and said, "If you are saved Eva, let my dear wife know that I died like a sailor". That was the last Eva Carmichael saw of the captain. She was swept off the ship by a huge wave. Eva saw Tom Pearce on a small rocky beach and yelled to attract his attention. He dived in and swam to the exhausted woman and dragged her to shore. He took her to the cave and broke the open case of brandy which had washed up on the beach. He opened a bottle to revive the unconscious woman. A few hours later Tom scaled a cliff in search of help. He followed hoof prints and came by chance upon two men from nearby Glenample Station three and a half miles away. In a complete state of exhaustion, he told the men of the tragedy. Tom then returned to the gorge while the two men rode back to the station to get help. By the time they reached Loch Ard Gorge, it was cold and dark. The two shipwreck survivors were taken to Glenample Station to recover. Eva stayed at the station for six weeks before returning to Ireland by steamship. In Melbourne, Tom Pearce received a hero's welcome. He was presented with the first gold medal of the Royal Humane Society of Victoria and a £1000 cheque from the Victorian Government. Concerts were performed to honour the young man's bravery and to raise money for those who lost family in the disaster. Of the 54 crew members and passengers on board, only two survived: the apprentice, Tom Pearce and the young woman passenger, Eva Carmichael, who lost her family in the tragedy. Ten days after the Loch Ard tragedy, salvage rights to the wreck were sold at auction for £2,120. Cargo valued at £3,000 was salvaged and placed on the beach, but most washed back into the sea when another storm developed. The wreck of Loch Ard still lies at the base of Mutton Bird Island. Much of the cargo has now been salvaged and some items were washed up into Loch Ard Gorge. Cargo and artefacts have also been illegally salvaged over many years before protective legislation was introduced in March 1982. One of the most unlikely pieces of cargo to have survived the shipwreck was a Minton majolica peacock- one of only nine in the world. The peacock was destined for the Melbourne 1880 International Exhibition. It had been well packed, which gave it adequate protection during the violent storm. Today the Minton peacock can be seen at the Flagstaff Hill Maritime Museum in Warrnambool. From Australia's most dramatic shipwreck, it has now become Australia's most valuable shipwreck artifact and is one of very few 'objects' on the Victorian State Heritage Register.The shipwreck of the Loch Ard is of significance for Victoria and is registered on the Victorian Heritage Register ( S 417). Flagstaff Hill has a varied collection of artefacts from Loch Ard and its collection is significant for being one of the largest accumulation of artefacts from this notable Victorian shipwreck. The collections object is to also give us a snapshot into history so we can interpret the story of this tragic event. The collection is also archaeologically significant as it represents aspects of Victoria's shipping history that allows us to interpret Victoria's social and historical themes of the time. The collections historically significance is that it is associated unfortunately with the worst and best-known shipwreck in Victoria's history. Fork, nickel silver plated spoon with Fiddle-back design handle, narrow stem with flared collar.Fork has maker's marks. It was recovered from the wreck of the Loch Ard.Shapes of Crown, Square with cut corners, 2 circles, diamondflagstaff hill, warrnambool, shipwrecked coast, flagstaff hill maritime museum, maritime museum, shipwreck coast, flagstaff hill maritime village, great ocean road, loch line, loch ard, captain gibbs, eva carmichael, tom pearce, glenample station, mutton bird island, loch ard gorge, silverware, cutlery, dining utensil, fork, dining fork -
 Flagstaff Hill Maritime Museum and Village
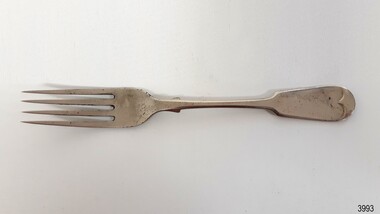
Domestic object - Fork, Prior to 1878
This fork was recovered from the wreck of the Loch Ard that sailed from Gravesend, London. The manifest listed an array of manufactured goods being exported to the Colony of Victoria. Included in the cargo manifest was a large number of hardware and cutlery items. These spoons are representative of similar items of silver electro-plated cutlery salvaged from the Loch Ard wreck site, comprising nickel silver electroplated spoons and forks of various sizes but all sharing the same general shape and design. History of the Loch Ard: - The Loch Ard got its name from ”Loch Ard” a loch that lies to the west of Aberfoyle, and the east of Loch Lomond. It means "high lake" in Scottish Gaelic. The vessel belonged to the famous Loch Line which sailed many vessels from England to Australia. The Loch Ard was built in Glasgow by Barclay, Curdle and Co. in 1873, the vessel was a three-masted square-rigged iron sailing ship that measured 79.87 meters in length, 11.58 m in width, and 7 m in depth with a gross tonnage of 1693 tons with a mainmast that measured a massive 45.7 m in height. Loch Ard made three trips to Australia and one trip to Calcutta before its fateful voyage. Loch Ard left England on March 2, 1878, under the command of 29-year-old Captain Gibbs, who was newly married. The ship was bound for Melbourne with a crew of 37, plus 17 passengers. The general cargo reflected the affluence of Melbourne at the time. Onboard were straw hats, umbrellas, perfumes, clay pipes, pianos, clocks, confectionery, linen and candles, as well as a heavier load of railway irons, cement, lead and copper. There were other items included that were intended for display in the Melbourne International Exhibition of 1880. The voyage to Port Phillip was long but uneventful. Then at 3 am on June 1, 1878, Captain Gibbs was expecting to see land. But the Loch Ard was running into a fog which greatly reduced visibility. Captain Gibbs was becoming anxious as there was no sign of land or the Cape Otway lighthouse. At 4 am the fog lifted and a lookout aloft announced that he could see breakers. The sheer cliffs of Victoria's west coast came into view, and Captain Gibbs realised that the ship was much closer to them than expected. He ordered as much sail to be set as time would permit and then attempted to steer the vessel out to sea. On coming head-on into the wind, the ship lost momentum, the sails fell limp and Loch Ard's bow swung back towards land. Gibbs then ordered the anchors to be released in an attempt to hold their position. The anchors sank some 50 fathoms - but did not hold. By this time the ship was among the breakers and the tall cliffs of Mutton Bird Island rose behind. Just half a mile from the coast, the ship's bow was suddenly pulled around by the anchor. The captain tried to tack out to sea, but the ship struck a reef at the base of Mutton Bird Island, near Port Campbell. Waves subsequently broke over the ship and the top deck became loosened from the hull. The masts and rigging came crashing down knocking passengers and crew overboard. When a lifeboat was finally launched, it crashed into the side of Loch Ard and capsized. Tom Pearce, who had launched the boat, managed to cling to its overturned hull and shelter beneath it. He drifted out to sea and then on the flood tide came into what is now known as Loch Ard Gorge. He swam to shore, bruised and dazed, and found a cave in which to shelter. Some of the crew stayed below deck to shelter from the falling rigging but drowned when the ship slipped off the reef into deeper water. Eva Carmichael a passenger had raced onto the deck to find out what was happening only to be confronted by towering cliffs looming above the stricken ship. In all the chaos, Captain Gibbs grabbed Eva and said, "If you are saved Eva, let my dear wife know that I died like a sailor". That was the last Eva Carmichael saw of the captain. She was swept off the ship by a huge wave. Eva saw Tom Pearce on a small rocky beach and yelled to attract his attention. He dived in and swam to the exhausted woman and dragged her to shore. He took her to the cave and broke the open case of brandy which had washed up on the beach. He opened a bottle to revive the unconscious woman. A few hours later Tom scaled a cliff in search of help. He followed hoof prints and came by chance upon two men from nearby Glenample Station three and a half miles away. In a complete state of exhaustion, he told the men of the tragedy. Tom then returned to the gorge while the two men rode back to the station to get help. By the time they reached Loch Ard Gorge, it was cold and dark. The two shipwreck survivors were taken to Glenample Station to recover. Eva stayed at the station for six weeks before returning to Ireland by steamship. In Melbourne, Tom Pearce received a hero's welcome. He was presented with the first gold medal of the Royal Humane Society of Victoria and a £1000 cheque from the Victorian Government. Concerts were performed to honour the young man's bravery and to raise money for those who lost family in the disaster. Of the 54 crew members and passengers on board, only two survived: the apprentice, Tom Pearce and the young woman passenger, Eva Carmichael, who lost her family in the tragedy. Ten days after the Loch Ard tragedy, salvage rights to the wreck were sold at auction for £2,120. Cargo valued at £3,000 was salvaged and placed on the beach, but most washed back into the sea when another storm developed. The wreck of Loch Ard still lies at the base of Mutton Bird Island. Much of the cargo has now been salvaged and some items were washed up into Loch Ard Gorge. Cargo and artefacts have also been illegally salvaged over many years before protective legislation was introduced in March 1982. One of the most unlikely pieces of cargo to have survived the shipwreck was a Minton majolica peacock- one of only nine in the world. The peacock was destined for the Melbourne 1880 International Exhibition. It had been well packed, which gave it adequate protection during the violent storm. Today the Minton peacock can be seen at the Flagstaff Hill Maritime Museum in Warrnambool. From Australia's most dramatic shipwreck, it has now become Australia's most valuable shipwreck artifact and is one of very few 'objects' on the Victorian State Heritage Register.The shipwreck of the Loch Ard is of significance for Victoria and is registered on the Victorian Heritage Register ( S 417). Flagstaff Hill has a varied collection of artefacts from Loch Ard and its collection is significant for being one of the largest accumulation of artefacts from this notable Victorian shipwreck. The collections object is to also give us a snapshot into history so we can interpret the story of this tragic event. The collection is also archaeologically significant as it represents aspects of Victoria's shipping history that allows us to interpret Victoria's social and historical themes of the time. The collections historically significance is that it is associated unfortunately with the worst and best-known shipwreck in Victoria's history. Fork, nickel silver plated spoon with Fiddle-back design handle, narrow stem with flared collar. Handle has maker's marks underneath. It was recovered from the wreck of the Loch Ard.Shapes of Drown, Oval, Square, Circle and Diamondflagstaff hill, warrnambool, shipwrecked coast, flagstaff hill maritime museum, maritime museum, shipwreck coast, flagstaff hill maritime village, great ocean road, loch line, loch ard, captain gibbs, eva carmichael, tom pearce, glenample station, mutton bird island, loch ard gorge, silverware, cutlery, dining utensil, fork, dining fork -
 Flagstaff Hill Maritime Museum and Village
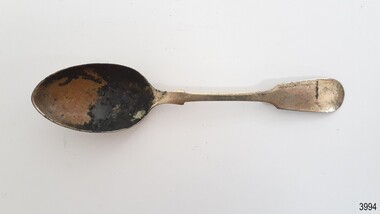
Domestic object - Spoon, Prior to 1878
This tablespoon was recovered from the wreck of the Loch Ard that sailed from Gravesend, London. The manifest listed an array of manufactured goods being exported to the Colony of Victoria. Included in the cargo manifest was a large number of hardware and cutlery items. These spoons are representative of similar items of silver electro-plated cutlery salvaged from the Loch Ard wreck site, comprising nickel silver electroplated spoons and forks of various sizes but all sharing the same general shape and design. History of the Loch Ard: - The Loch Ard got its name from ”Loch Ard” a loch that lies to the west of Aberfoyle, and the east of Loch Lomond. It means "high lake" in Scottish Gaelic. The vessel belonged to the famous Loch Line which sailed many vessels from England to Australia. The Loch Ard was built in Glasgow by Barclay, Curdle and Co. in 1873, the vessel was a three-masted square-rigged iron sailing ship that measured 79.87 meters in length, 11.58 m in width, and 7 m in depth with a gross tonnage of 1693 tons with a mainmast that measured a massive 45.7 m in height. Loch Ard made three trips to Australia and one trip to Calcutta before its fateful voyage. Loch Ard left England on March 2, 1878, under the command of 29-year-old Captain Gibbs, who was newly married. The ship was bound for Melbourne with a crew of 37, plus 17 passengers. The general cargo reflected the affluence of Melbourne at the time. Onboard were straw hats, umbrellas, perfumes, clay pipes, pianos, clocks, confectionery, linen and candles, as well as a heavier load of railway irons, cement, lead and copper. There were other items included that were intended for display in the Melbourne International Exhibition of 1880. The voyage to Port Phillip was long but uneventful. Then at 3 am on June 1, 1878, Captain Gibbs was expecting to see land. But the Loch Ard was running into a fog which greatly reduced visibility. Captain Gibbs was becoming anxious as there was no sign of land or the Cape Otway lighthouse. At 4 am the fog lifted and a lookout aloft announced that he could see breakers. The sheer cliffs of Victoria's west coast came into view, and Captain Gibbs realised that the ship was much closer to them than expected. He ordered as much sail to be set as time would permit and then attempted to steer the vessel out to sea. On coming head-on into the wind, the ship lost momentum, the sails fell limp and Loch Ard's bow swung back towards land. Gibbs then ordered the anchors to be released in an attempt to hold their position. The anchors sank some 50 fathoms - but did not hold. By this time the ship was among the breakers and the tall cliffs of Mutton Bird Island rose behind. Just half a mile from the coast, the ship's bow was suddenly pulled around by the anchor. The captain tried to tack out to sea, but the ship struck a reef at the base of Mutton Bird Island, near Port Campbell. Waves subsequently broke over the ship and the top deck became loosened from the hull. The masts and rigging came crashing down knocking passengers and crew overboard. When a lifeboat was finally launched, it crashed into the side of Loch Ard and capsized. Tom Pearce, who had launched the boat, managed to cling to its overturned hull and shelter beneath it. He drifted out to sea and then on the flood tide came into what is now known as Loch Ard Gorge. He swam to shore, bruised and dazed, and found a cave in which to shelter. Some of the crew stayed below deck to shelter from the falling rigging but drowned when the ship slipped off the reef into deeper water. Eva Carmichael a passenger had raced onto the deck to find out what was happening only to be confronted by towering cliffs looming above the stricken ship. In all the chaos, Captain Gibbs grabbed Eva and said, "If you are saved Eva, let my dear wife know that I died like a sailor". That was the last Eva Carmichael saw of the captain. She was swept off the ship by a huge wave. Eva saw Tom Pearce on a small rocky beach and yelled to attract his attention. He dived in and swam to the exhausted woman and dragged her to shore. He took her to the cave and broke the open case of brandy which had washed up on the beach. He opened a bottle to revive the unconscious woman. A few hours later Tom scaled a cliff in search of help. He followed hoof prints and came by chance upon two men from nearby Glenample Station three and a half miles away. In a complete state of exhaustion, he told the men of the tragedy. Tom then returned to the gorge while the two men rode back to the station to get help. By the time they reached Loch Ard Gorge, it was cold and dark. The two shipwreck survivors were taken to Glenample Station to recover. Eva stayed at the station for six weeks before returning to Ireland by steamship. In Melbourne, Tom Pearce received a hero's welcome. He was presented with the first gold medal of the Royal Humane Society of Victoria and a £1000 cheque from the Victorian Government. Concerts were performed to honour the young man's bravery and to raise money for those who lost family in the disaster. Of the 54 crew members and passengers on board, only two survived: the apprentice, Tom Pearce and the young woman passenger, Eva Carmichael, who lost her family in the tragedy. Ten days after the Loch Ard tragedy, salvage rights to the wreck were sold at auction for £2,120. Cargo valued at £3,000 was salvaged and placed on the beach, but most washed back into the sea when another storm developed. The wreck of Loch Ard still lies at the base of Mutton Bird Island. Much of the cargo has now been salvaged and some items were washed up into Loch Ard Gorge. Cargo and artefacts have also been illegally salvaged over many years before protective legislation was introduced in March 1982. One of the most unlikely pieces of cargo to have survived the shipwreck was a Minton majolica peacock- one of only nine in the world. The peacock was destined for the Melbourne 1880 International Exhibition. It had been well packed, which gave it adequate protection during the violent storm. Today the Minton peacock can be seen at the Flagstaff Hill Maritime Museum in Warrnambool. From Australia's most dramatic shipwreck, it has now become Australia's most valuable shipwreck artifact and is one of very few 'objects' on the Victorian State Heritage Register.The shipwreck of the Loch Ard is of significance for Victoria and is registered on the Victorian Heritage Register ( S 417). Flagstaff Hill has a varied collection of artefacts from Loch Ard and its collection is significant for being one of the largest accumulation of artefacts from this notable Victorian shipwreck. The collections object is to also give us a snapshot into history so we can interpret the story of this tragic event. The collection is also archaeologically significant as it represents aspects of Victoria's shipping history that allows us to interpret Victoria's social and historical themes of the time. The collections historically significance is that it is associated unfortunately with the worst and best-known shipwreck in Victoria's history. Spoon, tablespoon; nickel silver plated. Inscriptions stamped on the back of the handle. It was recovered from the wreck of the Loch Ard.Stamped images inside shapes of Diamond!, Square, Square with cut corners, Oval and Siamondflagstaff hill, warrnambool, shipwrecked coast, flagstaff hill maritime museum, maritime museum, shipwreck coast, flagstaff hill maritime village, great ocean road, loch line, loch ard, captain gibbs, eva carmichael, tom pearce, glenample station, mutton bird island, loch ard gorge, petrified timber, conglomerated cutlery, silverware, dining utensil, spoons, conglomeration of spoons, spoon, tablespoon, cutlery -
 Marysville & District Historical Society
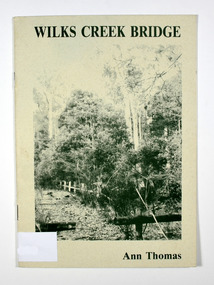
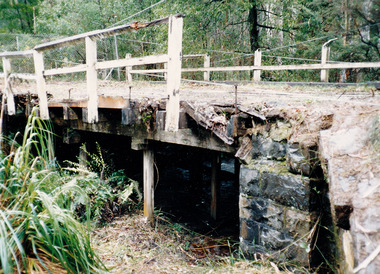
Booklet - Information booklet, Ann Thomas, Wilks Creek Bridge, 1993
A history of the Wilks Creek Bridge and its connection to the Yarra Track.Paperback. Front cover has an old photograph of the Wilks Creek Bridge.non-fictionA history of the Wilks Creek Bridge and its connection to the Yarra Track.wilks creek bridge, yarra track, narbethong, marysville, victoria, clement wilks, wood's point goldfields, jordan goldfields, john monash, monash and anderson, 2009 black saturday bushfires -
 Marysville & District Historical Society
Photograph (Item) - Colour photograph, Pre 2009
A colour photograph of the Wilks Creek Bridge near Marysville in Victoria.A colour photograph of the Wilks Creek Bridge near Marysville in Victoria. The Wilks Creek Bridge is a former timber and bluestone road bridge on the Yarra Track, and is located just off the Black Spur route, between Narbethong and Marysville, Victoria, Australia. It was built in 1870 to the design of colonial Public Works Department engineer Clement Wilks as part of the construction of a new road to the Woods Point and Jordan Goldfields. Like many bridges of the period, it had a timber superstructure employing squared beams supported by struts and straining pieces, on cut bluestone abutments. The bridge was remodelled around 1900 by engineer John Monash of the famous bridge-engineering firm of Monash and Anderson. It was last used for heavy vehicular traffic in 1980 following the realignment of Marysville Road, and was left to decay until its demolishment in 2008. All timber traces of the bridge were destroyed in the 2009 Black Saturday fires. The handcrafted bluestone masonry wingwalls and abutments, especially shaped to receive timber struts, rate among the earliest of its kind surviving intact in Victoria.wilks creek bridge, yarra track, narbethong, marysville, victoria, clement wilks, wood's point goldfields, jordan goldfields, john monash, monash and anderson, 2009 black saturday bushfires -
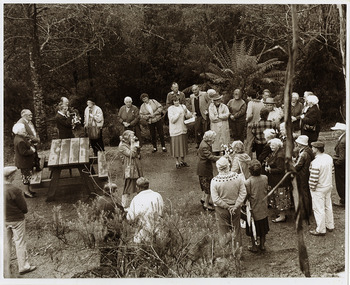 Marysville & District Historical Society
Photograph (Item) - Black and white photograph, 1993
A black and white photograph taken at the re-opening of the Wilks Creek Bridge picnic area and launch of Ann Thomas' book Wilks Creek Bridge.A black and white photograph taken at the re-opening of the Wilks Creek Bridge picnic area and launch of Ann Thomas' book Wilks Creek Bridge. The Wilks Creek Bridge is a former timber and bluestone road bridge on the Yarra Track, and is located just off the Black Spur route, between Narbethong and Marysville, Victoria, Australia. It was built in 1870 to the design of colonial Public Works Department engineer Clement Wilks as part of the construction of a new road to the Woods Point and Jordan Goldfields. Like many bridges of the period, it had a timber superstructure employing squared beams supported by struts and straining pieces, on cut bluestone abutments. The bridge was remodelled around 1900 by engineer John Monash of the famous bridge-engineering firm of Monash and Anderson. It was last used for heavy vehicular traffic in 1980 following the realignment of Marysville Road, and was left to decay until its demolishment in 2008. All timber traces of the bridge were destroyed in the 2009 Black Saturday fires. The handcrafted bluestone masonry wingwalls and abutments, especially shaped to receive timber struts, rate among the earliest of its kind surviving intact in Victoria.wilks creek bridge, yarra track, narbethong, marysville, victoria, clement wilks, wood's point goldfields, jordan goldfields, john monash, monash and anderson, 2009 black saturday bushfires -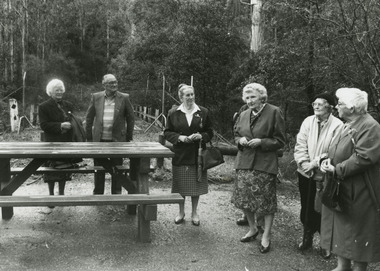
 Marysville & District Historical Society
Document (Item) - Heritage Report, Biosis Research Pty Ltd, Heritage Report-Dismantling of Wilks Creek Brdige Deck Marysville, Unknown
A heritage report on the dismantiling of the Wilks Creek Bridge deck in Marysville in Victoria.A heritage report on the dismantiling of the Wilks Creek Bridge deck in Marysville in Victoria. The Wilks Creek Bridge is a former timber and bluestone road bridge on the Yarra Track, and is located just off the Black Spur route, between Narbethong and Marysville, Victoria, Australia. It was built in 1870 to the design of colonial Public Works Department engineer Clement Wilks as part of the construction of a new road to the Woods Point and Jordan Goldfields. Like many bridges of the period, it had a timber superstructure employing squared beams supported by struts and straining pieces, on cut bluestone abutments. The bridge was remodelled around 1900 by engineer John Monash of the famous bridge-engineering firm of Monash and Anderson. It was last used for heavy vehicular traffic in 1980 following the realignment of Marysville Road, and was left to decay until its demolishment in 2008. All timber traces of the bridge were destroyed in the 2009 Black Saturday fires. The handcrafted bluestone masonry wingwalls and abutments, especially shaped to receive timber struts, rate among the earliest of its kind surviving intact in Victoria.wilks creek bridge, yarra track, narbethong, marysville, victoria, clement wilks, wood's point goldfields, jordan goldfields, john monash, monash and anderson, 2009 black saturday bushfires -
 Federation University Historical Collection
Equipment, Glass slides with square divisions
Large glass slidesG with square divisions painted designated my plastic on one sidelaboratory, scientific object -
 Glen Eira Historical Society
Album - Album page, Glenfern, Inkerman Street, Circa 1972
This photograph is part of the Caulfield Historical Album 1972. This album was created in approximately 1972 as part of a project by the Caulfield Historical Society to assist in identifying buildings worthy of preservation. The album is related to a Survey the Caulfield Historical Society developed in collaboration with the National Trust of Australia (Victoria) and Caulfield City Council to identify historic buildings within the City of Caulfield that warranted the protection of a National Trust Classification. Principal photographer thought to be Trevor Hart, member of Caulfield Historical Society. Most photographs were taken between 1966-1972 with a small number of photographs being older and from unknown sources. All photographs are black and white except where stated, with 386 photographs over 198 pages.From Victorian Heritage Database citation for Glernfern H0136 https://vhd.heritagecouncil.vic.gov.au/places/57 (as at 23/10/2020) Glenfern was built on spacious grounds at the corner of Inkerman and Hotham Streets, East St Kilda in two main stages in 1857 and 1876. From 1876 to 1984 Glenfern had only two owners, including the well known Melbourne family of artists, the Boyds. The property was bequeathed to the National Trust of Australia (Victoria) in 1984 and has remained in their ownership. The original Glenfern allotment was bought by John Bakewell in 1856 and sold the following year to Francis McDonnell, a prominent Melbourne investor. By 1858, the house, rated as the most valuable in Caulfield, had been built on the site. Due to financial difficulties, McDonnell offered a number of properties for sale in 1860, including Glenfern. It was not sold at this stage, but subsequently mortgaged in 1862. In 1866 Thomas Watson purchased the property and lived there until 1876 when it was sold to Captain John T. T. Boyd and his wife, Lucy, founders of the Boyd dynasty of artists, musicians, writers and architects. The Boyd family, including twelve children, lived there until 1907, with Lucy Boyd retaining ownership after her husband's death in 1891. In 1907 the property was subdivided and the greatly reduced Glenfern portion was purchased by the Ostberg family, who lived there from 1915. In the latter years of Boyd family ownership and the Ostberg ownership, Glenfern had several tenants and was run as a school on two occasions. The Ostberg family occupancy continued until the death of Miss Amy Ostberg in 1984. From 1929 the property was listed as Glenfern Flats, necessitating various internal alterations over a period of time. The original two storey house, attributed to architect Charles Laing, was extended for the Boyd family in 1876, by architect M. Hennessy. This comprised the addition of a two storey wing to the south of the existing building. Stables were built in 1884 by the architects Smith and Johnson and other outbuildings, since removed, were recorded on the site. The gardens were developed from the establishment of the estate and remnants of early plantings, exotic trees in particular, are evident. Various additions and alterations were made to the house in the twentieth century and a separate block of flats was built on the southern boundary in c1964. Glenfern is a two storey picturesque Gothic house of stuccoed brick with steep, gabled slate roofs, elaborate bargeboards and chimneys of conjoined stacks set diagonally. The original, asymmetrically planned L-shaped house, containing the principal rooms and a rear wing, was designed with two main facades facing north and west. The north facade contains an unusual recessed pointed arch bay formed between twin chimney flues. Internally cedar joinery includes an unusual set of double doors between the drawing room and parlour, the centre pair of which fold back and then slide into the walls. Detailing of the 1876 additions copied that of the original house, including the bargeboards, chimneys and western verandah. Ownership of Glenfern passed to the National Trust of Australia (Victoria) in 1984 and in 2002 transformation of the property into a Centre for the Arts and Culture commenced. This began with the establishment of an Artist-in-residence programme, followed by the Glenfern Writers Centre. Restoration and renovation of the building has been undertaken concurrently with the establishment of this centre. How is it significant? Glenfern, East St Kilda is of architectural and historical significance to the State of Victoria. Why is it significant? Glenfern is of architectural significance as an unusually intact and rare example of the picturesque domestic Gothic Revival house in Victoria. Of particular note are the clustered chimneys, bargeboards and twin arched chimney flues and the folding/sliding cedar doors between the principal rooms. It is significant as an important work of the prominent Melbourne architect, Charles Laing. Glenfern is of historical significance for its connection with the distinguished Victorian Boyd family. It has been recorded in a painting by Emma Boyd, wife of Arthur, in 1885 and in print by writer, Martin Boyd in 1952. Glenfern is of historical significance due to its ownership by only two families from 1876; firstly the Boyds until 1907 and the Ostbergs until 1984. Of note is the resistance to redevelopment in the latter half of the twentieth century and the subsequent survival of the 1907 Glenfern estate.Page 98 of Photograph Album with two photographs (one square and one landscape) of views of Glenfern.Handwritten: "Glenfern" 417 Inkerman Street [top right] / 98 [bottom right]trevor hart, east st kilda, garden, pitched roof, glenfern, hotham street, boyd family, 1850's, 1860's, 1870's, john bakewell, francis mcdonnell, thomas watson, lucy boyd, glenfern flats, charles laing, m. hennessy, smith and johnson, stables, gothic, stuccoed brick, gabled slate roofs, elaborate bargeboards, asymmetrical, cedar joinery, verandah, national trust of australia, centre for the arts and culture, artist-in-residence, glenfern writers centre, gothic revival, clustered chimneys, emma boyd, inkerman street, north caulfield, captain john boyd, artists, writers, st kilda east, national trust of australia (victoria), caulfield, amy ostberg, architects, m hennessy, doors, chimneys, martin boyd, arthur boyd, ostberg family -
 Federation University Historical Collection
Document - Computer card, IBM, 80 Column IBM Computer punch card
This IBM card format, designed in 1928, had rectangular holes, 80 columns with 12 punch locations each, one character to each column. Card size was exactly 7-3/8 inch by 3-1/4 inch (187.325 by 82.55 mm). The cards were made of smooth stock, 0.007 inch (0.178 mm) thick. There are about 143 cards to the inch. In 1964, IBM changed from square to round corners. They came typically in boxes of 2000 cards.[20] (Reference and more information at http://en.wikipedia.org/wiki/Punched_card ) Early digital computers used punched cards, often prepared using keypunch machines, as the primary medium for input of both computer programs and data. (http://en.wikipedia.org/wiki/Punched_card) Yellow card with printed numbers. Used for feeding information into a computer.computer, computer card, ibm, data, punch card, punched card, binary -
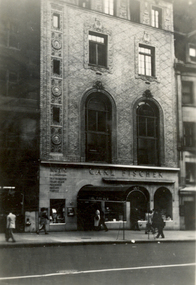 Federation University Historical Collection
Photograph - Black and White, Carl Fischer Building, New York, 1920s?
Carl Fischer was a major publisher of music. This photograph is part of Frank Wright's collection.Black and white photograph of the lower three floors of an Art Deco style building. On the ground level the arched door has a canvas porticoed entrance and there are three arched windows on the right side and a small square window on the left. The name 'Carl Fischer' is seen above the arches. Above are two second floor double height ornate arched windows and above these are two large rectangular windows. On the left side of these windows is a single column of small windows. Above these floors can be see the start of the rest of the building with more modest windows. People can be seen walking along the pavement. The place is New York.carl fischer, frank wright, new york, sheet music -
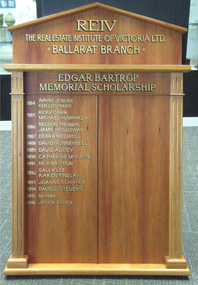 Federation University Historical Collection
Memorabilia - Honour Board, Edgar Bartrop Memorial Scholarship Honour Board, 1980s
The Real Estate Institute of Victoria (REIV) Ballarat branch were sponsors of the Edgar Bartrop Memorial Scholarship which was awarded at the Ballarat School of MinesTimber honour board with square columns on the left and right and a triangular top. Names awarded the Edgar Bartrop Memorial Scholarship are painted onto the honour board in gold. Those awarded the scholarship were: 1984 - Wayne Jenkins and Ken Leishman 1985 - Ricky Carr and Michael Humphrey 1986 - Nelson Thomas and Jamie Holloway 1987 - Debra Medwell 1988 - David Hunneybell 1989 - David Addey 1990 - Catherine McCann 1991 - Rick Britton 1992 - Sally Lee and Karen Findlay 1993 - Joanne Schaper 1994 - David L. Stevens 1995 - No award 1996 - Jason Ryder edgar bartrop, wayne jenkins, ken leishman, ricky carr, michael humphrey, nelson thomas, jamie holloway, debra medwell, david hunneybell, david addey, catherine mccann, rick britton, sally lee, karen findlay, joanne schaper, david stevens, jason ryder, real estate institute of victoria, scholarship -
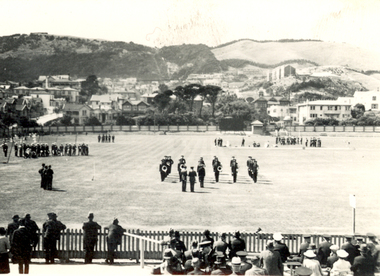 Federation University Historical Collection
Photograph - Black and White, Band Contest at Basin Reserve, Wellington, New Zealand, 1940, February 1940
Frank Wright was a renown resident of Smeaton, where he was born. He lived at Laura Villa, and attended Smeaton State School. His father William was a gold miner and his mother's name was Sarah. Their family won many singing and instrumental awards. Frank was tutored by Percy Code and was awarded a gold medal for the highest marks in the ALCM examinations in the British Colonies at the age of seventeen years. He became the Australian Open Cornet Champion by the age of eighteen. A year later, Frank conducted the City of Ballarat Band, and later the Ballarat Soldiers’ Memorial Band. He formed the Frank Wright Frisco Band and Frank Wright and his Coliseum Orchestra. These bands won many South Street awards, and Frank as conductor won many awards in the Australian Band Championship contest. In 1933 Frank Wright sailed to England to conduct the famous St Hilda’s Band and was later appointed Musical Director of the London County Council (the GLC or Greater London Council), where he organized many amazing concerts in most of the 150 parks, in and around the London district. He was also responsible for some of London’s major concerts at Kenwood, the Crystal Palace and Holland Park. He was made Professor of Brass and Military Band Scoring and conducted at the Guildhall of Music and Drama. Frank was often invited to adjudicate Brass Band Championships around Europe, in Australia, including South Street and in New Zealand. The Frank Wright Medal at the Royal South Street competition is awarded to an individual recognized as making an outstanding contribution to brass music in Australia.1). Black and white photograph of an oval and spectators in the foreground and houses beyond the far fence, with mountains in the distance. On the oval are several bands in different areas. The place is Basin Reserve, Wellington and the occasion is the band contest. 2). Newspaper photograph and caption of an oval with spectators in the foreground and brass bands formed in a square around a raised platform on which is standing the conductor. The place is Wellington and the conductor is Frank Wright.1). Written in pencil on the back - Band contest at Basin Reserve Wellington, Feb 1940 2). Written in pencil on left side - Free Lance Feb 1940frank wright, conductor, brass band, basin reserve, wellington, adjudicator -
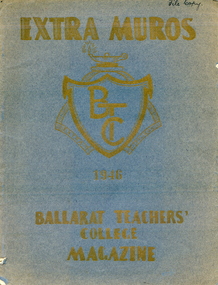 Federation University Historical Collection
Book, Ballarat Teachers' College, Ballarat Teachers College Extra Muros, 1946, 1946
Principal Frank Lord gave an ANZAC Day address called "Live Every Day as an Anzac Day". The address started with "Our opportunity is with the children. If we failed i nthe past, lest us begin again now. You are young, and let it be your resolve to live every day as an Anzac Day, and achieve some of the things for which the men of two wars have laid down their lives. Living your days with an air of kindness and decency, you will set an example to the children, and when a country's children are made happier and finer, it will follow that the county will be a happier and finer place." Mt Lord referred to theseven and a half months' occupation of Gallipoli, and the tenacious clinging by Anzac troops to their square mile of territory. Illness, disease and death came to the confined area, but there also came a spirit of self-sacrifice and charity, and a courage whoich scorrned death and won for the Australian troops world renown. Strong men broke under the conditions, but their comrades carried them on, and the prevailing spirit among men was that the had dedicated ther lives to ensuring a decent society at home, free of tyranny. For the achievement of this, they were prepared to die. It became characteristic that when things were at their worst, men were at their best. Discipline did not come from above on Gallipoli, for the men stuck their own standards of discipline, and stuck to them. ... After the 1914-18 war, it was surprising to find head teachers who did not know children of deceased and disabled soldiers in their schools. All teachers should acquaint themselves with this knowledge, and seek assistance from children who are eligible for help from the Repatriation Department. For those pupils who do not come withing the scope of Repatriation, teachers might secure the required help from the Teachers; R.S.L. sub-branch, the Carry-on Club, for from Government Scholarships. Blue soft covered magazine. Contents include: *Principal Frank Lord's Foreward * Rupert Brooke * Hostel Jottings * Looking Back * College photograph Images include: * Queenscliff Camp * Sport * ClubsCover 'File Copy' inside front cover (possibly by Monica Miller) 'With Compliments Ballarat Teachers' College. Xmas 1946'ballarat teachers college, monica miller, m fogarty, james parkinson, beatrix basterfield, patricia rea, nola stanway, valmai sprigg, valda sharp, queenscliffe, lonsdale, thea rowe, student hostel, student residence, wf lord, g kentish, don johnson, neville bunning, henry yeo, irene handley, betty smith, heather fraser, ron schneider, alma sunderland, pauline griffin, betty redford, robert eastcott, kathleen tobin, margaret mcintyre, jean somerville, ken andrews, frank lord -
 Federation University Historical Collection
Education kit - Educational Aid, Cuisenaire Rods, c1970s
Cuisenaire Rods are pieces of wood/plastic, 1 square cm in cross-section, made in 10 different lengths, each having a charactersitic colour. Invented by a Belgian teacher, Georges Cuisenaire, as a tool to assist in the teaching of mathematics.A plastic box with a clear lid containing 10 different coloured plastic Cuisenaire Rods: Orange, blue, brown, black, dark green, yellow, pink, light green, red, white. Taped to the box is a leaflet titles 'Cuisenaire Rods: A Brief History'. The following rods are: 6 x orange 6 x blue 6 x brown 6 x black 8 x dark green 16 x yellow 12 x pink 18 x light green 24 x red 24 x red 42 whiteeducation, maths, cuisenaire, rods, teaching tool, mathematics education -
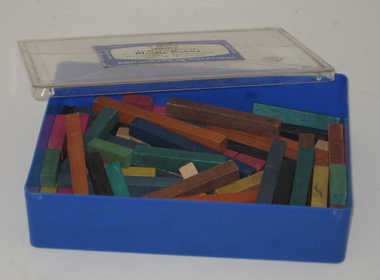 Federation University Historical Collection
Educational Aid, Cuisenaire Rods, c1970
Cuisenaire Rods are pieces of wood/plastic, 1 square cm in cross-section, made in 10 different lengths, each having a charactersitic colour. Invented by a Belgian teacher, Georges Cuisenaire, as a tool to assist in the teaching of mathematics.A selection of timber Cuisenaire rods in a blue plastic container with clear lid. education, maths, cuisenaire, rods -
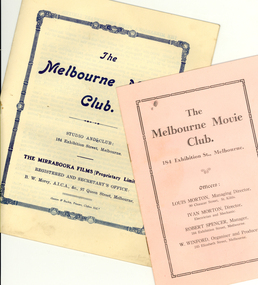 Federation University Historical Collection
Booklets, Melbourne Movie Club
Mirrabooka means Southern Cross. The Melbourne Movie Club was established for those interested in Moving Pictures and all its branches. 'A place to go to spend a few leisure hours, a select dance, parties, picnics, amusements, to learn the art of picture acting and make up, to take part in the Company's productions, dramatic art, to have a jolly good time, etc.' The Melbourne Movie Club has a spacious premises at 184 Exhibition Street, Melbourne, with a floor space of 10,000 square feet, where scenes and sets were erected for the use of Club Members. The Club had full moving picture producing equipment such as big light plant, stage effects, scenery, and cameras. The Melbourne Movie Club saw themselves ad the nursery and basis for a National Film Industry. .1) The secretary was Burnard W. Morey (AICA), the director was L. Morton, and the Managing director of Mirrabooka Films was James Weston. .2) The Managing Director was Louis Morton, the director was Ivan Morton, the Manager Robert Spencer and the organiser and Producer was W. Winford.Two booklets relating to the Melbourne Movie Club. .1) Eight page white booklet of the Melbourne Movie Club - The Mirrabooka Films Pty Ltd. The booklet discusses the place of film in Australia. .2) Eight page pink booklet of the Melbourne Movie Club.melbourne movie club, movie, theatre, james weston, mirrabooka, mirrabooka films, burnard morey -
 Federation University Historical Collection
Letter, Associated Board of Royal Schools of Music correspondence, 1936, 26th March, 1936
Frank Wright was a renown resident of Smeaton, where he was born on 2 August 1901. He lived at Laura Villa, and attended Smeaton State School. His father William was a gold miner and his mother's name was Sarah. Their family won many singing and instrumental awards. Frank was tutored by Percy Code and was awarded a gold medal for the highest marks in the ALCM examinations in the British Colonies at the age of seventeen years. He became the Australian Open Cornet Champion by the age of eighteen. A year later, Frank conducted the City of Ballarat Band, and later the Ballarat Soldiers’ Memorial Band. He formed the Frank Wright Frisco Band and Frank Wright and his Coliseum Orchestra. These bands won many South Street awards, and Frank as conductor won many awards in the Australian Band Championship contest. In 1933 Frank Wright sailed to England to conduct the famous St Hilda’s Band and was later appointed Musical Director of the London County Council, where he organized many amazing concerts in parks, in and around the London district. He was made Professor of Brass and Military Band Scoring and conducted at the Guildhall of Music and Drama. Frank was often invited to adjudicate Brass Band Championships around Europe, in Australia, including South Street and in New Zealand. The Frank Wright Medal at the Royal South Street competition is awarded to an individual recognized as making an outstanding contribution to brass music in Australia.An addressed envelope which is addressed to Frank Wright and a sheet of paper which is a letter from The Associated Board of the Royal Schools of Music.On the top left hand corner of the envelope is "The Associated Board of The Royal Schools of Music, London (The Royal Academy of Music and Royal College of Music) 14 & 15, Bedford Square. London, W.C.I on the right hand side is an inked stamp in red with Great Britain a crown G v R Post Paid N 1/12d 99. The address is Frank Wright Esq LRSM. 226 Cambridge Street, Hyde Park W2 The letter is from the Associated Board of the Royal Schools of Music London, altering Frank Wright that he is entitled to describe himself as a Licentiate of The Royal Schools of Music, London (L.R.S.M., London)frank wright, royal school of music, l.r.s.m.